Ford Aeromax Project
Page 1: Assembly
Since I've already fully documented a tractor truck build on my King Hauler page and the chassis is 90% similar, I'll be providing only a cursory overview of the build here.
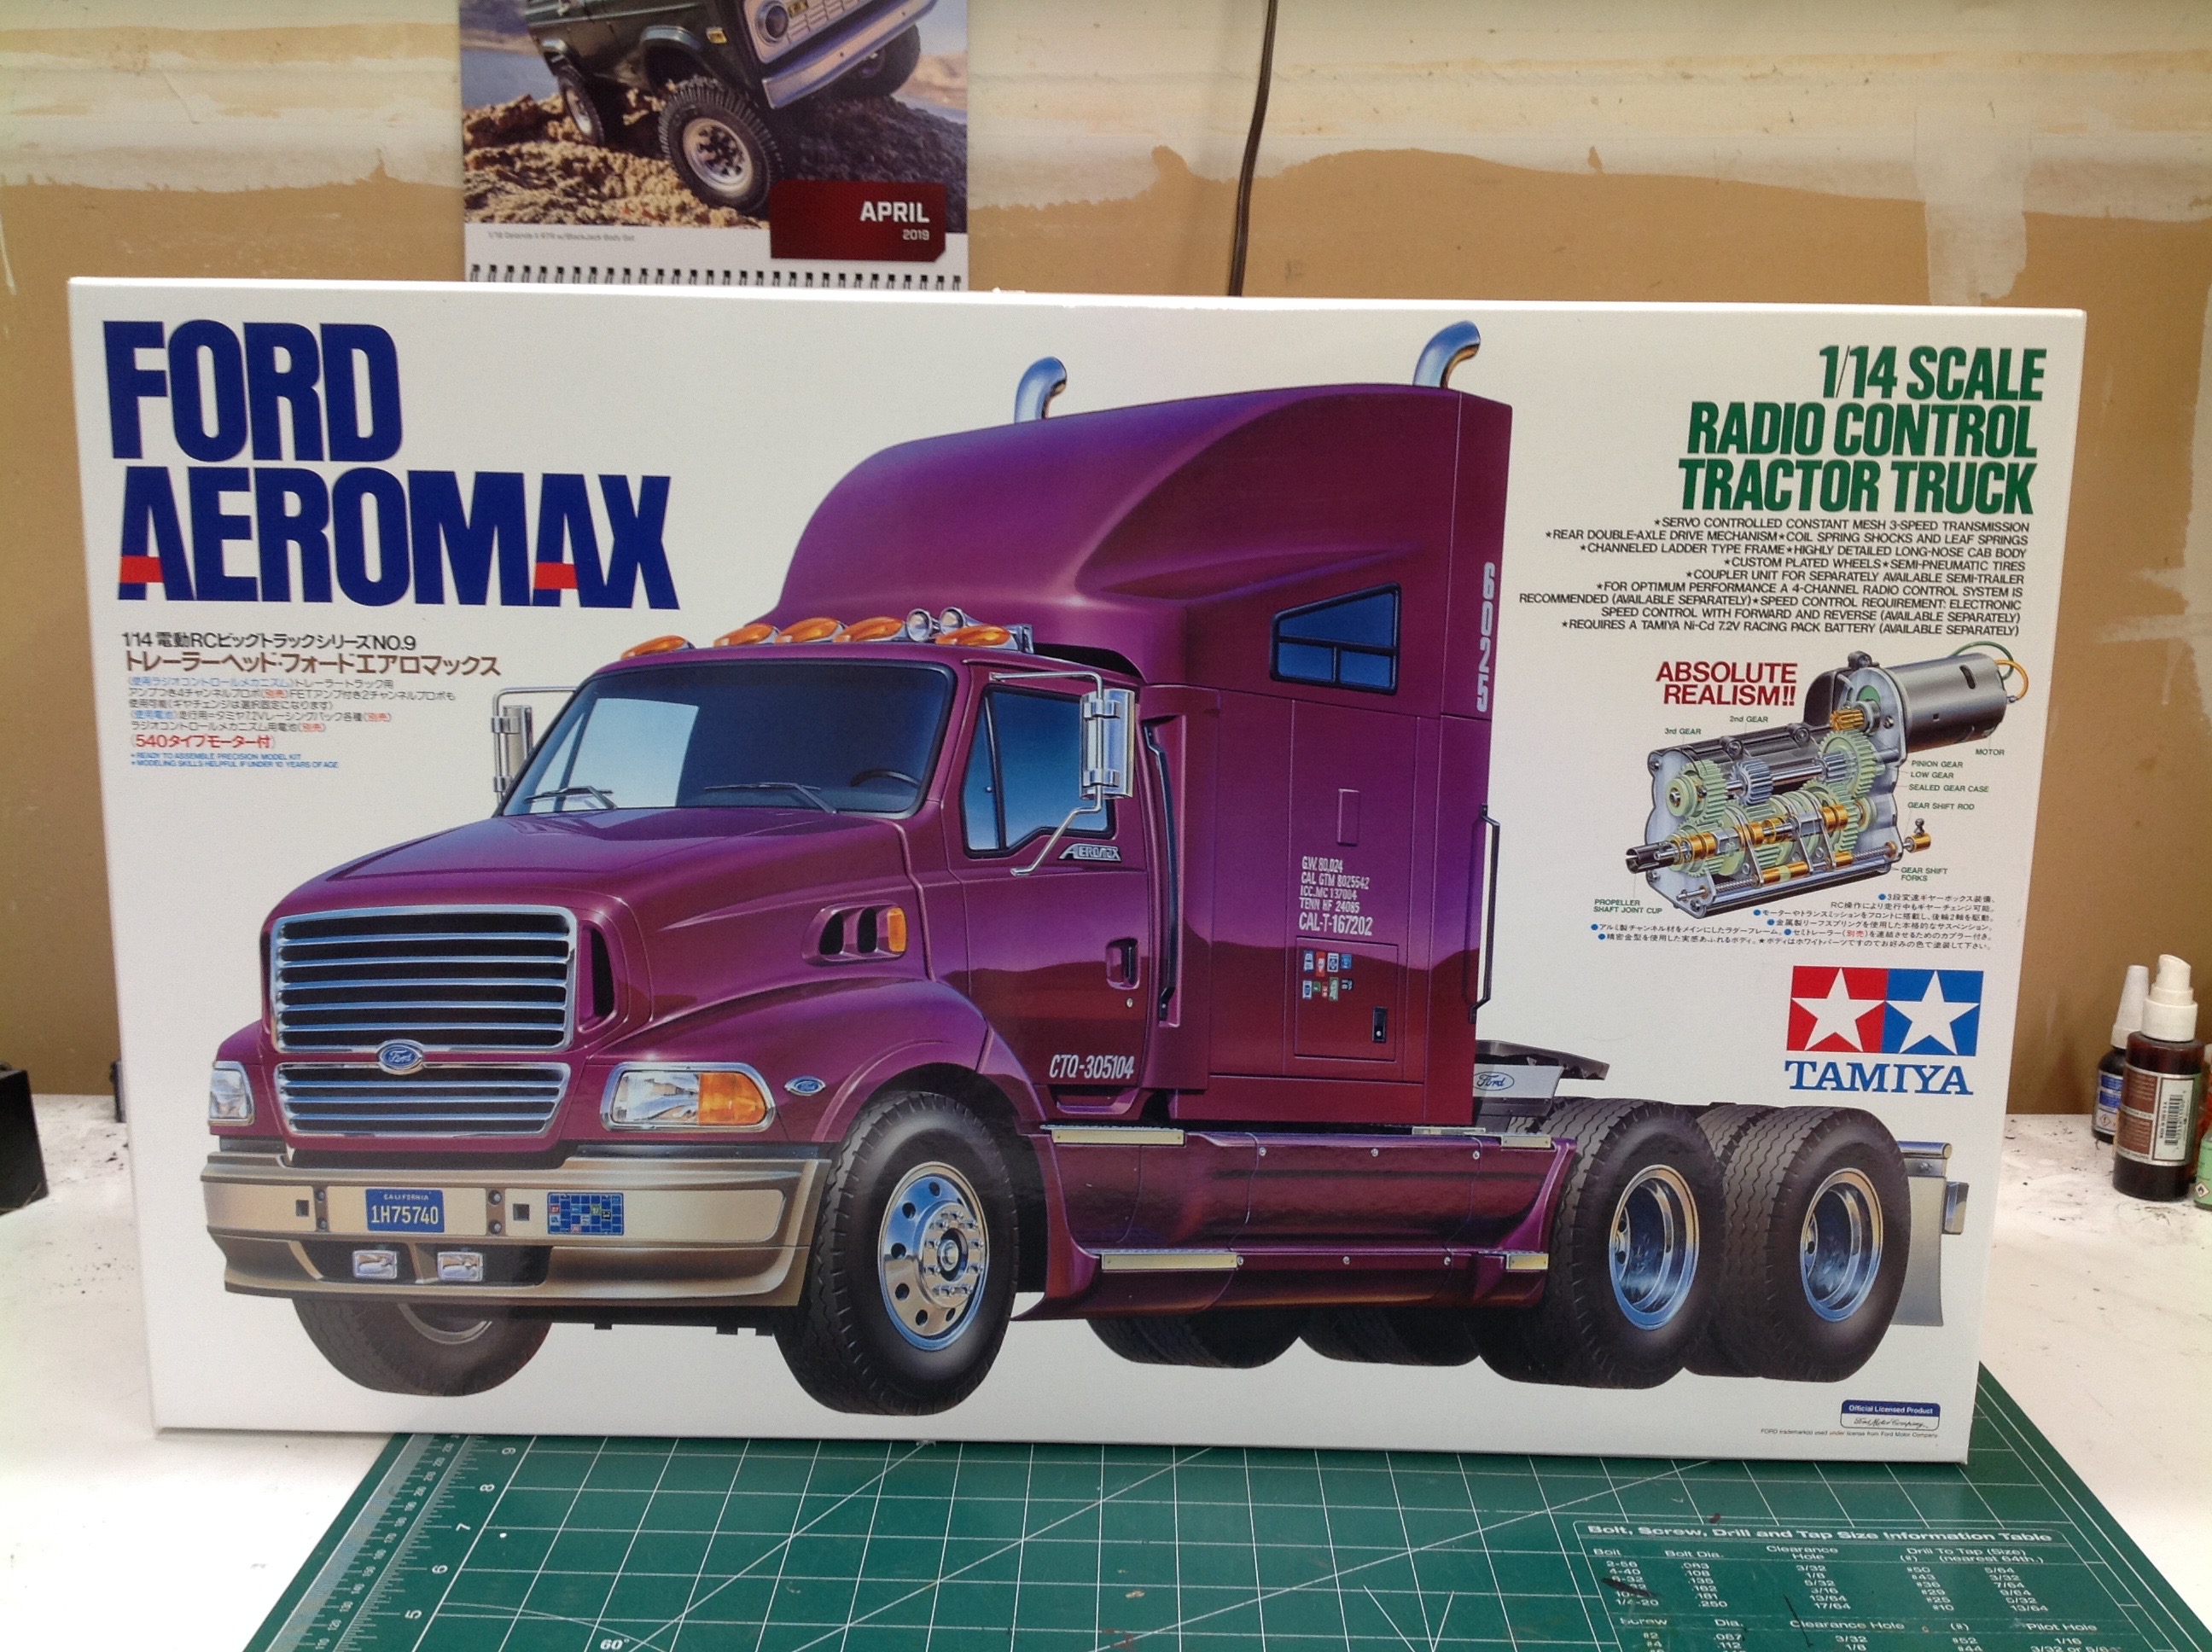
Here's the usual huge box with Tamiya's typical amazing hand drawn box
art. It is interesting that the text on the box lists this truck
as "No. 9" because, while it is #56309 and the 9th model in the series,
three of those were trailers and other was a "metallic special" edition
of the King Hauler so this is really only the 5th truck. The
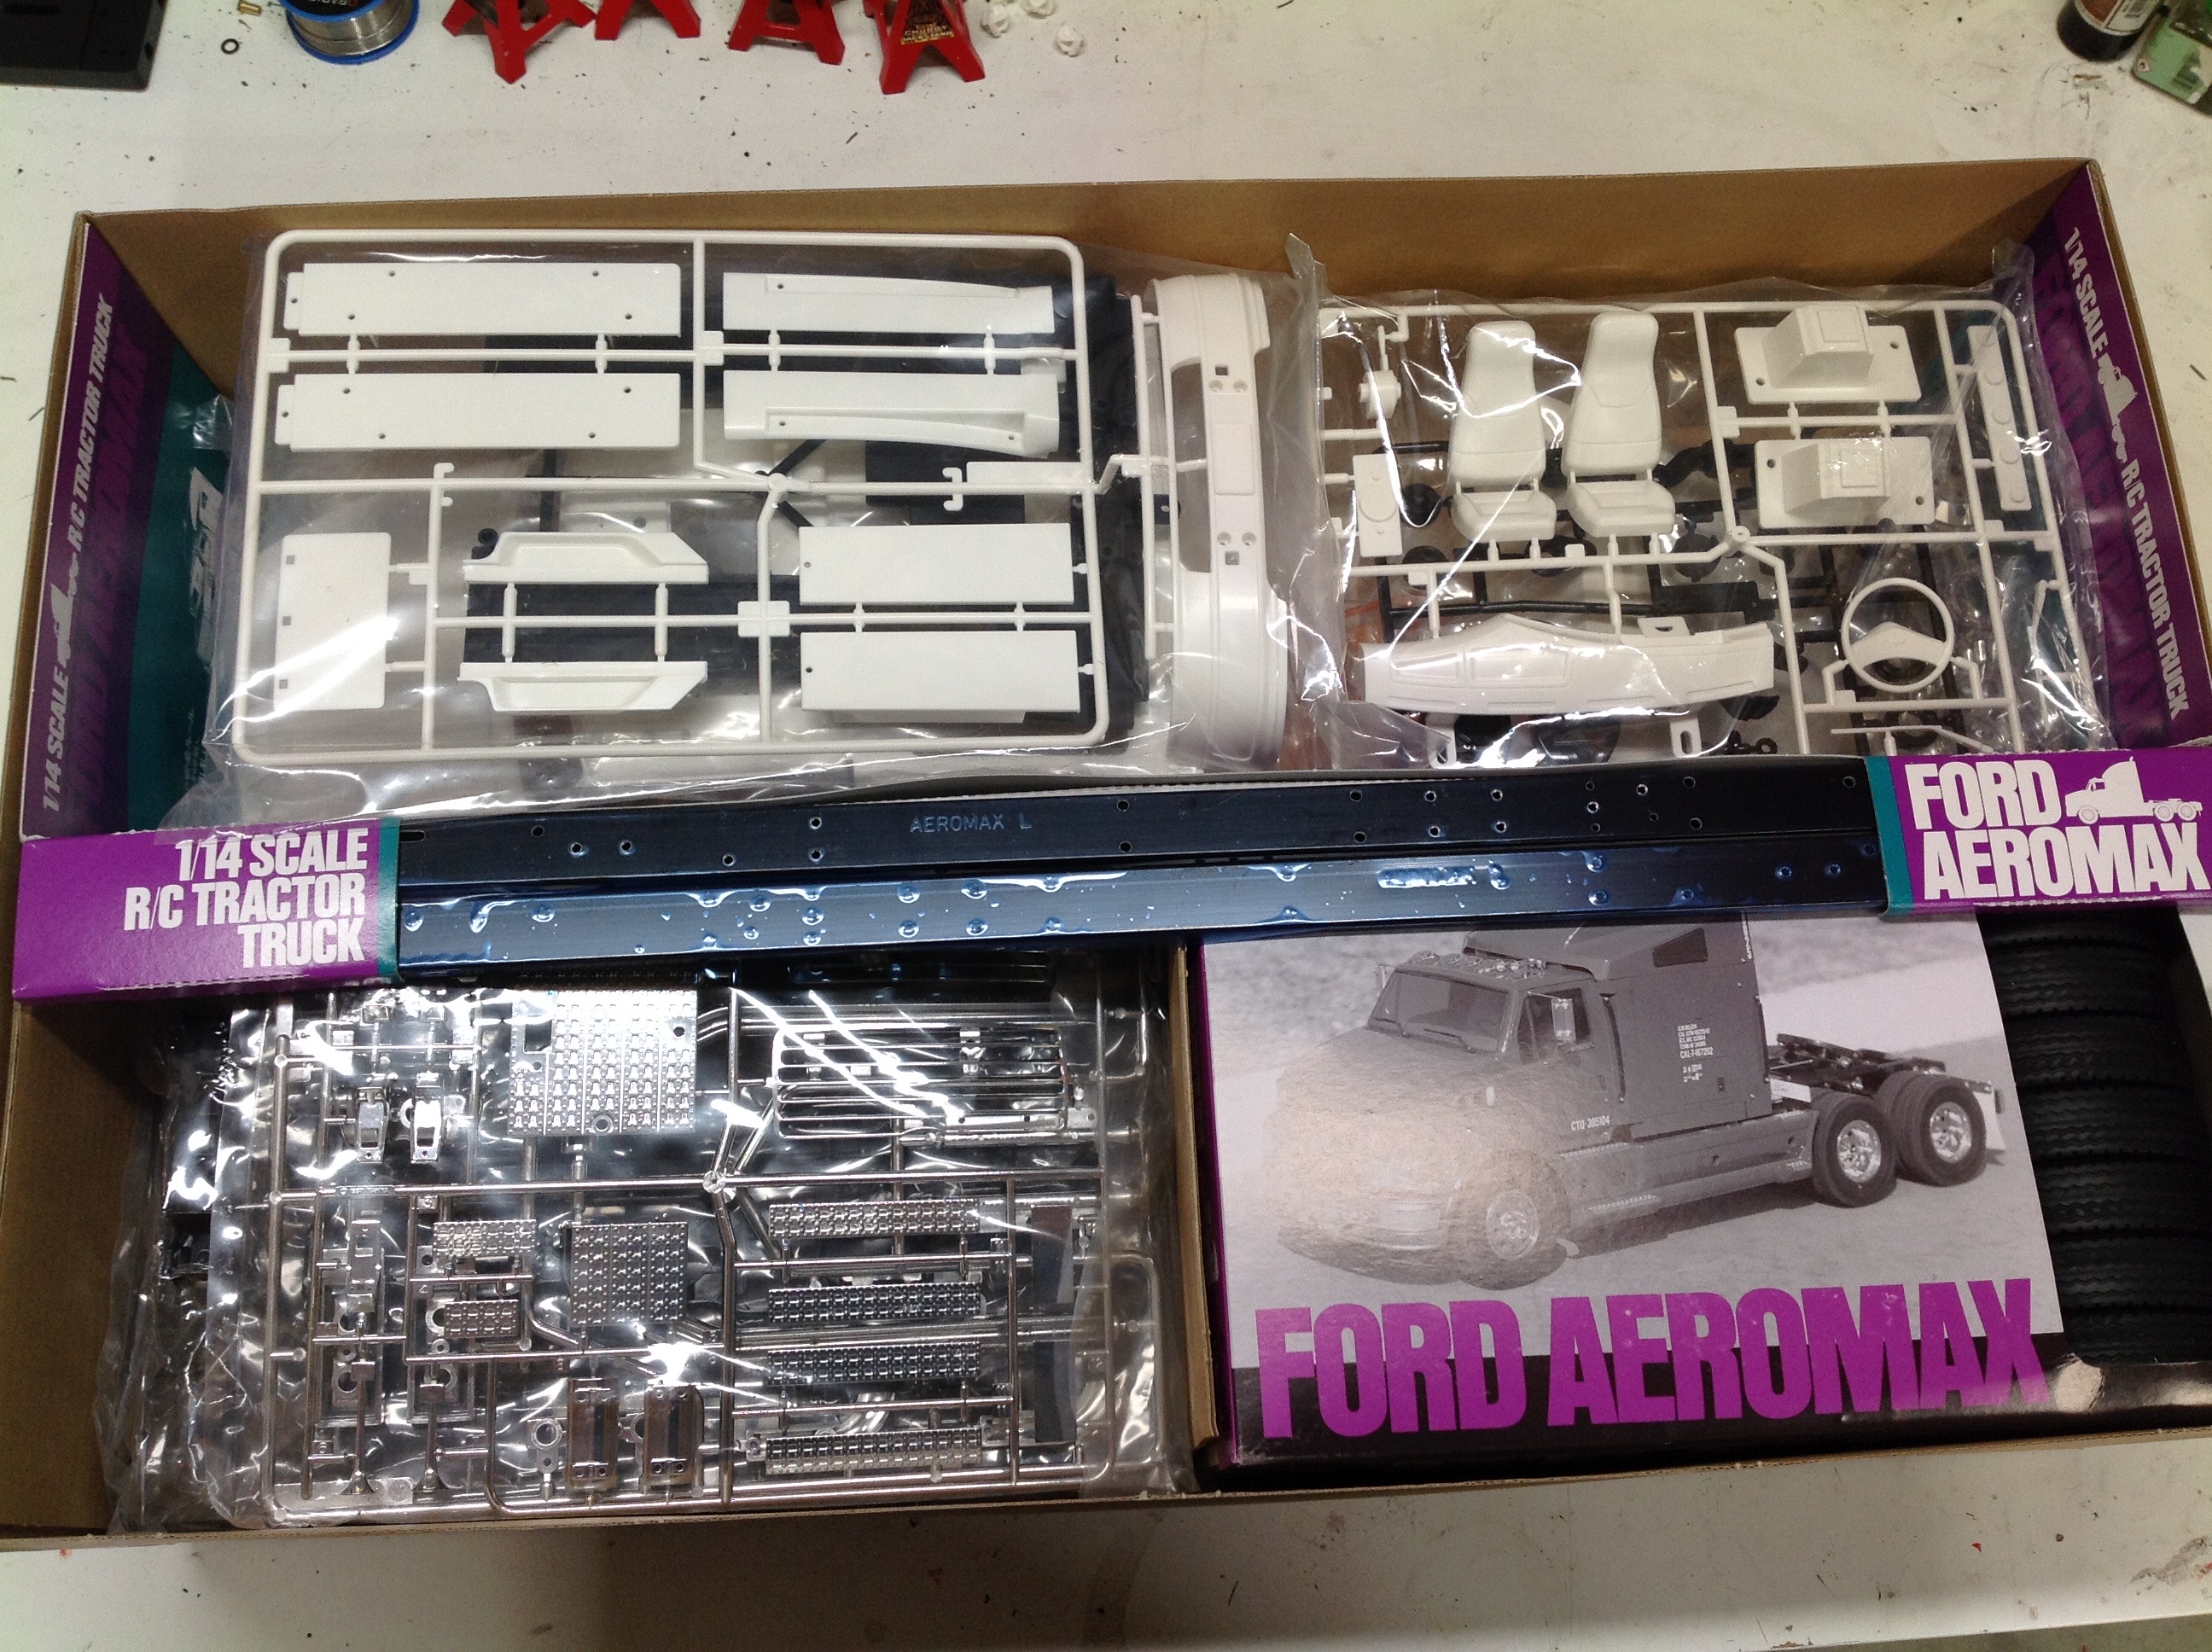
inside of the box is slightly less extravagant than some other tractor
trucks I've built, but you can certainly see the huge number of plastic
parts trees that make this as much like a static model build as an RC
build. Look at all that nice, shiny chrome.
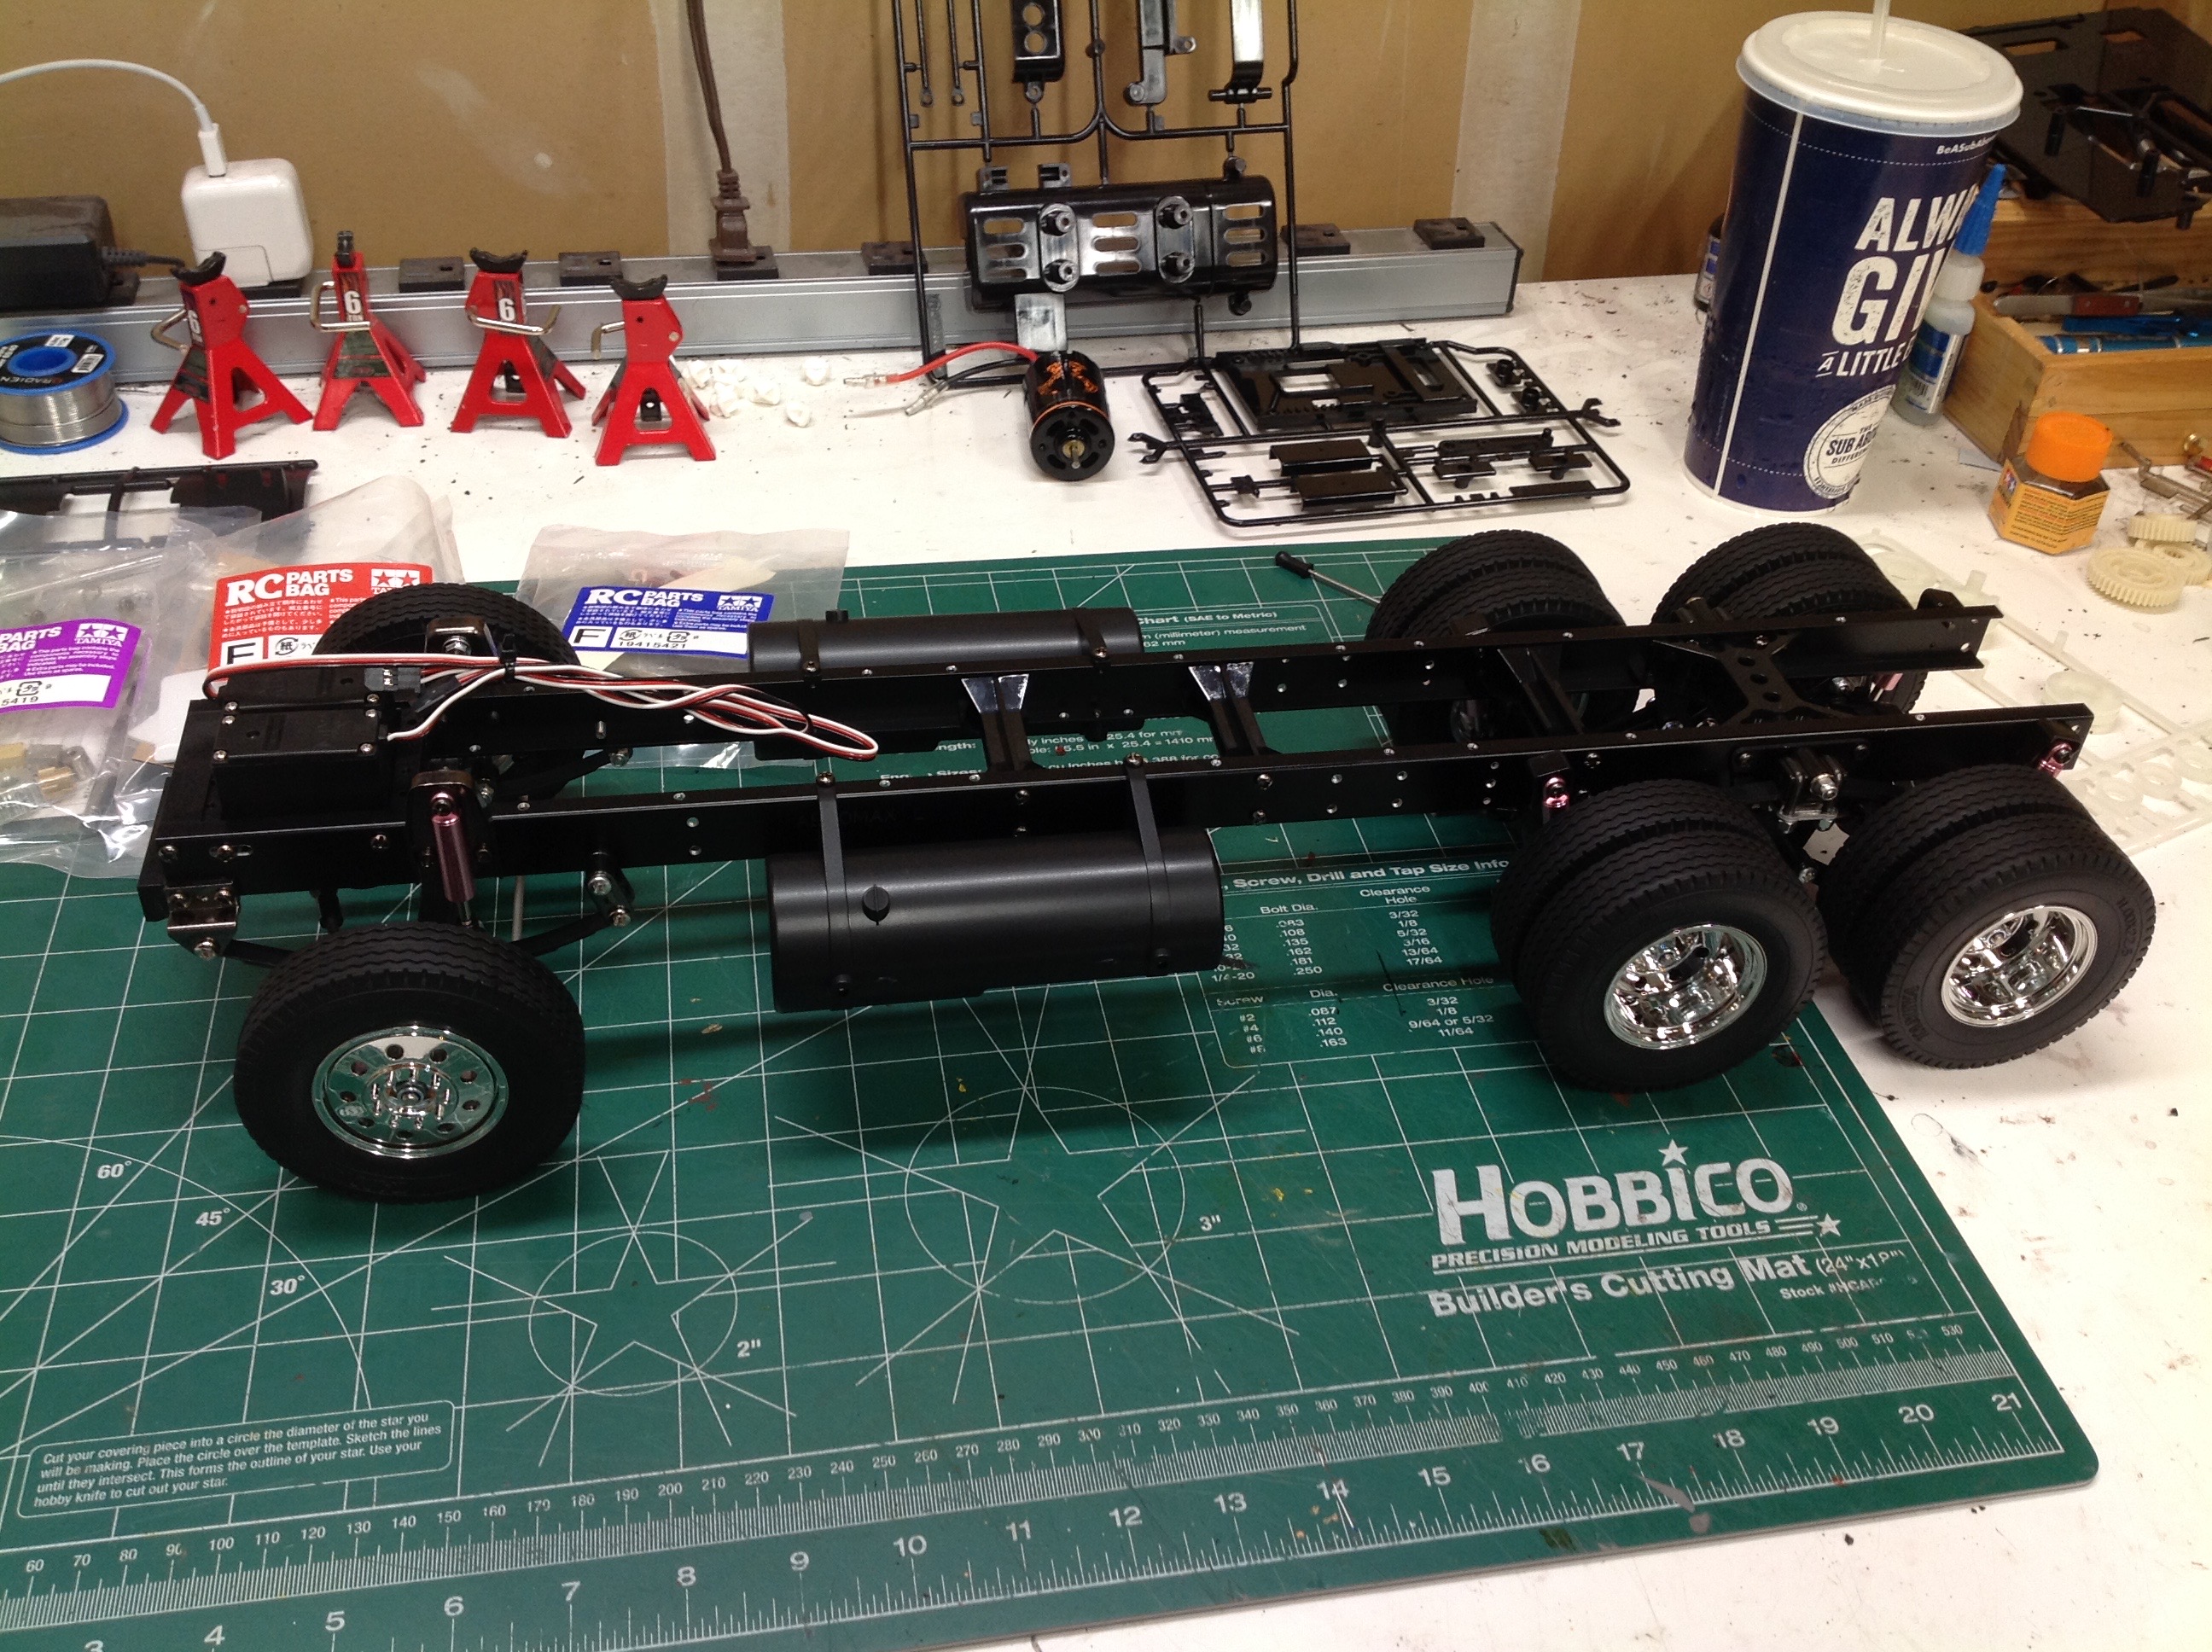
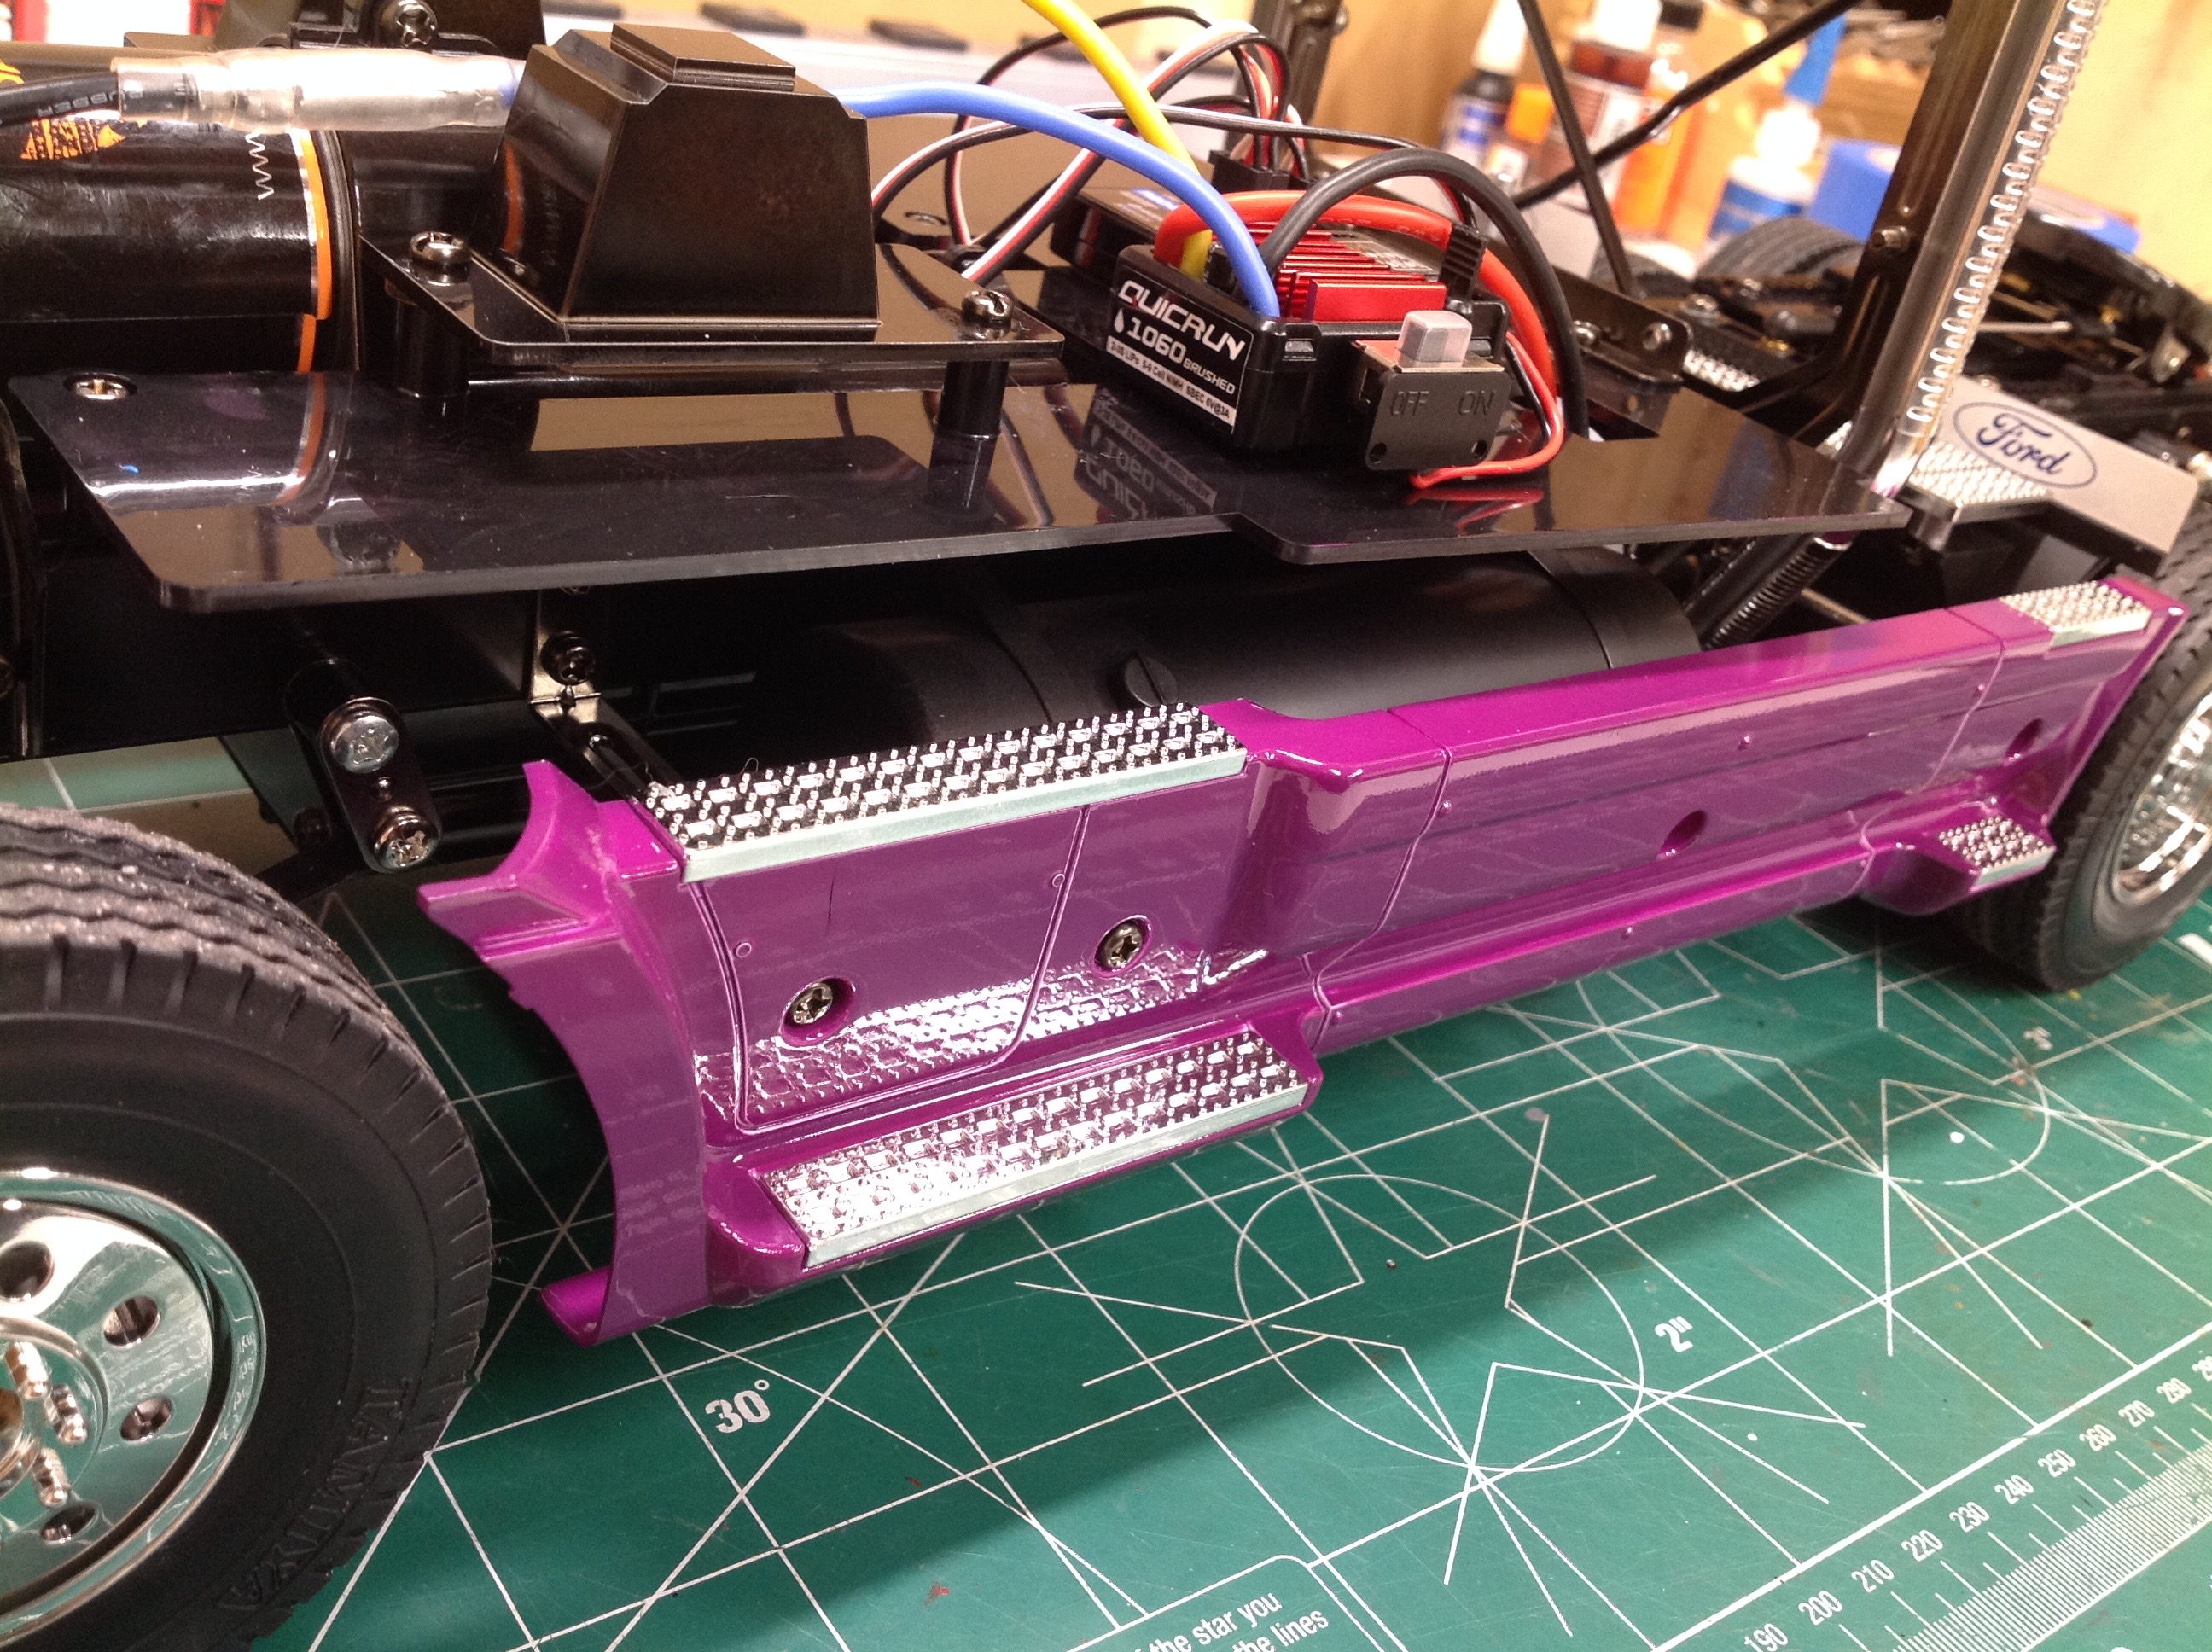
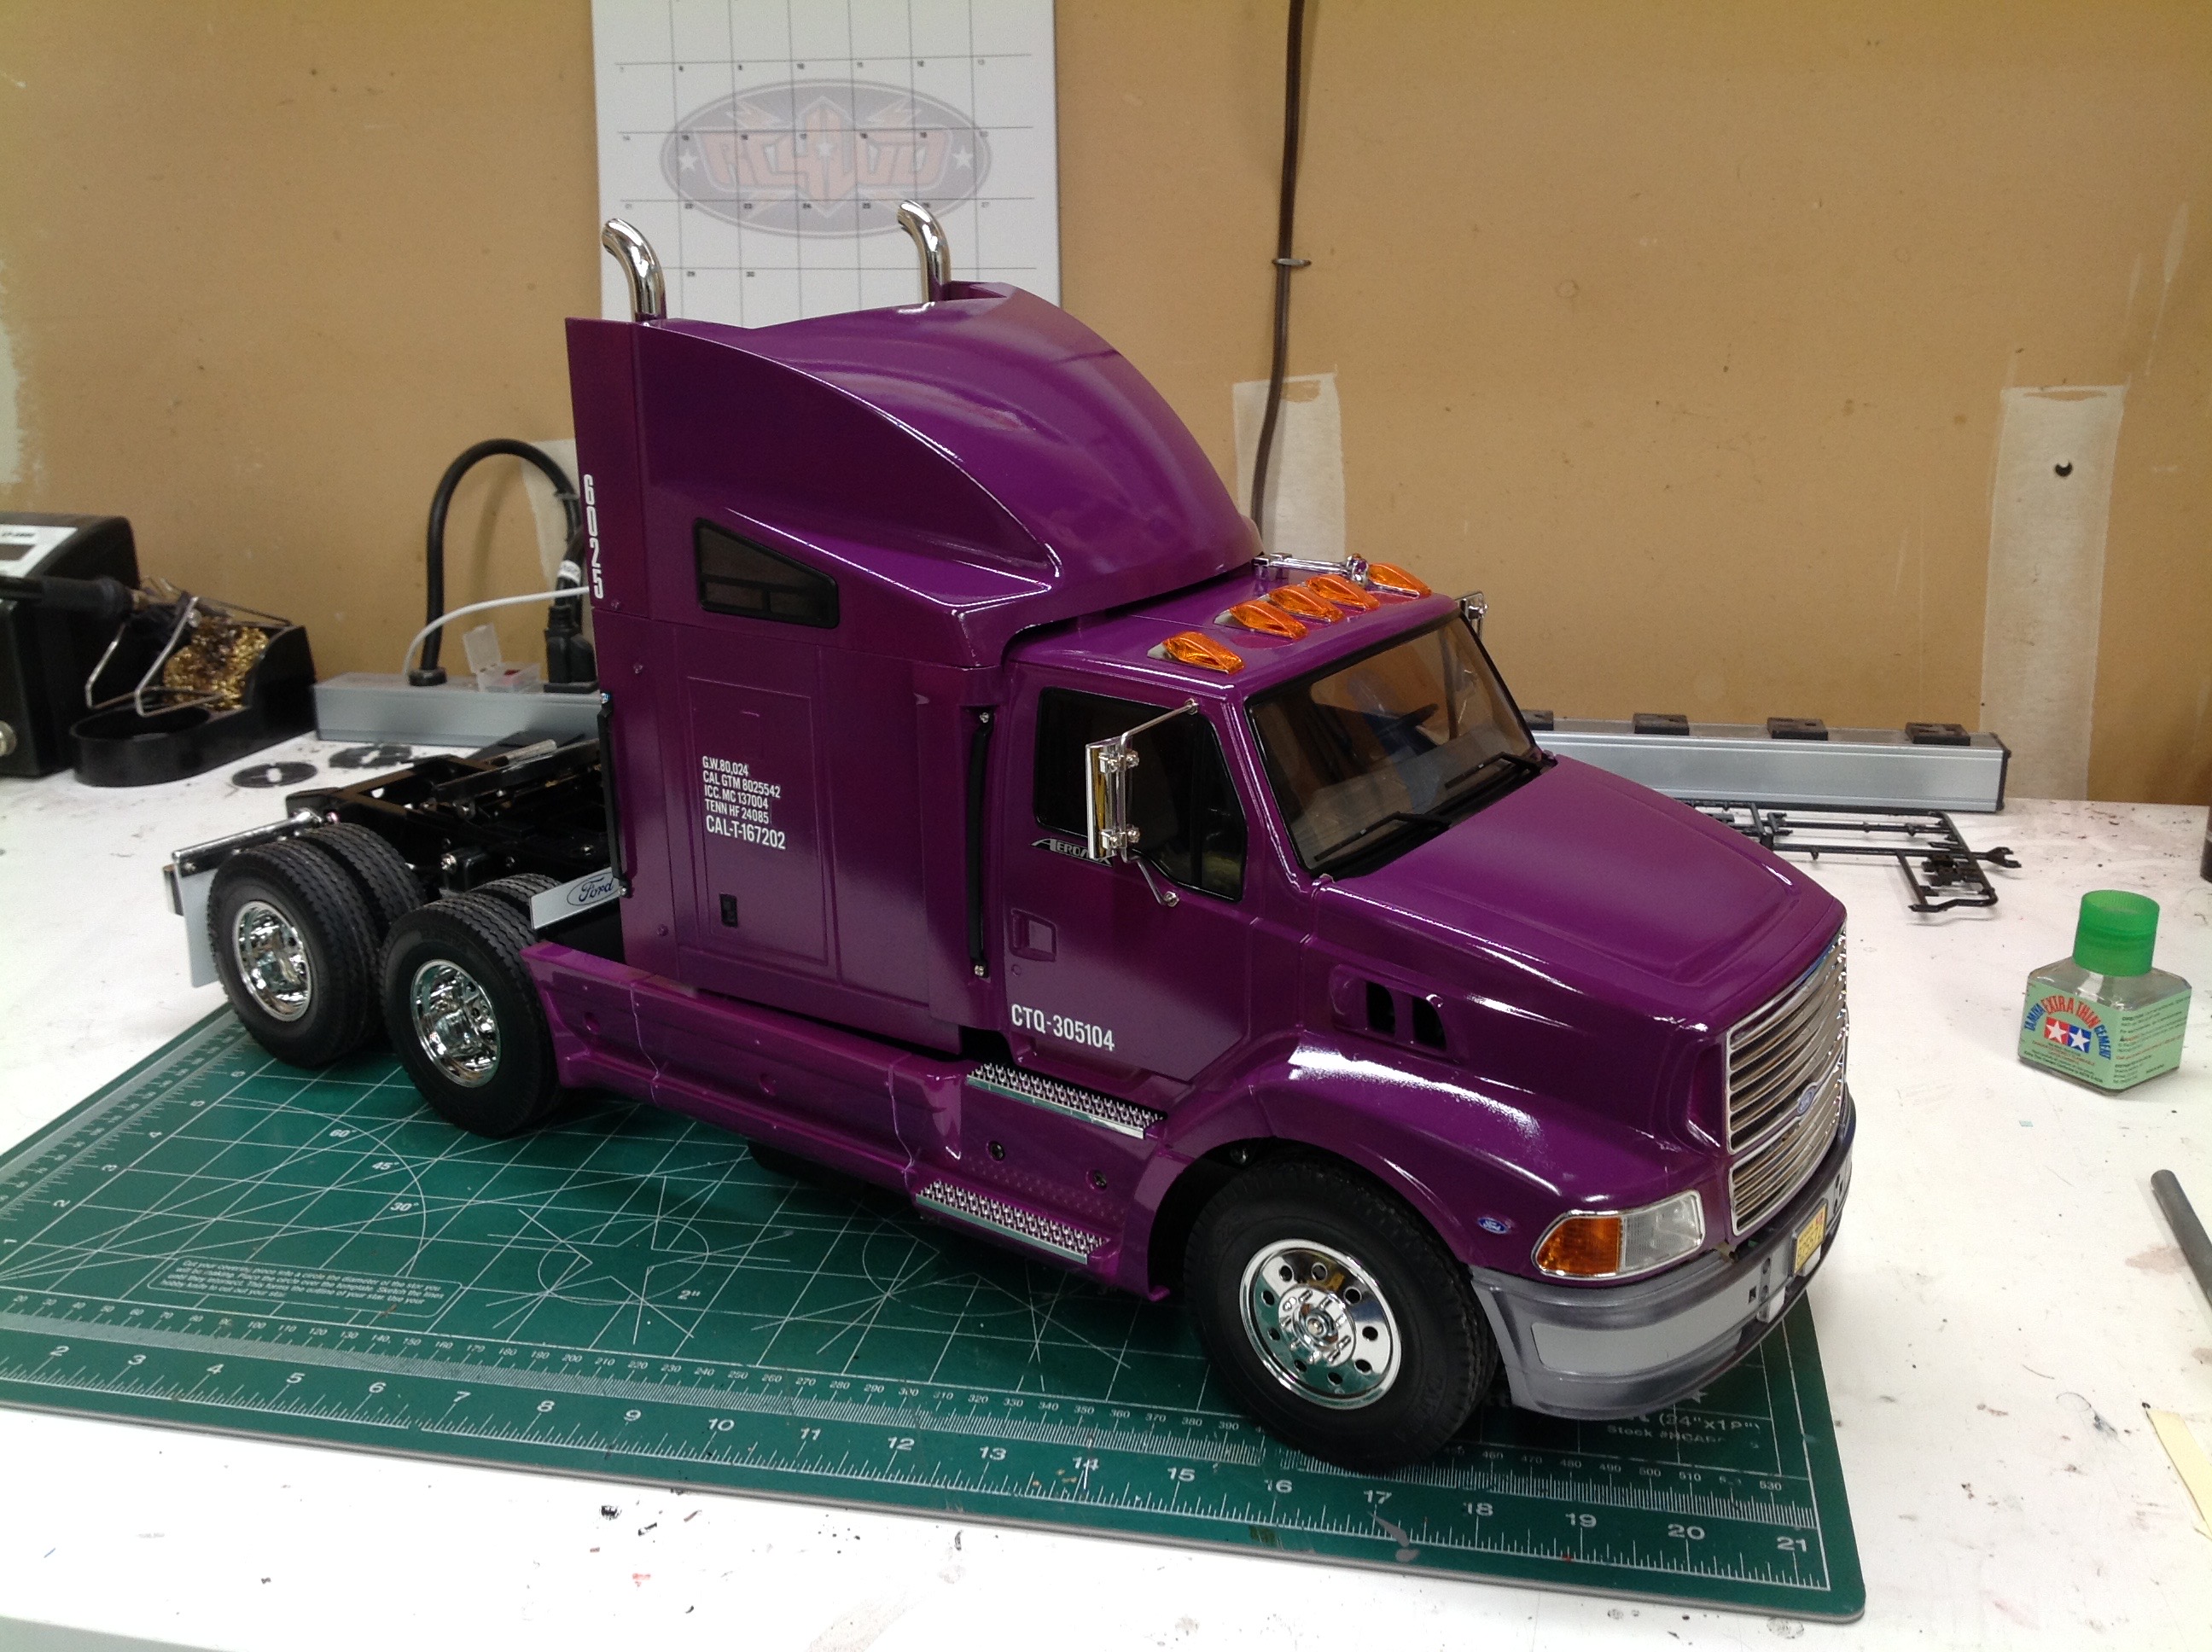
Here's the completed chassis which looks pretty much like the others
except for the large cylindrical fuel tanks on each side. The tank
on the right will get replaced when I install the MFC and will contain
the control panel. On the right I've added the front bumper and
the side skirts. The side skirts have been painted and clear
coated before installing the chrome steps. The electronics
platform supports some temporary equipment which will be used until I
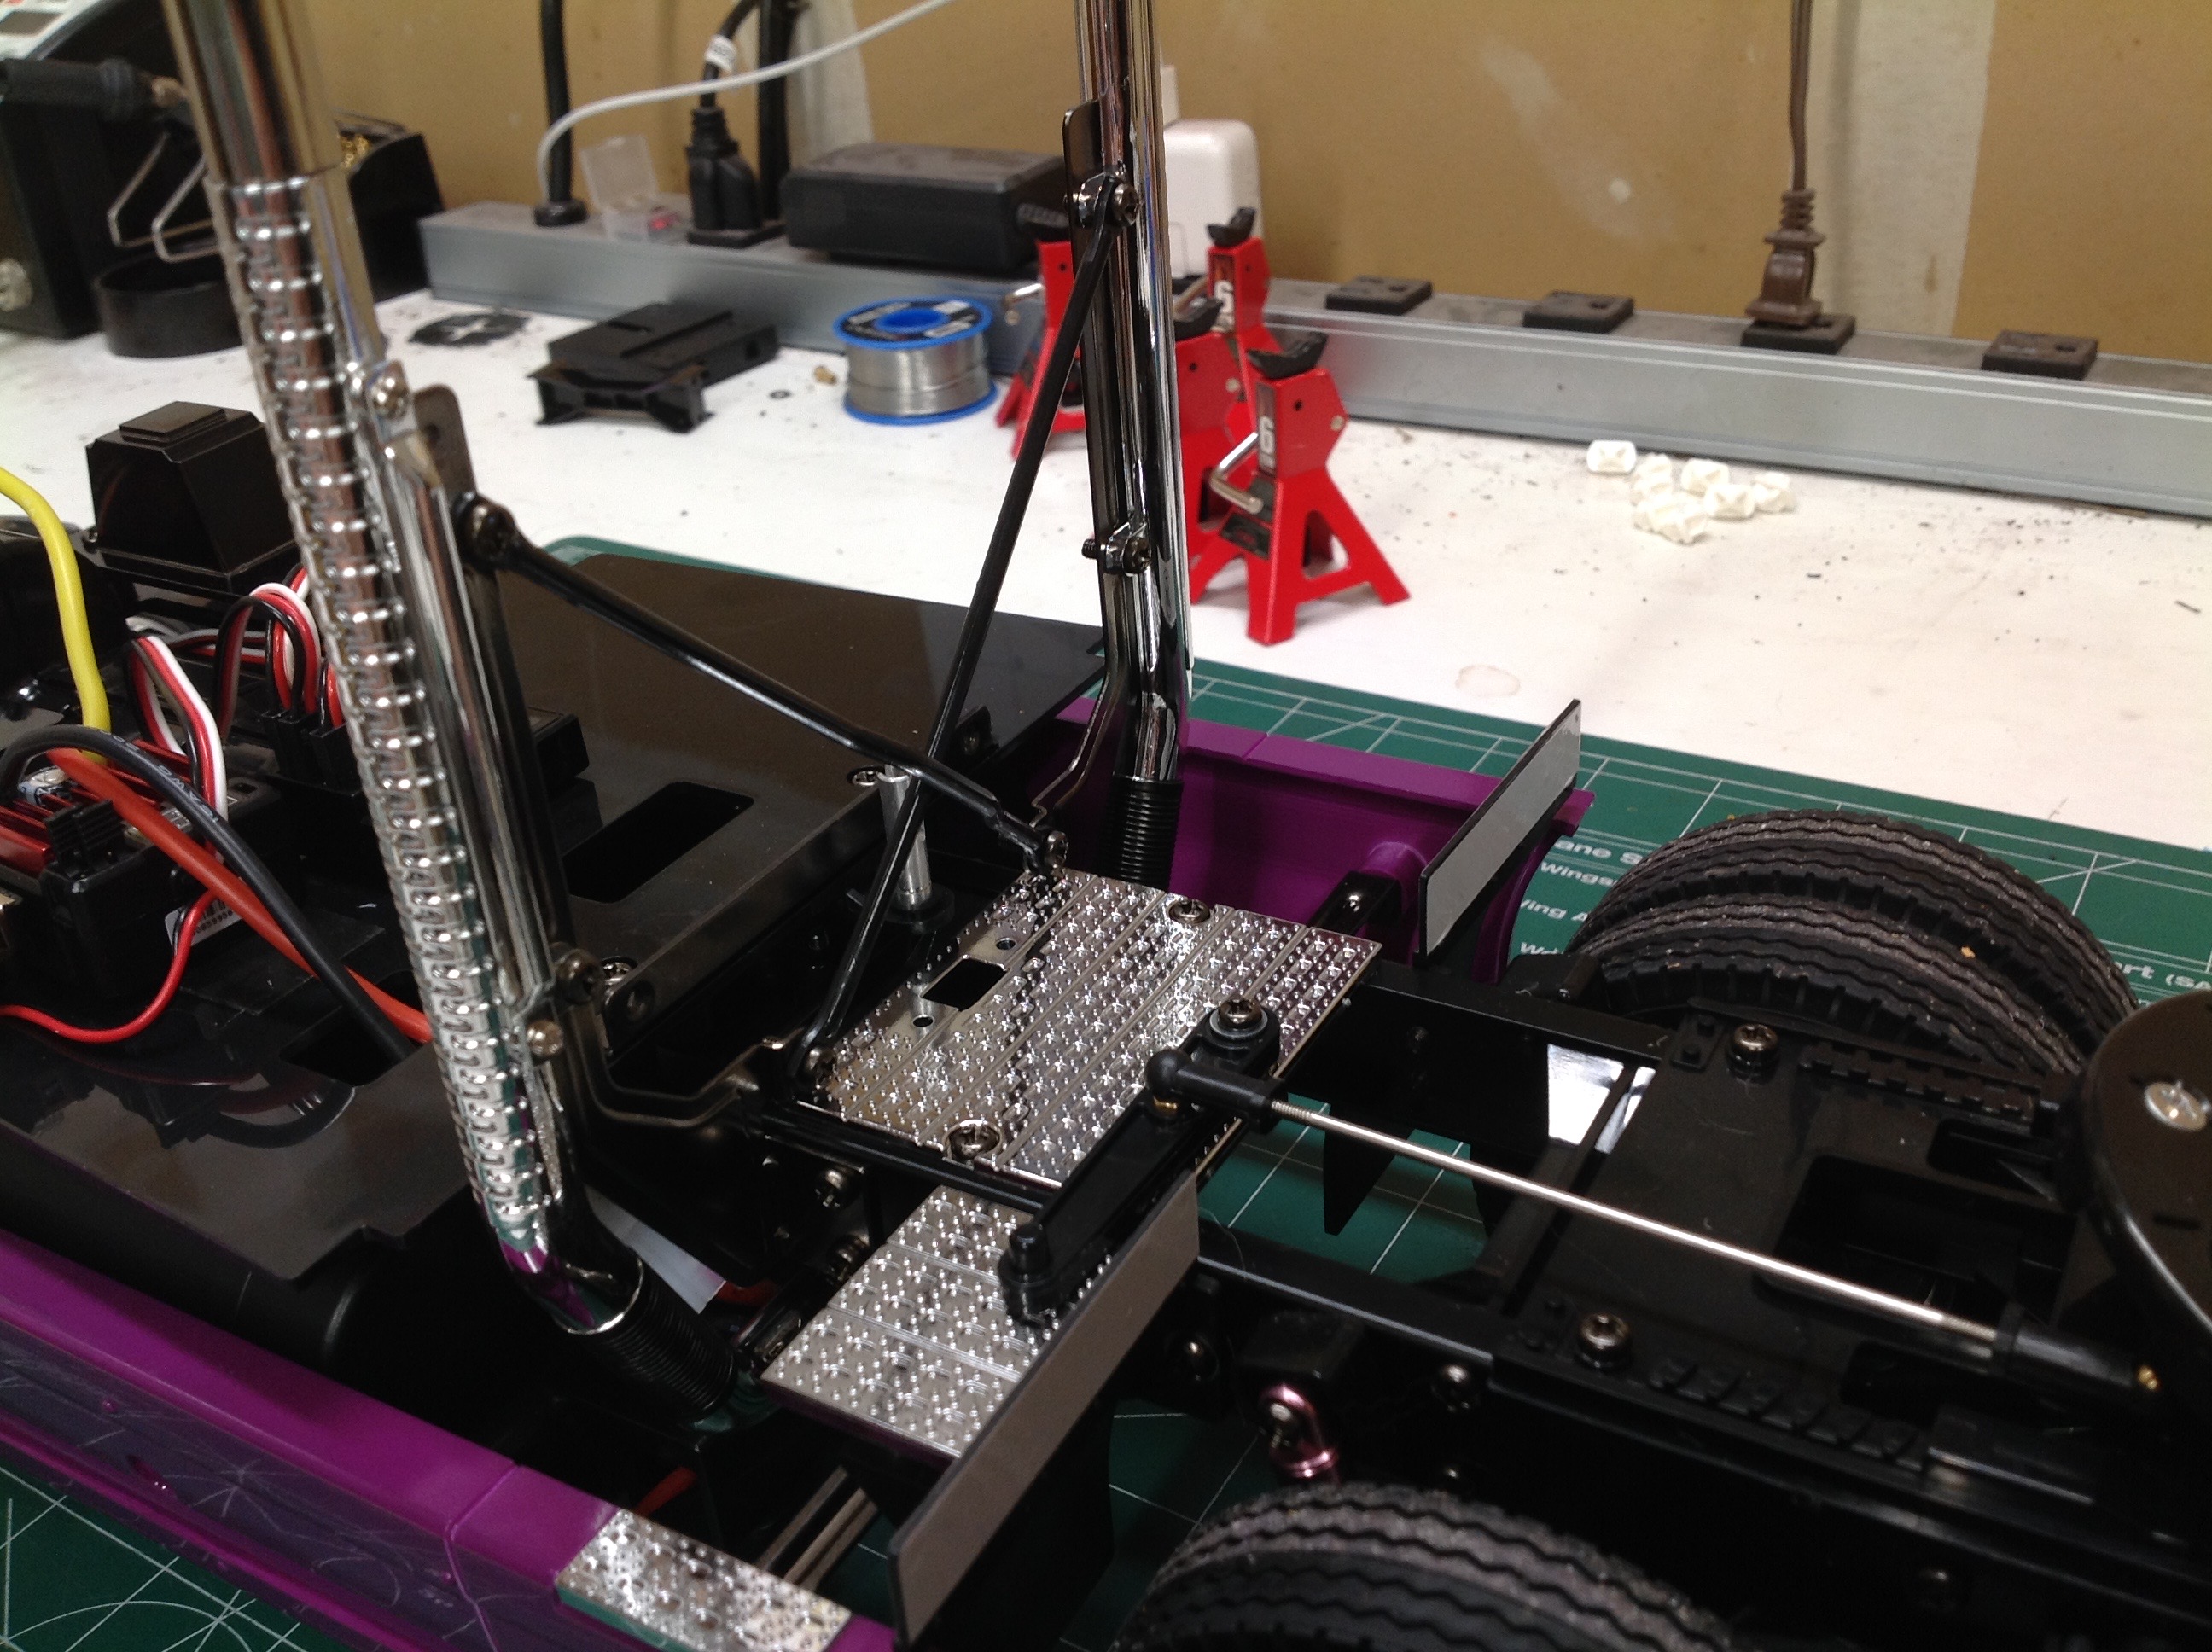
install the MFC. Most striking of all are the huge chrome vertical
exhaust stacks. These will not be so pronounced once the body is
installed, but they are a distinctive feature of this truck and American
trucks in general.
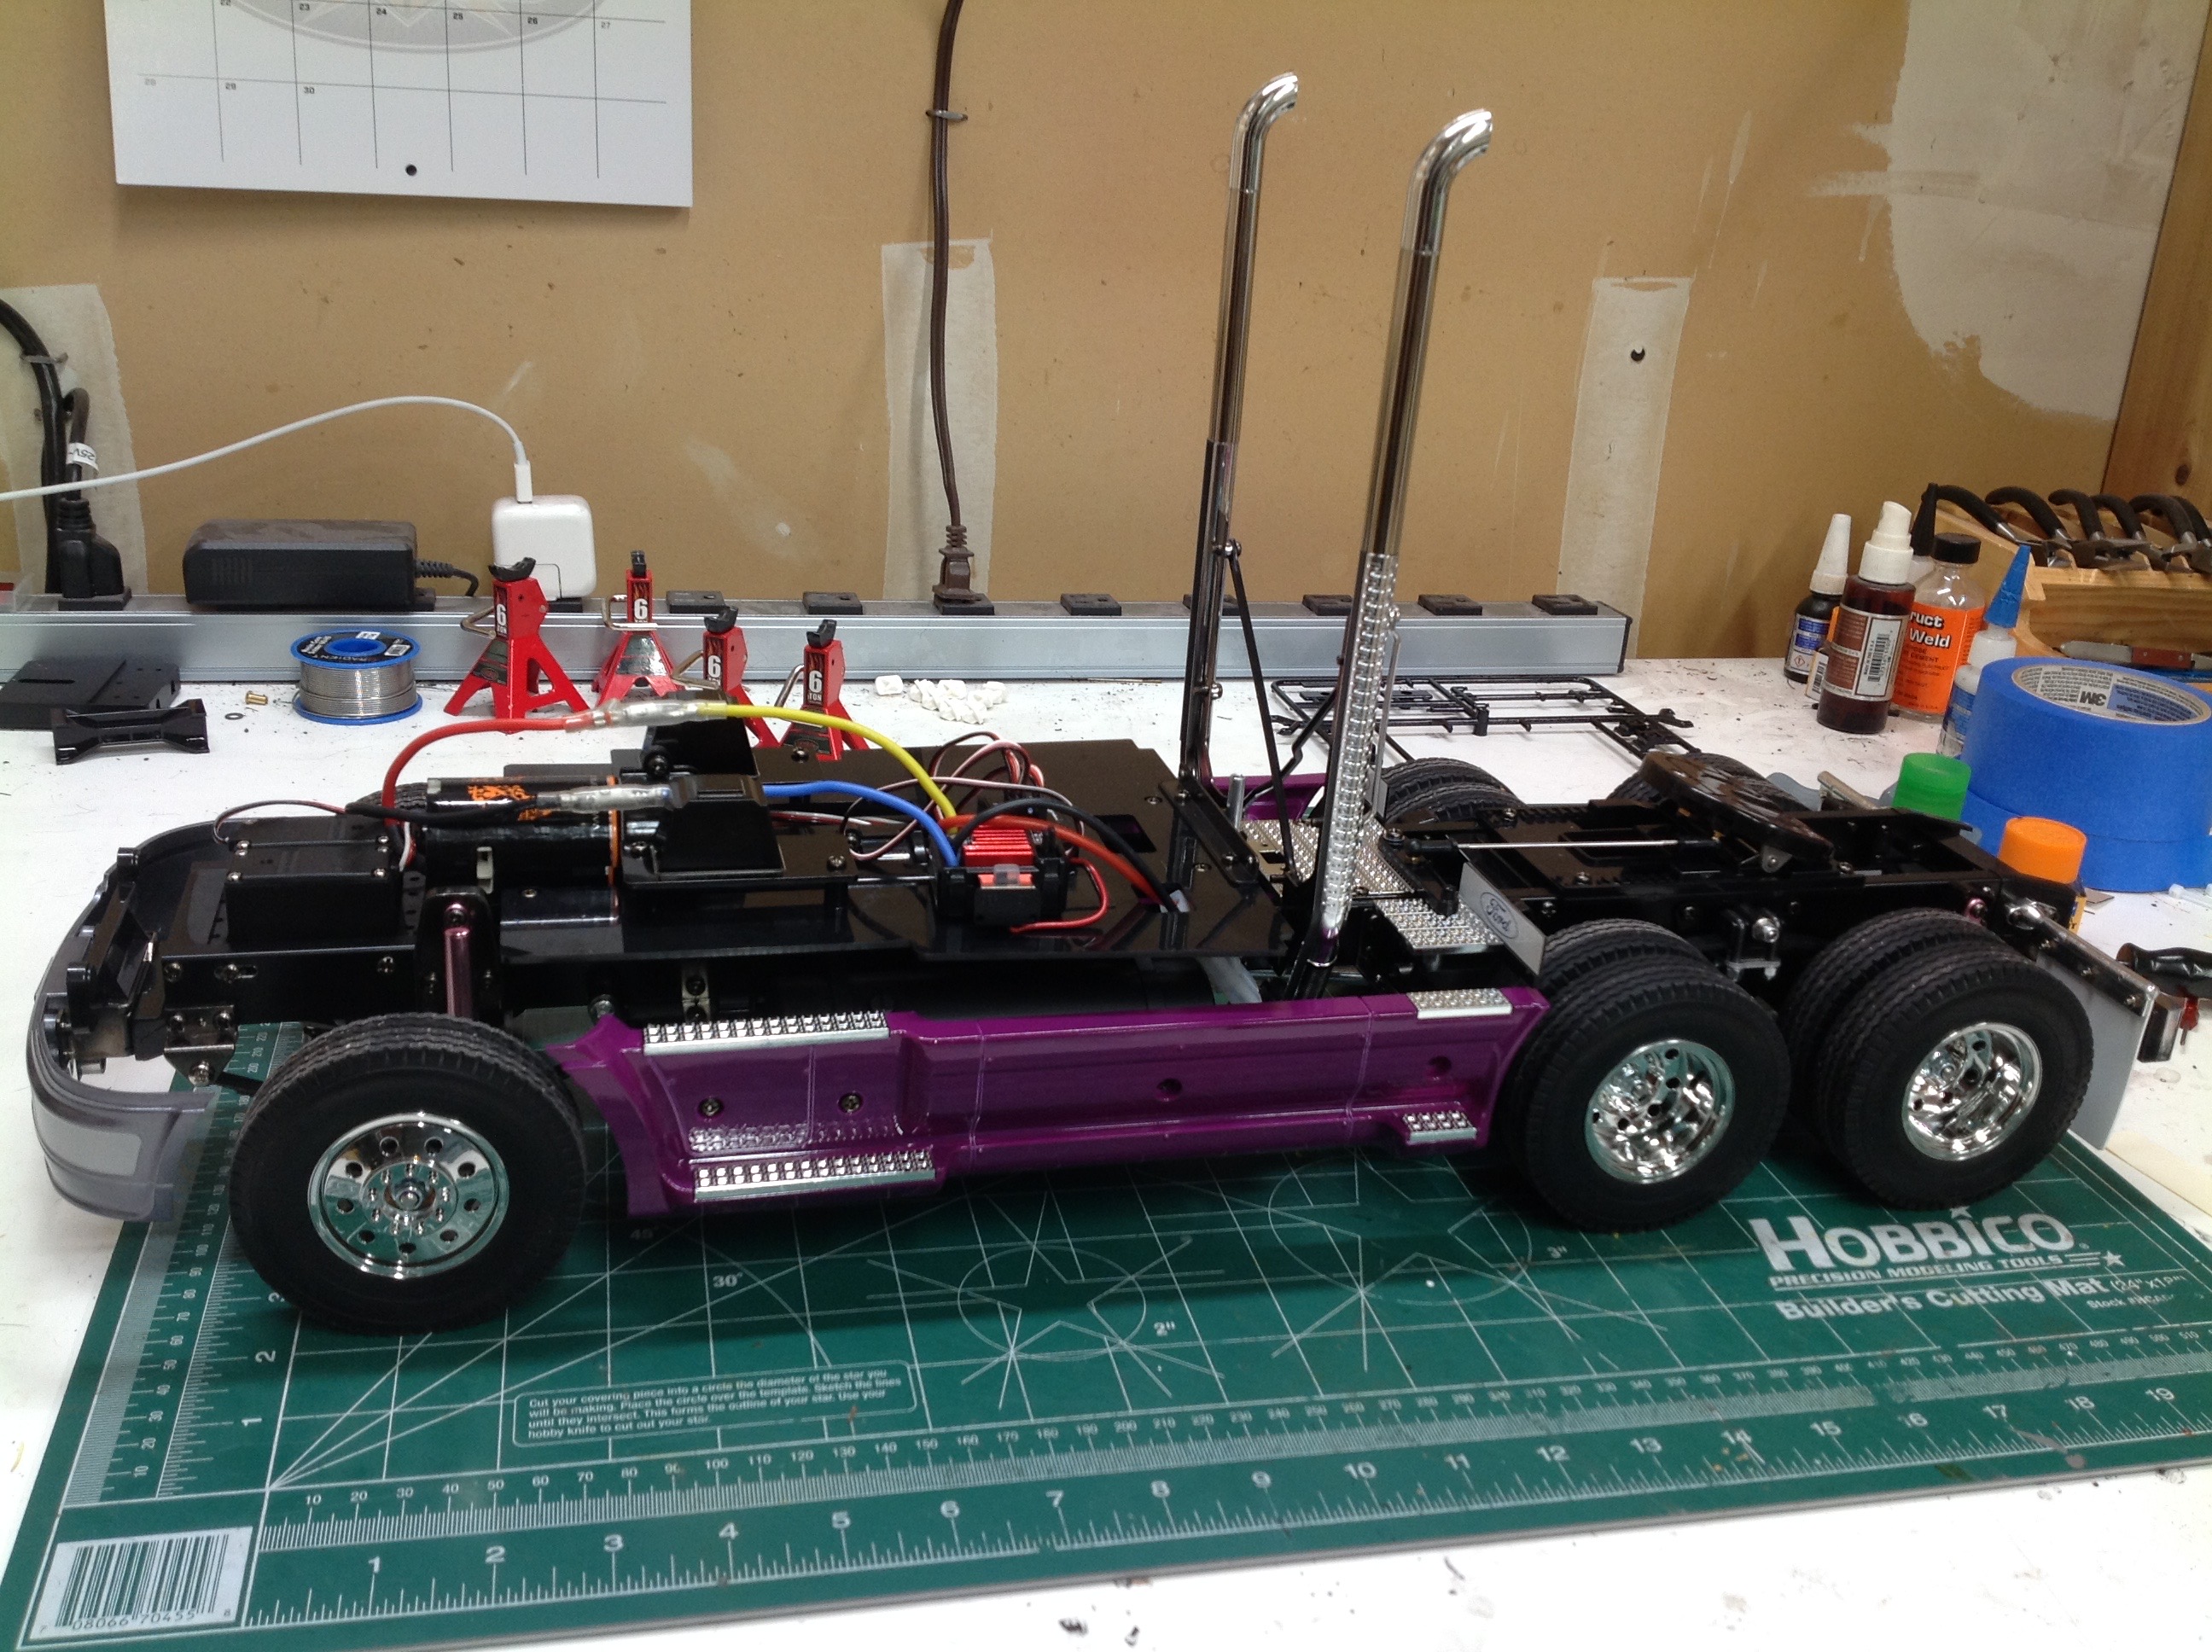
Here are some close up shots of detail parts of the truck. The
side skirts are very long and stretch from the front wheels to the
first drive axle. There are four chrome steps which look much
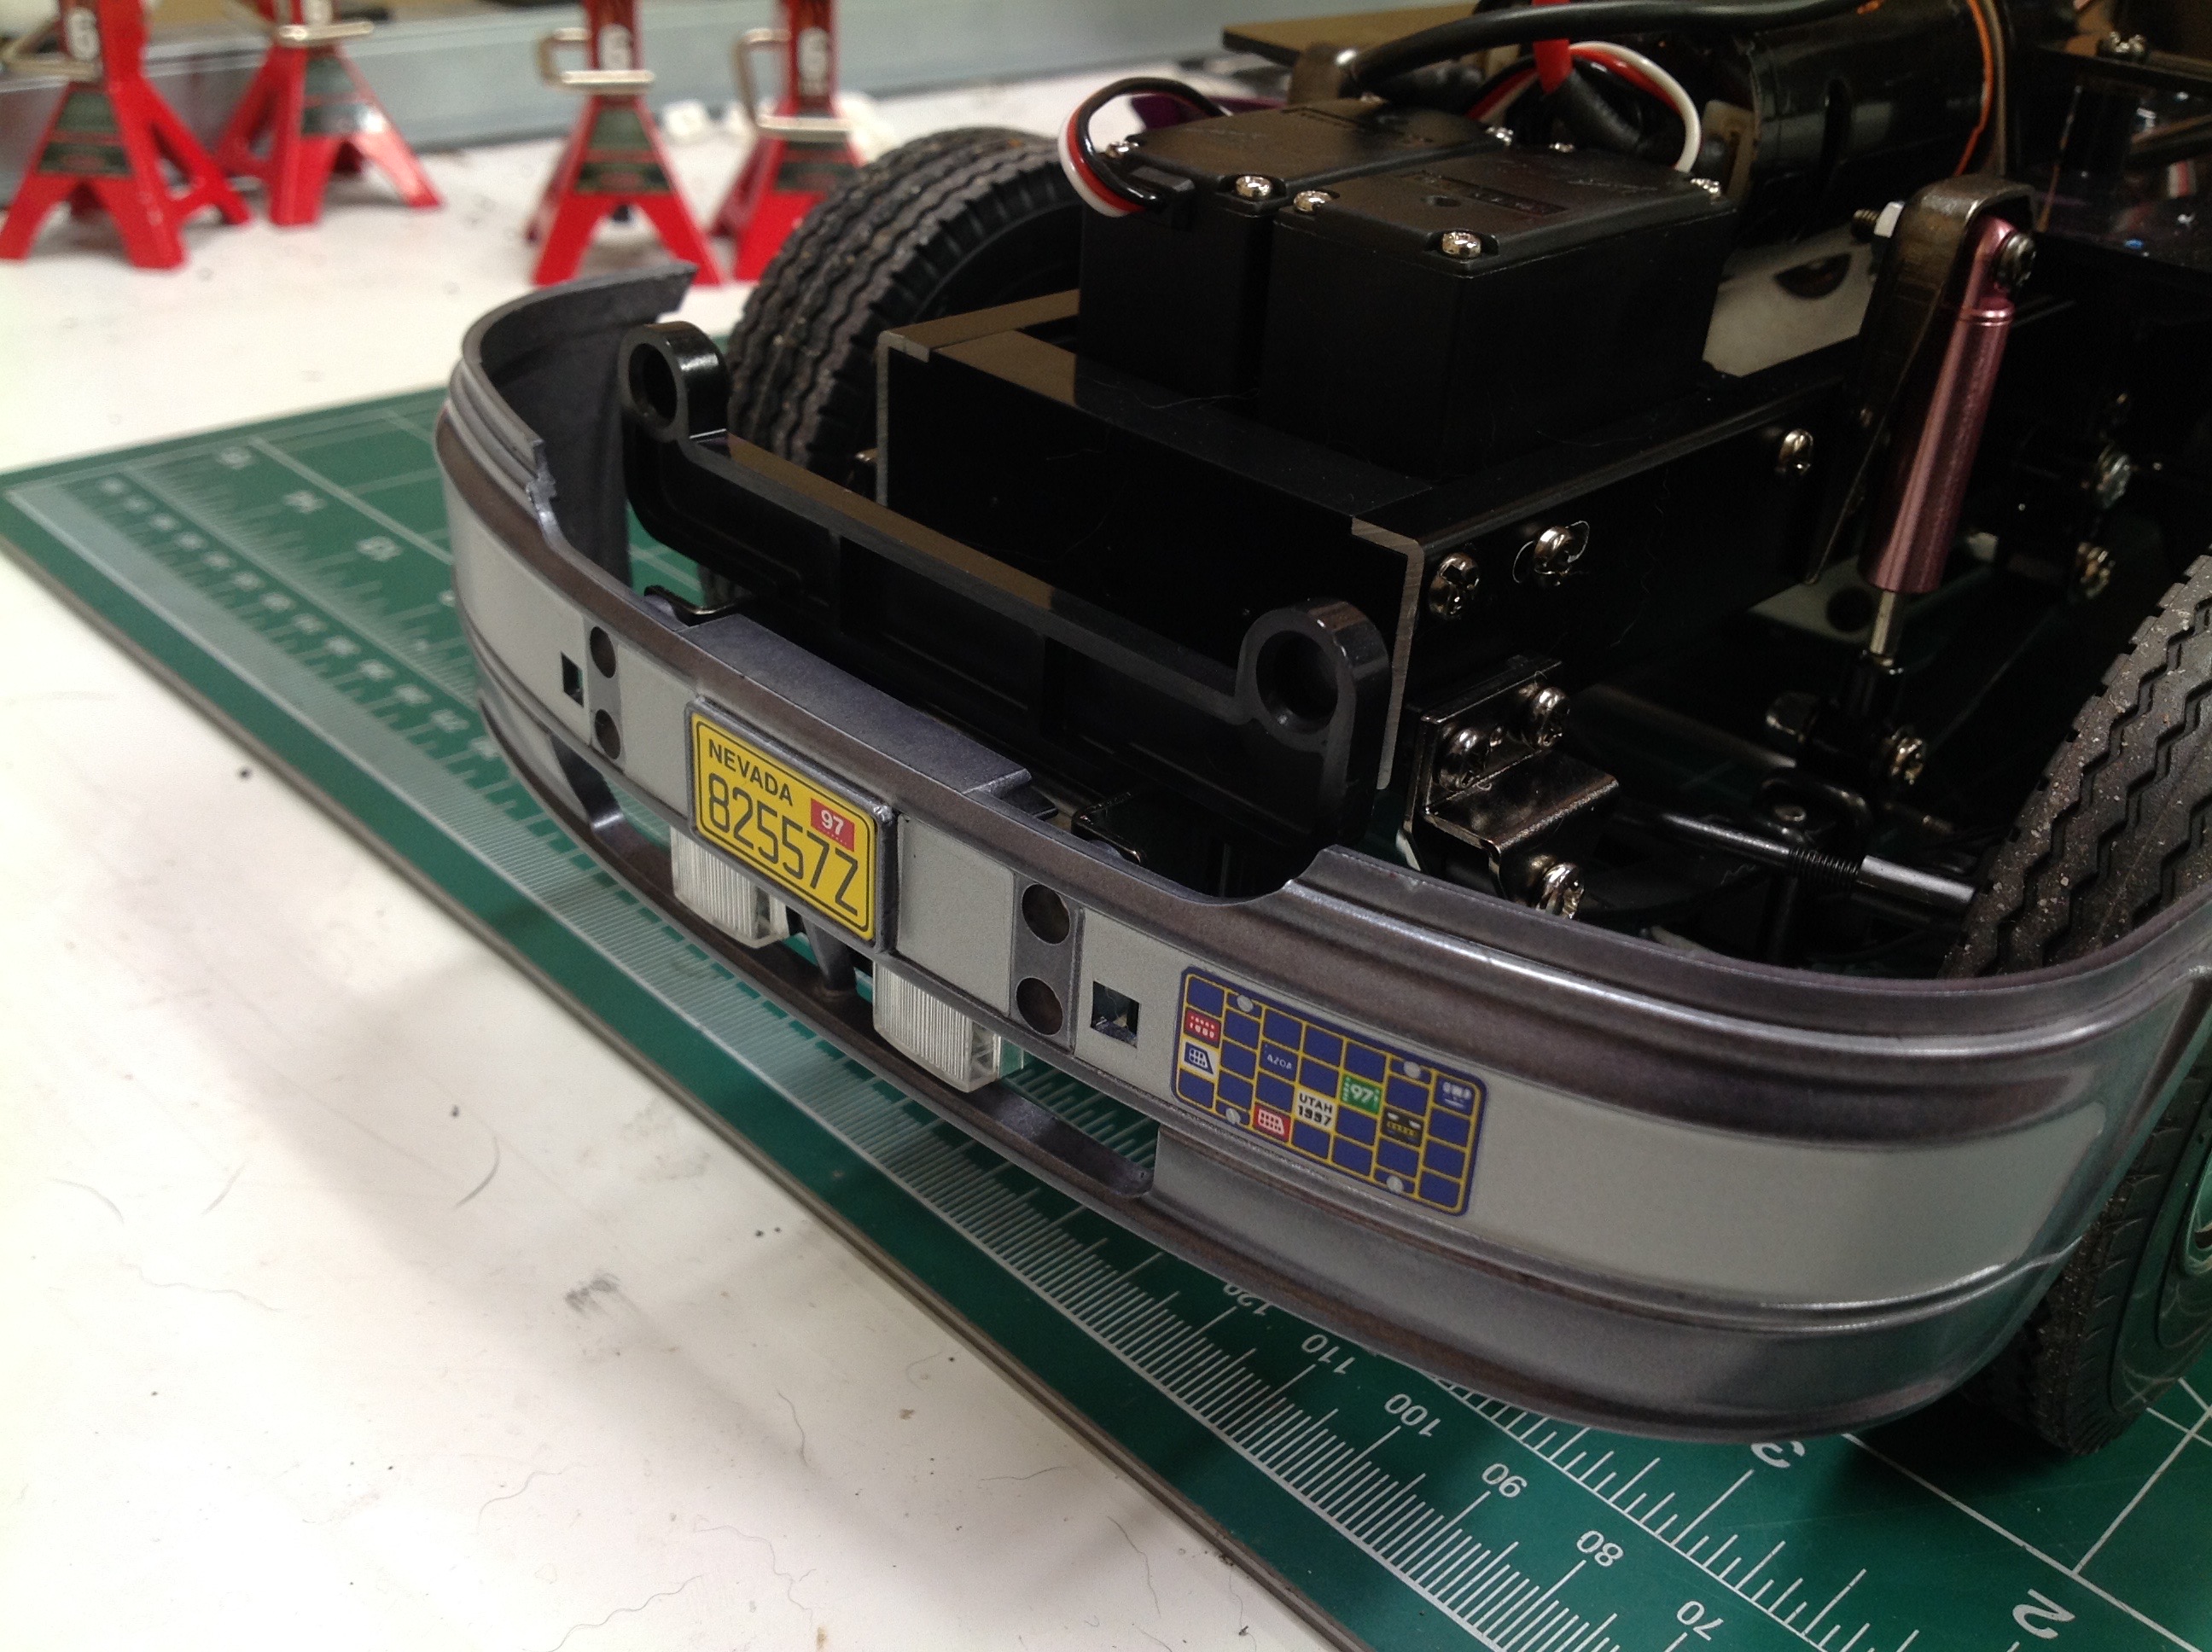
better than painted silver. The front bumper I've done in gun
metal with a semi-gloss clear coat. The silver portions are
stickers. There are a couple of license plate options on the
sticker sheet and I chose Nevada for this truck.
Behind the exhaust stacks is the diamond plate chrome panel that
supports the release mechanism for the fifth wheel. It has a slot
for a power switch, but this isn't used by the MFC or by my temporary
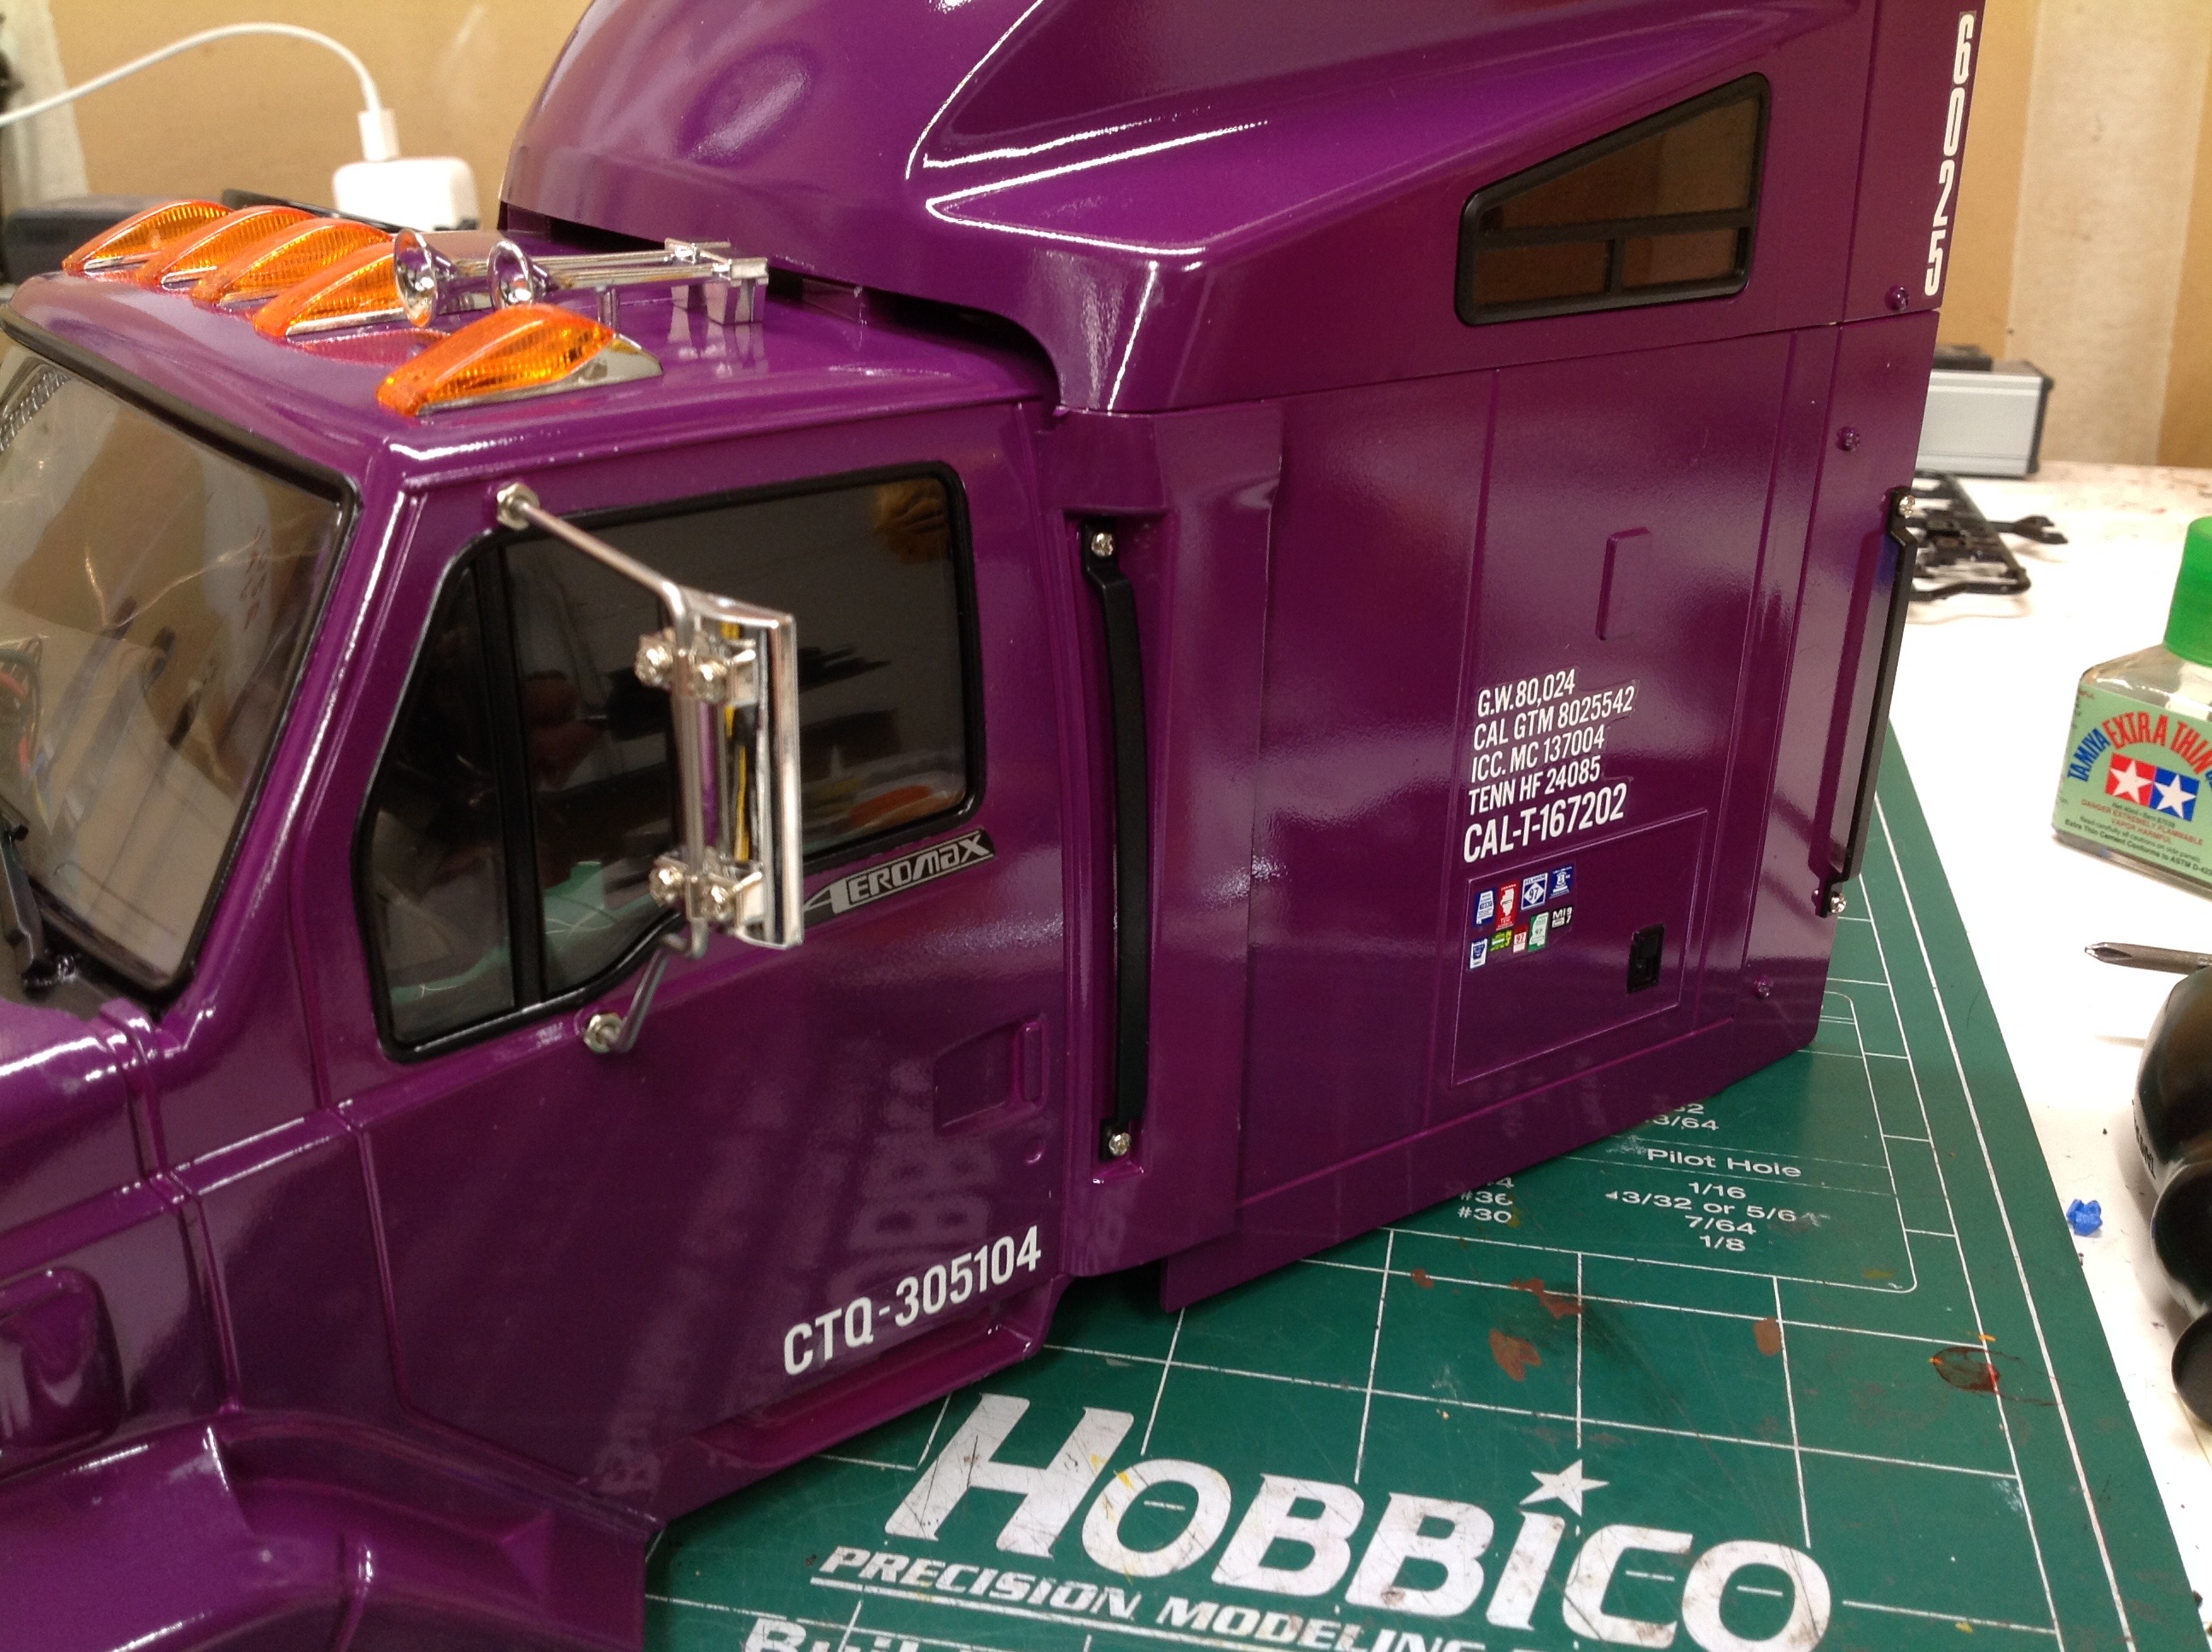
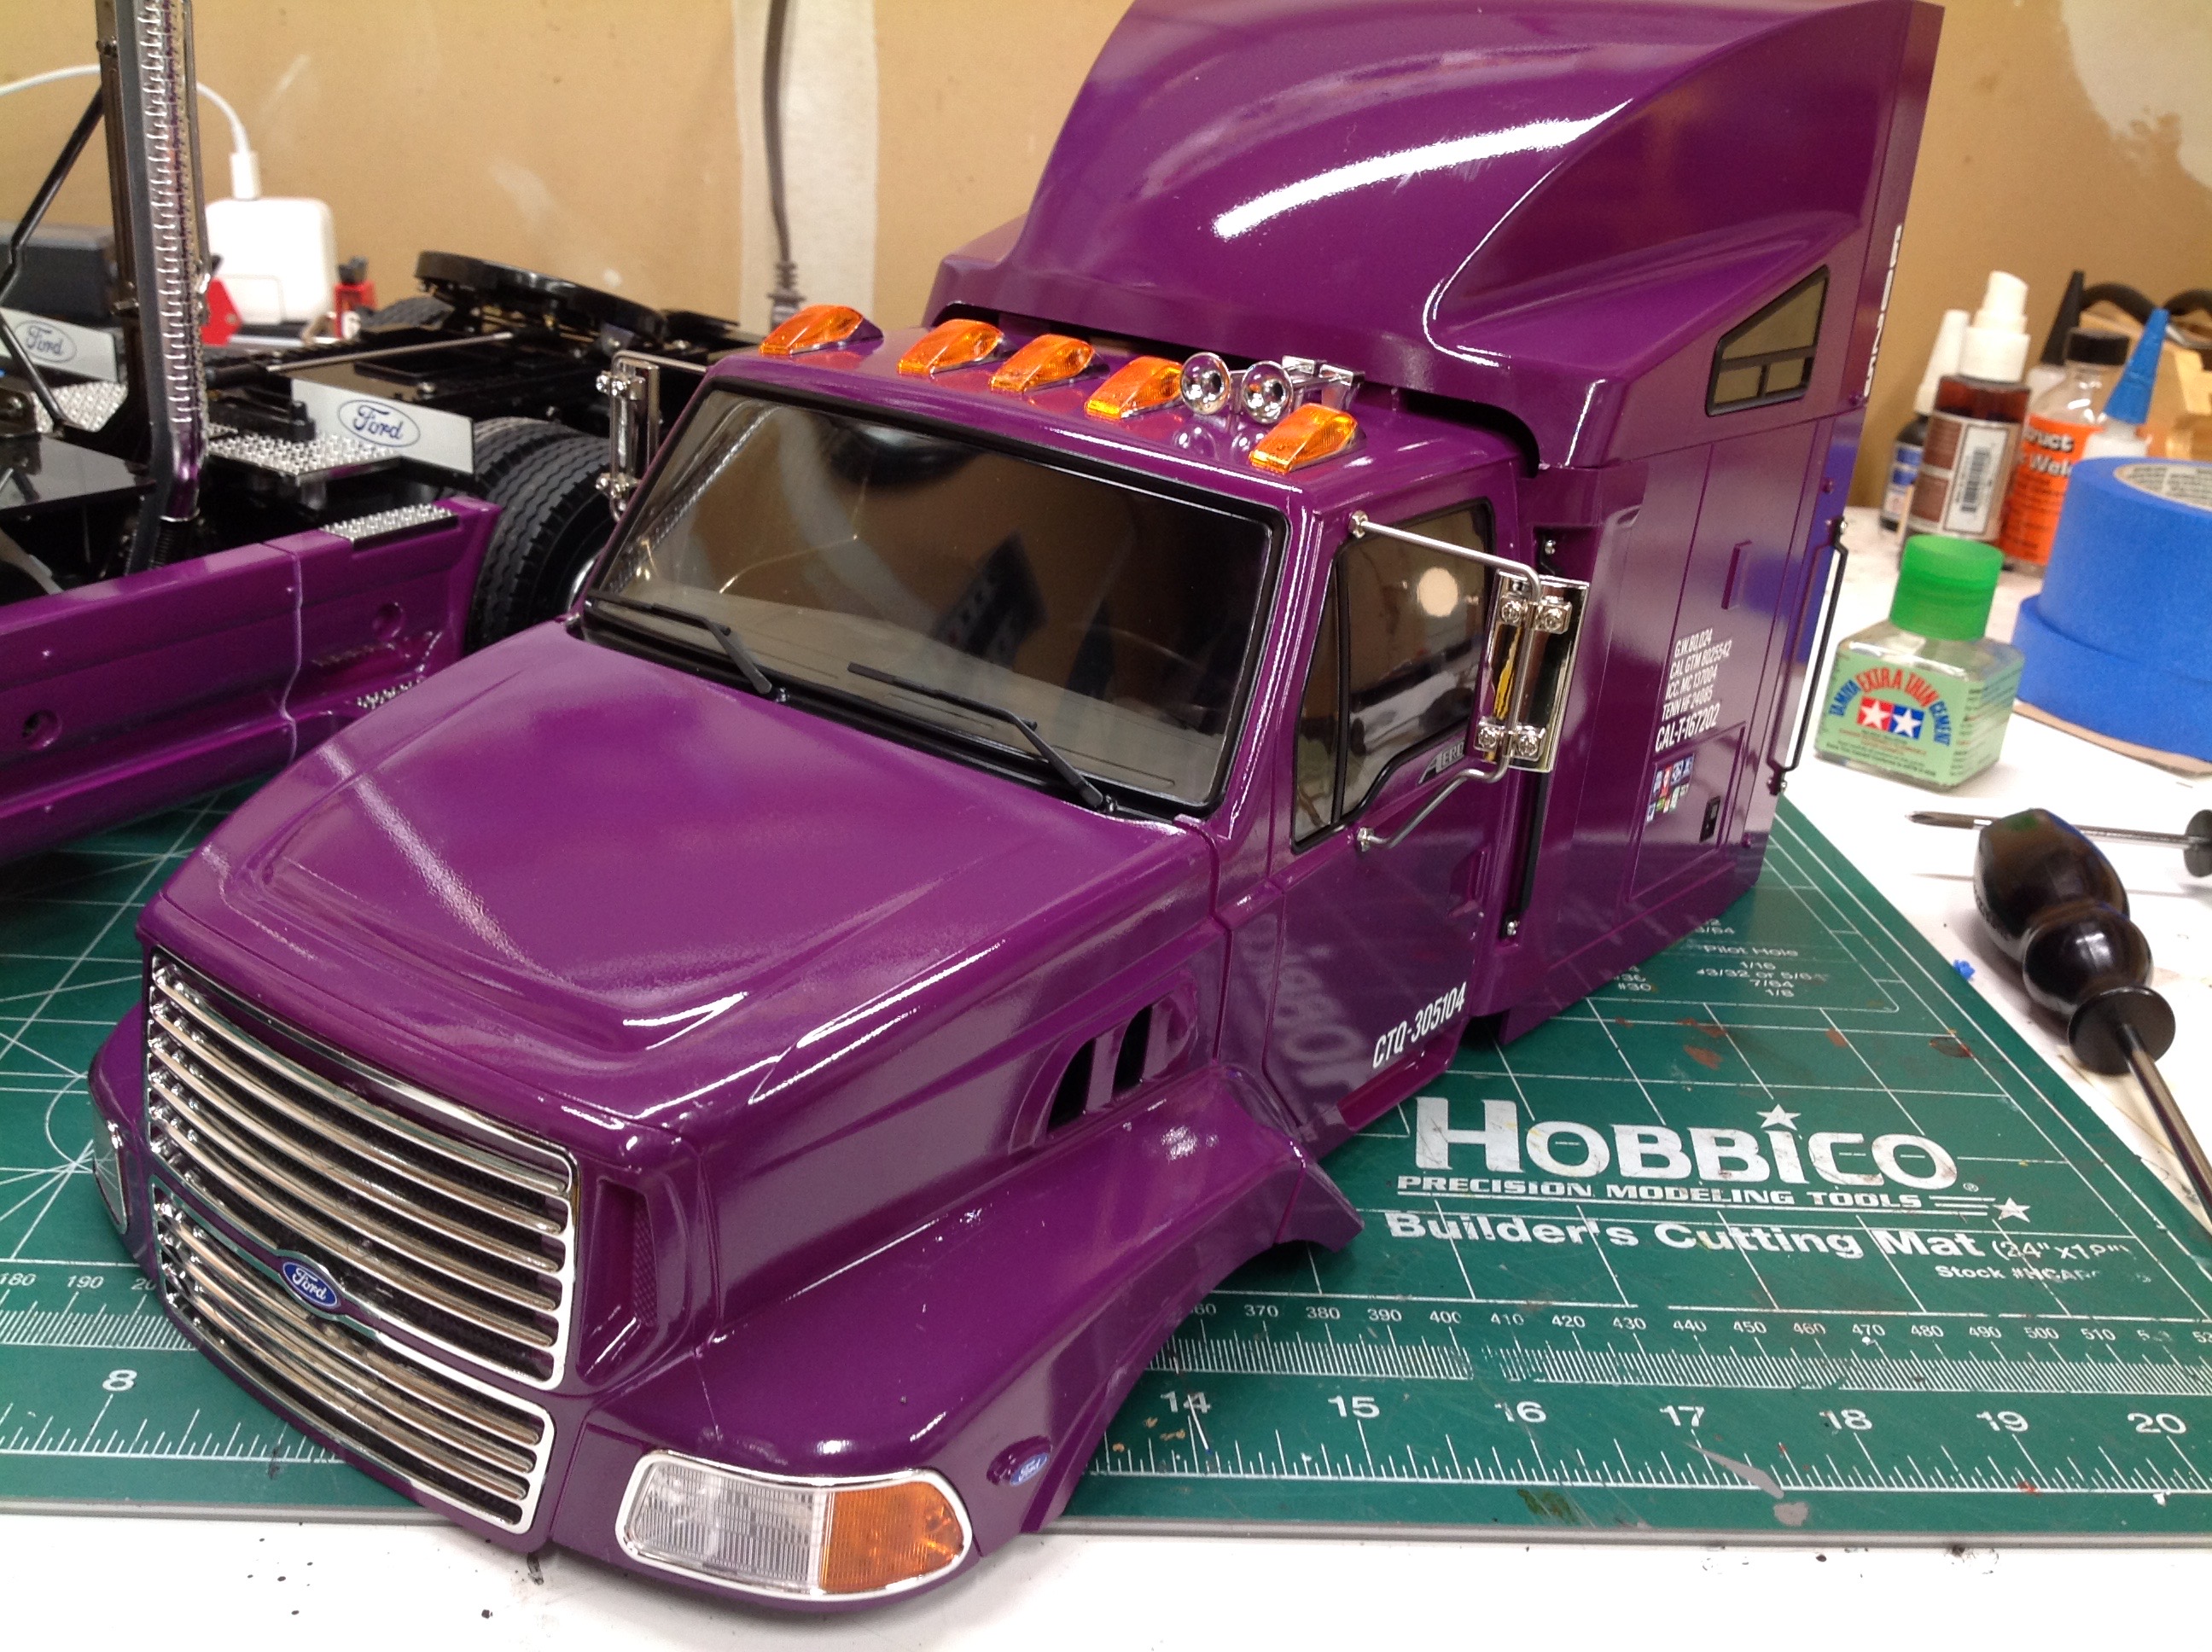
ESC. On the right you can see some of the detail of the main
cab. I've painted and top coated it and also done all the black
trim around the windows (which takes forever). The stickers were
applied under the clear. I assembled most of the parts before
painting with the exception of the windows and chrome parts. The
roof lights are quite tricky to install because you have to drill your
own holes to pass the 3mm LEDs and then bend the wires 90 degrees into
the housing.
The completed body now has the grille, the headlights, the roof horns,
the mirrors, and all the other details you'd expect from Tamiya.
The front amber turn signals are intended to use stickers, but I painted
them instead since I think it looks much better. You can't see
the interior very well, but there is a full dash board and a pair of
seats in there. I suppose an interior light could be added.
On the right you see the completed truck with the body installed on the
chassis. It installs with only 2 screws because it locks under
some tabs above the bumper in front and then bolts down near the exhaust
stacks. The body does not need to be removed to access the
battery which sits under the frame rails..
©2019 Eric Albrecht