Toyota FJ40 Project
Page 1: Construction
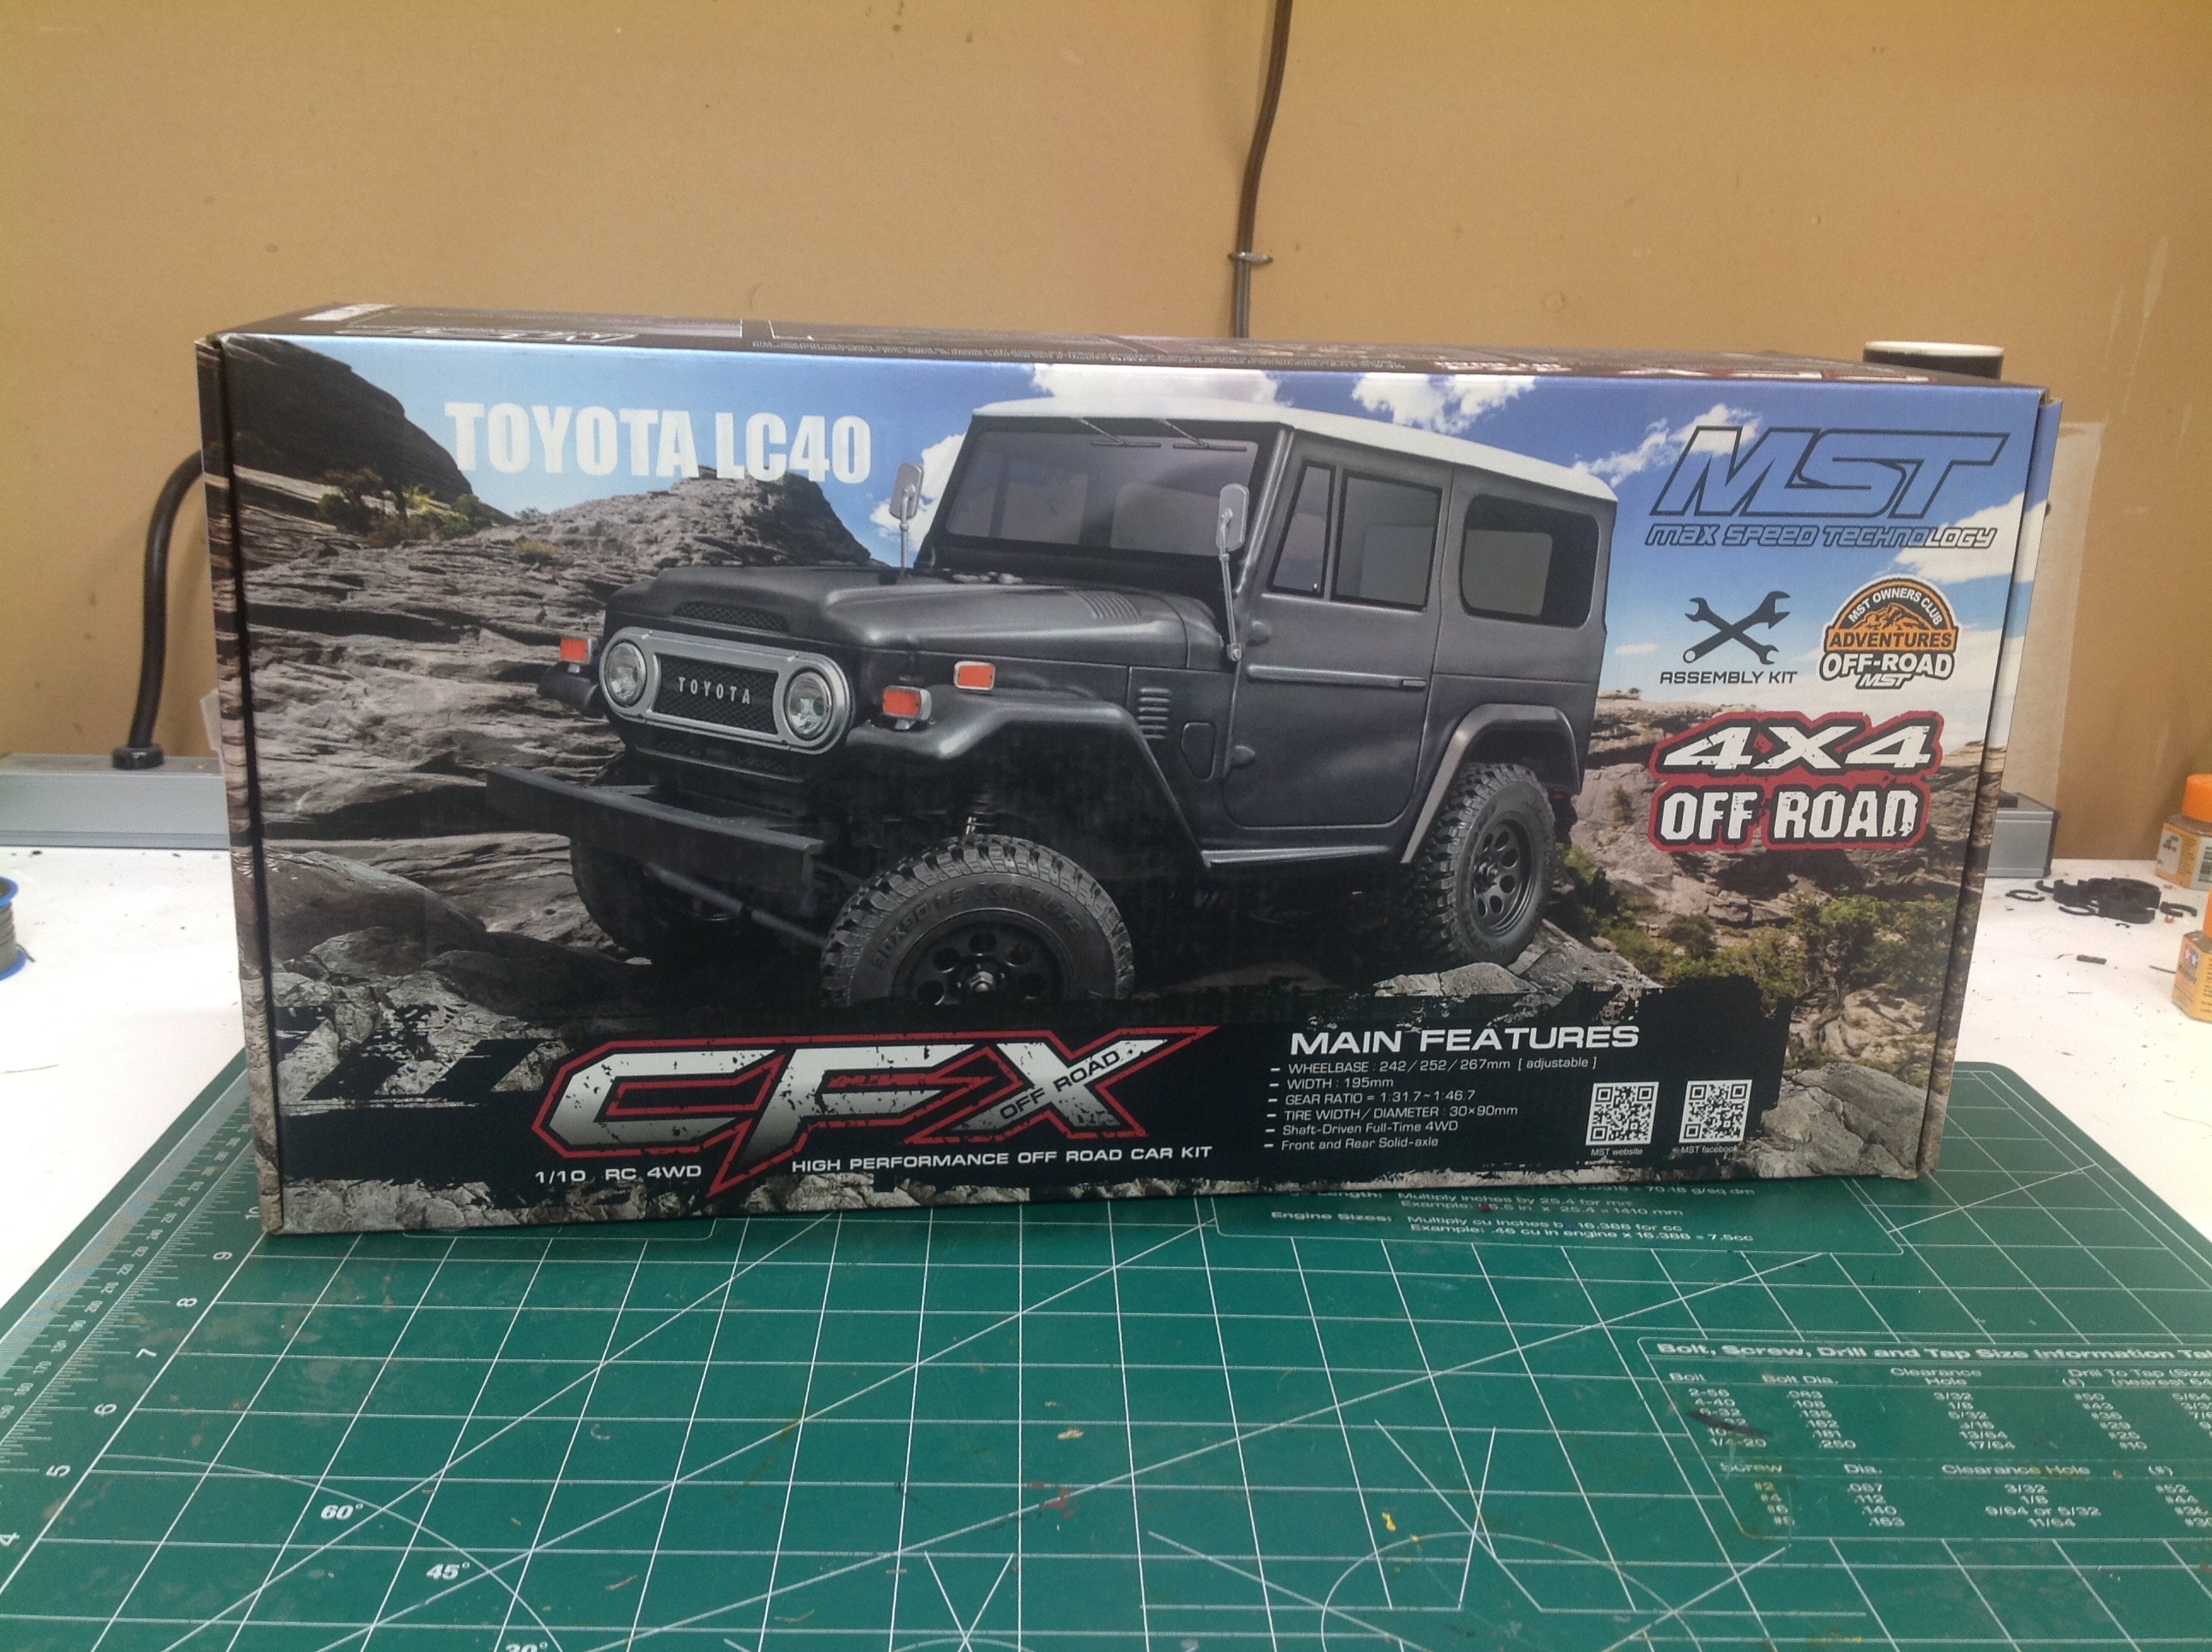
The CFX comes in a pretty small box, barely bigger than the body
contained within. It is nicely printed in full color with a flip
open top. Everything inside is very carefully bagged, though there
is not a 1:1 correlation between steps and bags. For example,
Step 1 uses bags 1, 2, and 3. The plastic parts are all bagged
together with the hardware, and everything is already cut away from the
molding sprues.
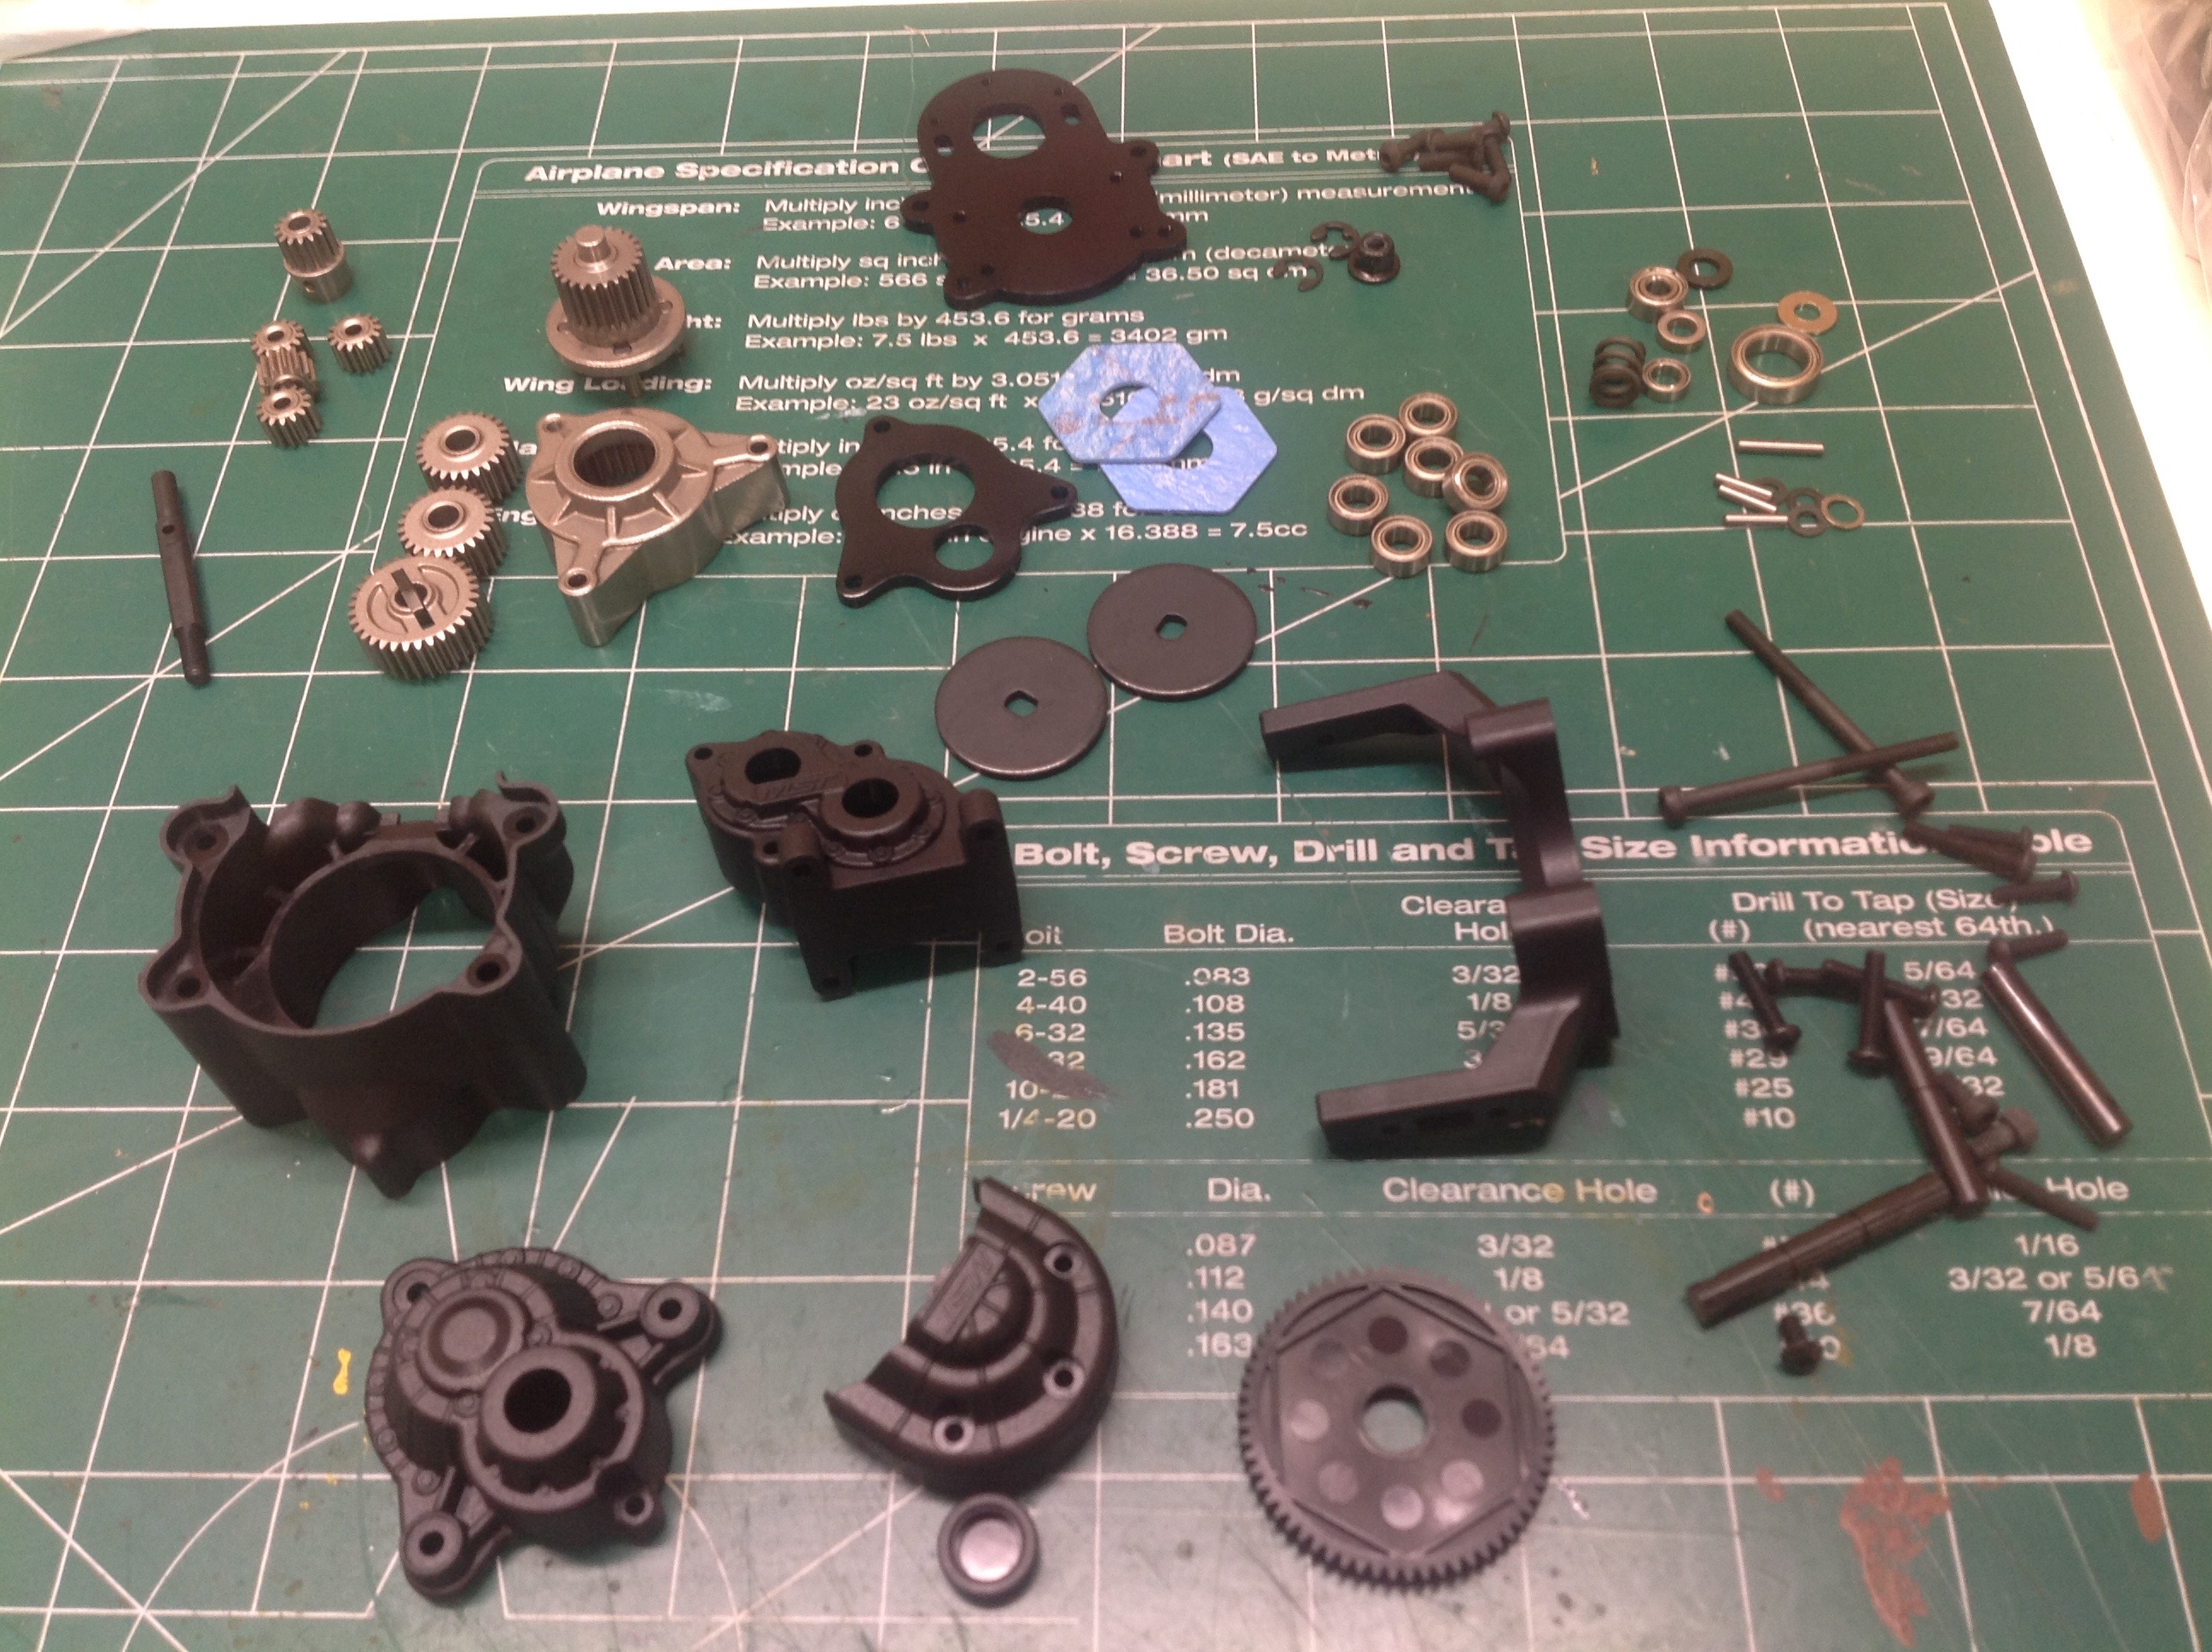
Step 1 builds the transmission. The first image shows all the
parts collected and sorted. You can see that there are full ball
bearings included and all the gears are metal. There is also a two
plate slipper clutch. The transmission uses only a single stage
of planetary reduction with a driven sun gear and the carrier as
output. The ring gear is fixed to the housing. The sun gear
is 14 teeth, the four planets 14 teeth, and the ring gear 42
teeth. This results in a 1+42/14 = 4:1 ratio. There is
an additional 62/20 = 3.1:1 ratio between the spur and pinion.
Note that the kit does not come with a pinion gear. You can use
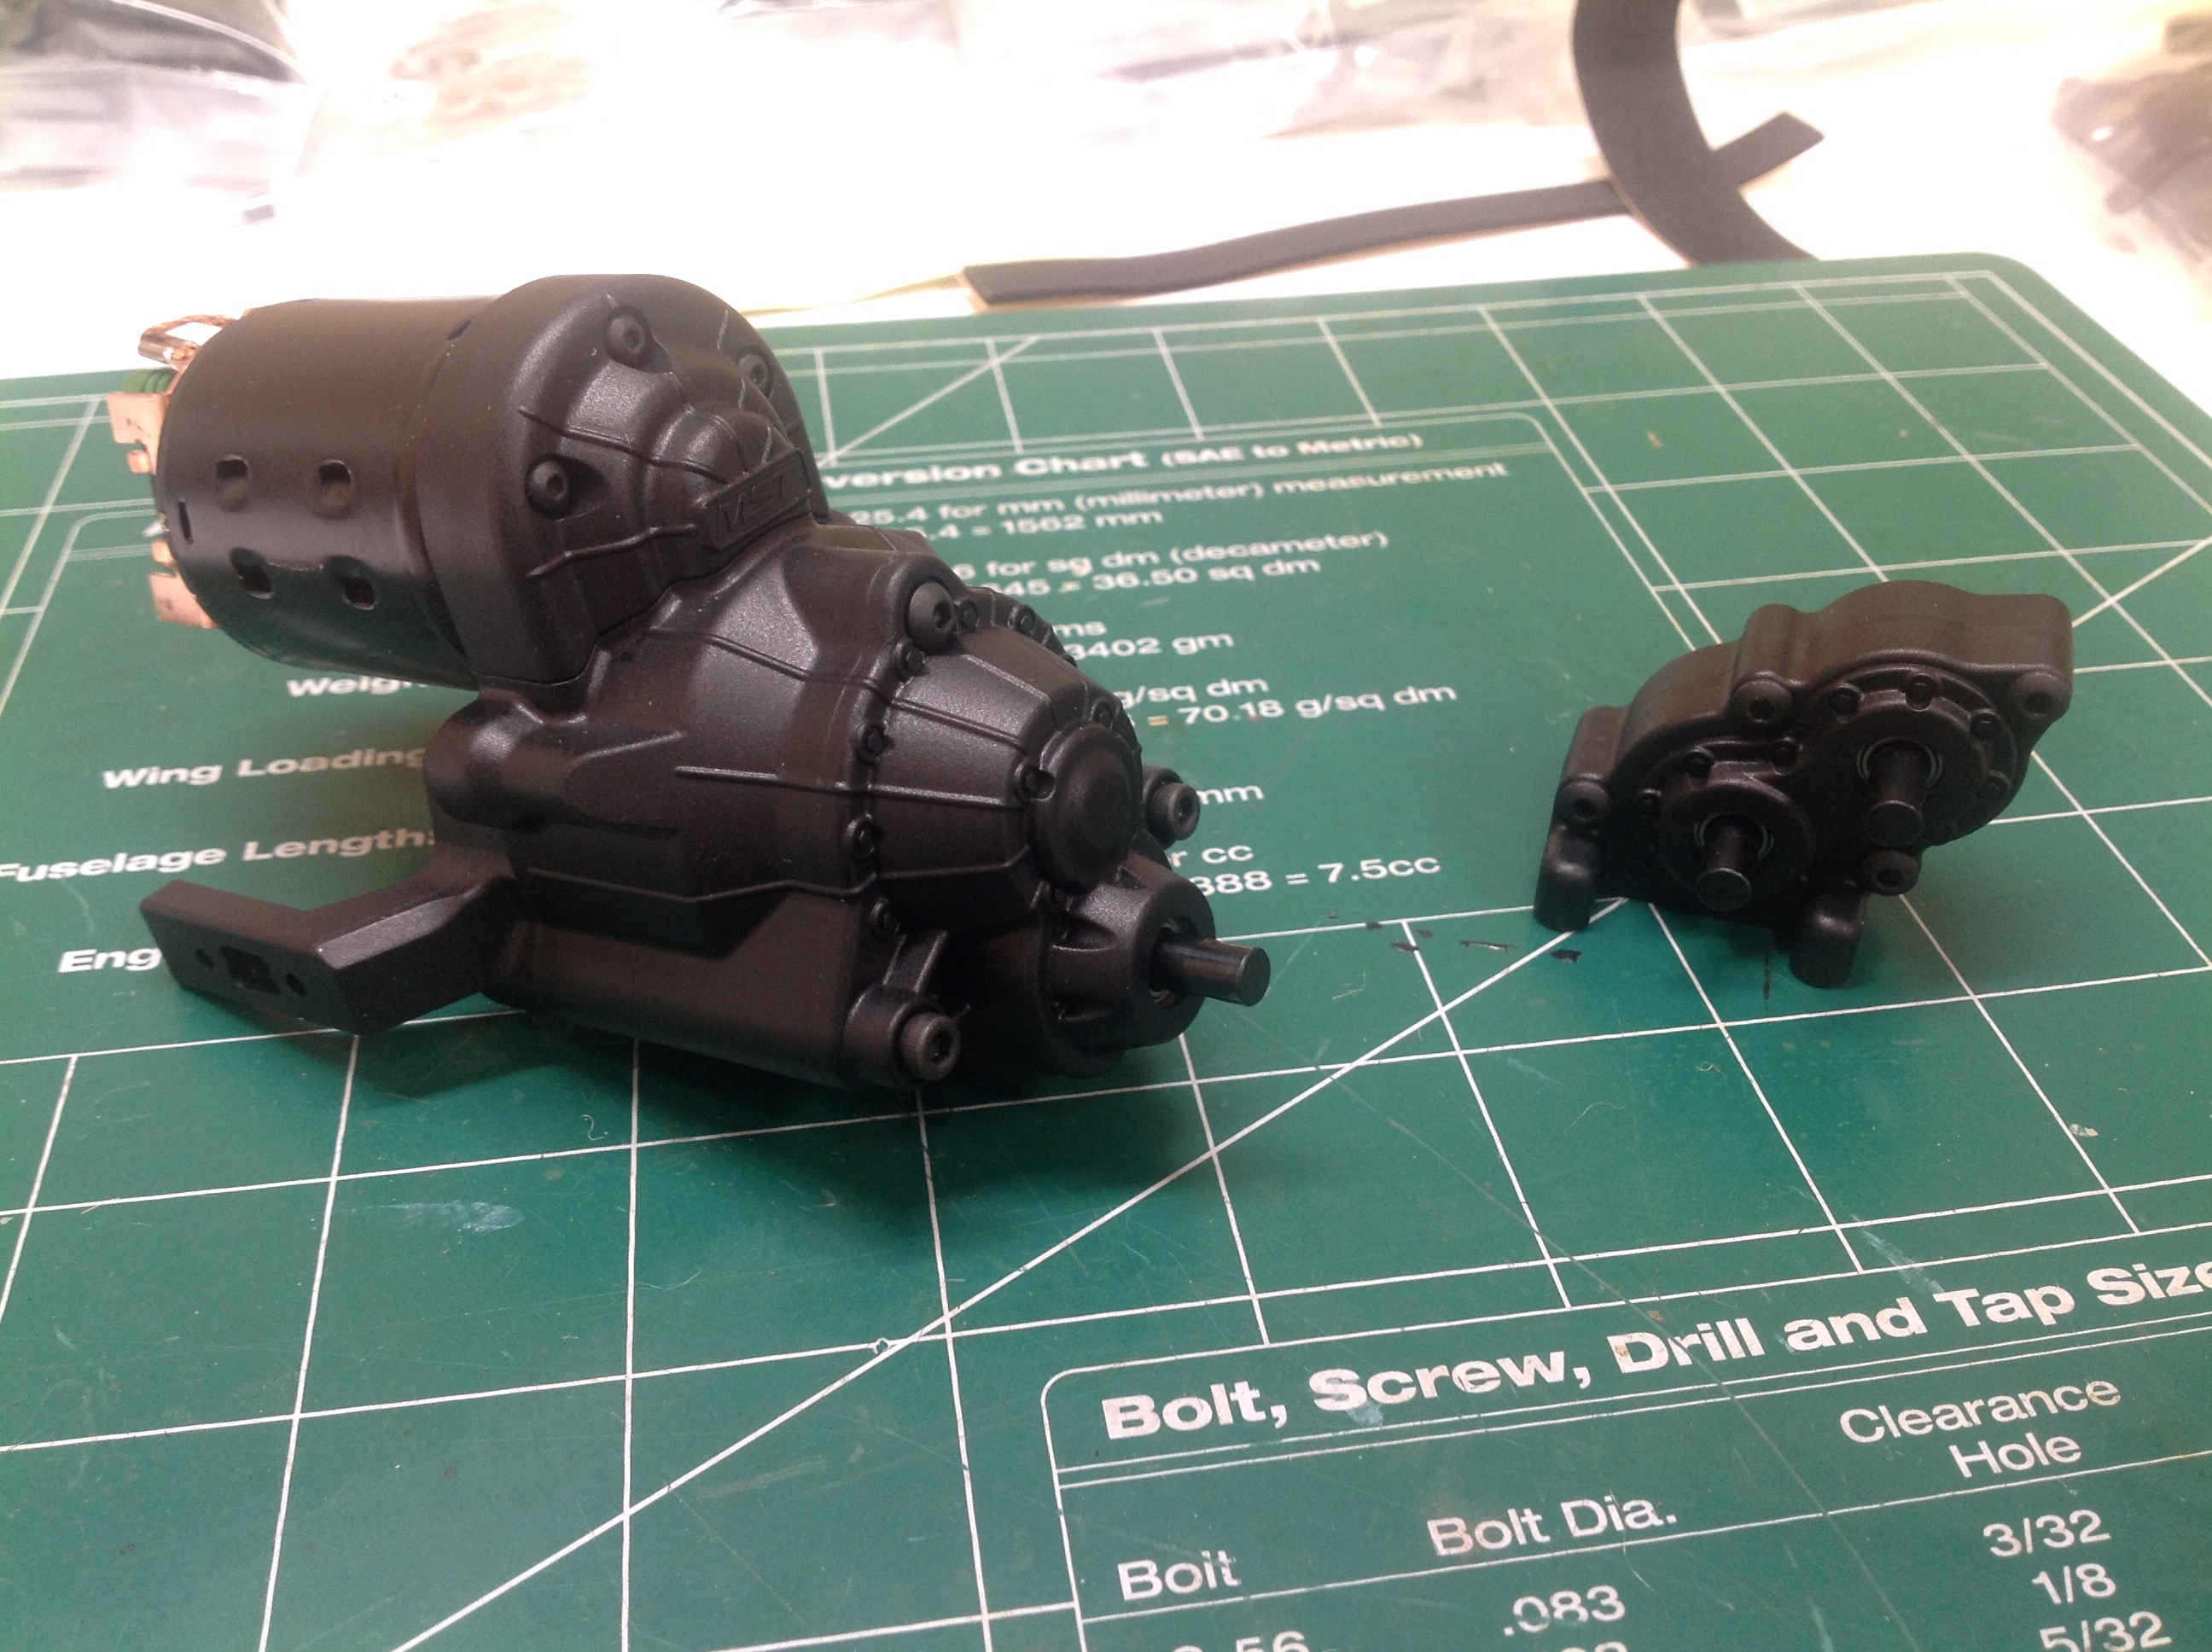
between a 17 and 25 tooth Mod 0.6 pinion. Step 2 builds the external
transfer case which has a 32:24 = 1.33:1 additional reduction. The
final reduction in the axle is 36:15 = 2.4:1 so the overall ratio is
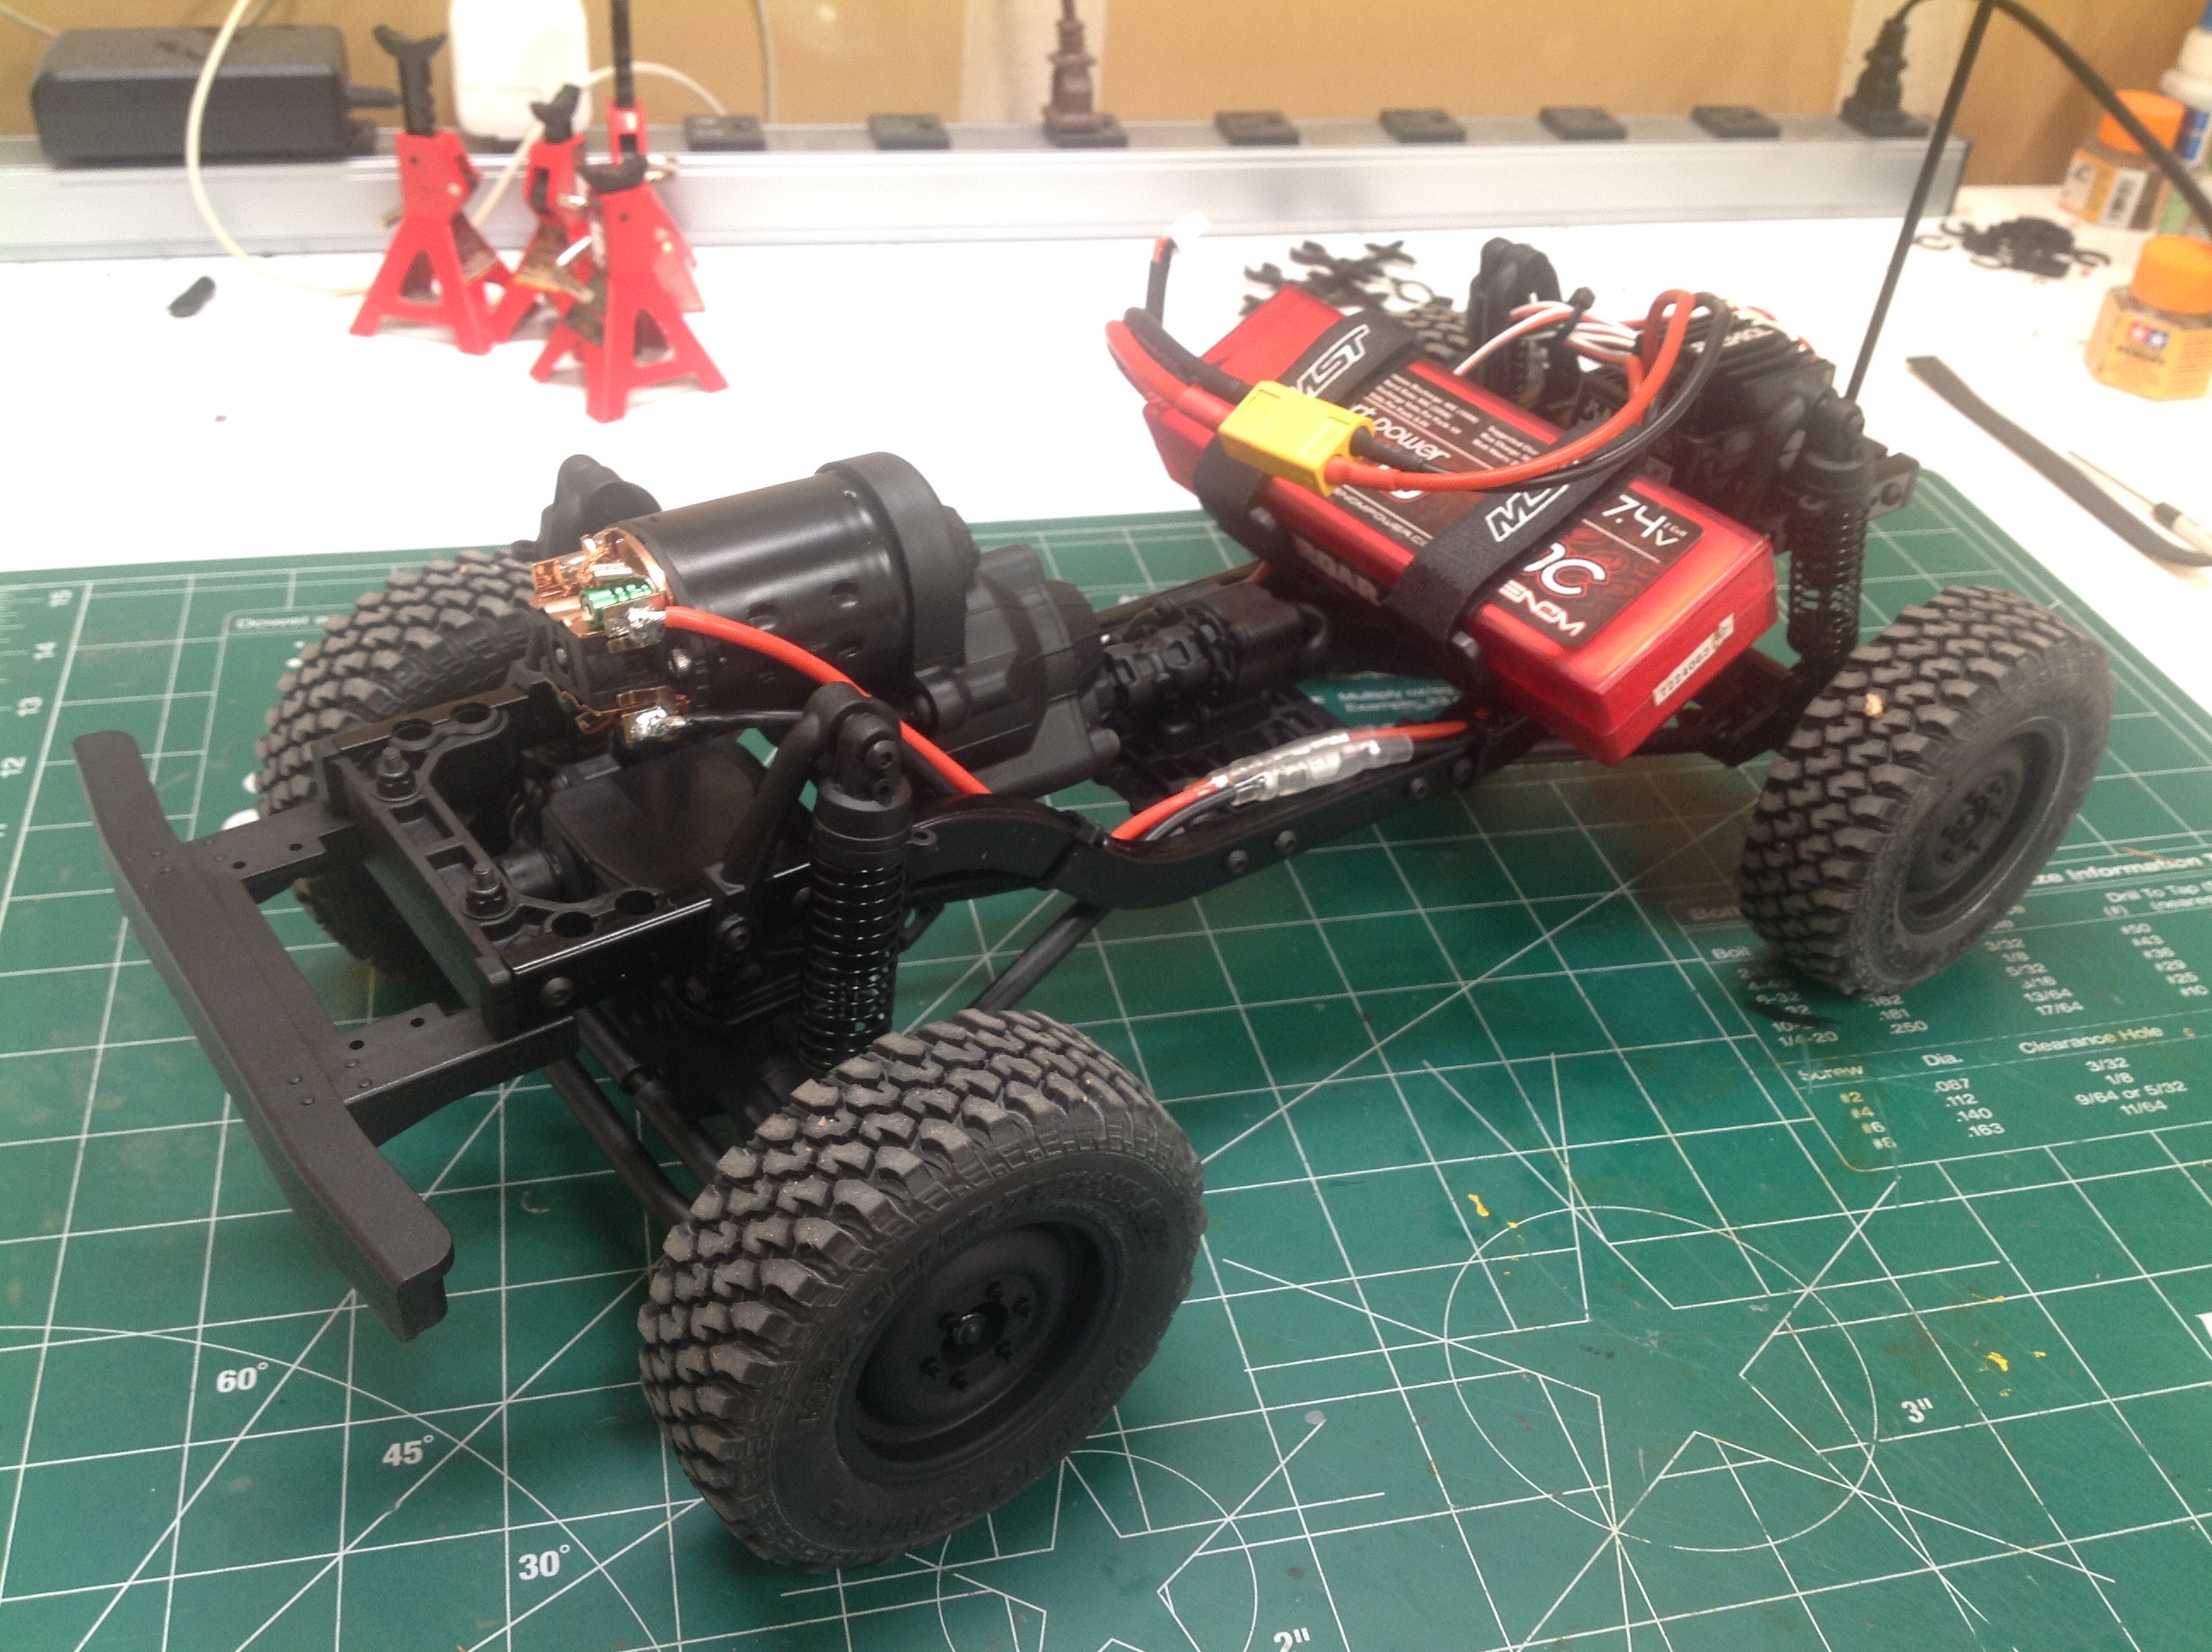
4*3.1*1.33*2.4 = 39.68:1. I used a 35 turn brushed motor.
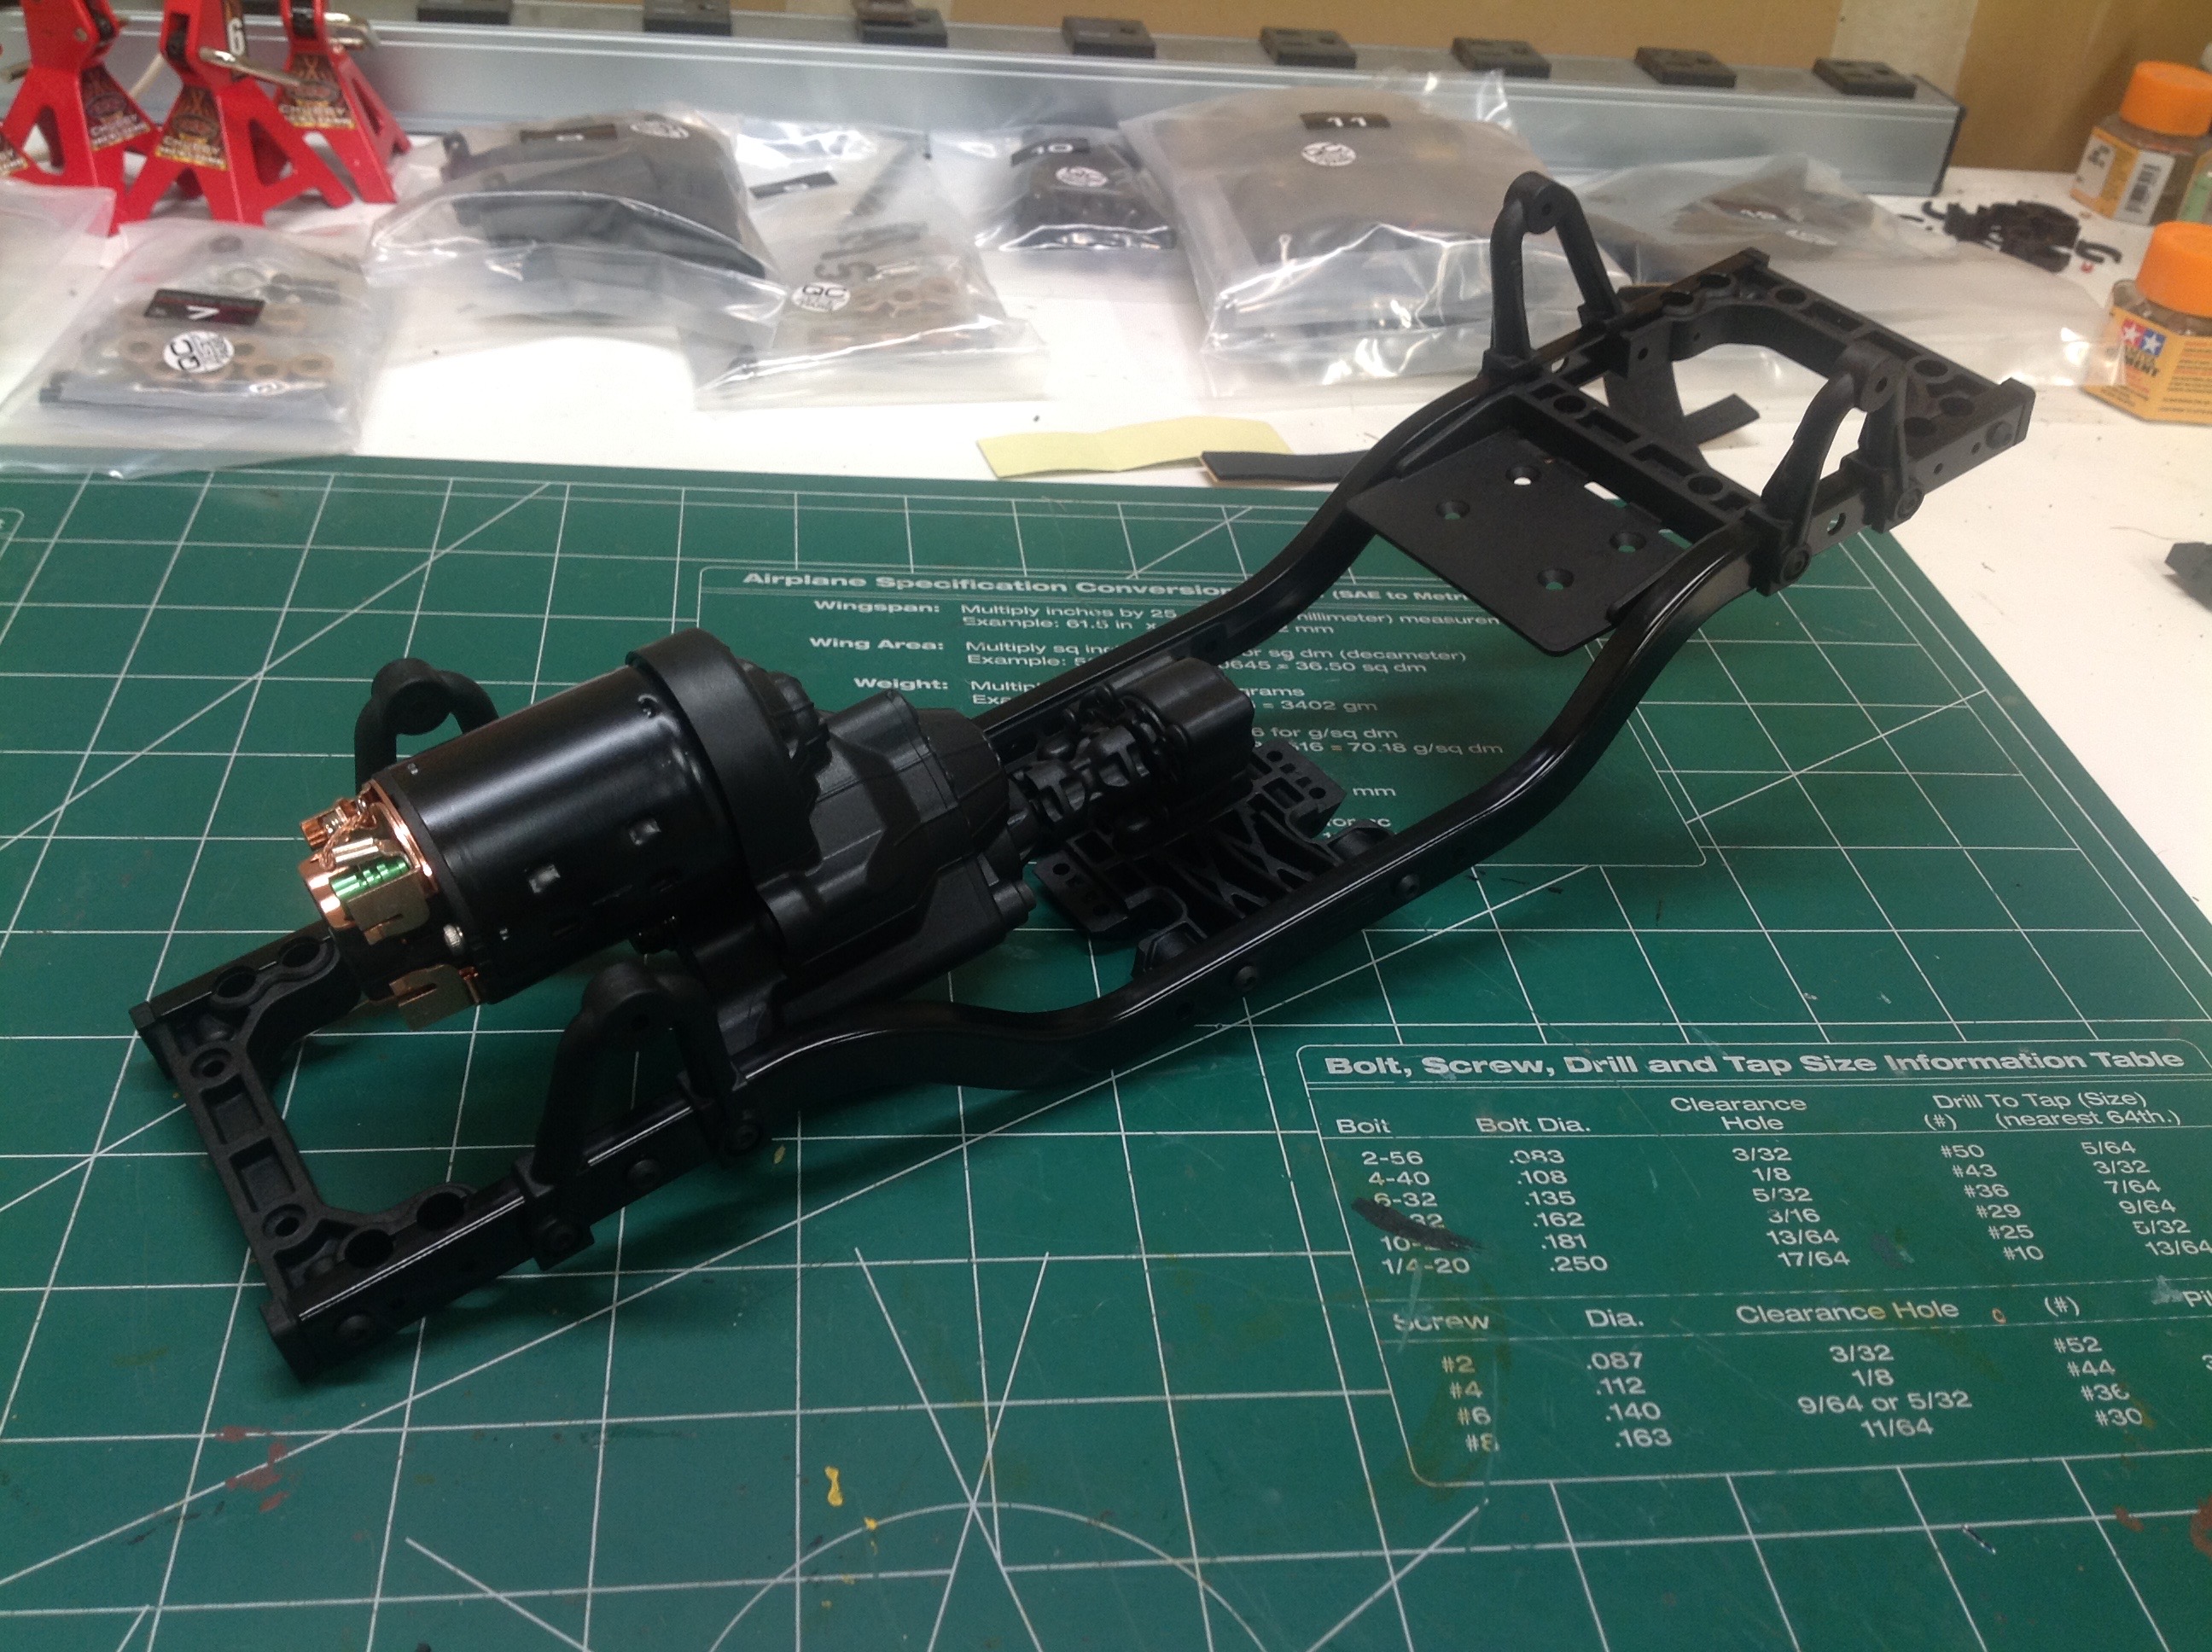
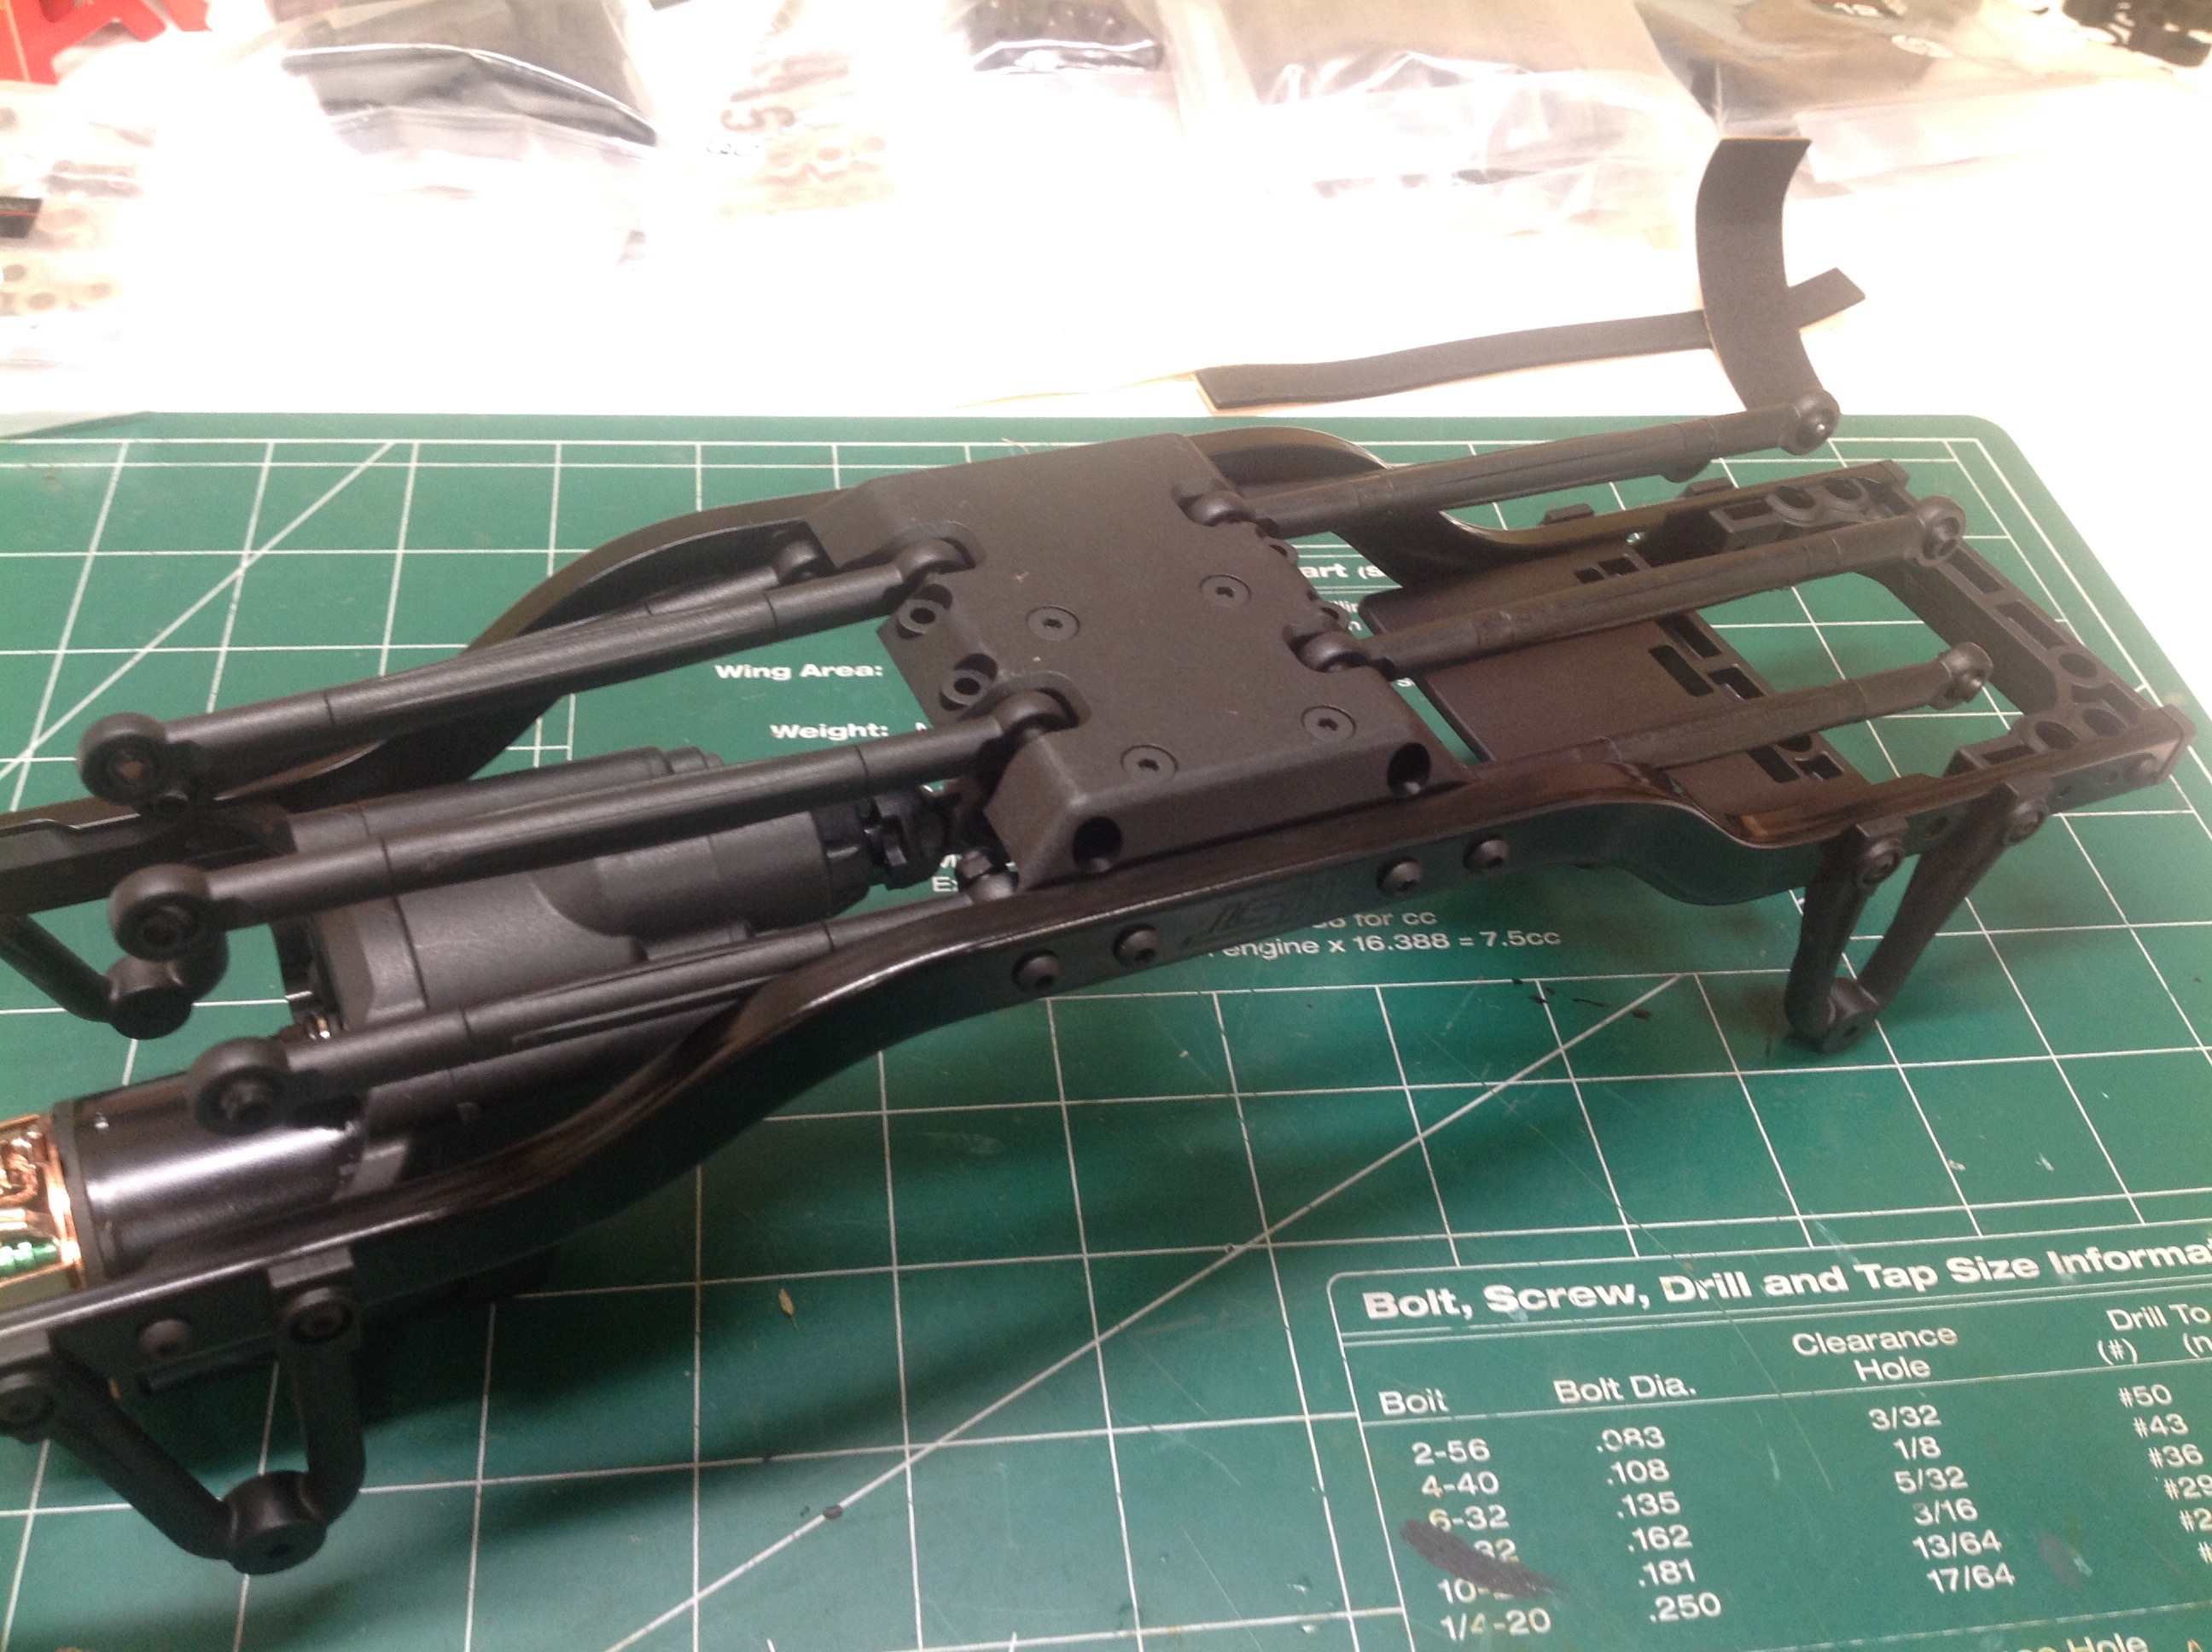
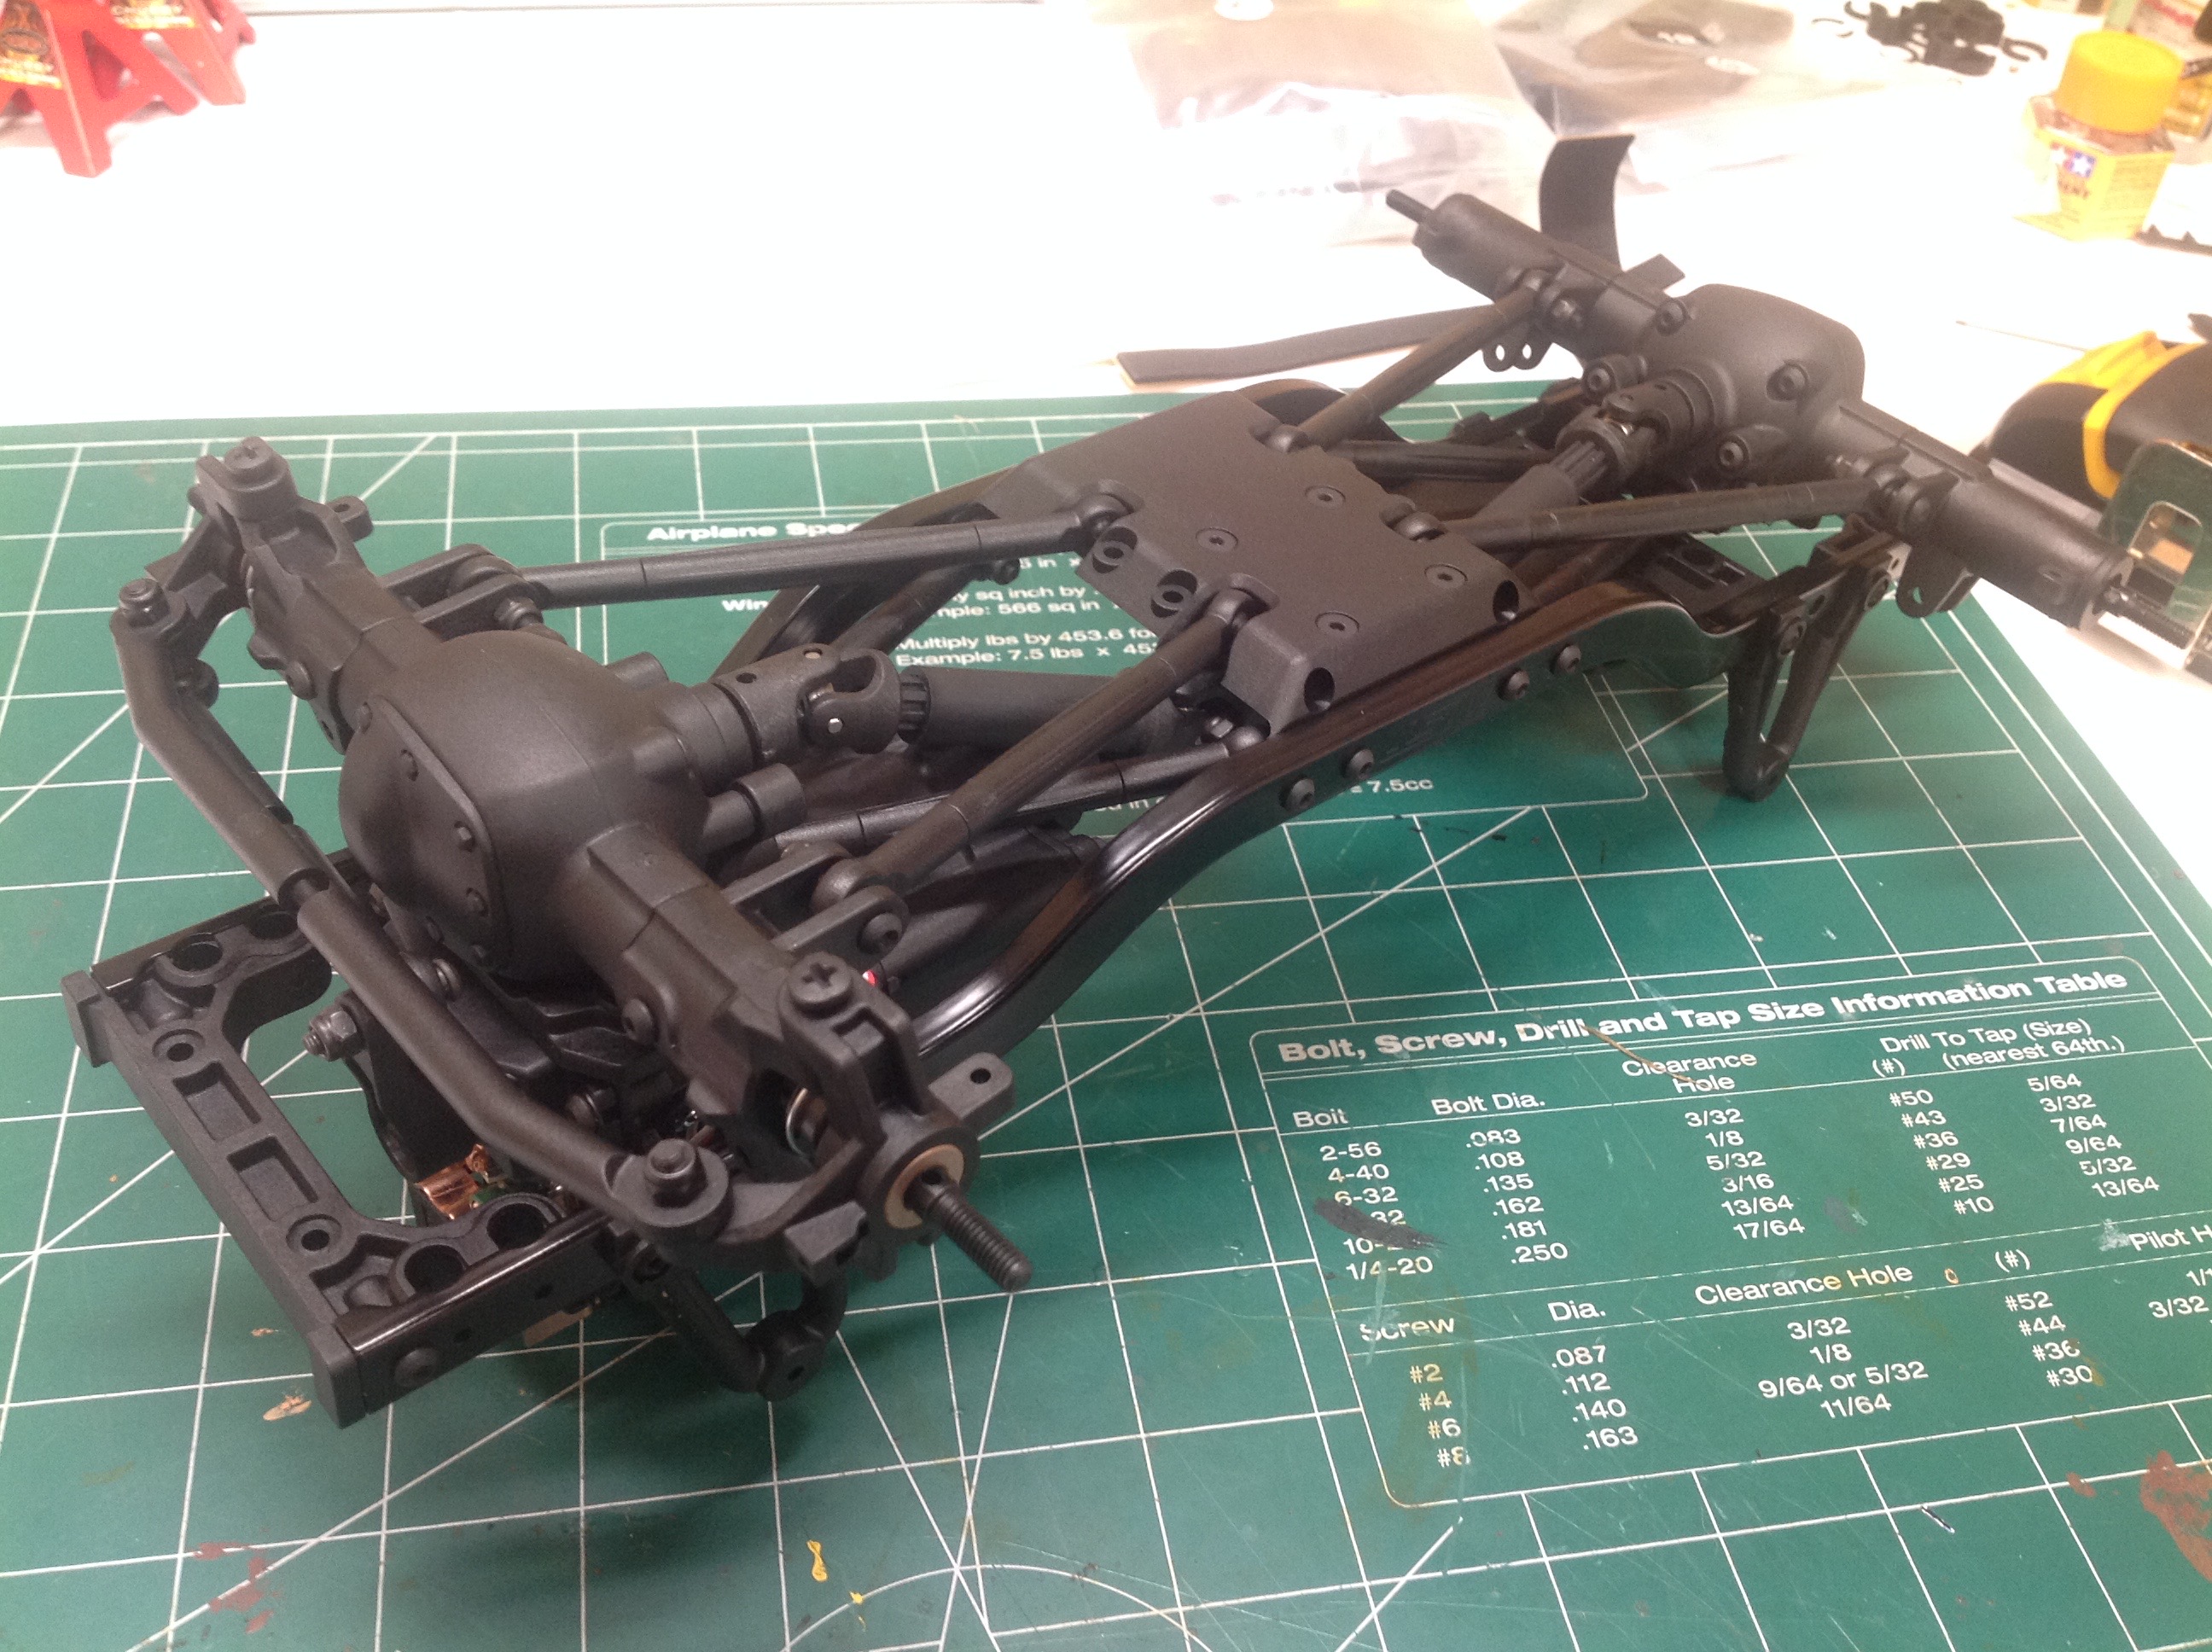
Step 3 attached the transmission and transfer case to the chassis
rails along with a couple of plastic cross members. The shock
hoops are also added at this point.
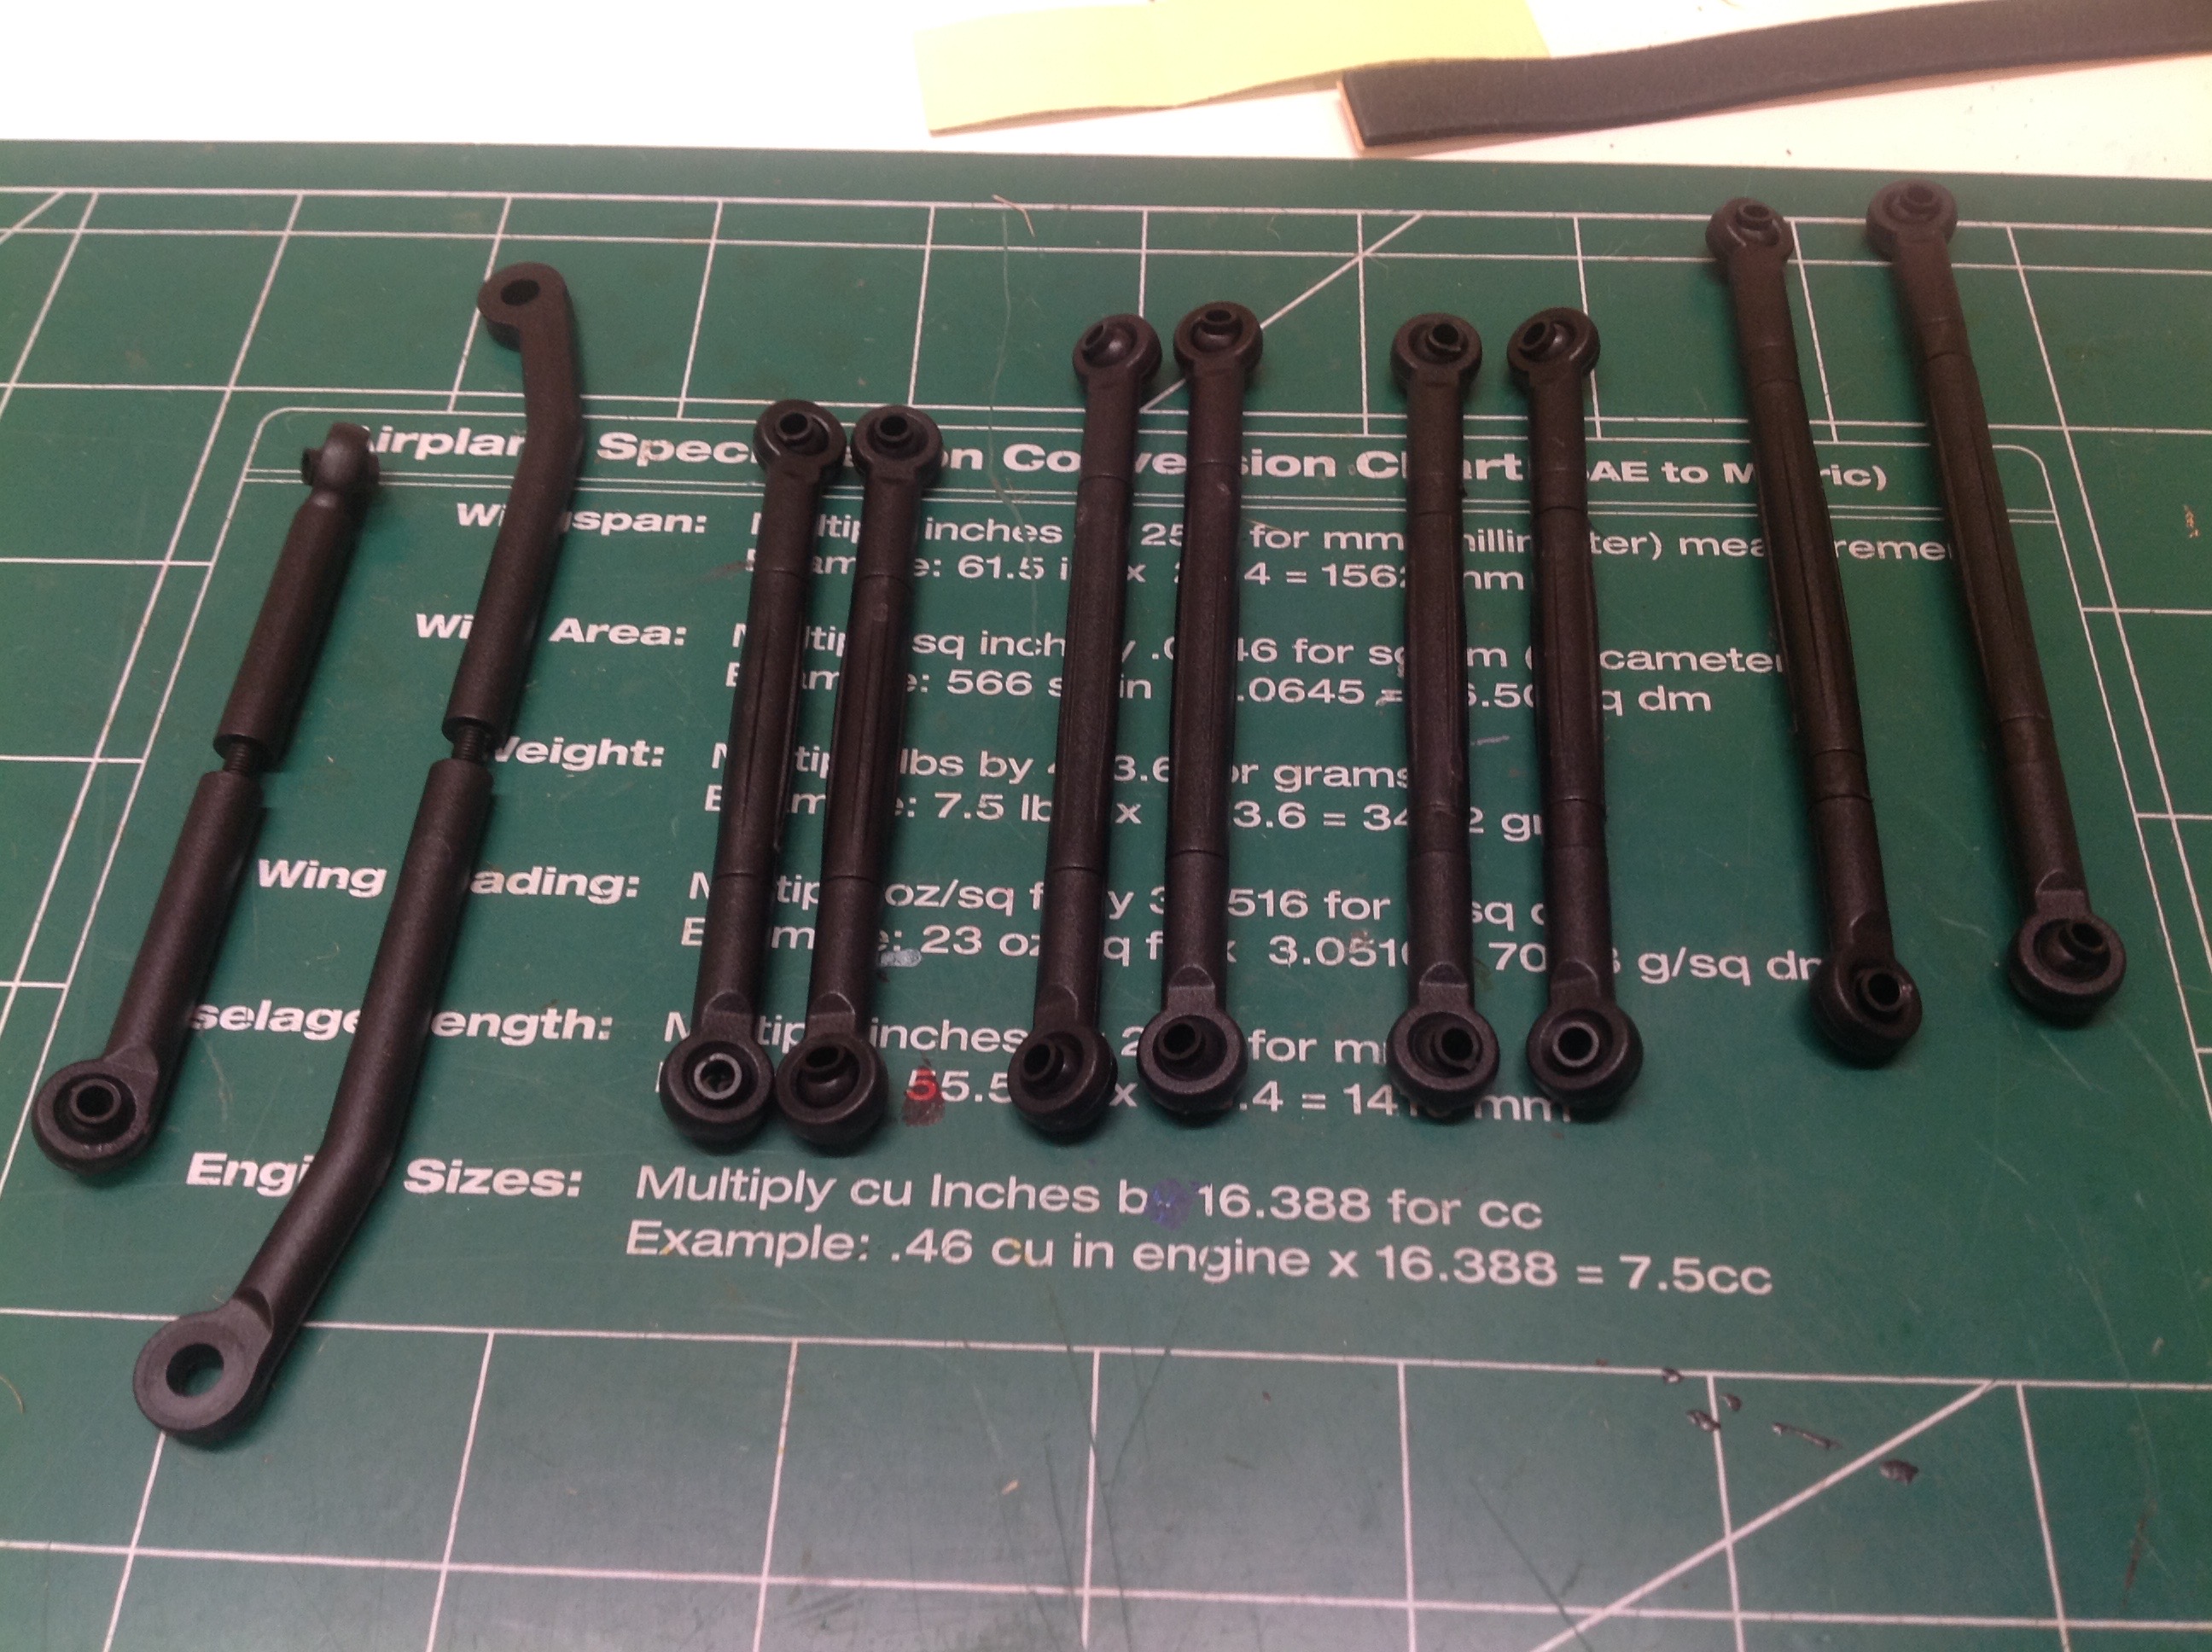
The links are plastic and are assembled with various combinations of
spacers depending on which wheelbase is needed. The chassis
capable of either a 242mm, 252mm, or 267mm wheelbase. This body
uses 252mm. Front and rear suspension are both 4-link type.
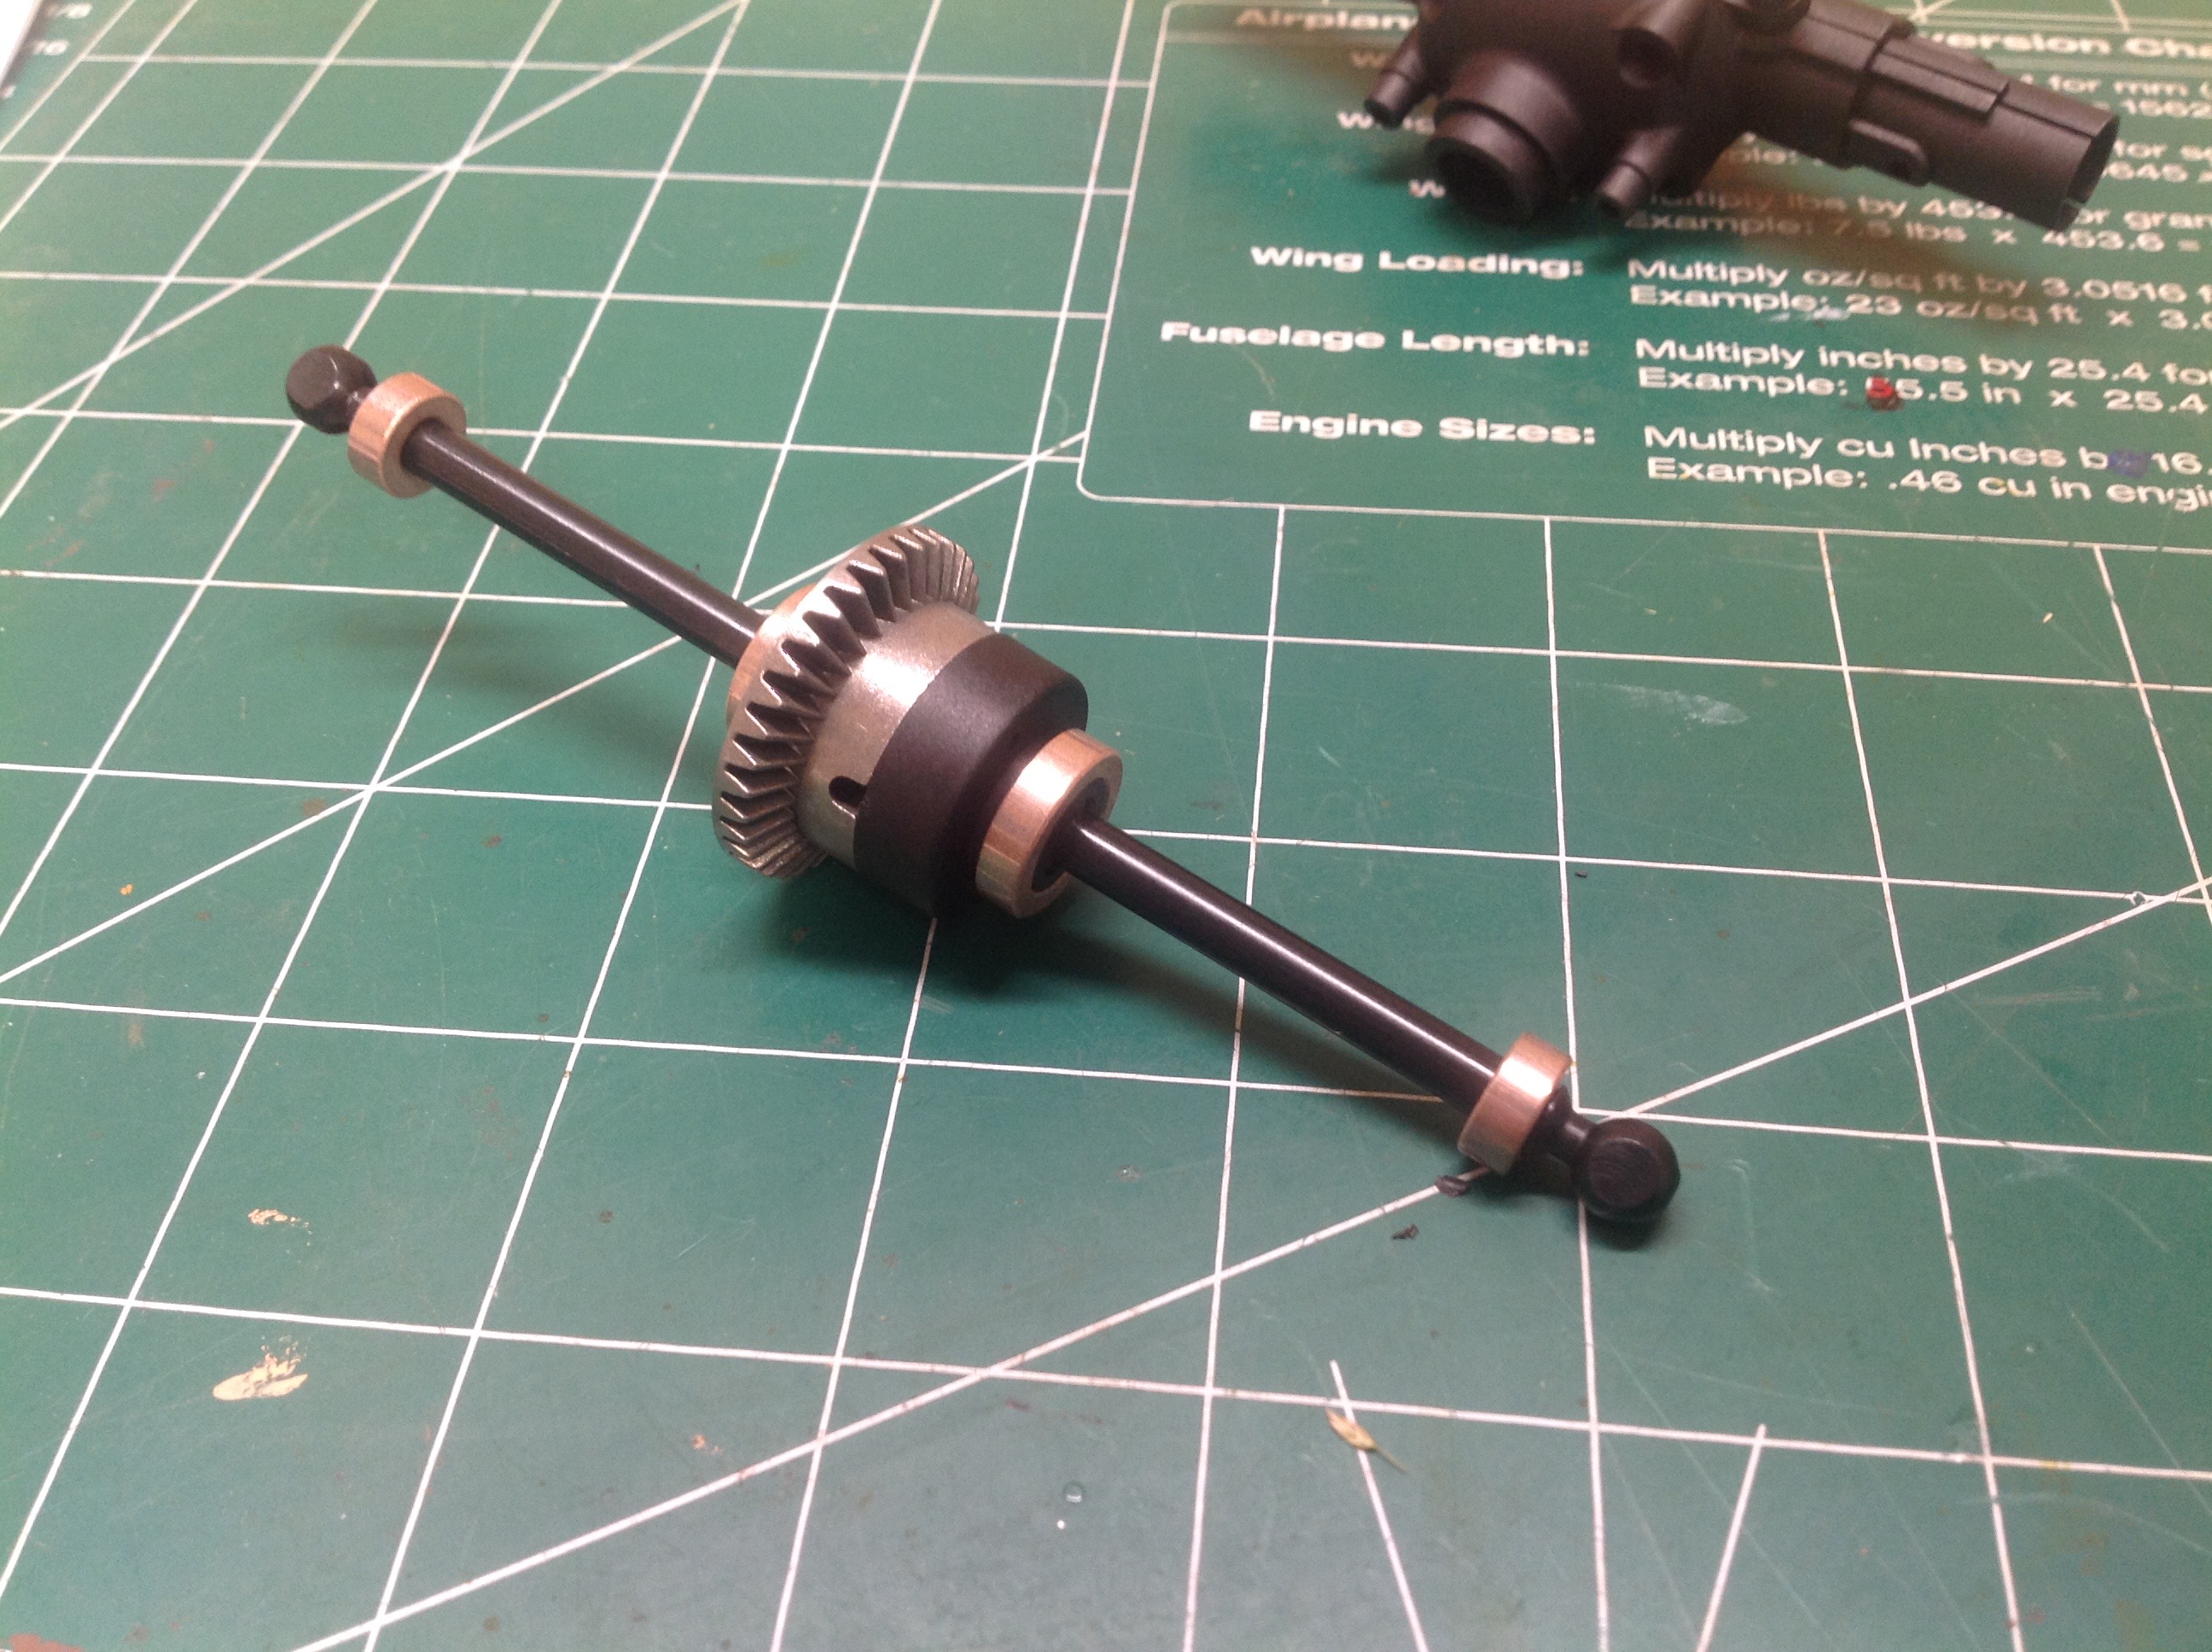
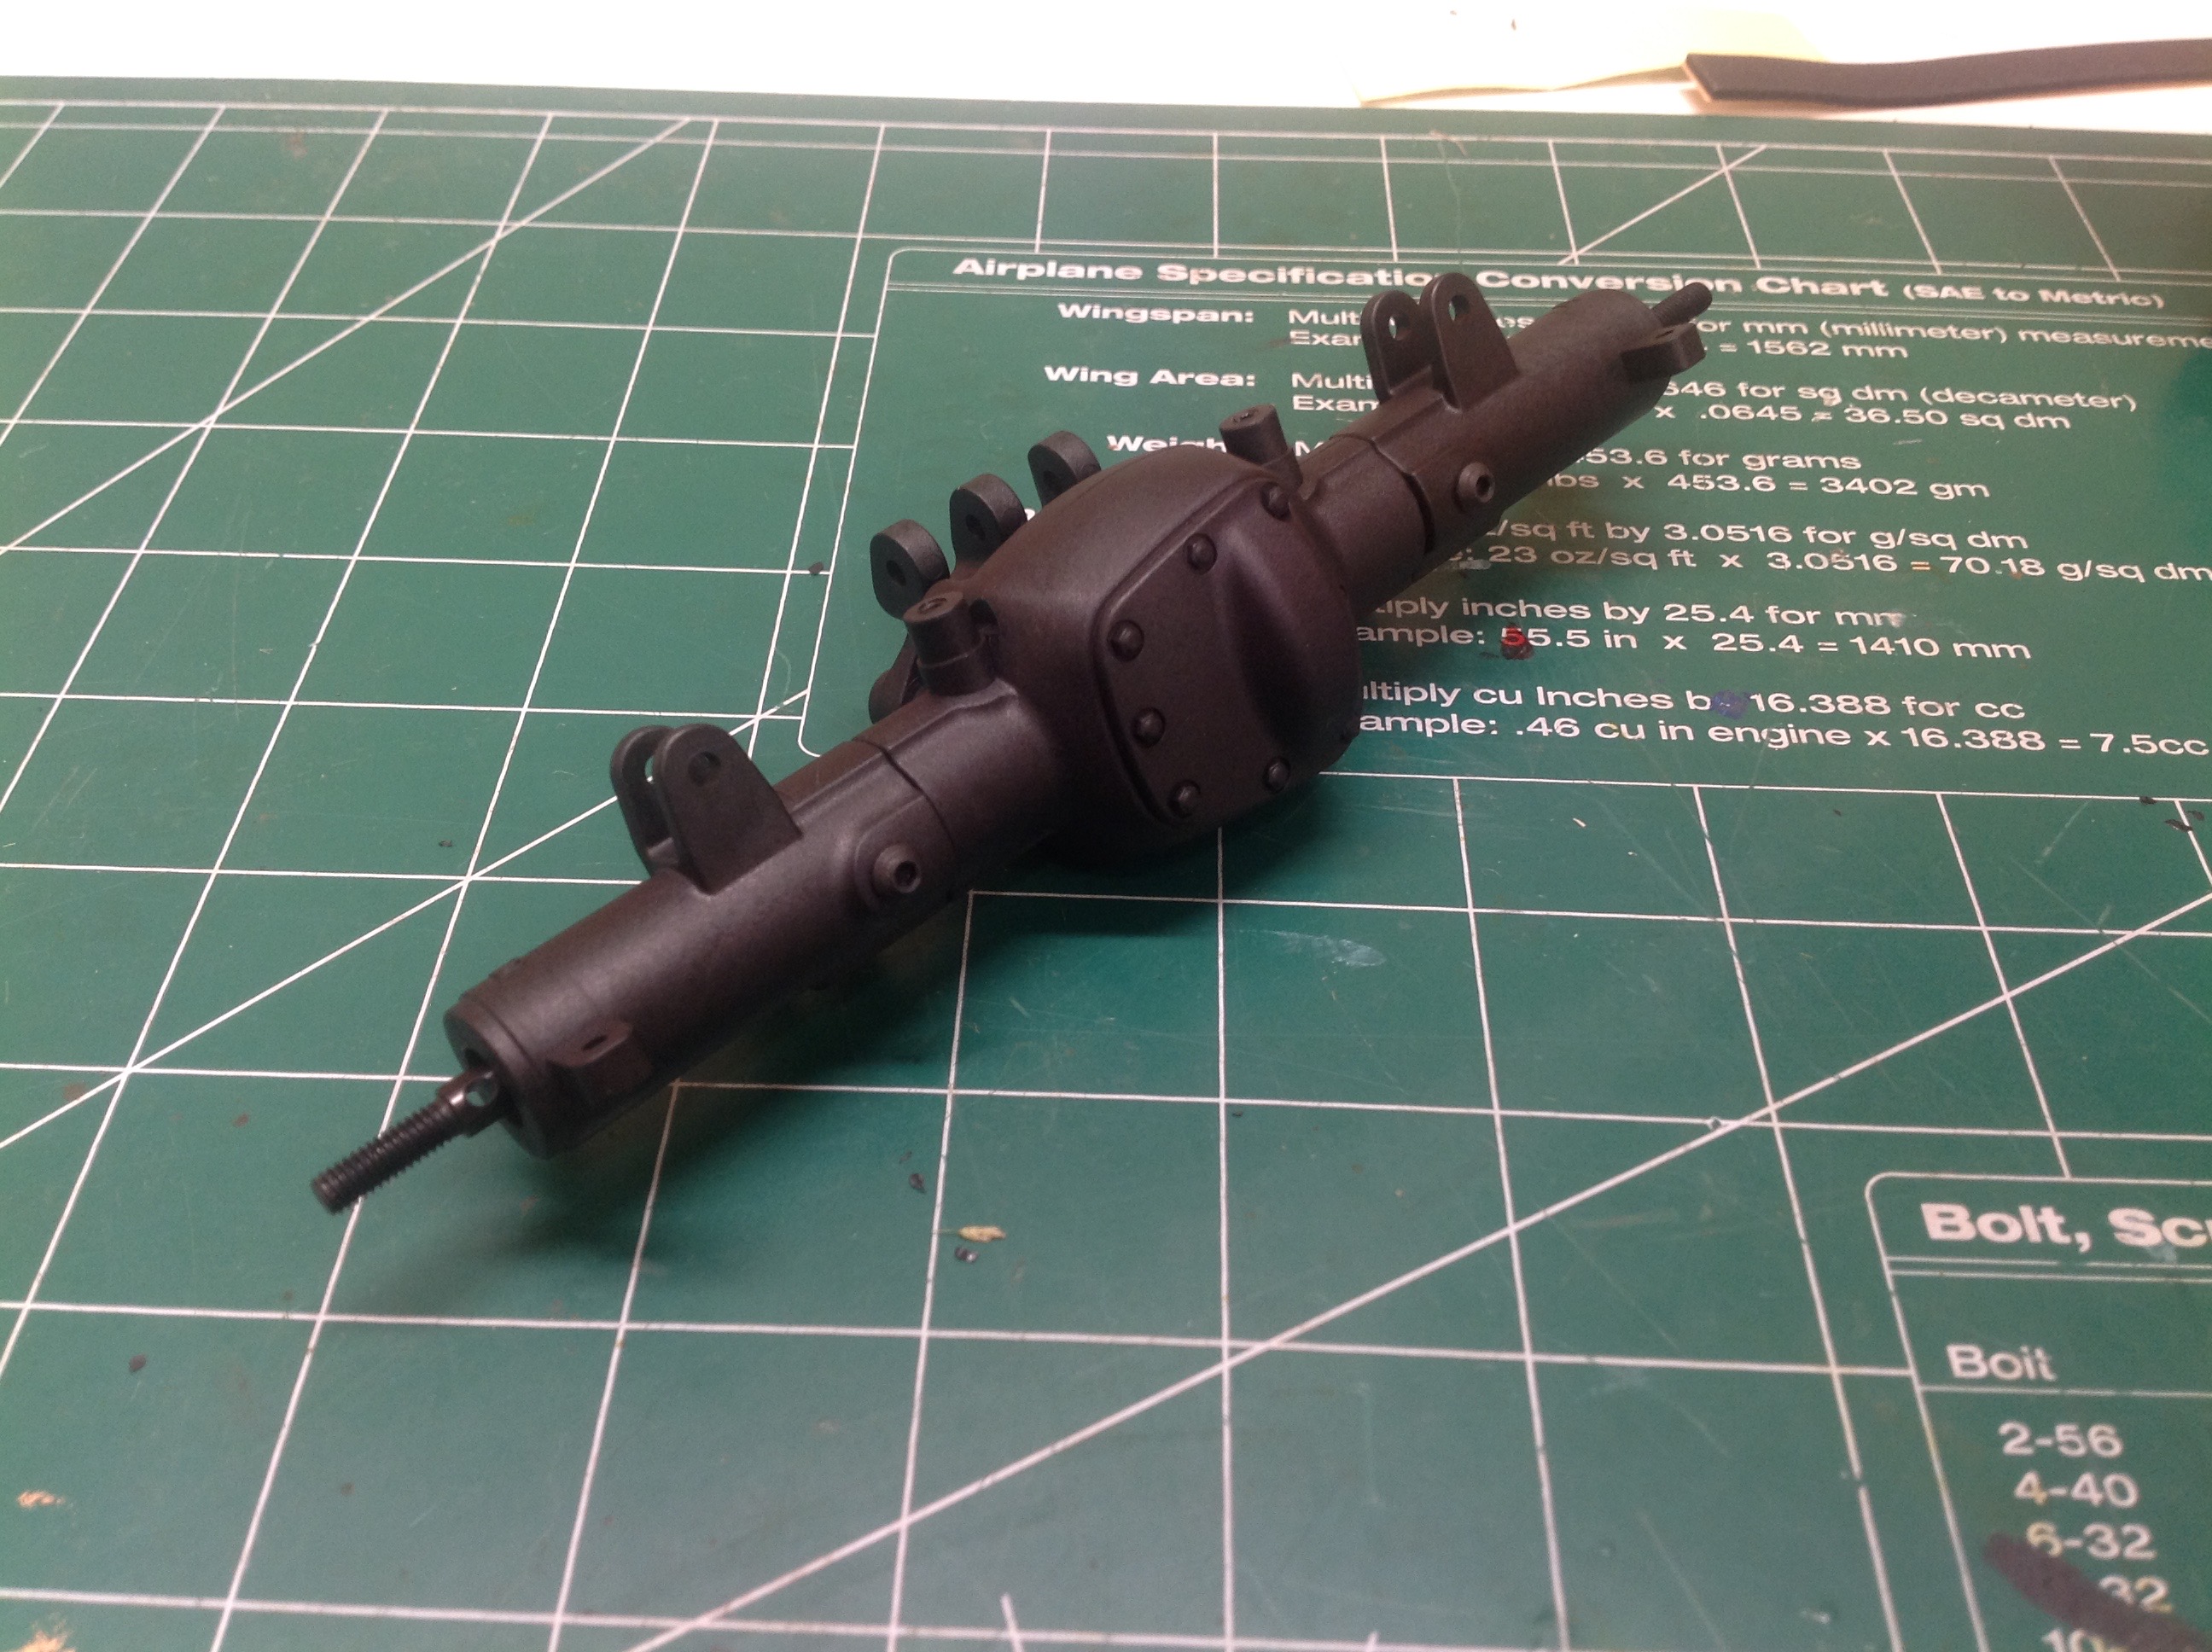
The front and rear axles both use locked spools instead of
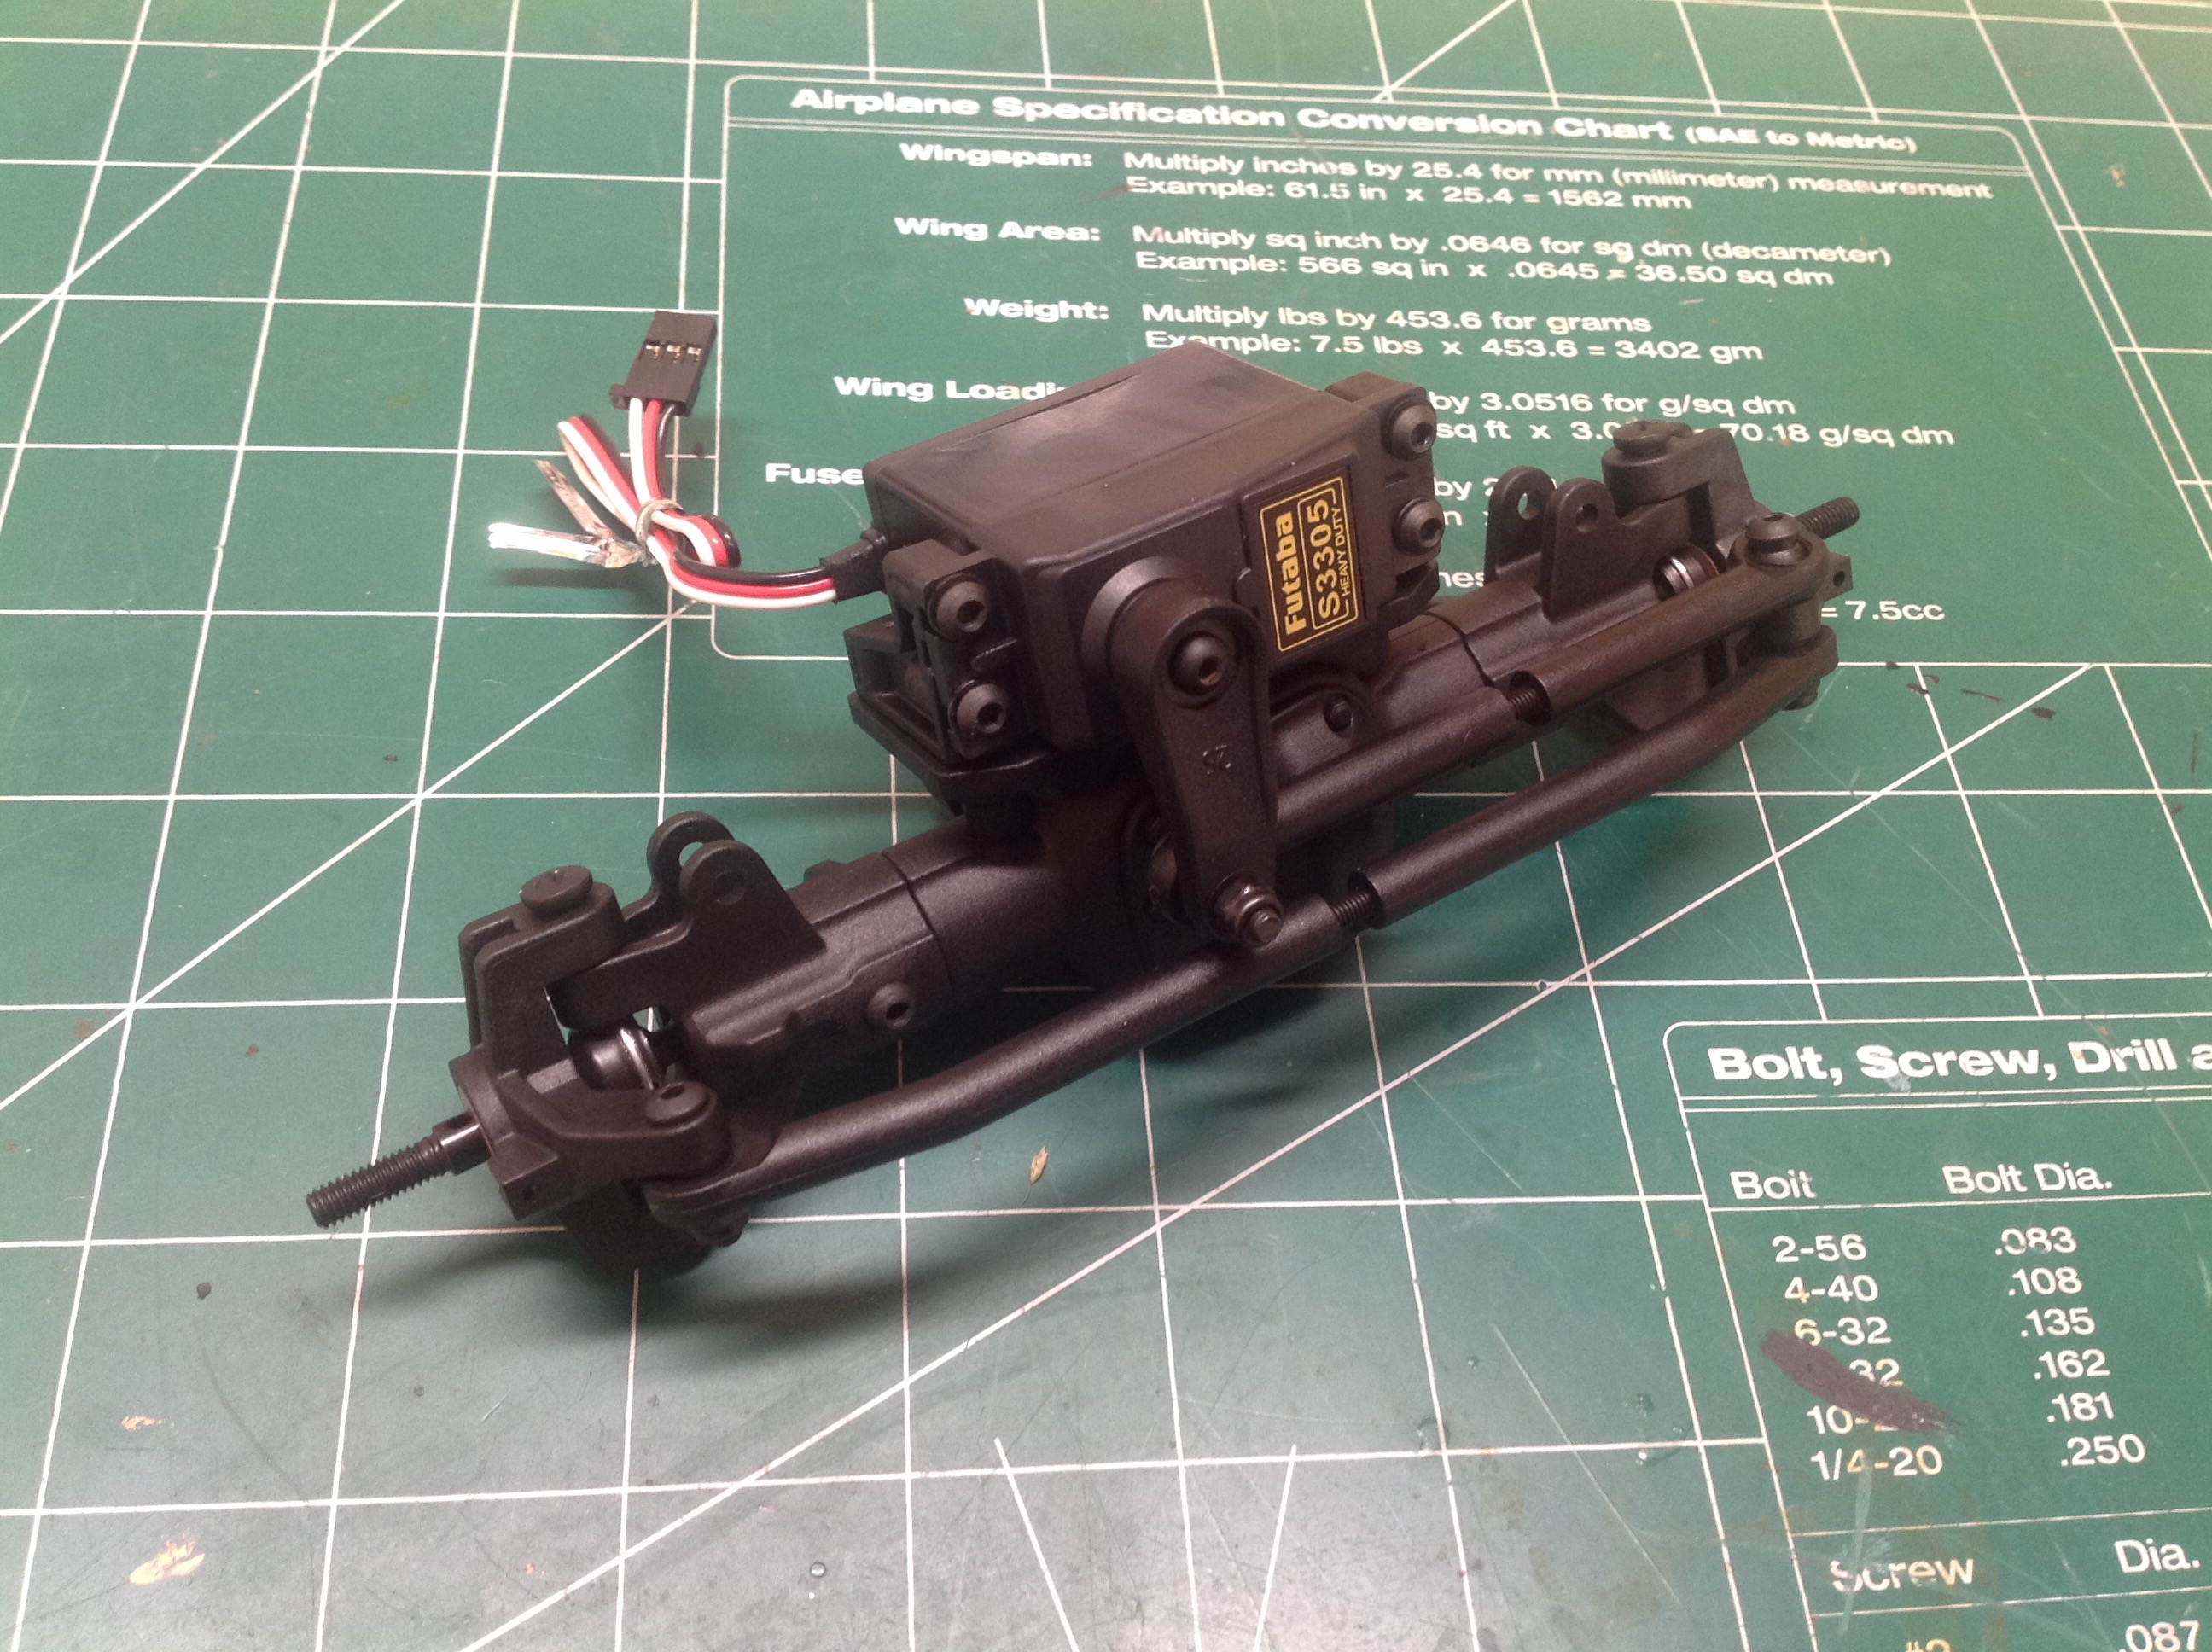
differentials. The front axle joints are CVD type, and the
steering servo is axle mounted. The kit comes with a very strong
plastic servo arm.
The rear axle spool is the same as the front. Step 7 attached both
axles to the chassis links and installs the plastic drive shafts.
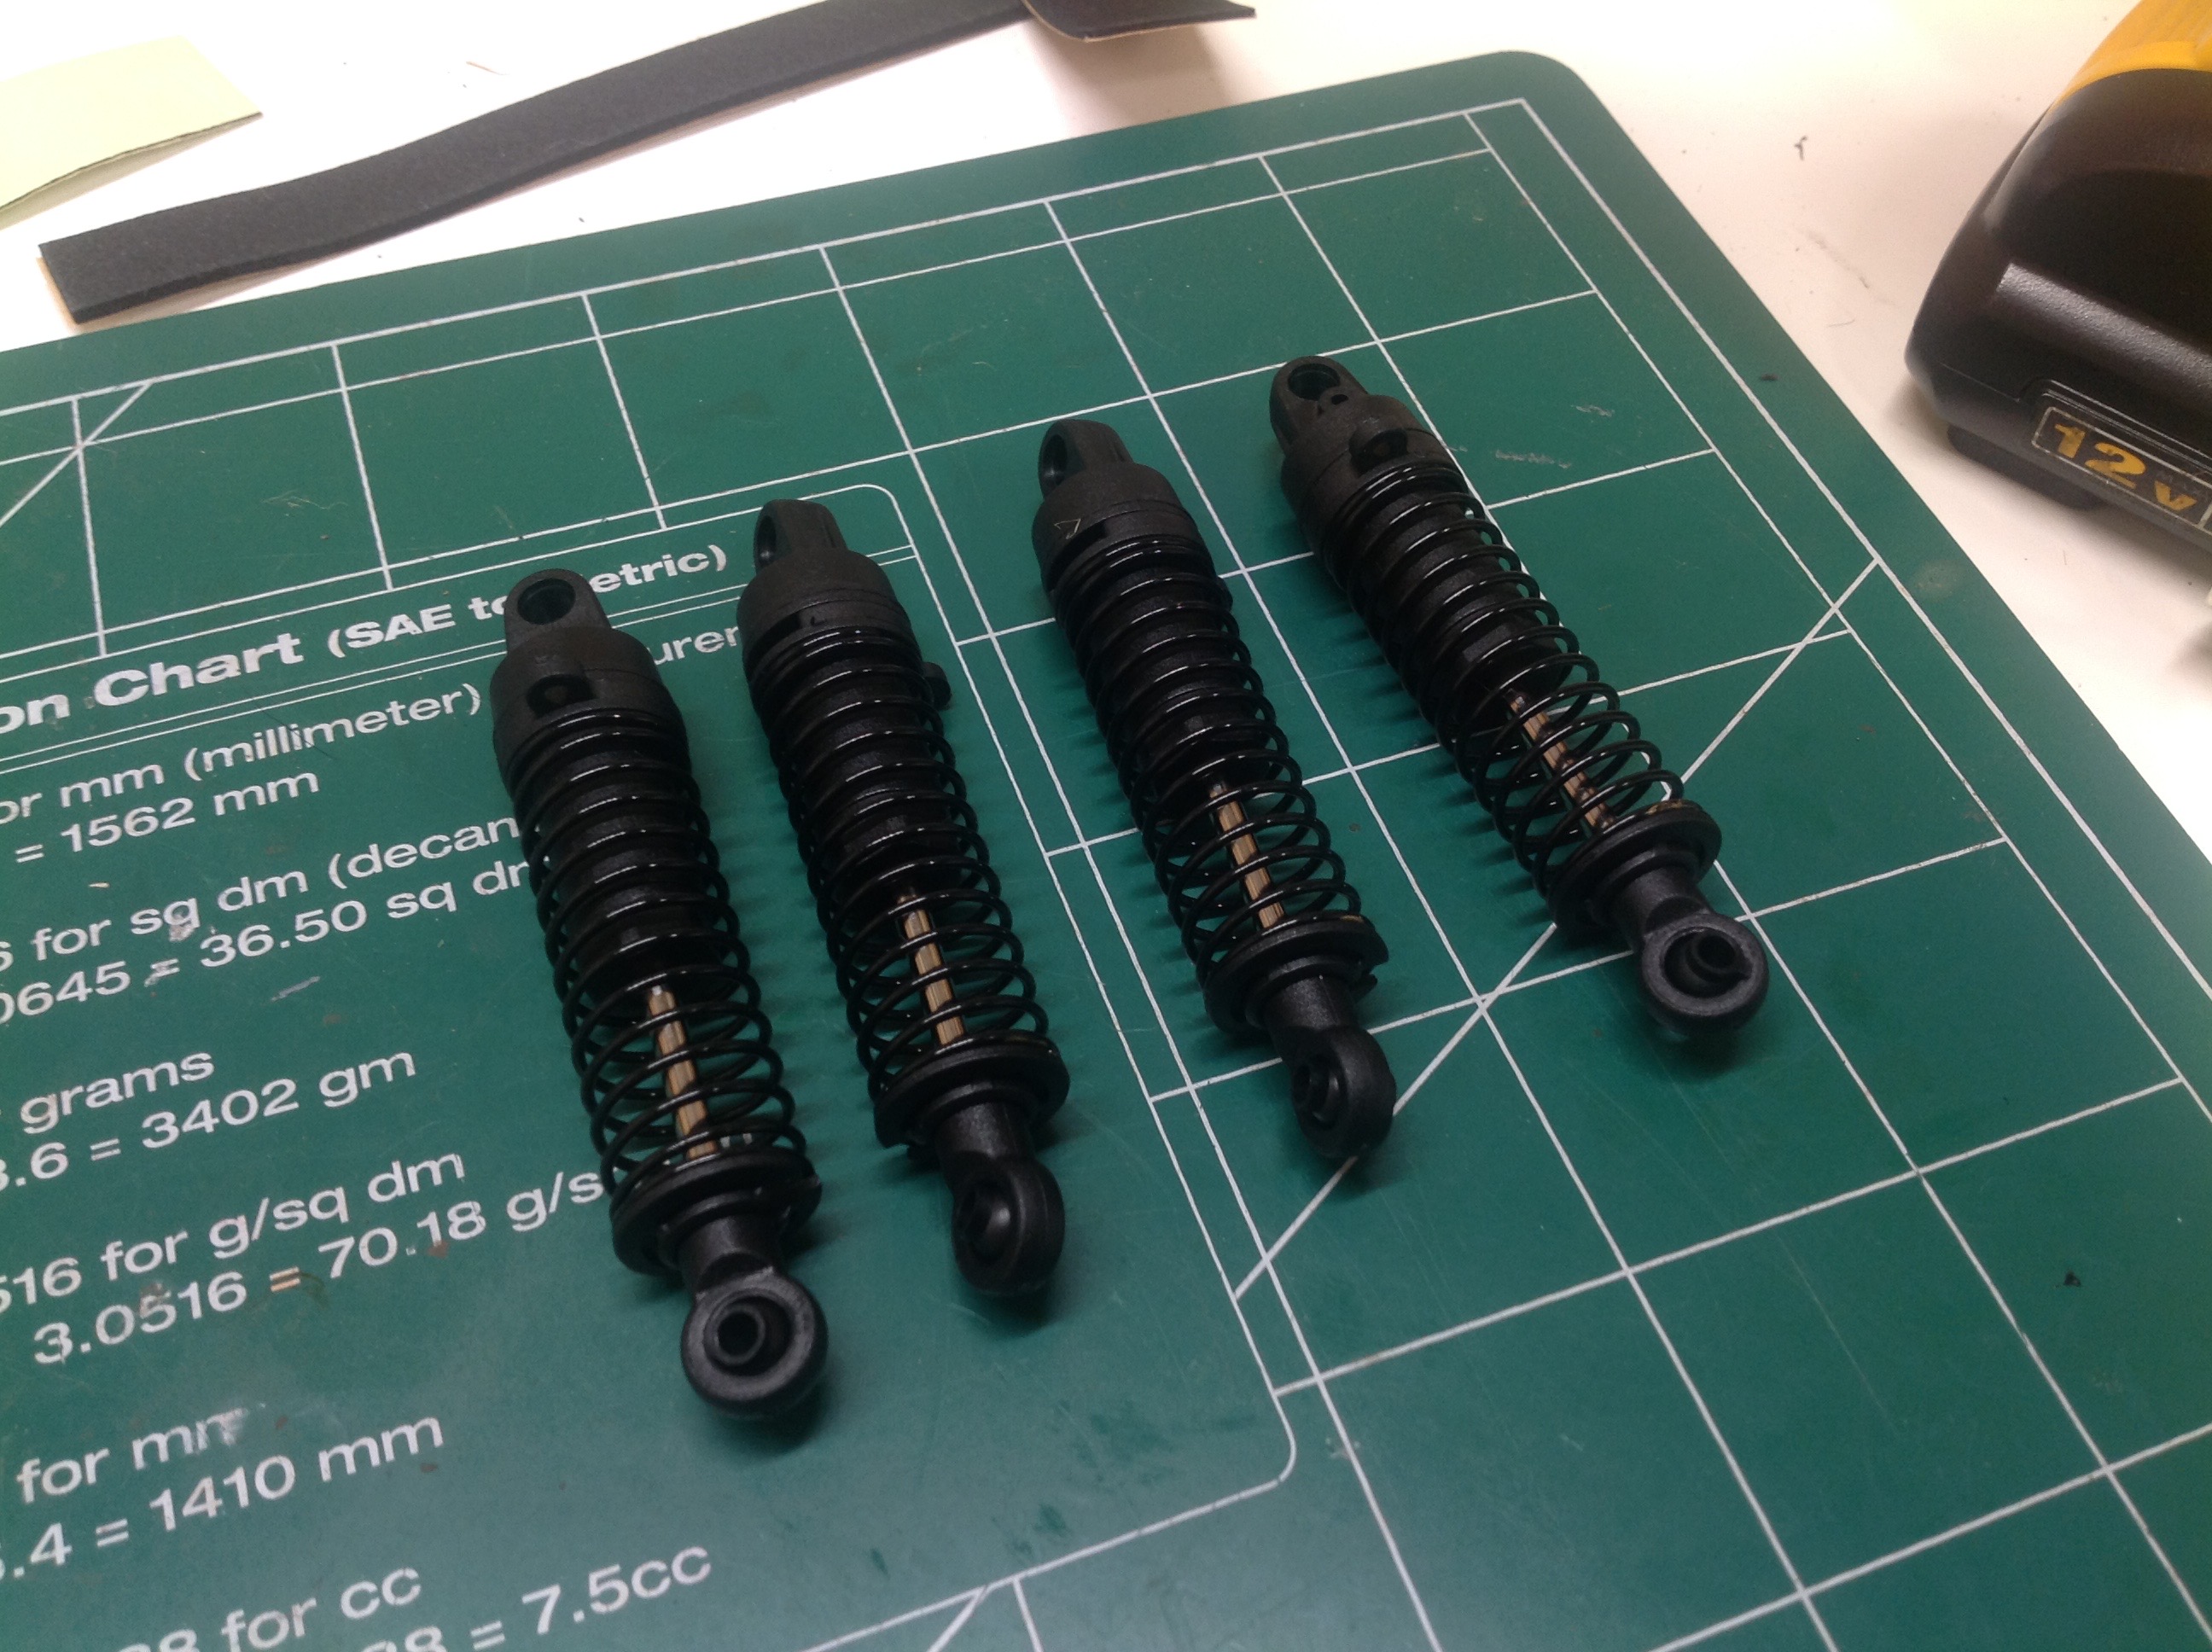
The shocks are plastic oil filled coilover dampers. Nothing fancy
going on here, but the shocks have nice smooth motion and the kind of
soft spring rate that I like.
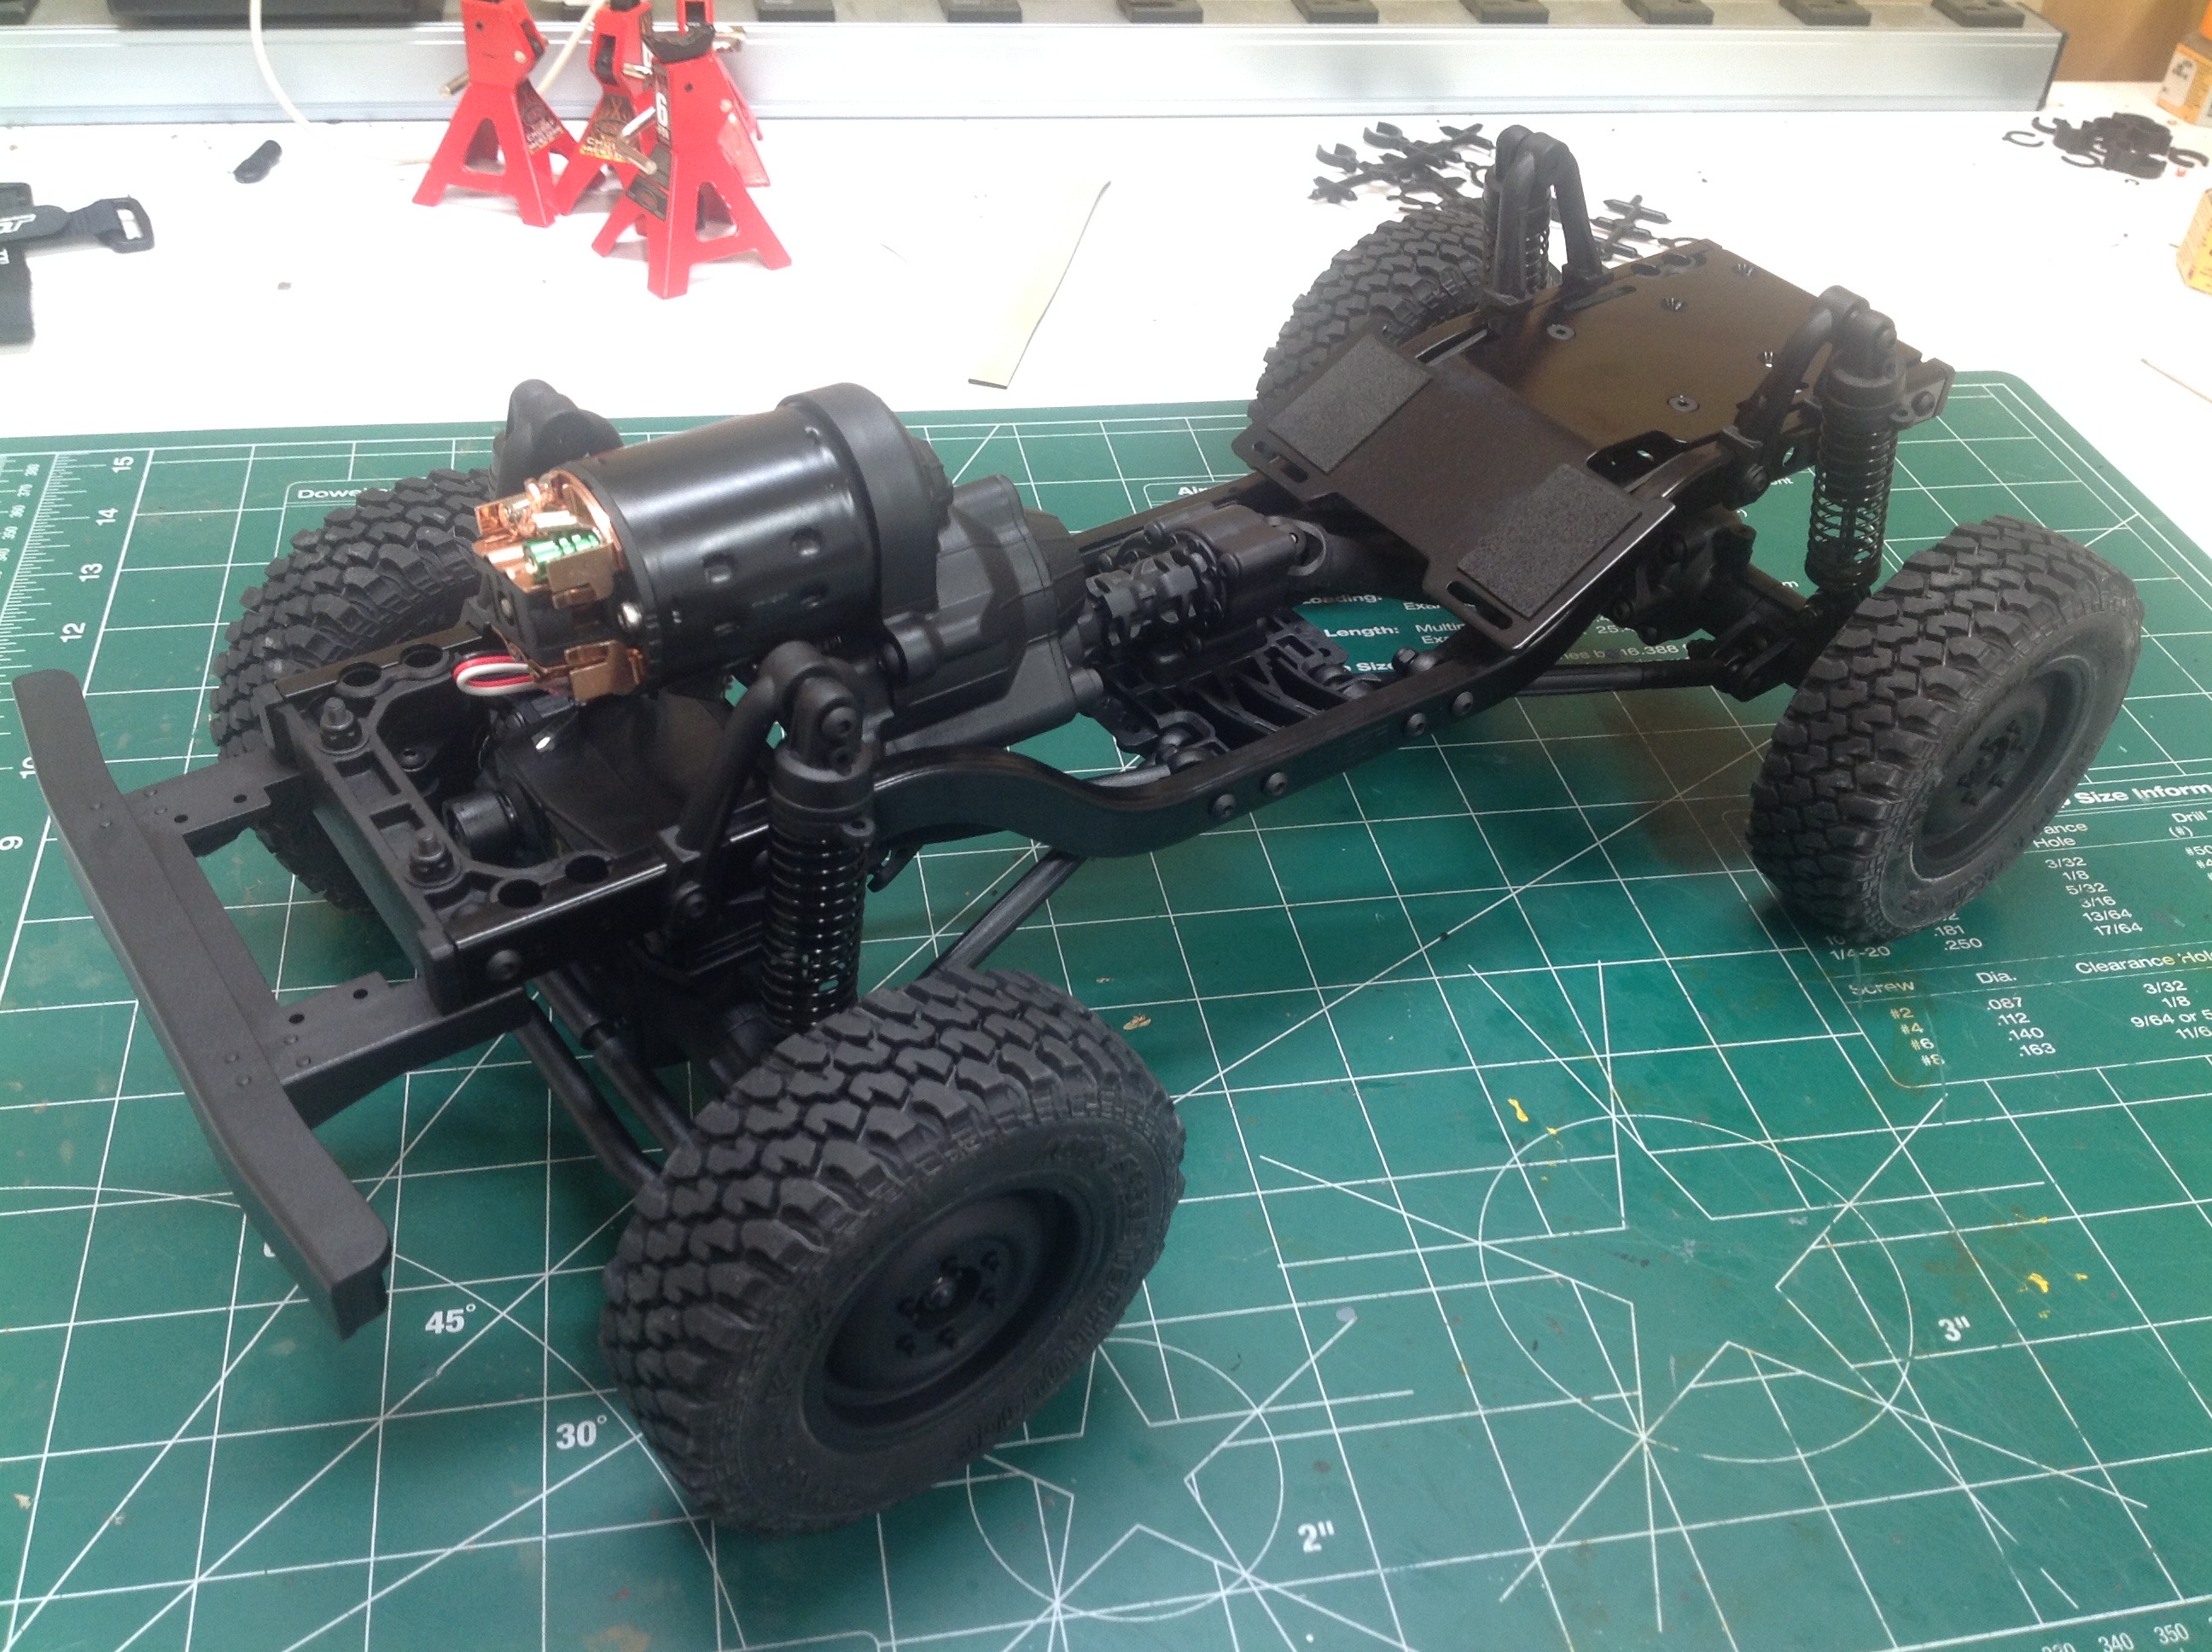
The plastic wheels are not beadlock. The tires are supposed to be
glued, but this model is so light that I chose not to glue them and have
not had any problems. The final step of building the chassis is
to hook up the electronics and install the battery.
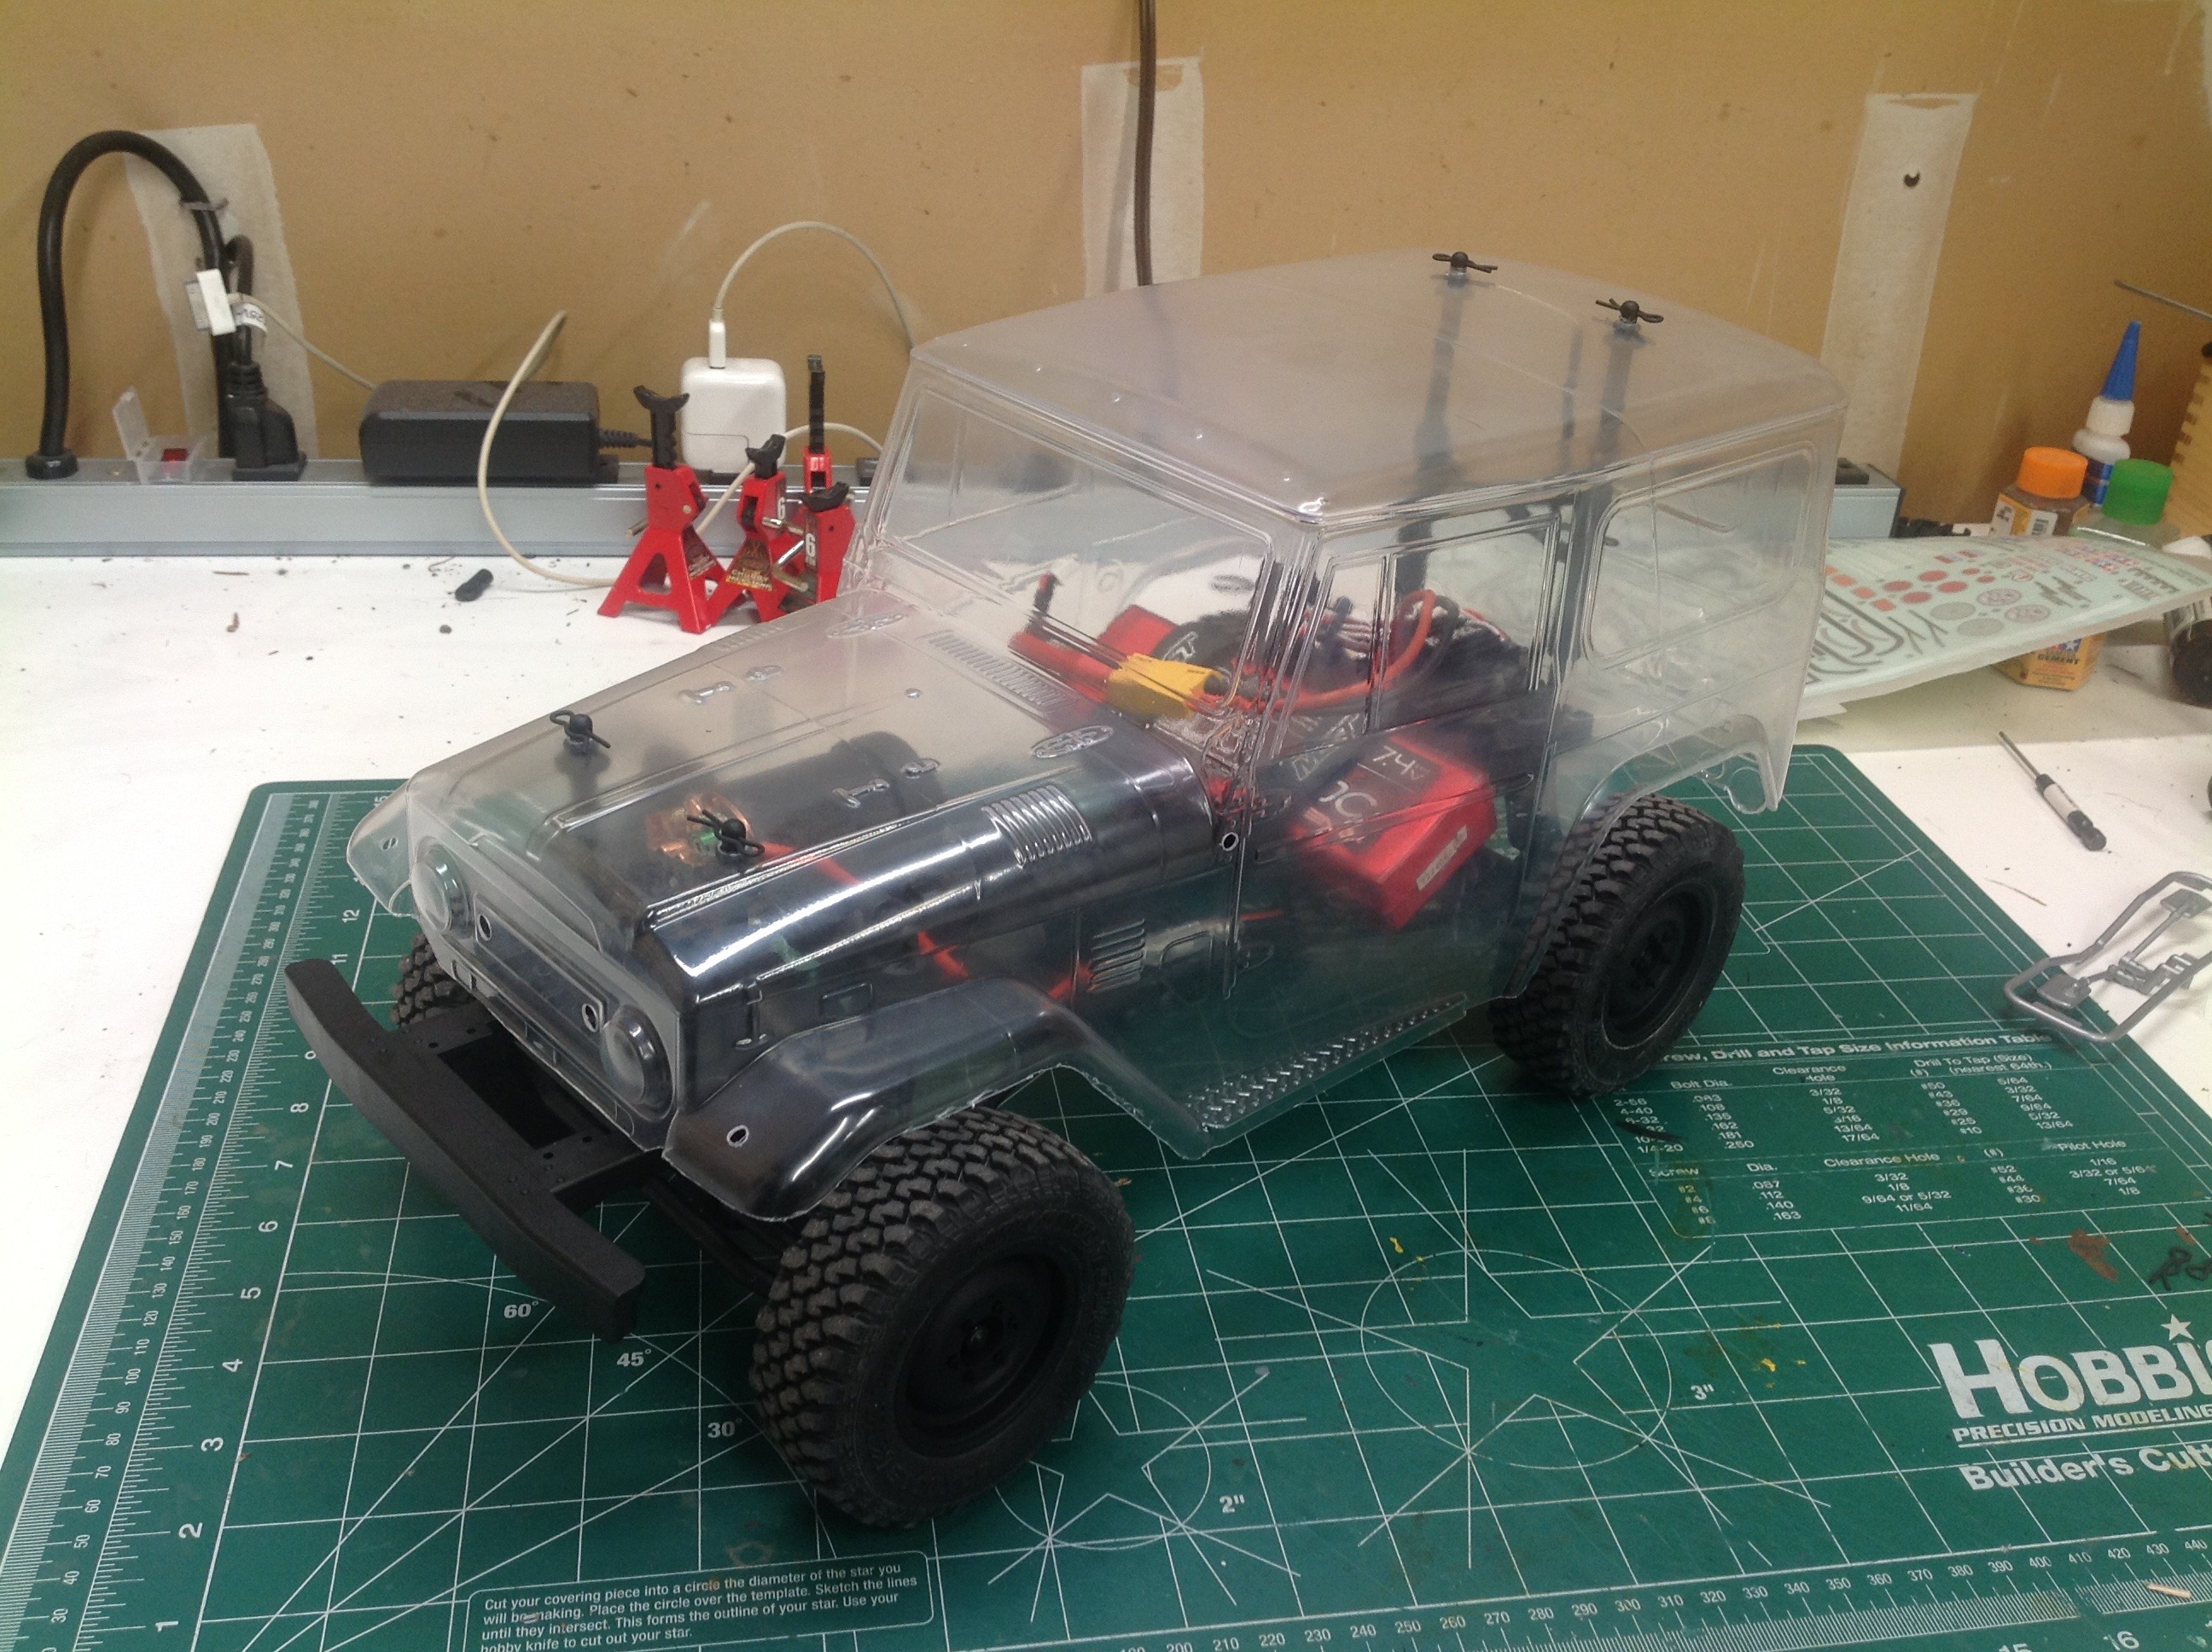
I've reamed the body post holes and fit the clear body to the chassis to
see how it looks. It fits perfectly except for a little bit of
interference at the front bumper that required a bit of trimming.
©2019 Eric Albrecht