D90 Project
Page 2: Upgrades!
This model was pretty well equipped right out the box, but the problem
with an RTR is that it is just like everyone else's so I wanted to make
this my own. With that in mind I blew a lot of money on
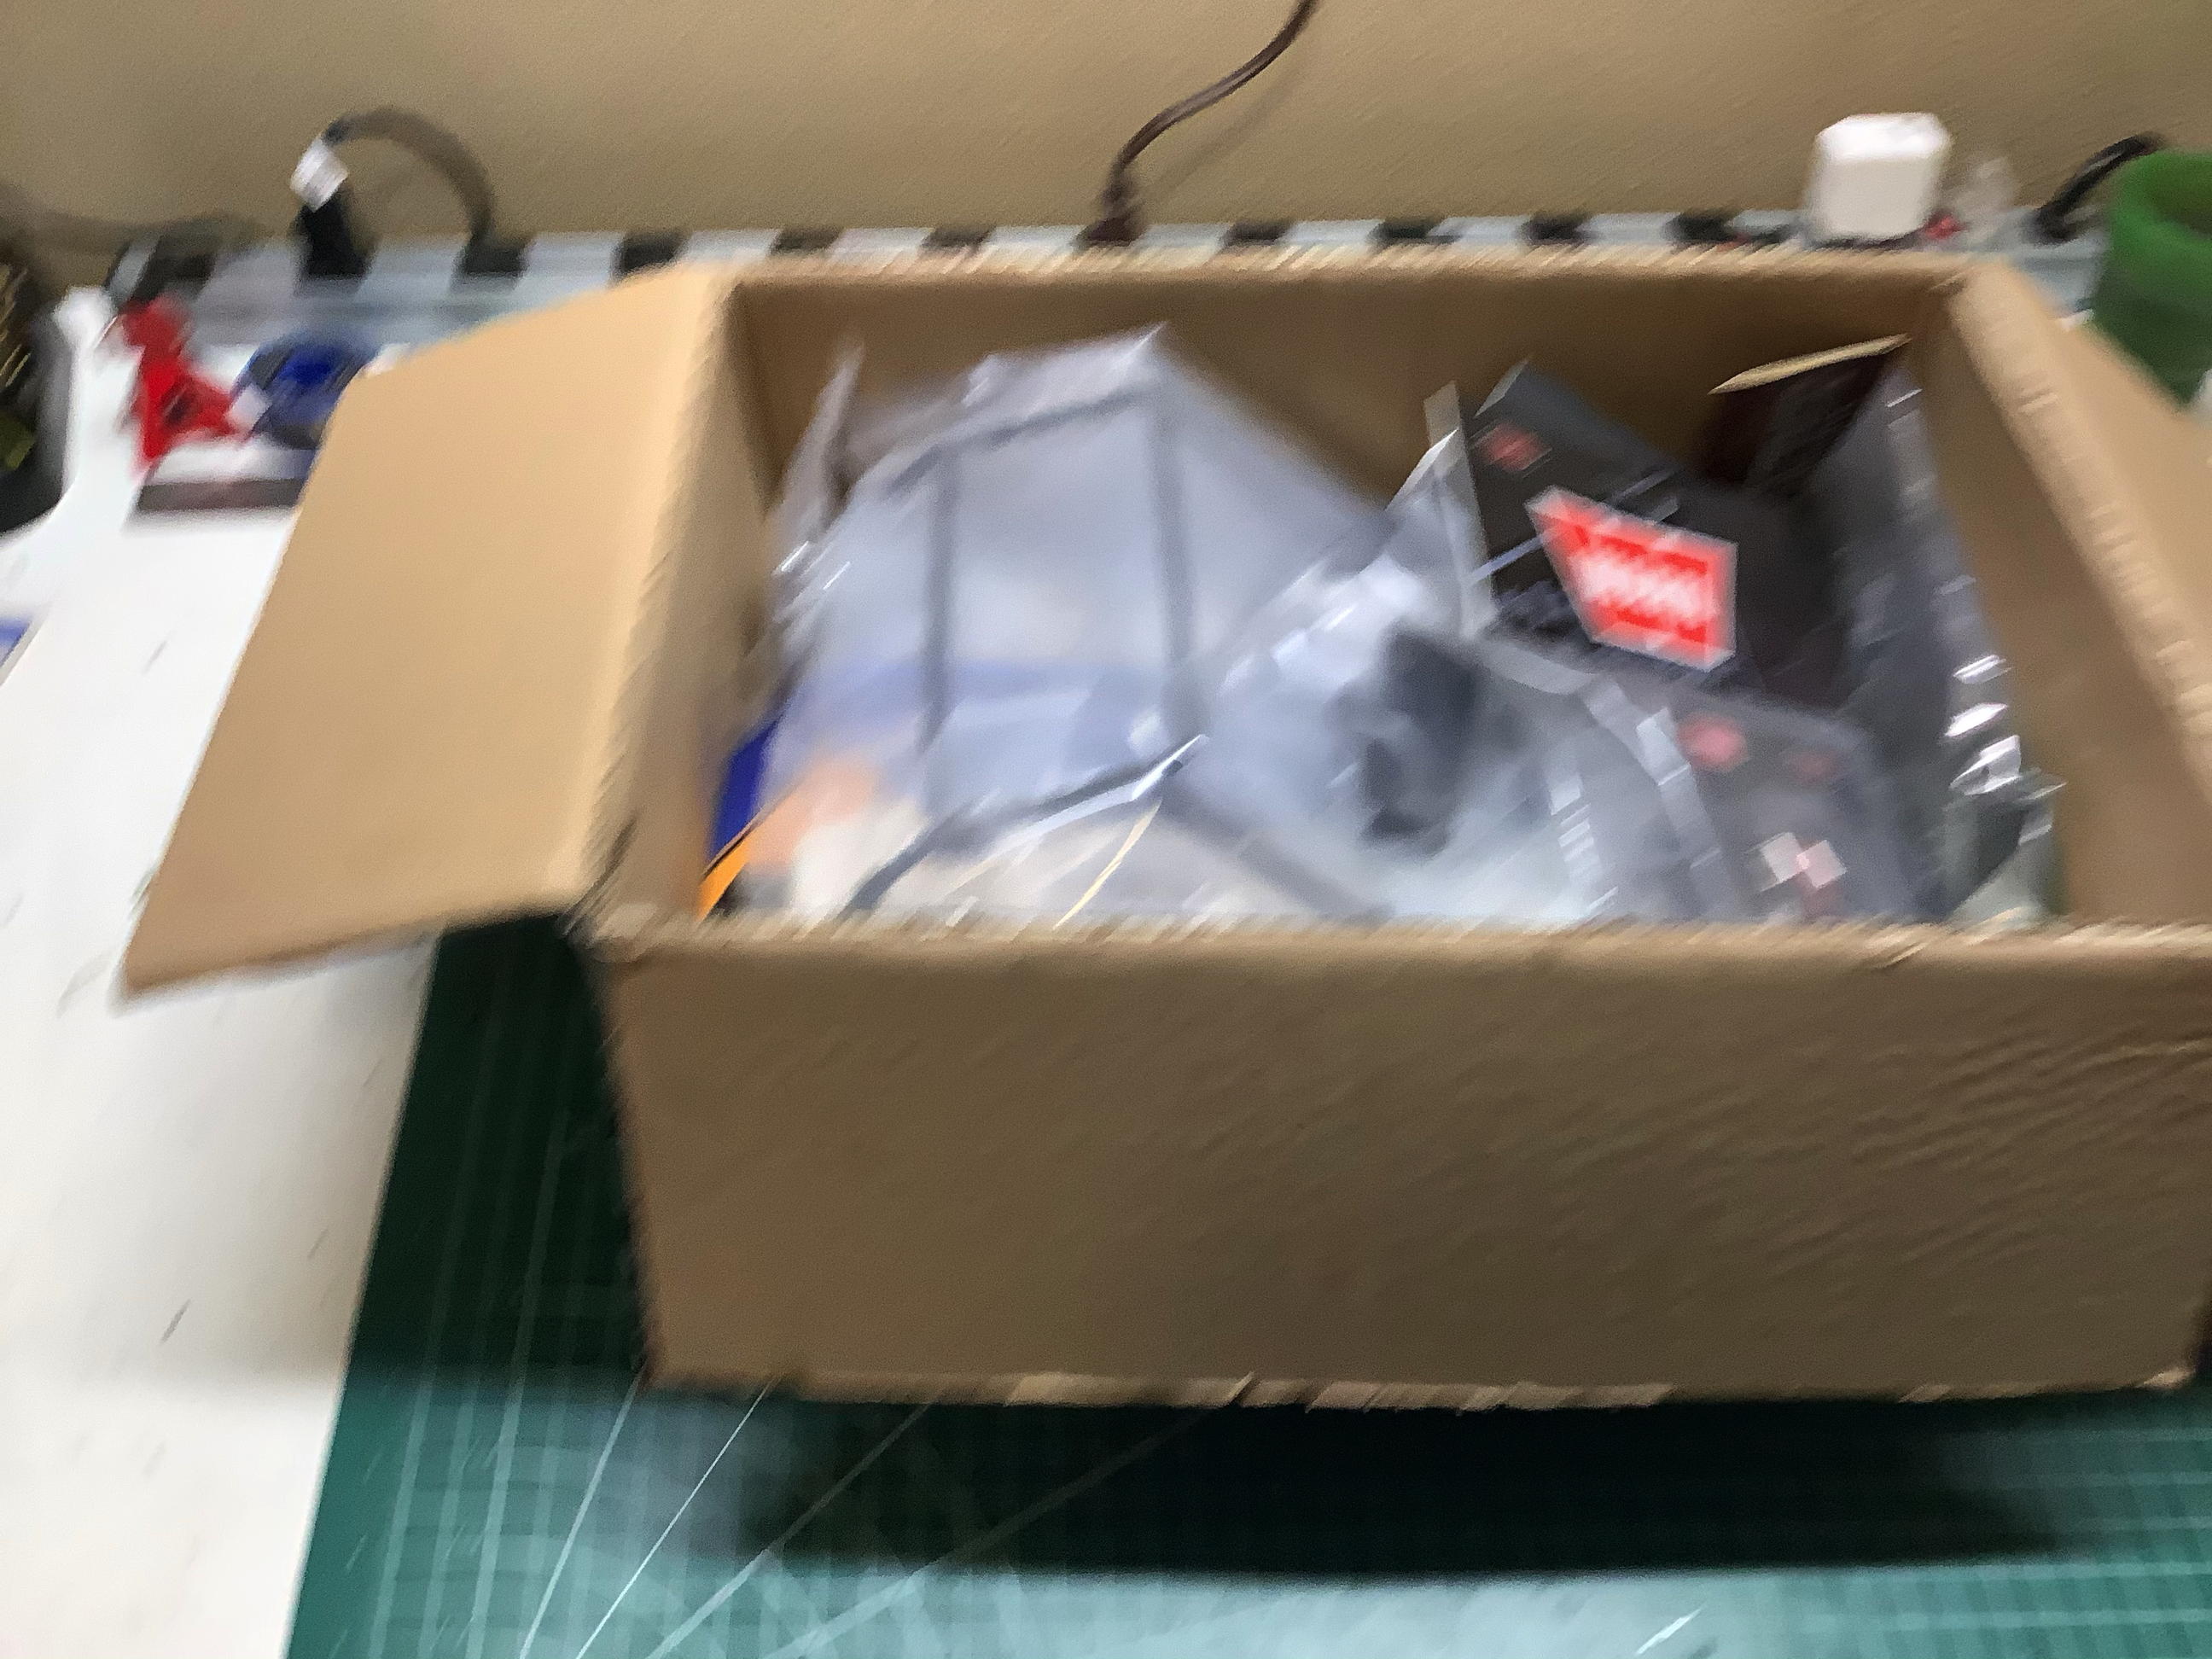
accessories. There was a whole box of them as shown. I don't
know why this picture is so blurry. I guess I was too excited to
hold the camera still.
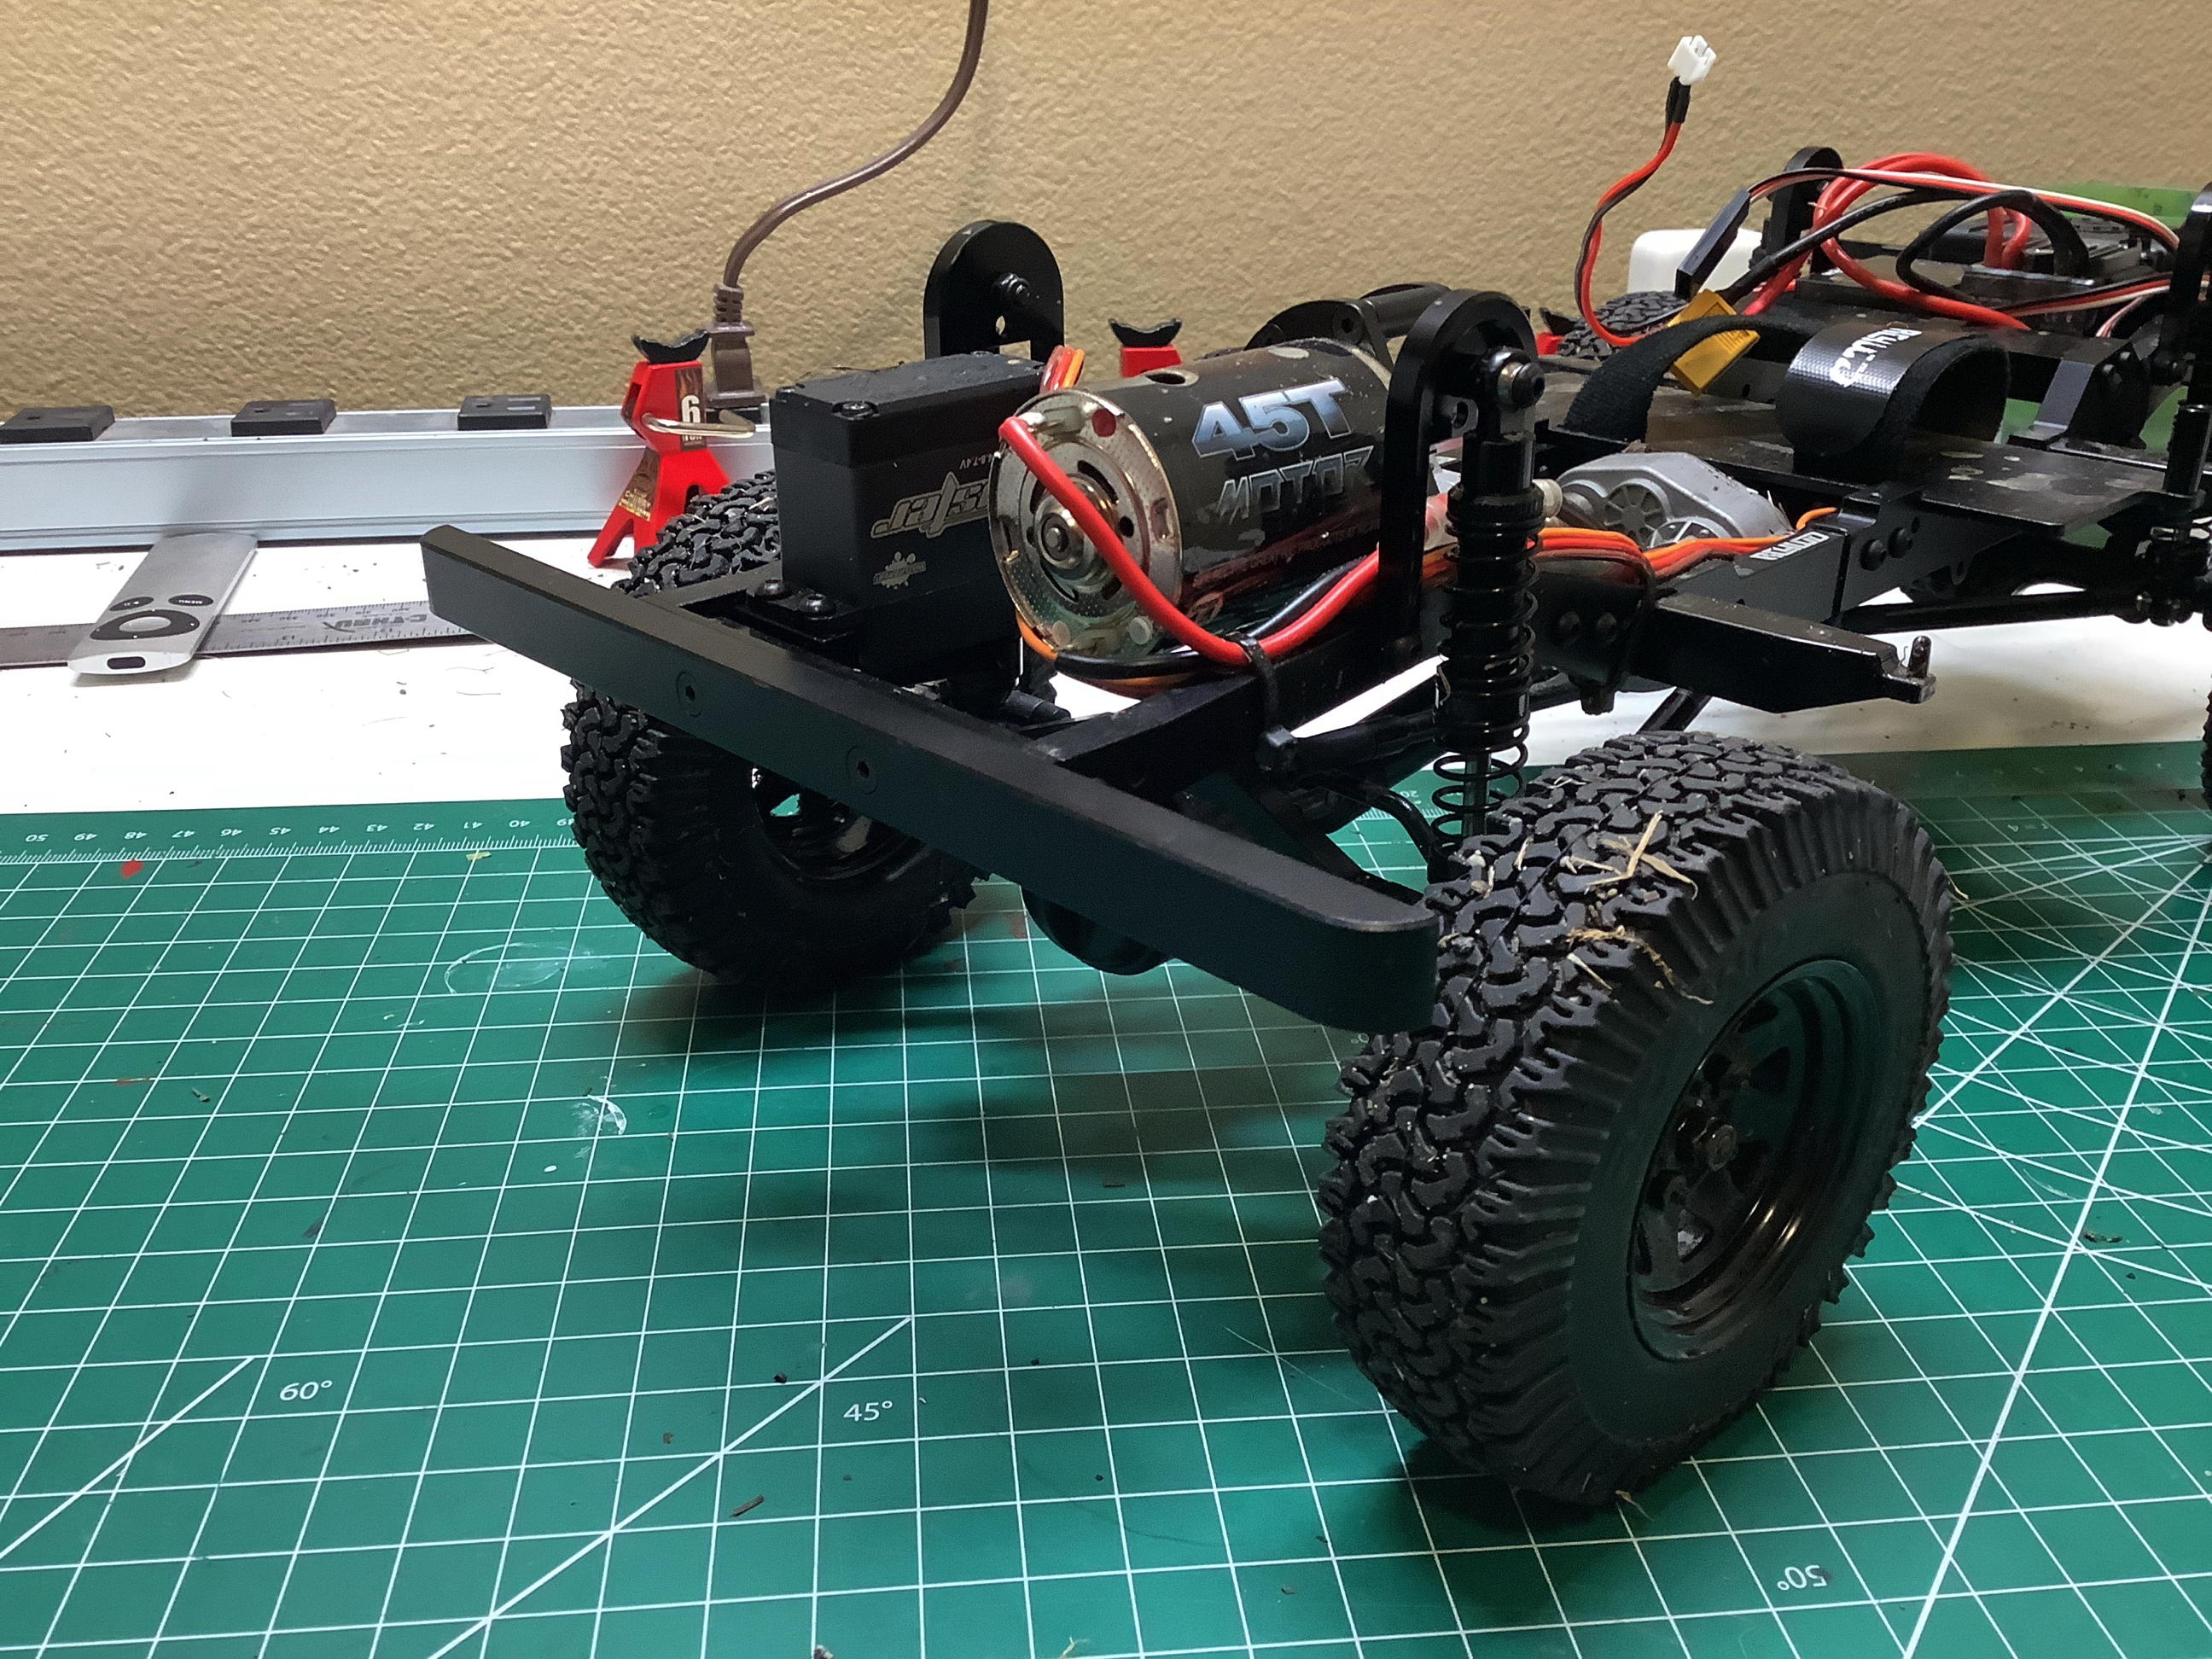
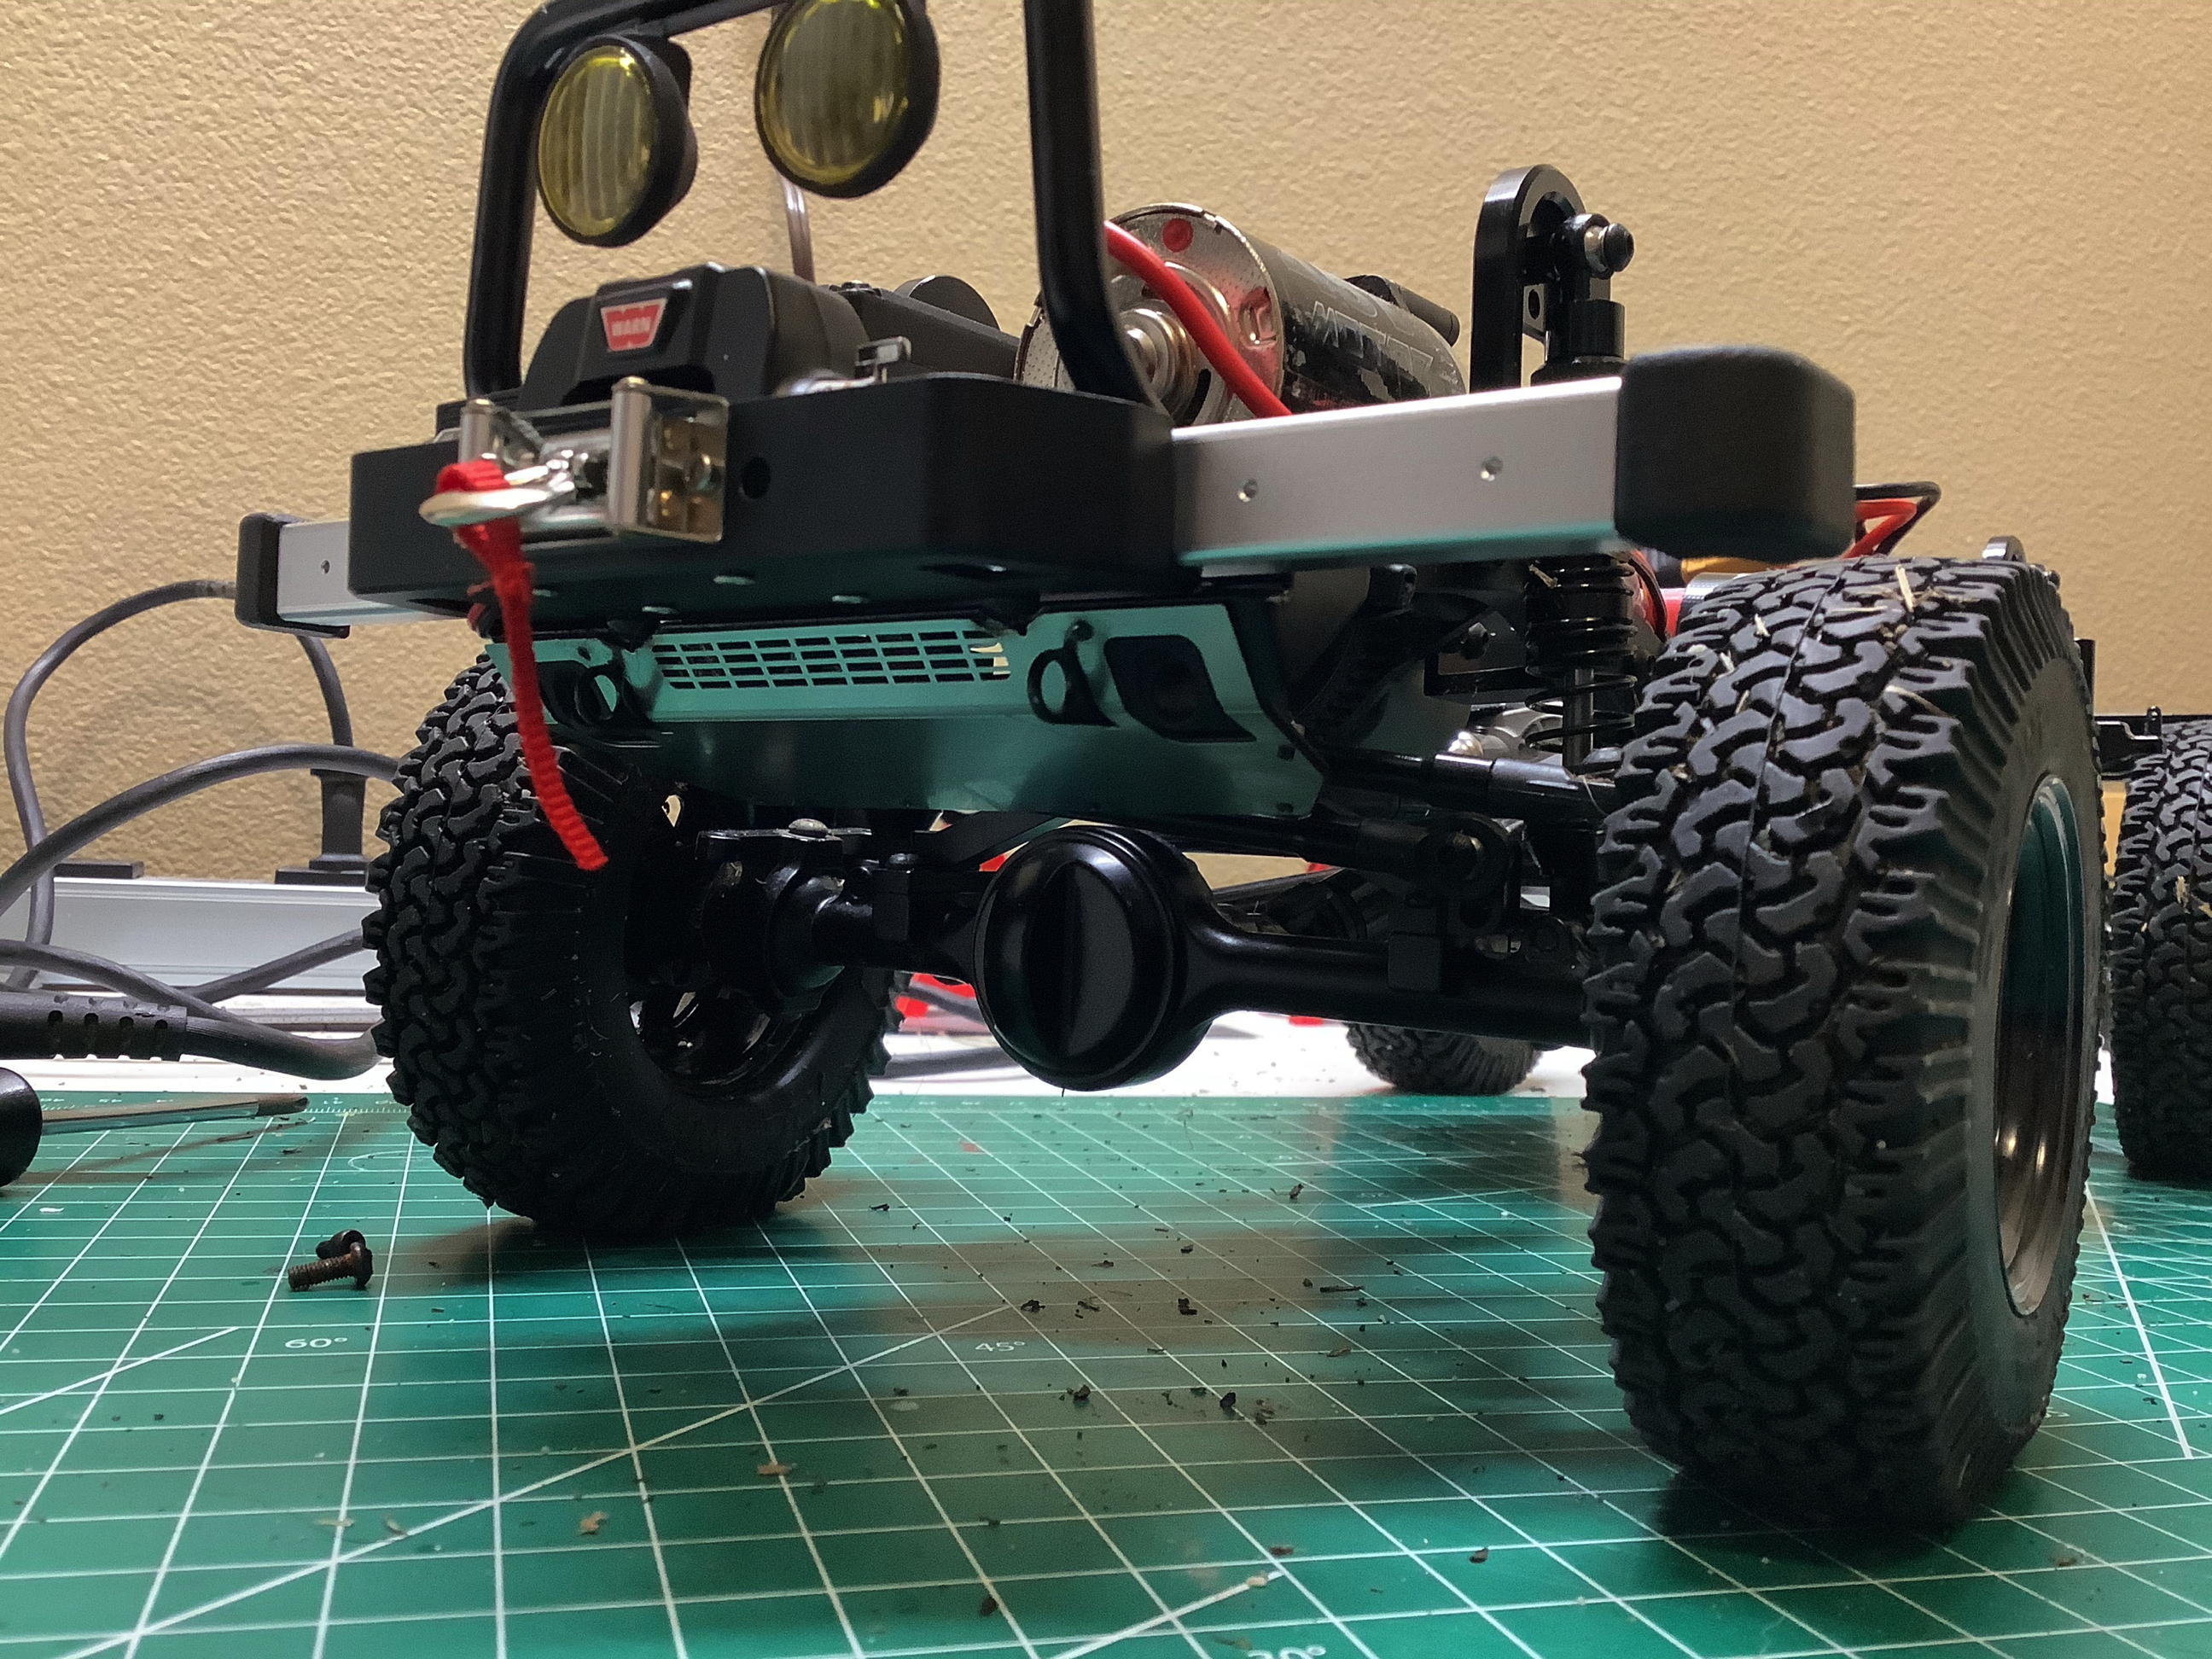
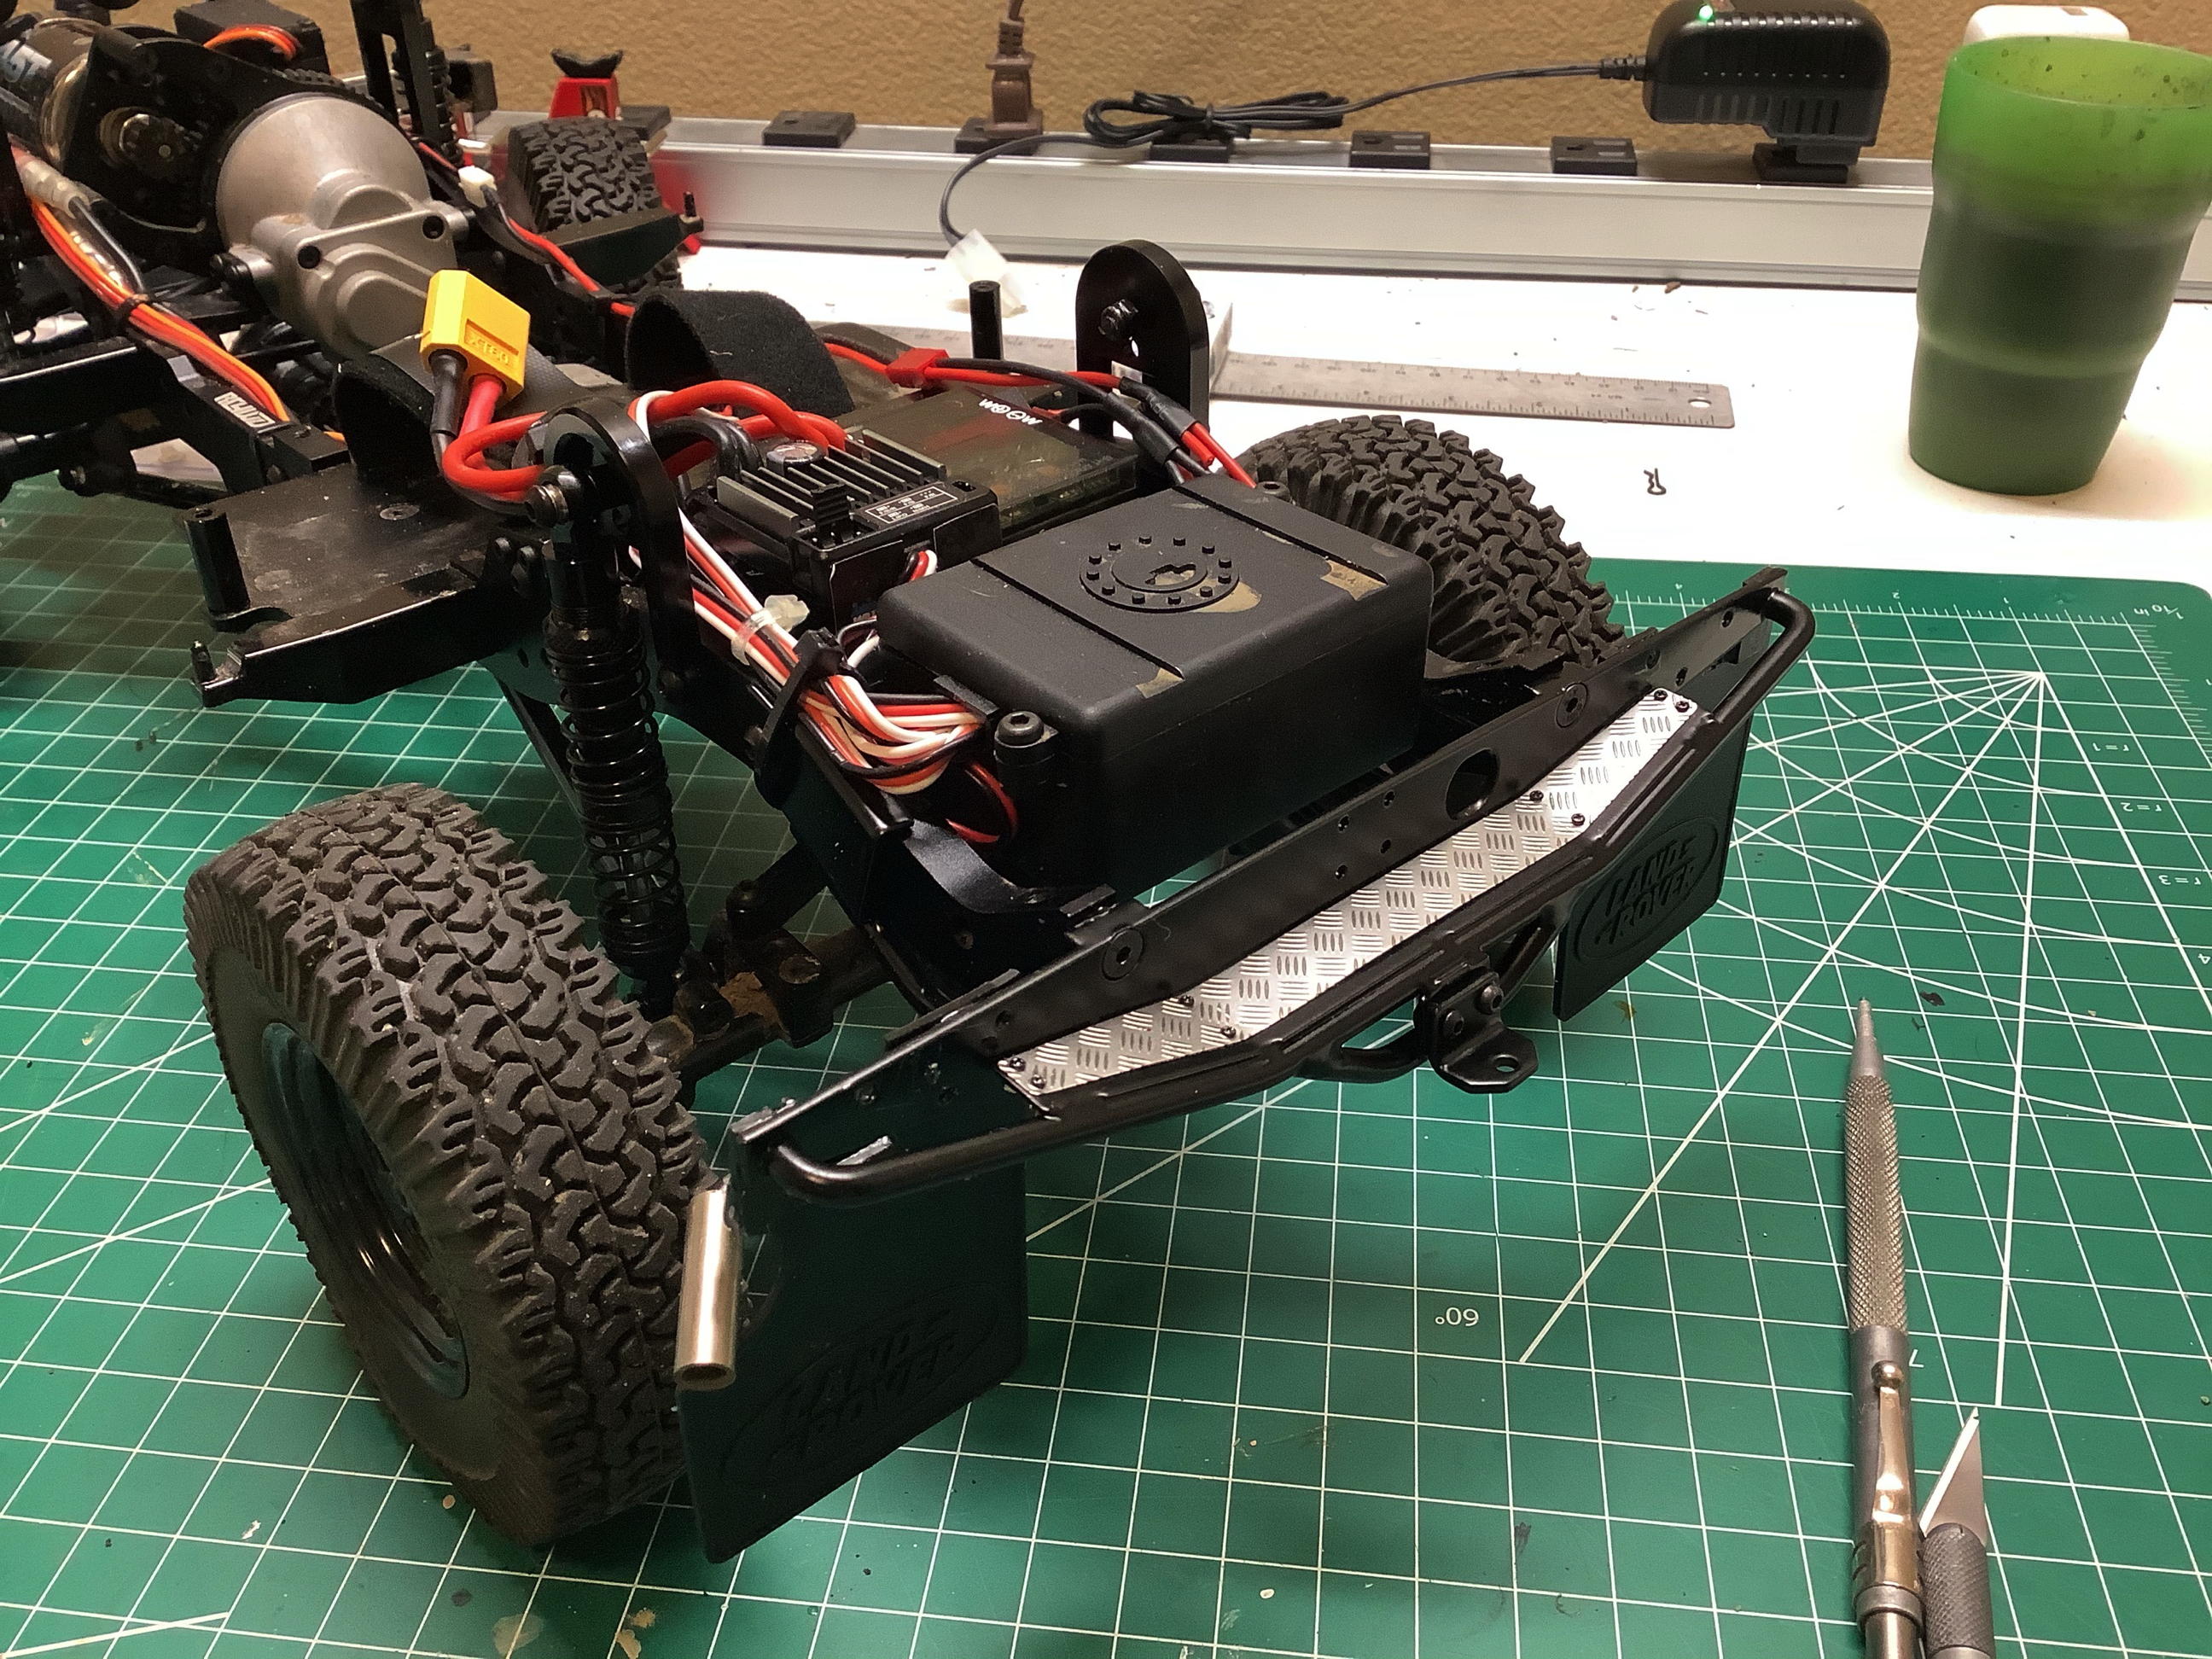
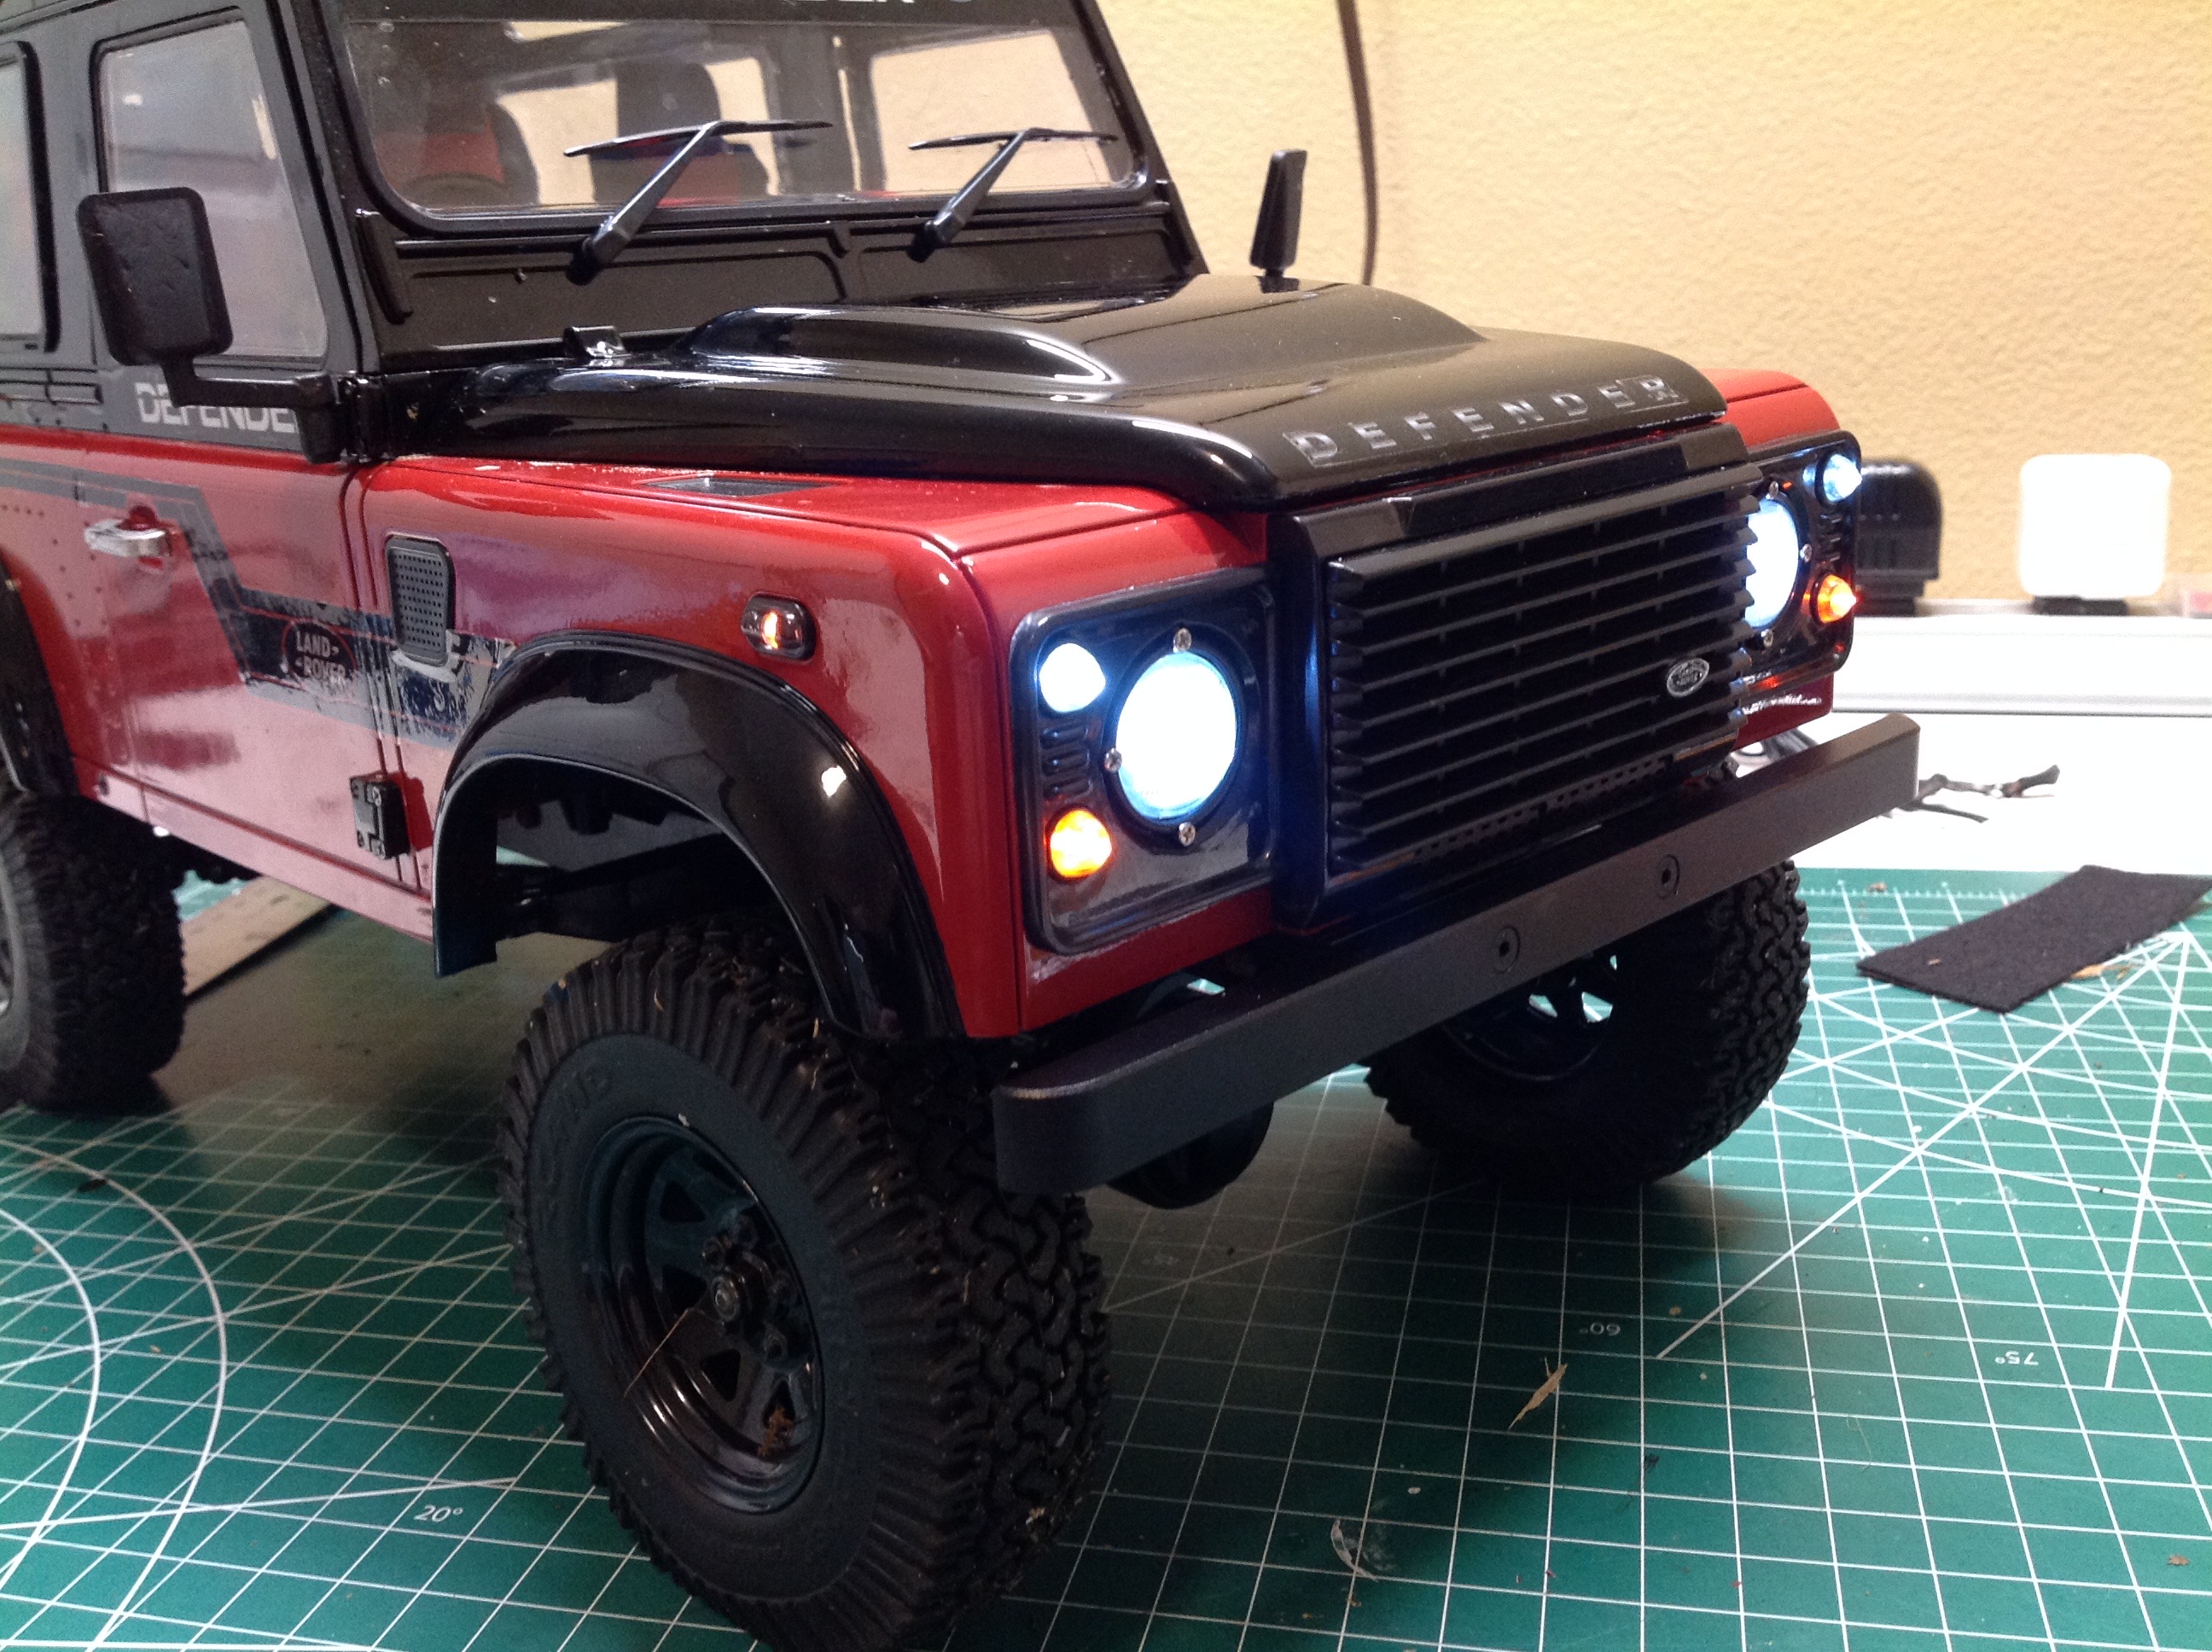
We'll start the upgrades on the chassis and the first target is the
front bumper. There is nothing wrong with the stock aluminum front
bumper (left), but I added a winch bumper with a bull bar and spot
lights which looks a lot better in my opinion. It also has better
shaped caps on the end of the bumper. The bumper, tray, winch, bull bar,
and winch controller were all separately sold items. I did not
put any LEDs in the spot light buckets yet because the LEDs are all
installed in the body.
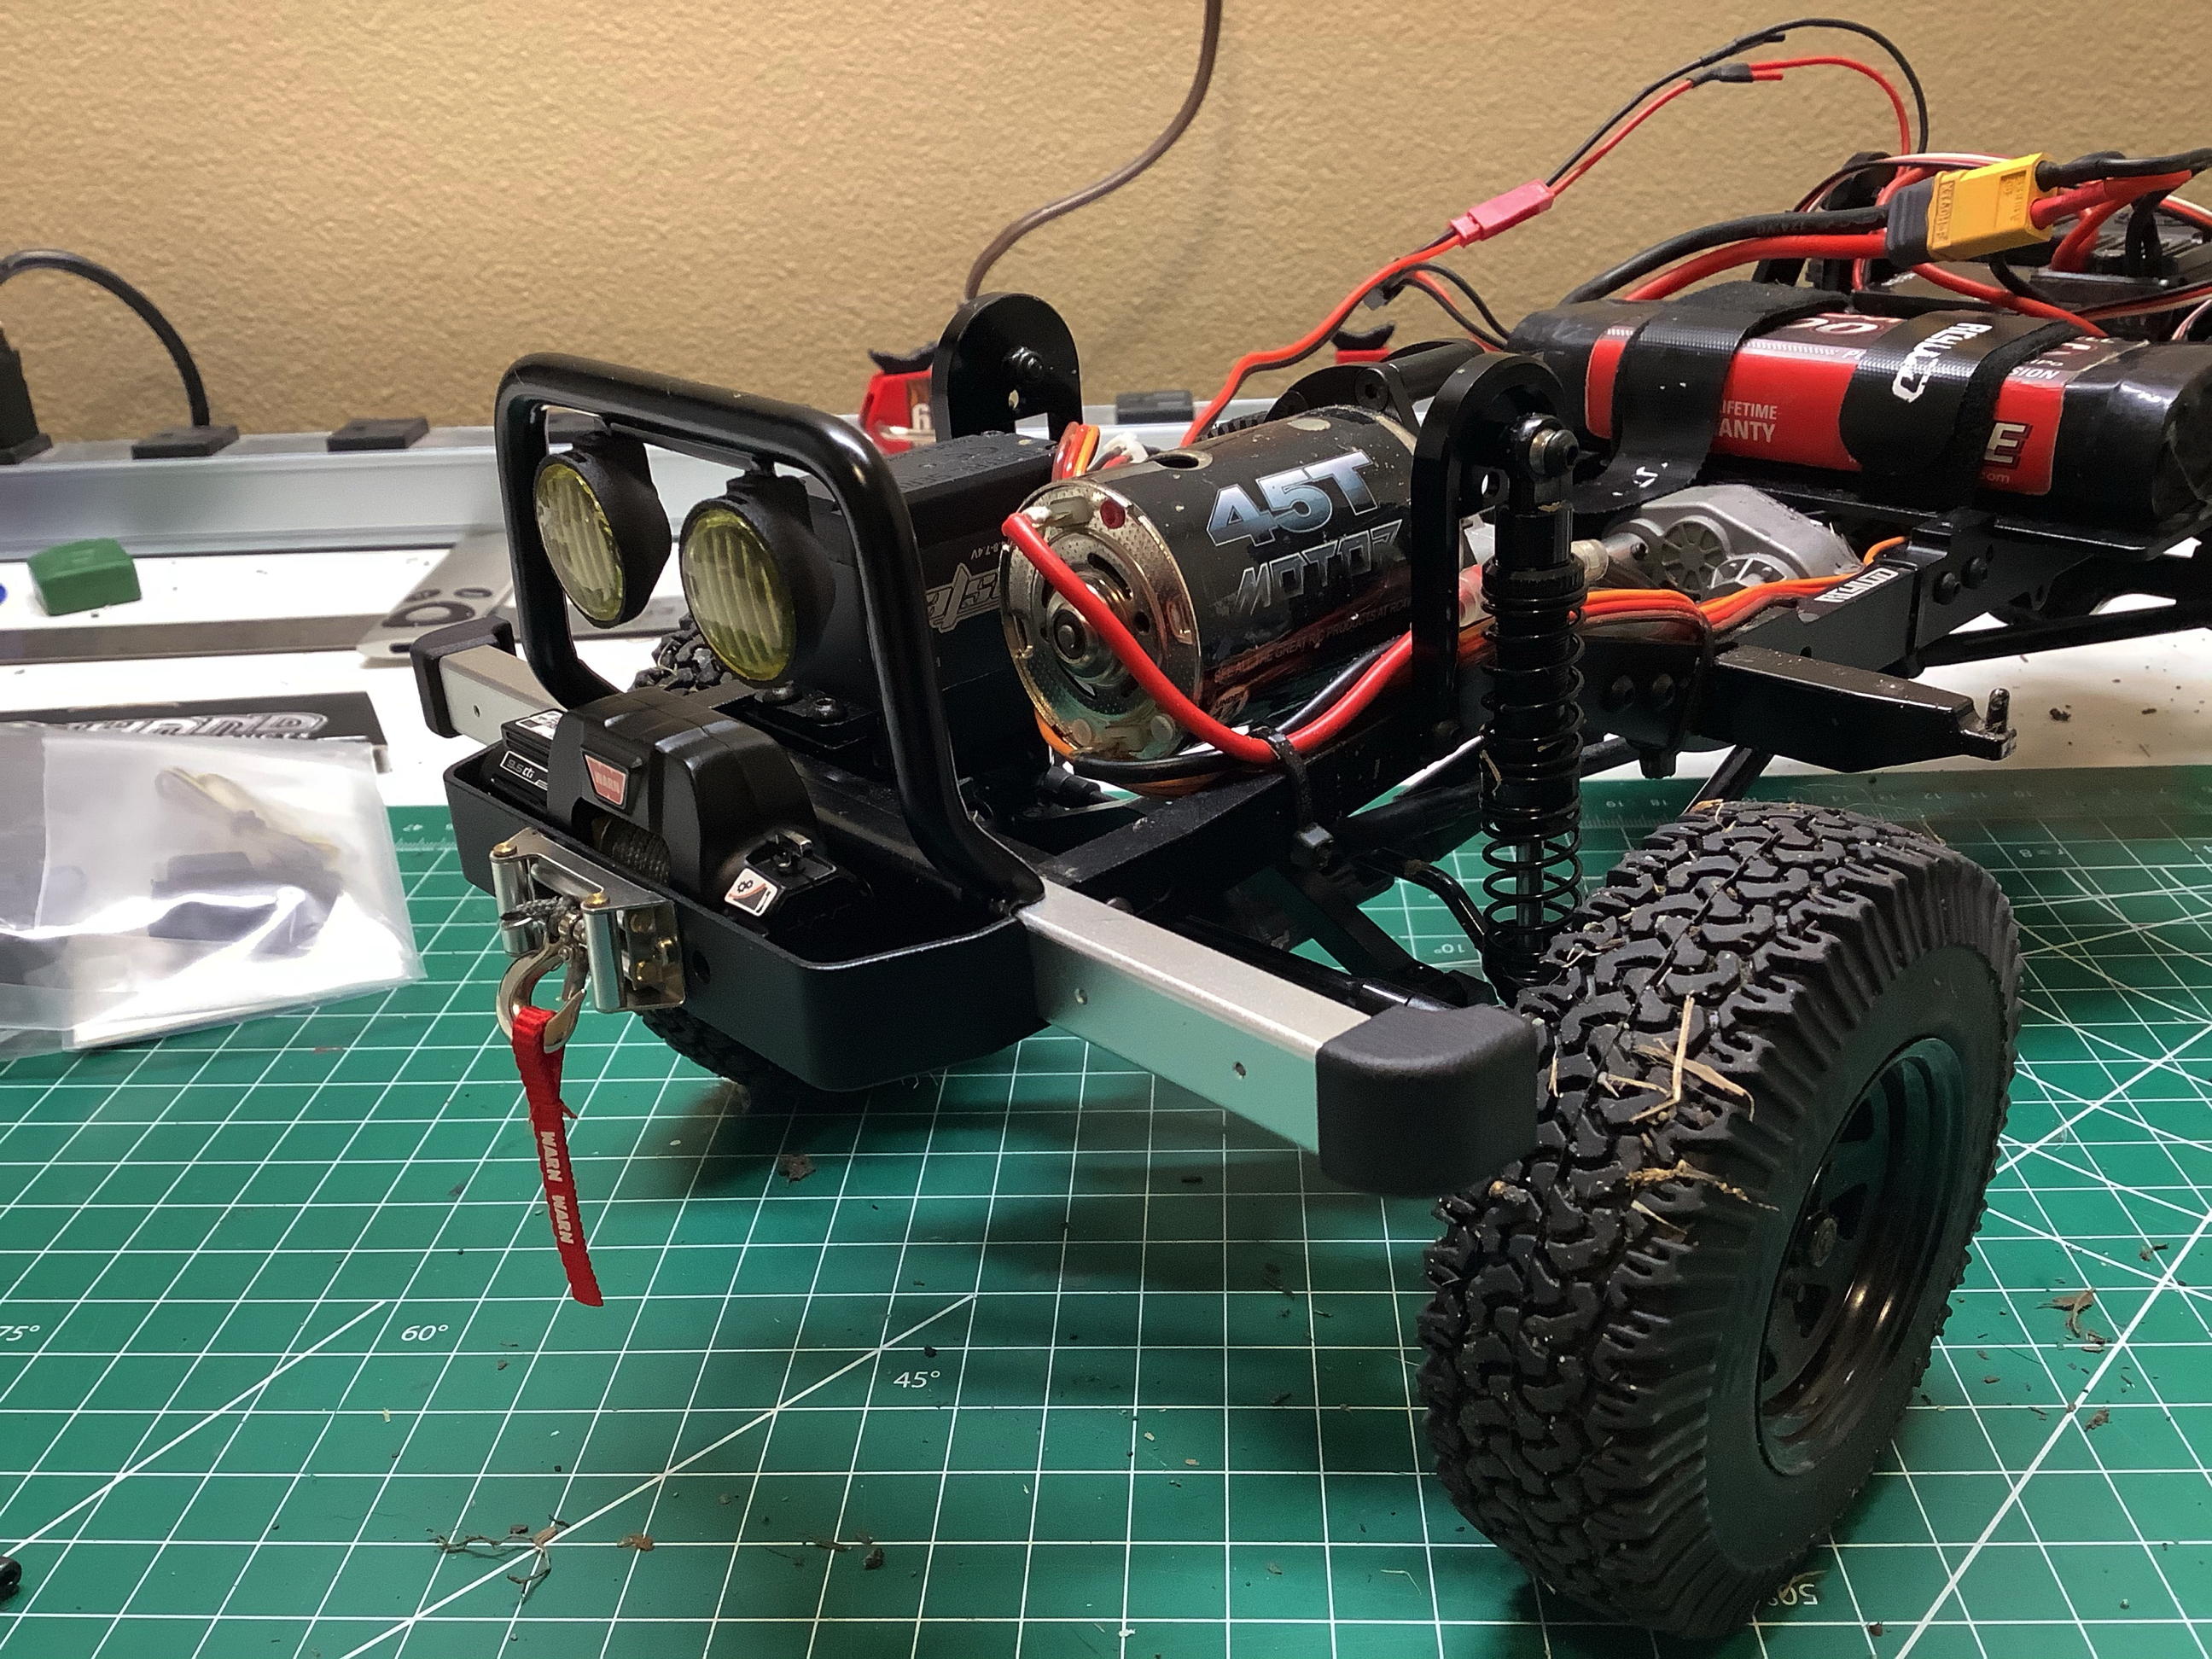
The next item is somewhat more subtle. Before and after are shown
above. I added a skid plate and steering link protector as
shown. This was a lot harder than it should have been.
Although the skid plate and bumper are from the same manufacturer, the
skid plate and winch tray are not meant to be used together and that
means some screw heads were interfering. I had to grind away the
area to clear the screw heads which wasn't that big of a deal, but I
also had to drill some new tiny 0.8mm holes for the micro screws which
hold on the stainless sheet. My tiny drill bits are not suitable
for drilling metal, so it took an hour of trials to get those two holes
drilled. It looks like I knew what I was doing though. I
just didn't. There are slots for lights in the skid plate but I
don't think I am going to use them. Maybe in the future.
I wanted to do something on the rear as well so I added an exhaust pipe
and some mud flaps as shown above, before and after. The exhaust
looks good, but the mud flaps look stupid just screwed to the back of
the bumper. Something else needs to be done.
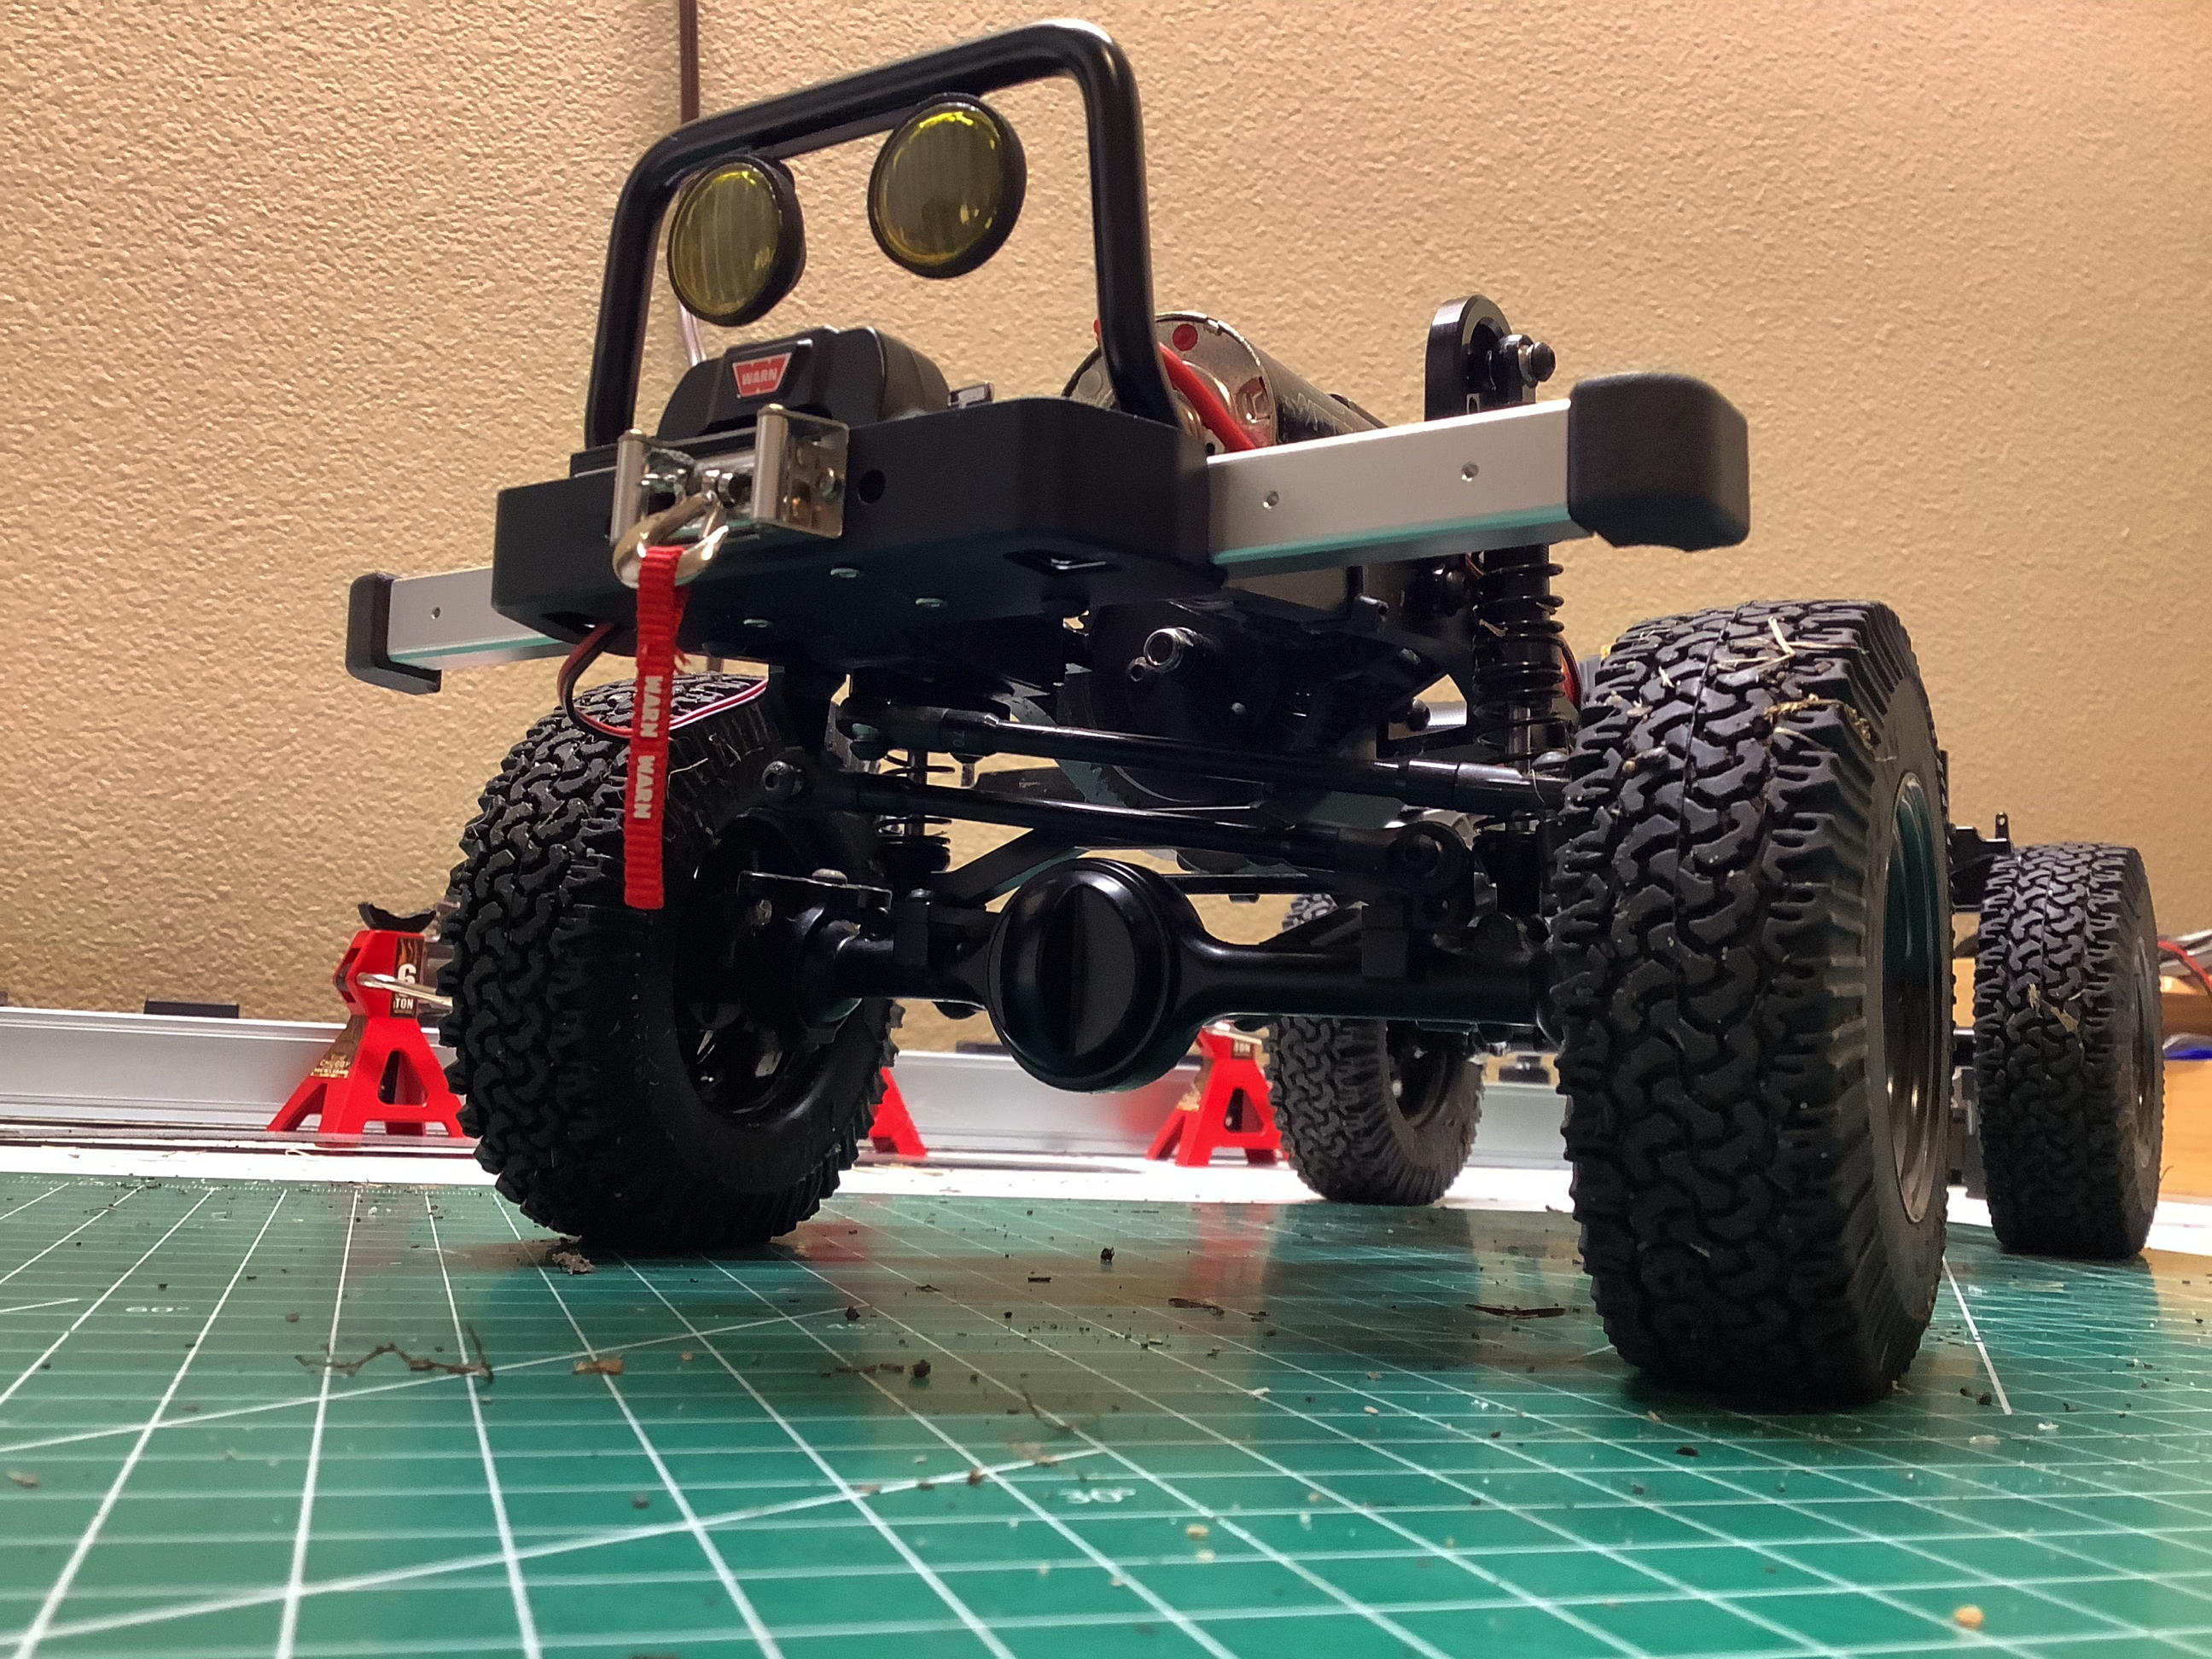
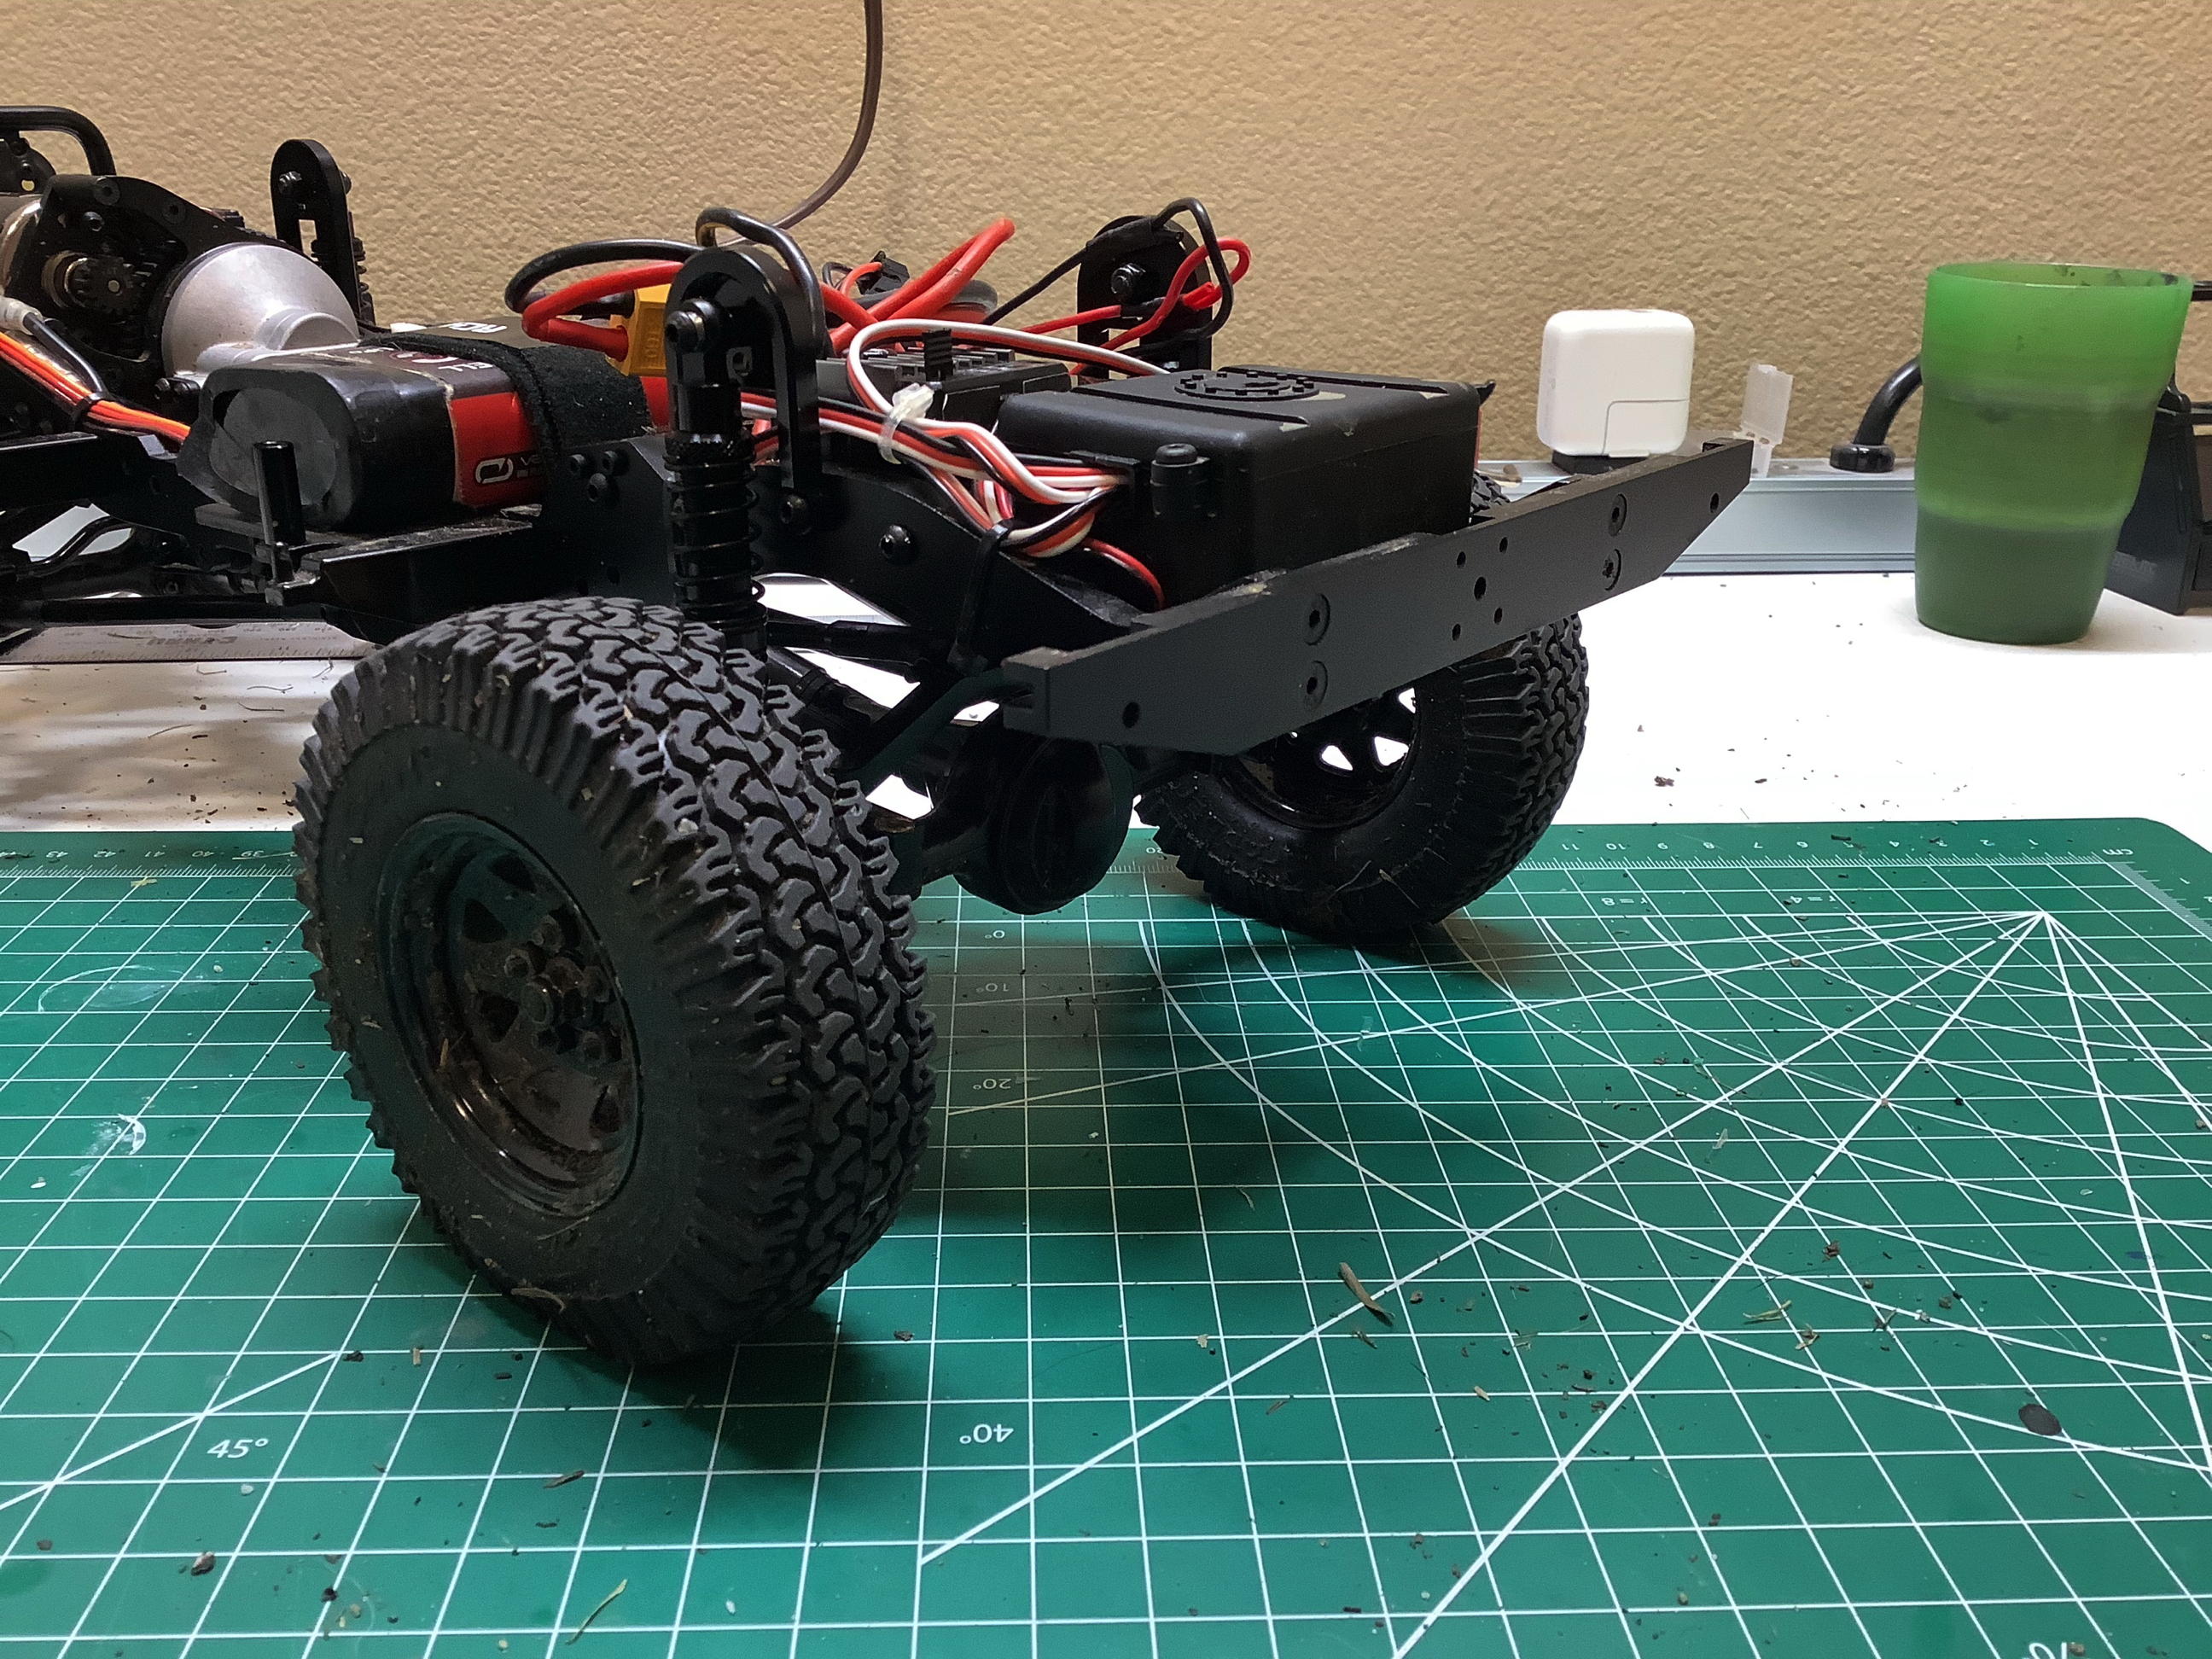
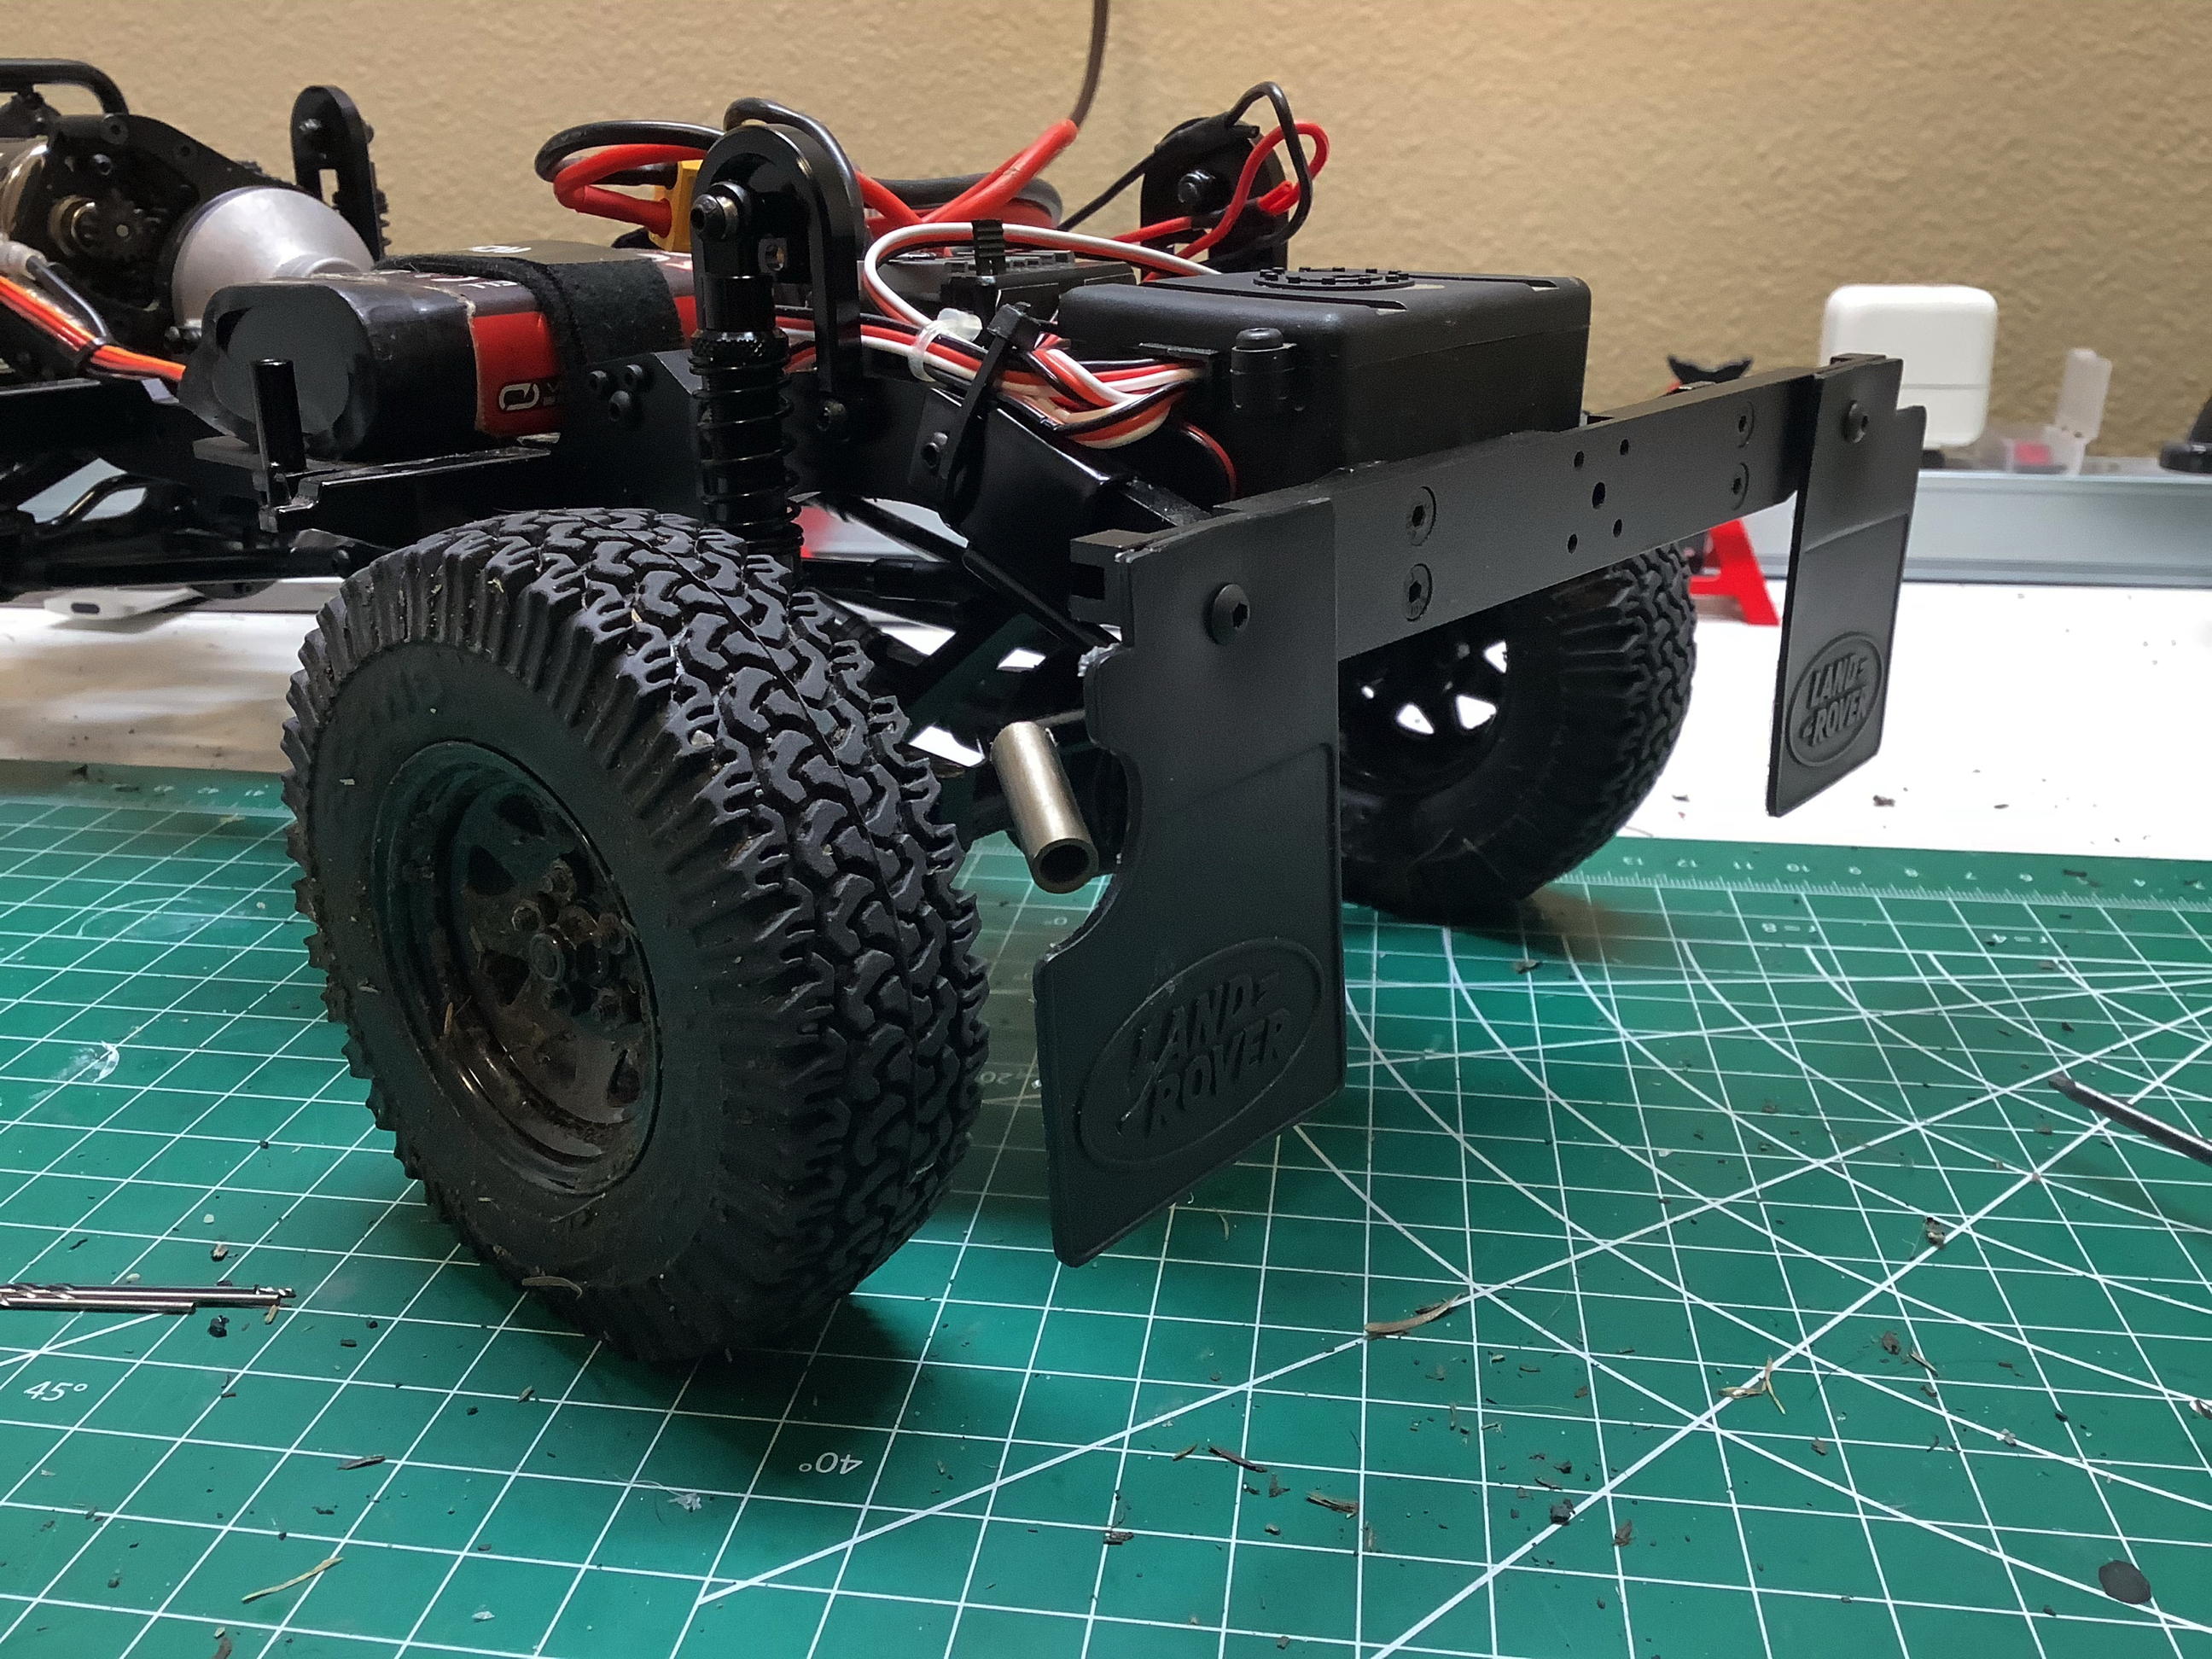
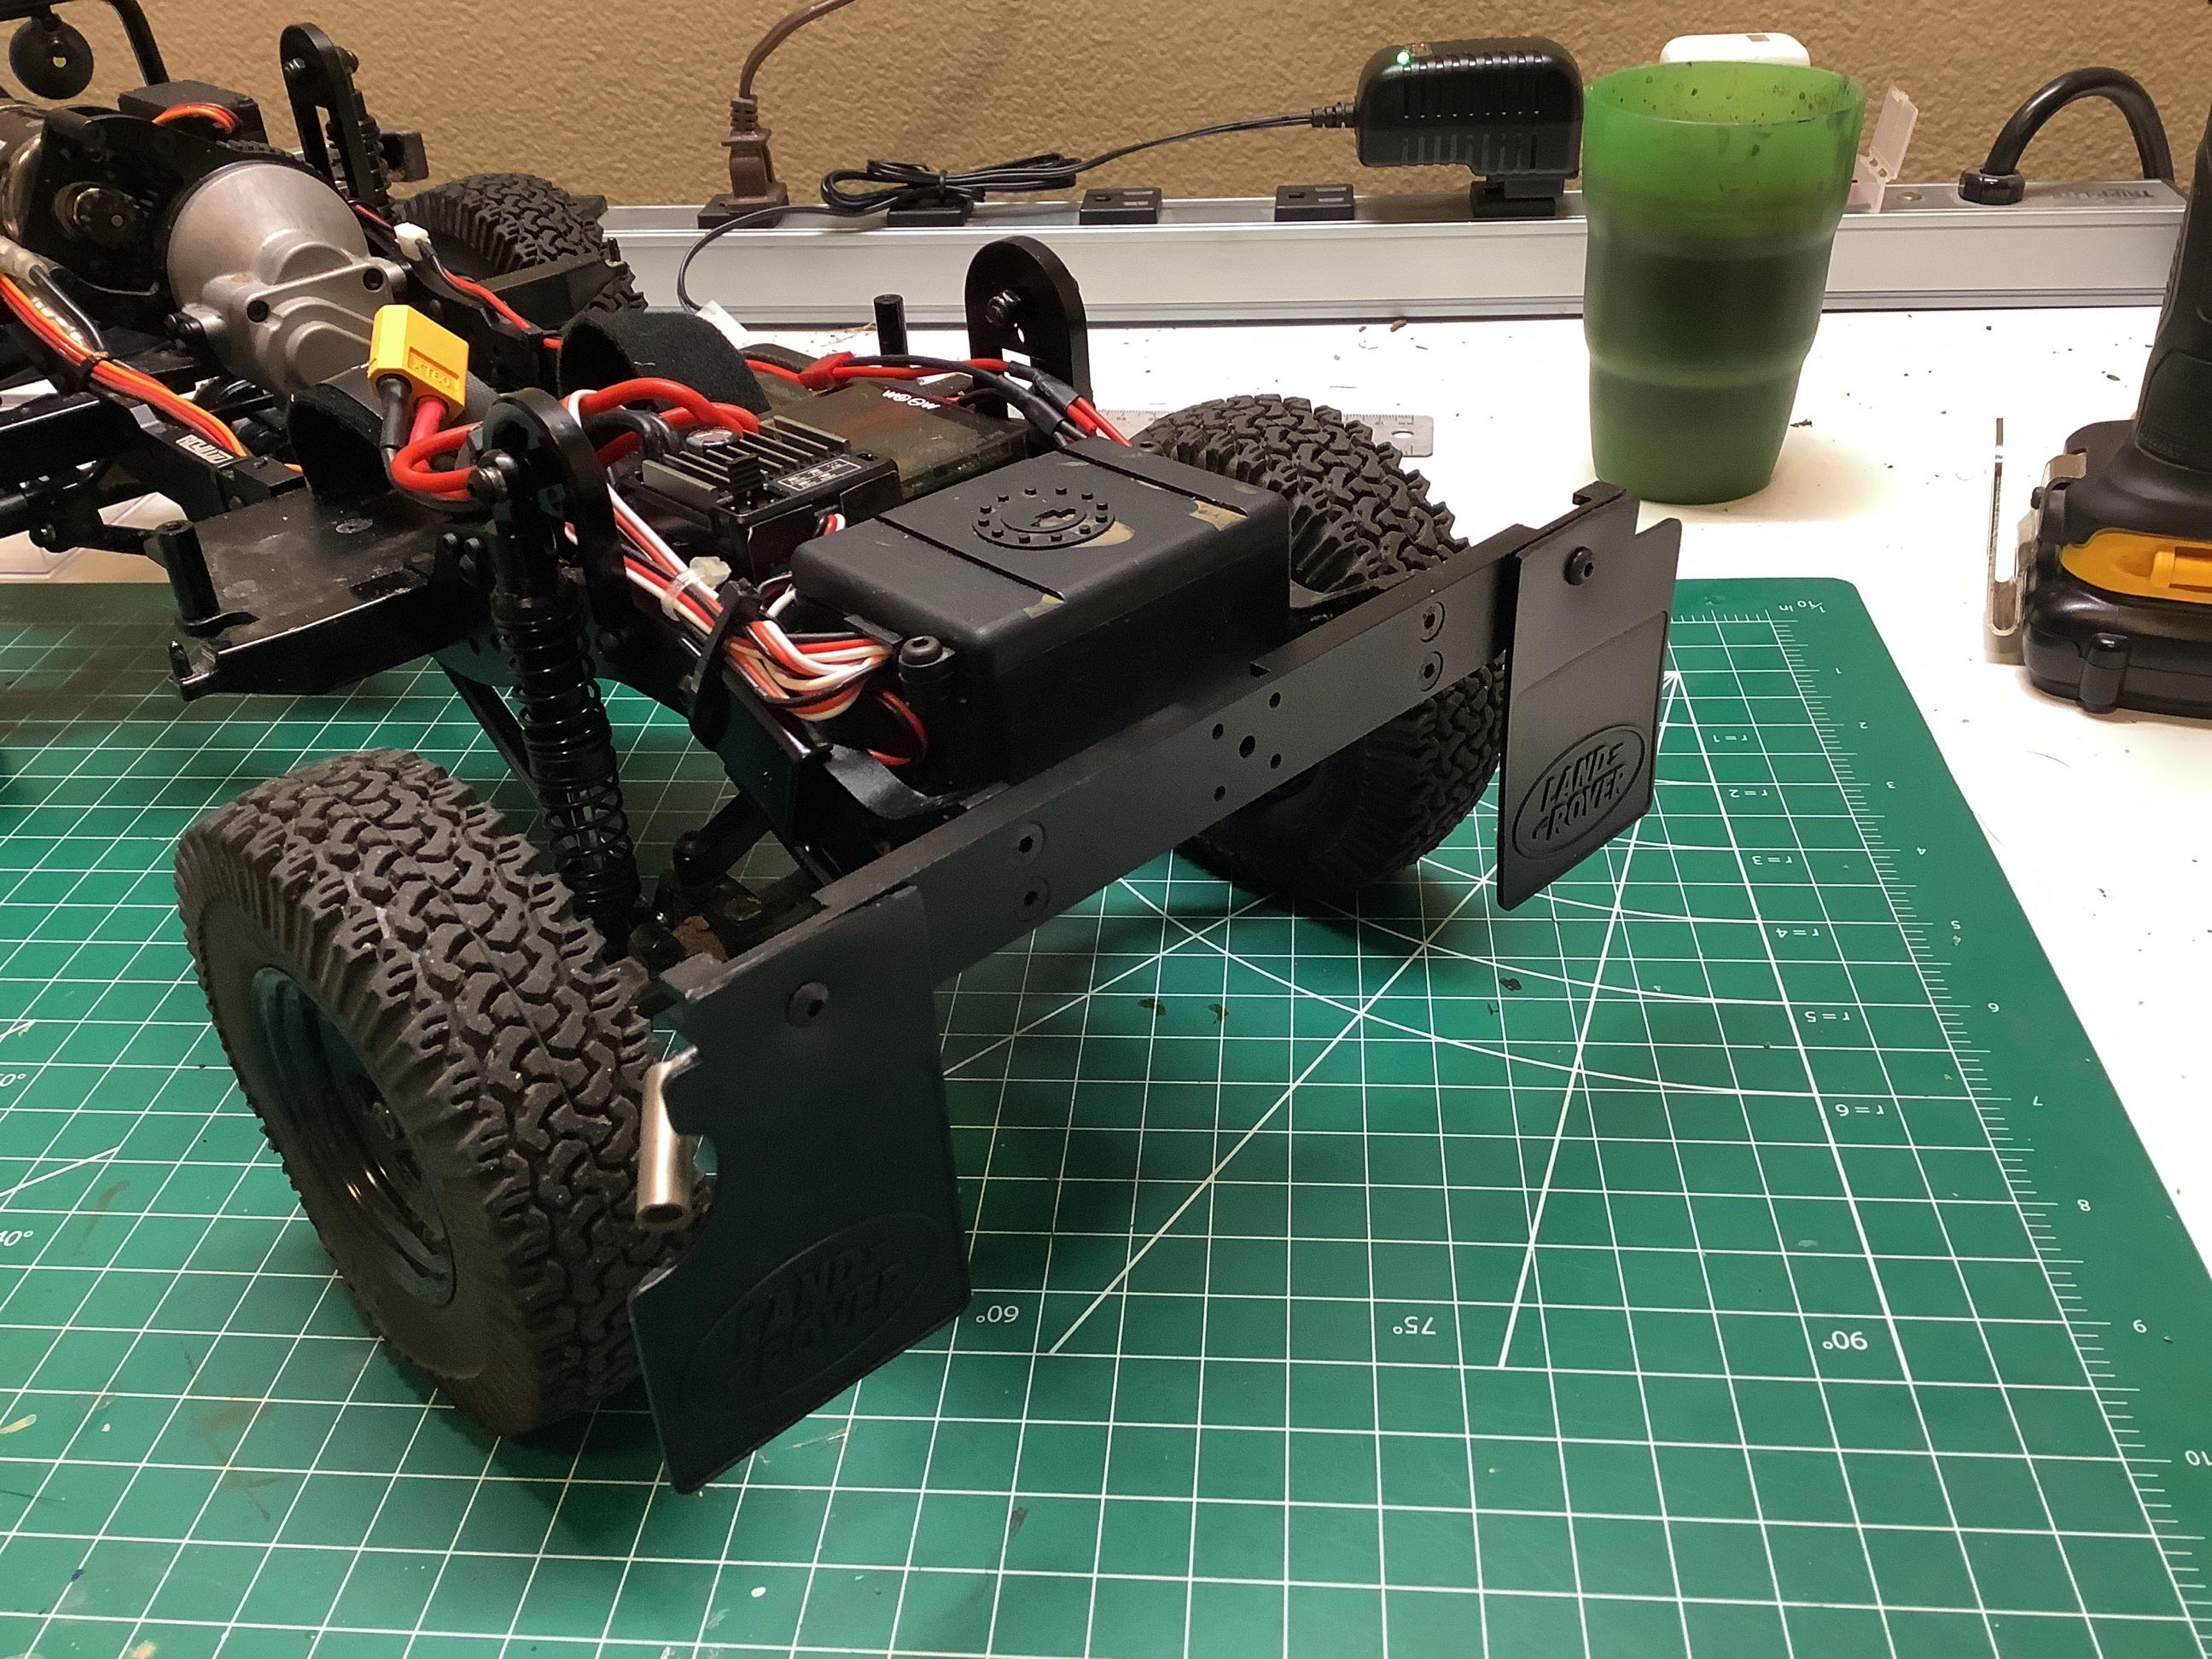
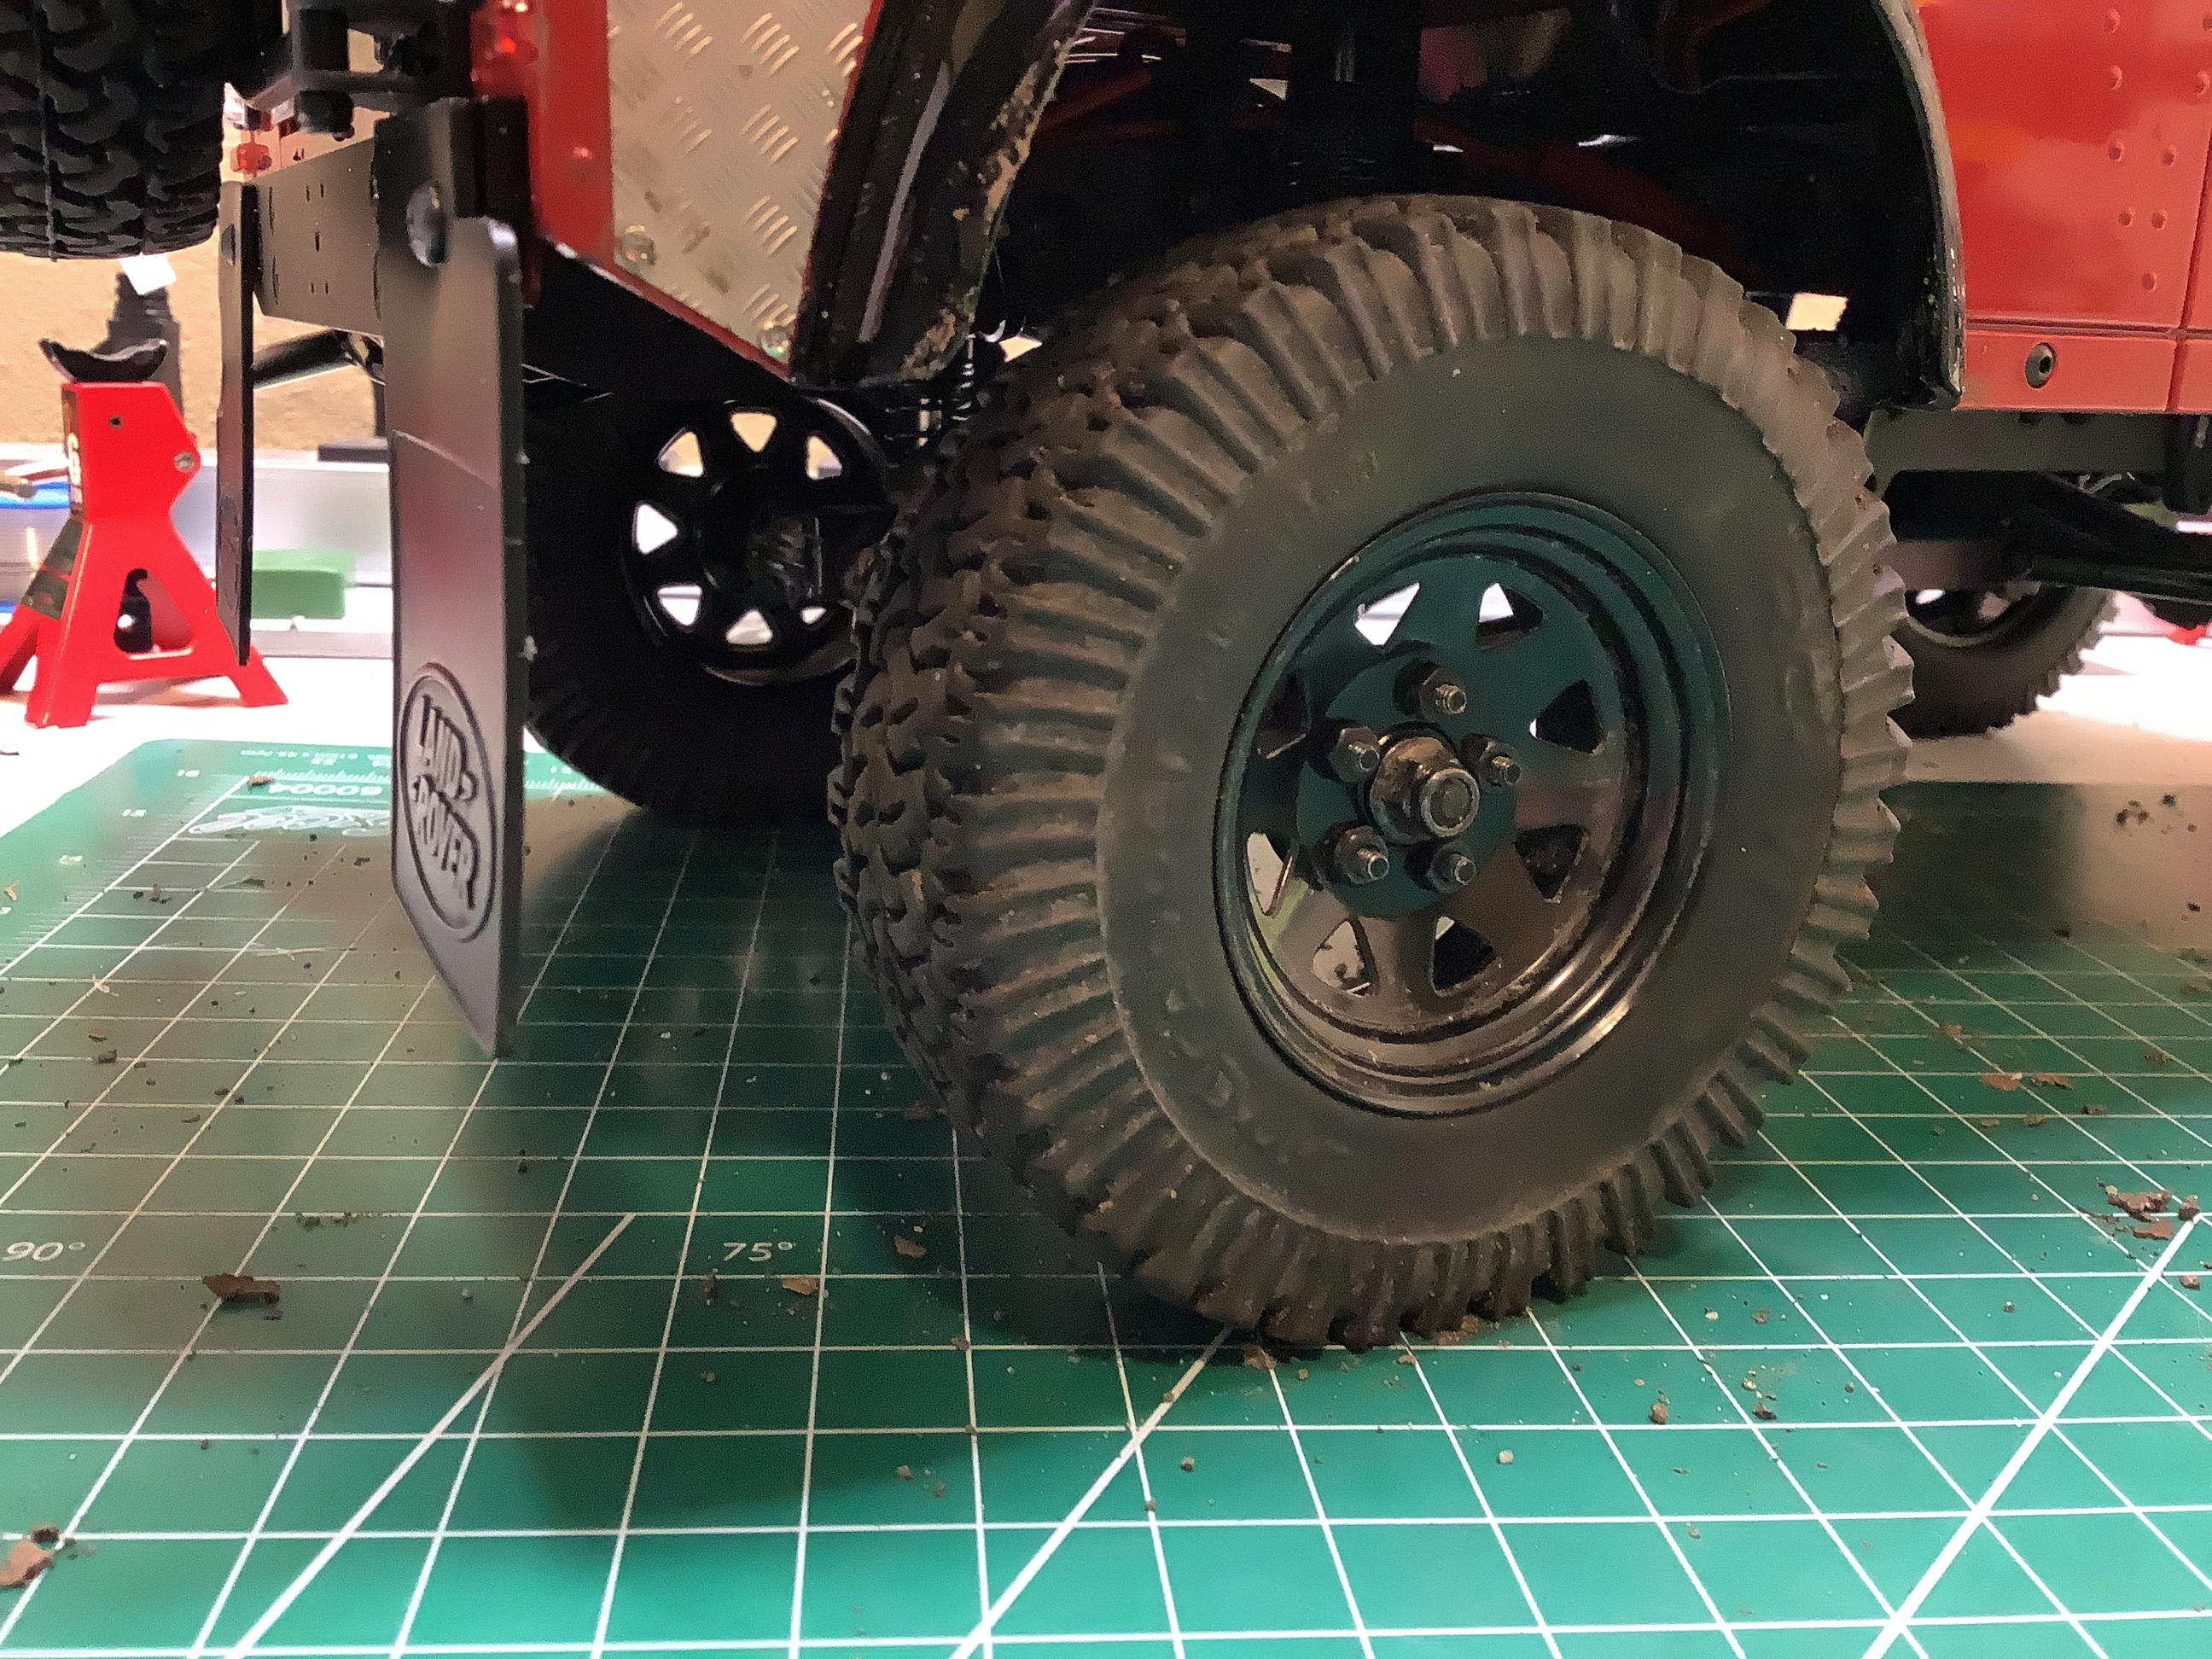
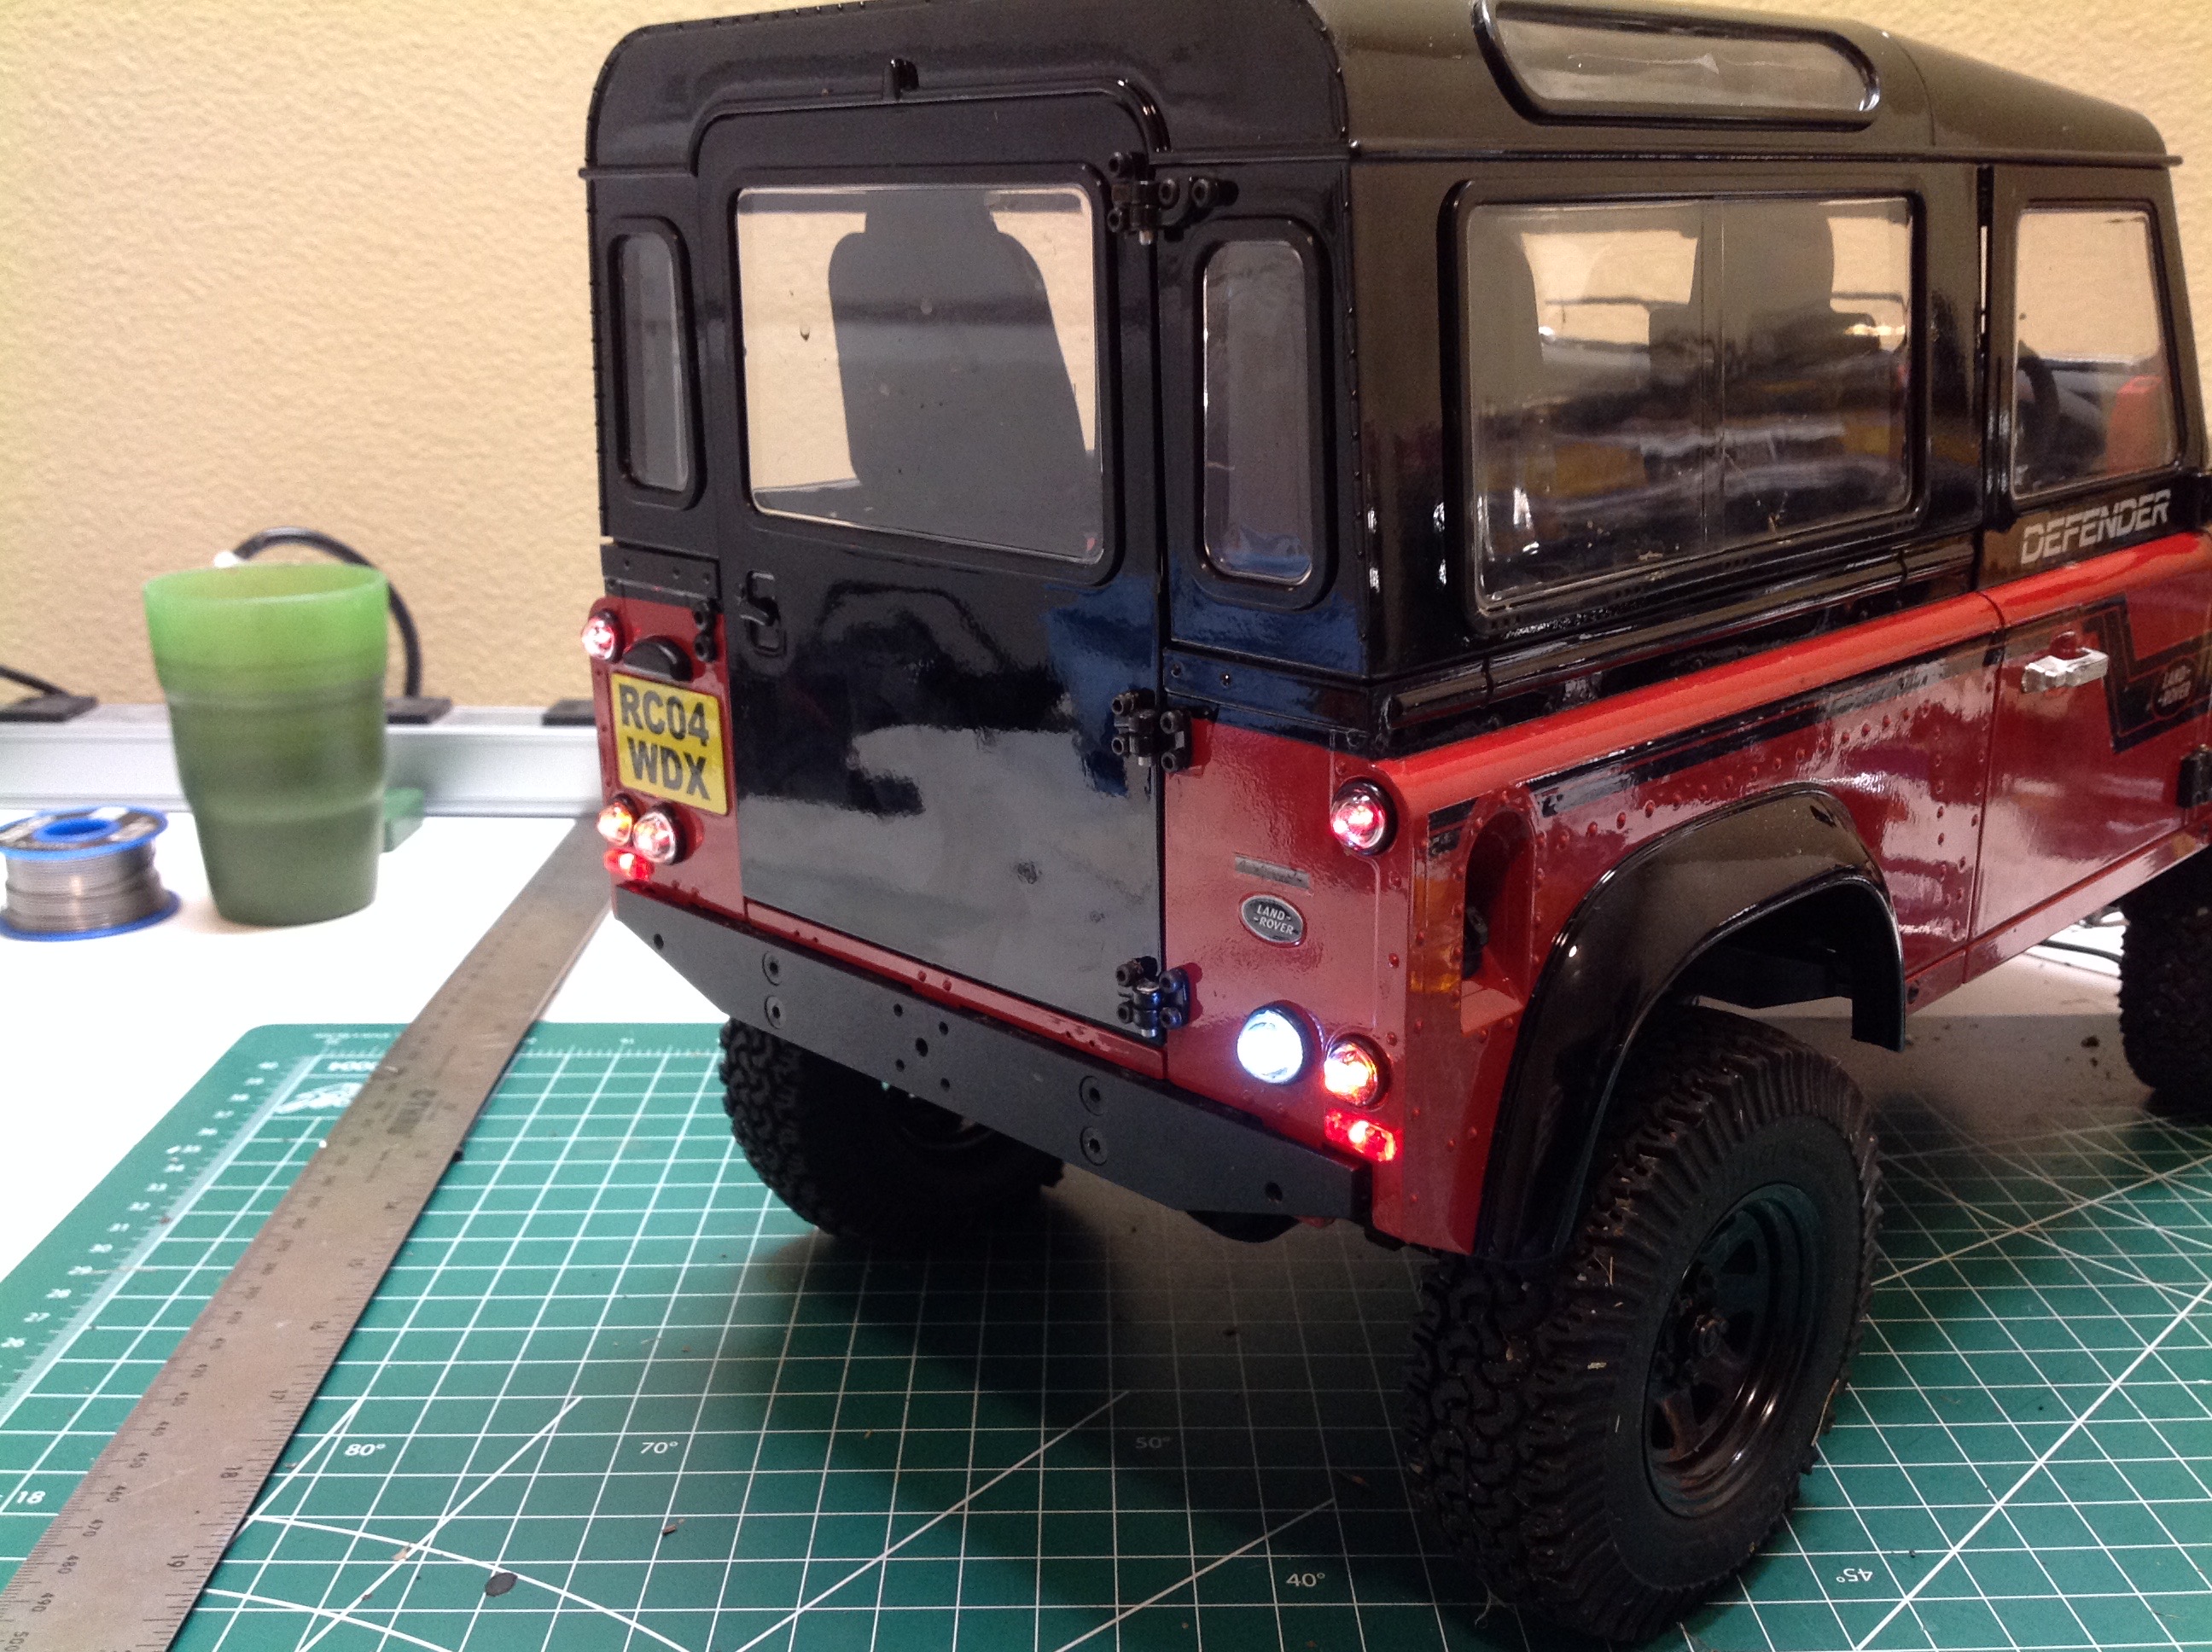
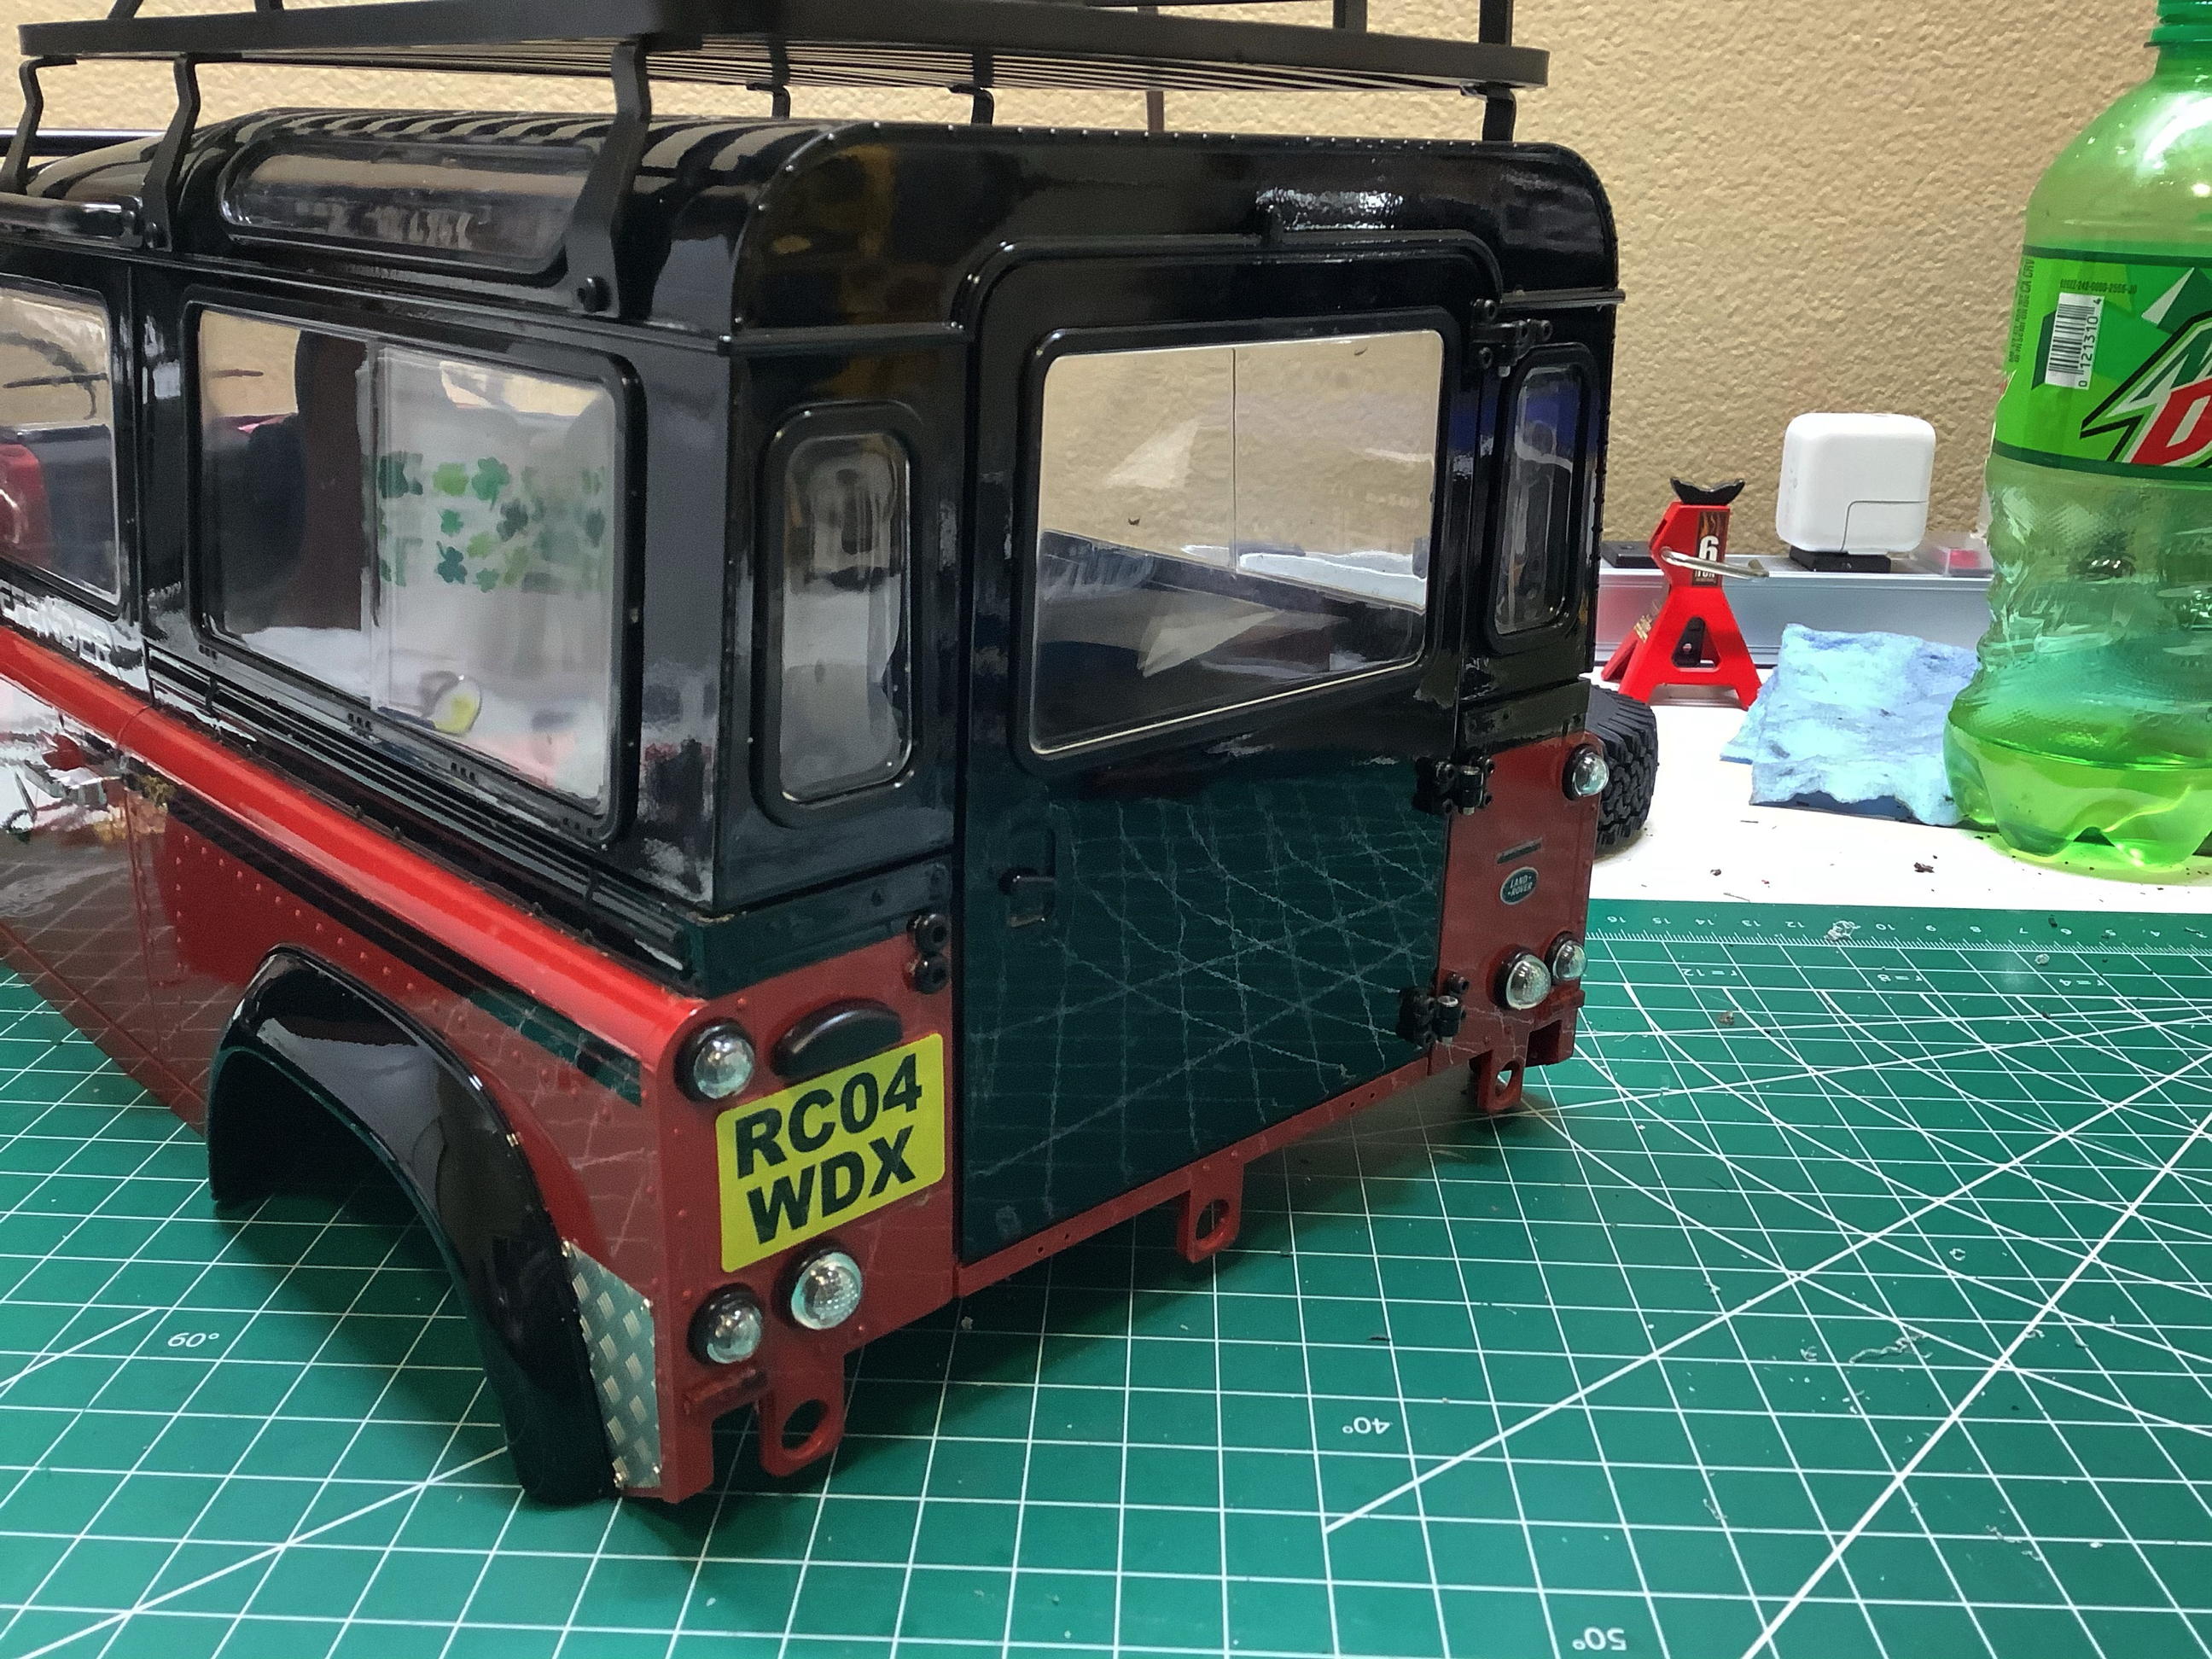
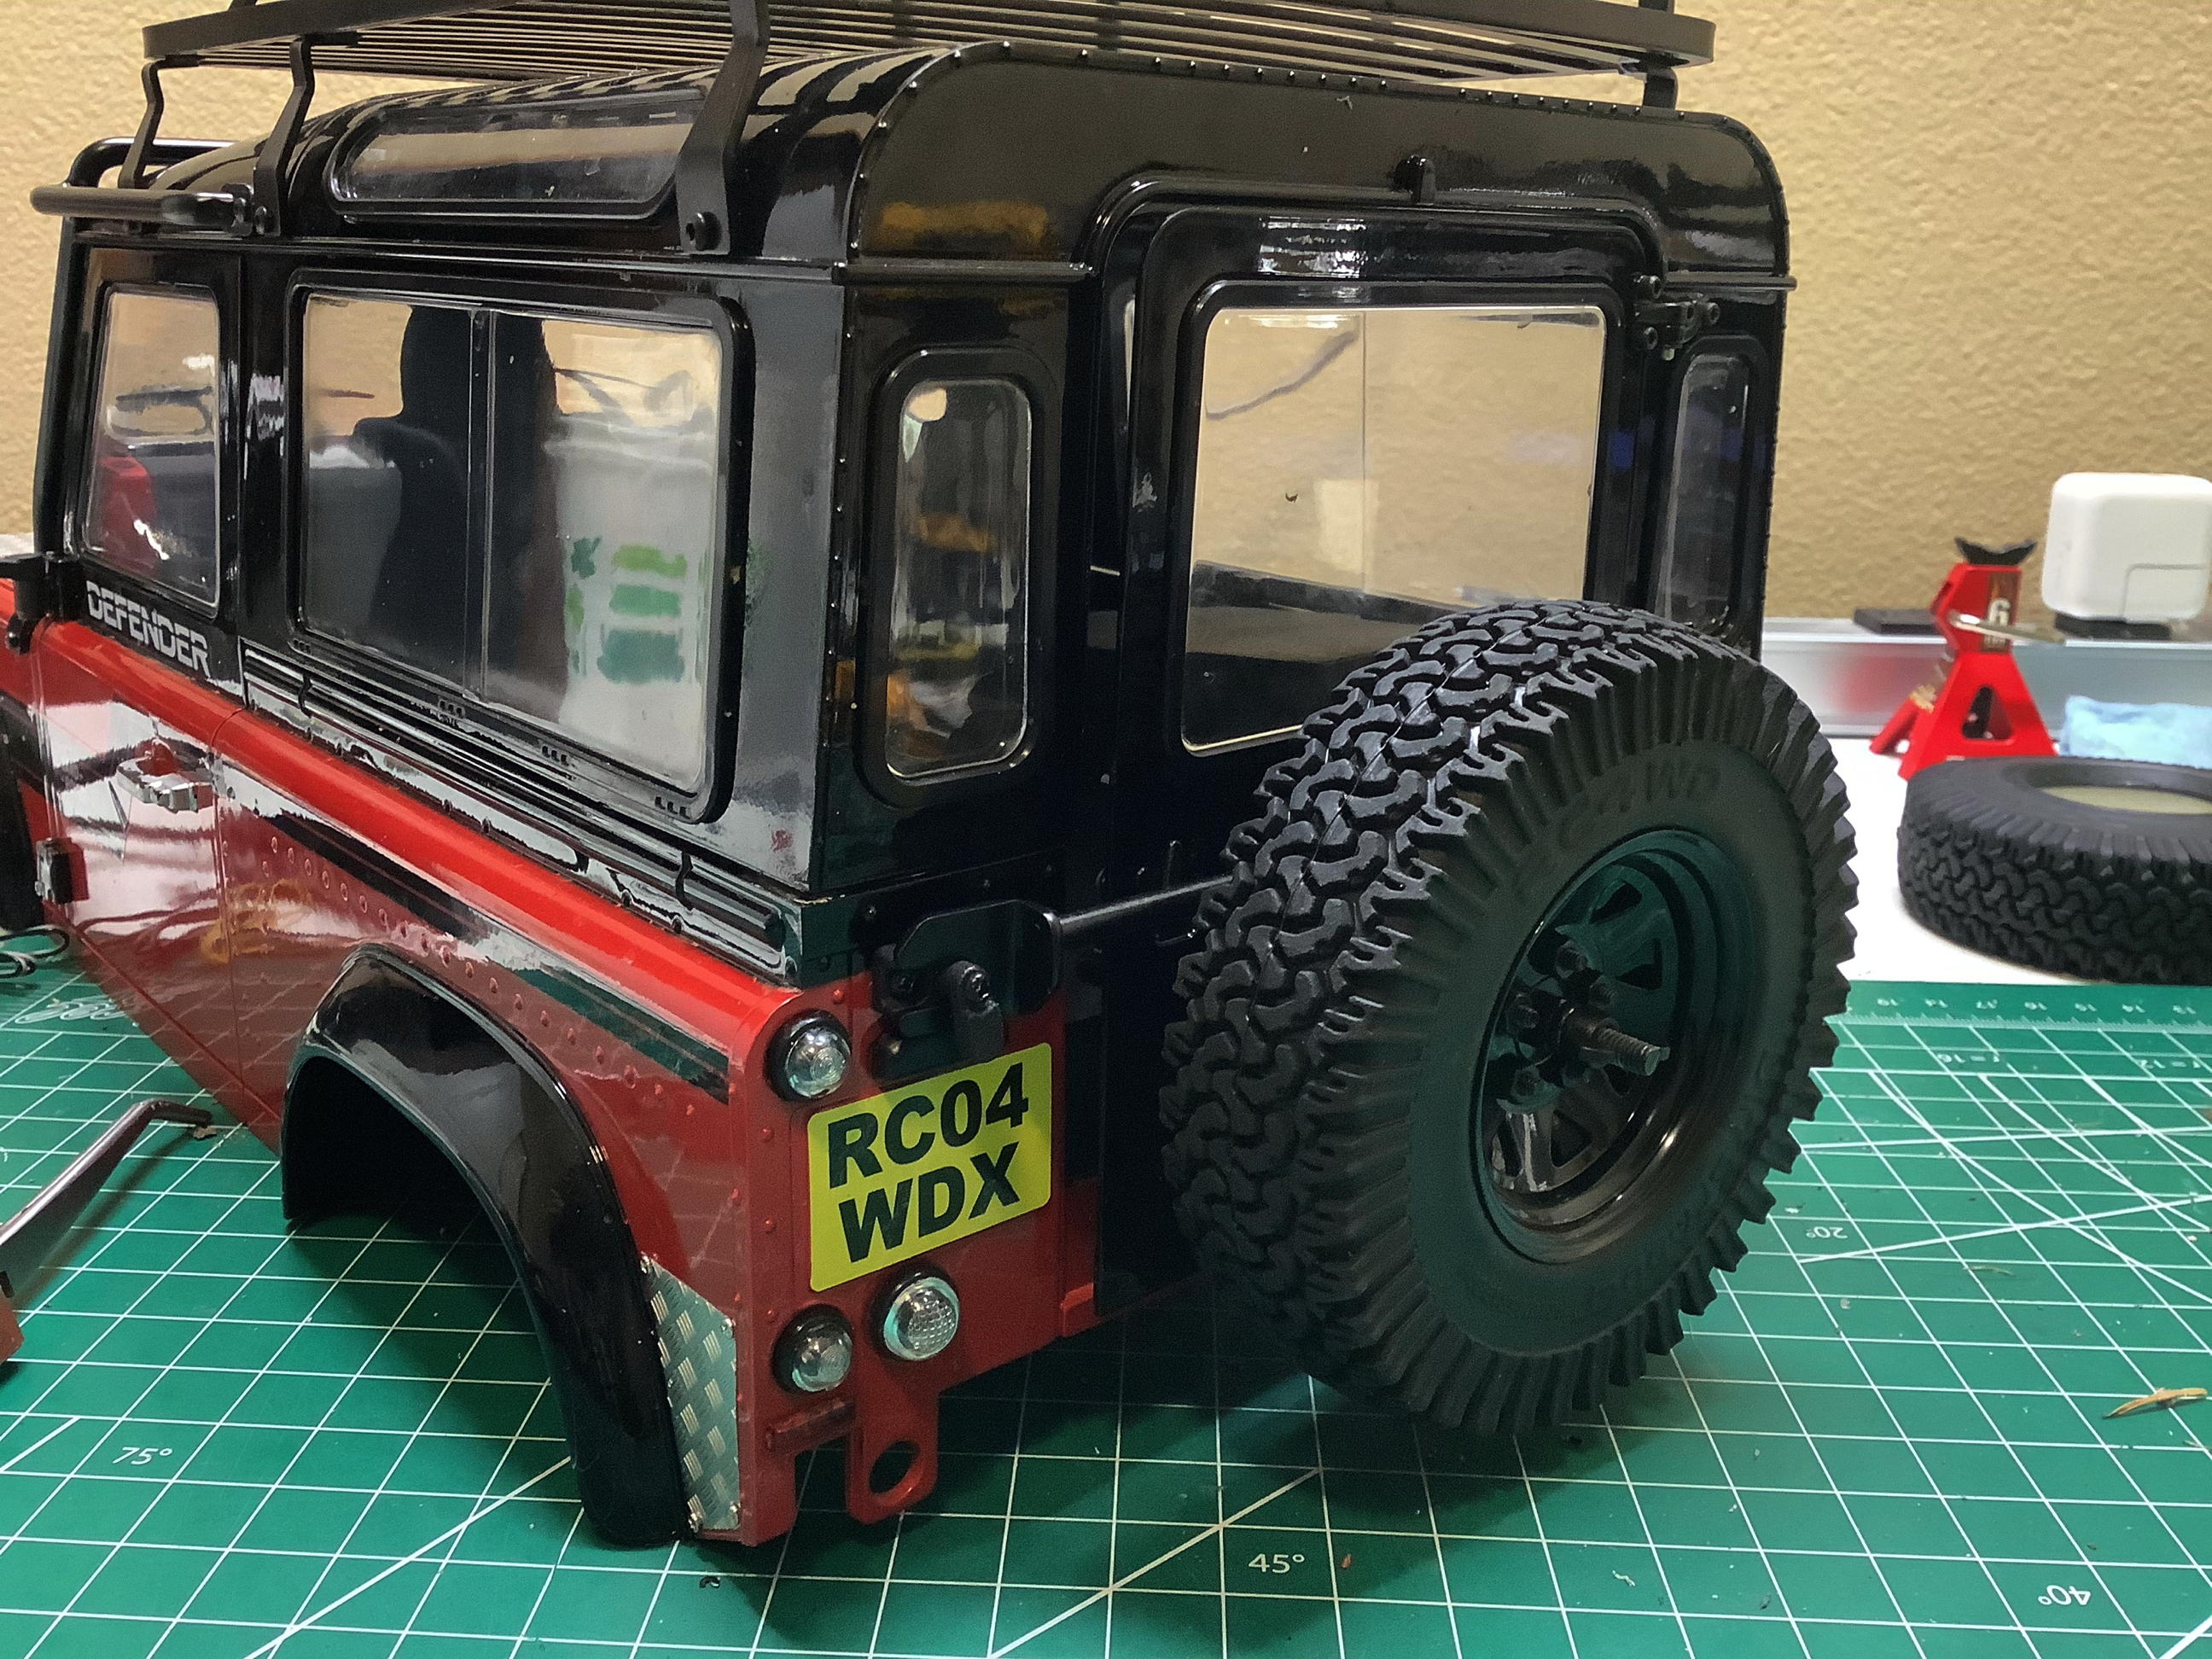
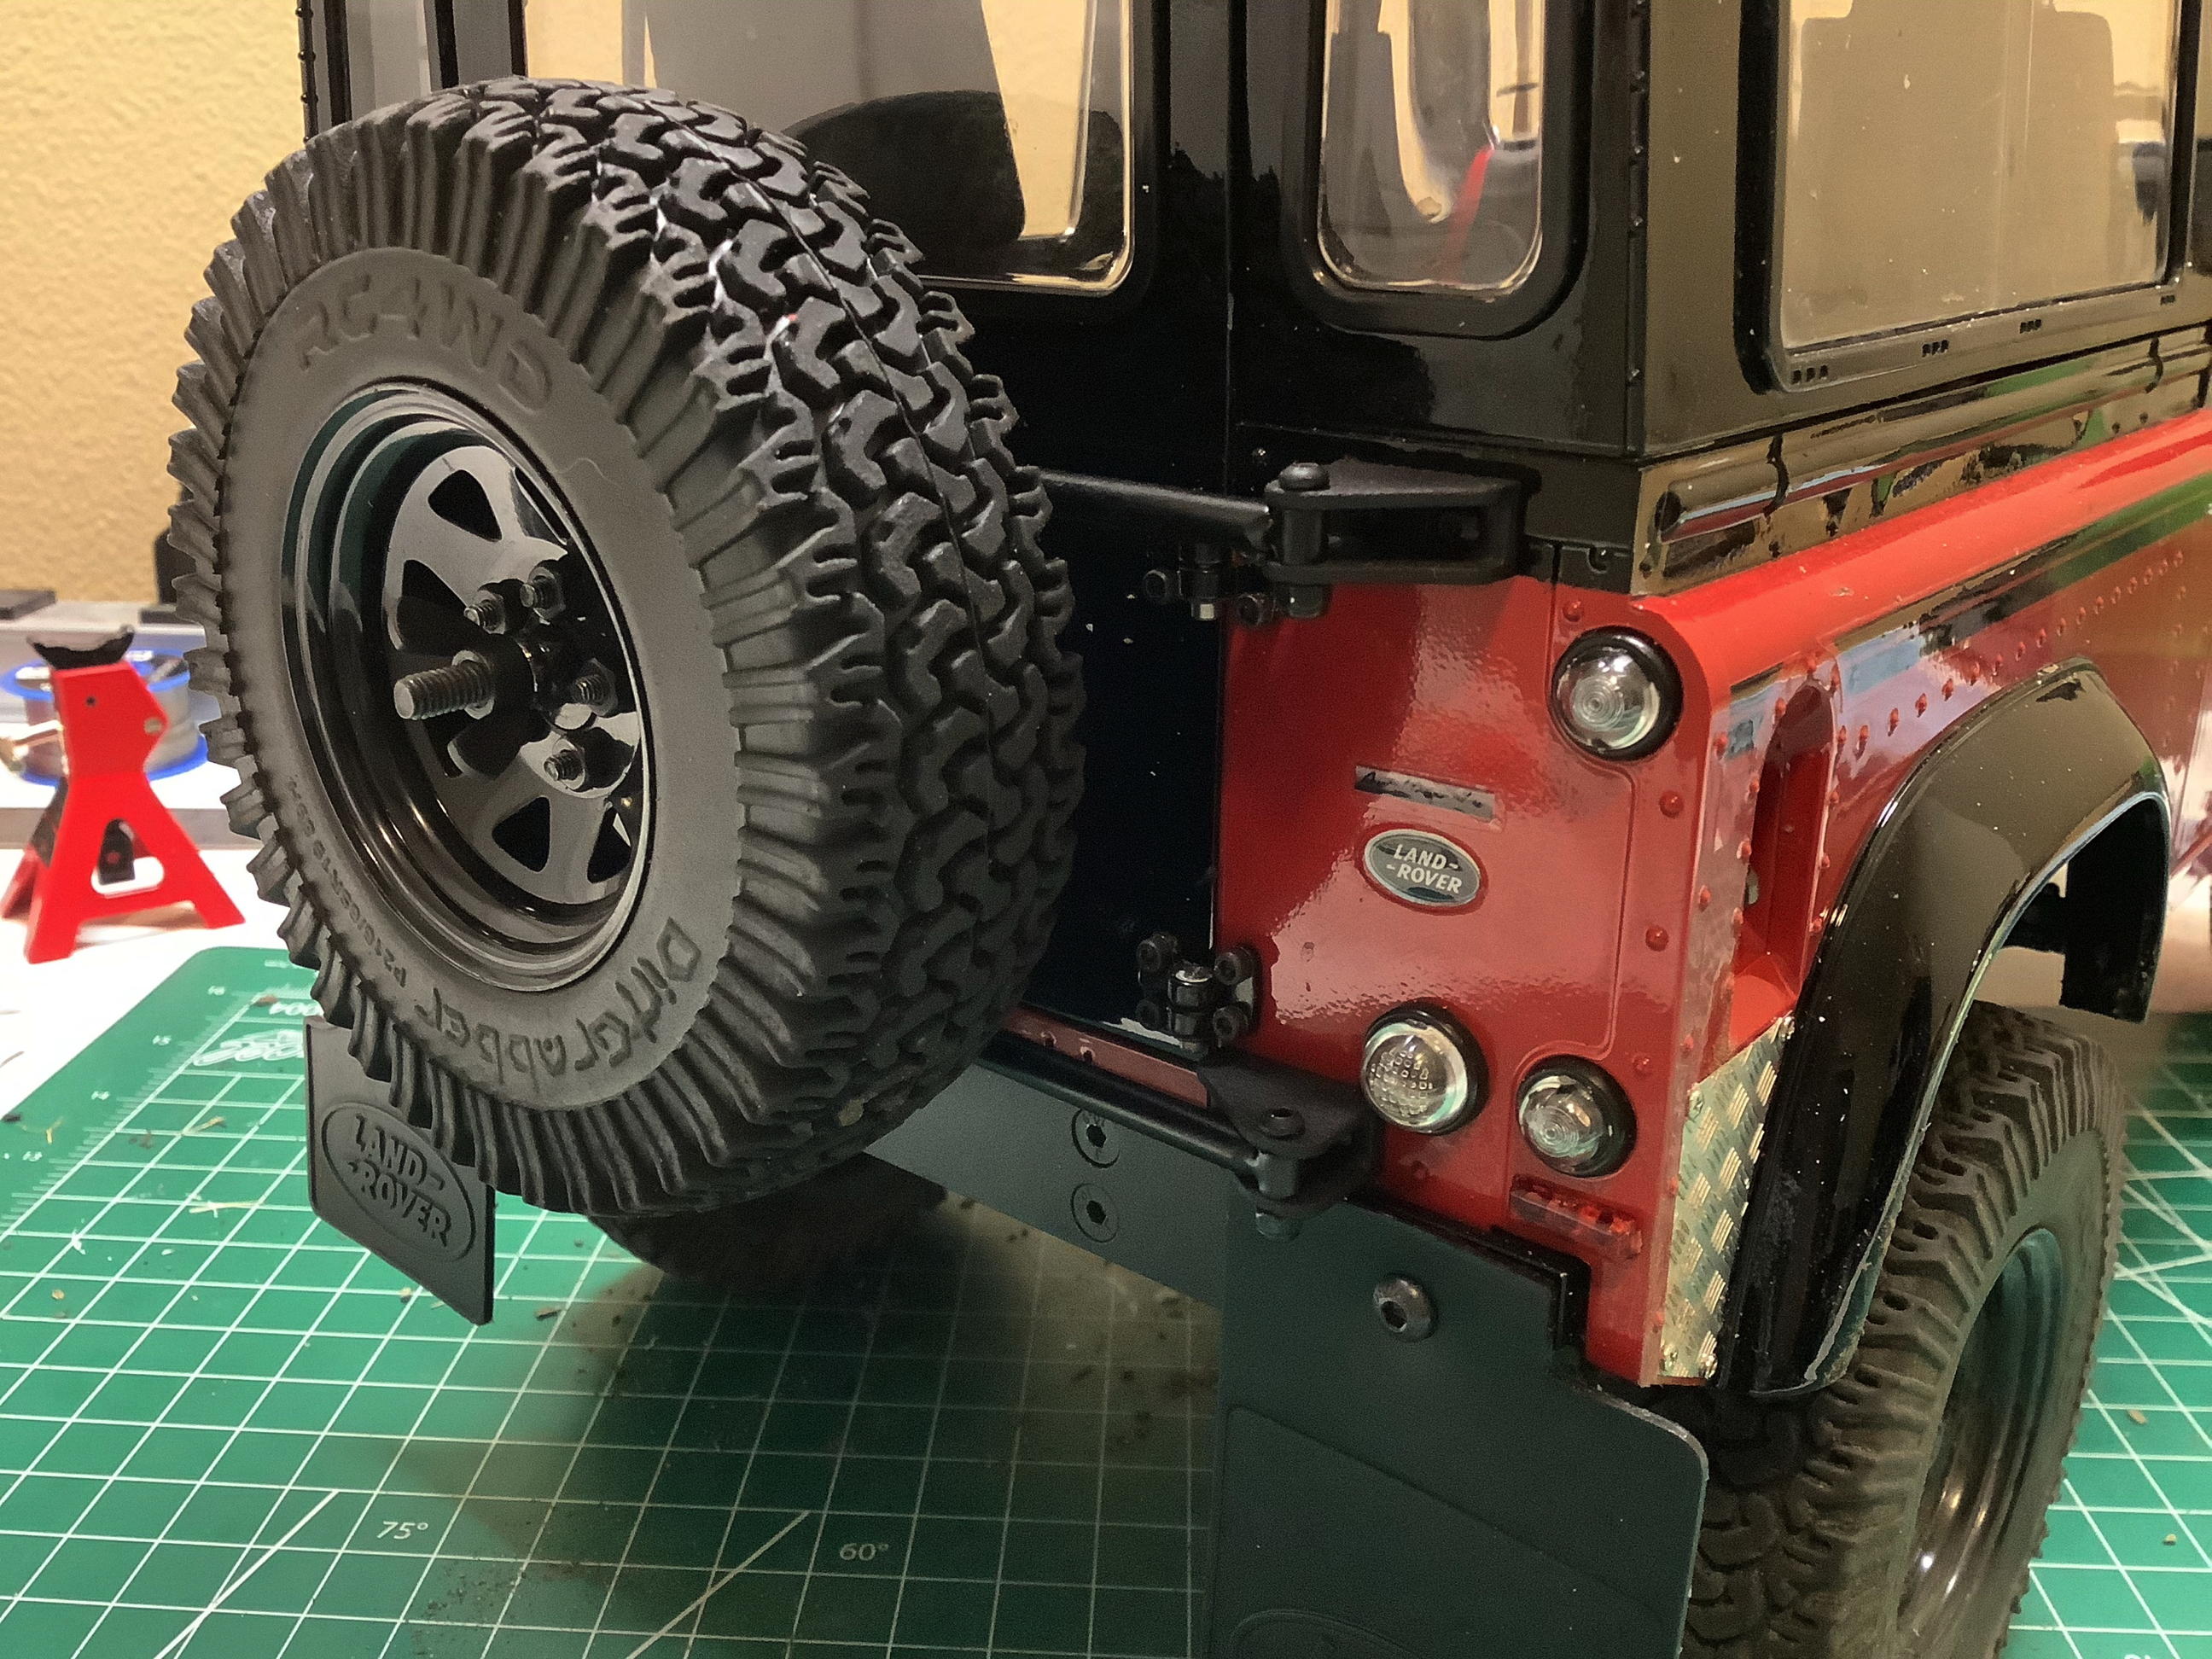
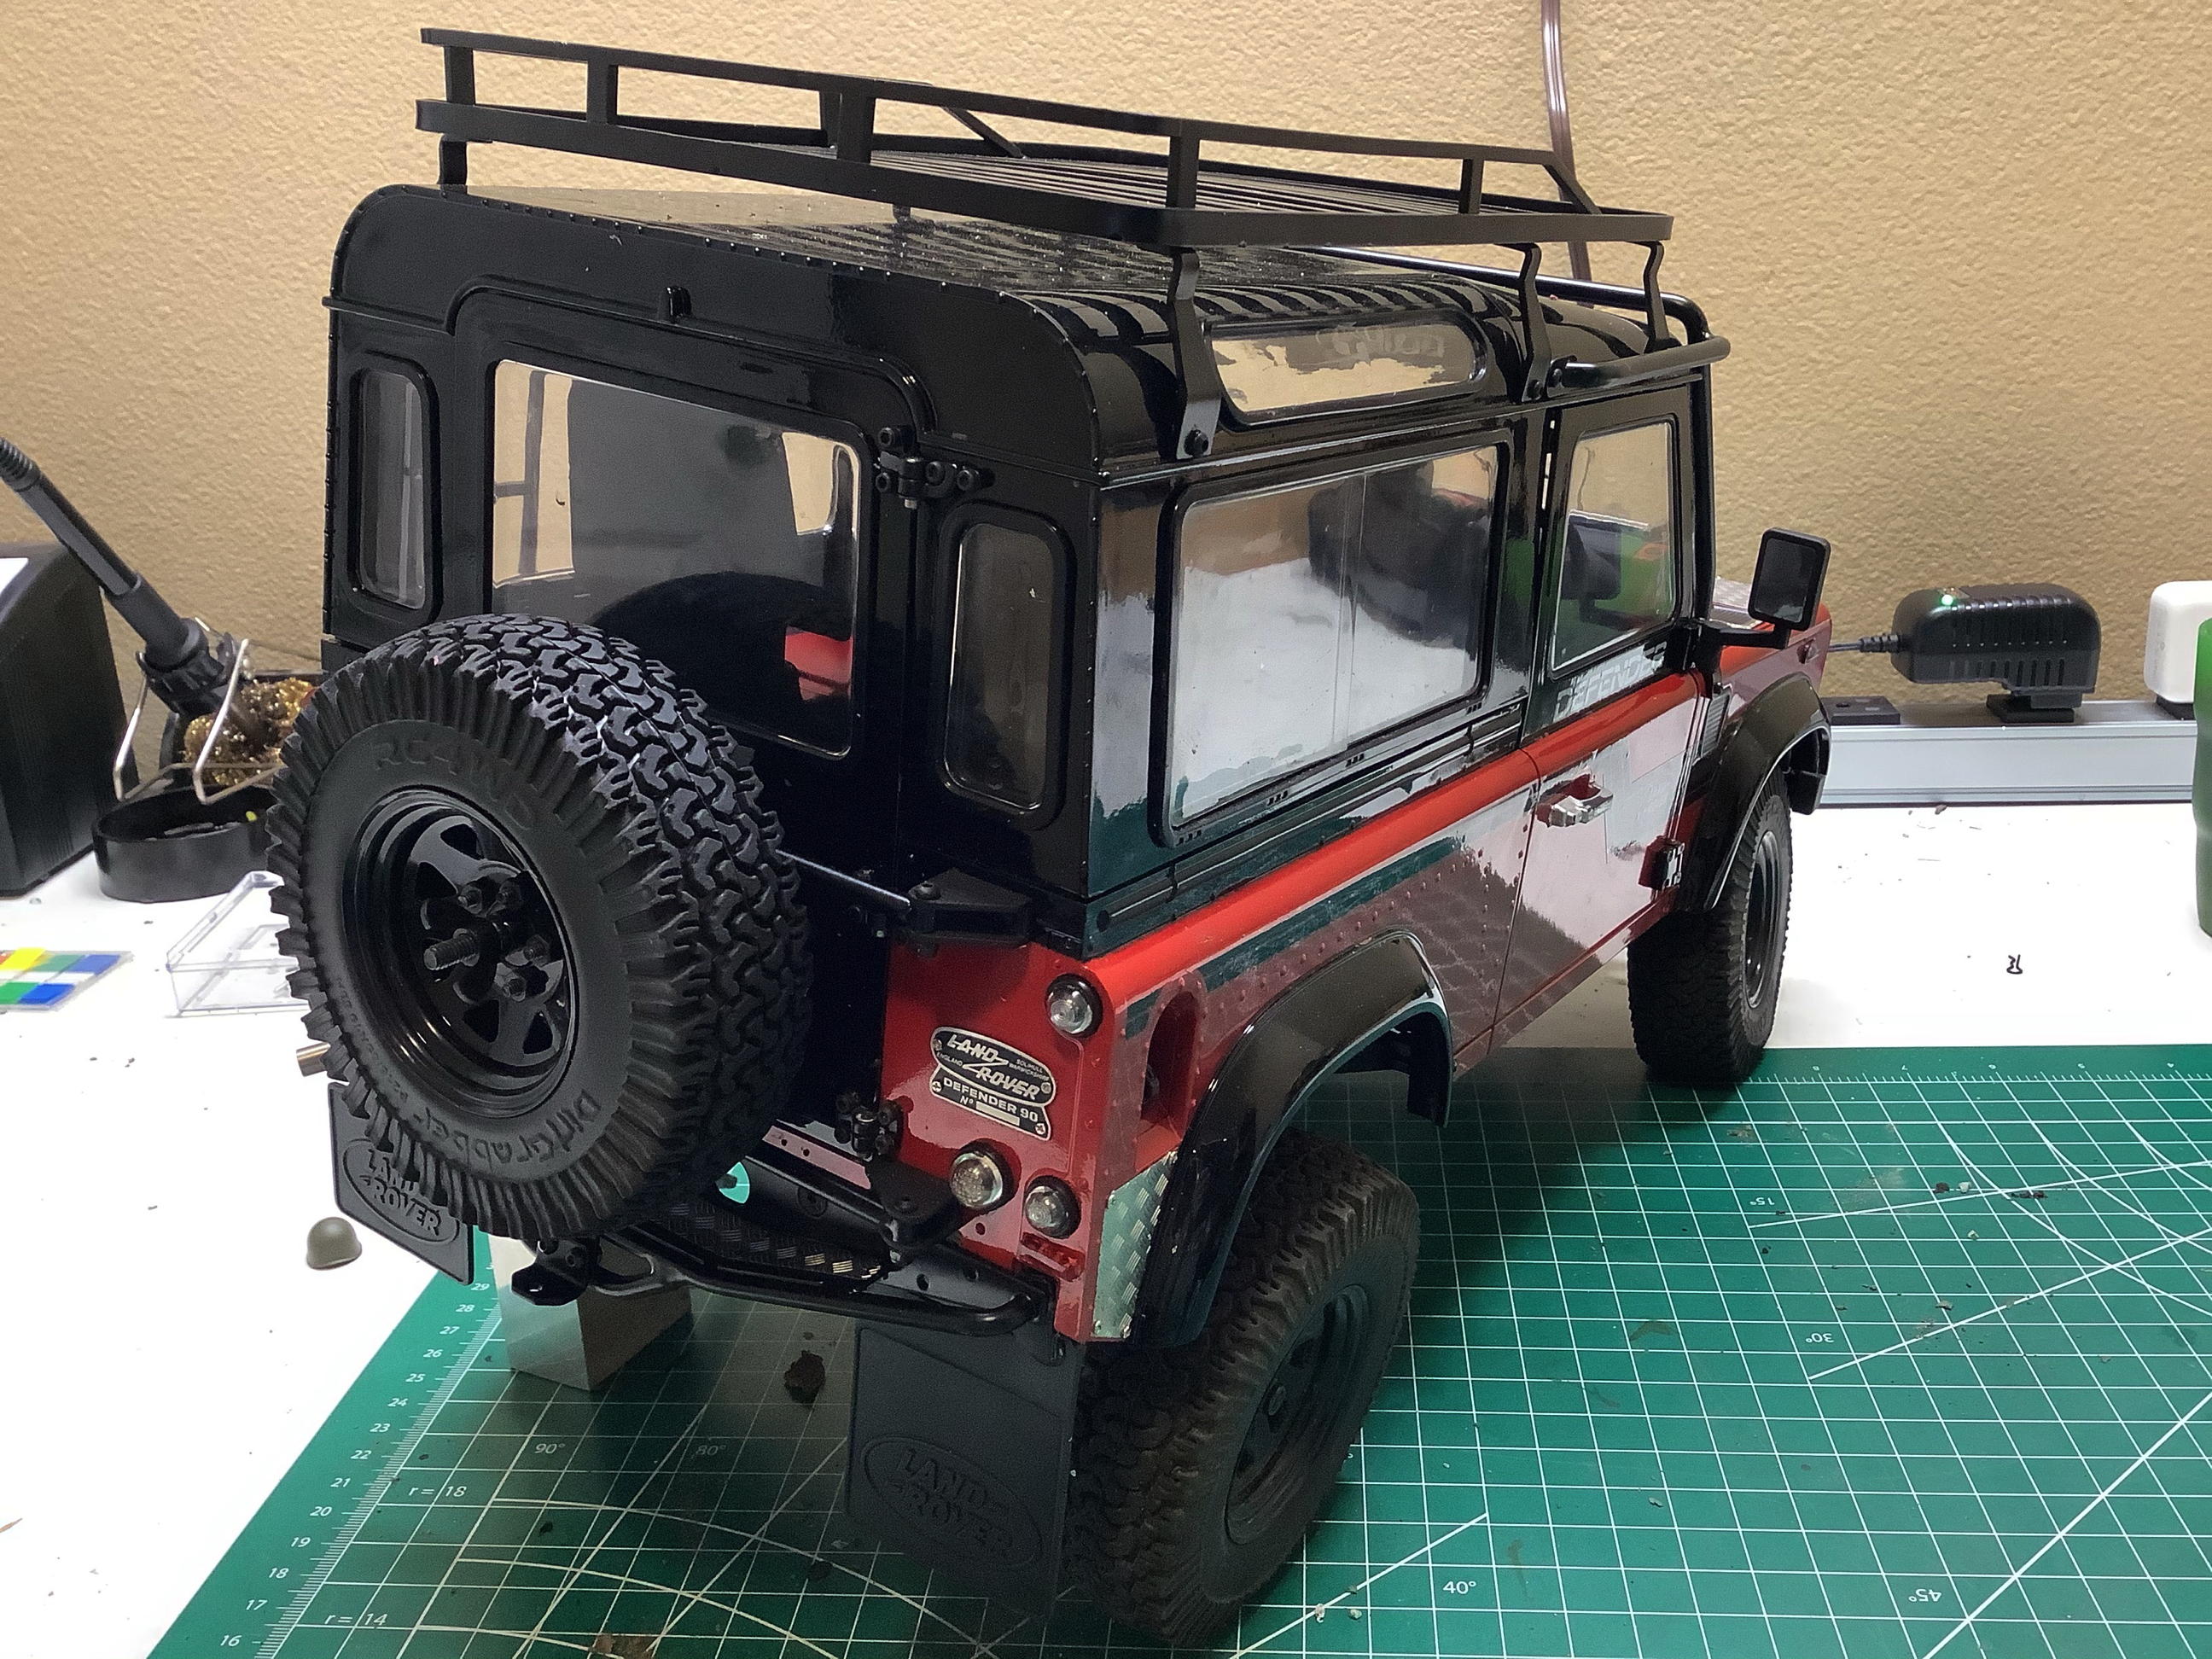
I replaced the solid metal rear bumper (which was actually very
nice), with this tube bumper as shown. The tube bumper not only
looks better with the diamond plate accents but also hides the tops of
the mud flaps better. There are no good mechanical mounting points
though, so I had to bond the mud flaps to the bumper. note that
the original bumper had tabs which interlocked with the body, but this
new bumper loses that feature which makes the body trickier to install.
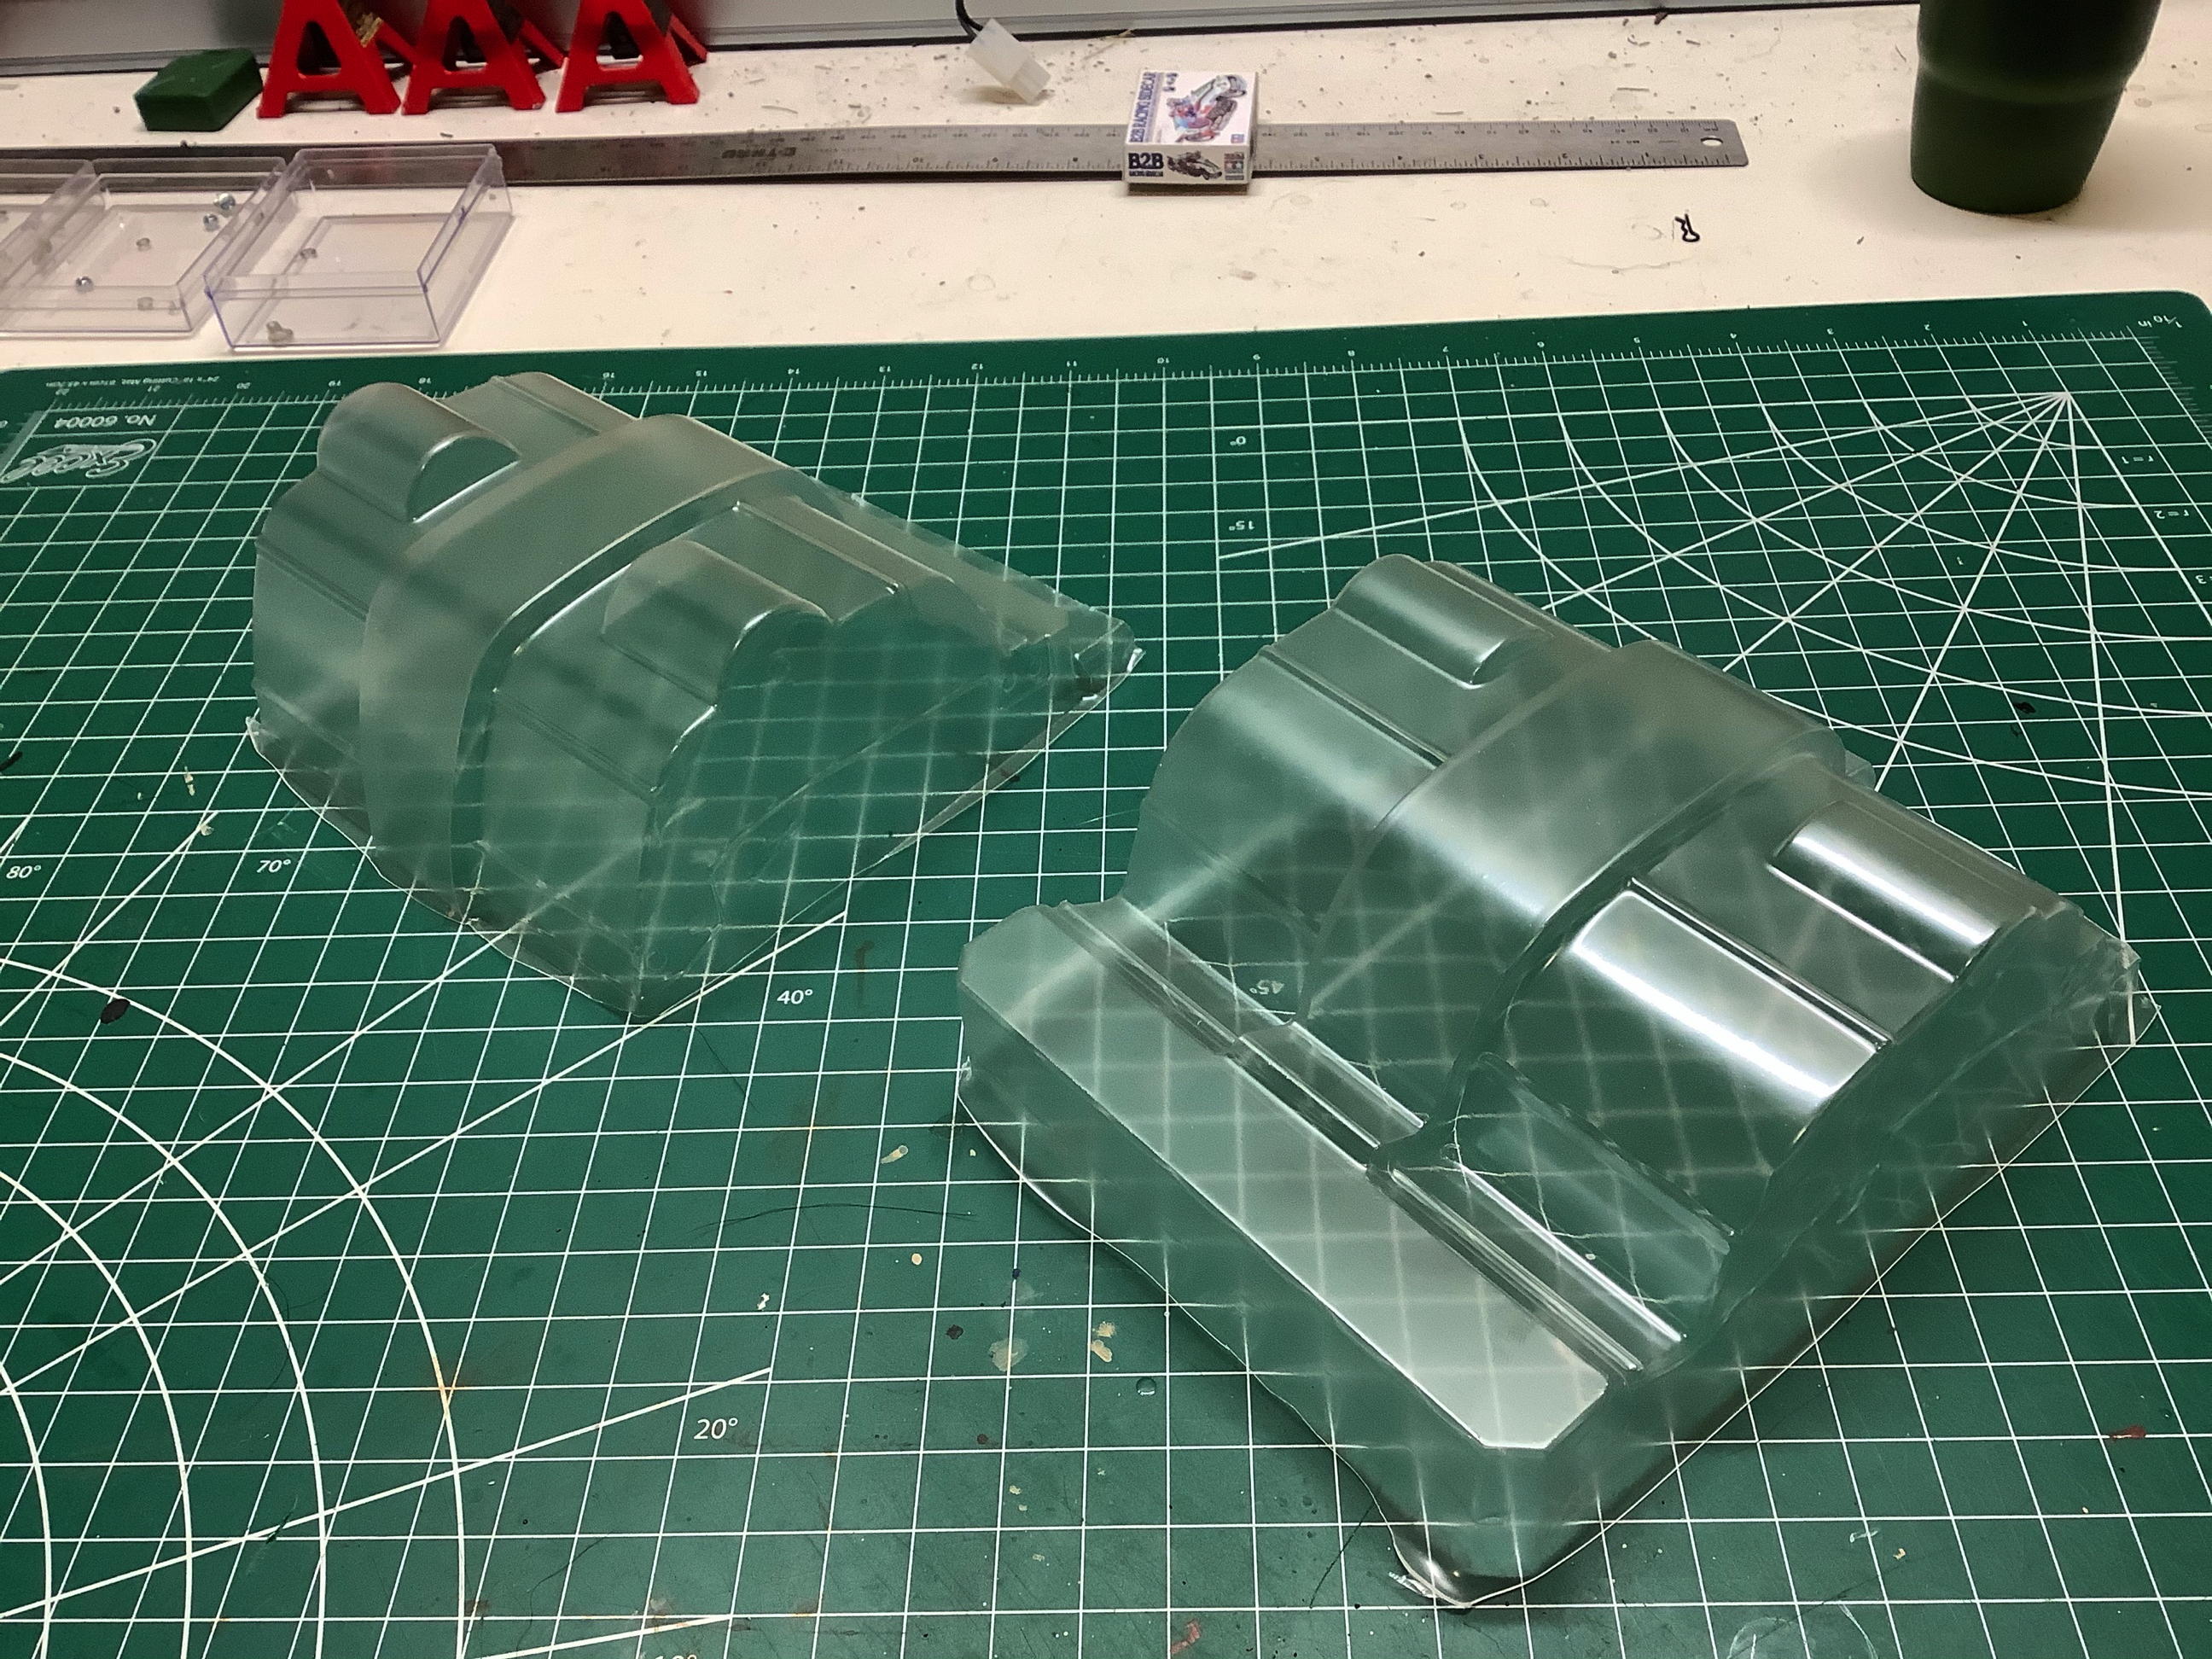
I really think having inner fenders adds a lot to the scale appearance
of a truck. Molded plastic variants look best, but these
polycarbonate versions are still better than nothing. They are
shown installed on the right. I sprayed flat clear over the black
to make them look a little less fake. They are incredibly thin and fragile though so I don't expect them to last long.
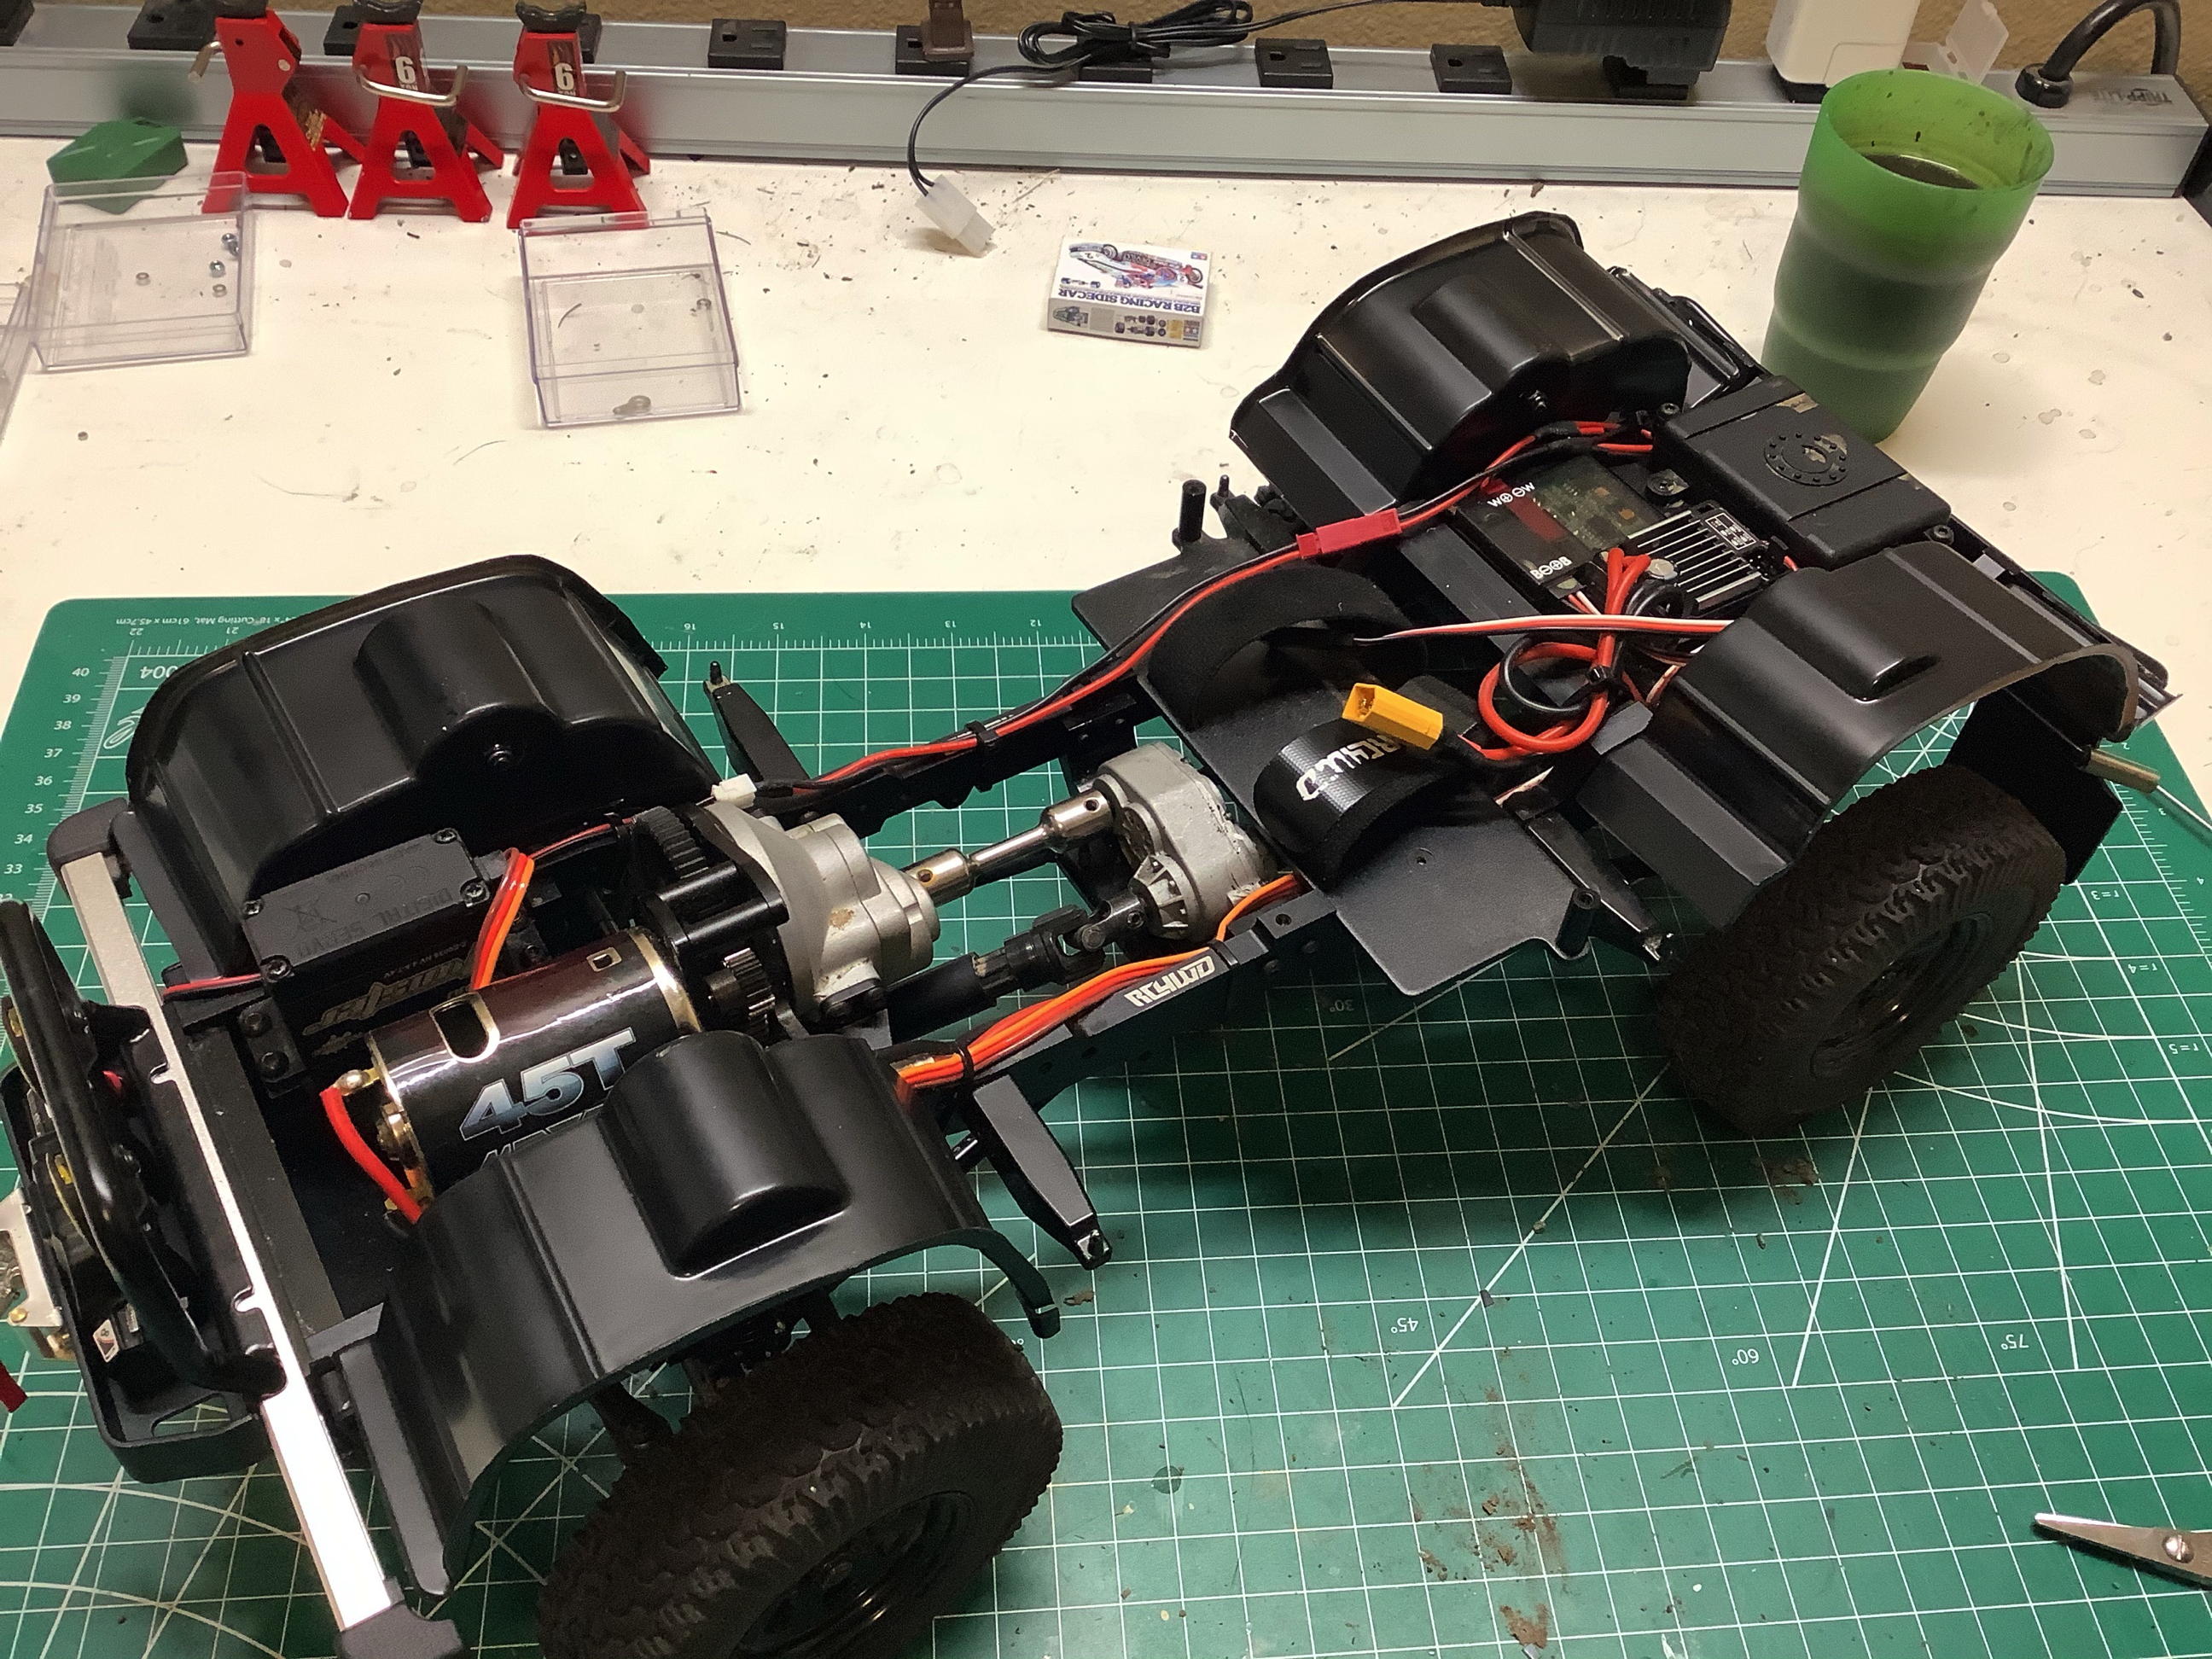
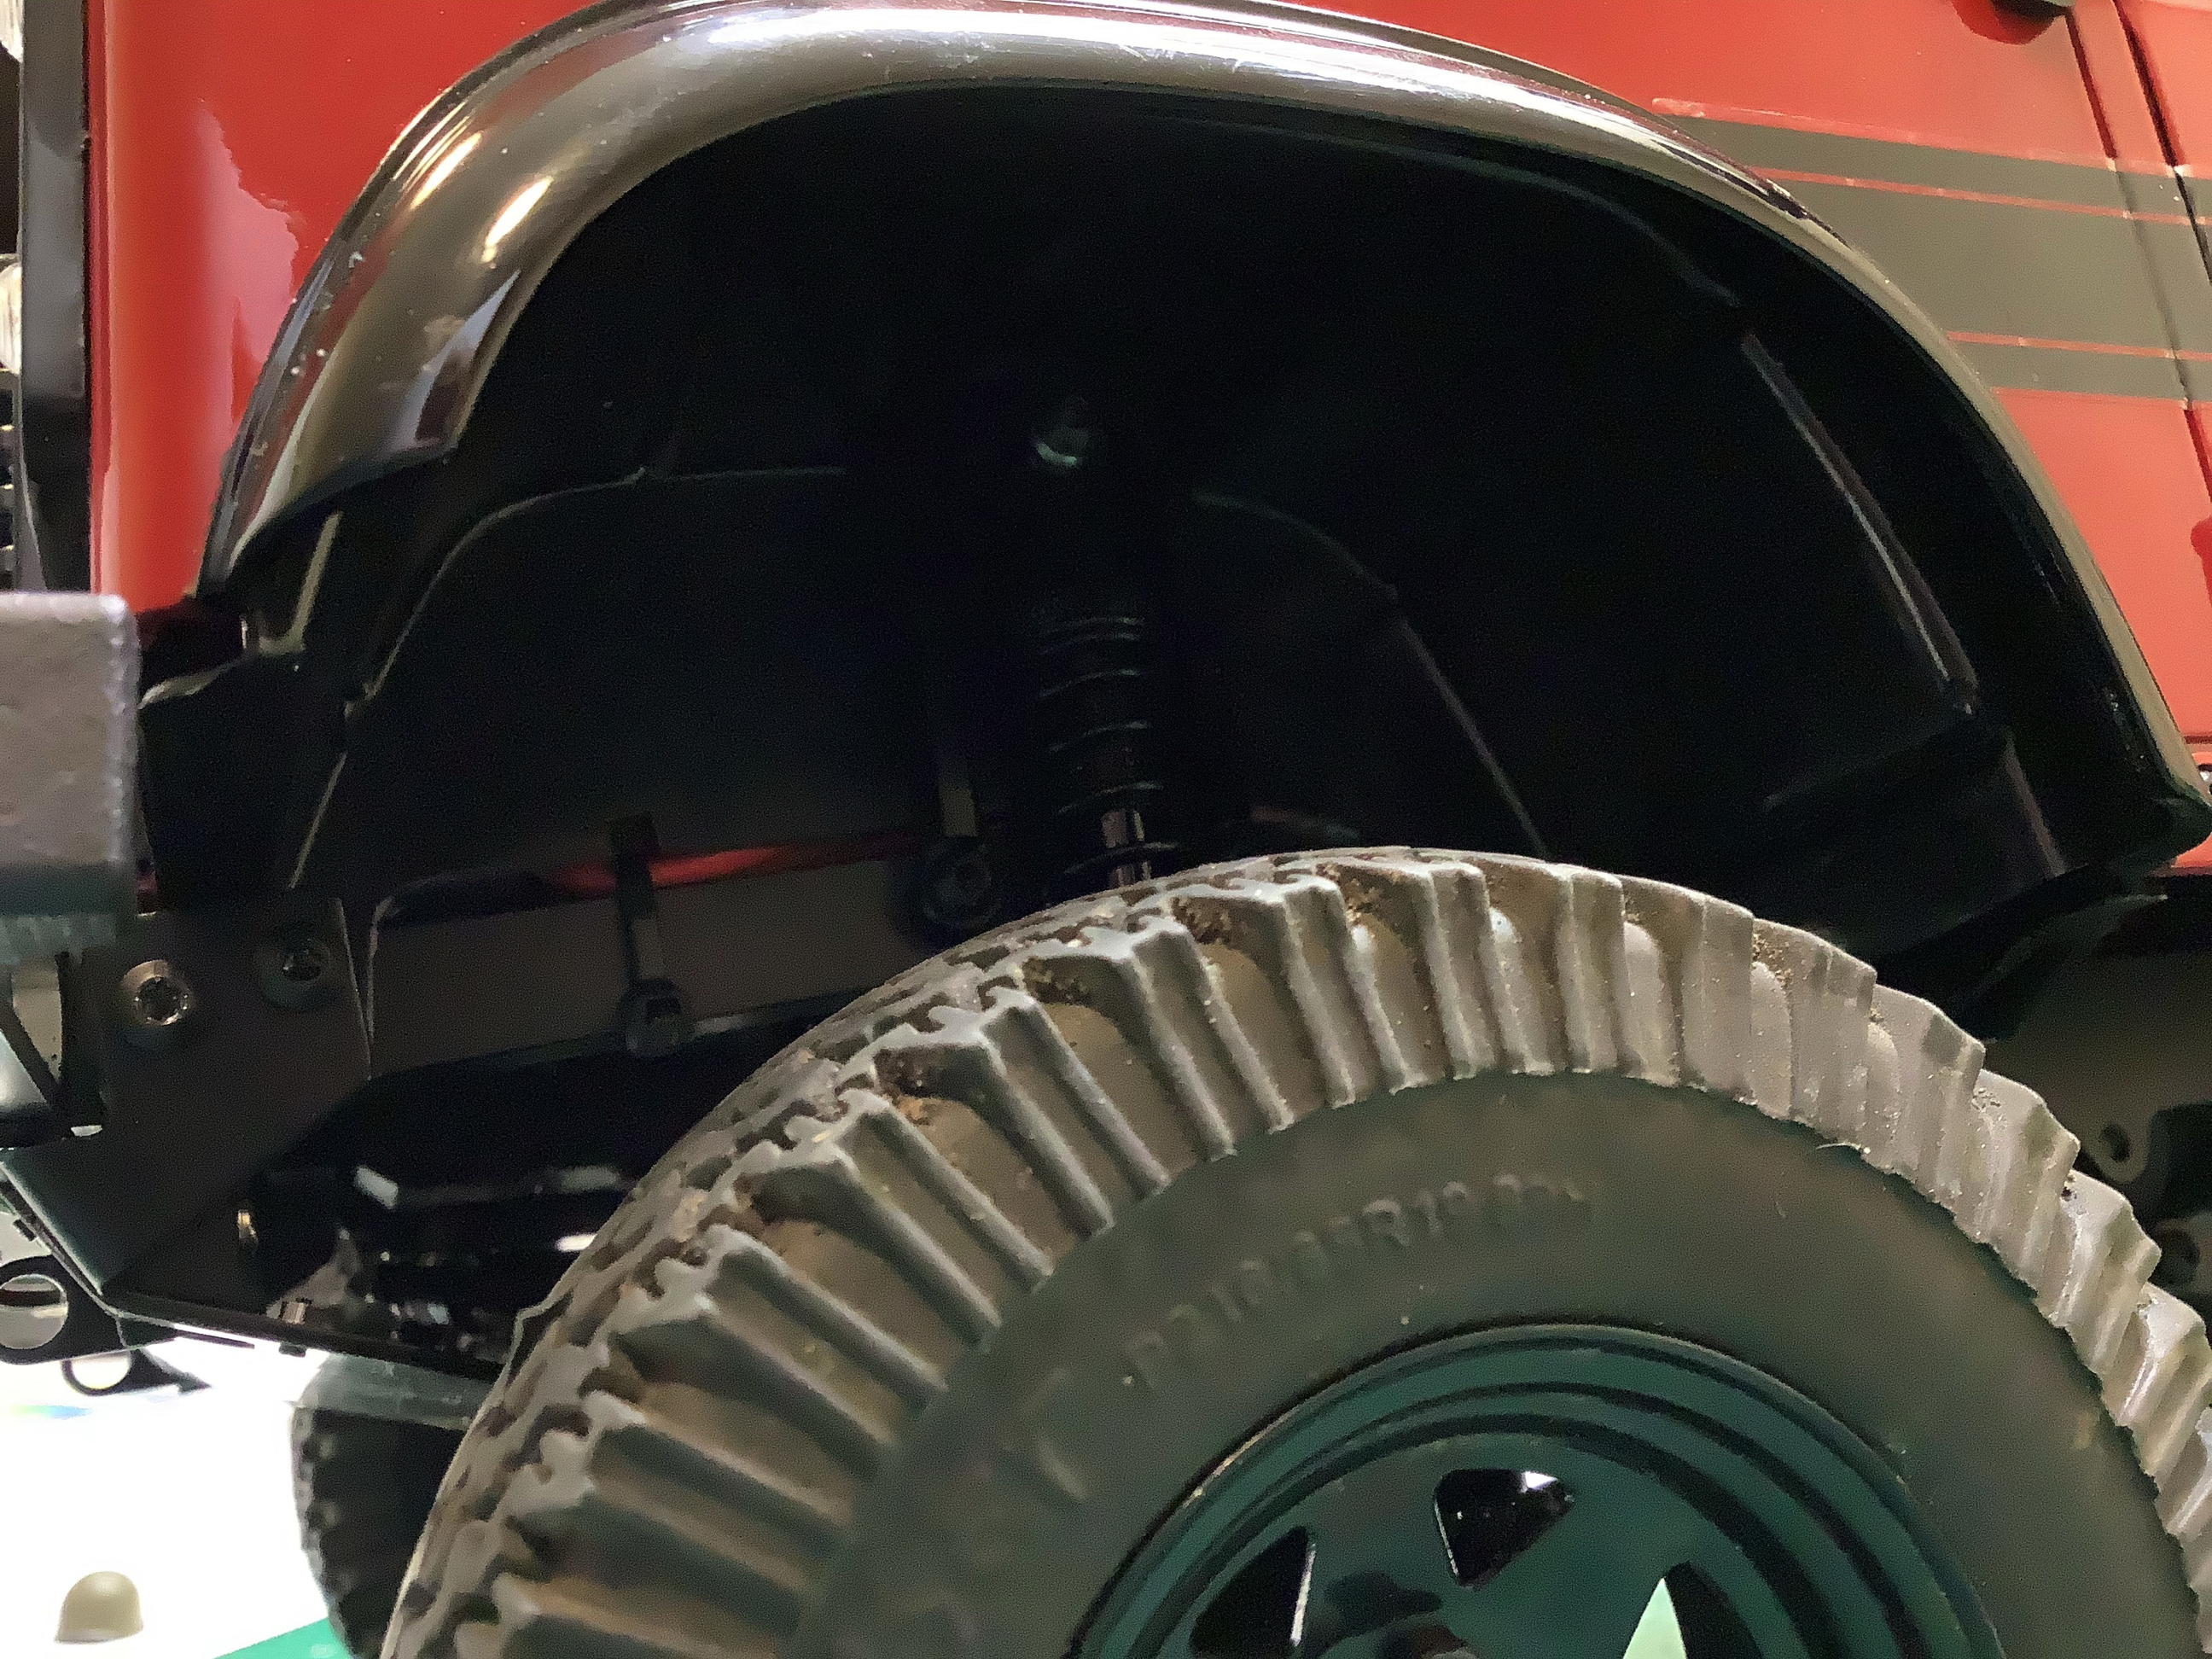
Here are a couple views of the wheel wells with the inner fenders
installed. They do a very good job of hiding the internals, and
will probably help keep mud out as well.
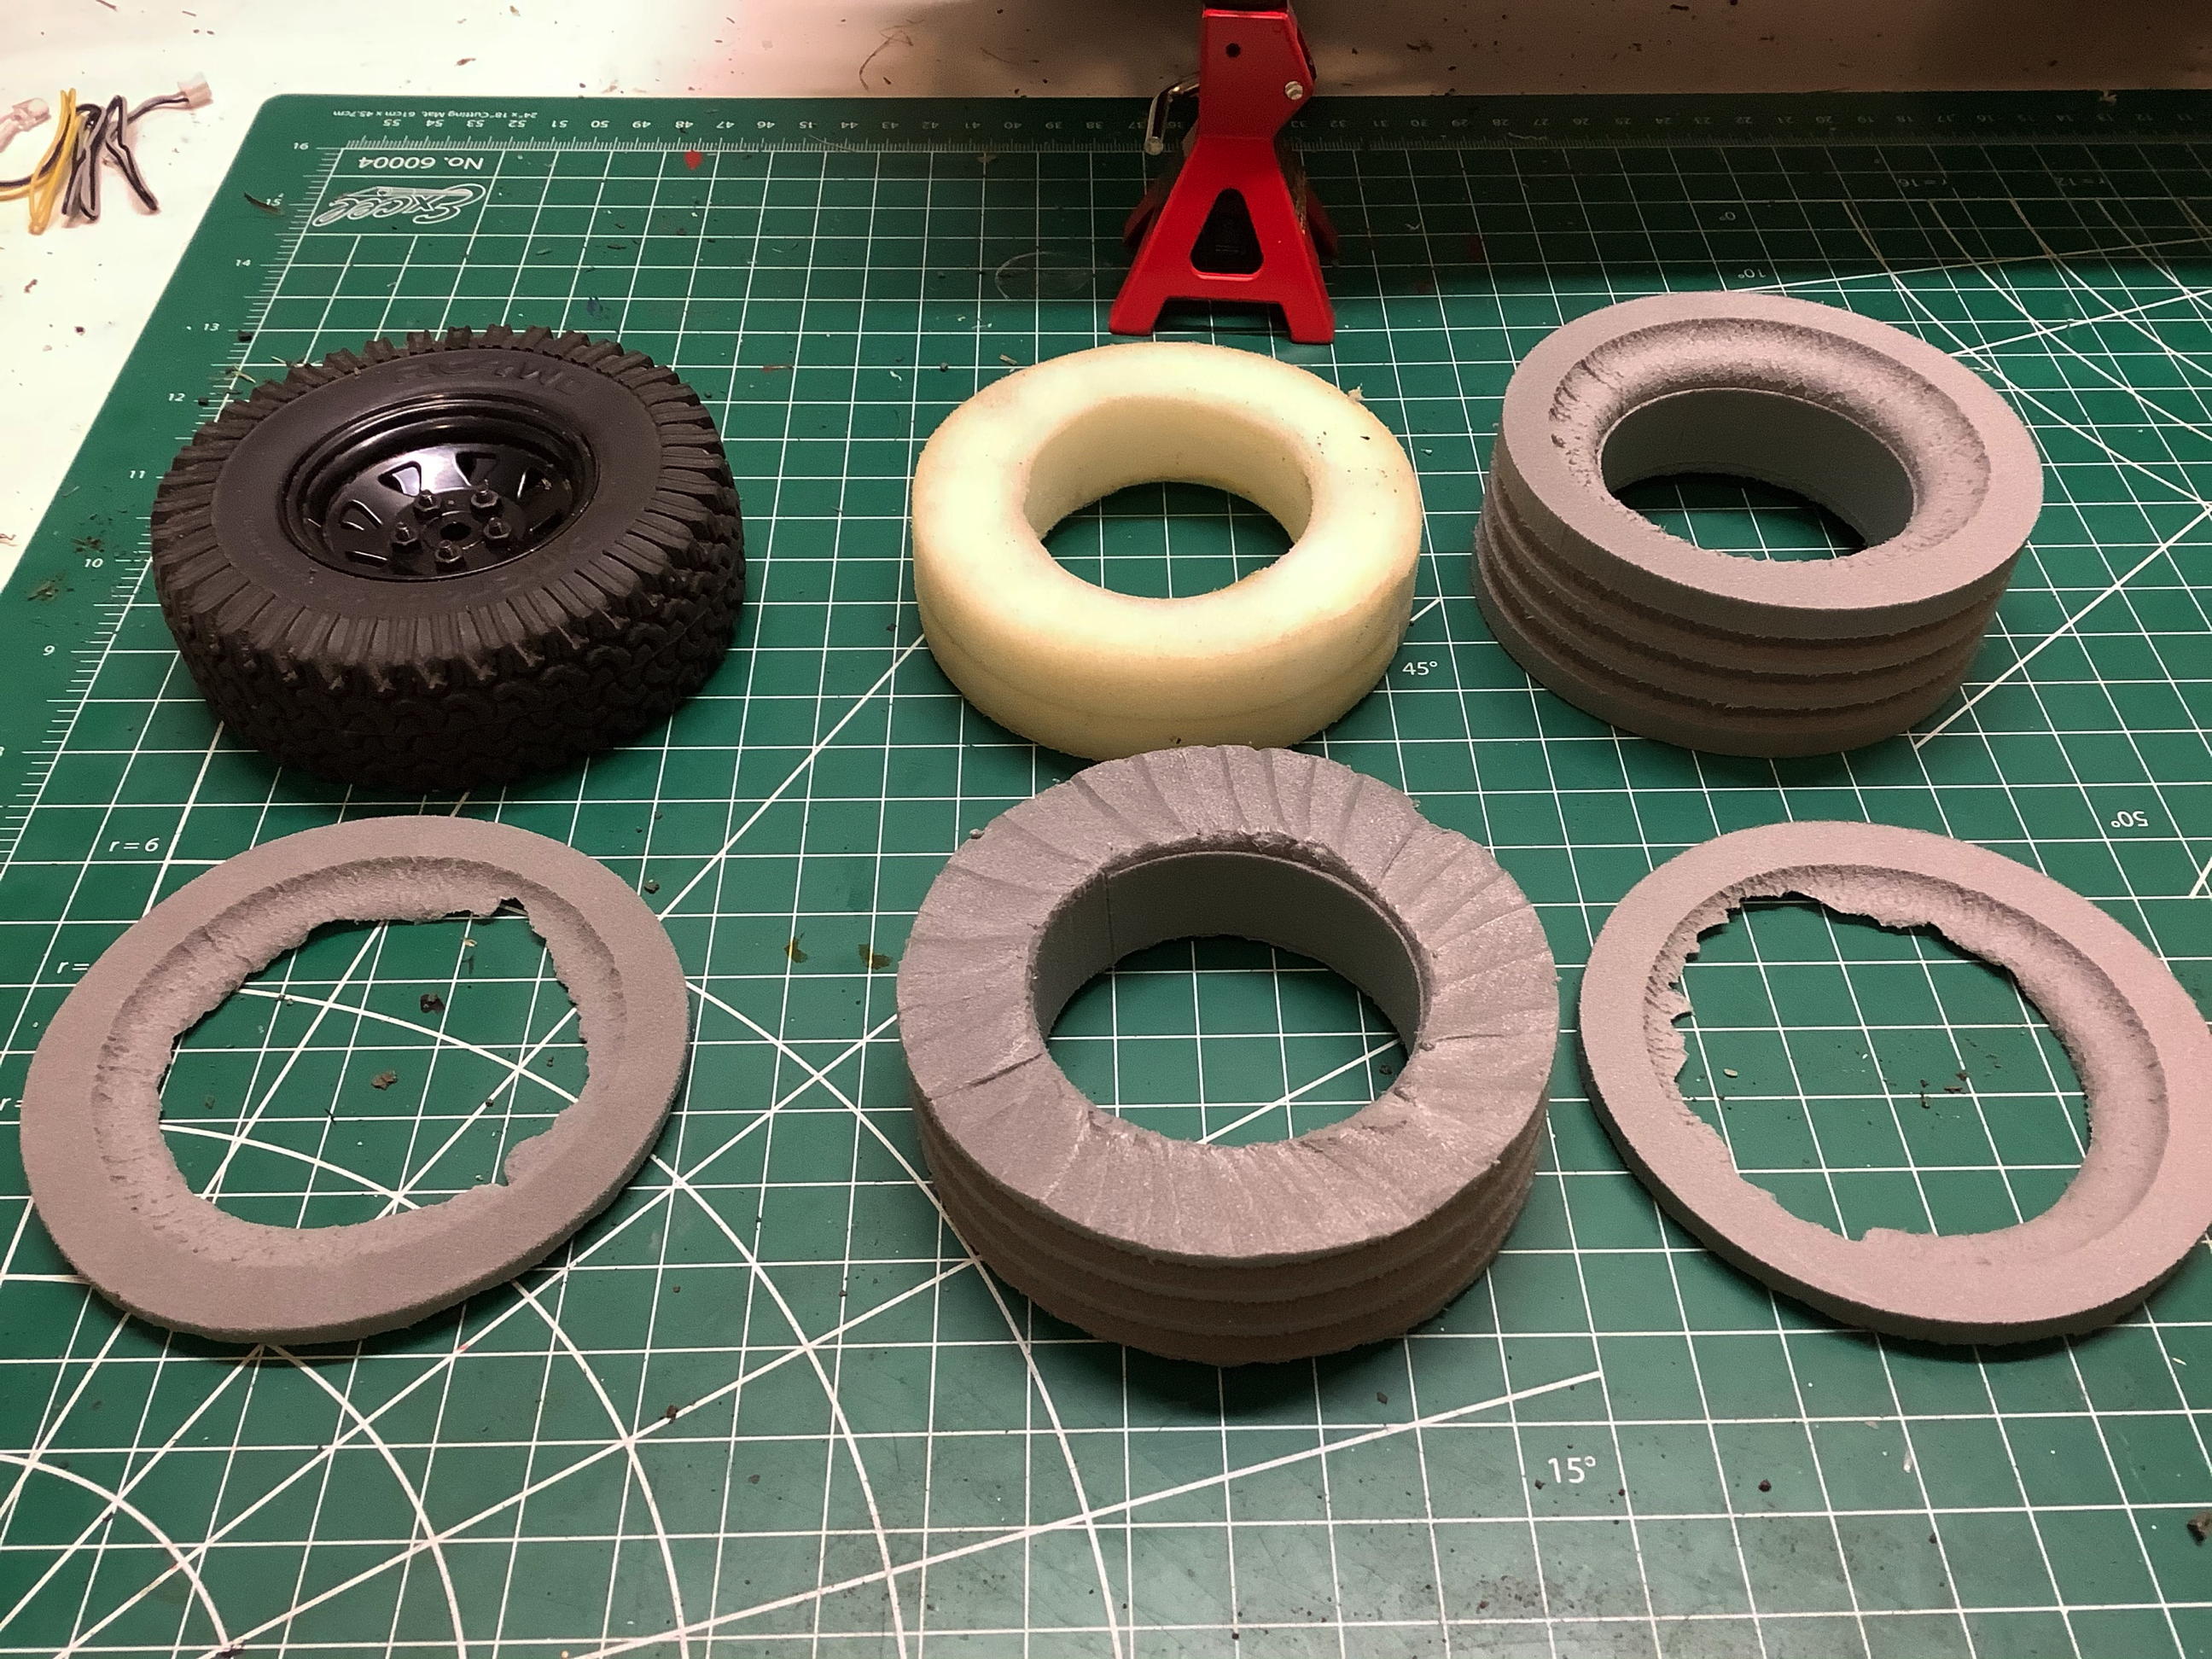
With all of the extra weight I added the original tire foams were not
really doing their job. There was way too much deformation. I
got some single stage closed cell foams from Crawler Innovations.
The diameter was right but they were too wide. On left top you
can see a tire, a white original foam, and a gray new foam. On the
bottom you can see the crude trim I did to remove a ring from either
side and make the foam fit. It worked fine. On the right you
can see how well the tire is supported now.
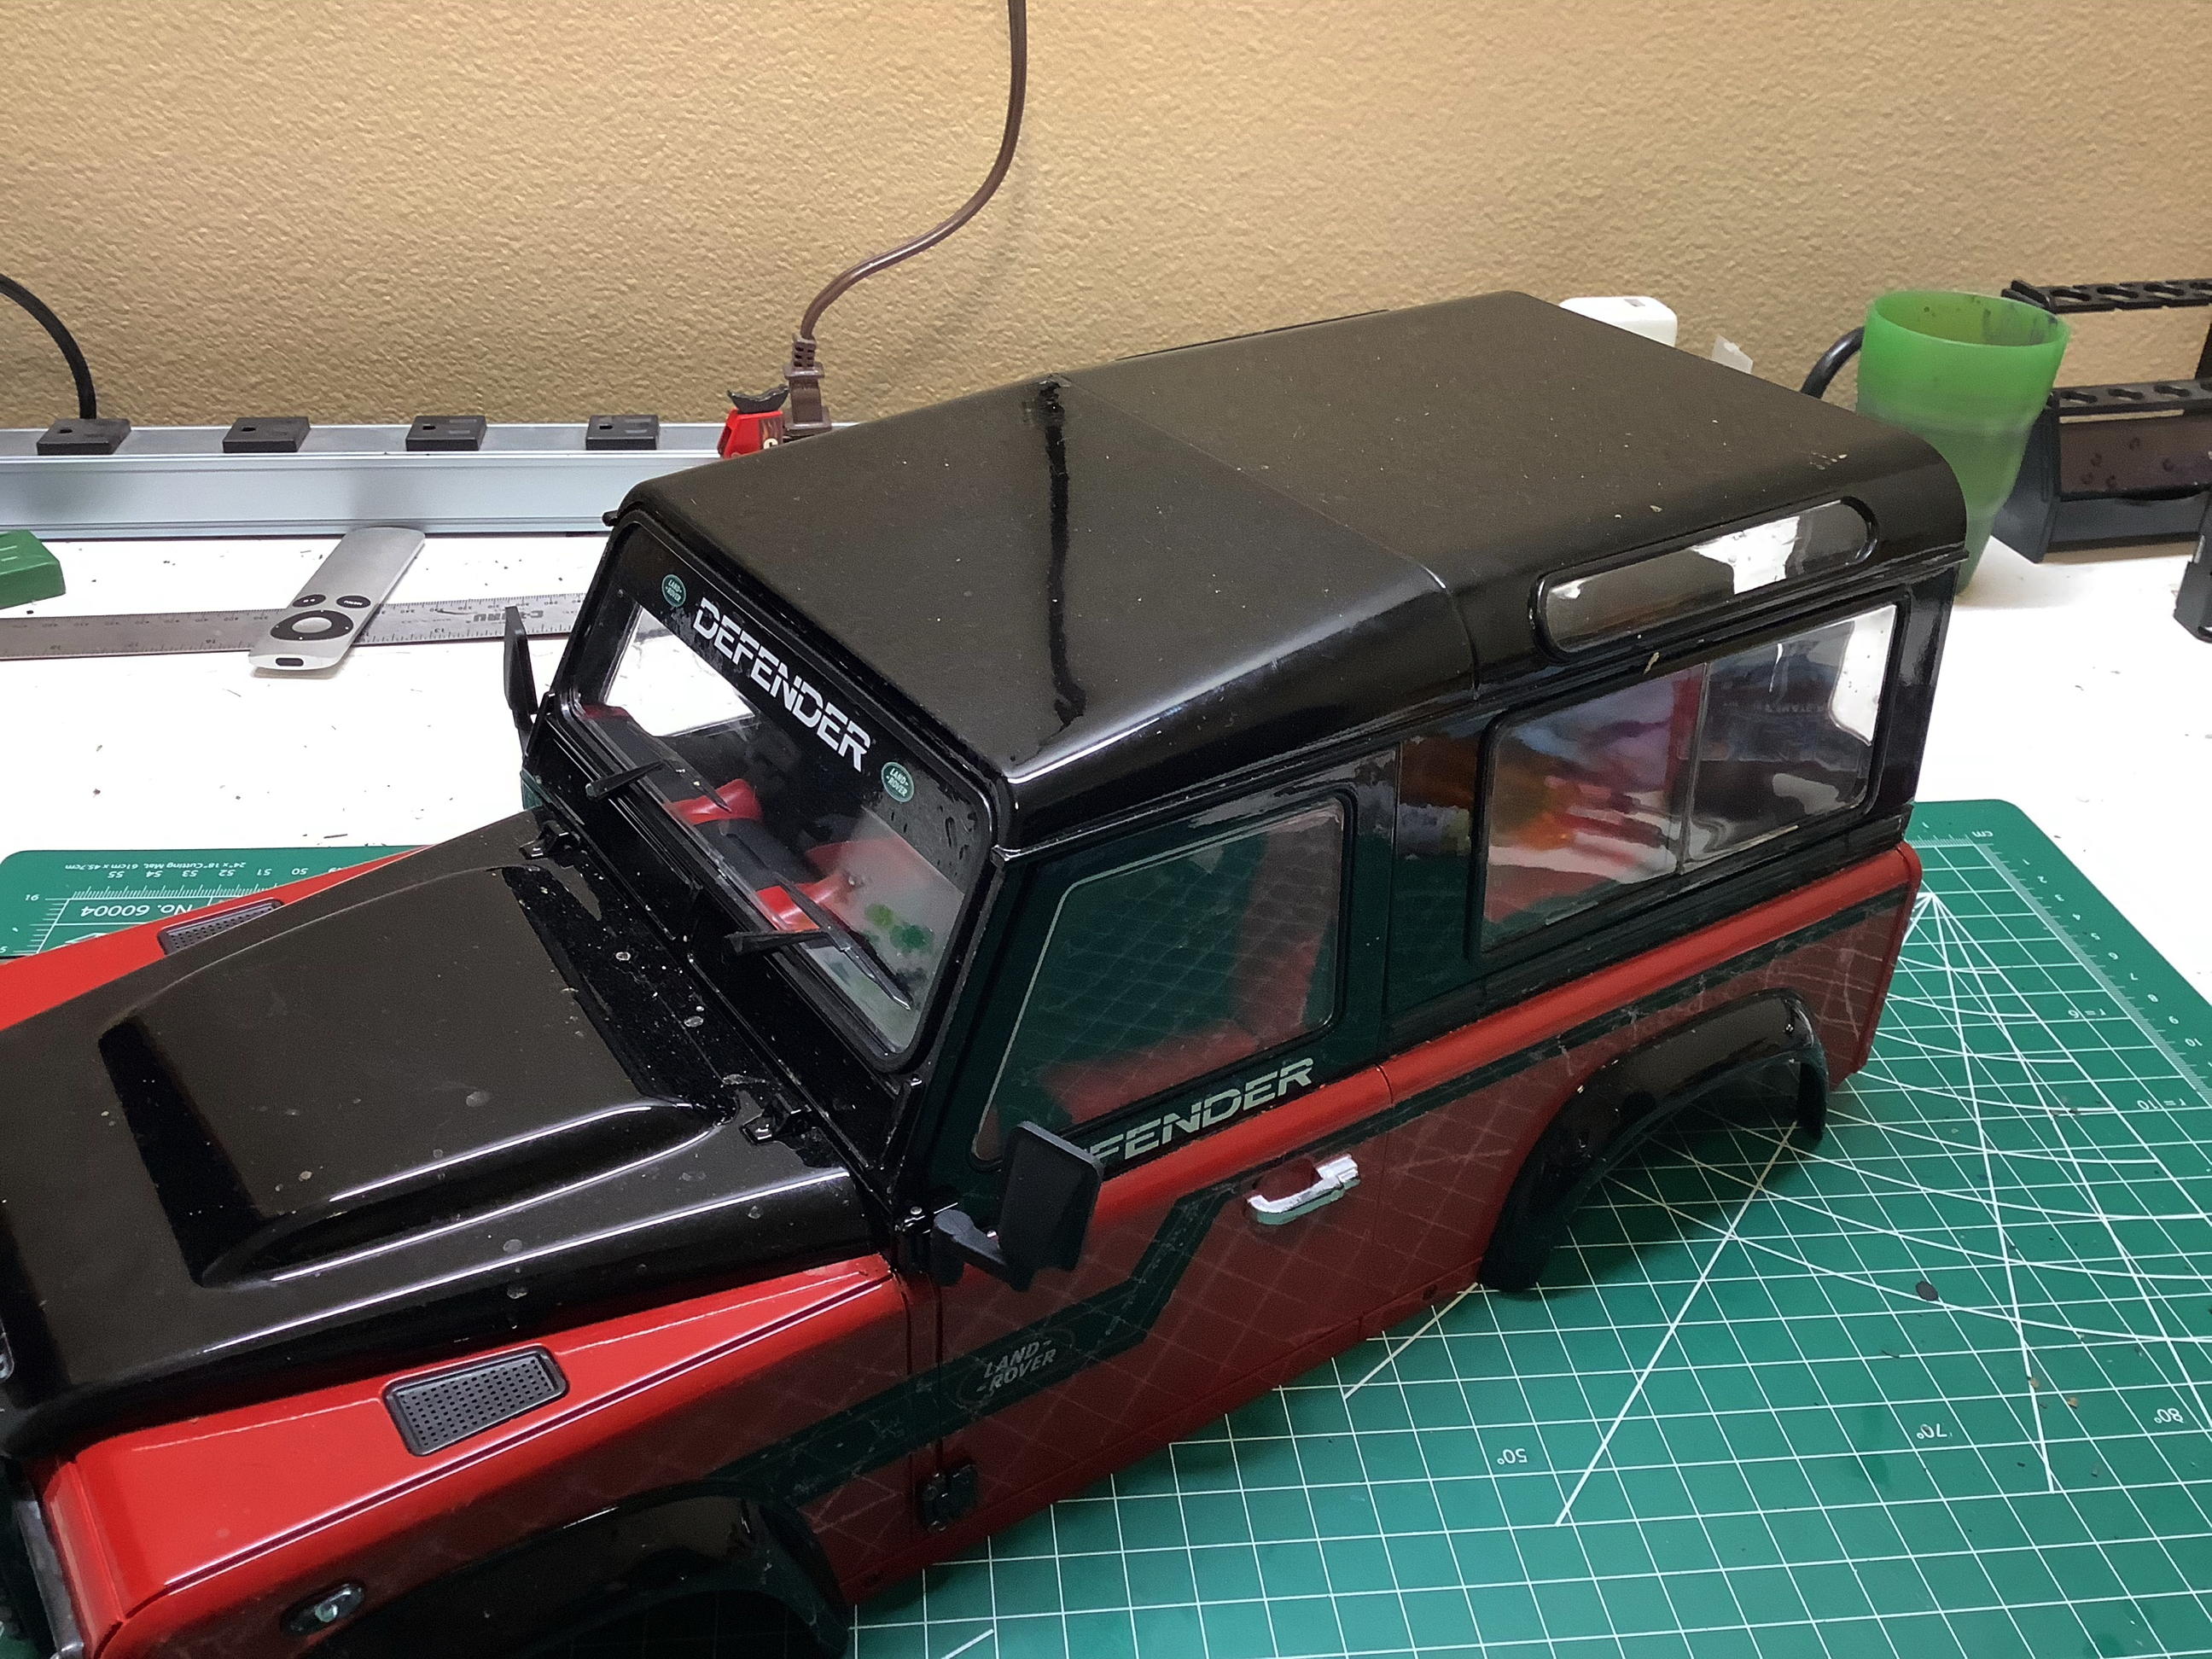
With the chassis done, let's move onto the body. Clearly a body
like this needs a light kit and luckily RC4WD has one made for this body
that is very inexpensive. It includes 16 lights and takes quite a
long time to install but looks great.
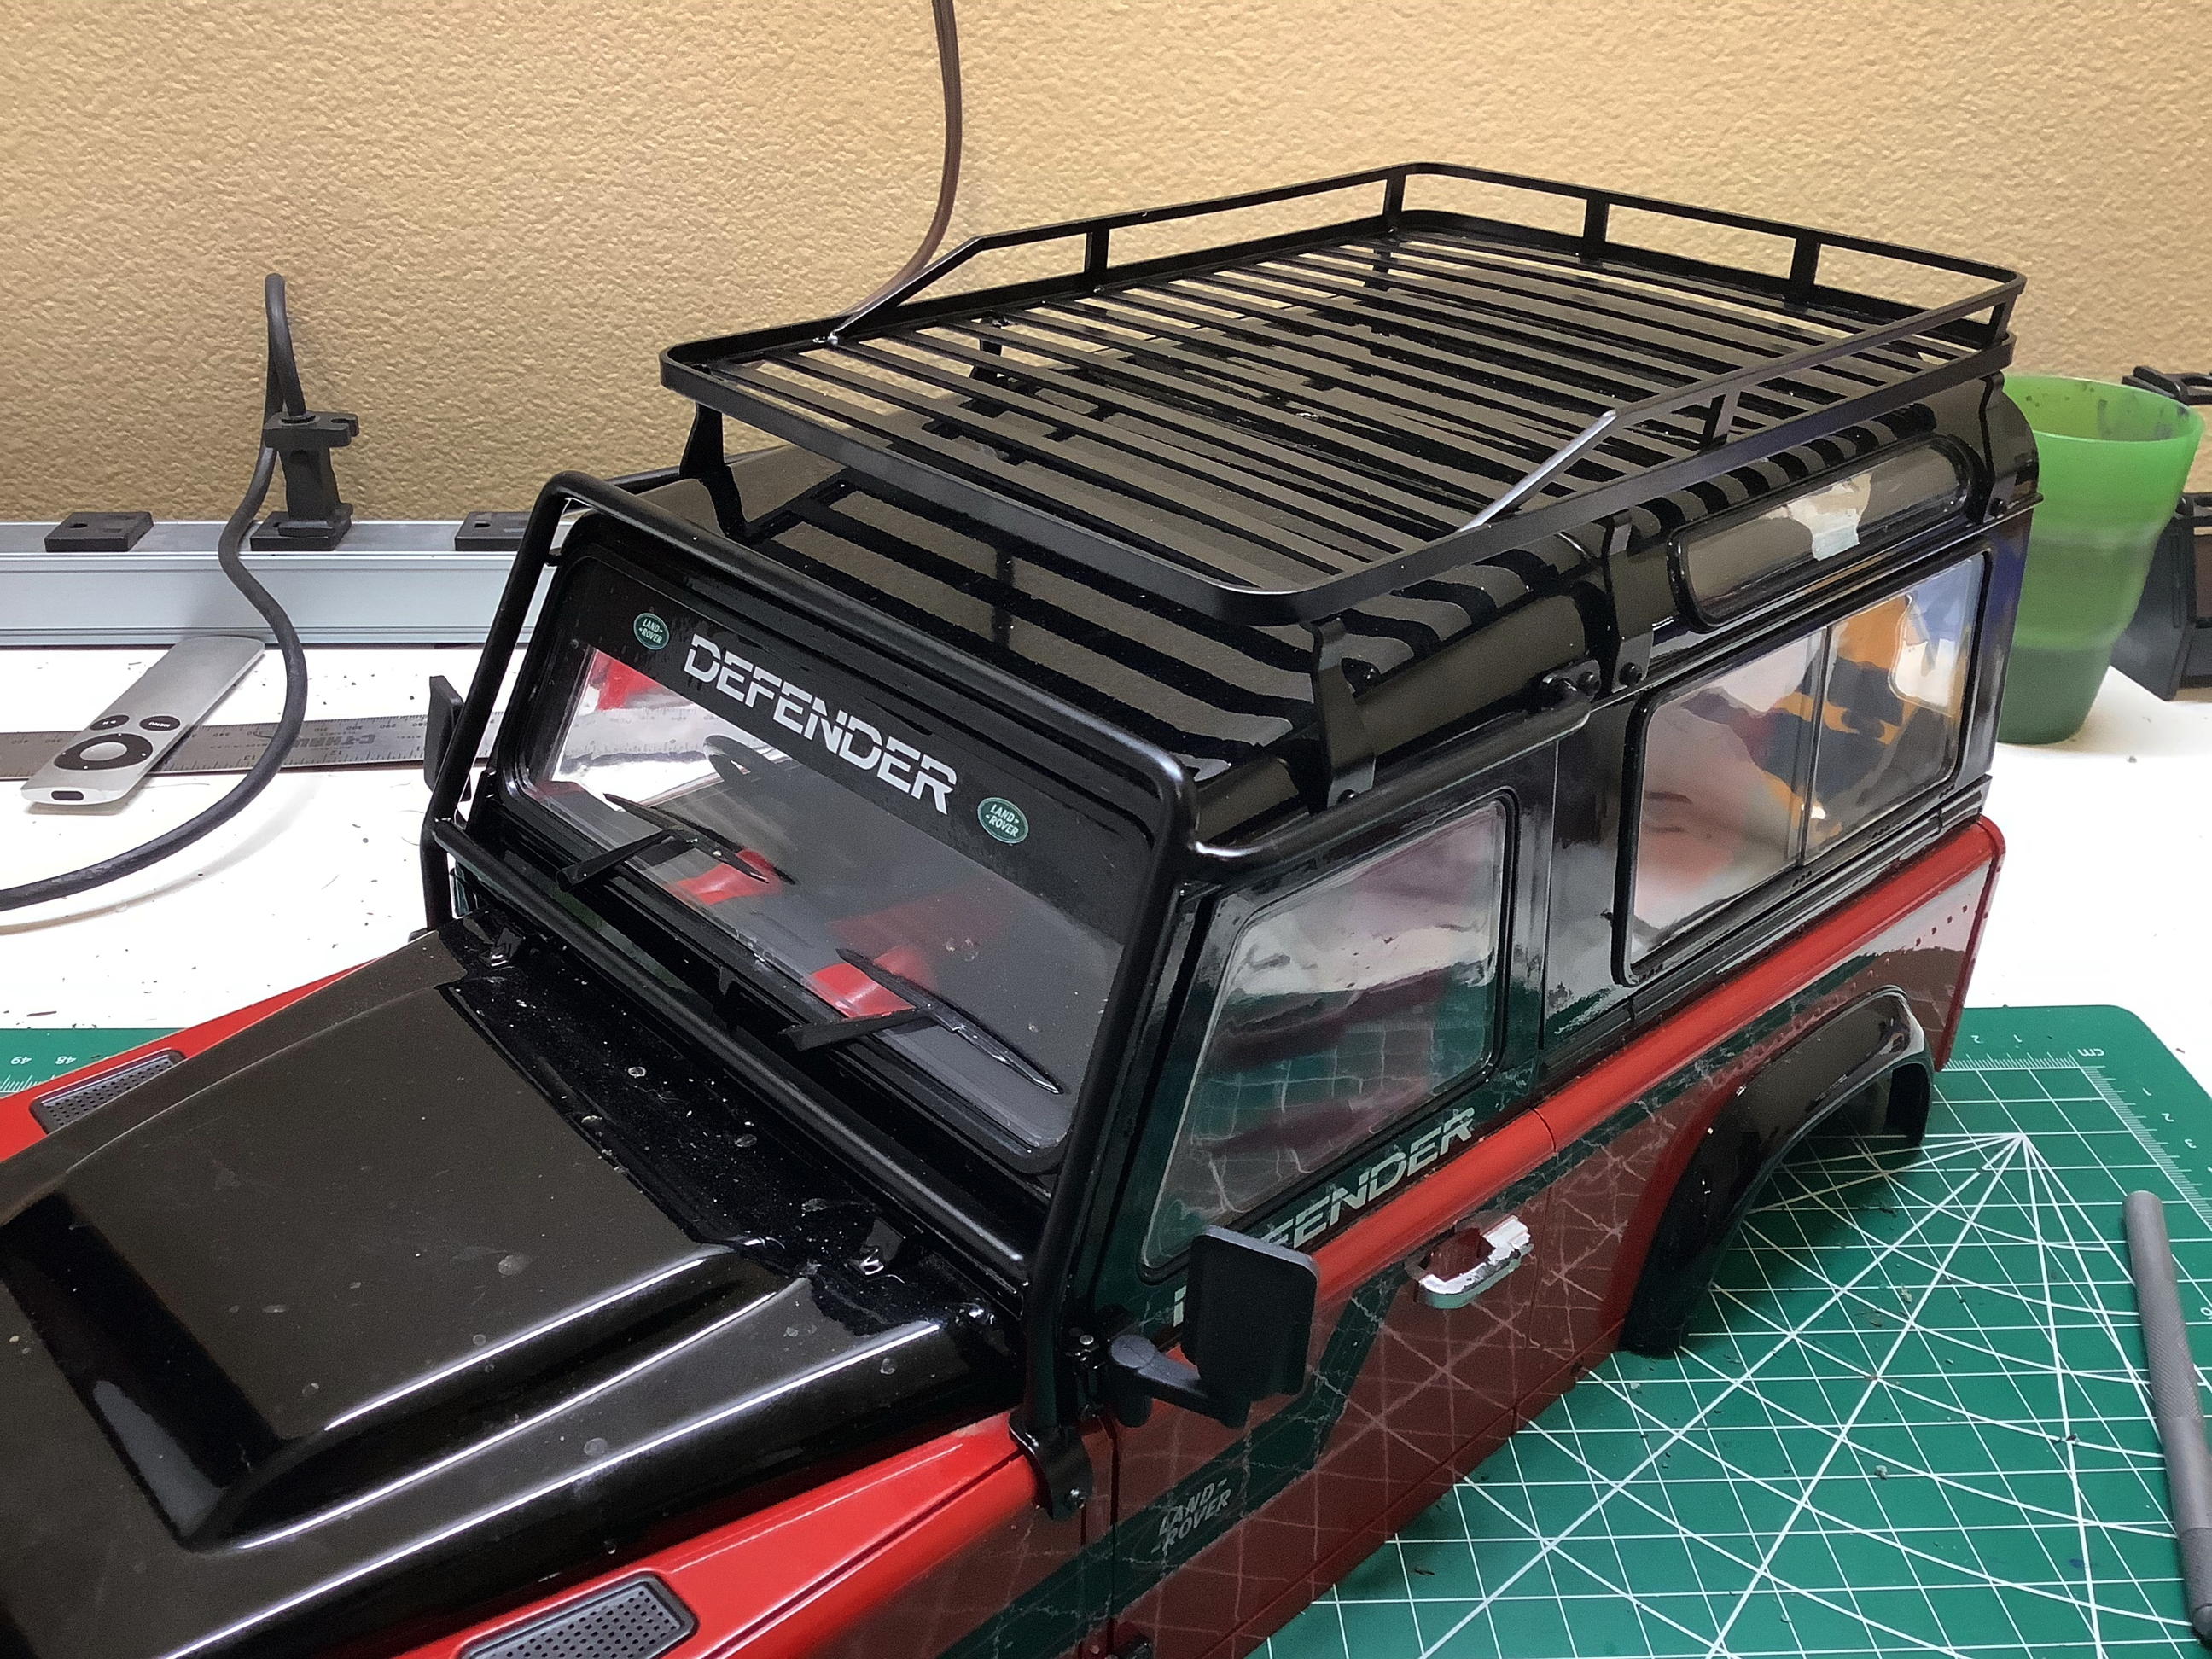
Next I put on a metal roof rack and a roll cage around the windshield
(look closely). More tiny holes to drill but at least in plastic
this time. Getting access to install the nuts on the backside of
each screw was difficult and took a long time. Putting all this
metal up high certainly raises the center of gravity and is probably a
net reduction in capability but it looks really good.
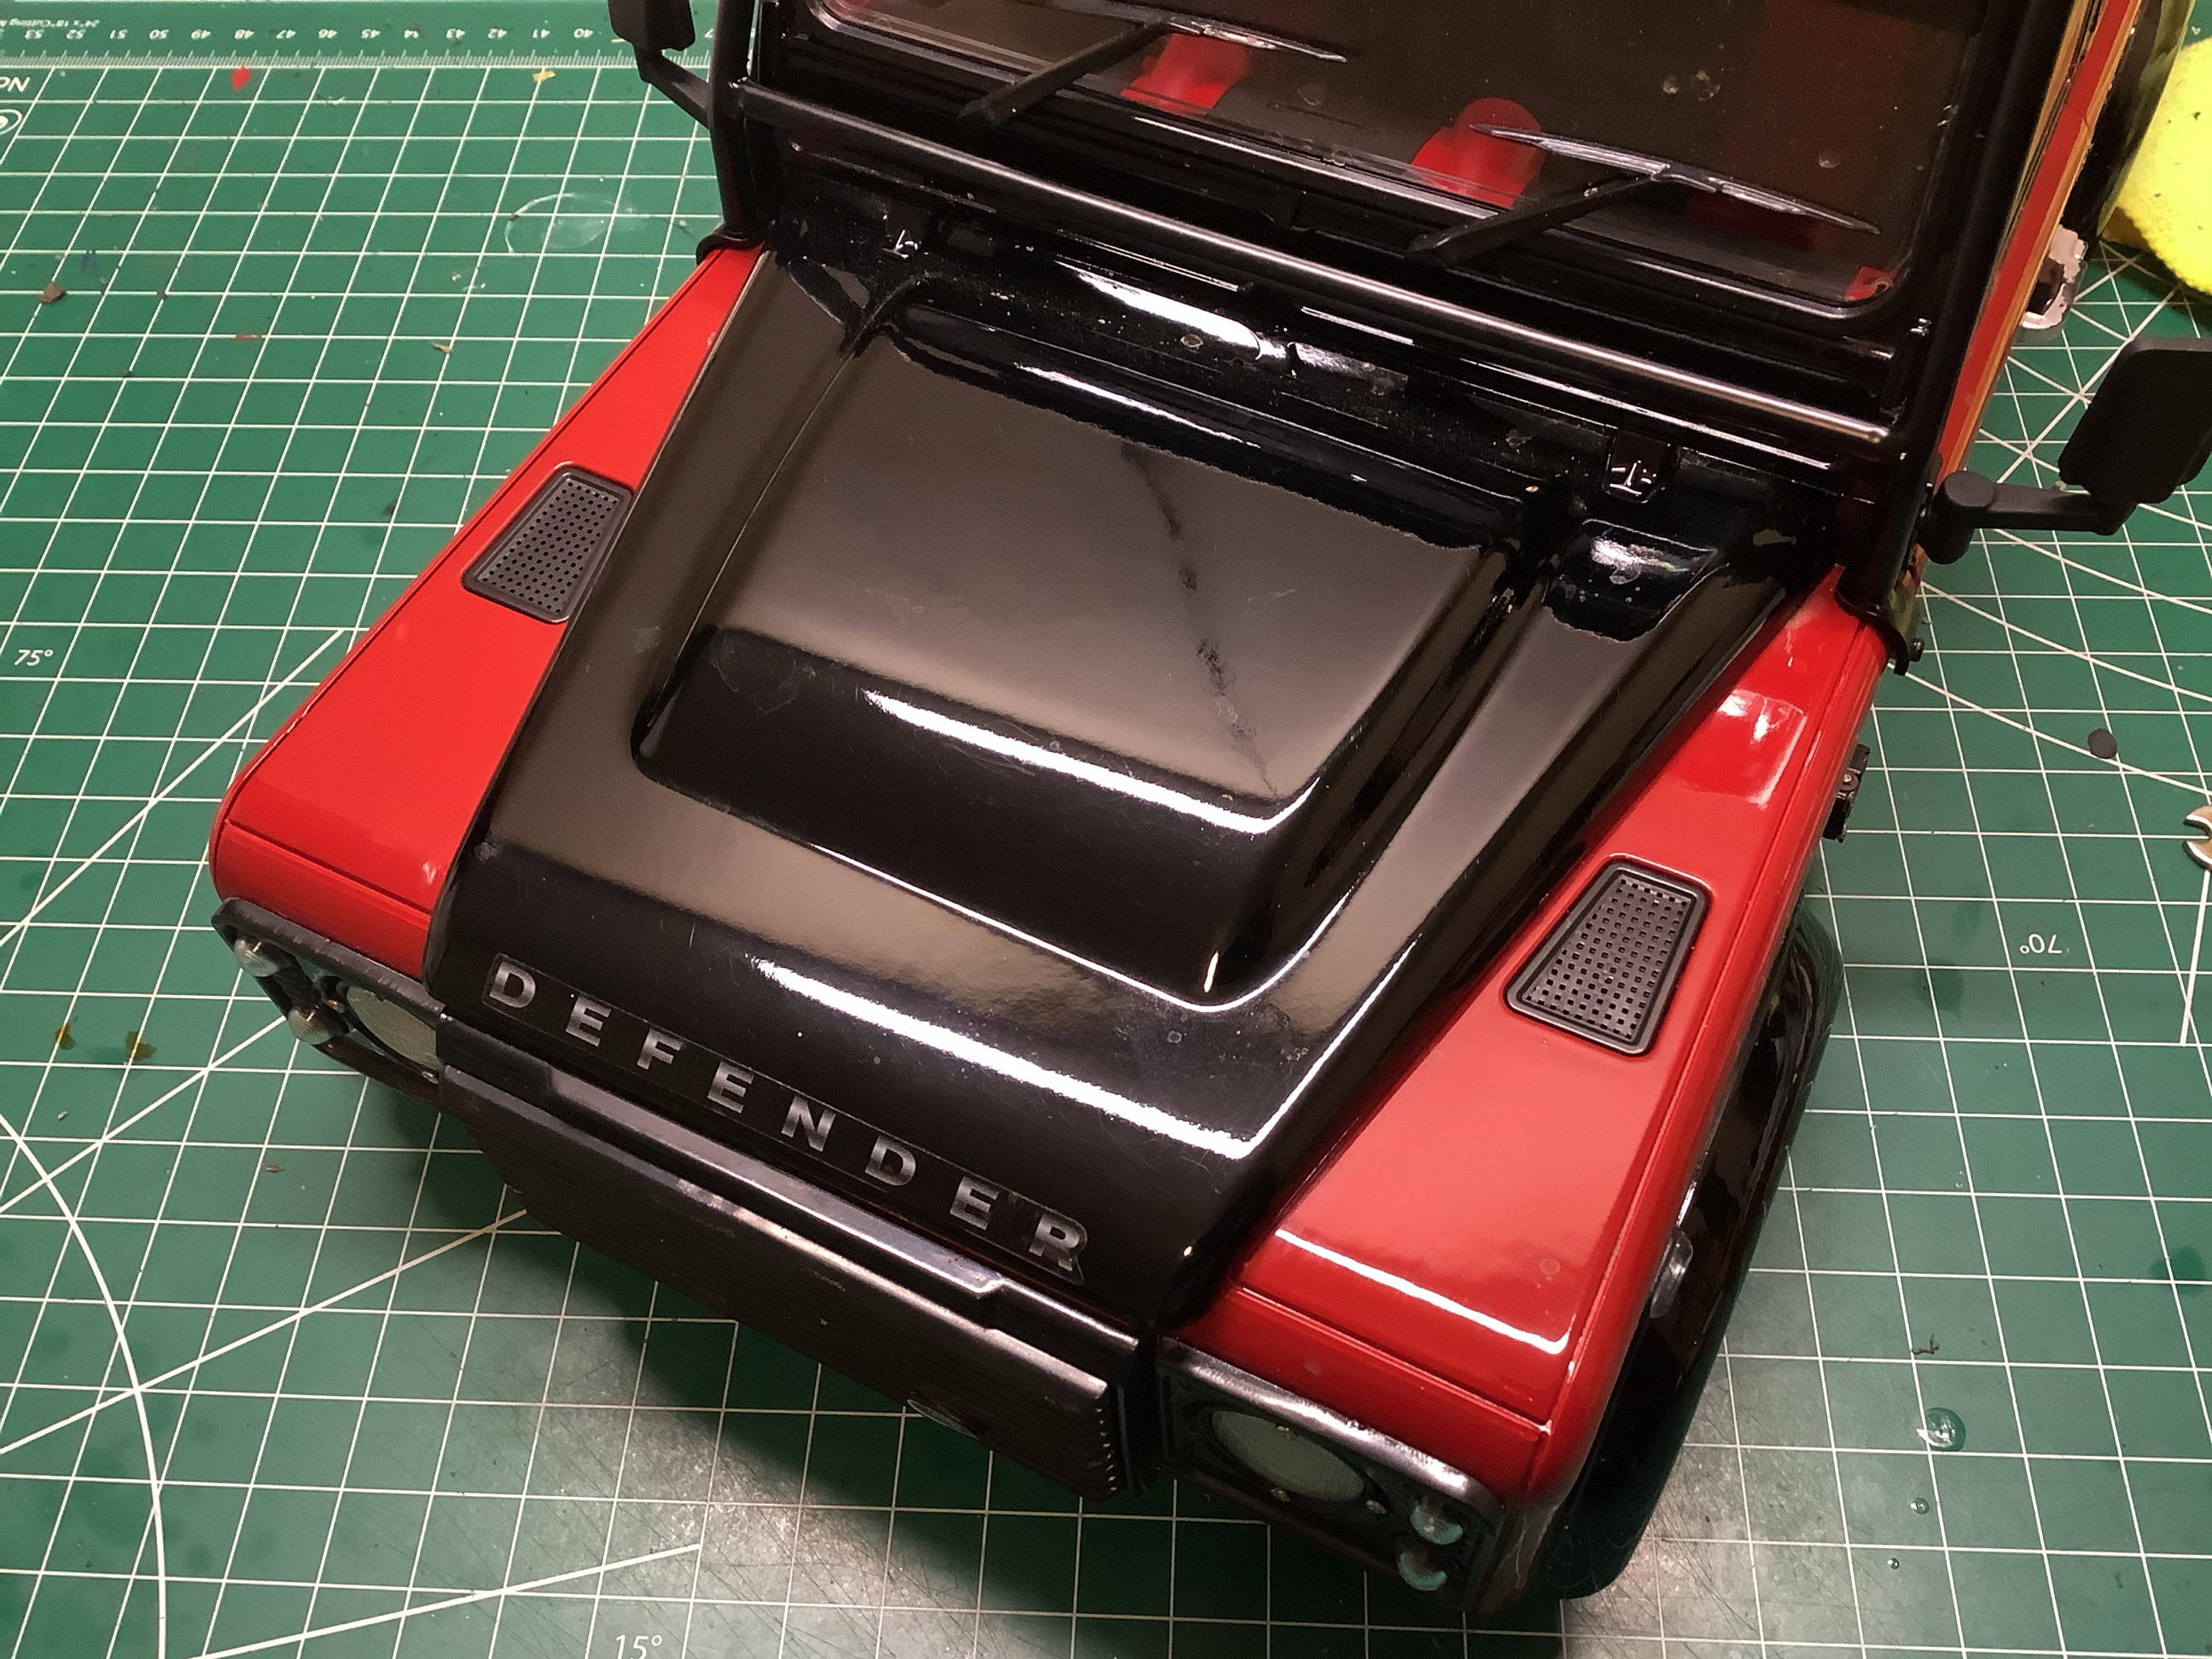
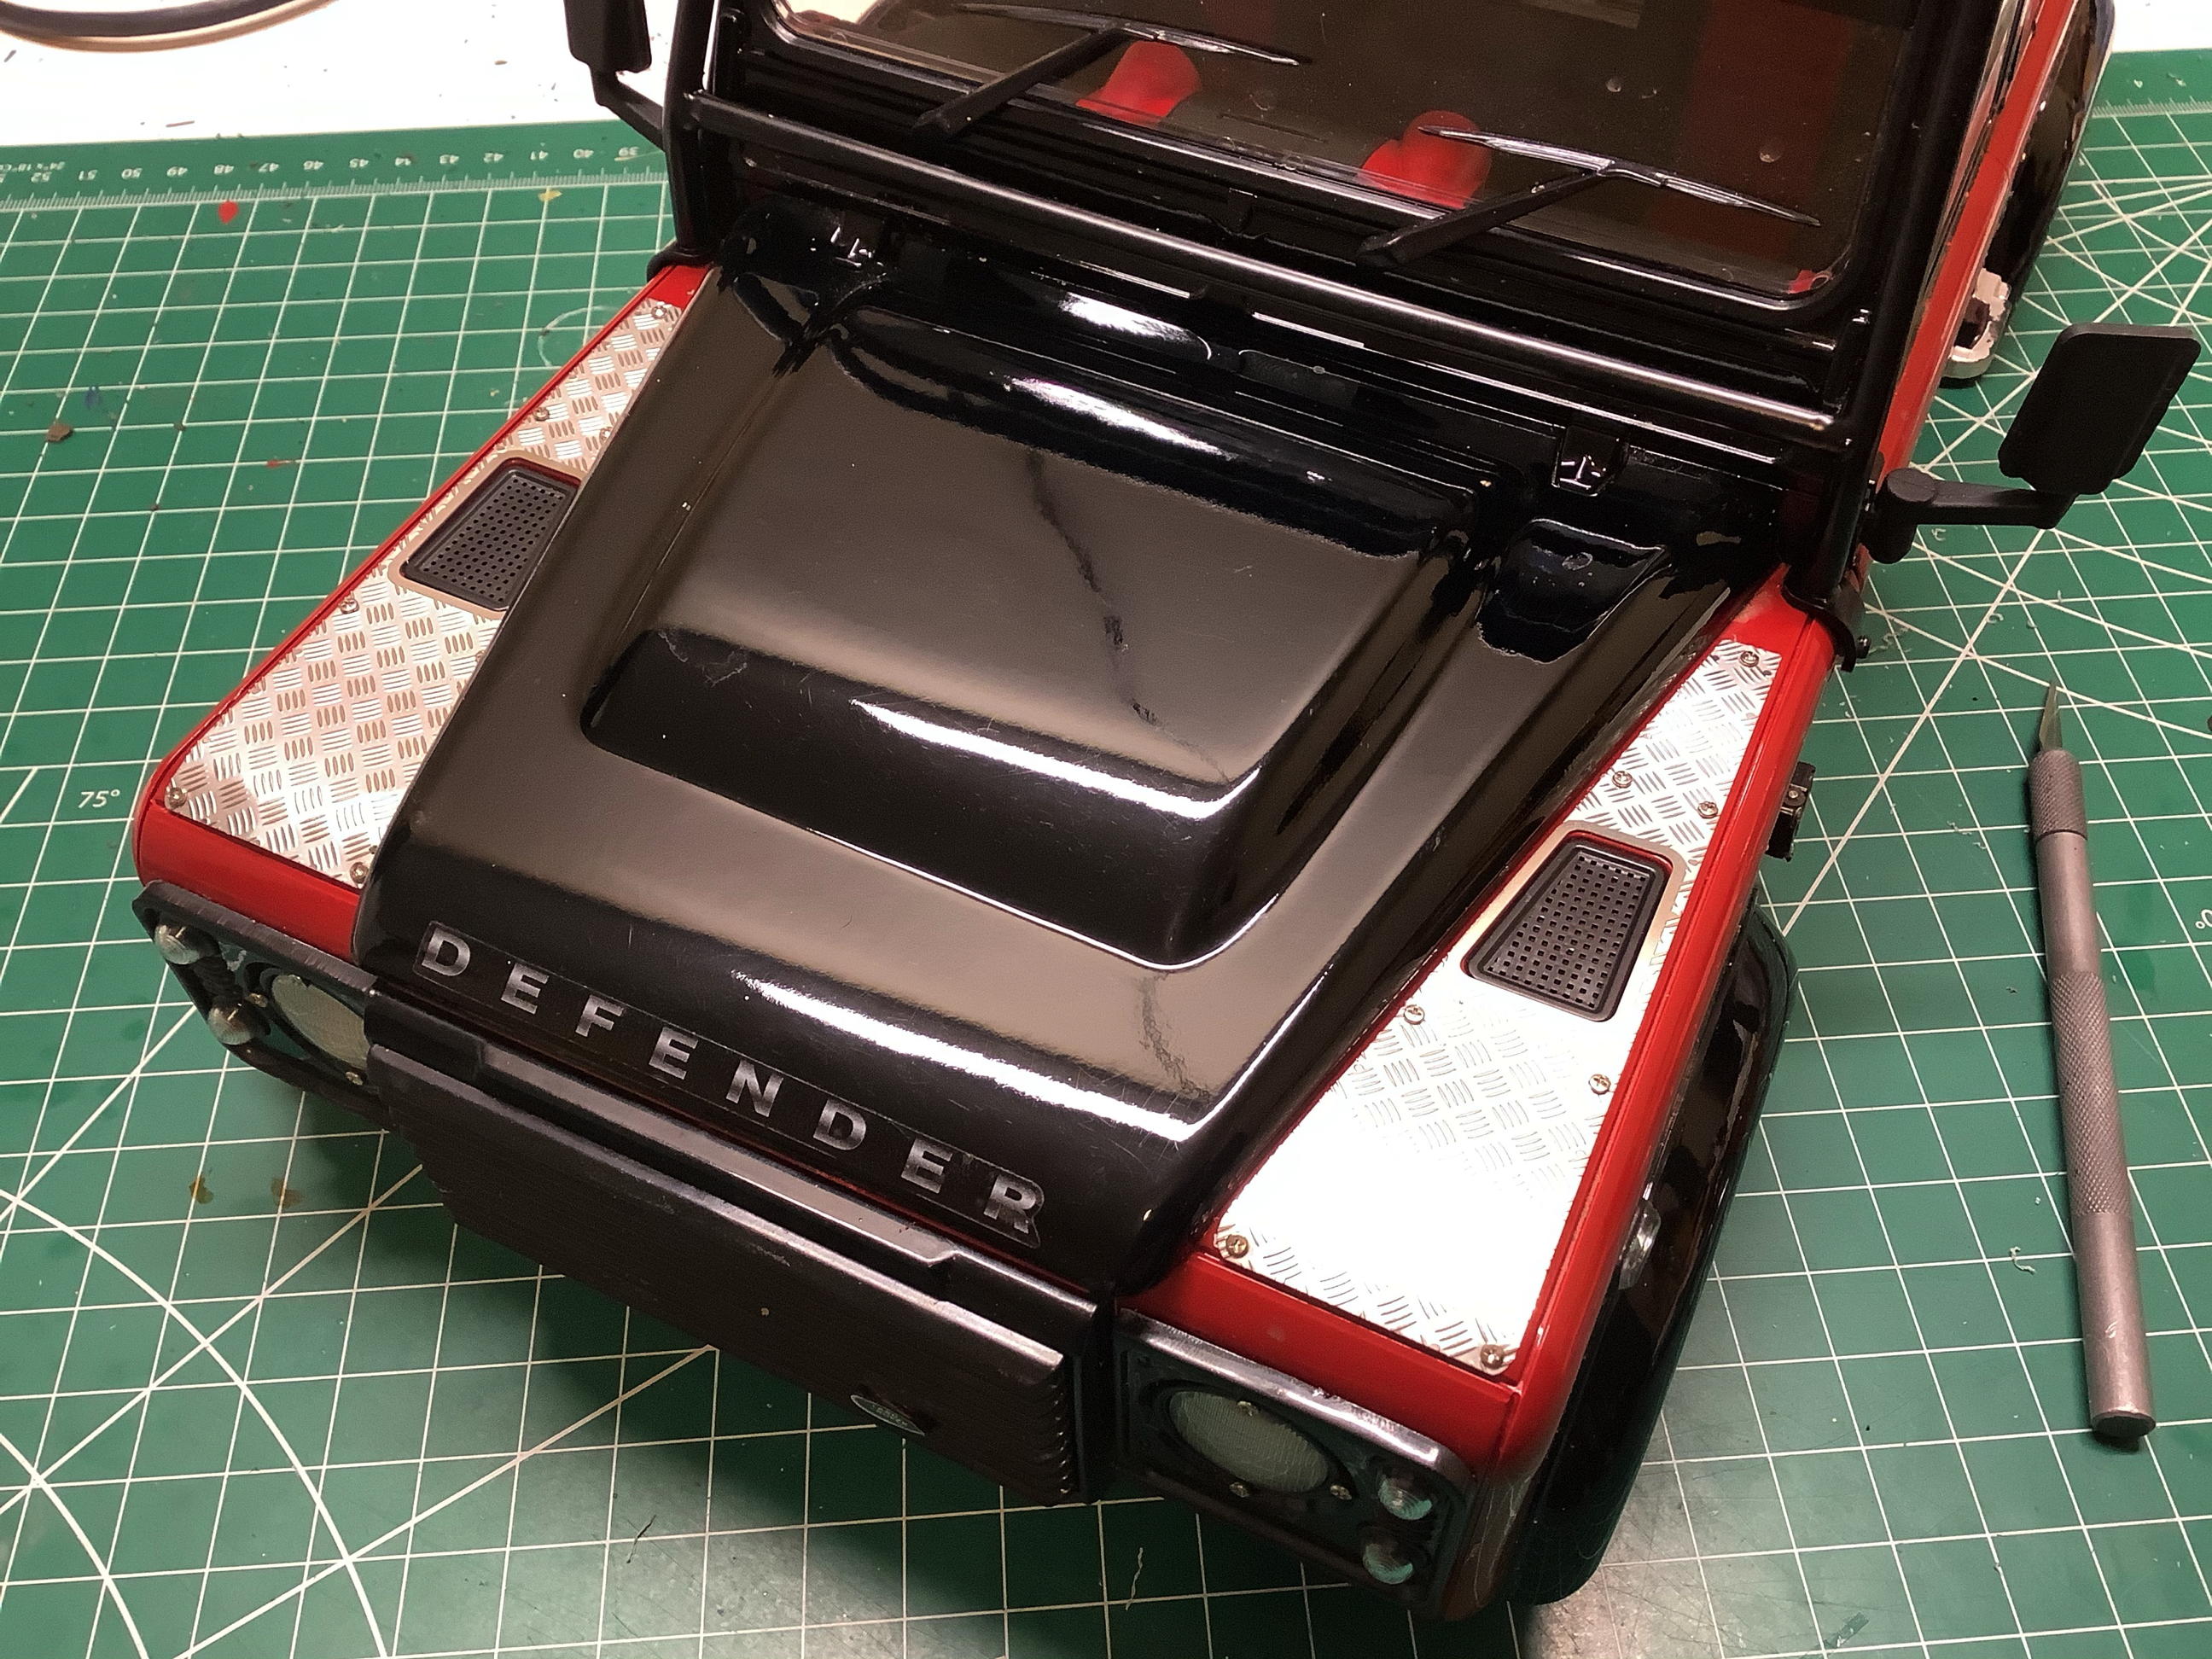
Here I've added some diamond plate wedges to the hood. Totally
unnecessary but, since when does that stop me? These are also
installed with tiny screws.
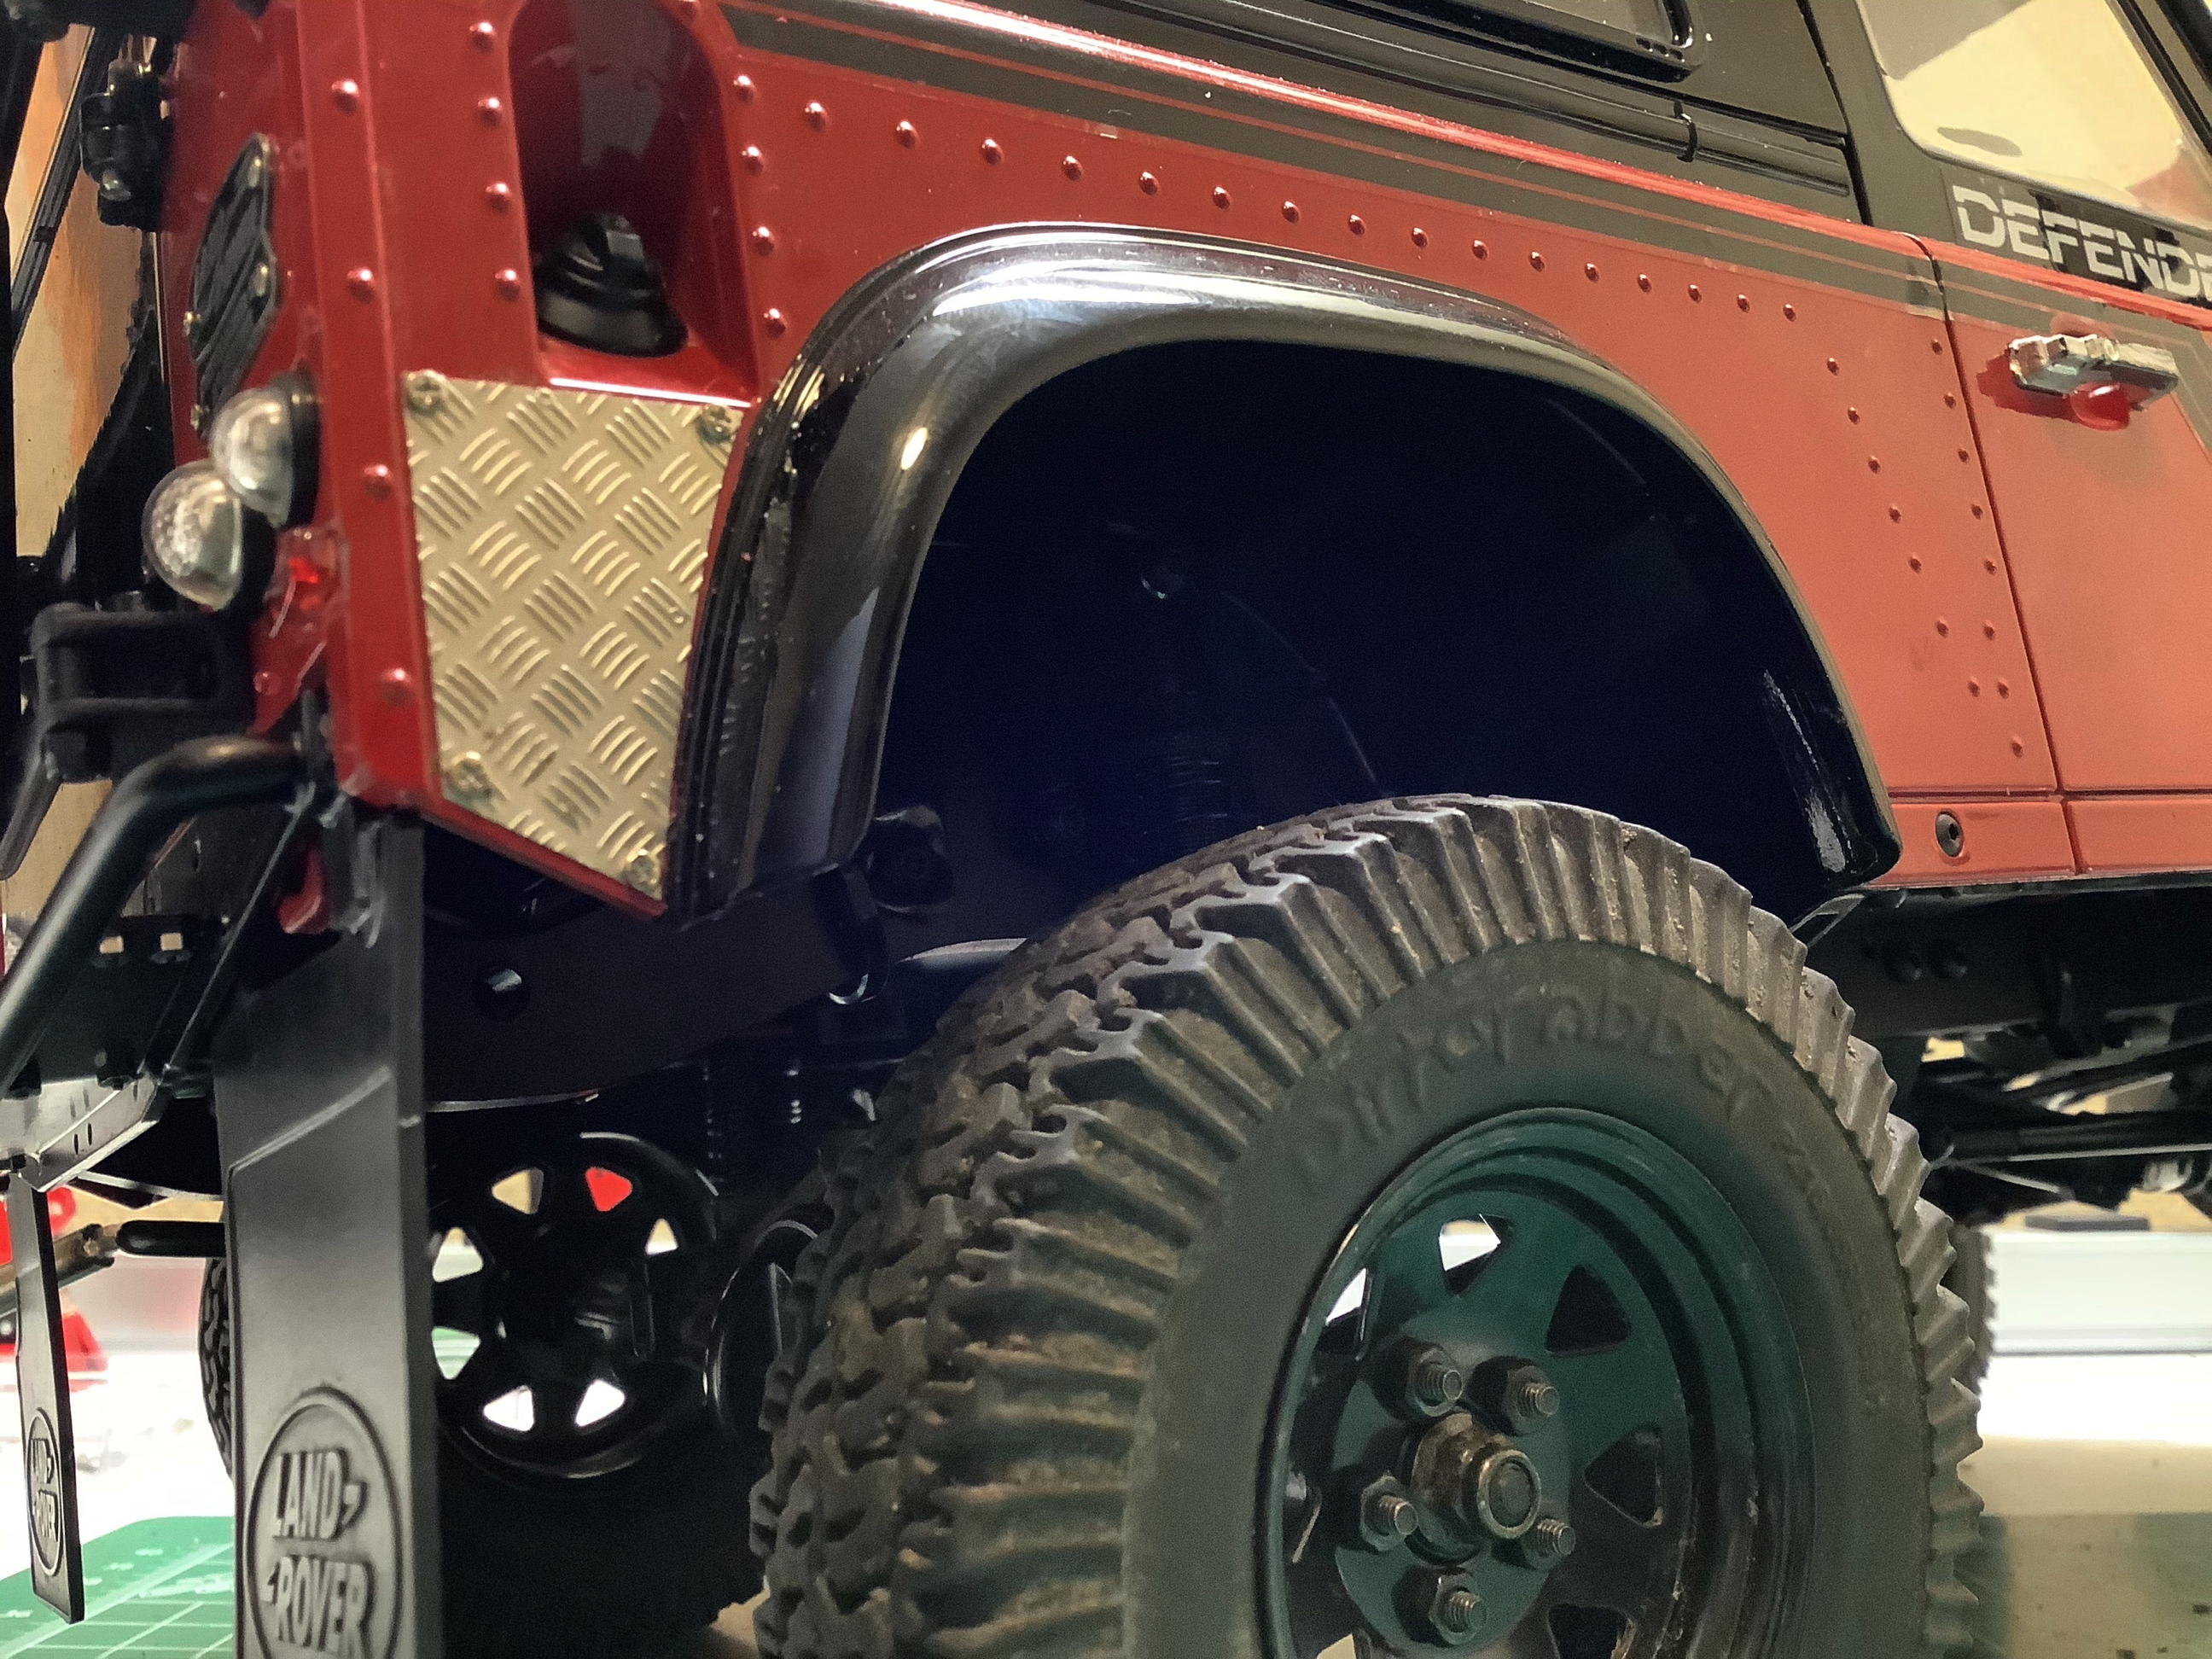
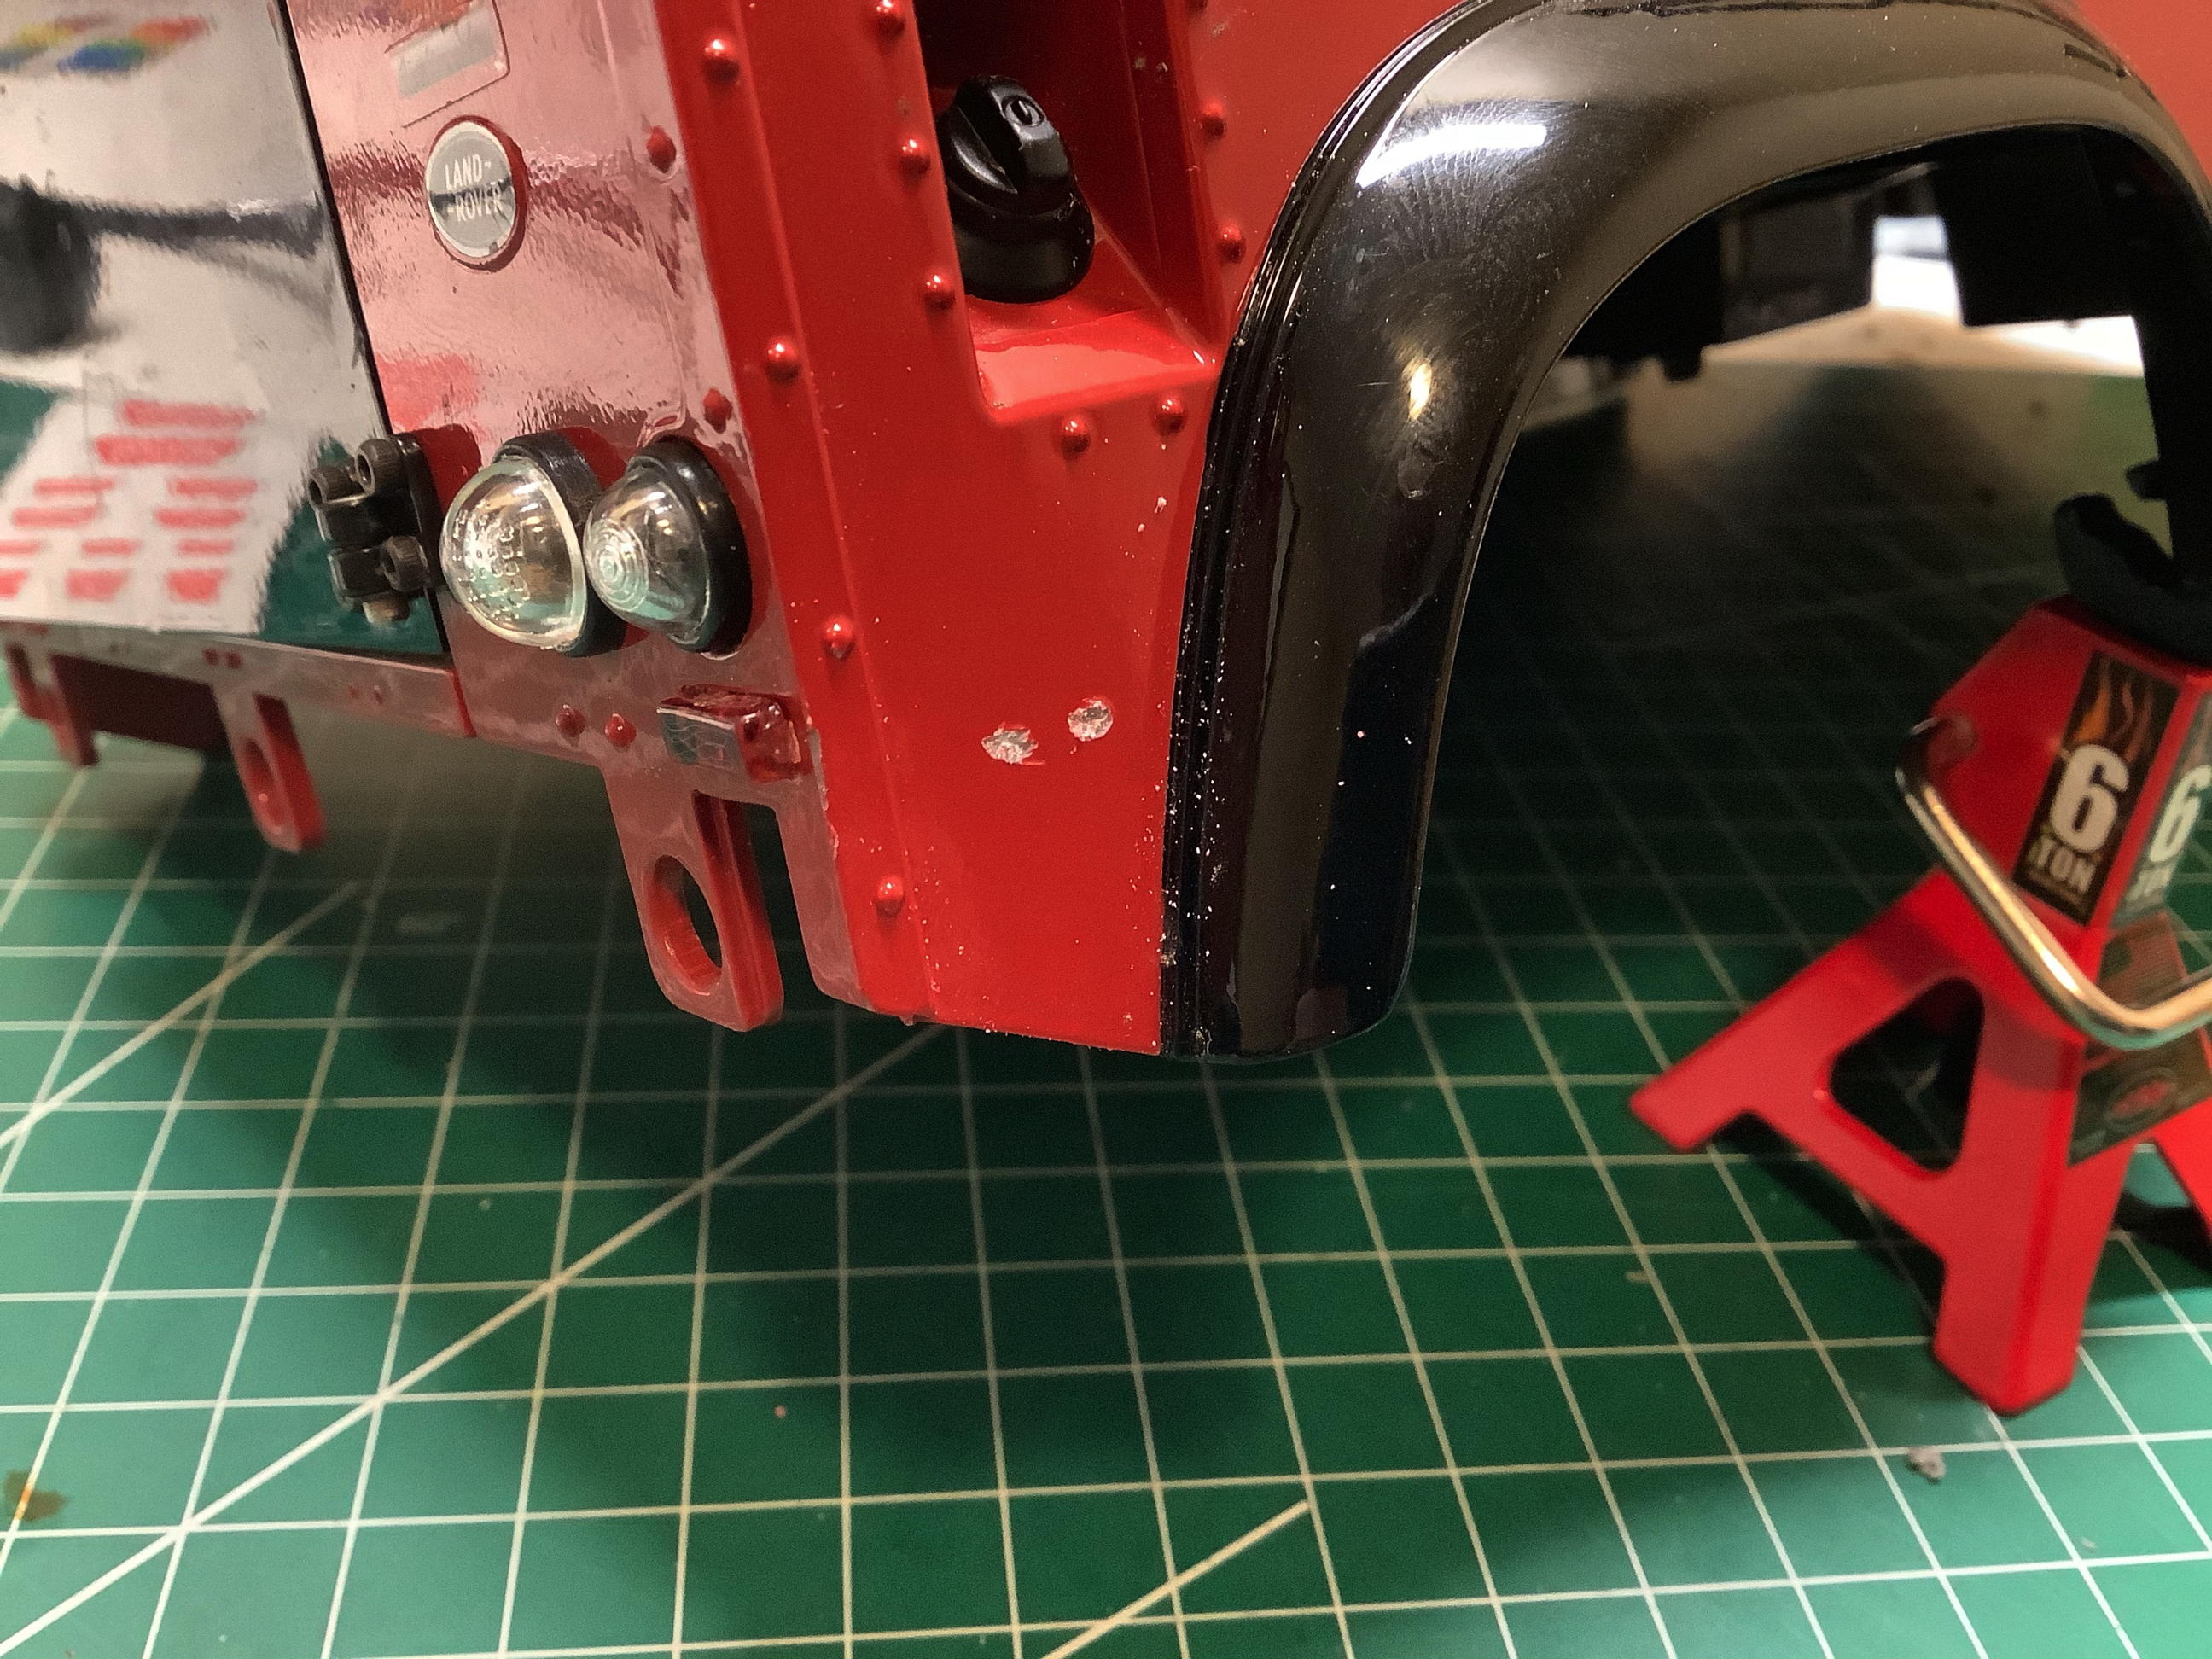
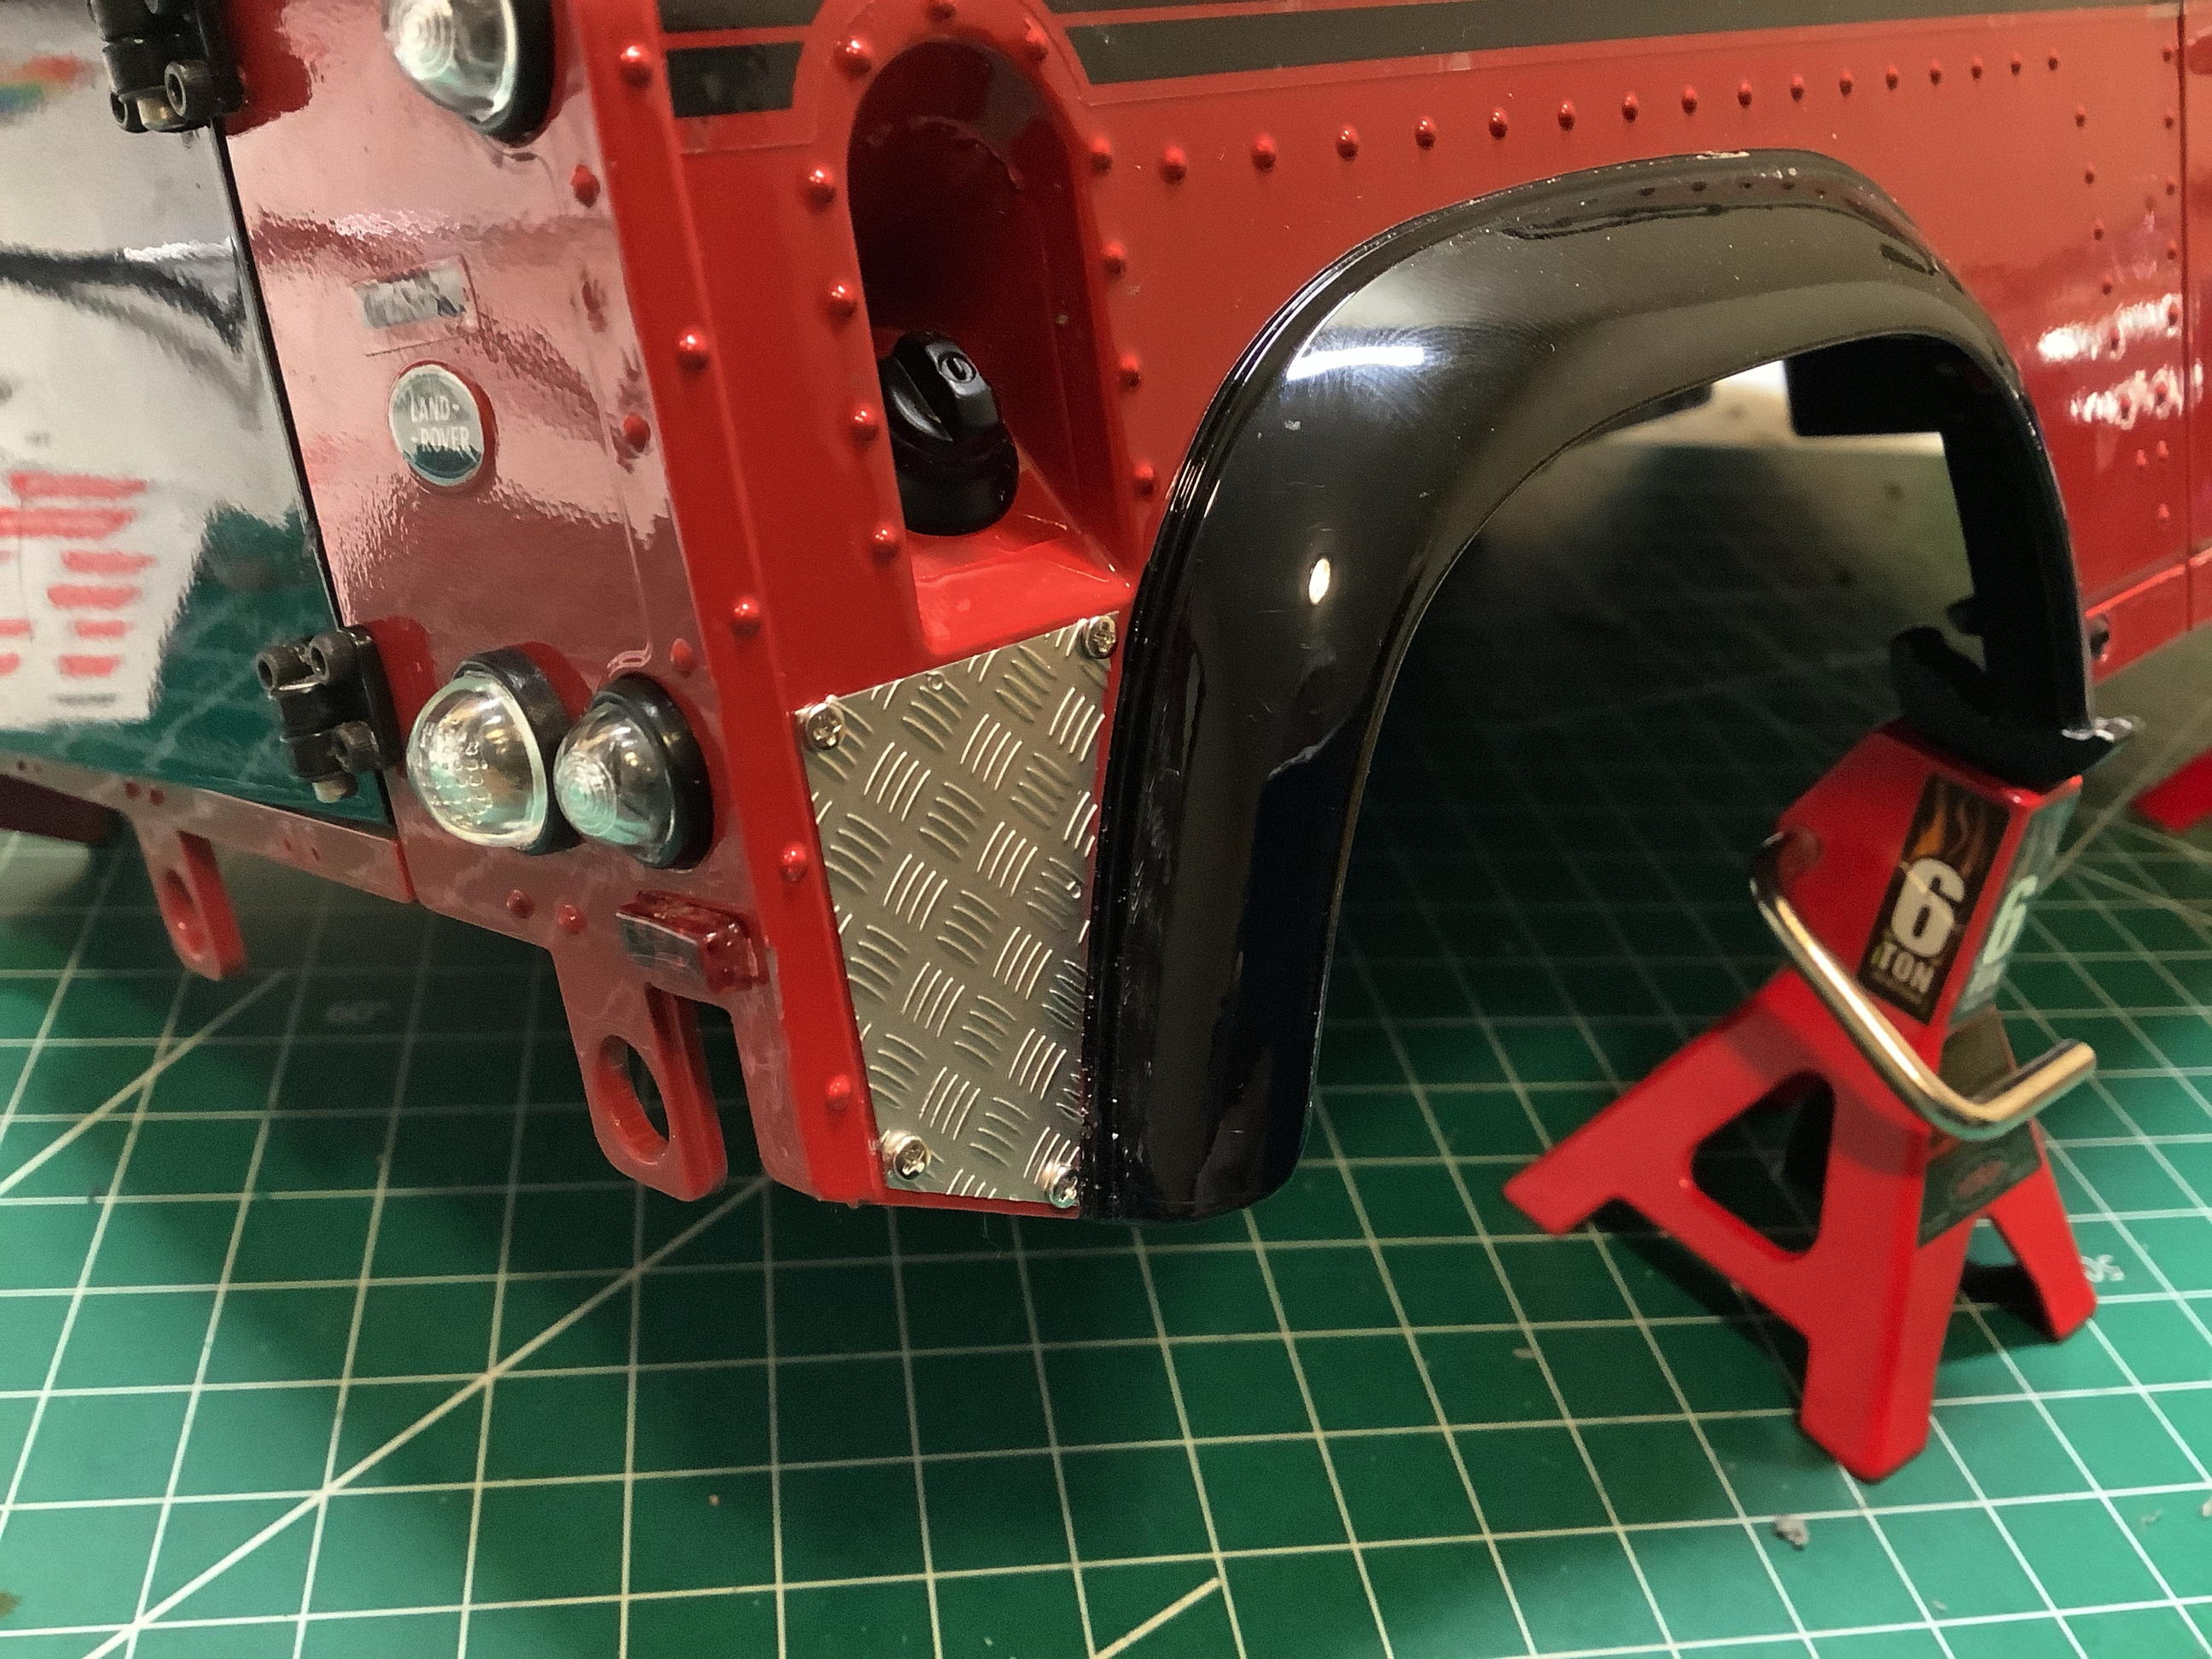
There was also diamond plate to be installed behind the rear wheel
arches. I had to grind away the scale rivet heads in this area as
shown on the left so that the plates would sit flat.
There are a couple of ways to install a spare tire on the back.
The easiest way is to just attach it to the rear door, but that puts a
lot of weight on the flimsy hinges. Instead I installed a metal
support which swings out and still allows the rear door to open. I
used the same style wheel and tire as are installed on the chassis so
this is a functional spare.
This ladder was meant to be installed in the back but it interferes with
the spare tire rack so I installed in on the side instead. I
actually think it looks fine here.
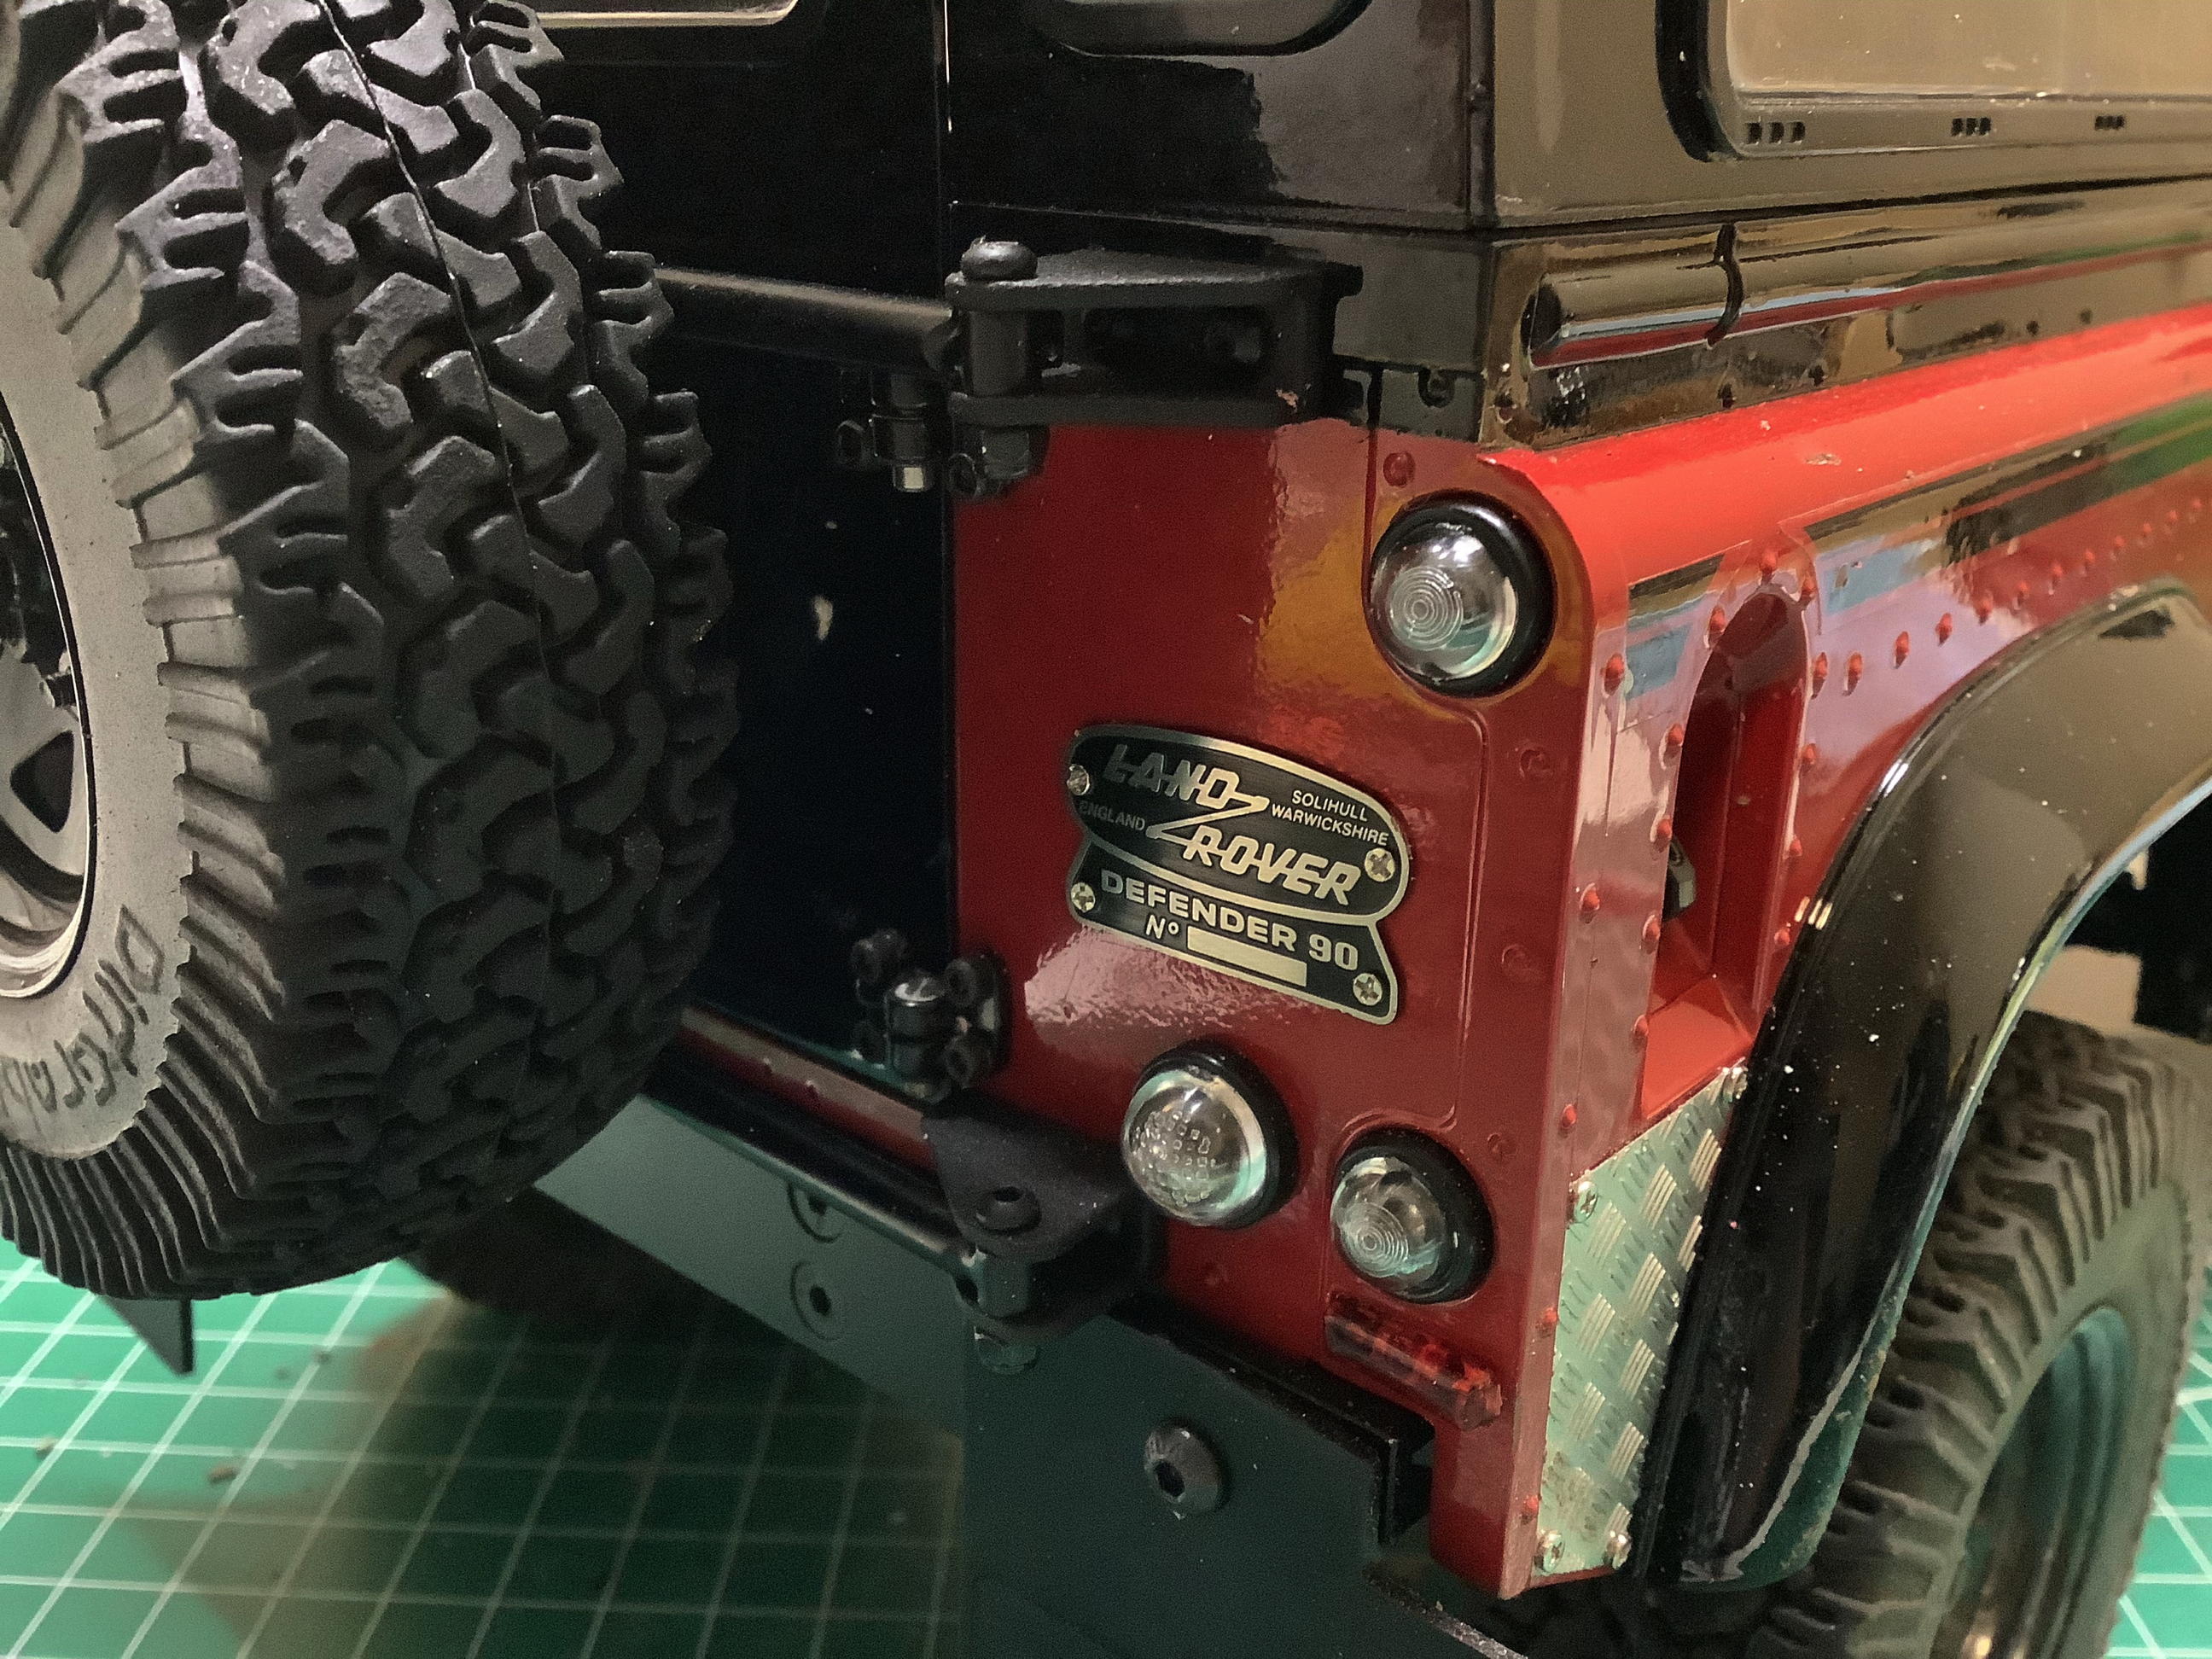
I also found a set of emblems that was so nice I couldn't resist.
Although the stickers shown on the left look pretty good, they don't
hold a candle to the emblems shown on the right. Again I had to
grind away some raised areas to make the emblems sit flat and had to
drill tiny holes to install them.
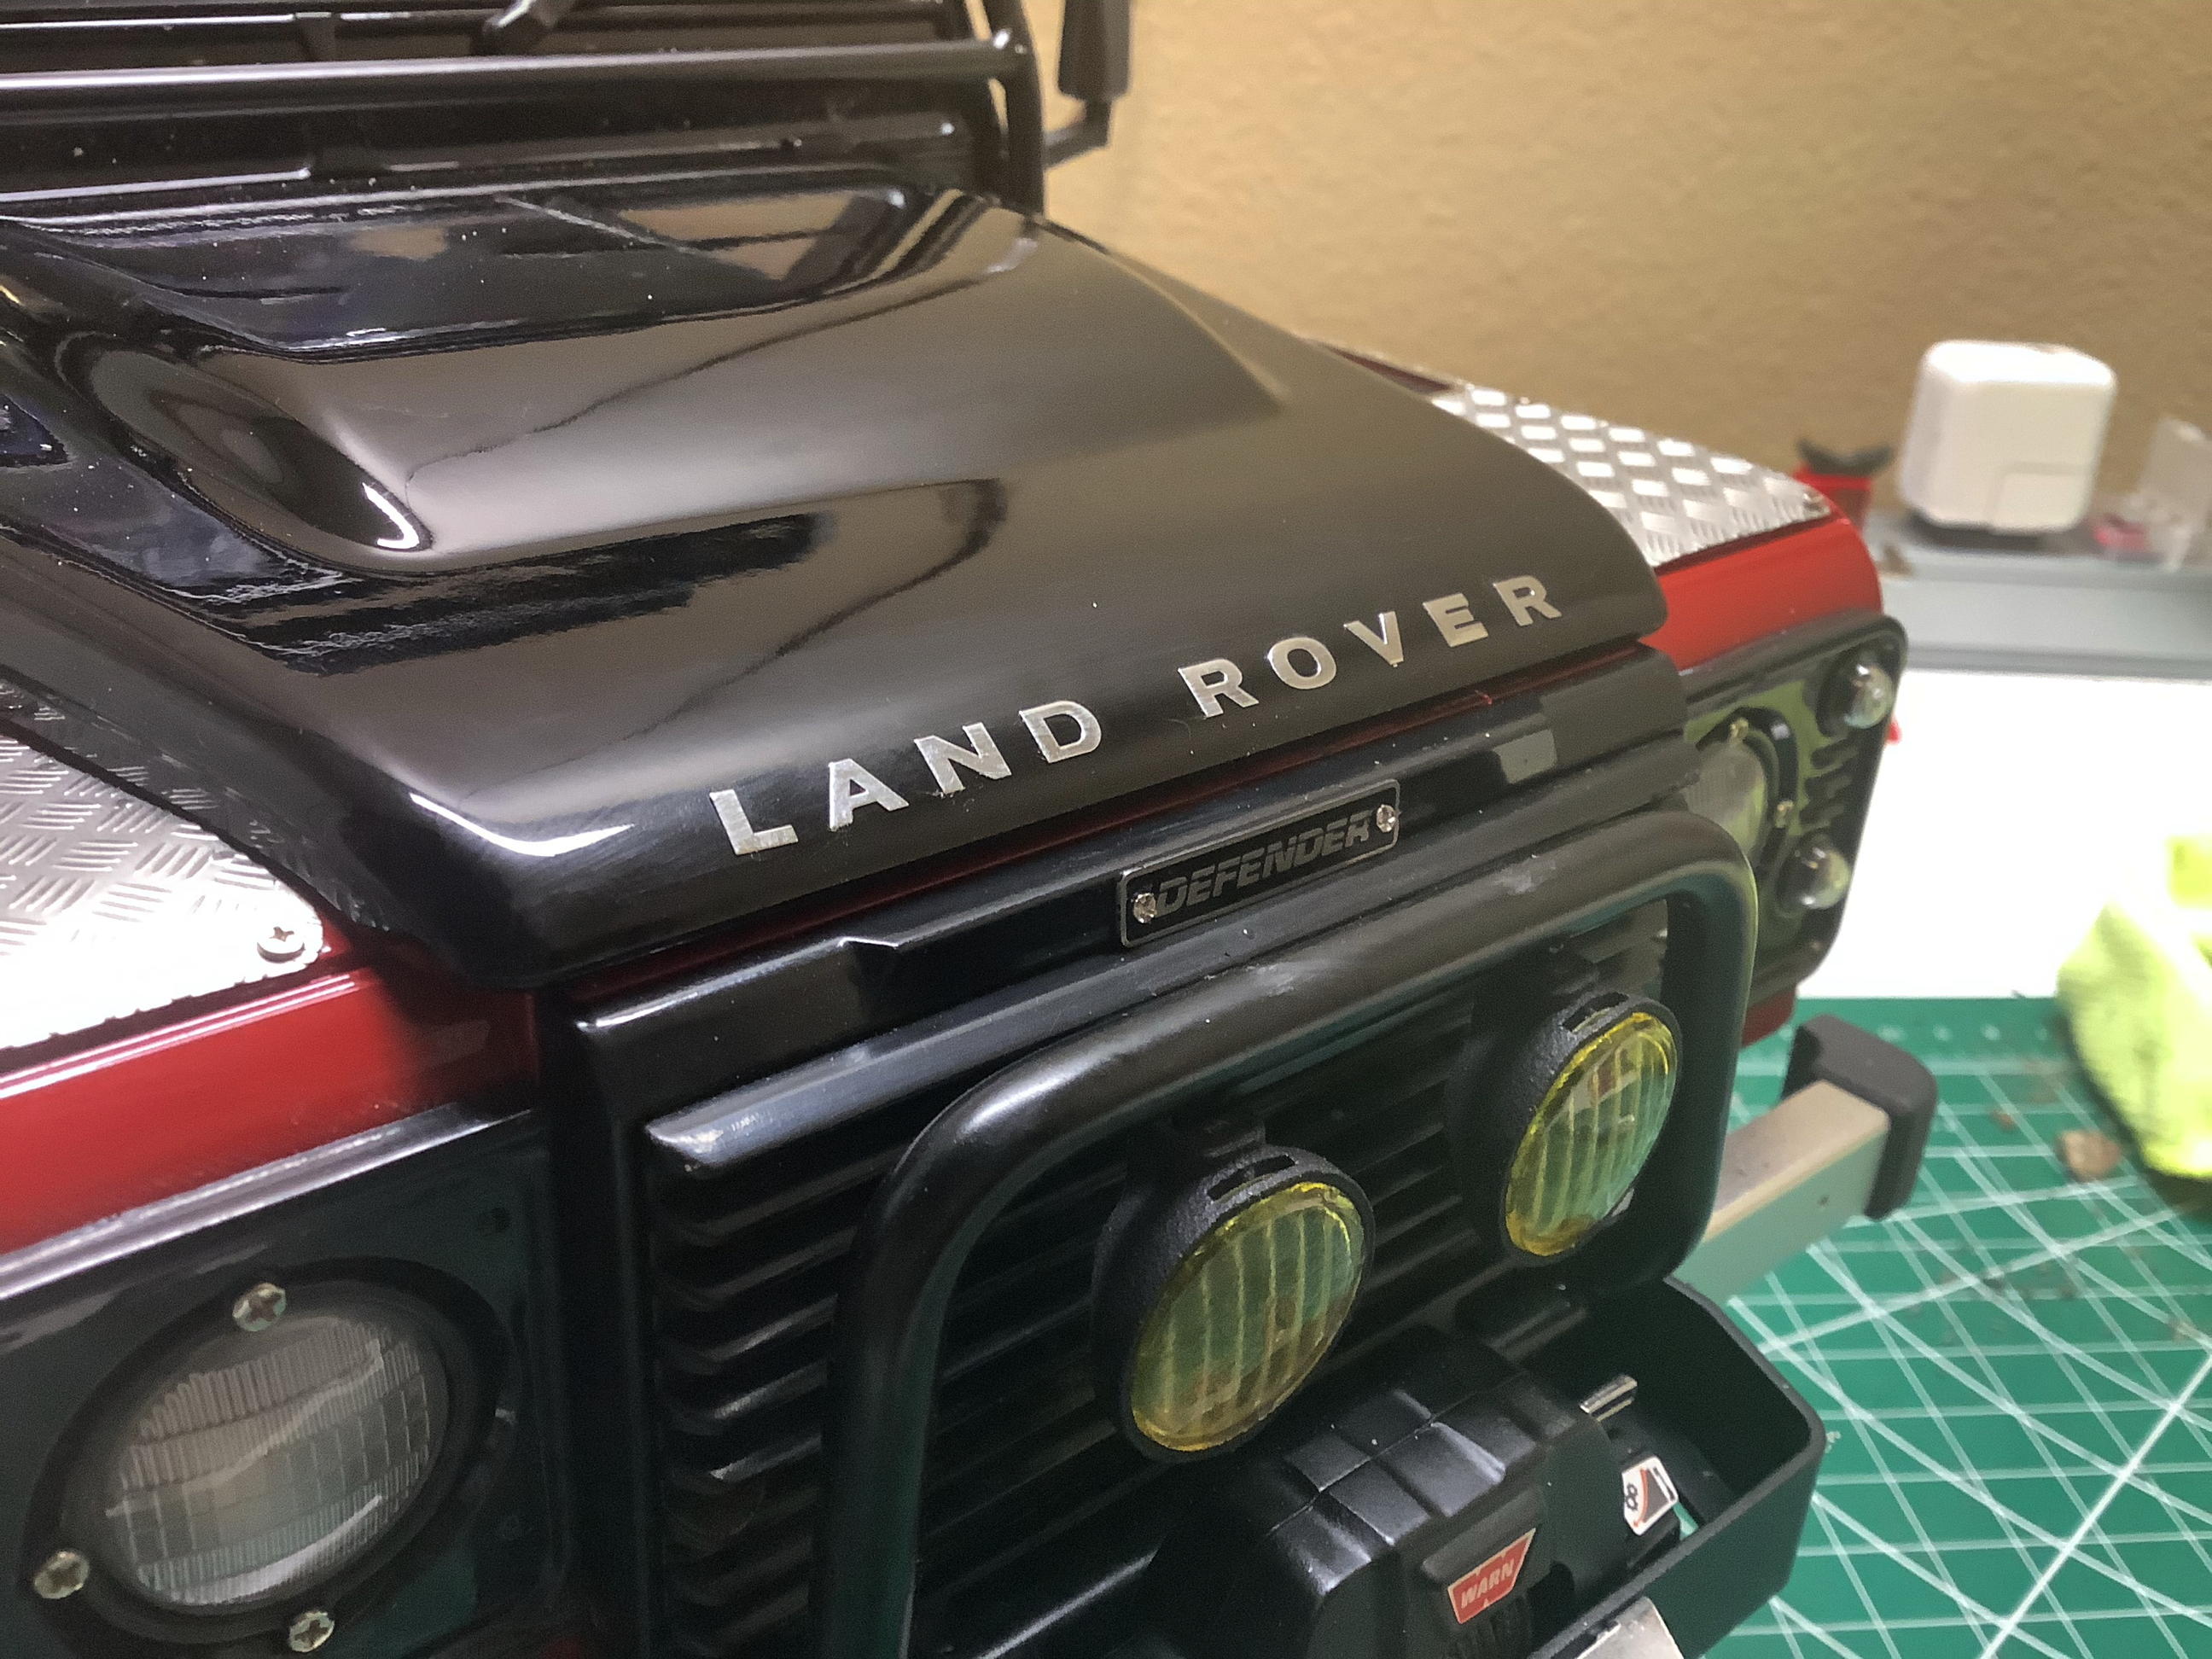
I also added some new emblems up front. I removed the
"Defender" sticker from the hood and added a "Land Rover" metal transfer
as well as a "Defender" emblem on top of the grille.
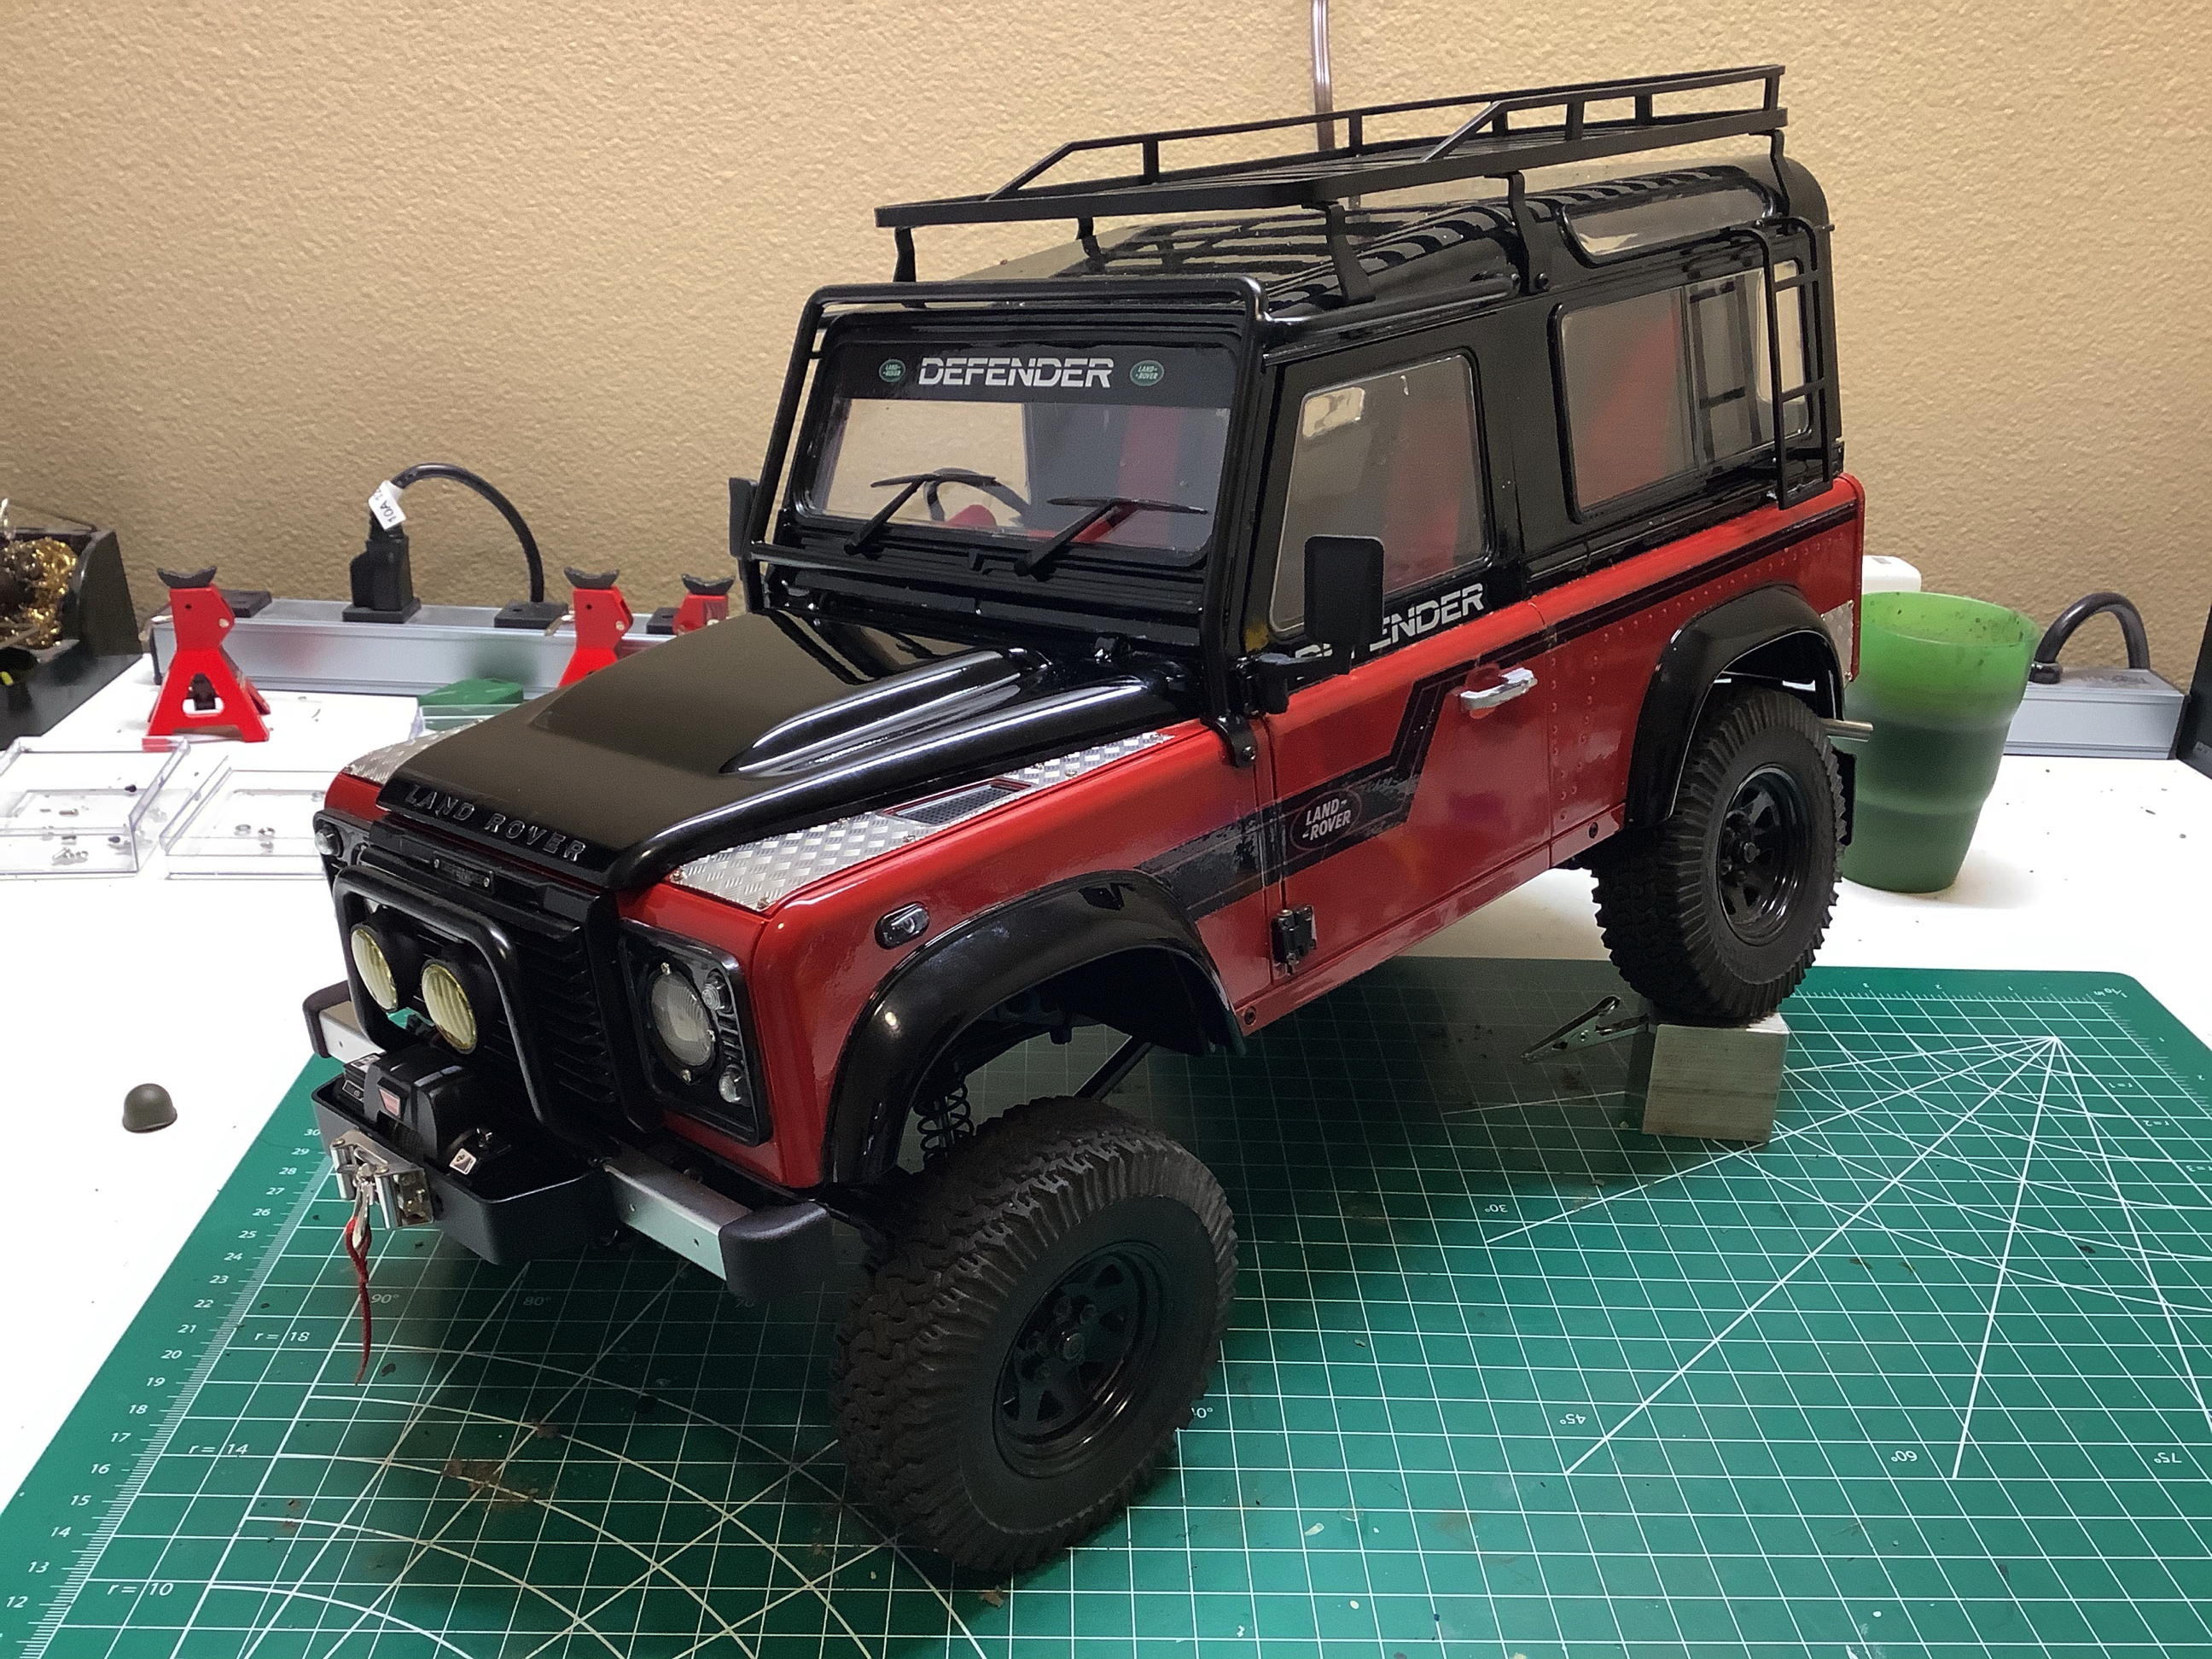
The complete upgraded model. There are a lot of changes here but
none of them are obnoxious. The completed mass went from 3.46kg
before to 4.49kg after. Does that seem like an adequate
amount of upgrades? I was worried that the shocks would bottom out
with the extra weight and I would have to change the springs, but the
stock suspension was actually too stiff and I think it is just right
now. I just added a little preload to the rears.
©2021 Eric Albrecht