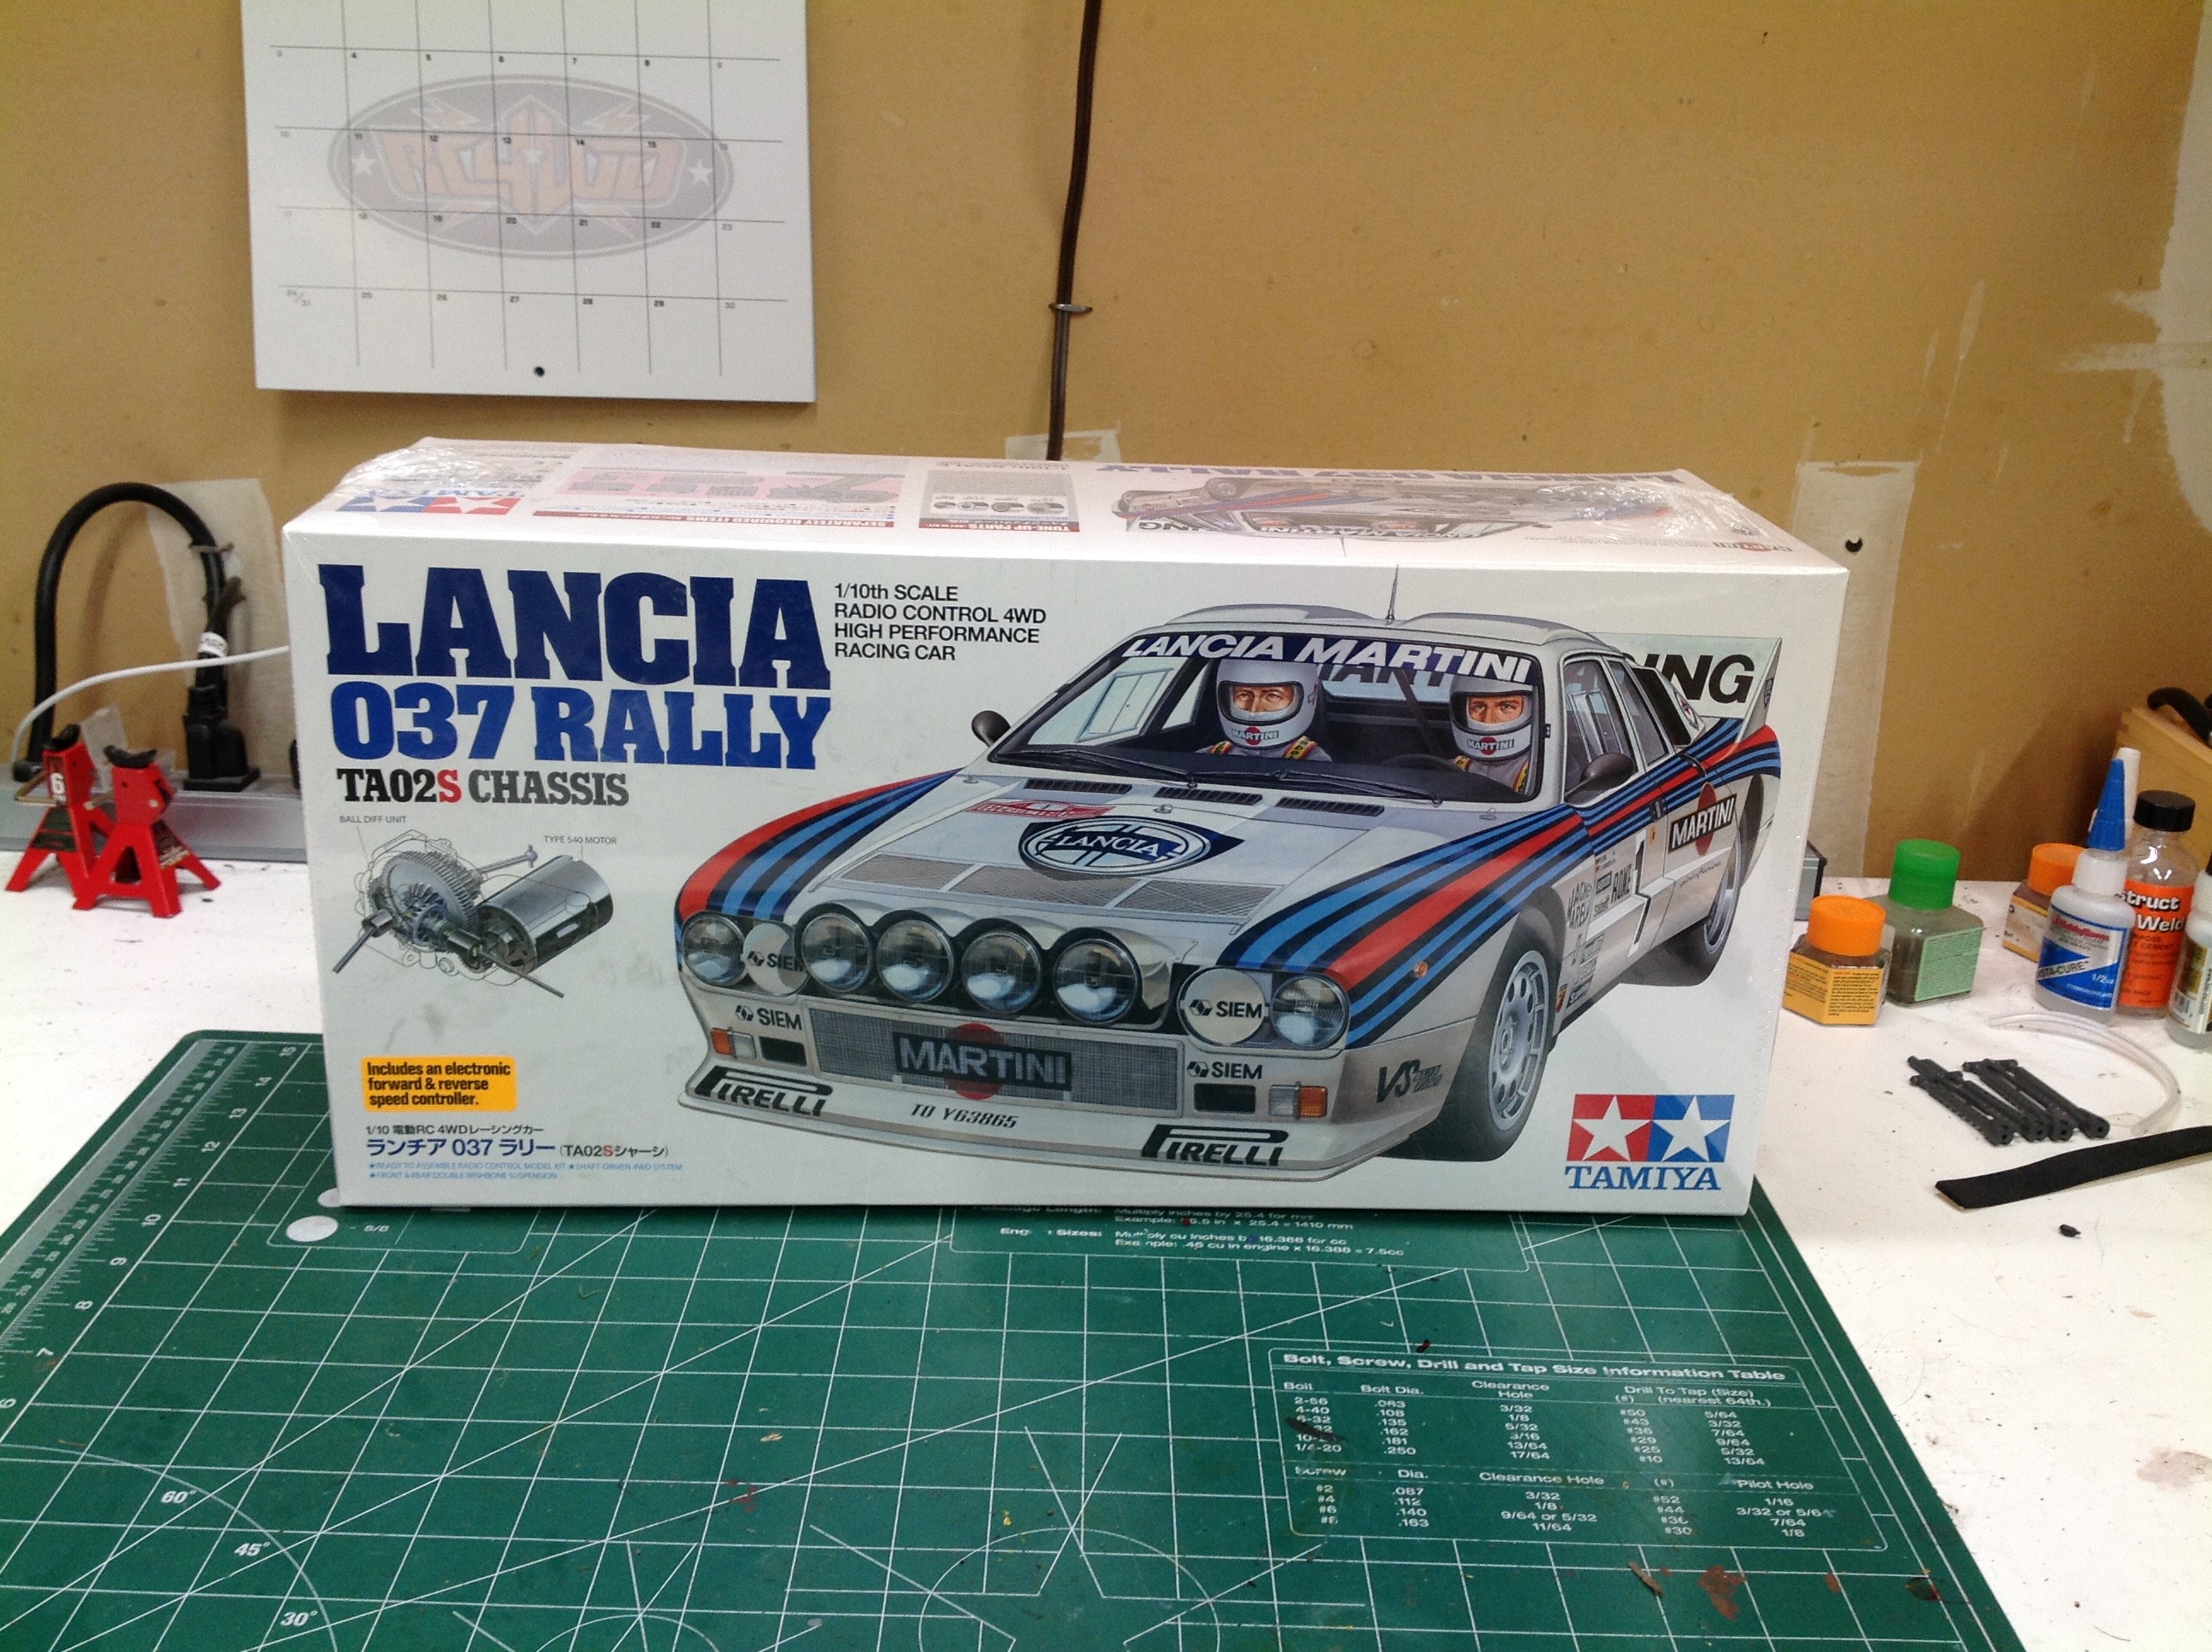
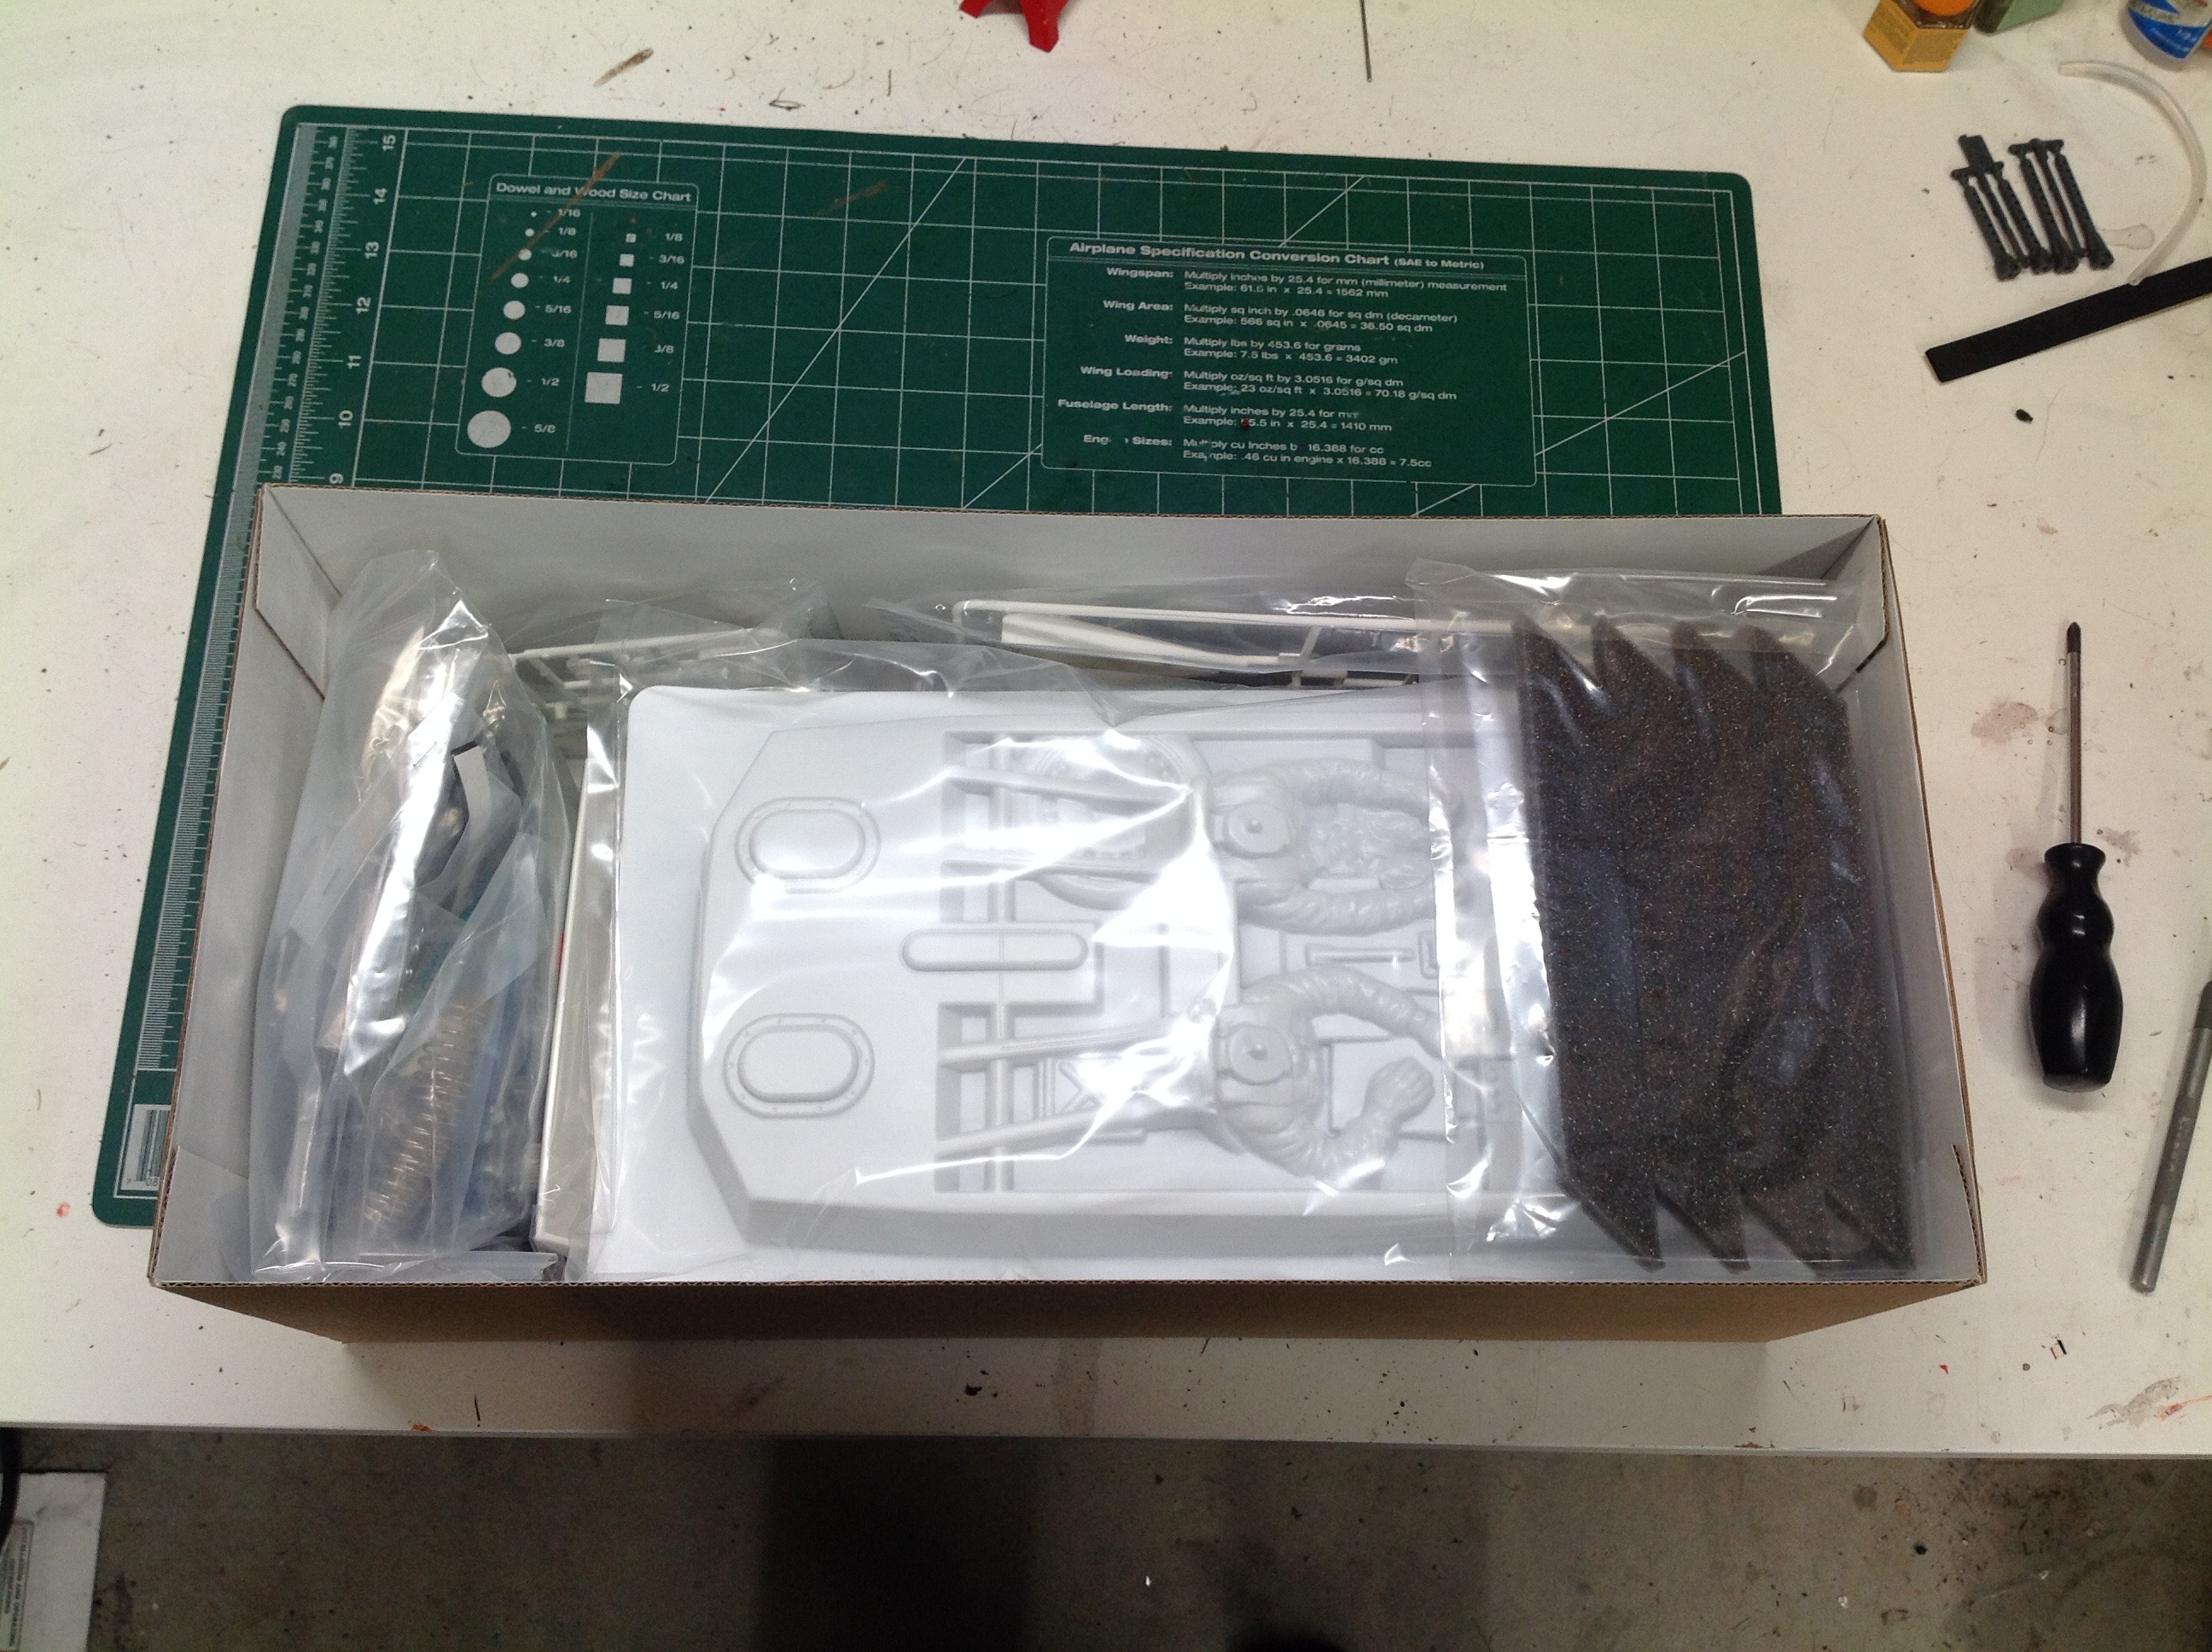
The Lancia comes in a small box with beautiful box
art. When I opened it, I was initially chagrined at what appeared
to be a polycarbonate body, but then I realized it was just the interior
with driver figures. Note the tire foams on the right, a rarity
for a Tamiya model out of the box.
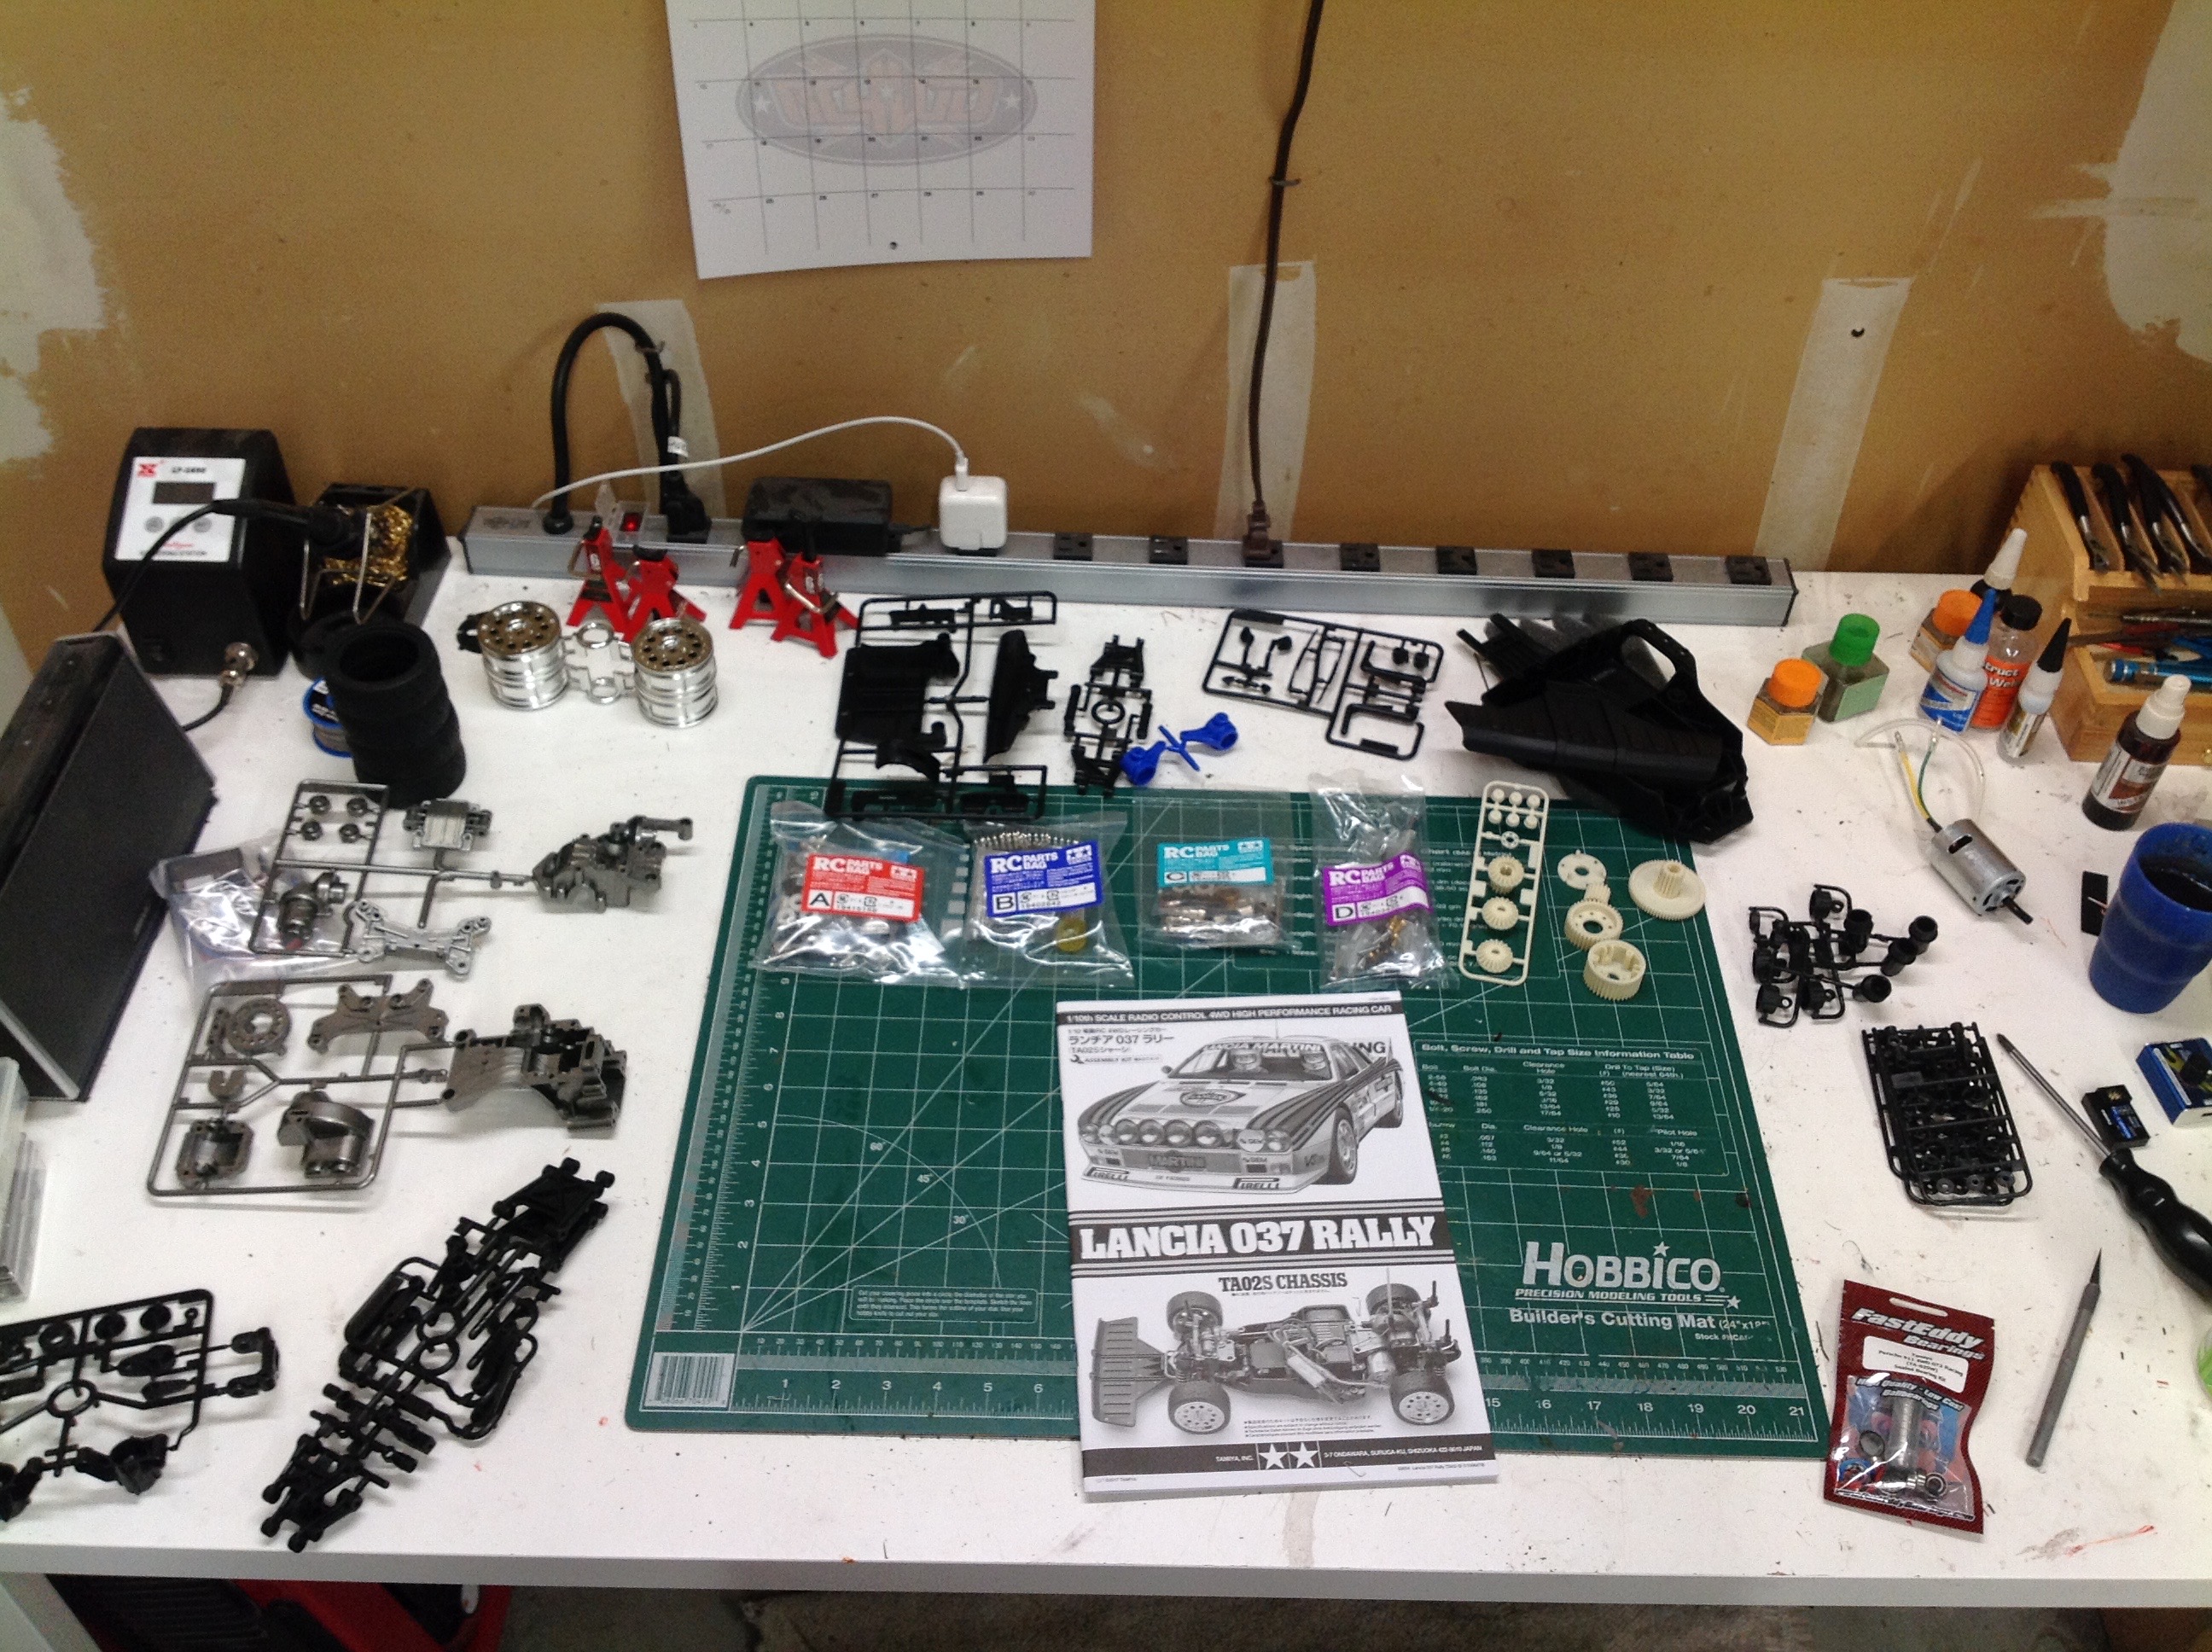
The TA-02 is a "real" touring car and therefore has a
lot of parts, but sadly did not come with ball bearings out of the
box. Easy to rectify, but I shouldn't have to.
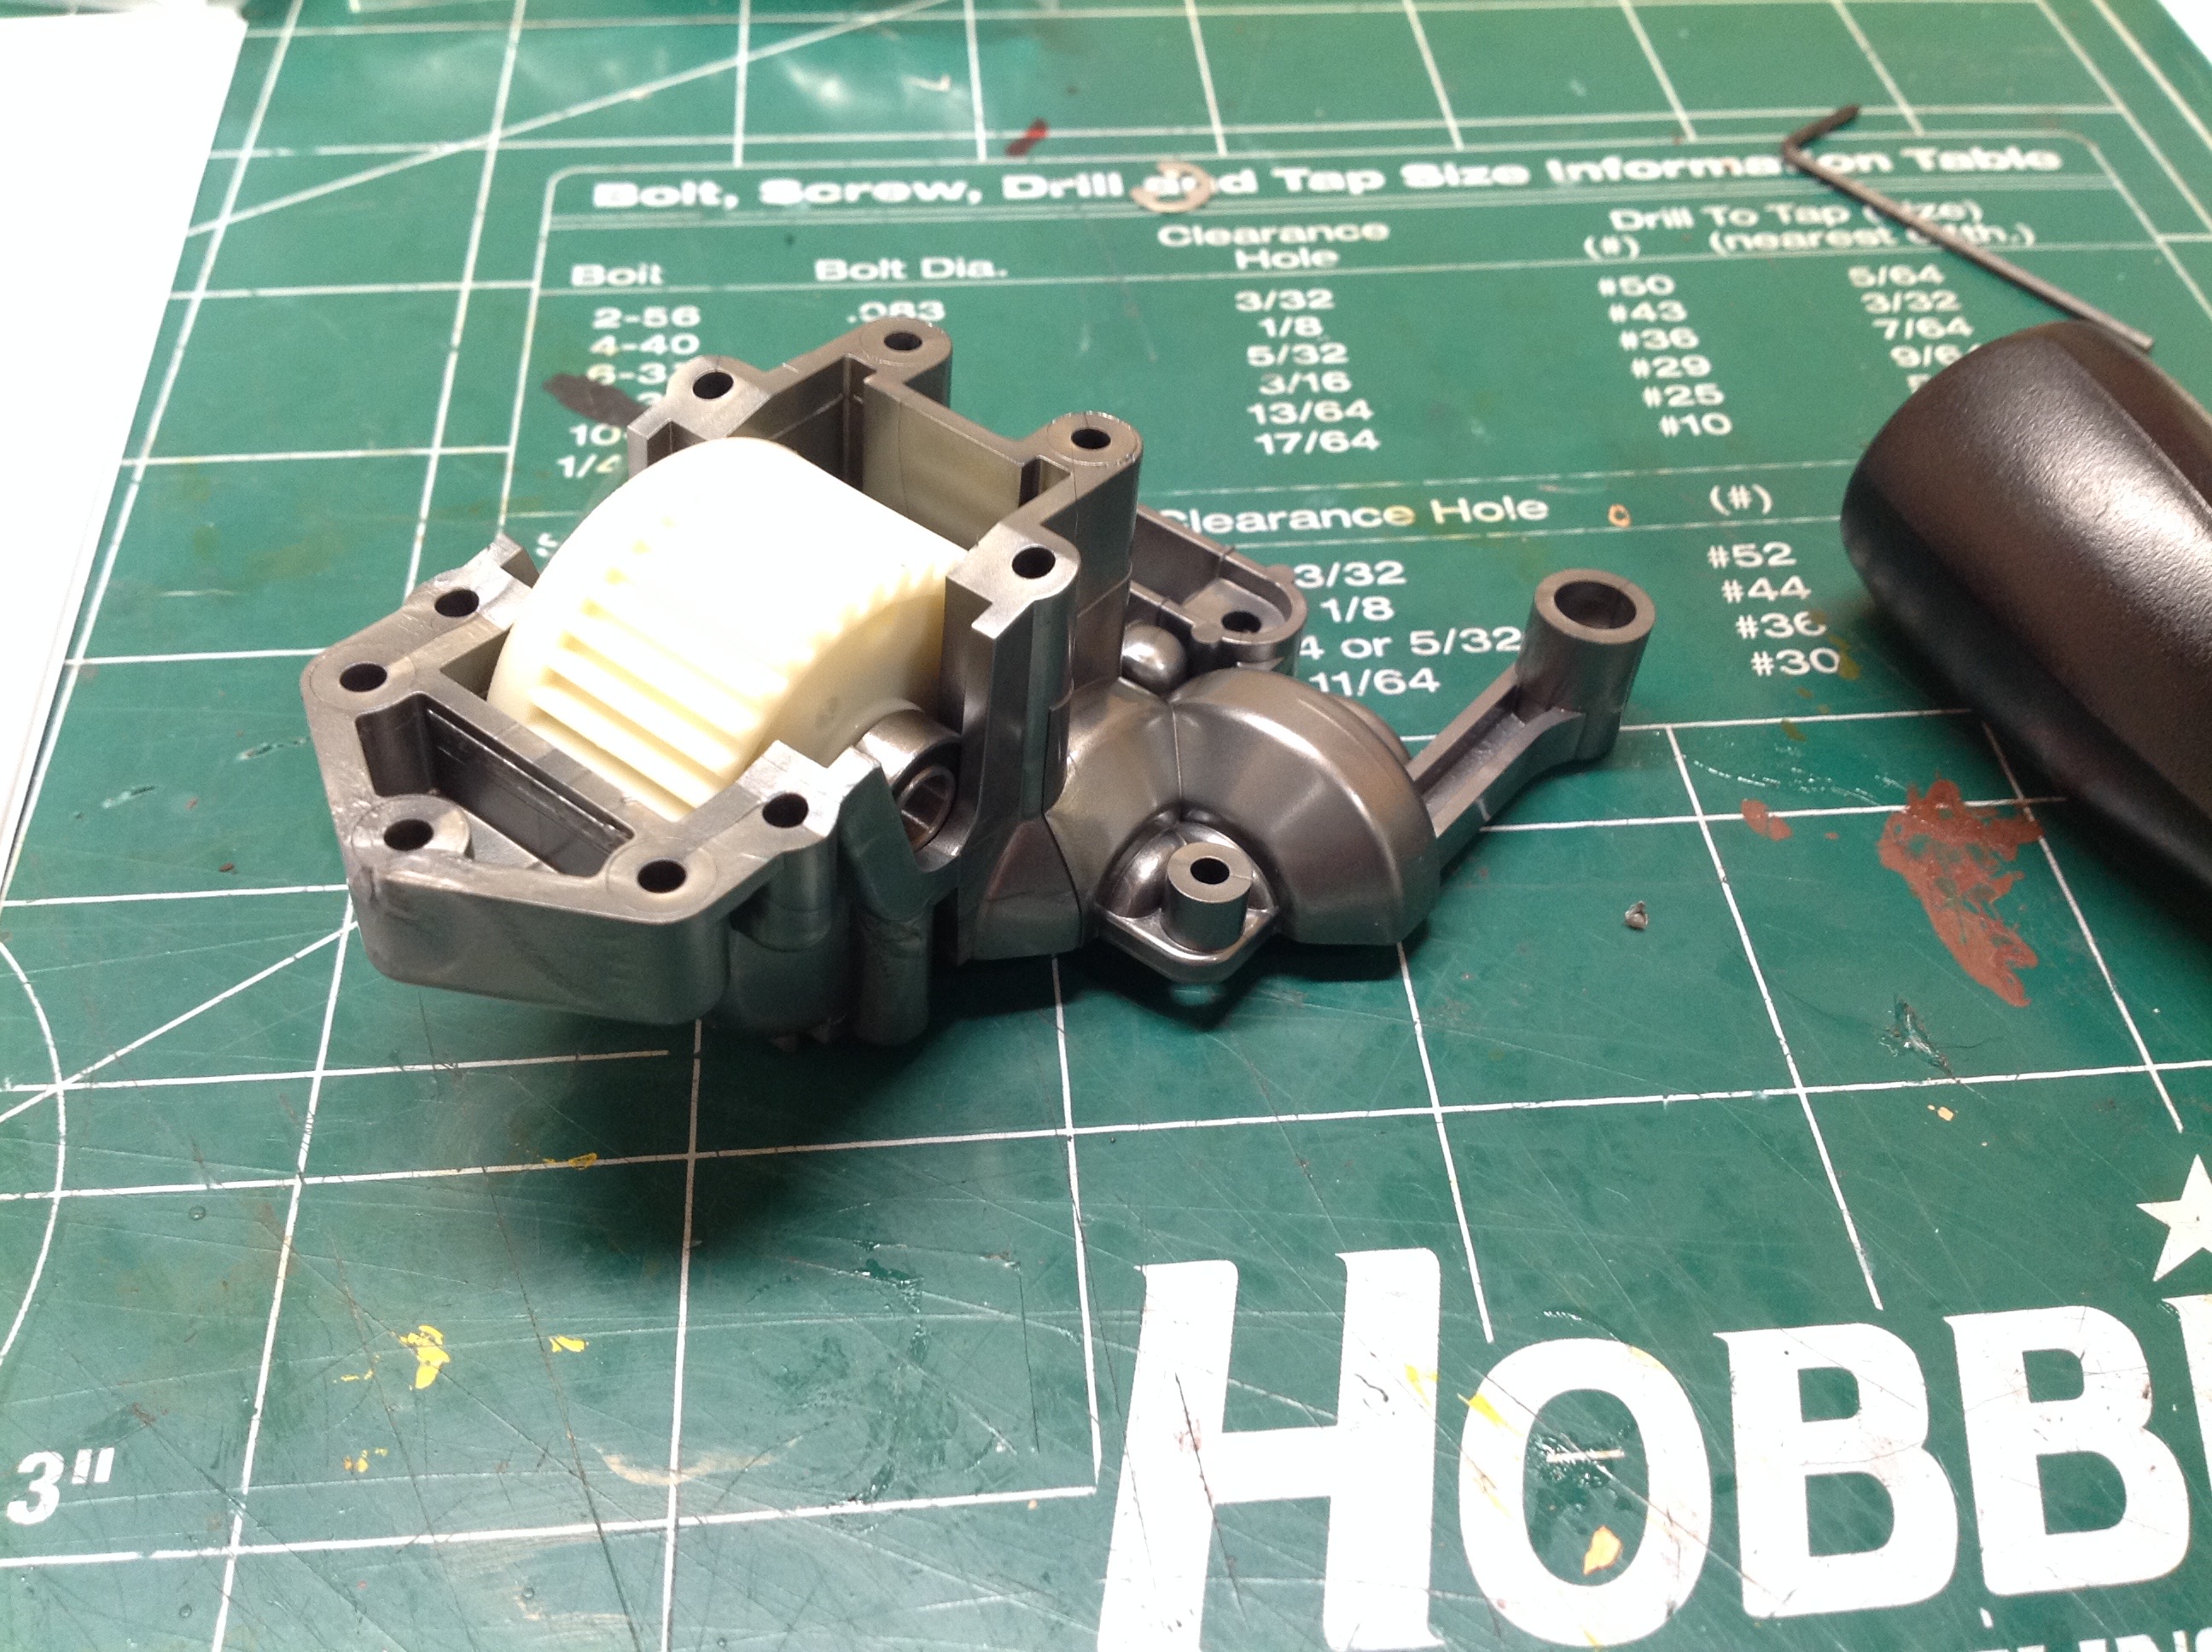
It is kind of amazing how many parts there are in Step
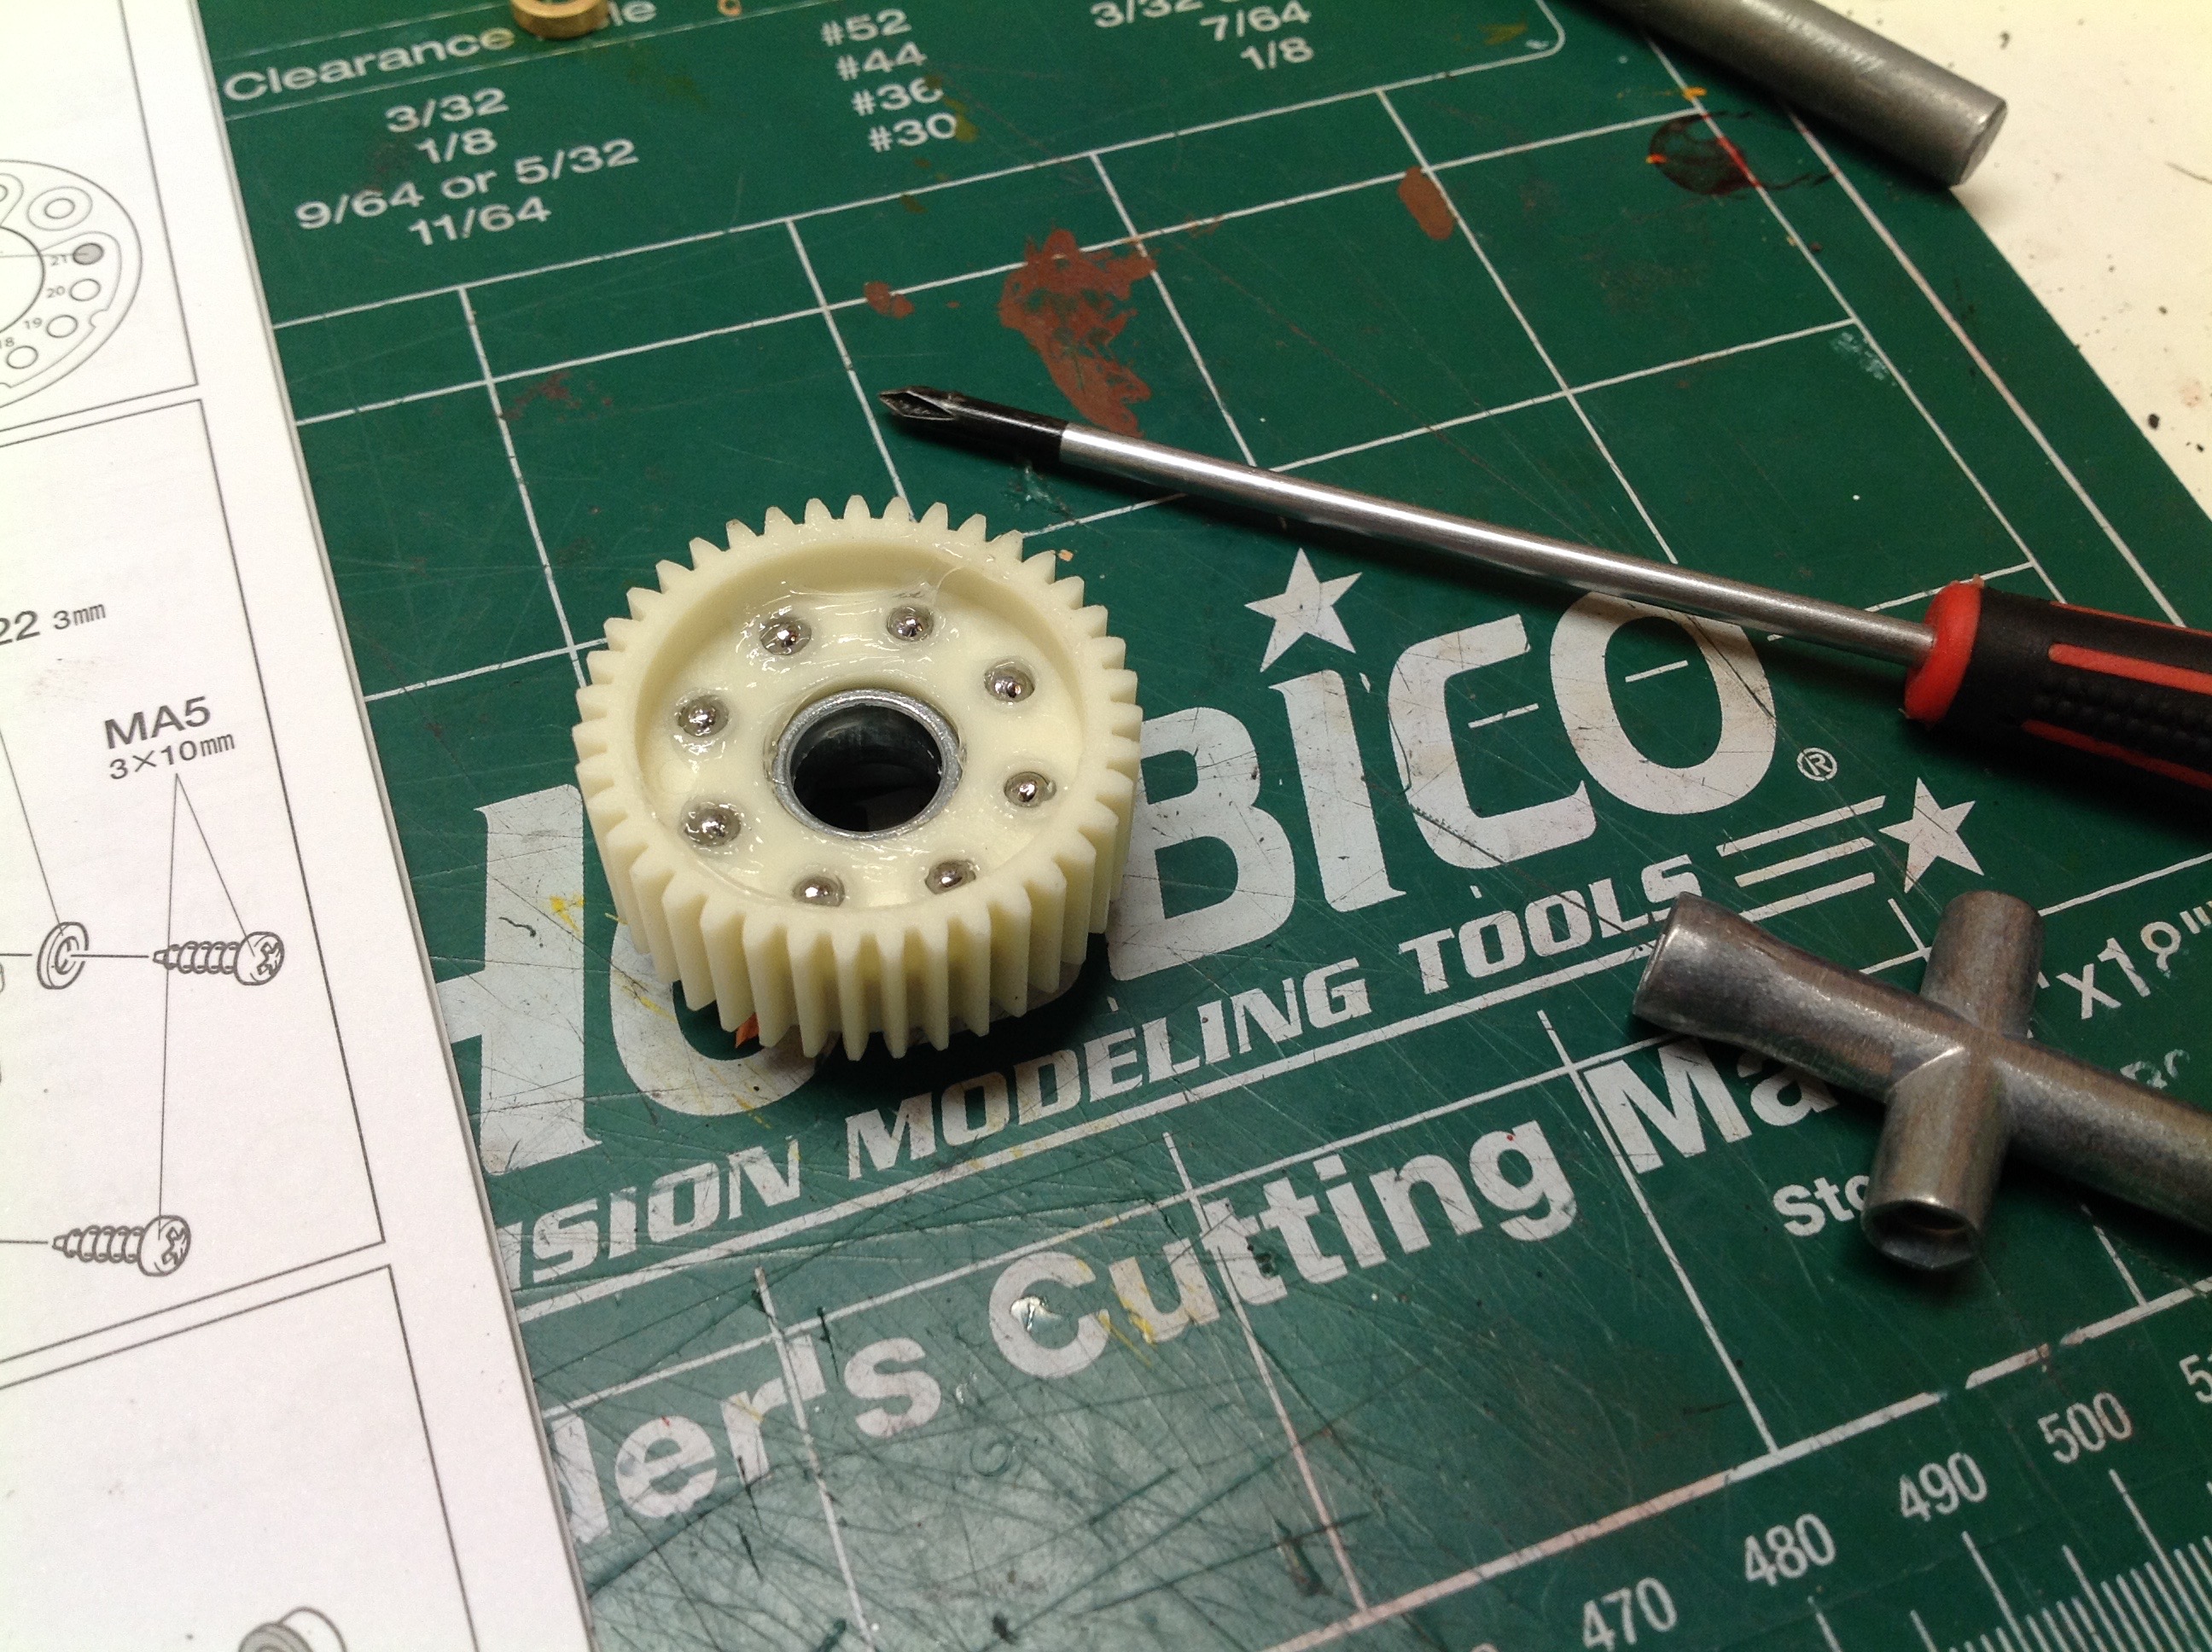
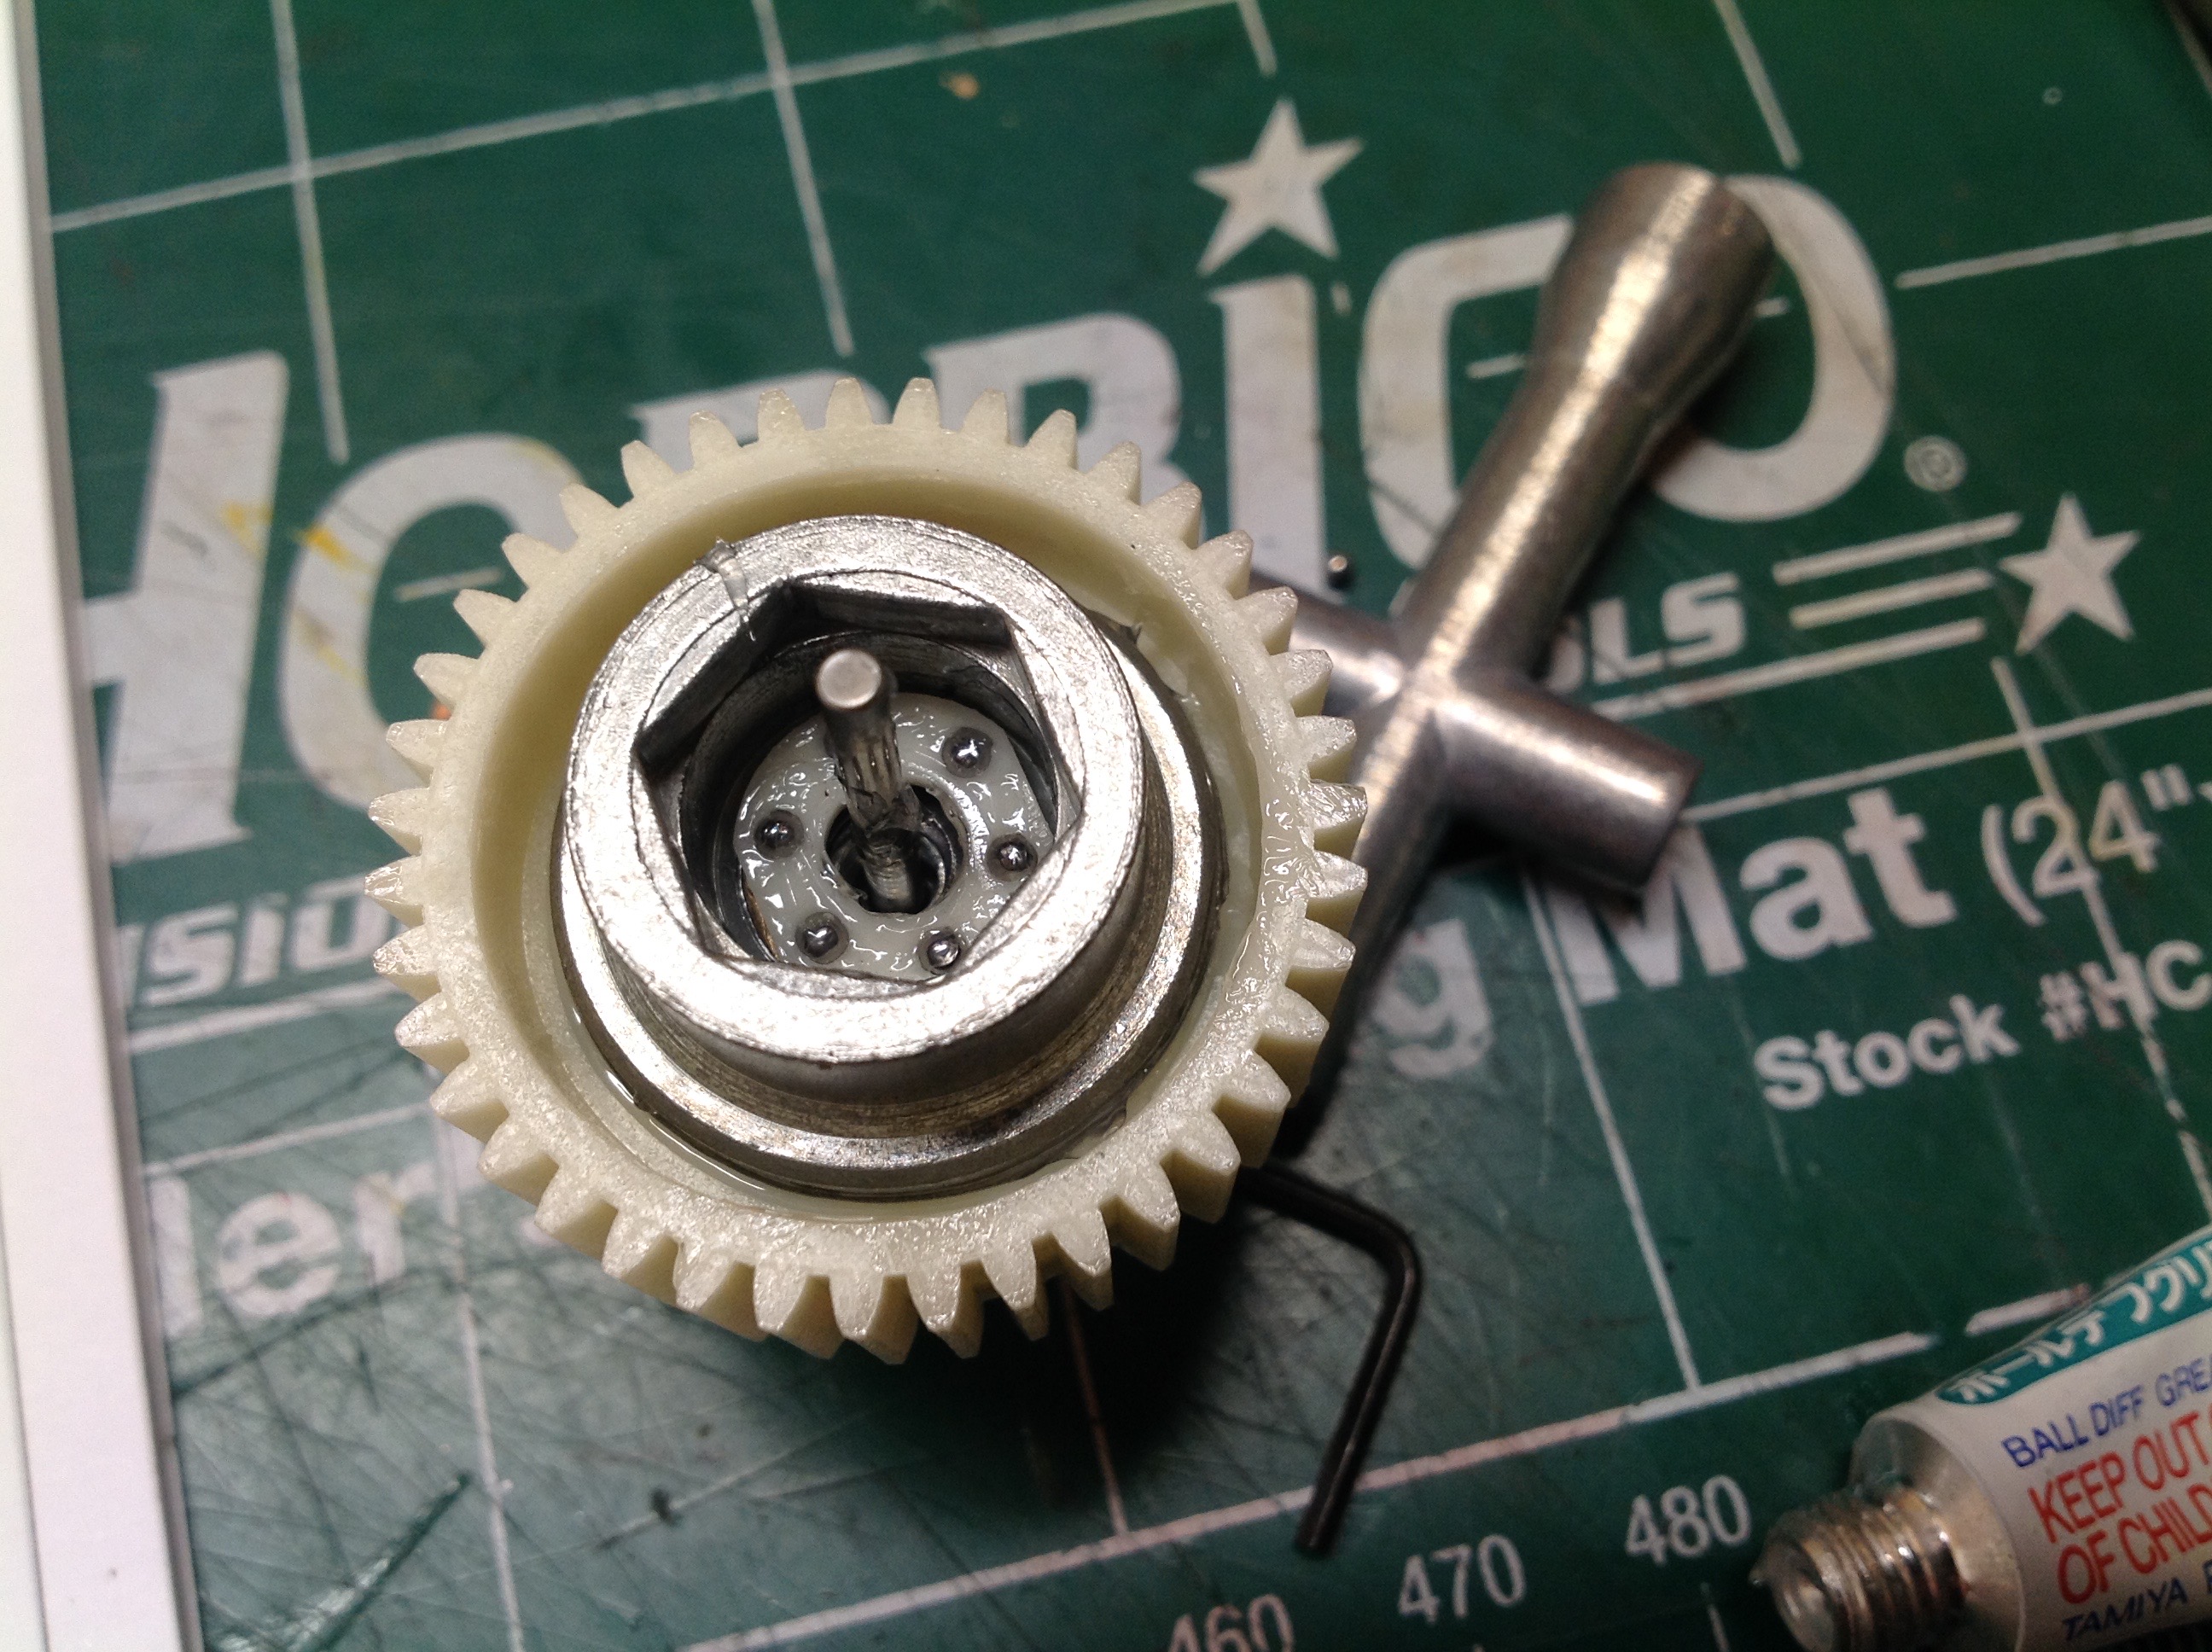
1 which builds the rear ball differential. I count at least
30. First the 8ea 3mm balls are inserted into the main spur gear
using grease. A thrust washer goes on either side followed by a
pressure plate which will be used to squeeze the washers and balls and
provide the splined connection to the outdrives. Next come a stack
of Belleville washers (or "disc springs"). There are 2 on the
inside of the thrust bearing and 3 on the outside. These provide a
spring rate low enough to make the squeeze adjustable. If you
clamped directly onto the balls a tiny turn of the nut would produce a
huge change in clamping pressure, but with a stackup of softer springs
you can make finer adjustments. The thrust bearing must be built
up from 6ea 1/16" balls. I found it interesting that one set of
balls is metric and the other Imperial units. Finally a bolt is
installed which is used to clamp everything up and make
adjustments. The instructions say nothing about how to adjust the
ball differential properly, so you need to already know what you are
doing.
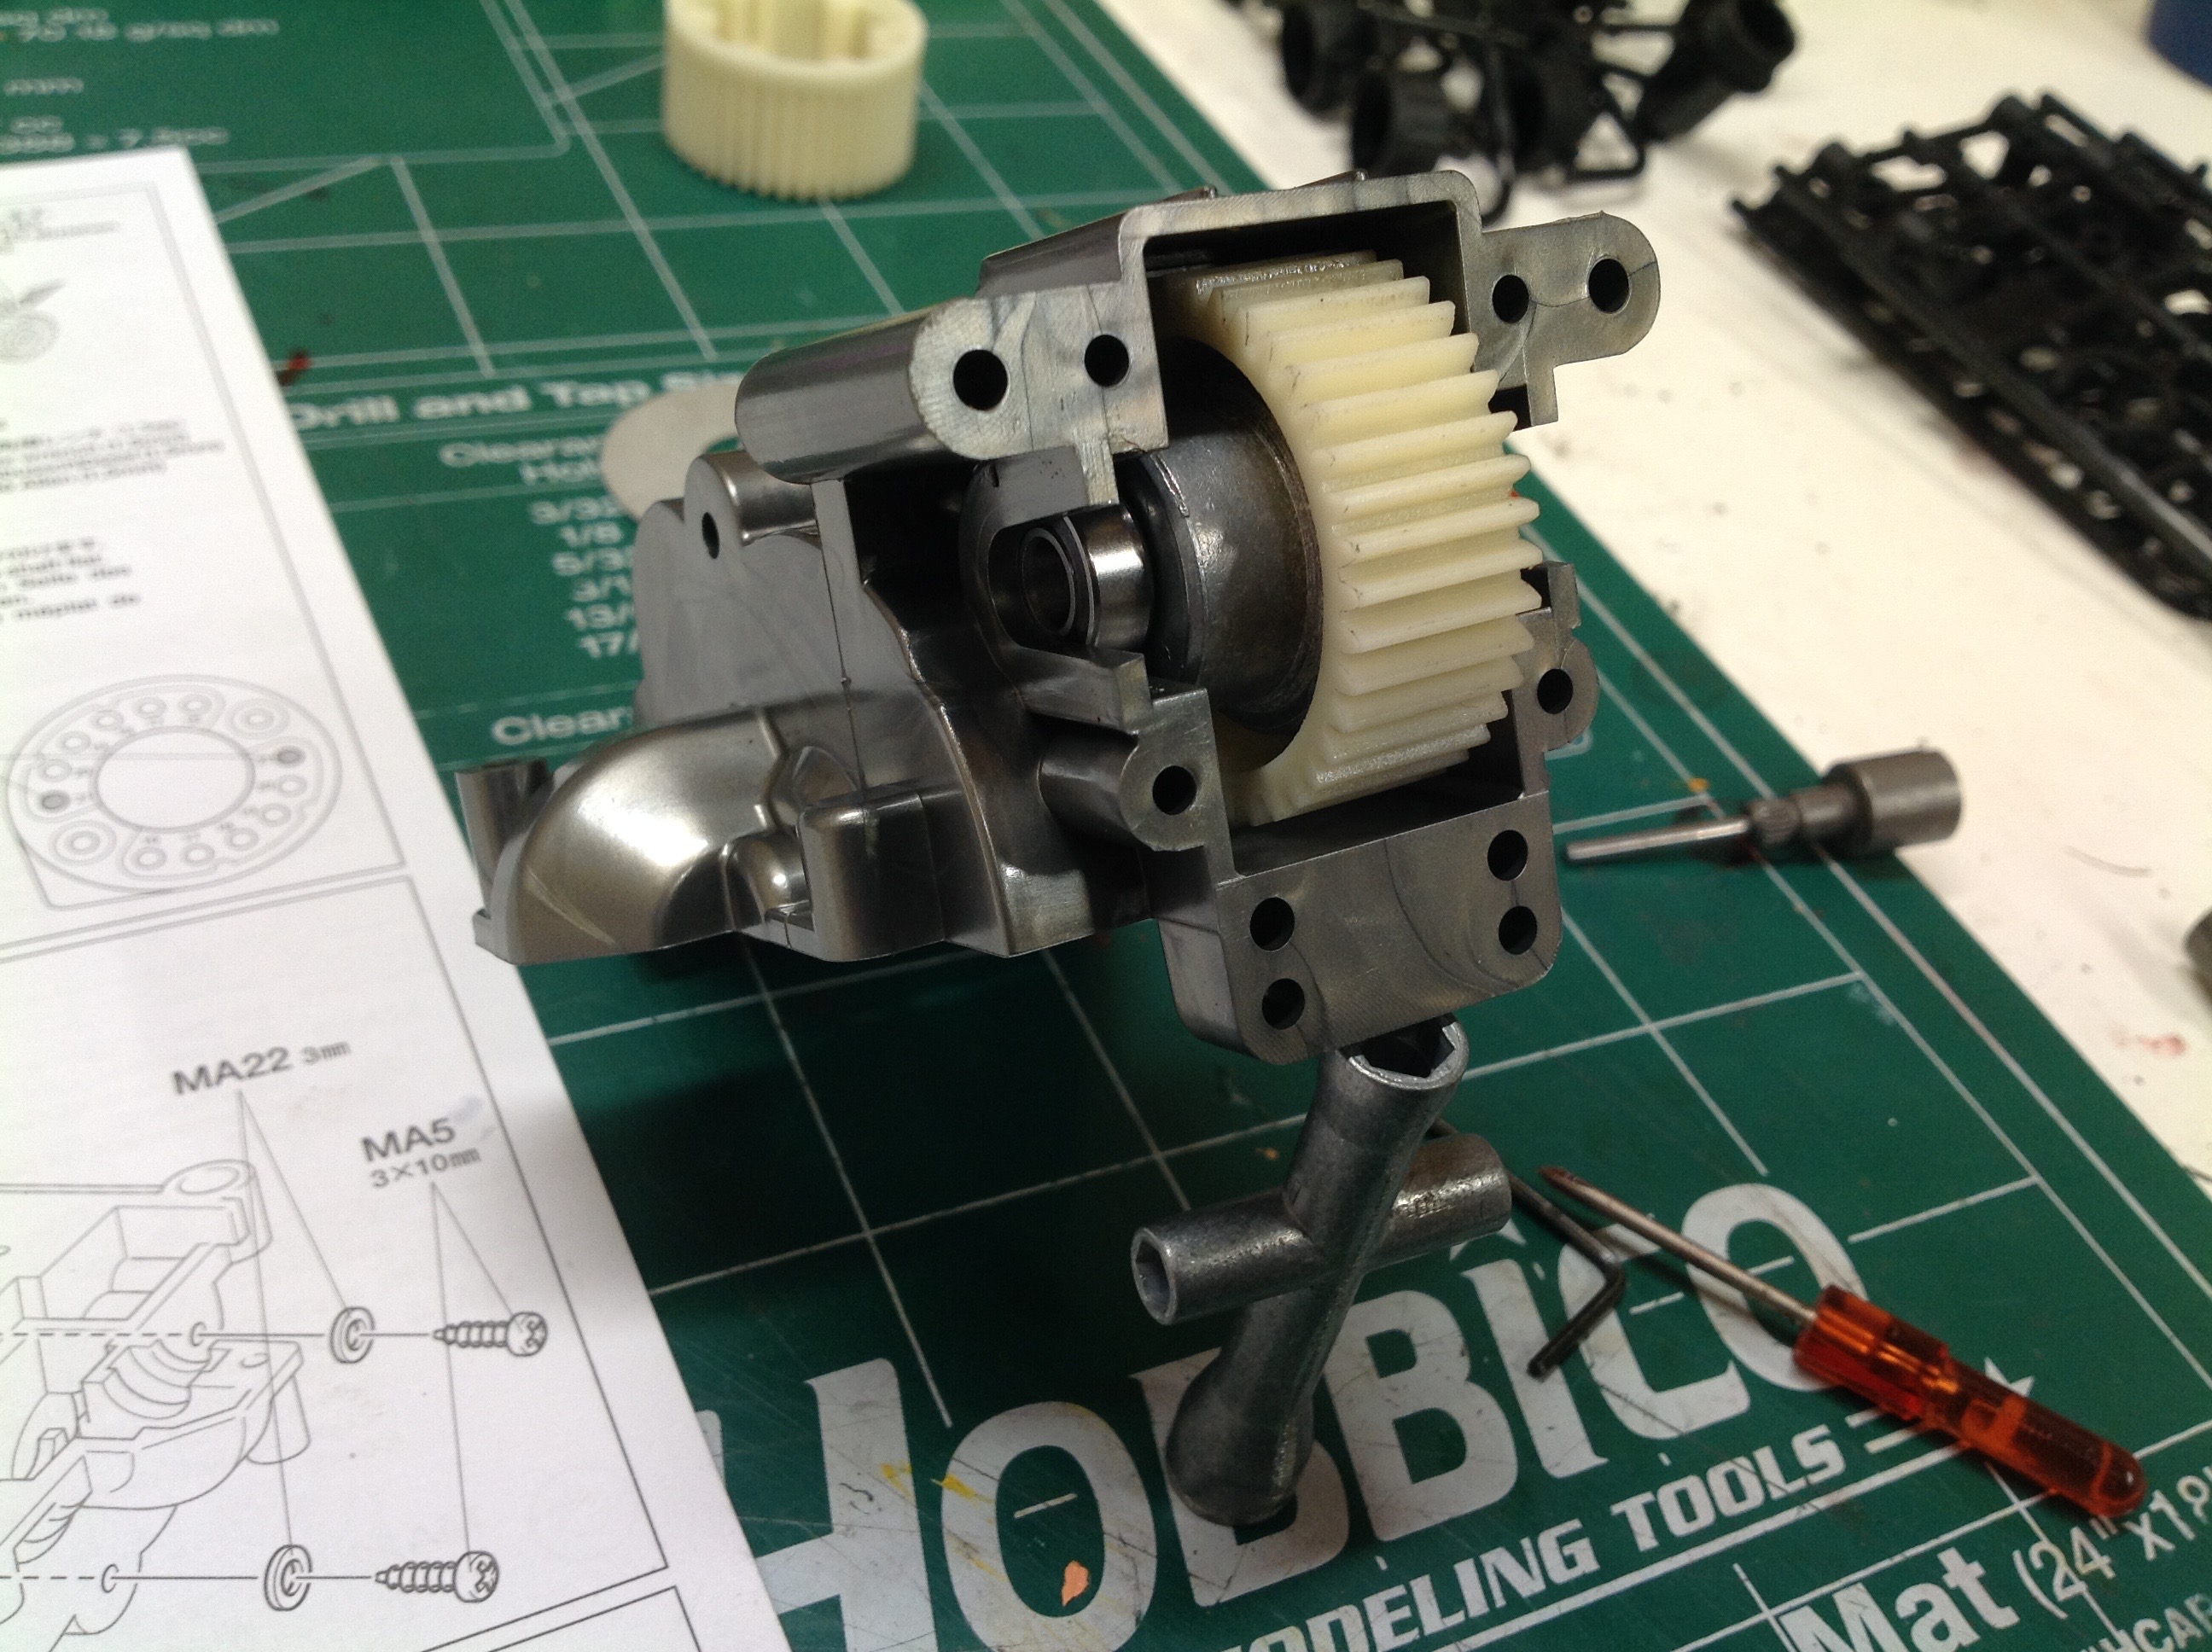
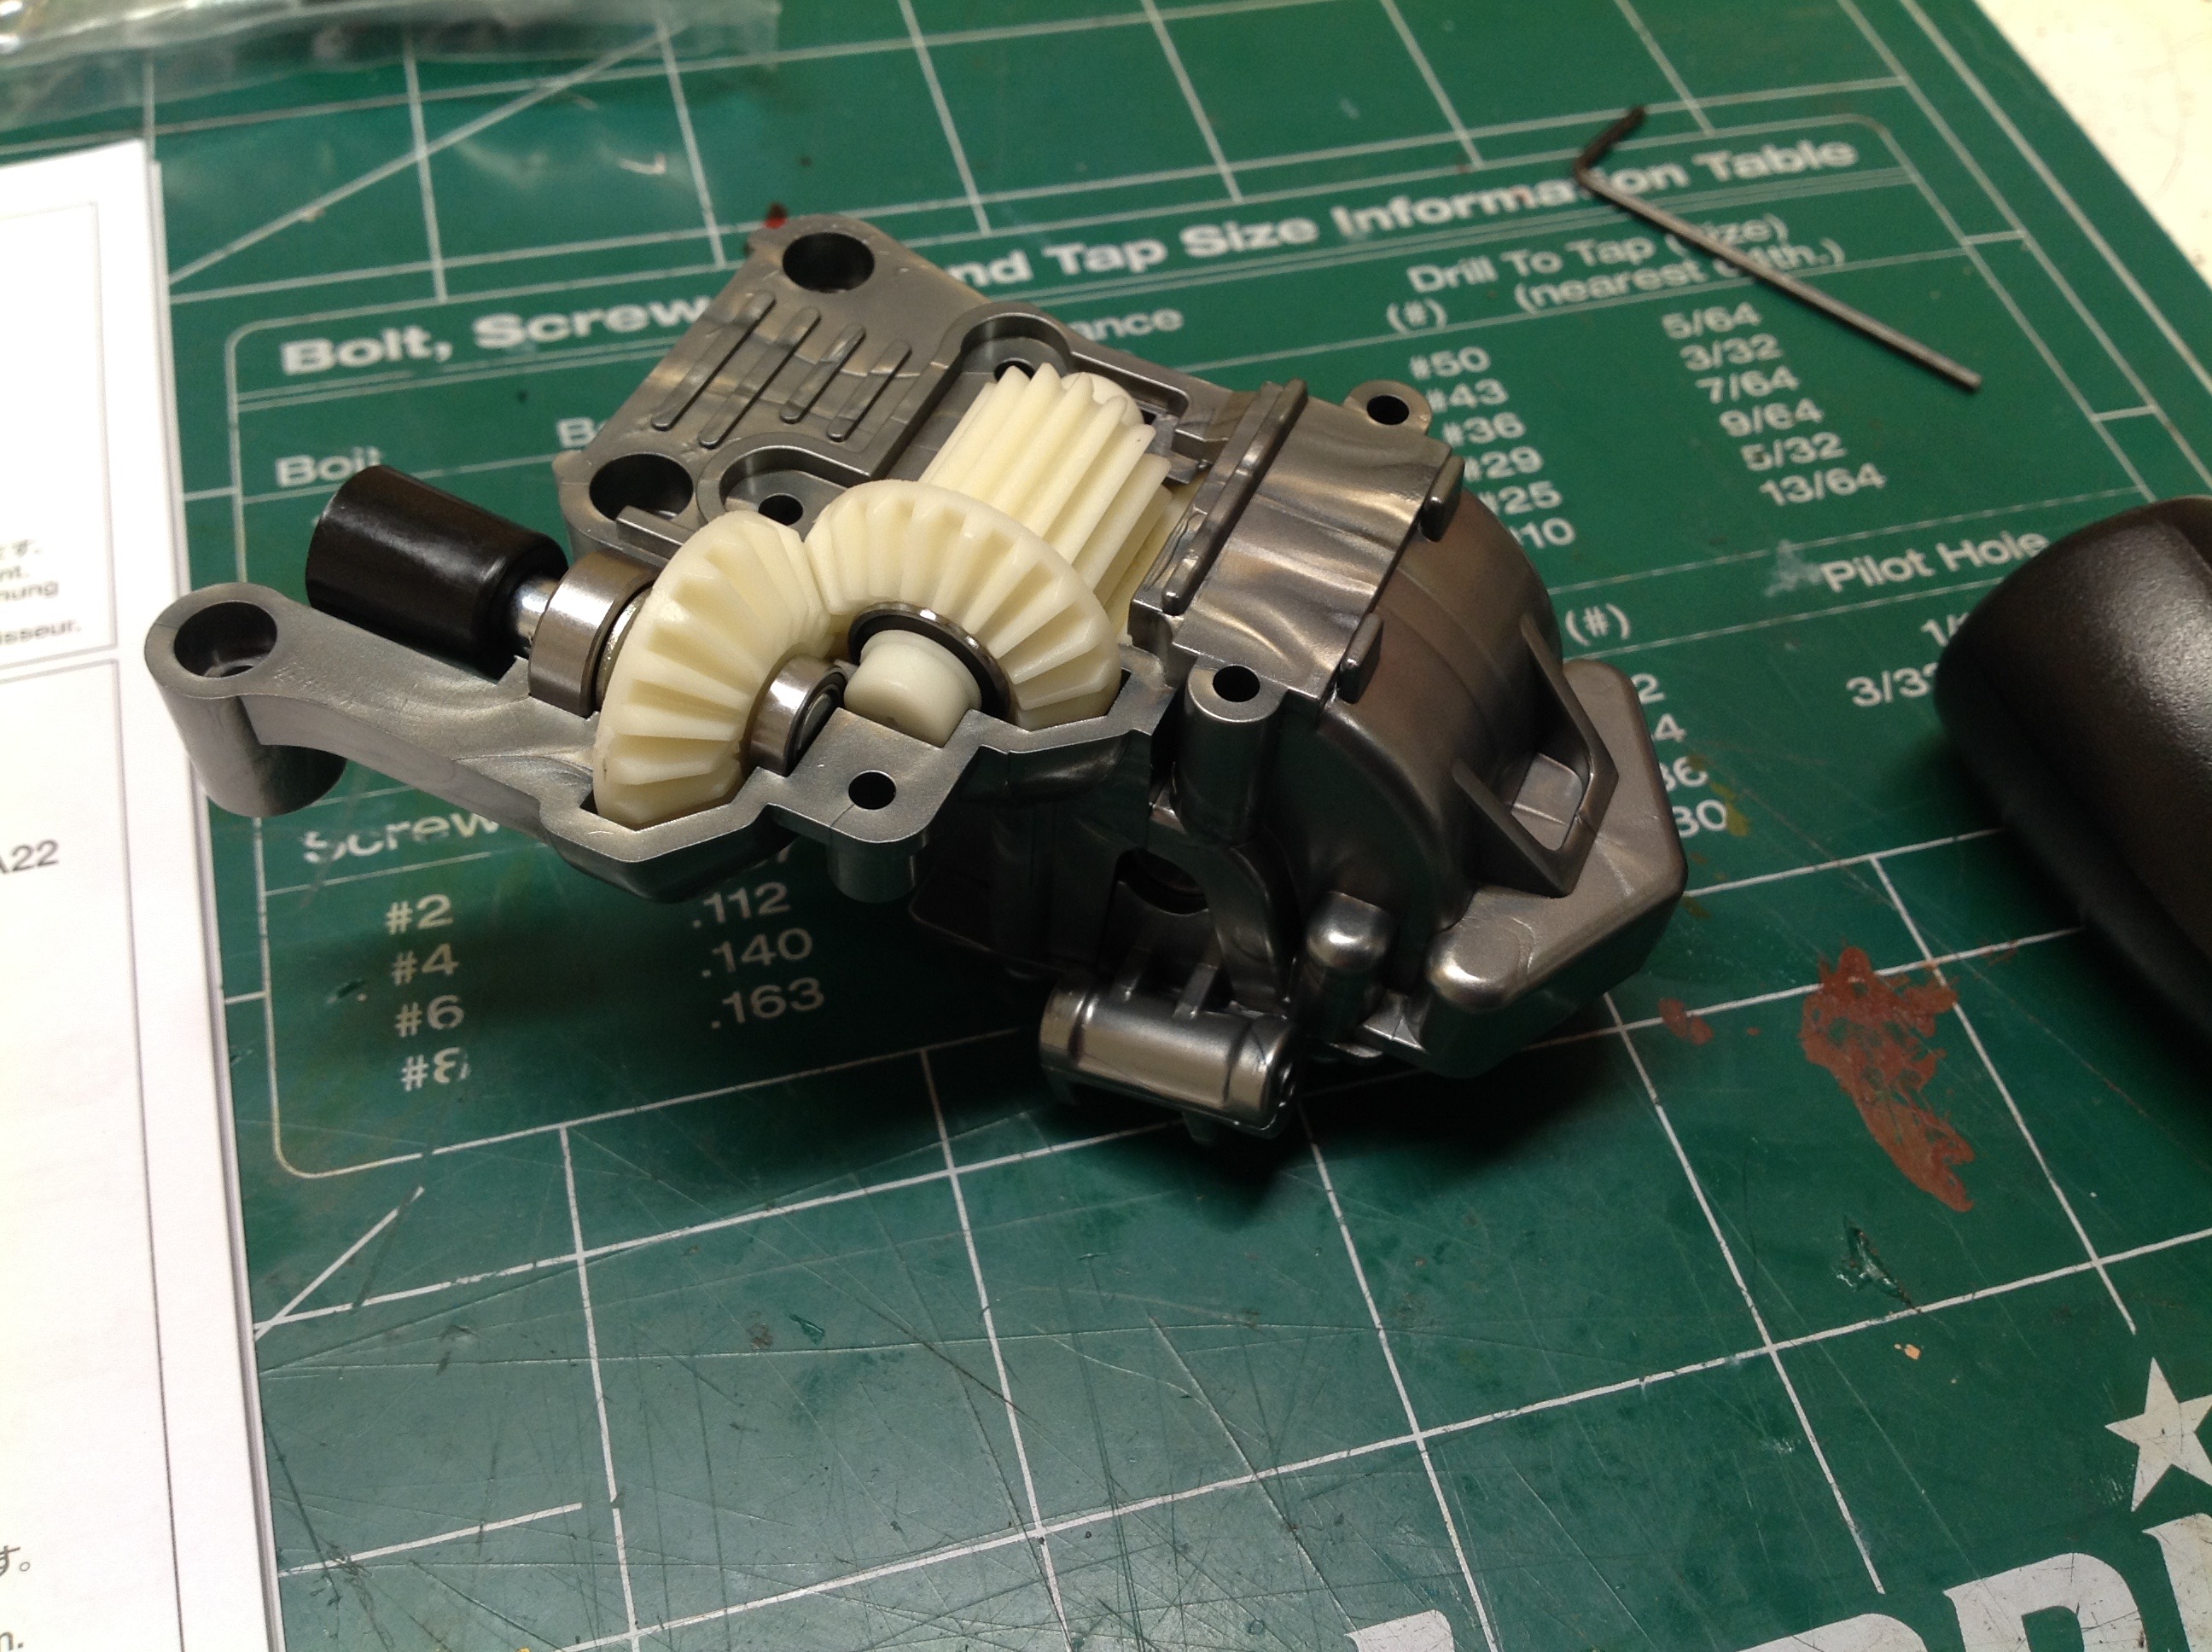
Now the differential unit is installed in the pearl
gunmetal colored housing. Plastic bushings are called for in the
instructions, but naturally I swapped them out for ball bearings.
The right hand photo shows the other gearbox half installed.
Interestingly, the gearbox connects front to back rather than side to
side.
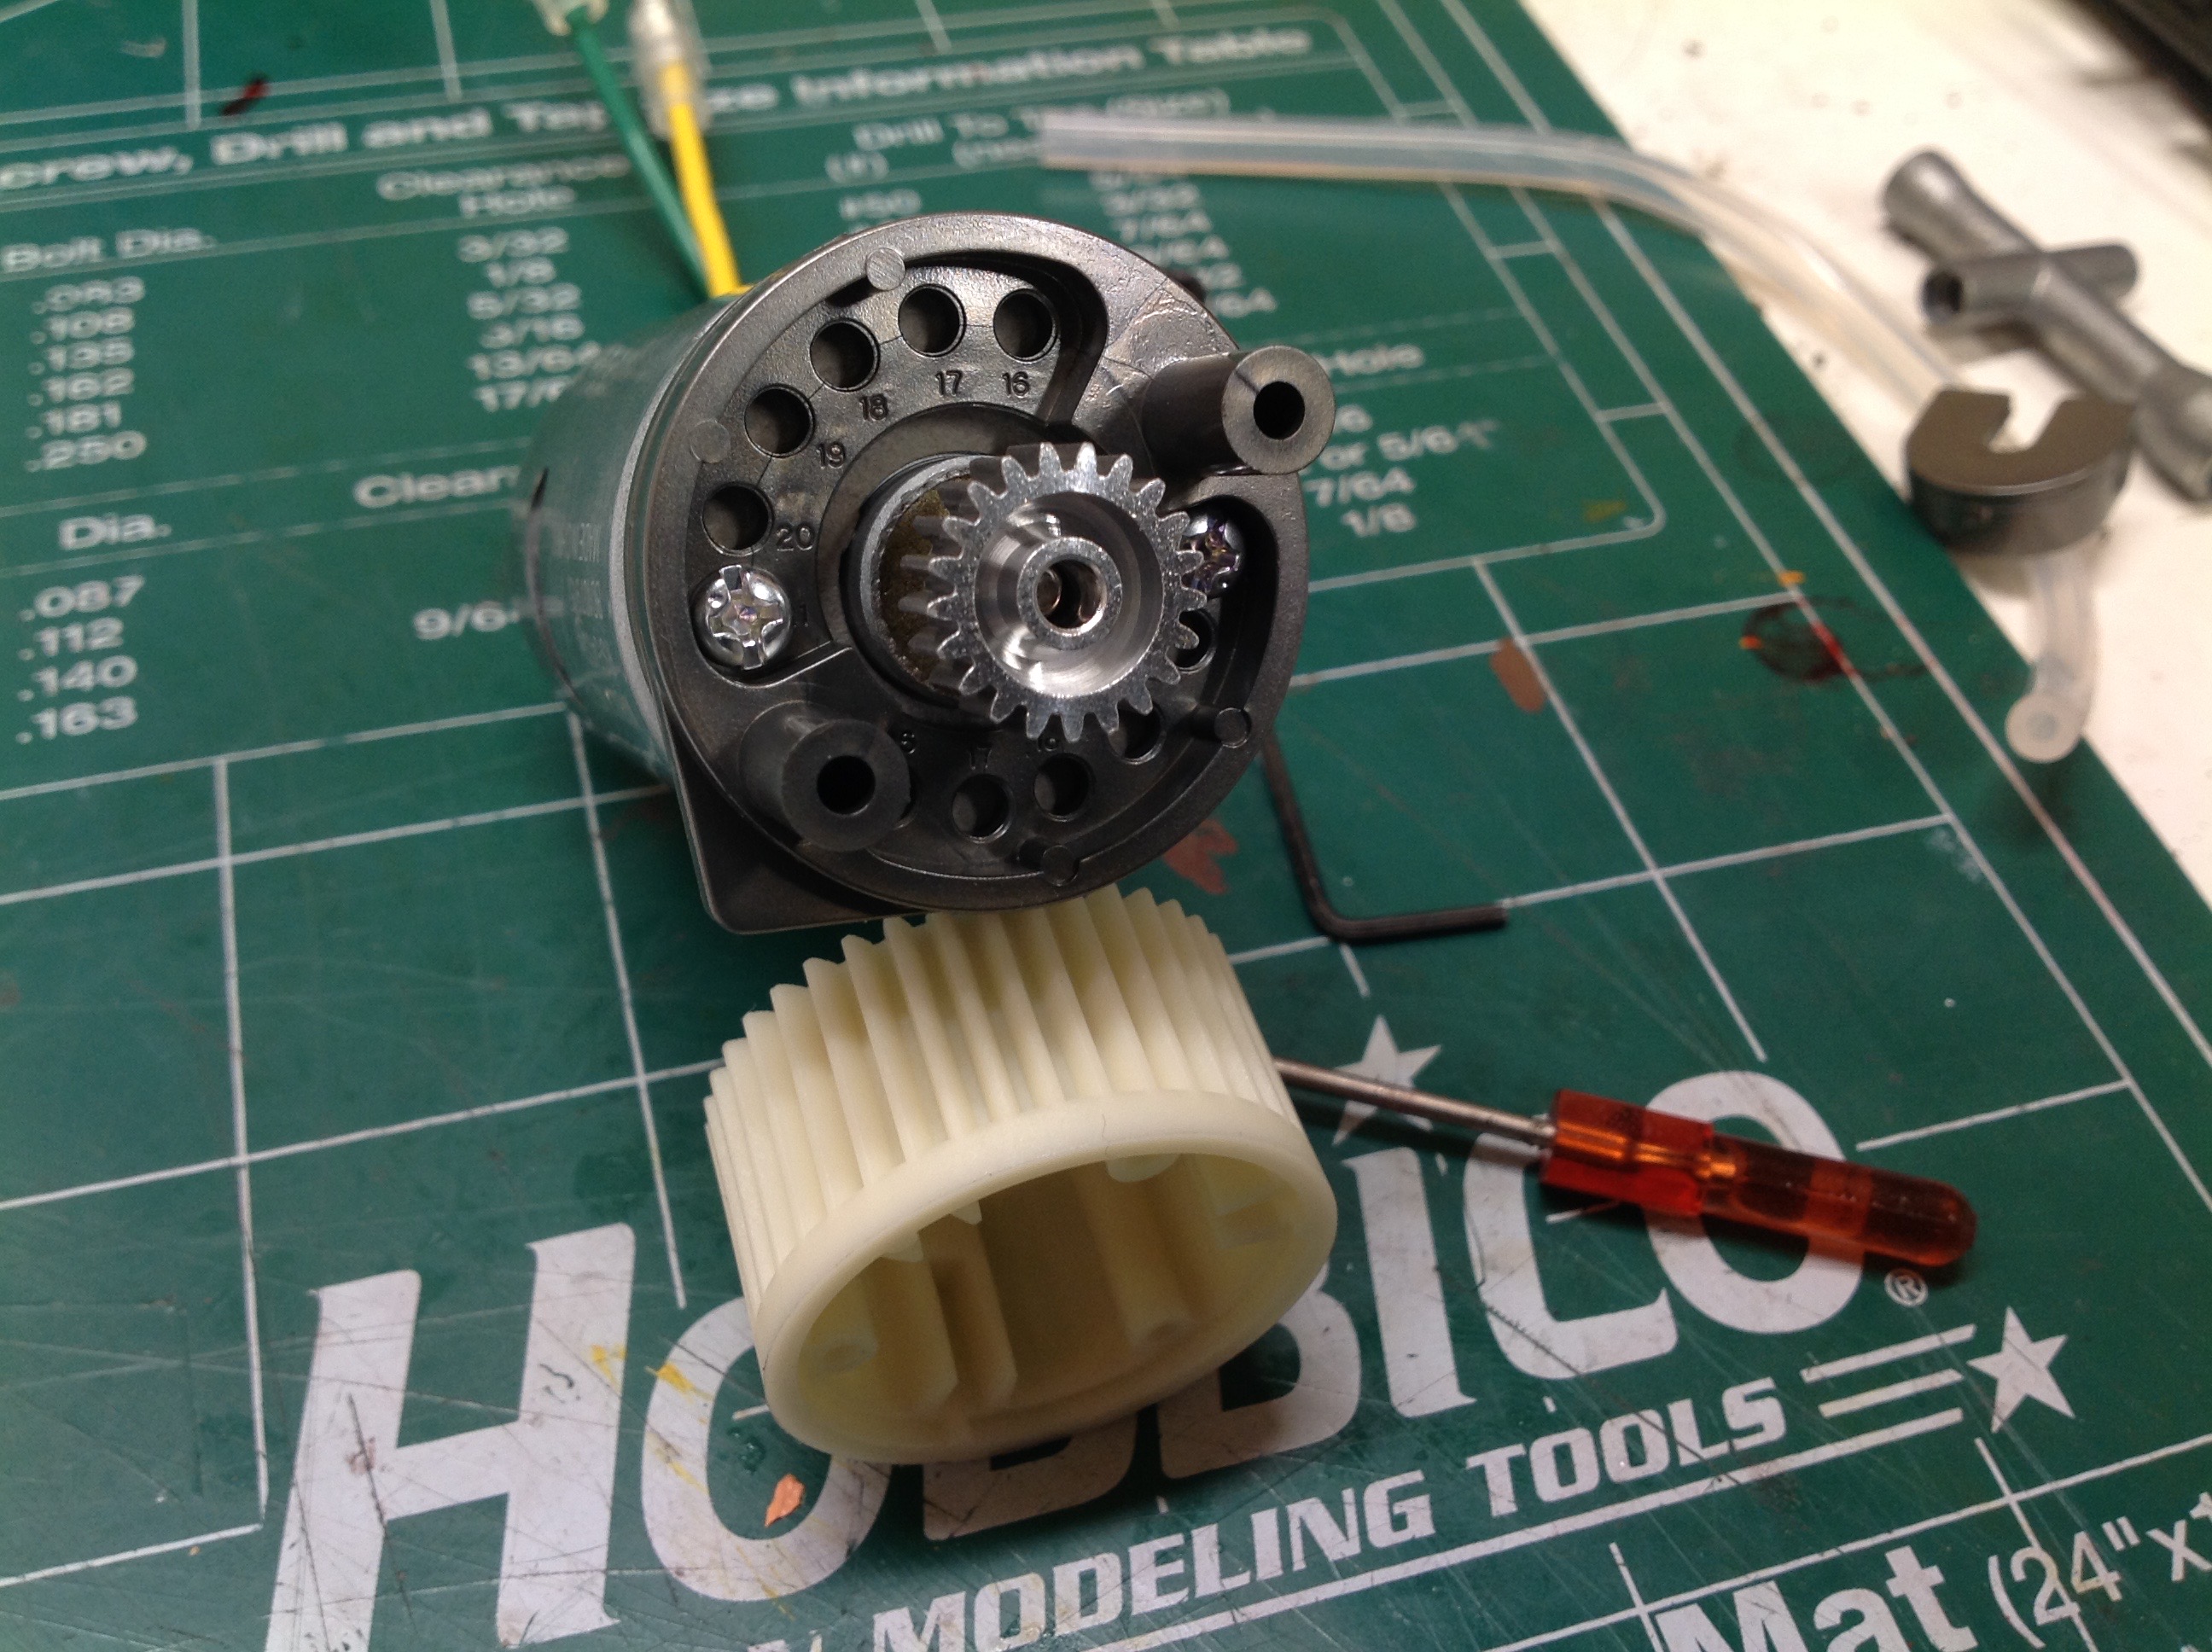
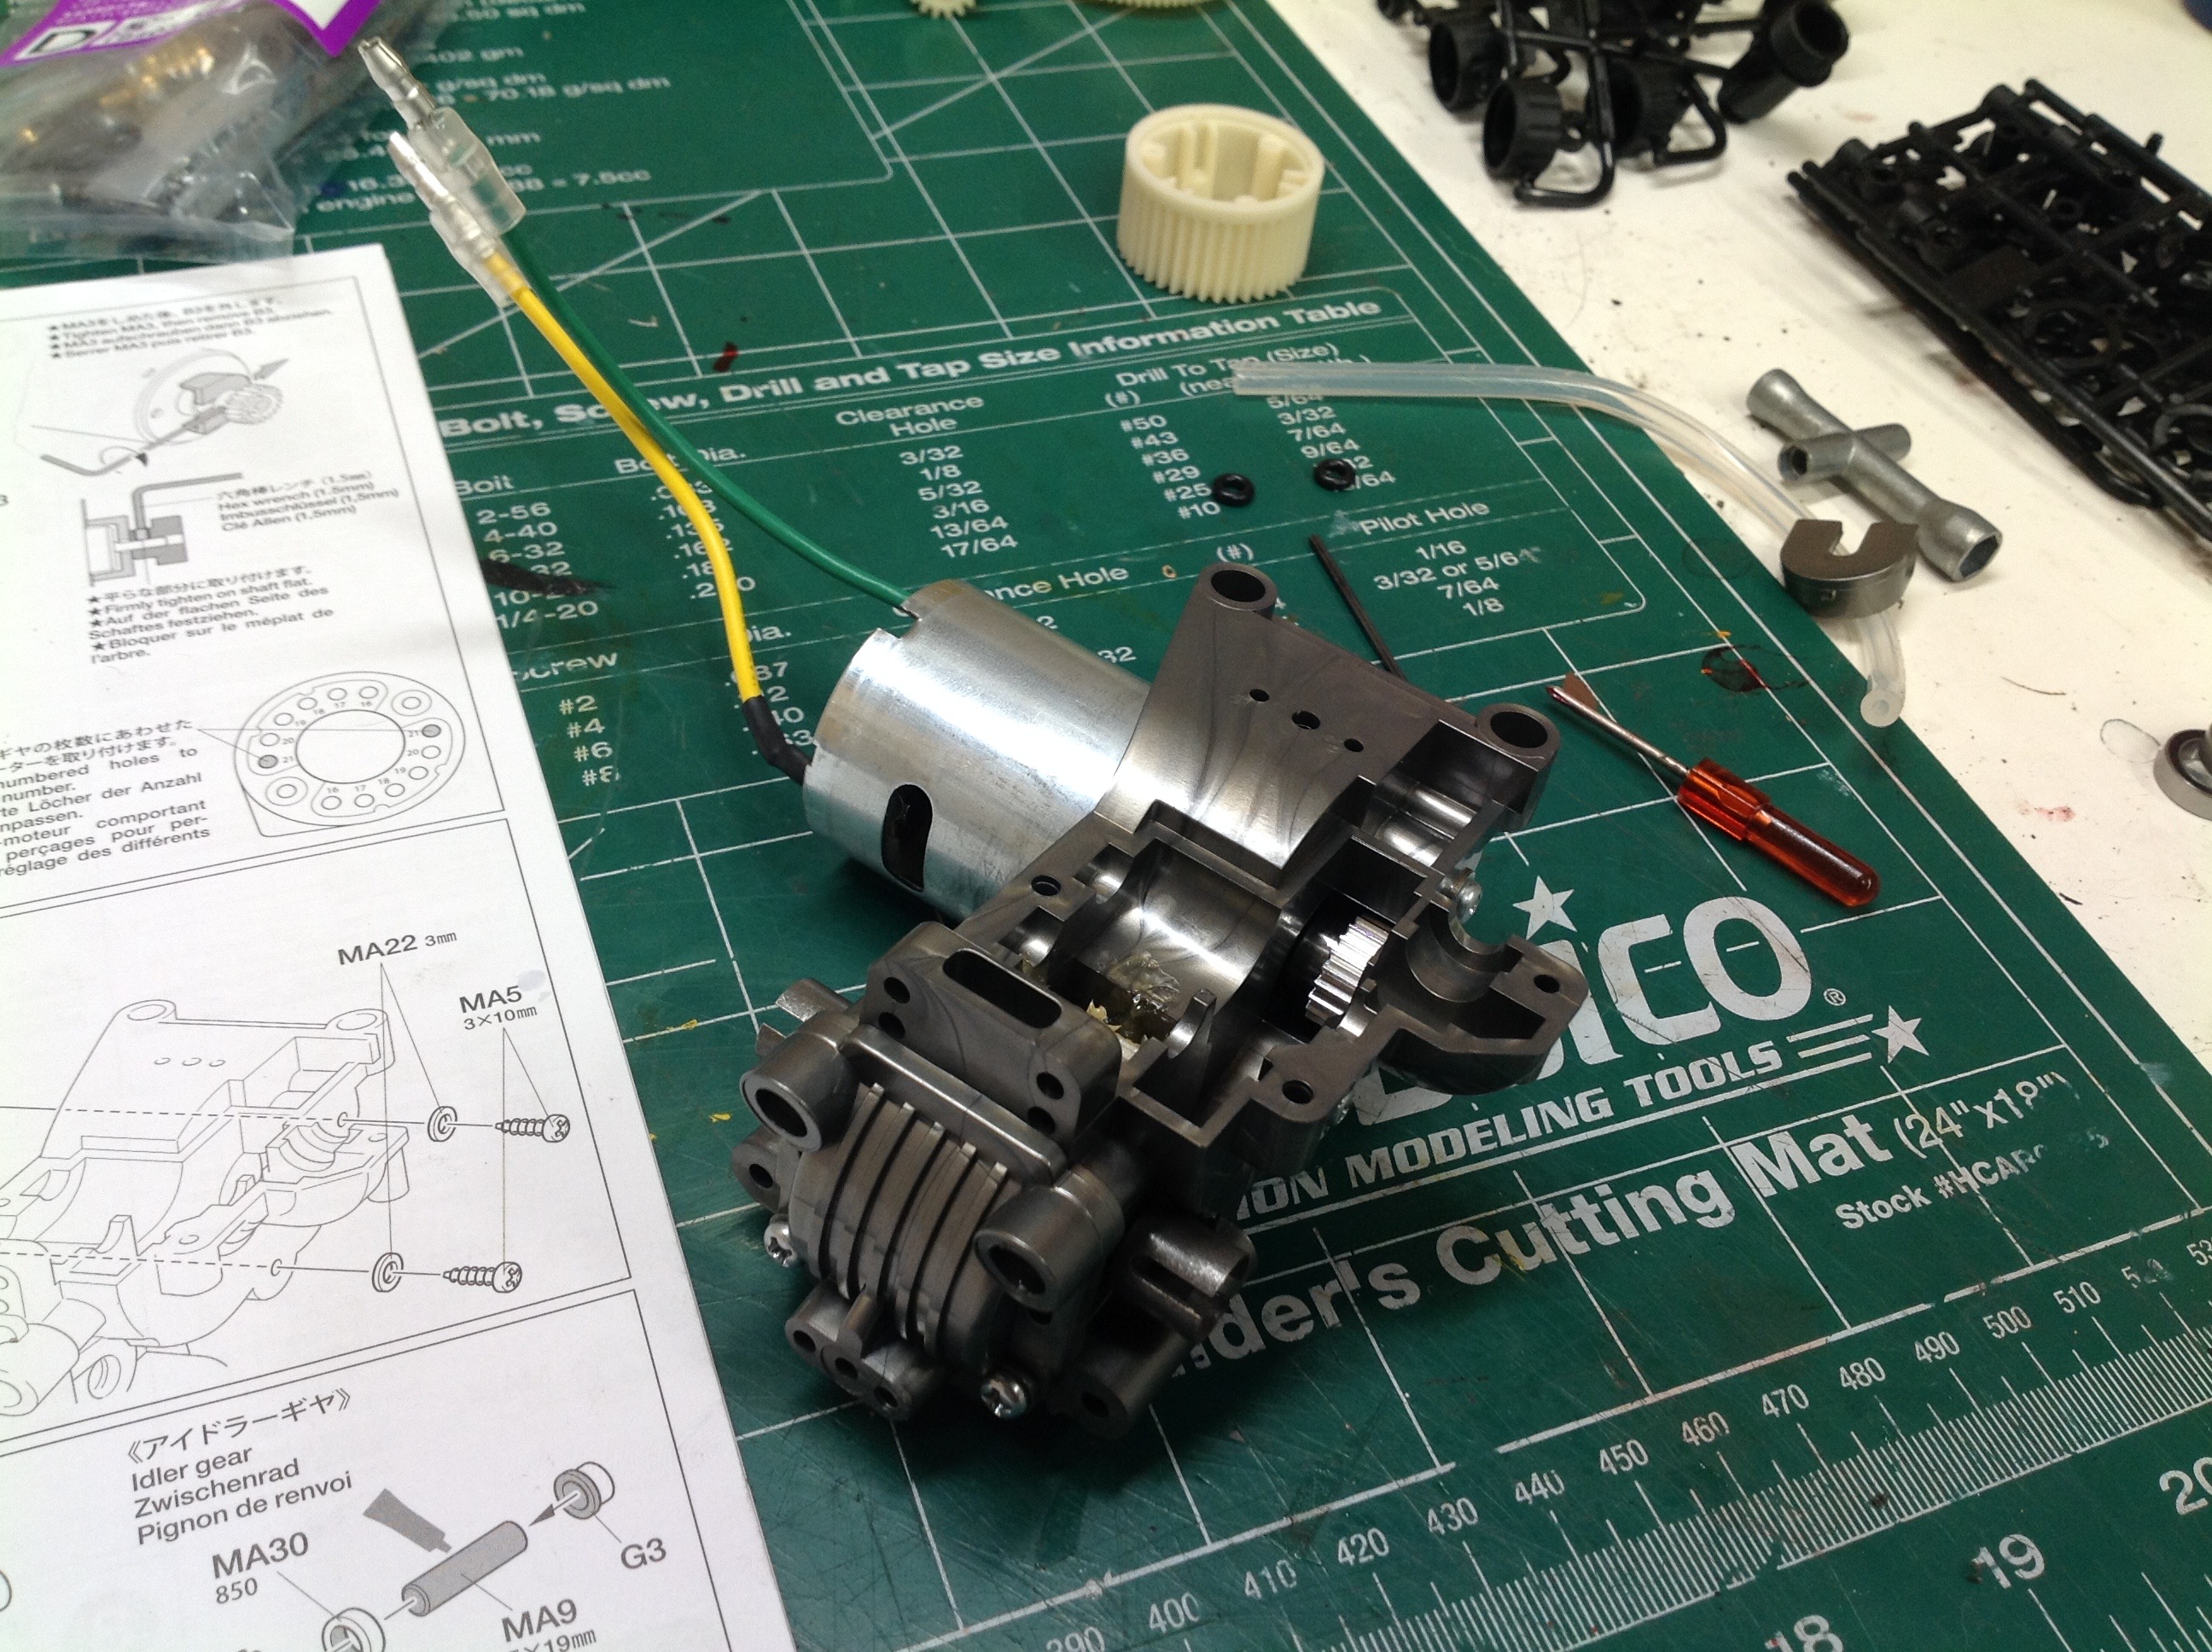
The standard 540 motor bolts to an indexing motor
mount which supports pinion gears from 16 to 21 teeth. The kit
supplied gear is the highest speed gear, the 21 tooth. The
instructions say never to use any other motor or pinion gear which seems
like a strange thing to say for a touring car like this. For now I
will obey, but I intend to rebel later.
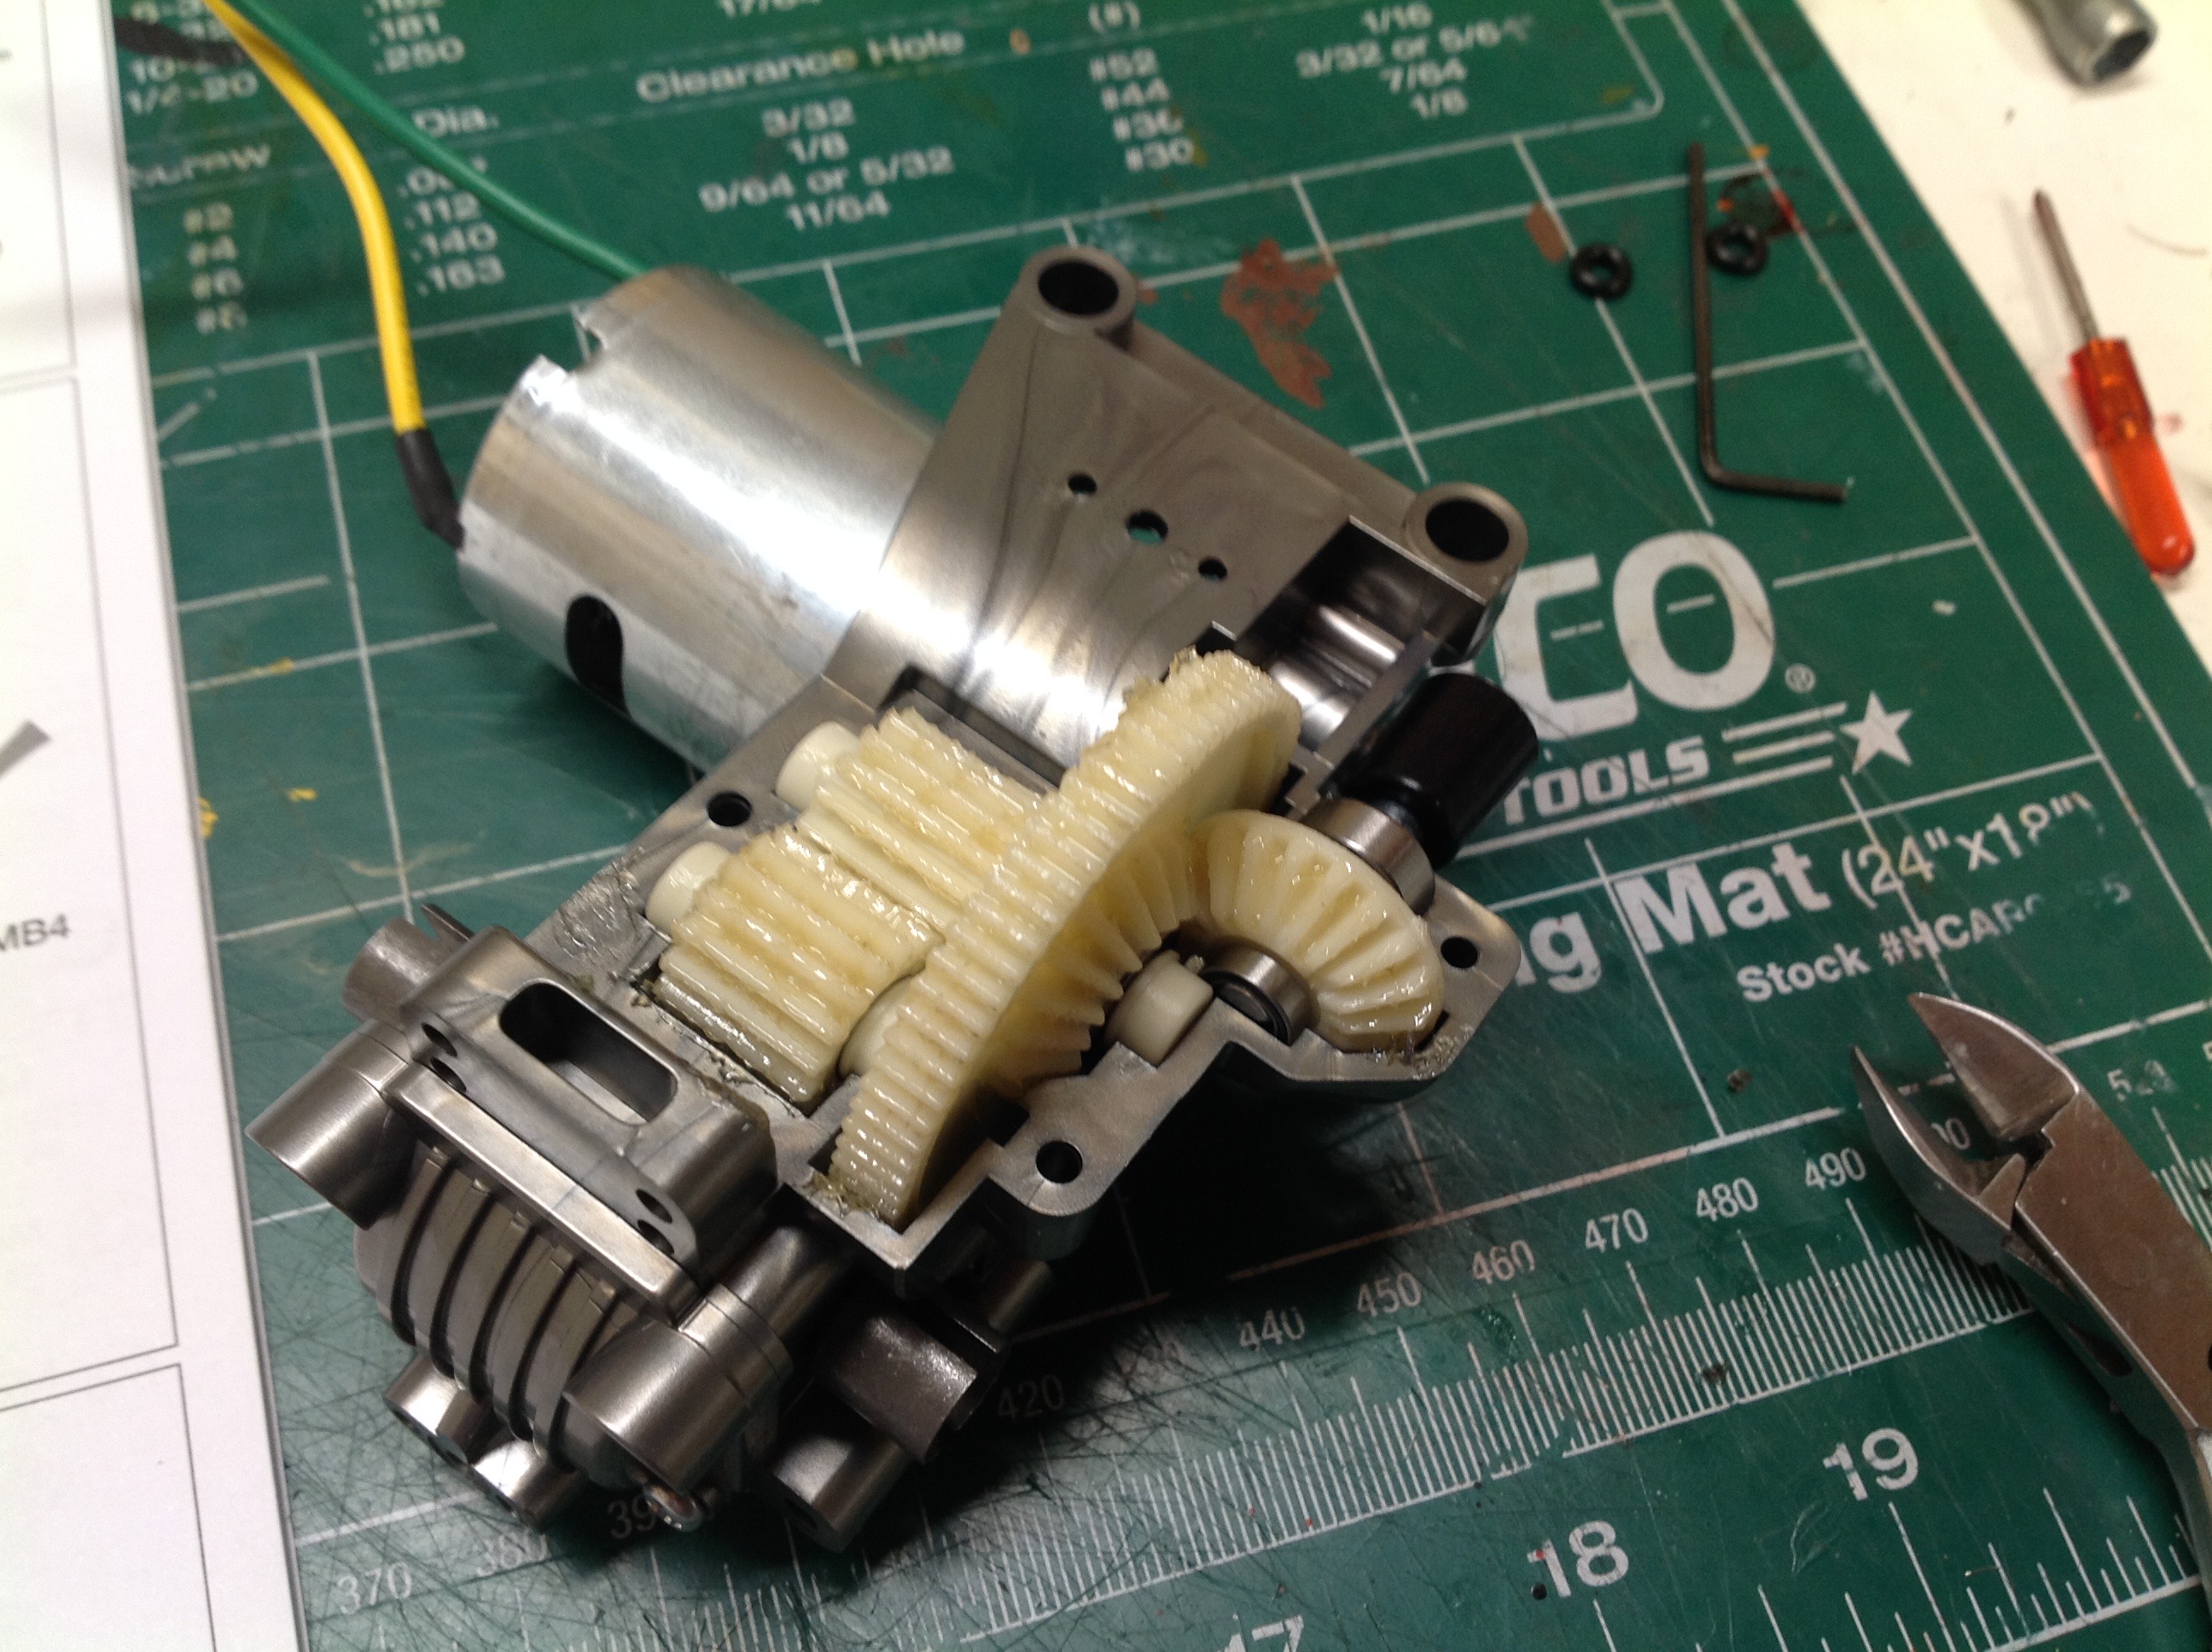
The weakest point in the drivertrain must surely be
this bevel gear which is built into the spur. As you can see in
the right hand image, the bevel isn't needed to drive the rear wheels,
but does turn the corner to drive the propeller shaft which runs to the
front wheels.
With the rear gearbox buttoned up we can add the
suspension arms, the dogbones, the hubs, and the drive cups.
Everything attaches to the gearbox housings with screw pins.

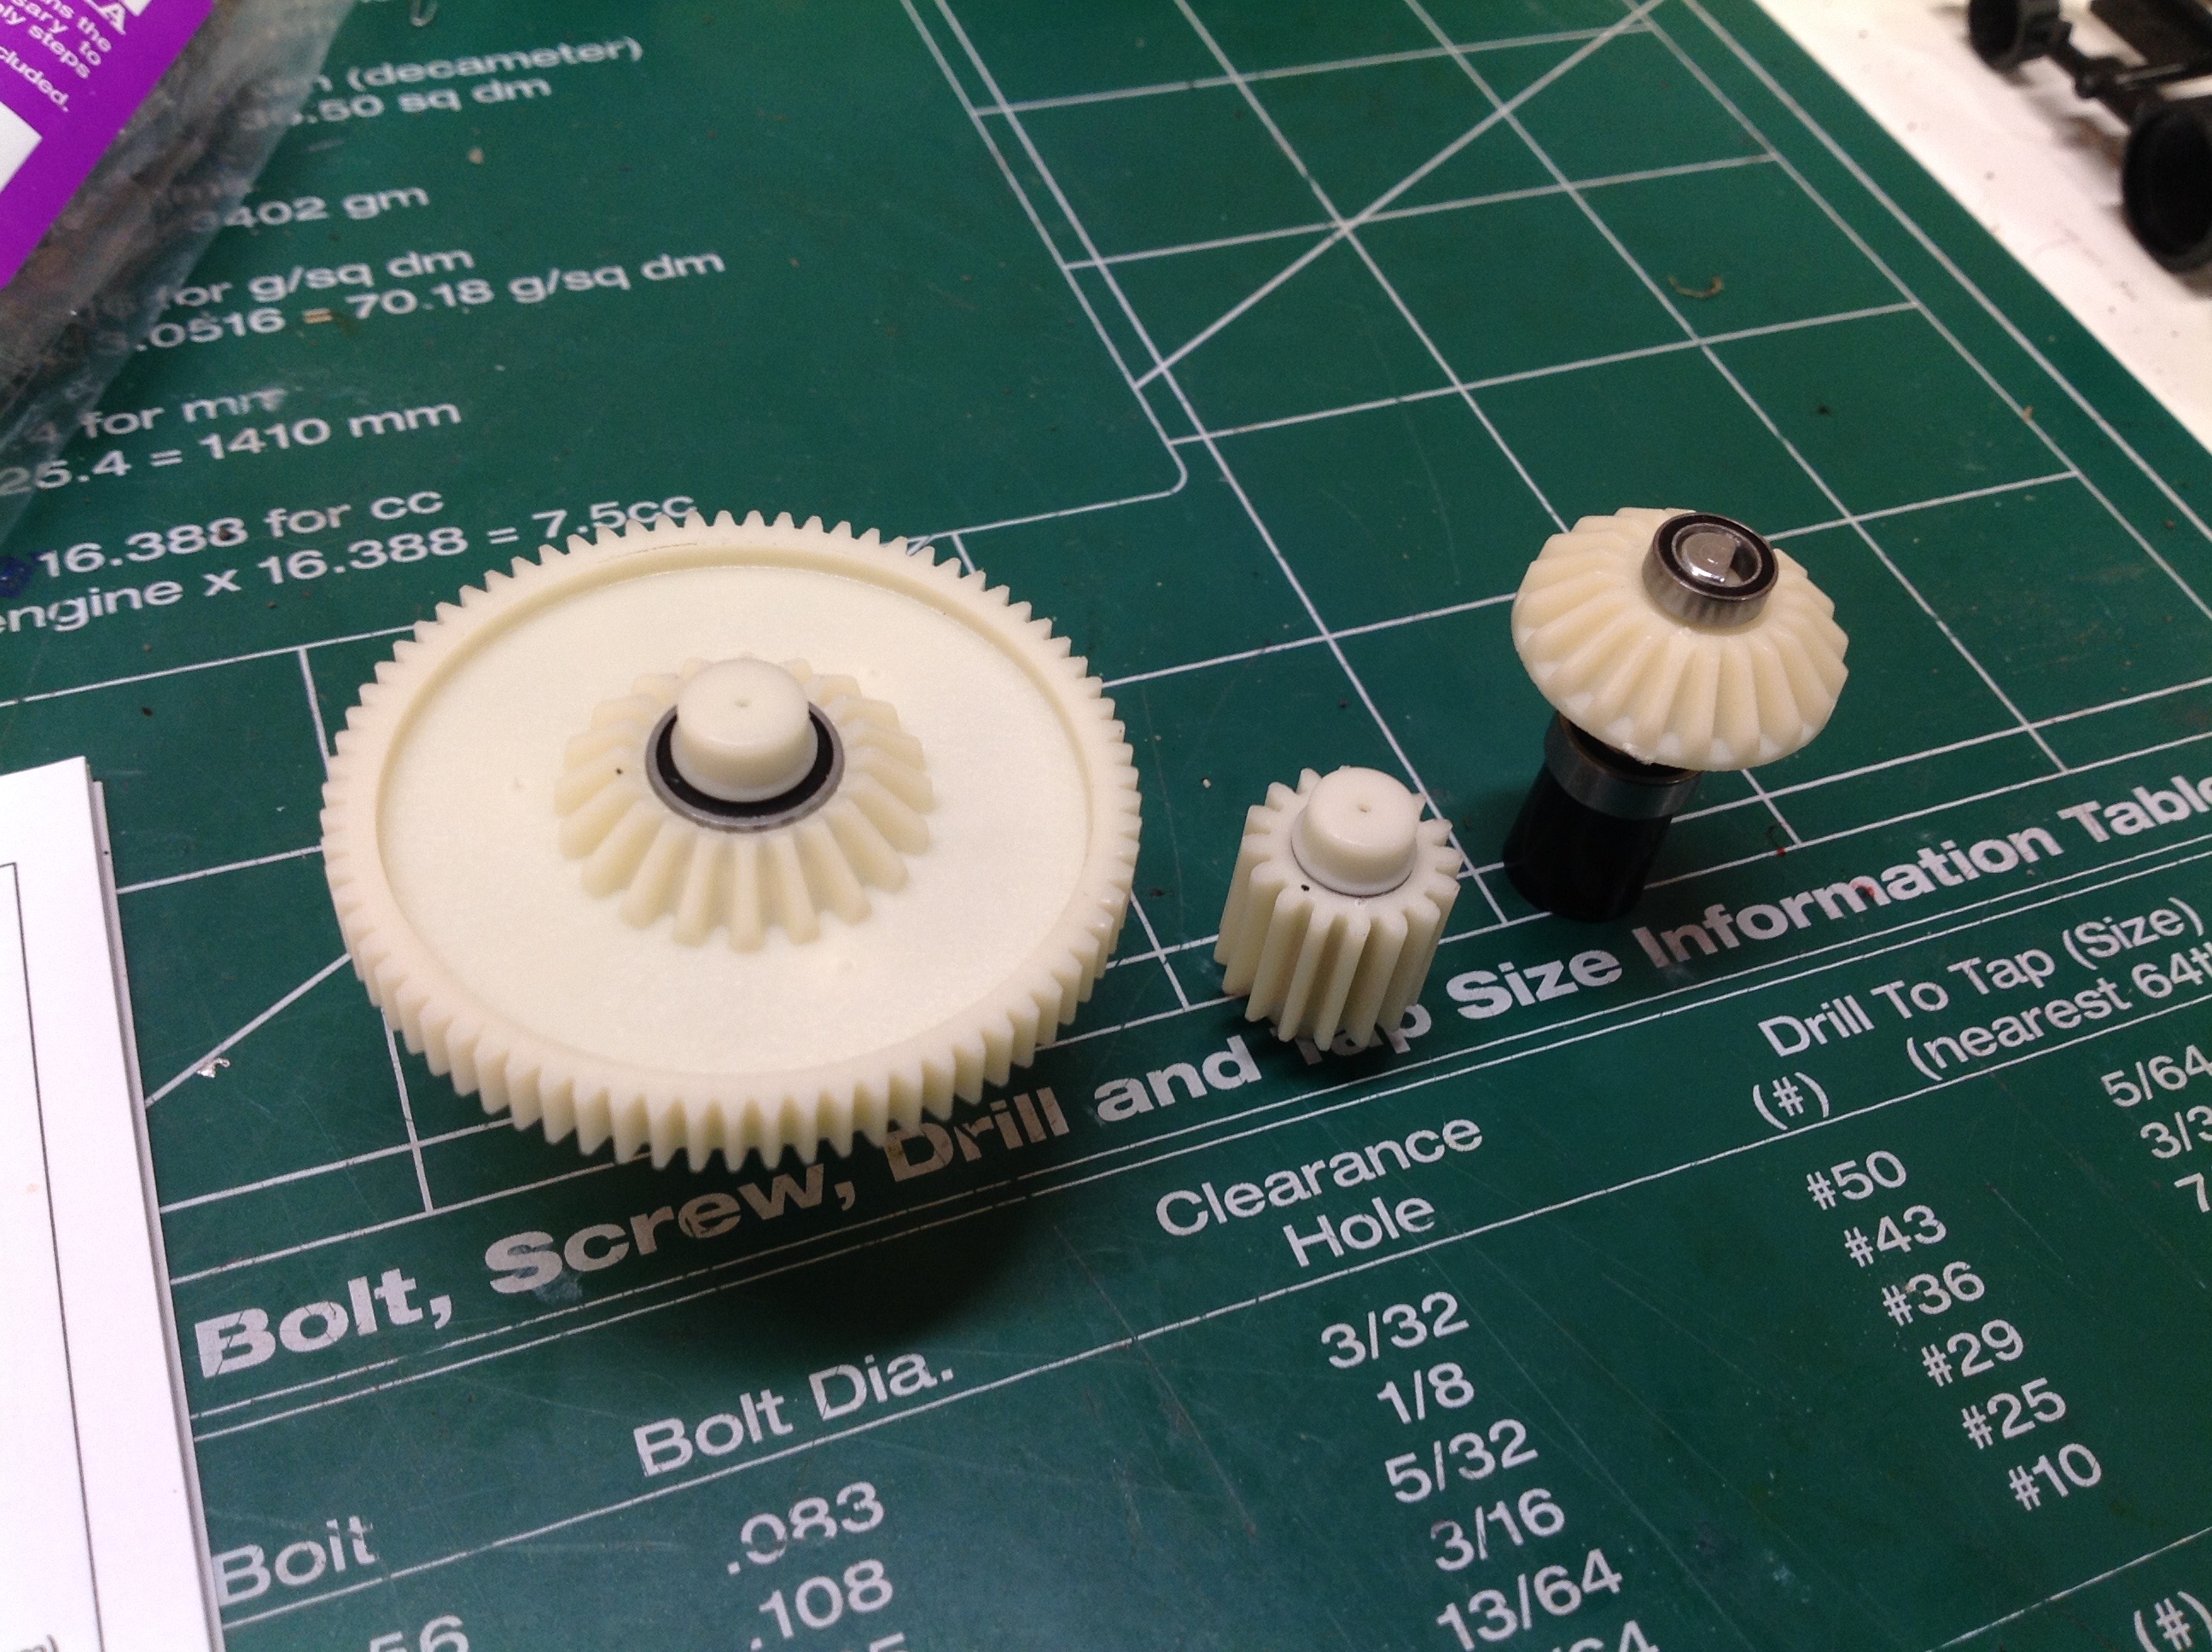
You might expect to see basically the same
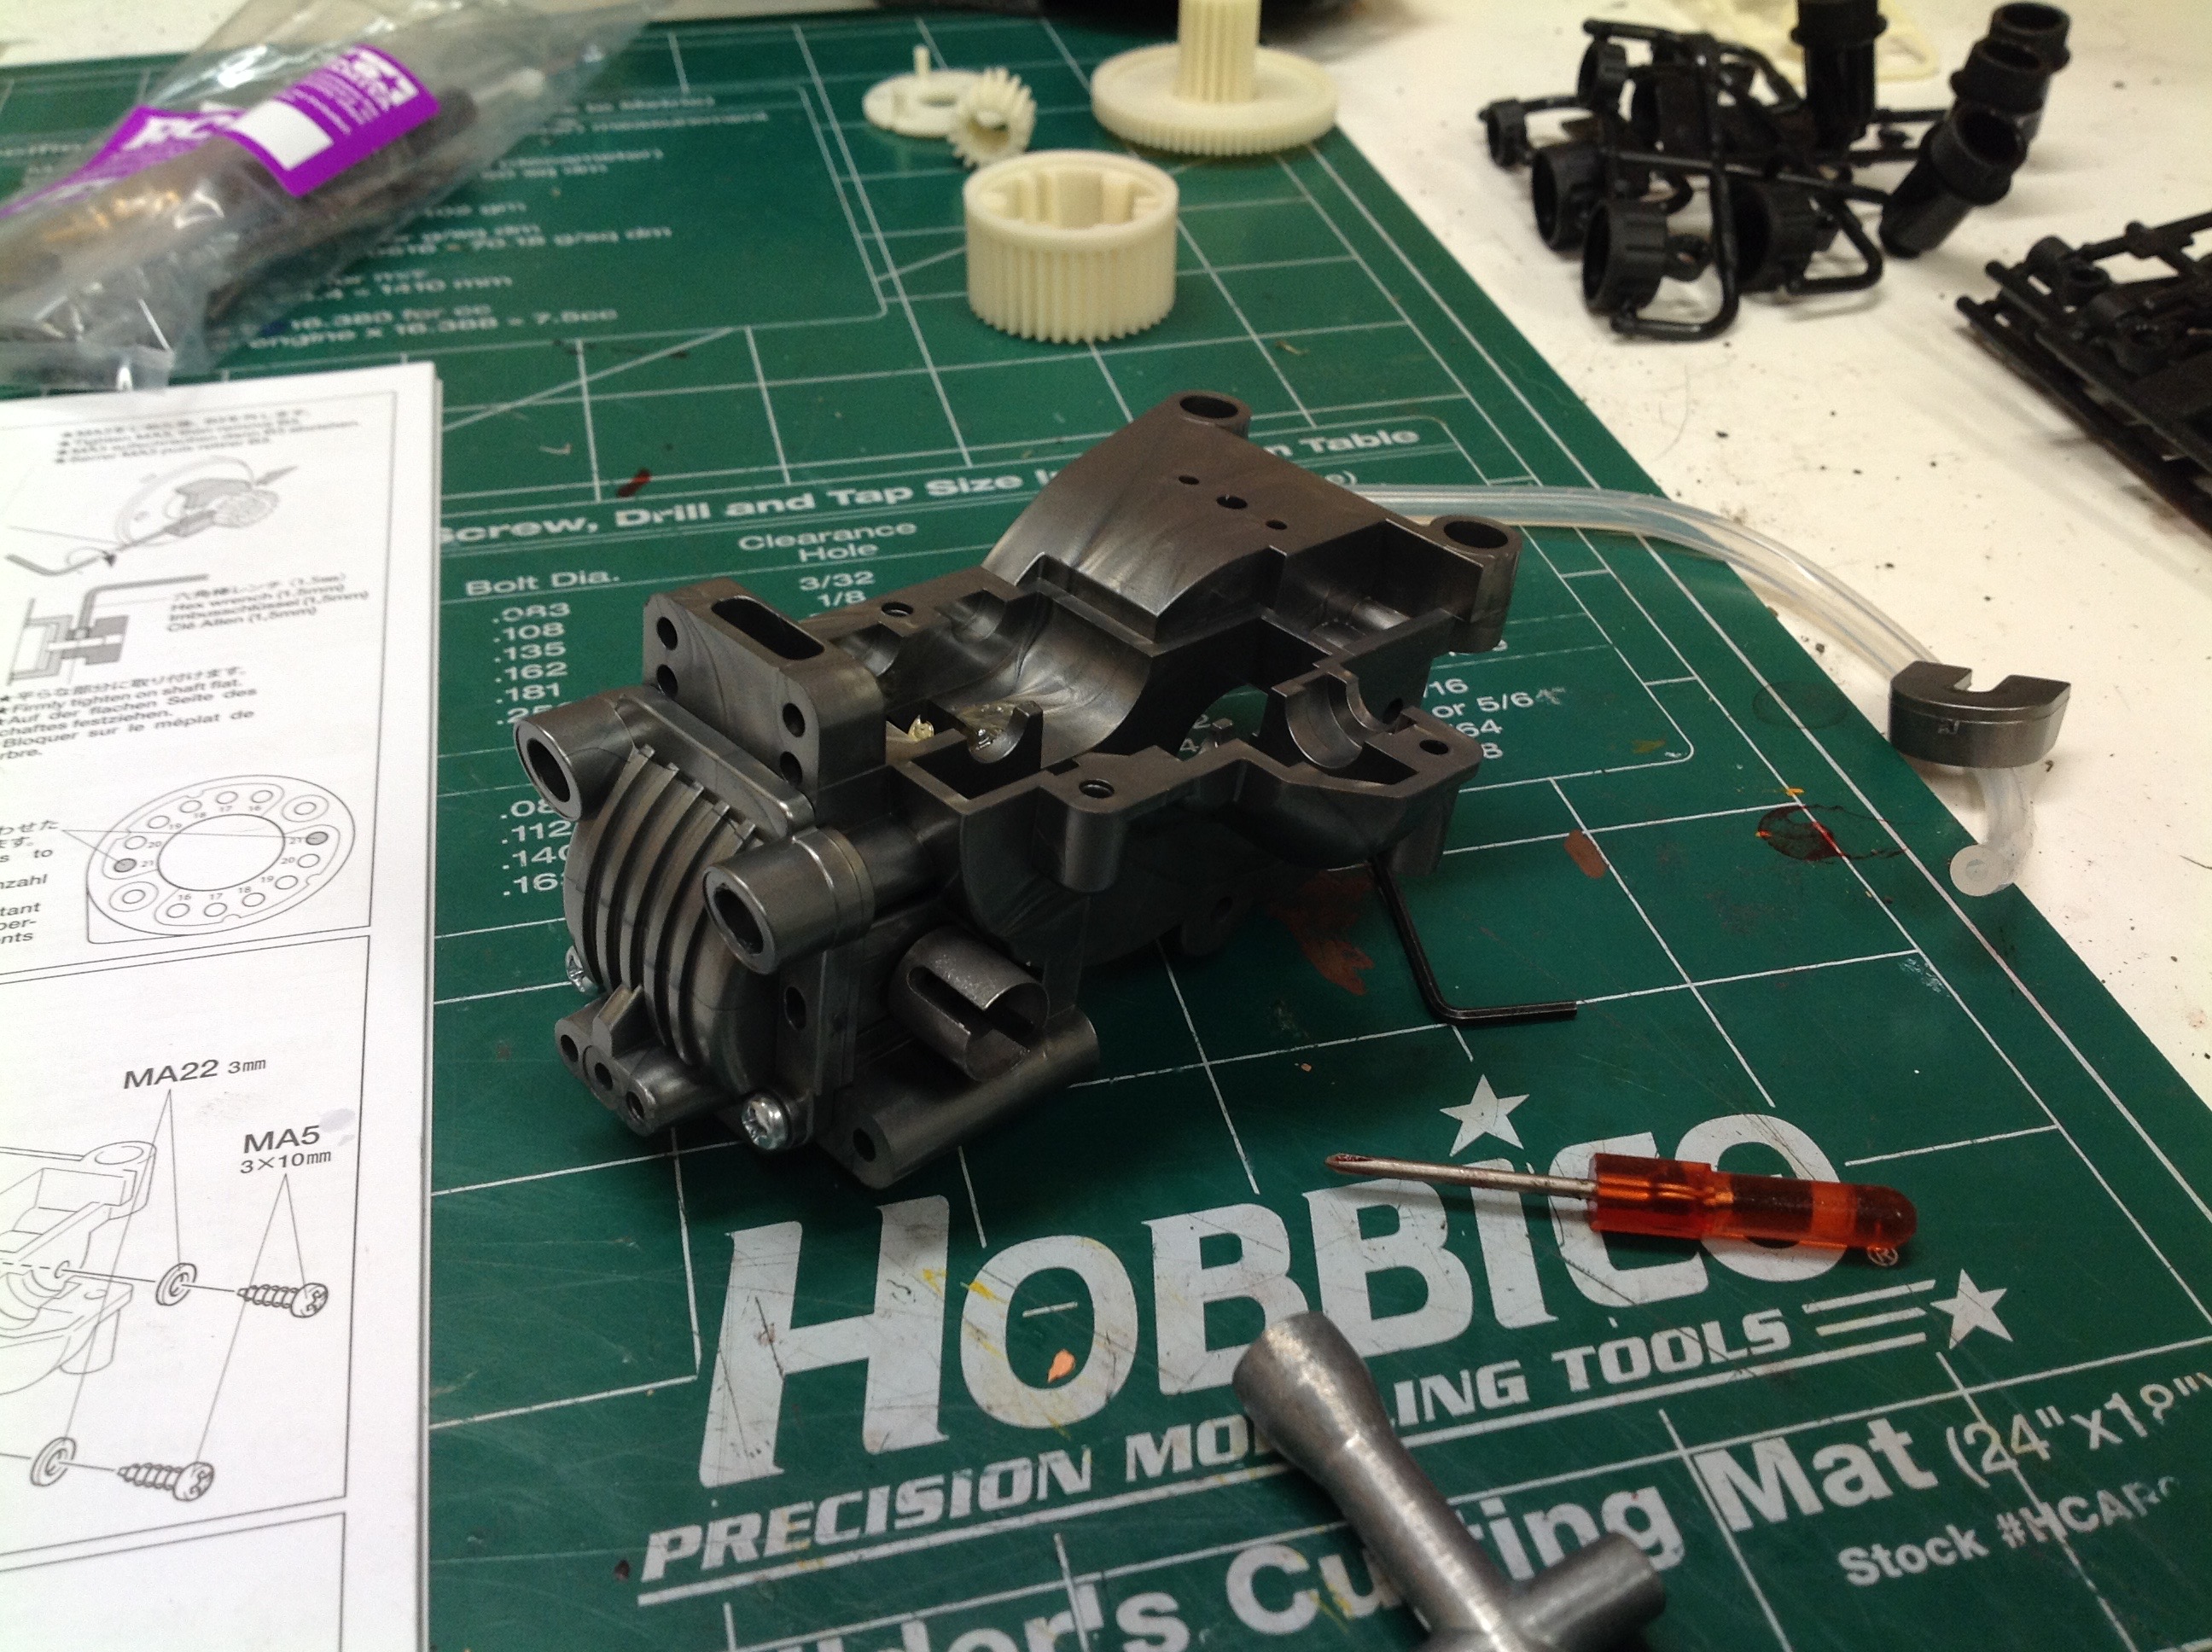
differential and gearbox up front, but you'd be wrong. In front we
get a standard open gear differential. It is not oil filled so
the resistance is not really adjustable. The front housing is the
same interesting color.

The front uses the same type of bevel gears. I
say they look weak, but that's really only in comparison to the other
gears. The pitch and face width are pretty large and certainly
adequate for the kit supplied motor. We'll see if they hold up to
something stronger. Note the tiny 5x8 bearing on the bevel gear
shaft. It won't support much load. The long cantilevered
mounting arm of the gearbox housing shown in the right hand image also
seems like a potential weak point.

Now I've enclosed the front gearbox and installed the
front suspension arms, C-hubs, and steering knuckles. The front
arms are pinned with a big u-bolt as shown. I'm not sure why the
steering knuckles are blue since they seem to clash with the rest of the
chassis a bit. They are made from a harder and stiffer plastic
than the arms.

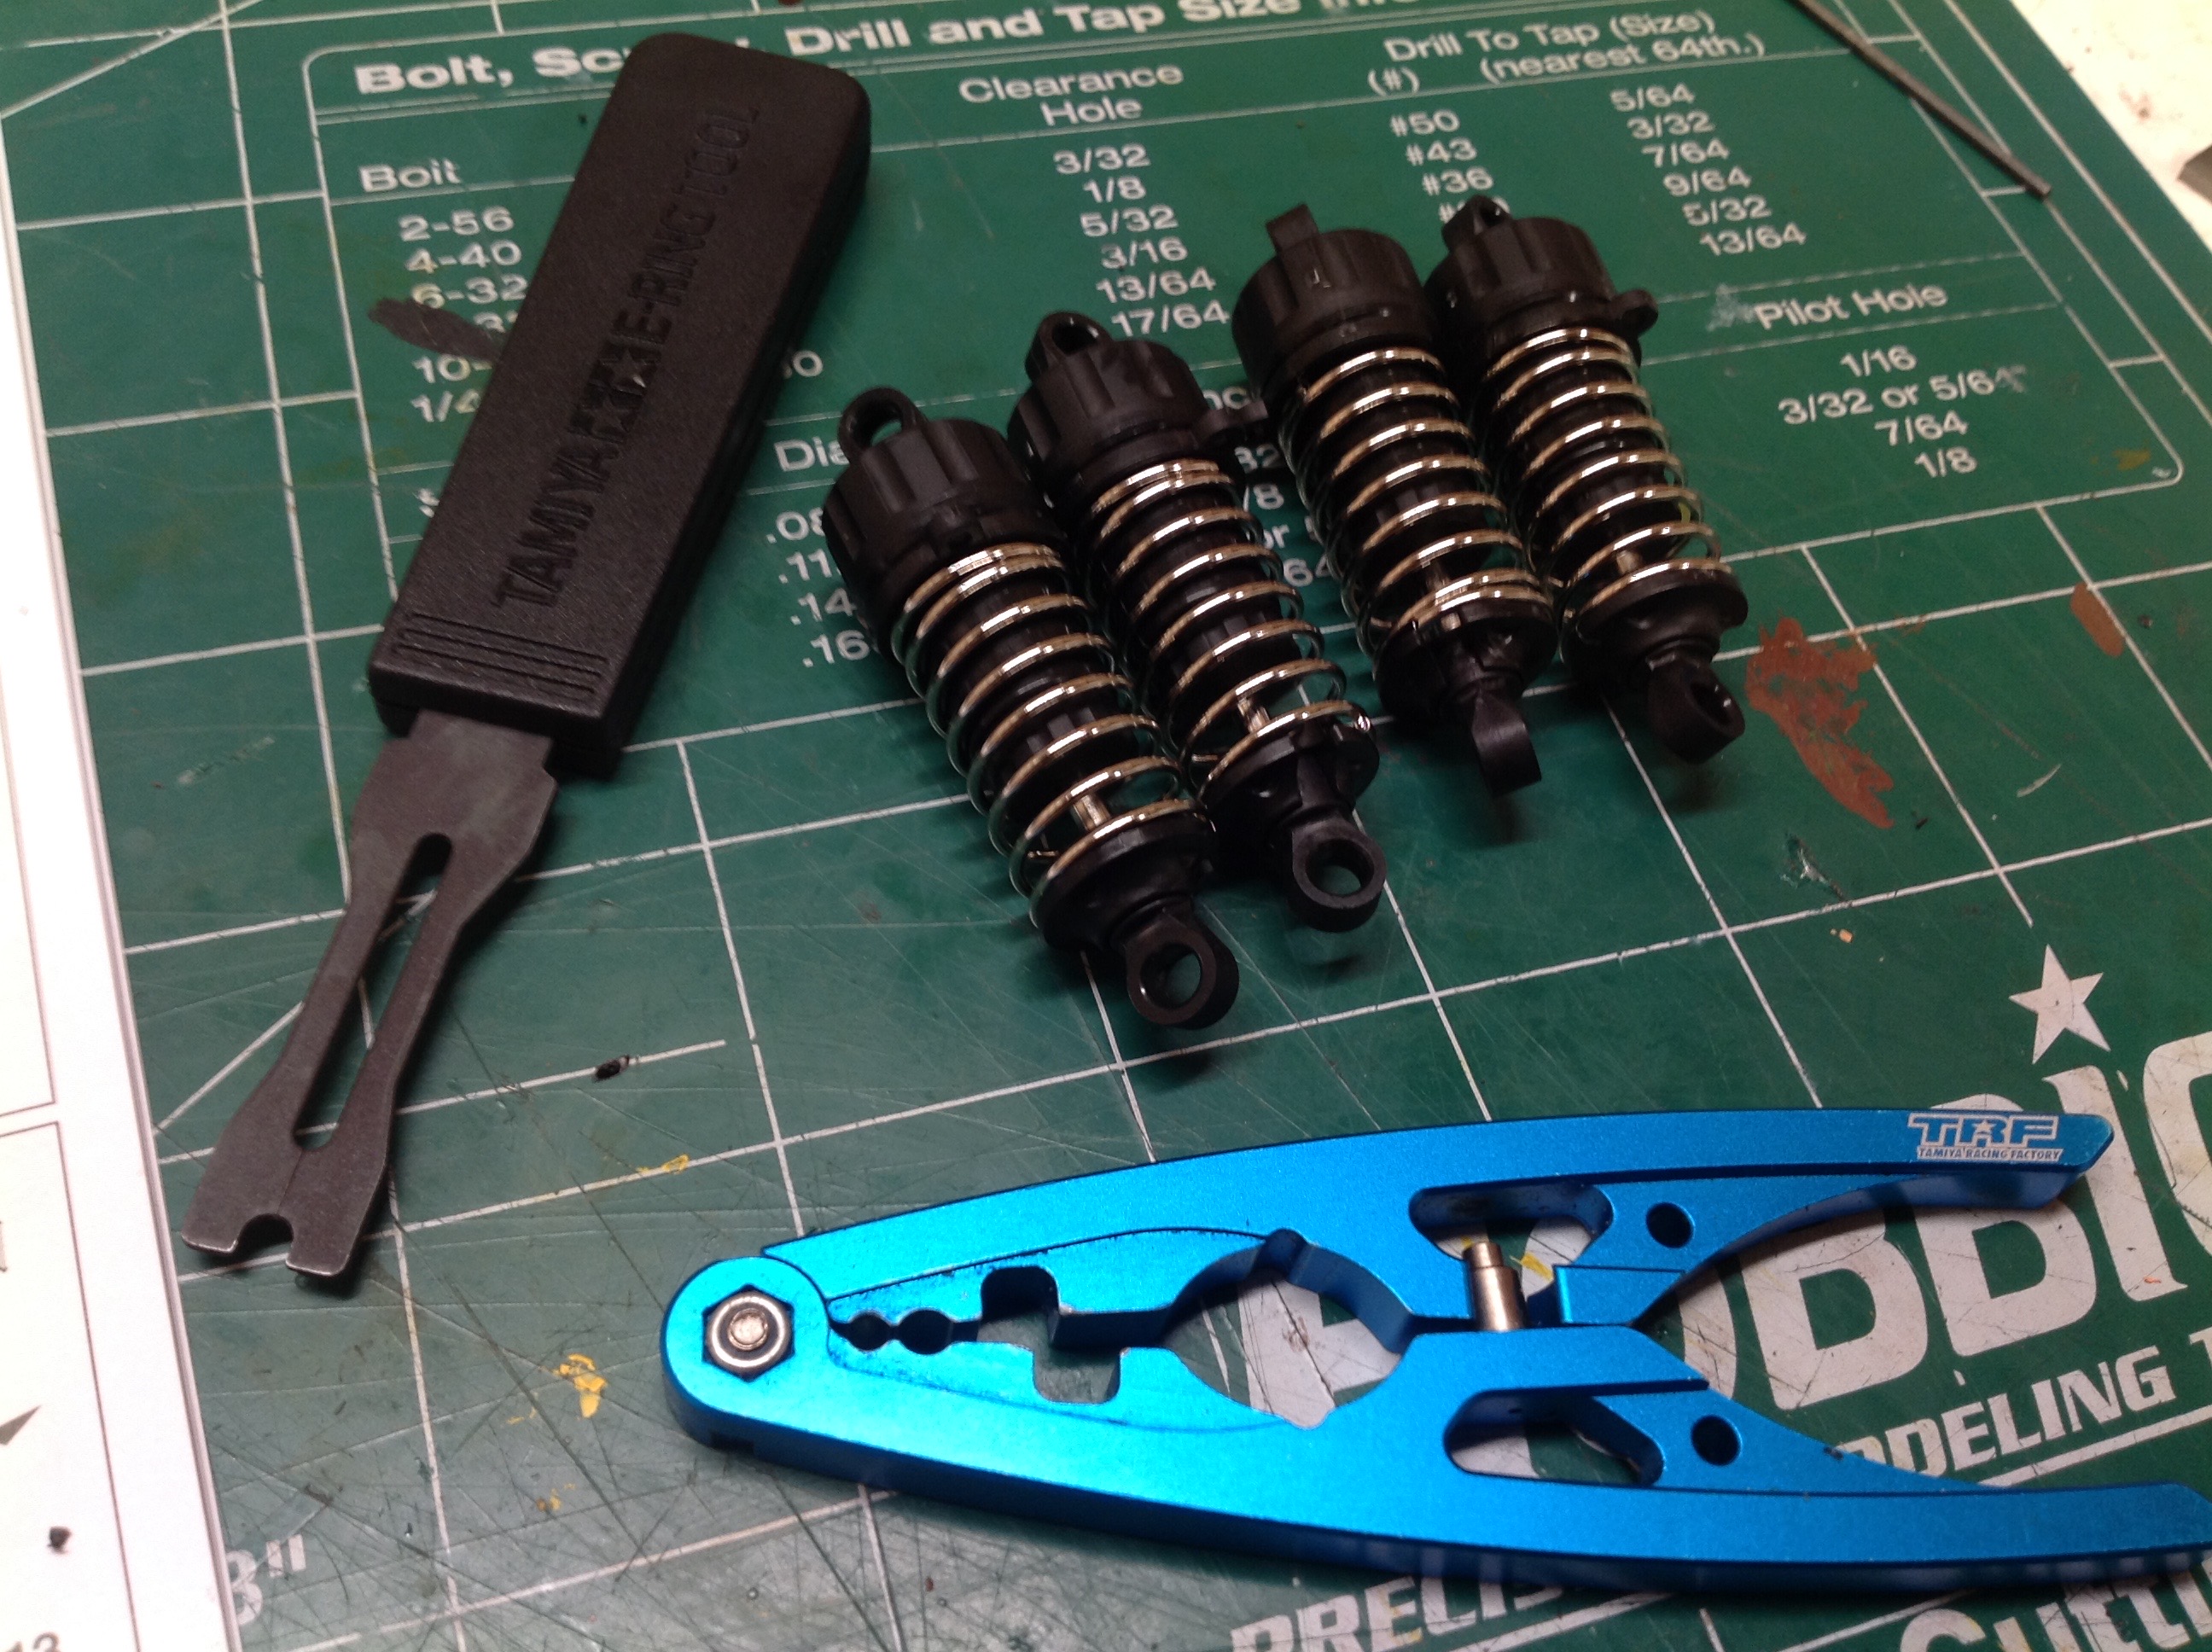
The kit uses standard oil filled CVA dampers which use
the parts shown. All 4 are identical including the springs.
It helps to have an E-clip tool and a shock pliers when building them.
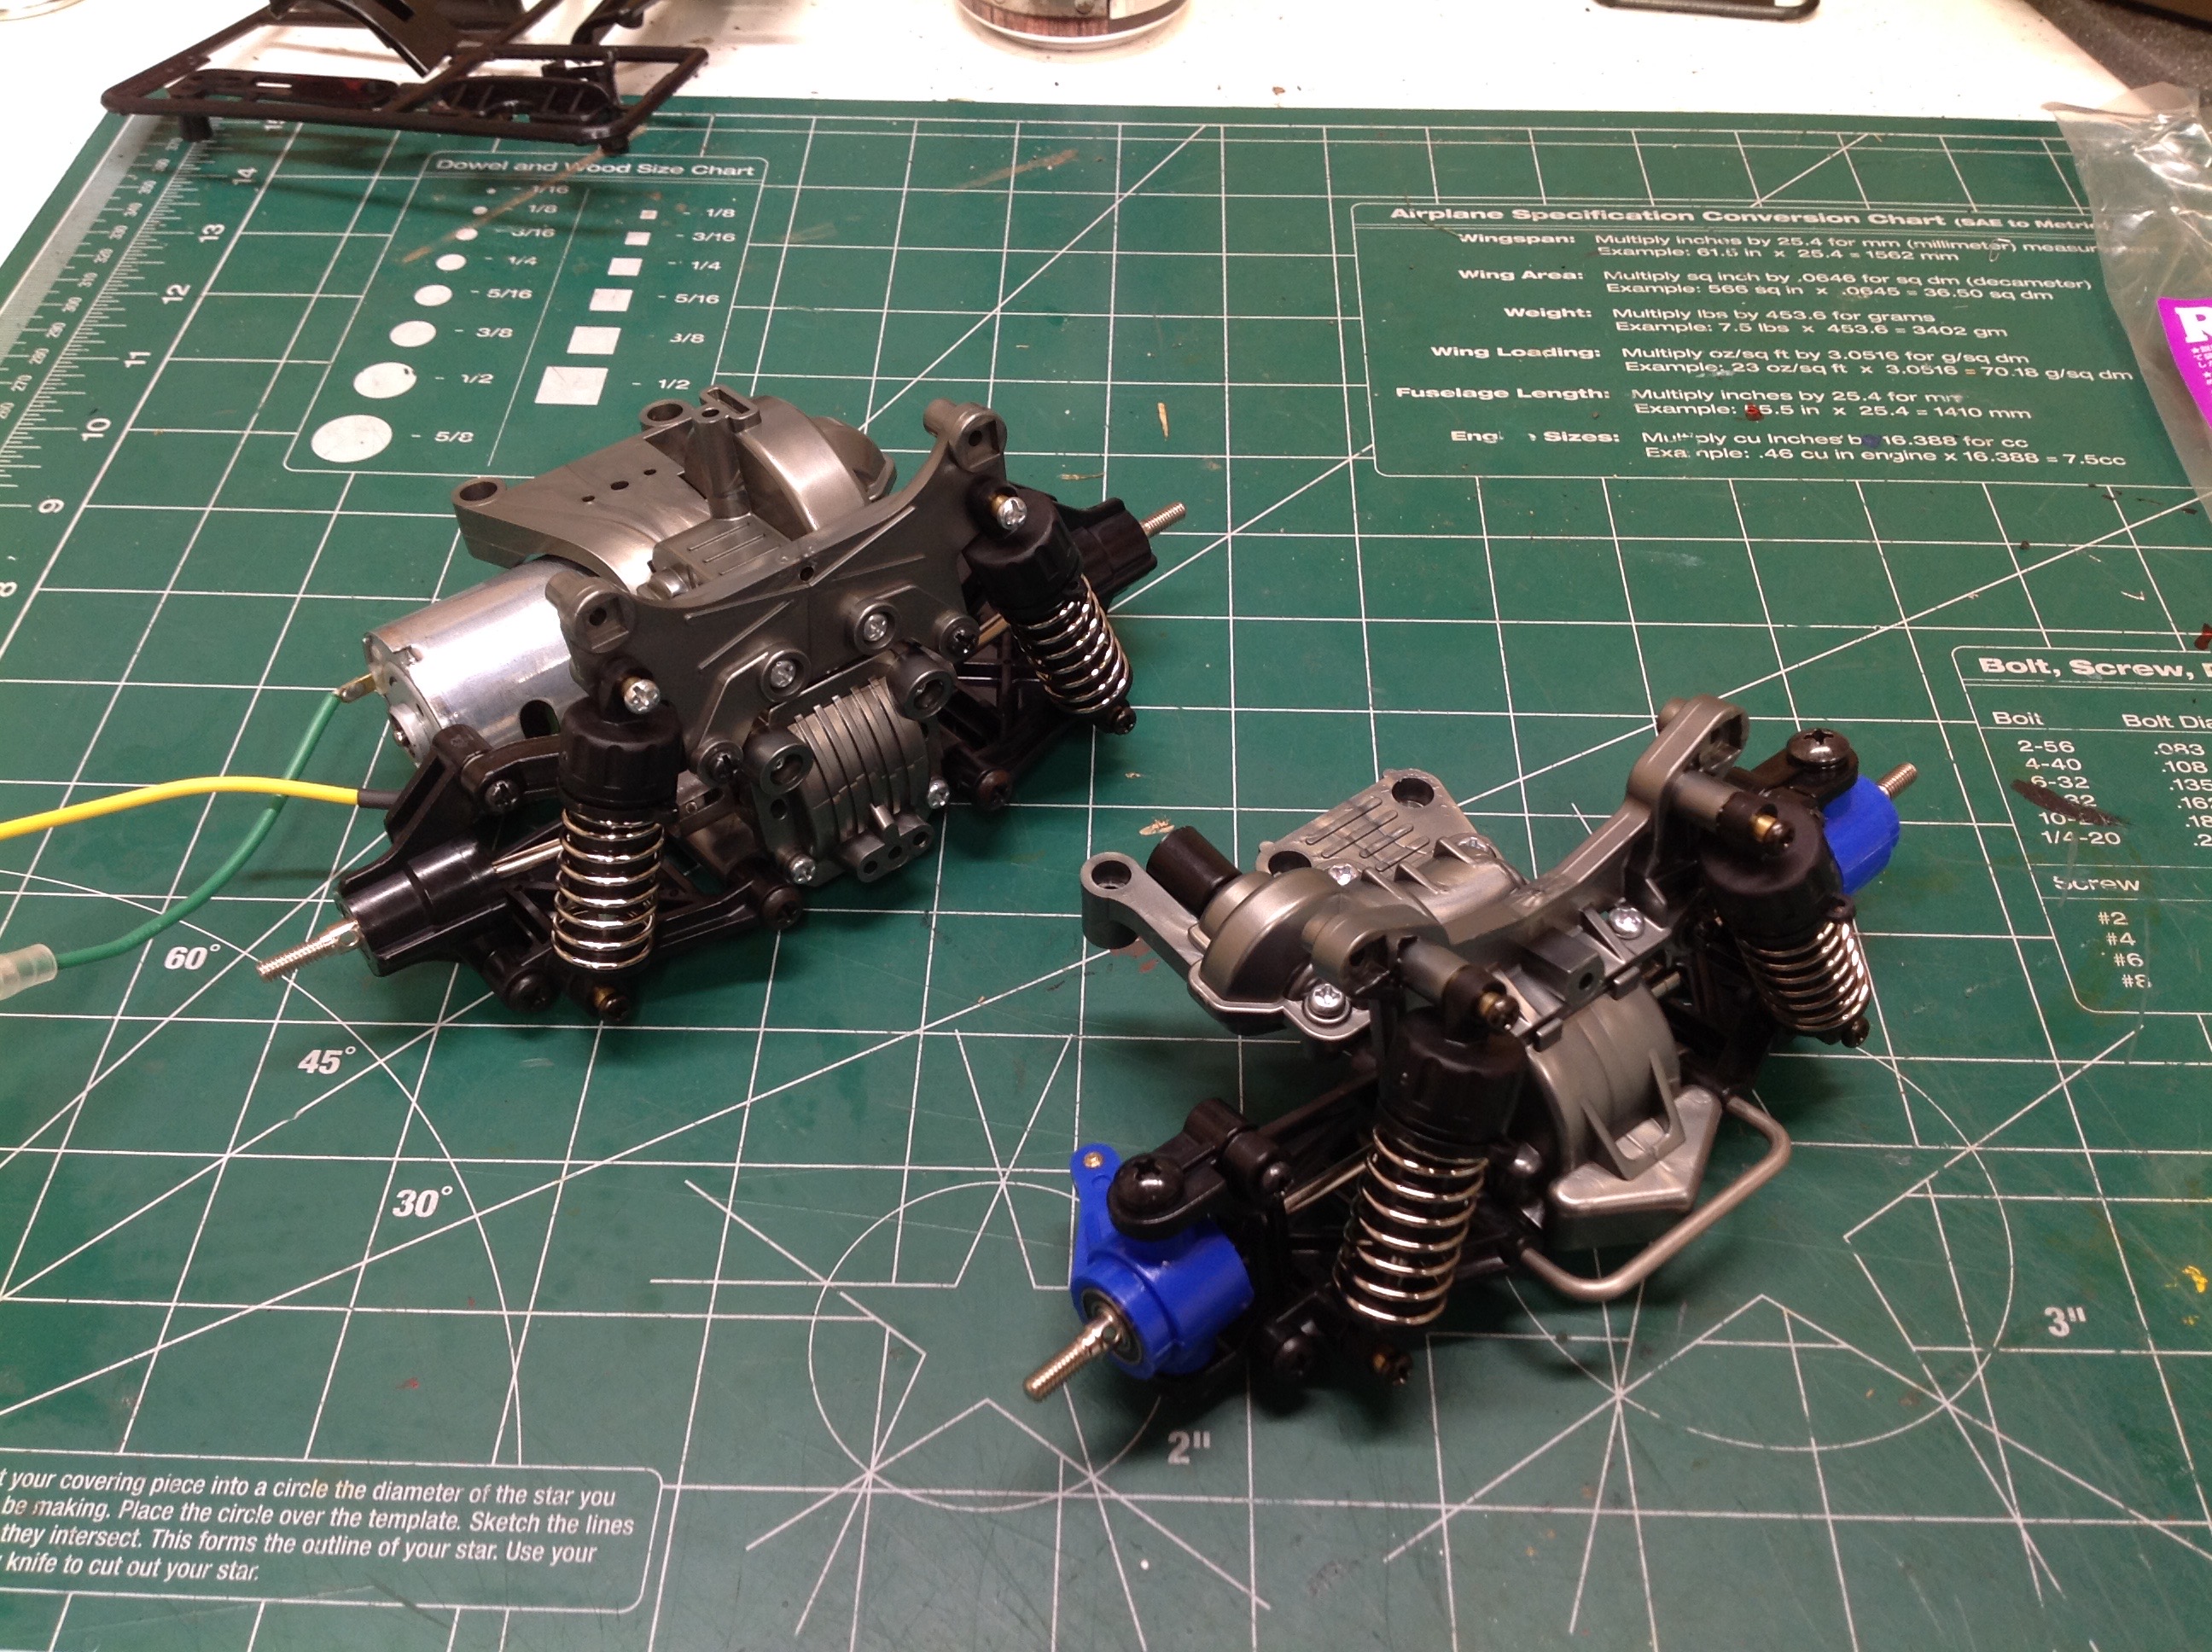
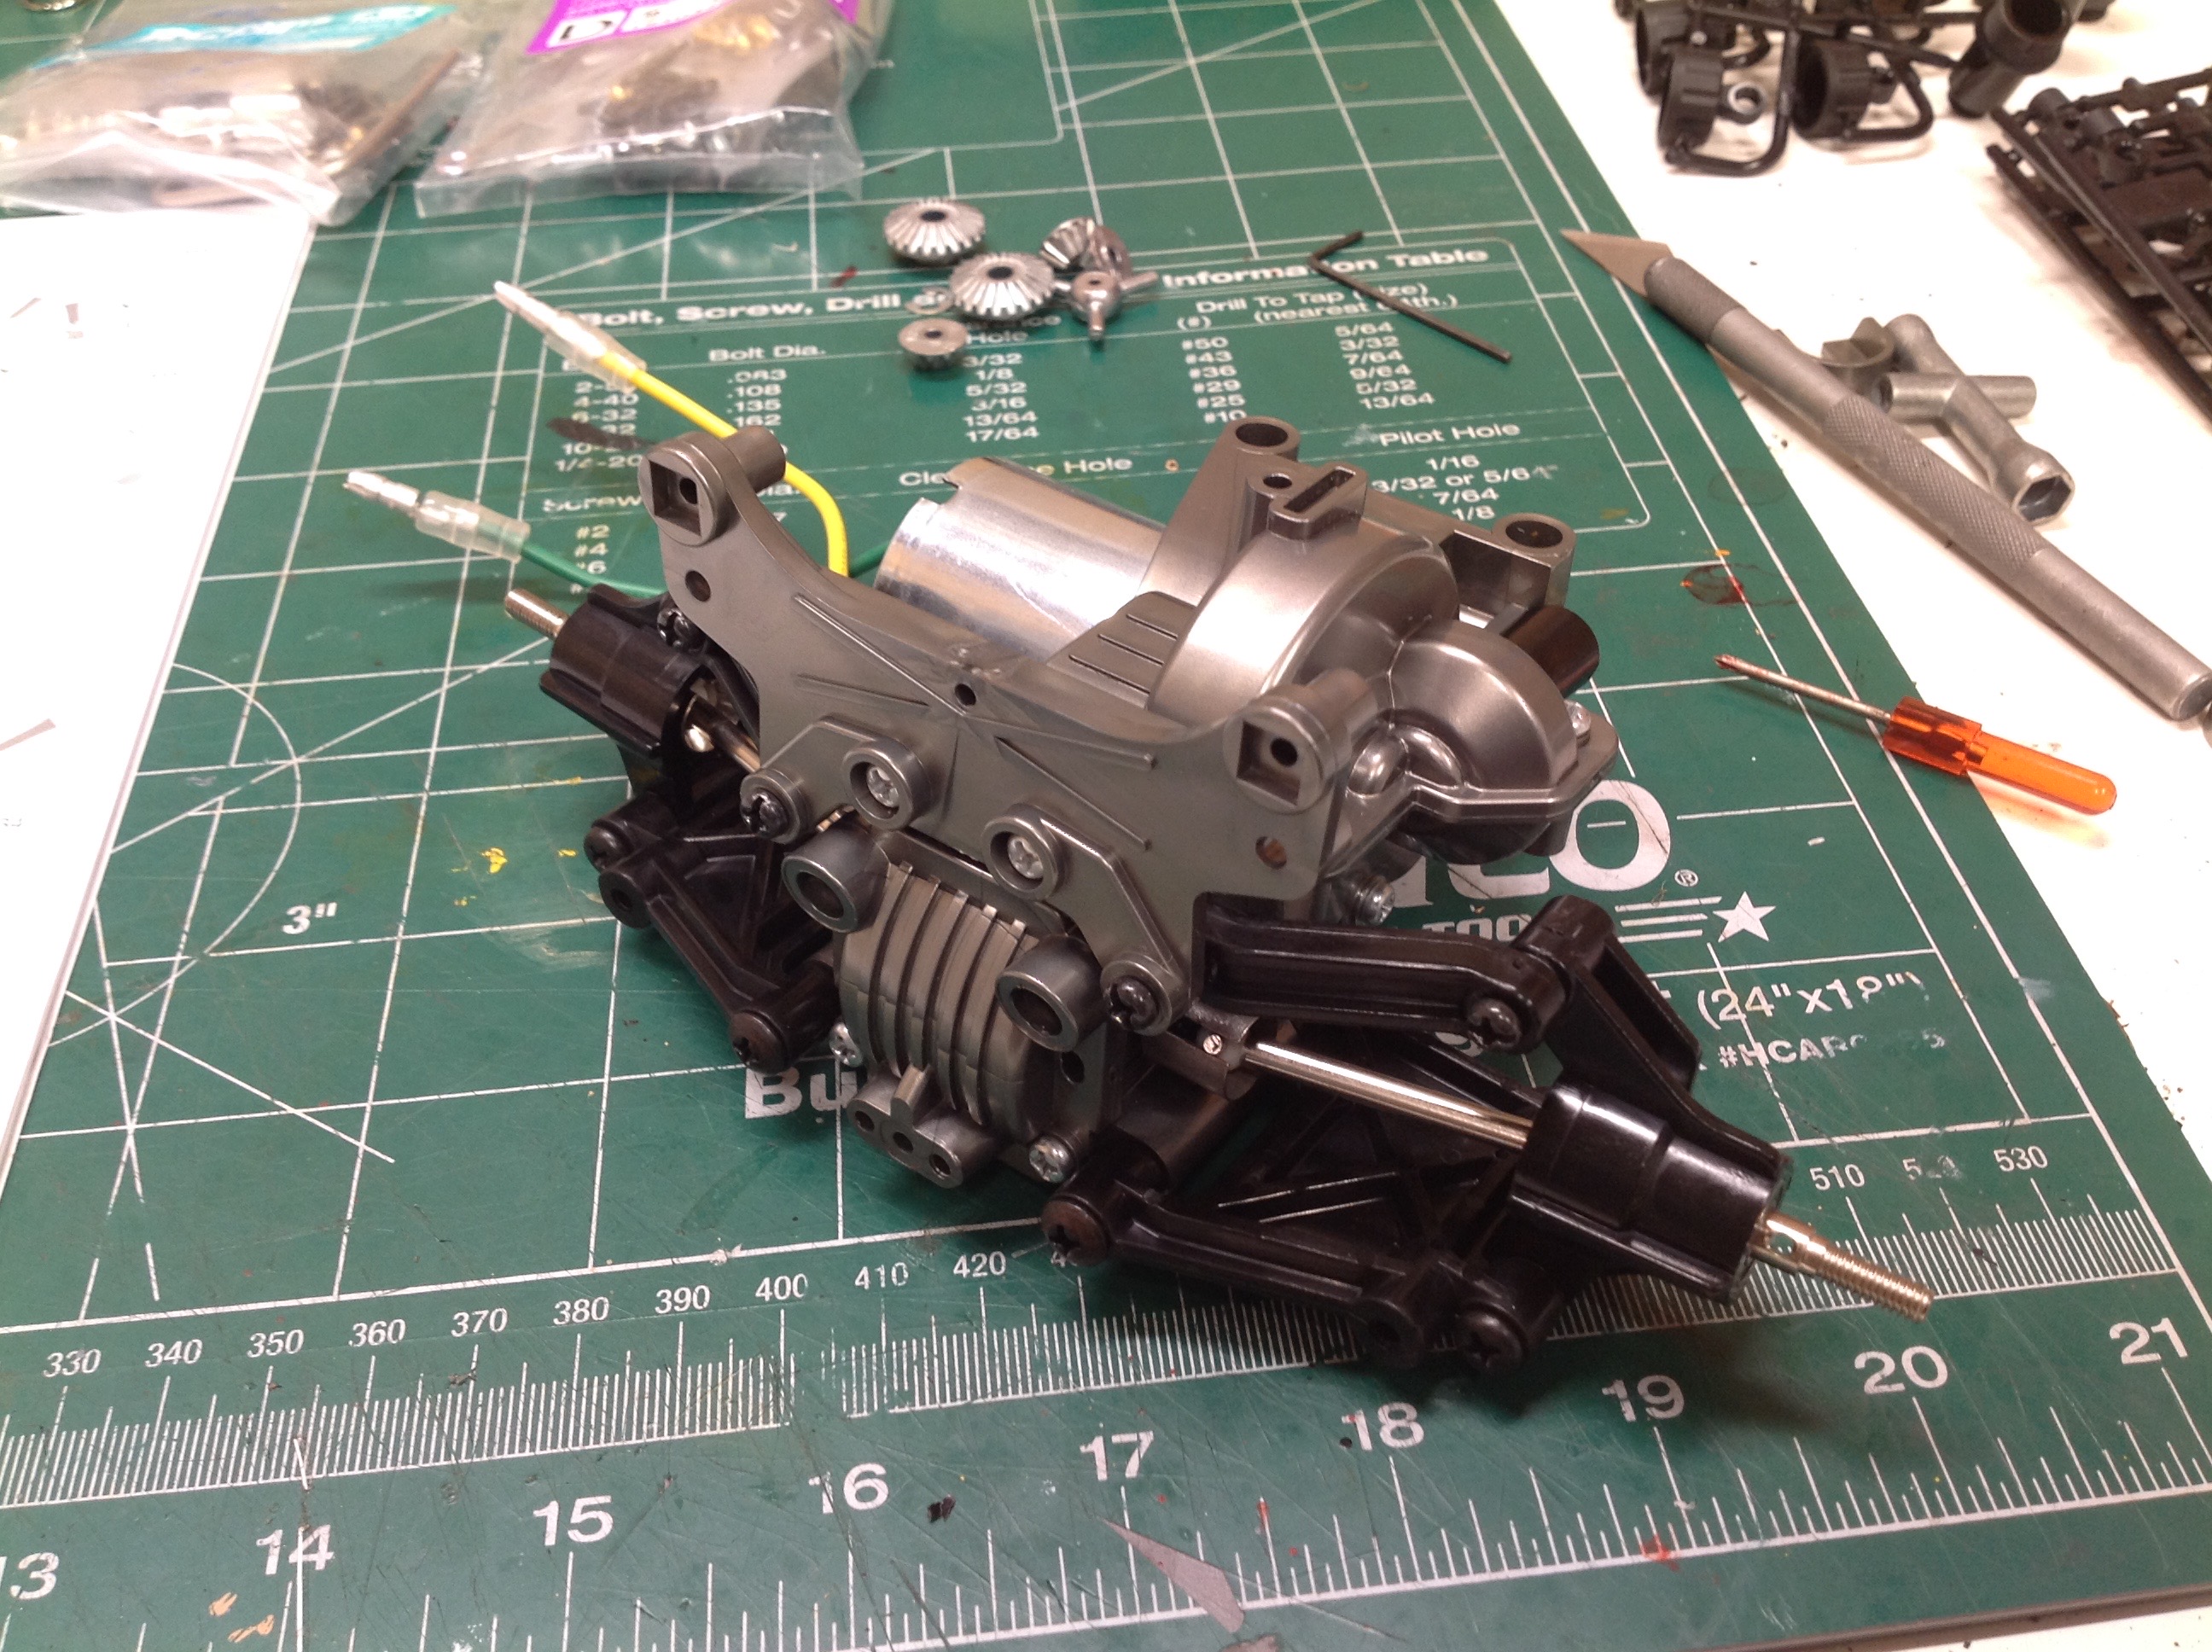
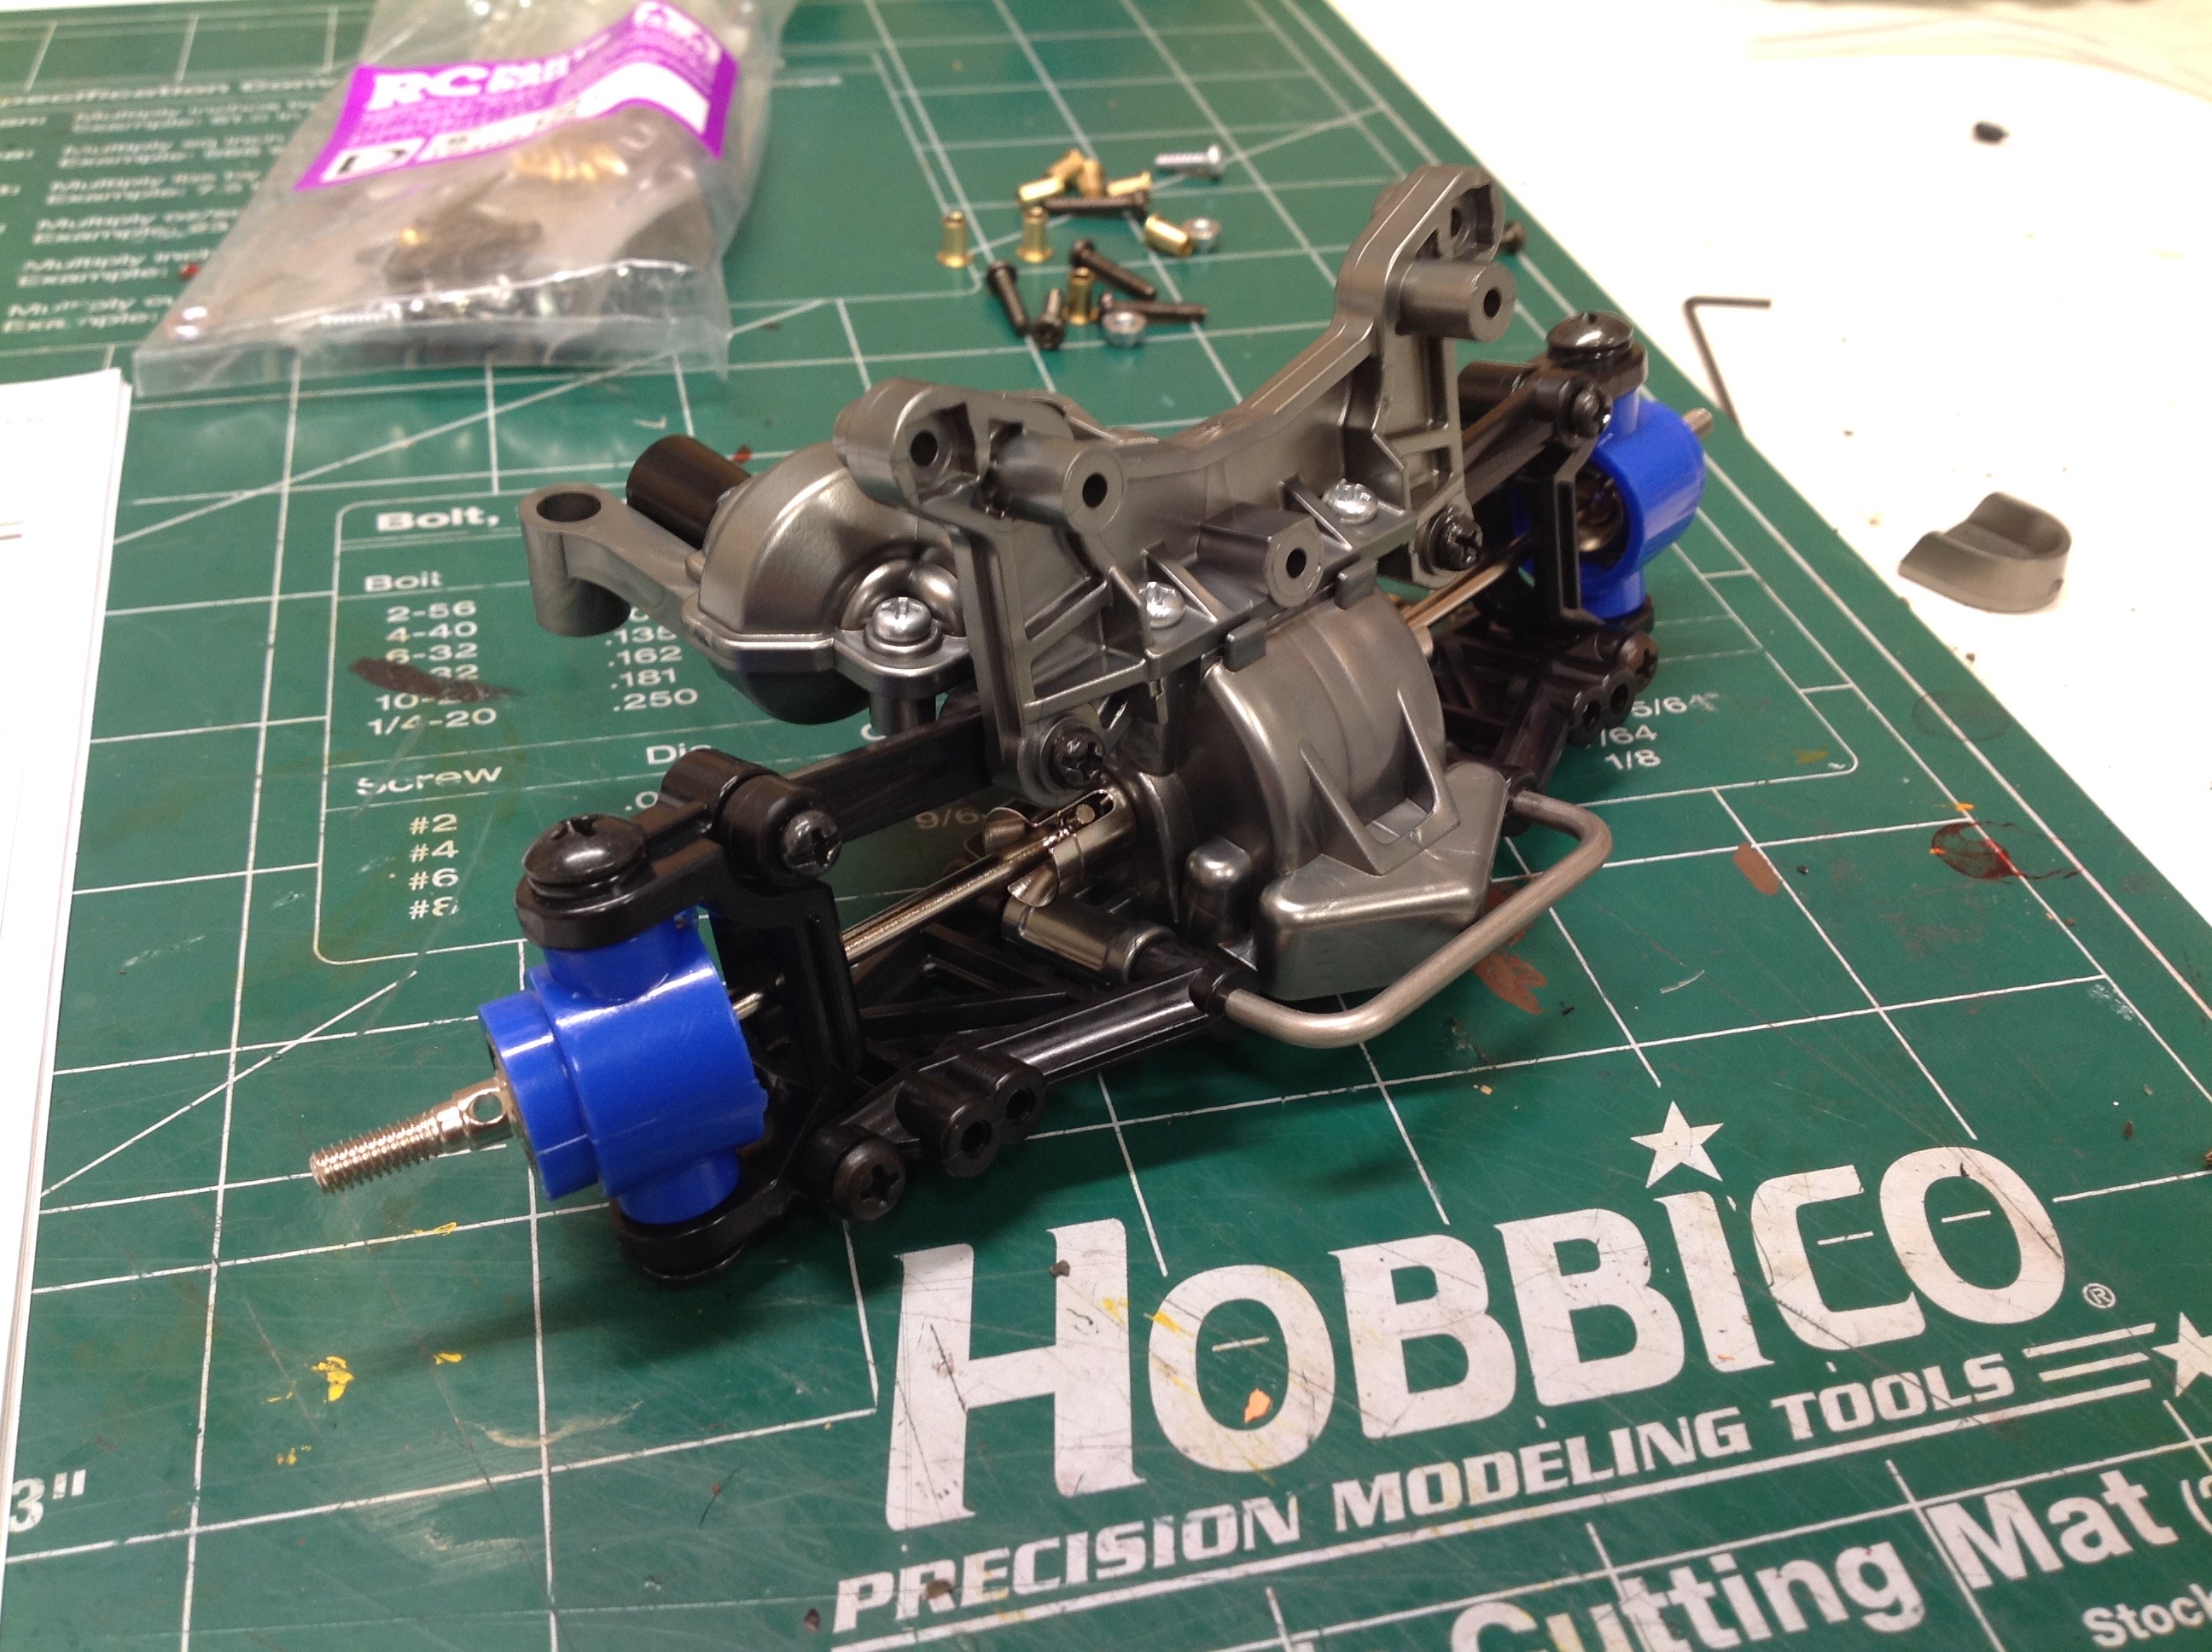
The front and rear gearbox assemblies are modular
which means they can be removed intact from the vehicle and serviced or
cleaned. This image shows the completed front and rear assemblies
with the shocks installed, ready to attached to the chassis.
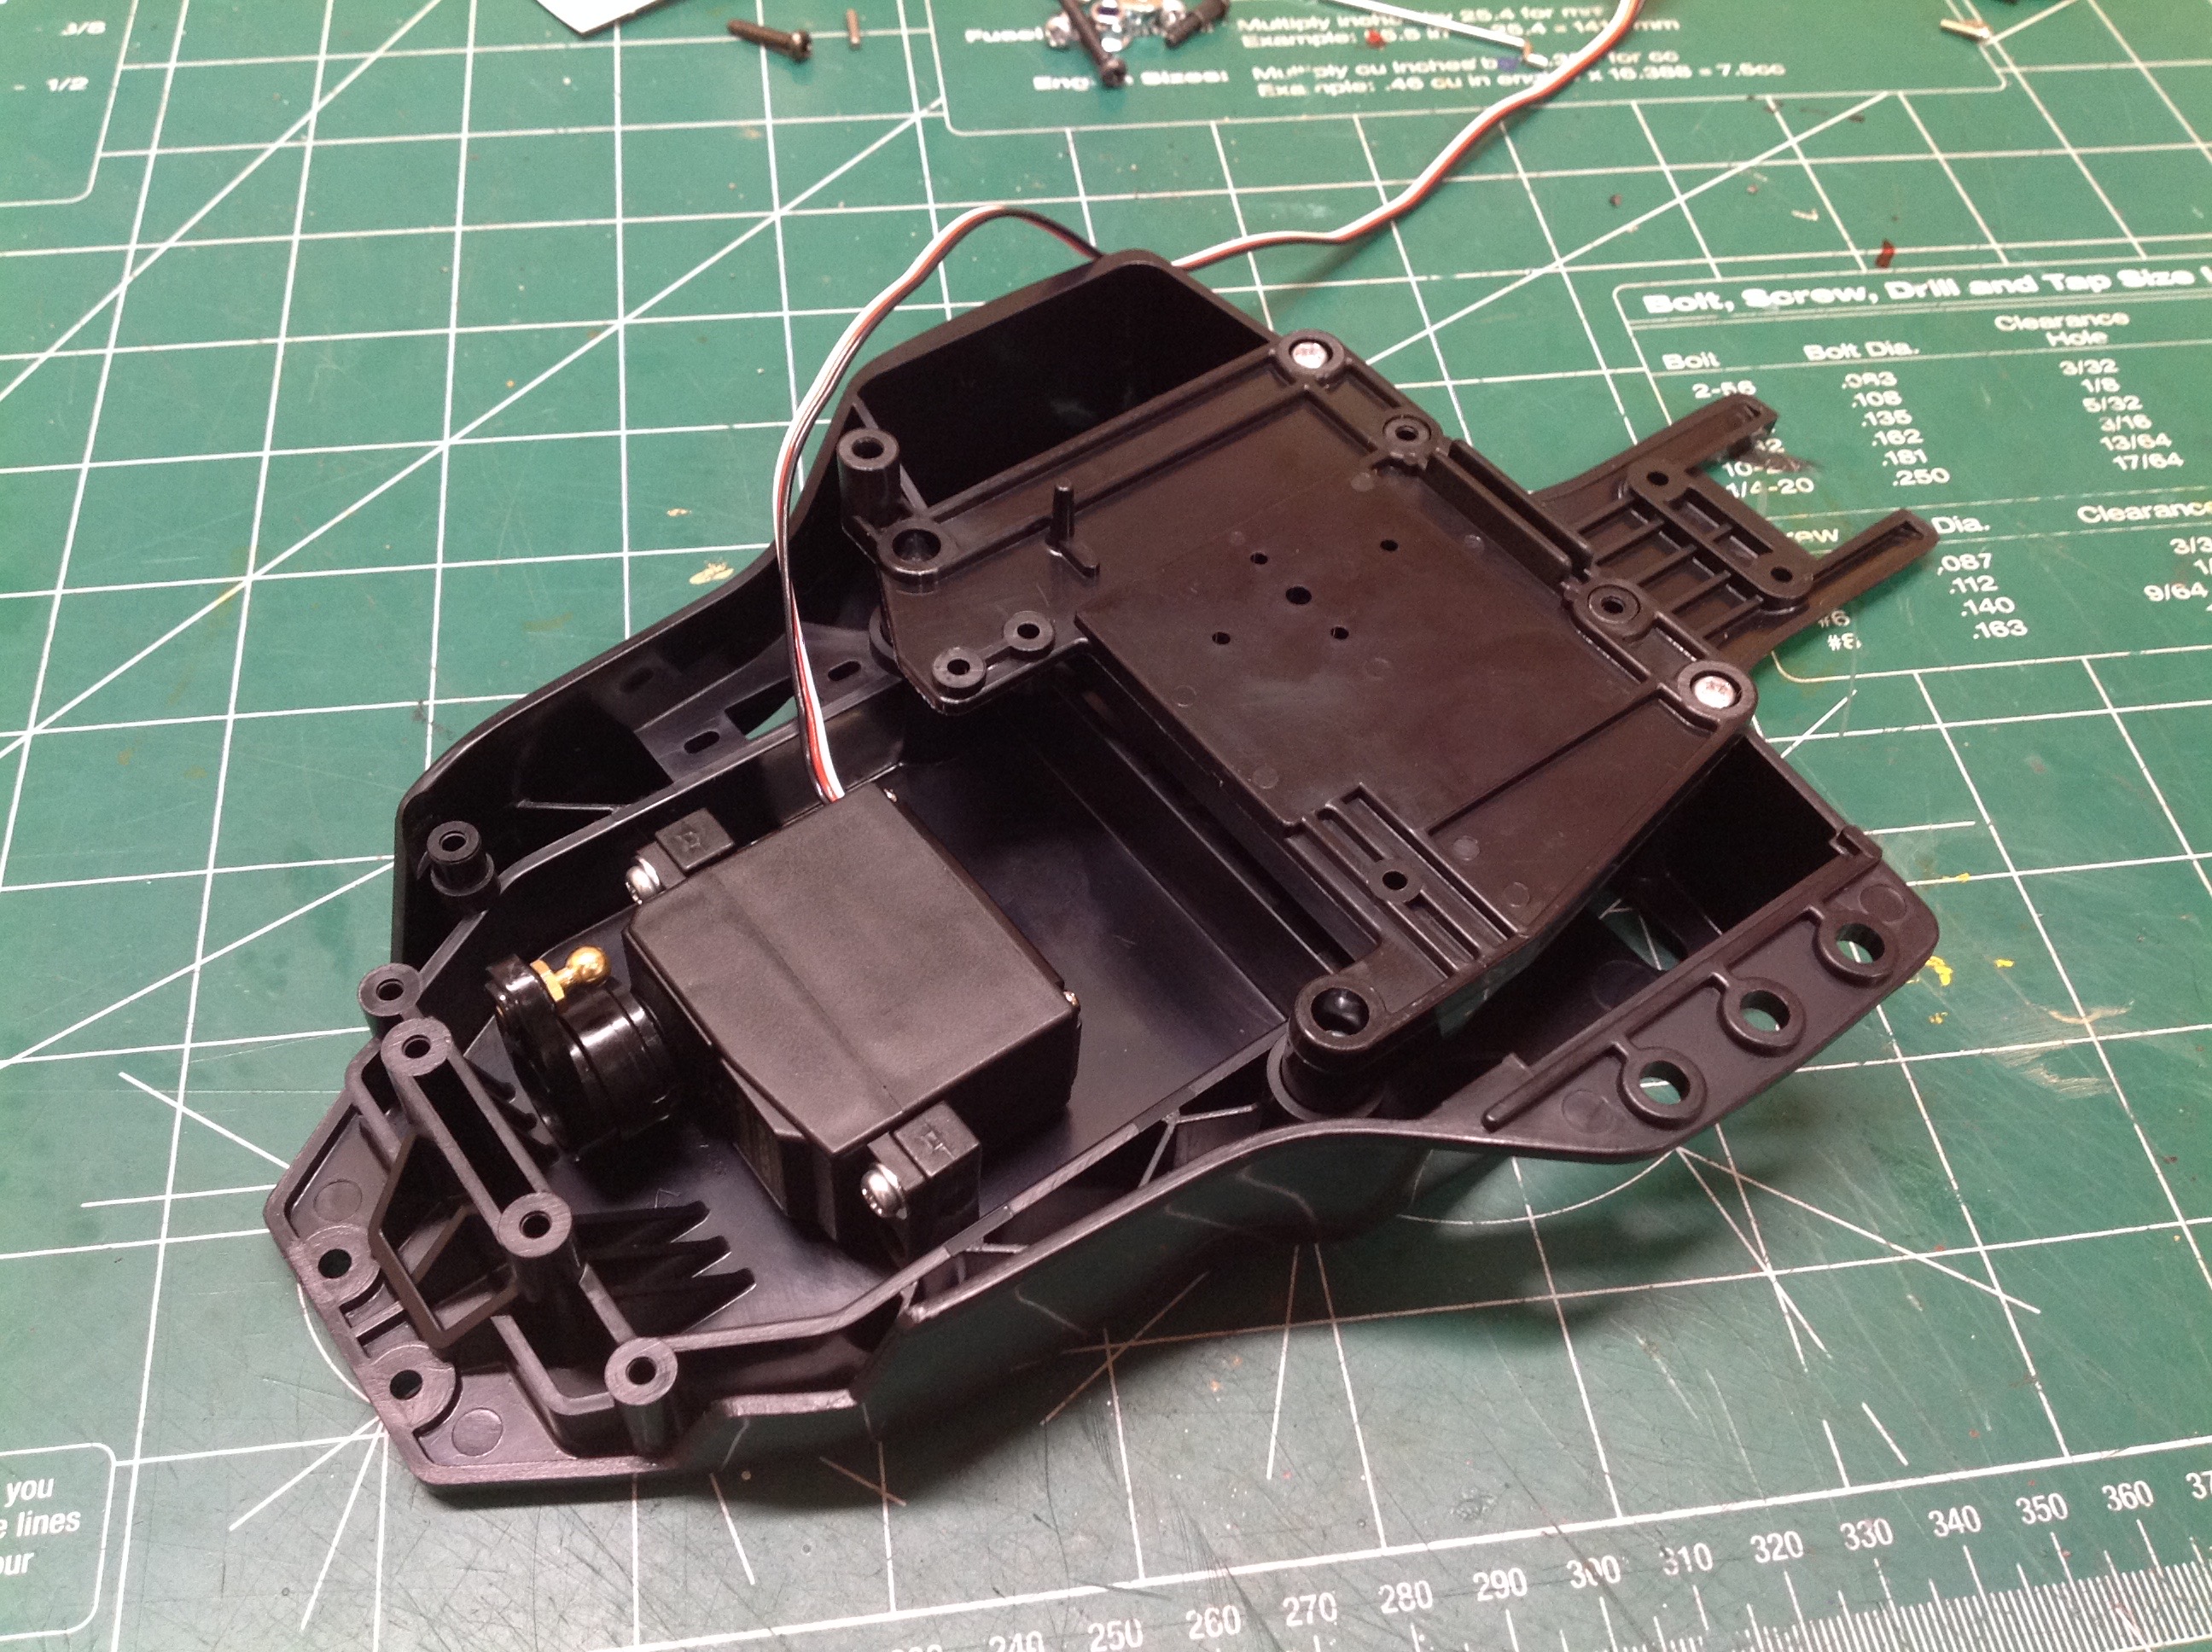
The main part of the chassis is a one piece
bathtub. The battery sits in the lateral slot with a cover over
the top which will support the electronics. Like many older
vehicles, this one is specifically sized to fit a rounded stick pack and
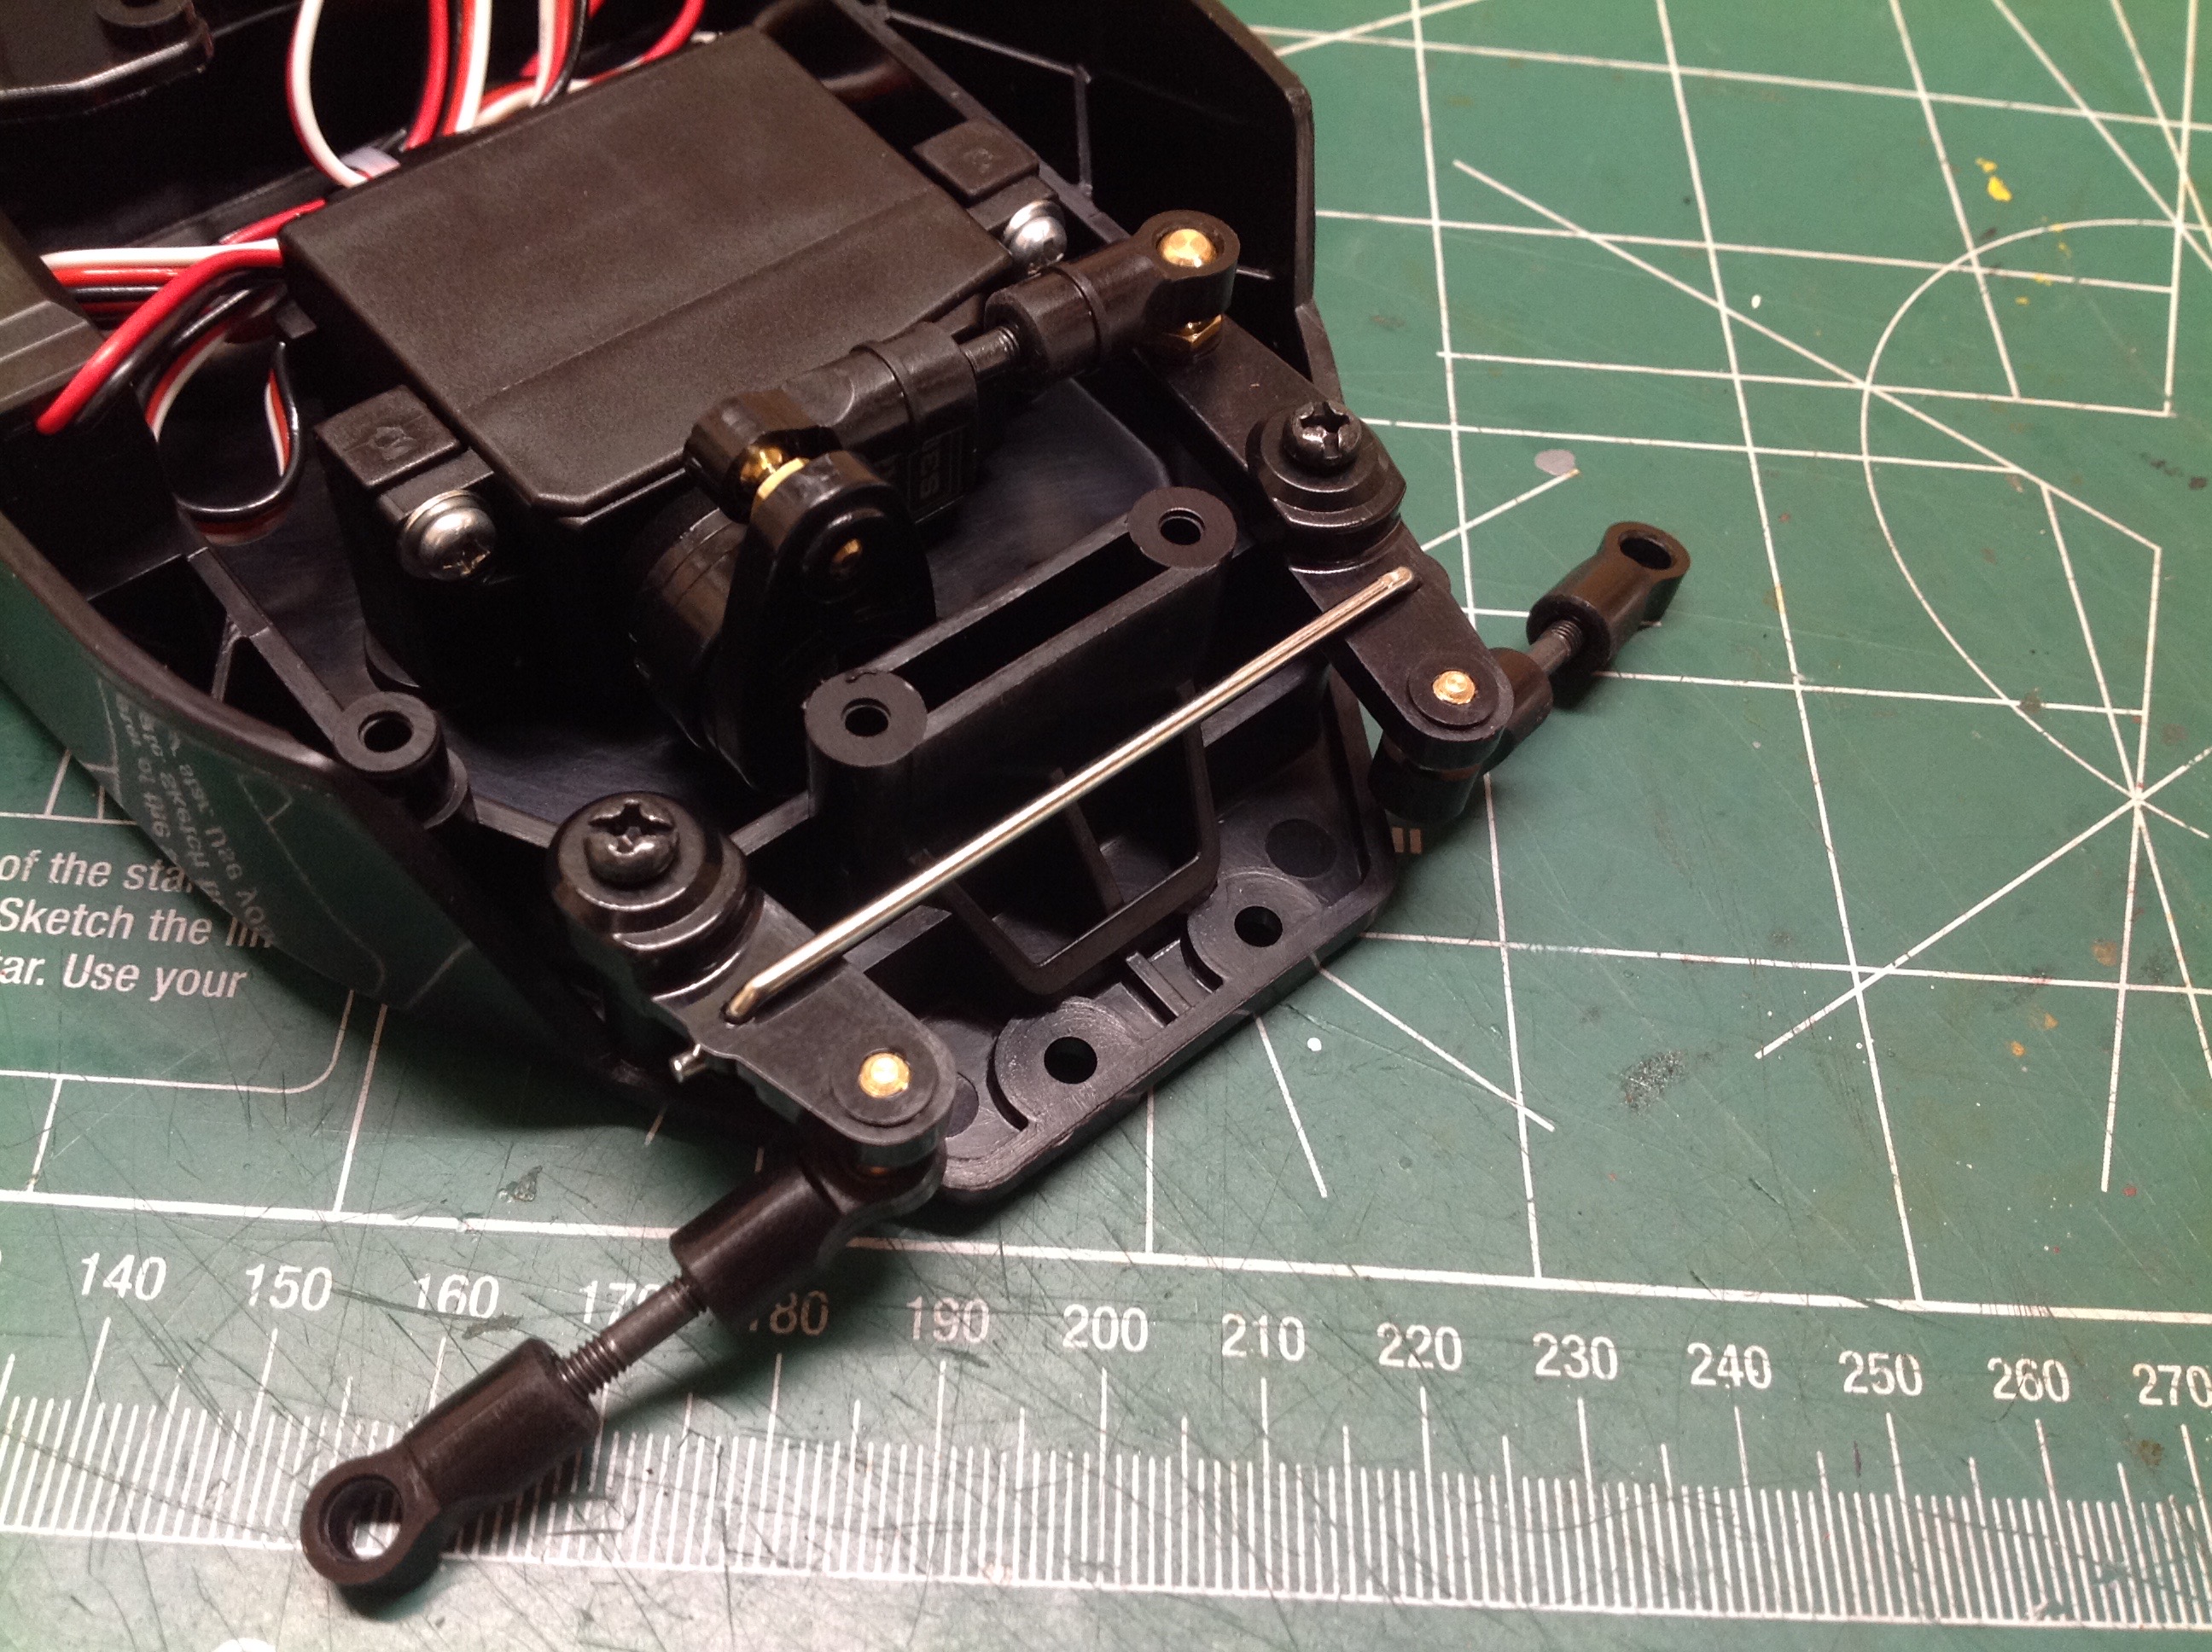
will have trouble with anything else. The steering servo connects
to a dual bellcrank system. No bearing on the cranks and they are
connected together with a Z-rod which means there is plenty of slop in
the steering.
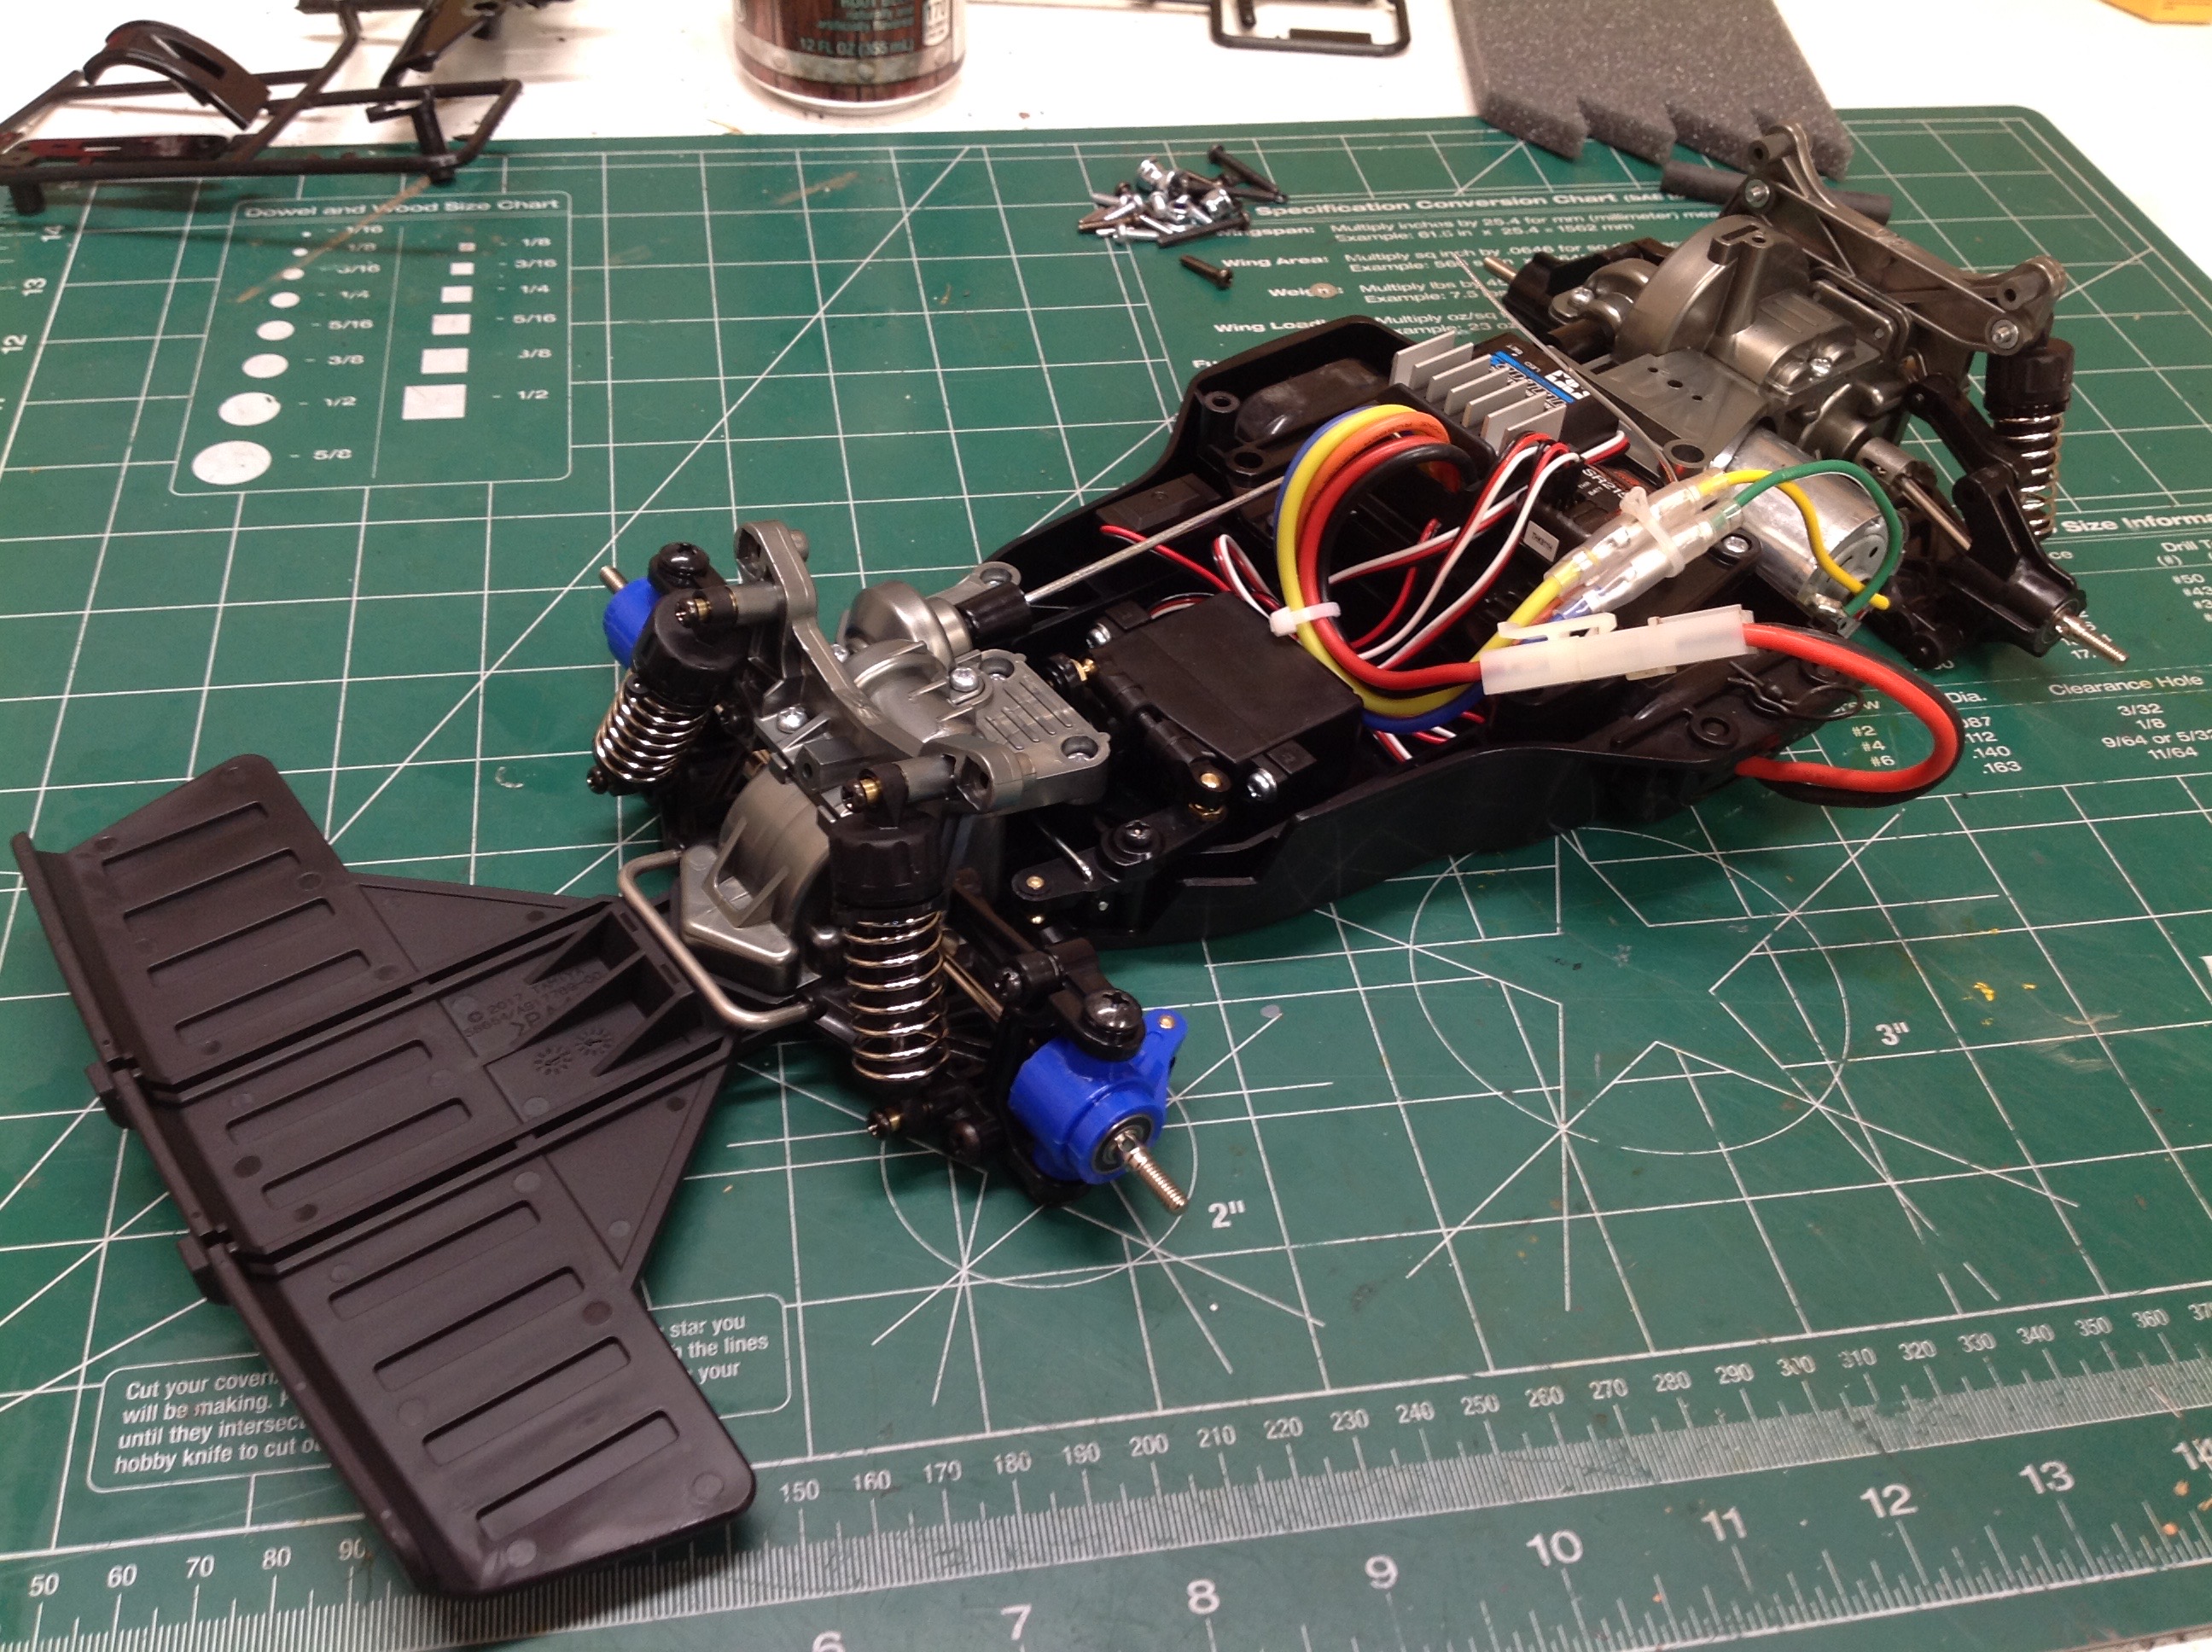
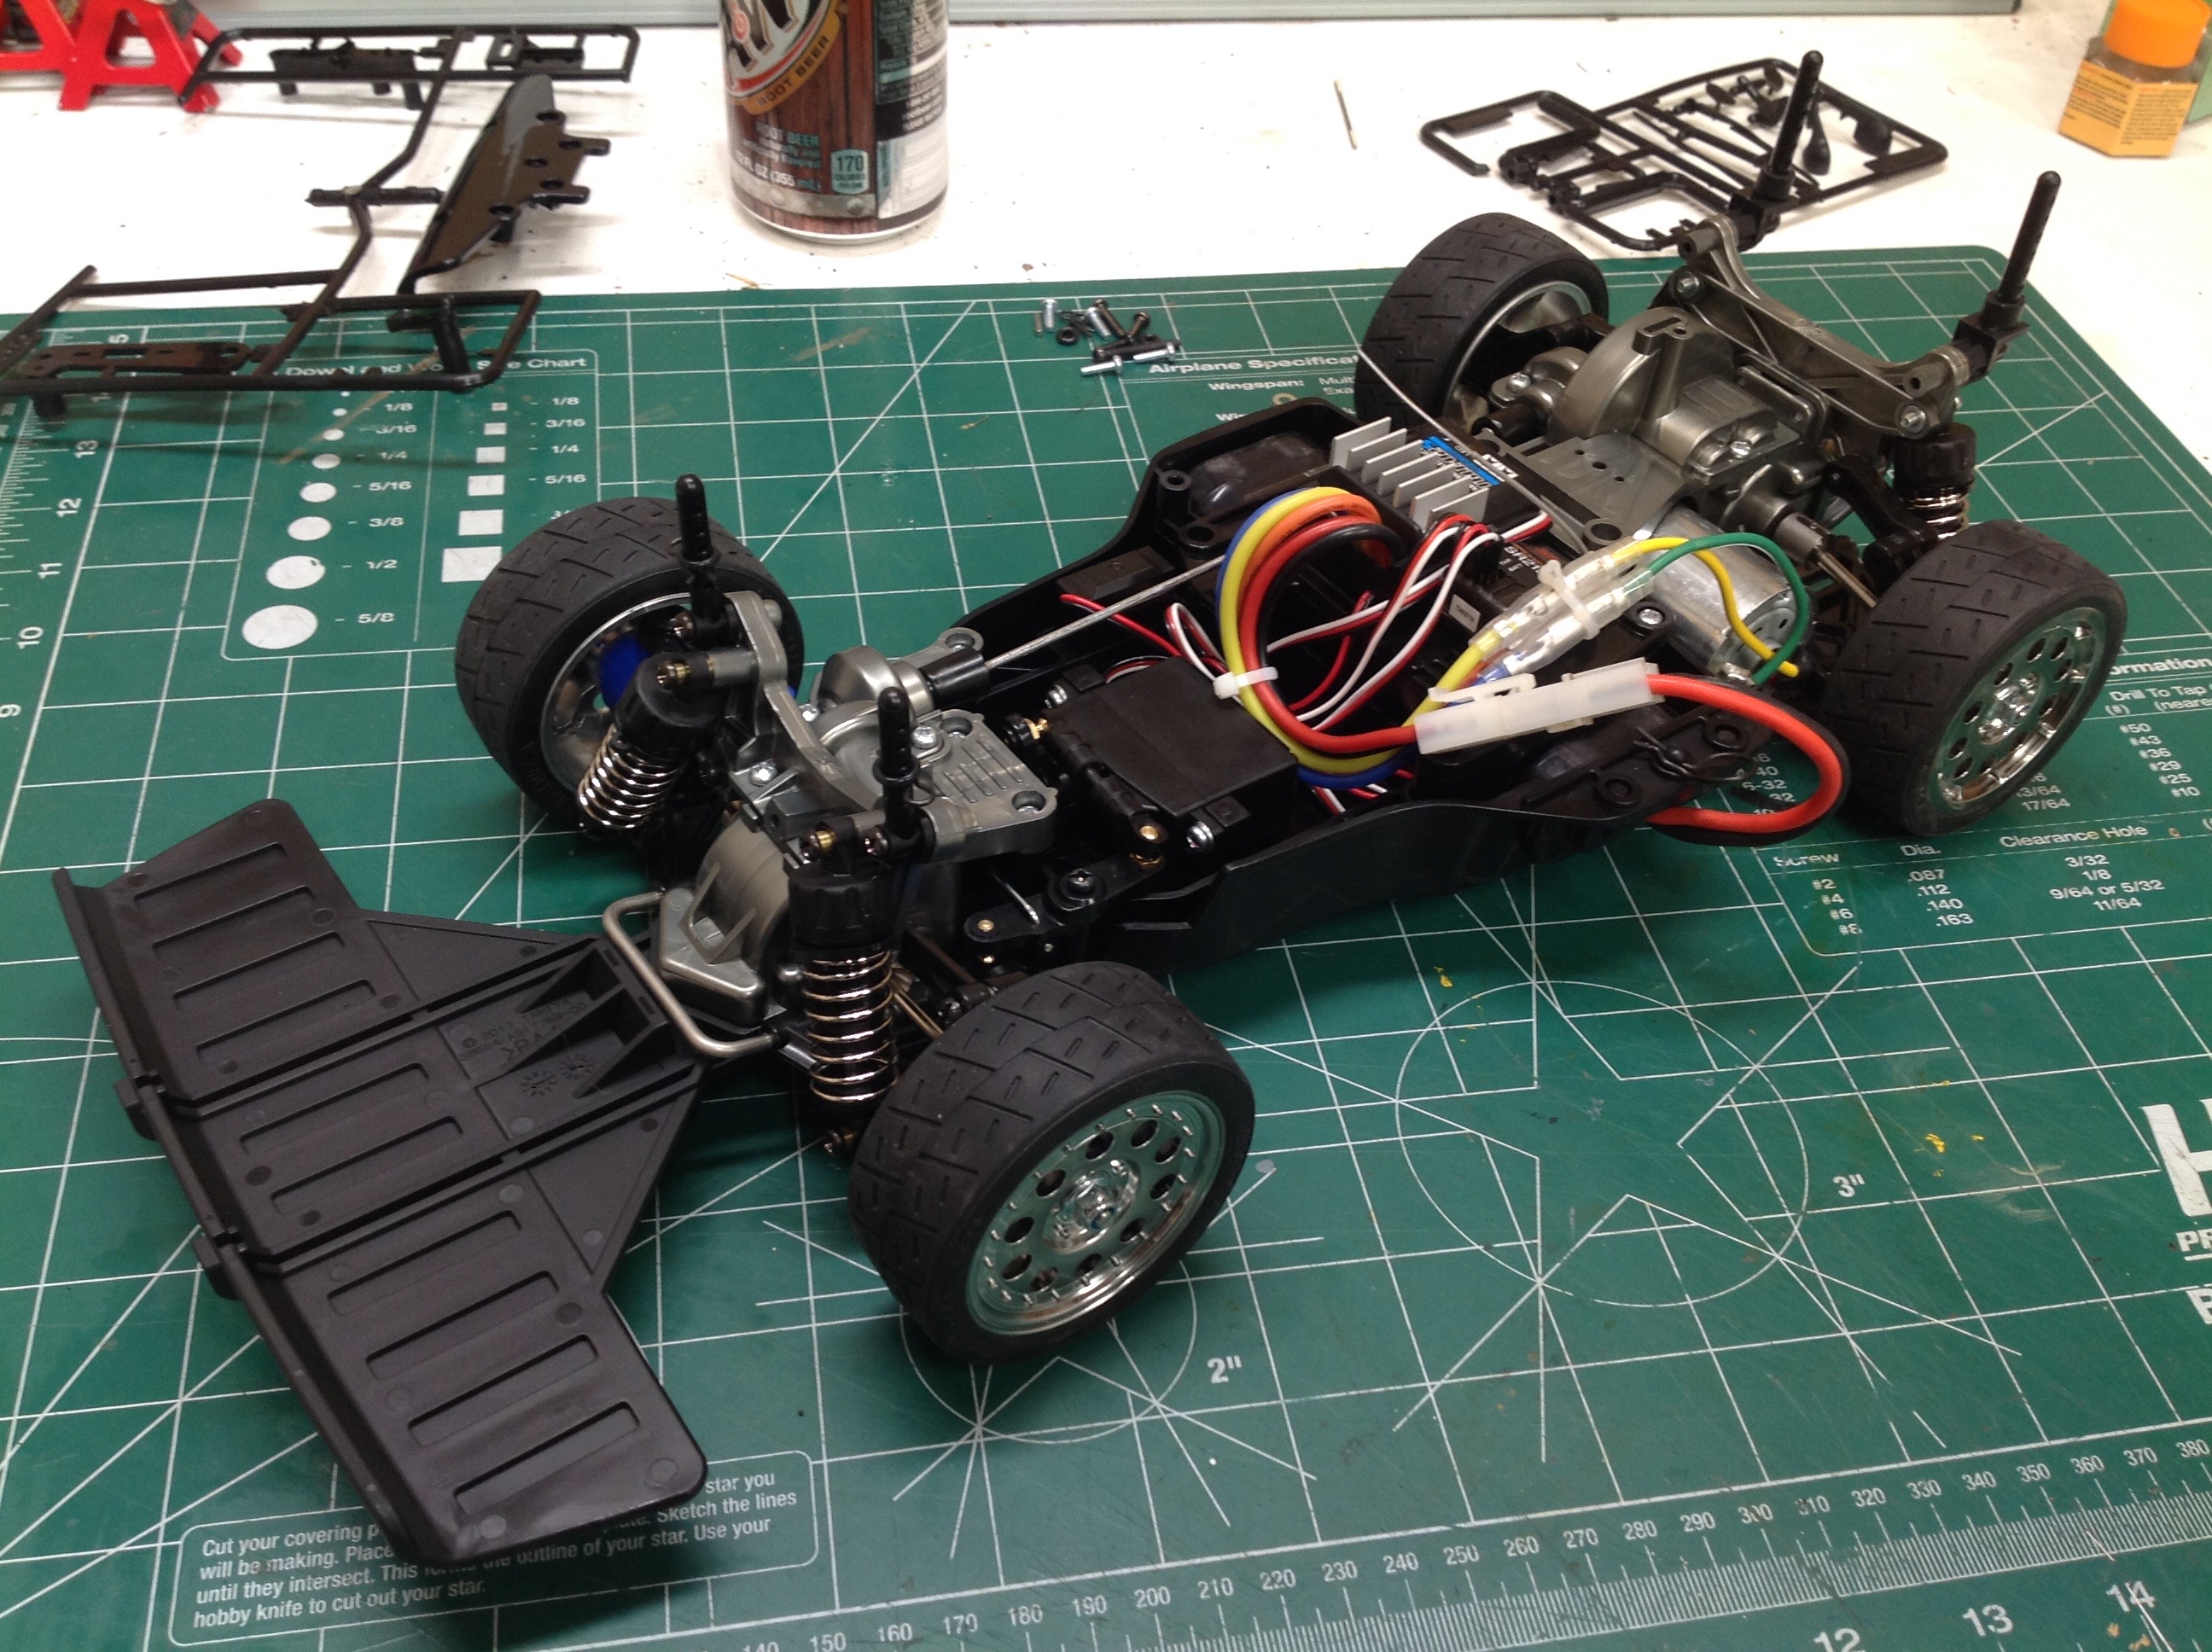
Now the front and rear suspension assemblies can be
installed and it finally starts to look like a car chassis. The
front bumper is a truly prodigious chunk of plastic. I thought of
removing it for scale, but it actually hides pretty well with the body
on and will do a good job of protecting the shell. The rear
bumper, on the other hand, is just a little nubbin. To complete
the rolling chassis I've installed the wheels and tires. The
wheels are a very nice replica of real rally wheels and look excellent.
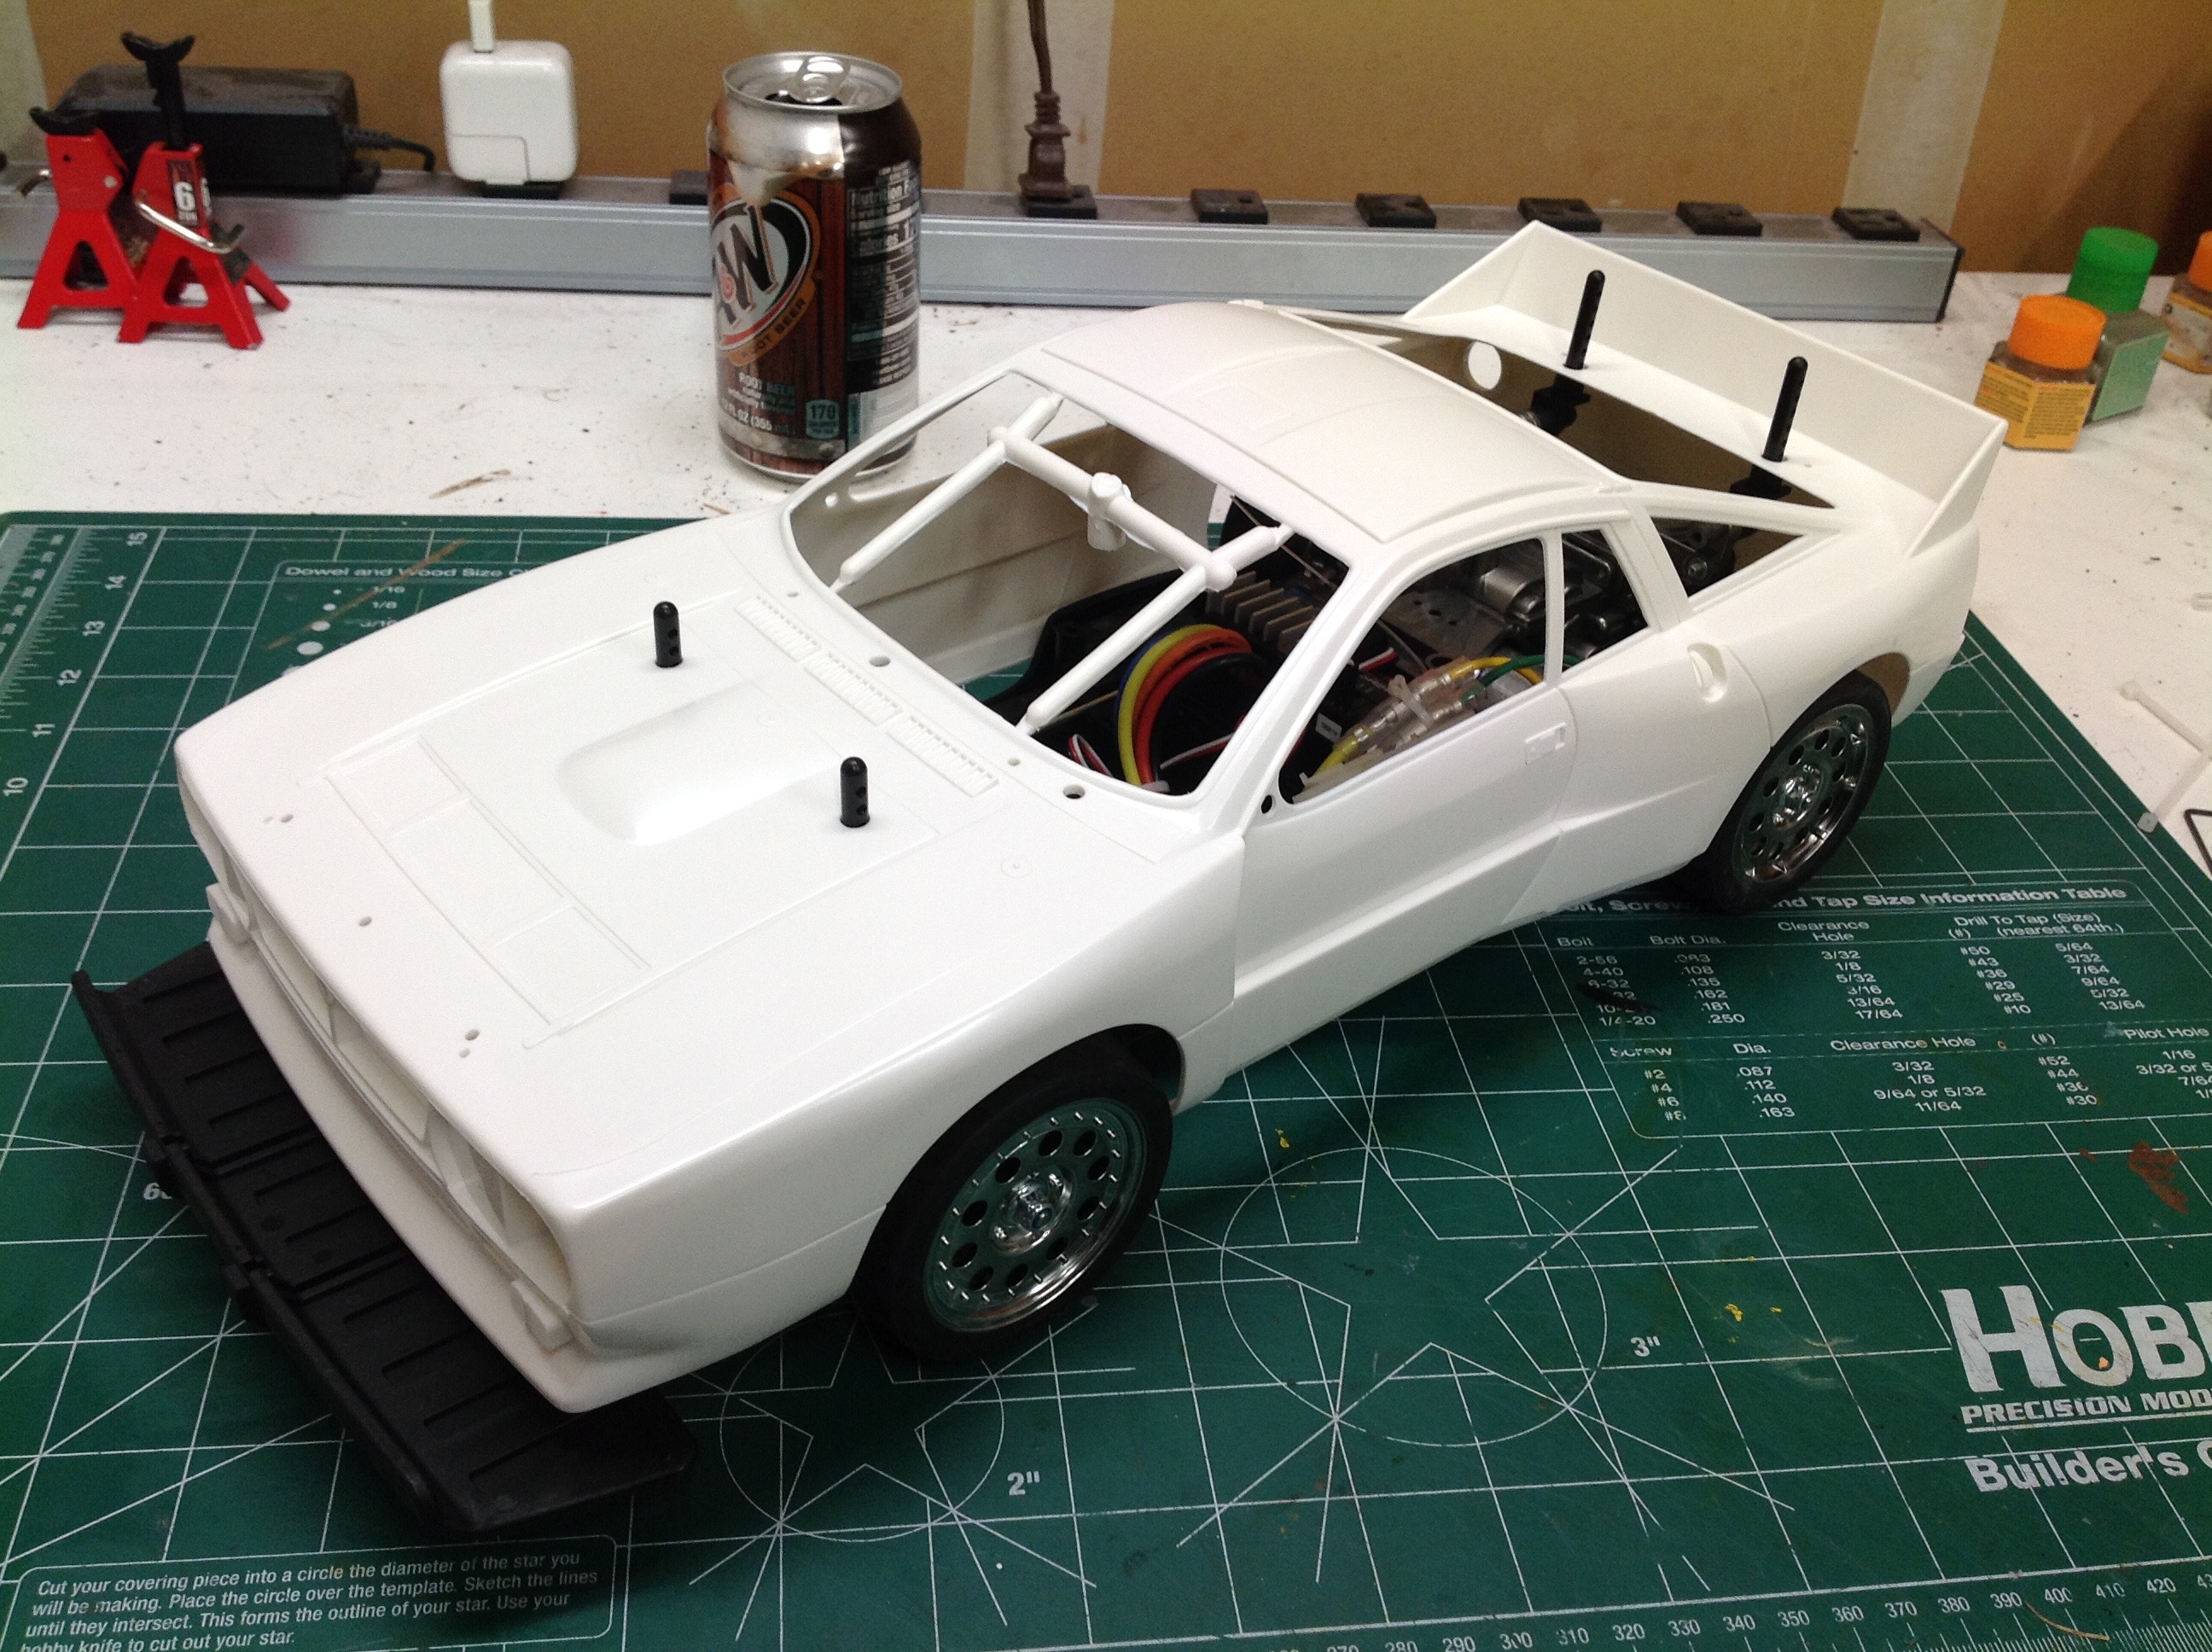
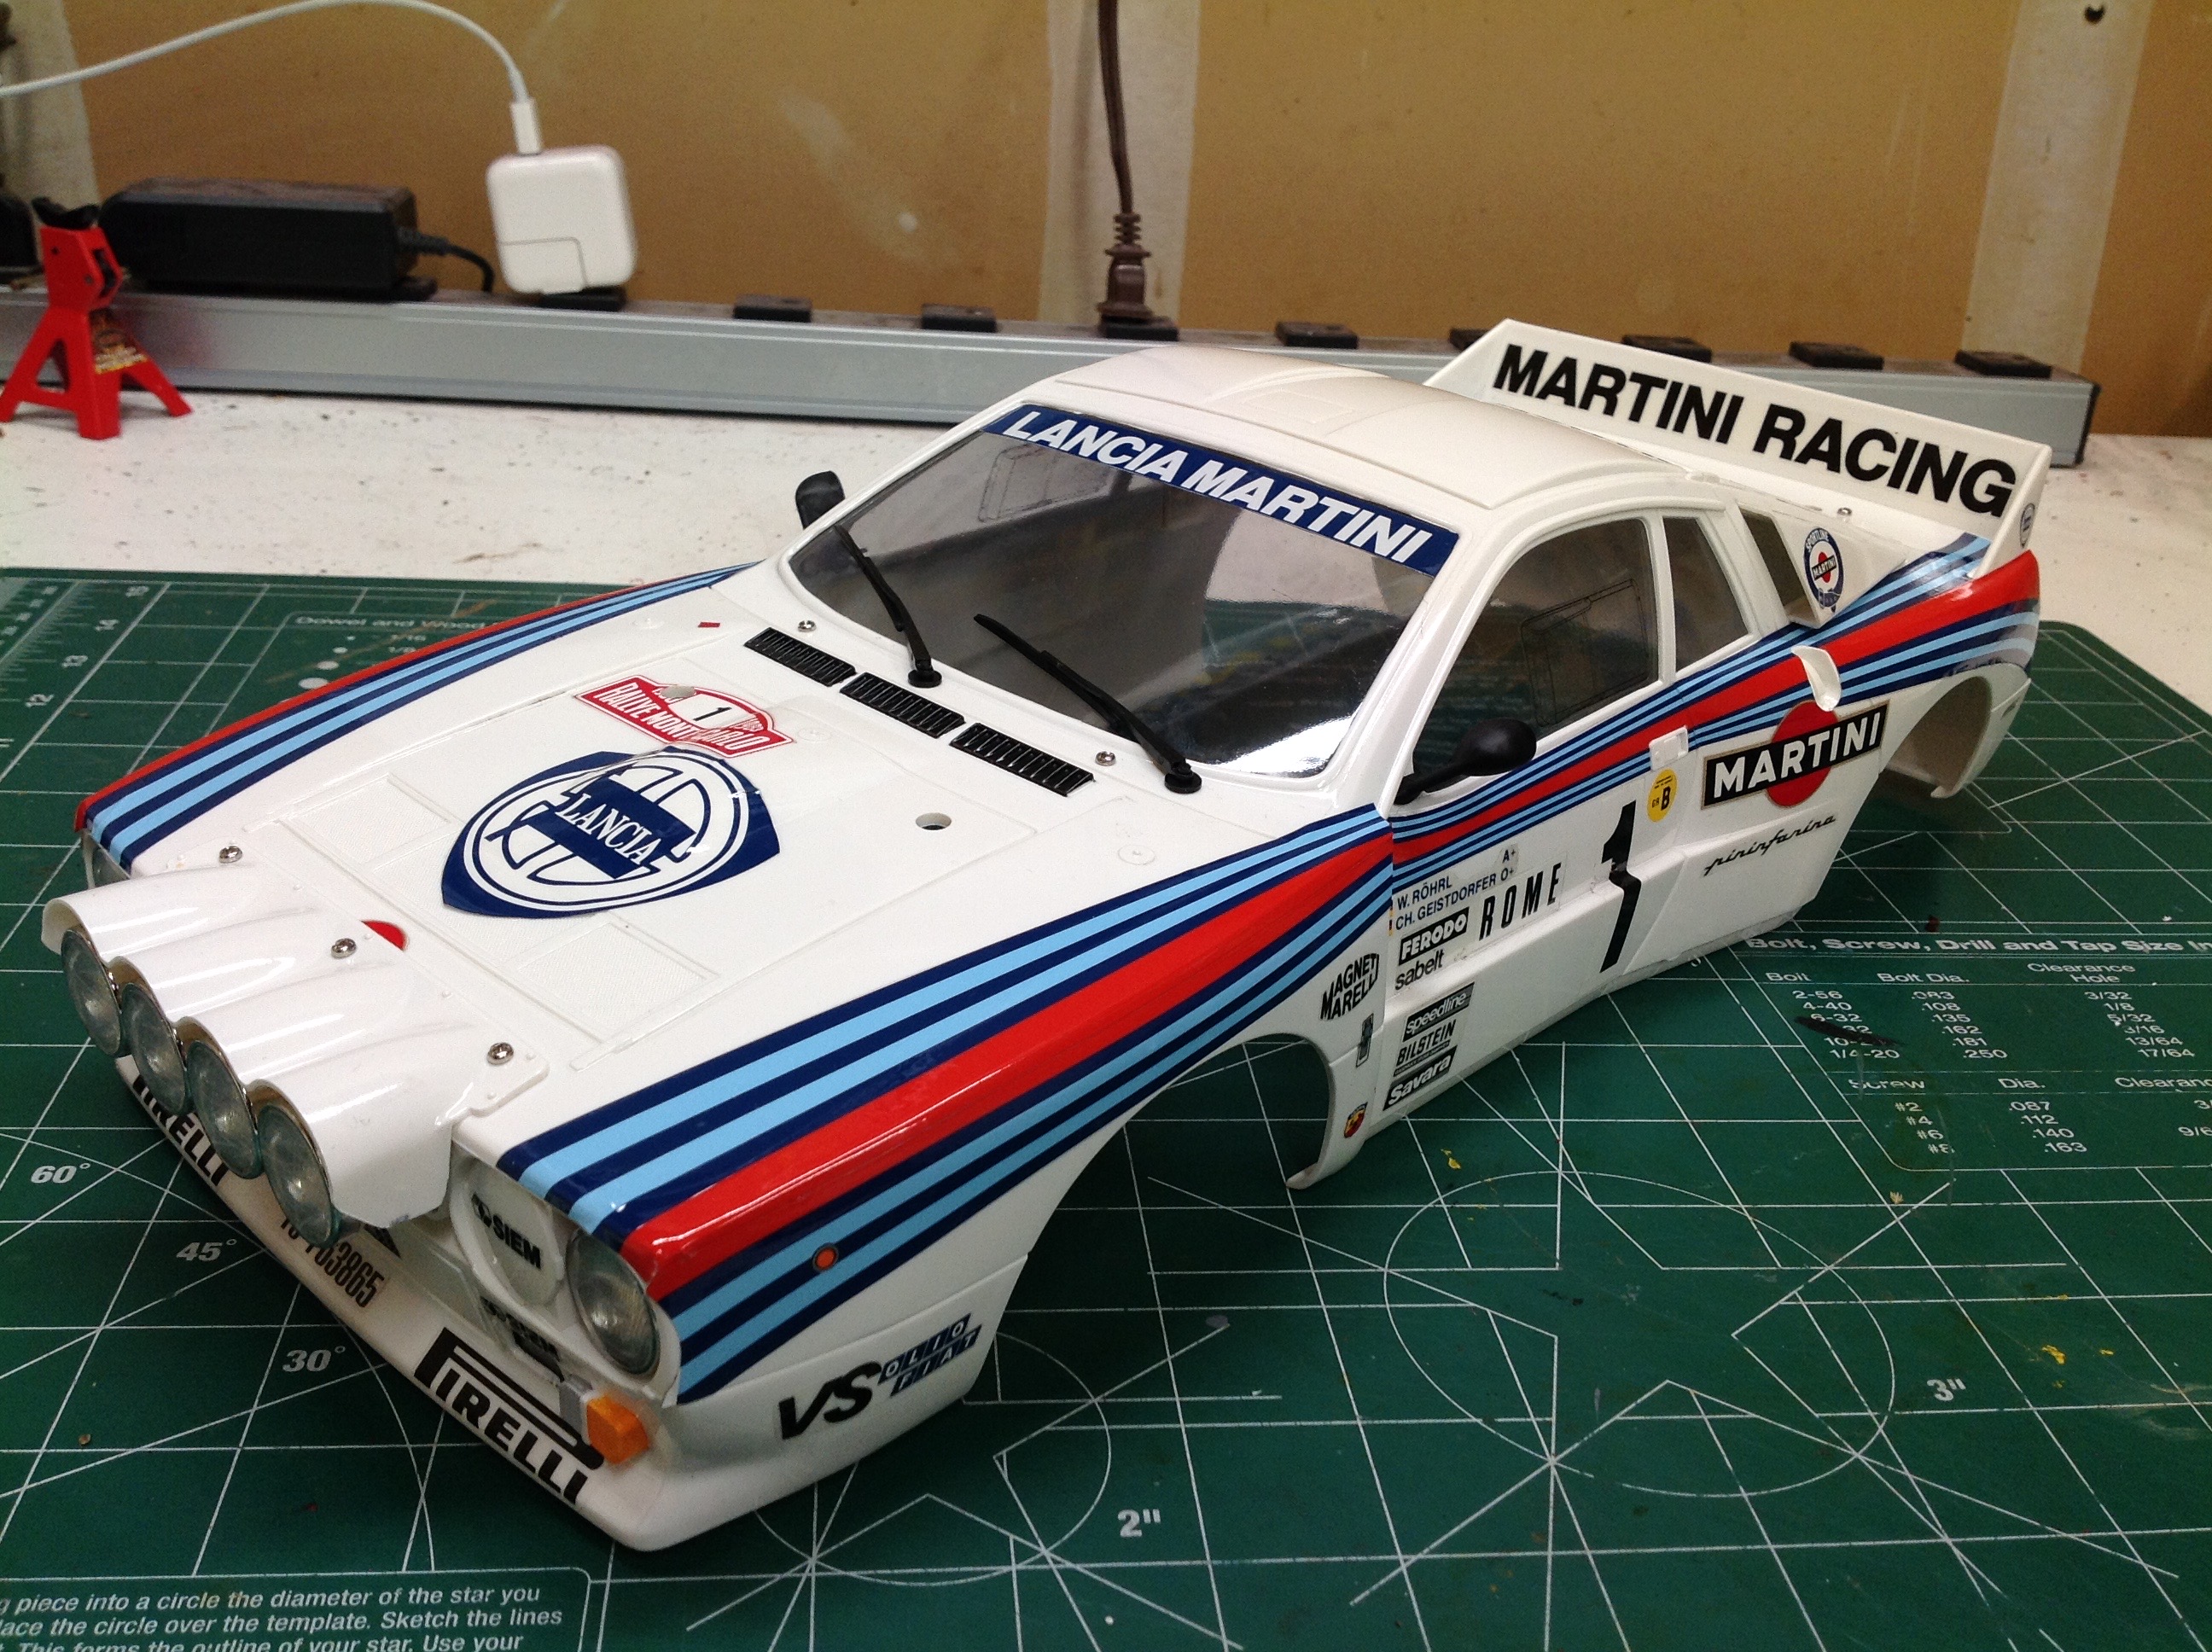
The gorgeous hard shell body comes molded in white,
but that didn't stop me from painting in white anyway. The shine
is much better that way. Then there was the long arduous process
of applying the stickers. I would much have preferred water slide
decals at this scale because large stickers are very difficult to keep
straight and free of bubbles. They came out pretty well in the
end. There are also plenty of other details to paint including the
front marker lights, tail lights, heater intake grilles, and
wipers. The model comes with transparent tinted windows.
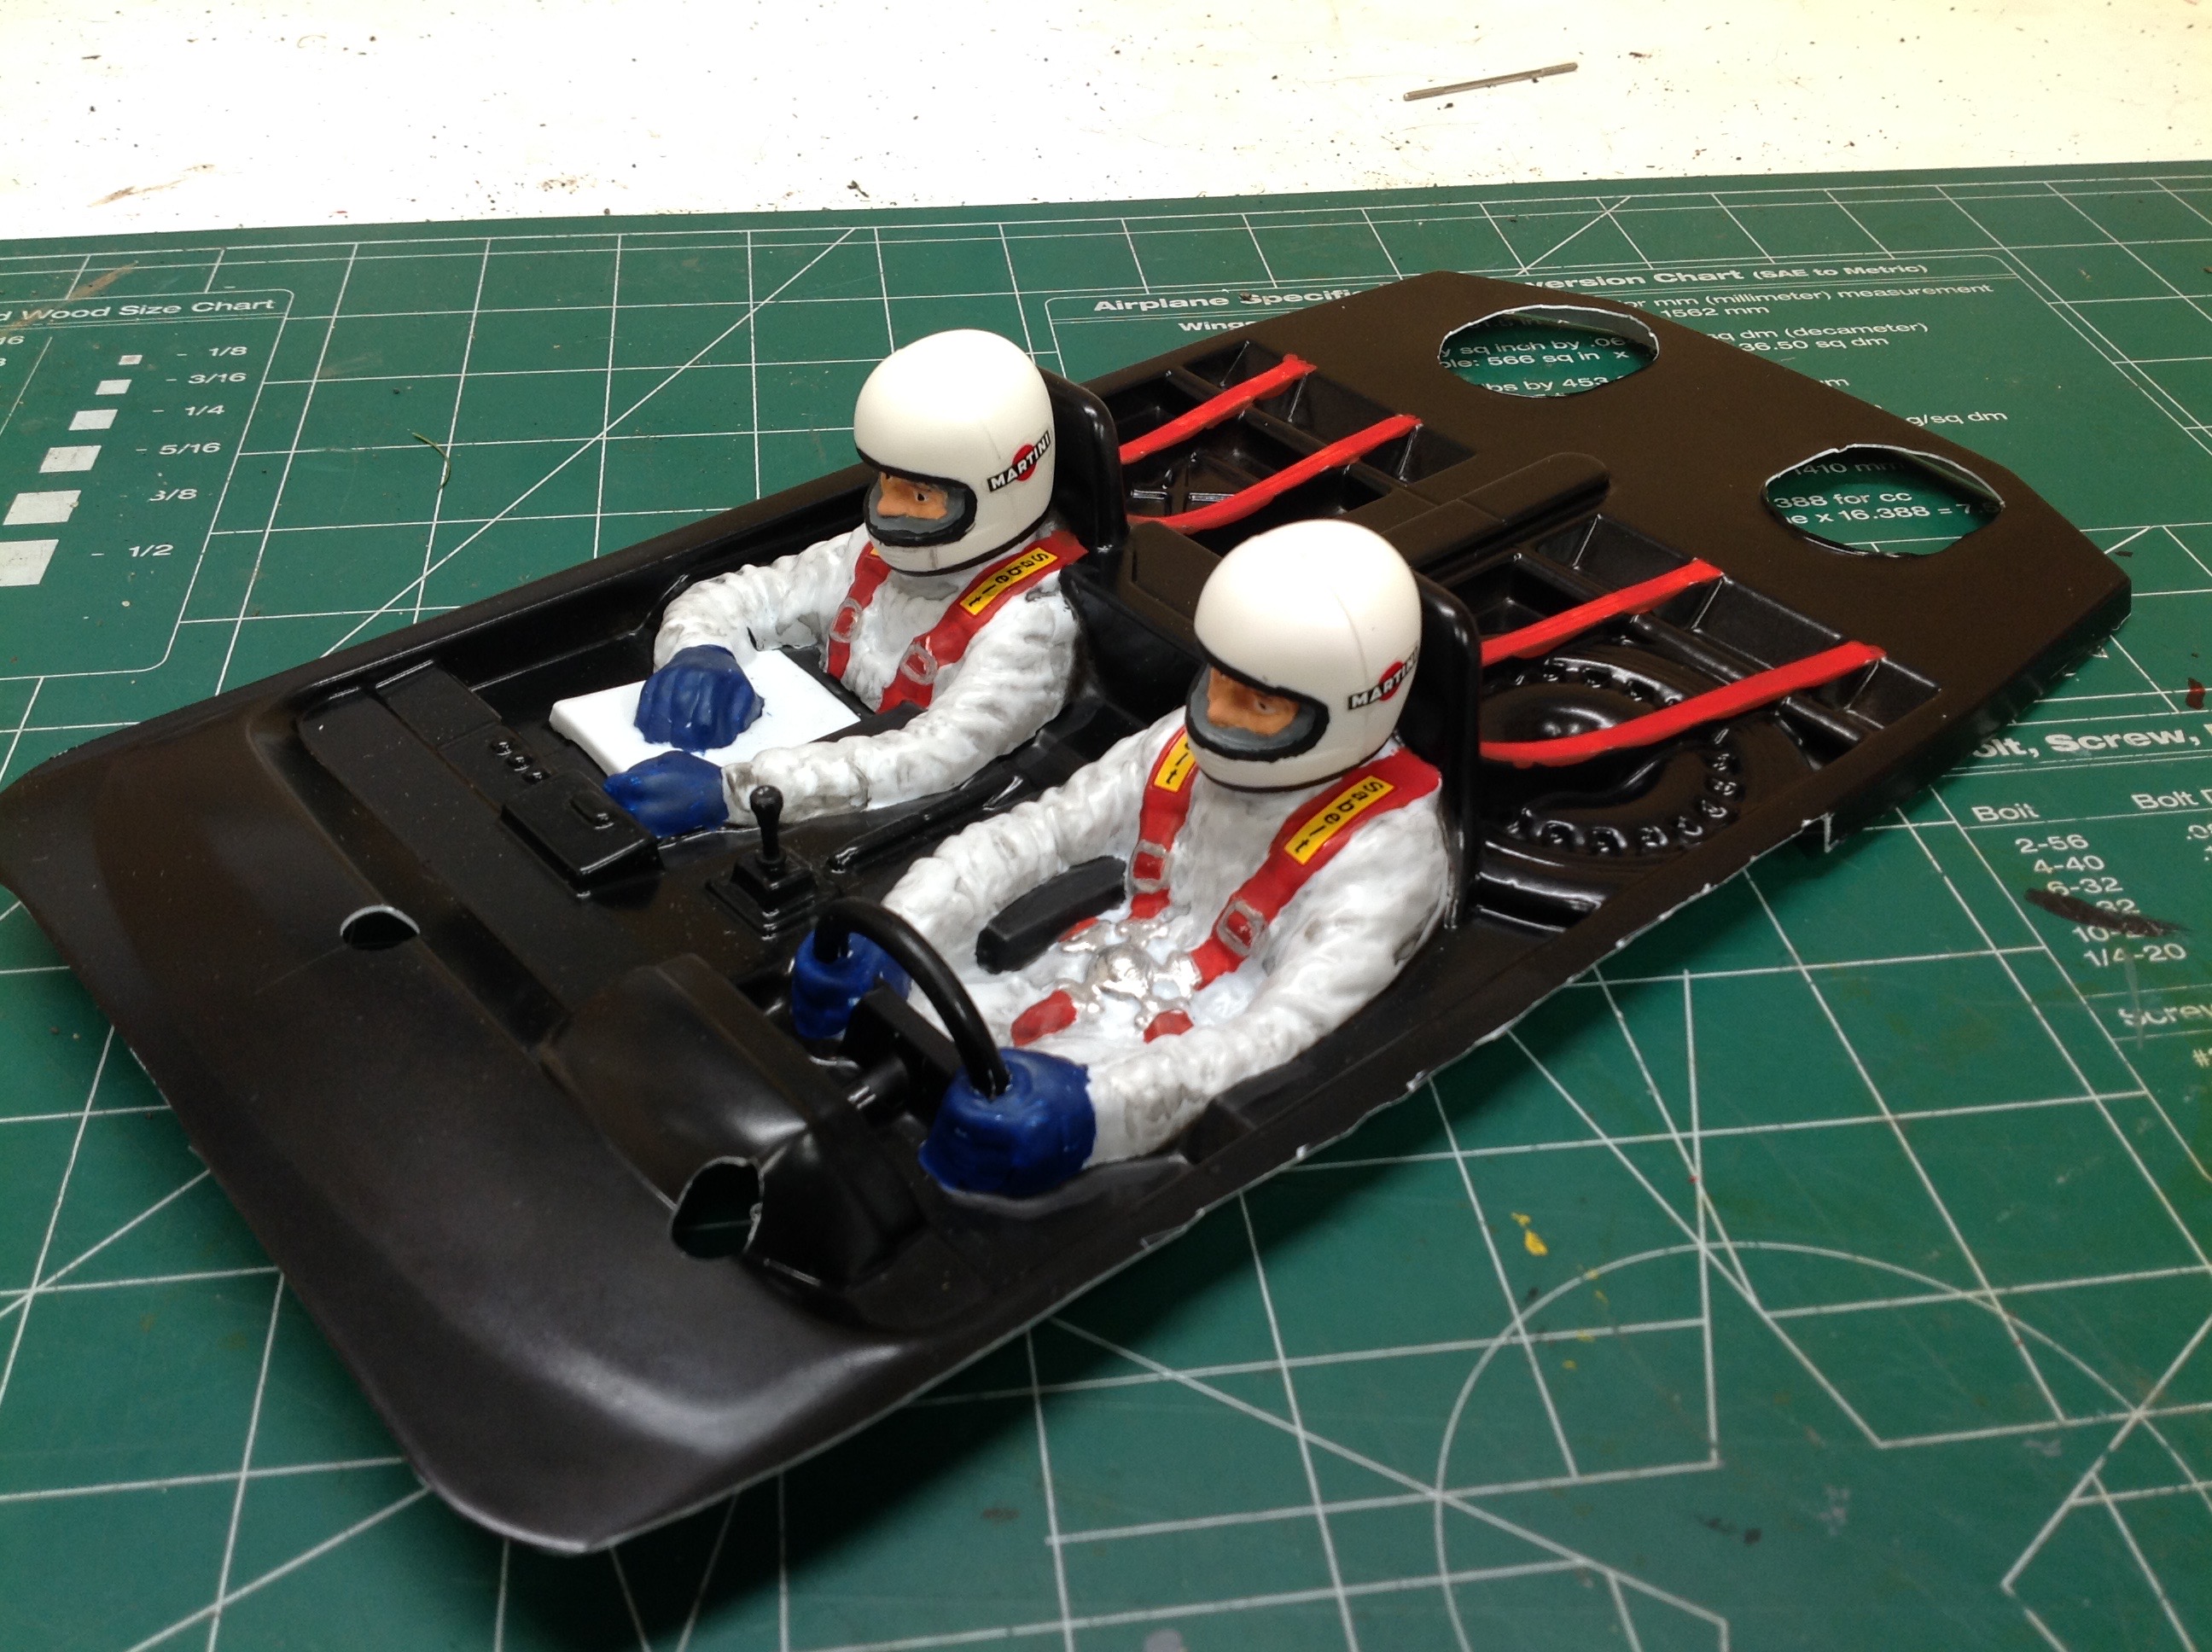
Unlike most touring cars, this one even comes with a
set of drivers. This starts as a molded sheet which must be
trimmed and painted. The driver's heads and the steering wheel are
separate parts. Painting took quite a long time, but it really
improves the realism of the car.
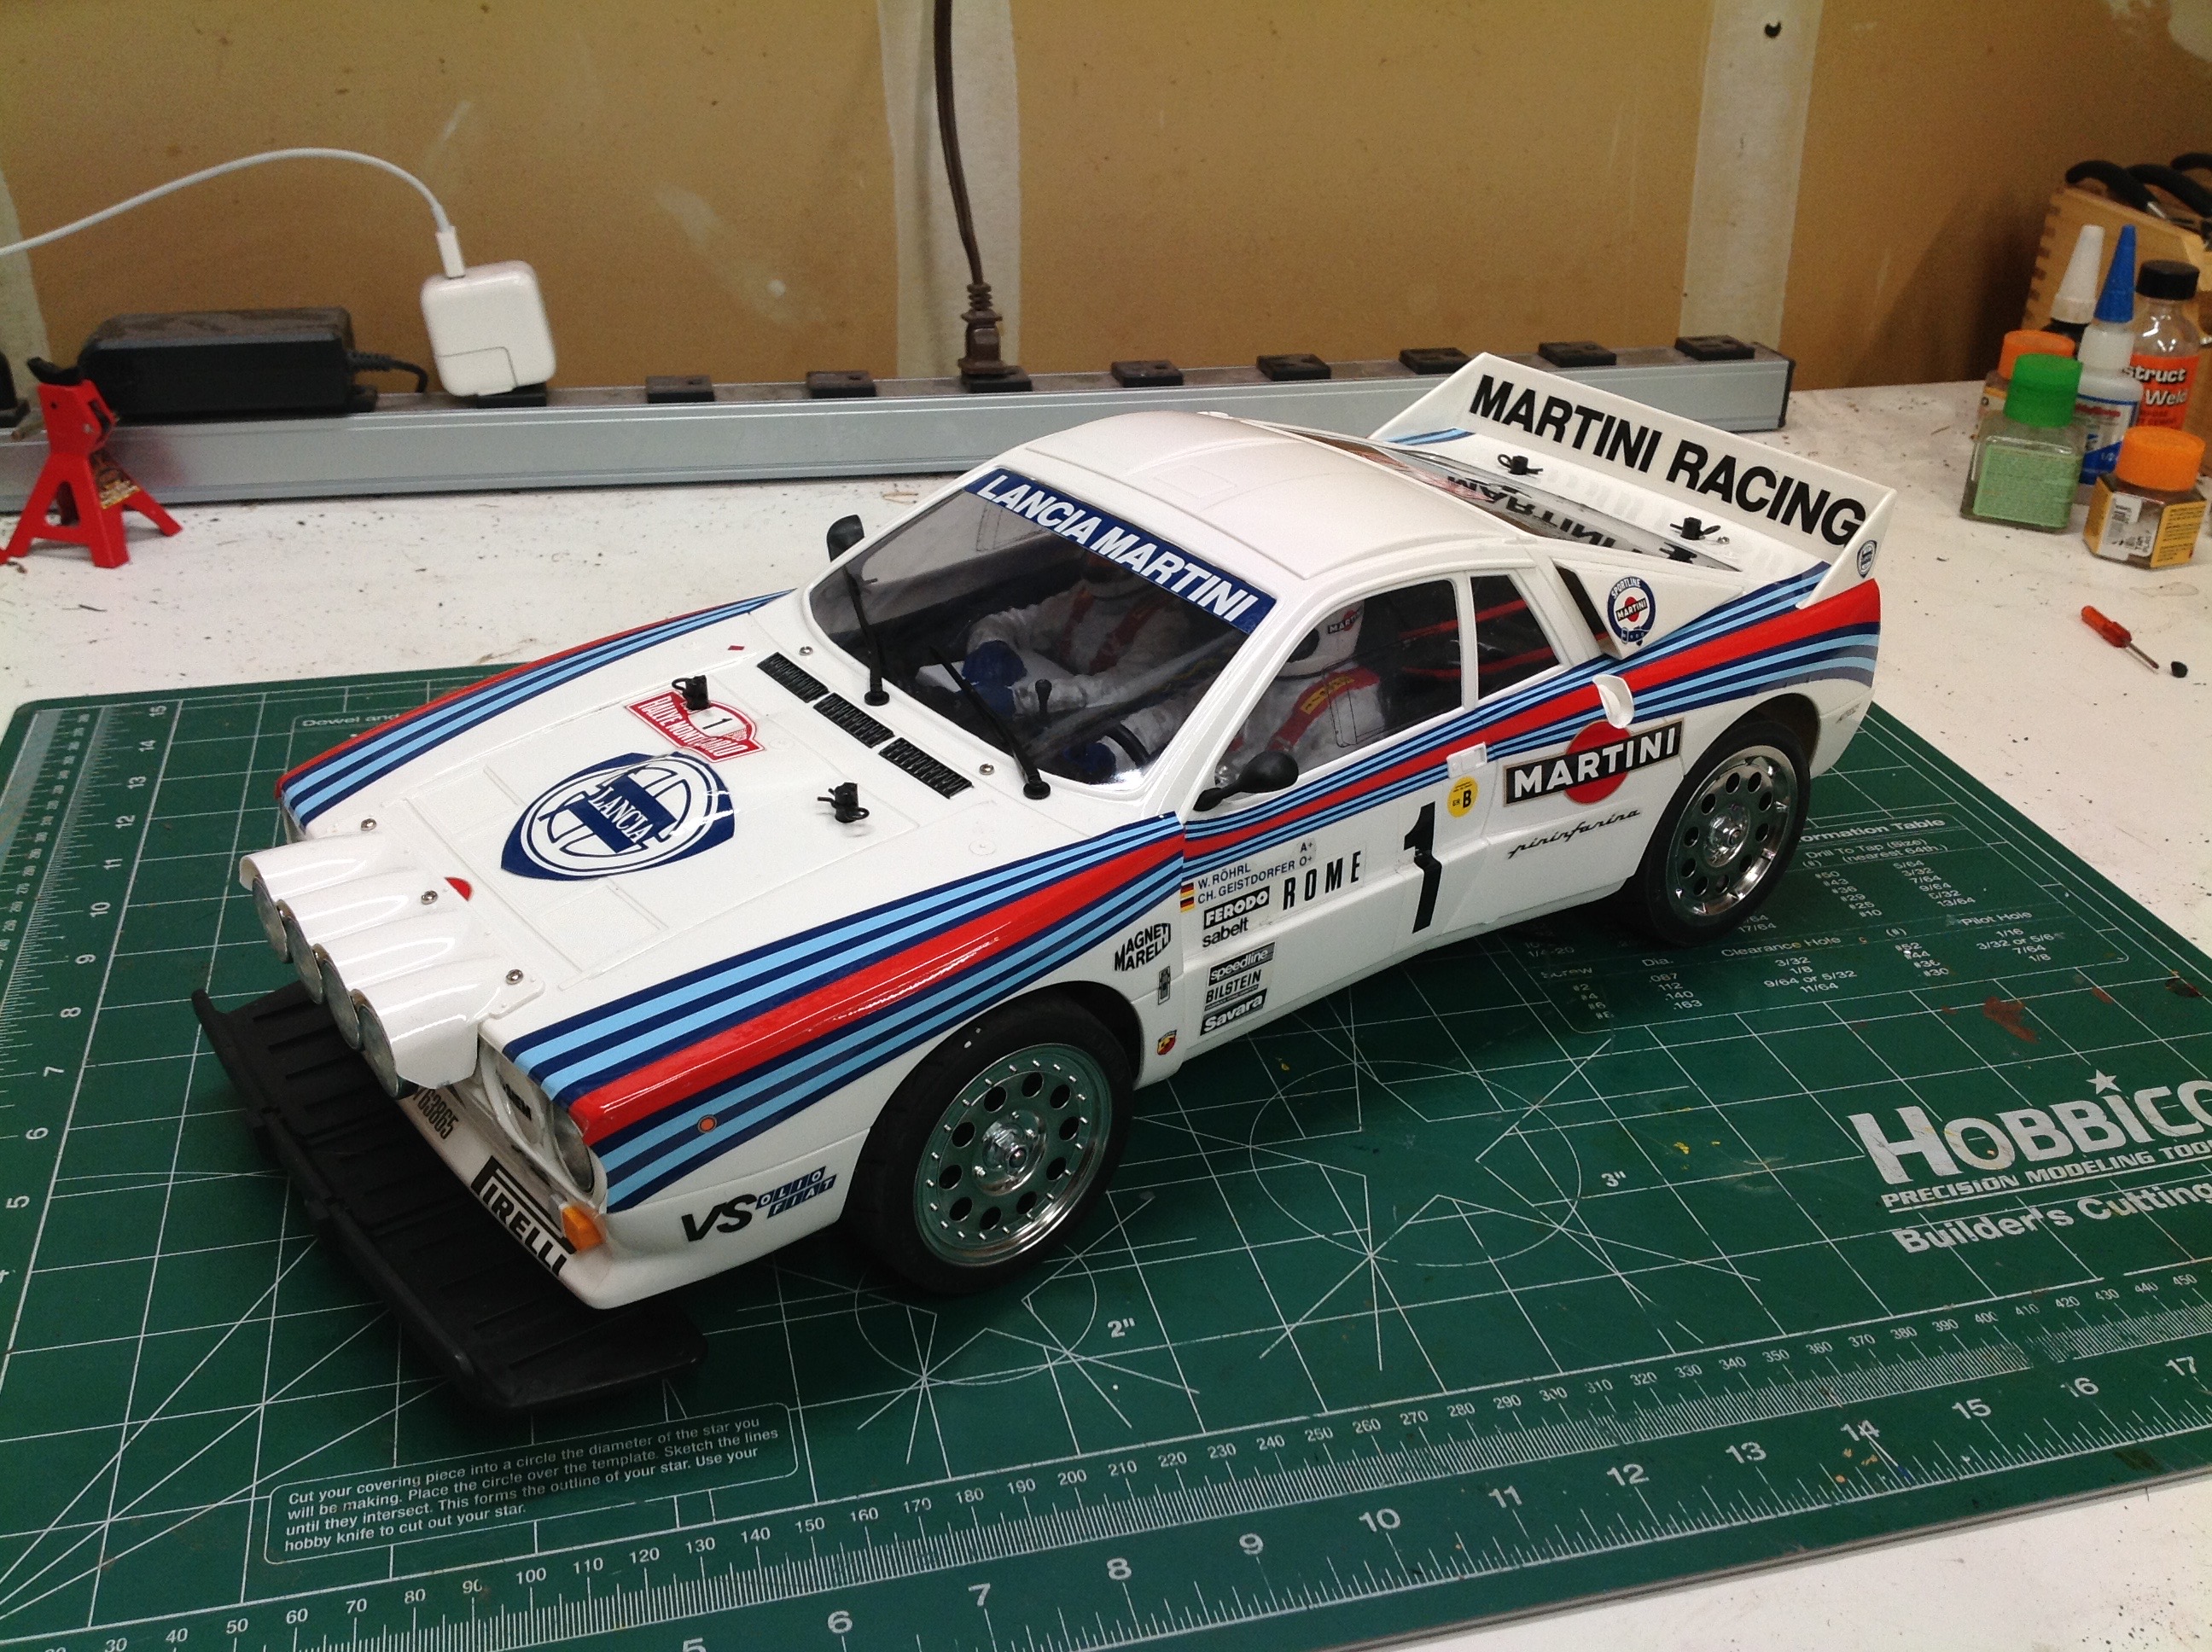
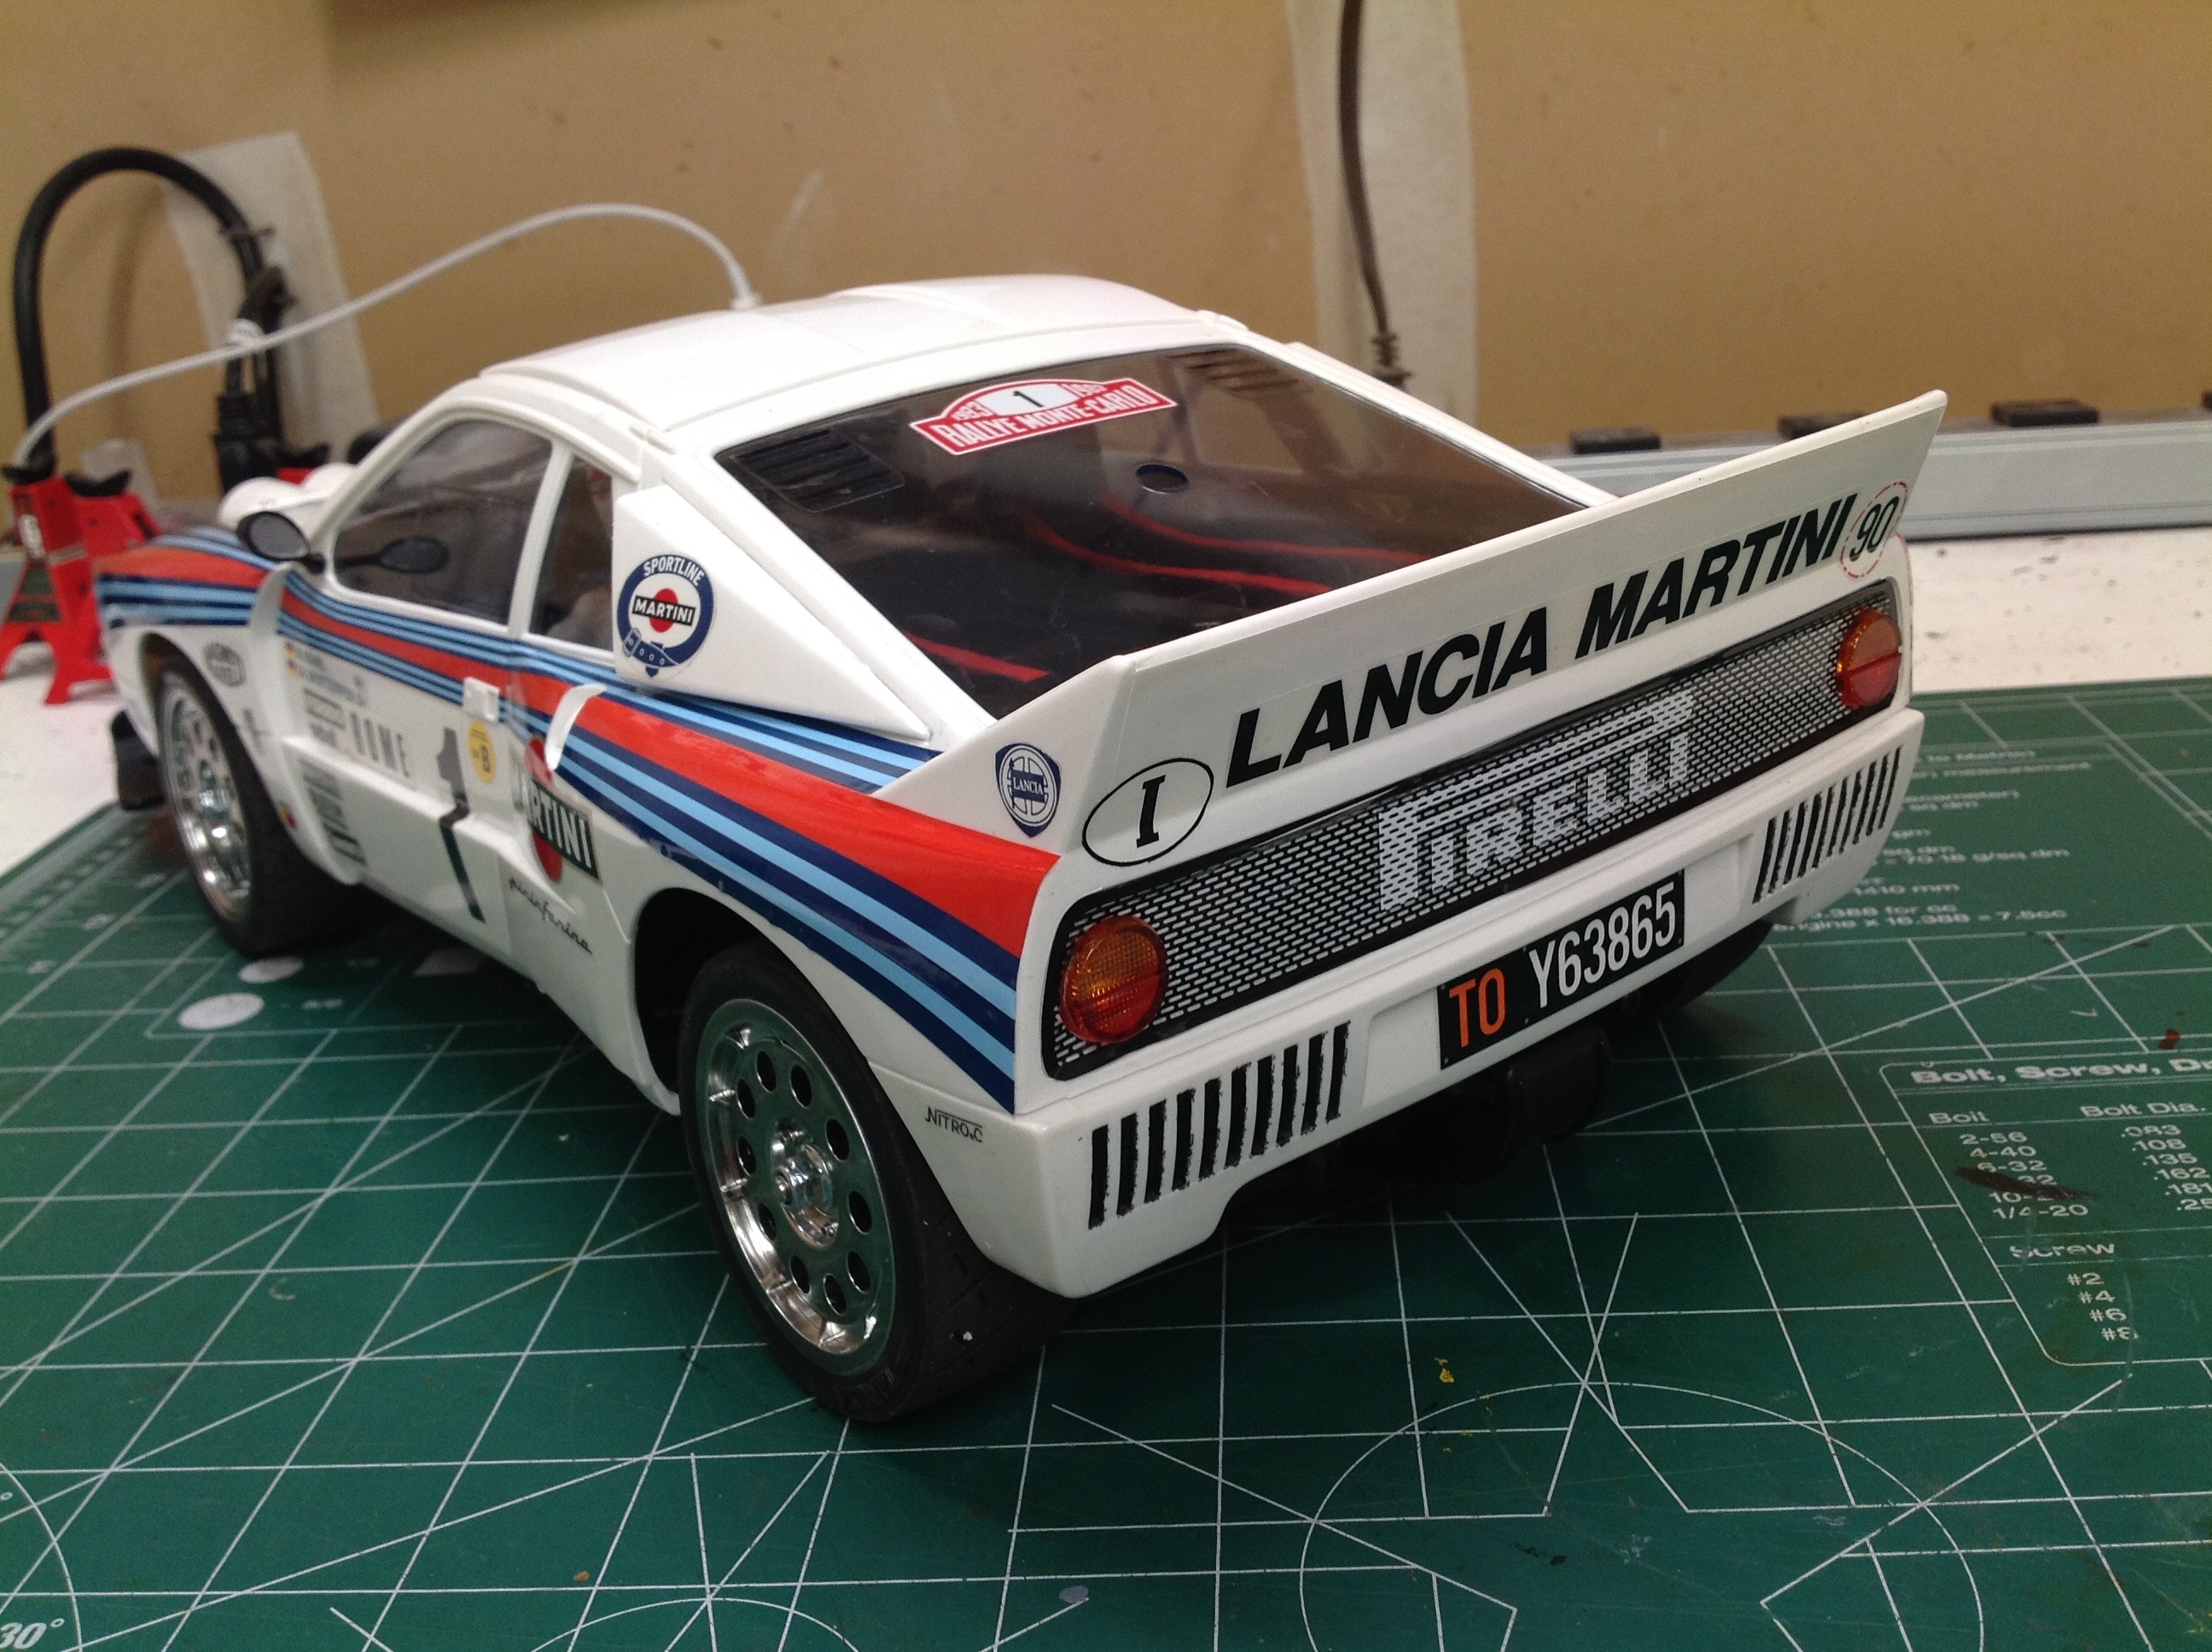
Here are some final shots of the car once fully detailed and clear coated. I chose not to paint the black trim around the windows because I was too afraid of screwing it up. I did mask and paint the louvers on the rear bumper.