Tamiya Rock Buster Project
Page 1: Assembly
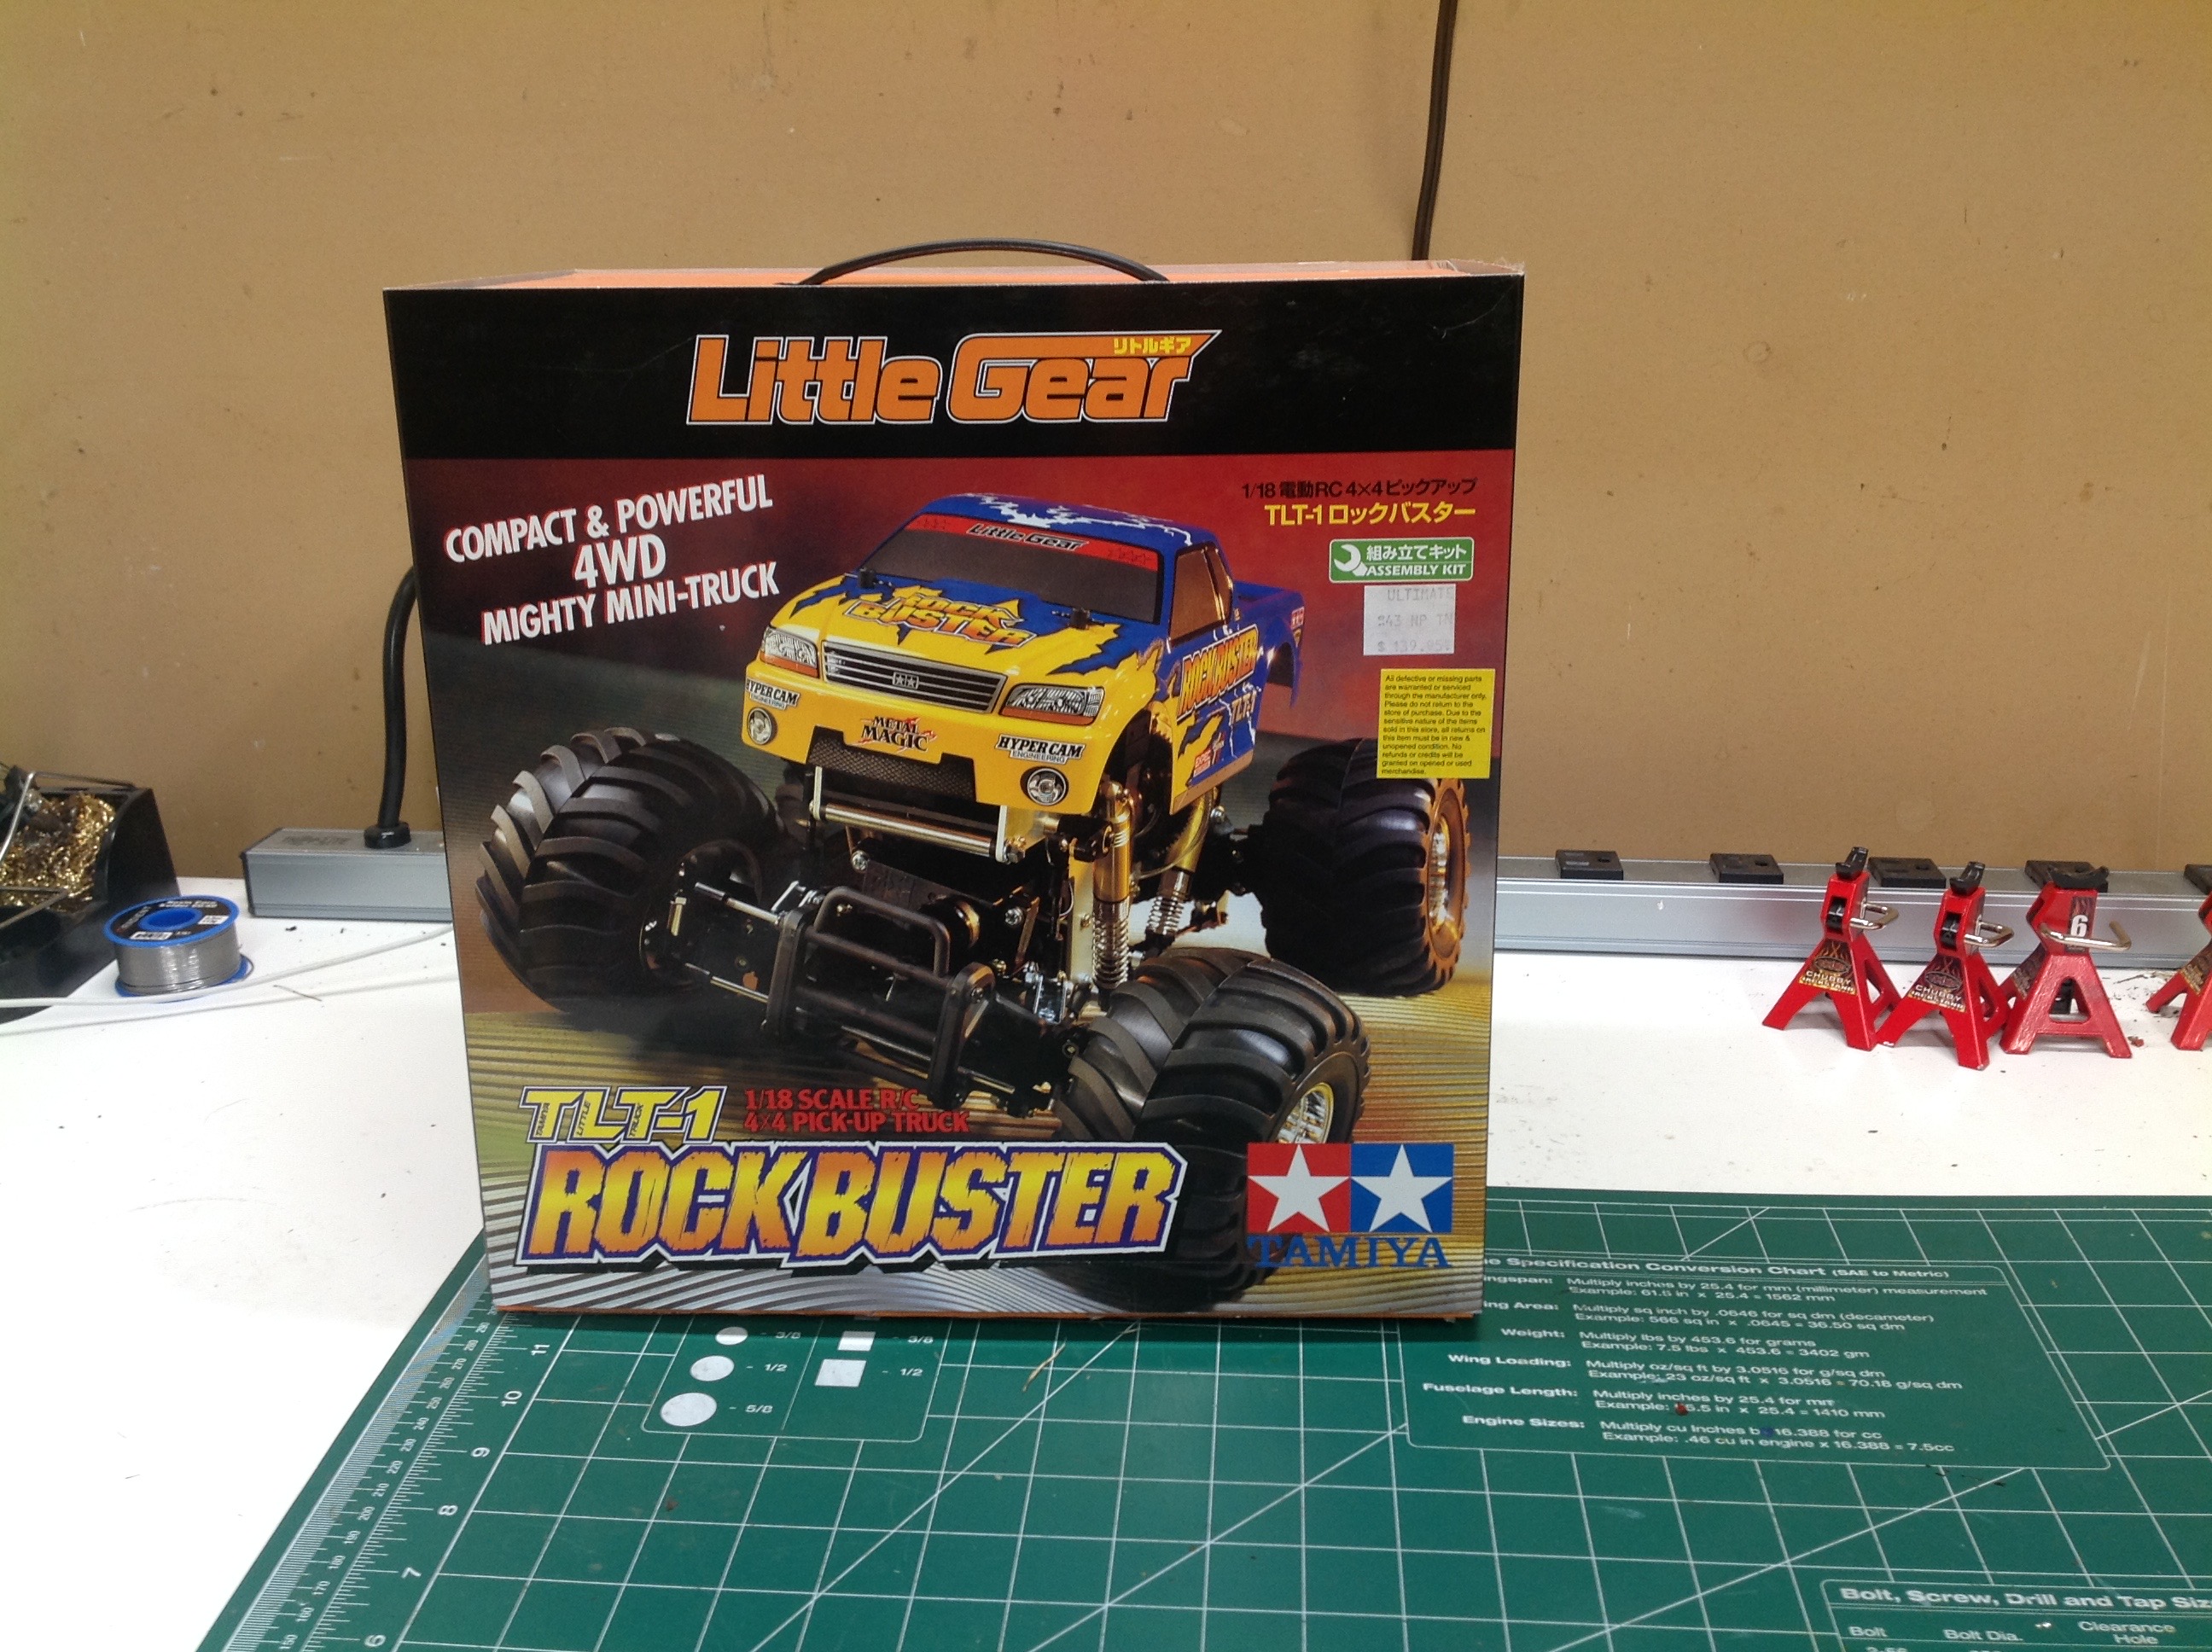
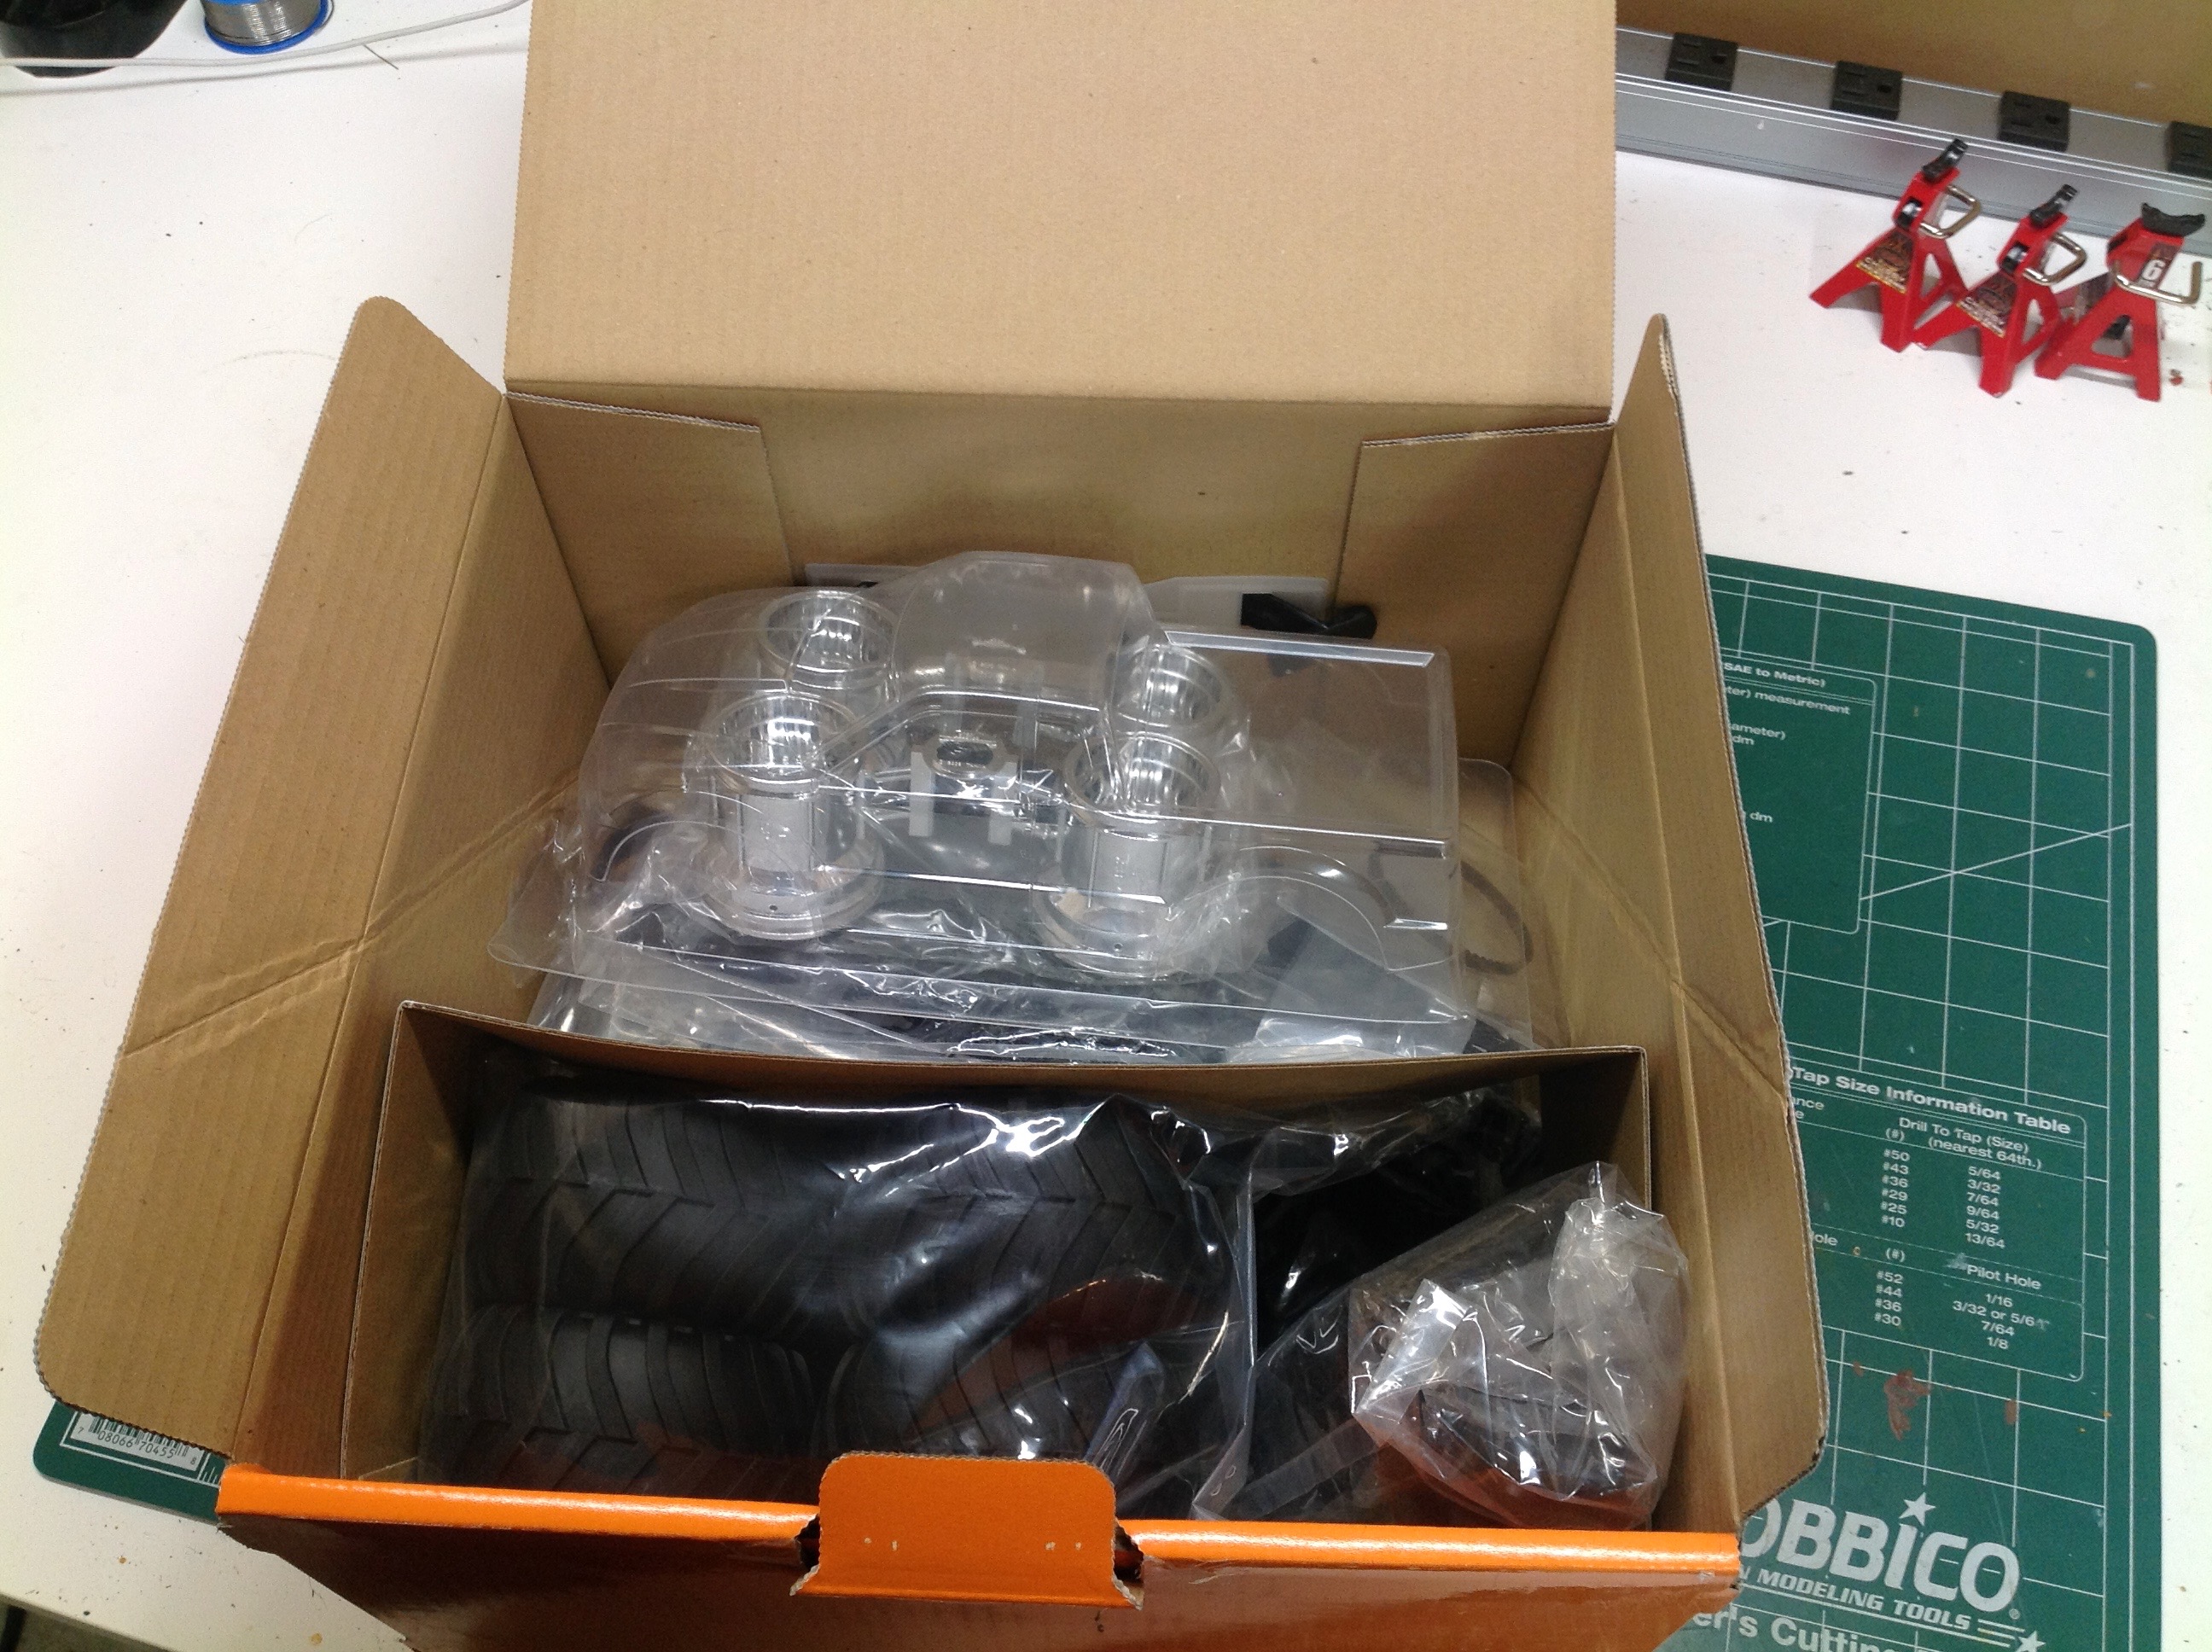
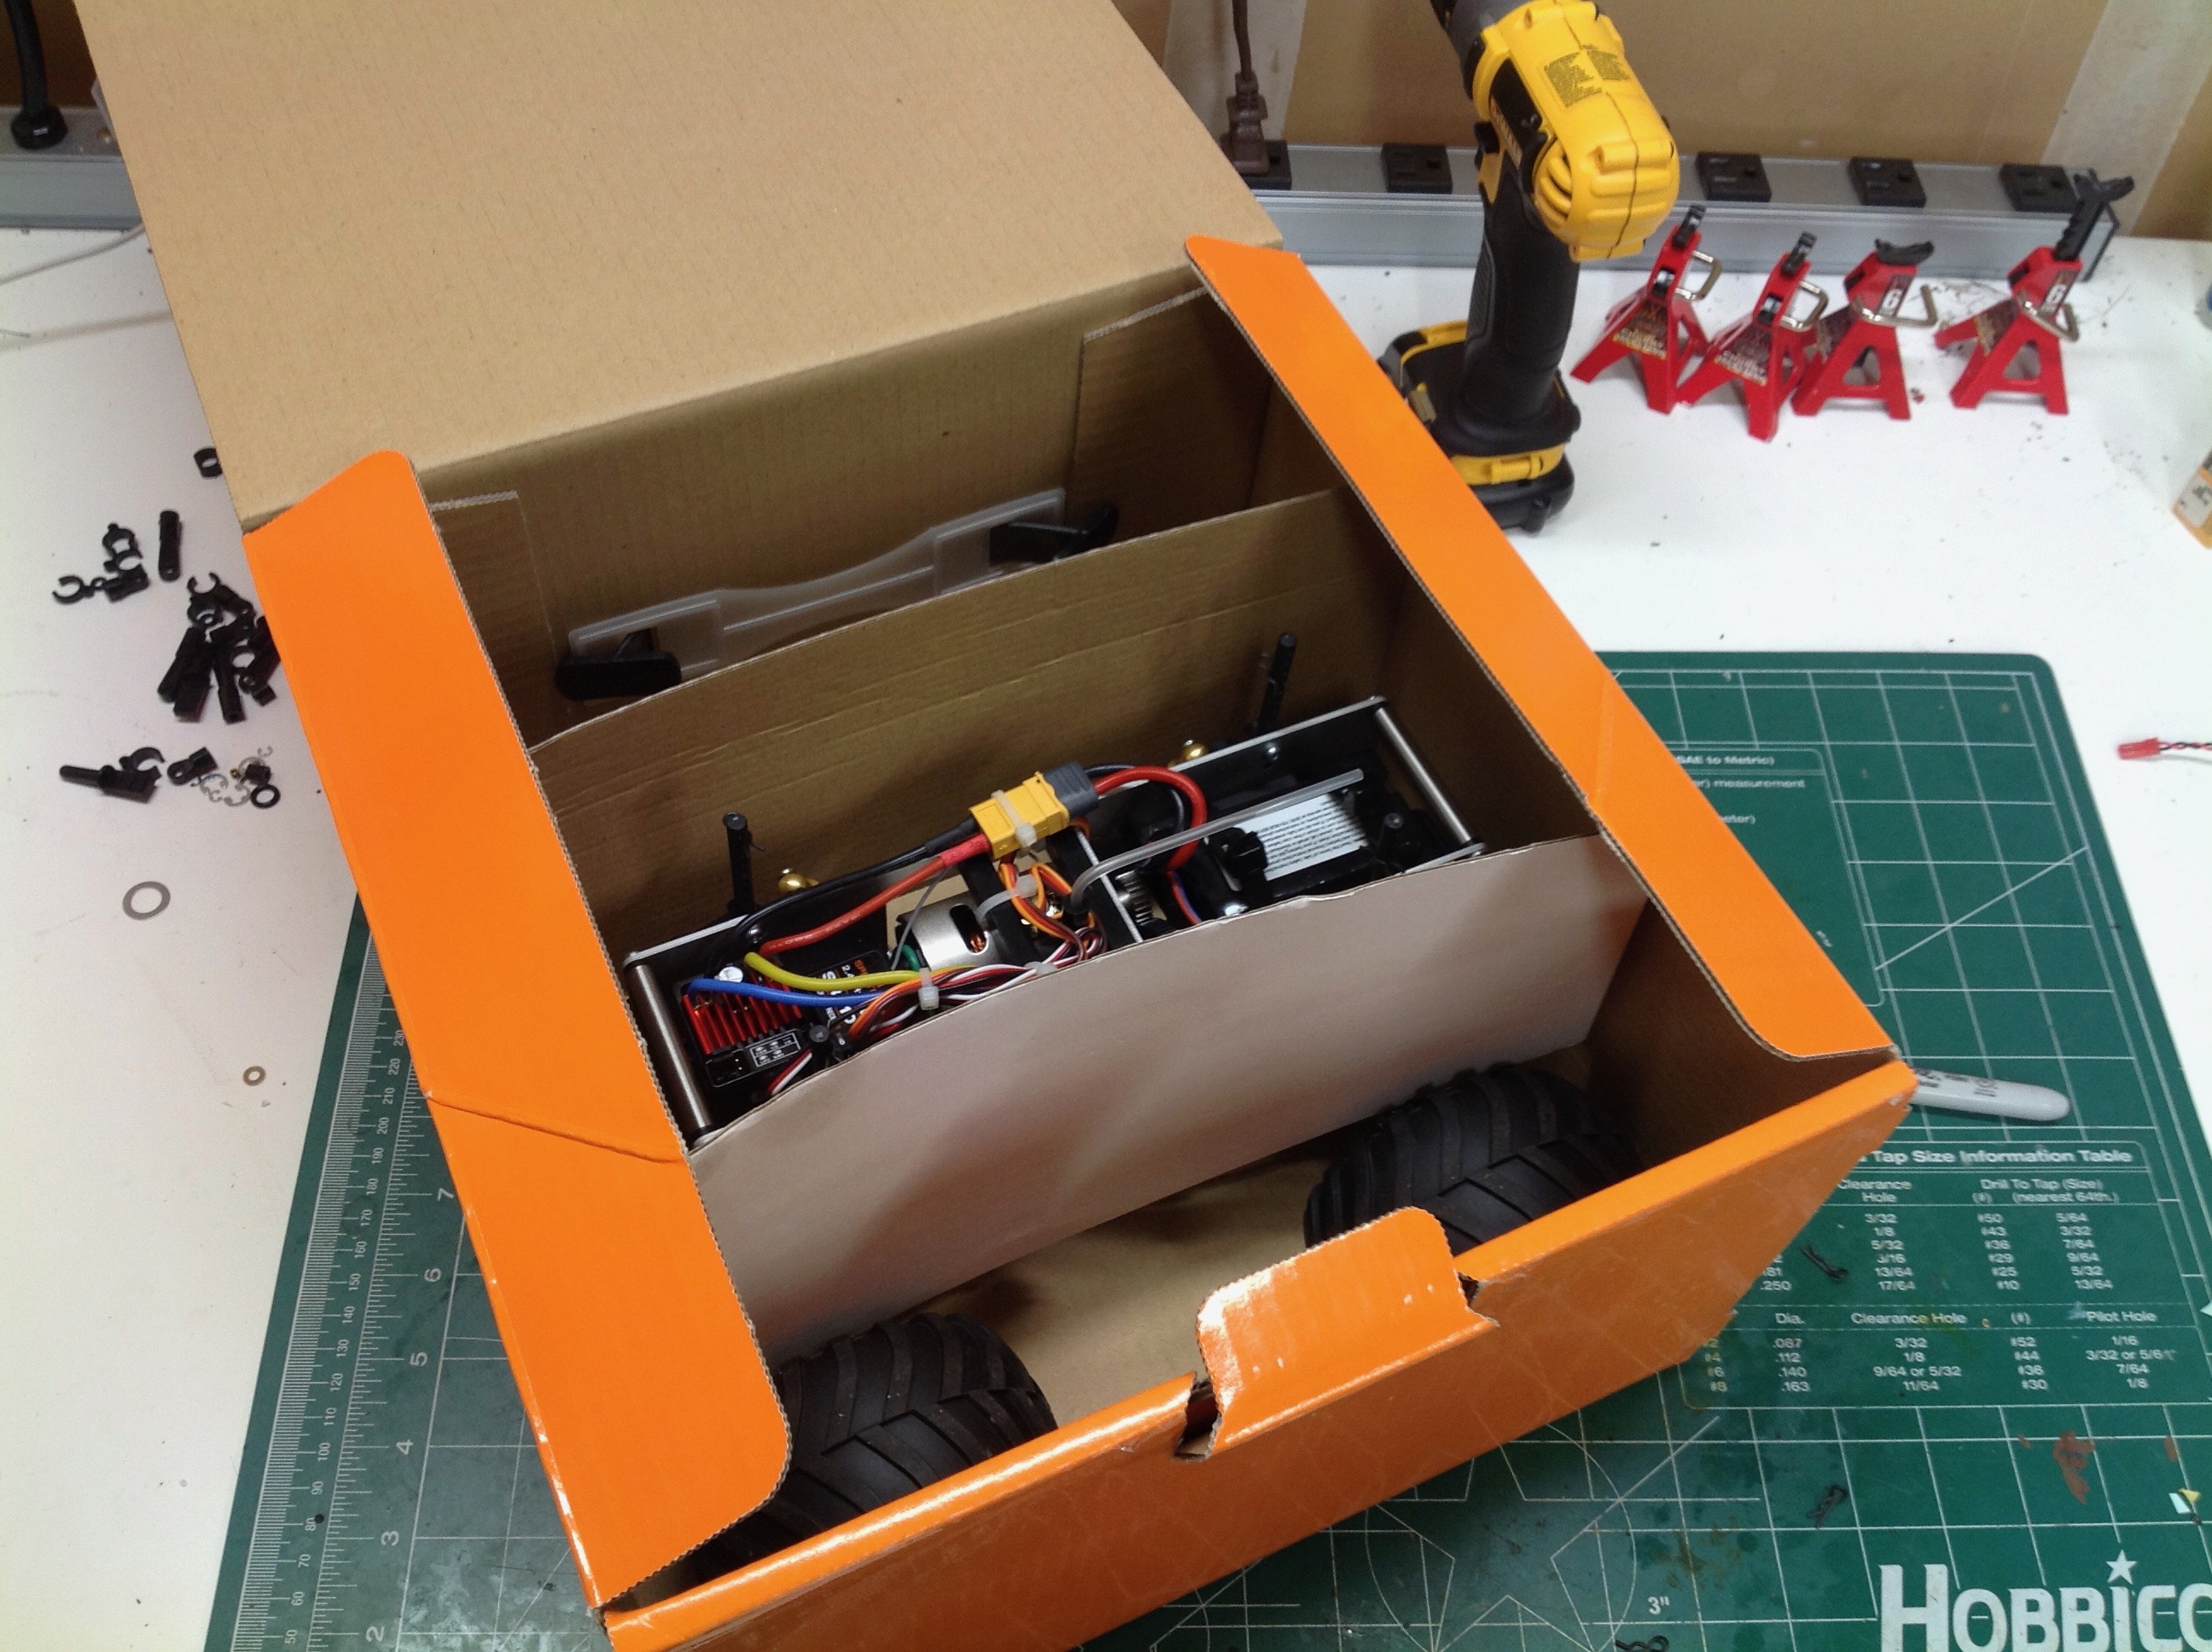
This model comes in a different type of box that I've seen on a Tamiya
model before. It is small, square, and stands upright with a handle
at the top. Looking inside, the body is much smaller than I was
anticipating even though I knew this was a 1/18 scale model. There
is no fancy packaging inside, but the cardboard insert is
important. The box can be used as a carrying case for the
completed model and the insert serves as a support so the model stays
centered.
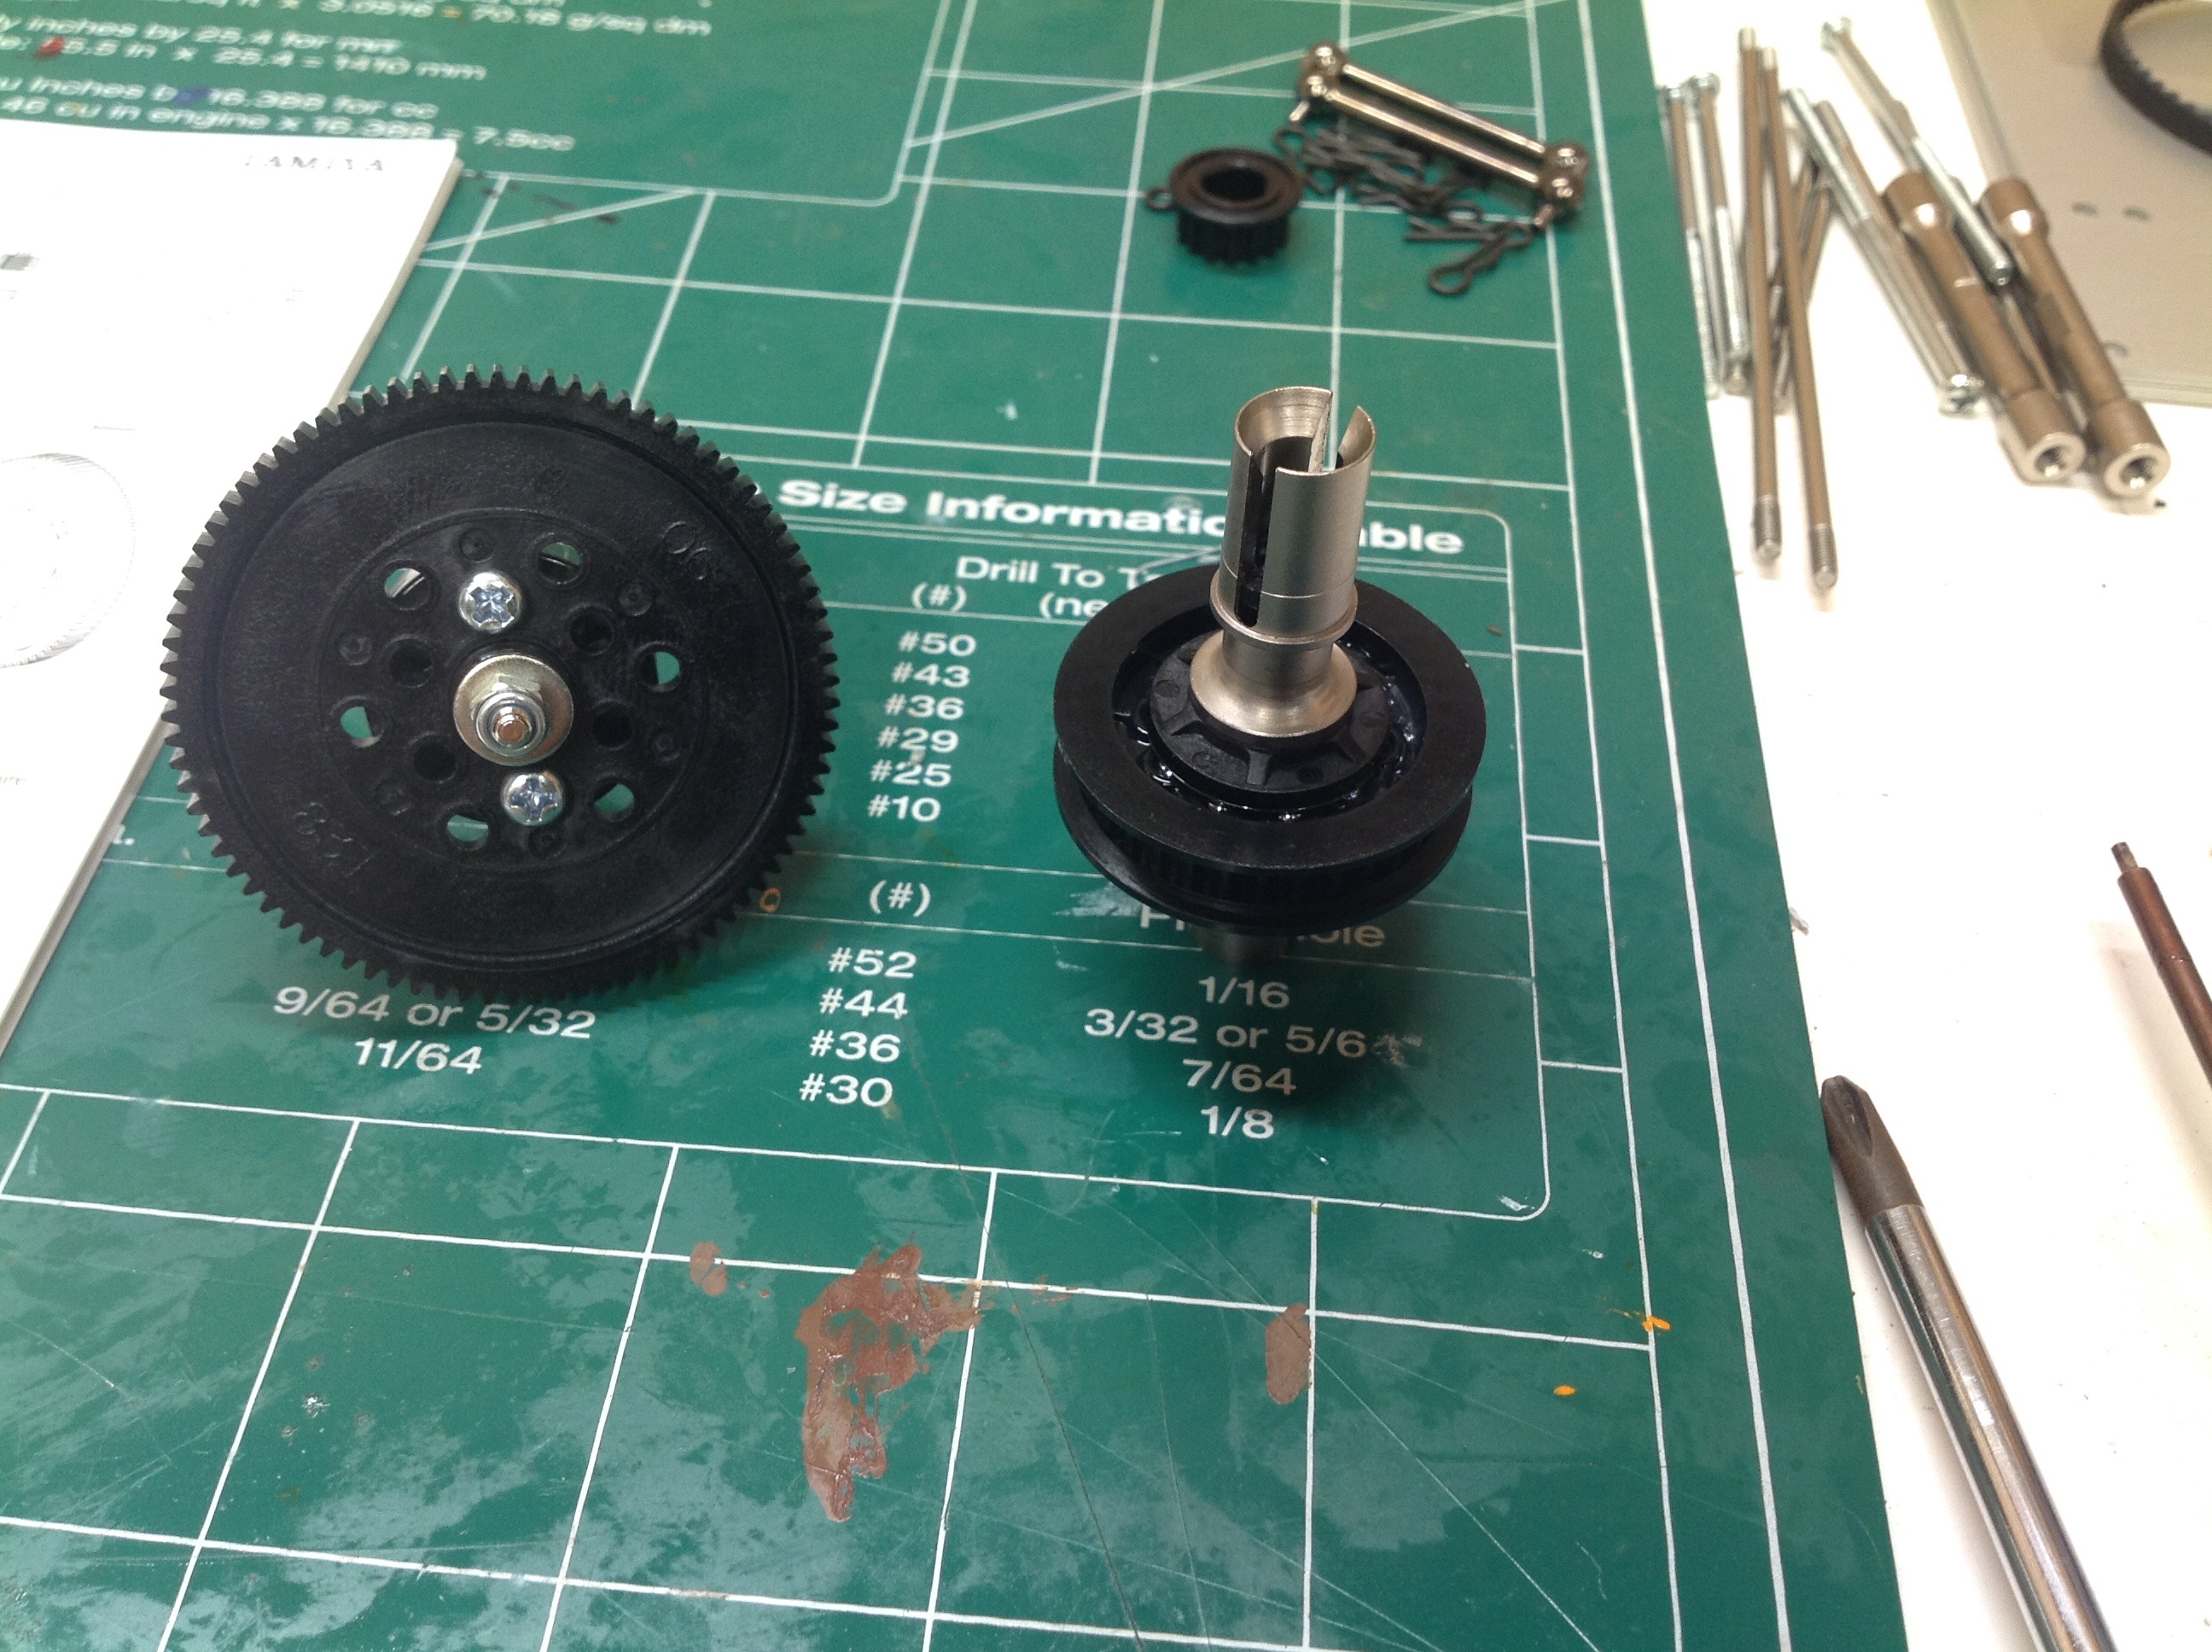
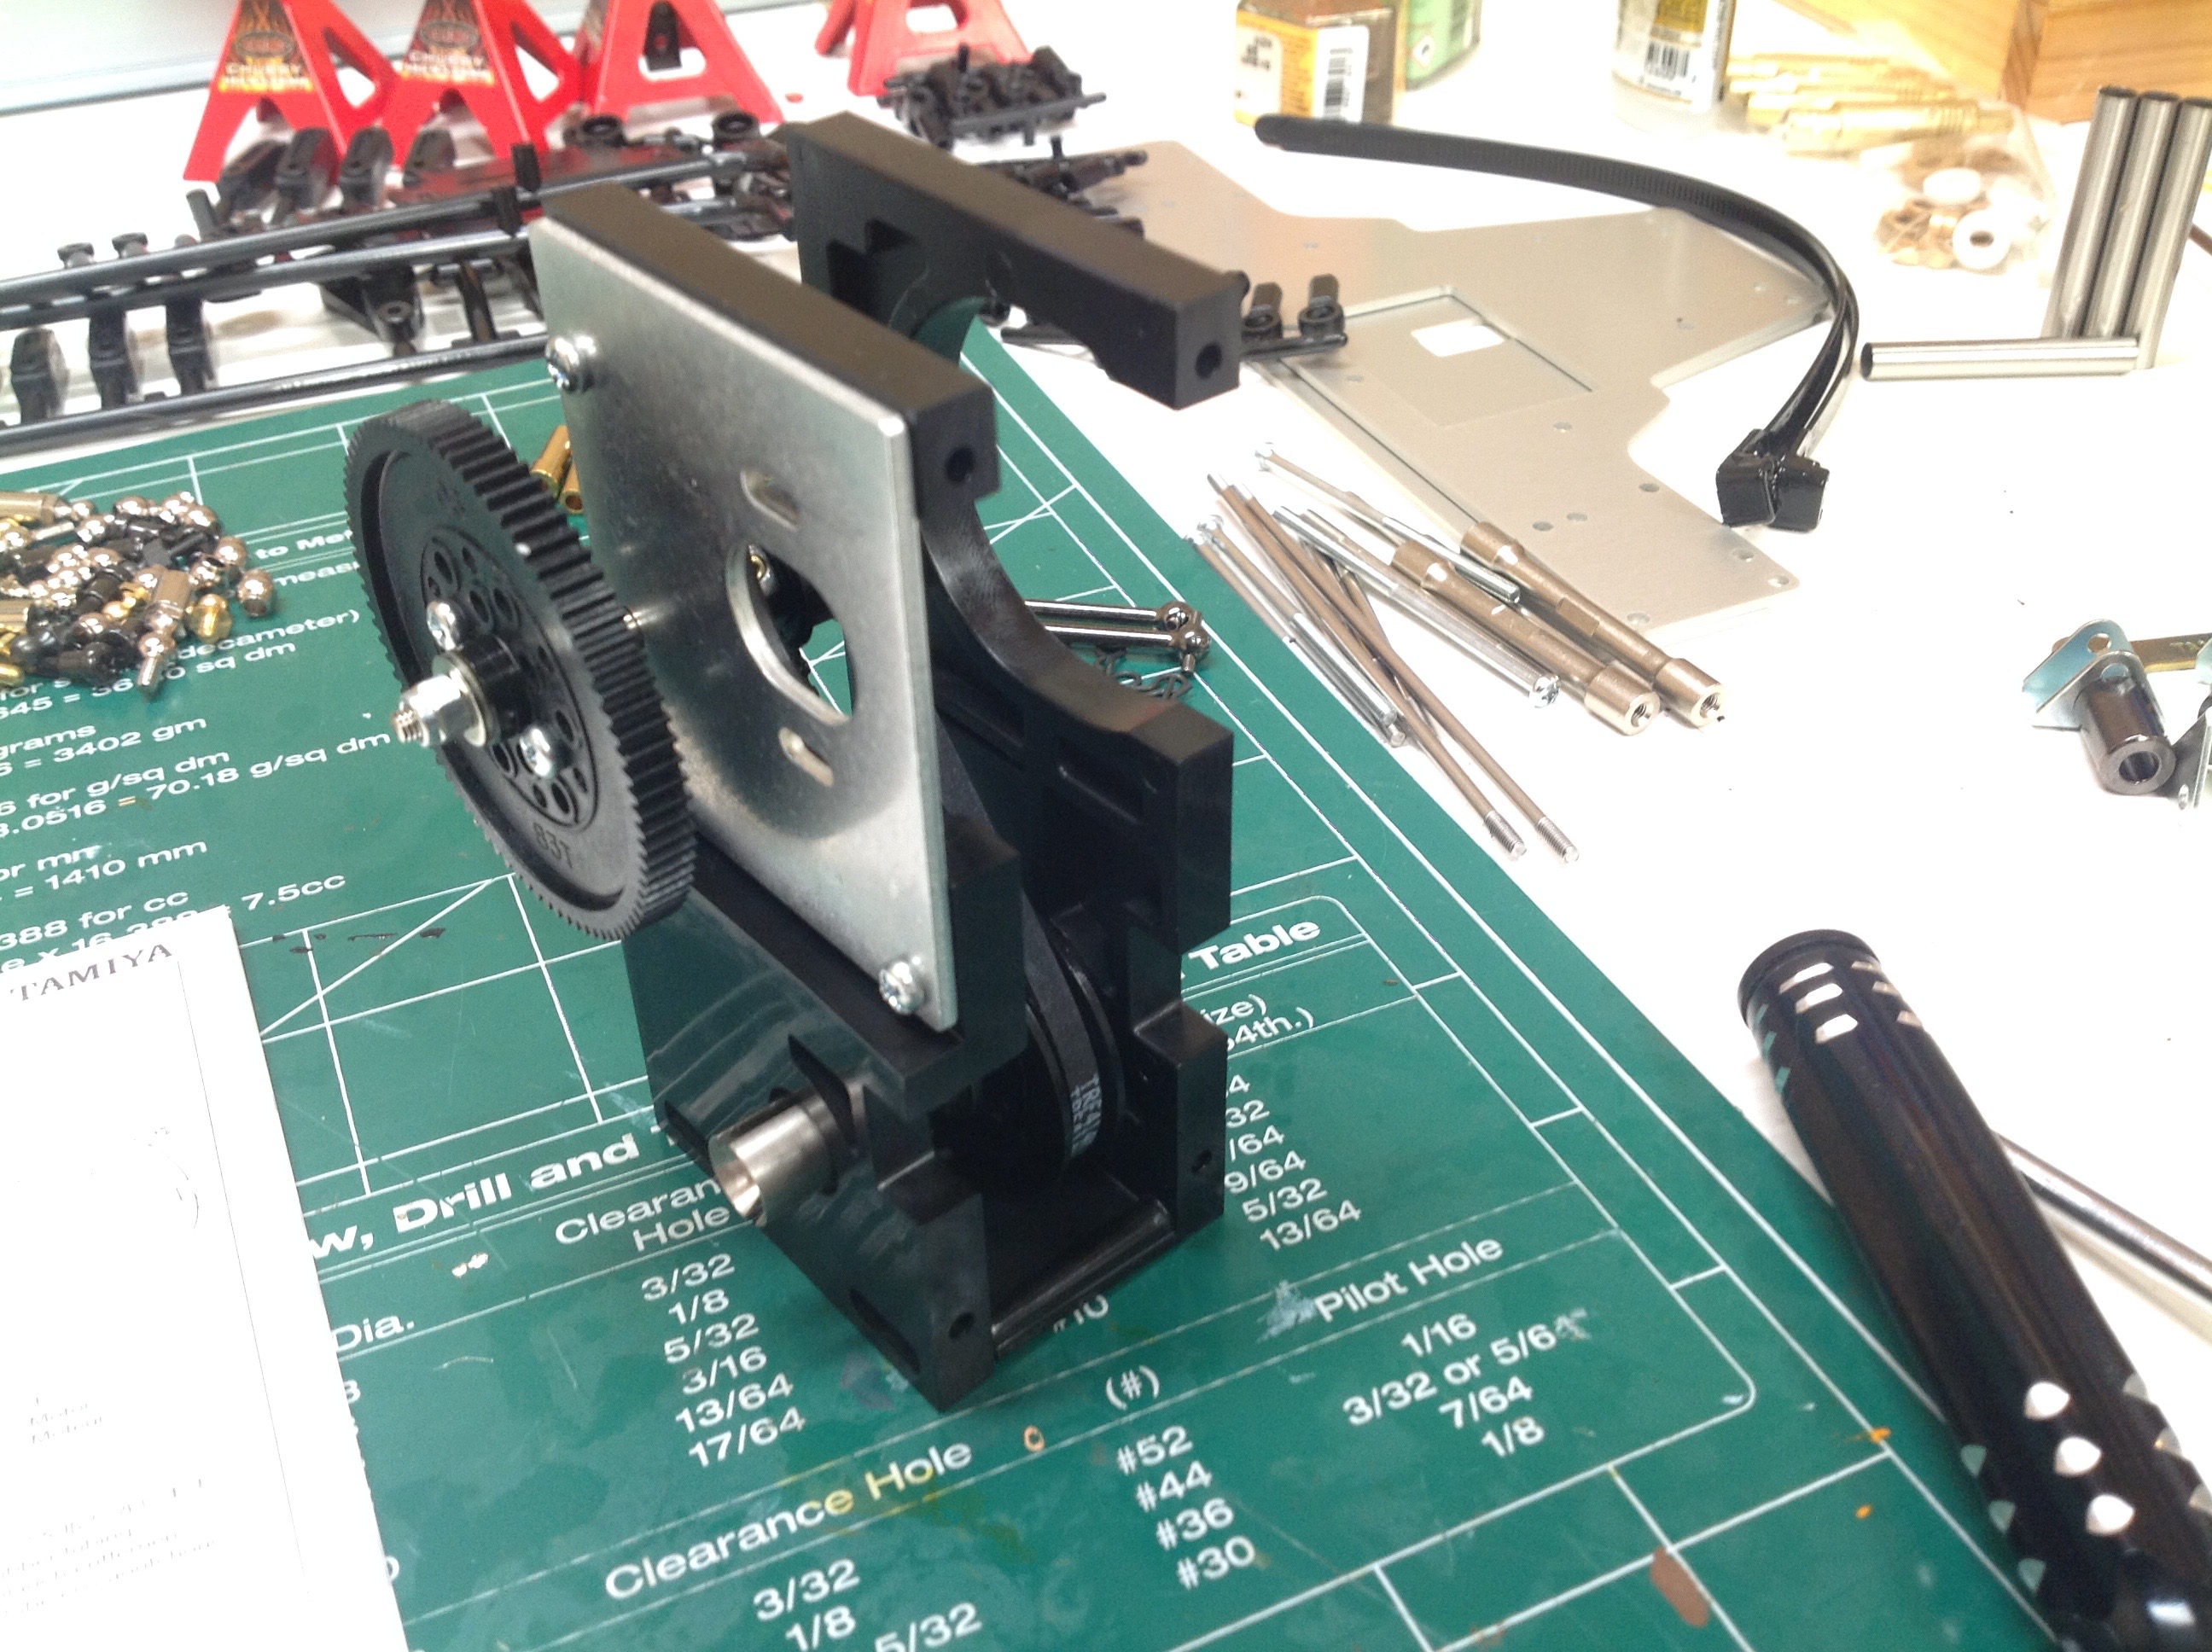
Much about this model is not what you would expect. In general,
you'd expect a 4WD truck to have a transfer case but no center
differential. In this case, there is a center ball diff. If
that weren't unusual enough, the connection between the spur gear shaft
and the differential shaft is a drive belt. There is no slipper
clutch, but theoretically the belt would break before any gears.
Nothing is likely to ever break though. With 3 open differentials
you lose all torque if any on wheel comes off the ground.
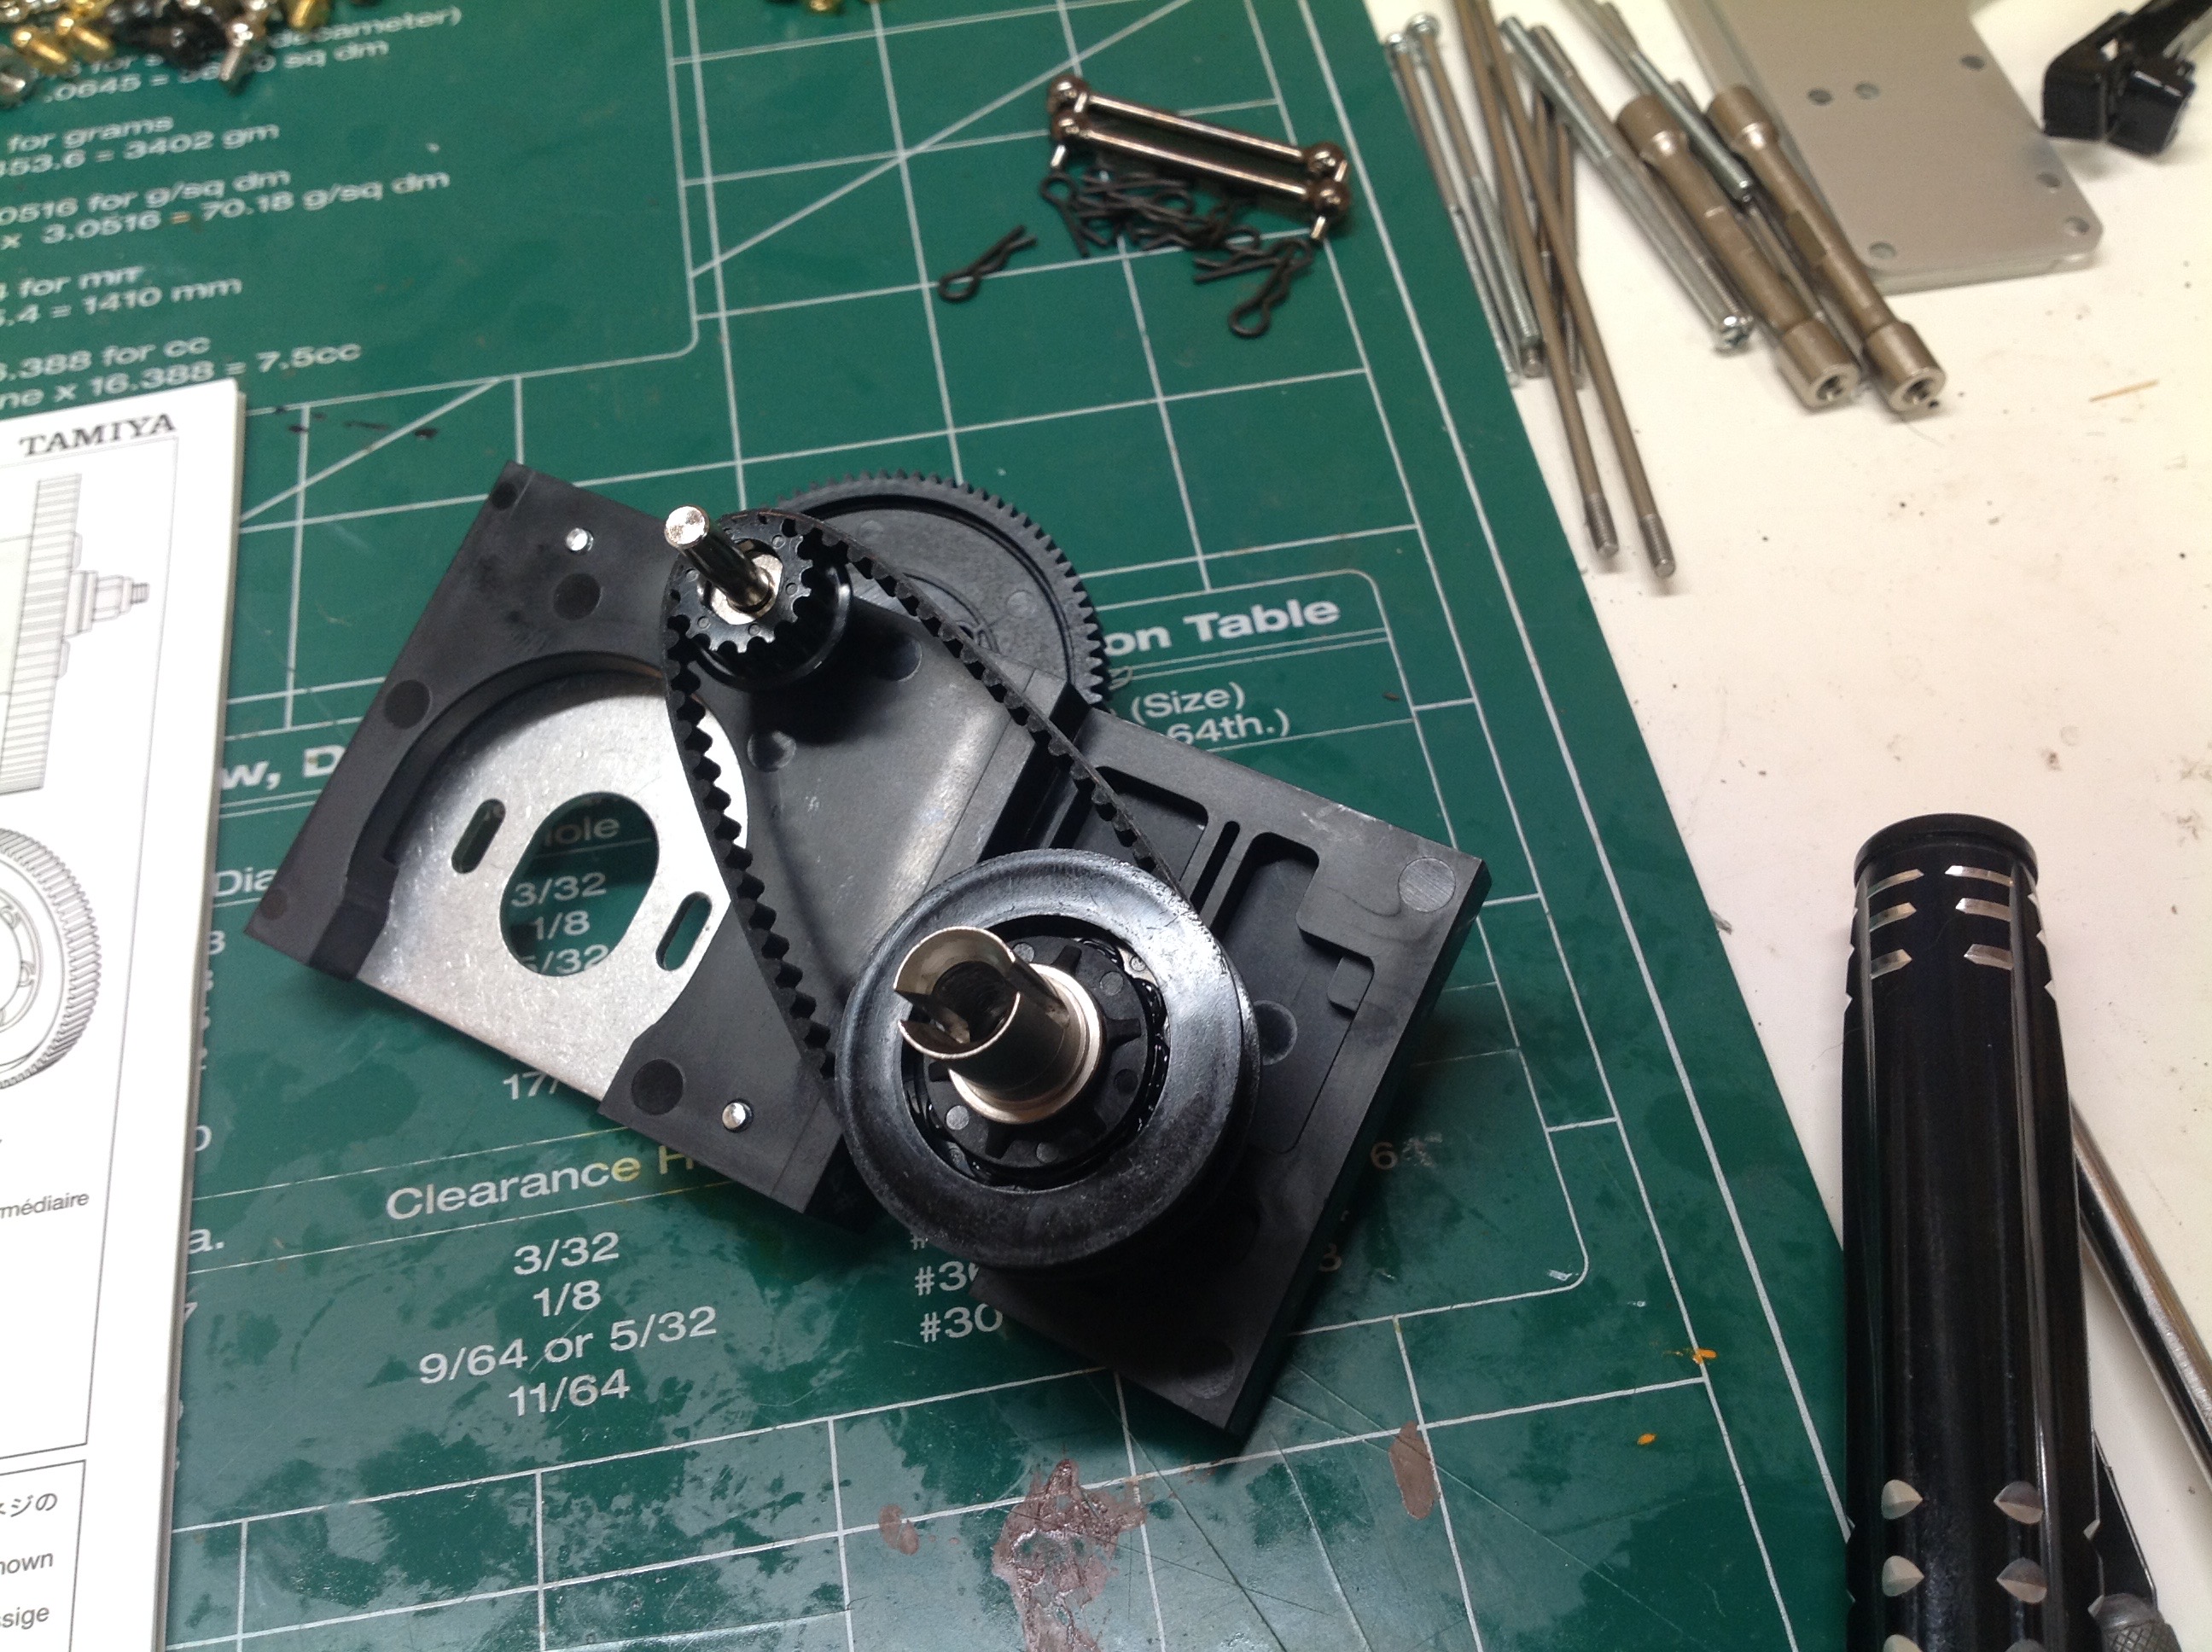
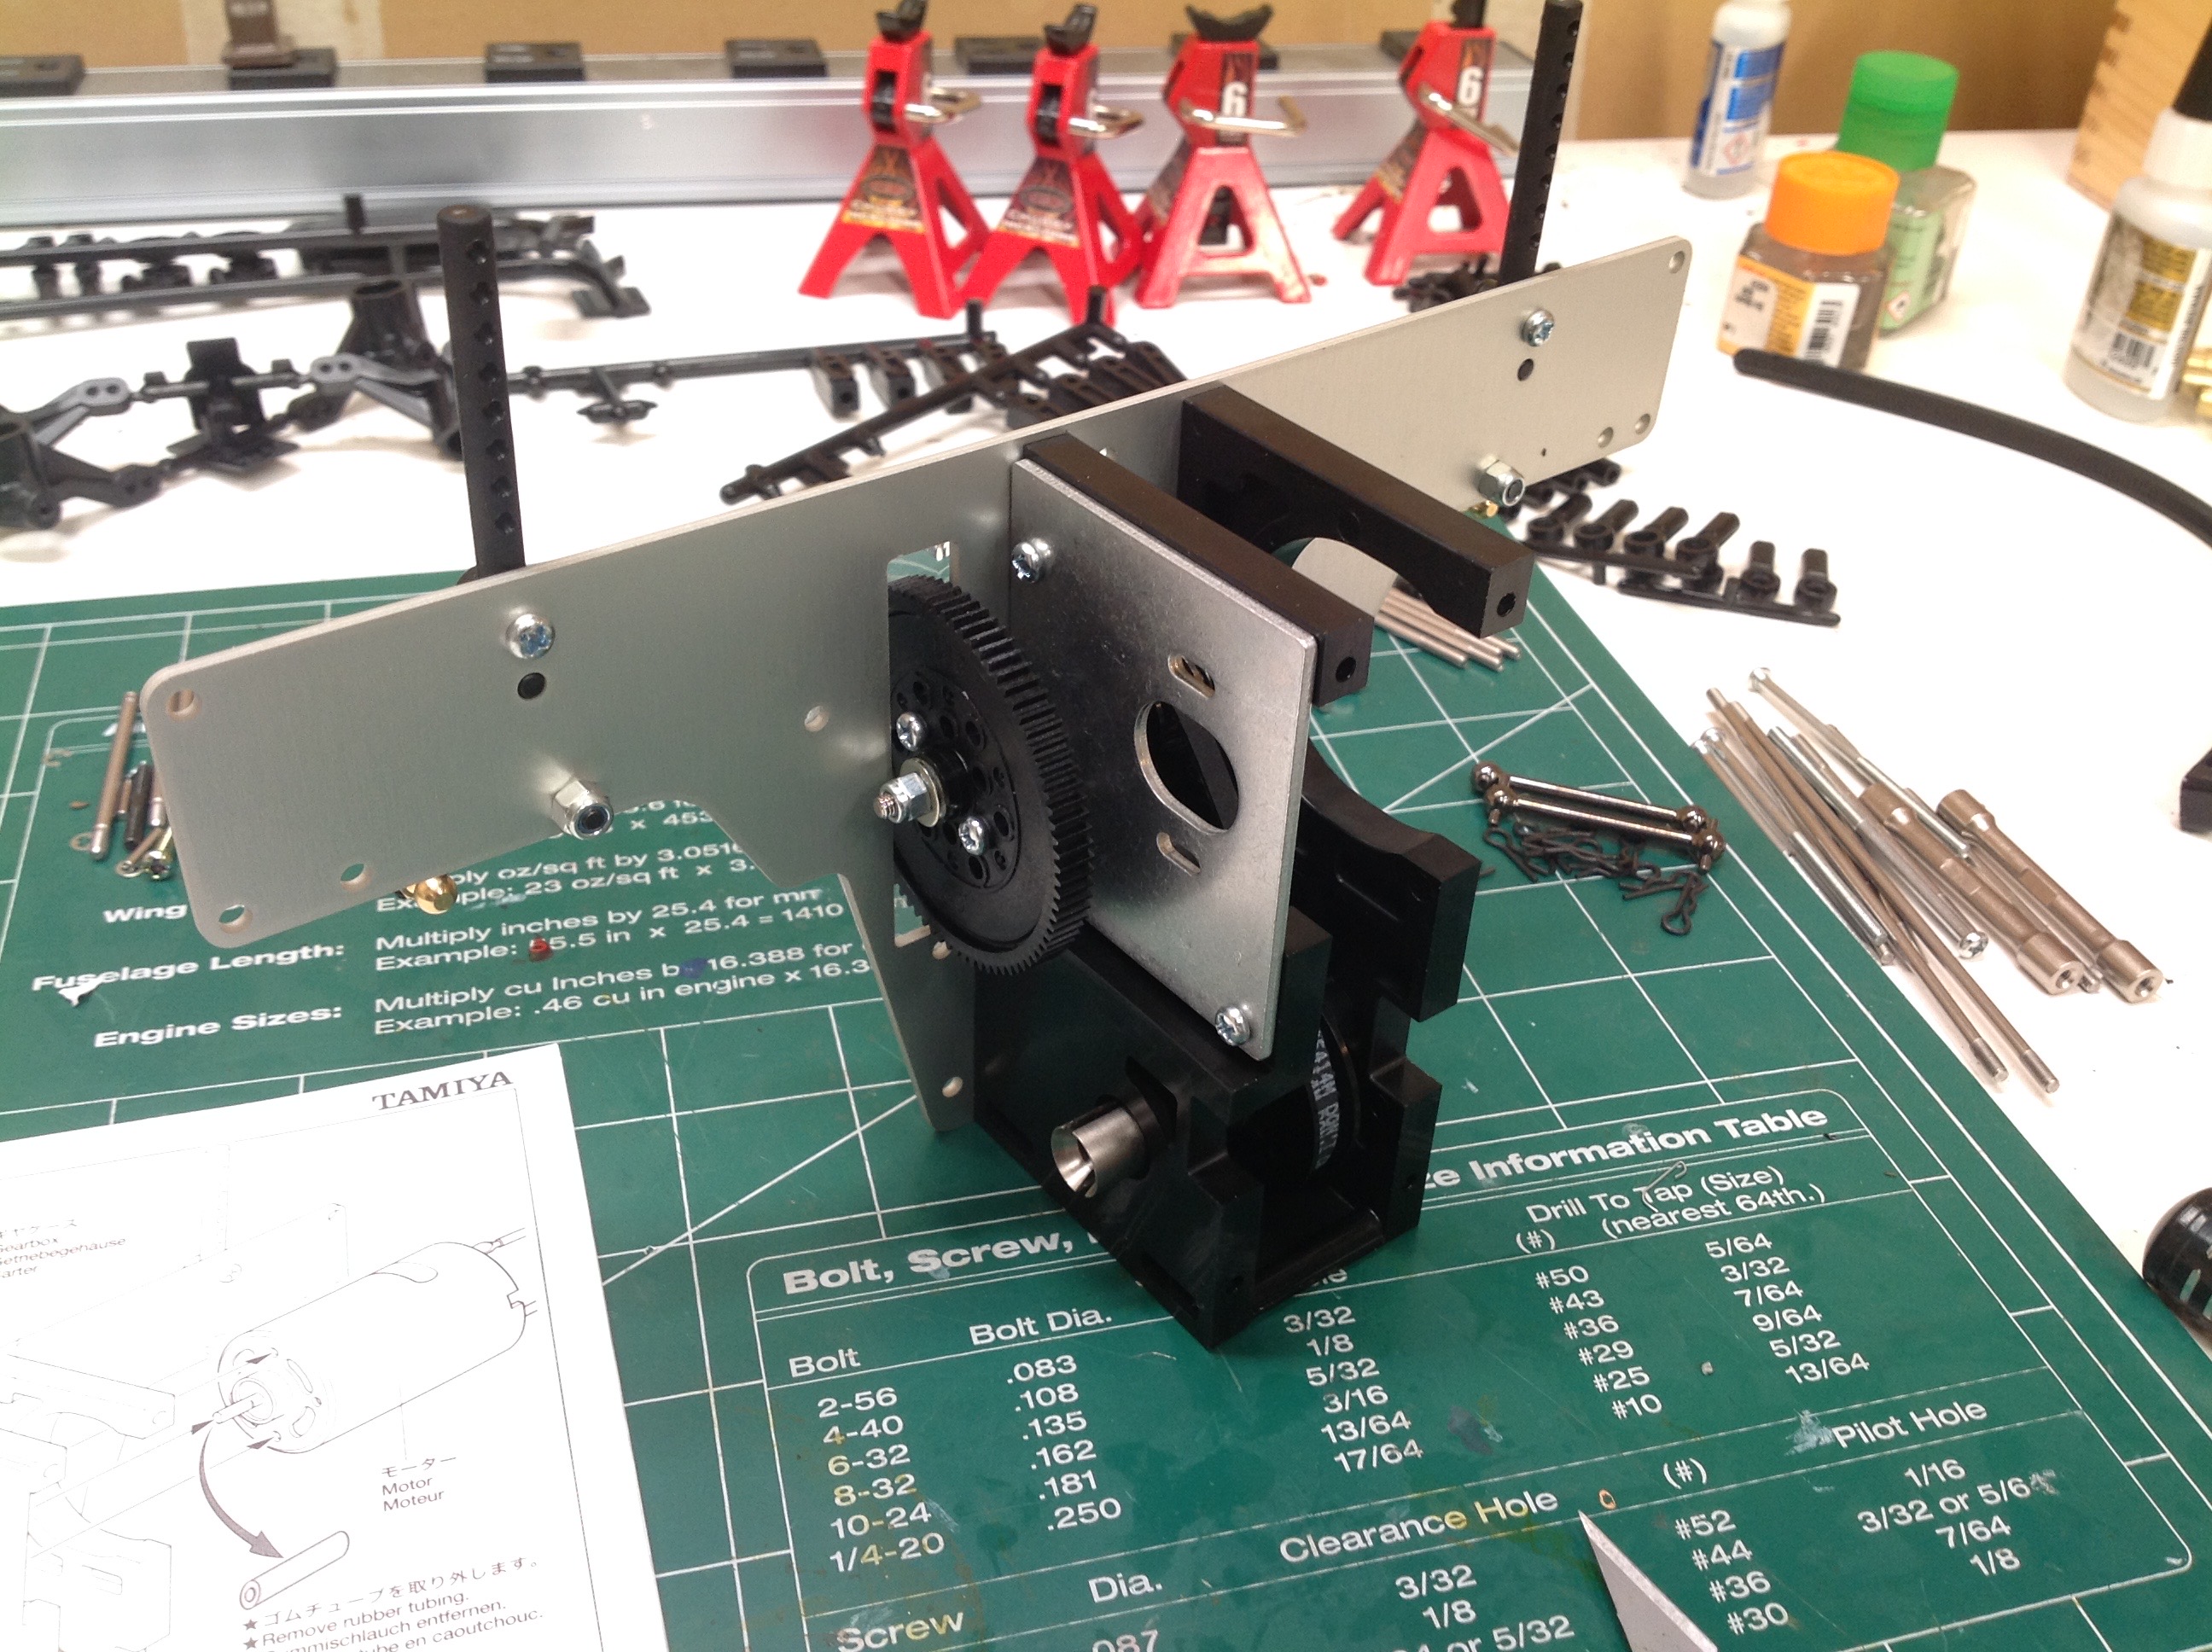
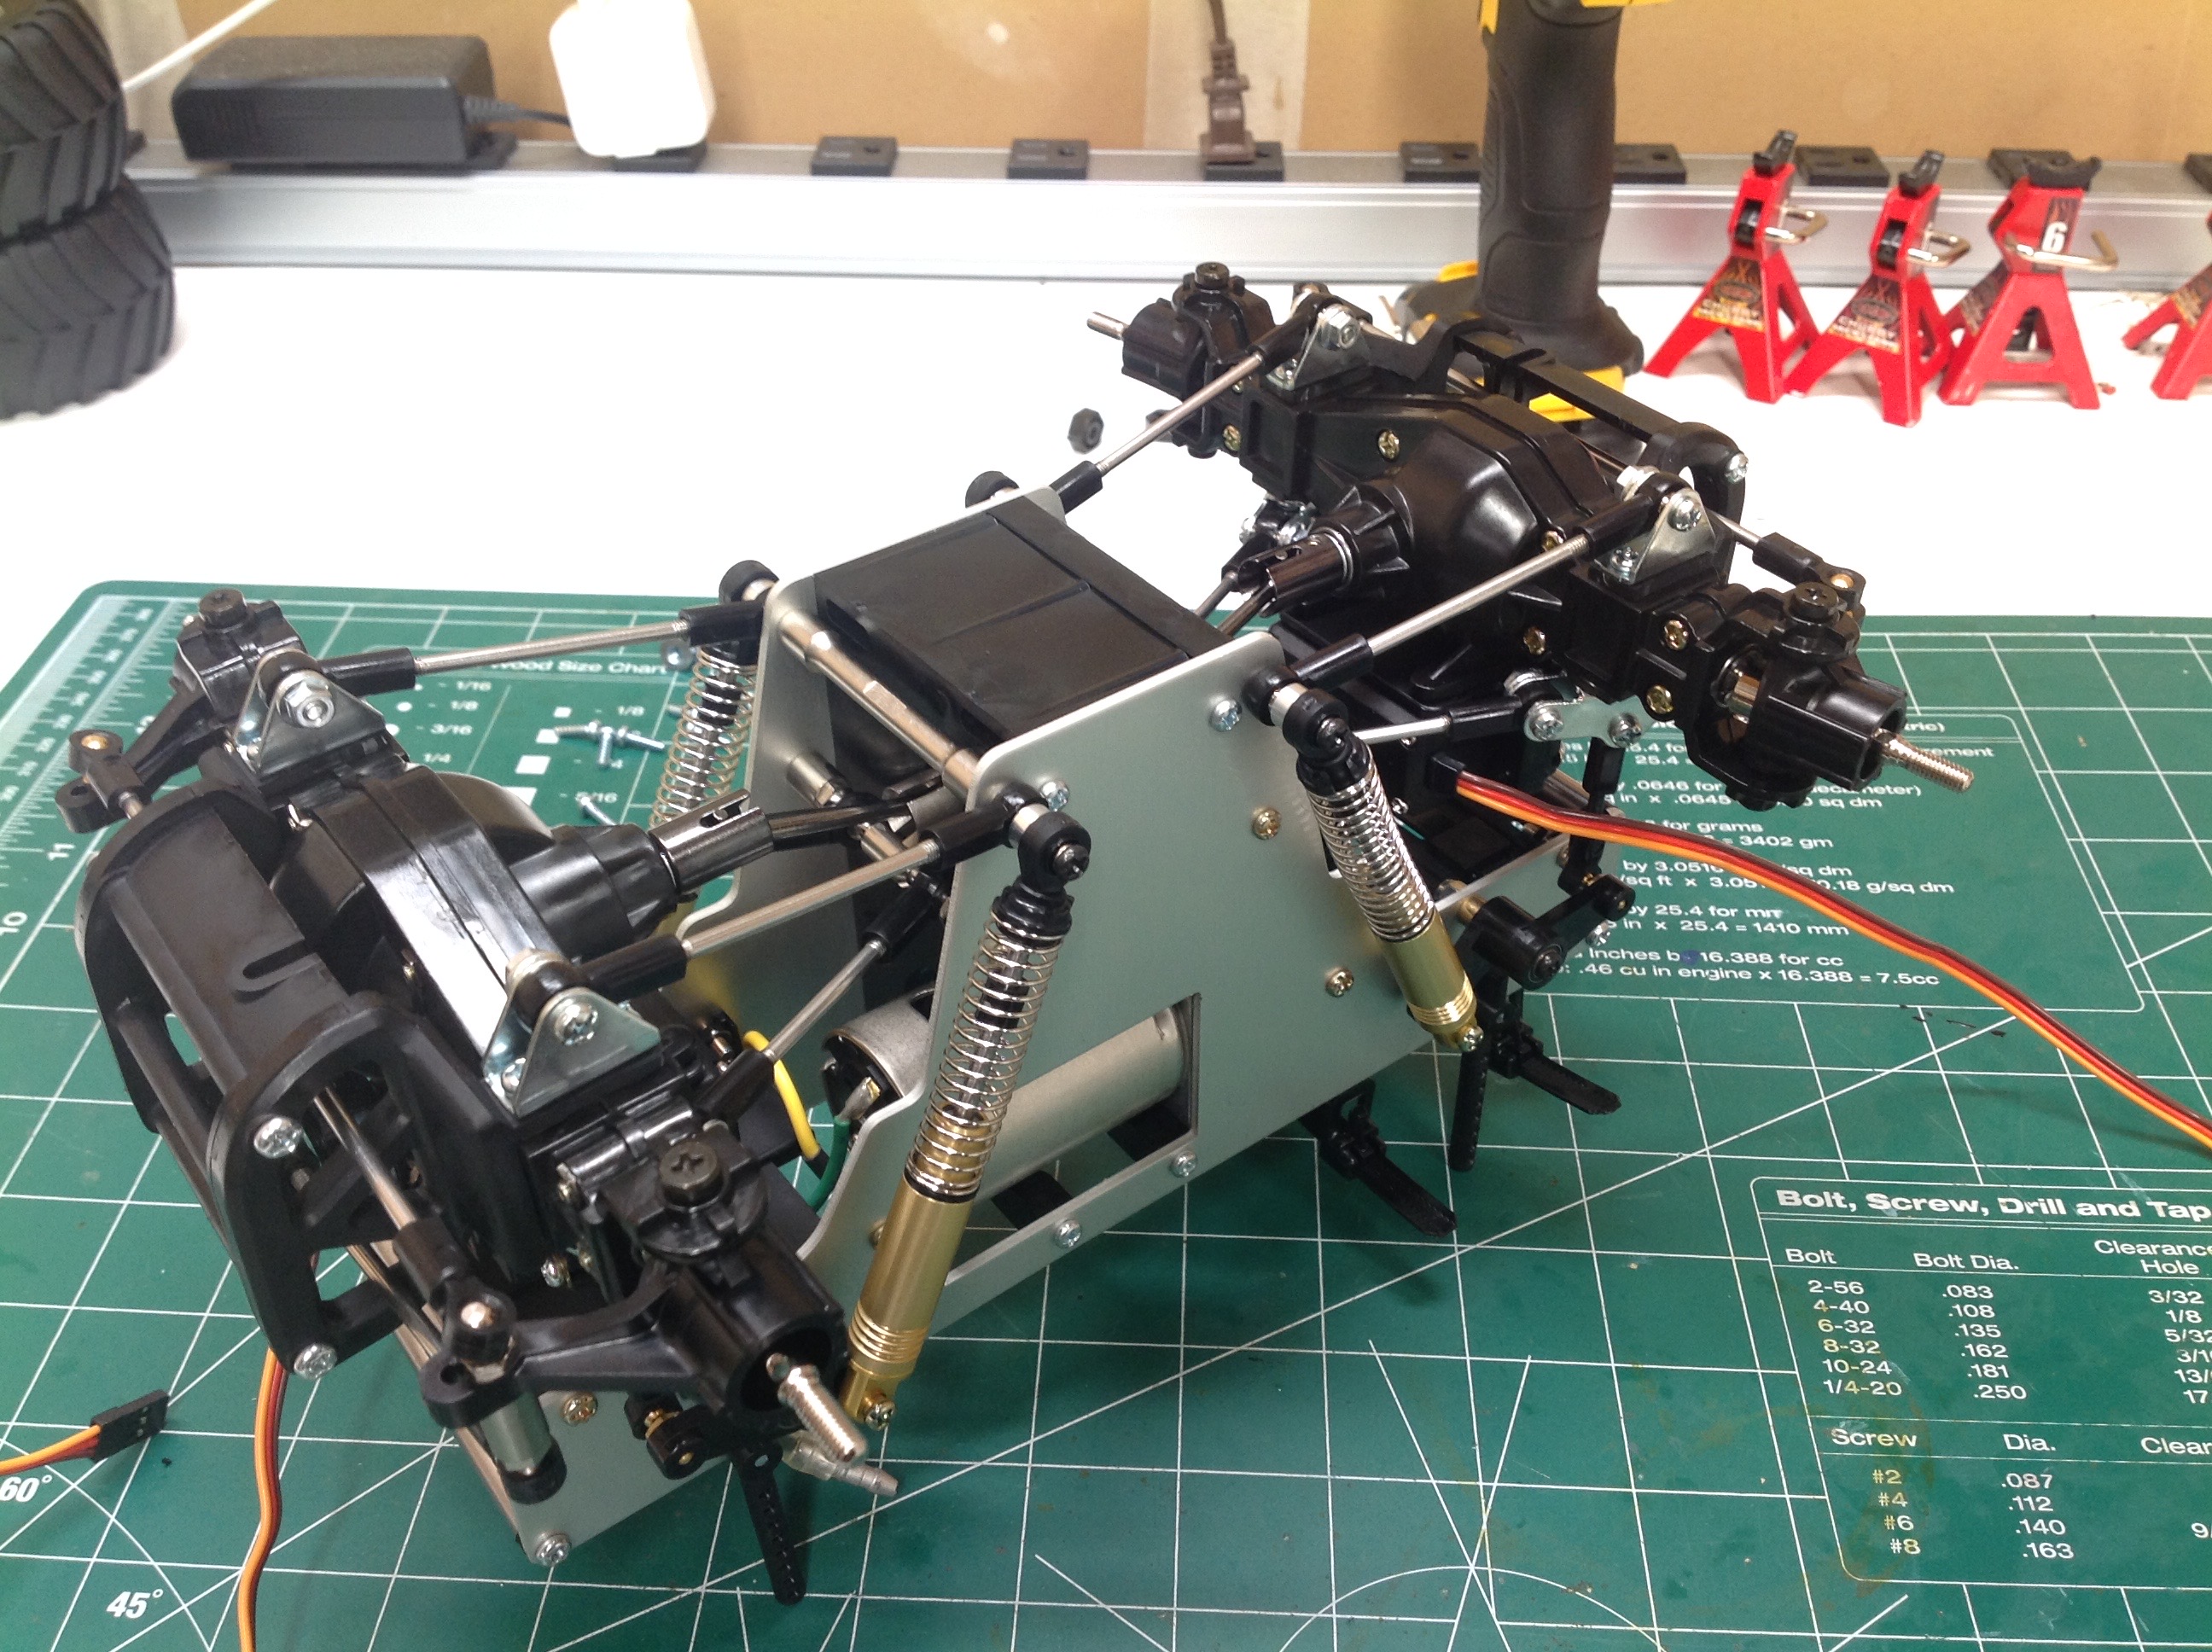
The completed gearbox. This is a very tall layout with almost no
access once the chassis is assembled. Belt maintenance requires a
complete teardown.
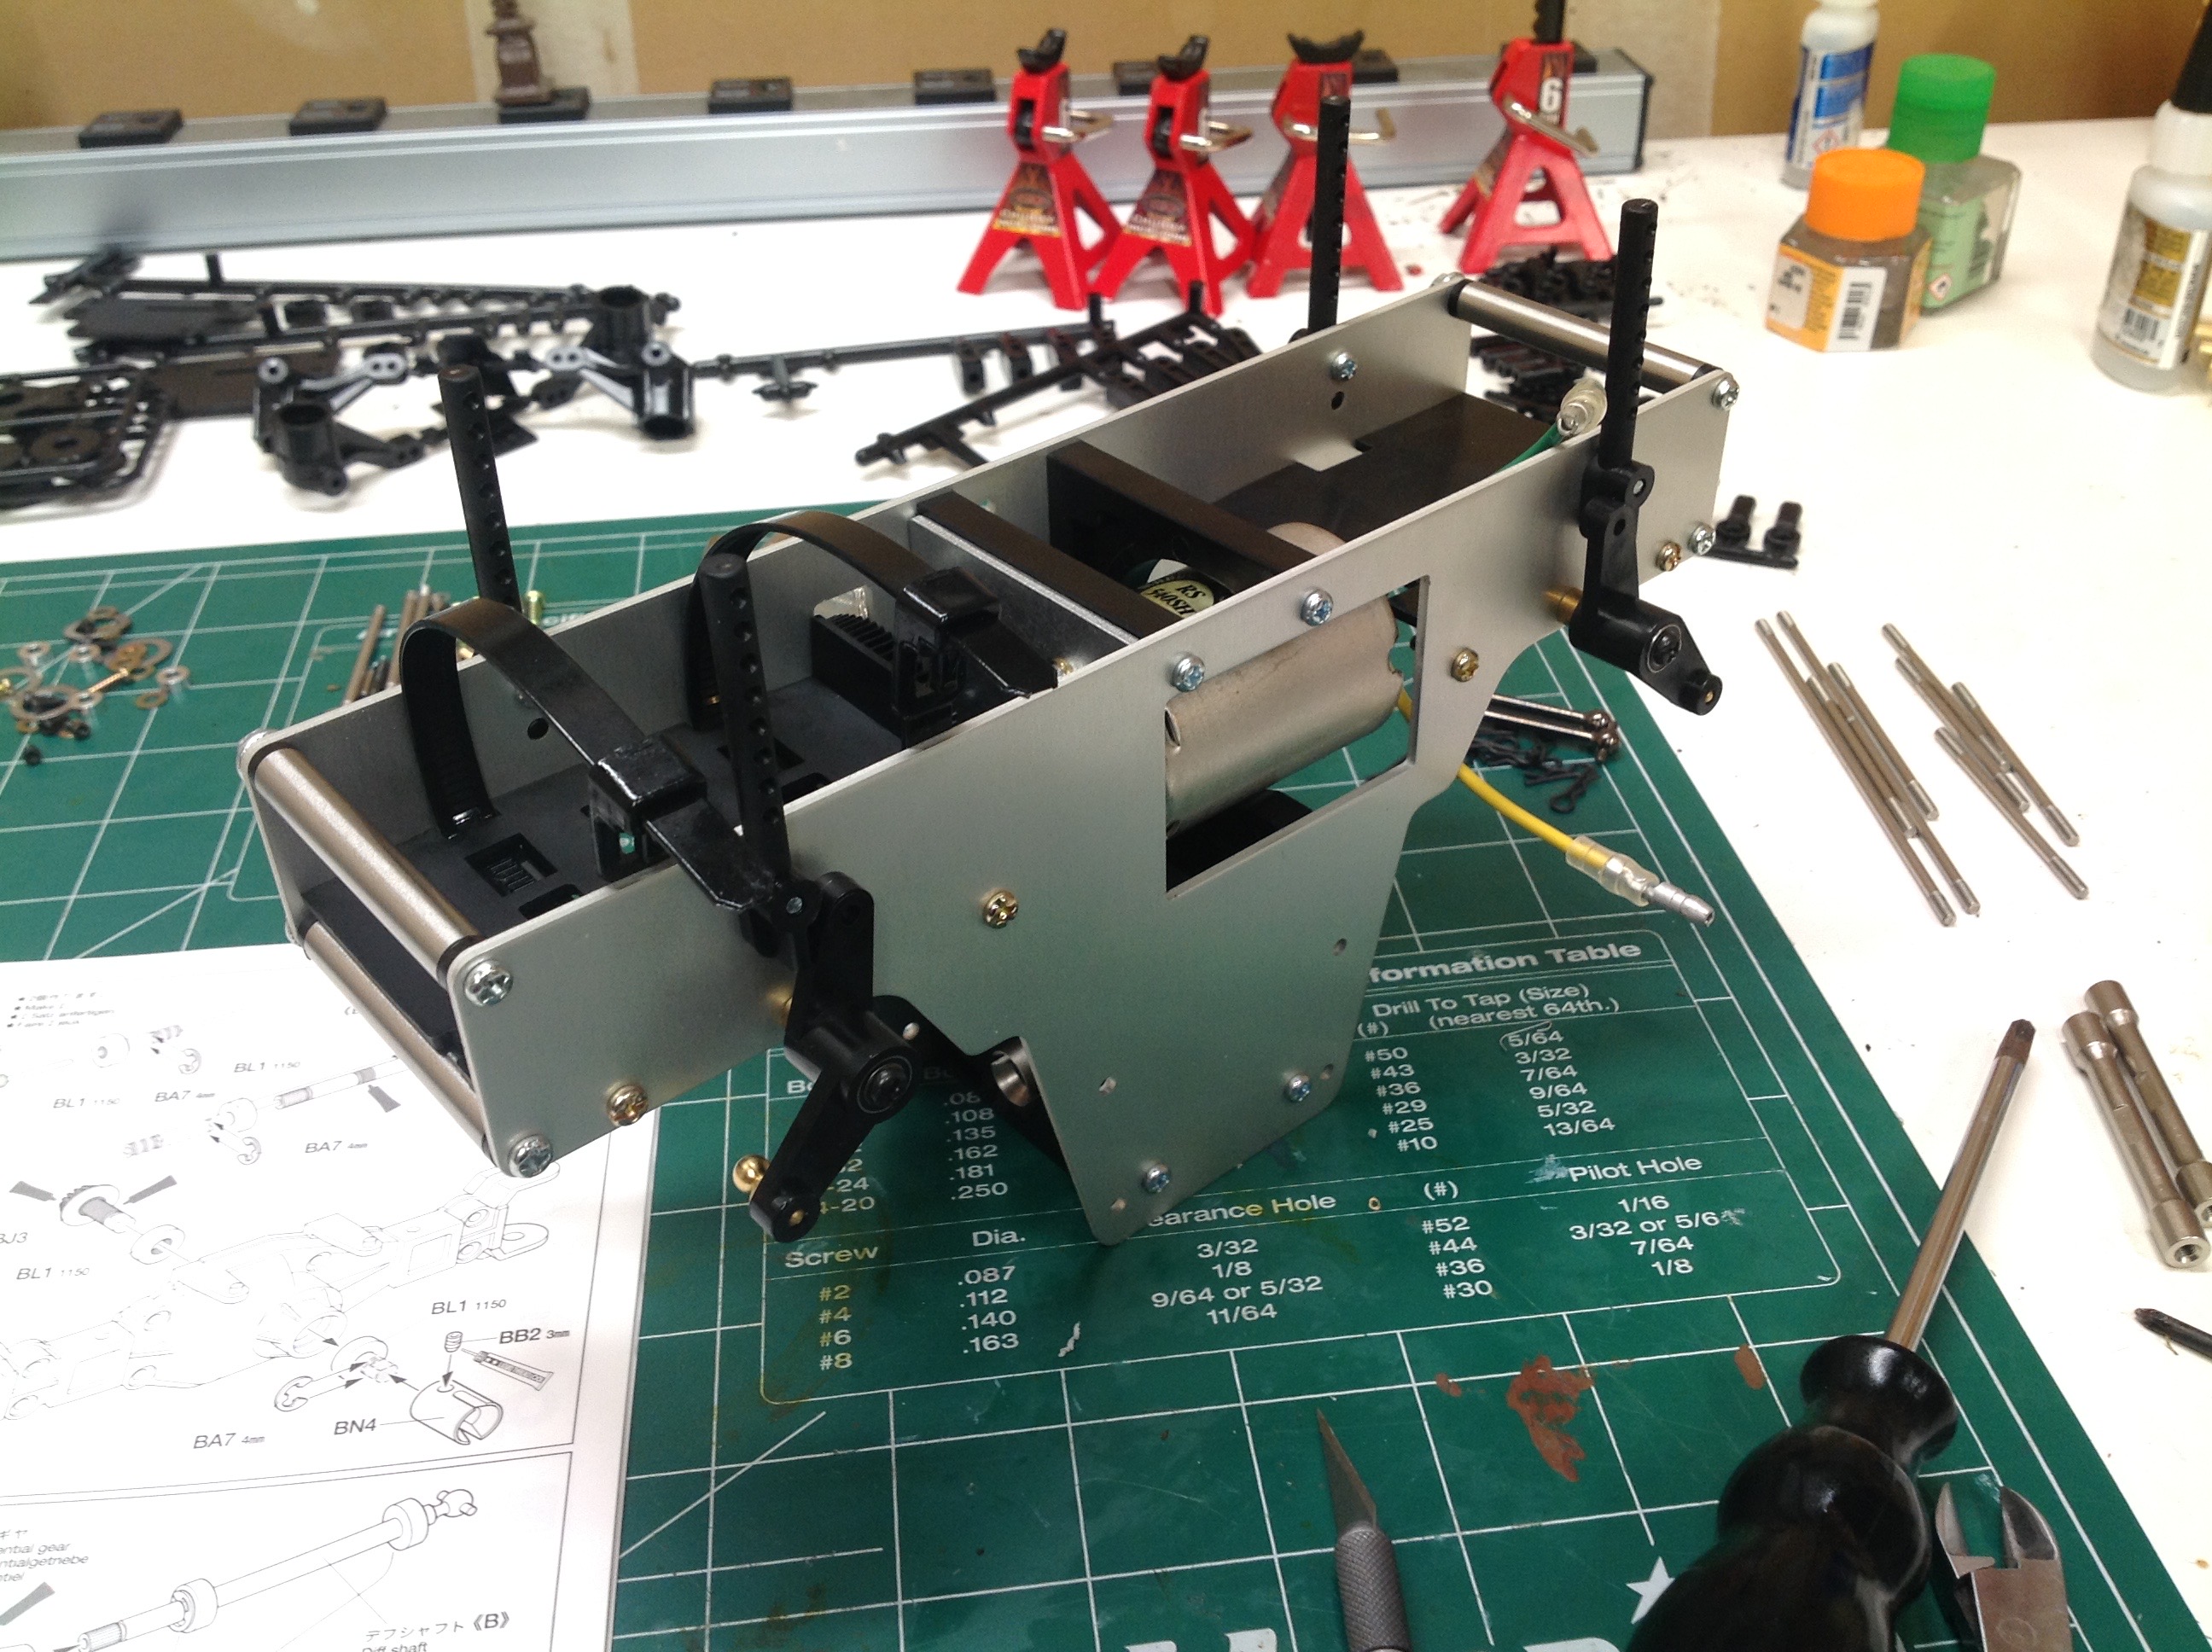
The vertical aluminum chassis side plates are ridiculous. The
bending moment of inertia is enormous which means this thing is not
going to bend or twist. This structure would be plenty adequate
for a 1/8 scale model; at 1/18 it is built like a tank. The
gearbox sits between the plates. In the second image you can see
the cranks for the cantilever suspension. You can also see the
unusually shaped battery tray by the straps which will not allow use of a
standard 6cell NiMH pack.
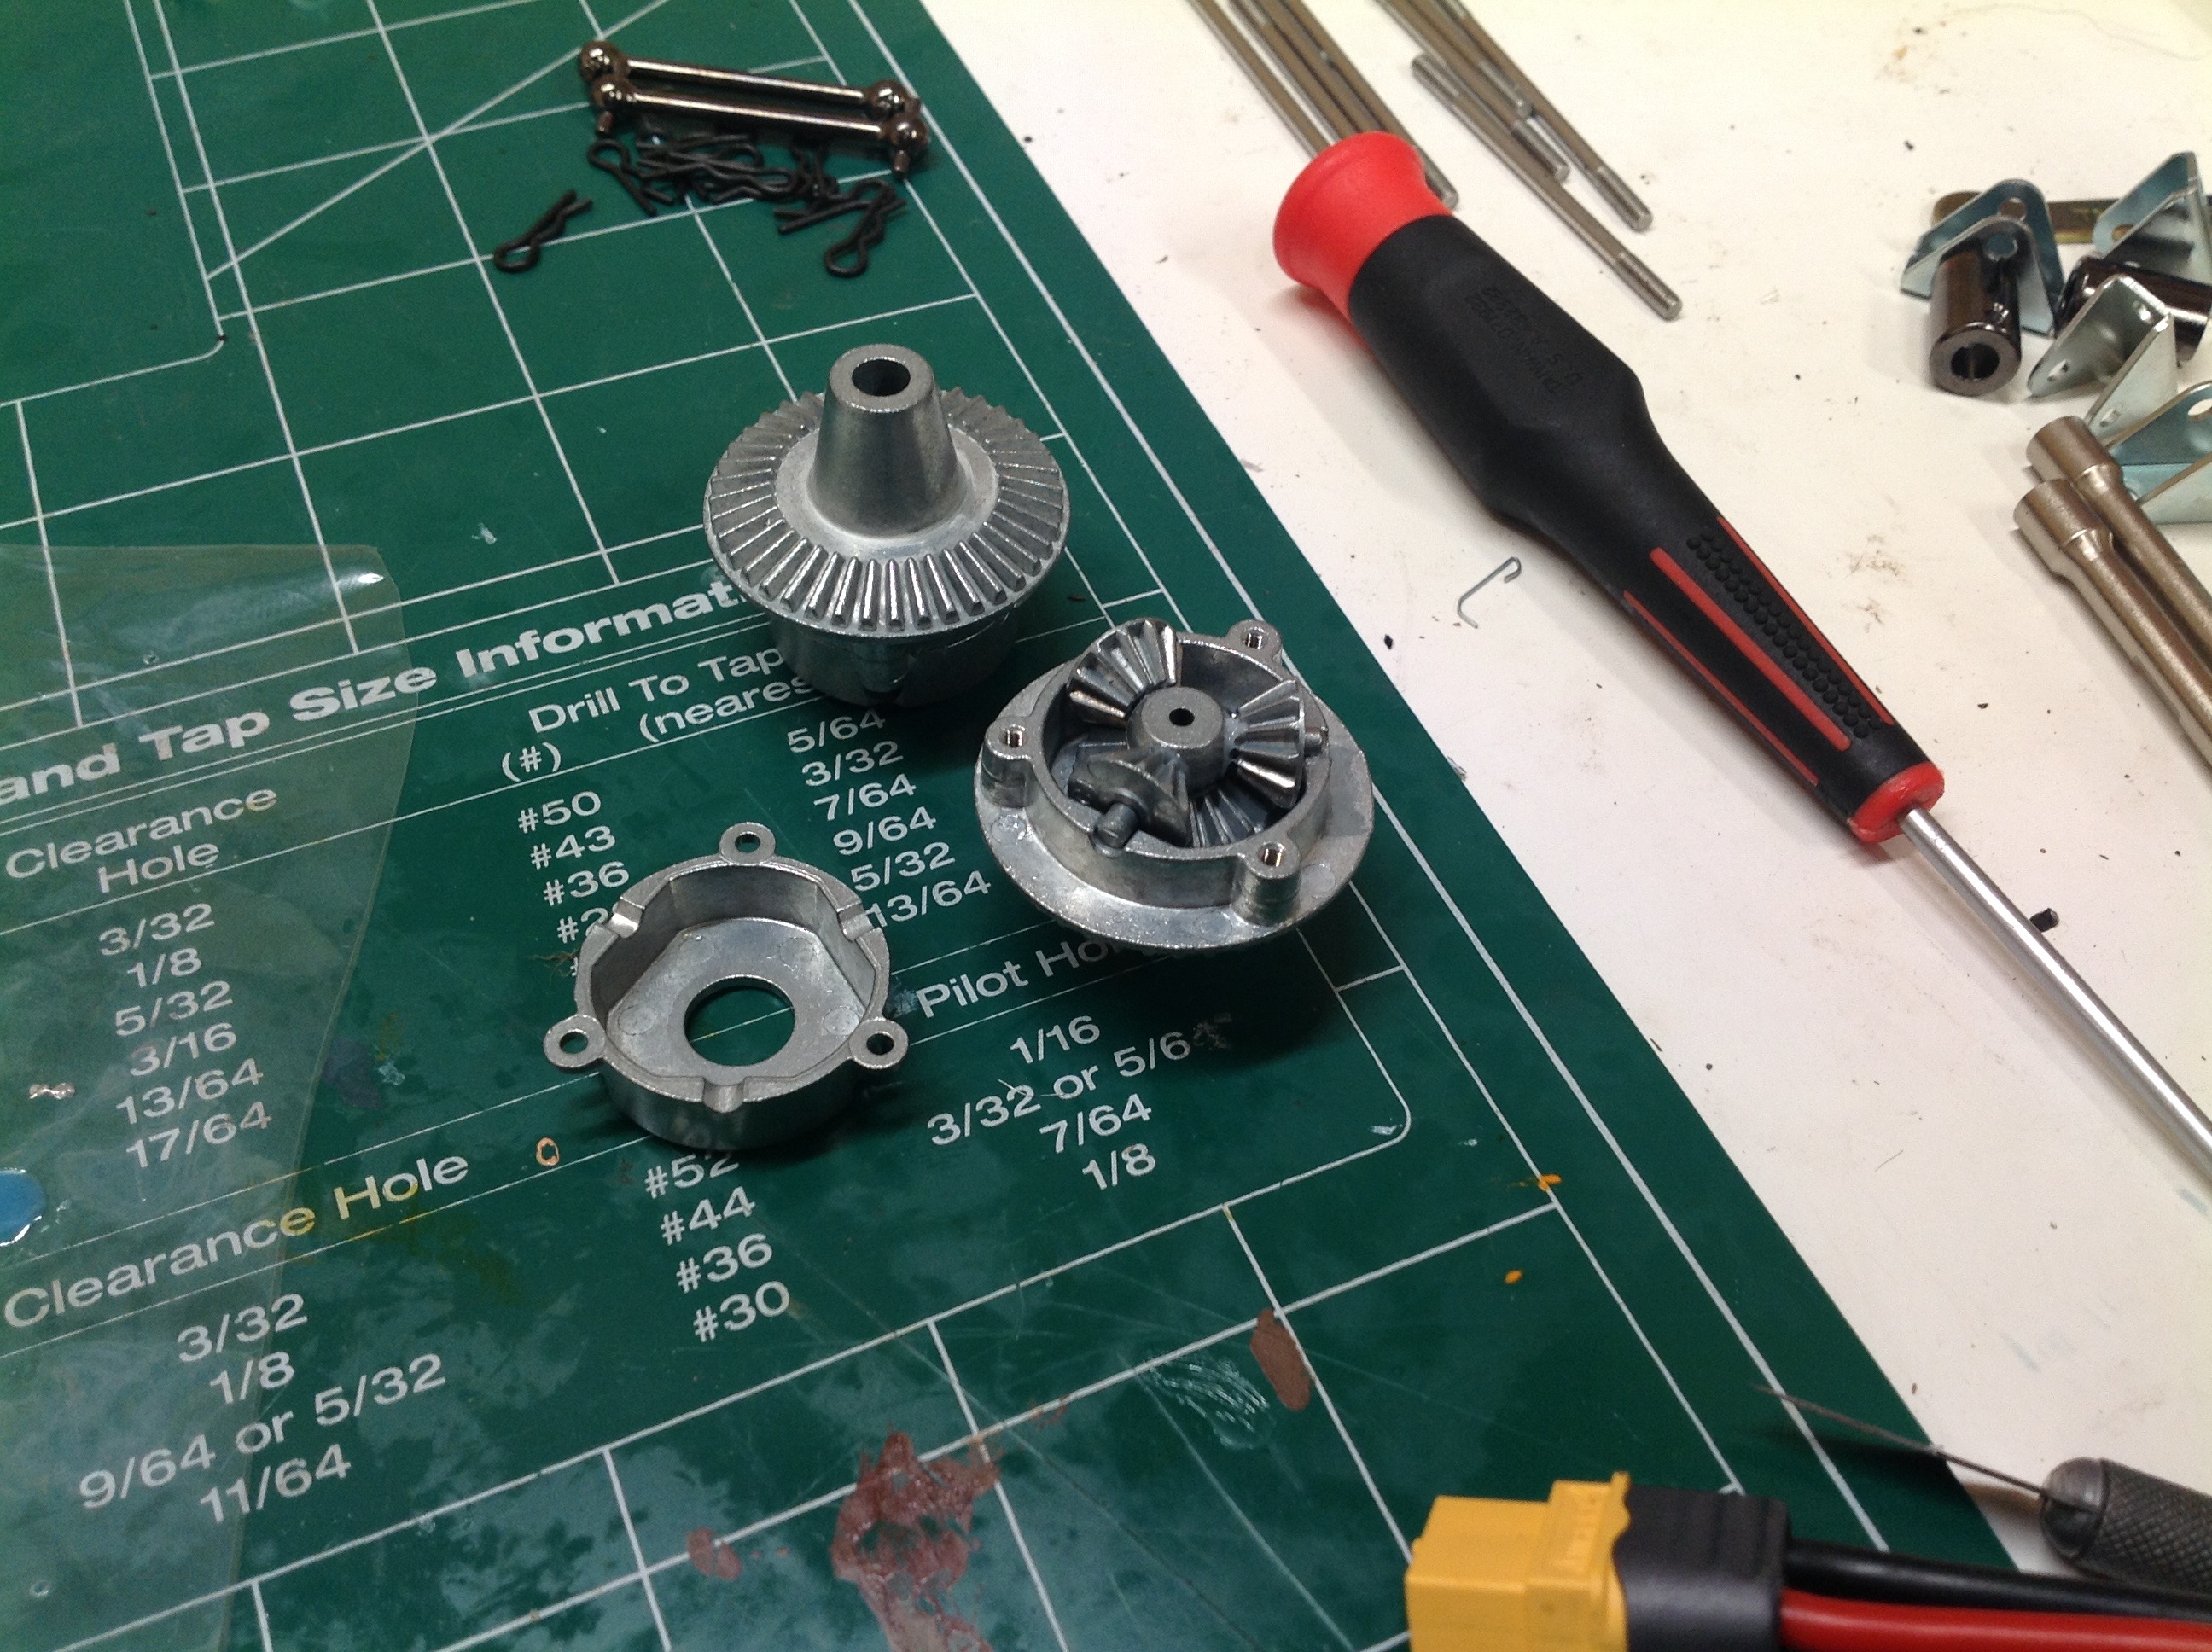
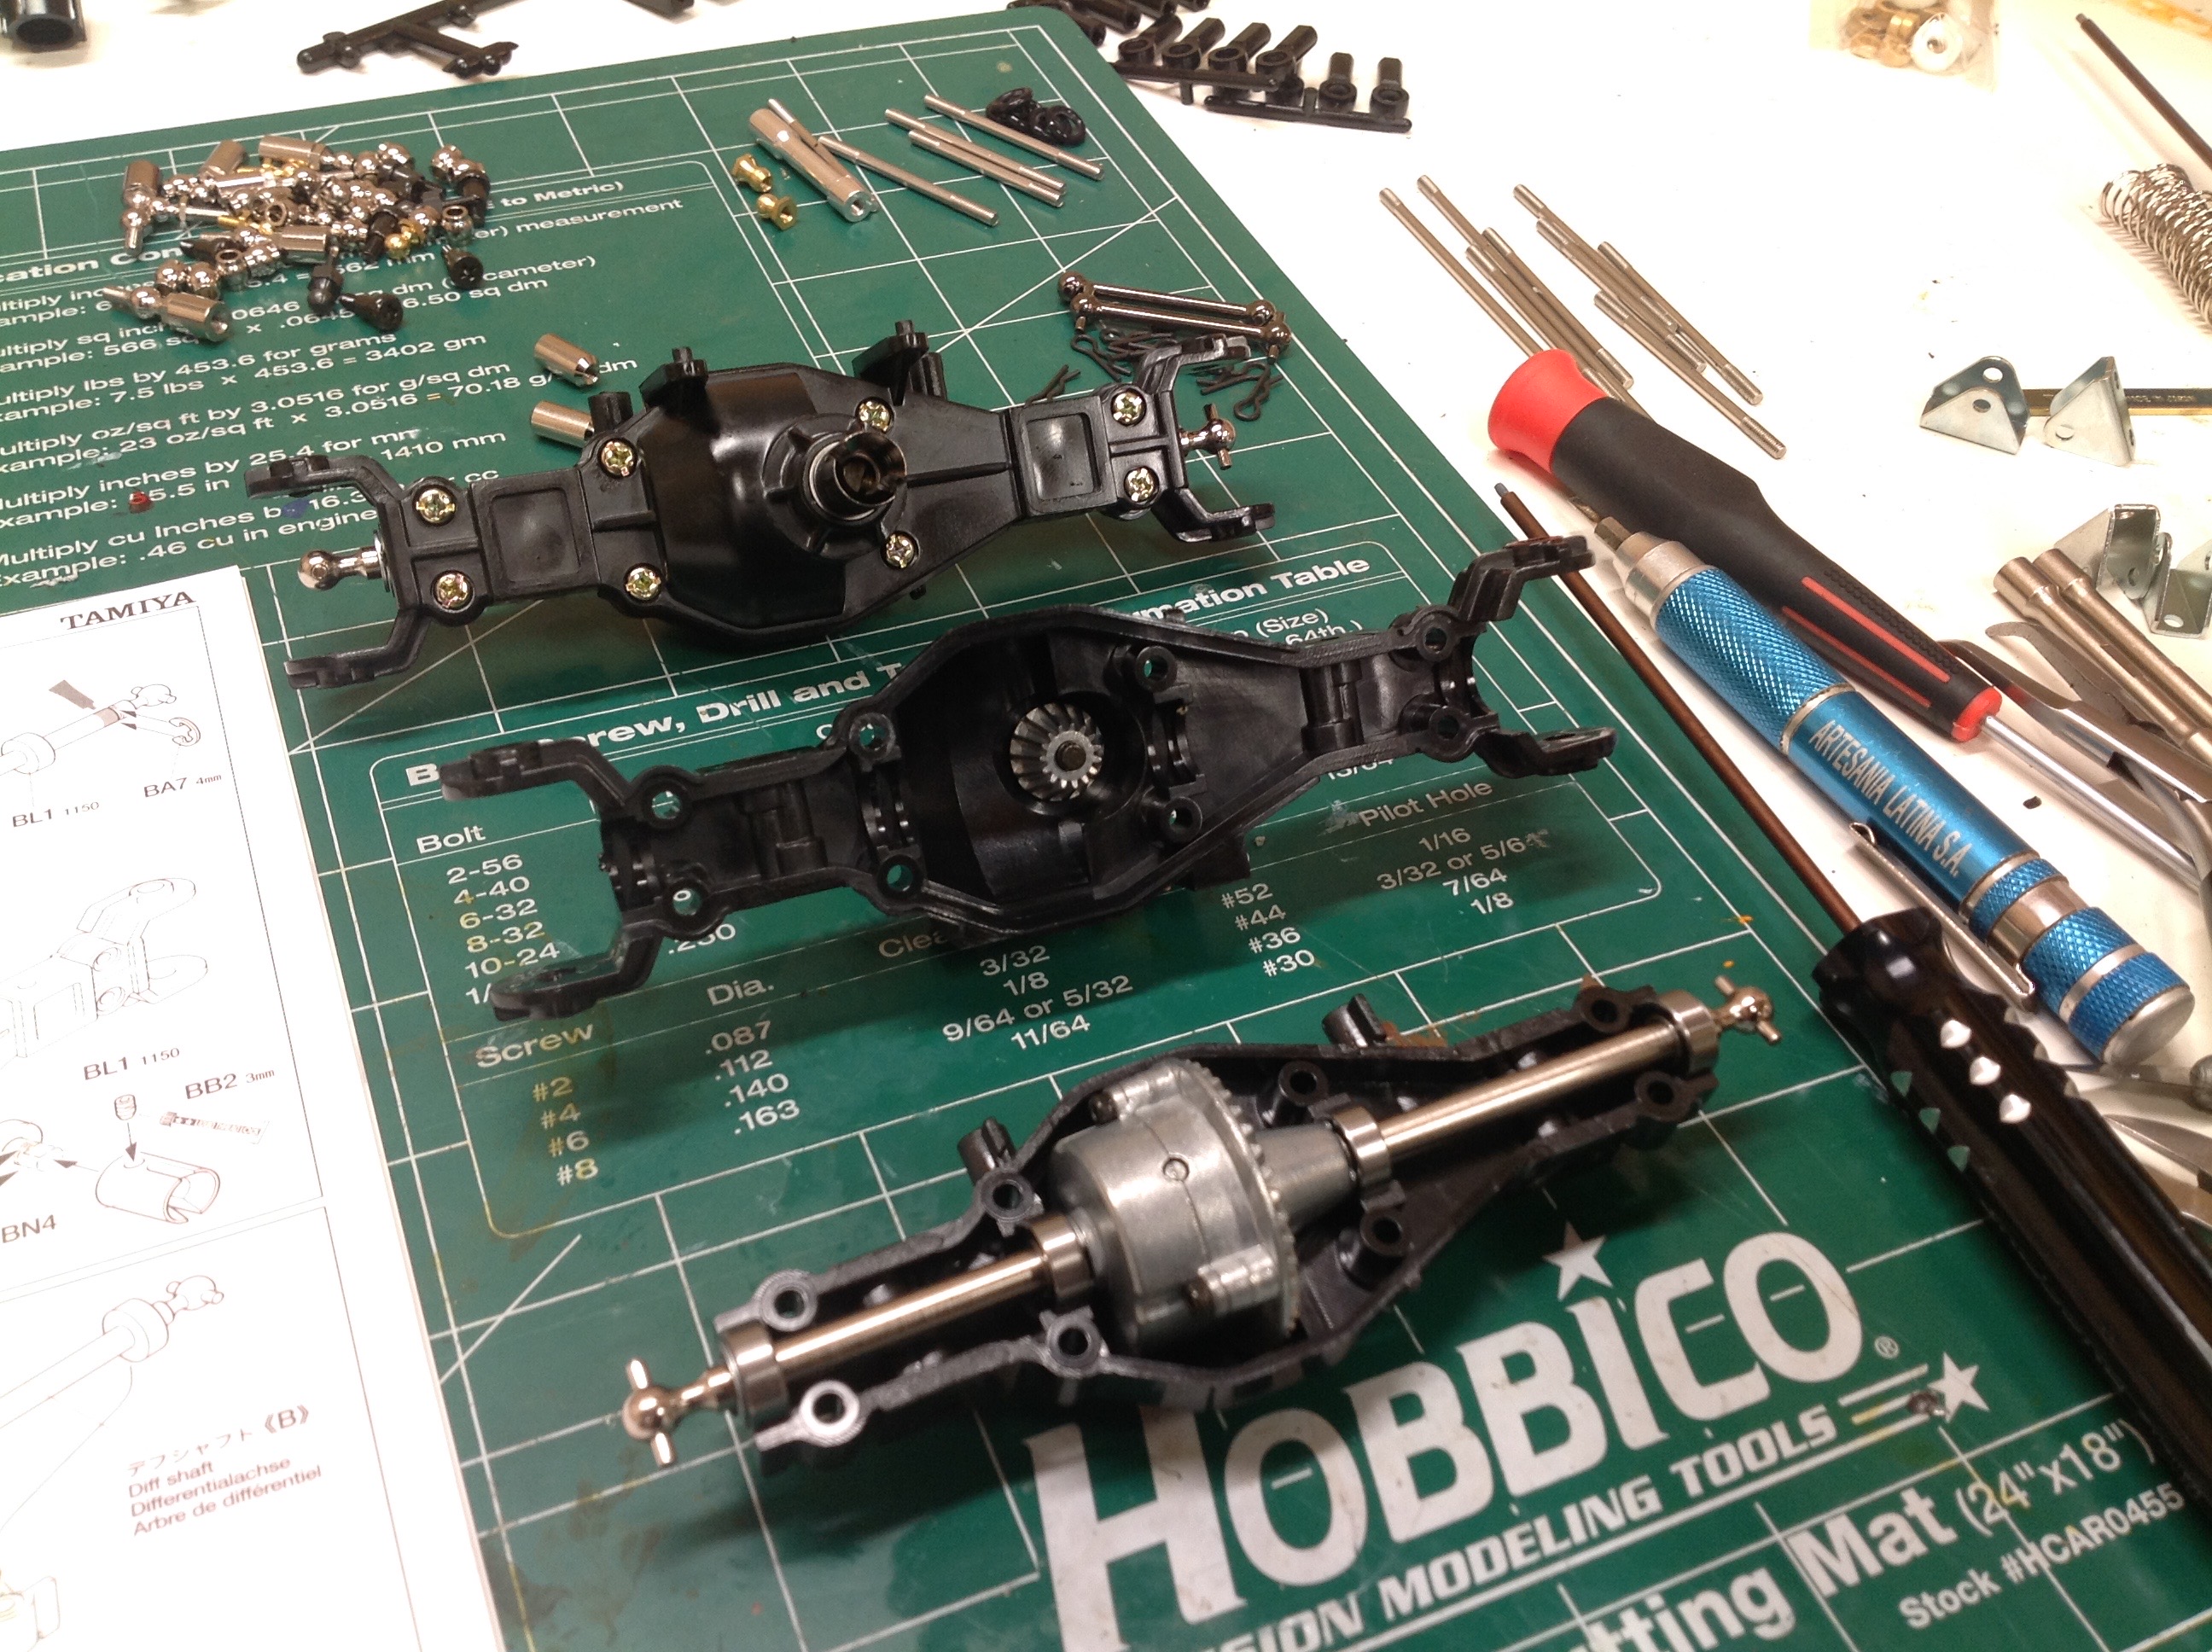
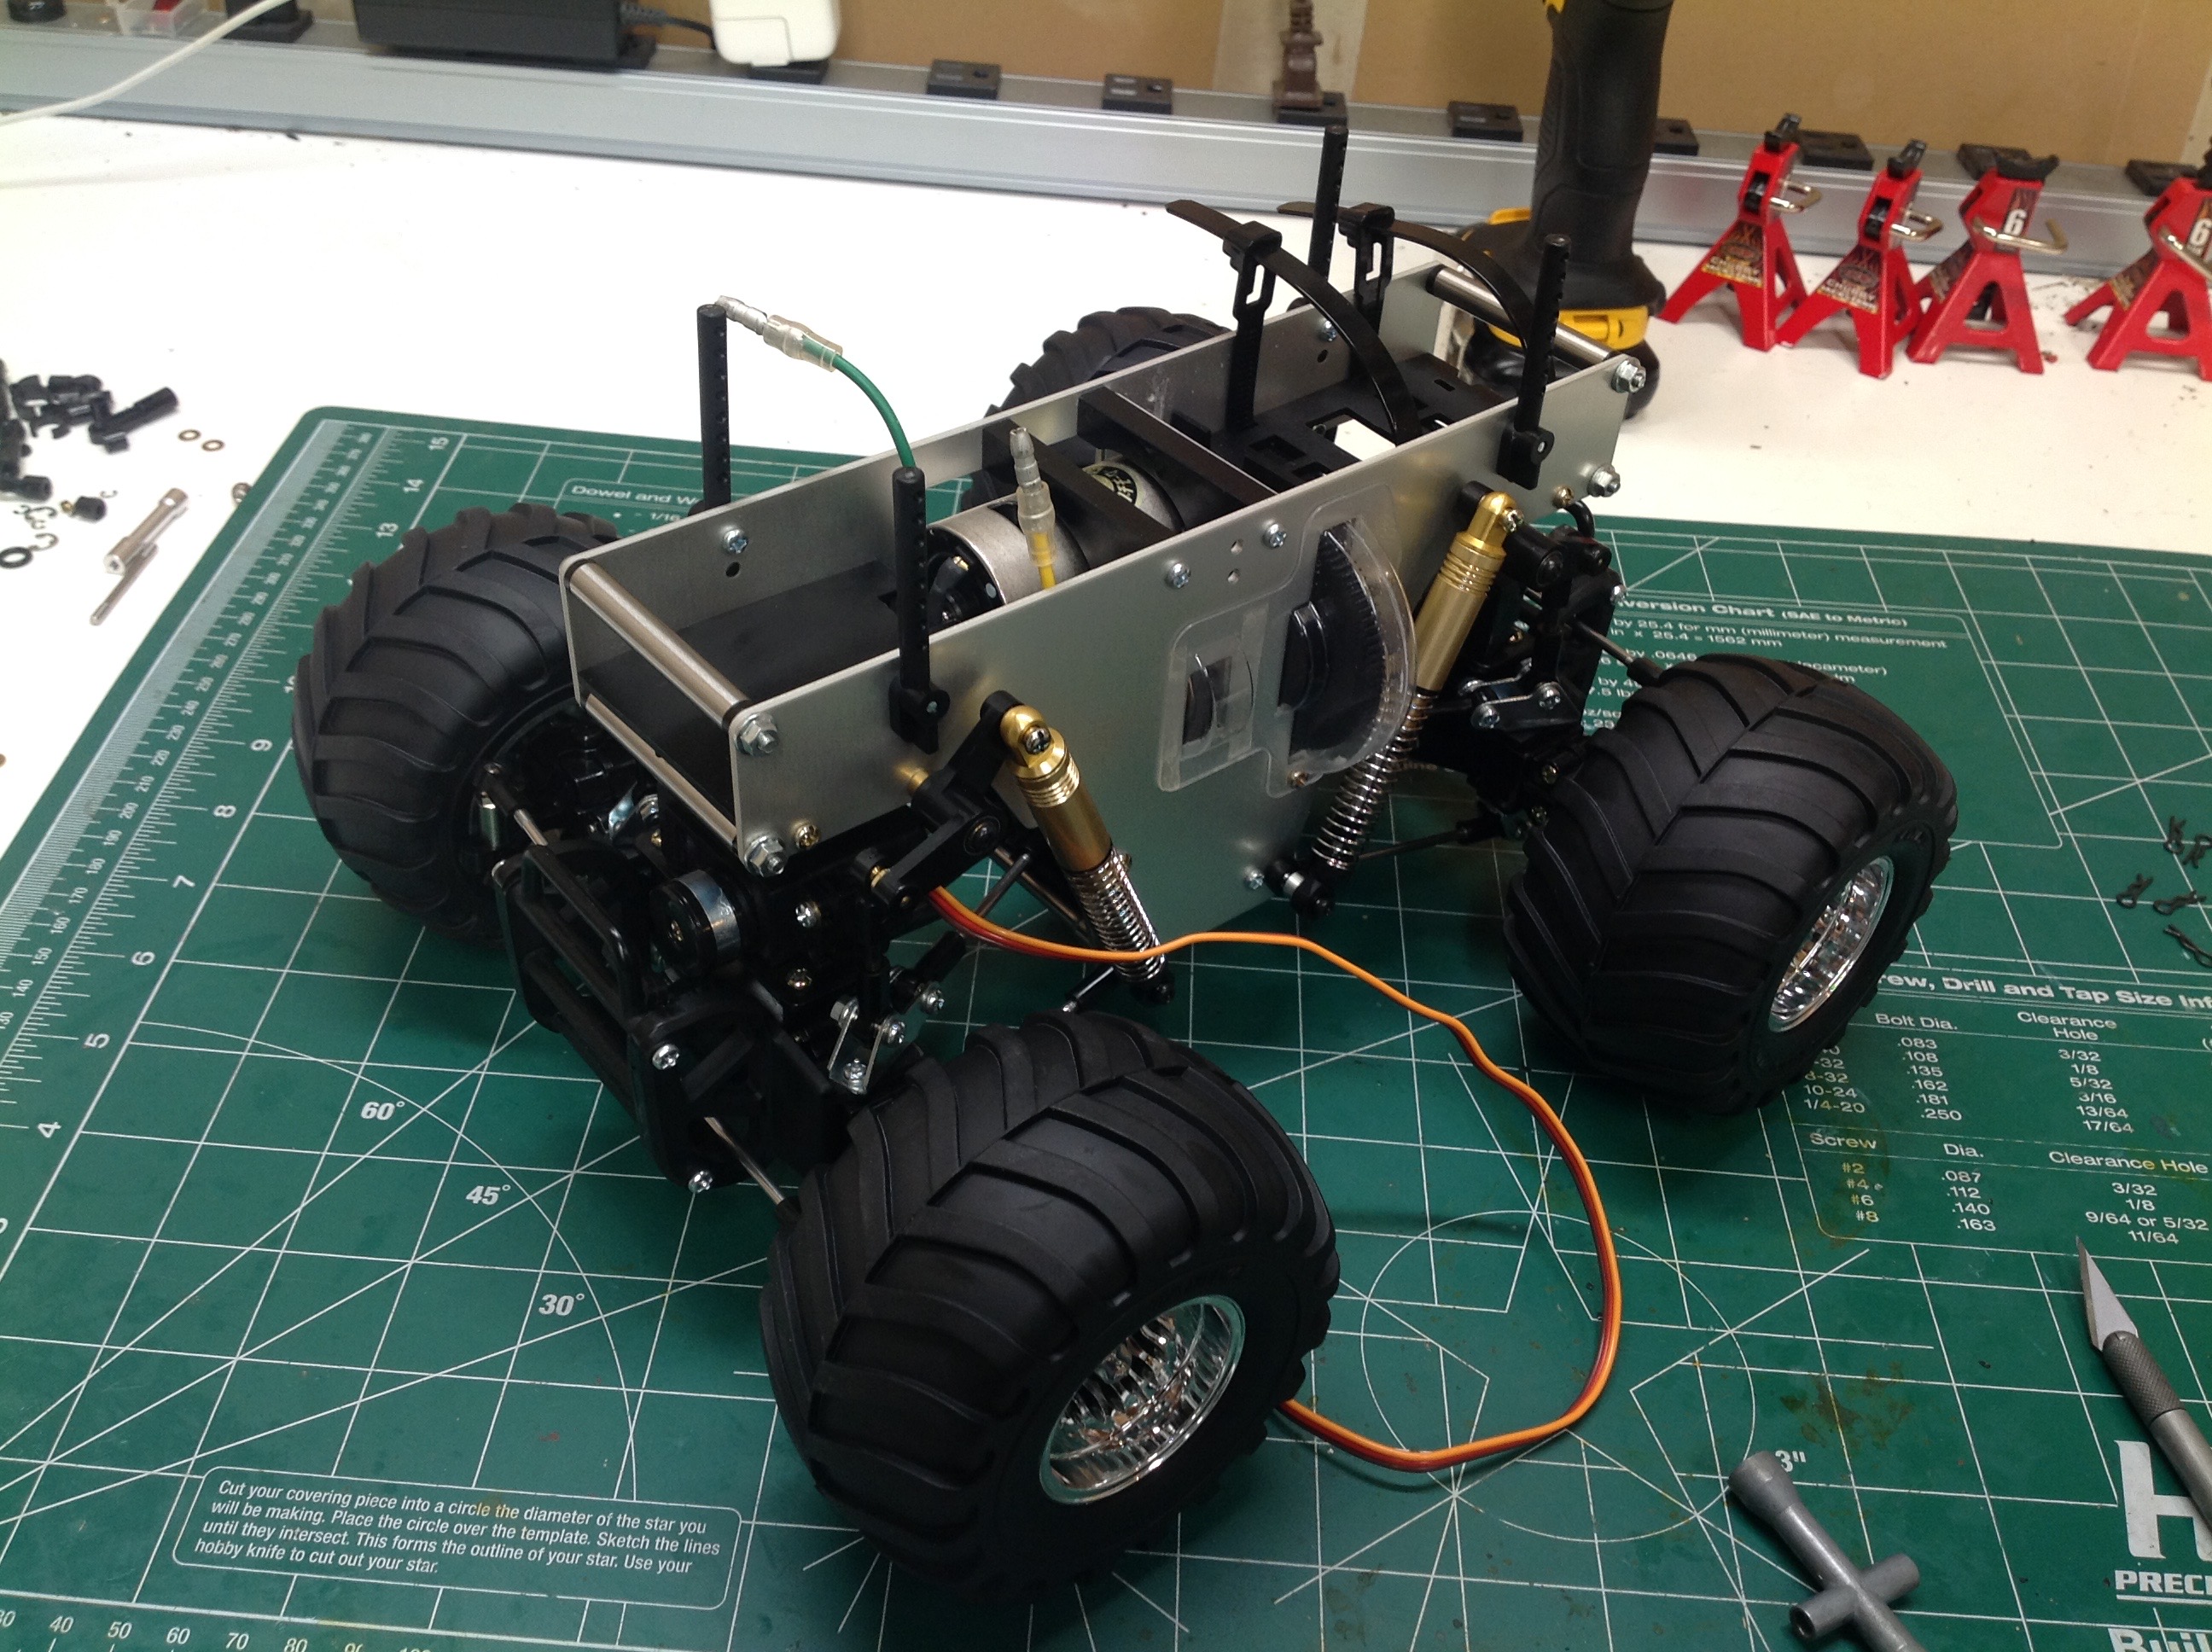
The metal differentials in this truck are clearly meant for 1:10 scale
models (or even bigger). There are some advantages to this:
they will never break in this application and the axles could be used in
larger trucks. The disadvantage is that the pumpkin is really big
which results in very little ground clearance. I installed ball
bearings throughout as part of my original build.
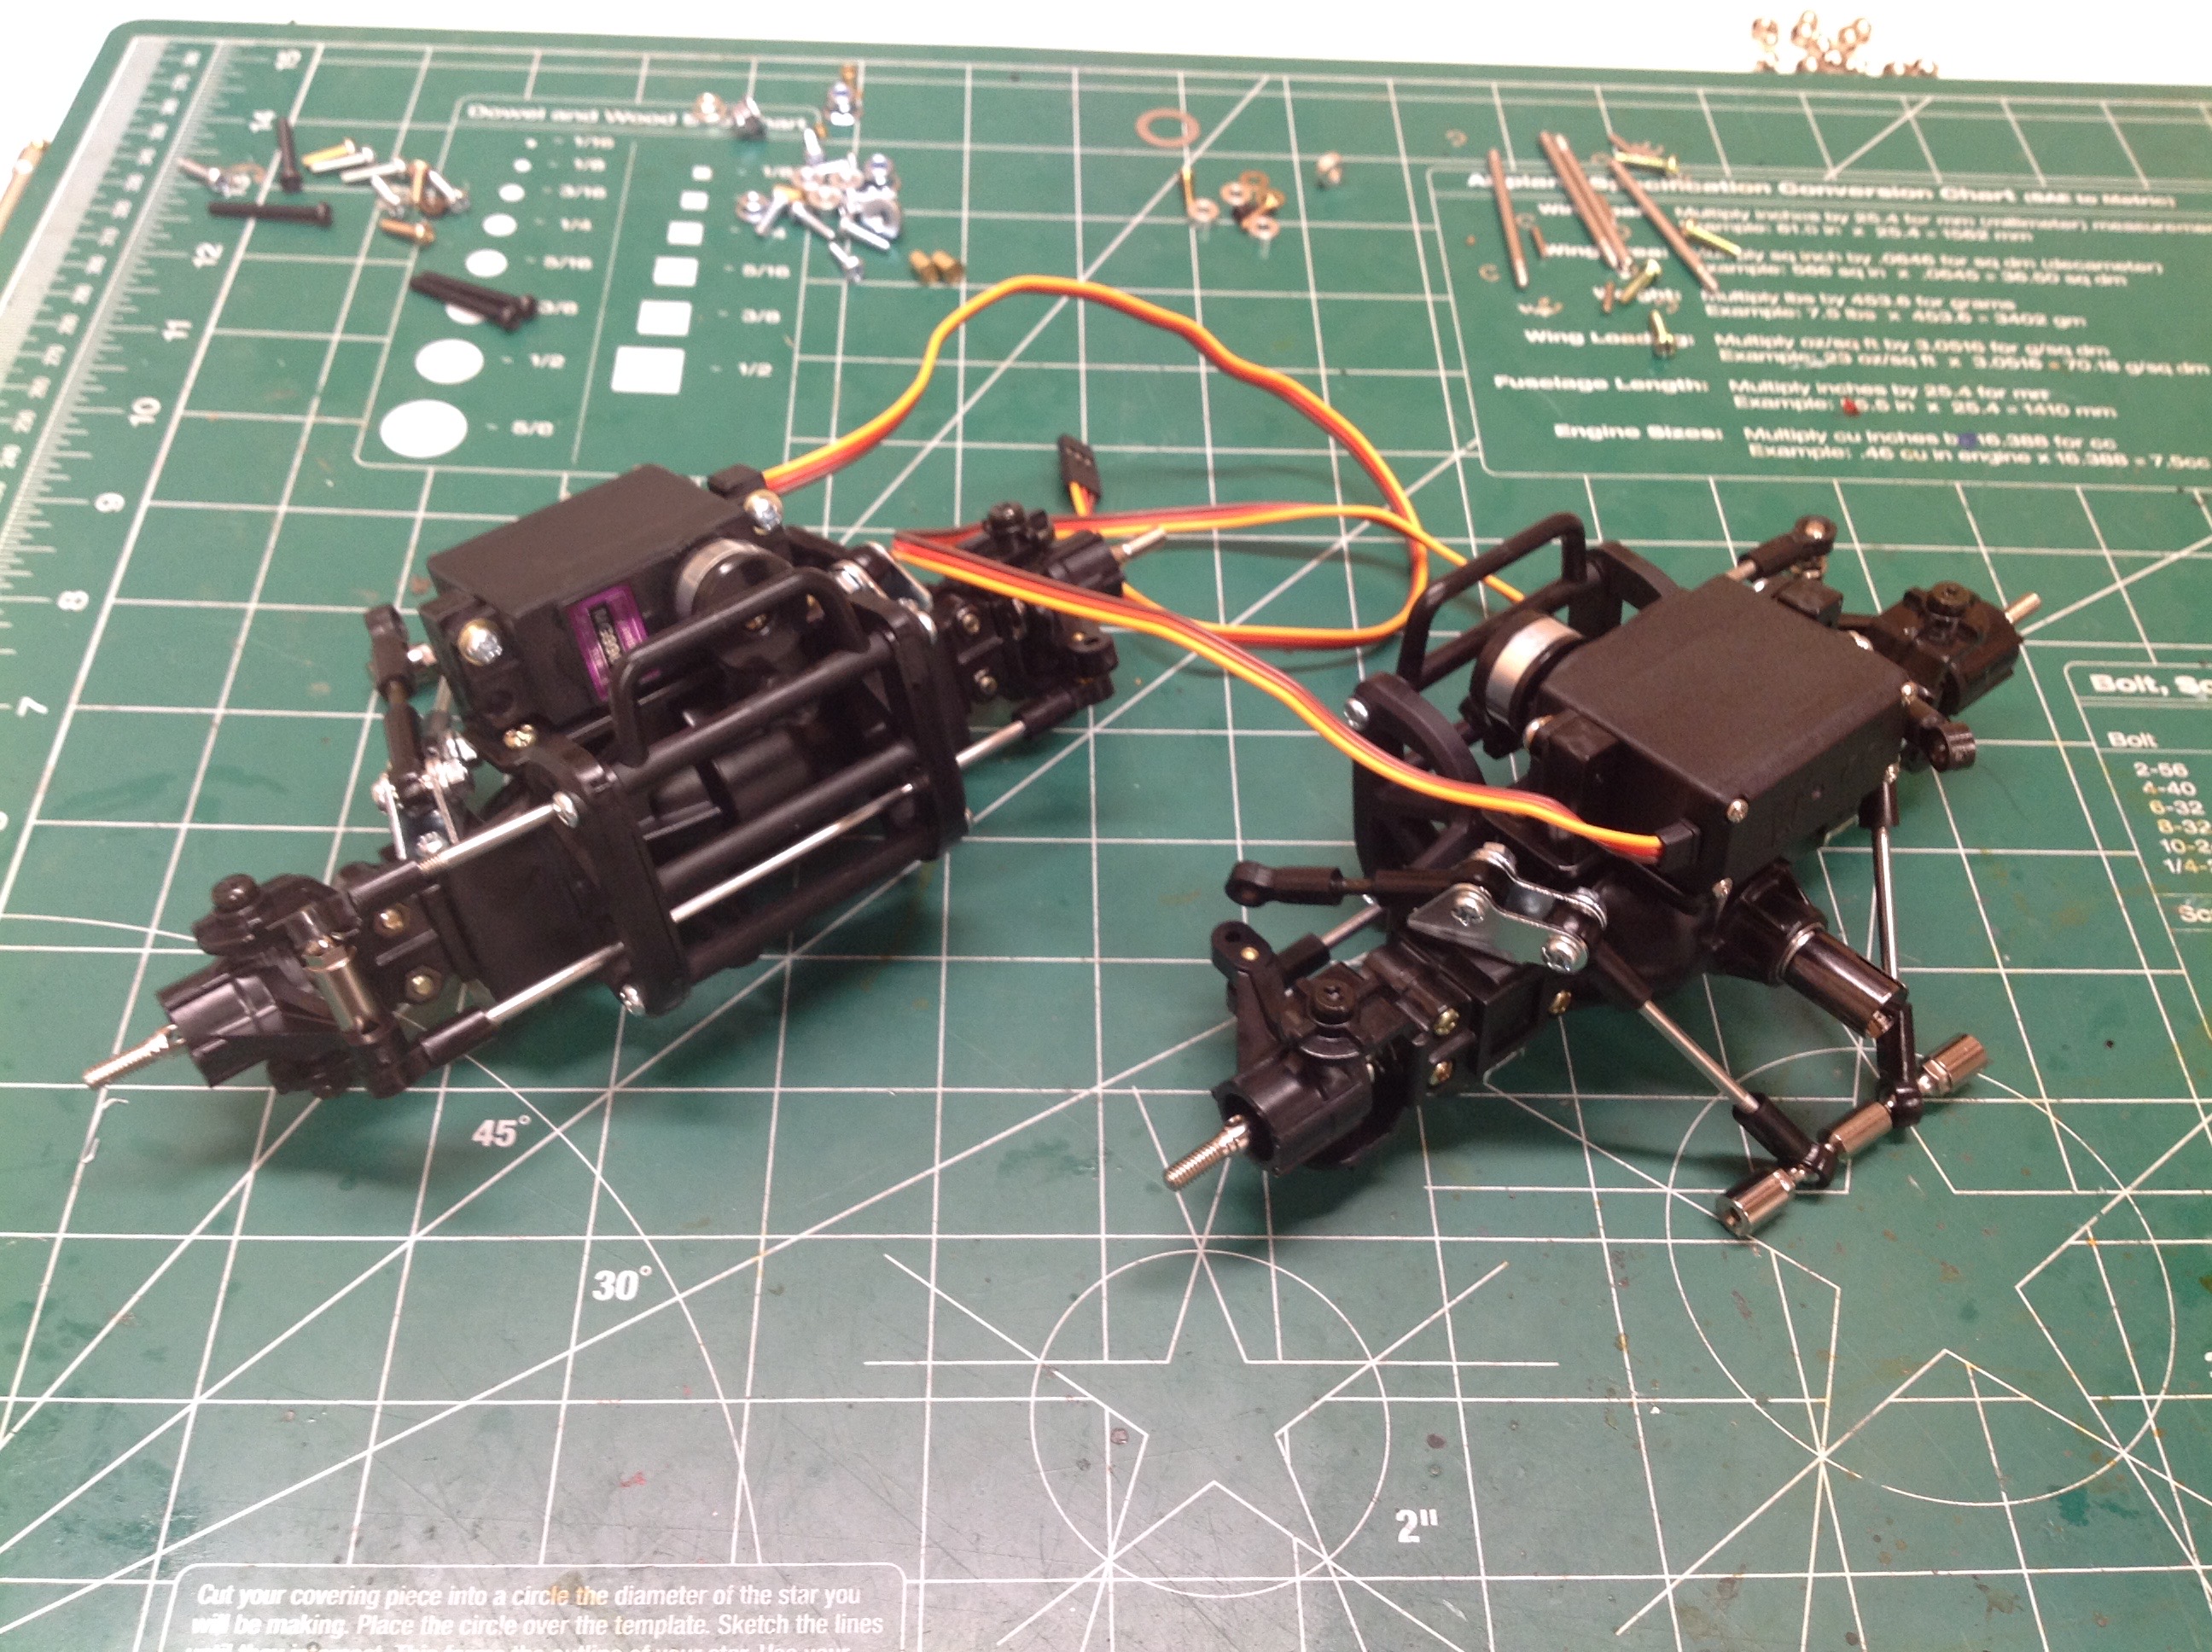
The front and rear axles are identical if you build them with the four
wheel steering option. You can also build the rear axle with
locked steering. This is a servo-on-axle system with a nice high
torque servo saver on each.
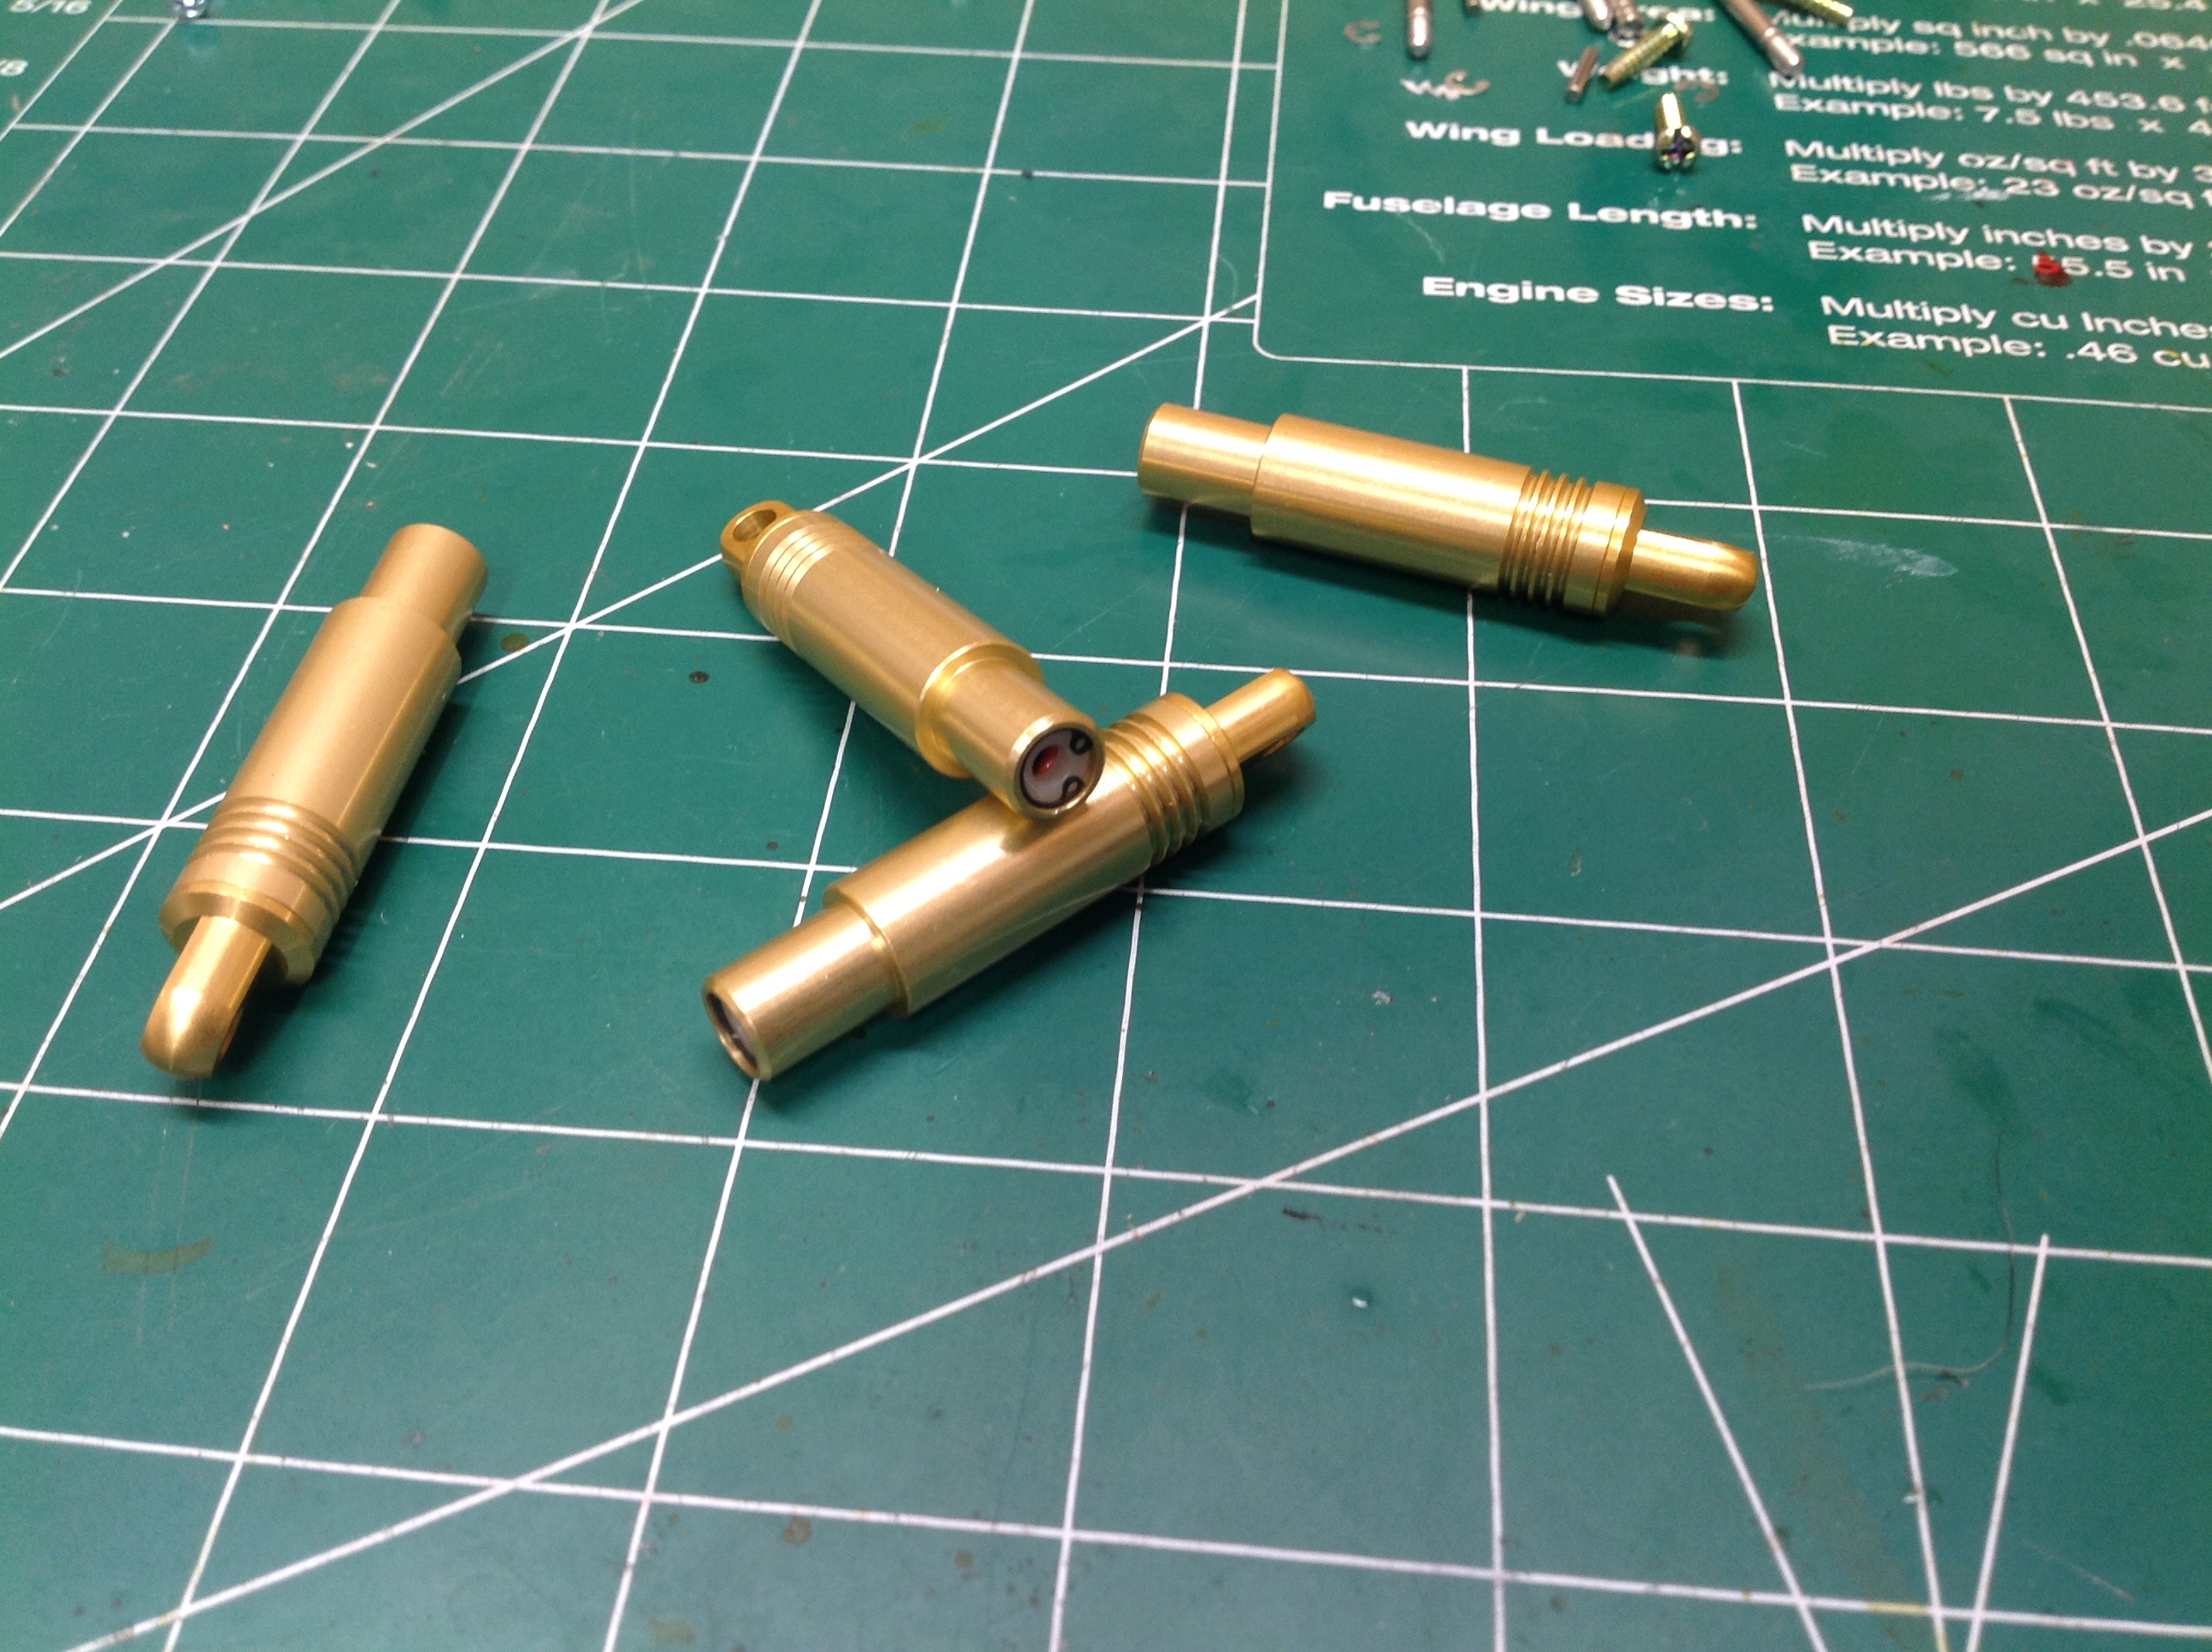
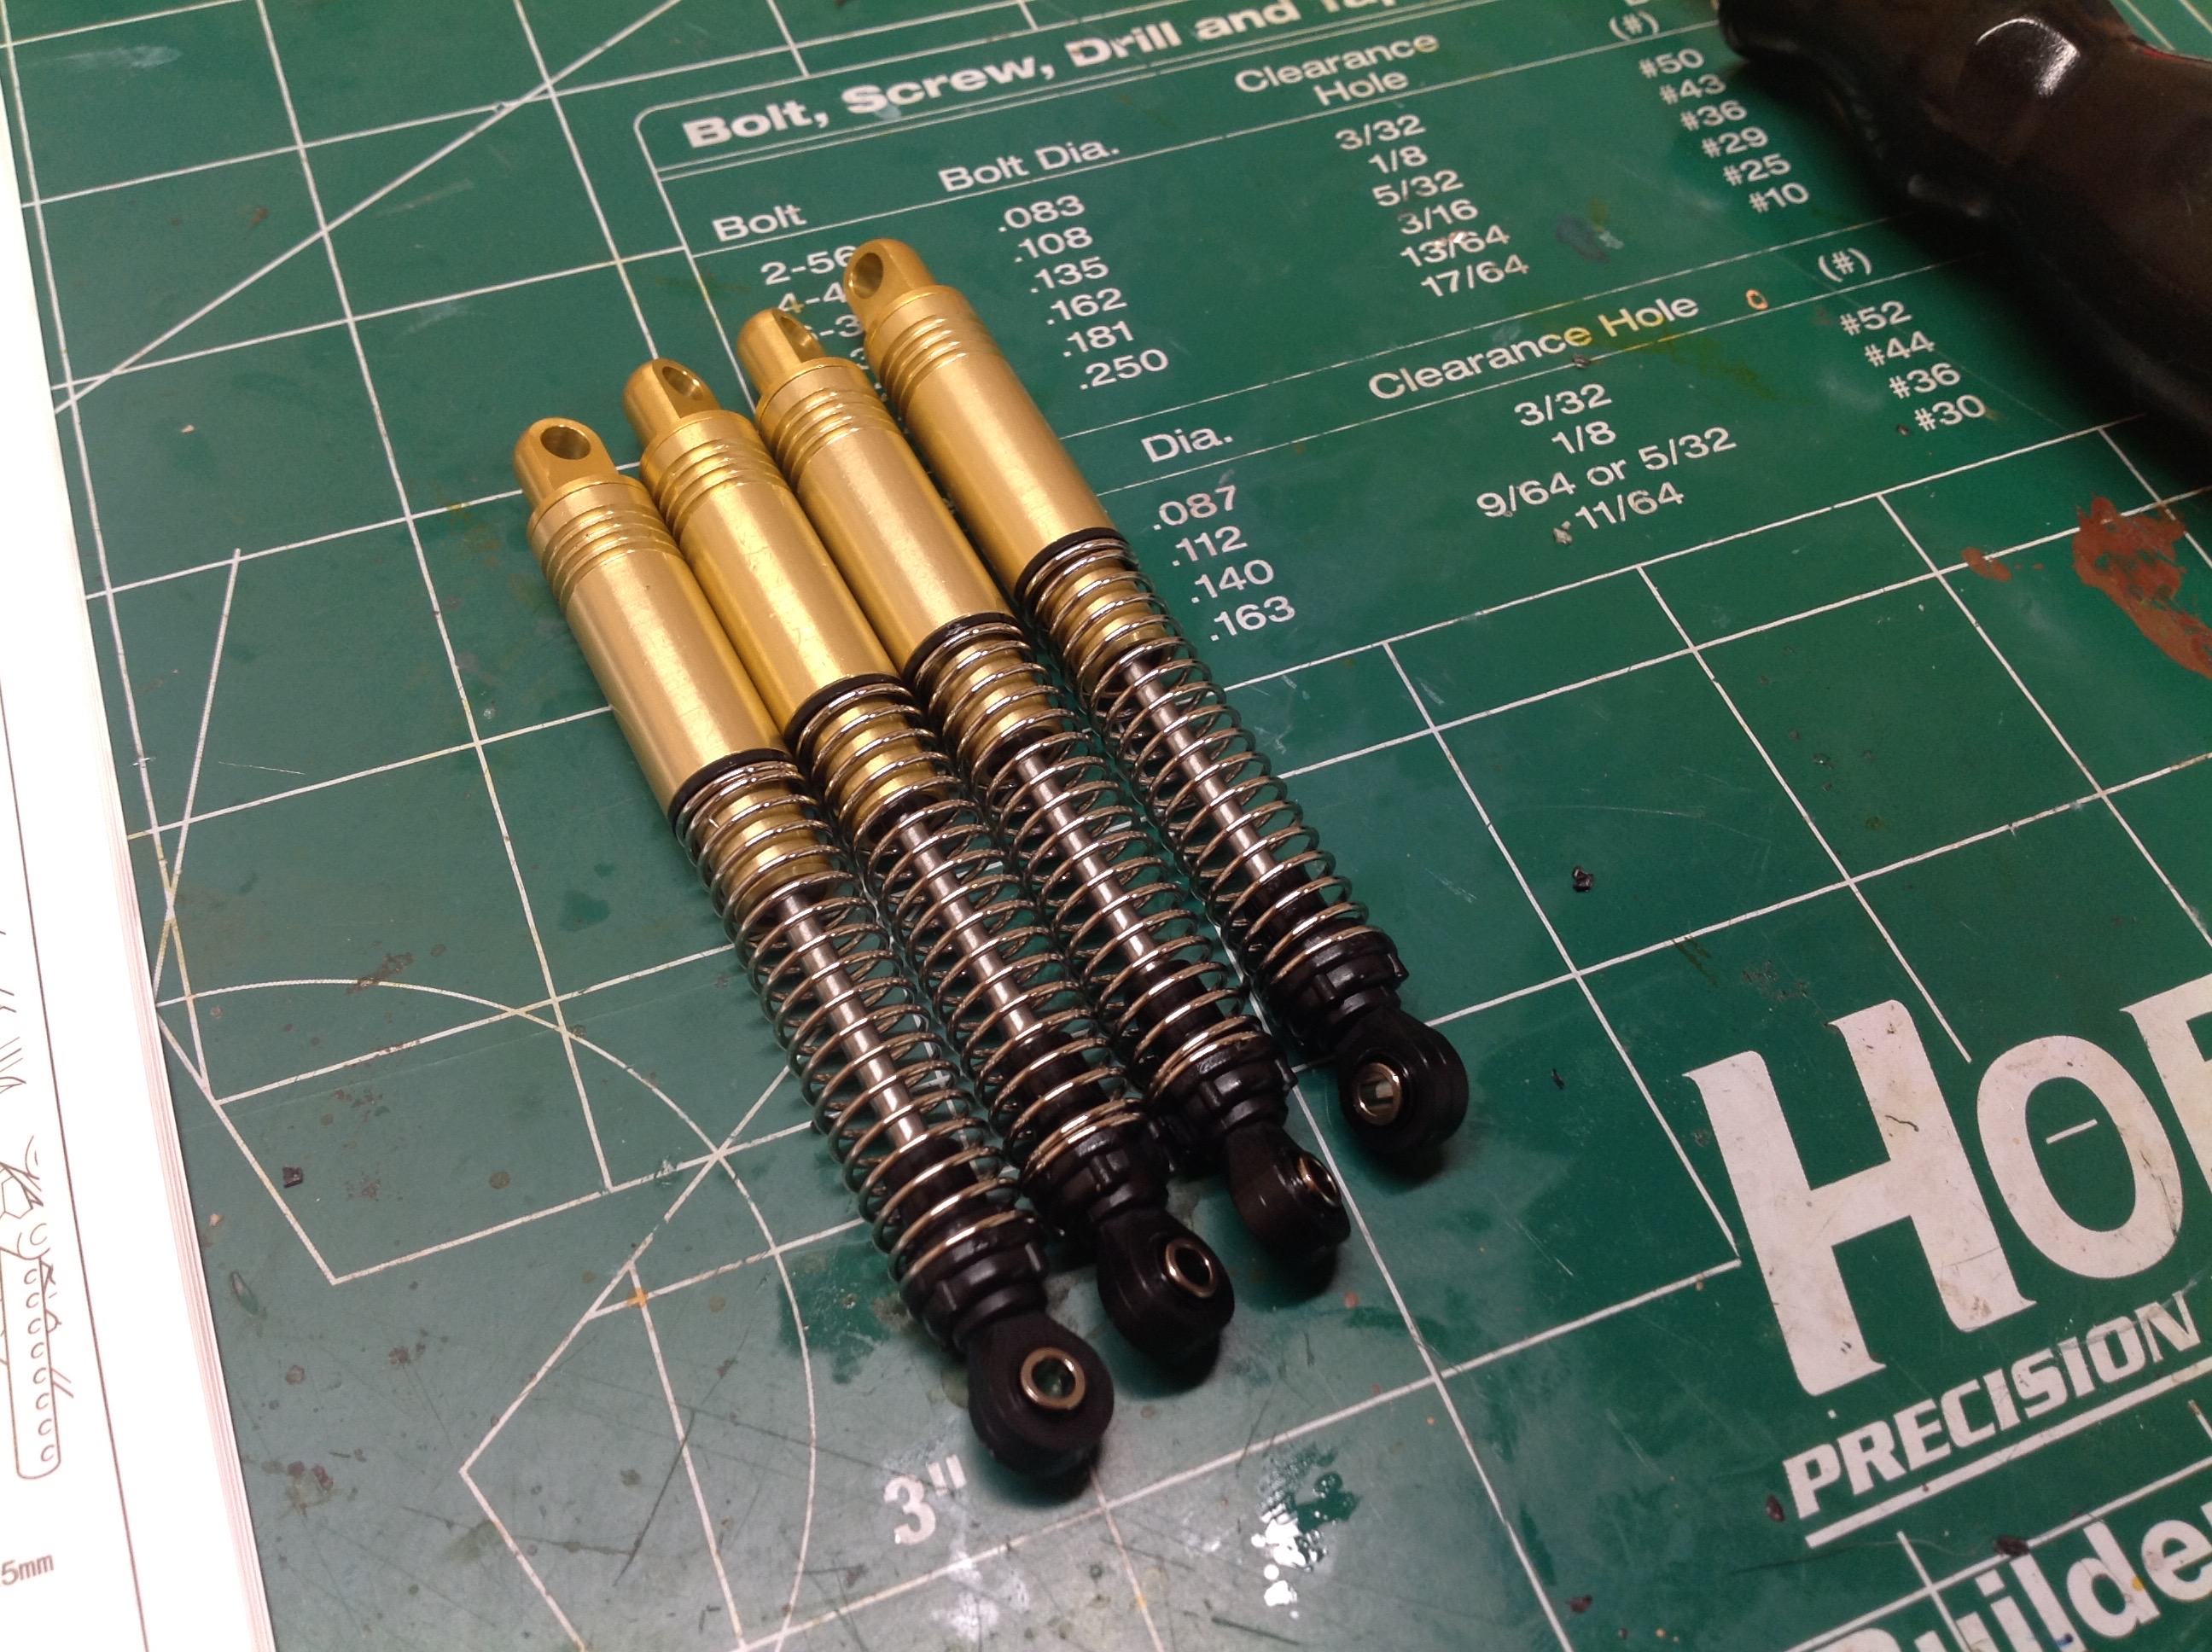
These are some surprisingly nice shocks. They feature an anodized
aluminum housing and a very long stroke. The diameter is small
which means there isn't much oil volume, but this truck also weighs very
little. In the left hand image you can see how the shock bodies
came out of the box. The o-rings and c-clips in the rod end are
pre-installed, probably because most people won't have a c-clip pliers
this small. The head end threads off for filling.
Now the axles are installed into the chassis. Both front and rear
use identical 4-link assemblies and drive shafts. Because of the
cantilever suspension, there is an additonal set of vertical links which
connect to axle to the shock crank. Between this and the
steering, this makes for a lot of link building
This is how the completed chassis fits into the storage and carrying
box. The center cardboard support surrounds the chassis rails and
sits on the axles. It works very well to protect the model.
©2018 Eric Albrecht