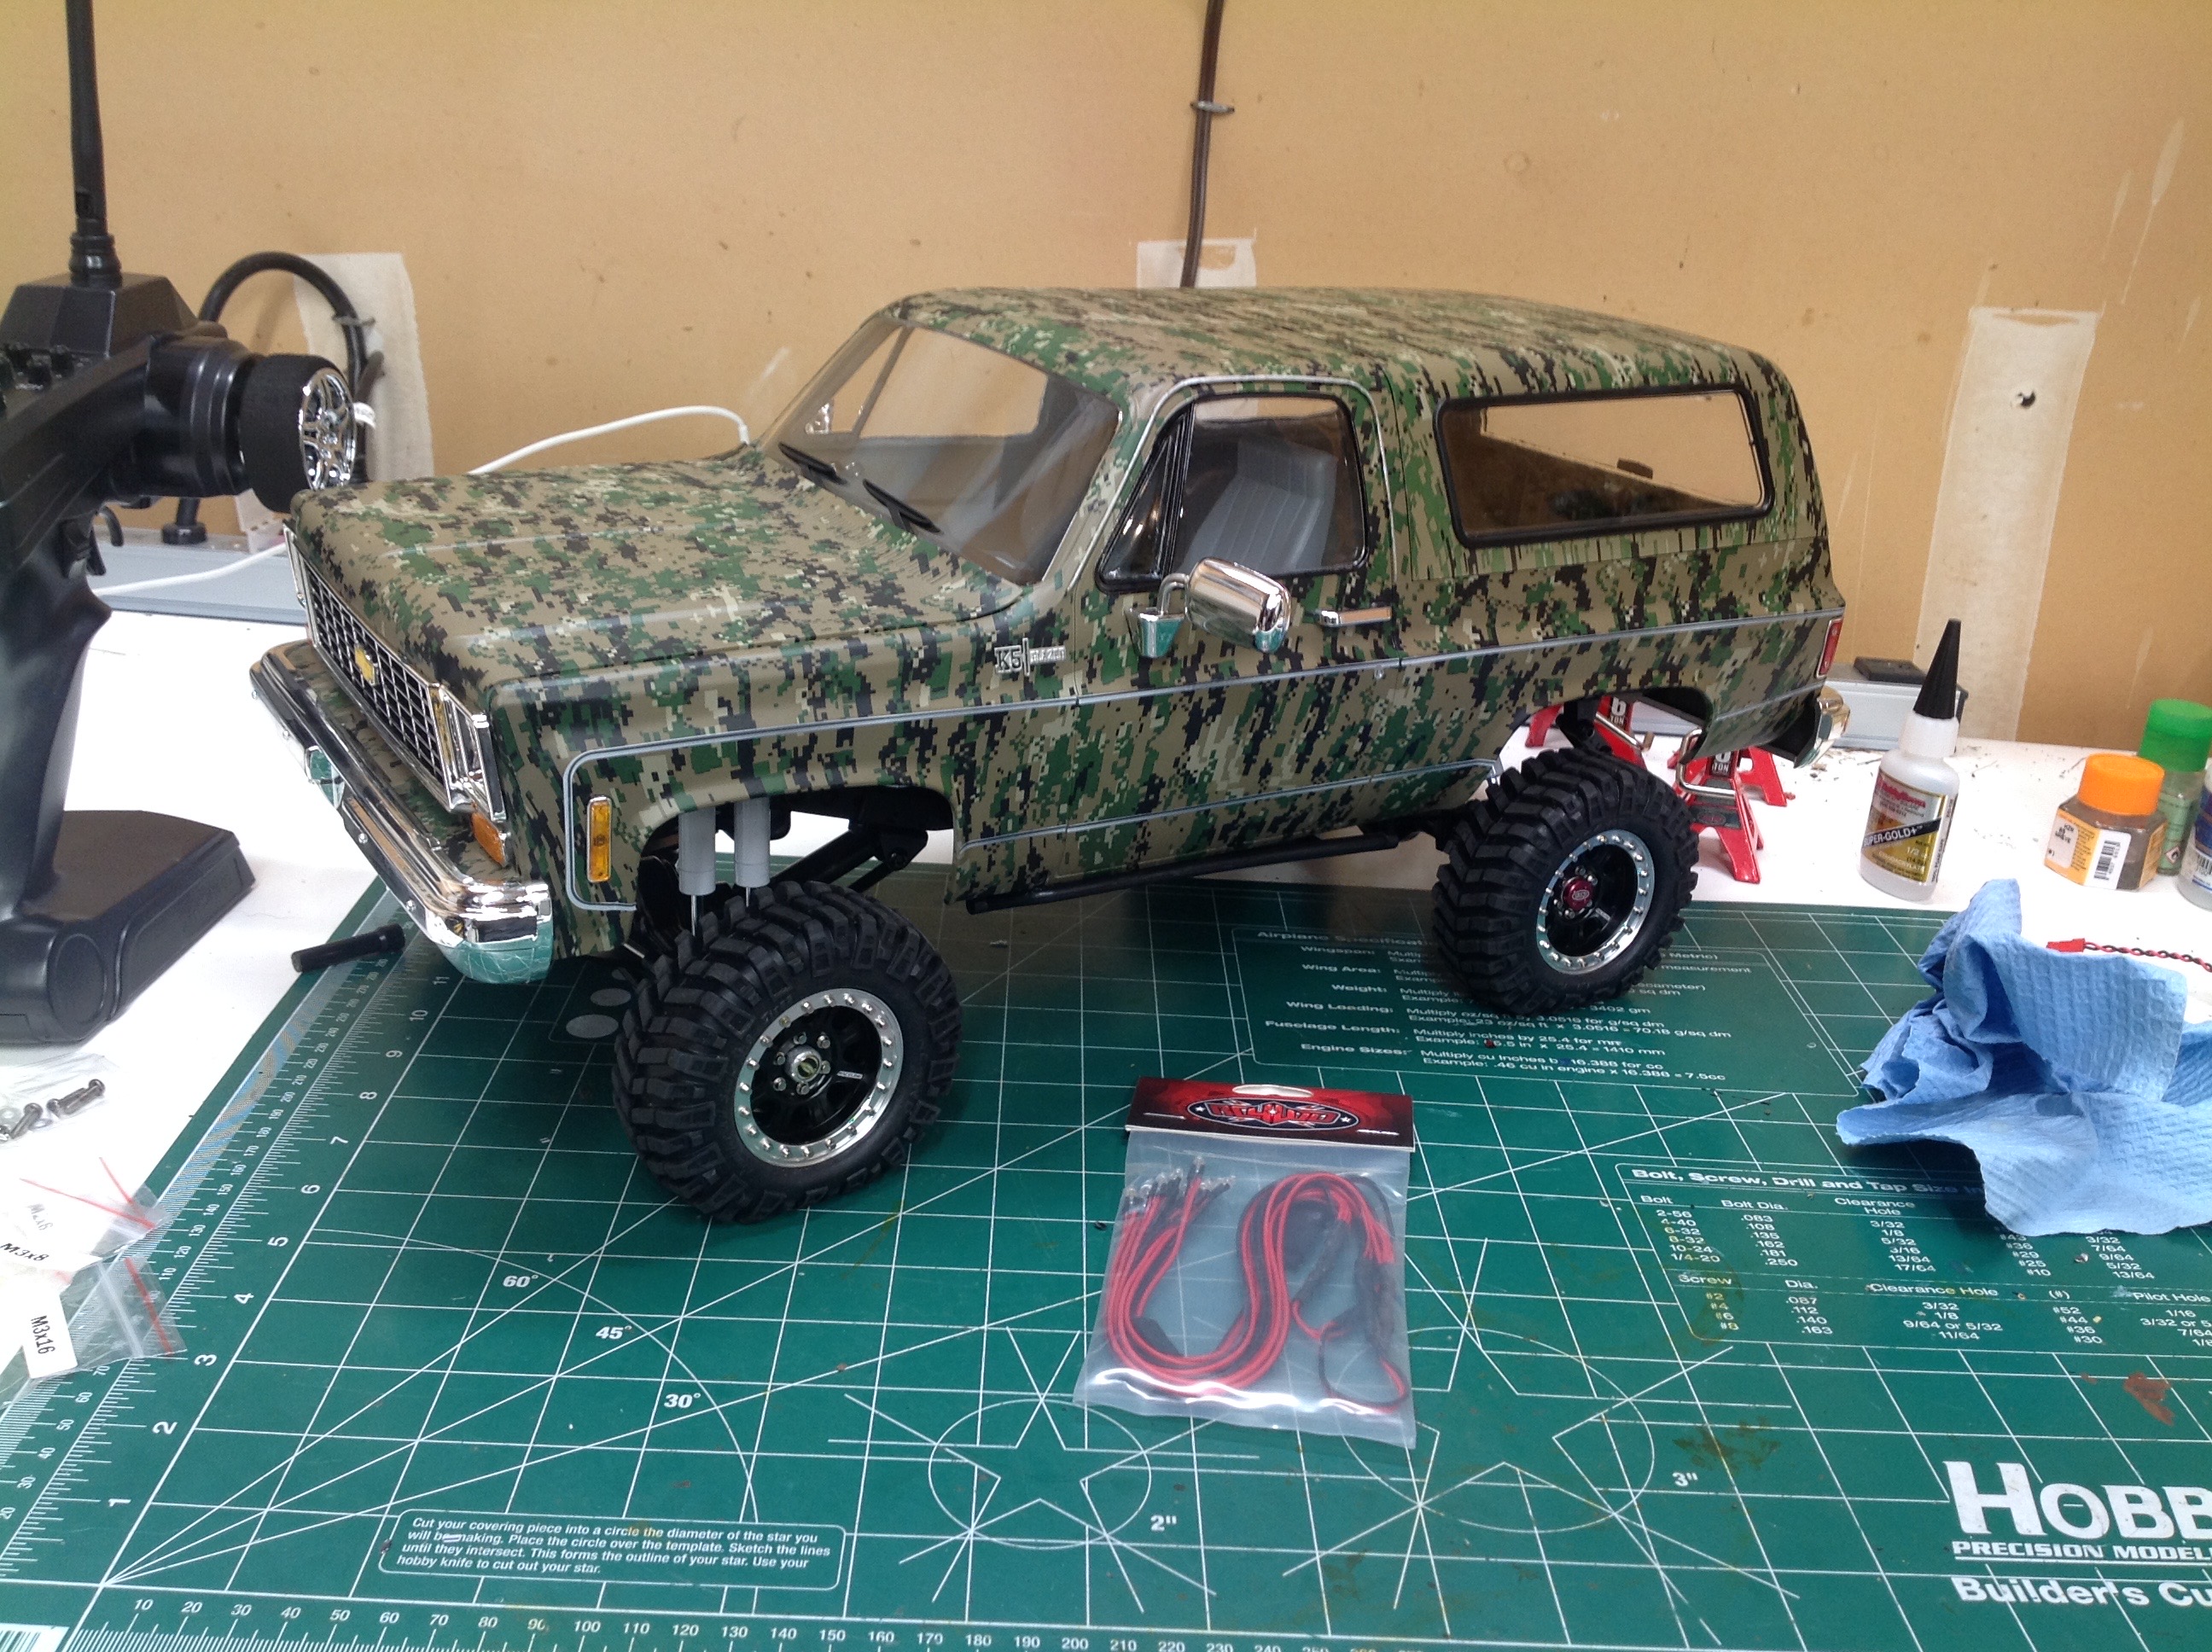
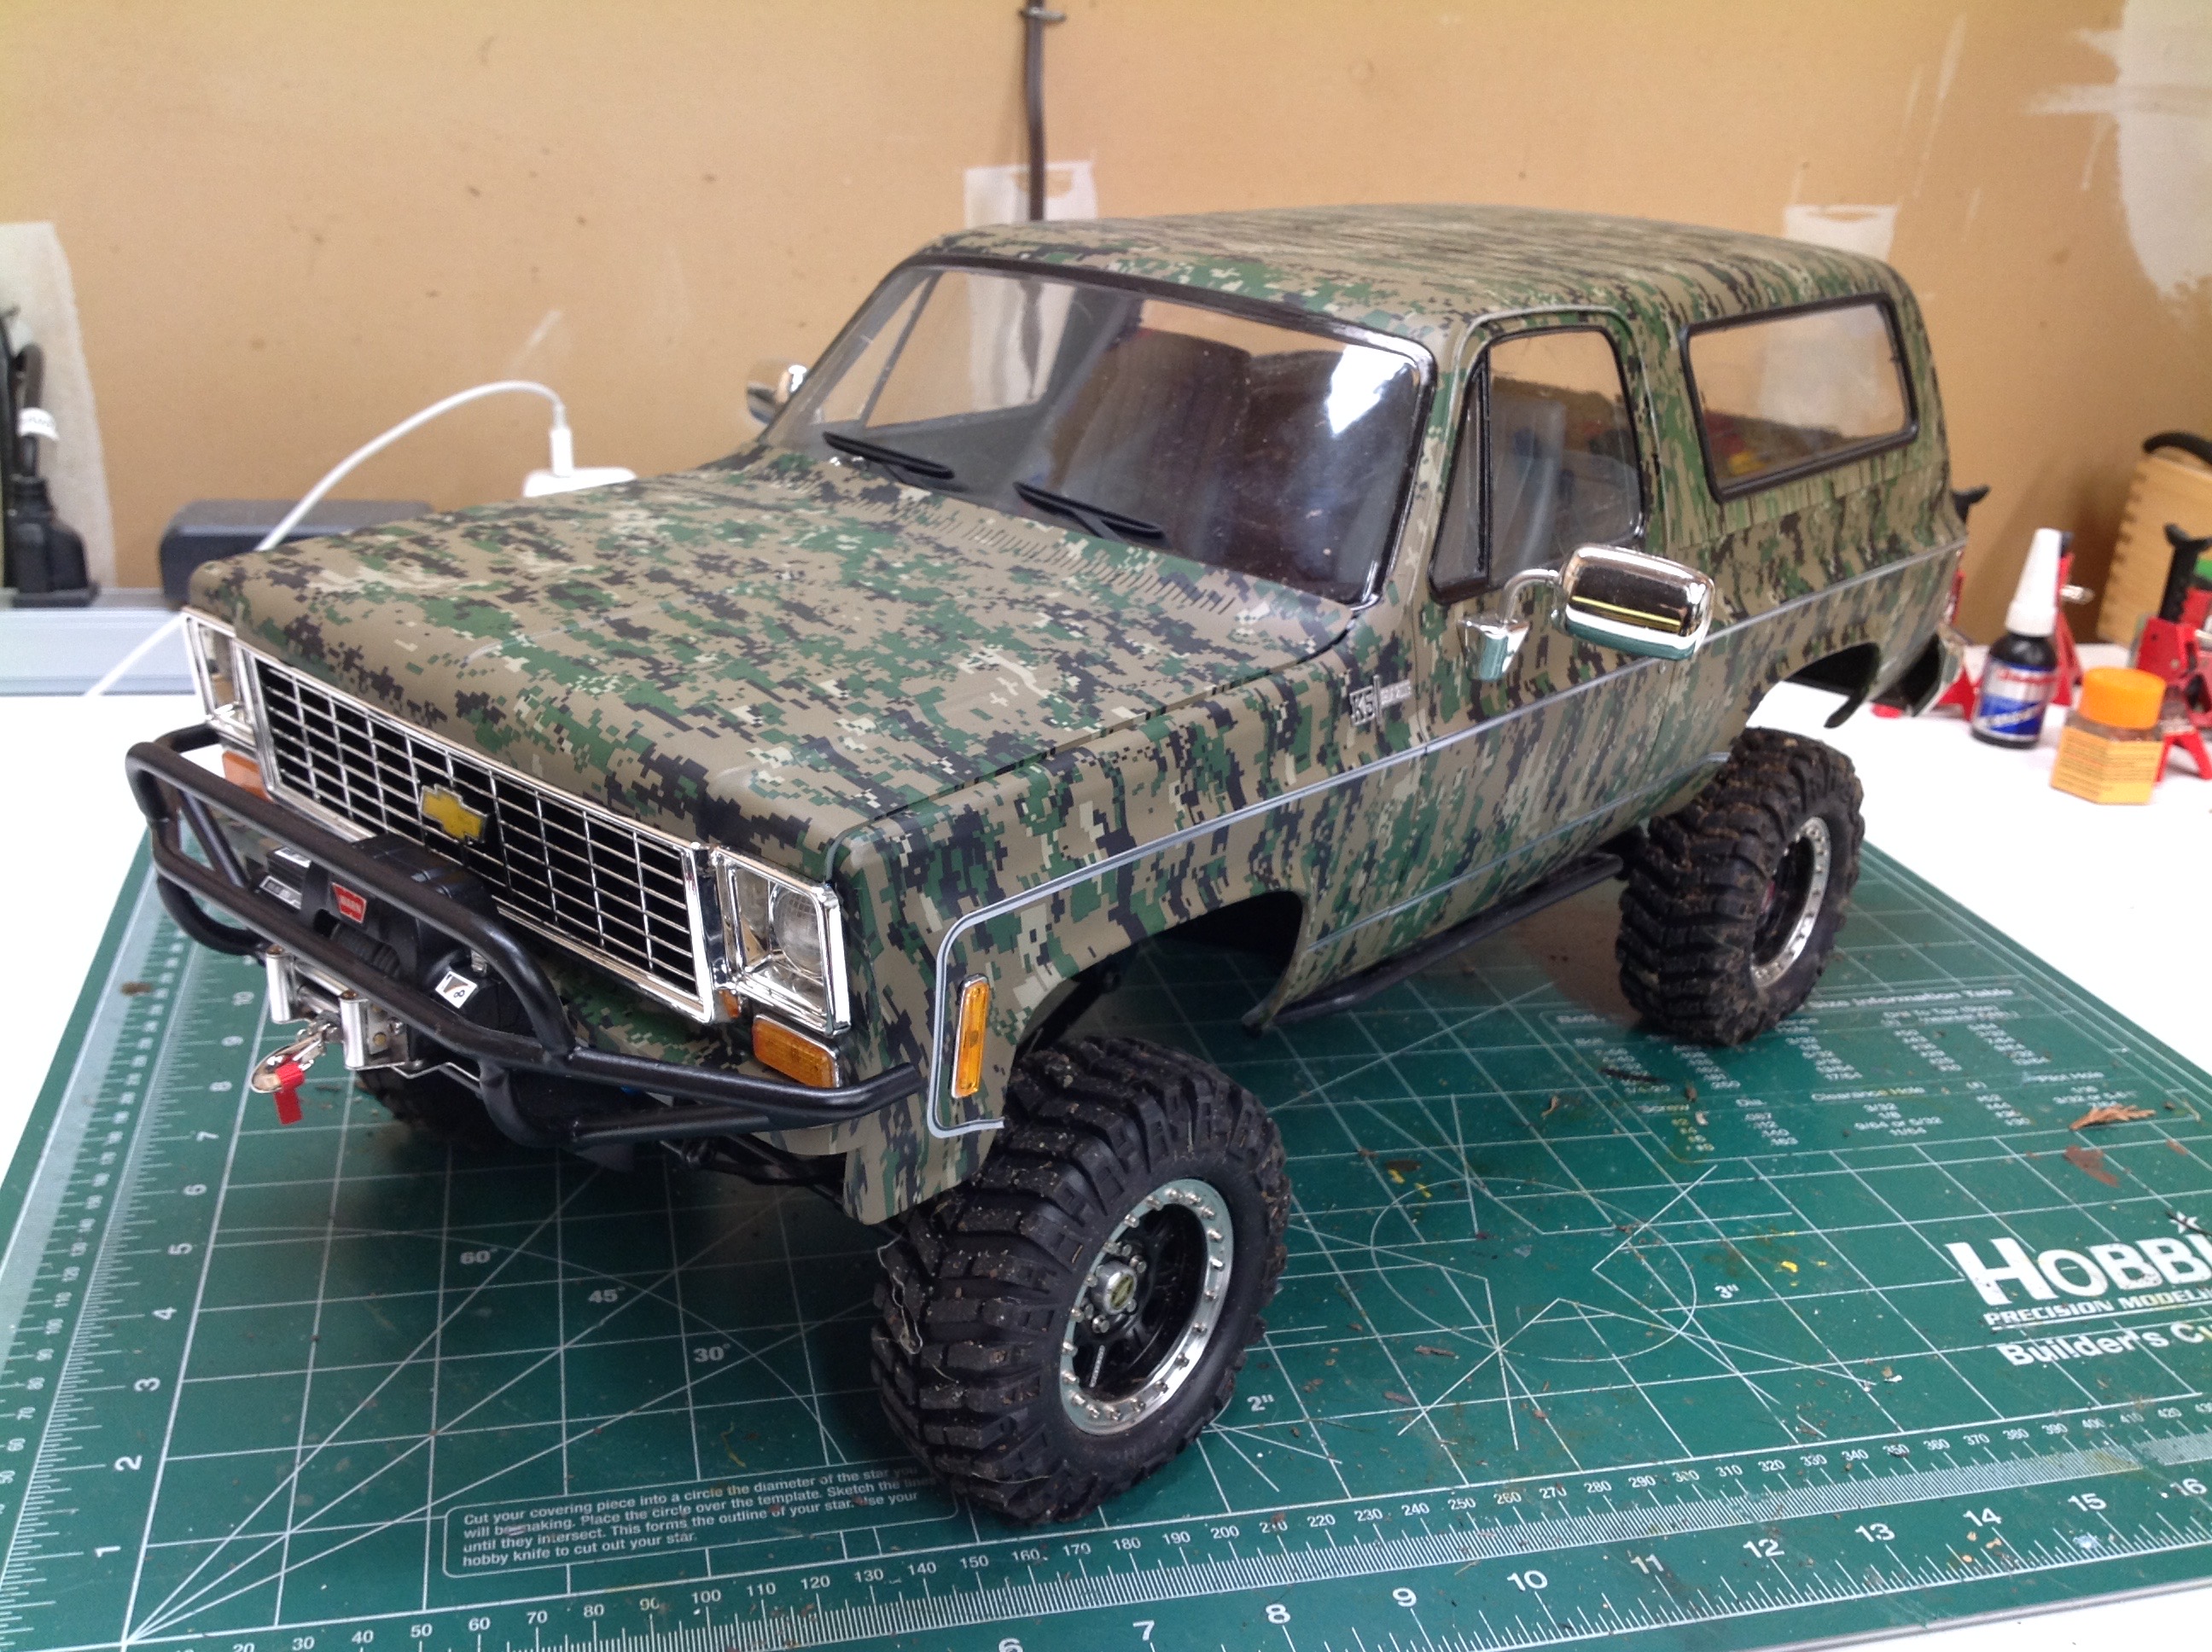
RC4WD Blazer Project
Page 2: Upgrades!
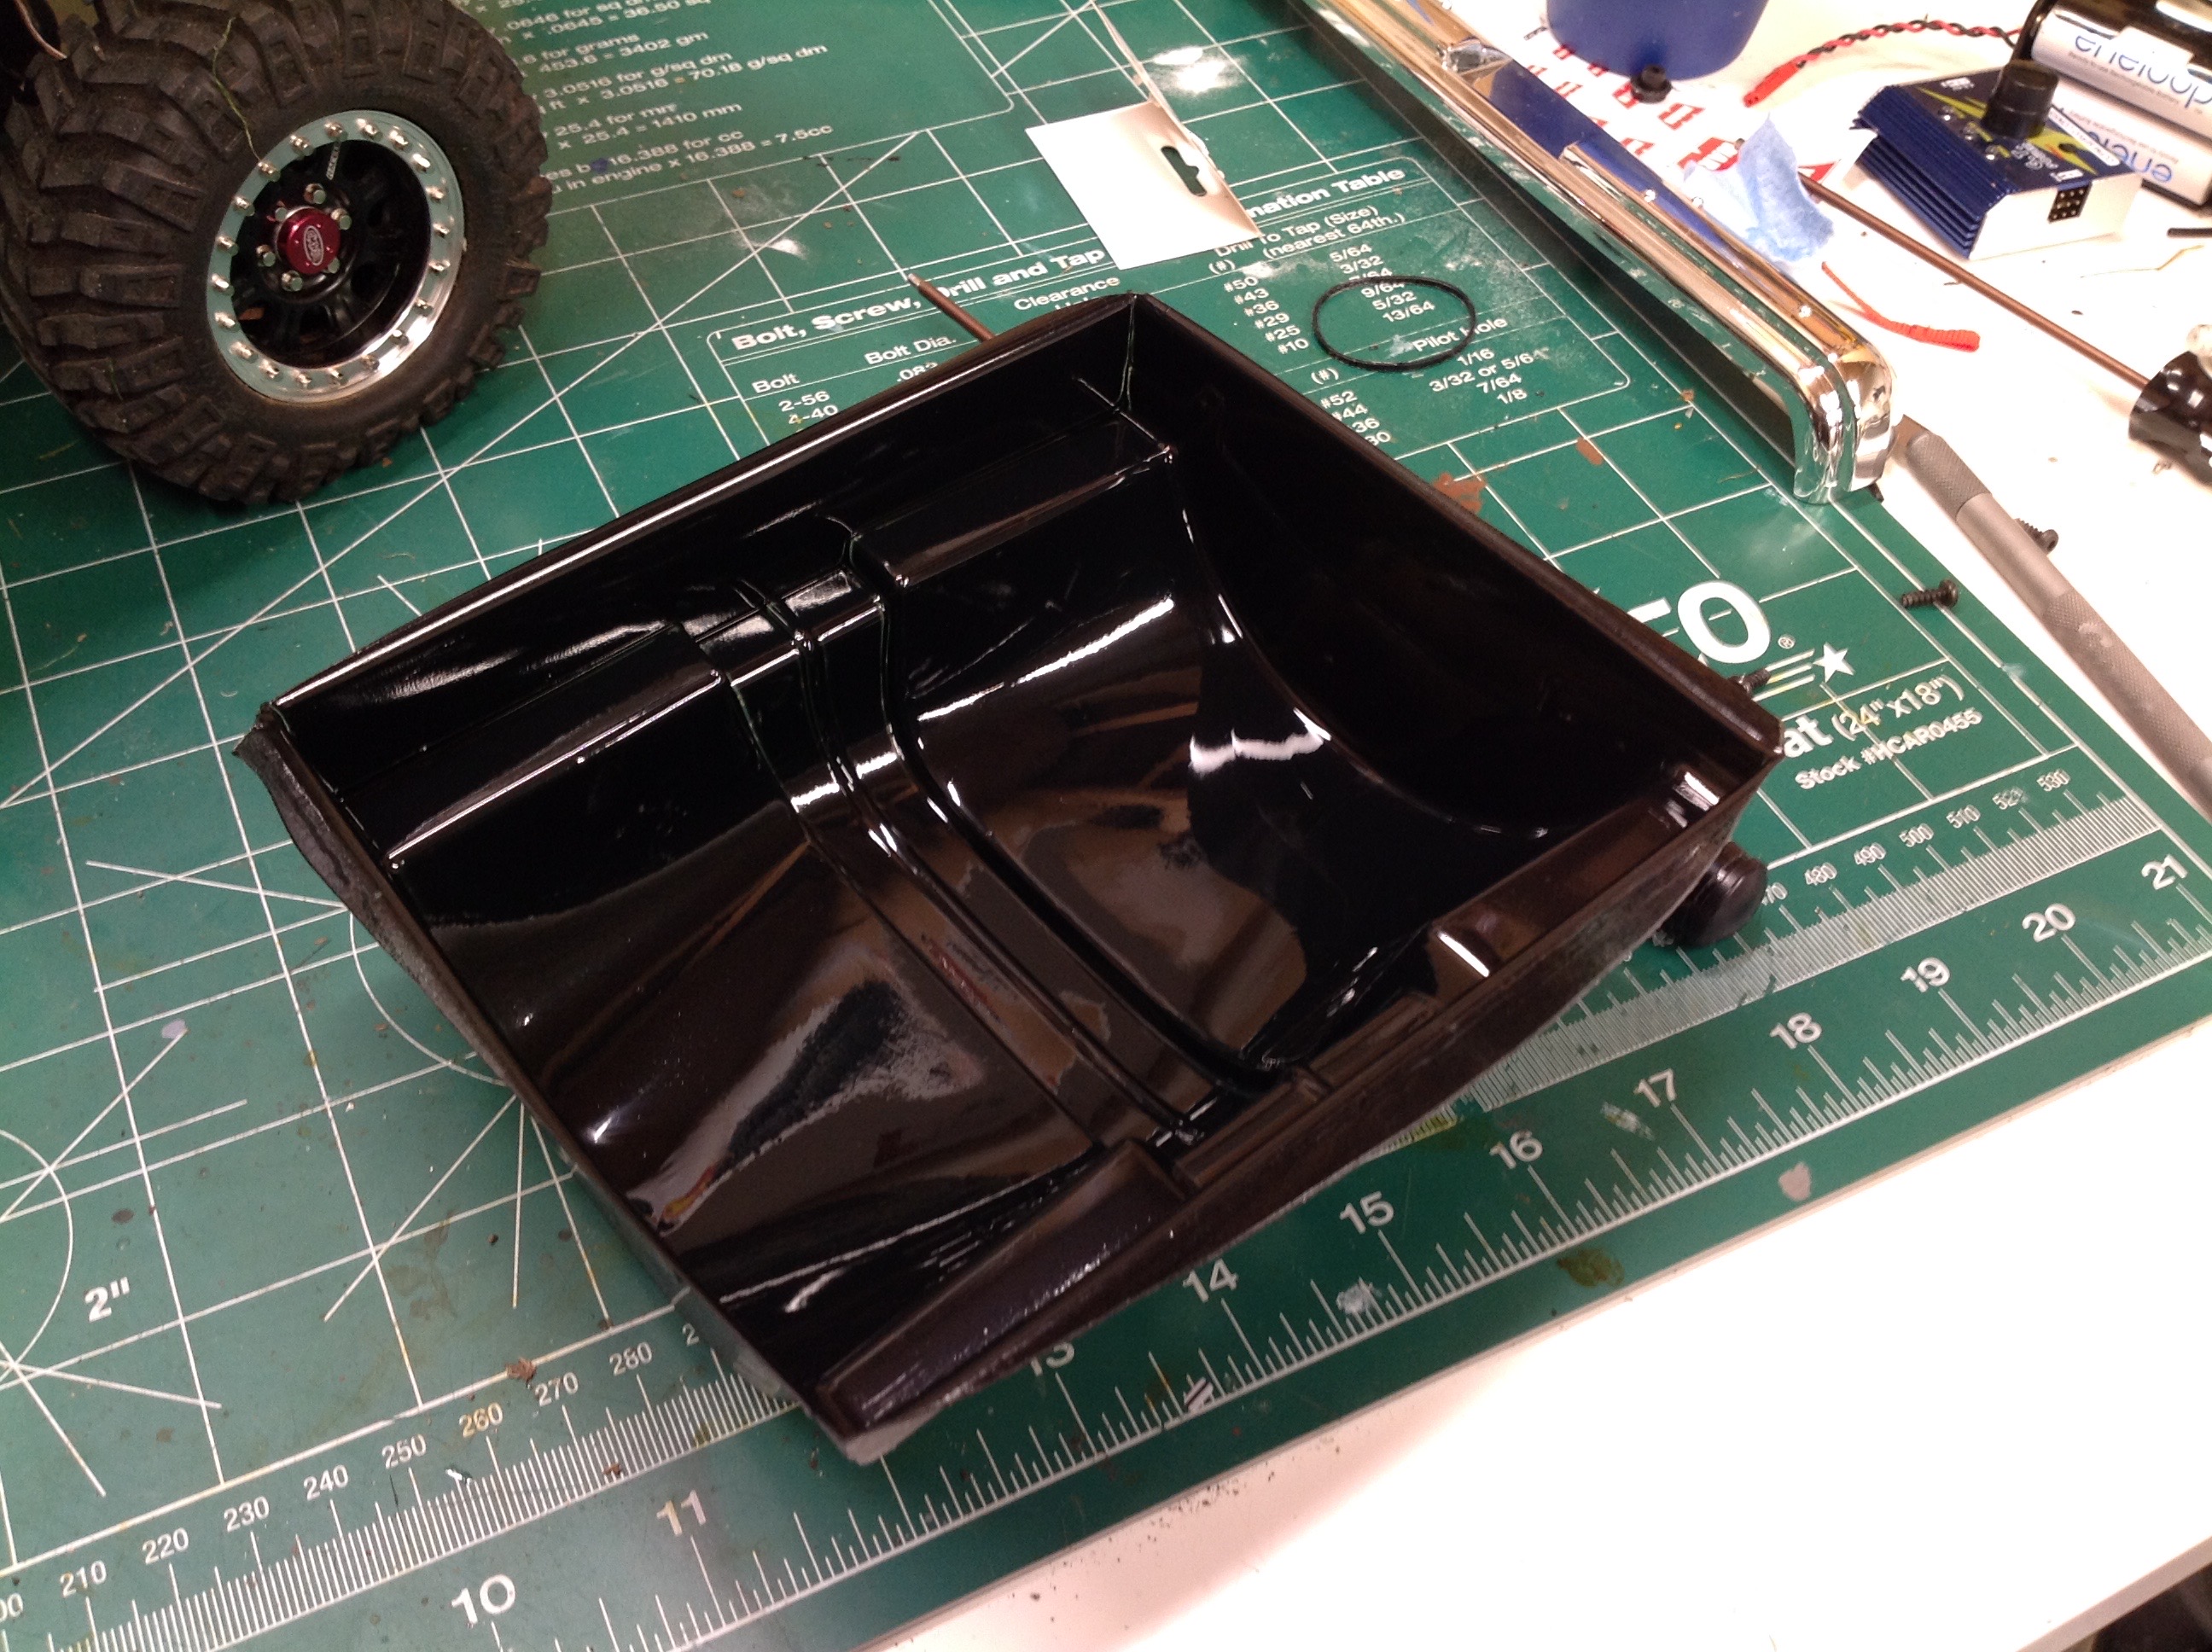
The box in which the separate Blazer body is packaged is about the
same size and the whole RTR truck. Unlike the RTR though, this
body comes completely unassembled and includes quite a large number of
molded parts as shown.
Construction of the body is done almost entirely with hardware rather
than adhesives which is a good thing for a truck that might roll
over. Working features include an opening hood with metal hinges,
an opening tail gate, and a removable topper. The doors do not
open. There are light buckets front and rear. The interior
includes front seats, a center console, and a detailed dash. The
camouflage was pre-painted, but I added pin striping, black outlines
around the windows, and a black backing to the grille.
The first and easiest upgrade is a lighting kit. This is a set
from RC4WD specfically made for this body. It includes 1 set of
white headlights, 3 sets of orange marker lights, and 2 sets of red tail
lights. They simply plug into an open receiver channel and
therefore are on whenever the model is on. I used black duct tape
to fix the wires to the body and try to hide them.
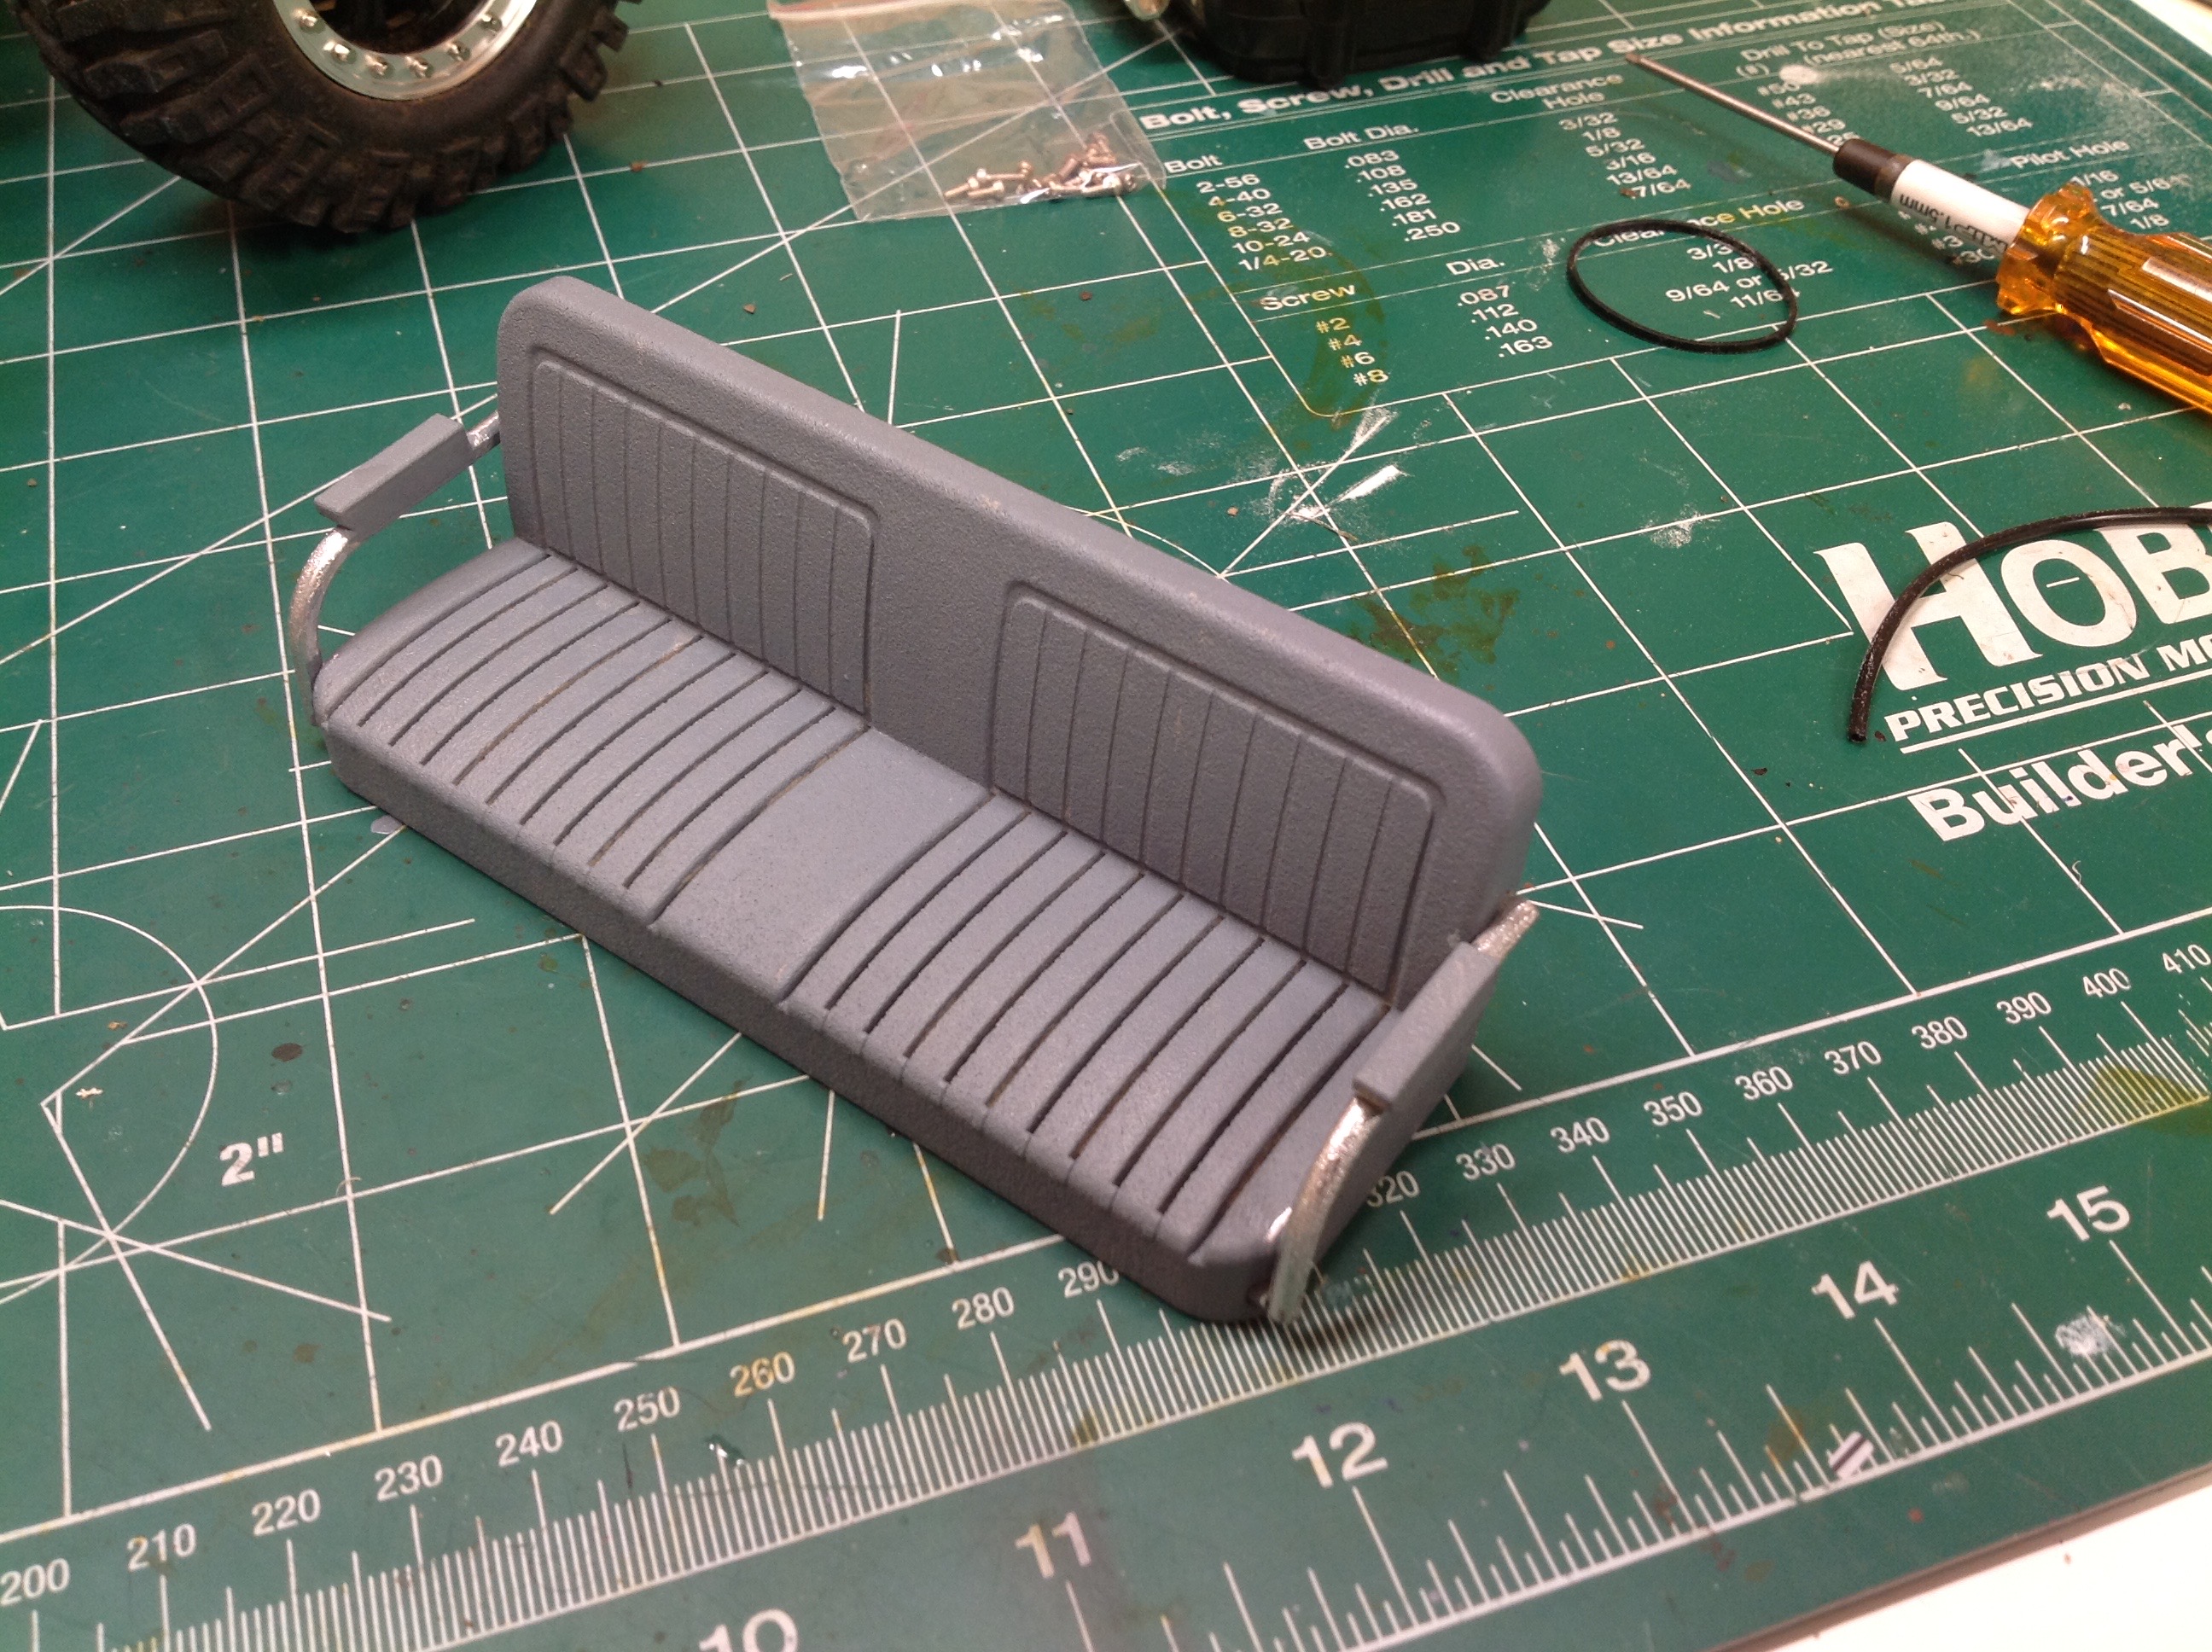
I found a 3D printed rear seat on Shapeways and painted it to match the
interior. It is simply bonded to the rear bed. It looks a
bit odd this way with the topper off, but looks good through the window
later.
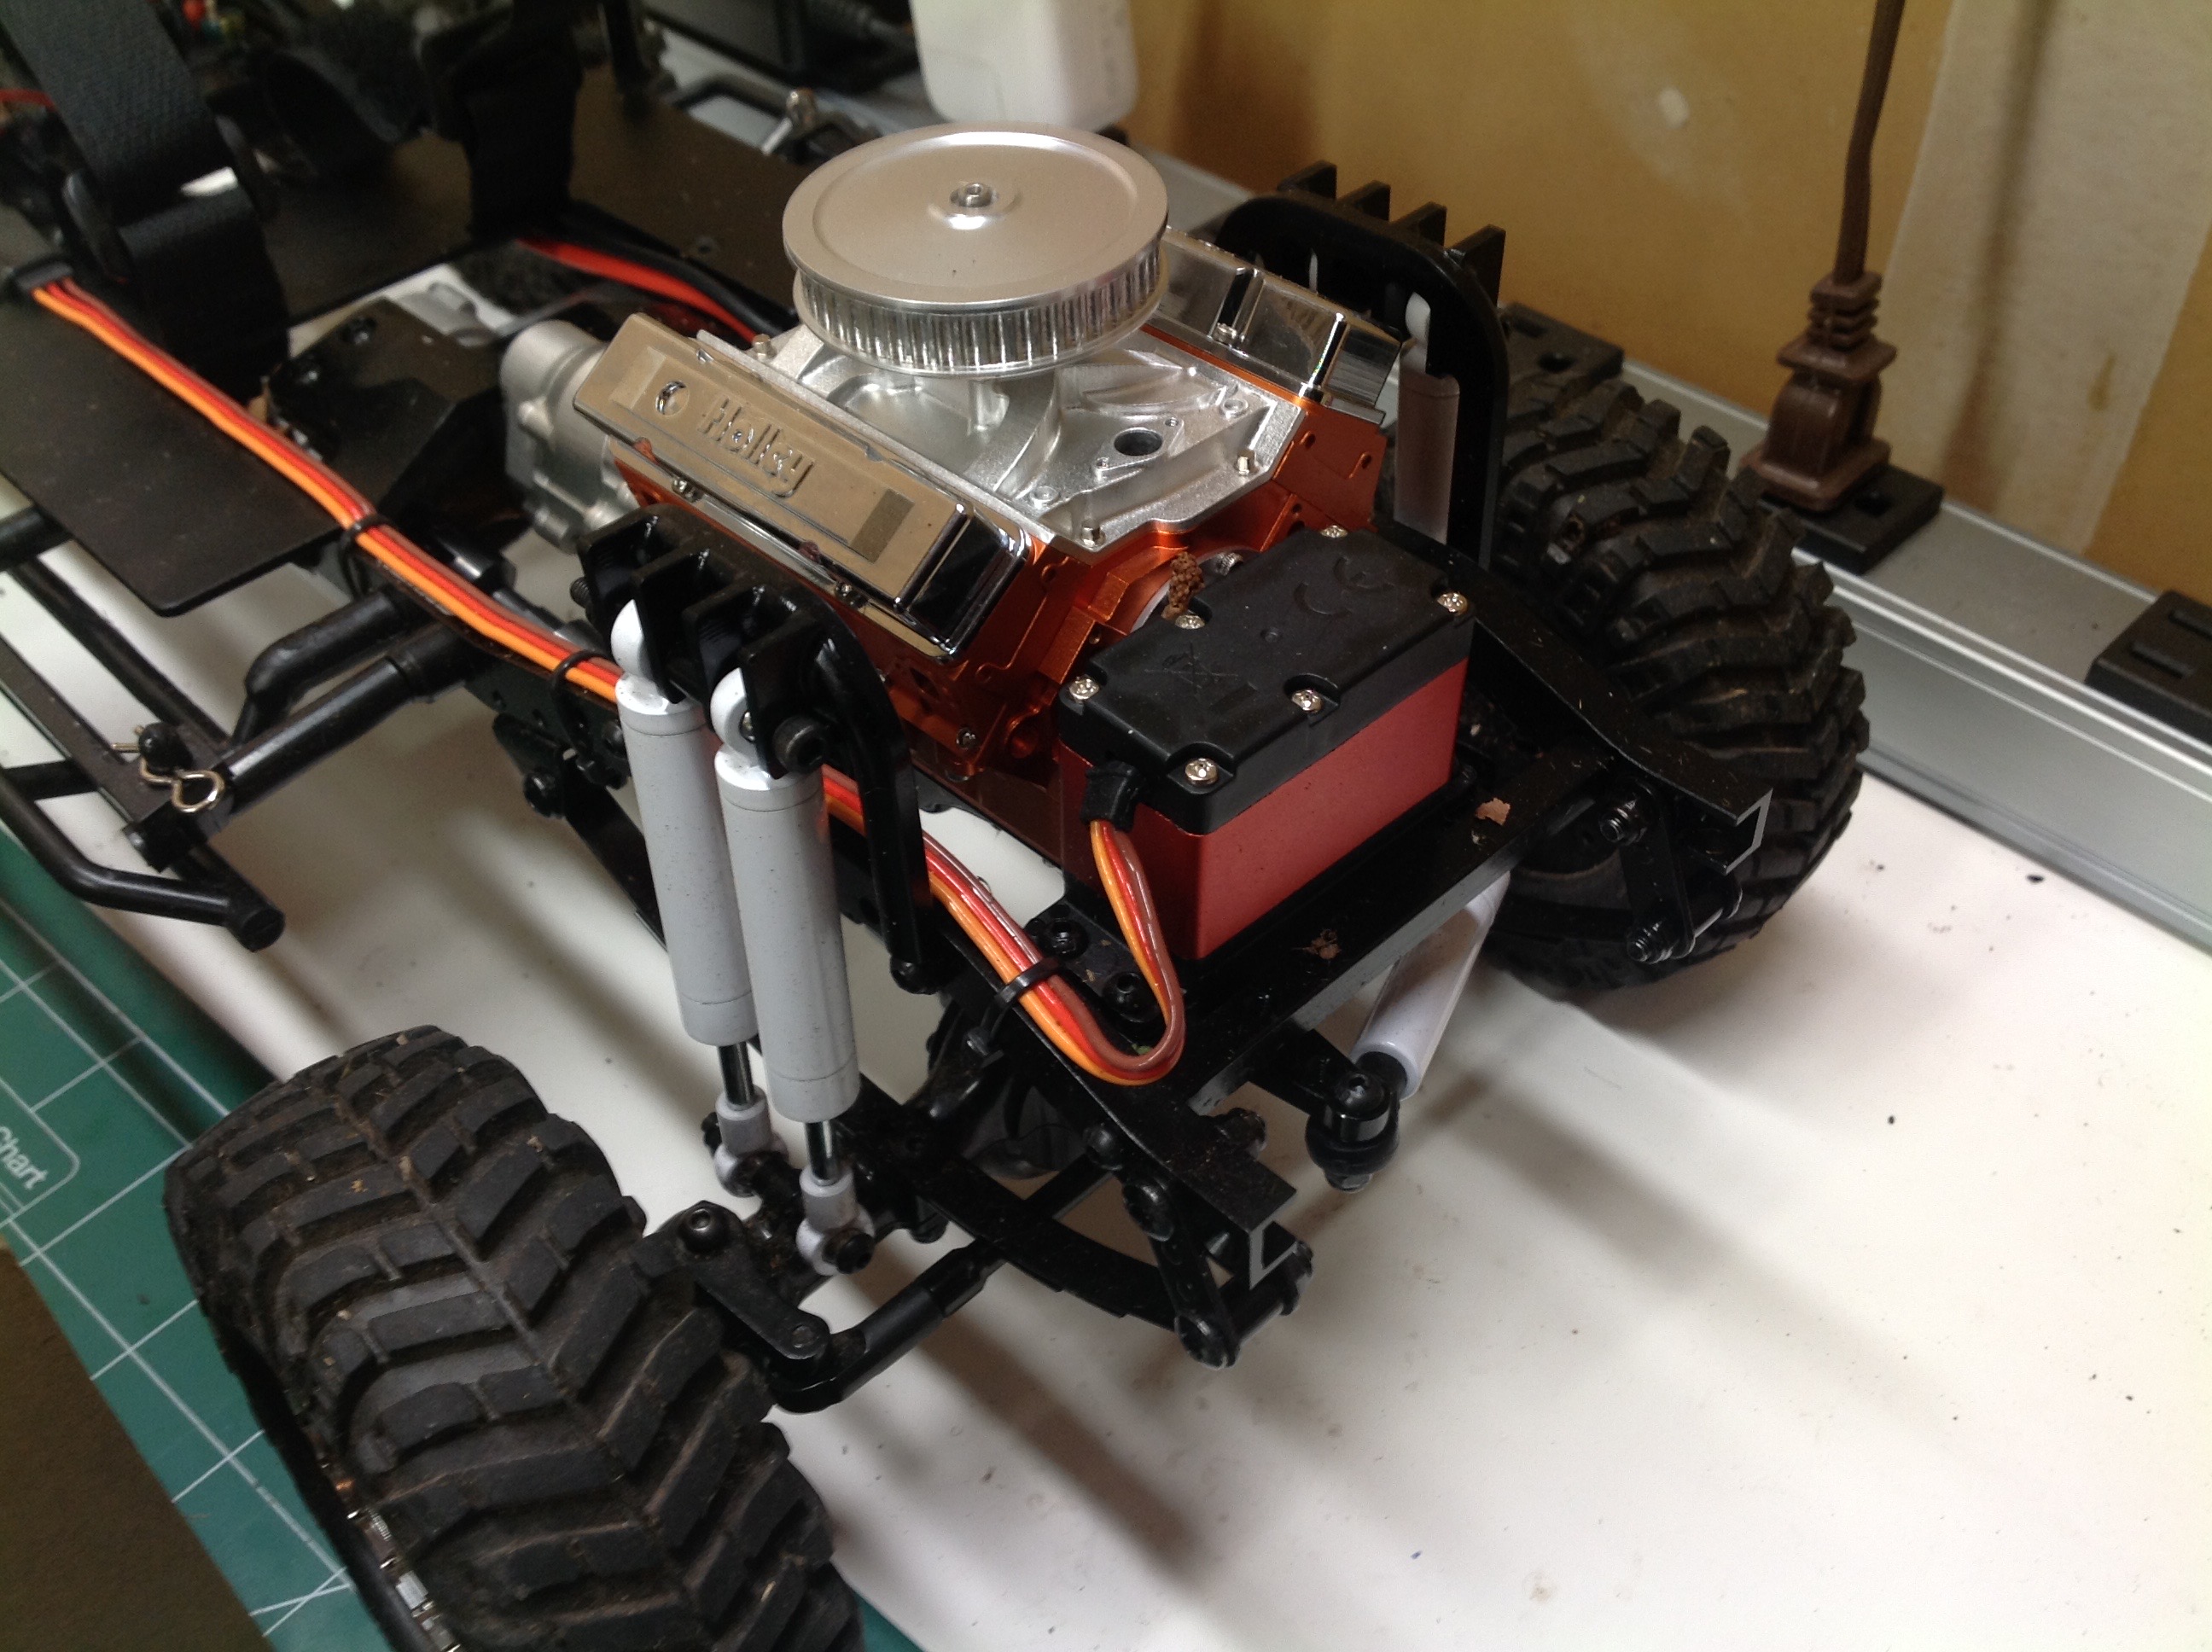
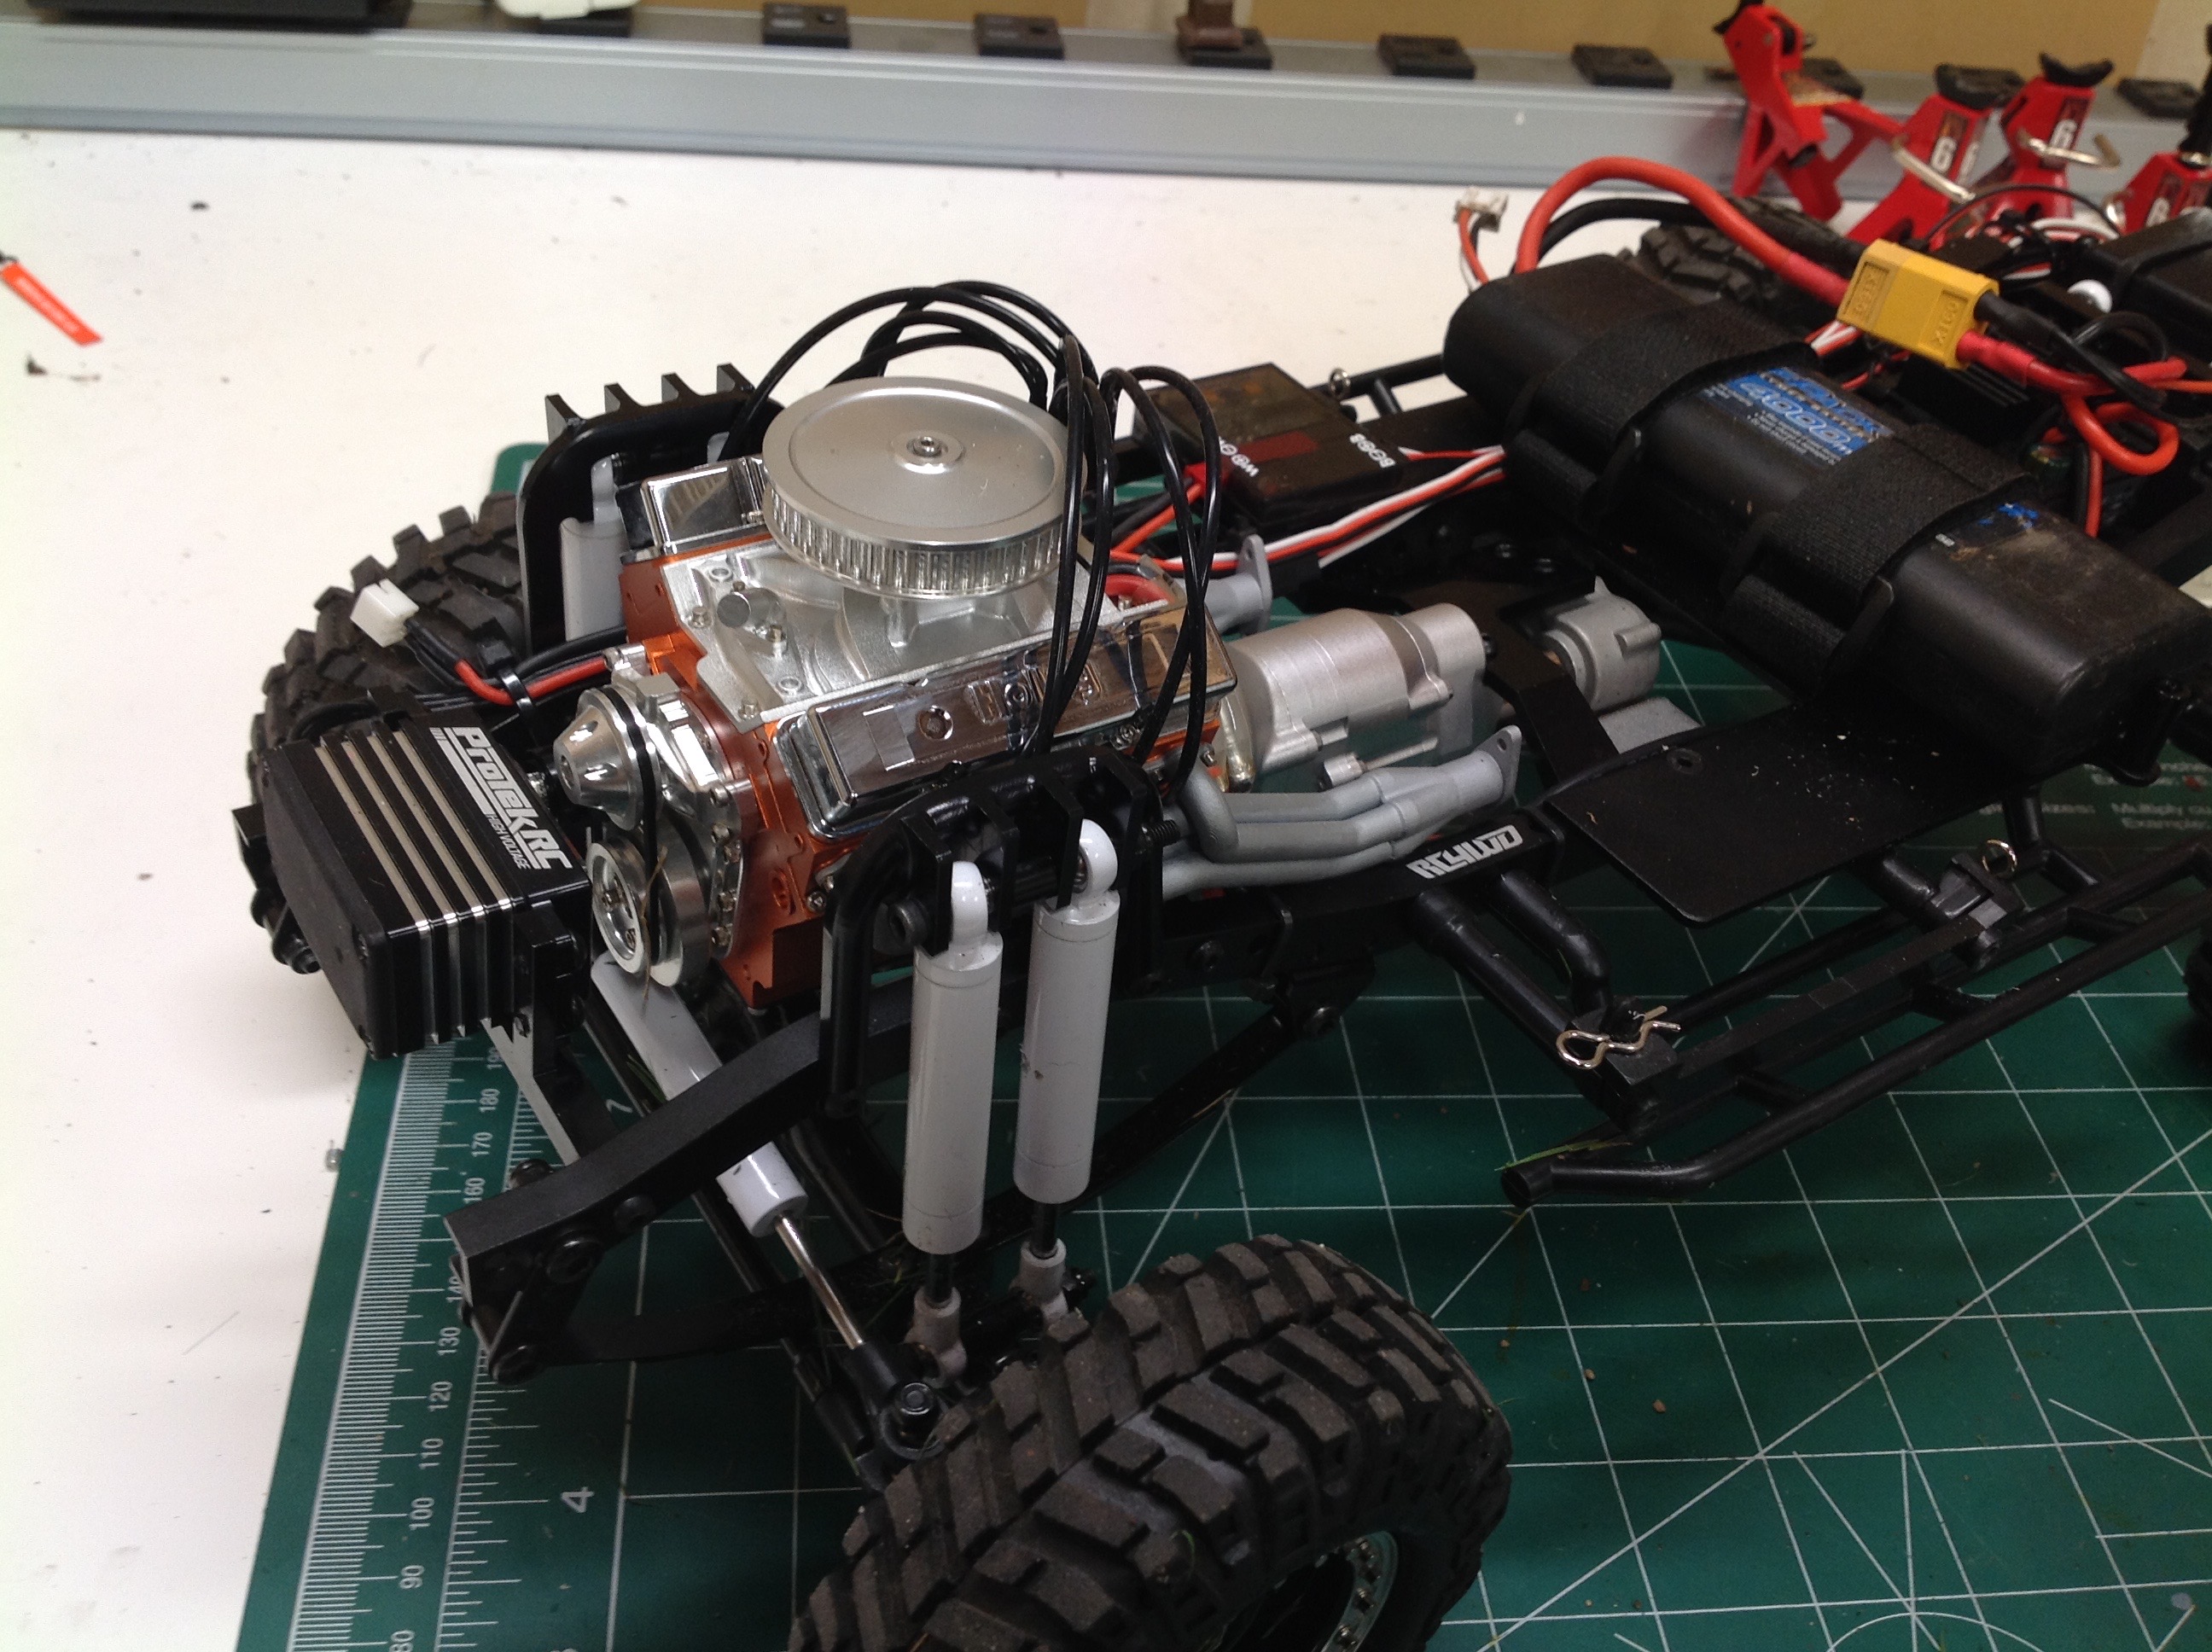
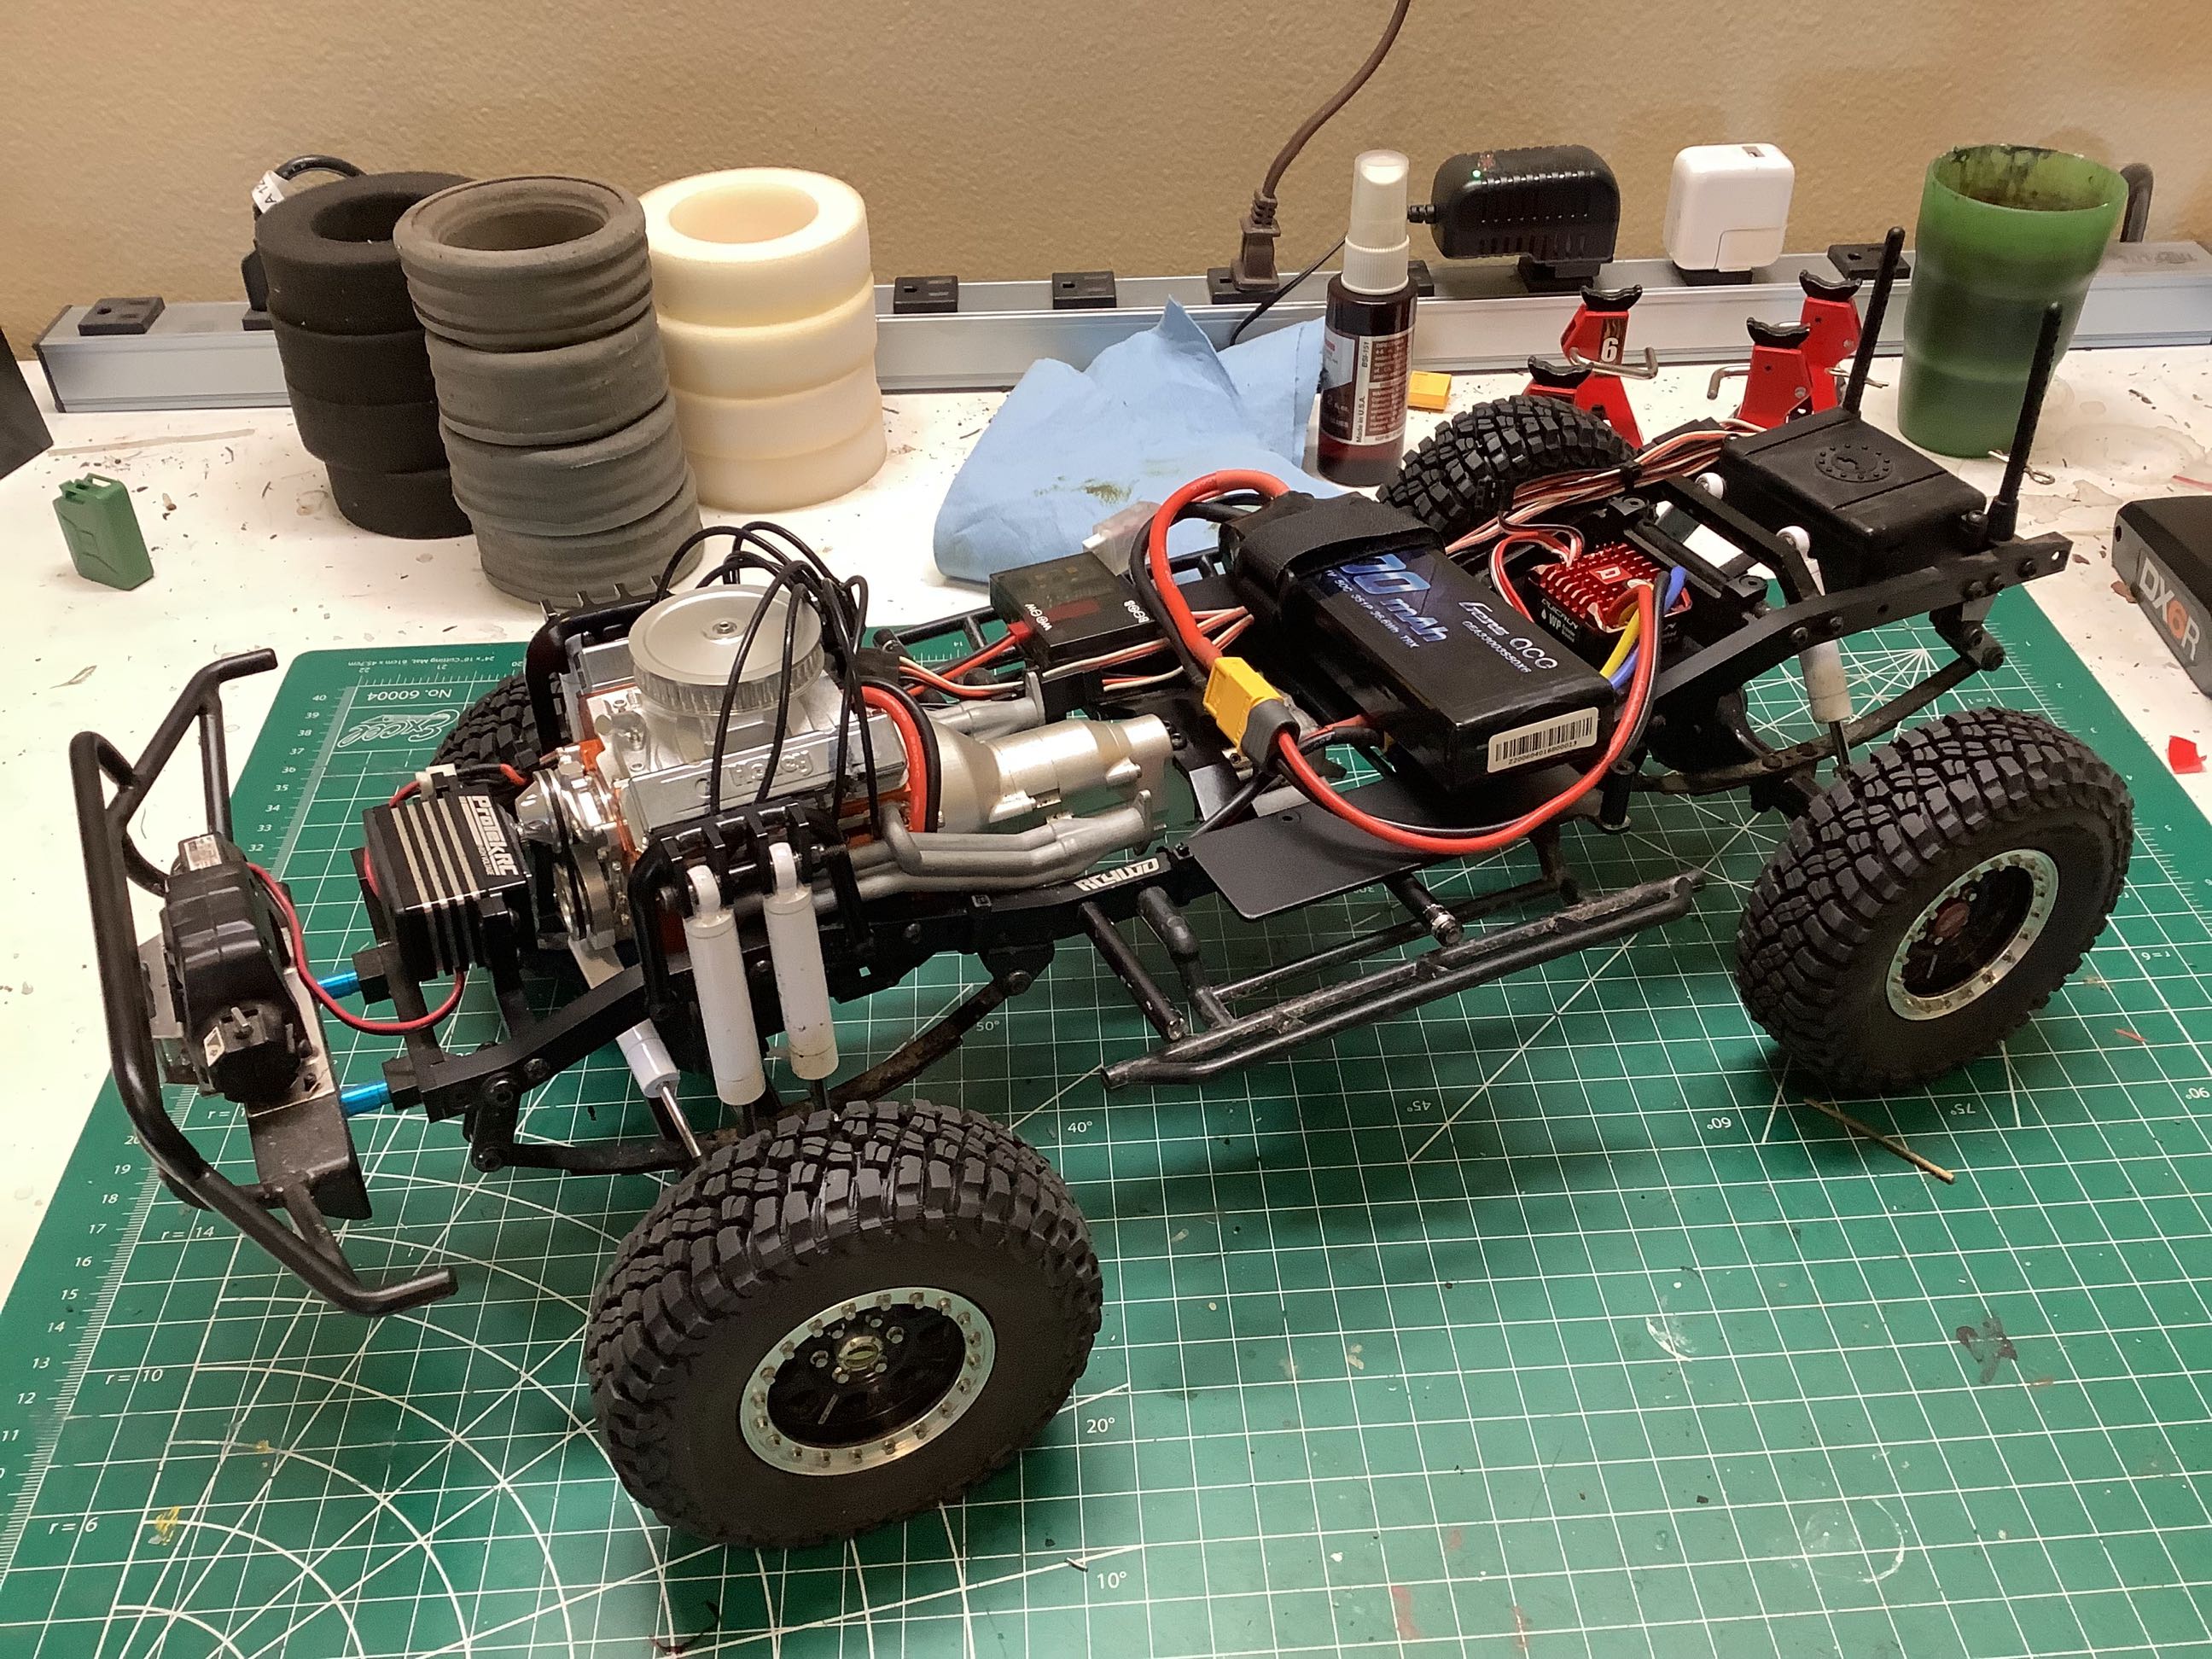
I always intended to add some more detail to the scale V-8, but a big
problem with that plan is the chassis mounted steering servo. The
way it is mounted it sits right in front of the engine where pulleys and
accessories would go. I rotated the servo mount 90 degrees to
give me more room. The problem with this change is that the servo
then interferes with the bumper so I chose a low profile servo from
Protek. The stock servo has terrible torque so this was a
worthwhile upgrade even without the need for engine realism. To
power this servo I added a 10A BEC.
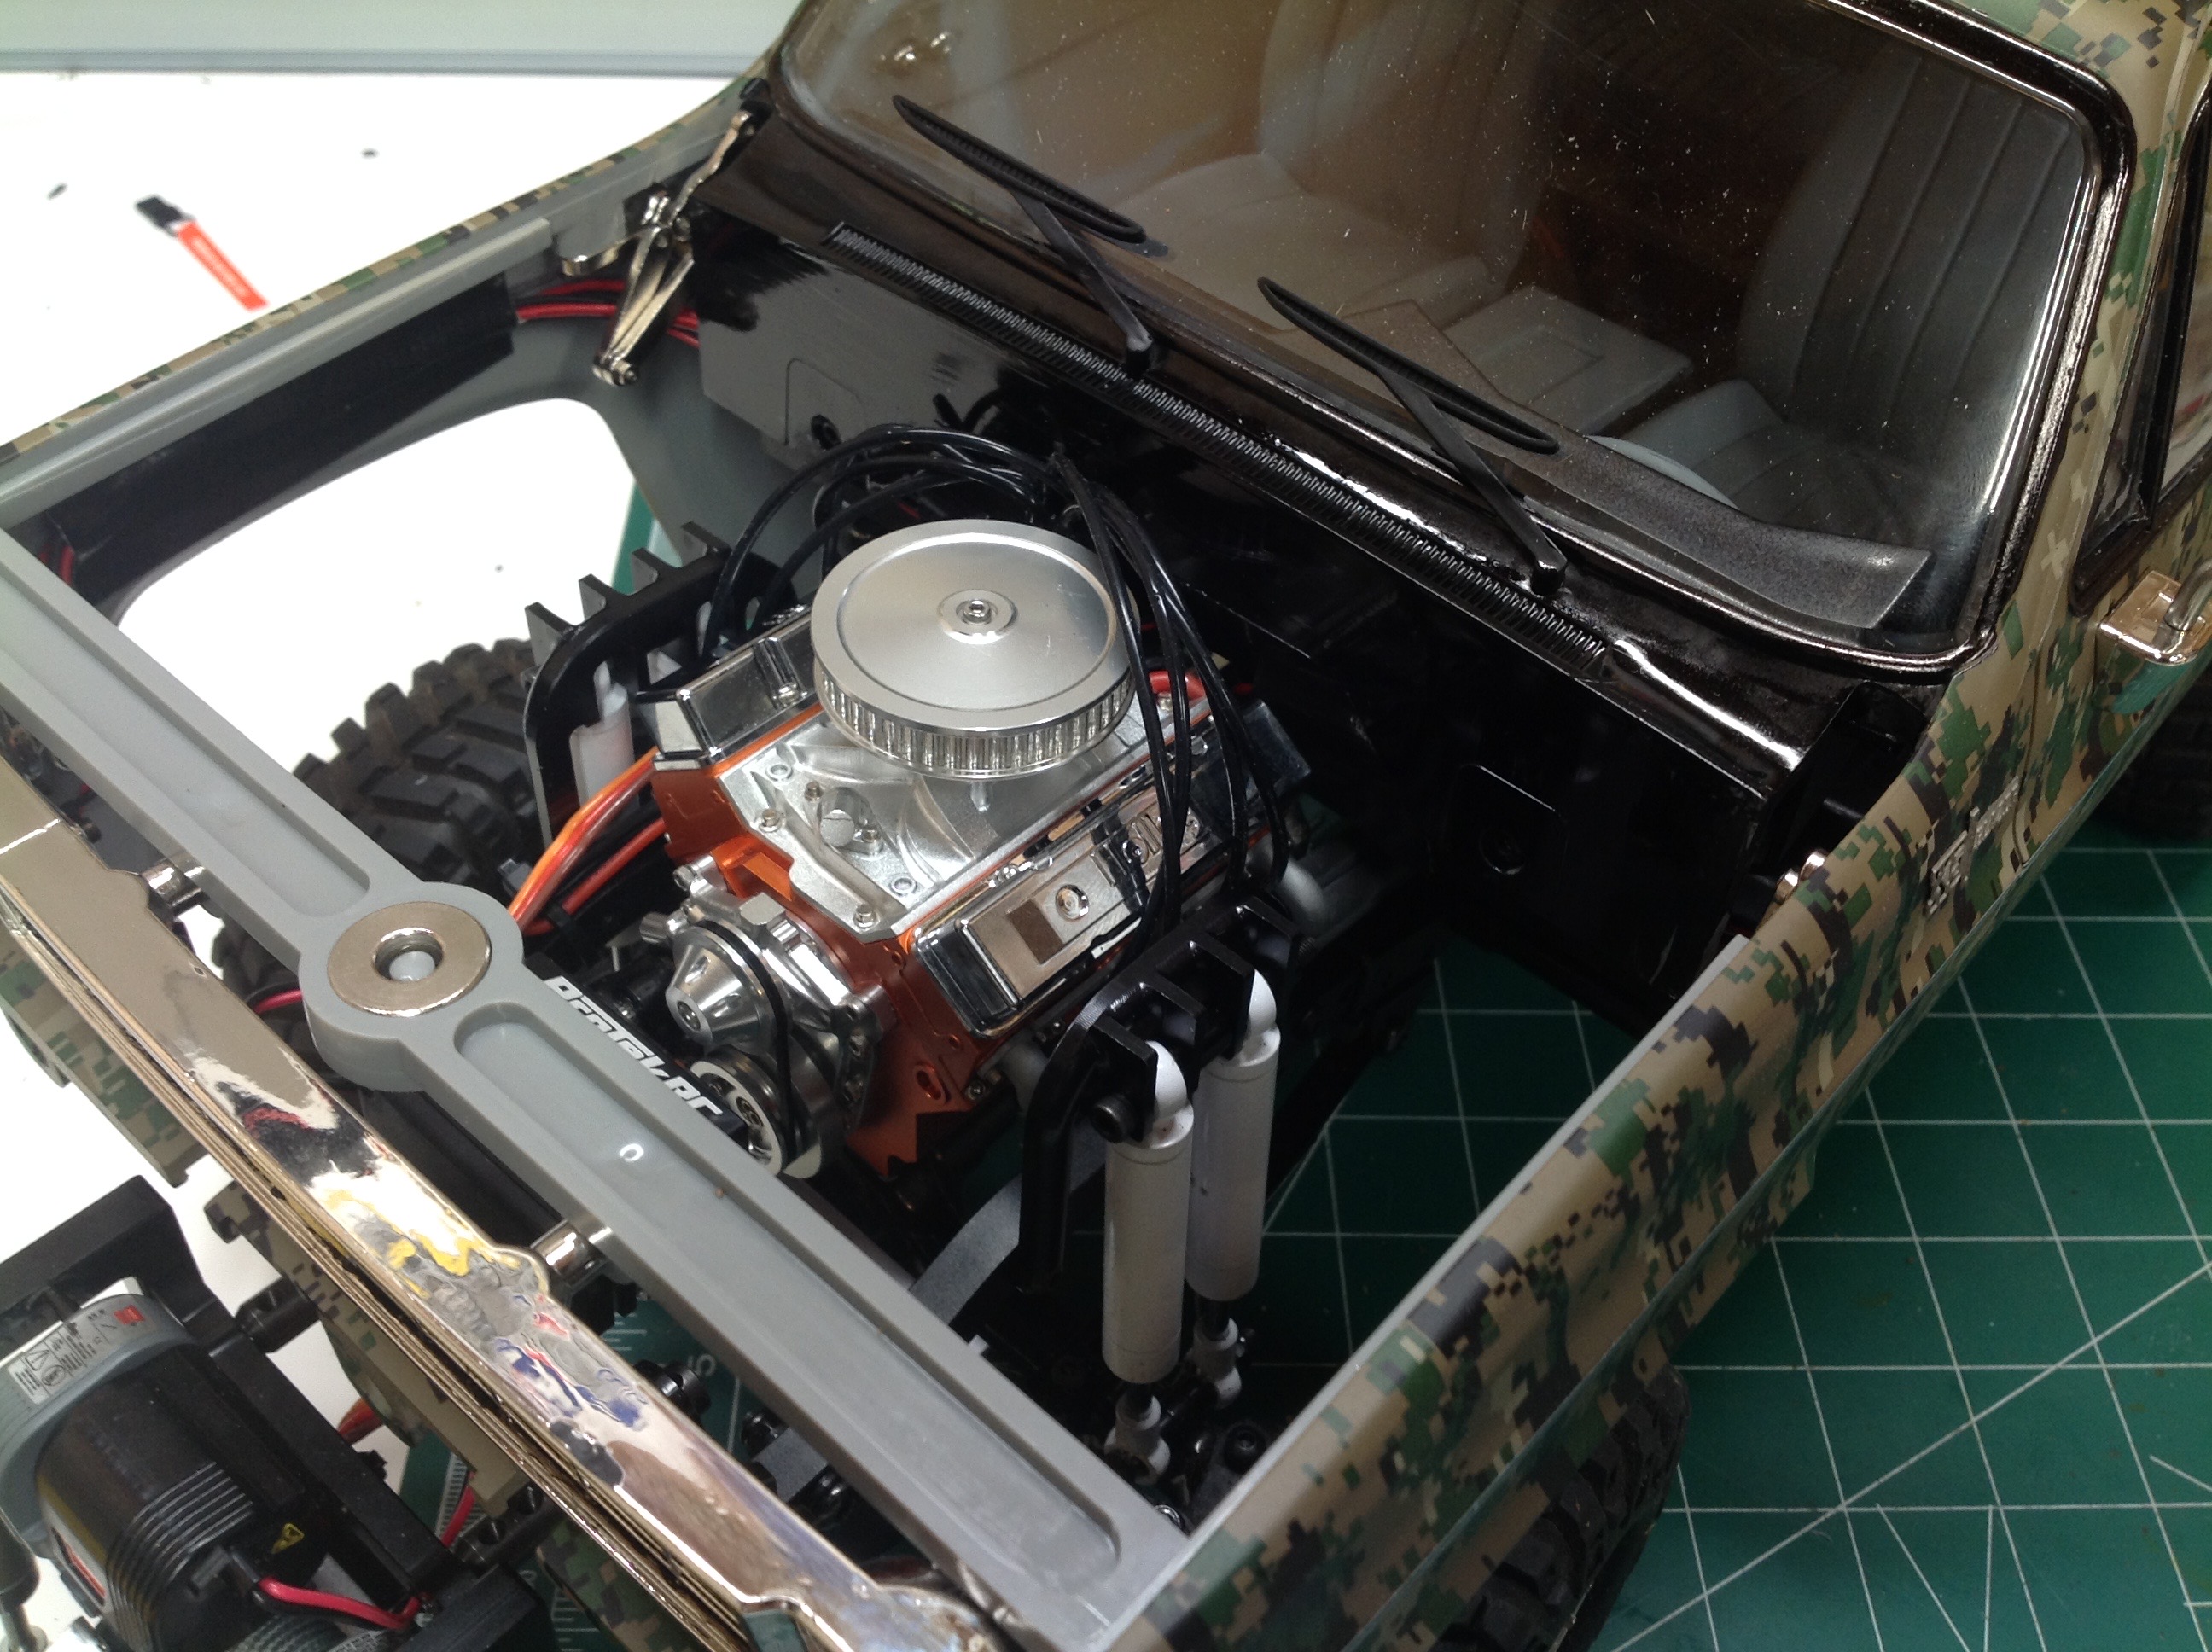
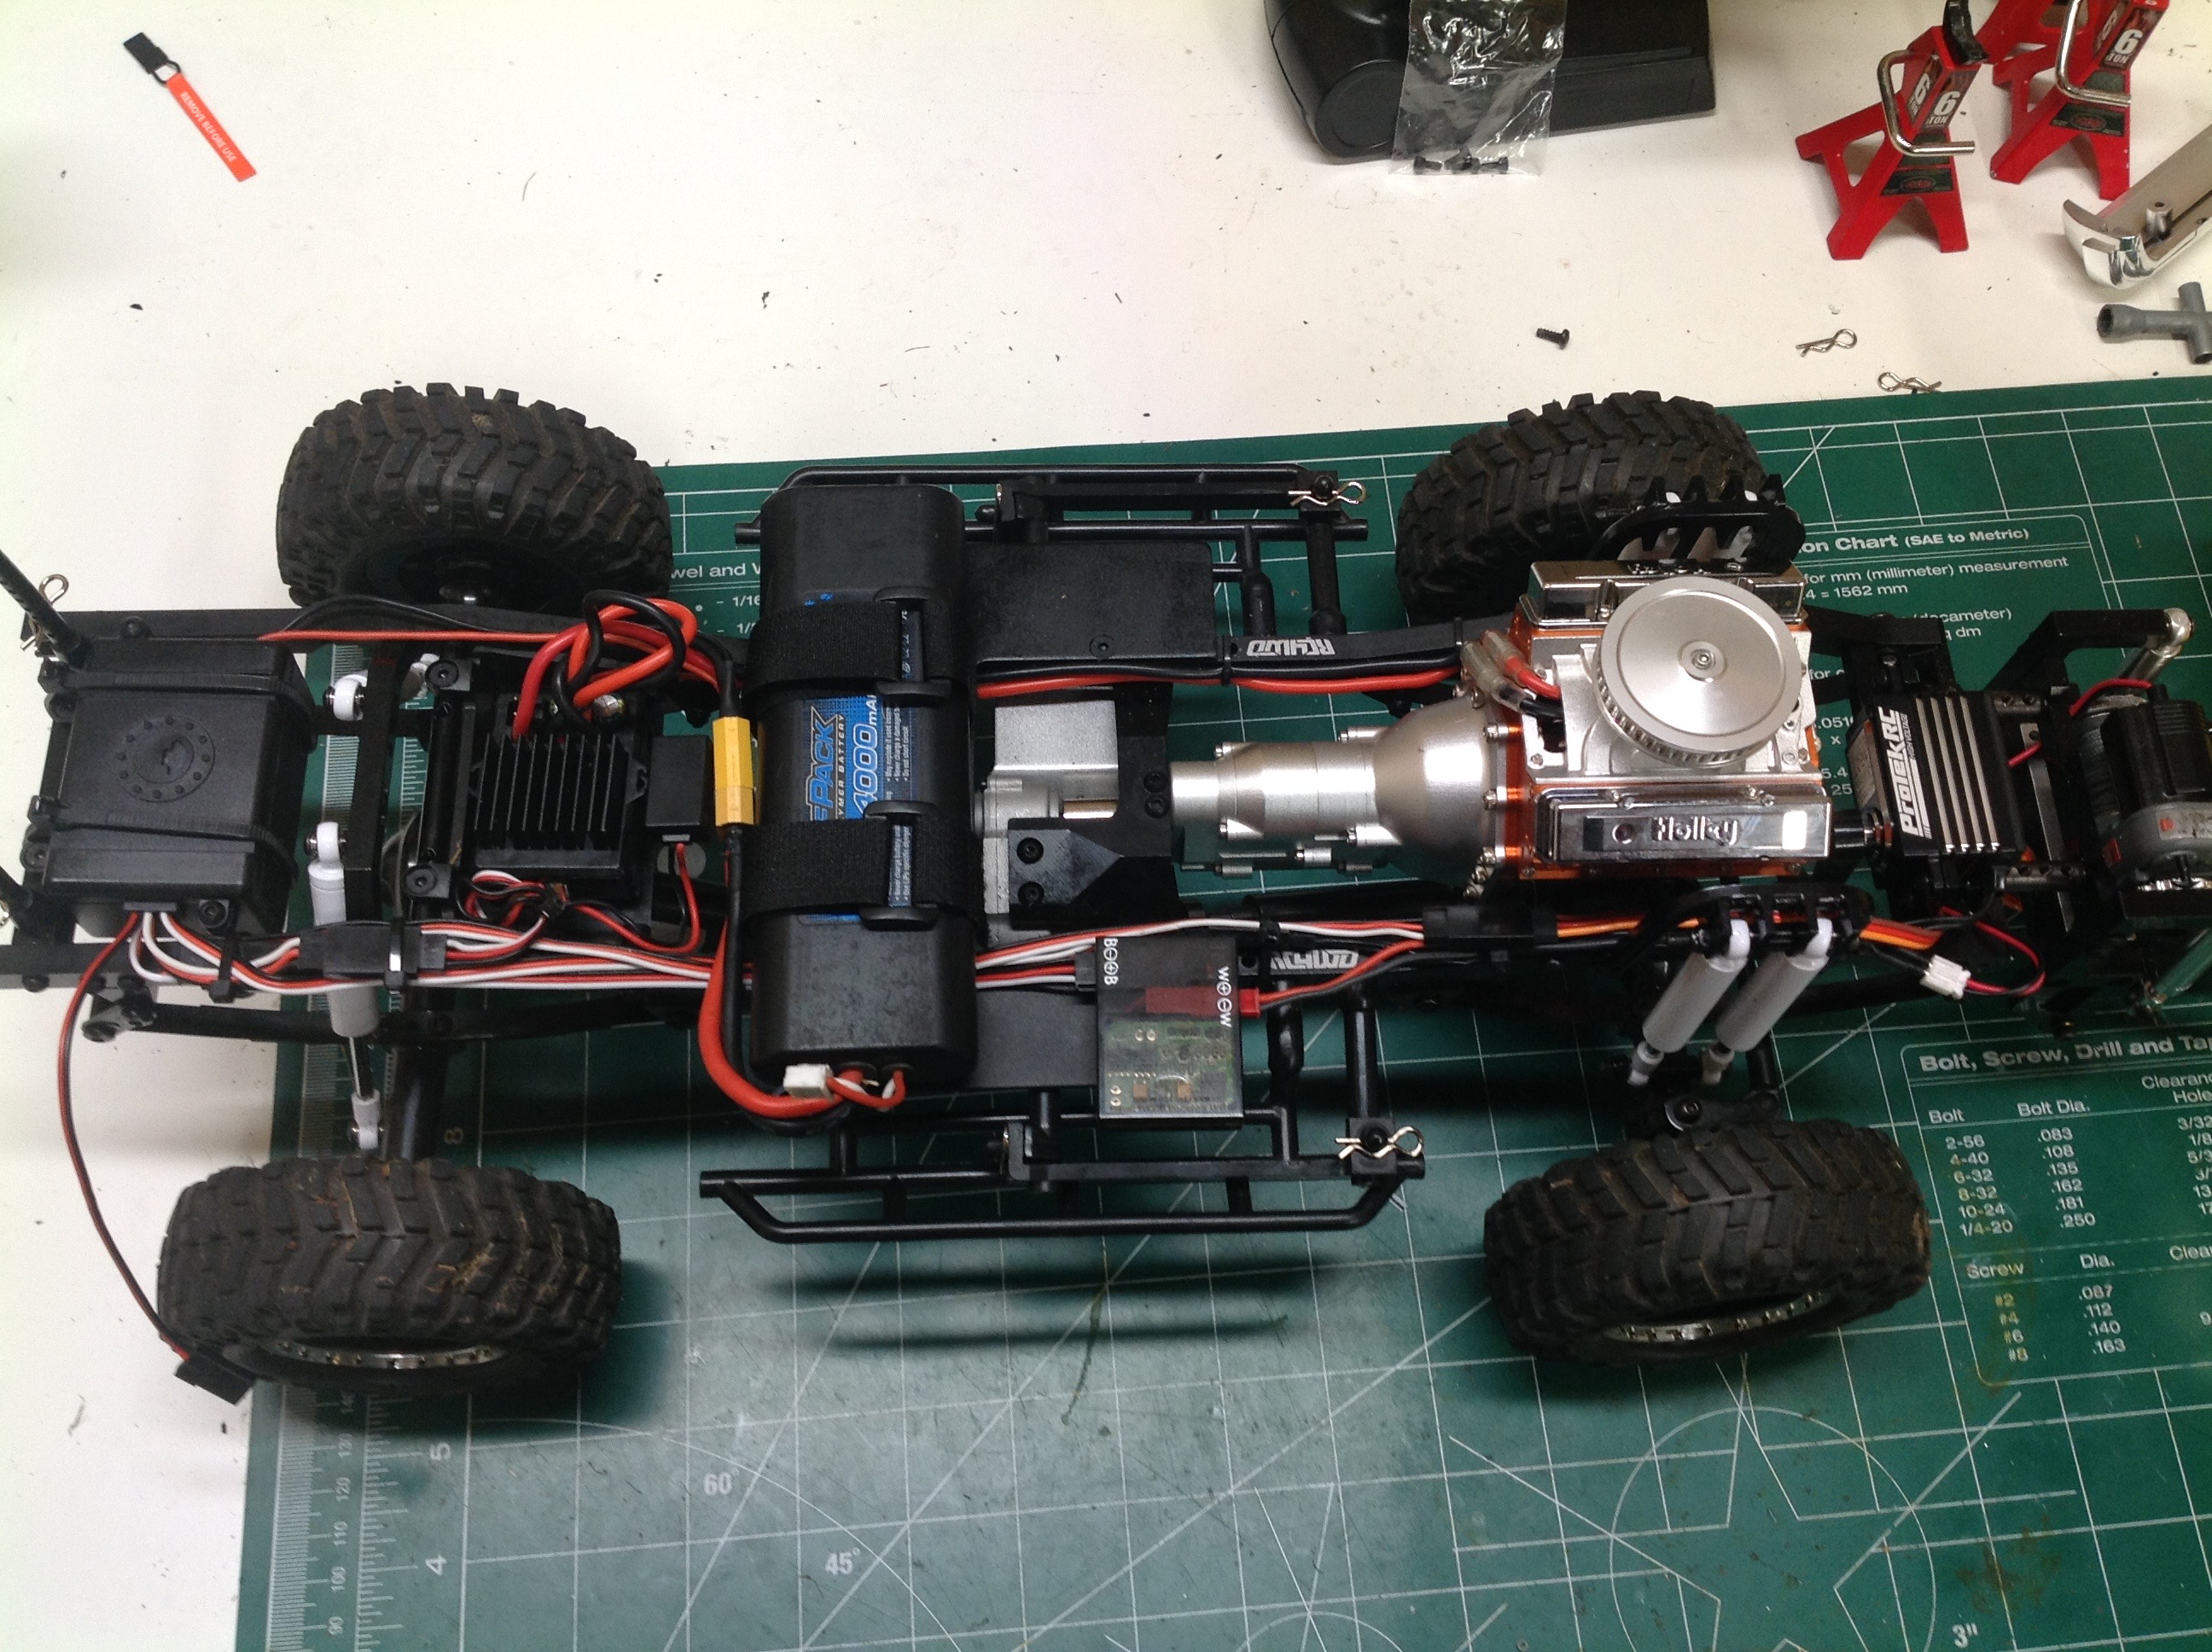
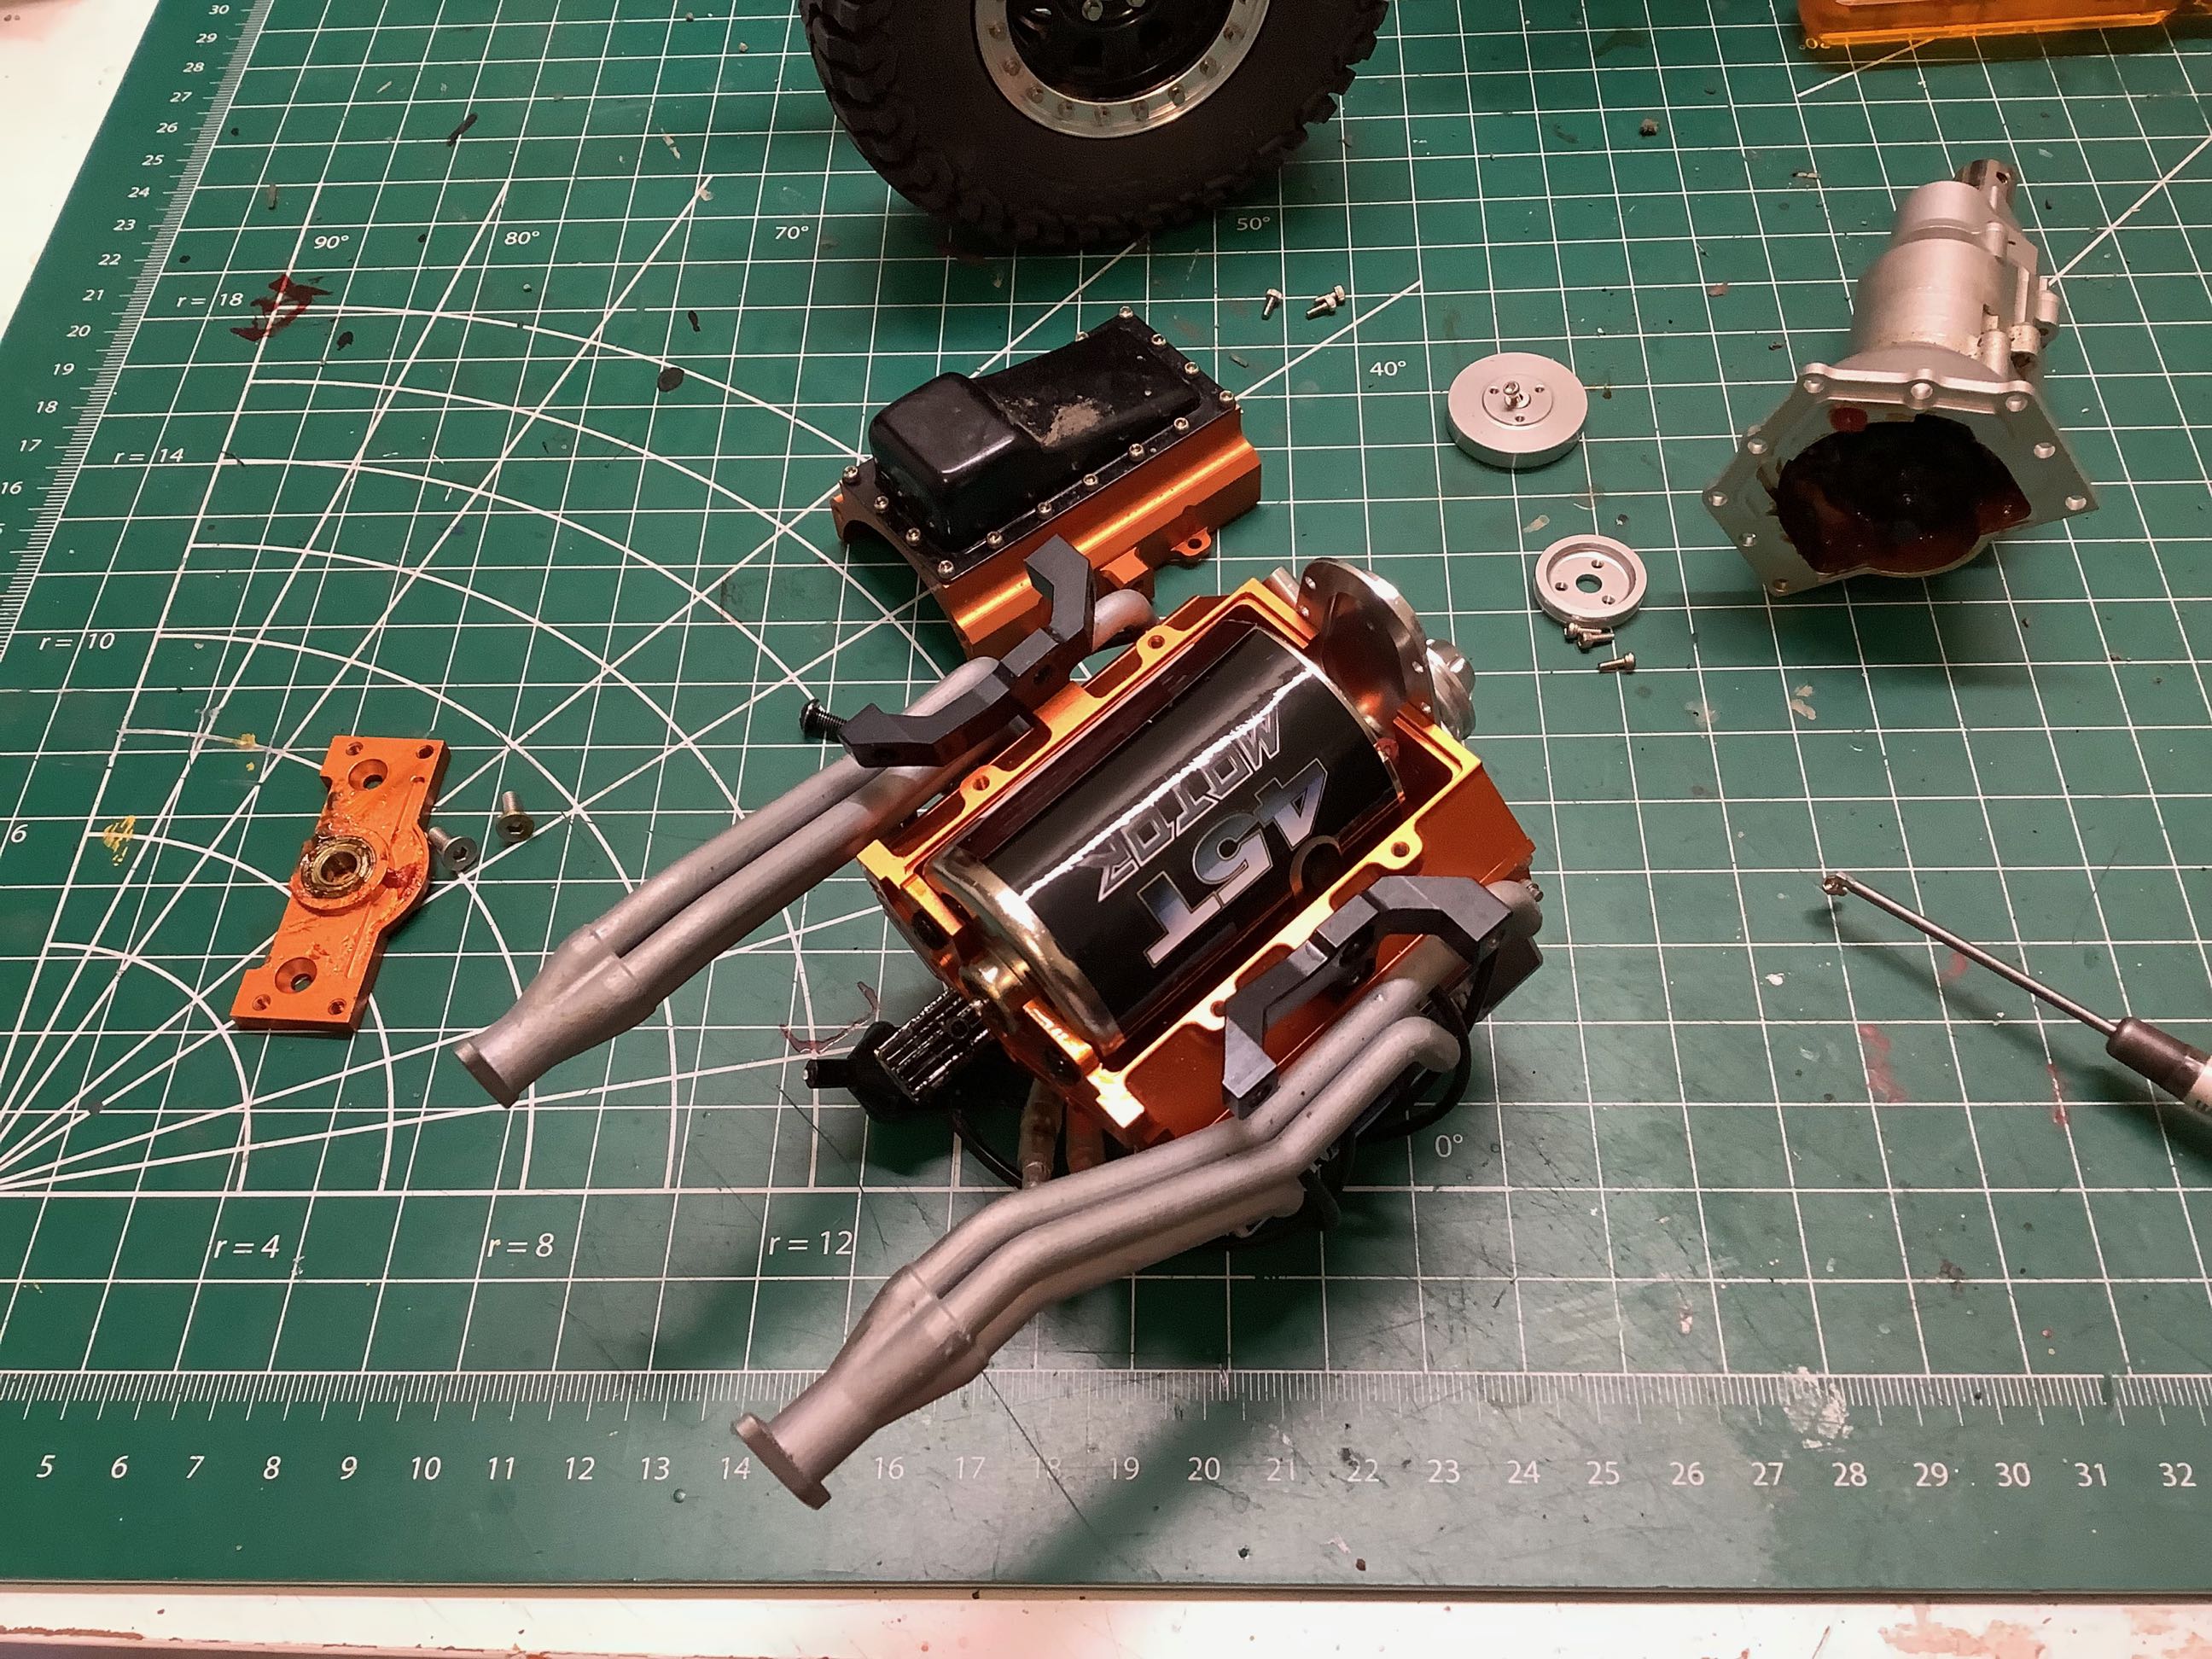
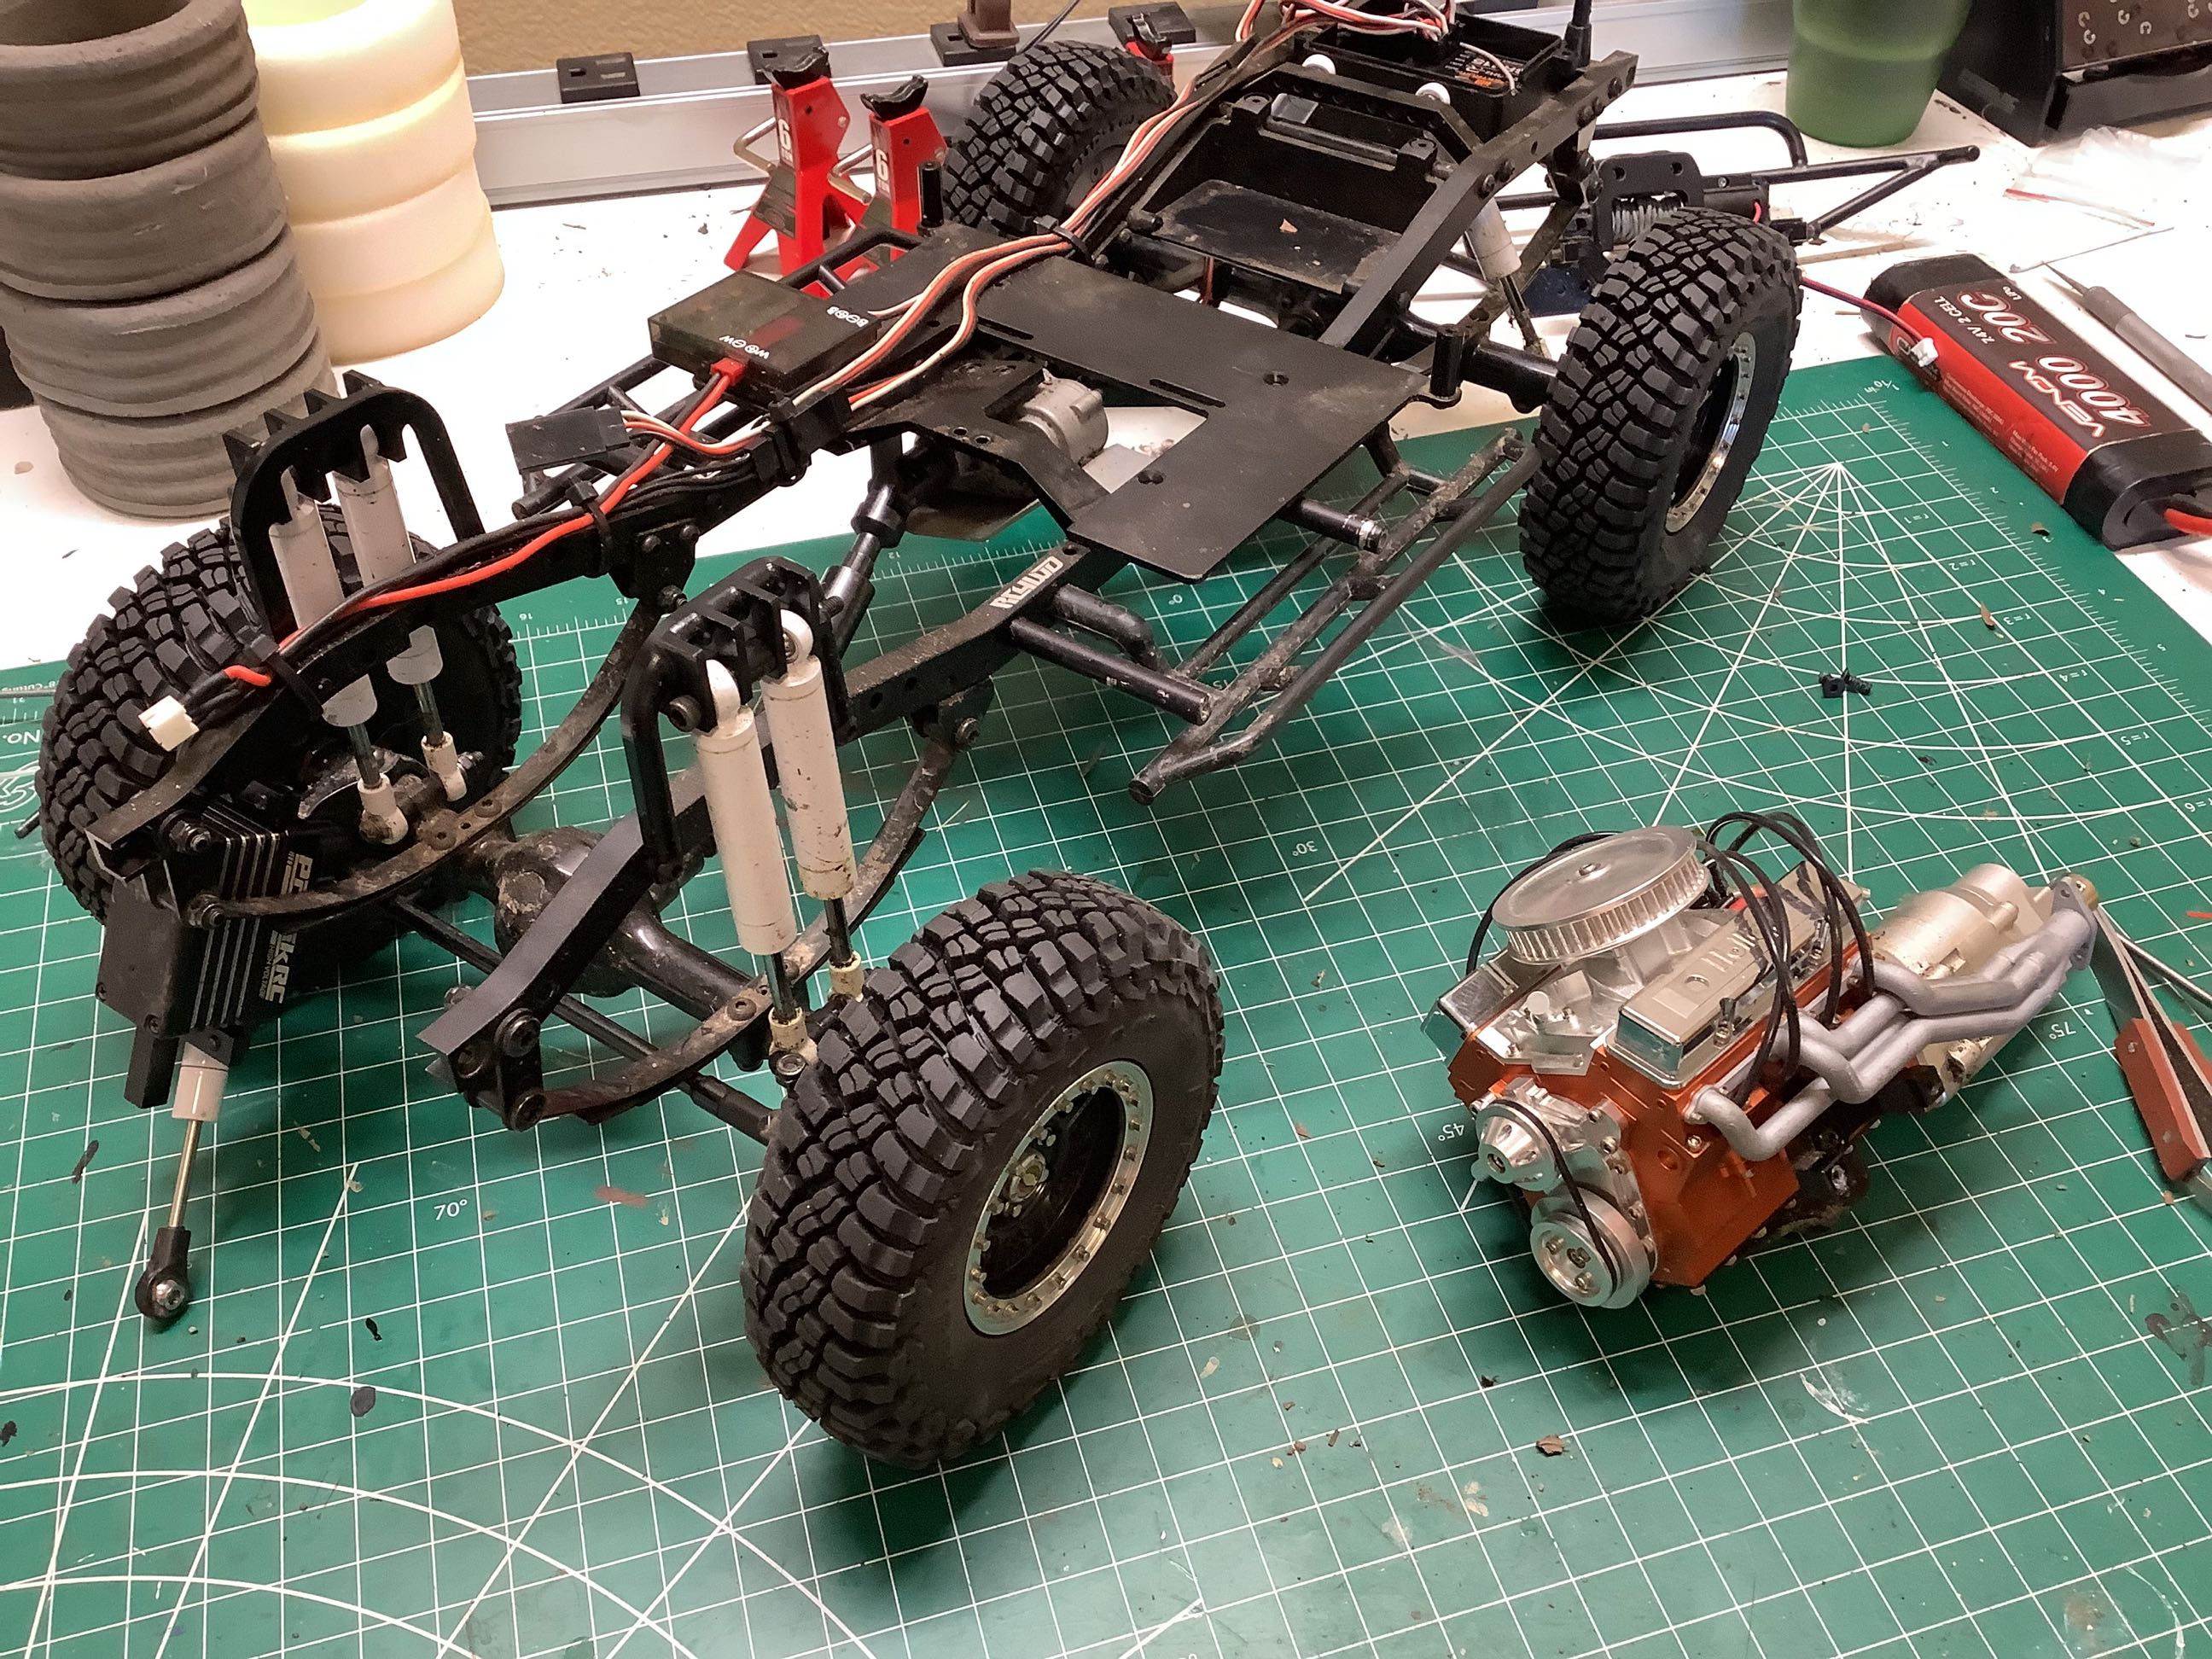
Here we see the scale V-8 in the background as it came in the
model. The base version from RC4WD has the following details:
engine block, oil pan, transmission housing, valve covers, timing cover, intake
manifold, and air filter. All listed parts are aluminum. To
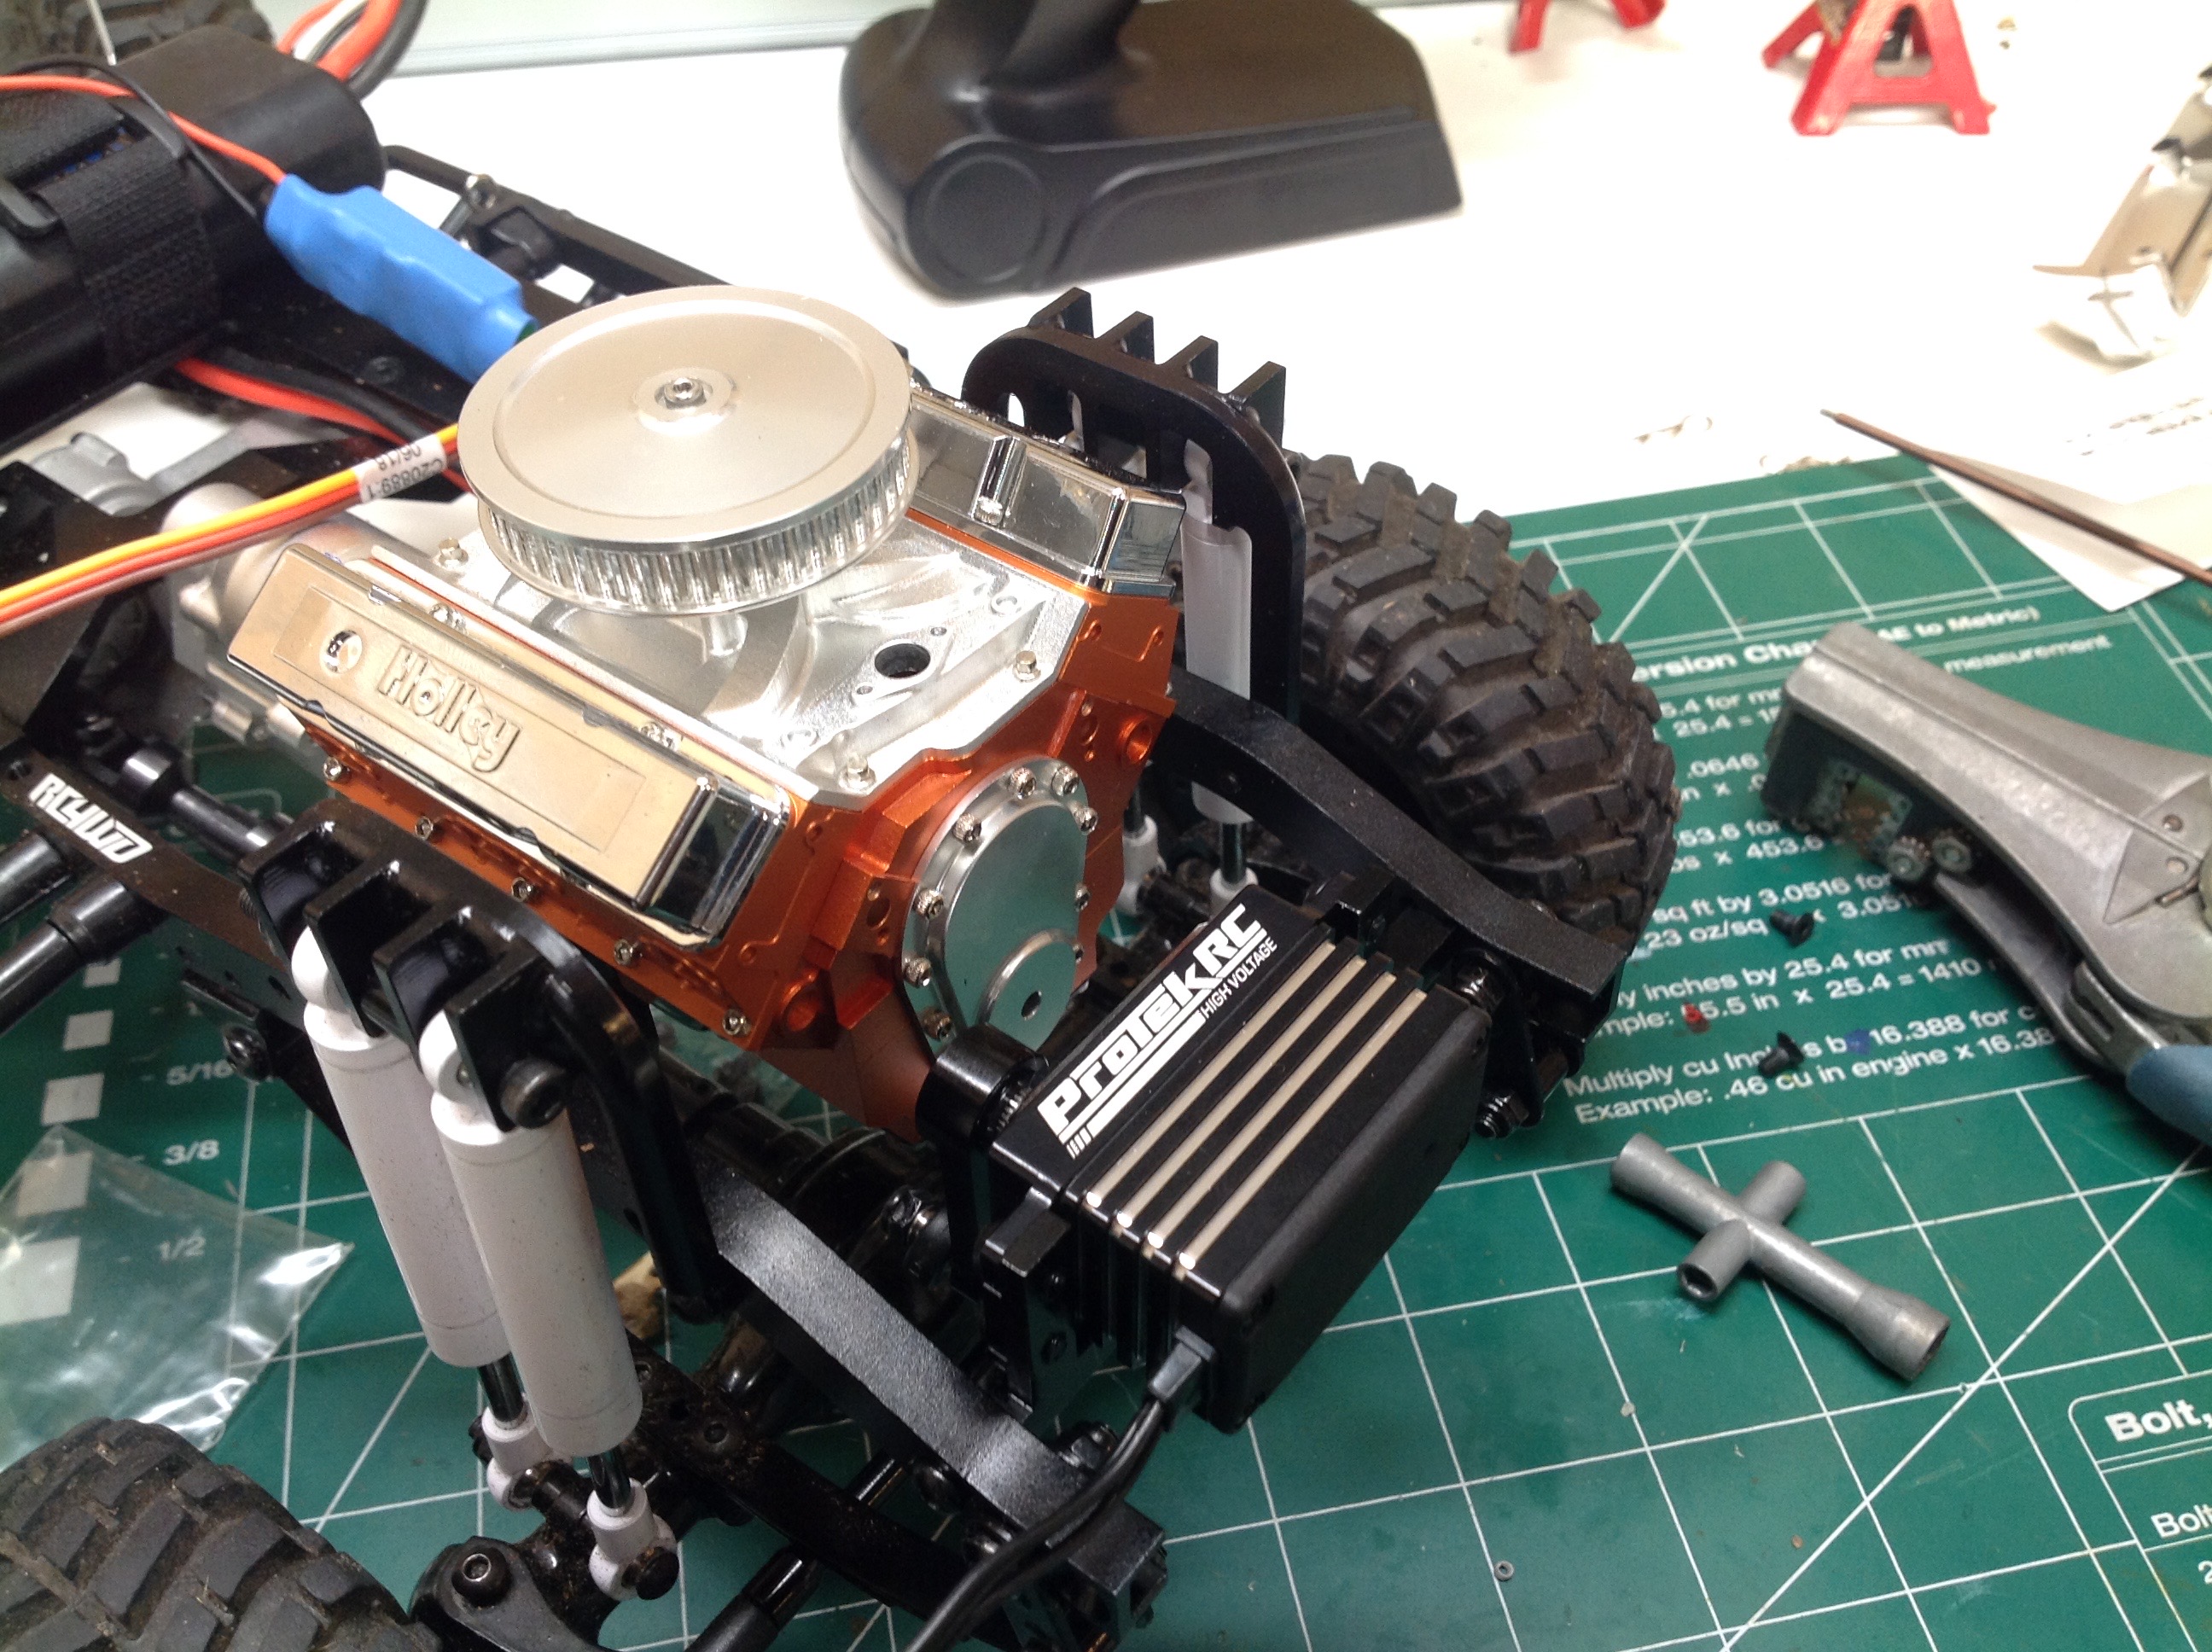
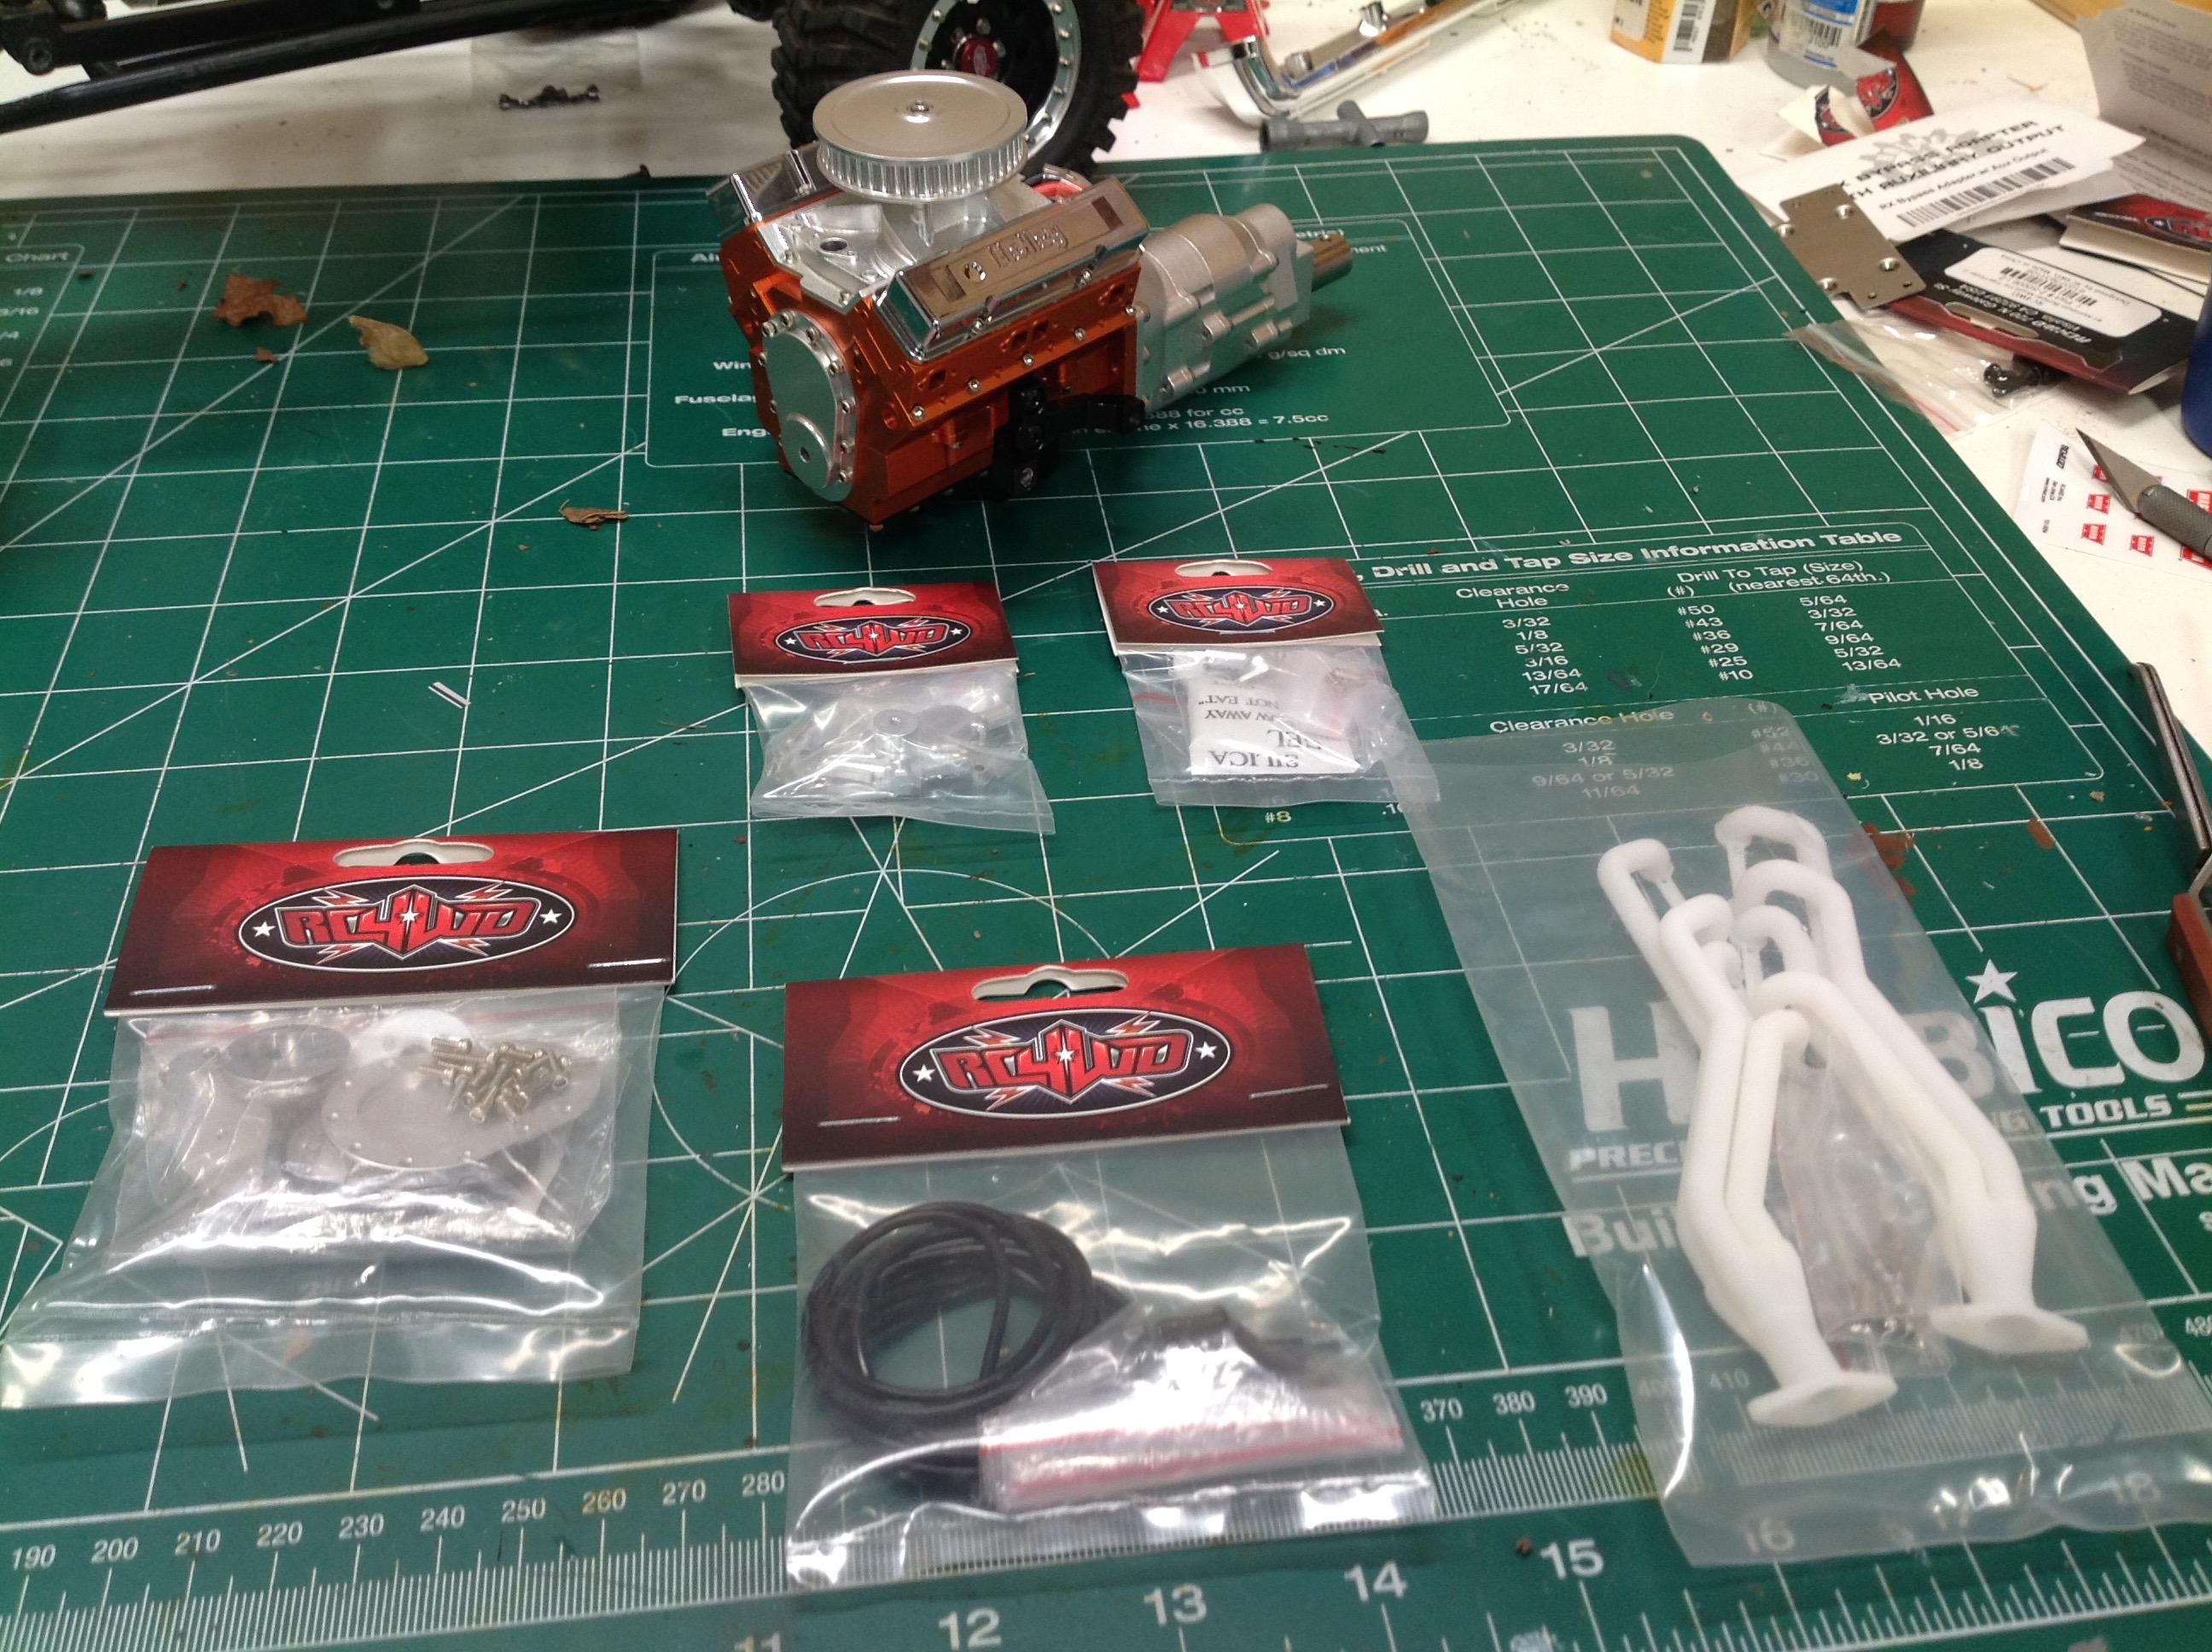
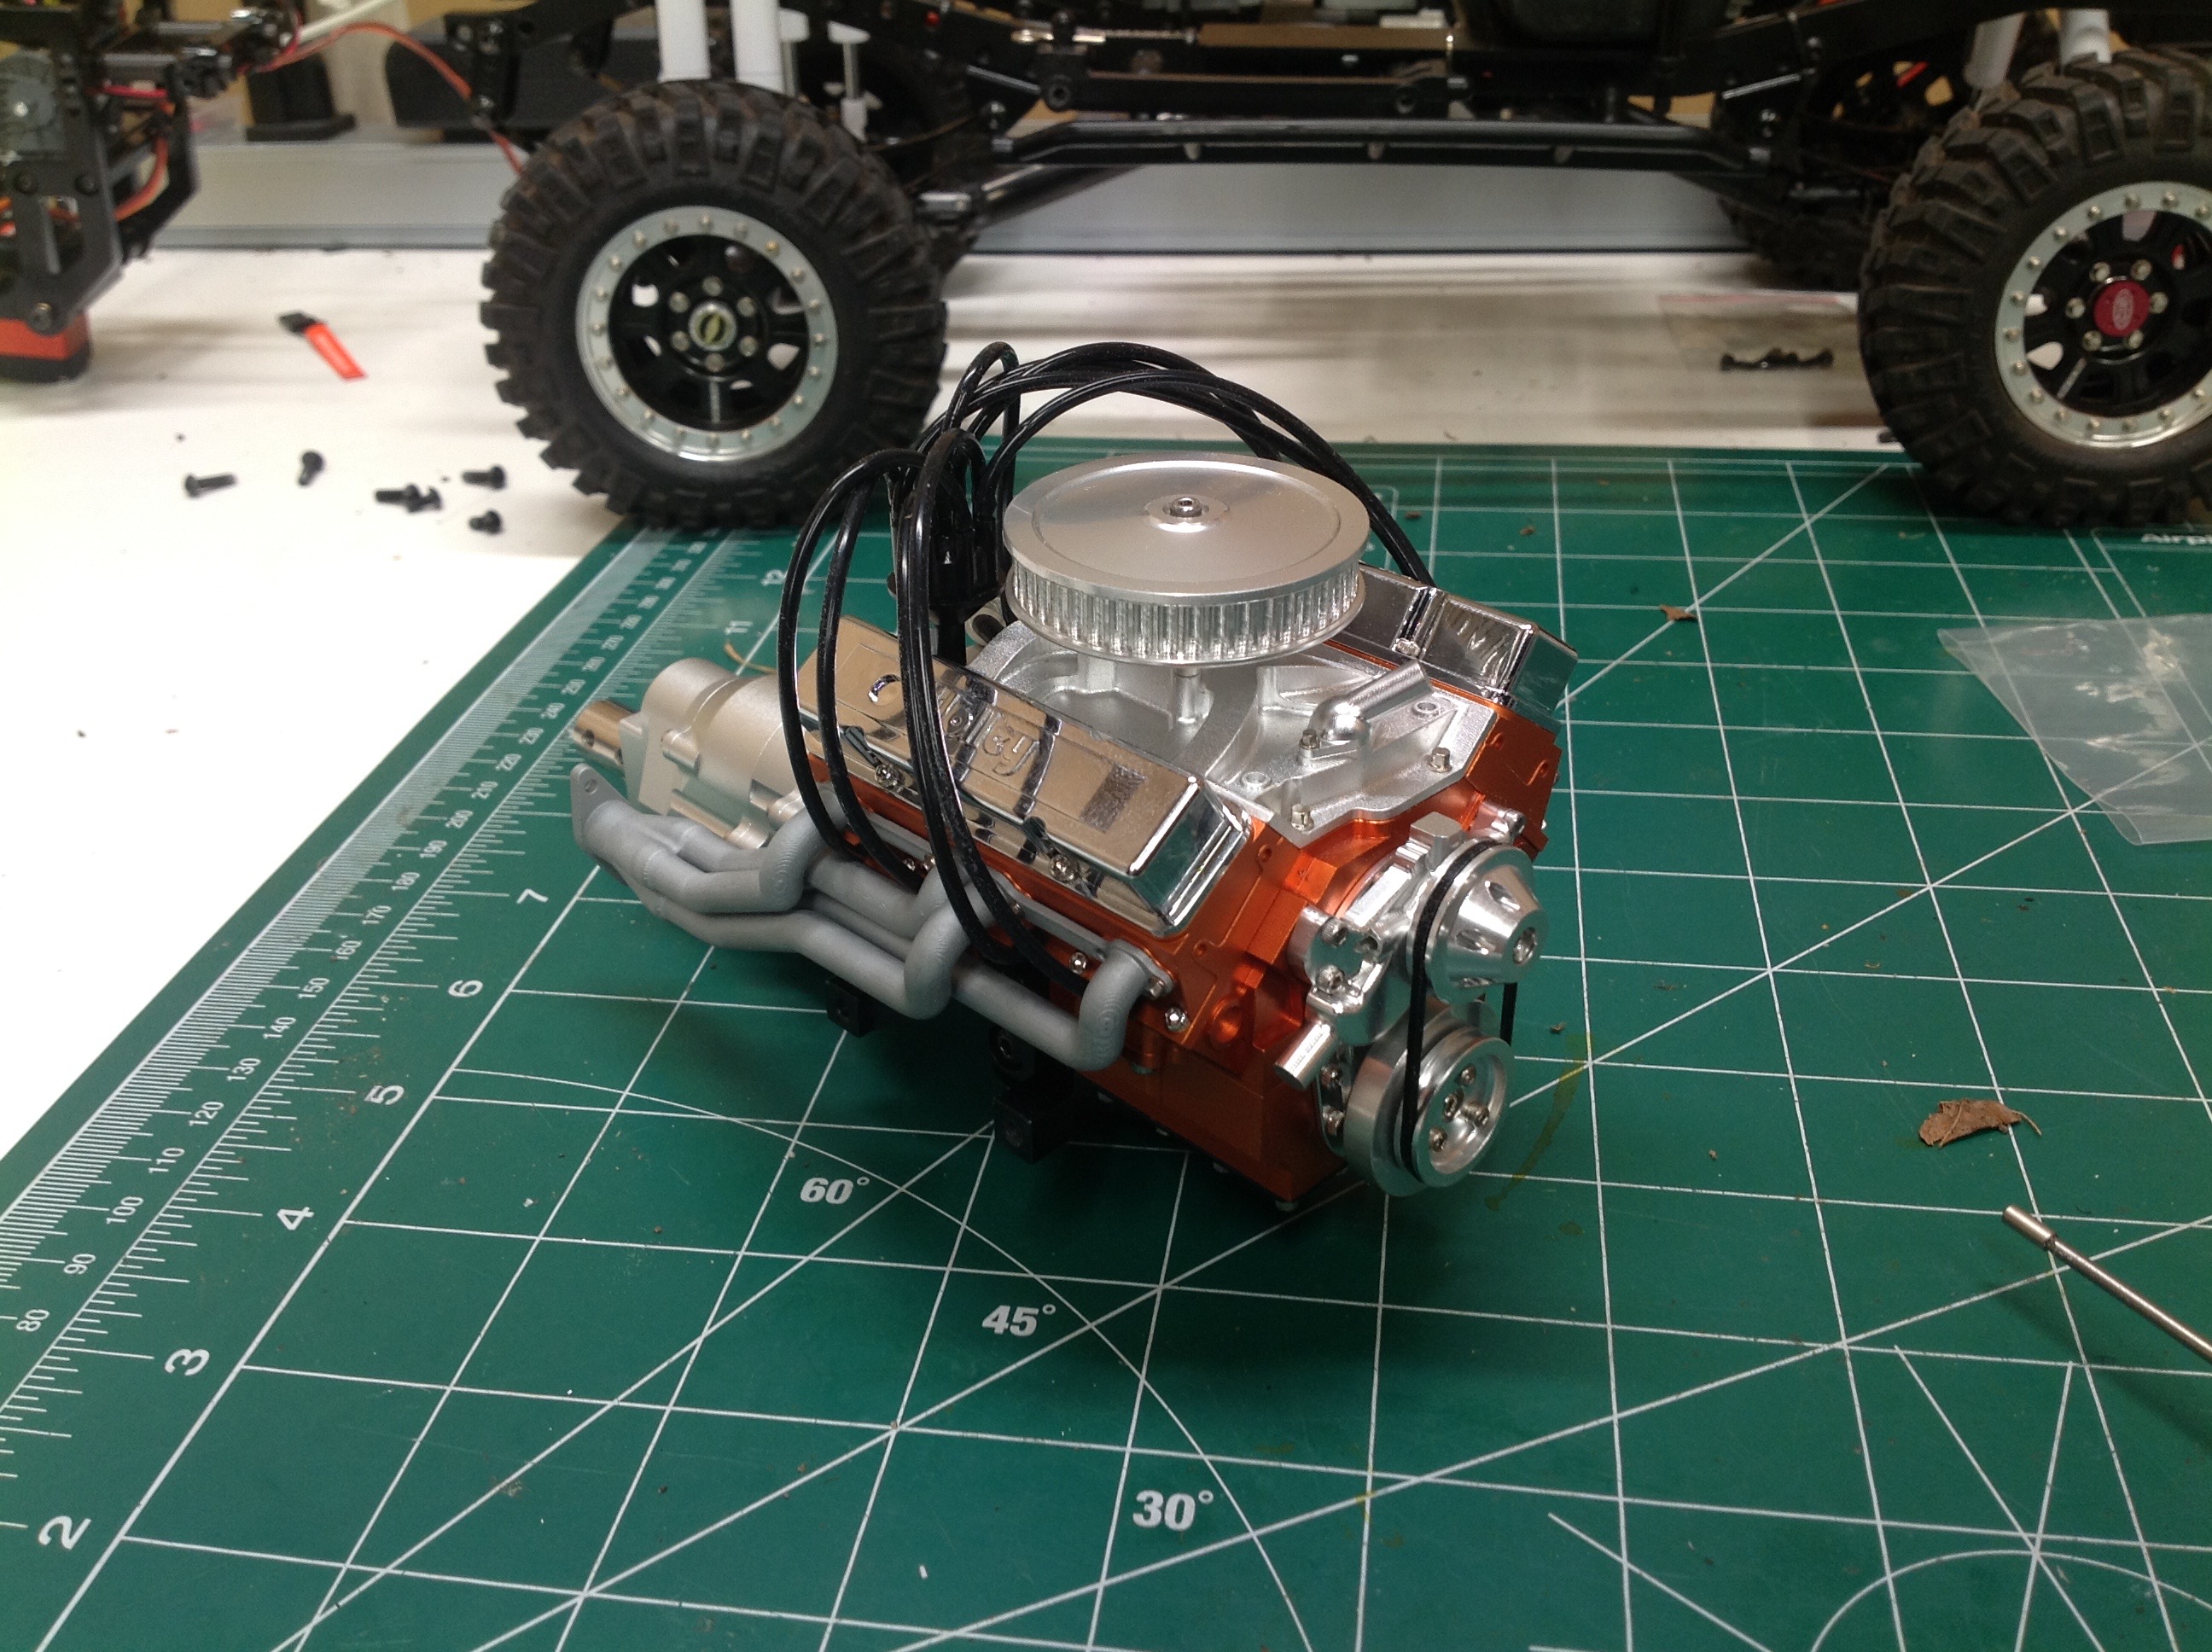
make the motor even better, I added exhaust manifolds, a distributor,
spark plug wires, water pump, thermostat housing, pulleys, and
belt. The exhaust manifolds are 3D printed and needed to be
painted. The final engine is shown on the right. Careful
observers will notice that I used the correct firing order for a Chevy
V-8. It is also possible to add a radiator and hoses, but there is
no room in the model for these because of the servo.
Here is the engine installed back in the vehicle. There was some
interference between the distributor and the firewall so I had to trim
the firewall. I also painted this area black. It is possible
to install the distributor on the front, but that would not be correct
for a Chevy 350. The big open areas around the engine bother me.
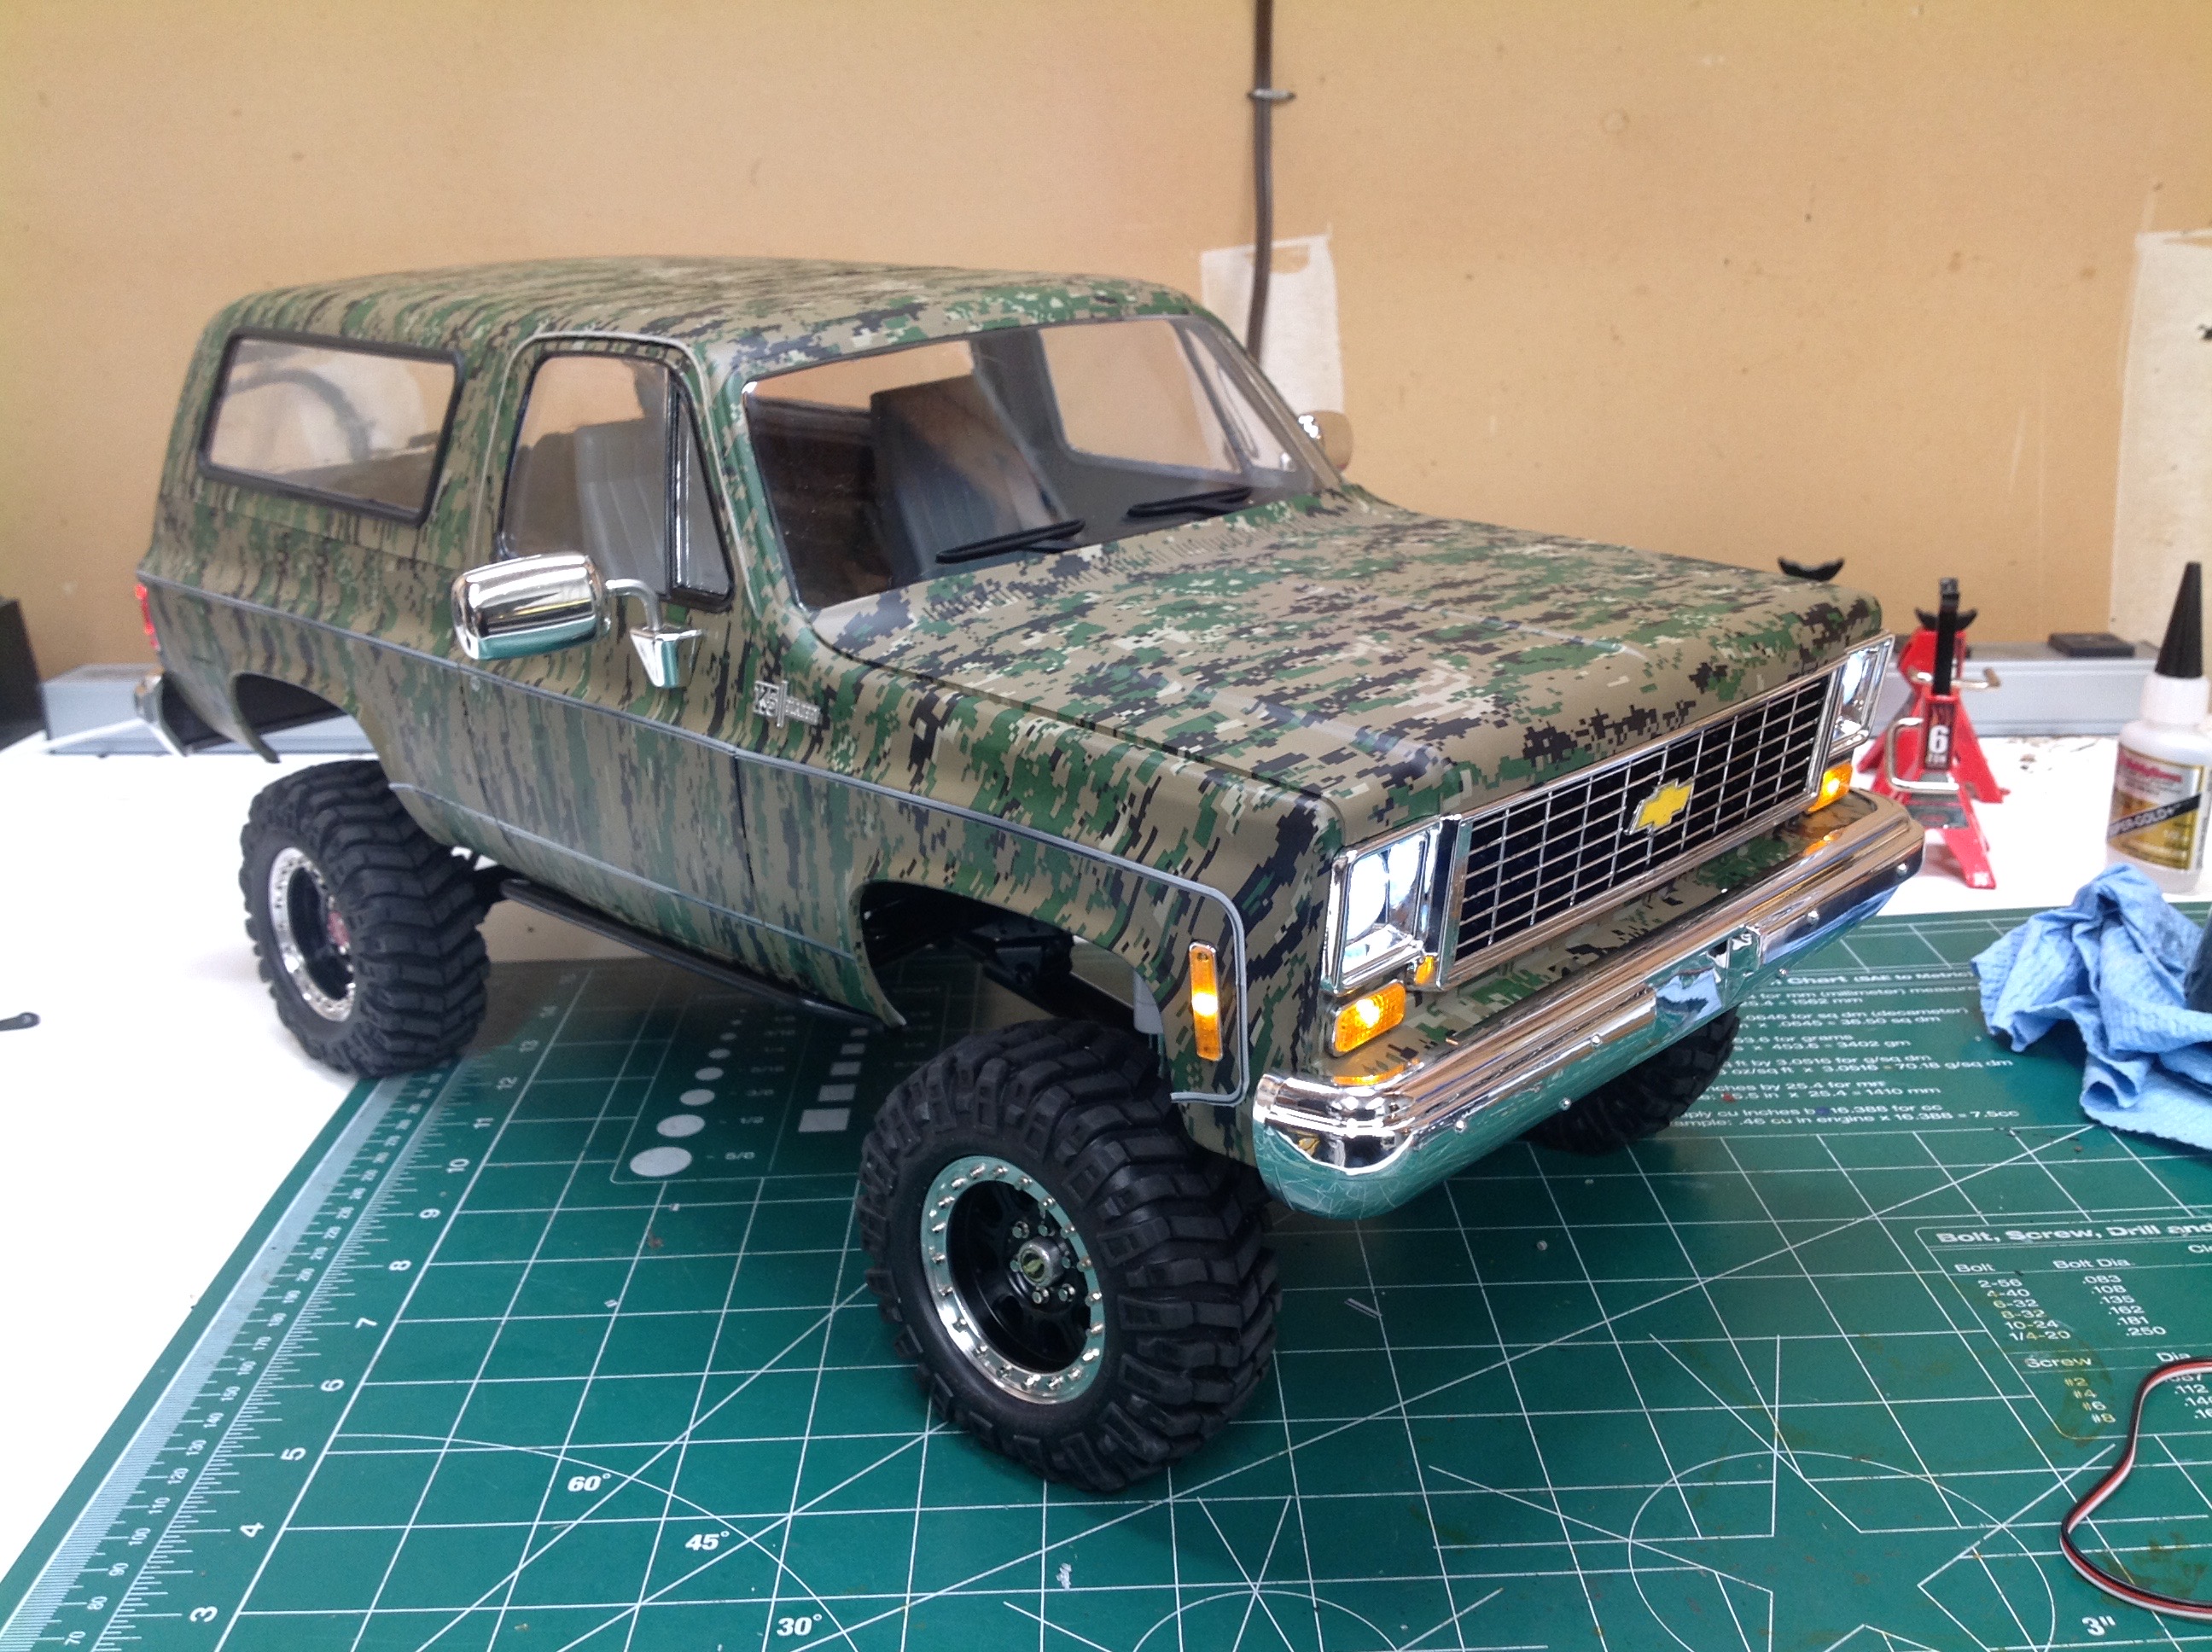
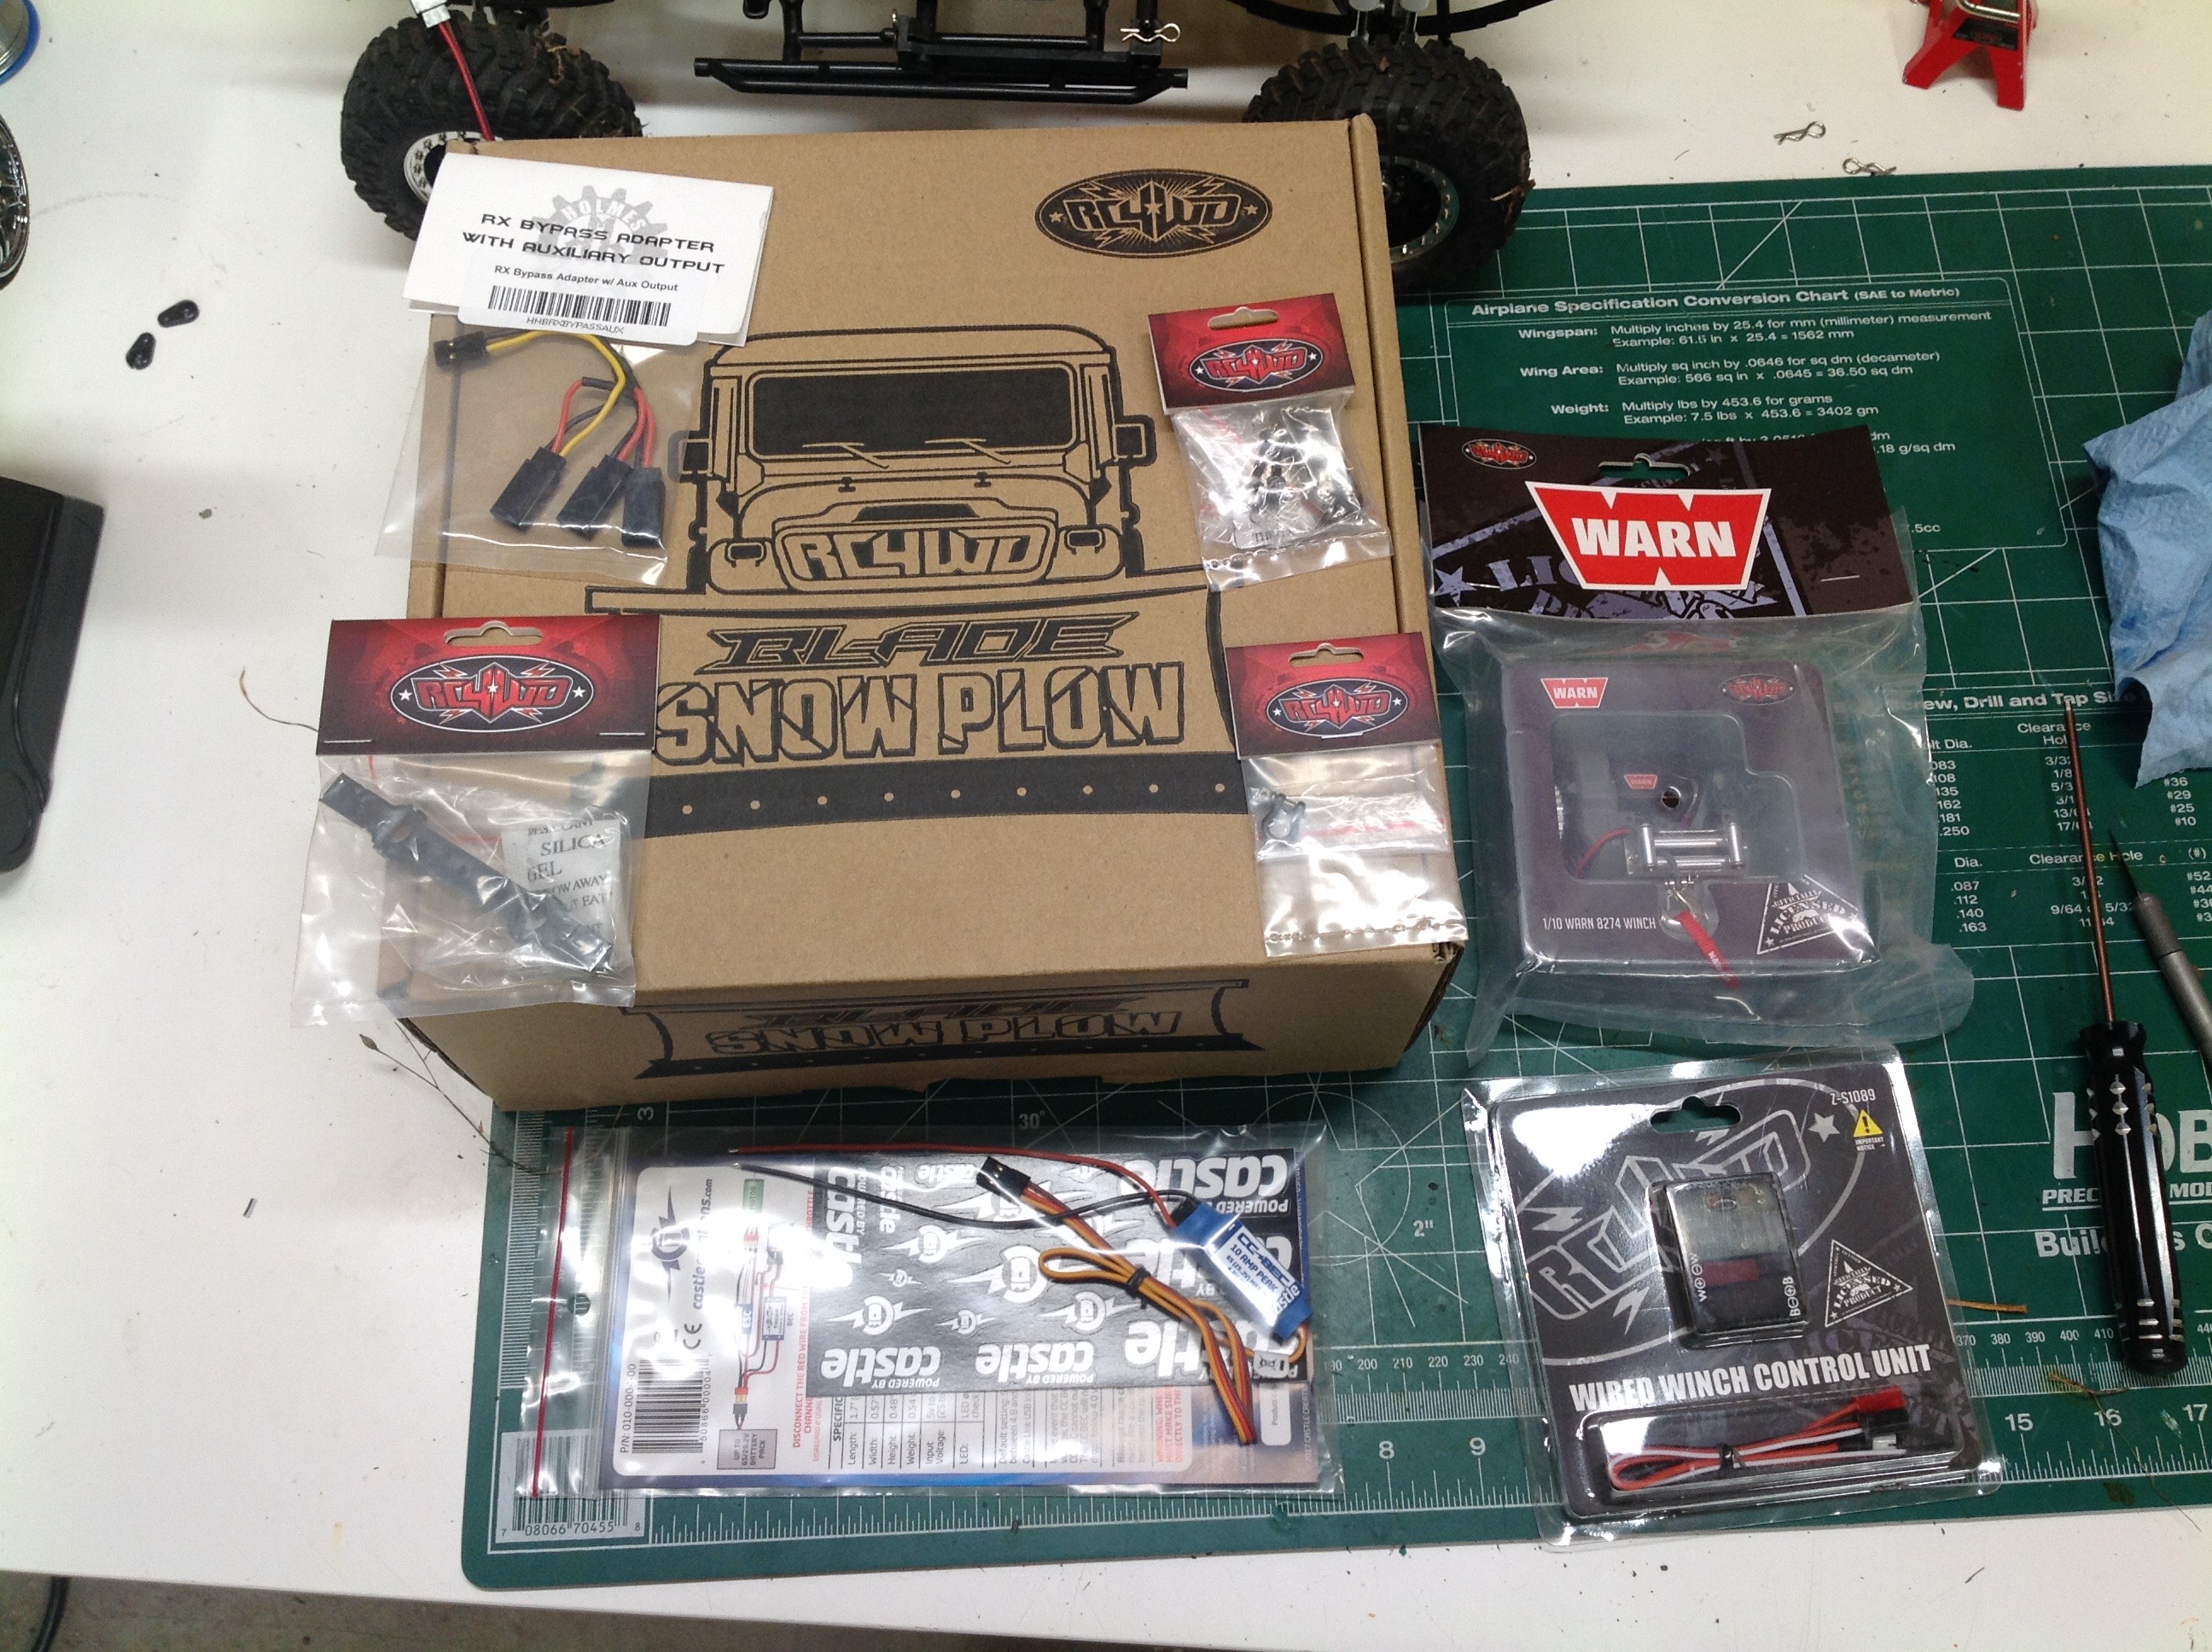
My big source of customization for this model is the RC4WD snow
plow. I need quite a pile of accessories to install and power it.
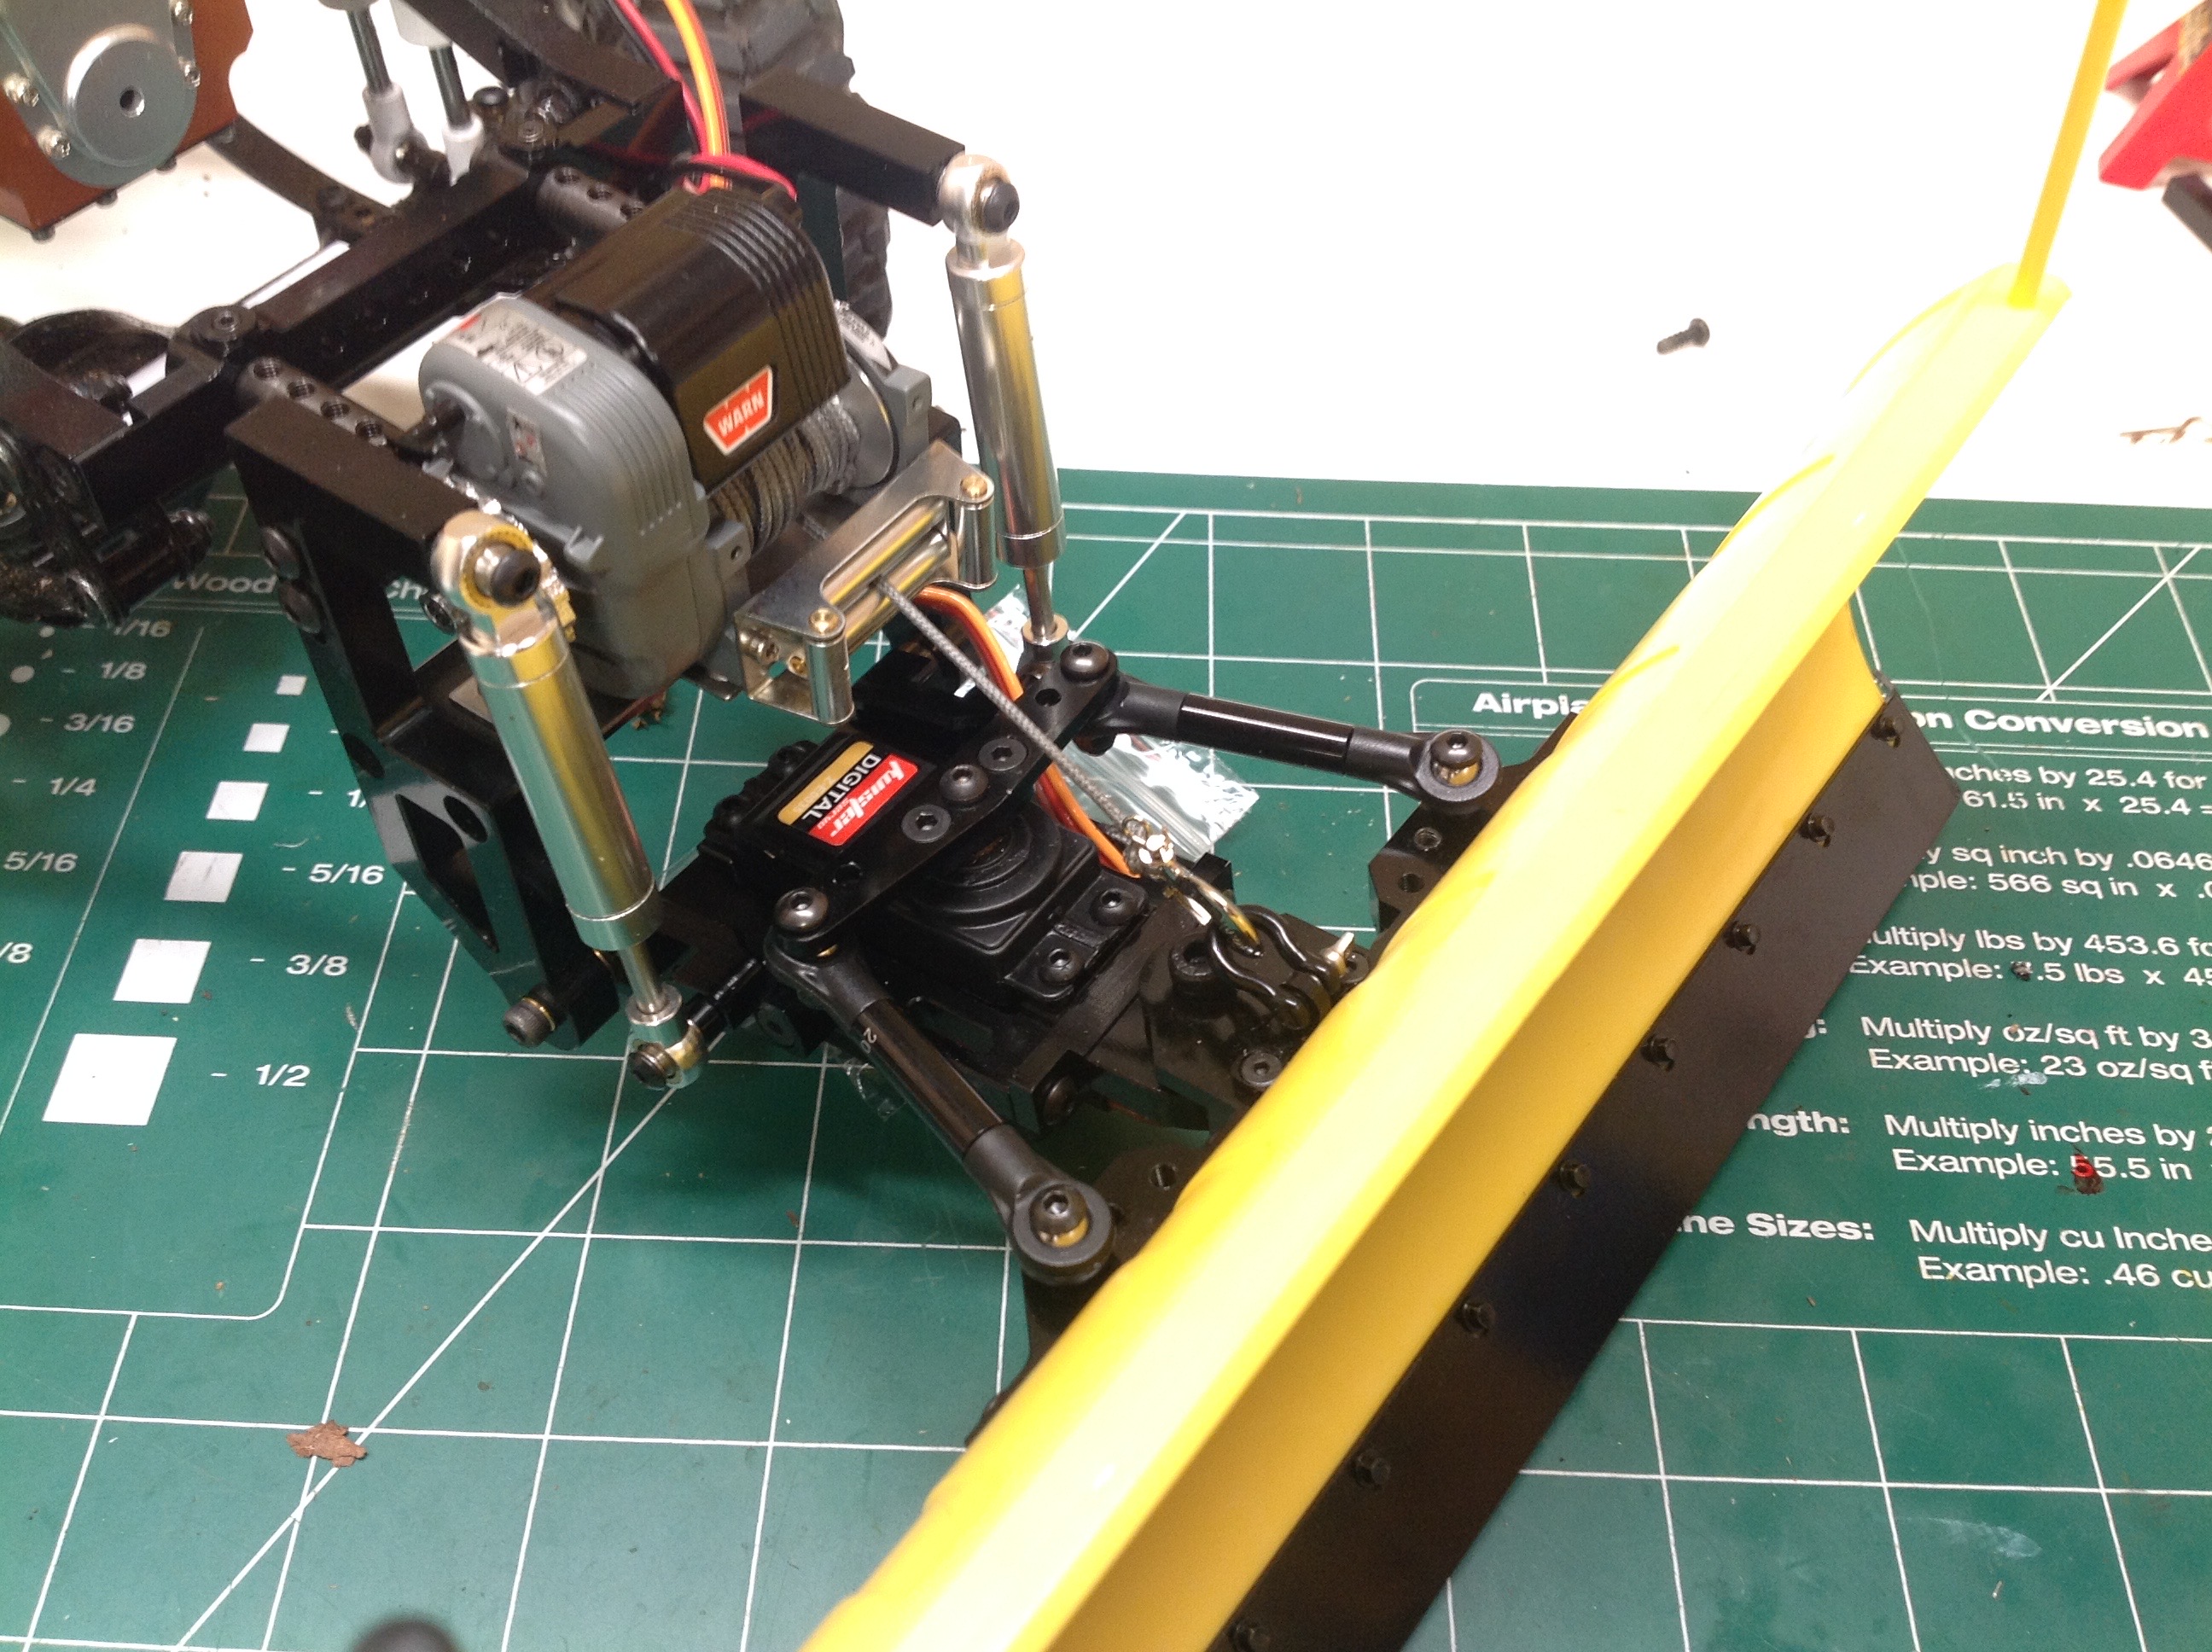
Here is the snow plow installed on the chassis. To make the plow
raise and lower I need the biggest winch RC4WD offers
along with a controller. I used the stock servo which I'd
previously
replaced to control the rotation of the plow. The shock absorbers
really just serve to help push the plow down against the ground. I
wired the system such that it can be easily unplugged when not in
use. It is two plugs (winch power and servo) and two screws on the
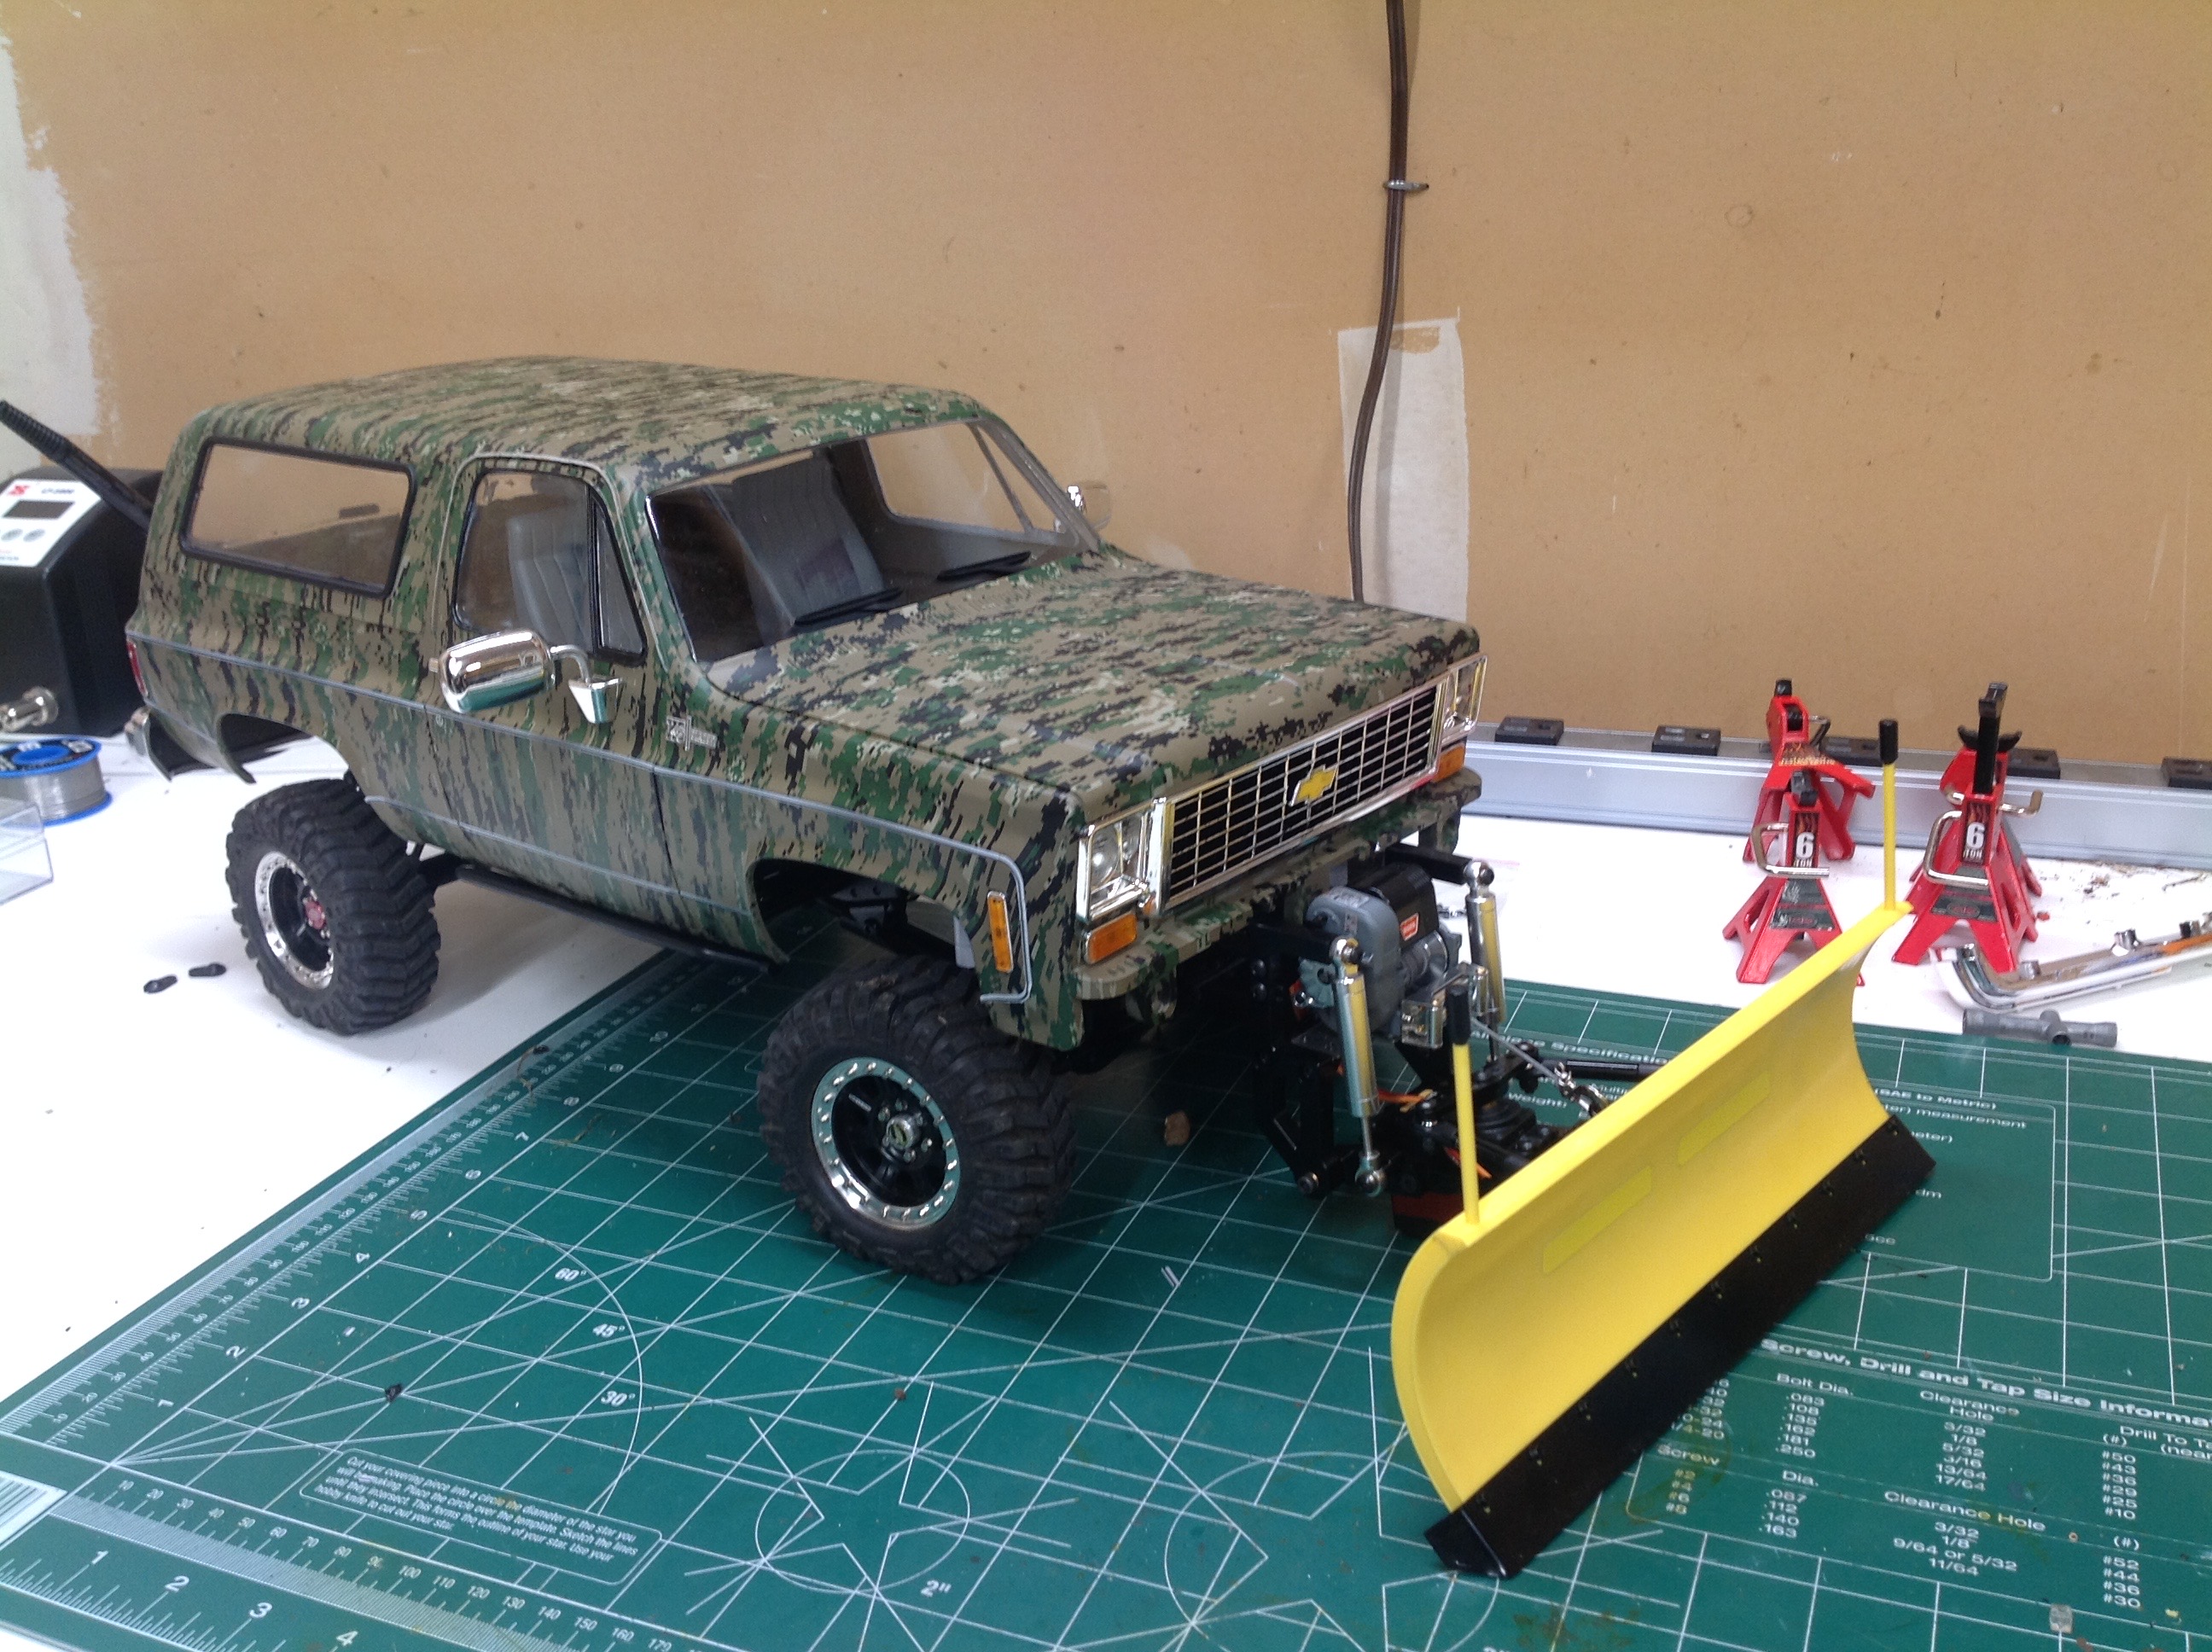
front mount. The right hand image shows the body installed.
The front bumper must be removed when the plow is in use. The
plow looks and moves well, but the servo is a problem. It hangs
down far below the bracket and almost scrapes the ground. I
later replaced the RC4WD servo with a much more expensive low profile
Savox servo. It is way overkill for the application but it is hard
to find a cheap low profile servo.
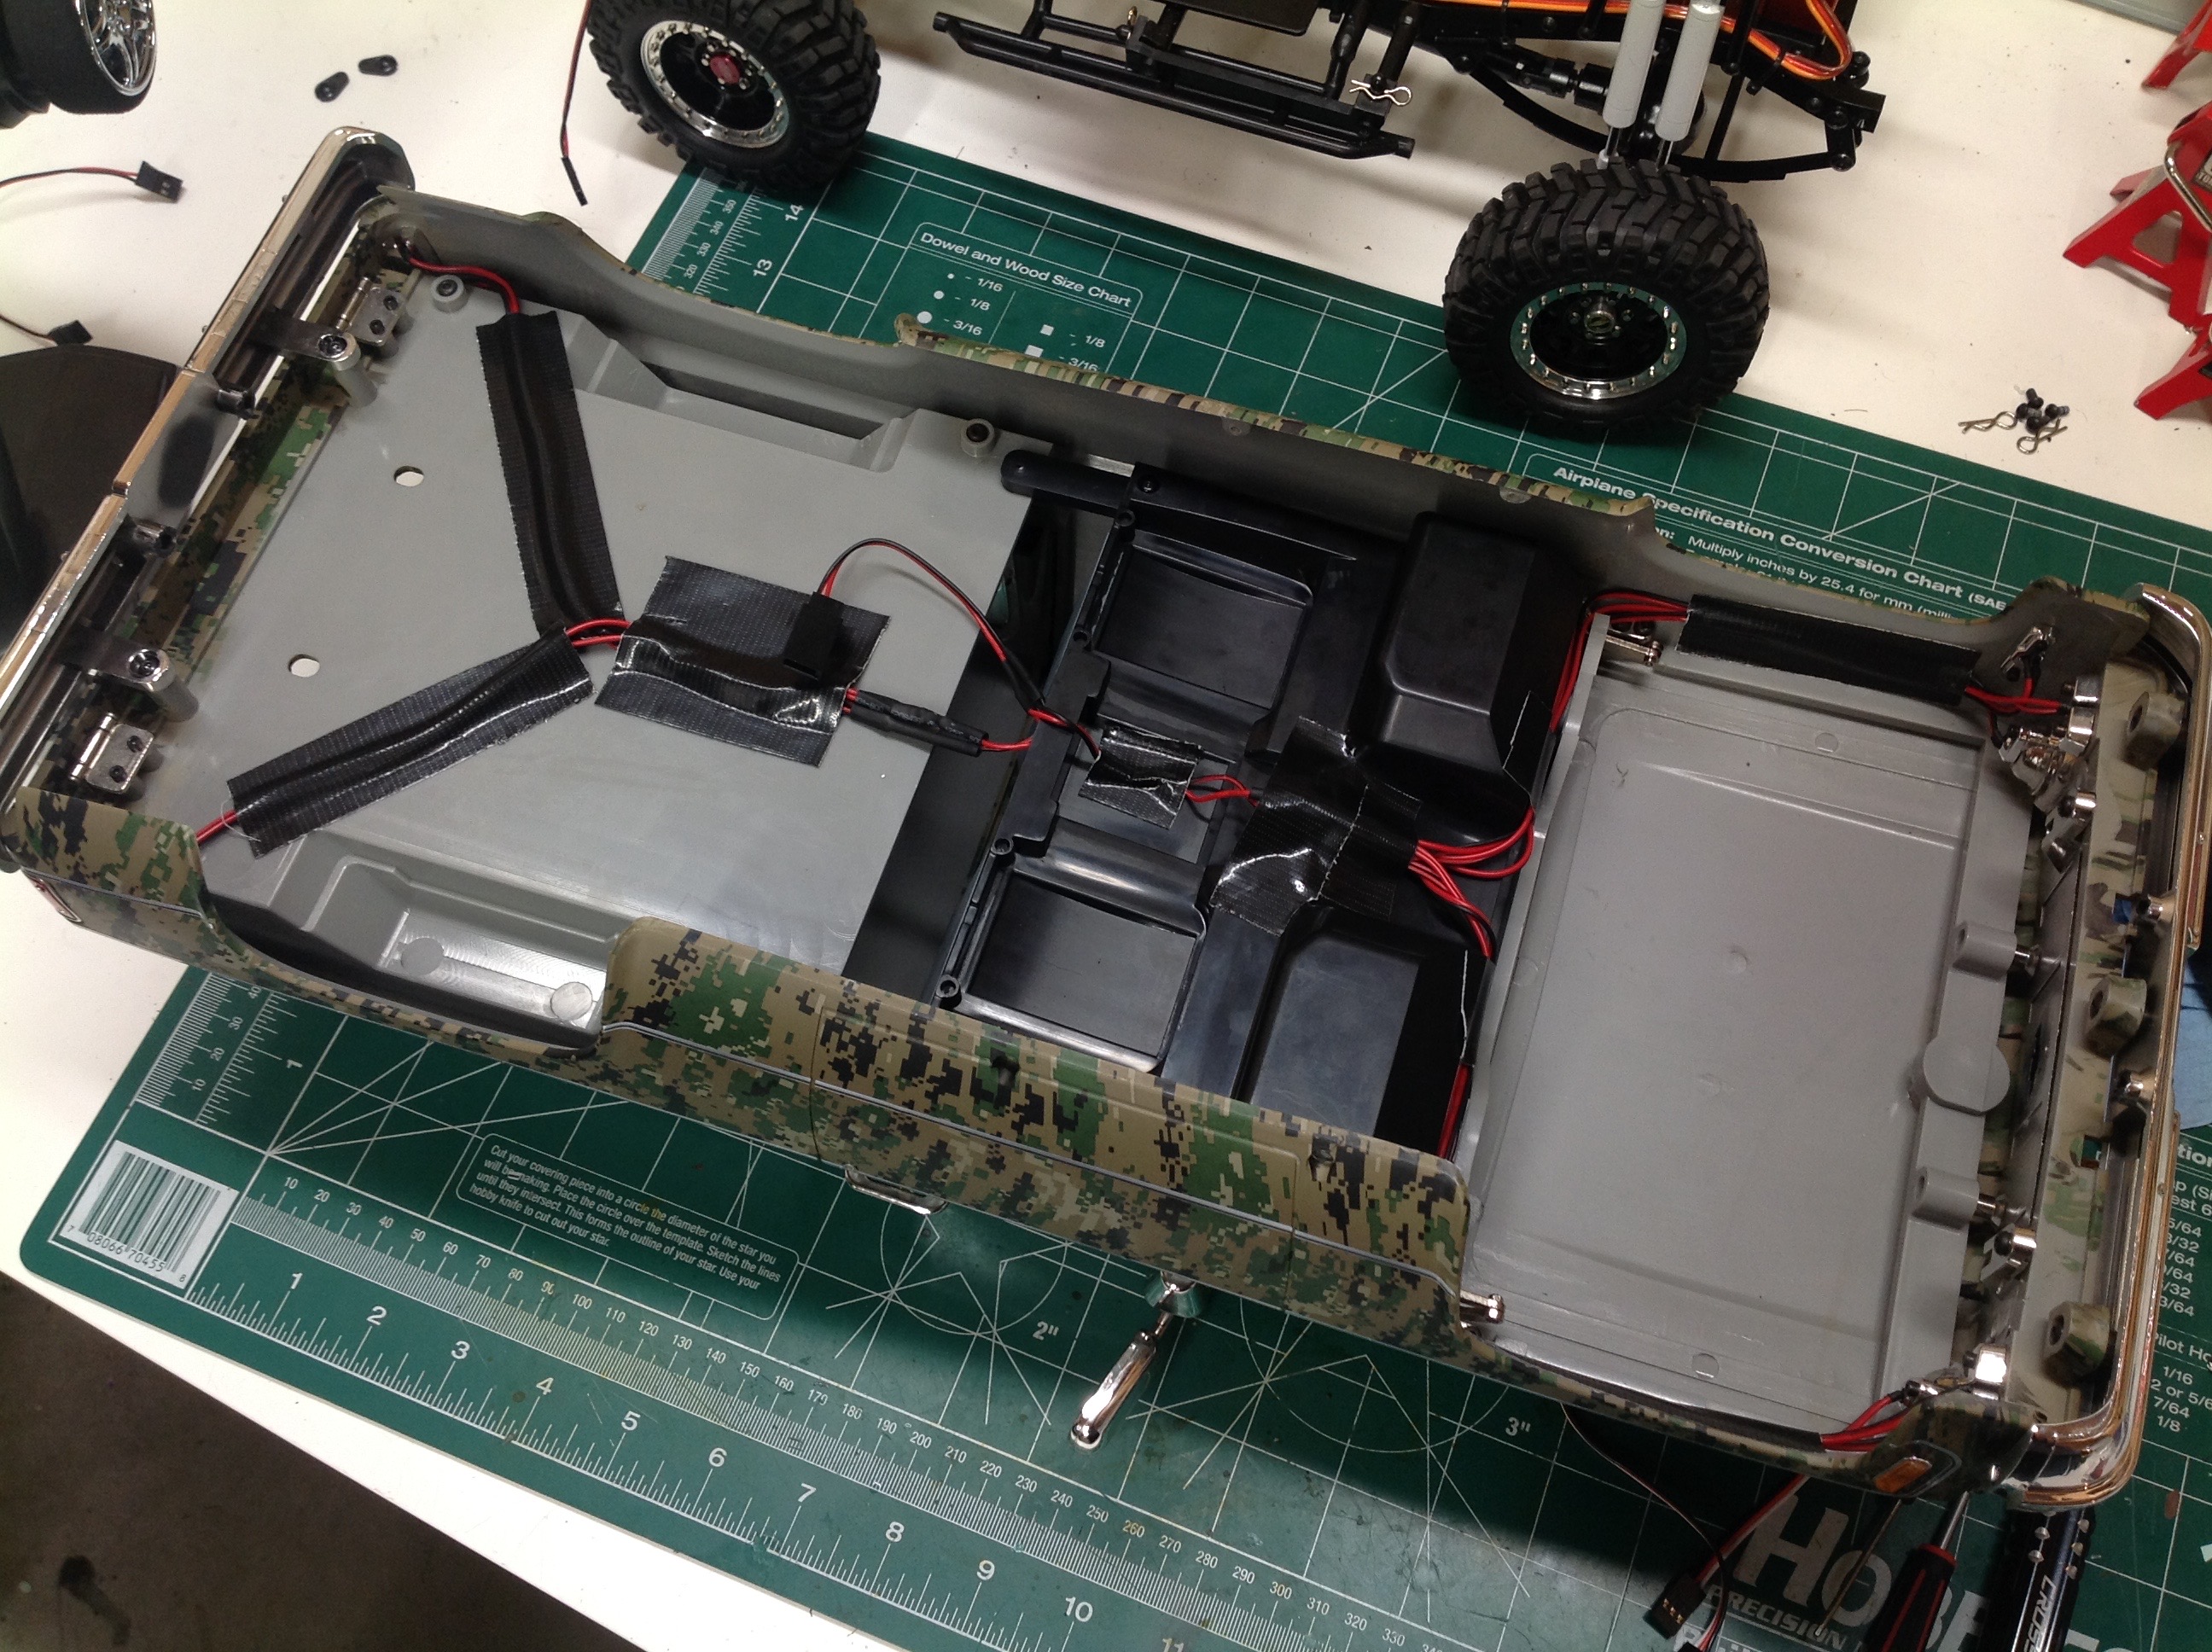
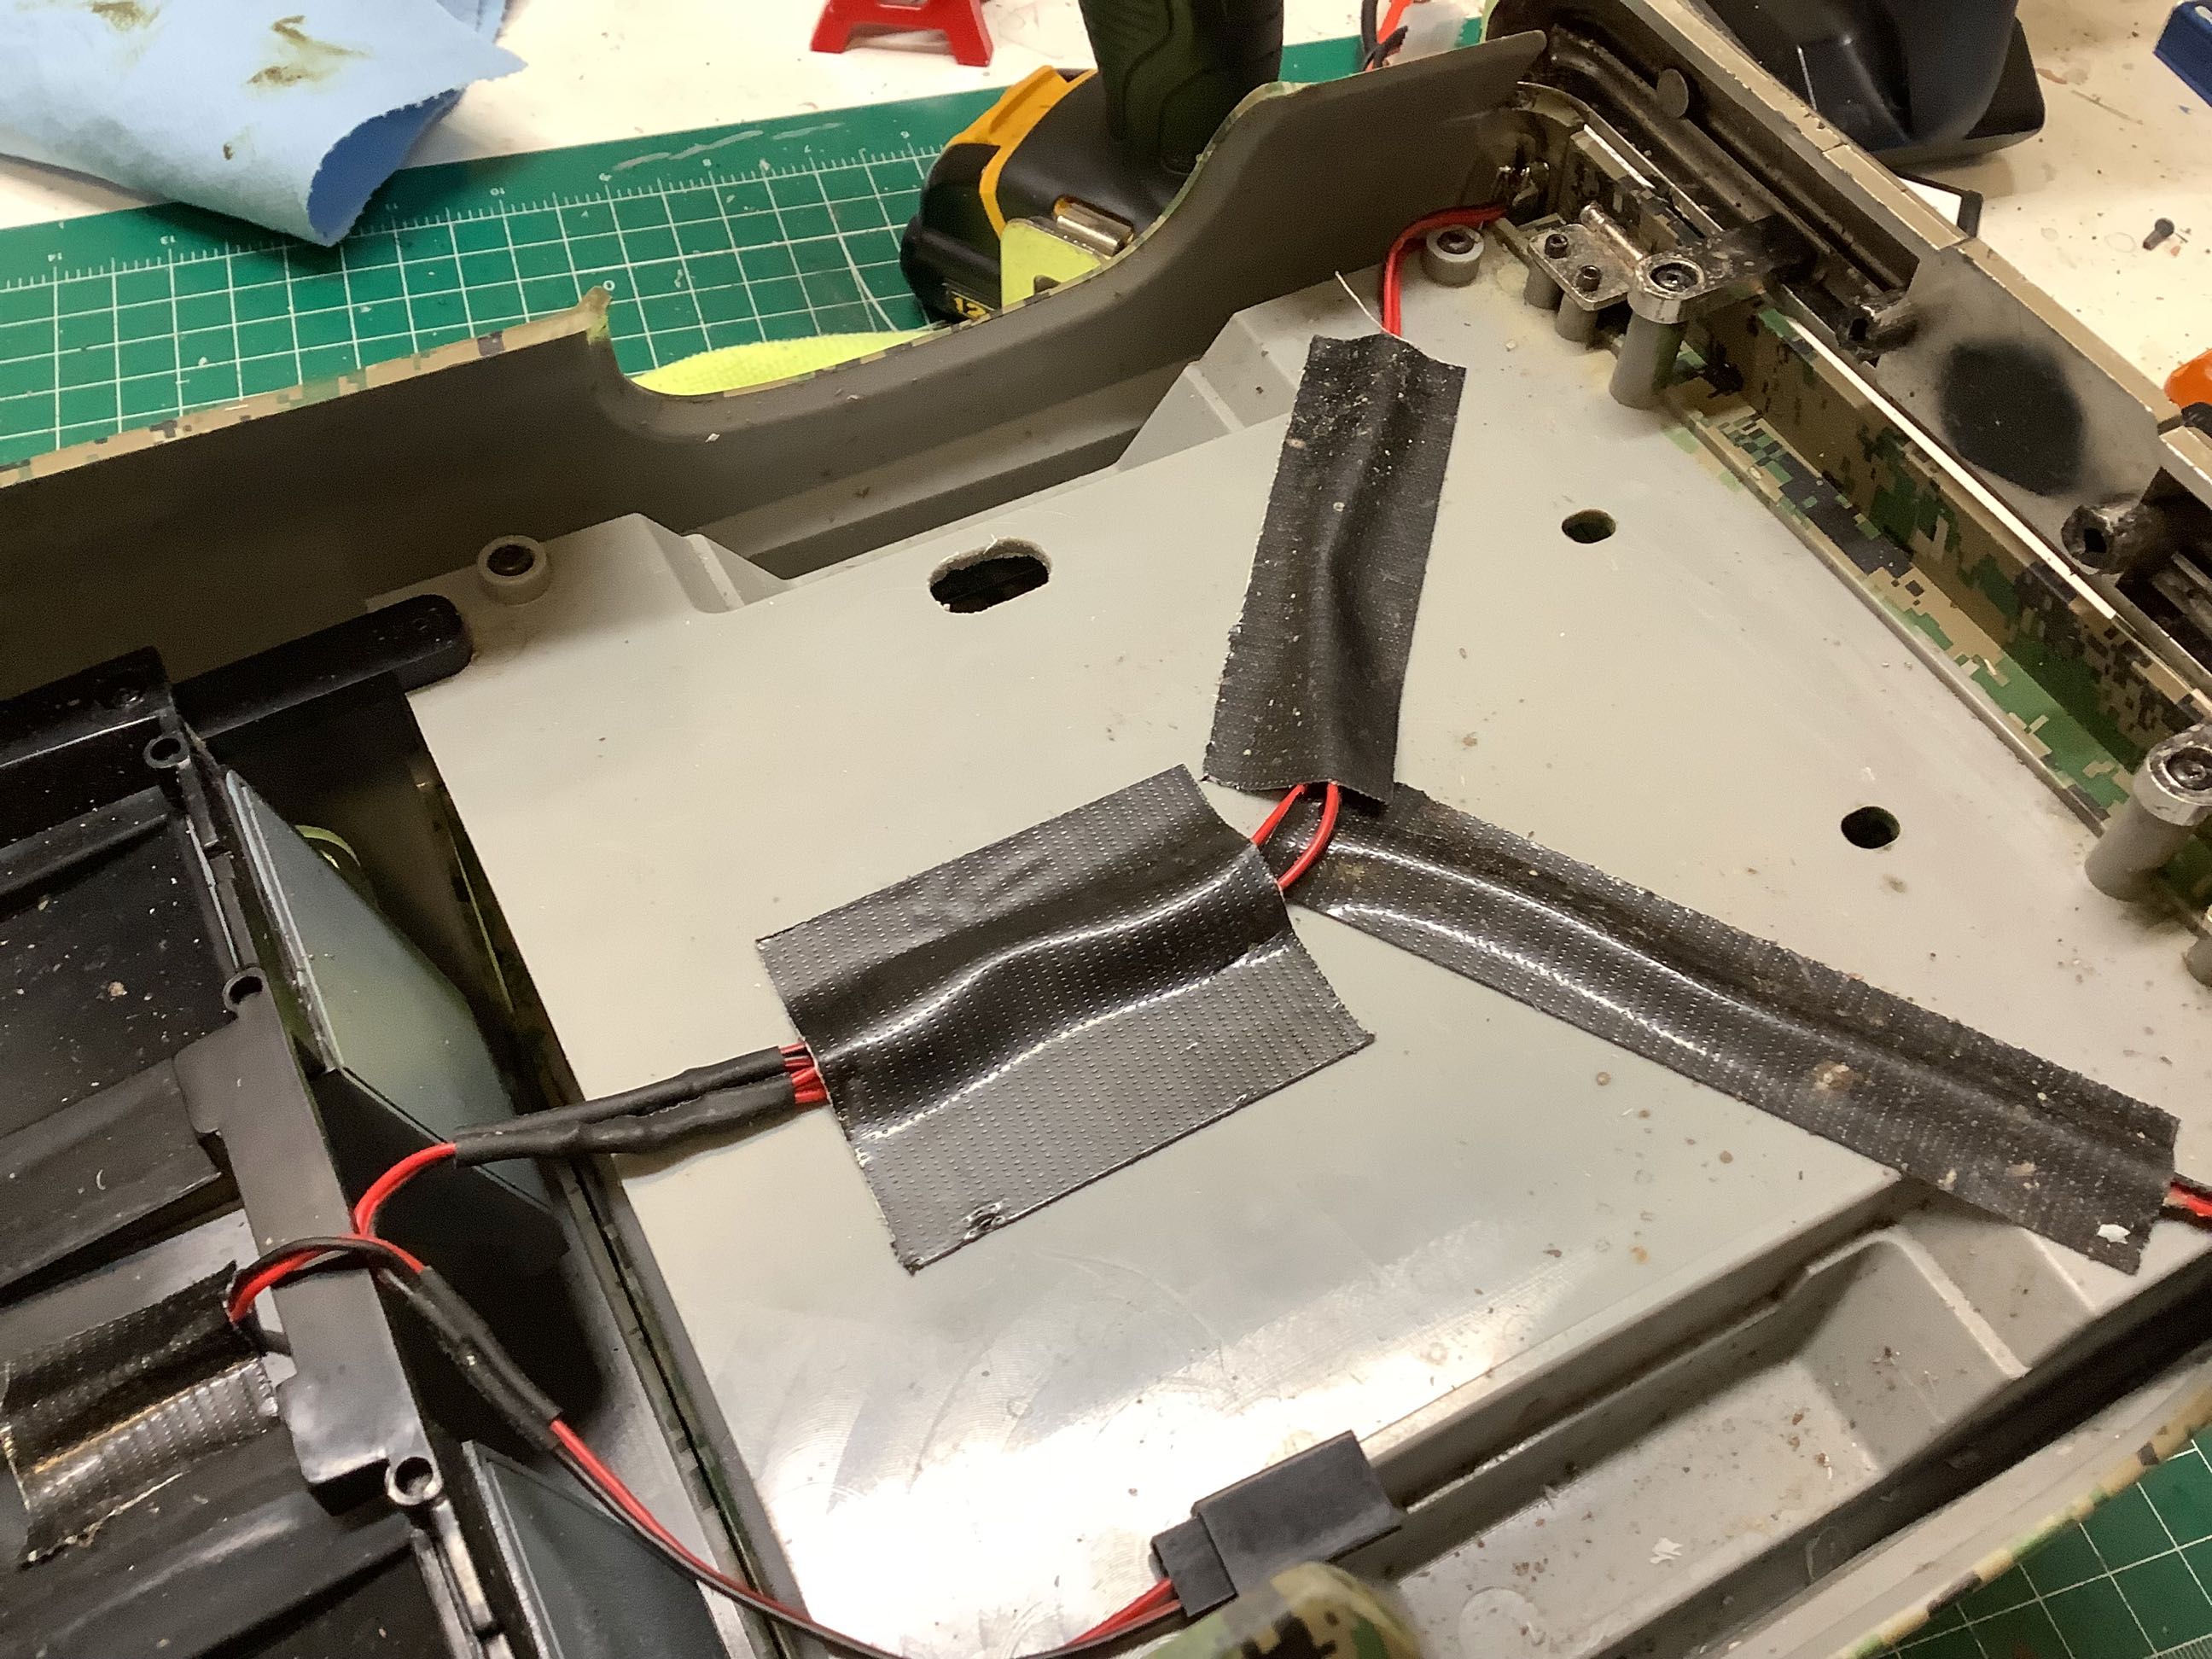
Keeping the wiring tidy was a bit challenging. The Trail Finder 2
chassis puts the electronics box all the way at the back, but of course
the steering servo and plow are at the front. This required a few
extensions. I managed to get the receiver, BEC, and splitter
inside the box. The wire sticking out the side is to connect to
the body lights.
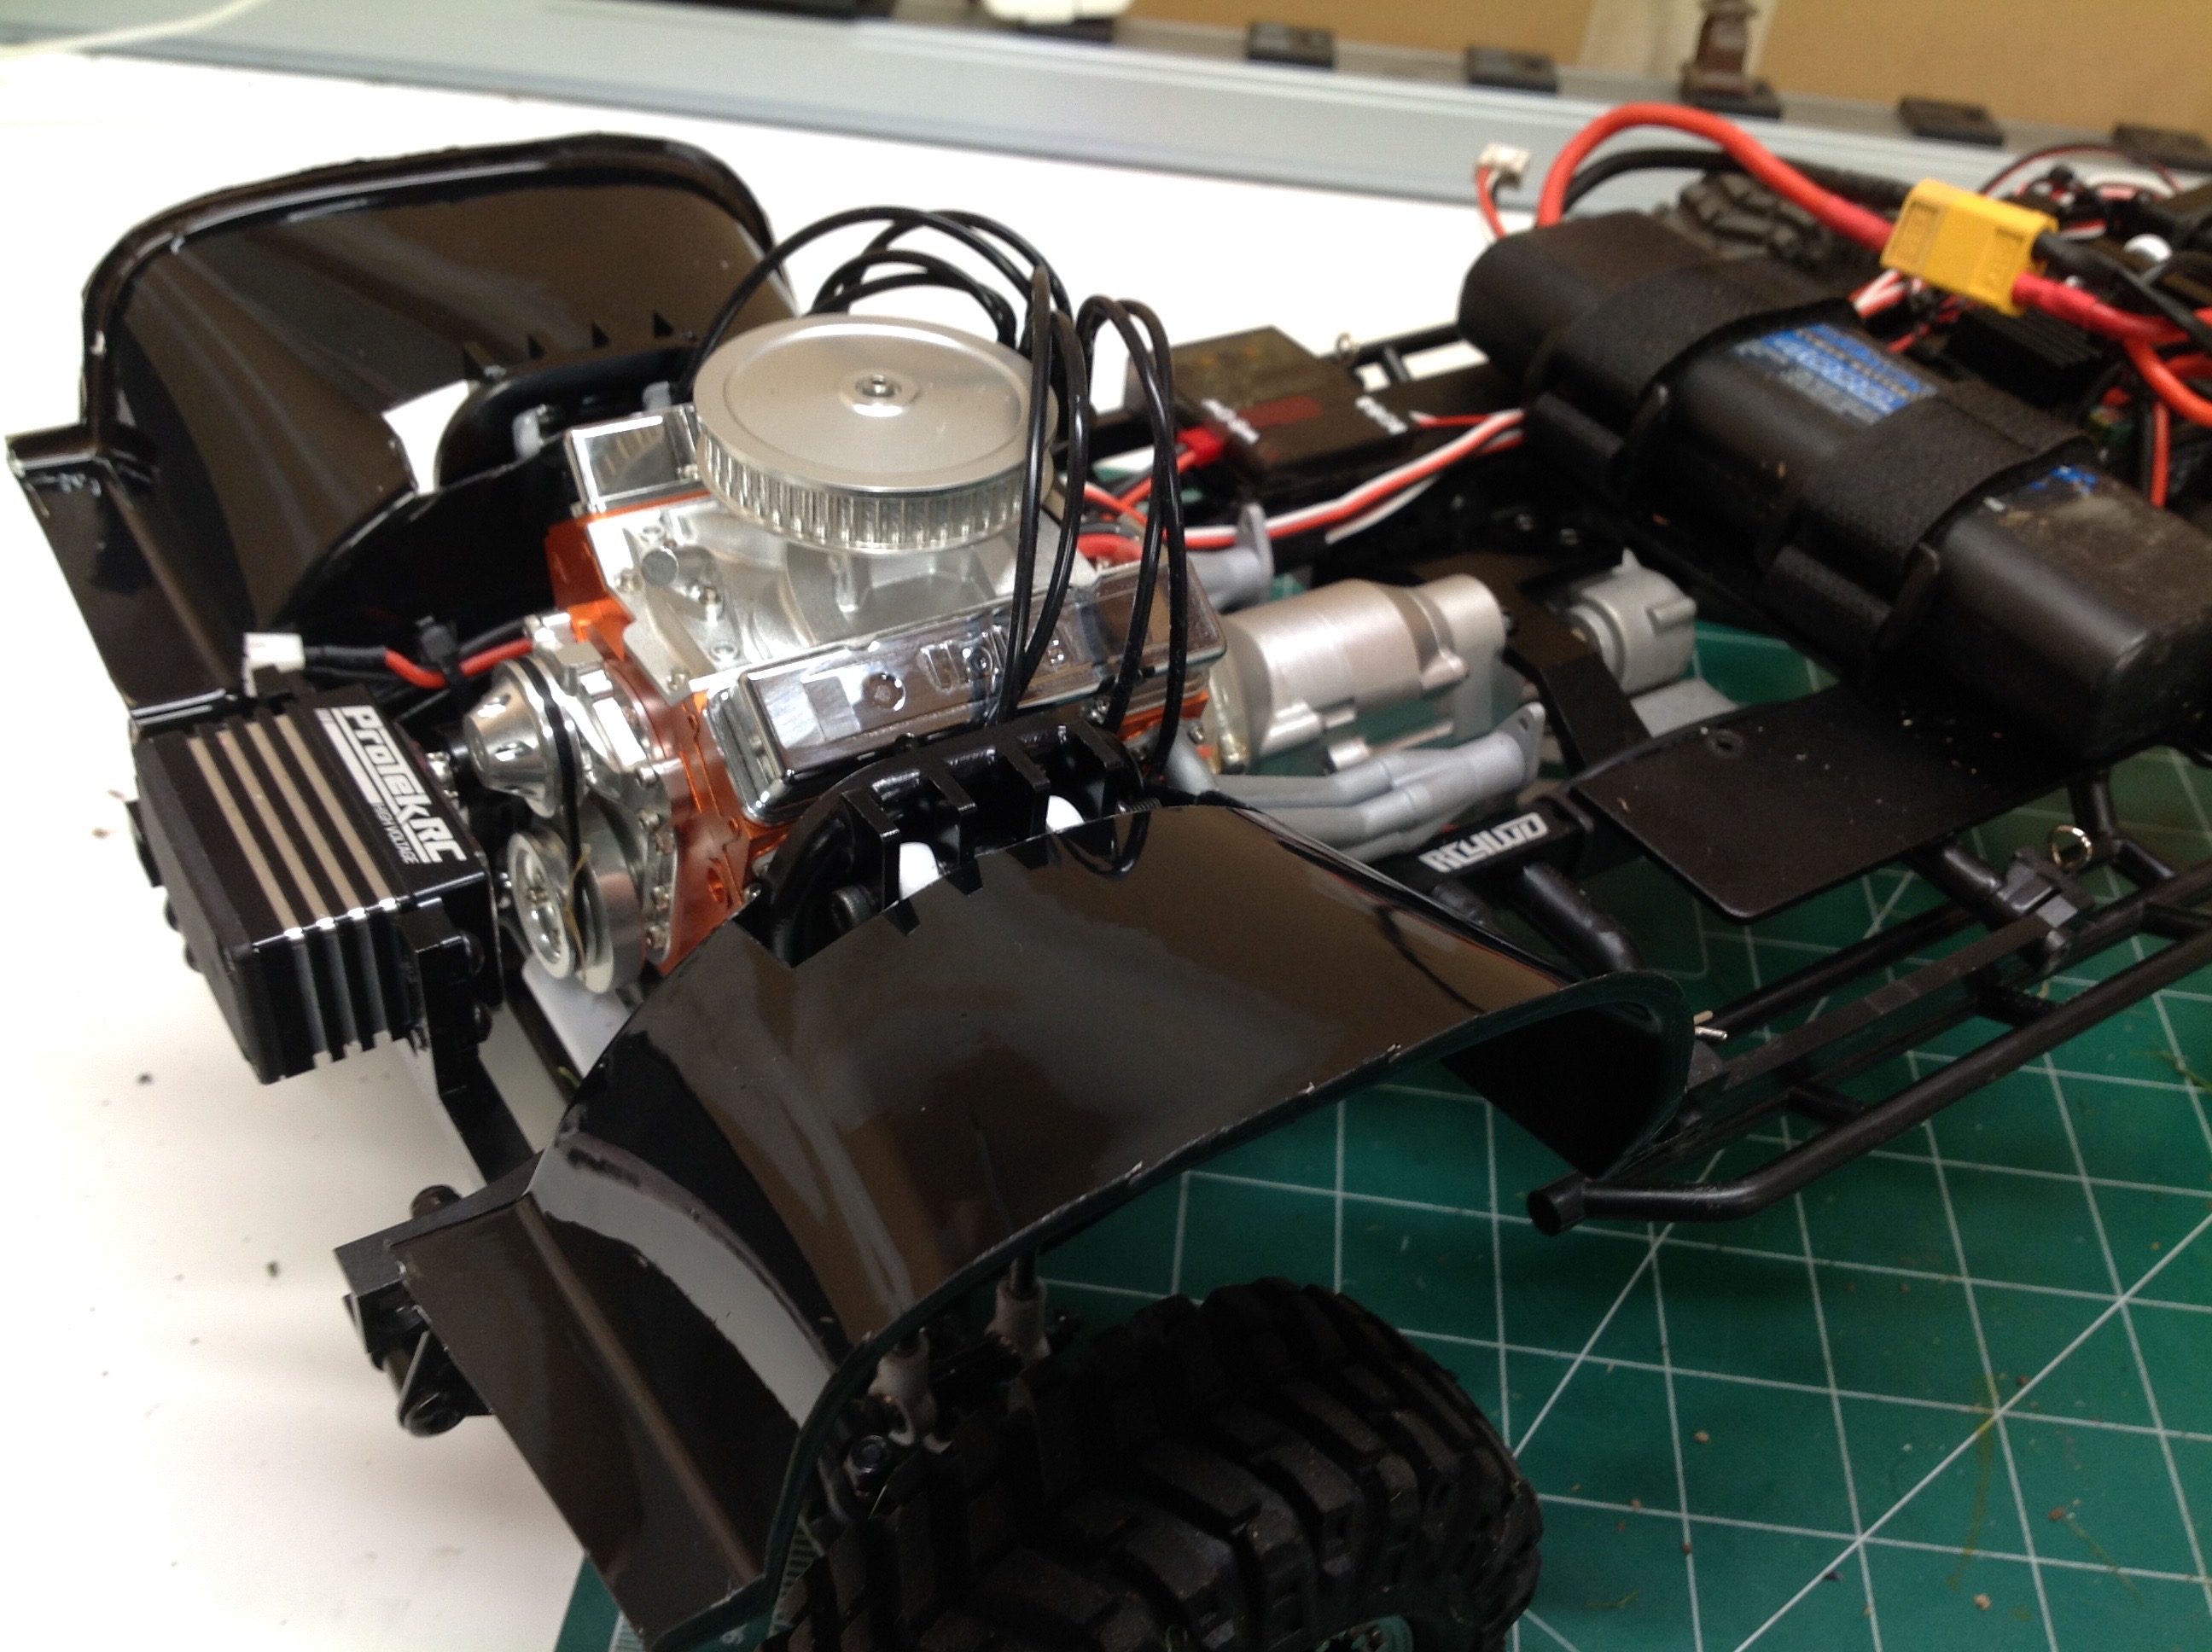
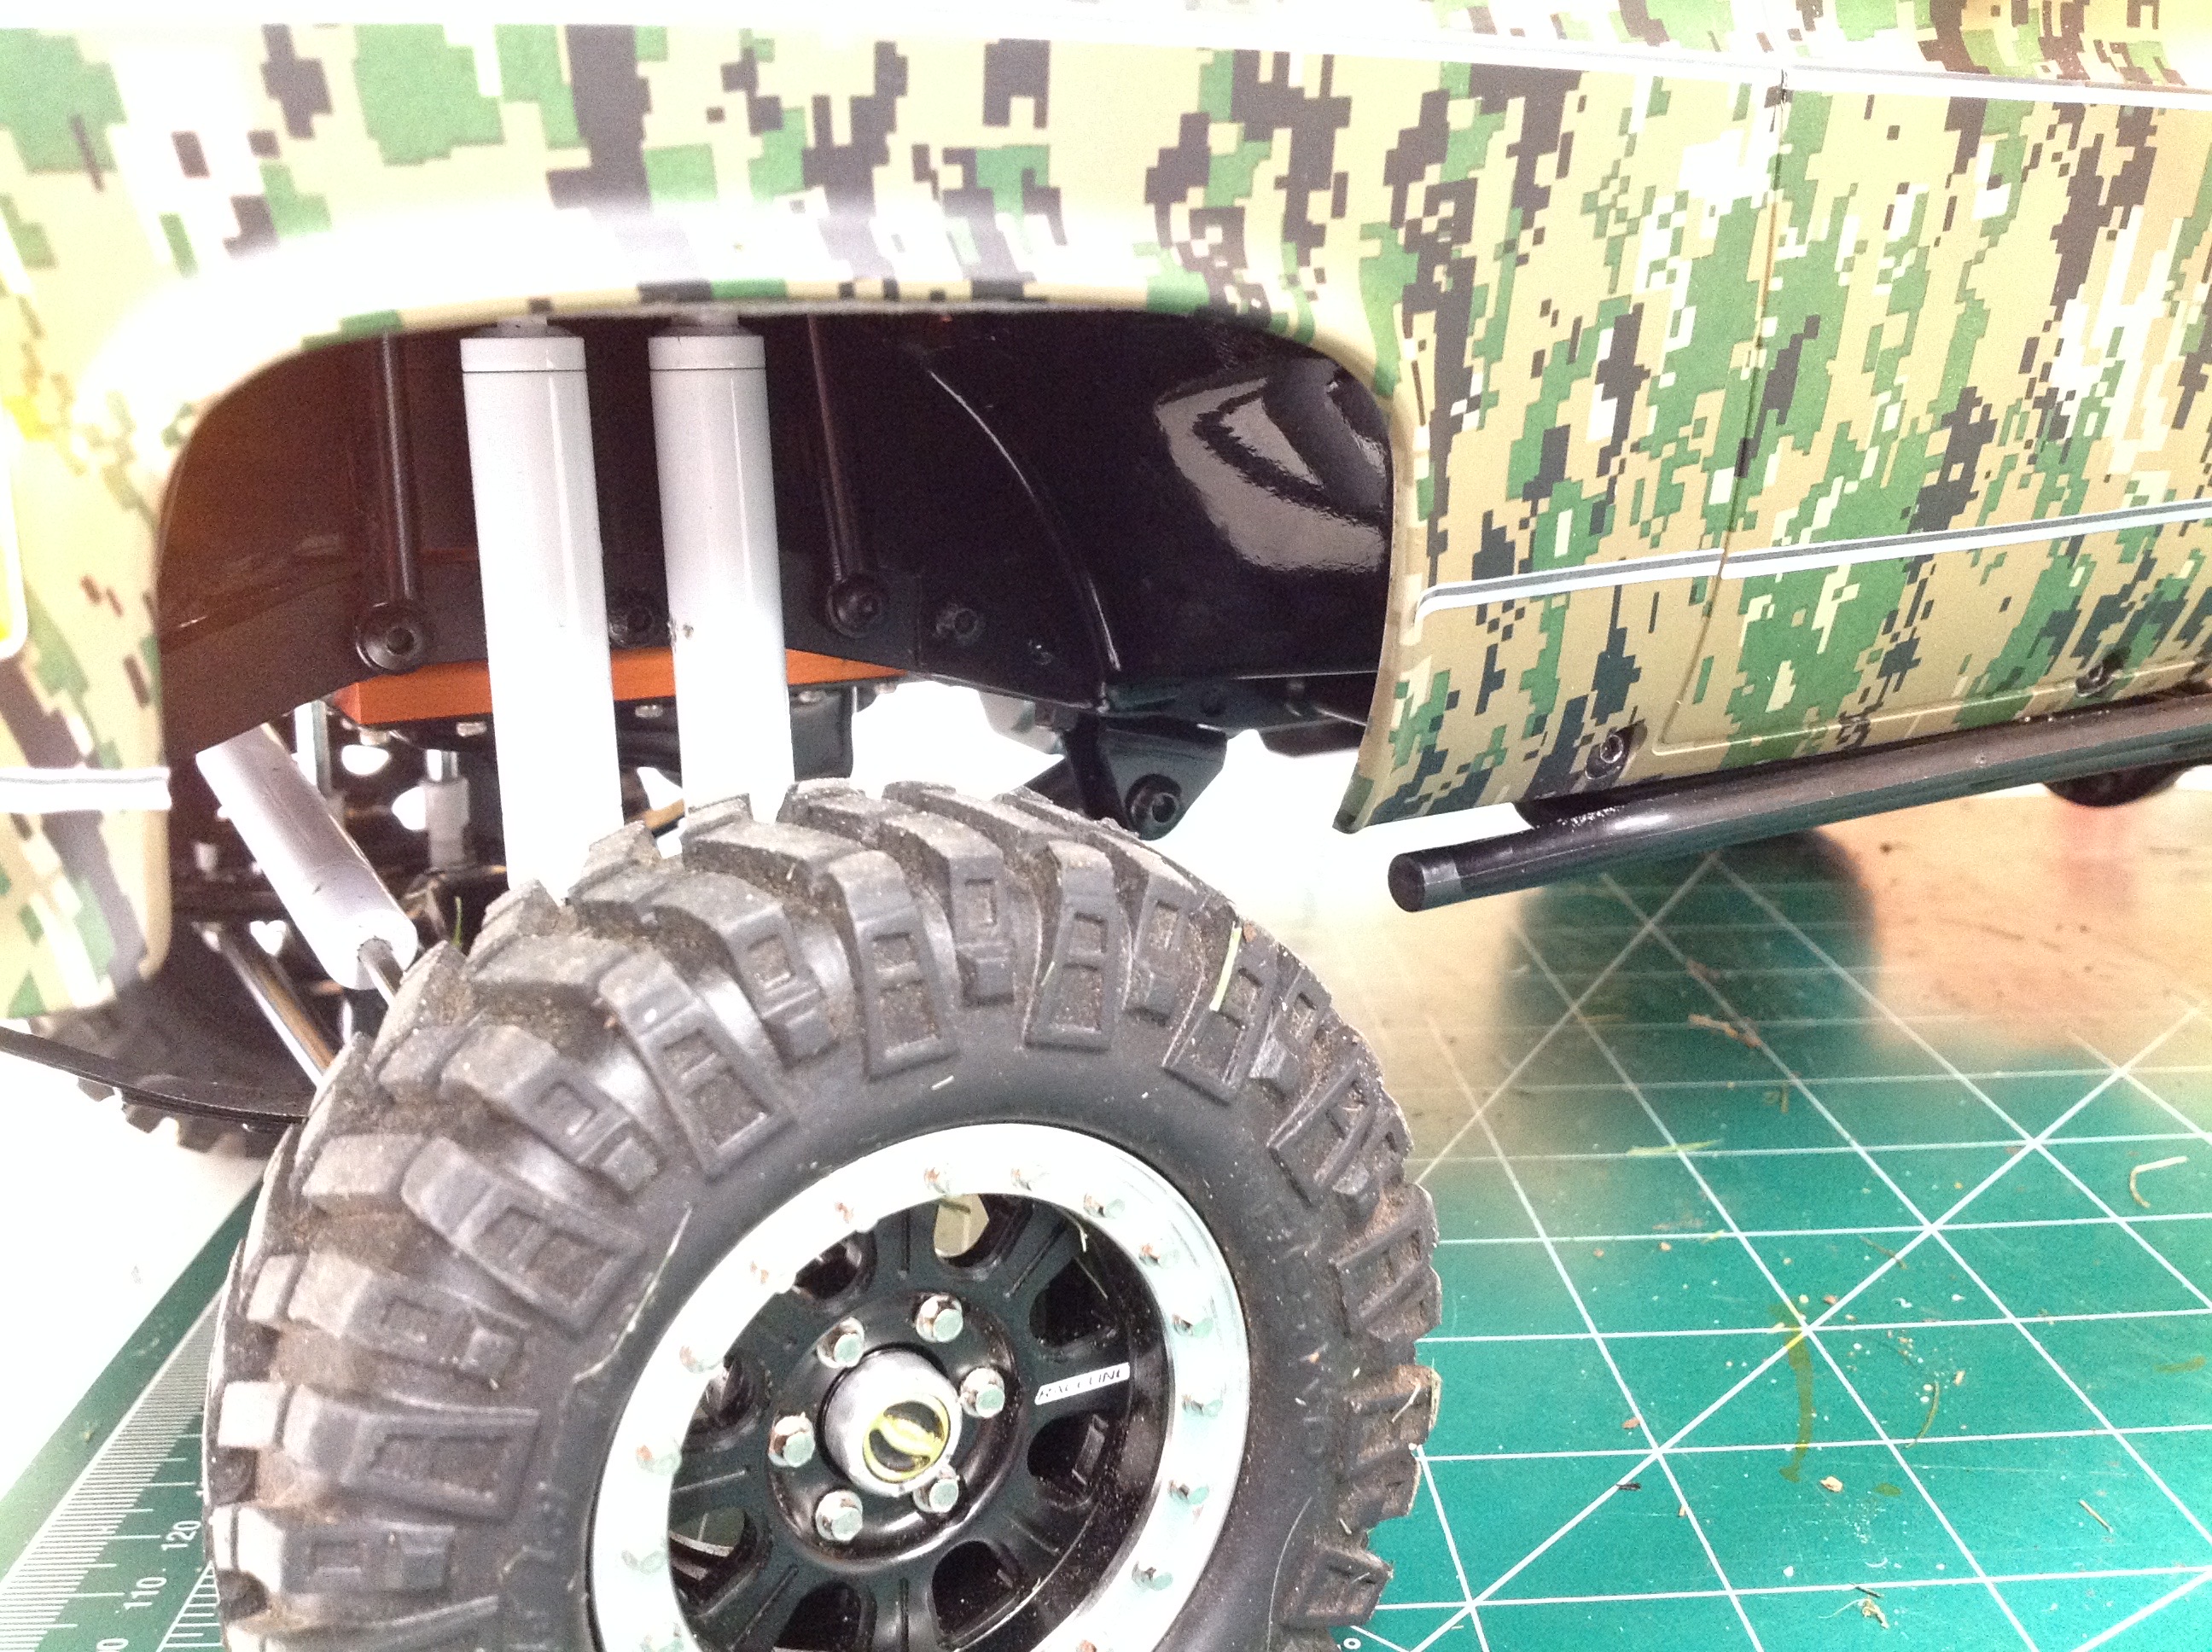
The big gaps around the otherwise beautiful engine bay bothered me so I
bought this set of front inner fenders. They are nothing more than a
slab of polycarbonate. I started by painting them black and then
cut them out.
These pictures show the difference before and after the inner fenders
were installed. Although the parts are made to work with the
Blazer body, they are not made for this version of the chassis with
double front shocks. To make them fit I needed to cut slots for
the shock towers.
Here is another set of before and after photos, this time with the body
on. With the inner fenders installed, you no longer see the engine
and exhaust through the wheel well.
Since the snow plow is really not usable when driving off road and I
didn't want this truck to be single purpose, I added this tube style
winch bumper for normal use. It is easy to swap on the snow plow
when desired with just two screws.
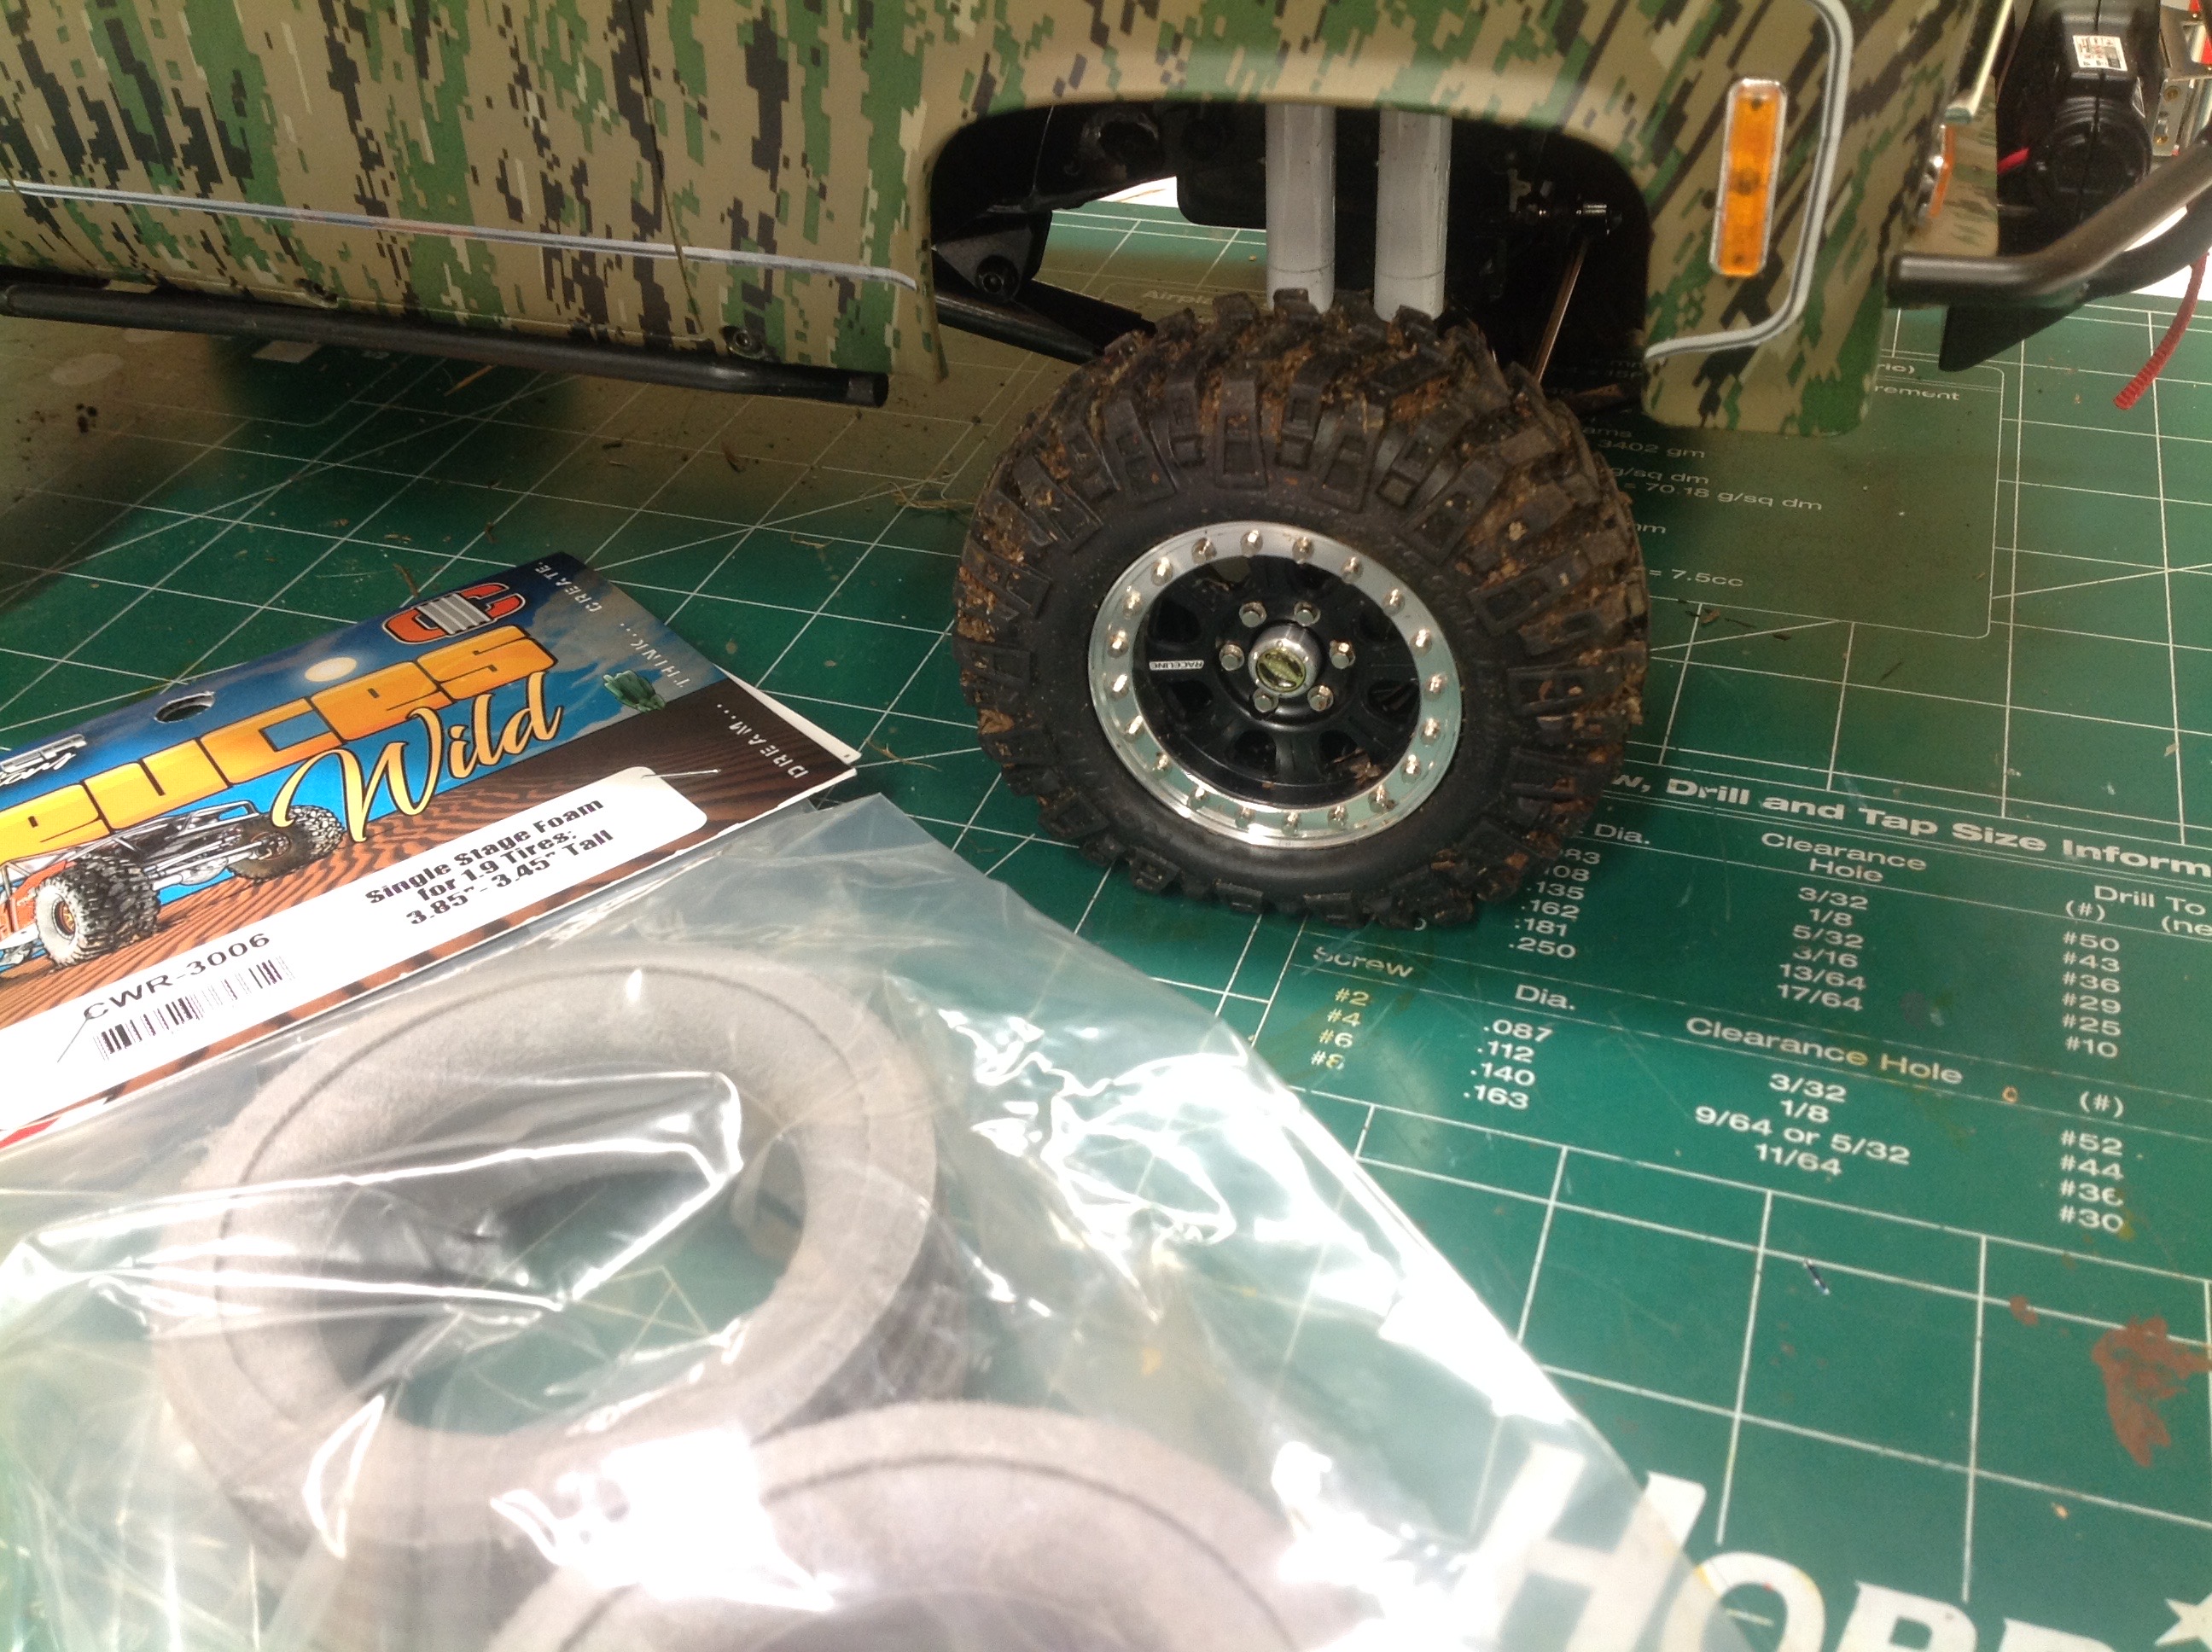
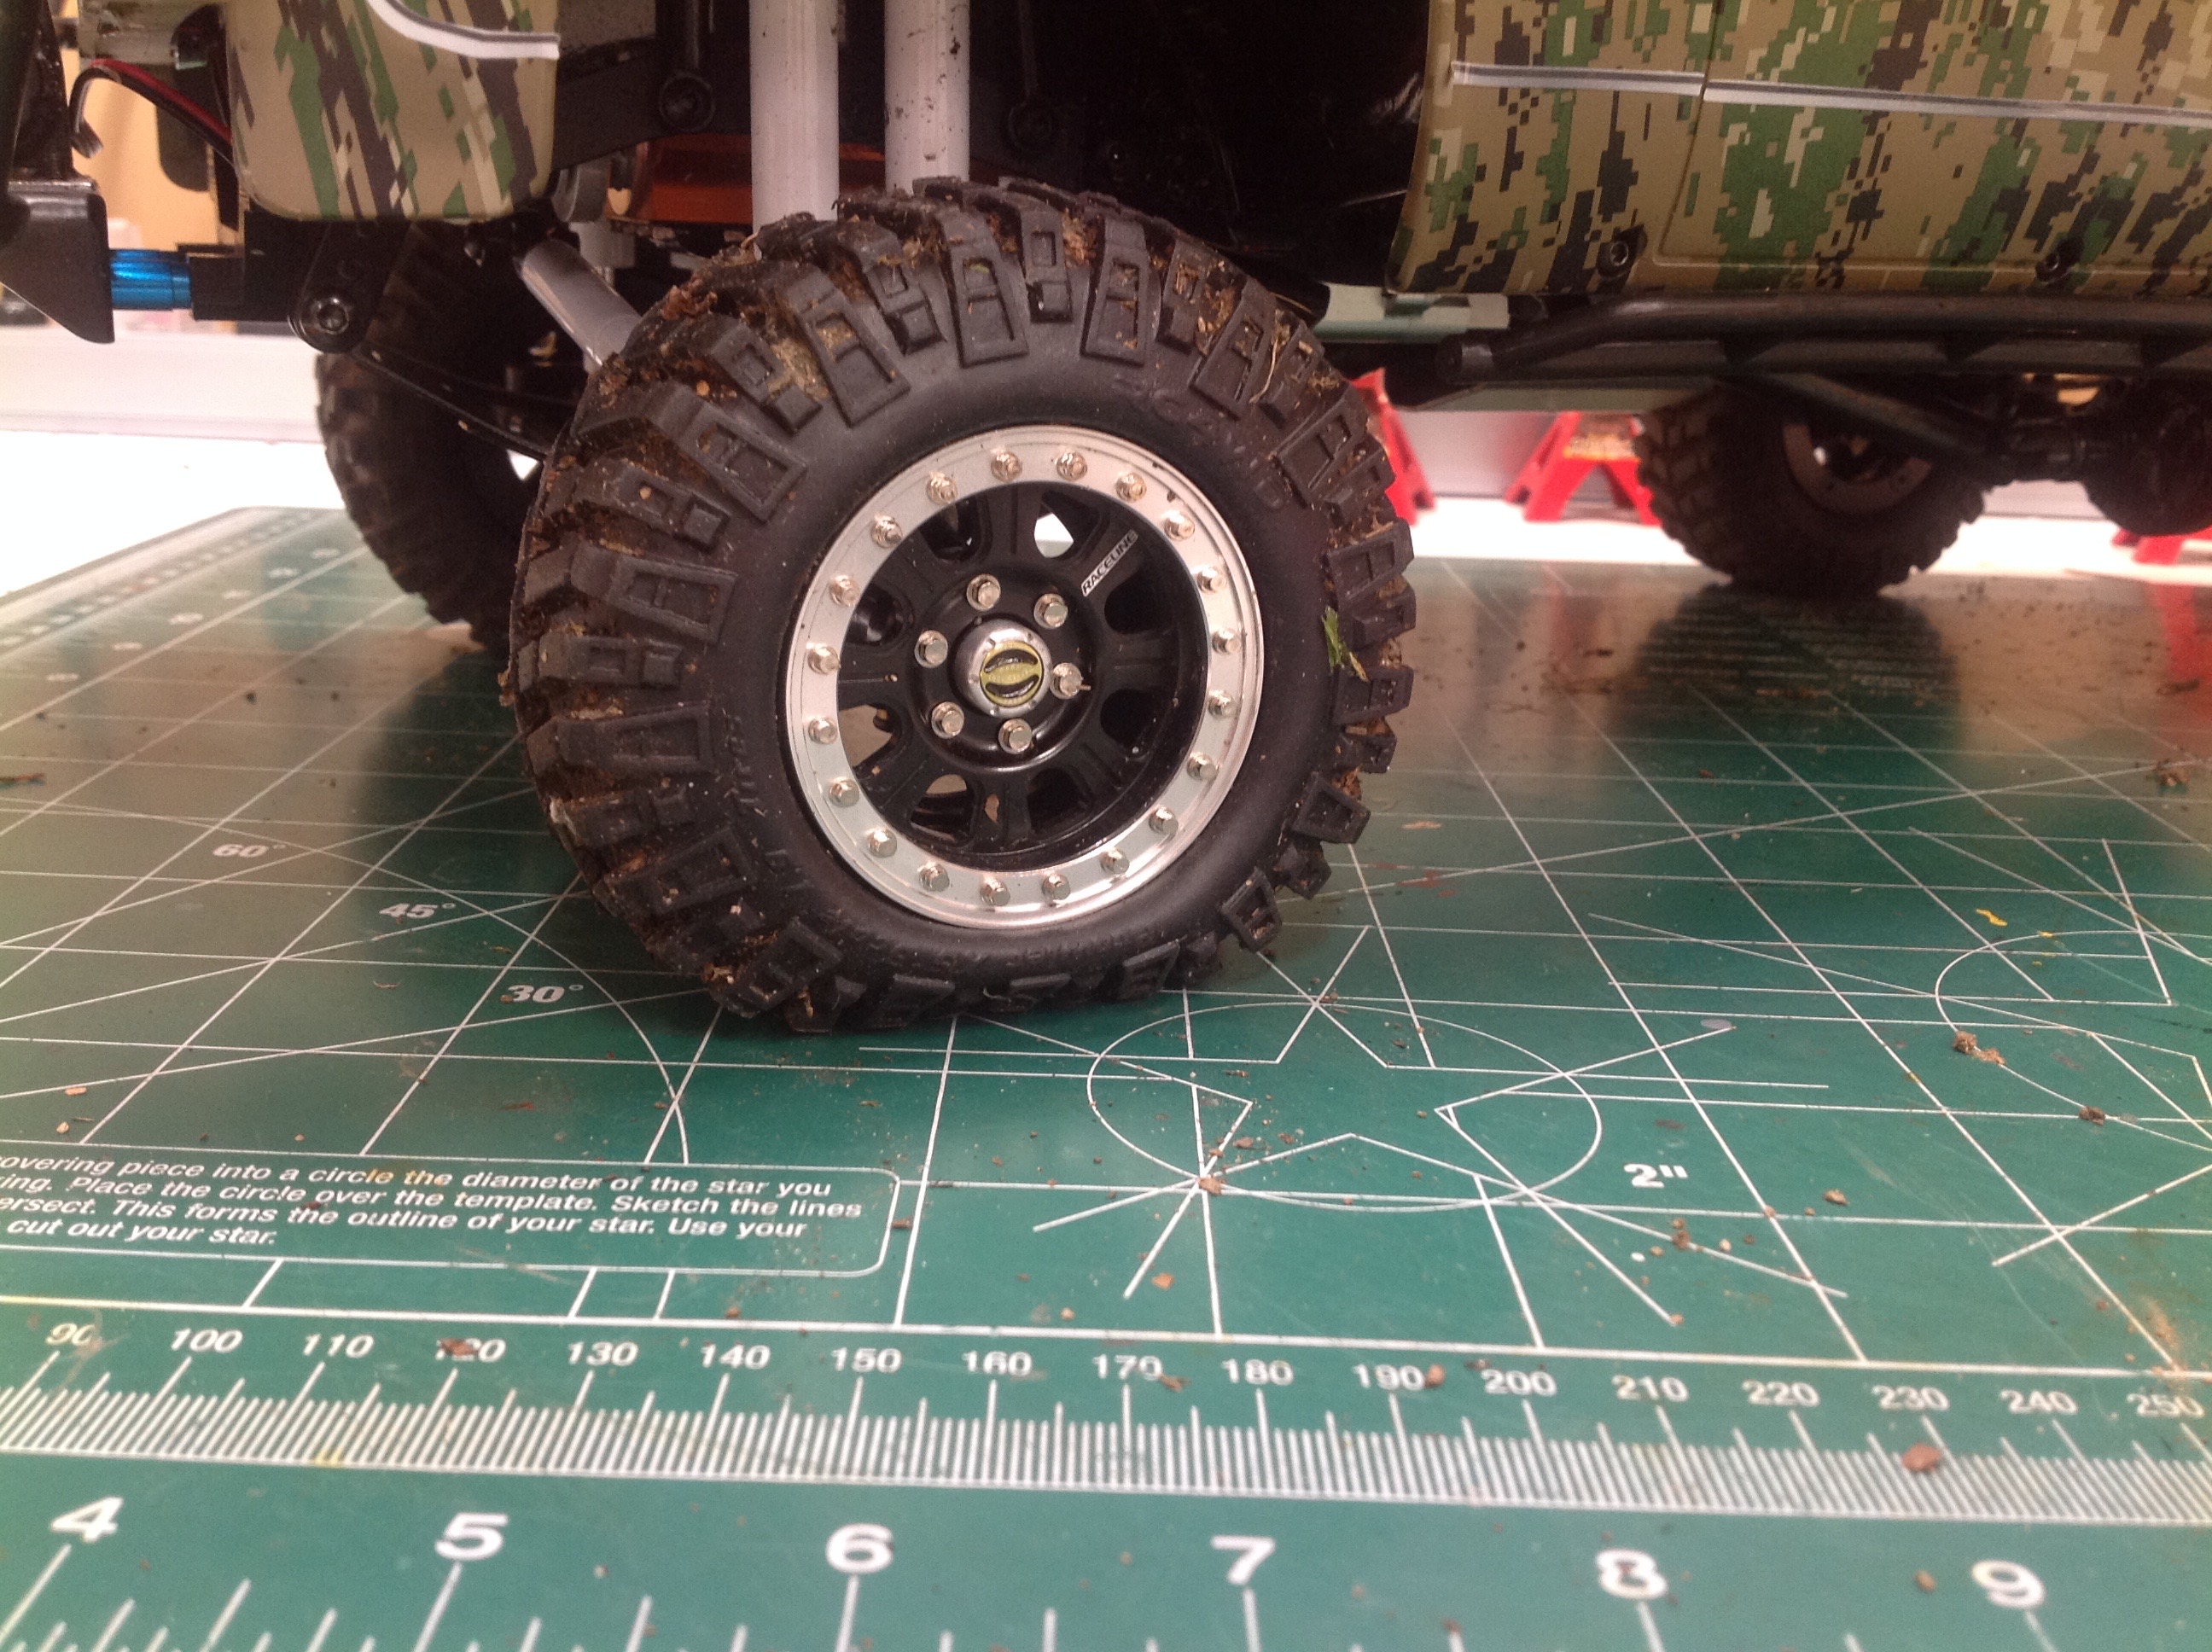
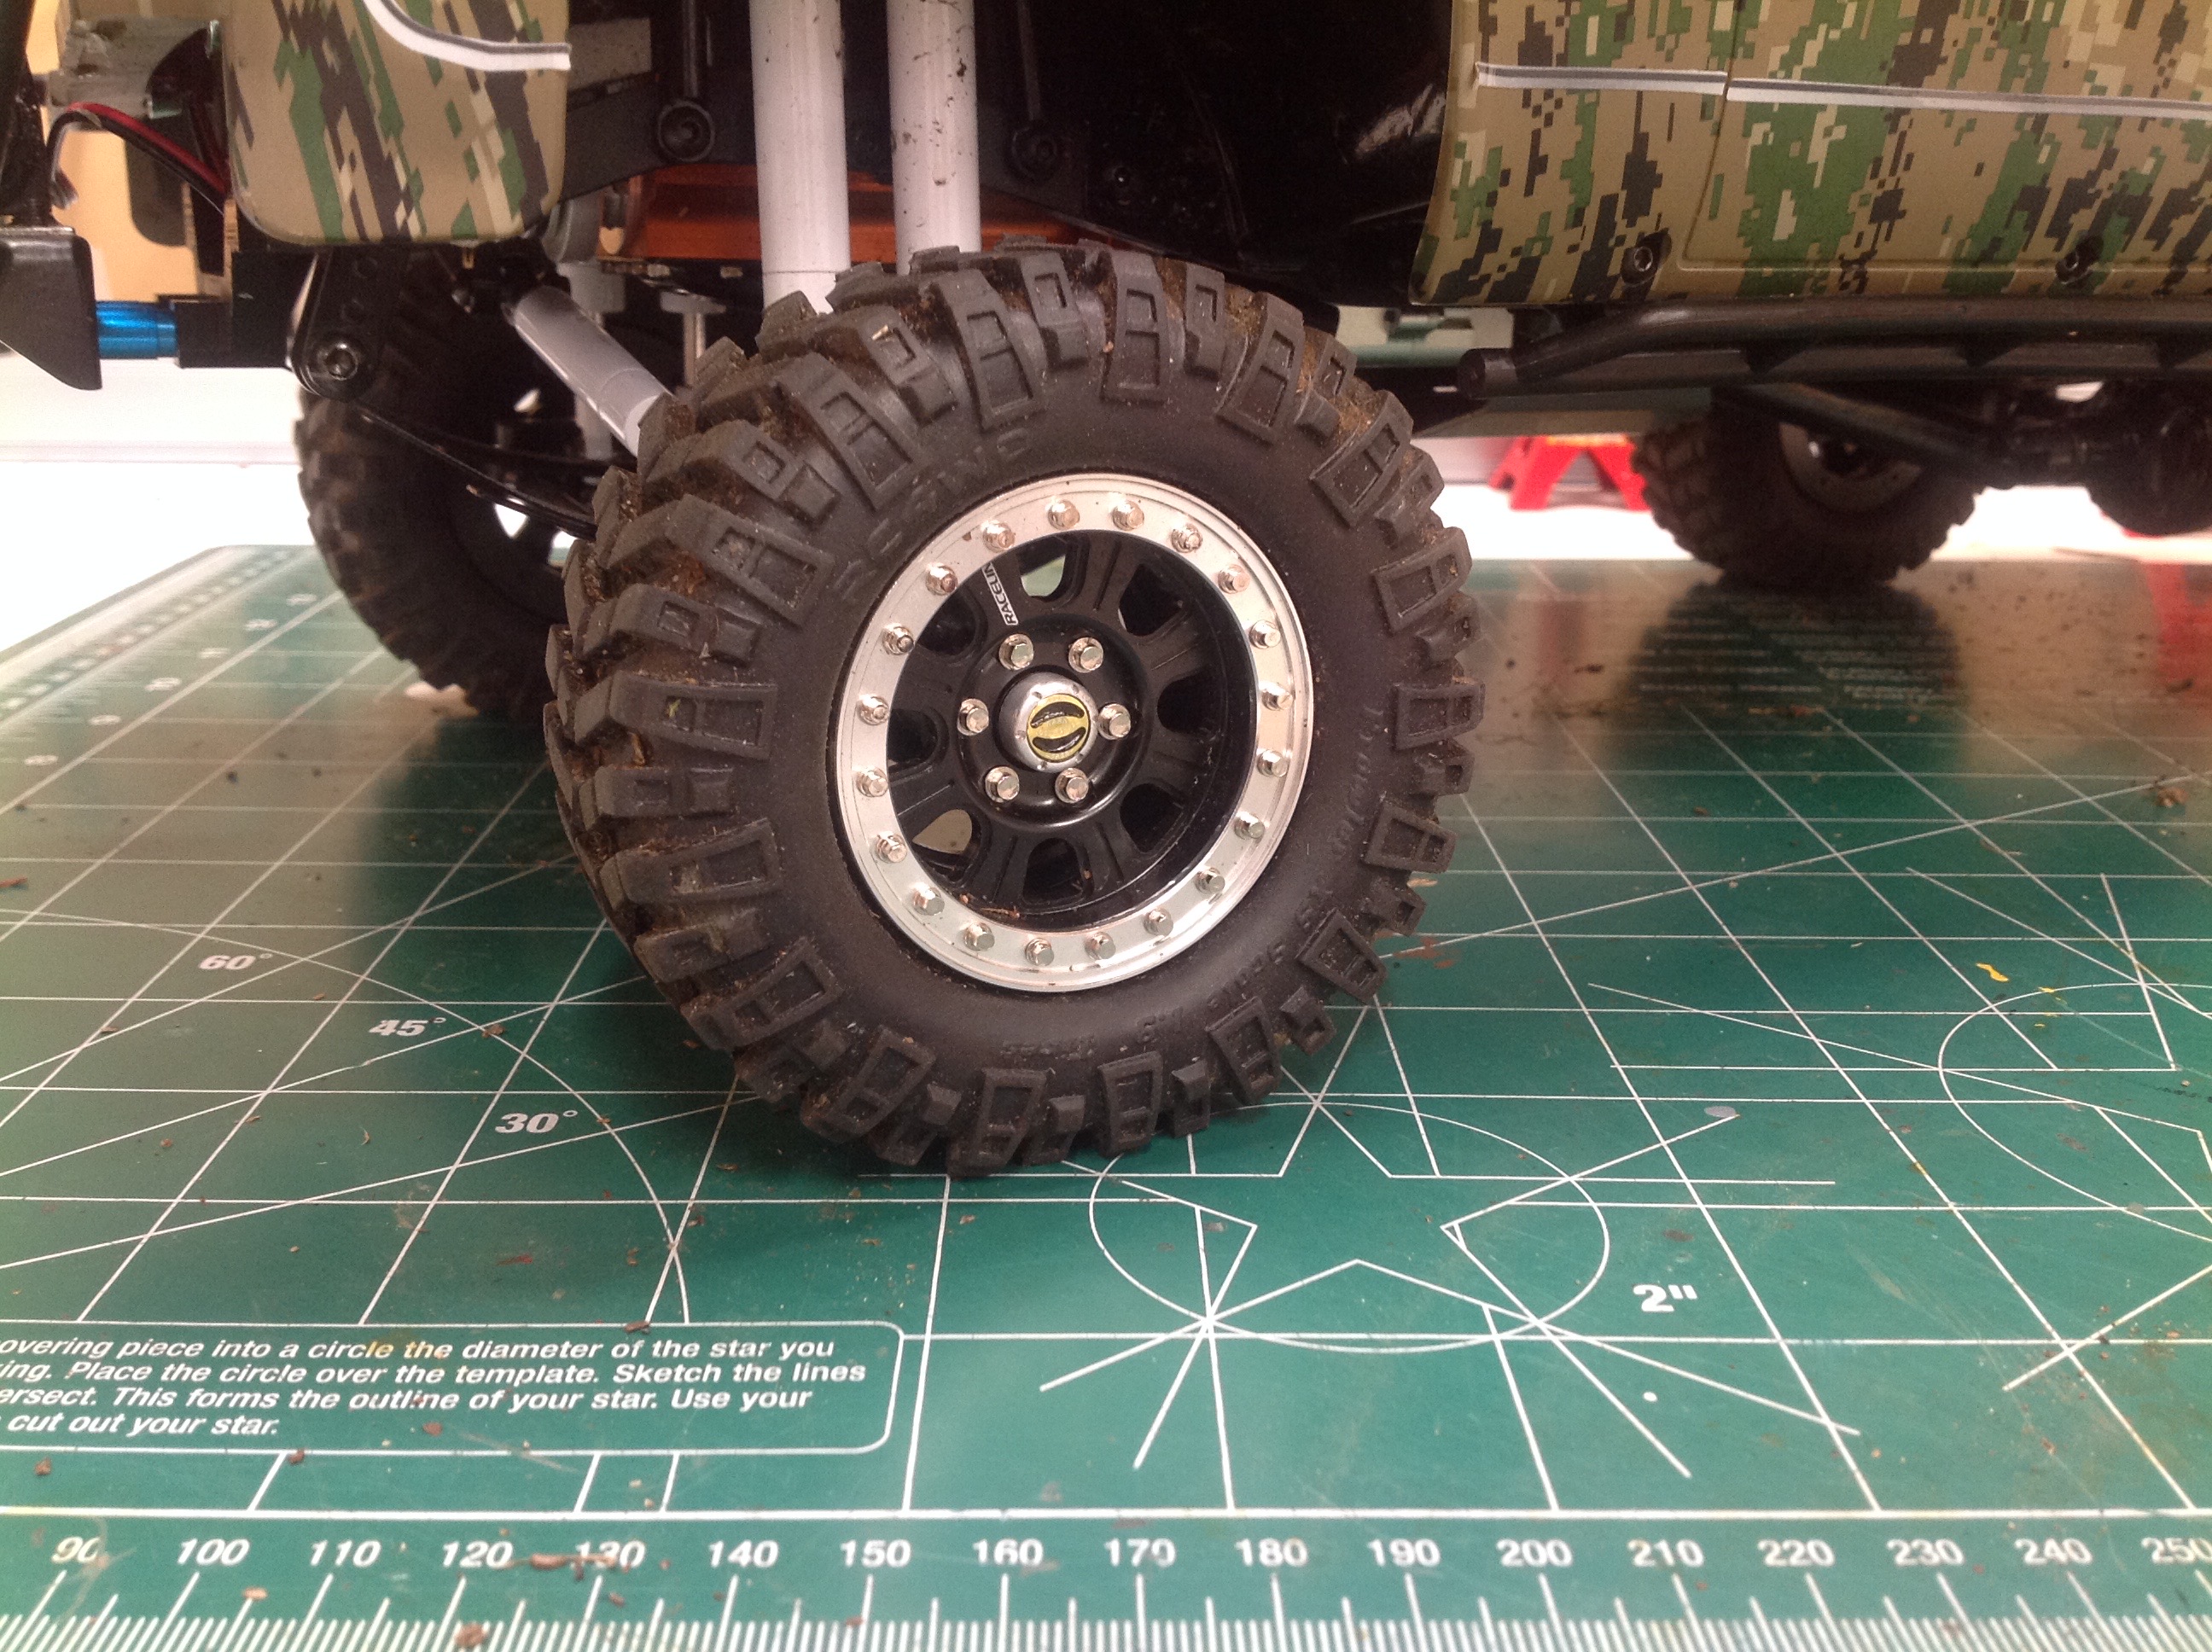
After driving for a while, I found the biggest problem to be the soft
front tires. Because the engine is so heavy and I've added either a
steel bumper or a snow plow, the front tires always look flat as shown
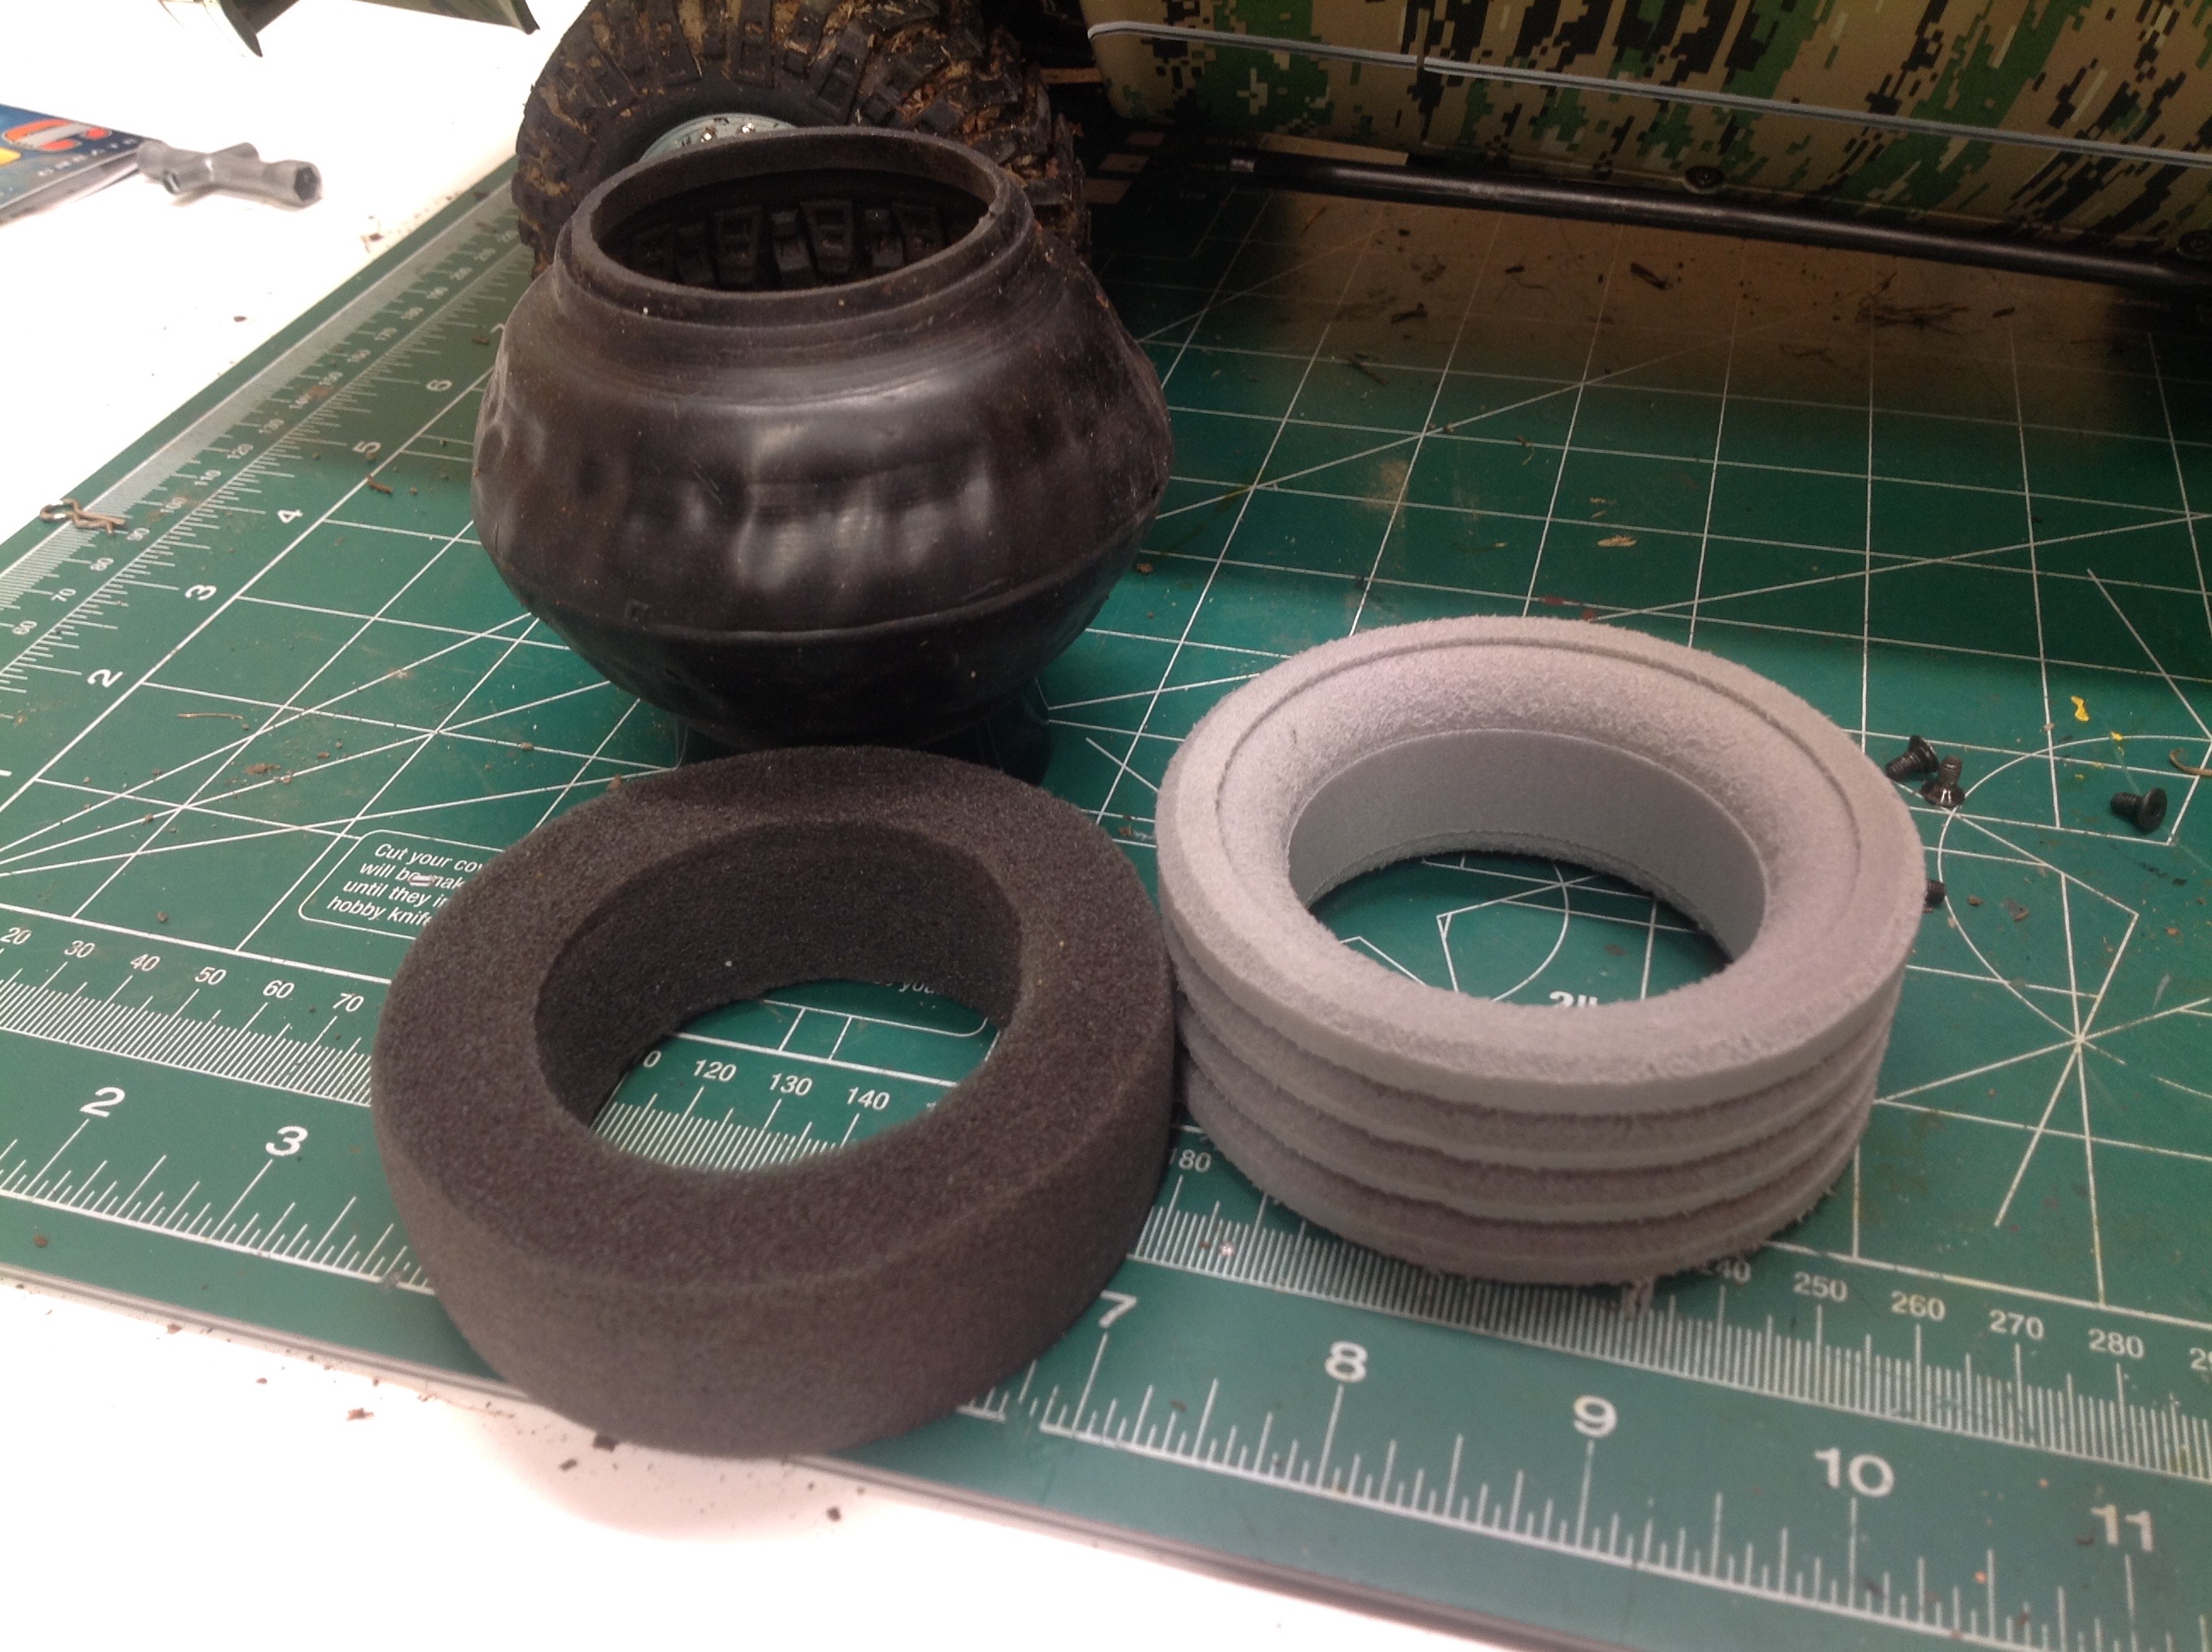
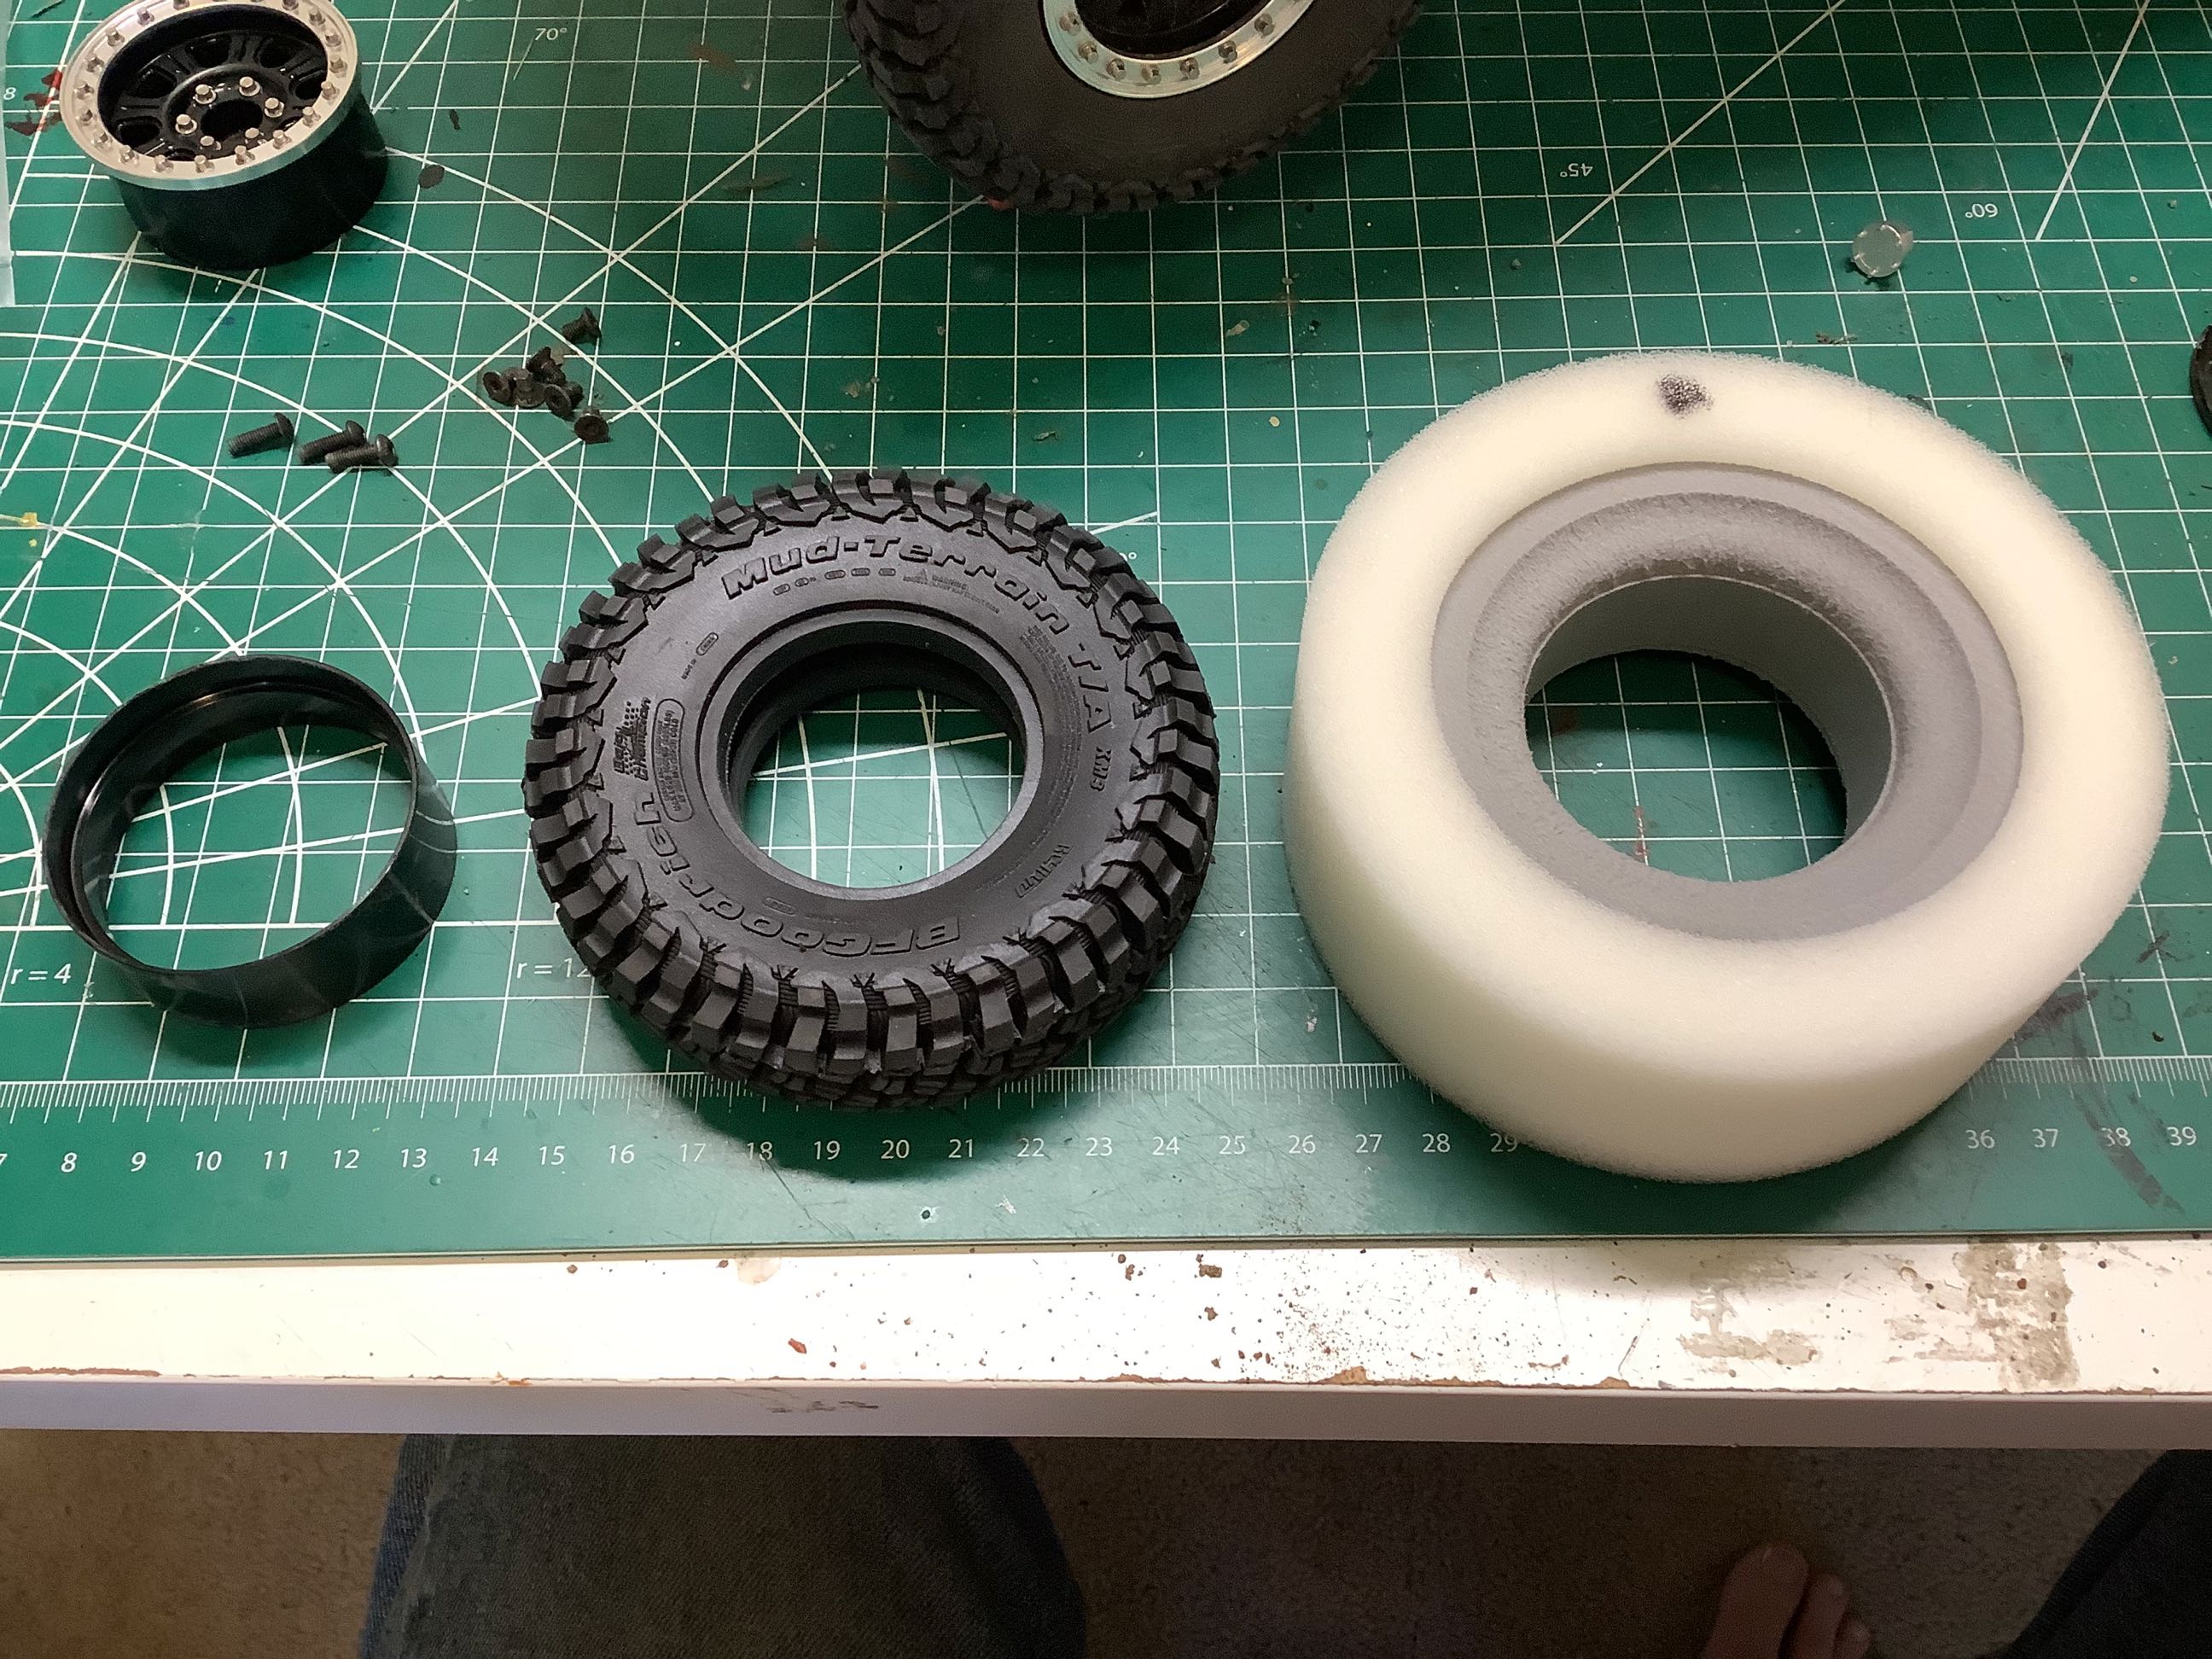
on the left. To solve this I got a set of closed cell foams from
Crawler Innovations. I was able to remove the old foams and
install the new without totally removing the tires from the
beadlocks. I just removed the rear ring and then turned the tire
inside out as shown.
These before and after photos show the huge impact of the more rigid foams. The tires look much less ridiculous now.
Phase 2:
I came back later with another set of upgrades to improve this truck
even further. The idea was to solve the more nagging issues that
kept me from driving it very often. High on the list were the
stock RTR electronics and the undersized tires.
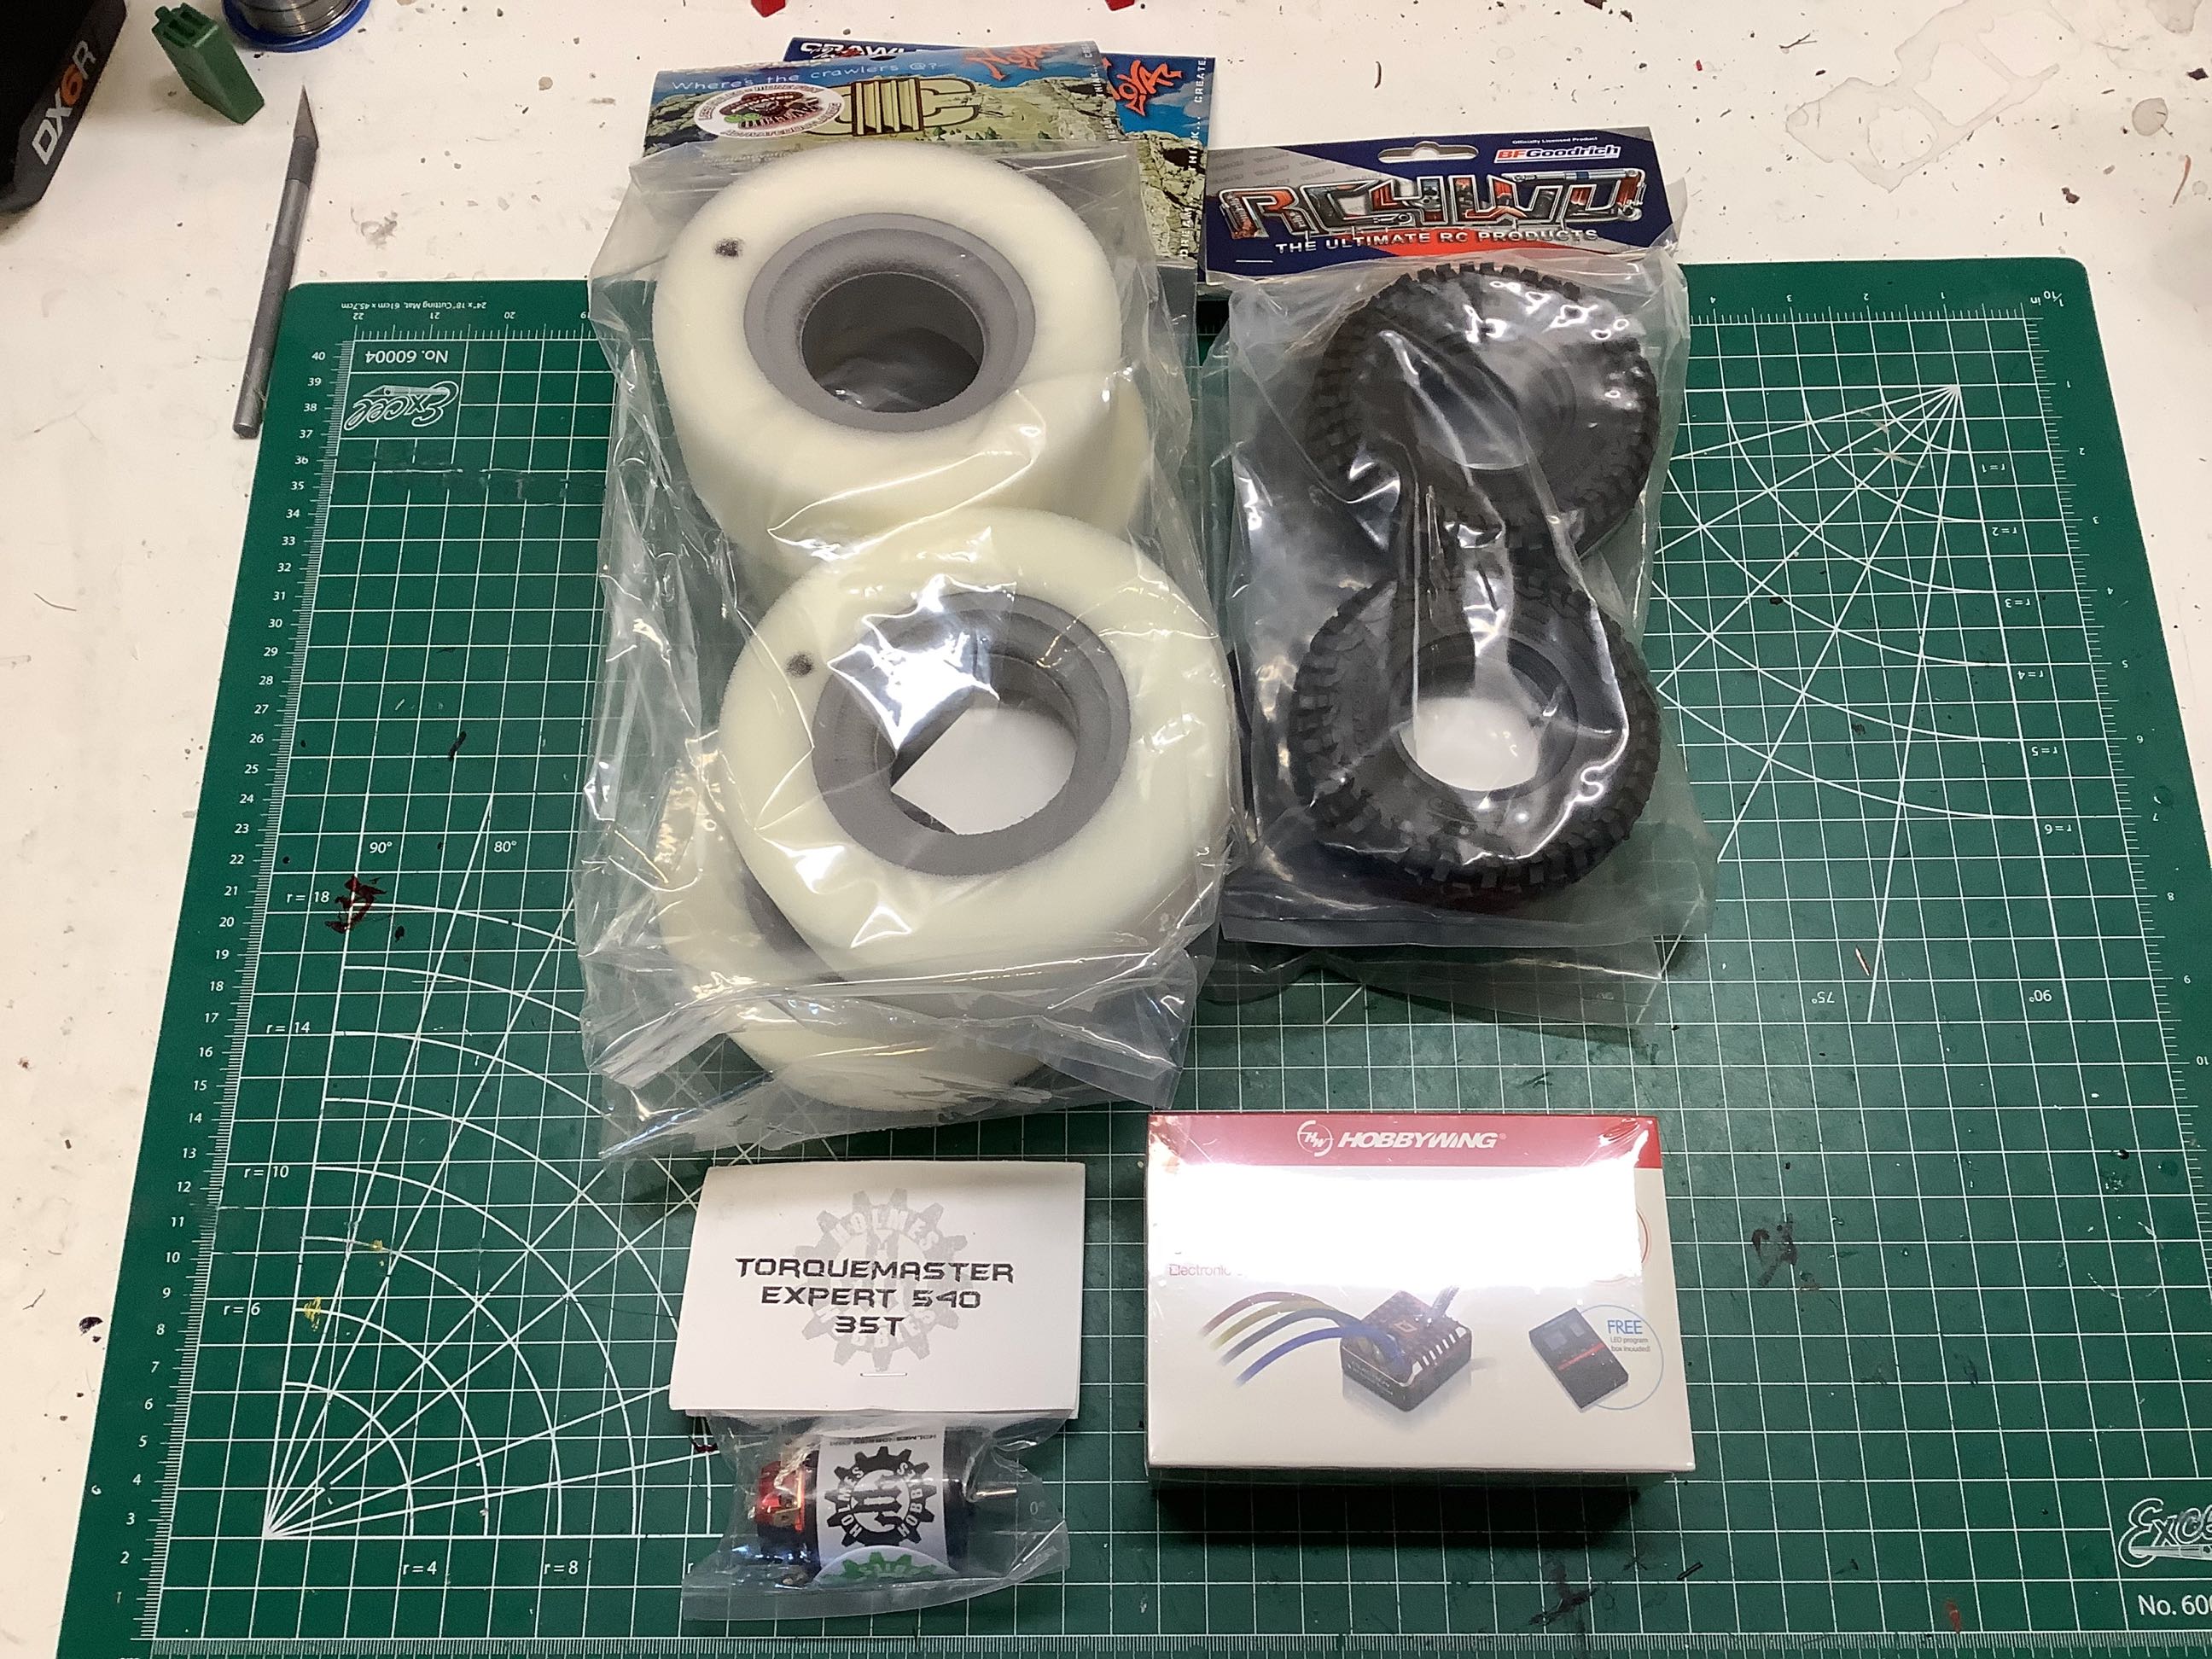
I had previously installed a set of hard foams to prevent the tires from
flattening. That was successful, but the tires were still much
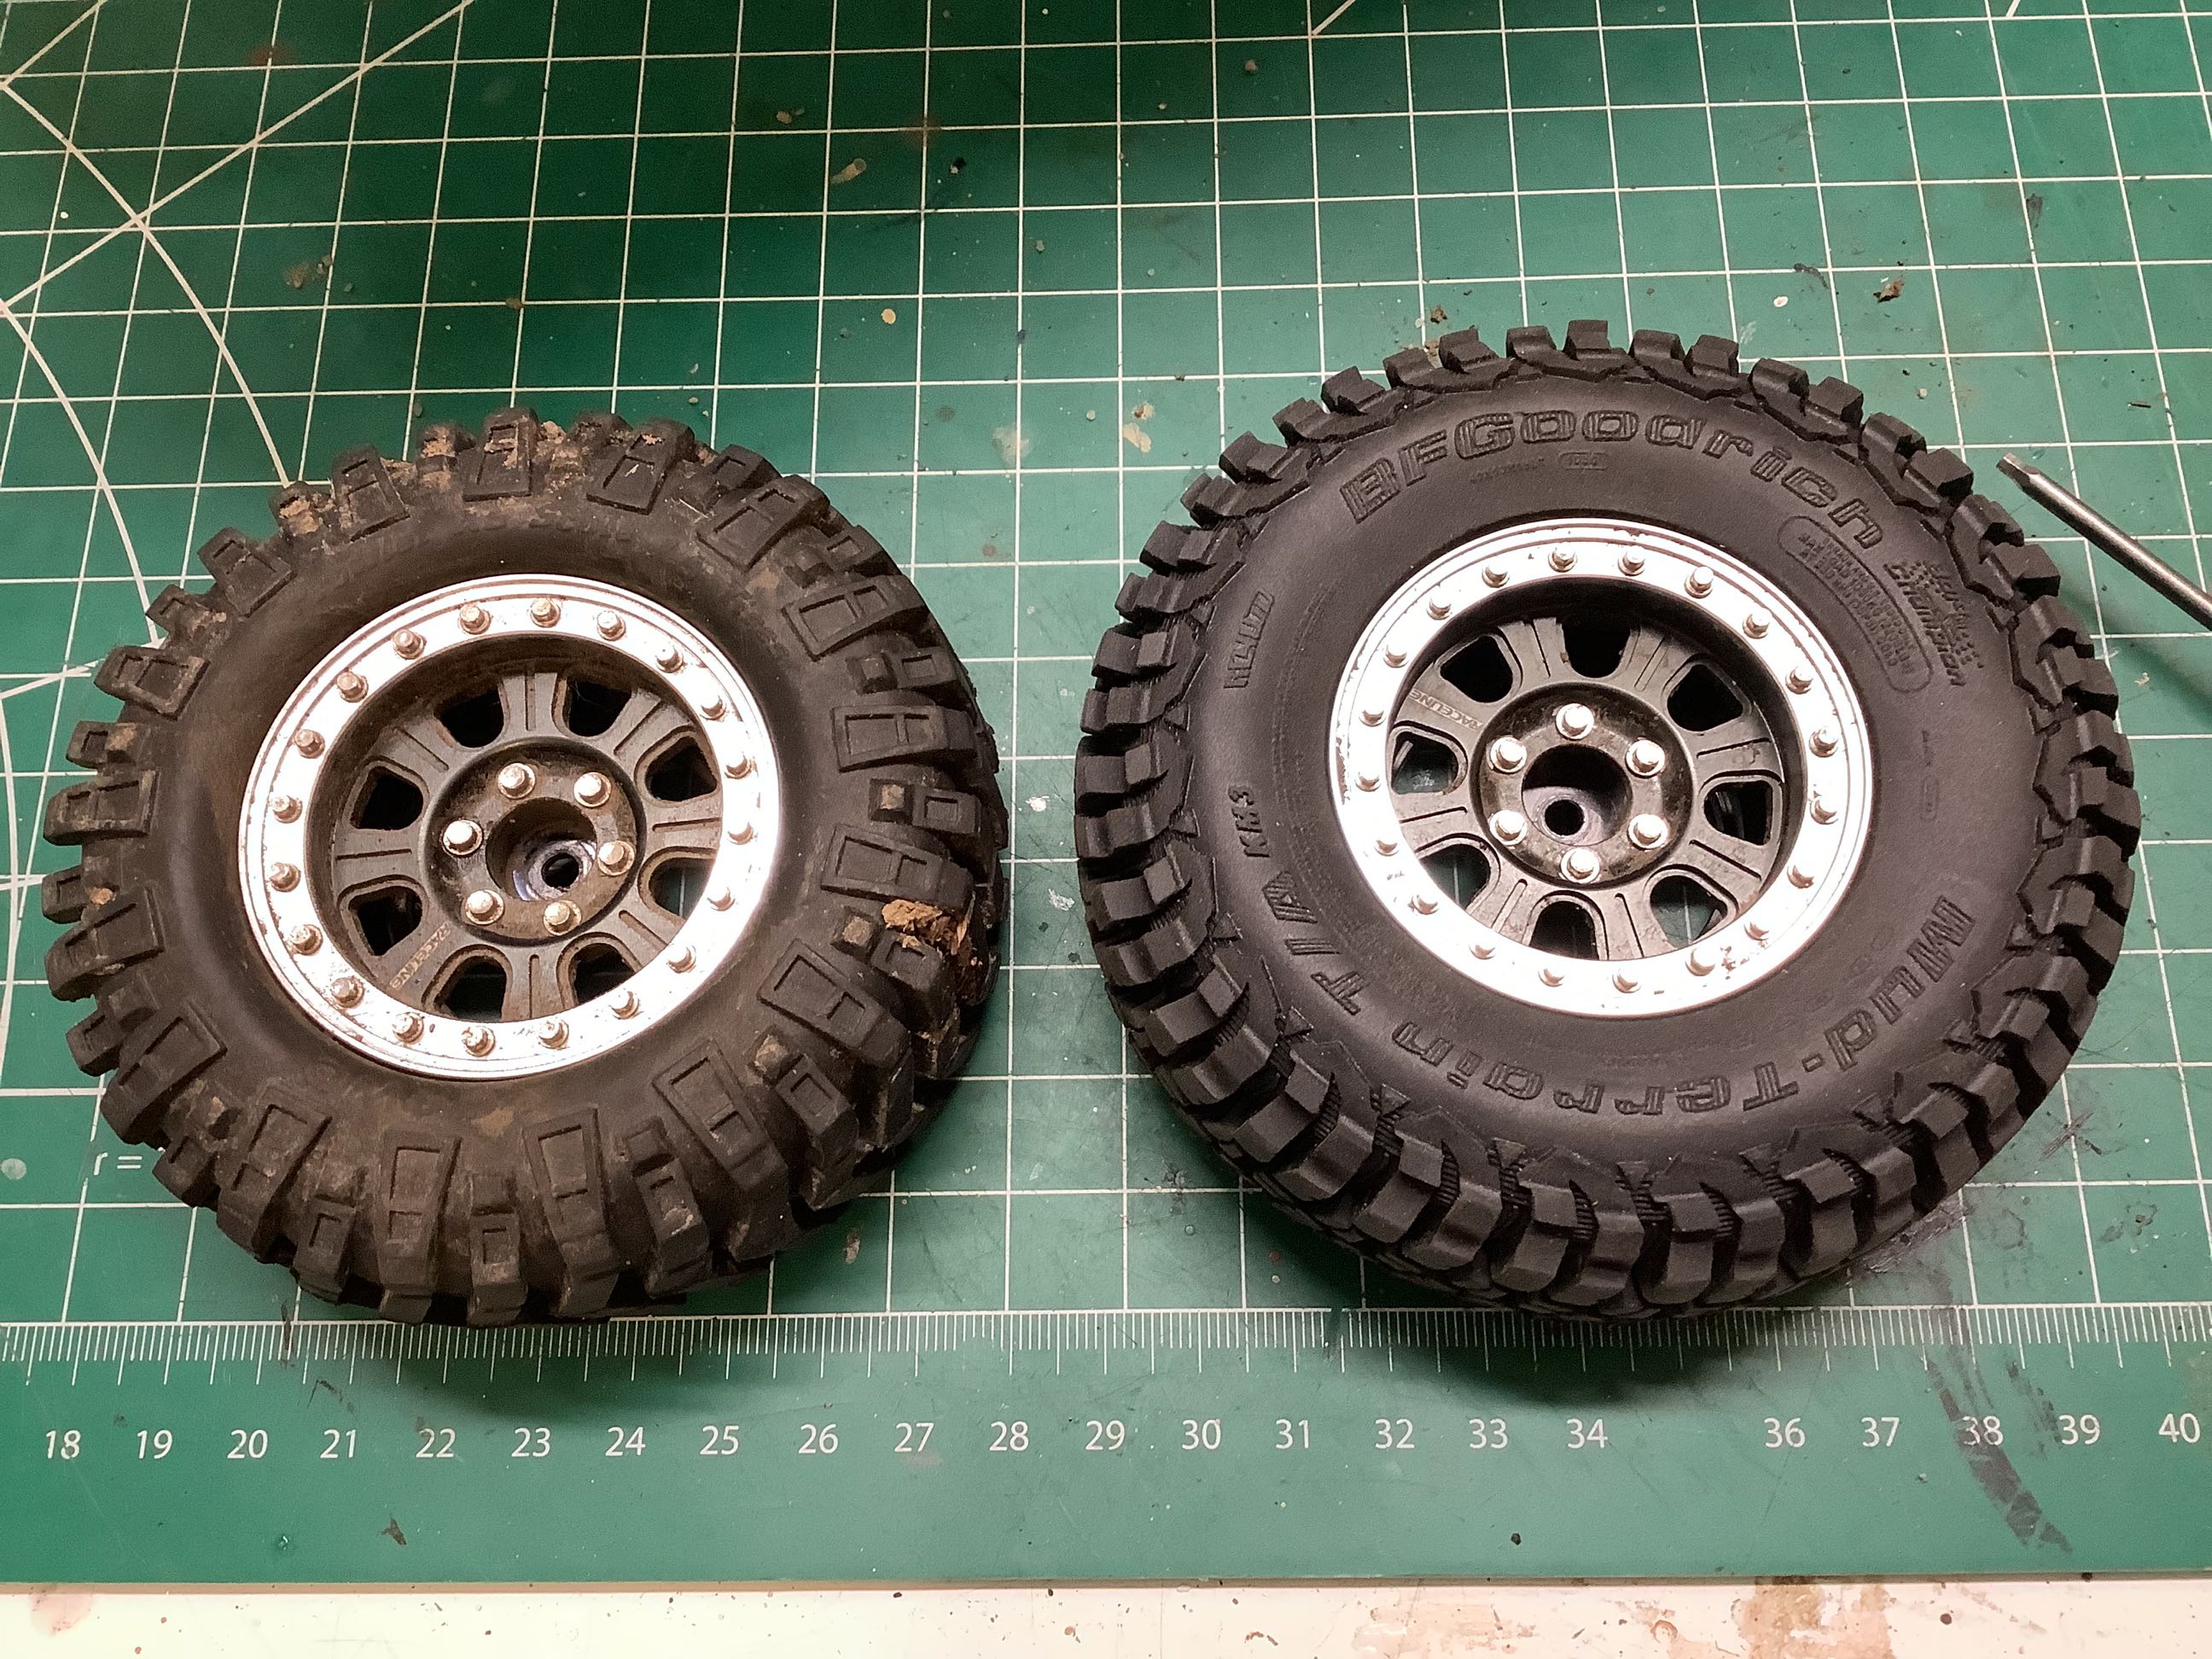
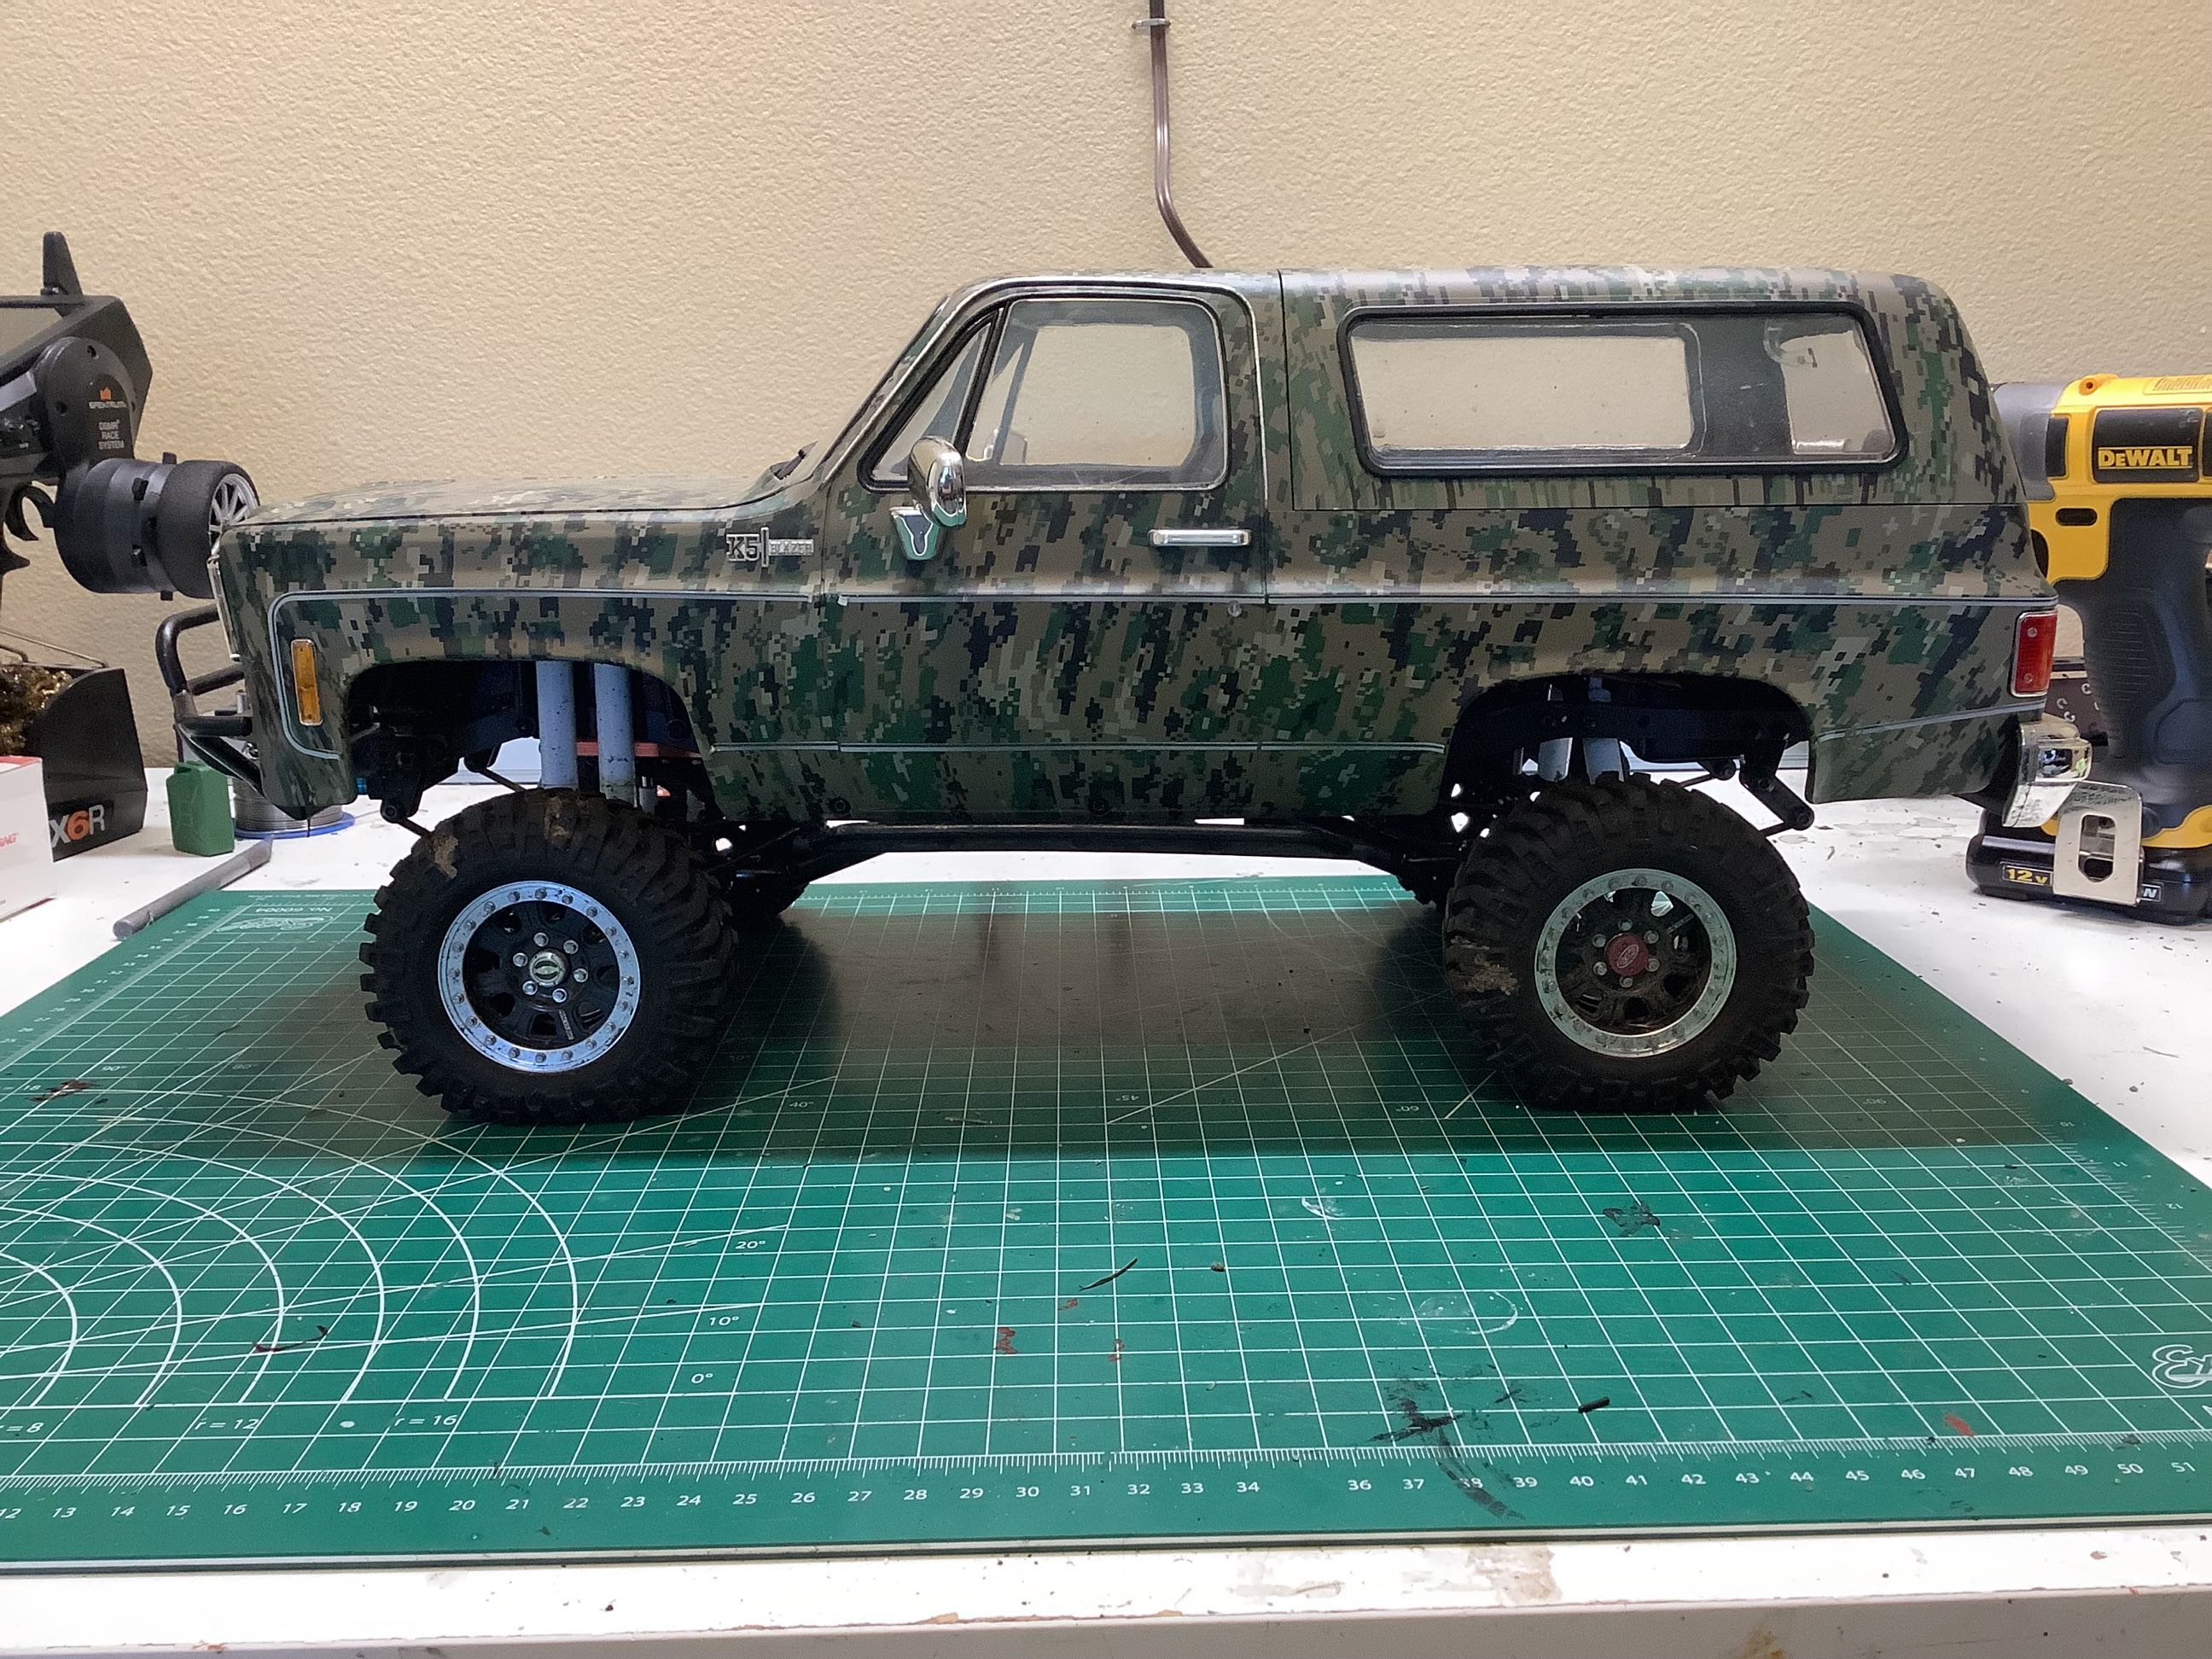
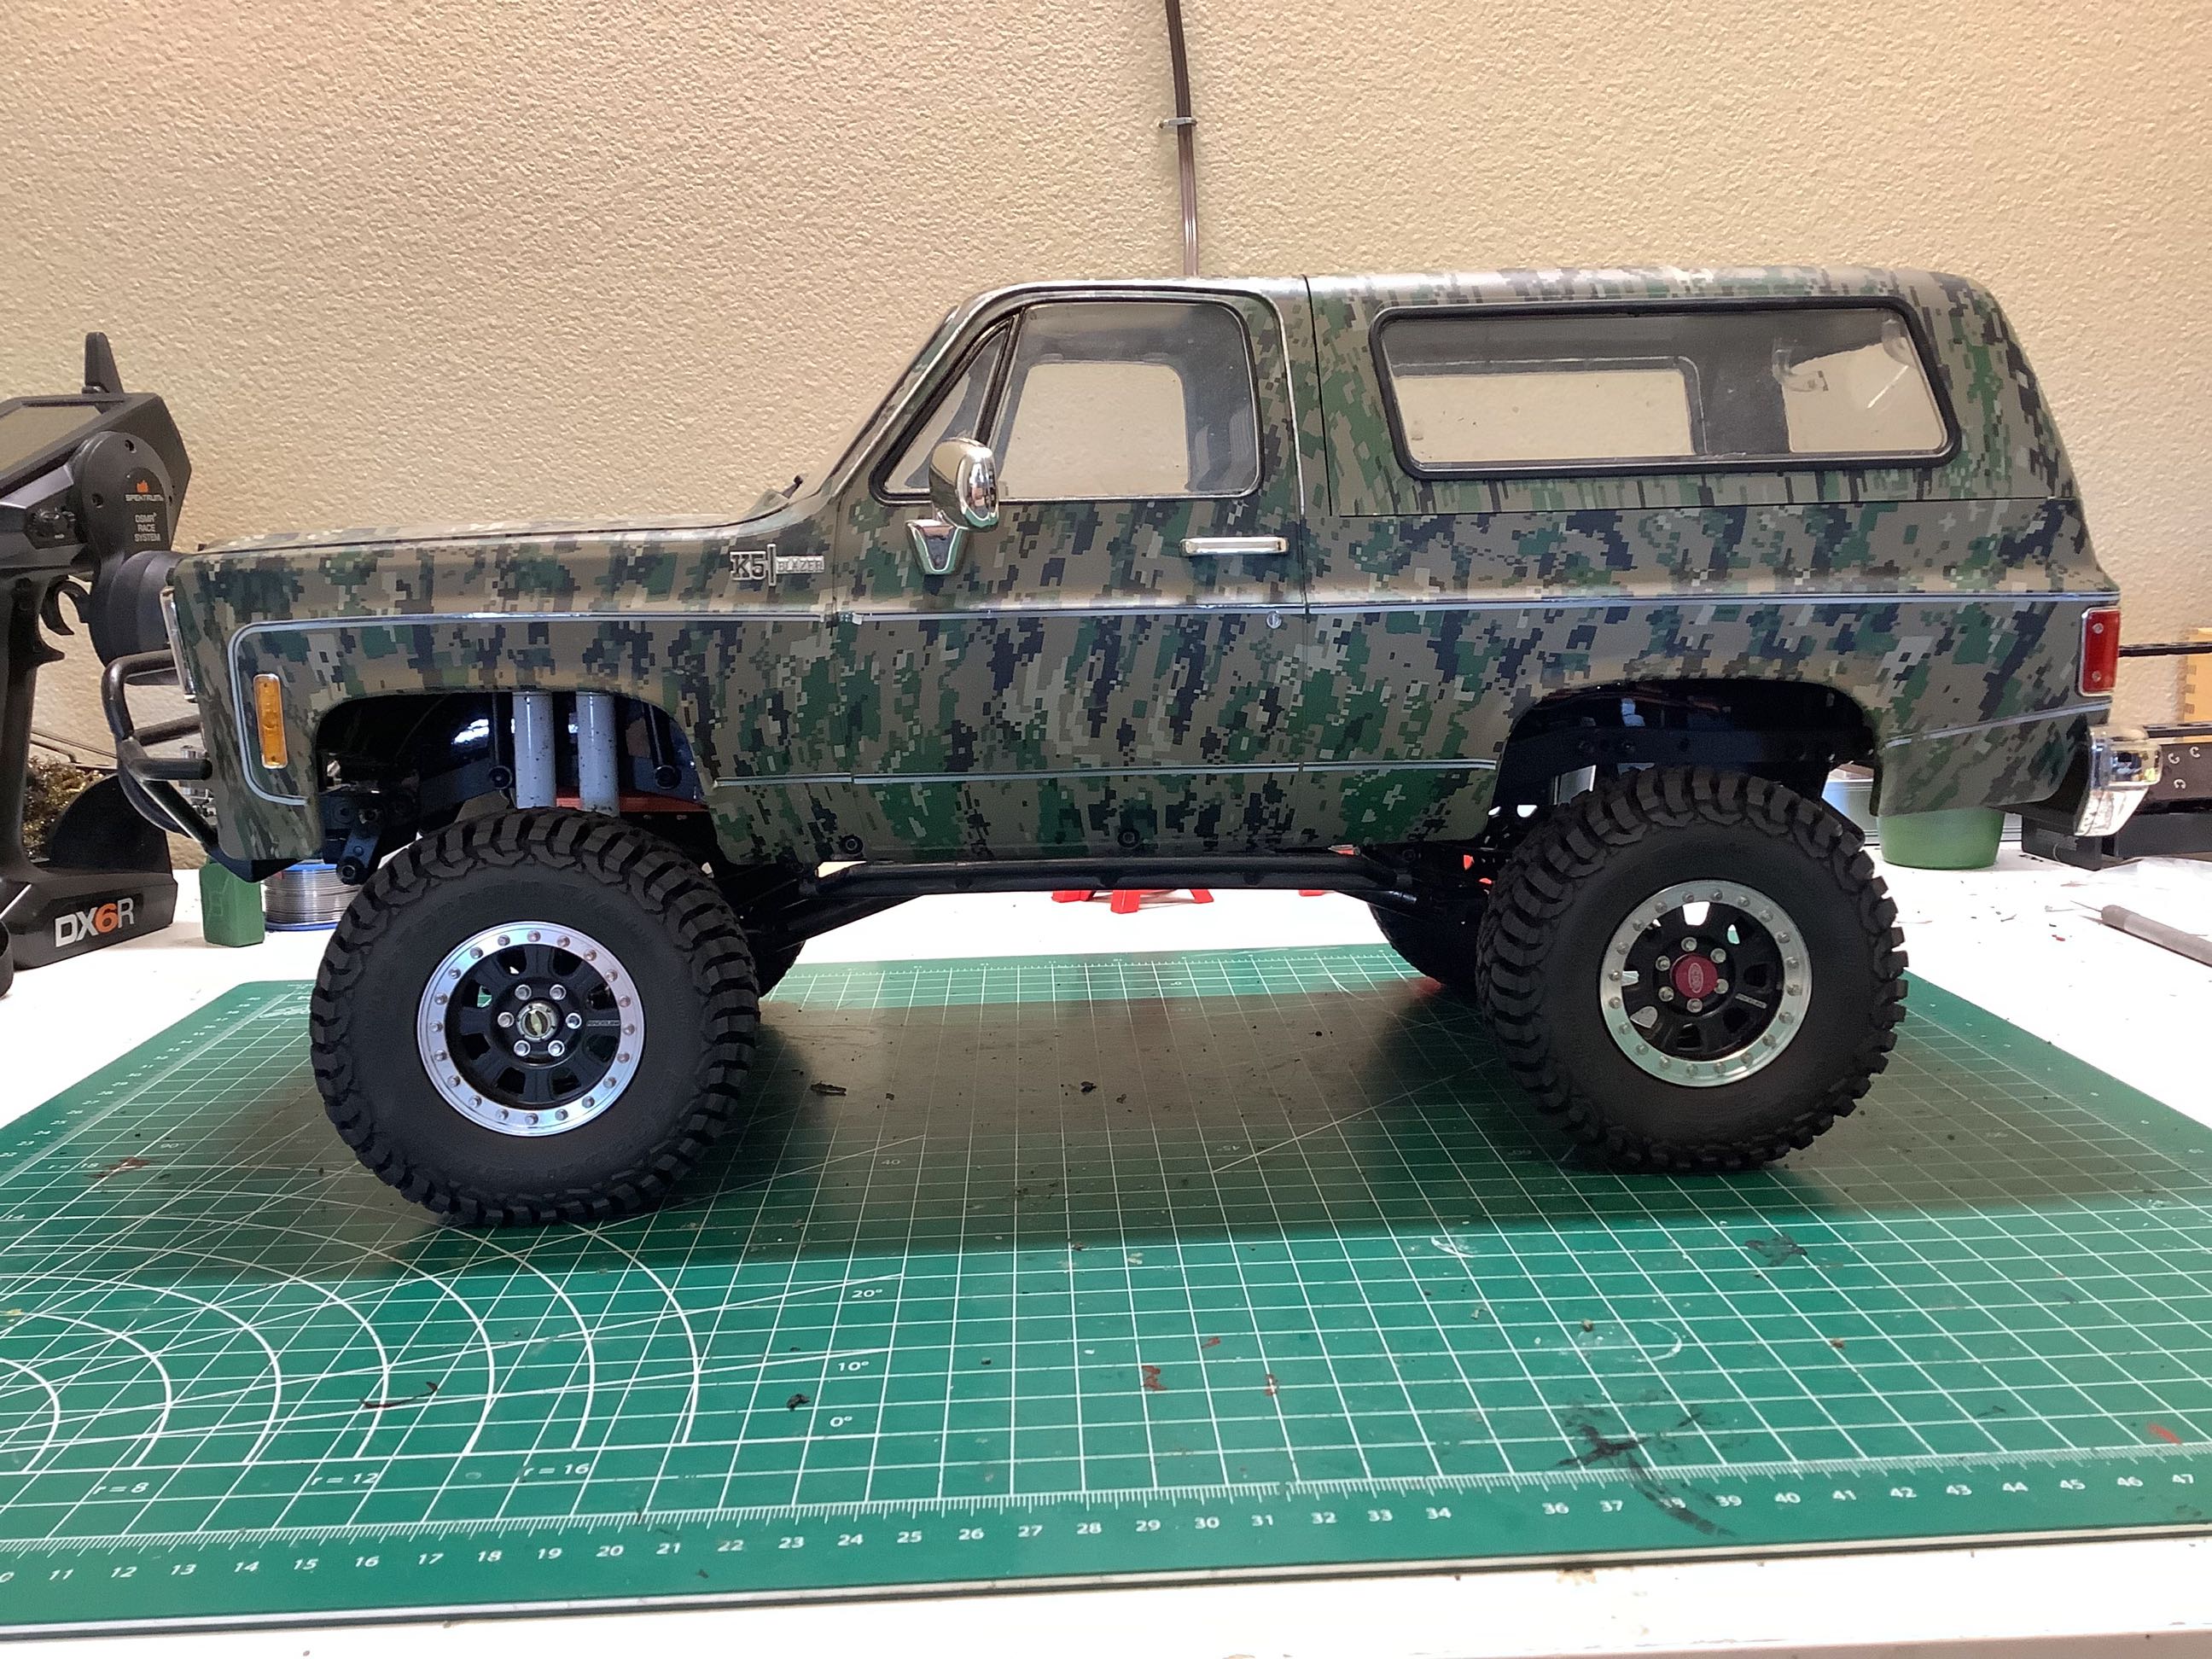
too small for a truck lifted as much as this one. I decided to
replace the stock Prowler XS tires (3.76") with some BF Goodrich Mud
Terrain T/A KM3 tires (4.09"). Besides being larger in diameter,
the KM3 is also a much more realistically molded tire. The before
and after comparison is shown on the left. The right hand image
shows the dual stage foams I managed to cram inside those new KM3 making
for a very solid support.
These before and after photos show the visual impact of changing the
tires. It looks so much better after the change, in my opinion.
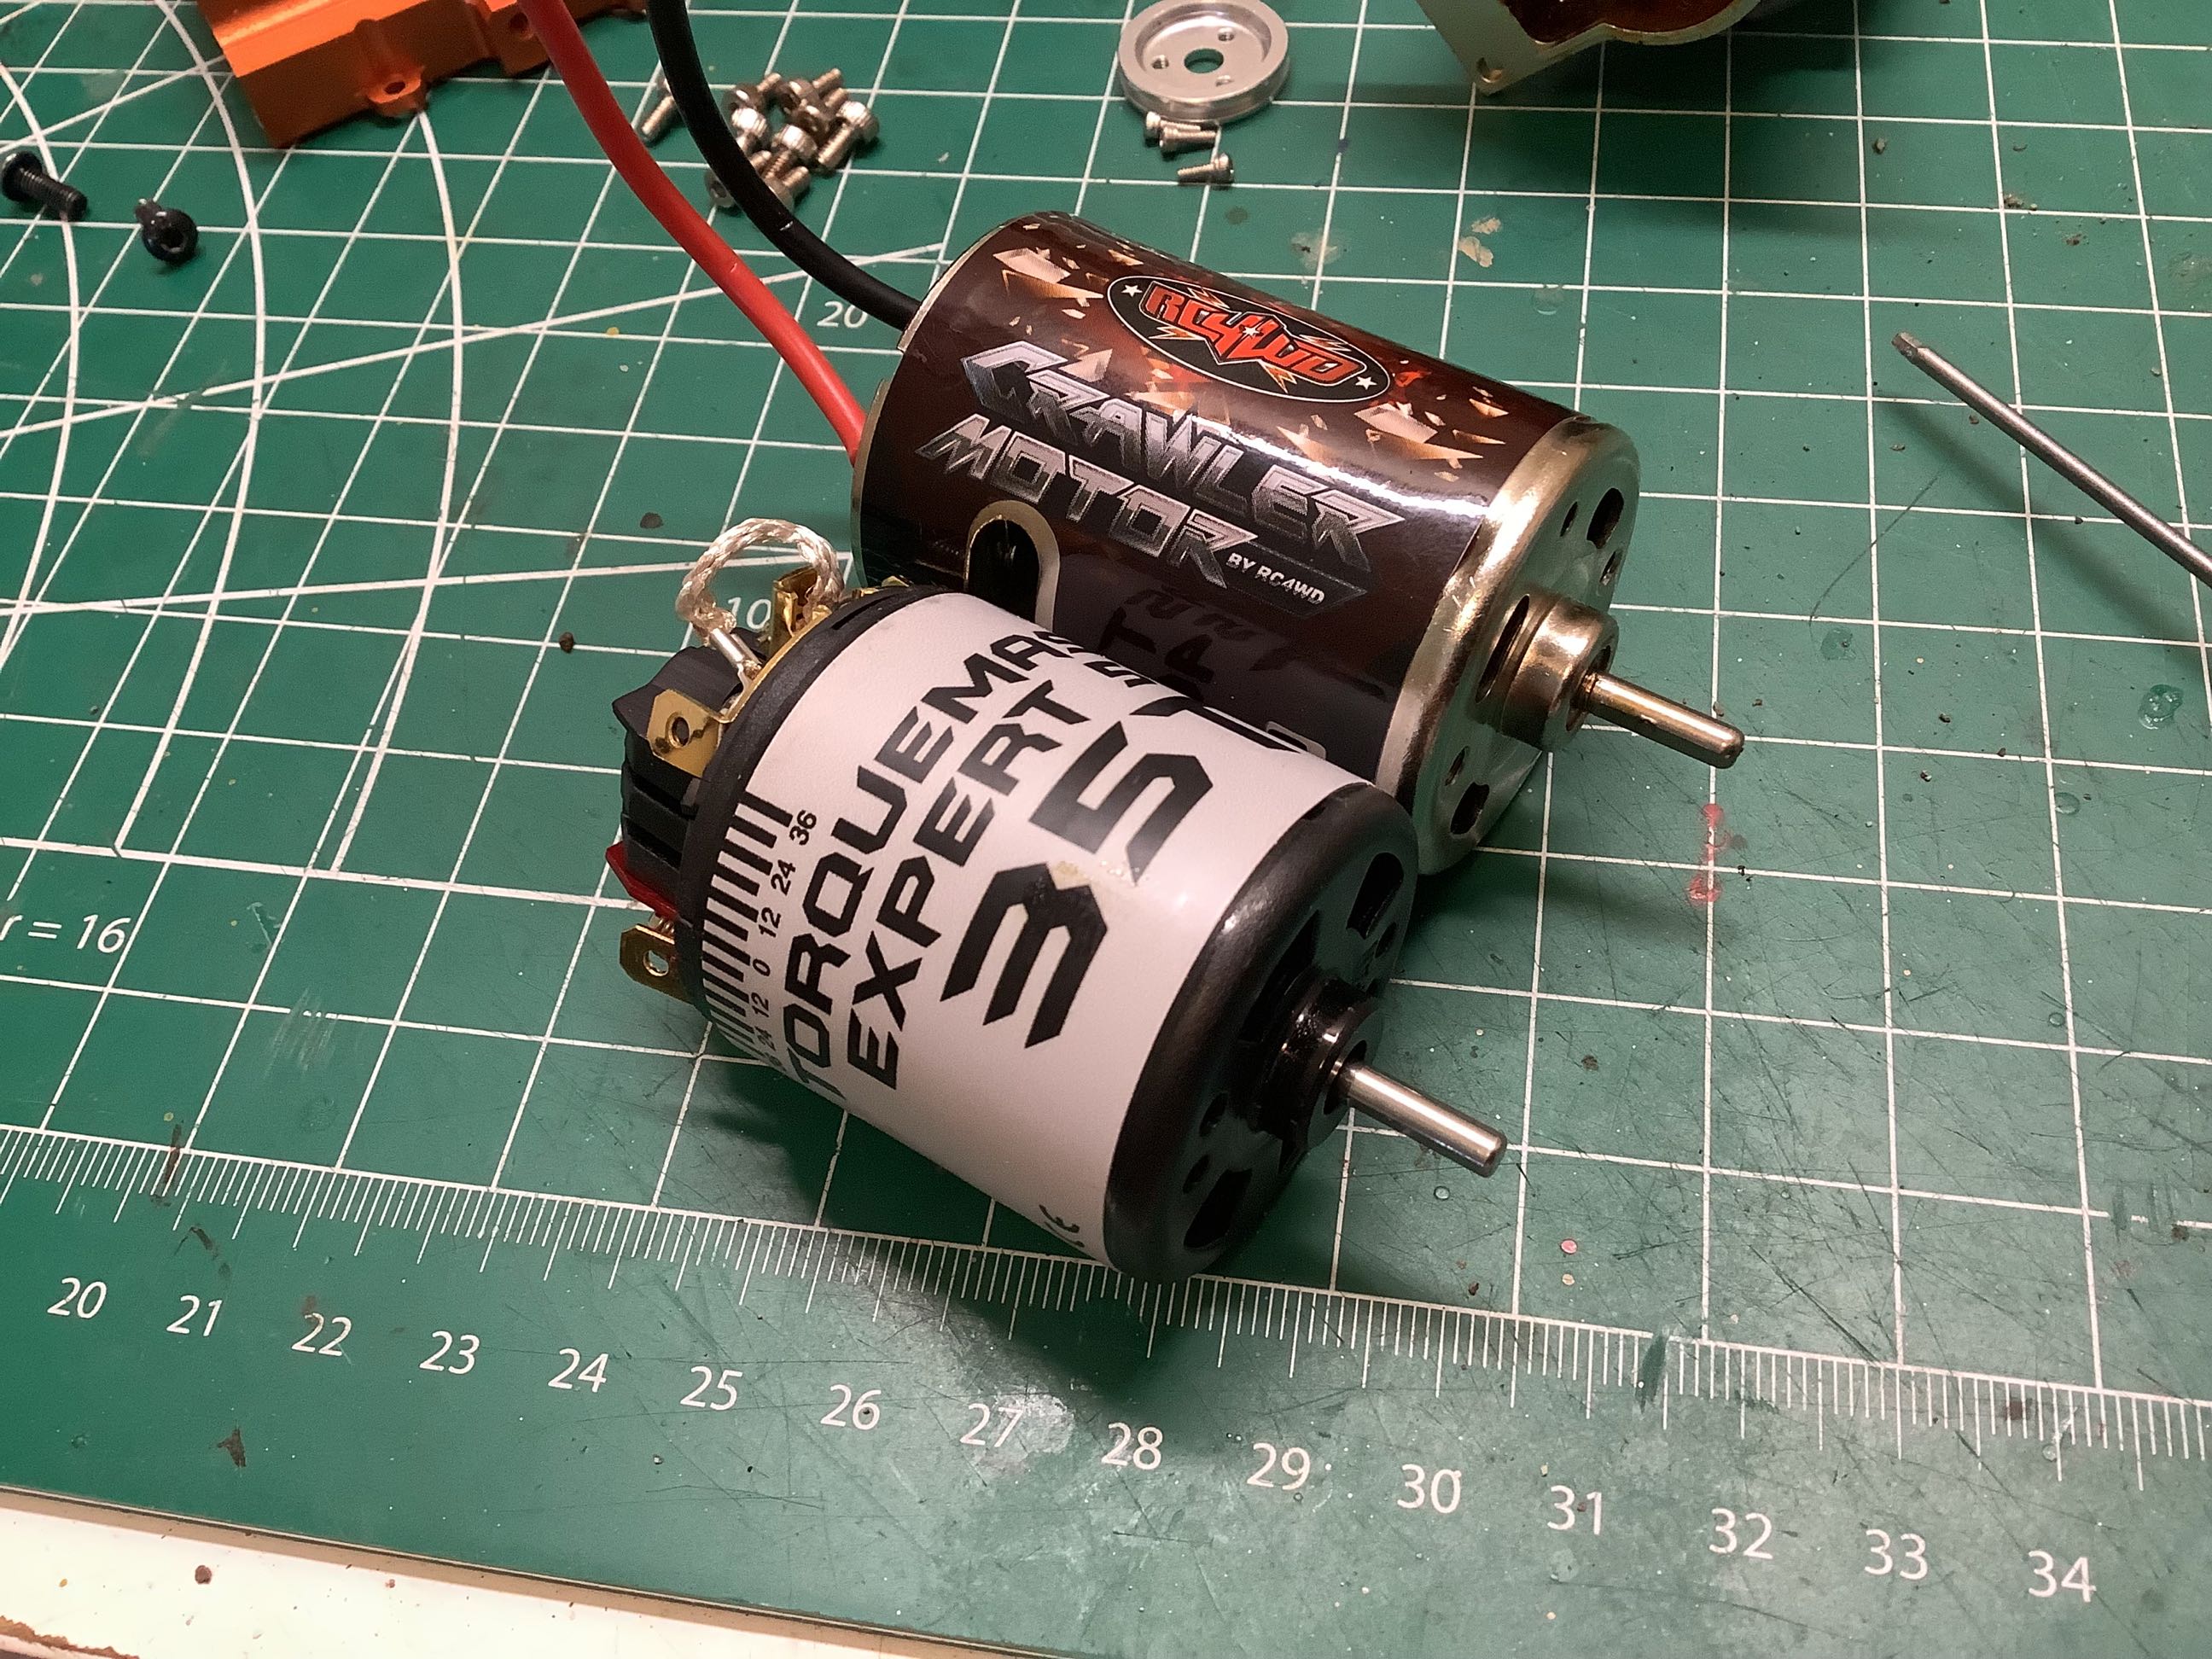
Changing out the stock brushed motor is not that easy to do given that
it is buried deep inside a scale V-8 engine. I had to
significantly tear the down to access the motor as shown. The new
Holmes Hobbies motor should be smoother and quieter.
Here I am re-installing the engine and motor as well as making a home
for the upgraded Hobbbywing 1080 ESC. This will make the biggest
difference in the low speed performance of the vehicle.
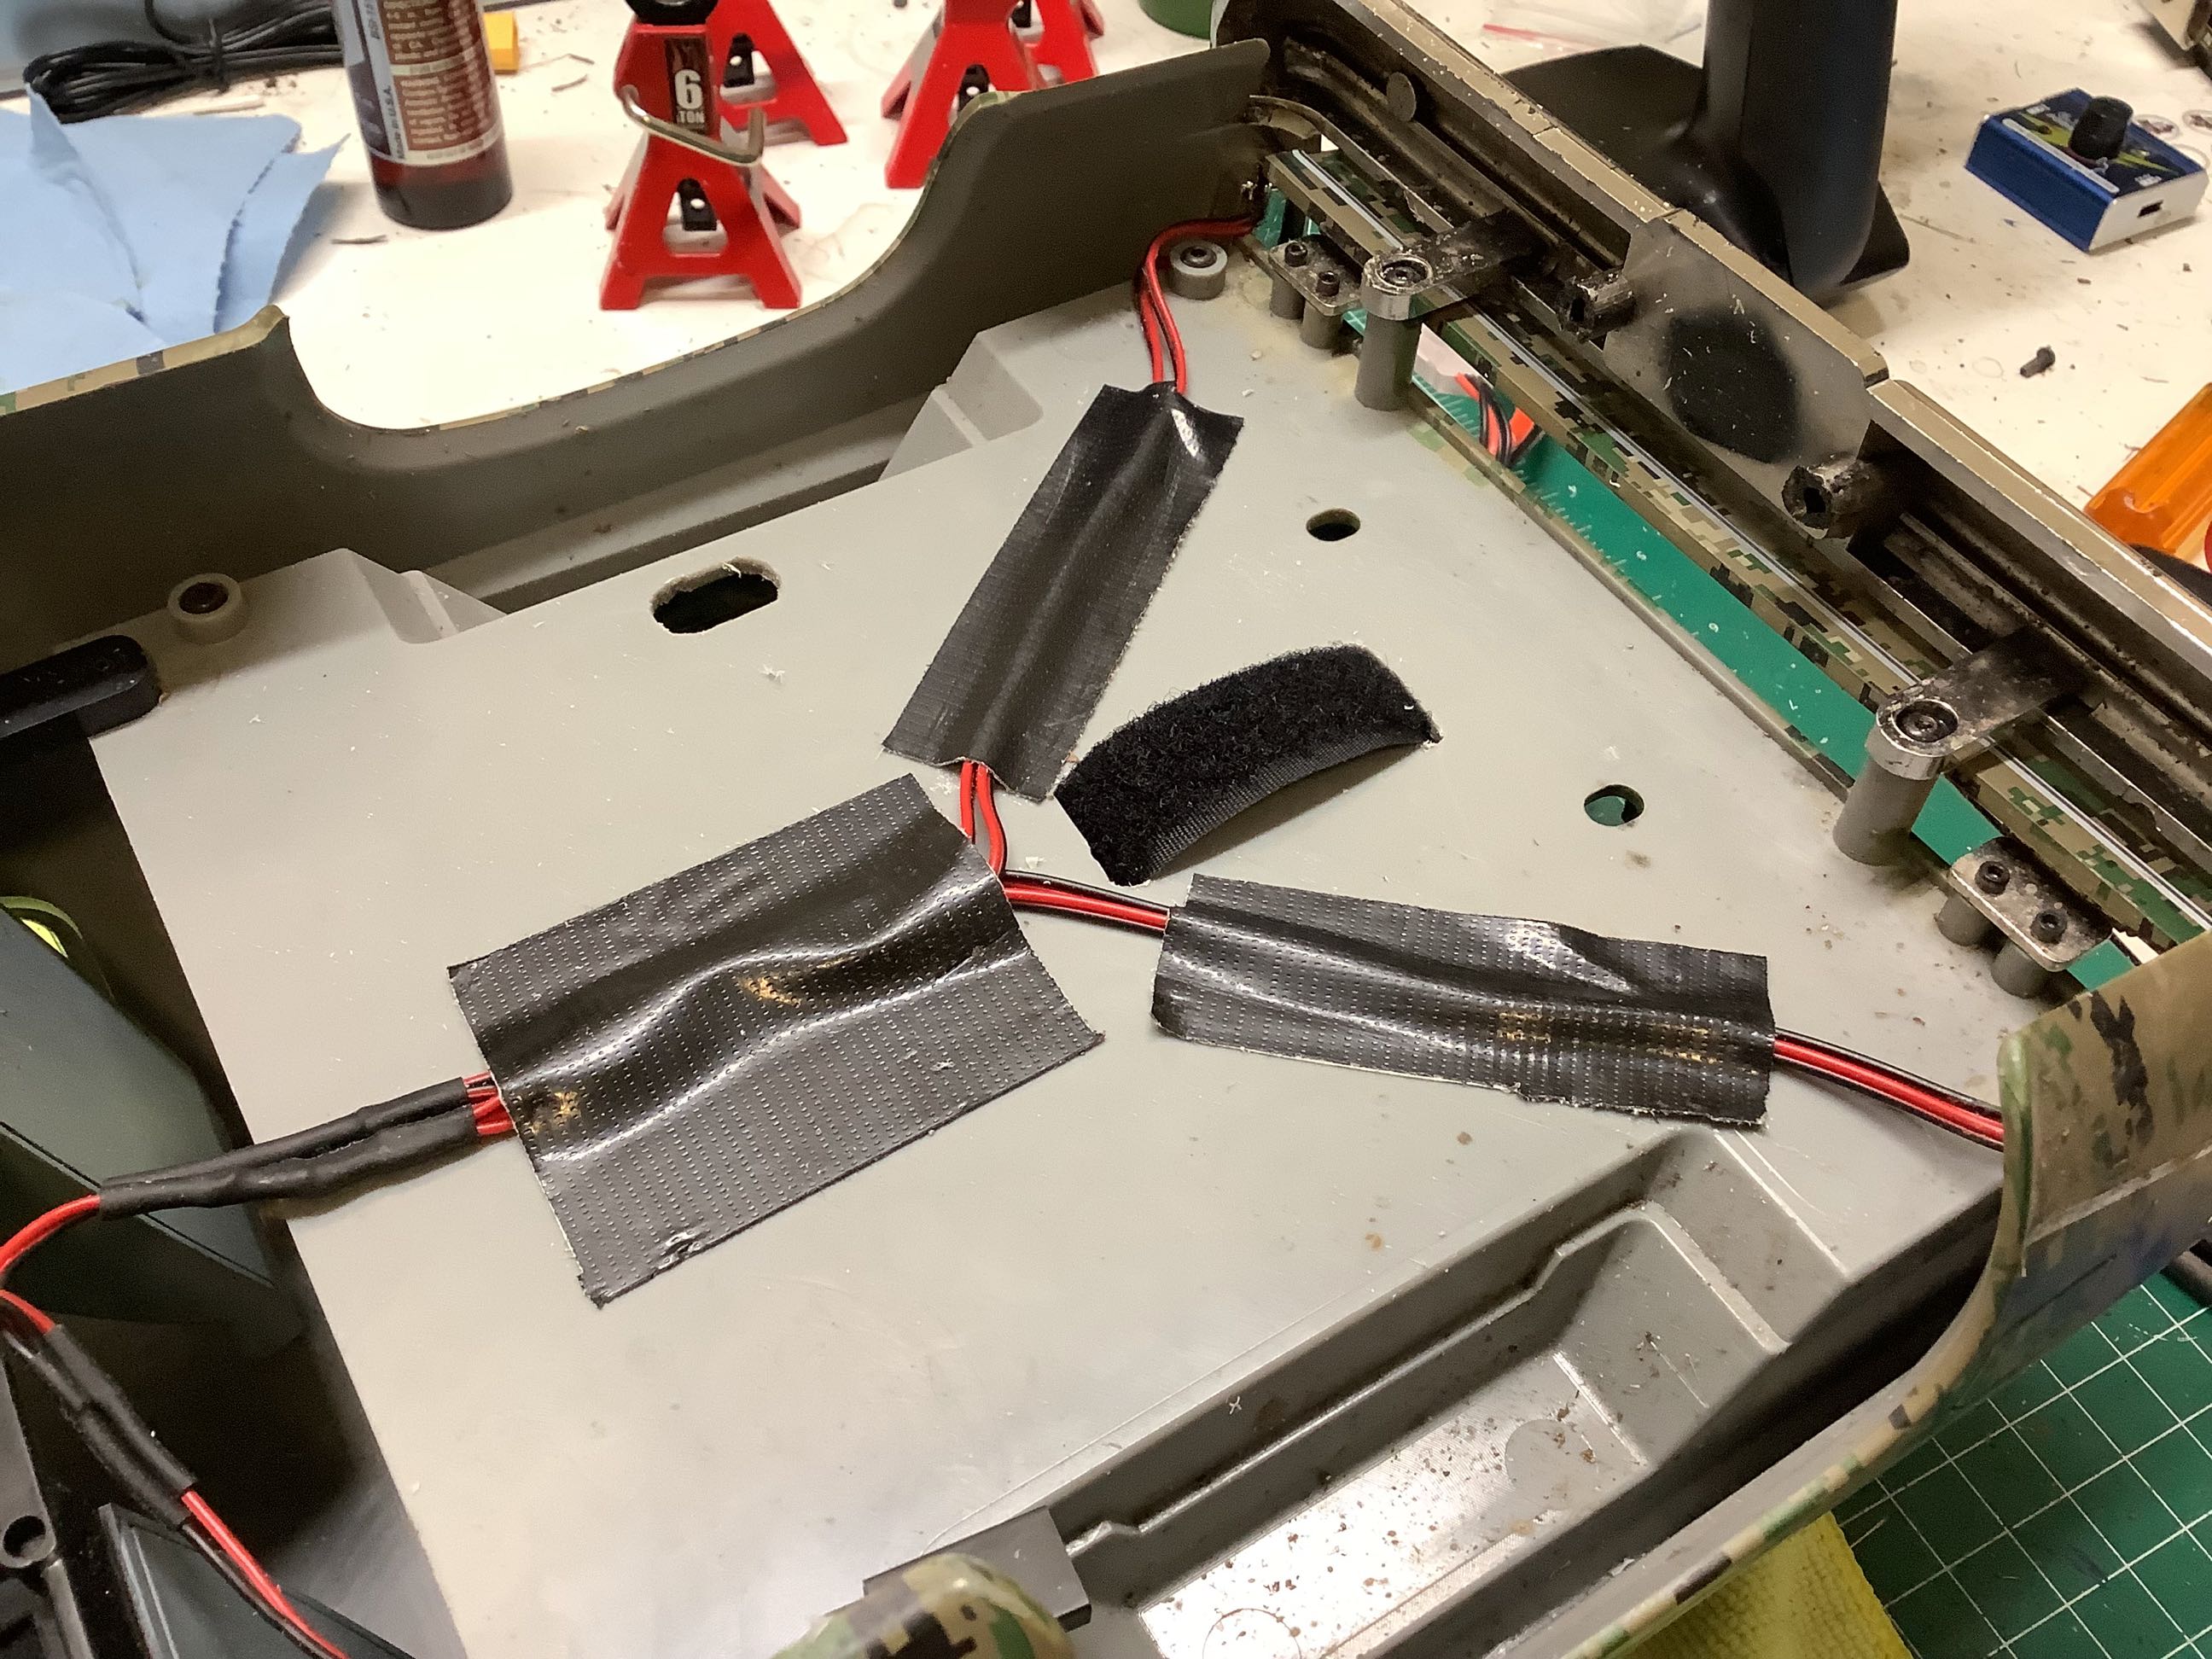
The original home for the battery is under the body between the front
and rear seats. The problem with that location is that accessing
the battery involves removing the body which is not that easy to do with
the inner fenders I've installed. These pictures show how I
installed a Velcro strap in the rear of the truck which allows me to
install the battery through the rear window. It is slightly more
visible this way, but the much easier access is worth the trade.
©2018/2022 Eric Albrecht