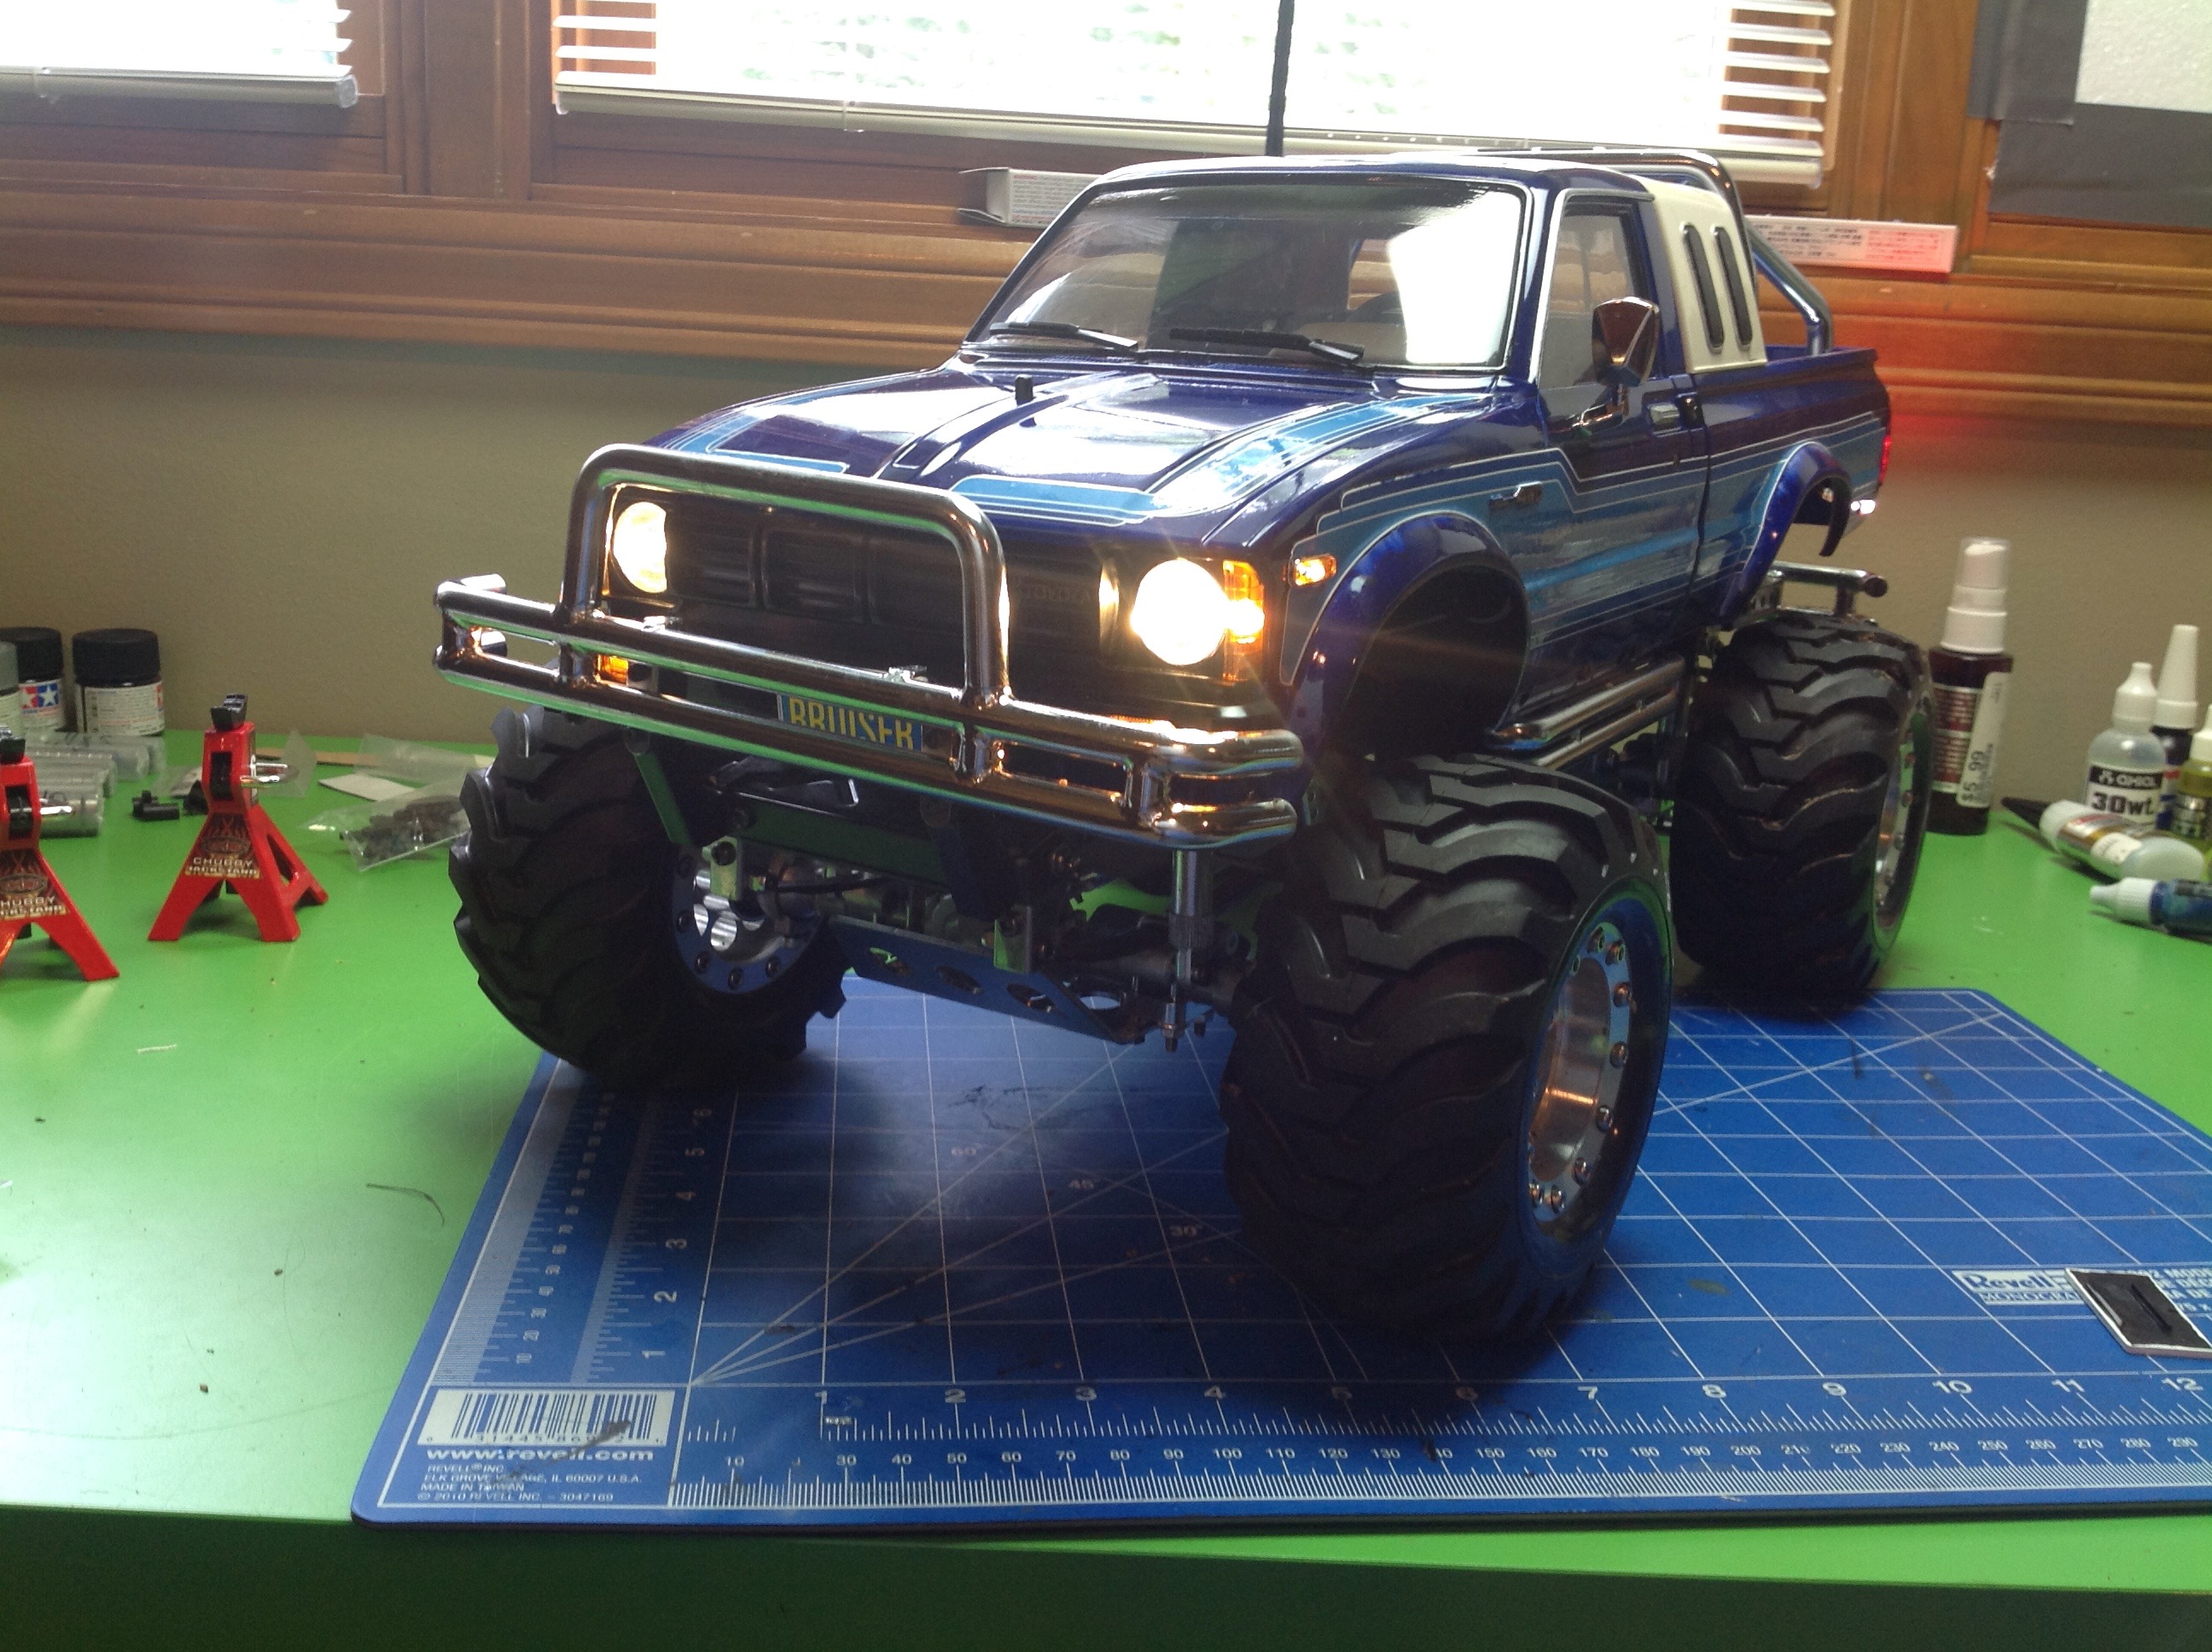
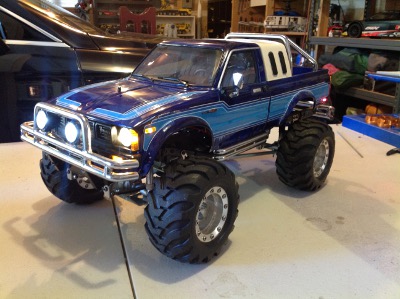
Let me start by saying that a brushless system on this truck is
completely unnecessary. It was still fun though. The truck
is pretty slow stock, even in high gear. That's actually a good
thing though, because the suspension can't handle high speed.
Since many of the modern Tamiya kits come with TBLE-02s speed
controllers which work with sensored brushless motors and since I had
never used a sensored motor before, I decided to give it a shot. I
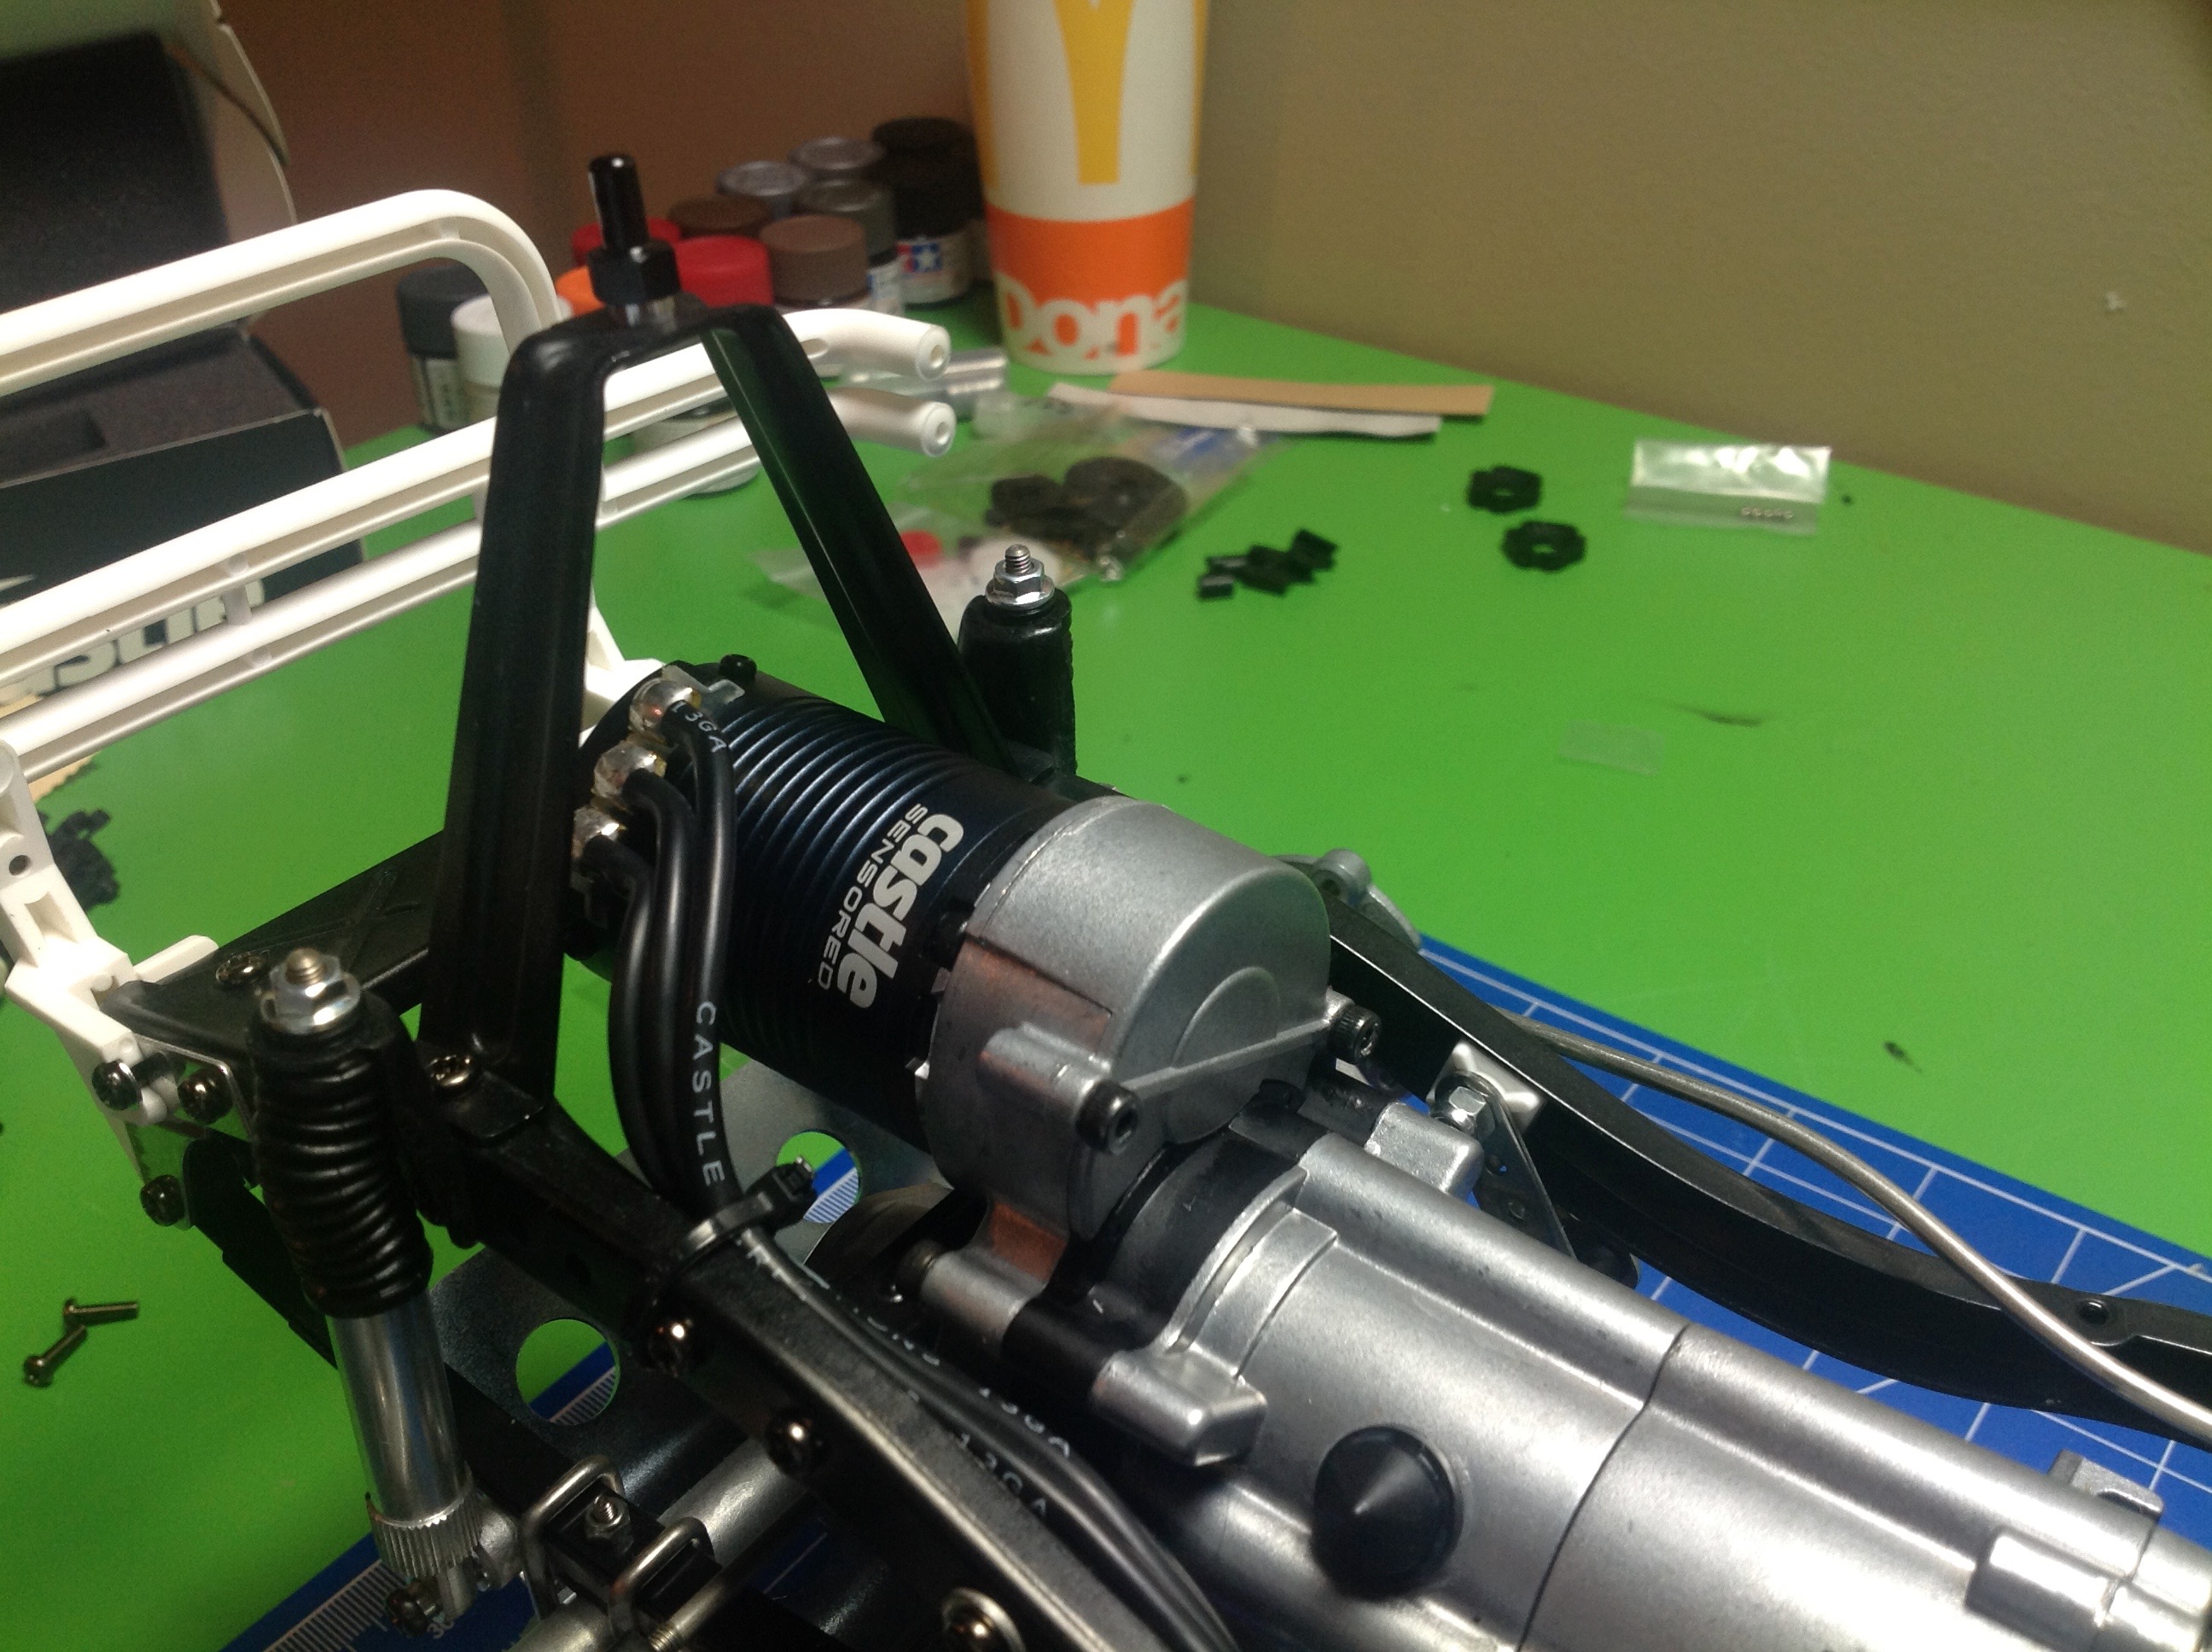
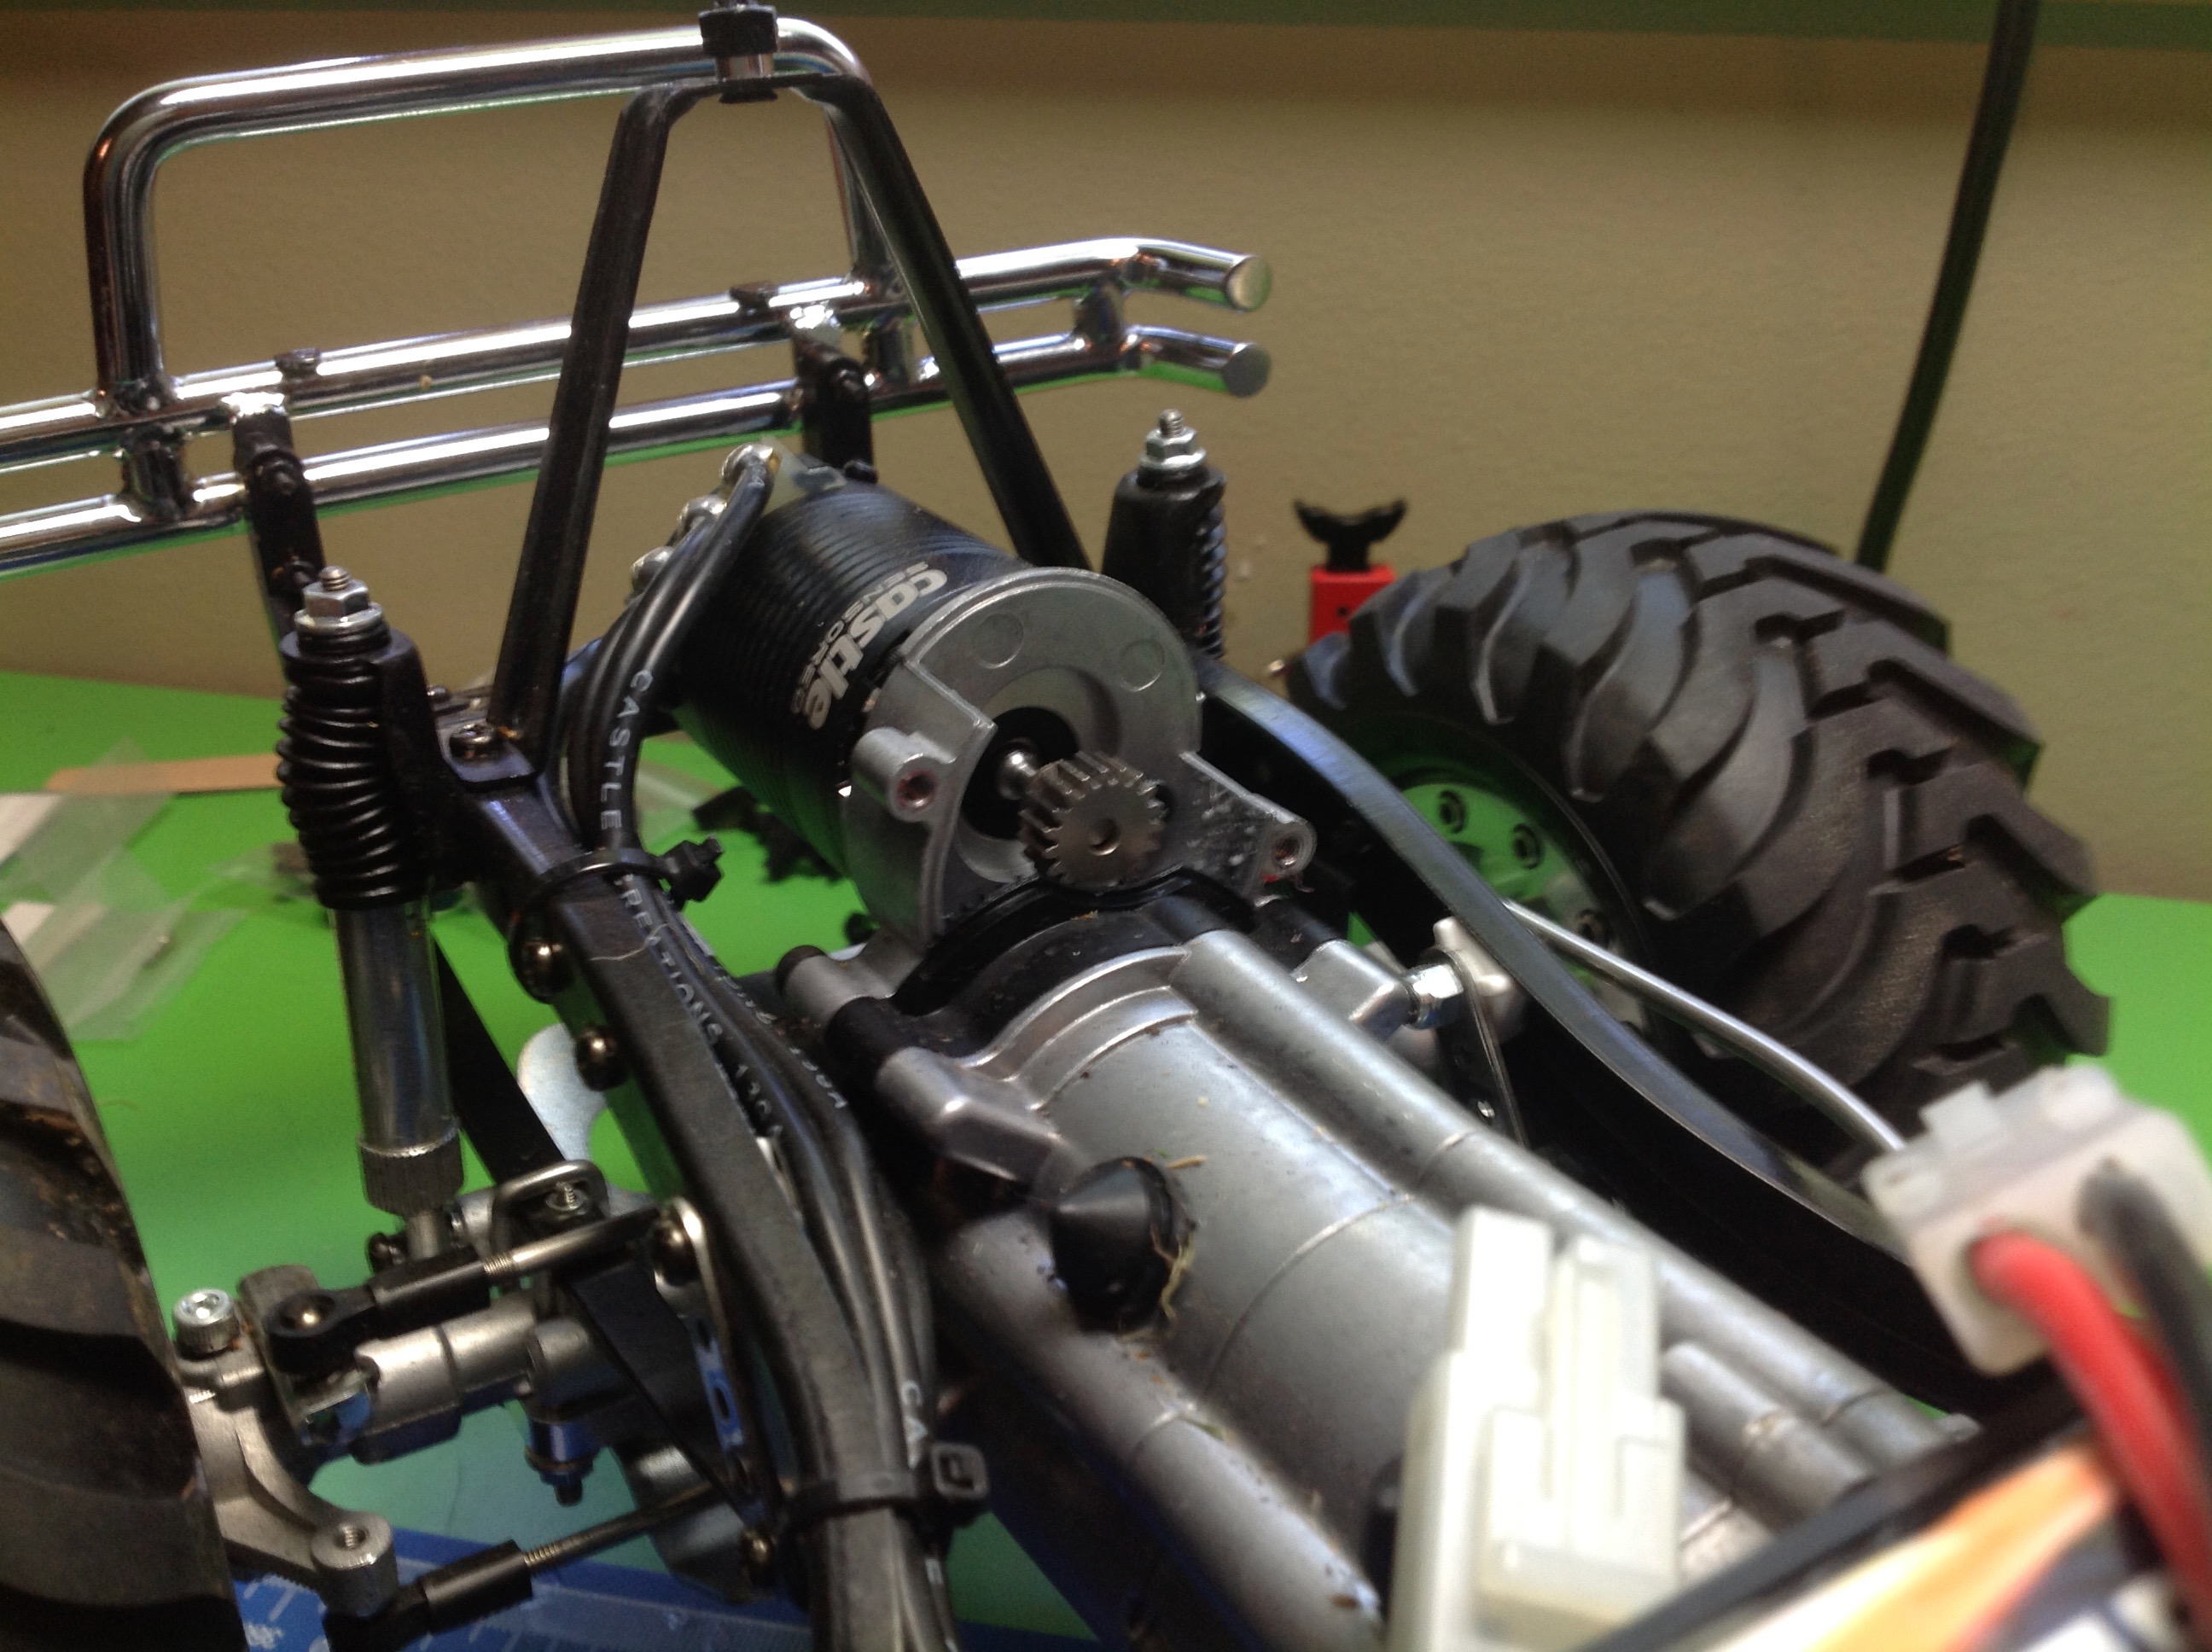
used a Castle 2280kV motor. The first problem I ran into is that
the motor is in the very front and the controller is in the very
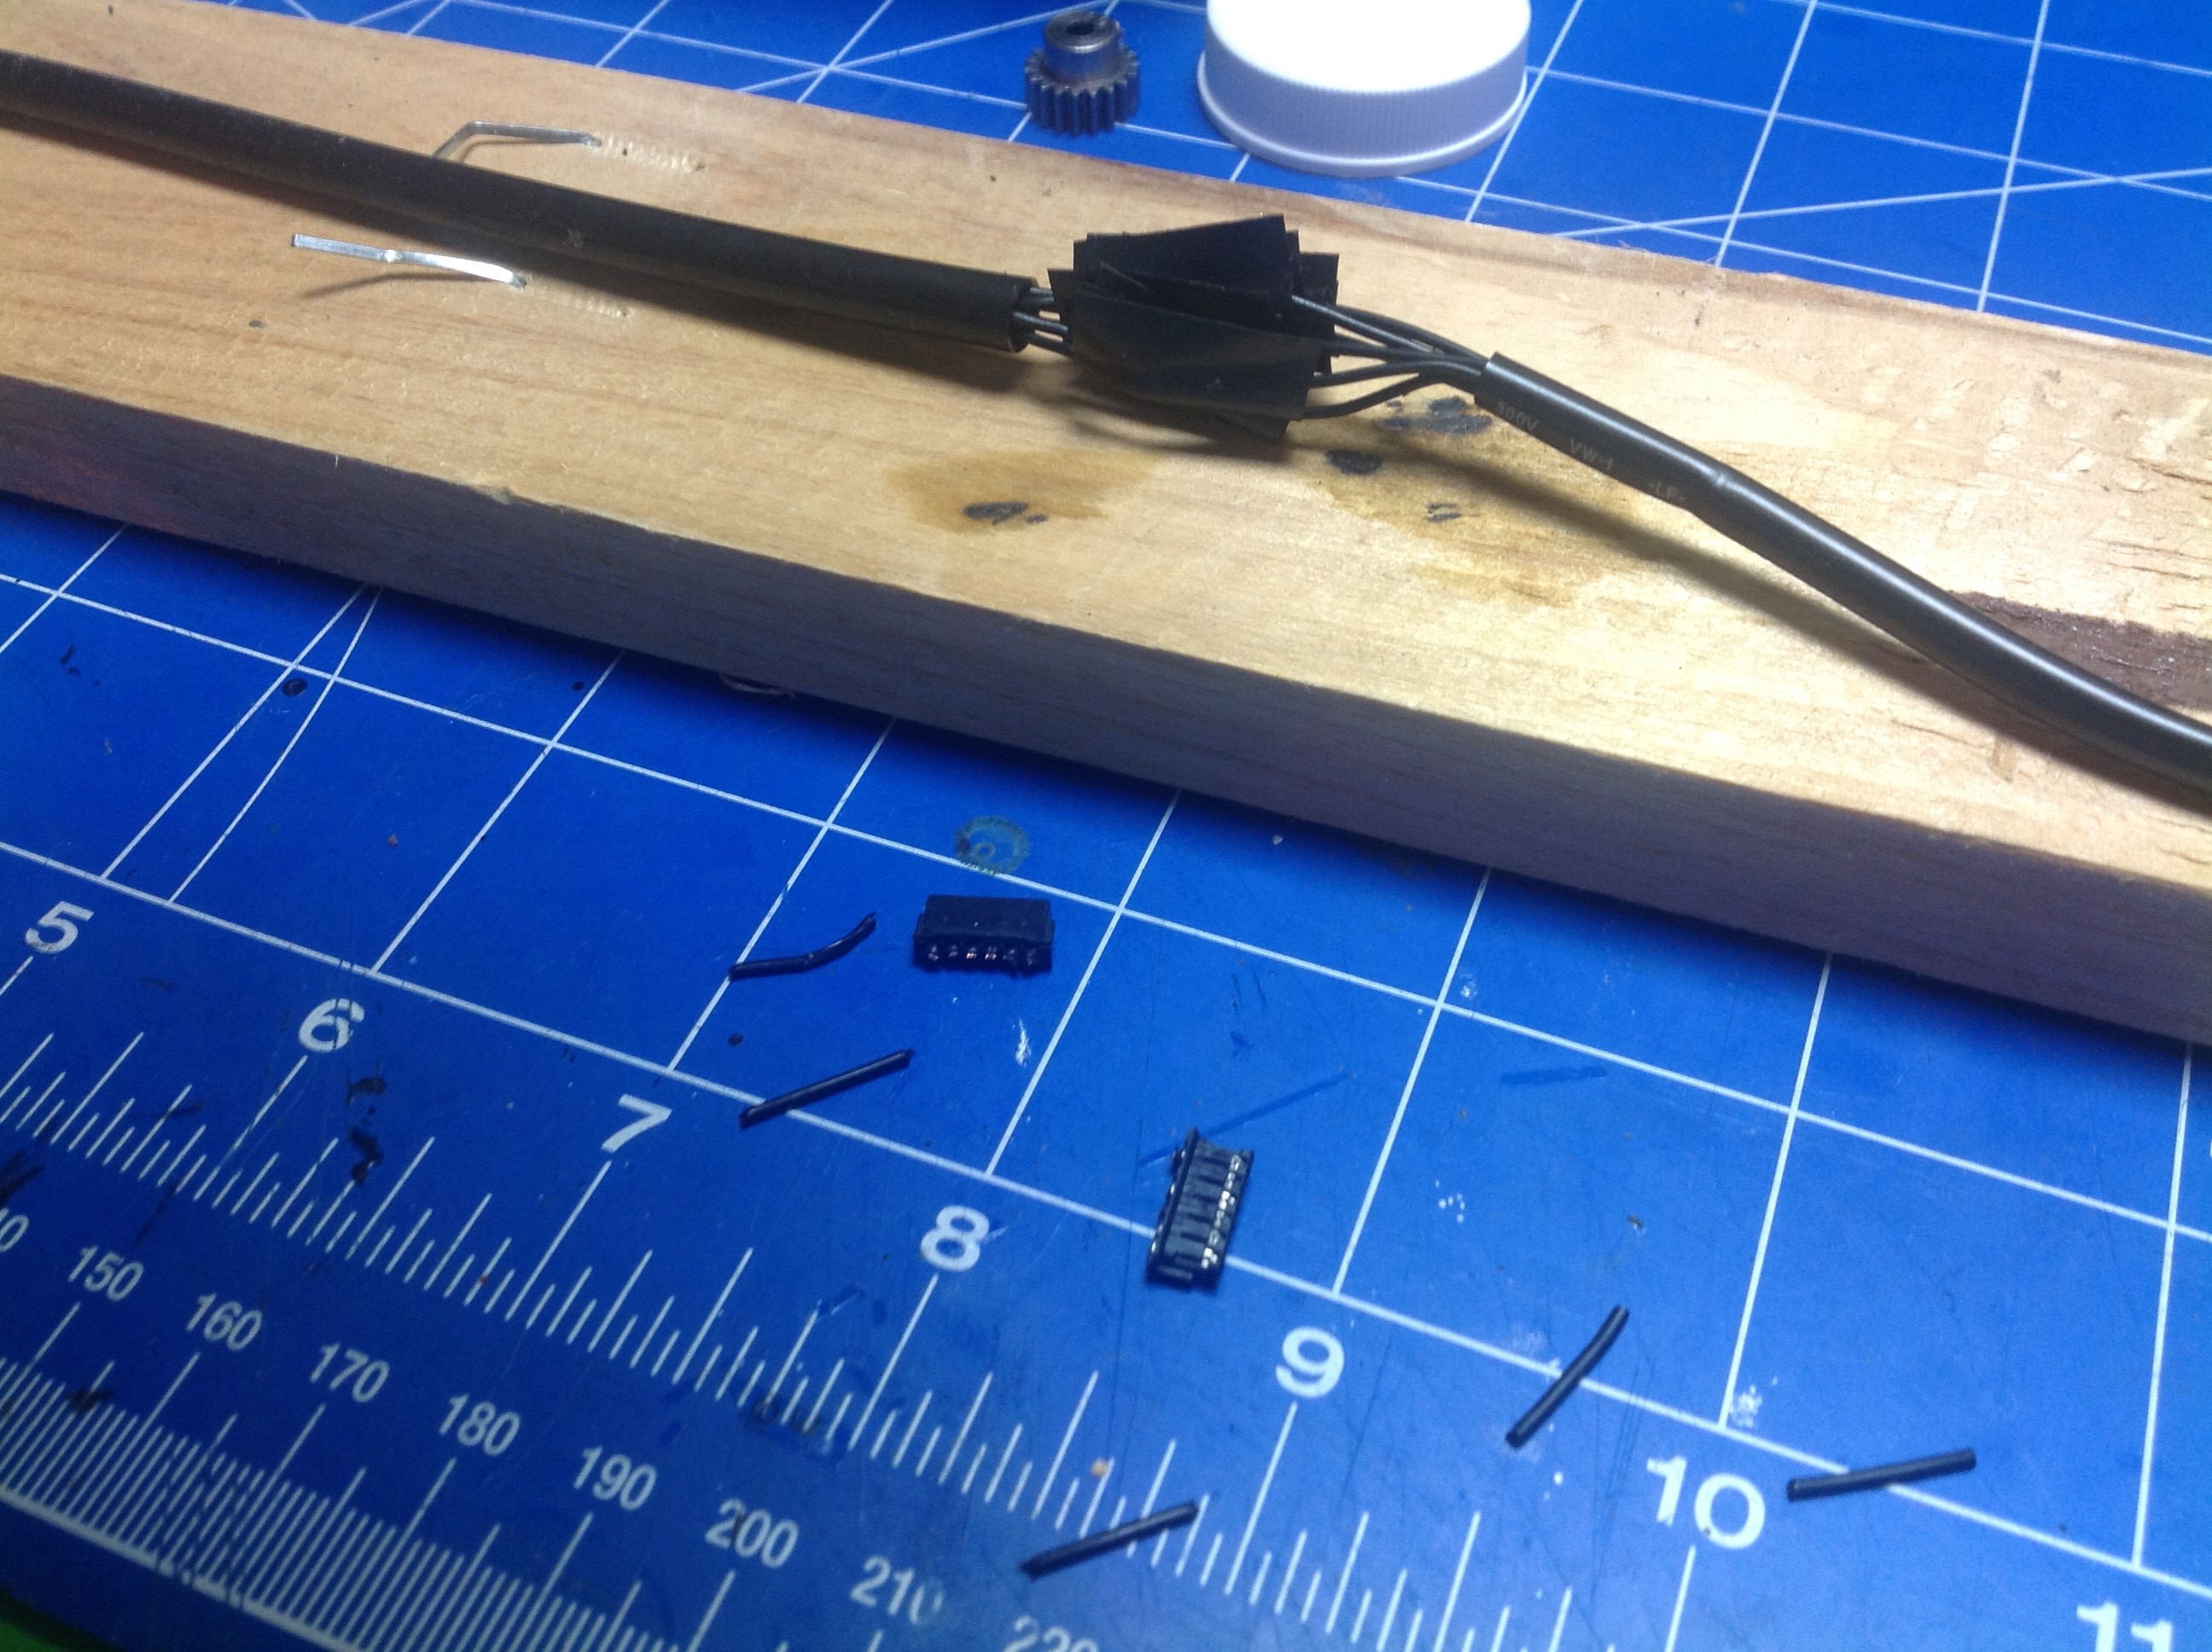
back. The longest sensor wire you can buy is 270mm and that wasn't
long enough. That means I had to buy 2, cut them in half, and
carefully splice the wires together. I didn't even have any heat
shrink tubing so the resulting wire is a kluge but it works and I will
never touch it again.
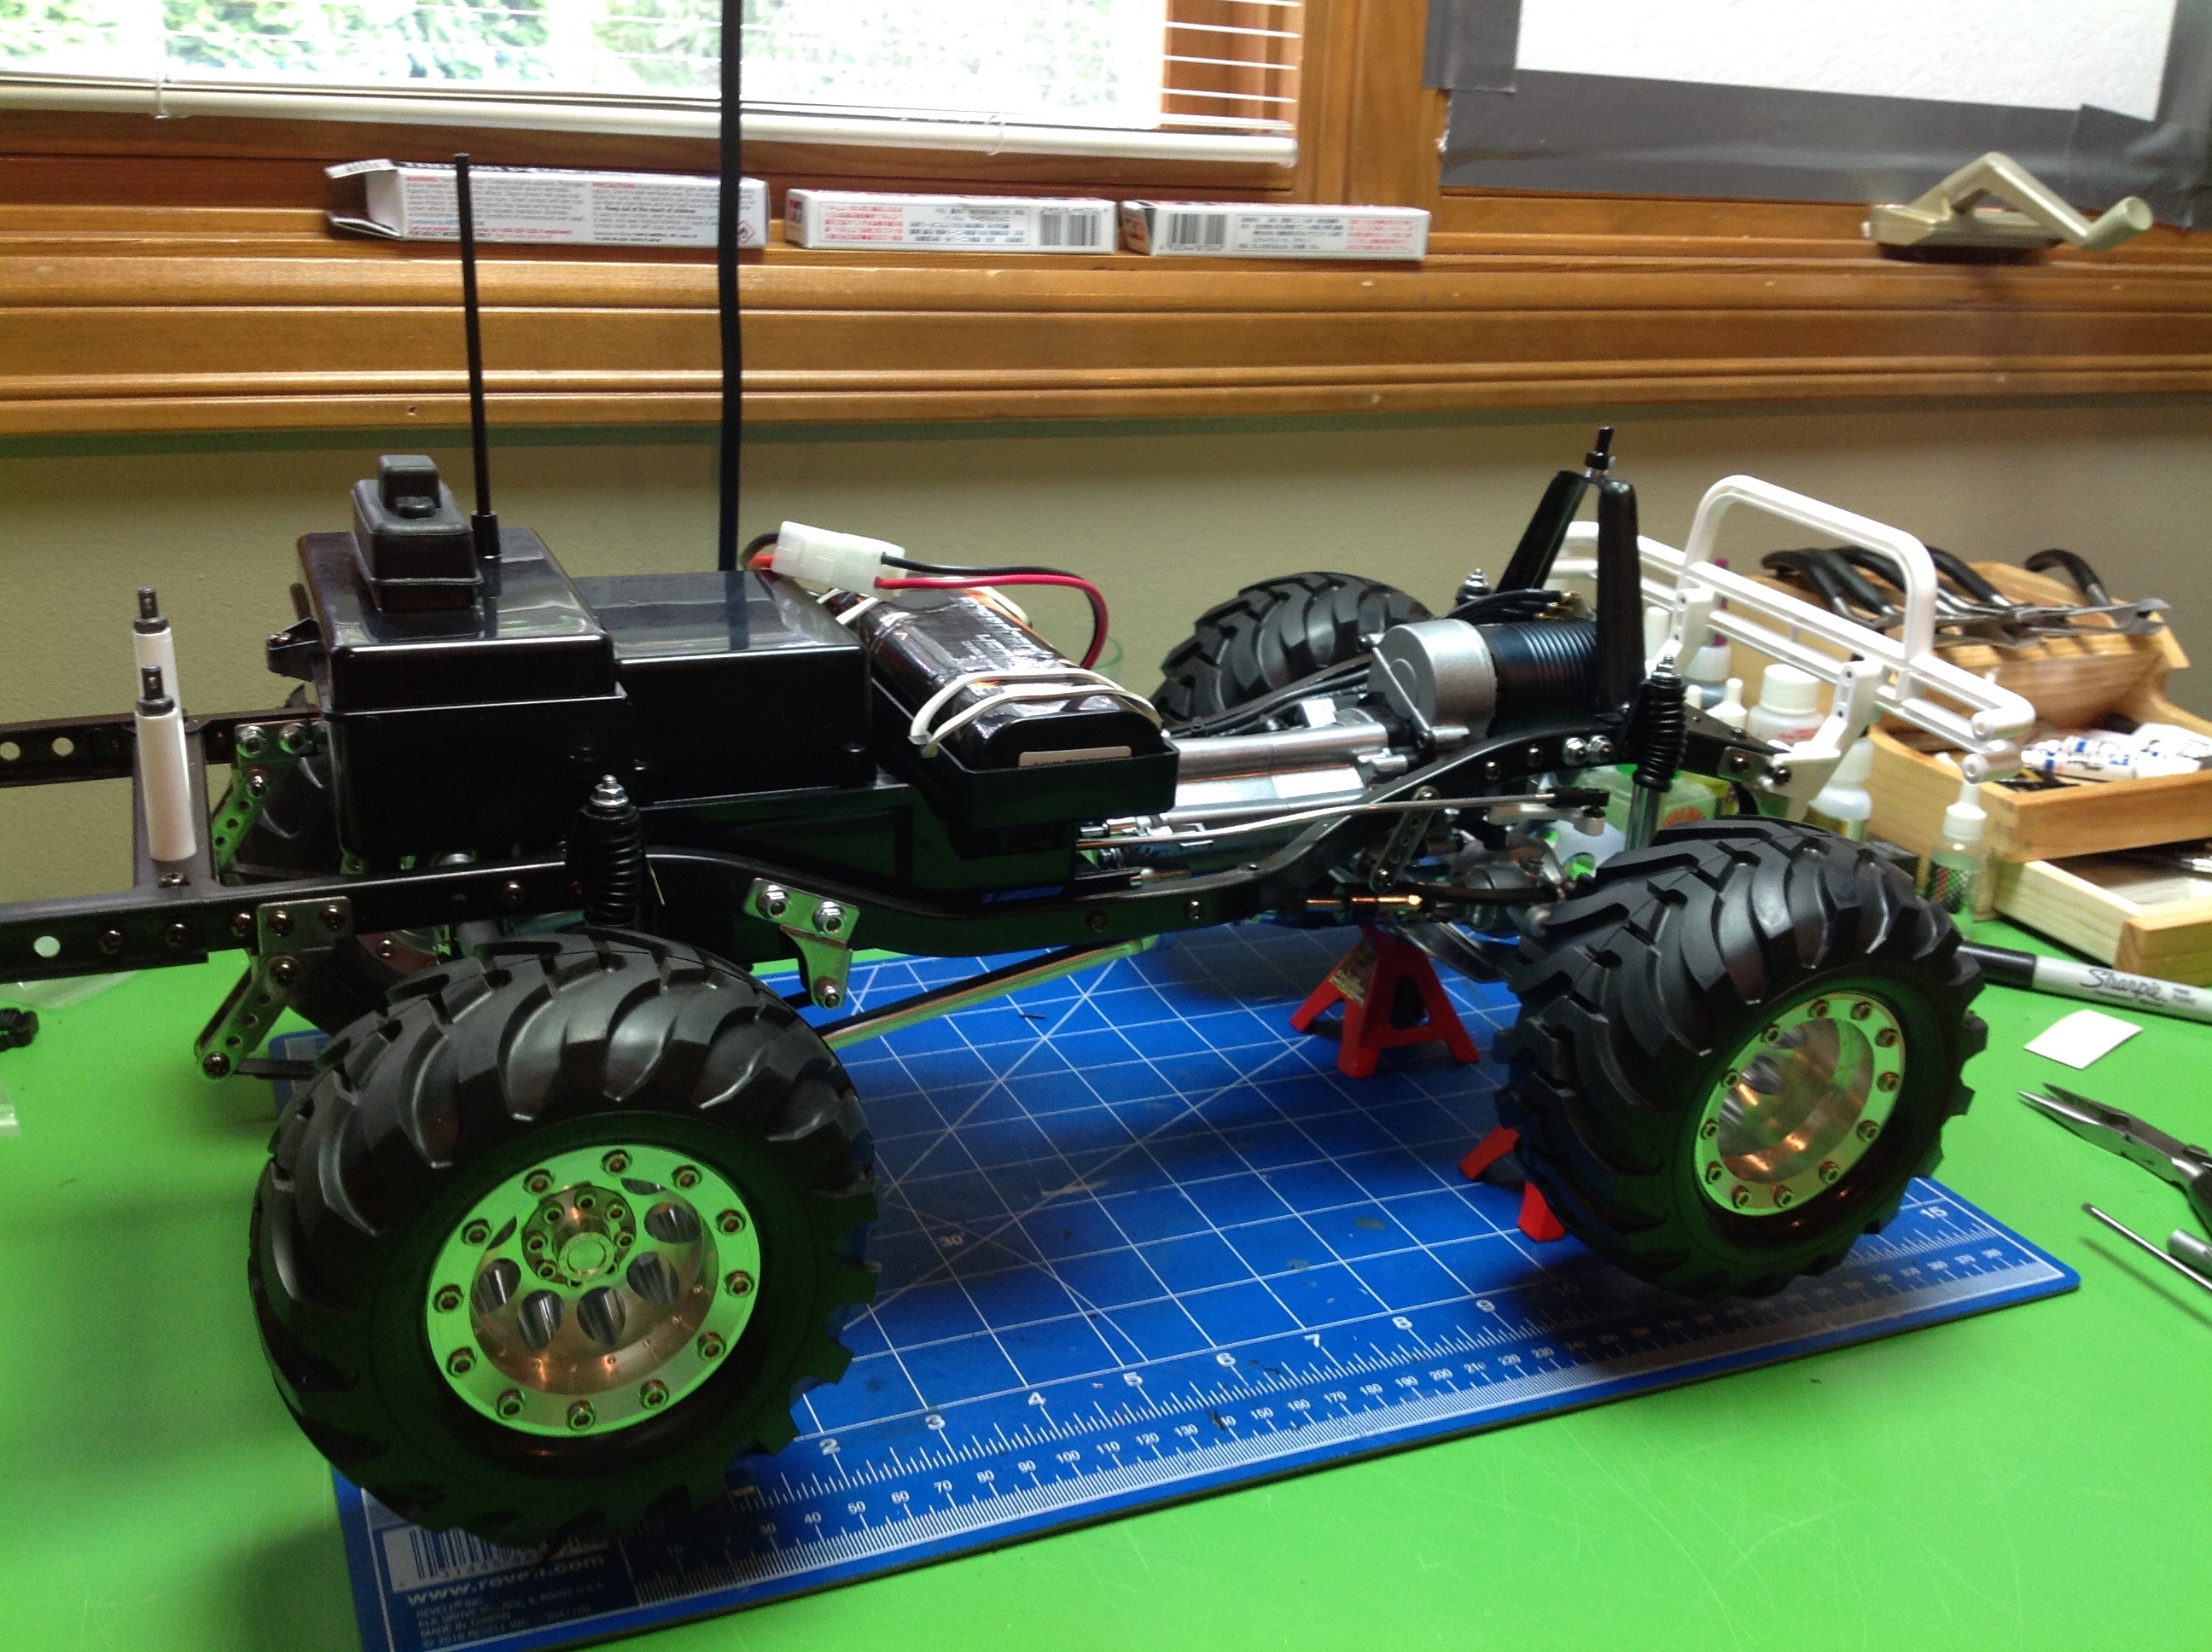
With a 2280kV motor on 7.2 volts, the truck wasn't really any faster
than stock. On the plus side, it operates almost totally
silently. There is no gear or motor noise. Still, I figured I
could put a larger pinion in there without hurting anything. I
went from the stock 19 tooth up to a 23 tooth steel pinion. I
think this combination is perfect for this model. I love the speed
and torque. There is adjustment space for an even bigger pinion,
but Robinson doesn't make anything with more than 24 tooth in 0.6 mod
pitch.
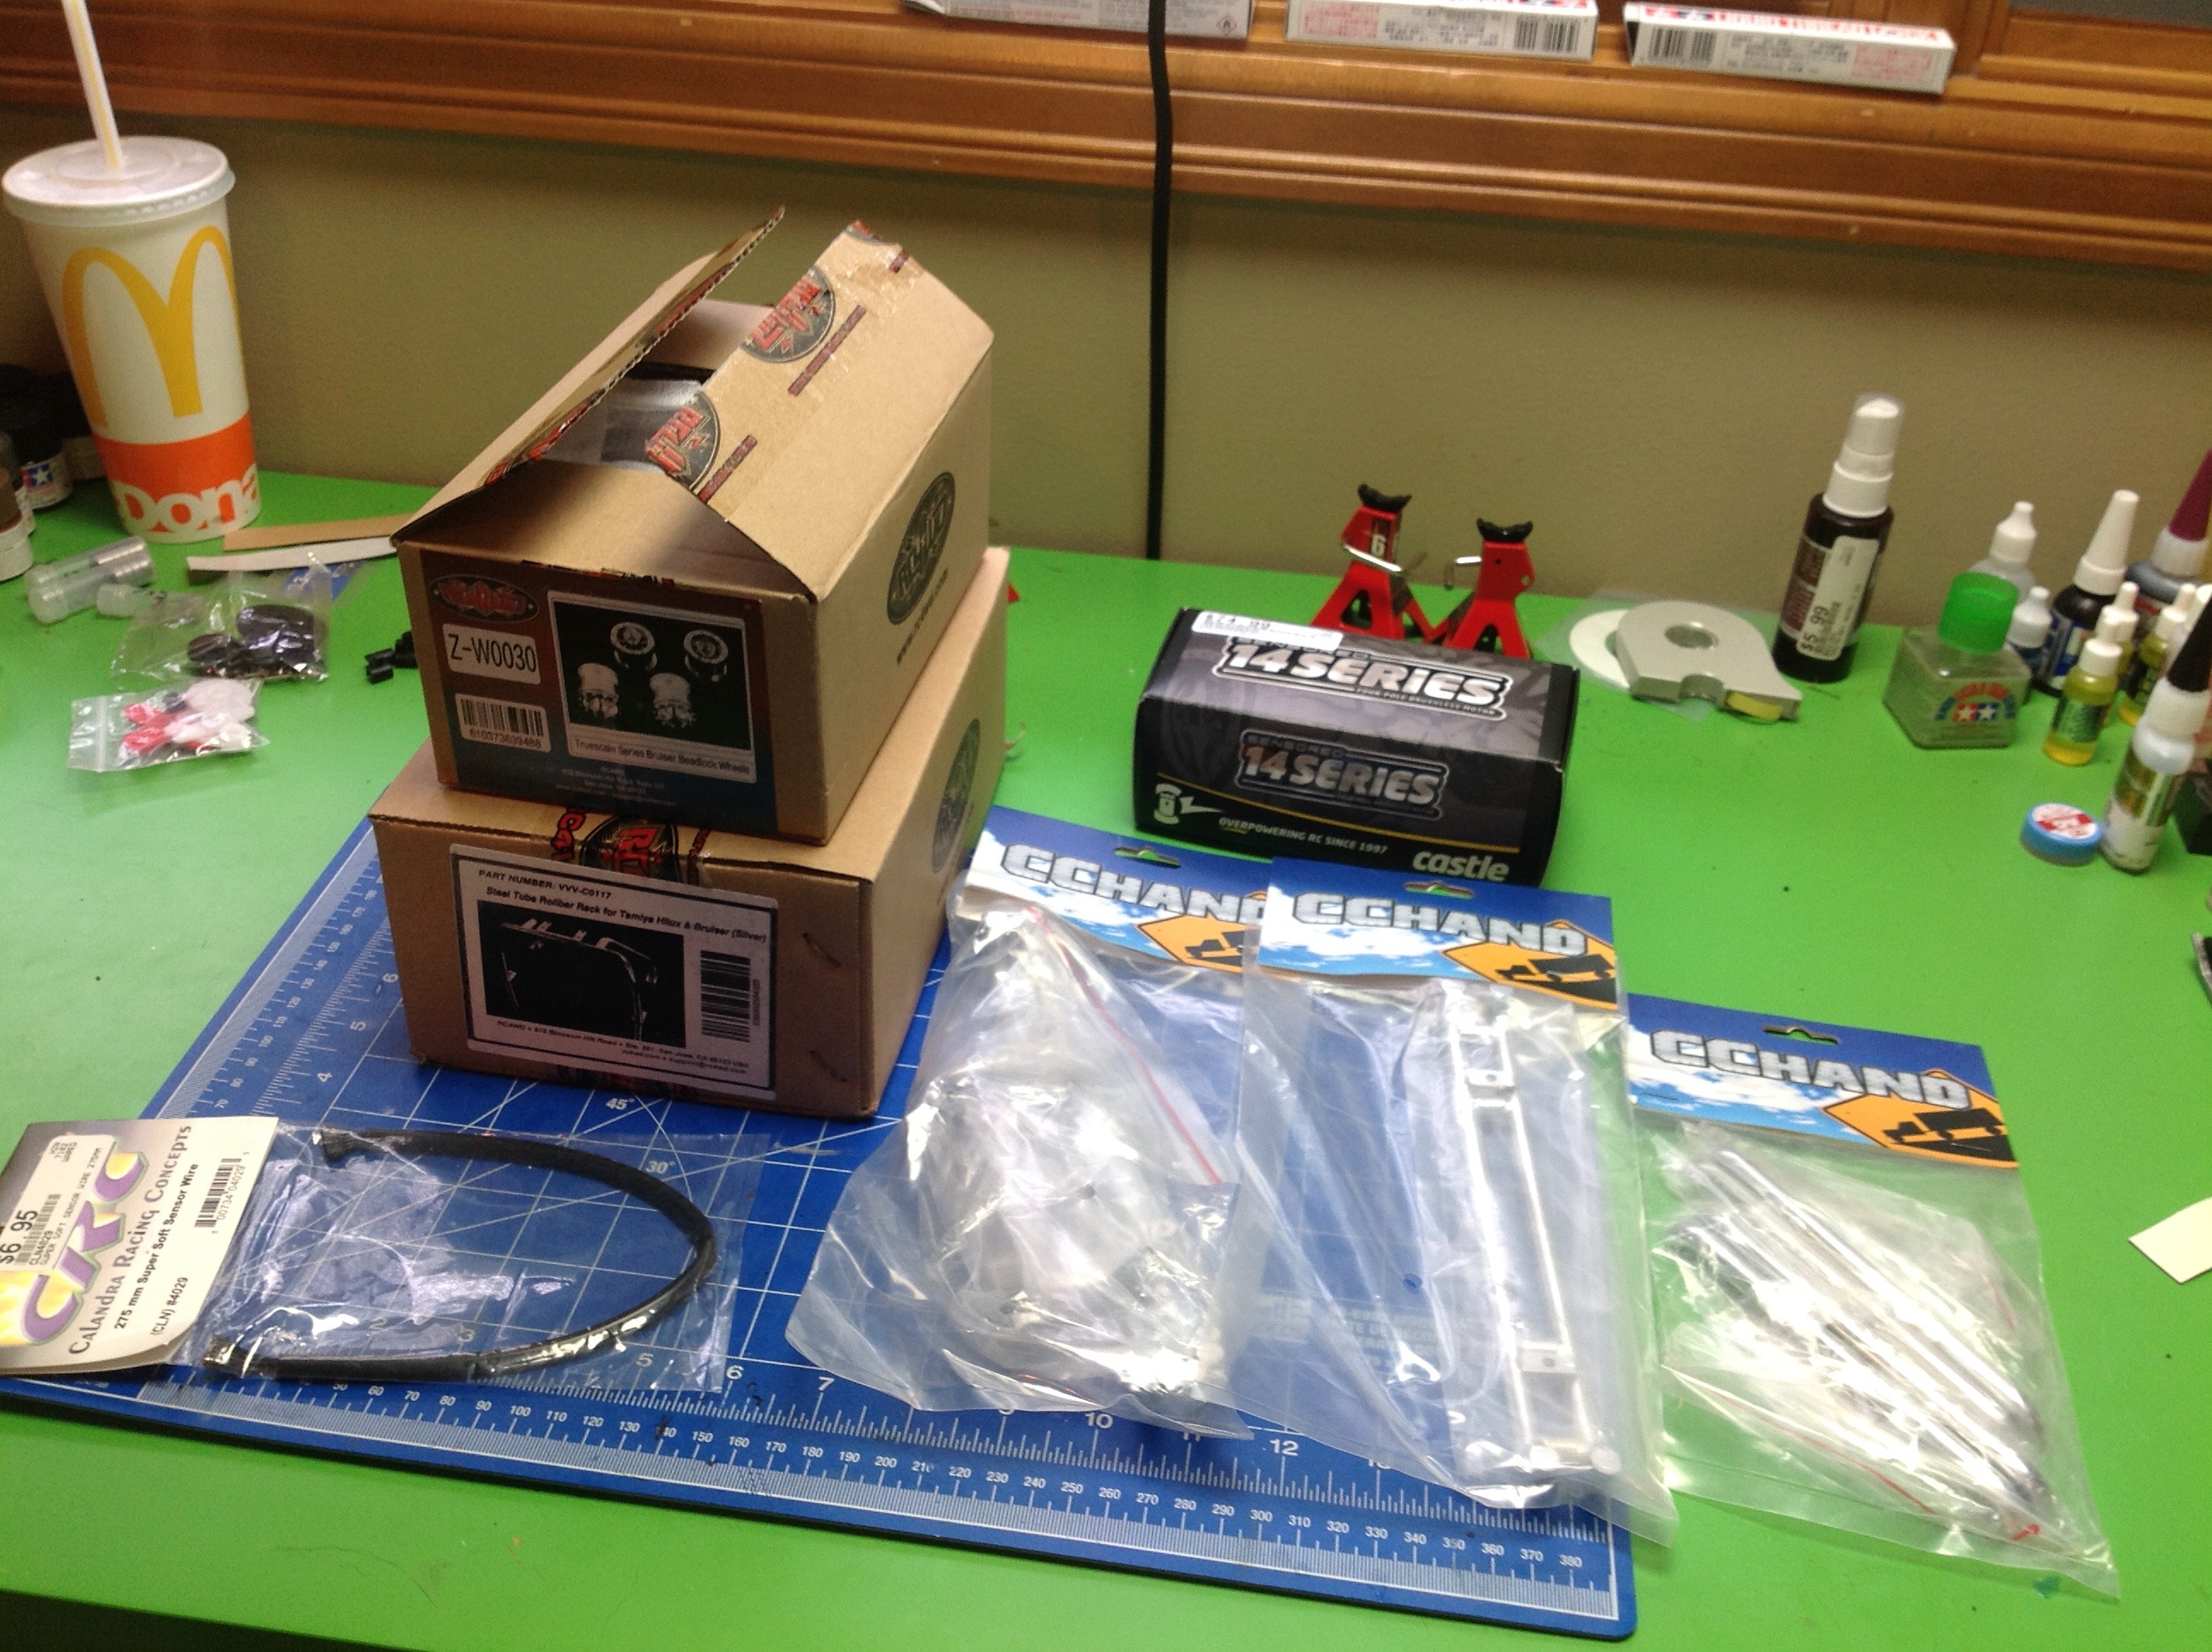
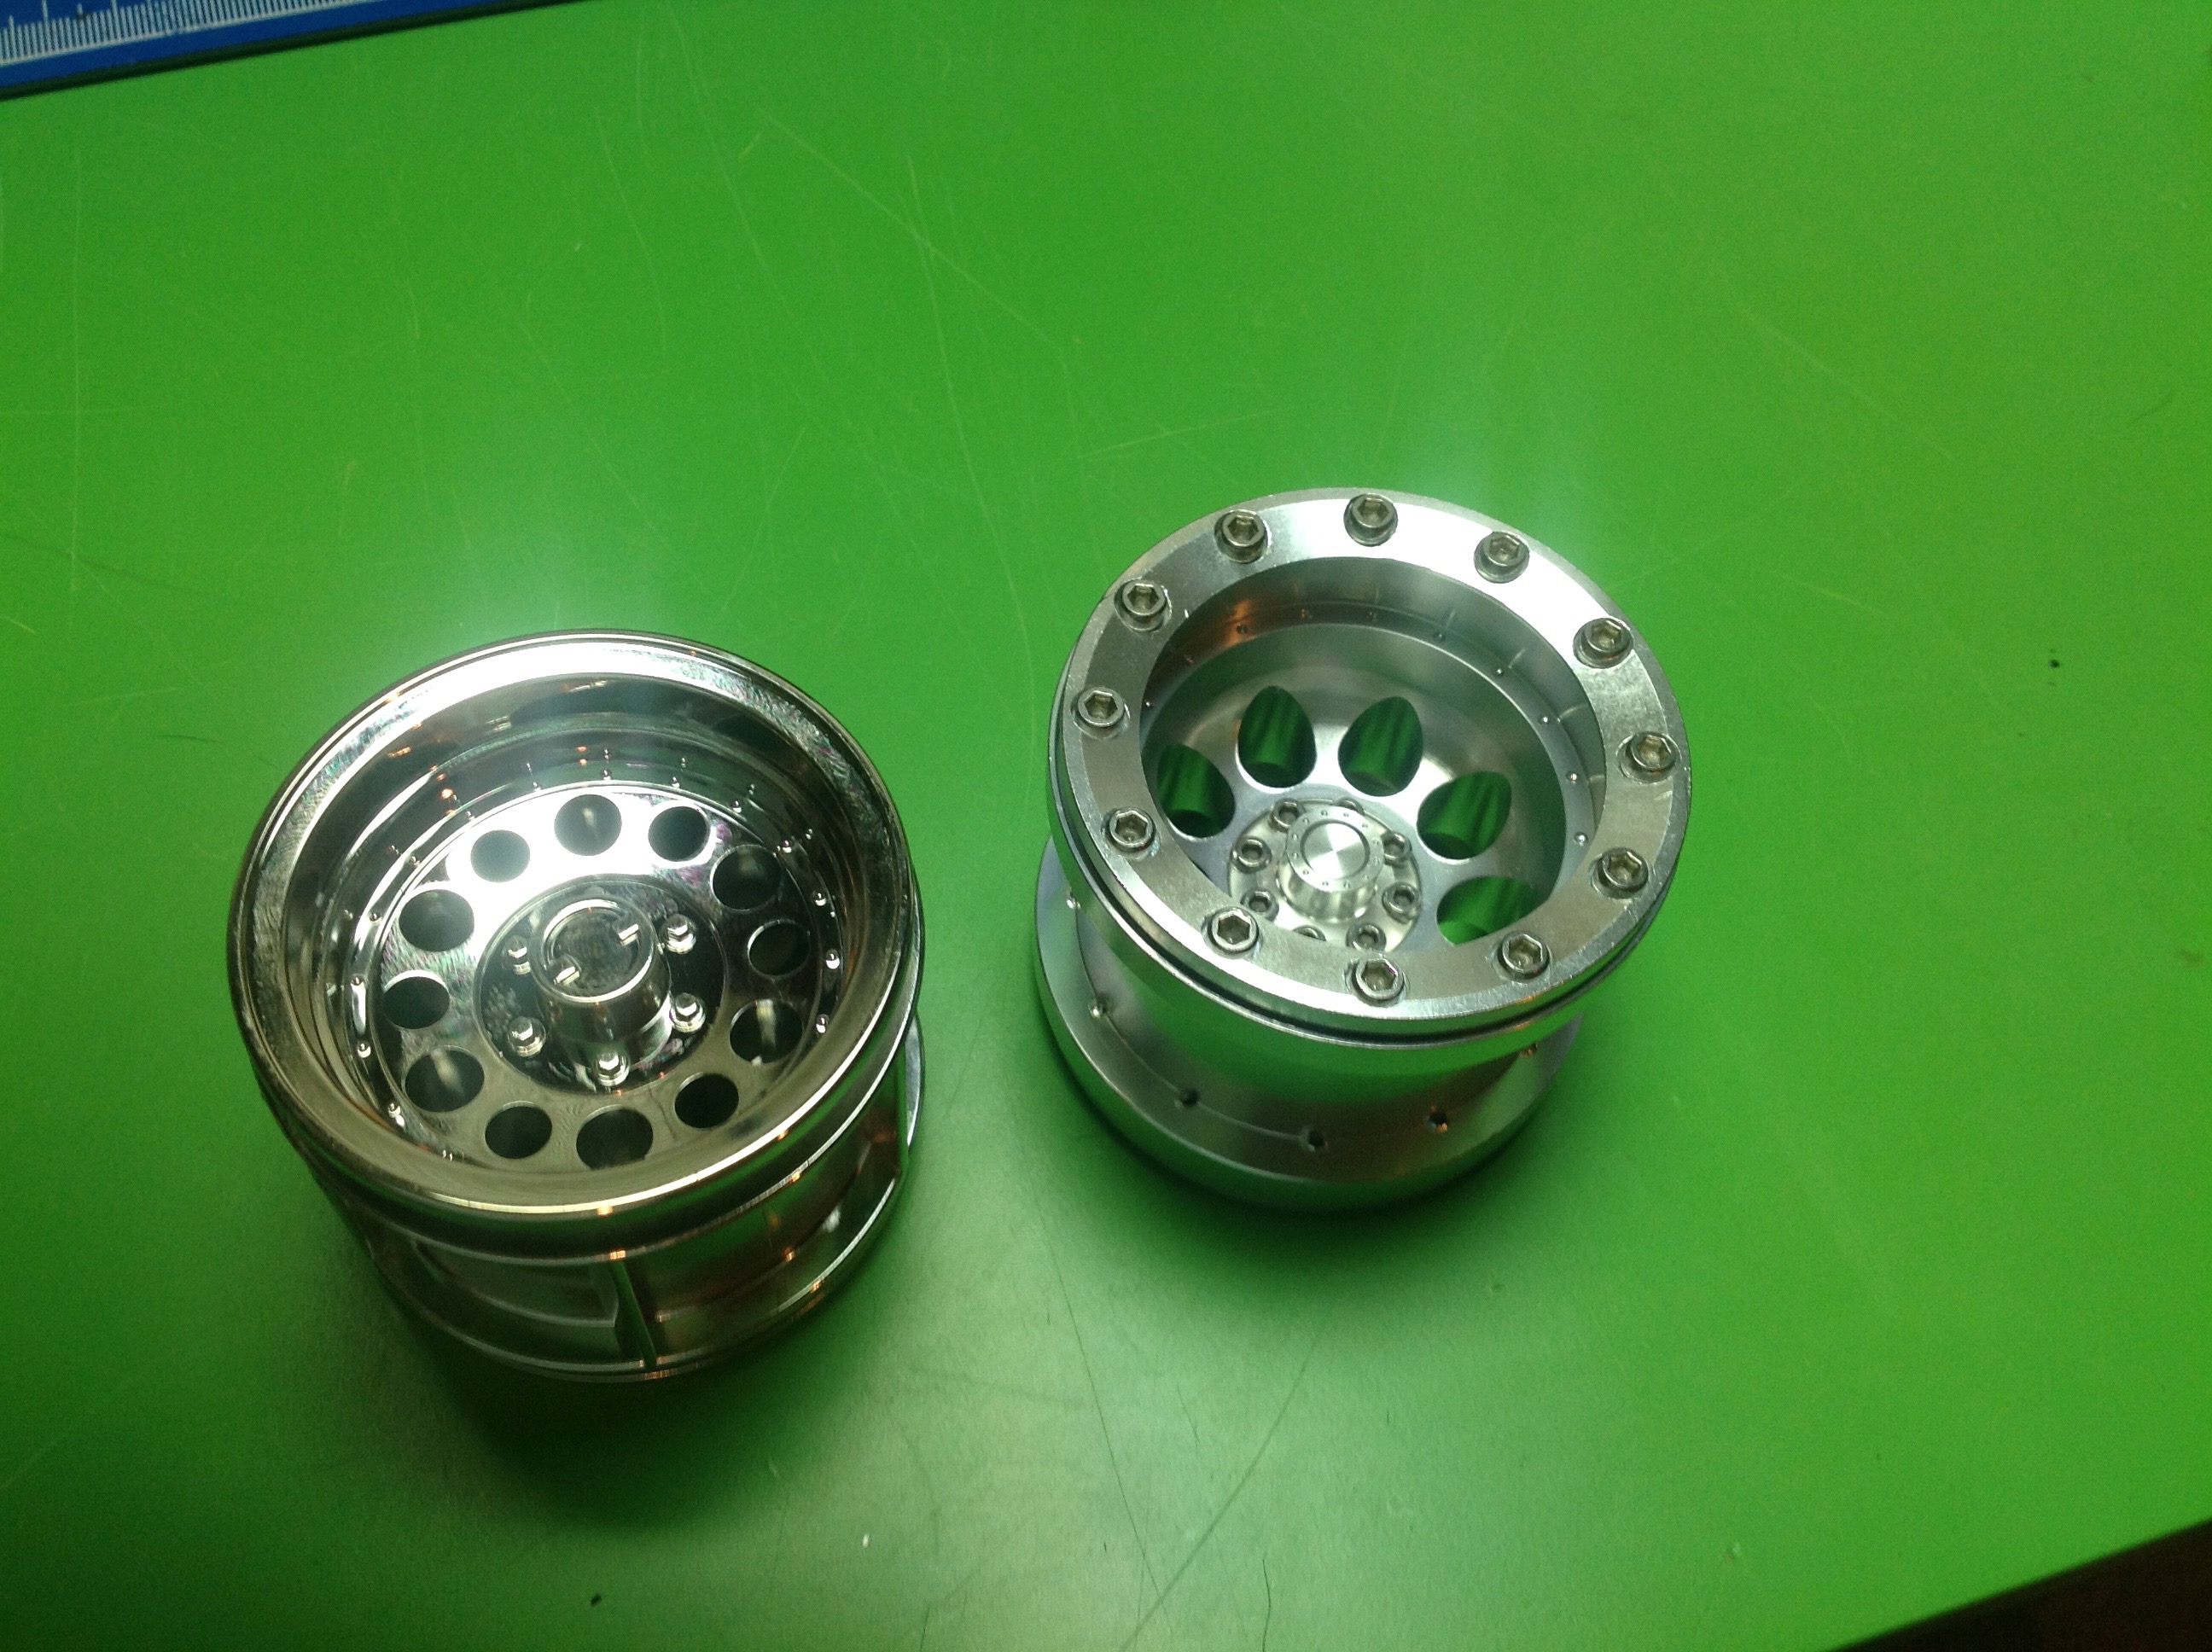
RC4WD offers a beautiful set of aluminum beadlock wheels specifically
for the Bruiser and I had to have them. You can see the original
plastic (and very nice) wheel on the left and the aluminum on the
right. This was another totally unnecessary upgrade, but I really
like the solid feel of the aluminum and, in case I needed to justify myself, they help lower the CG and prevent rollovers.
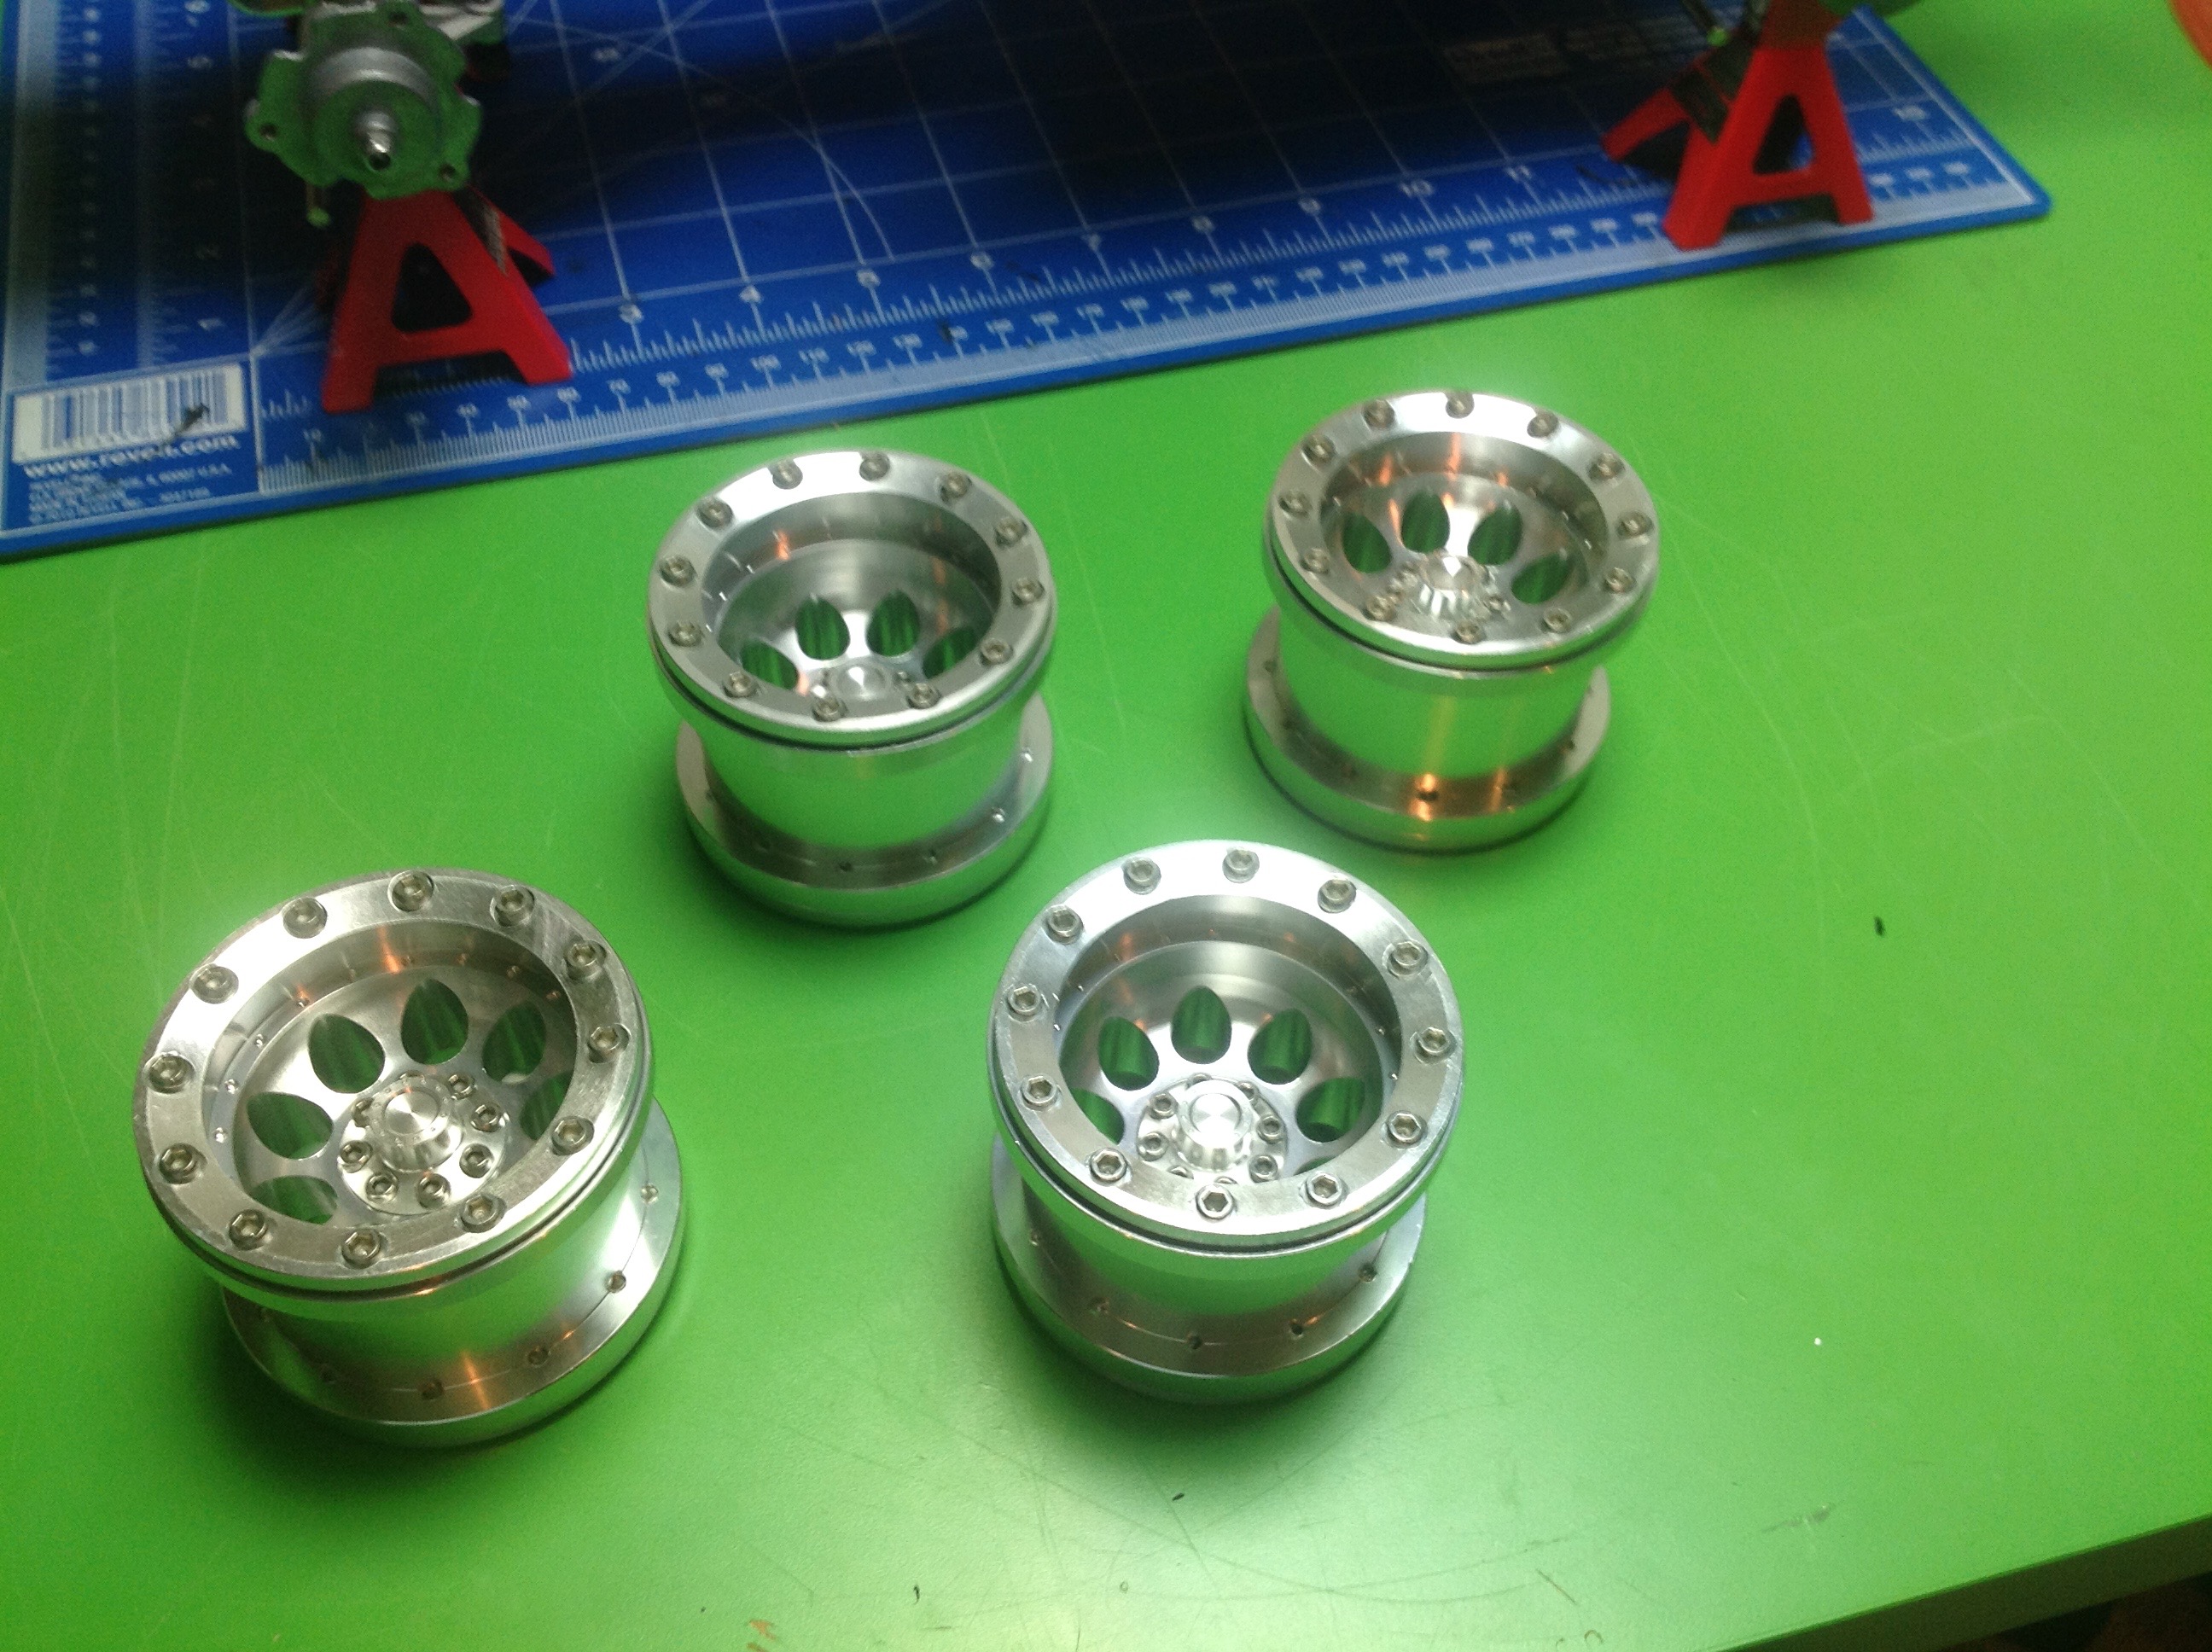
Here is the before and after wheel with tires mounted. You can see
that the stock wheel actually looks really good and you can't even tell
it is plastic. The aluminum wheel hides the mounting nut behind a
center hub which looks good but makes them difficult to remove.
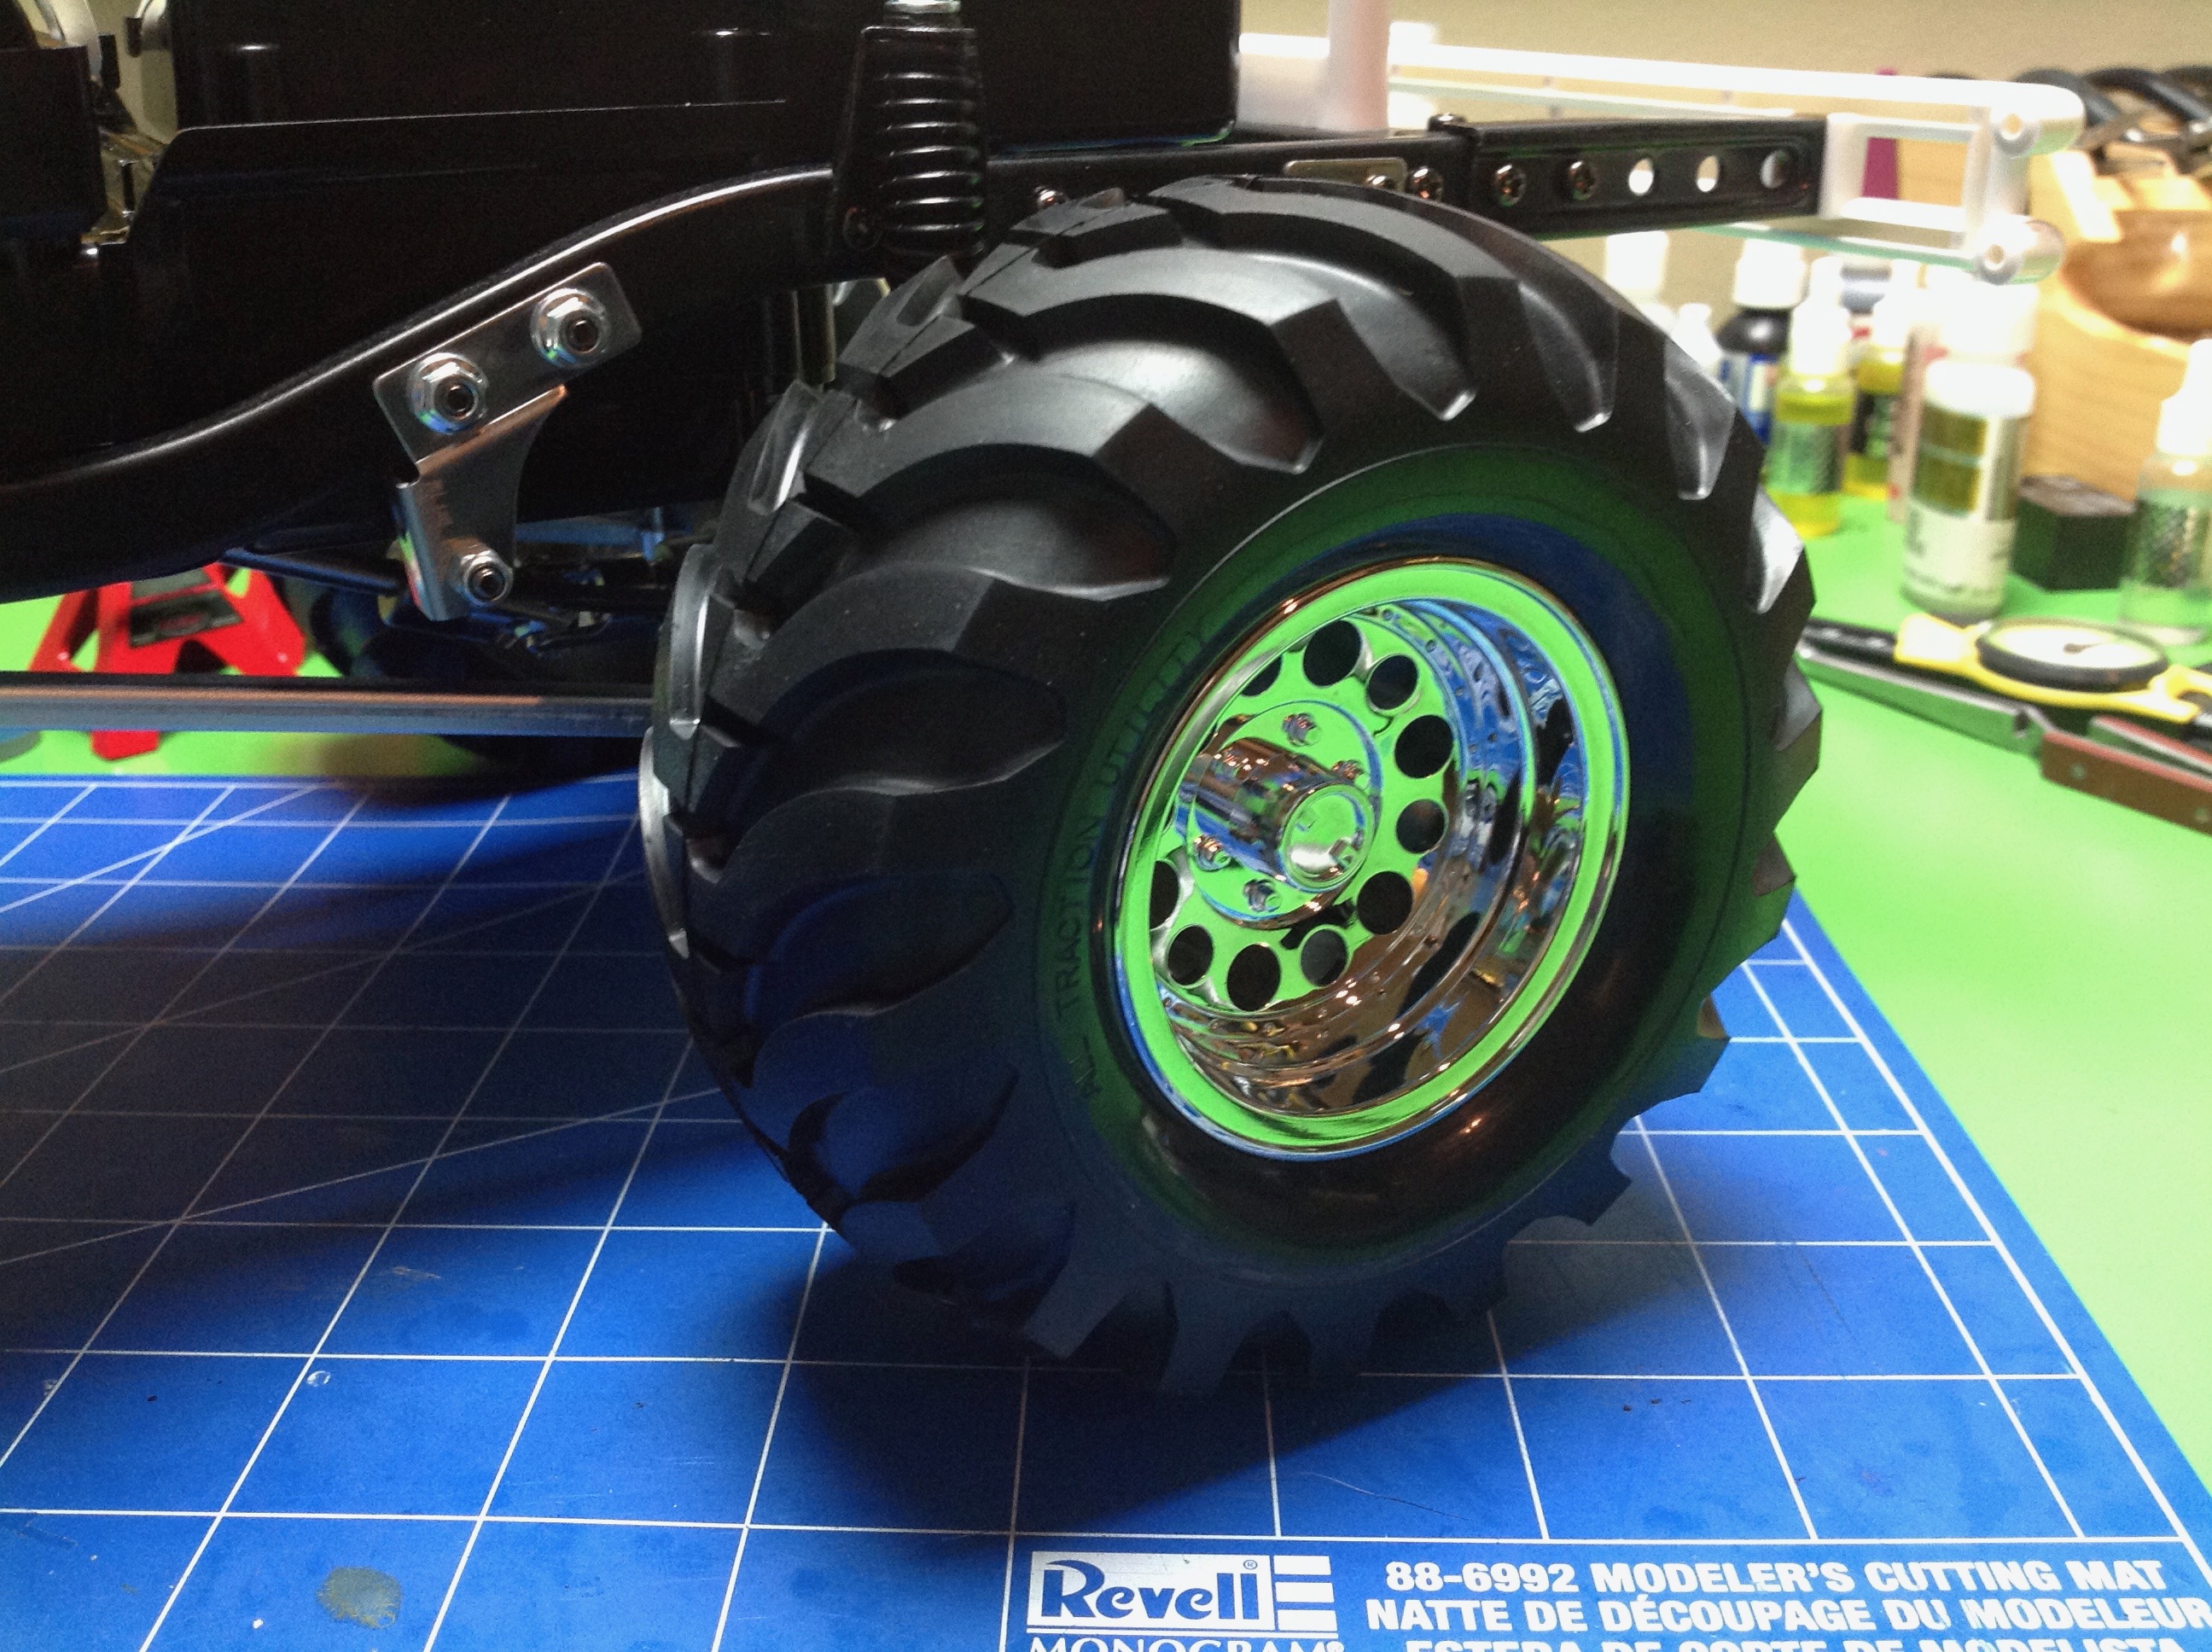
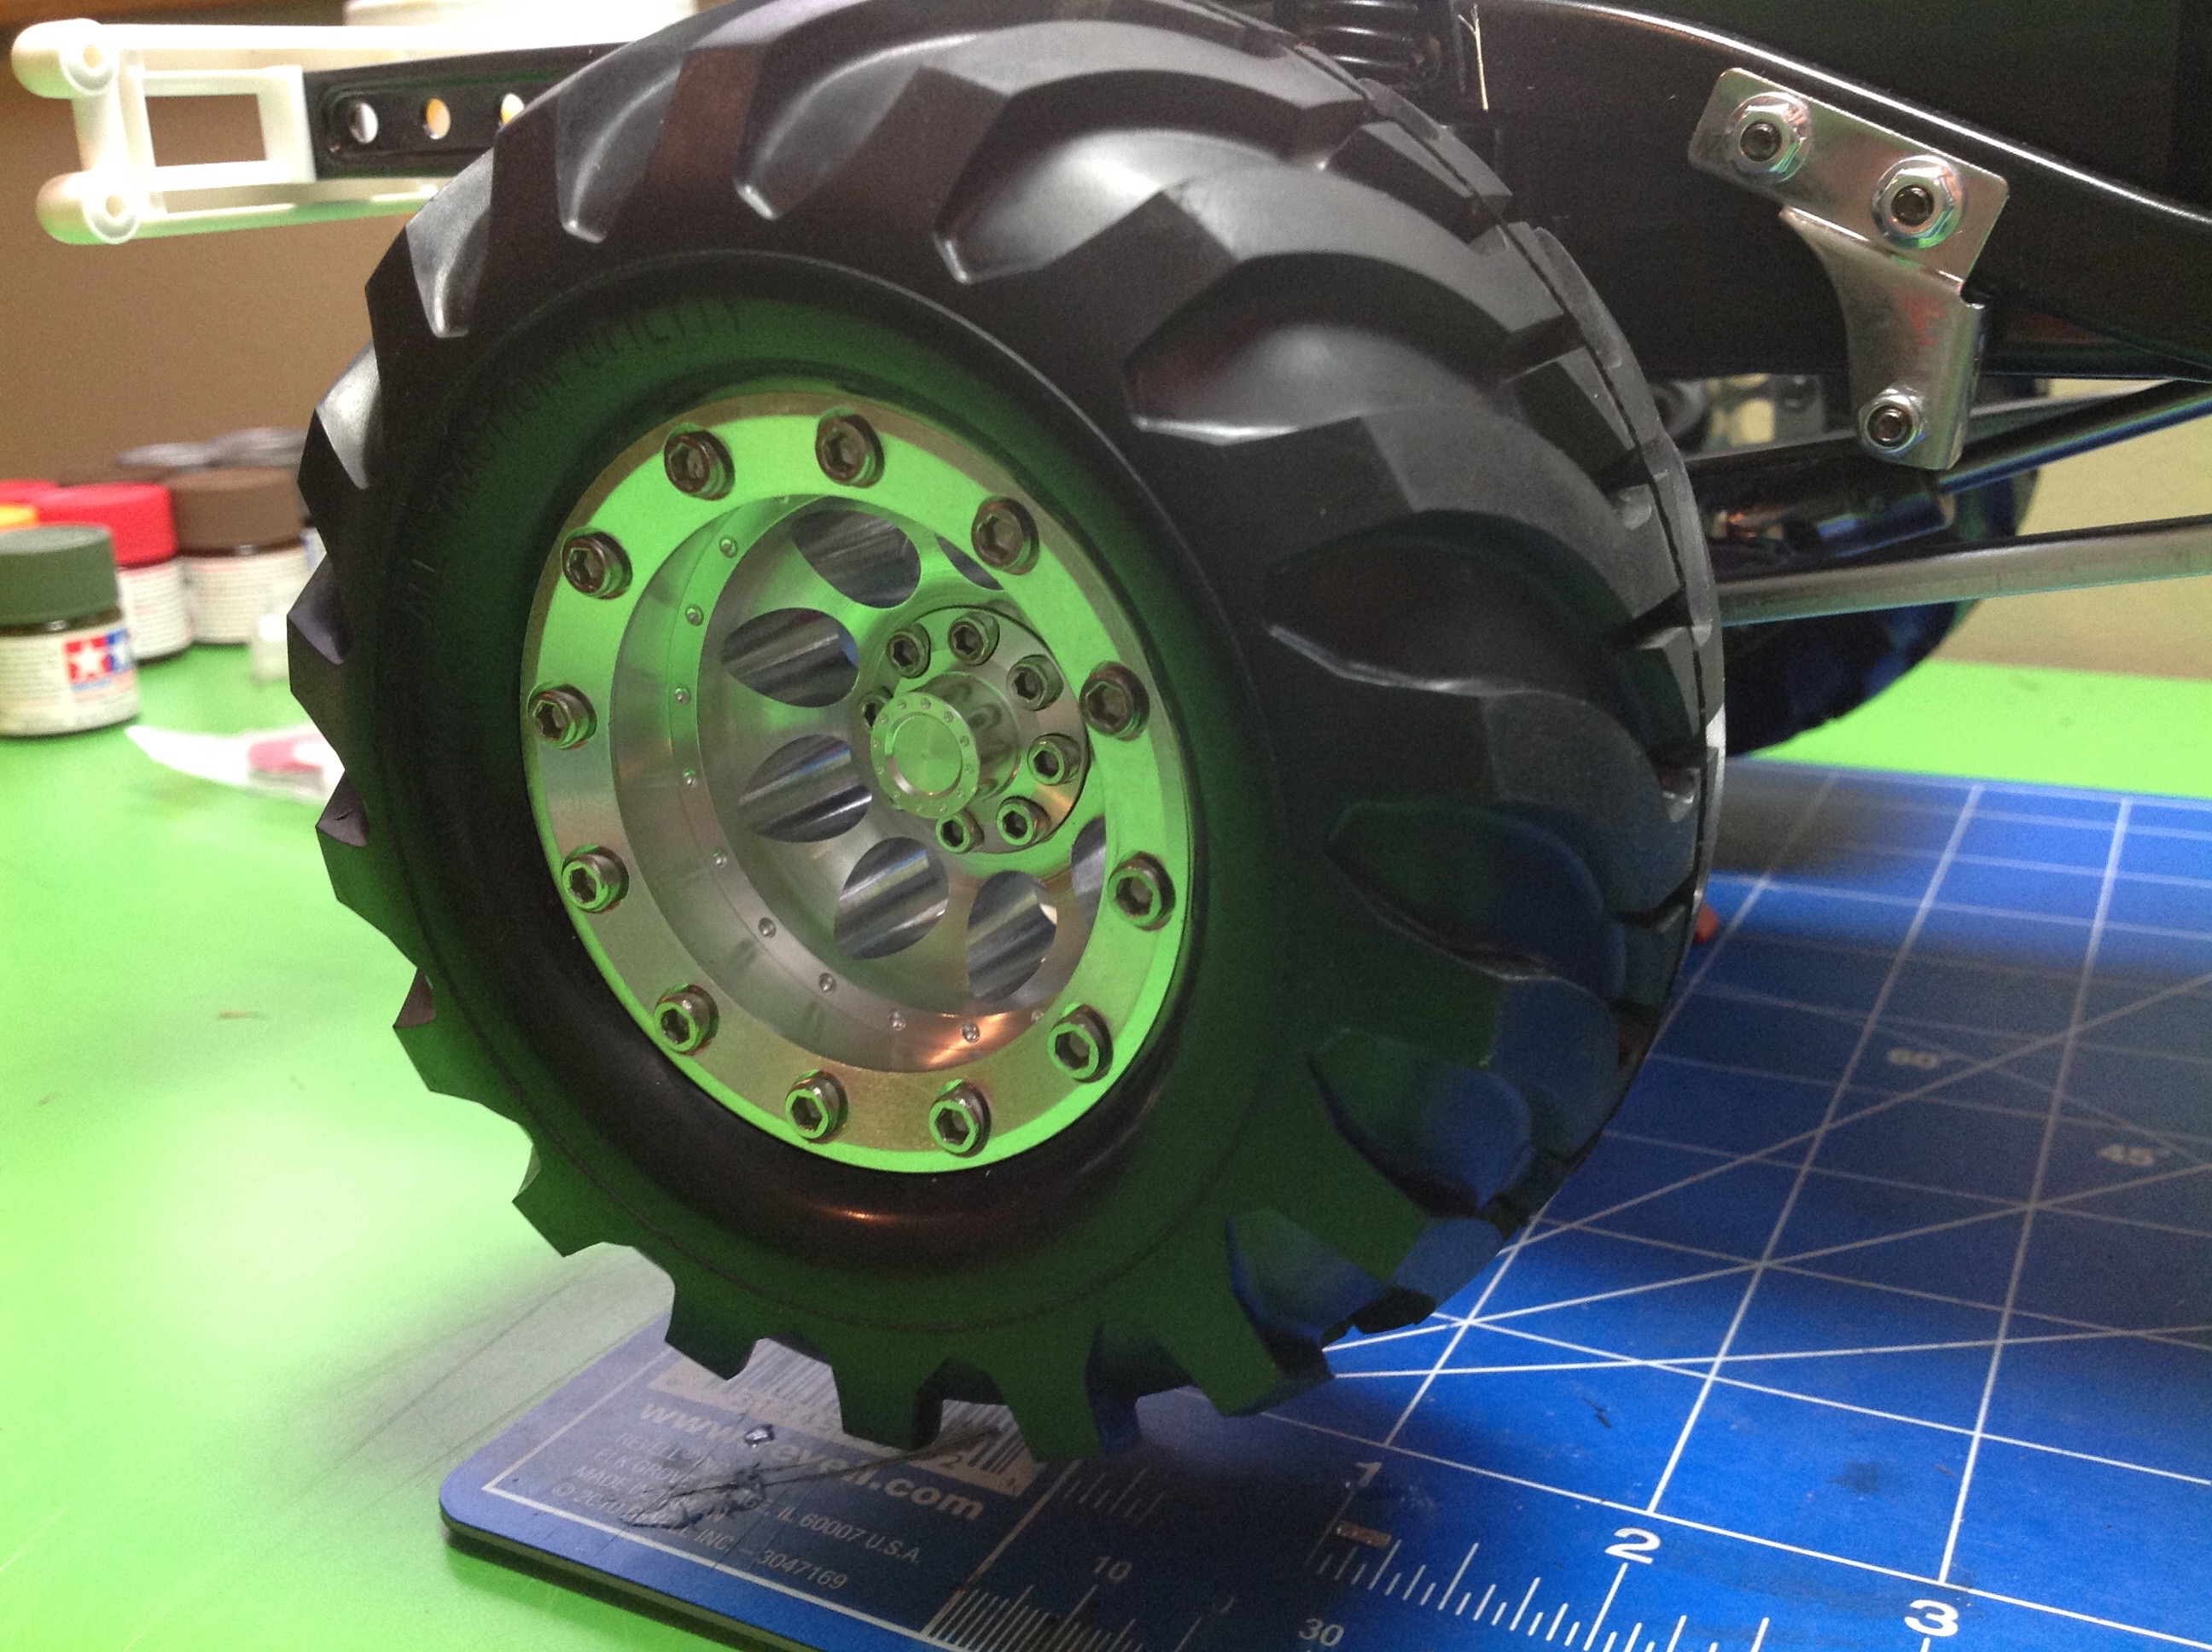
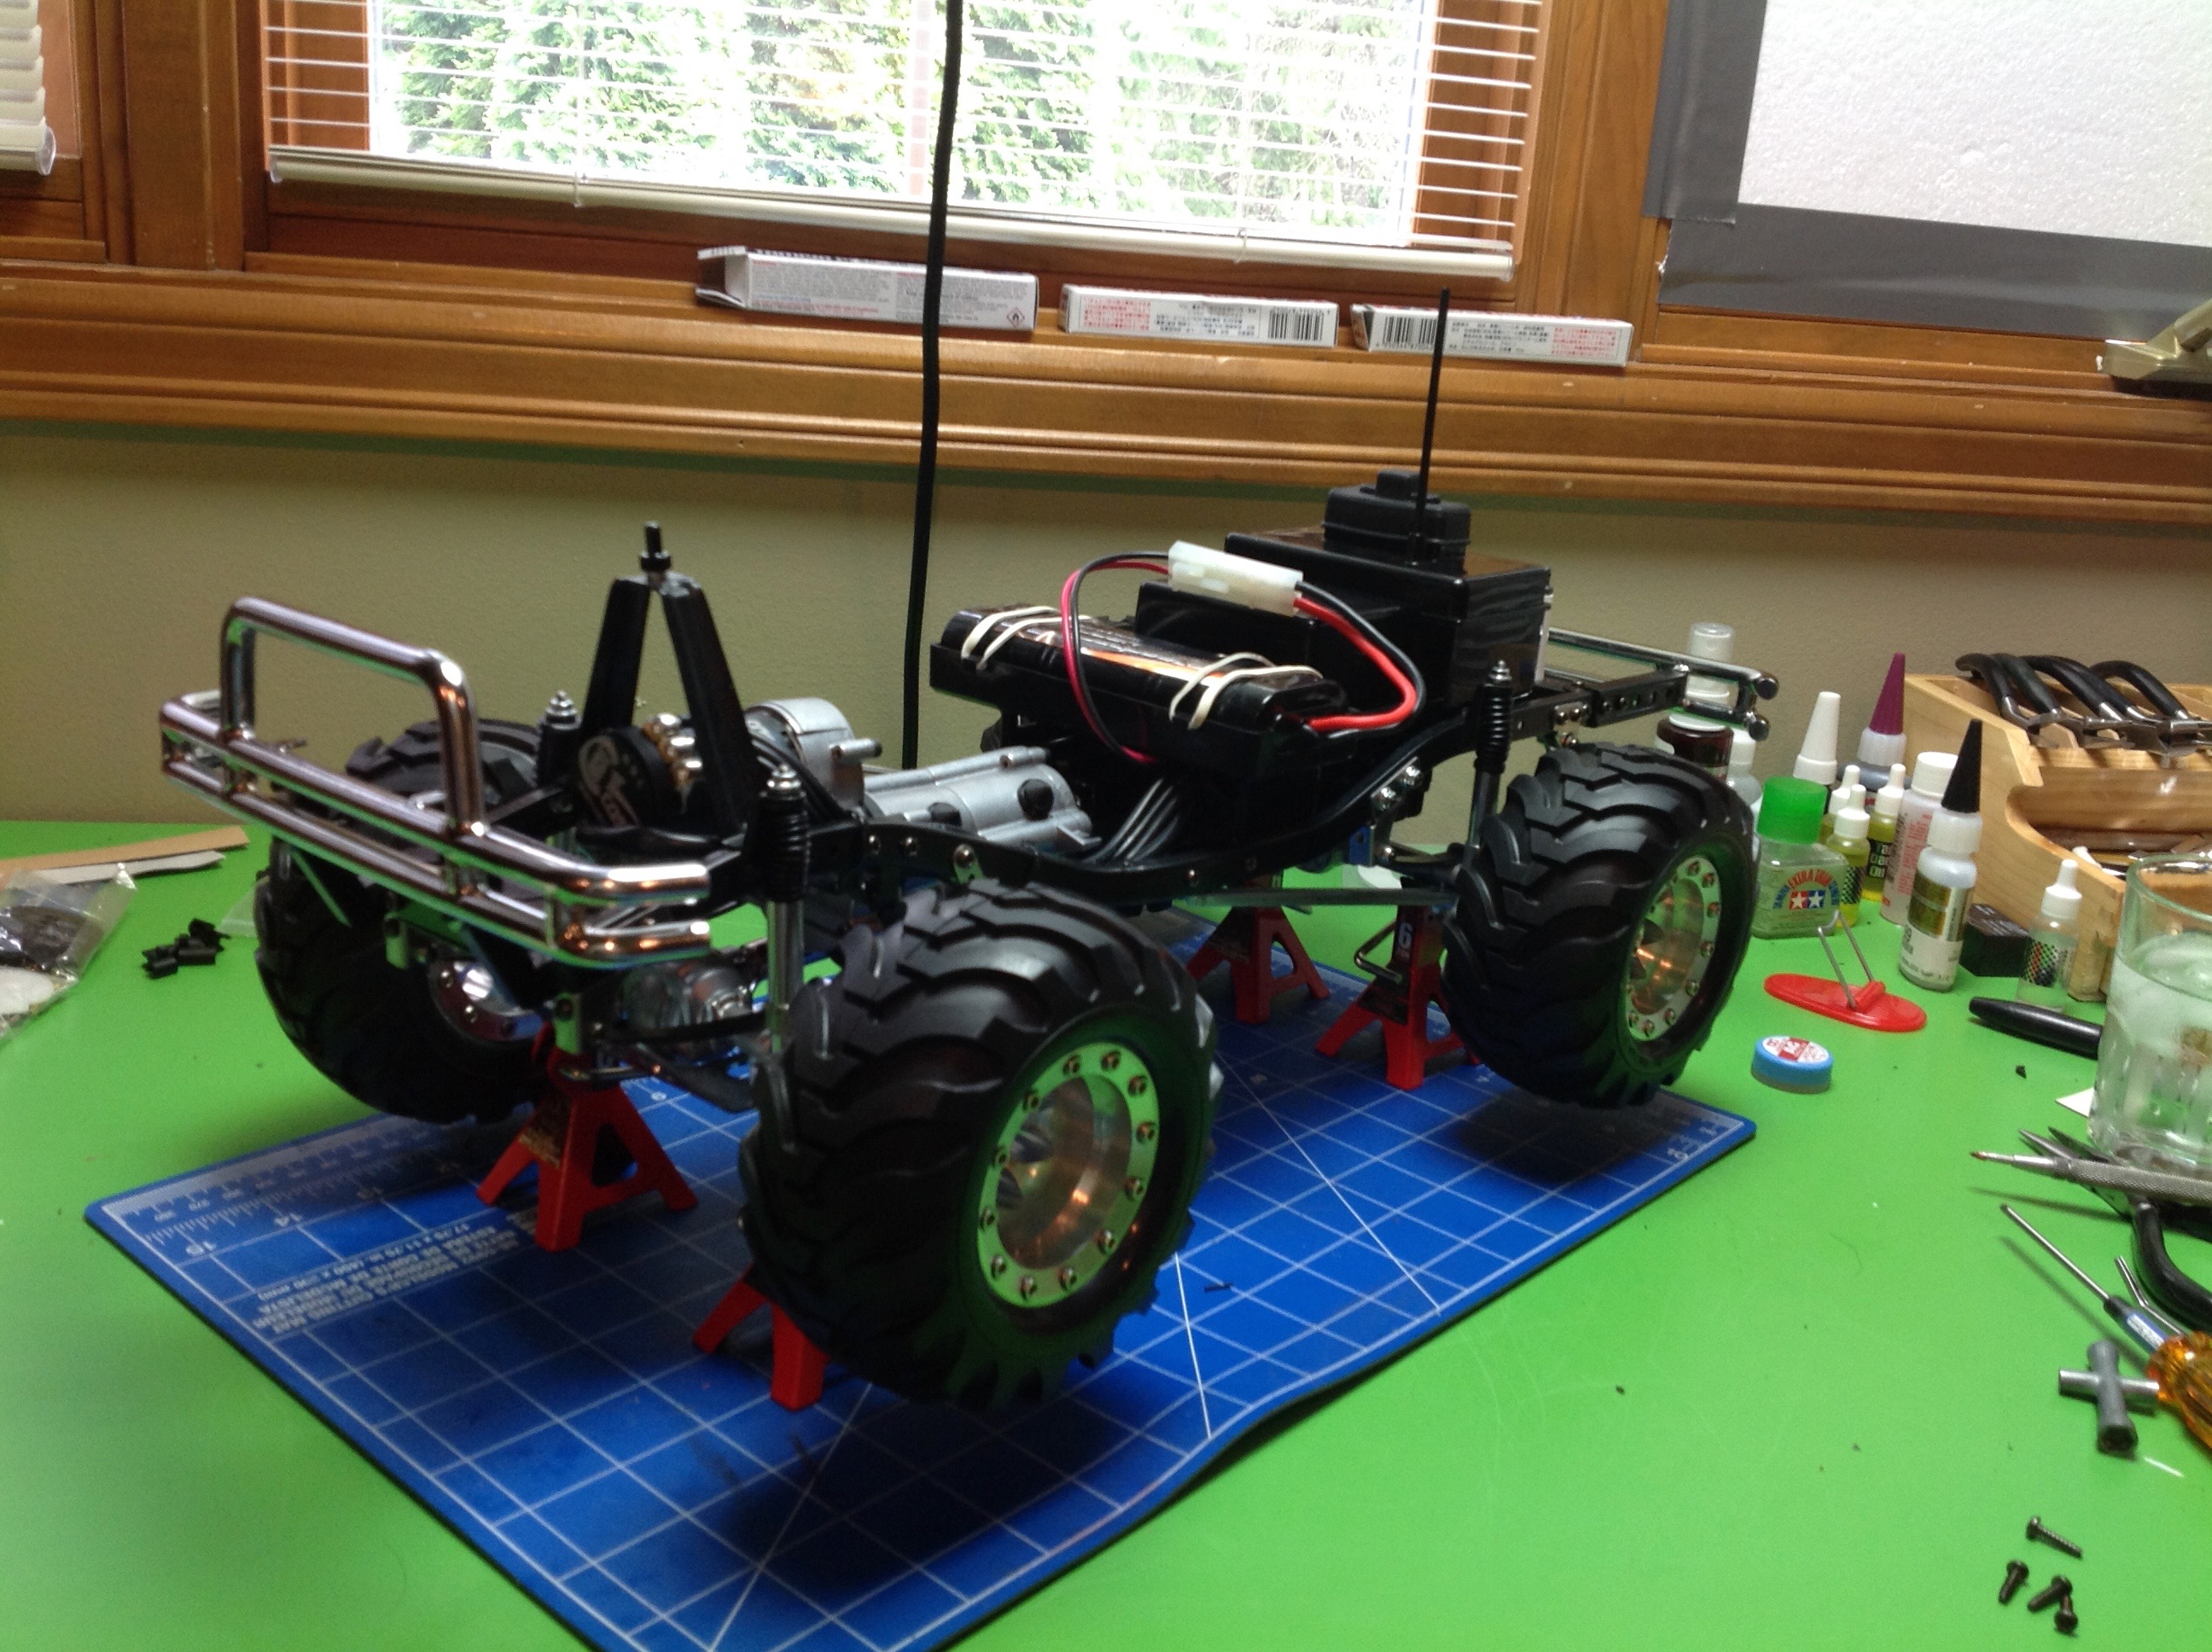
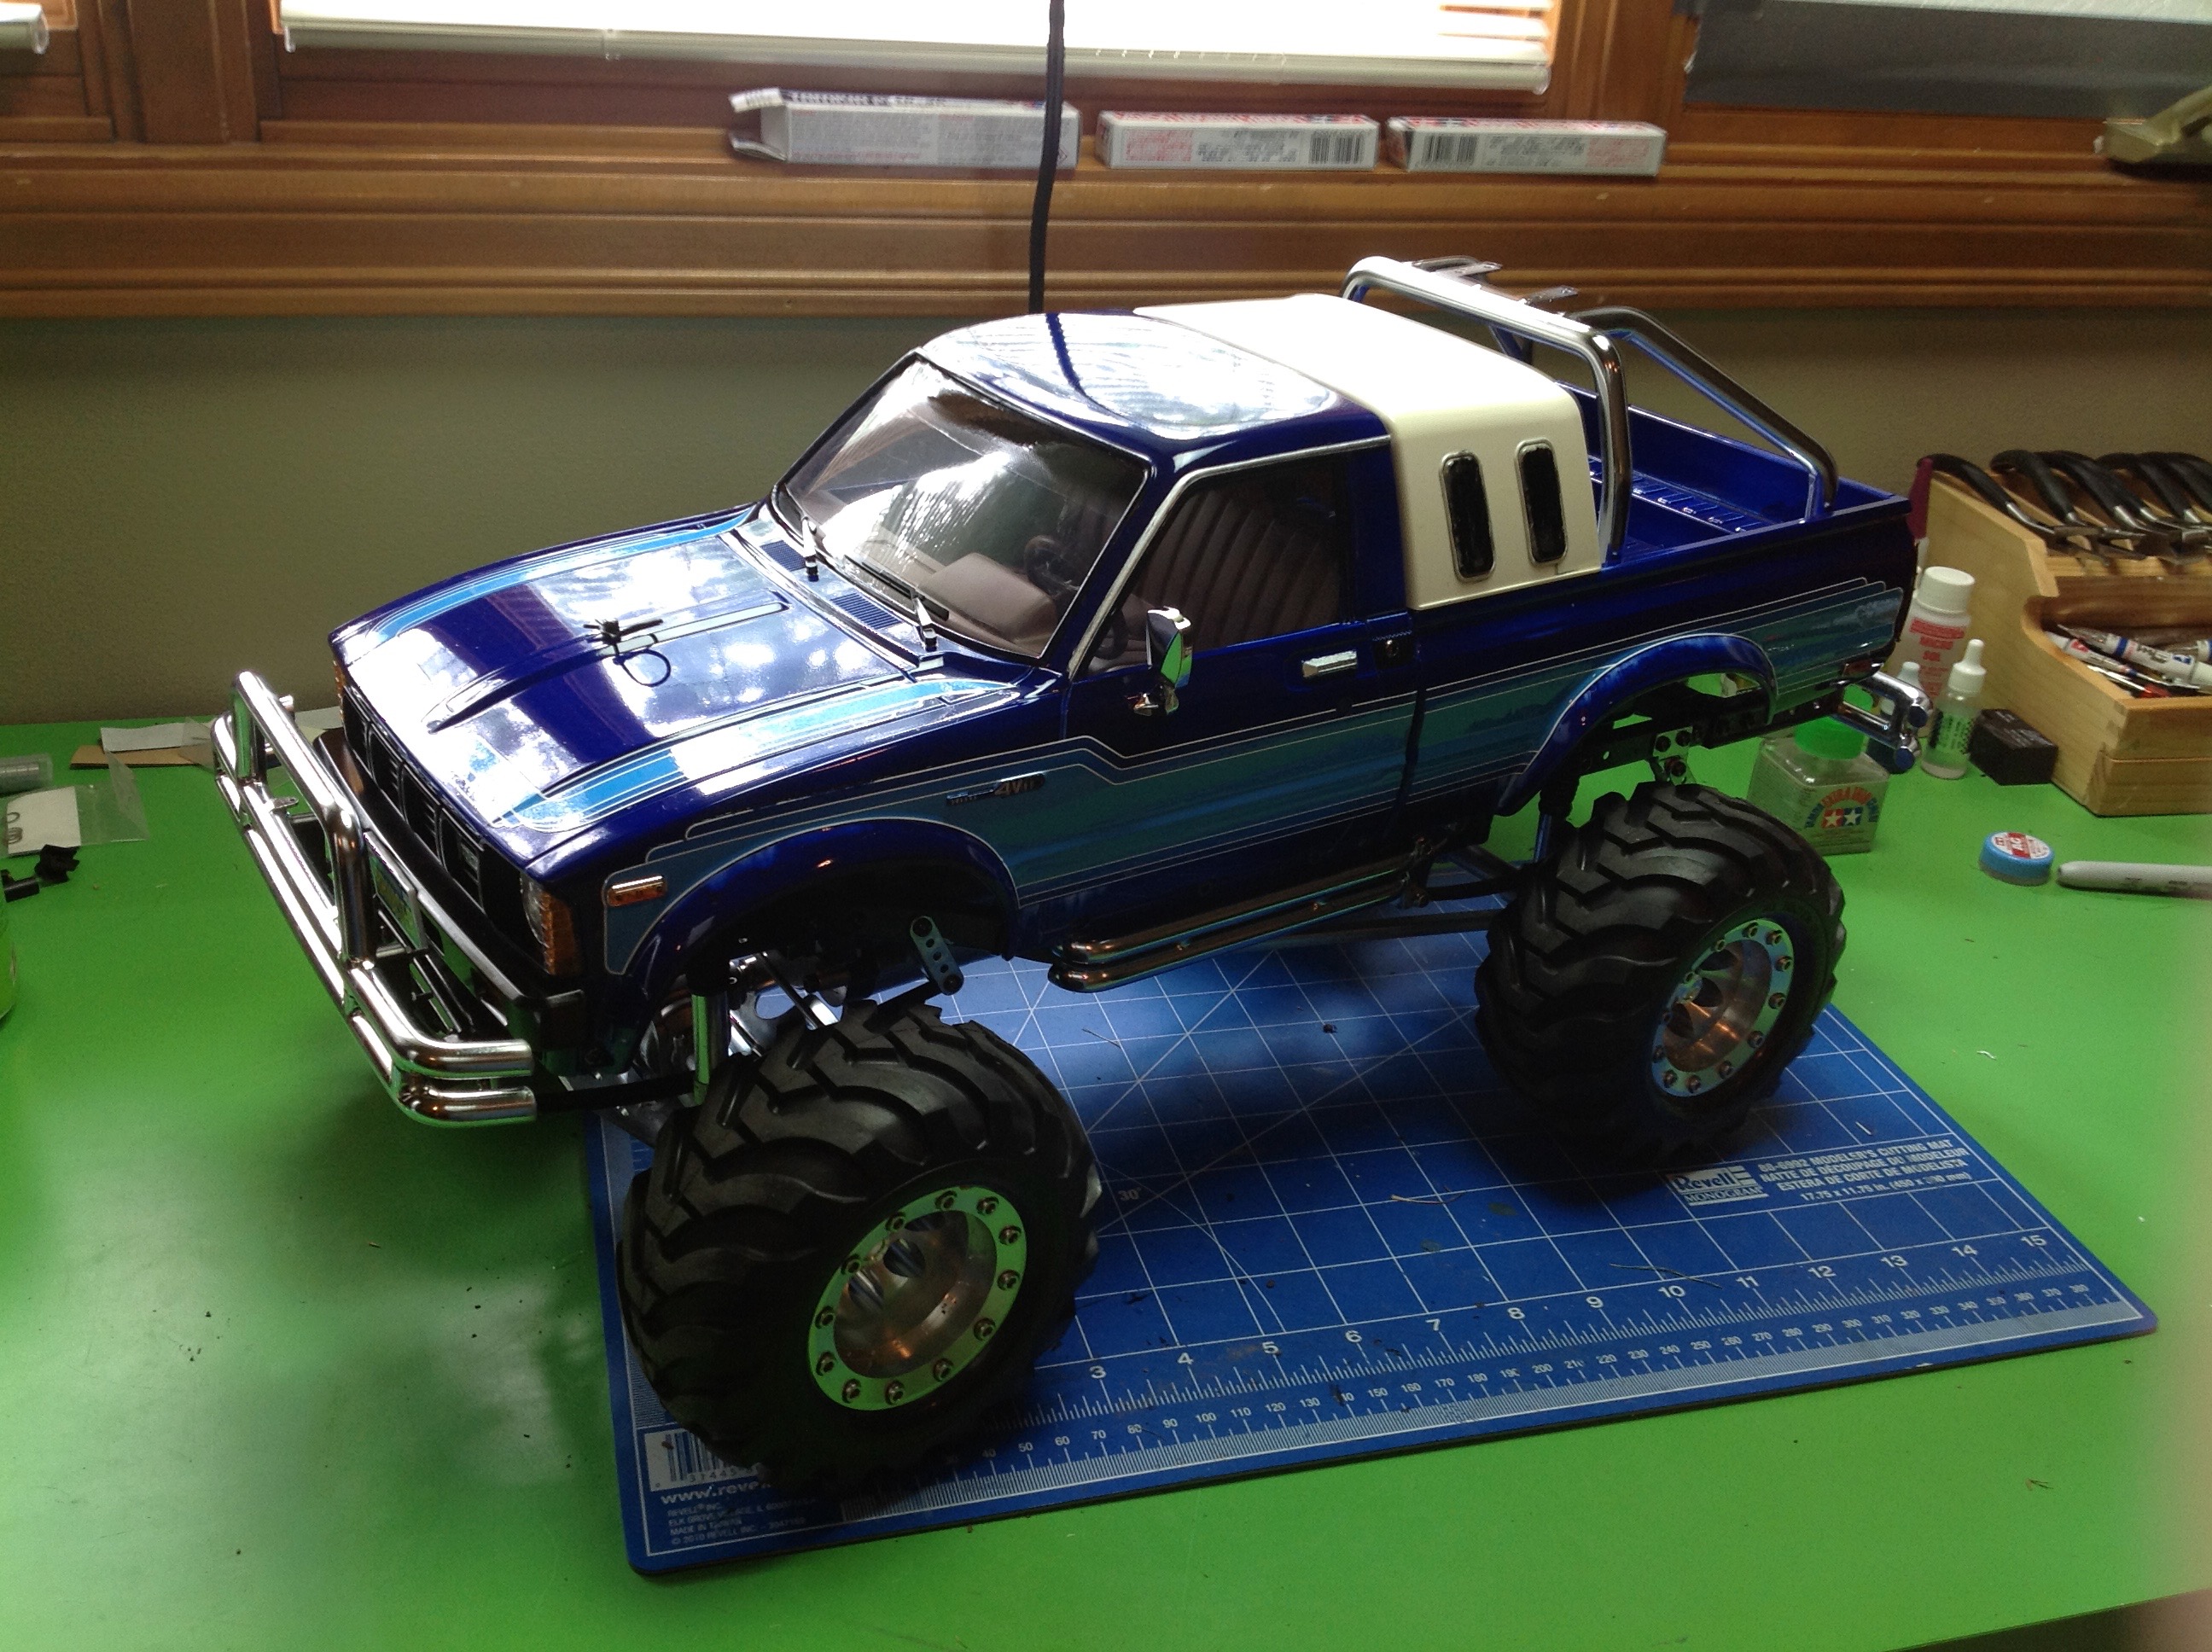
Now all four are installed and I was able to go drive the truck around
the yard. It is really a good machine with easy characteristics,
but it is neither a speed demon nor a hard core crawler.
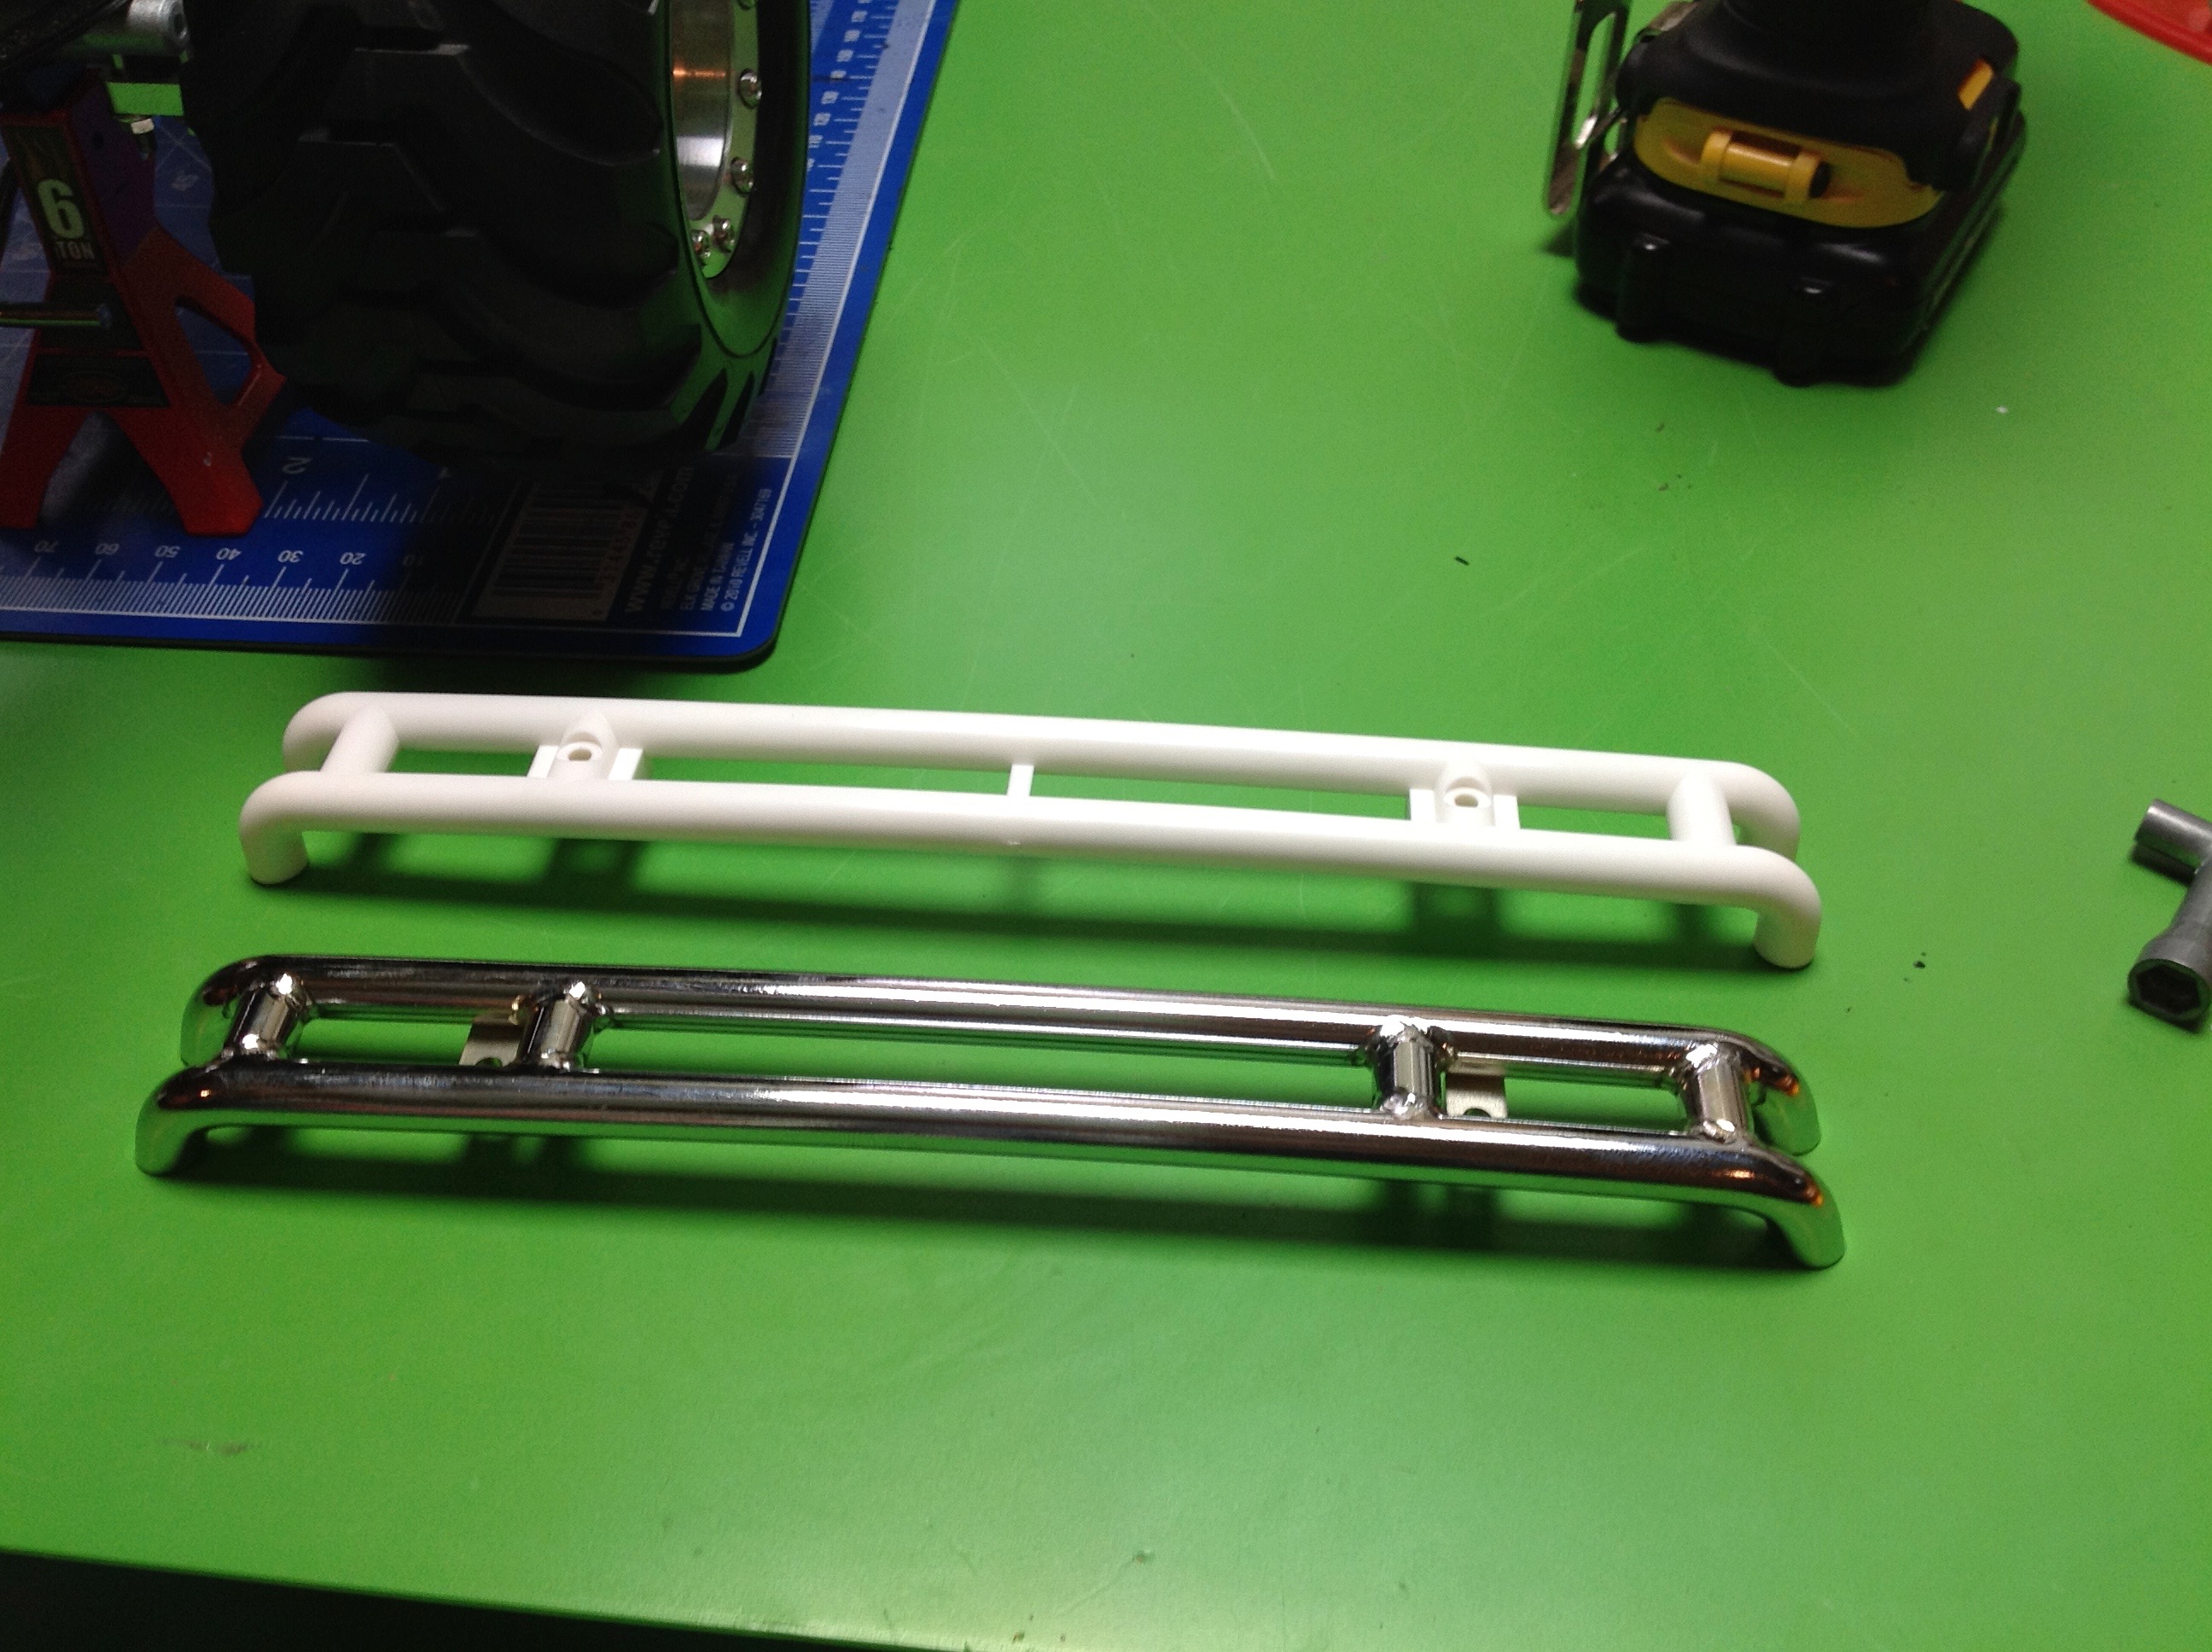
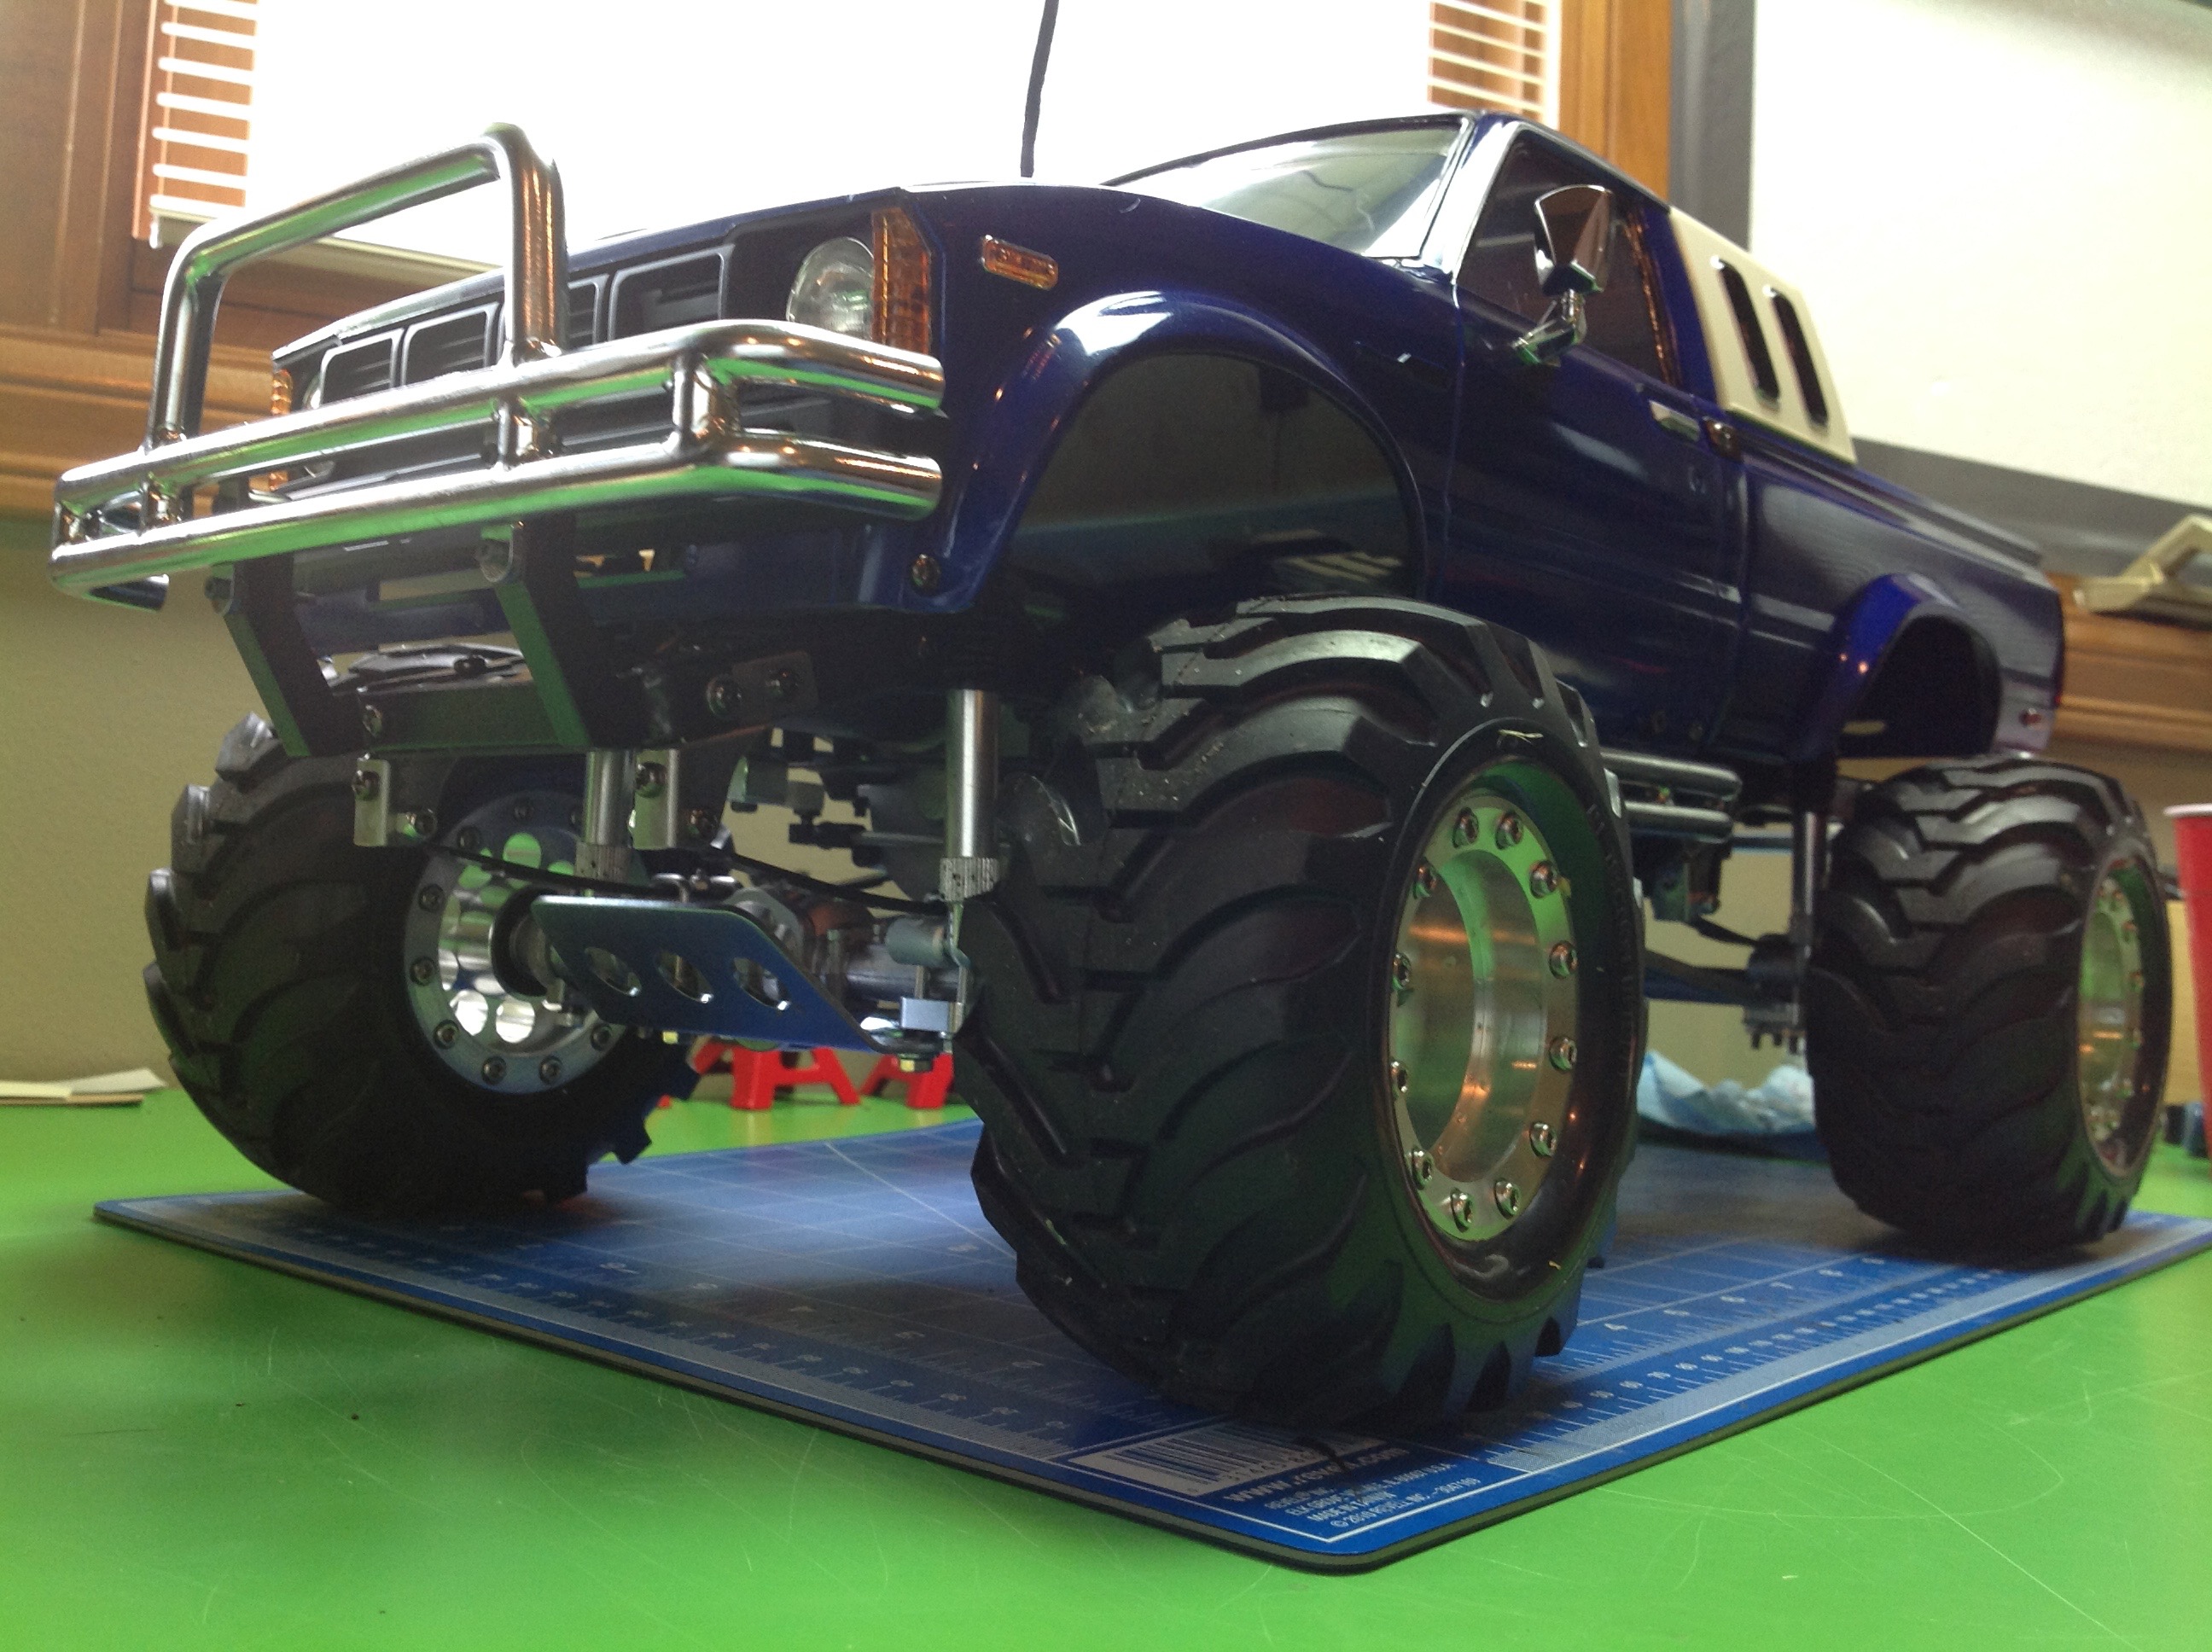
All of the bumpers on the model are white, very flexible plastic.
This is probably a good thing for bumpers, but since RC4WD offered tube
steel versions, I had to have them. This shows the stock rear and
upgraded bumpers.
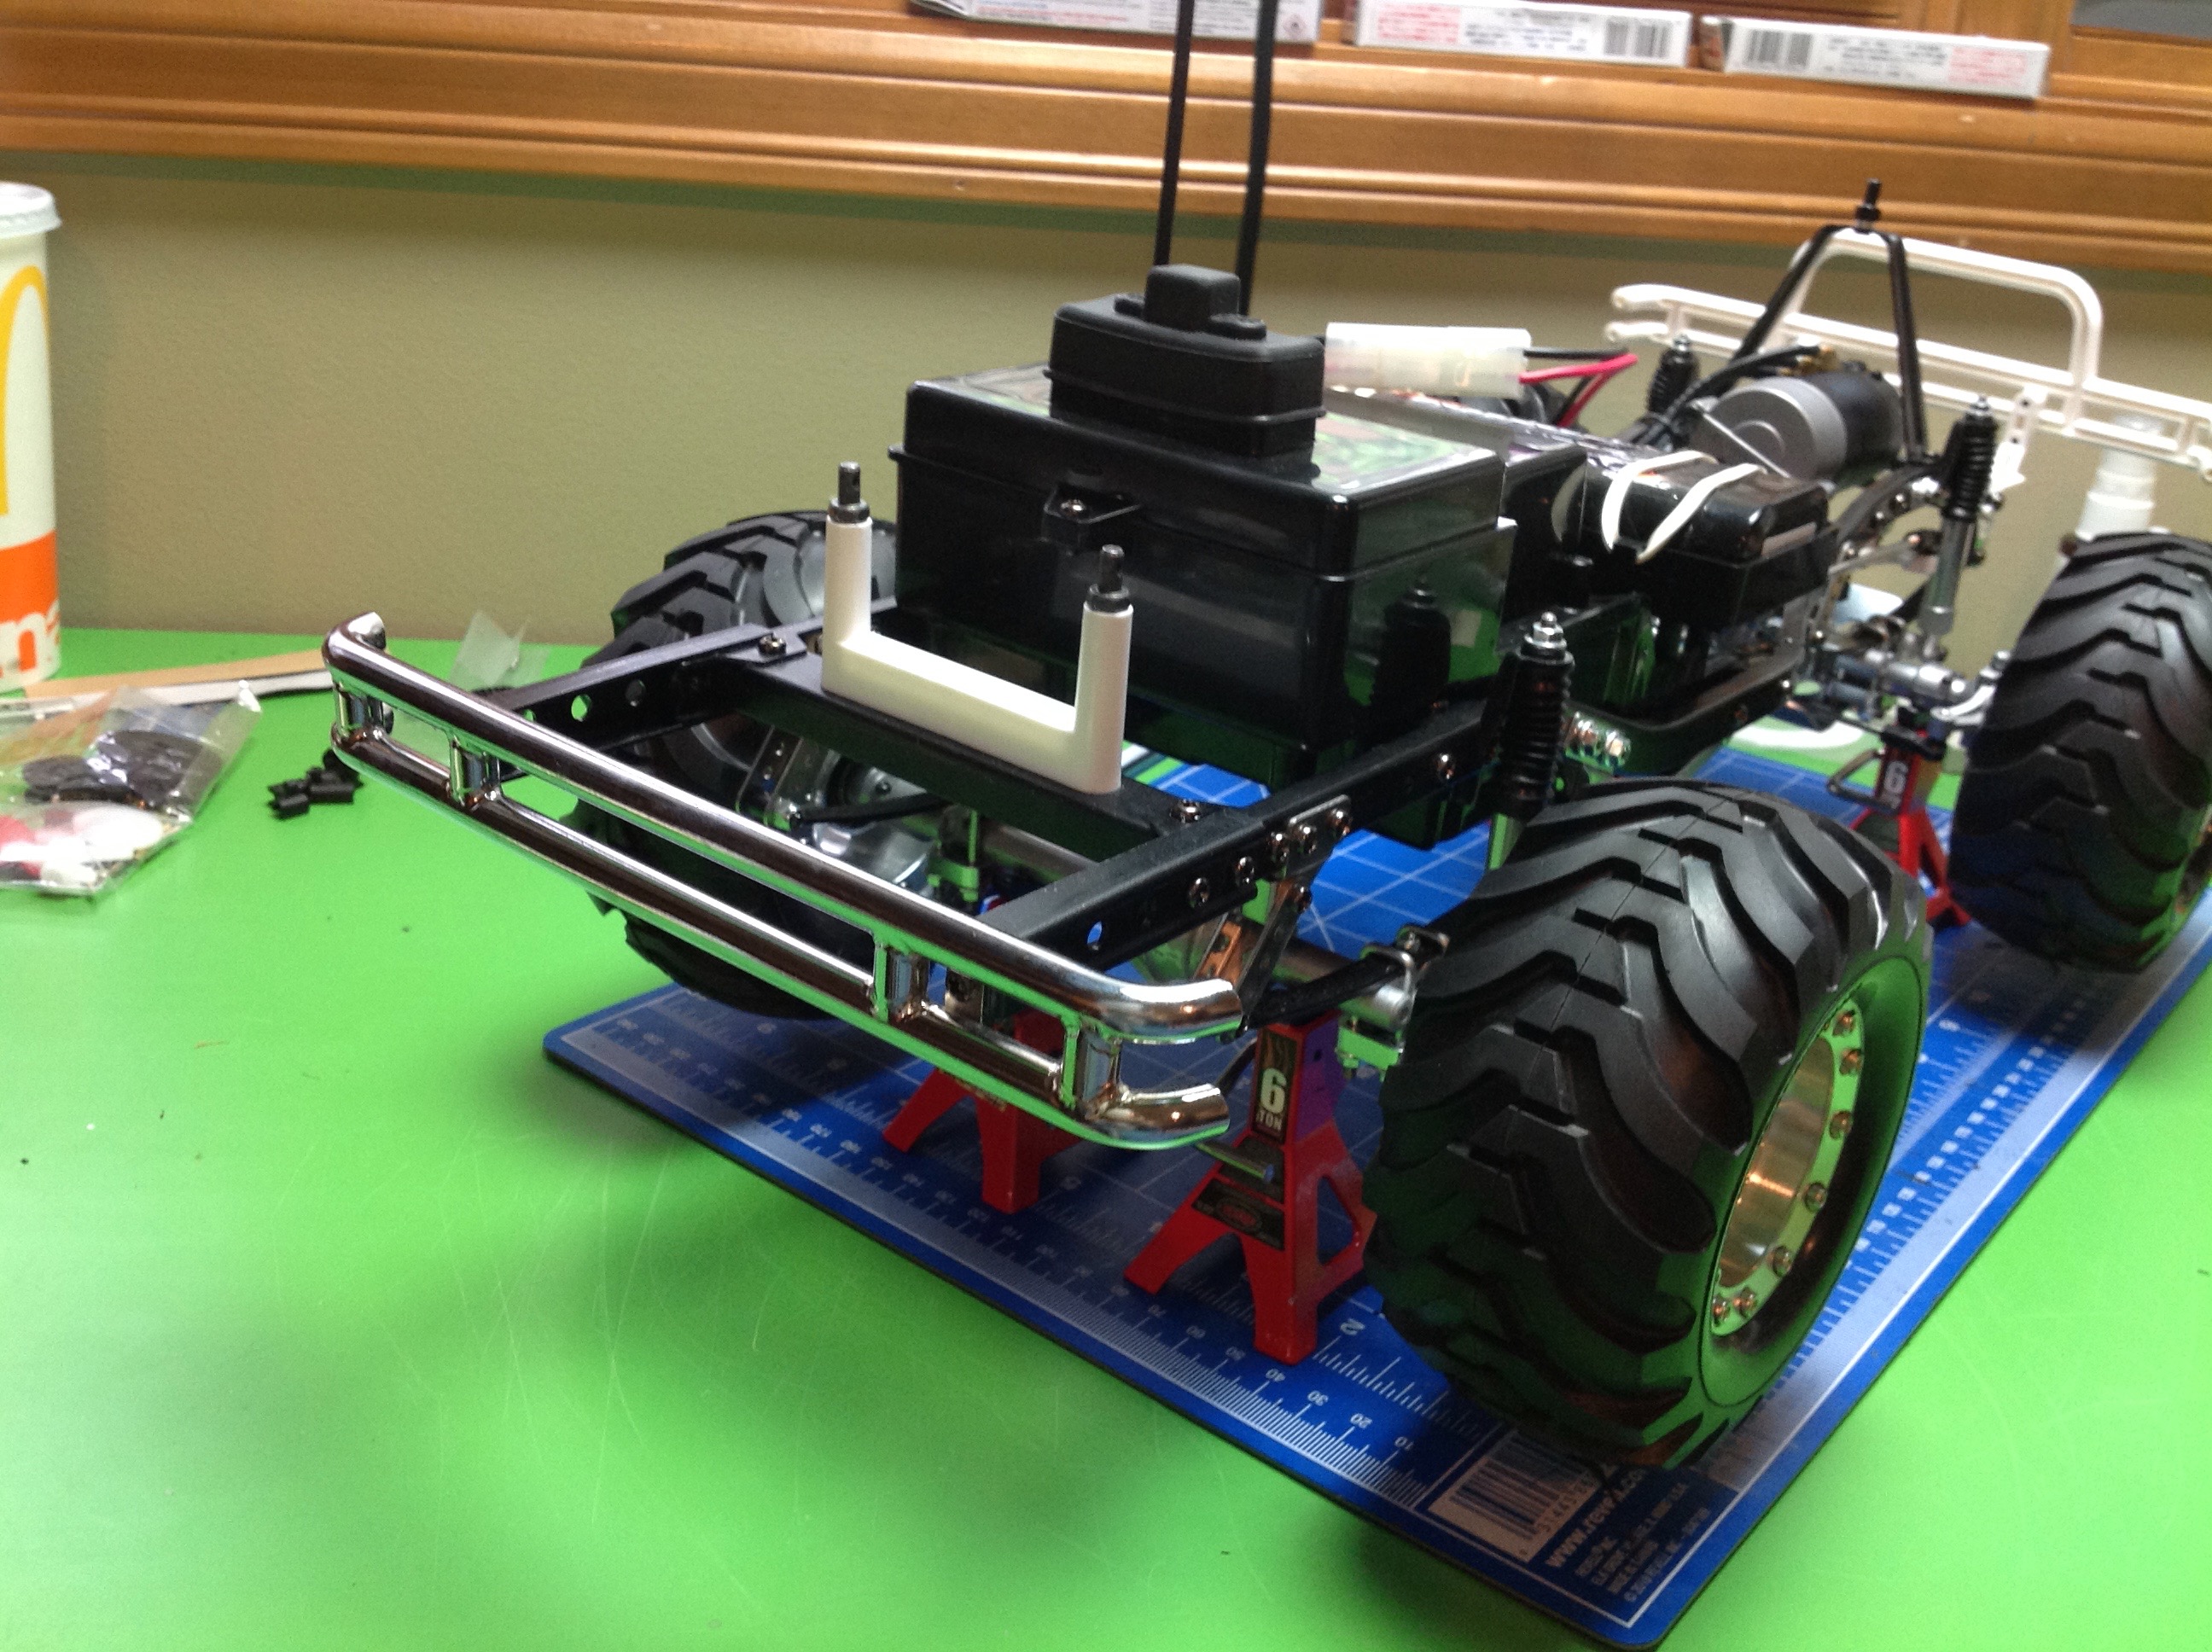
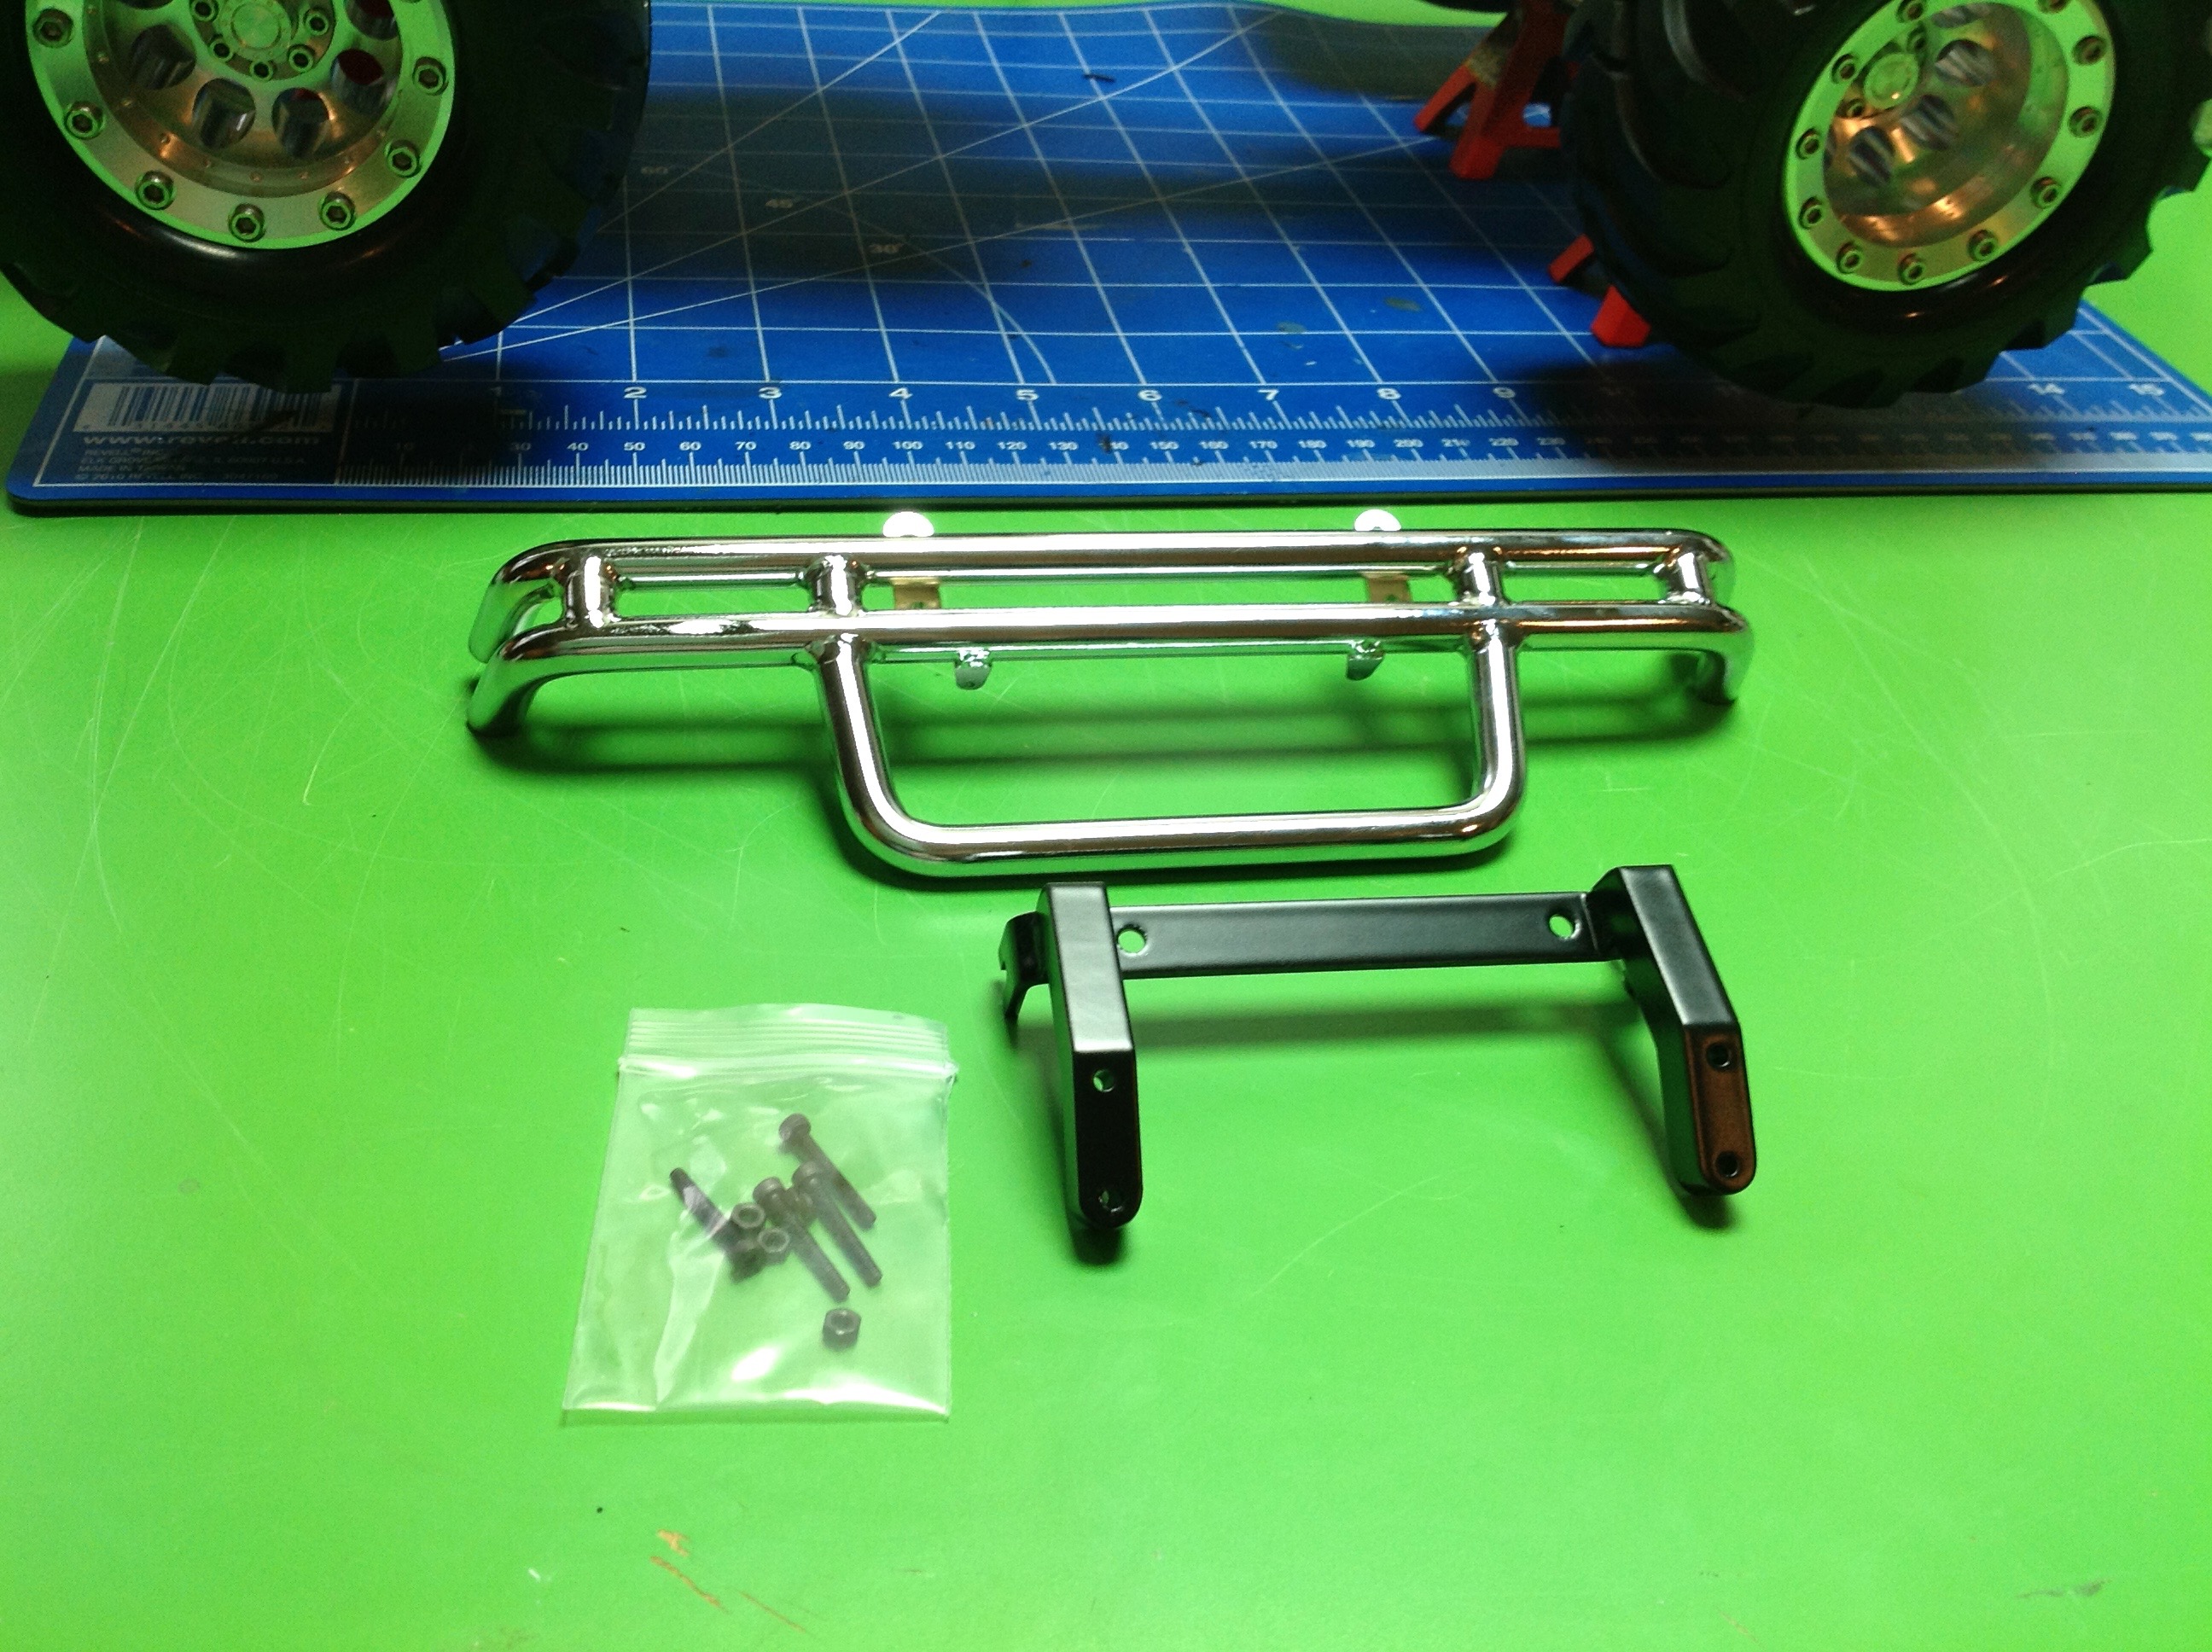
Here is the steel front bumper. I am sorry to say that the quality
isn't great. The holes are not drilled quite evenly and the
result is that the bumper sits a little crooked on the chassis. It
is not very noticeable in the picture, but once you put the body on you
can see that they are not aligned.
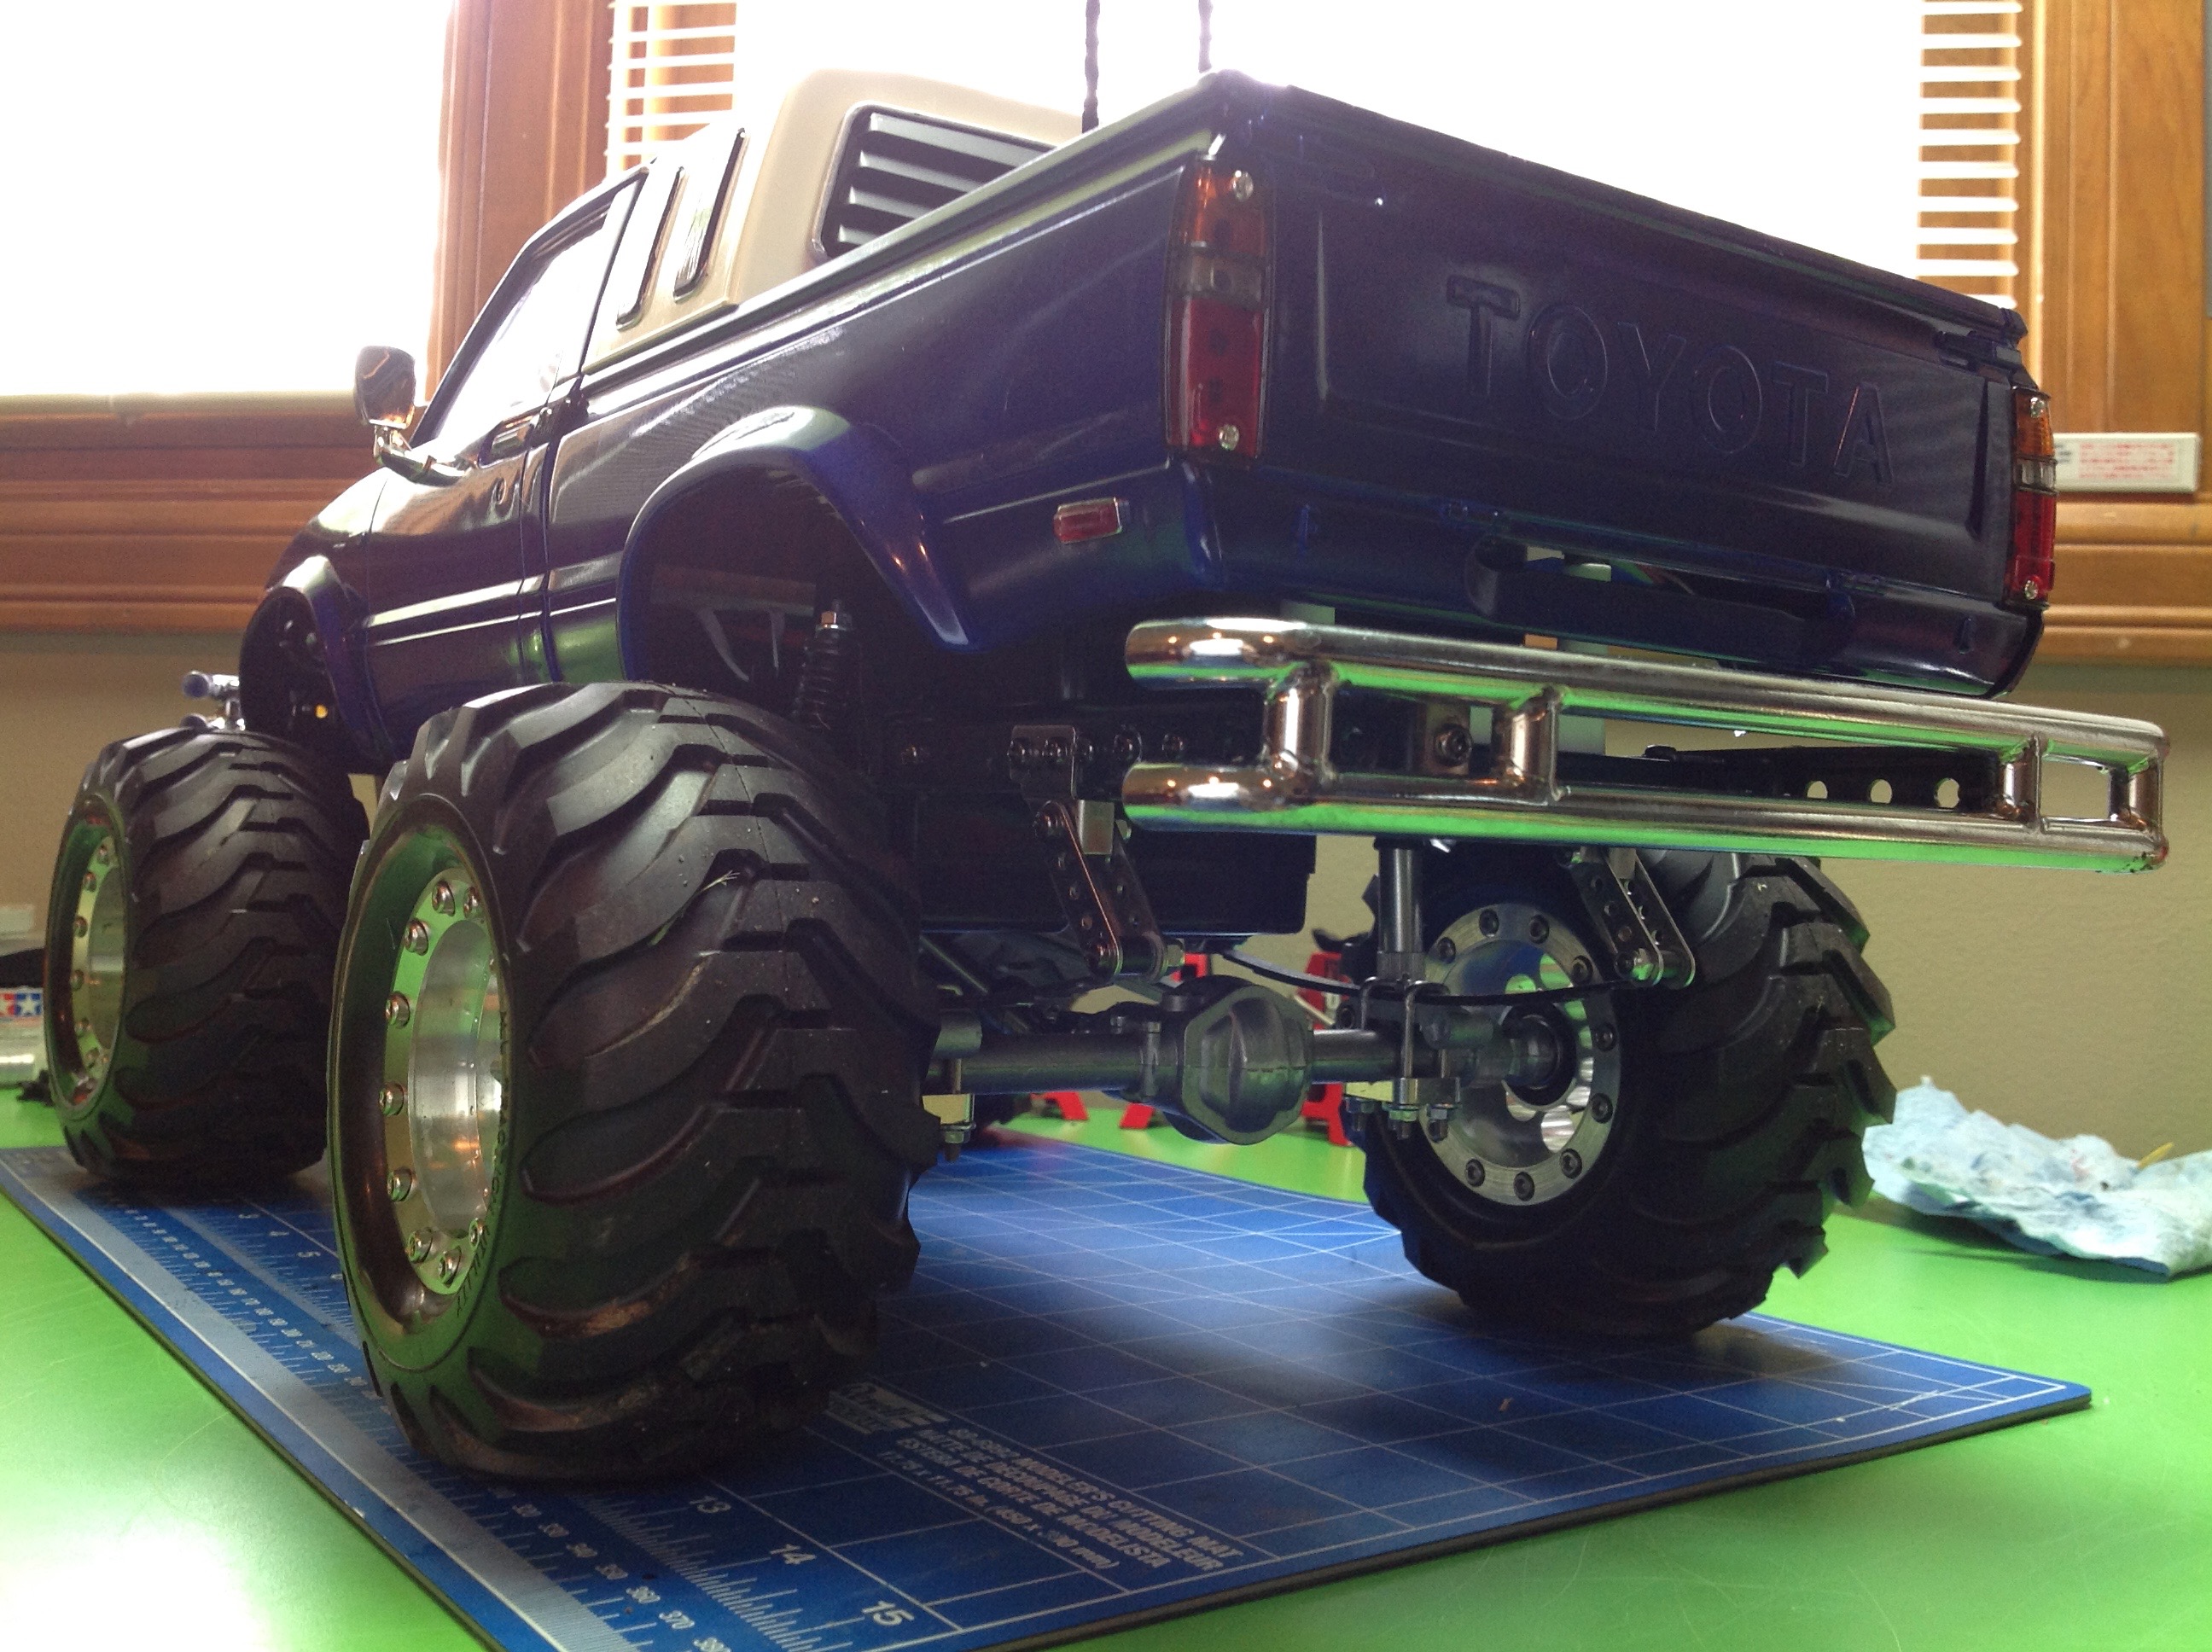
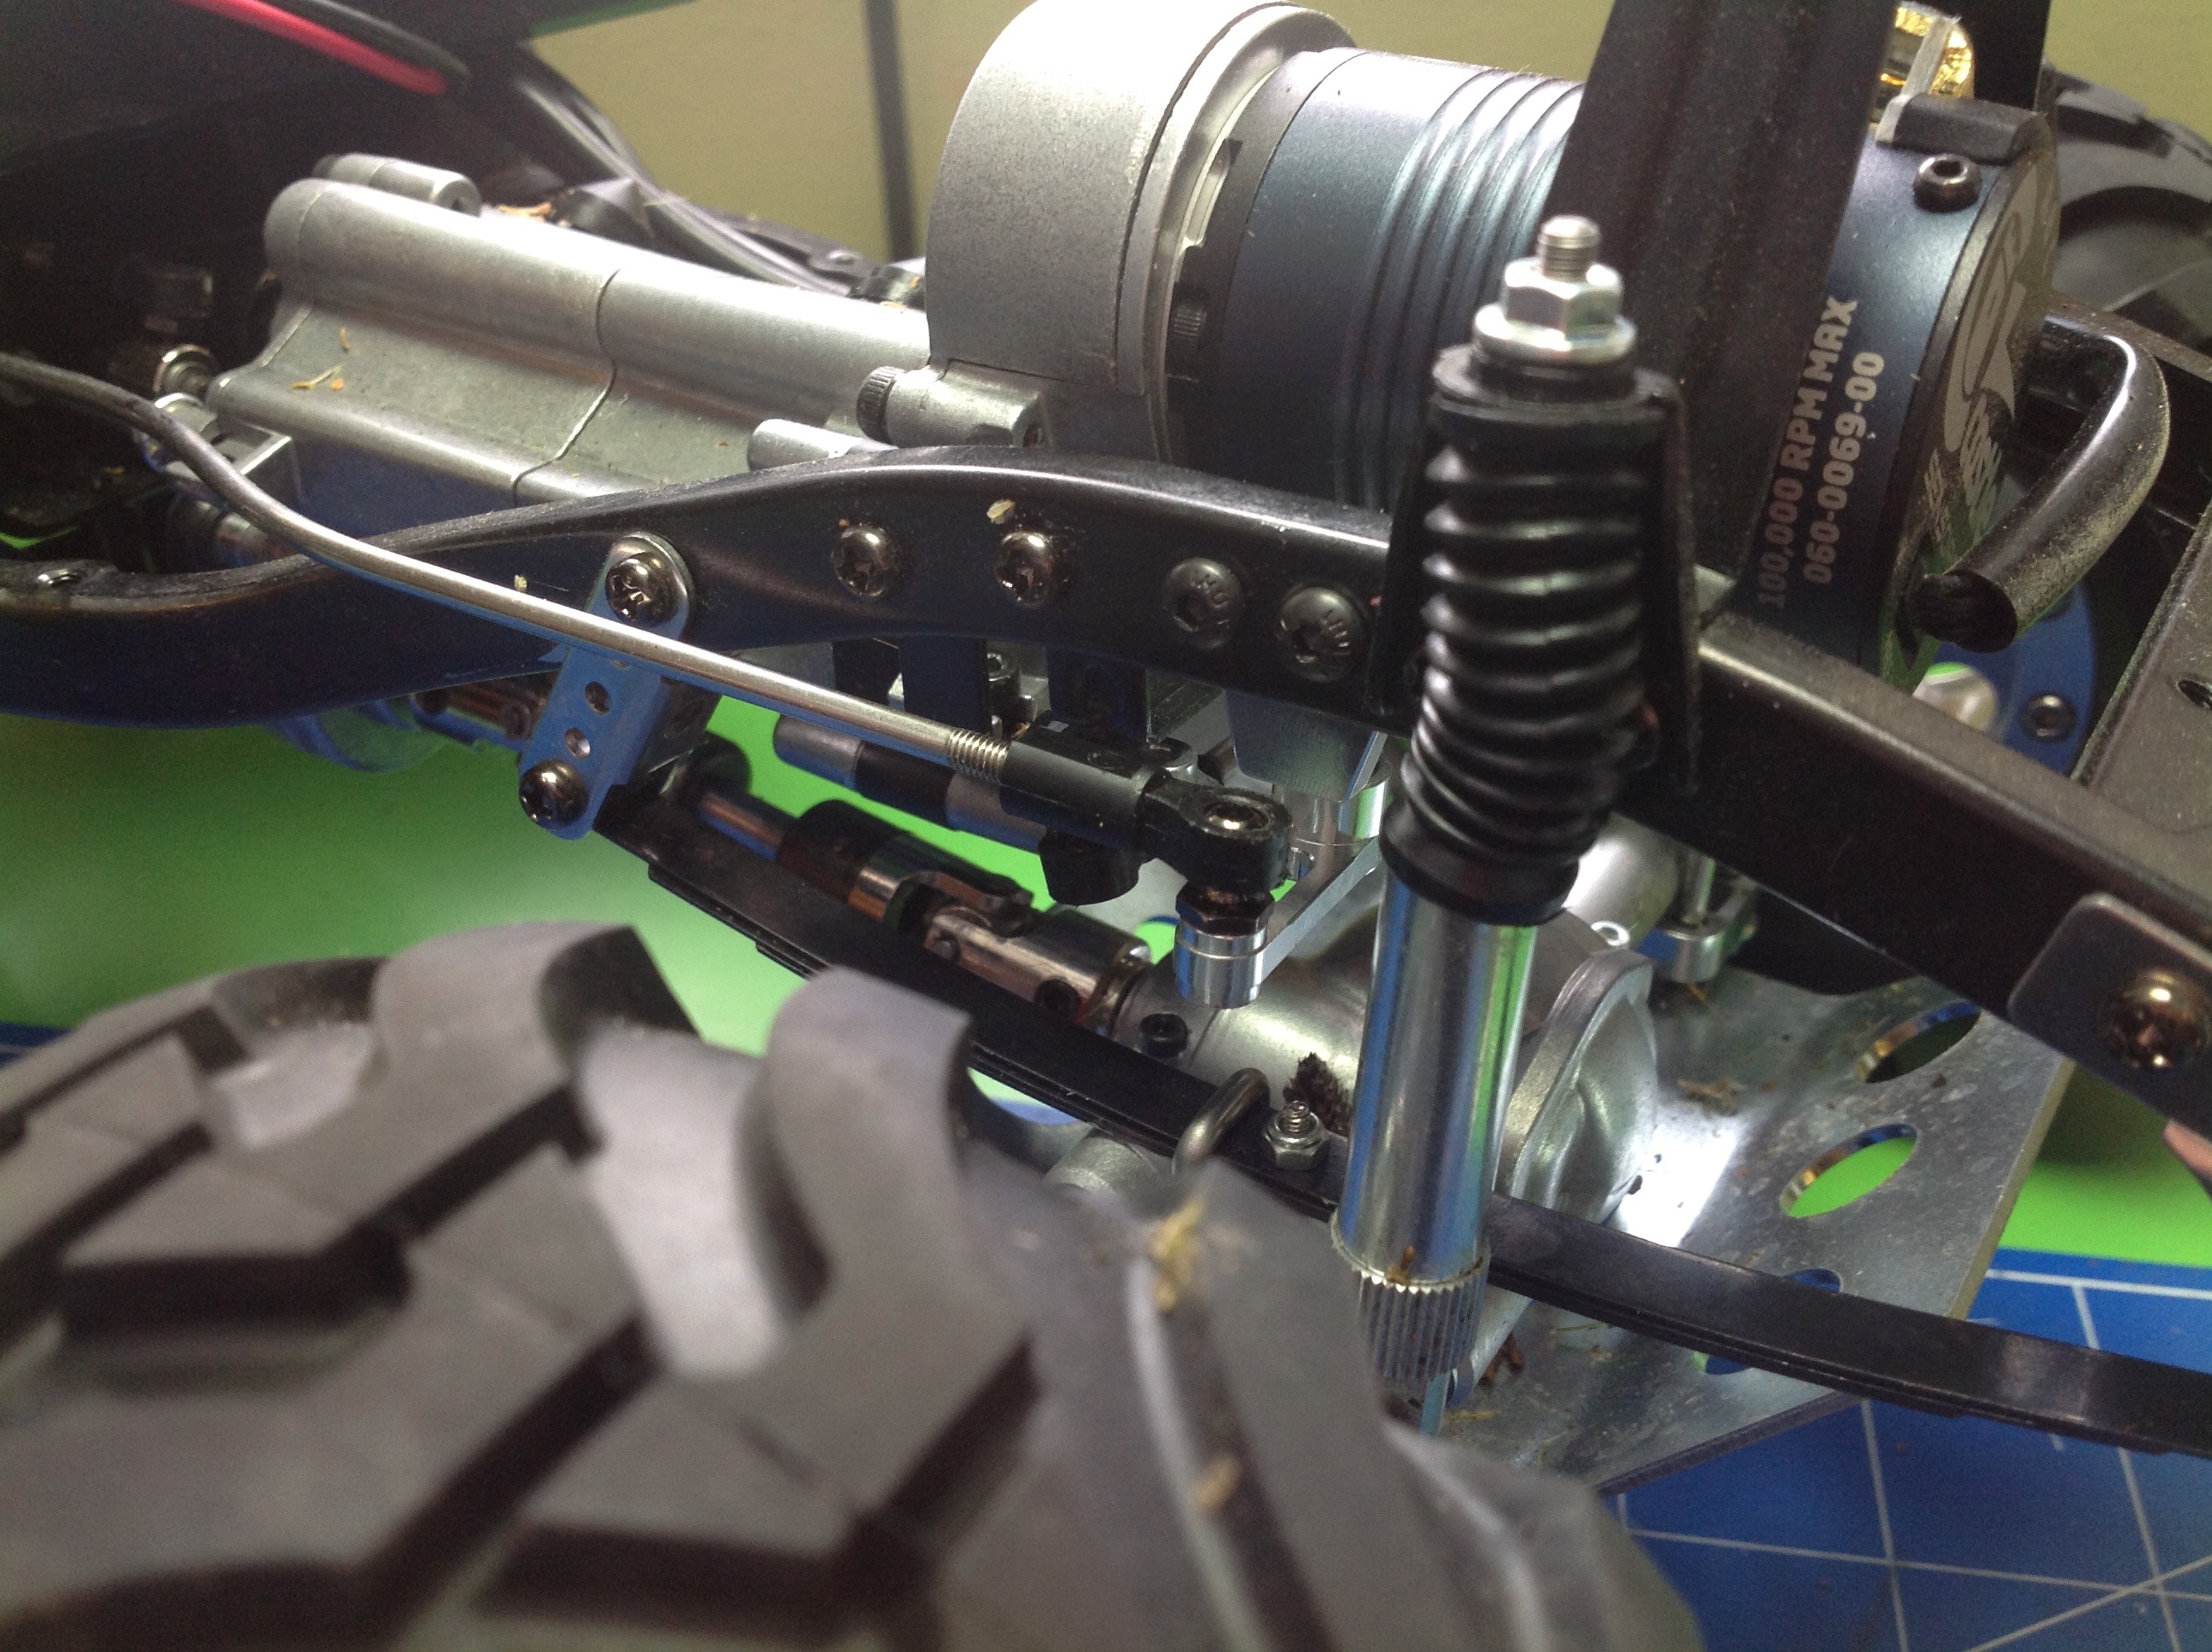
Now the front and rear bumpers have been installed, and so have a pair
of steel skid plates below the doors. There's a lot of metal on
display here. The skid plates are actually attached to the body
and come off with it.
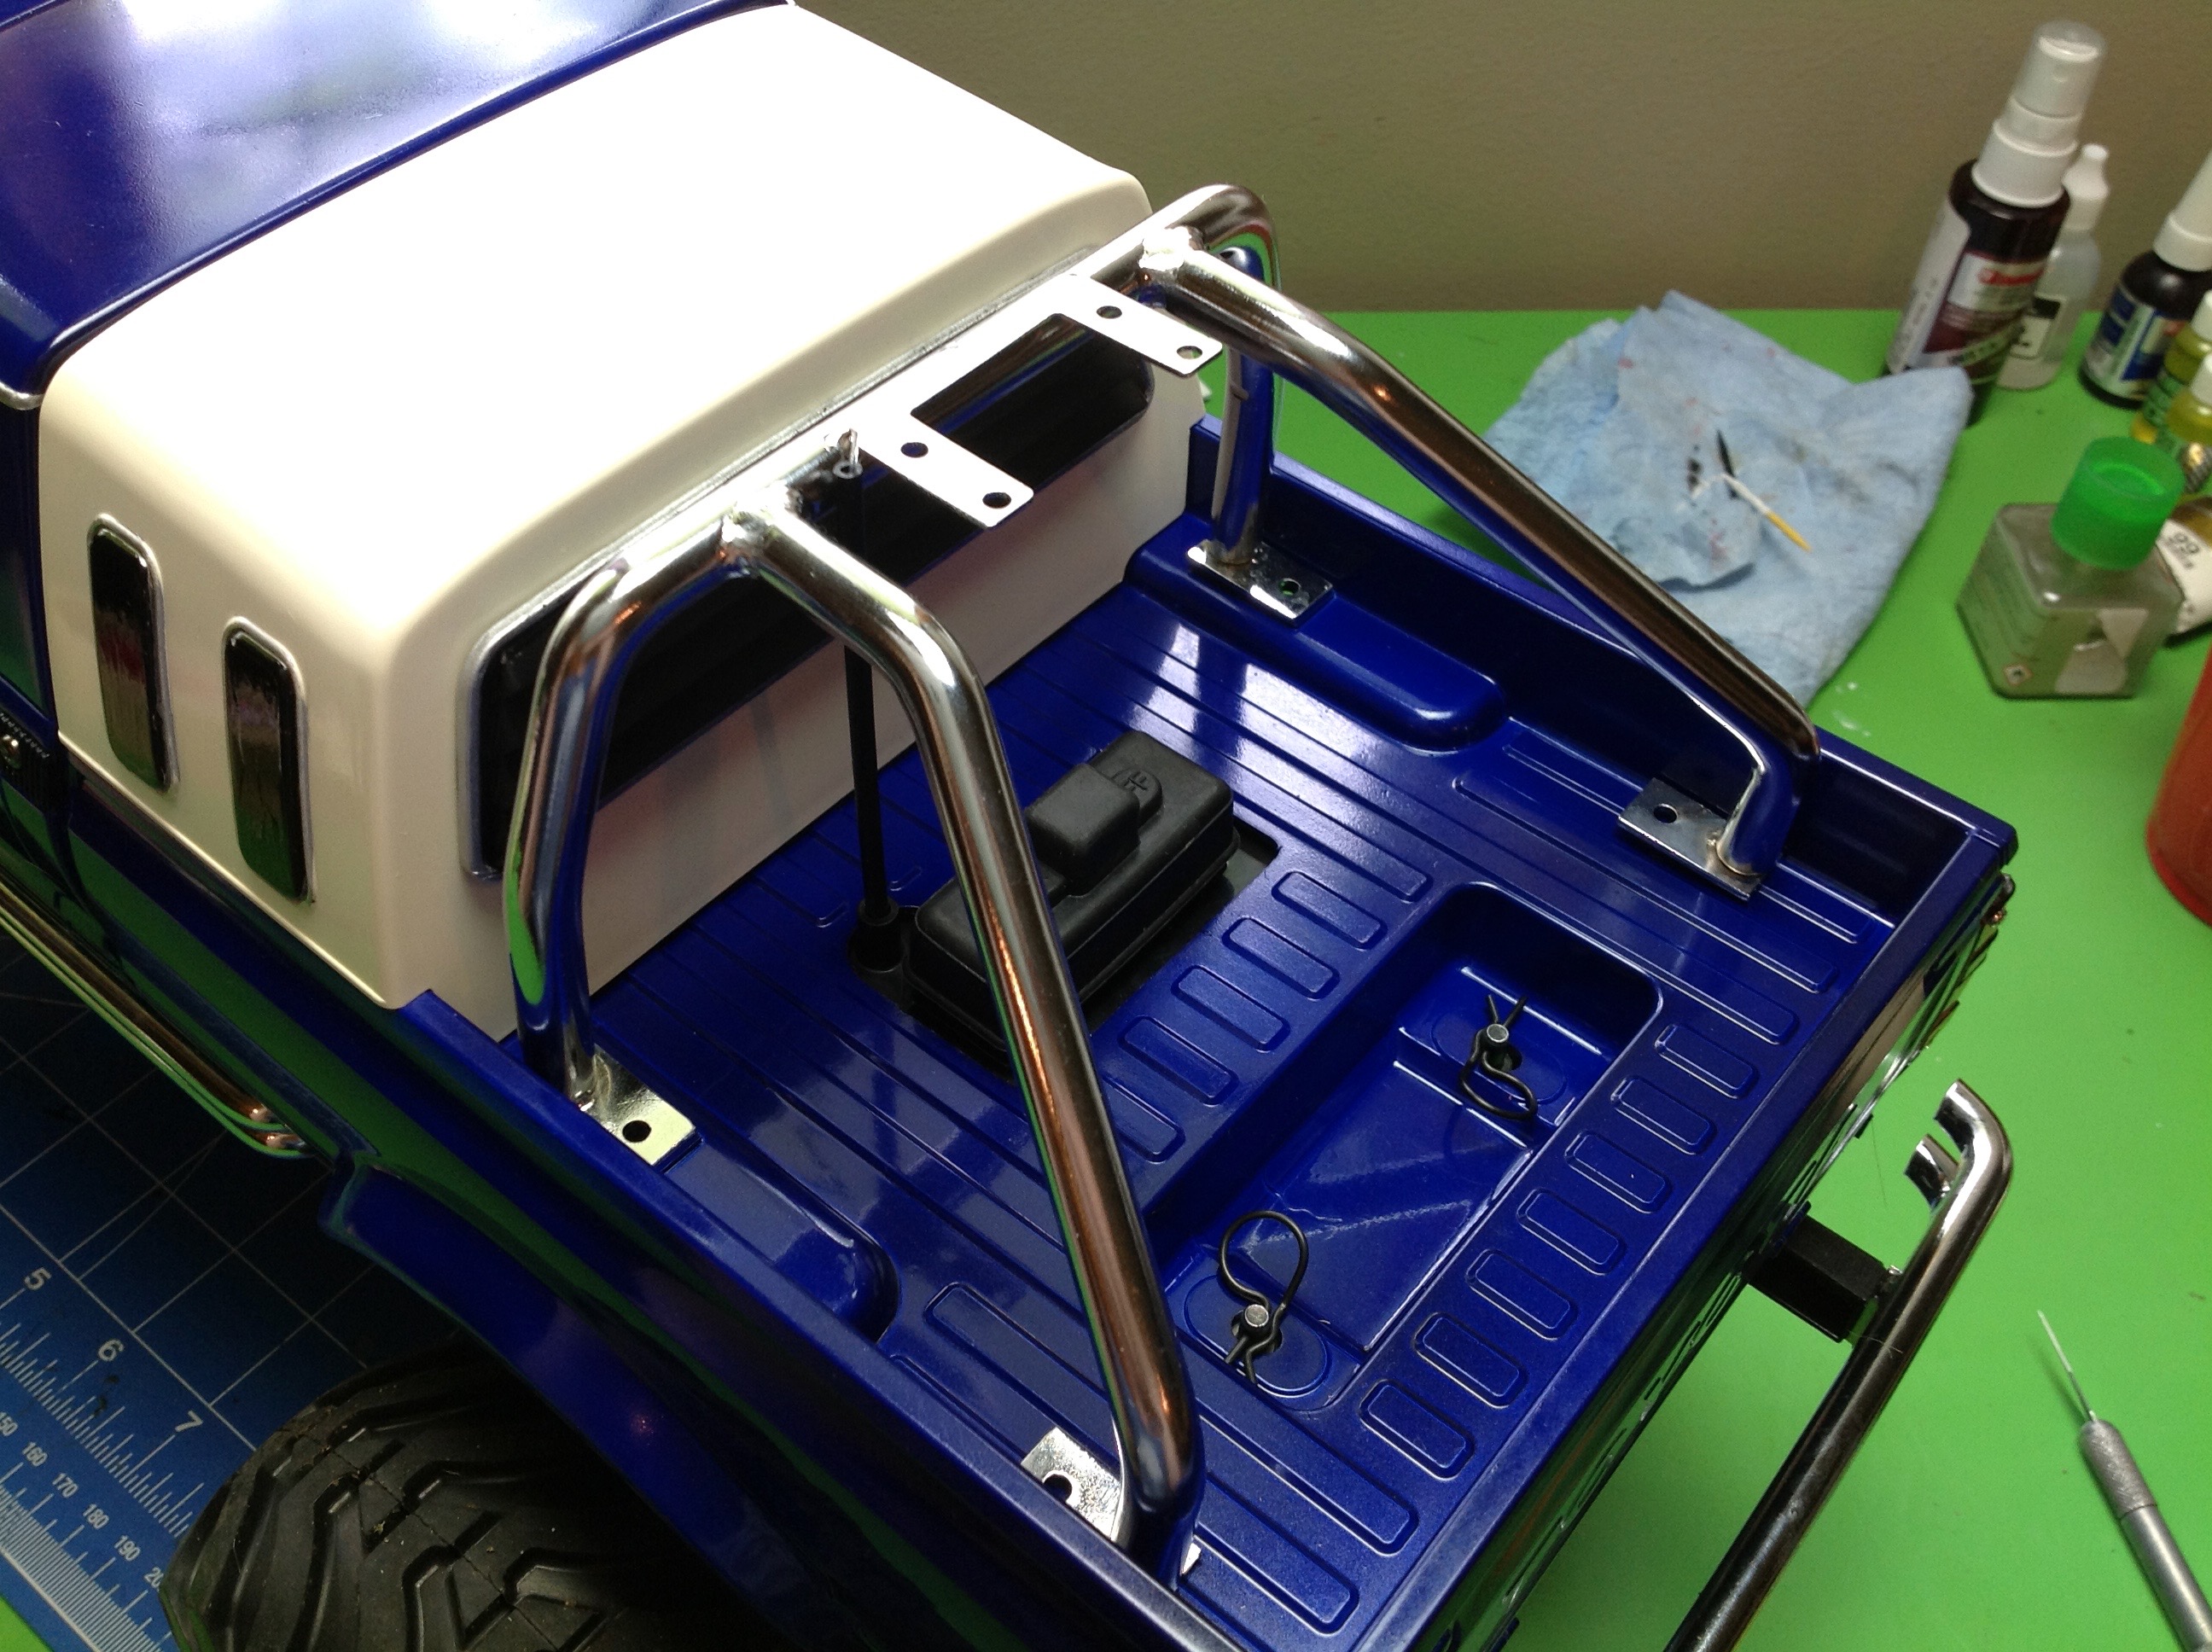
The stock Bruiser never came with a roll cage, but the Mountaineer which
came out later and used the same body did. That means this
aftermarket steel roll cage should fit, right? Not quite.
The sleeper means it needs to sit farther back. You can see that
the front mounting feet are up on a little pad, but there are no pads in
back. This makes the whole cage tilt backward.
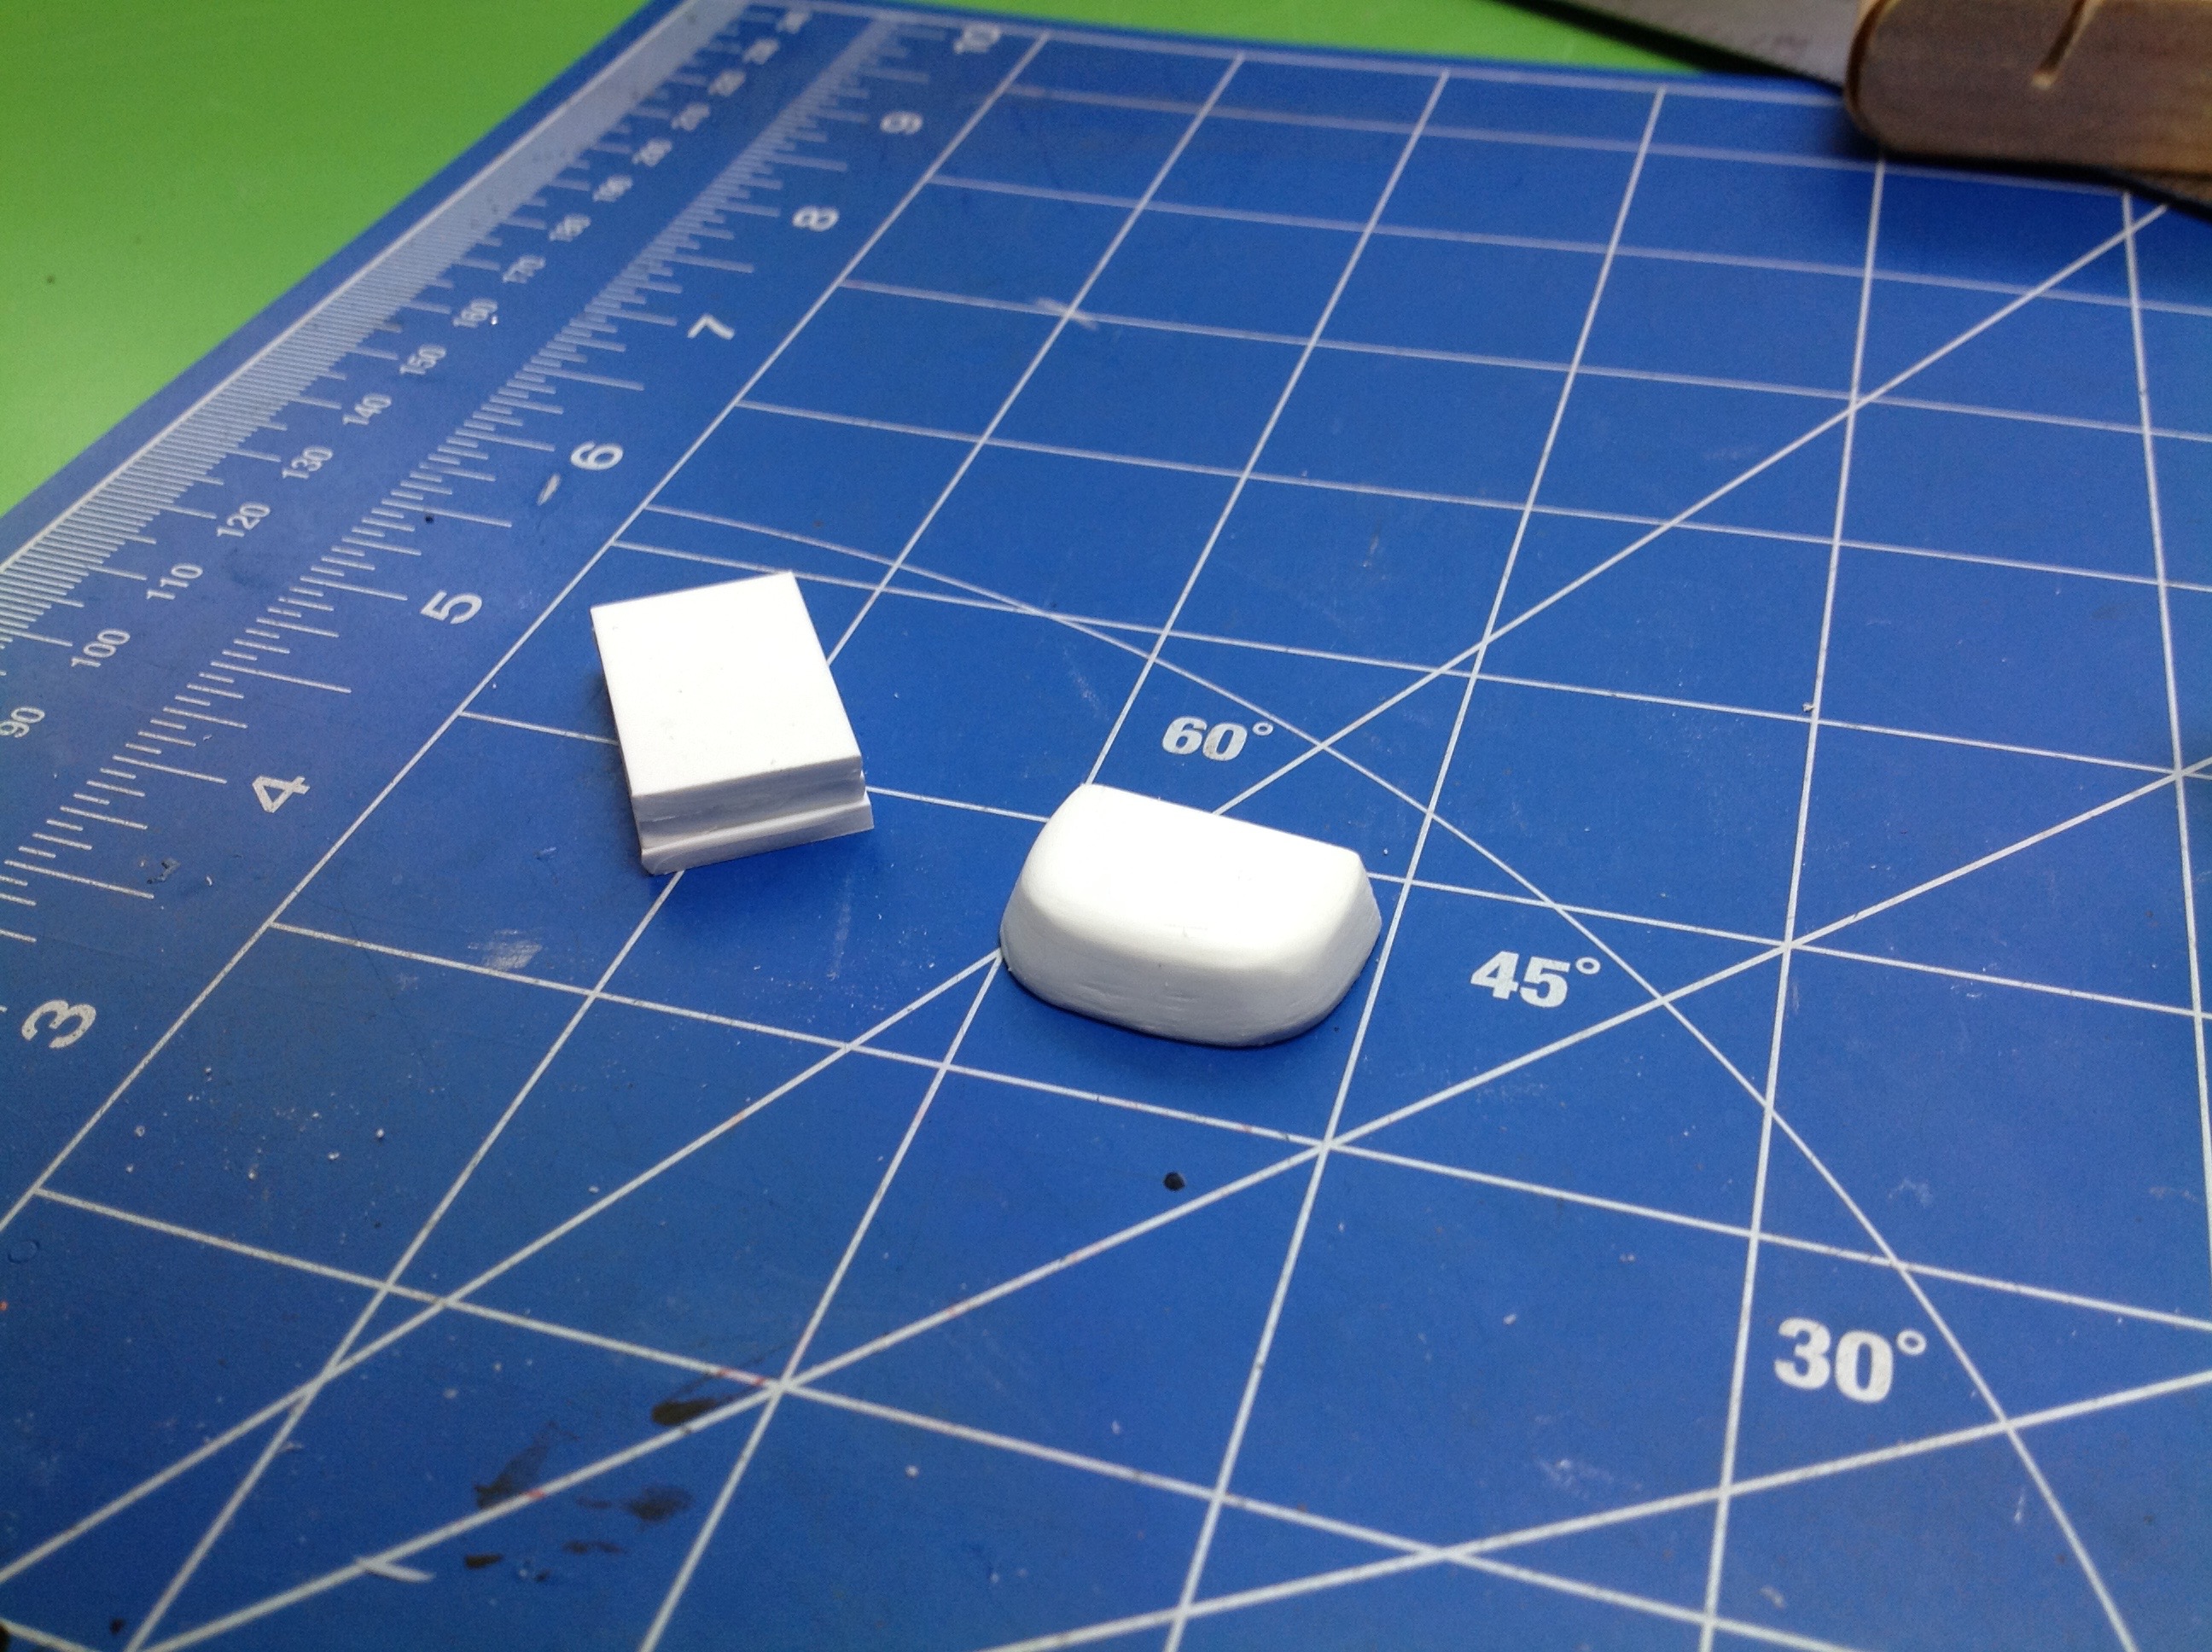
I used some sheet styrene to fabricate some rear pads to look mostly
like the front pads. I just glued 4 layers together and then
sanded them. The left image shows before and after sanding.
The right image shows the installed roll cage, now sitting
straight. It also attaches to the body like the sliders, so that
makes the whole body very heavy.
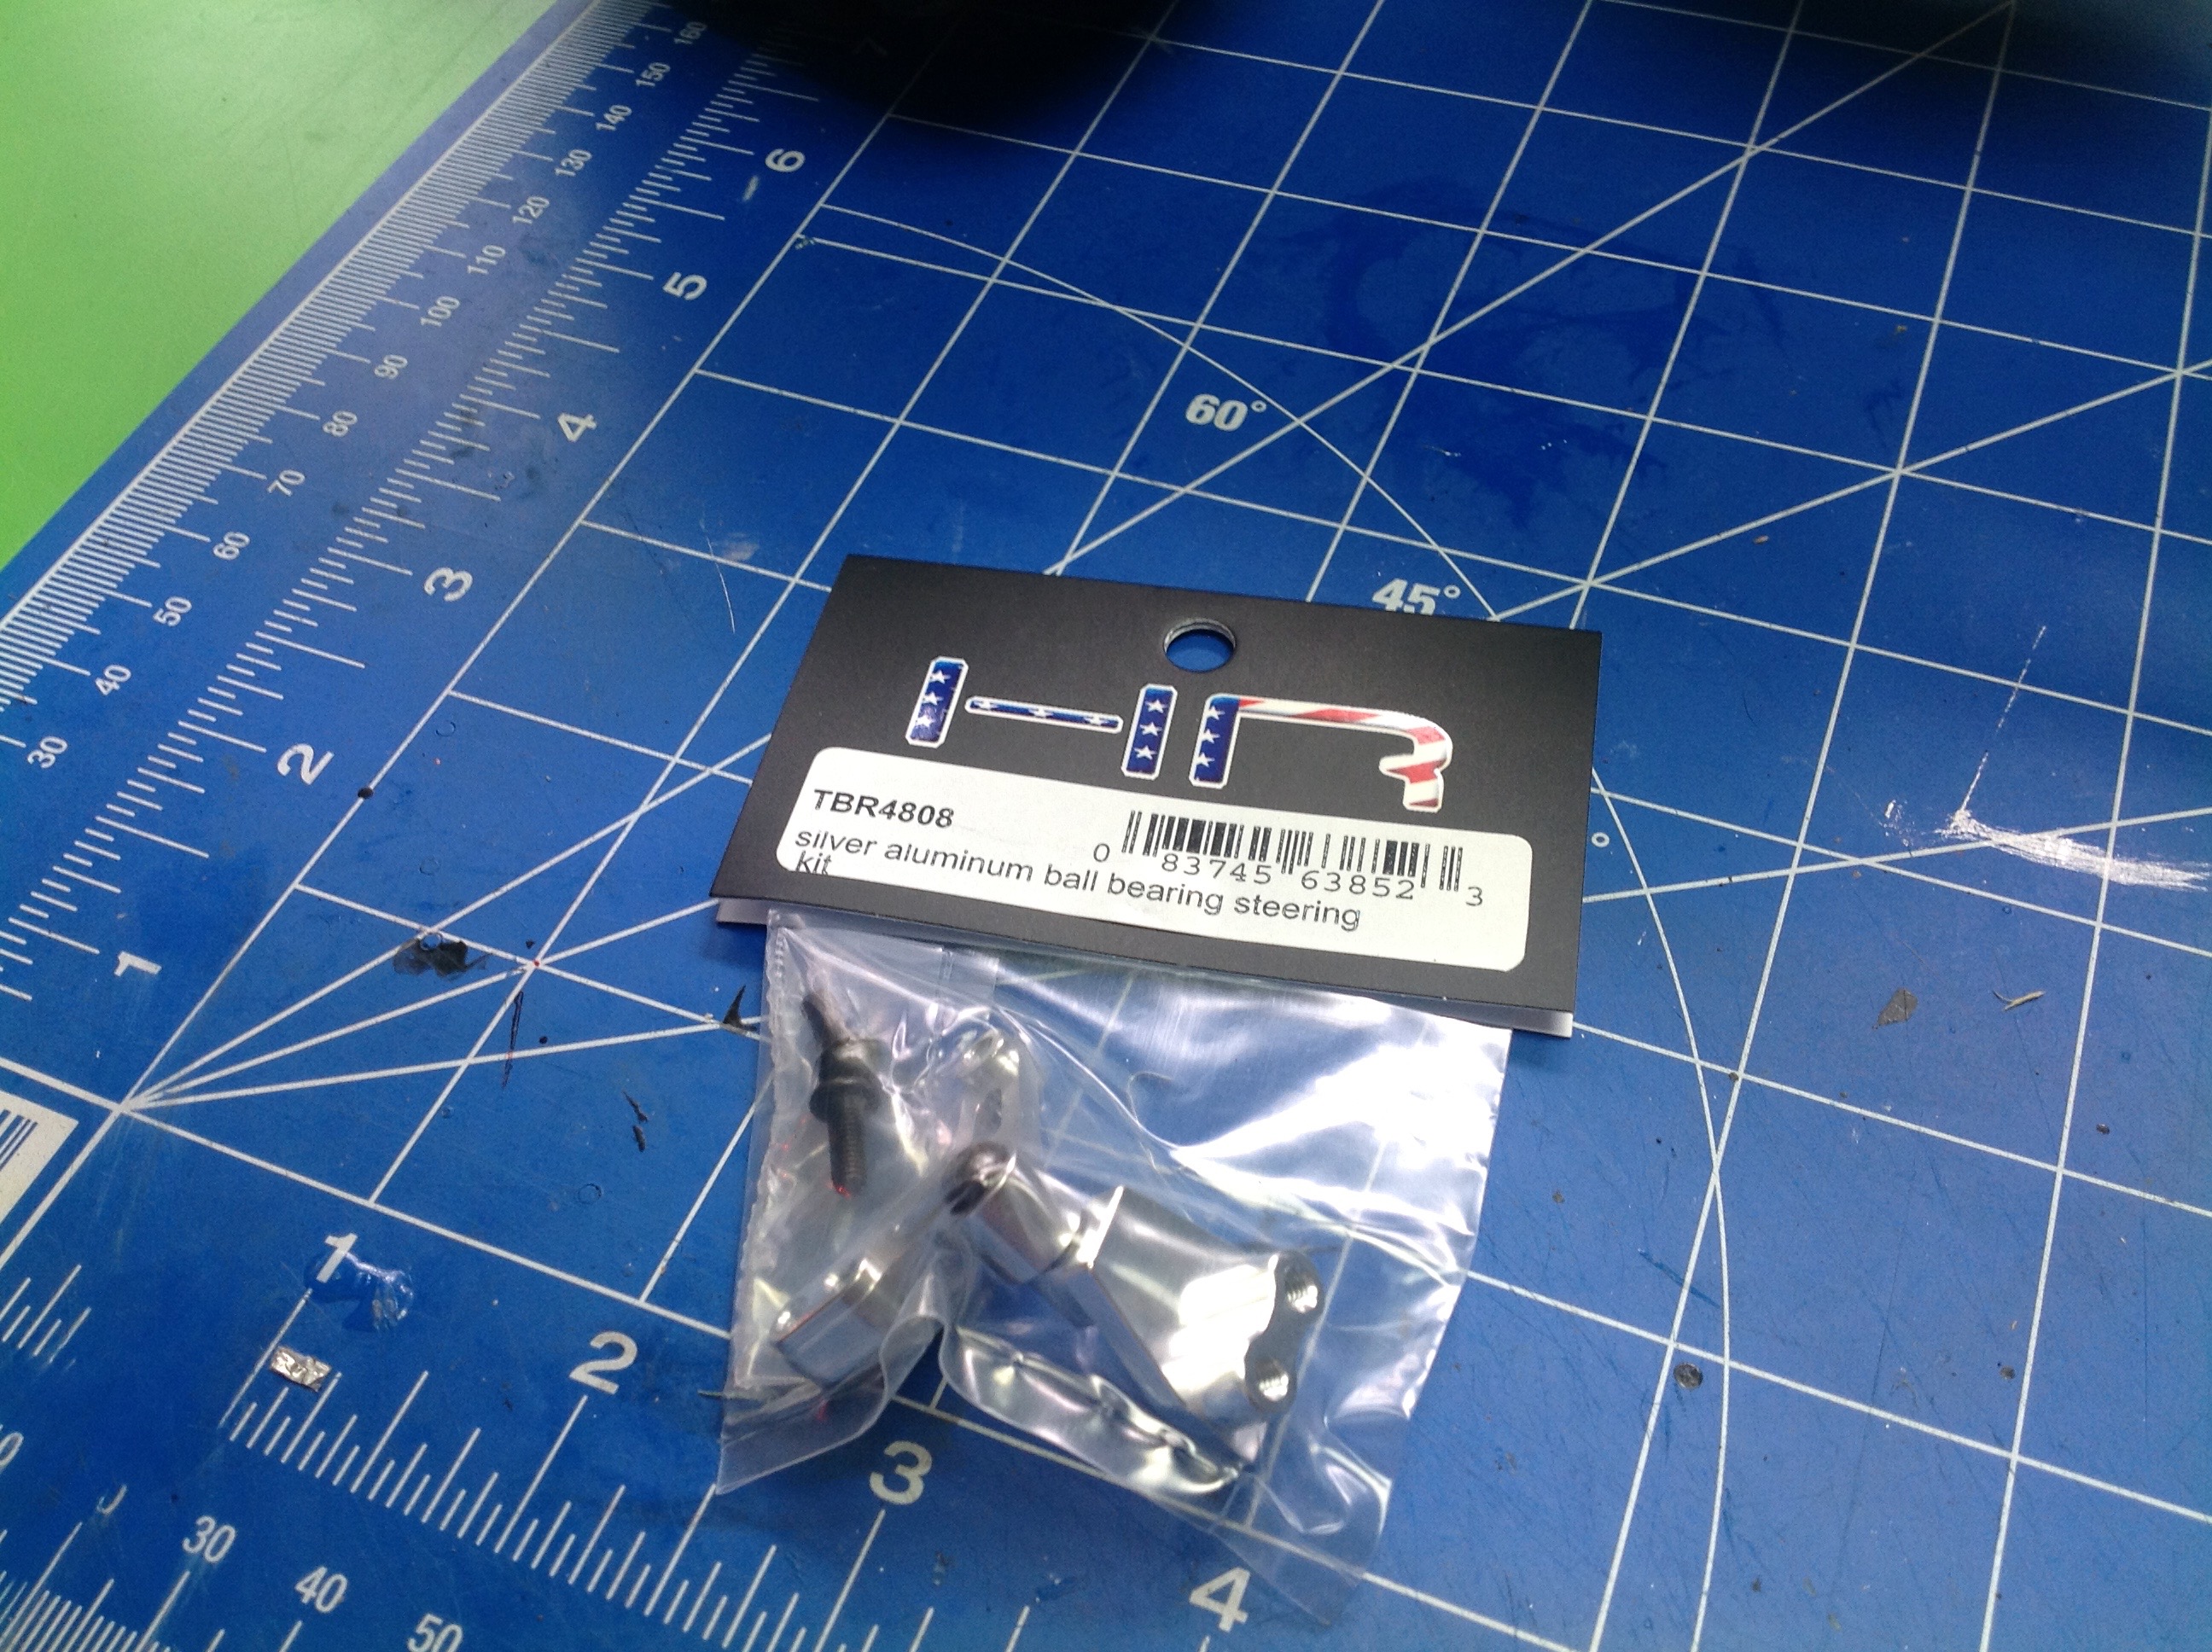
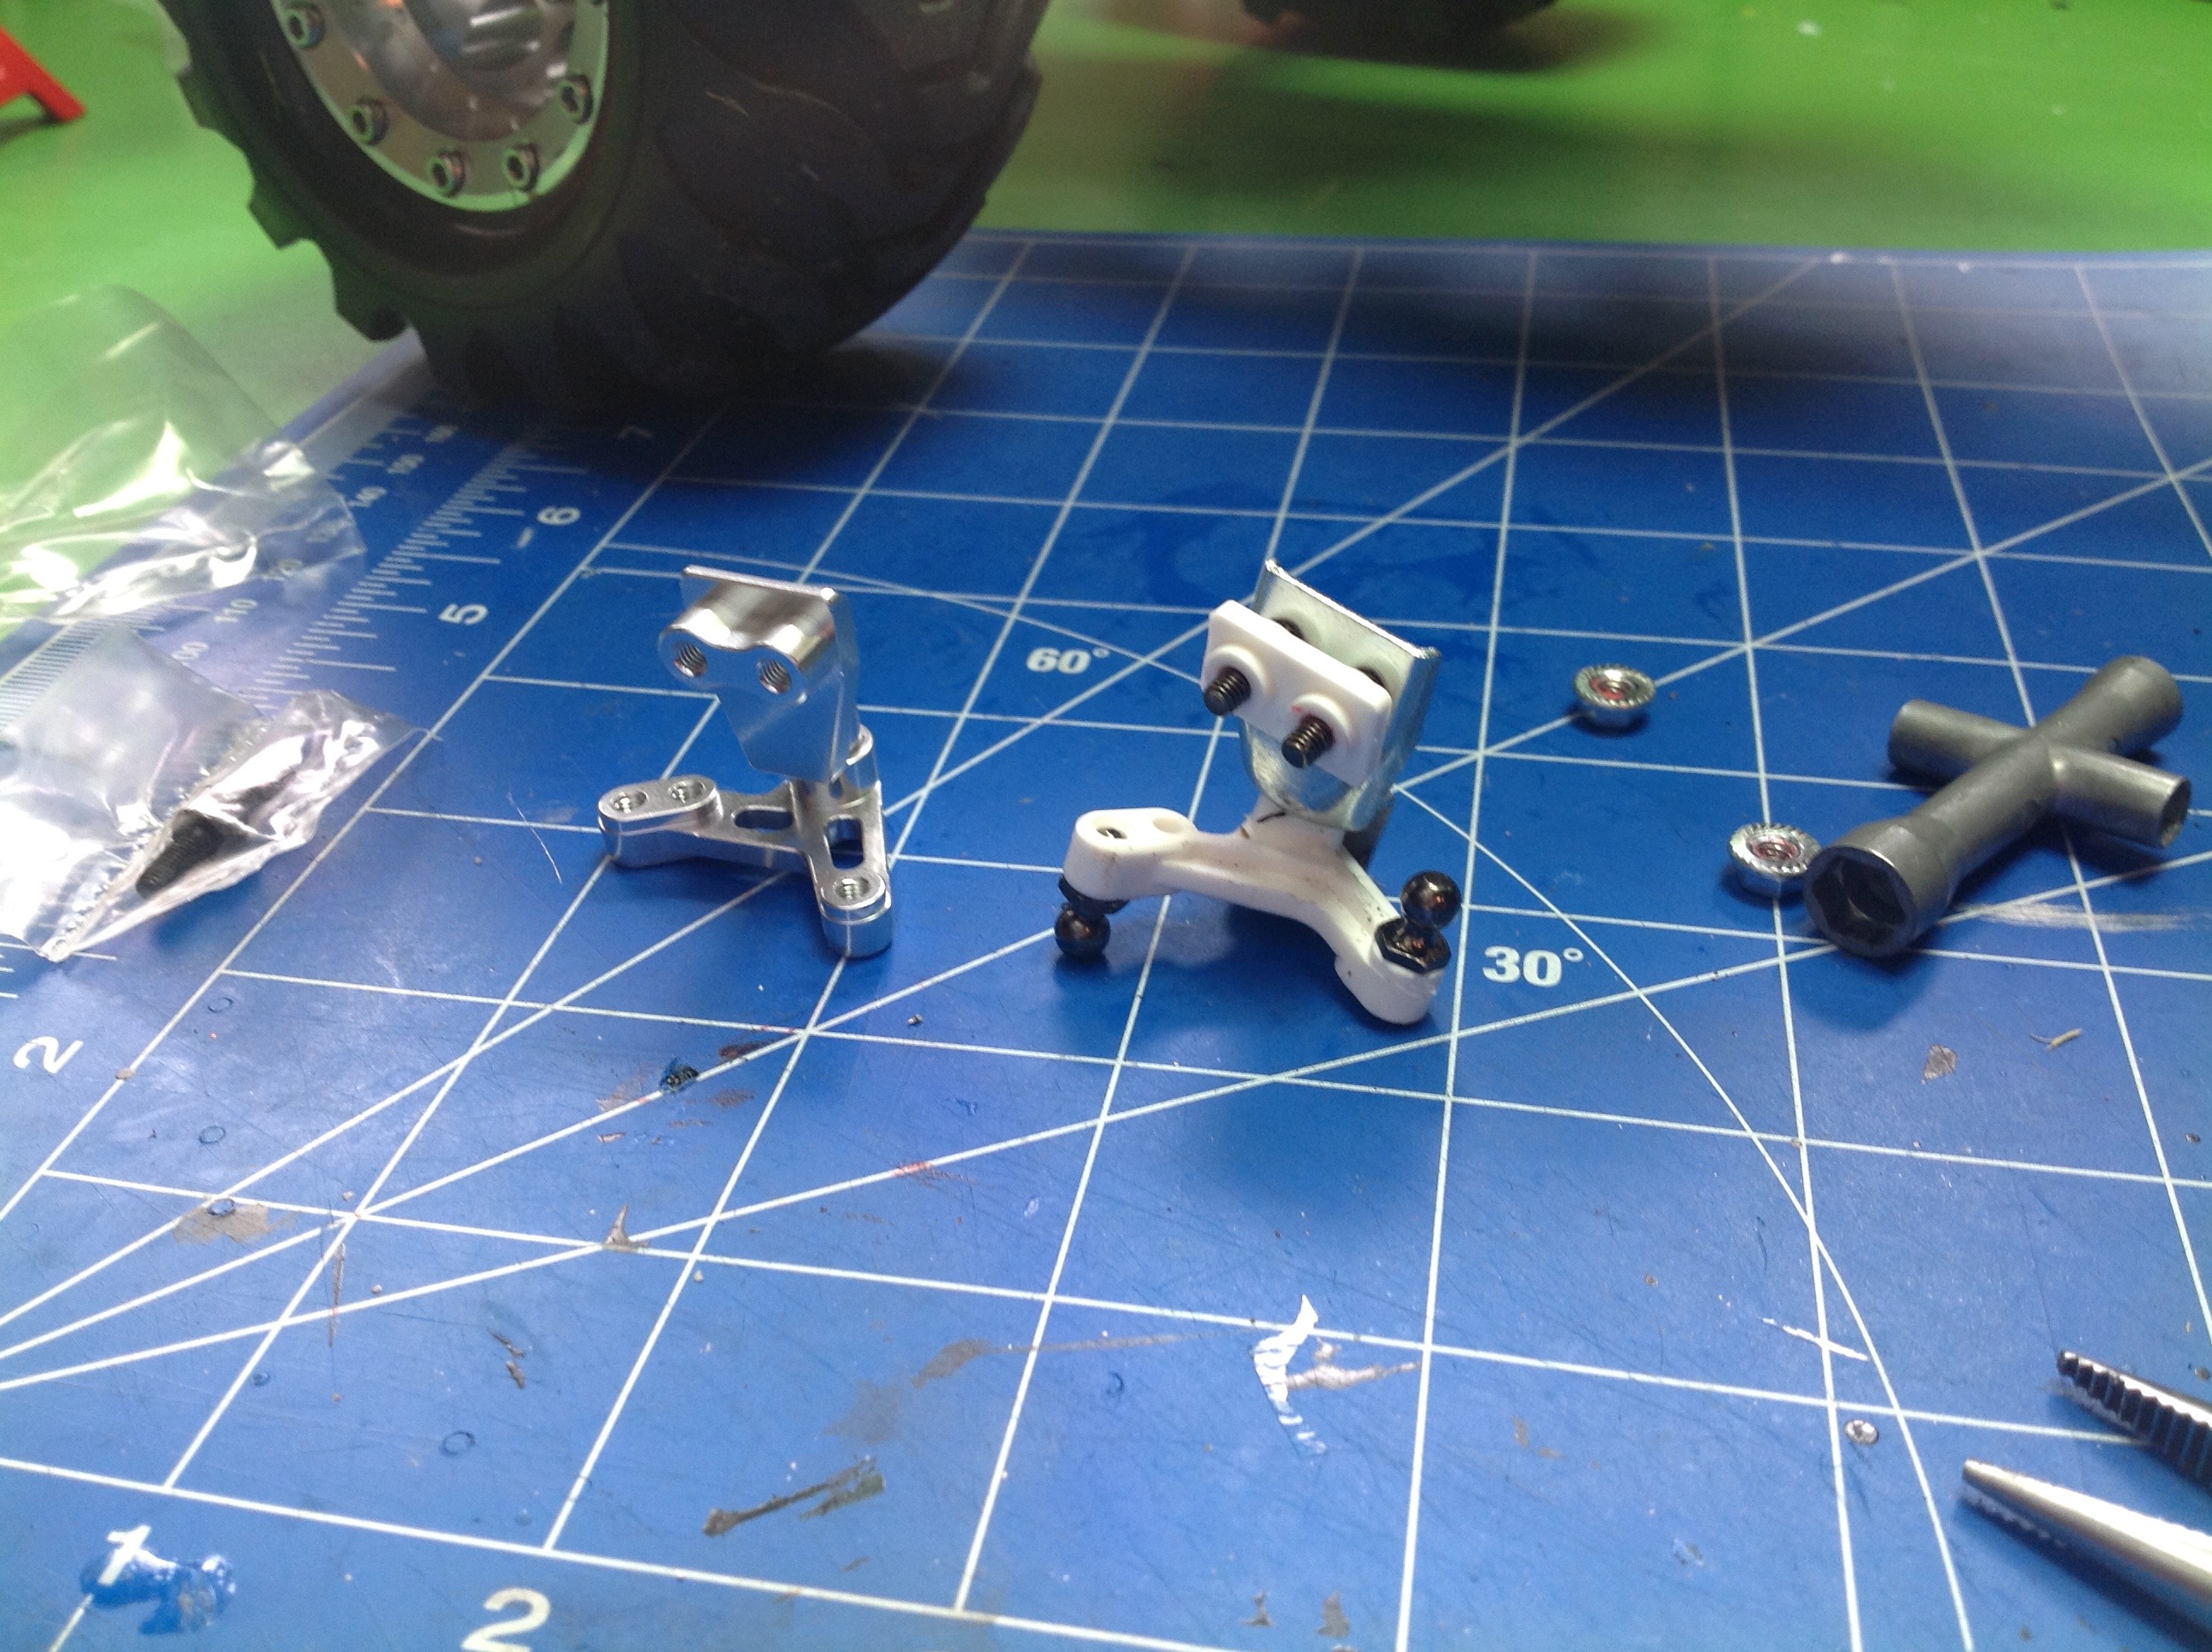
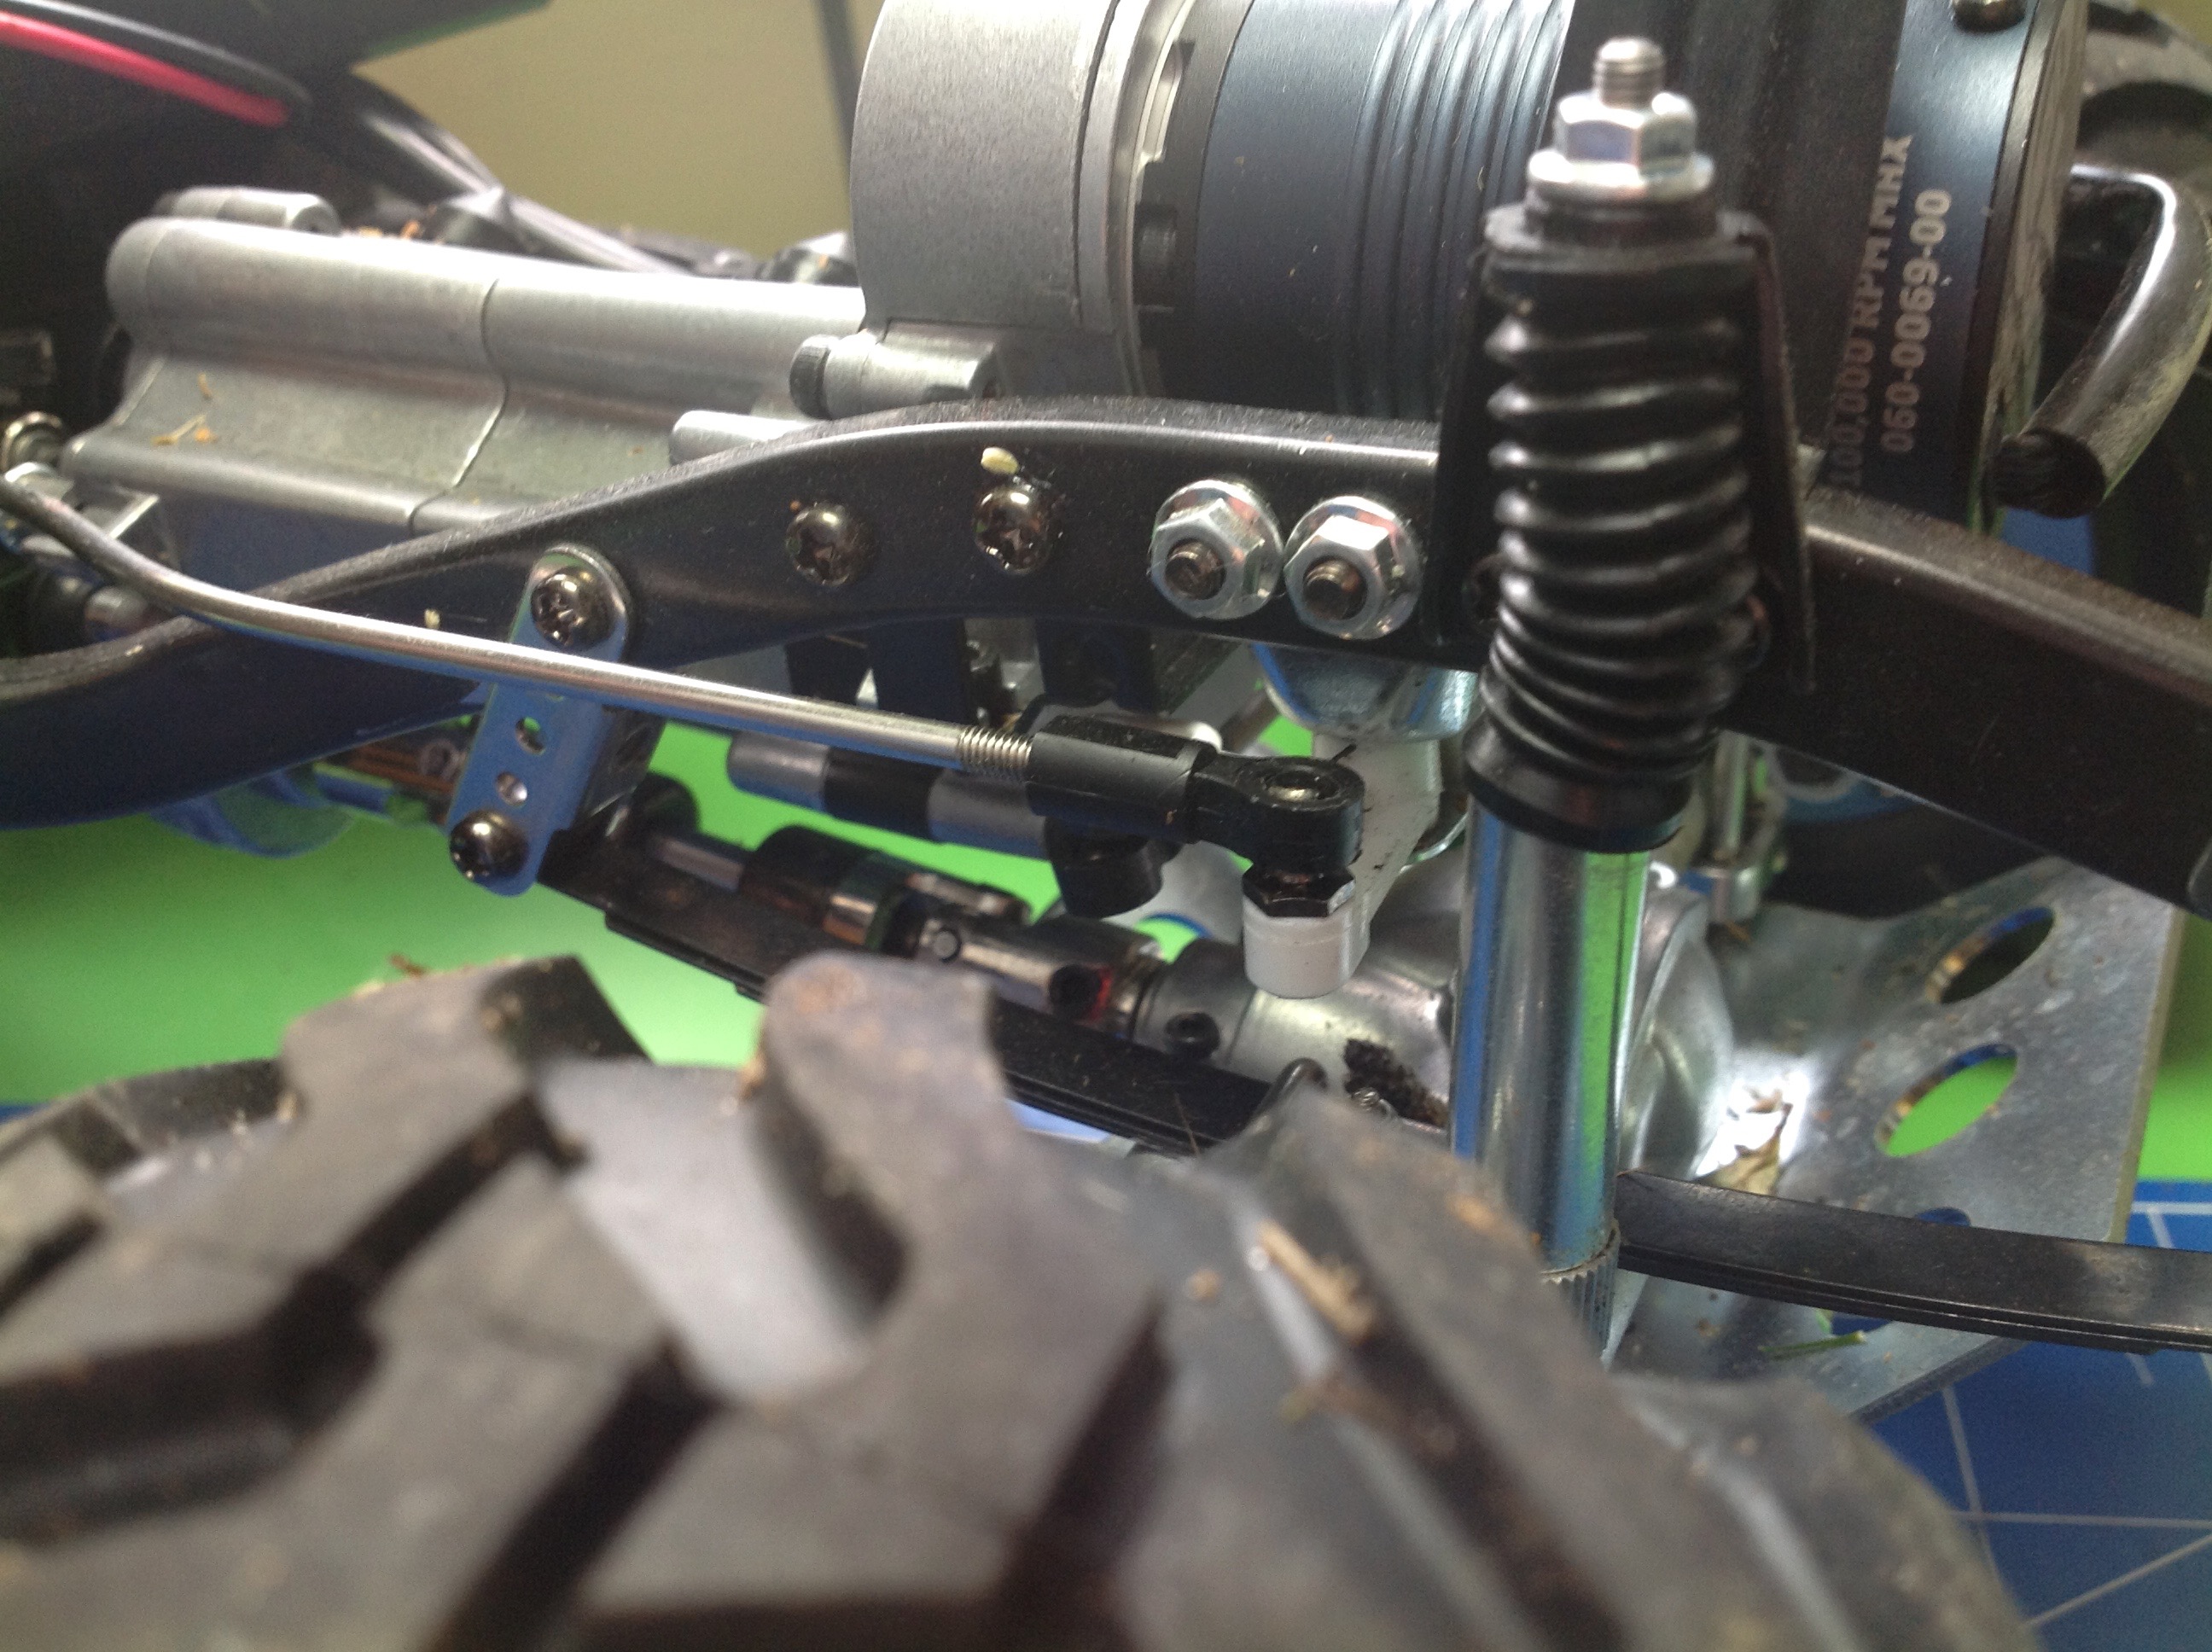
Most of the upgrades so far have been for fun, but the steering crank is something that really
needs to
be changed. I don't know why they used a soft plastic crank, but
it is completely inadequate for turning the wheels. There is so
much flex in the crank that the steering wobbles all over.
Luckily, Hot Racing offers an aluminum crank. You can see the old
and new parts in the right hand image.
You have to look closely to see that the crank has been changed, but it
made all the difference in the world. The truck now turns on a
dime with the new steering crank. Best upgrade I've made.
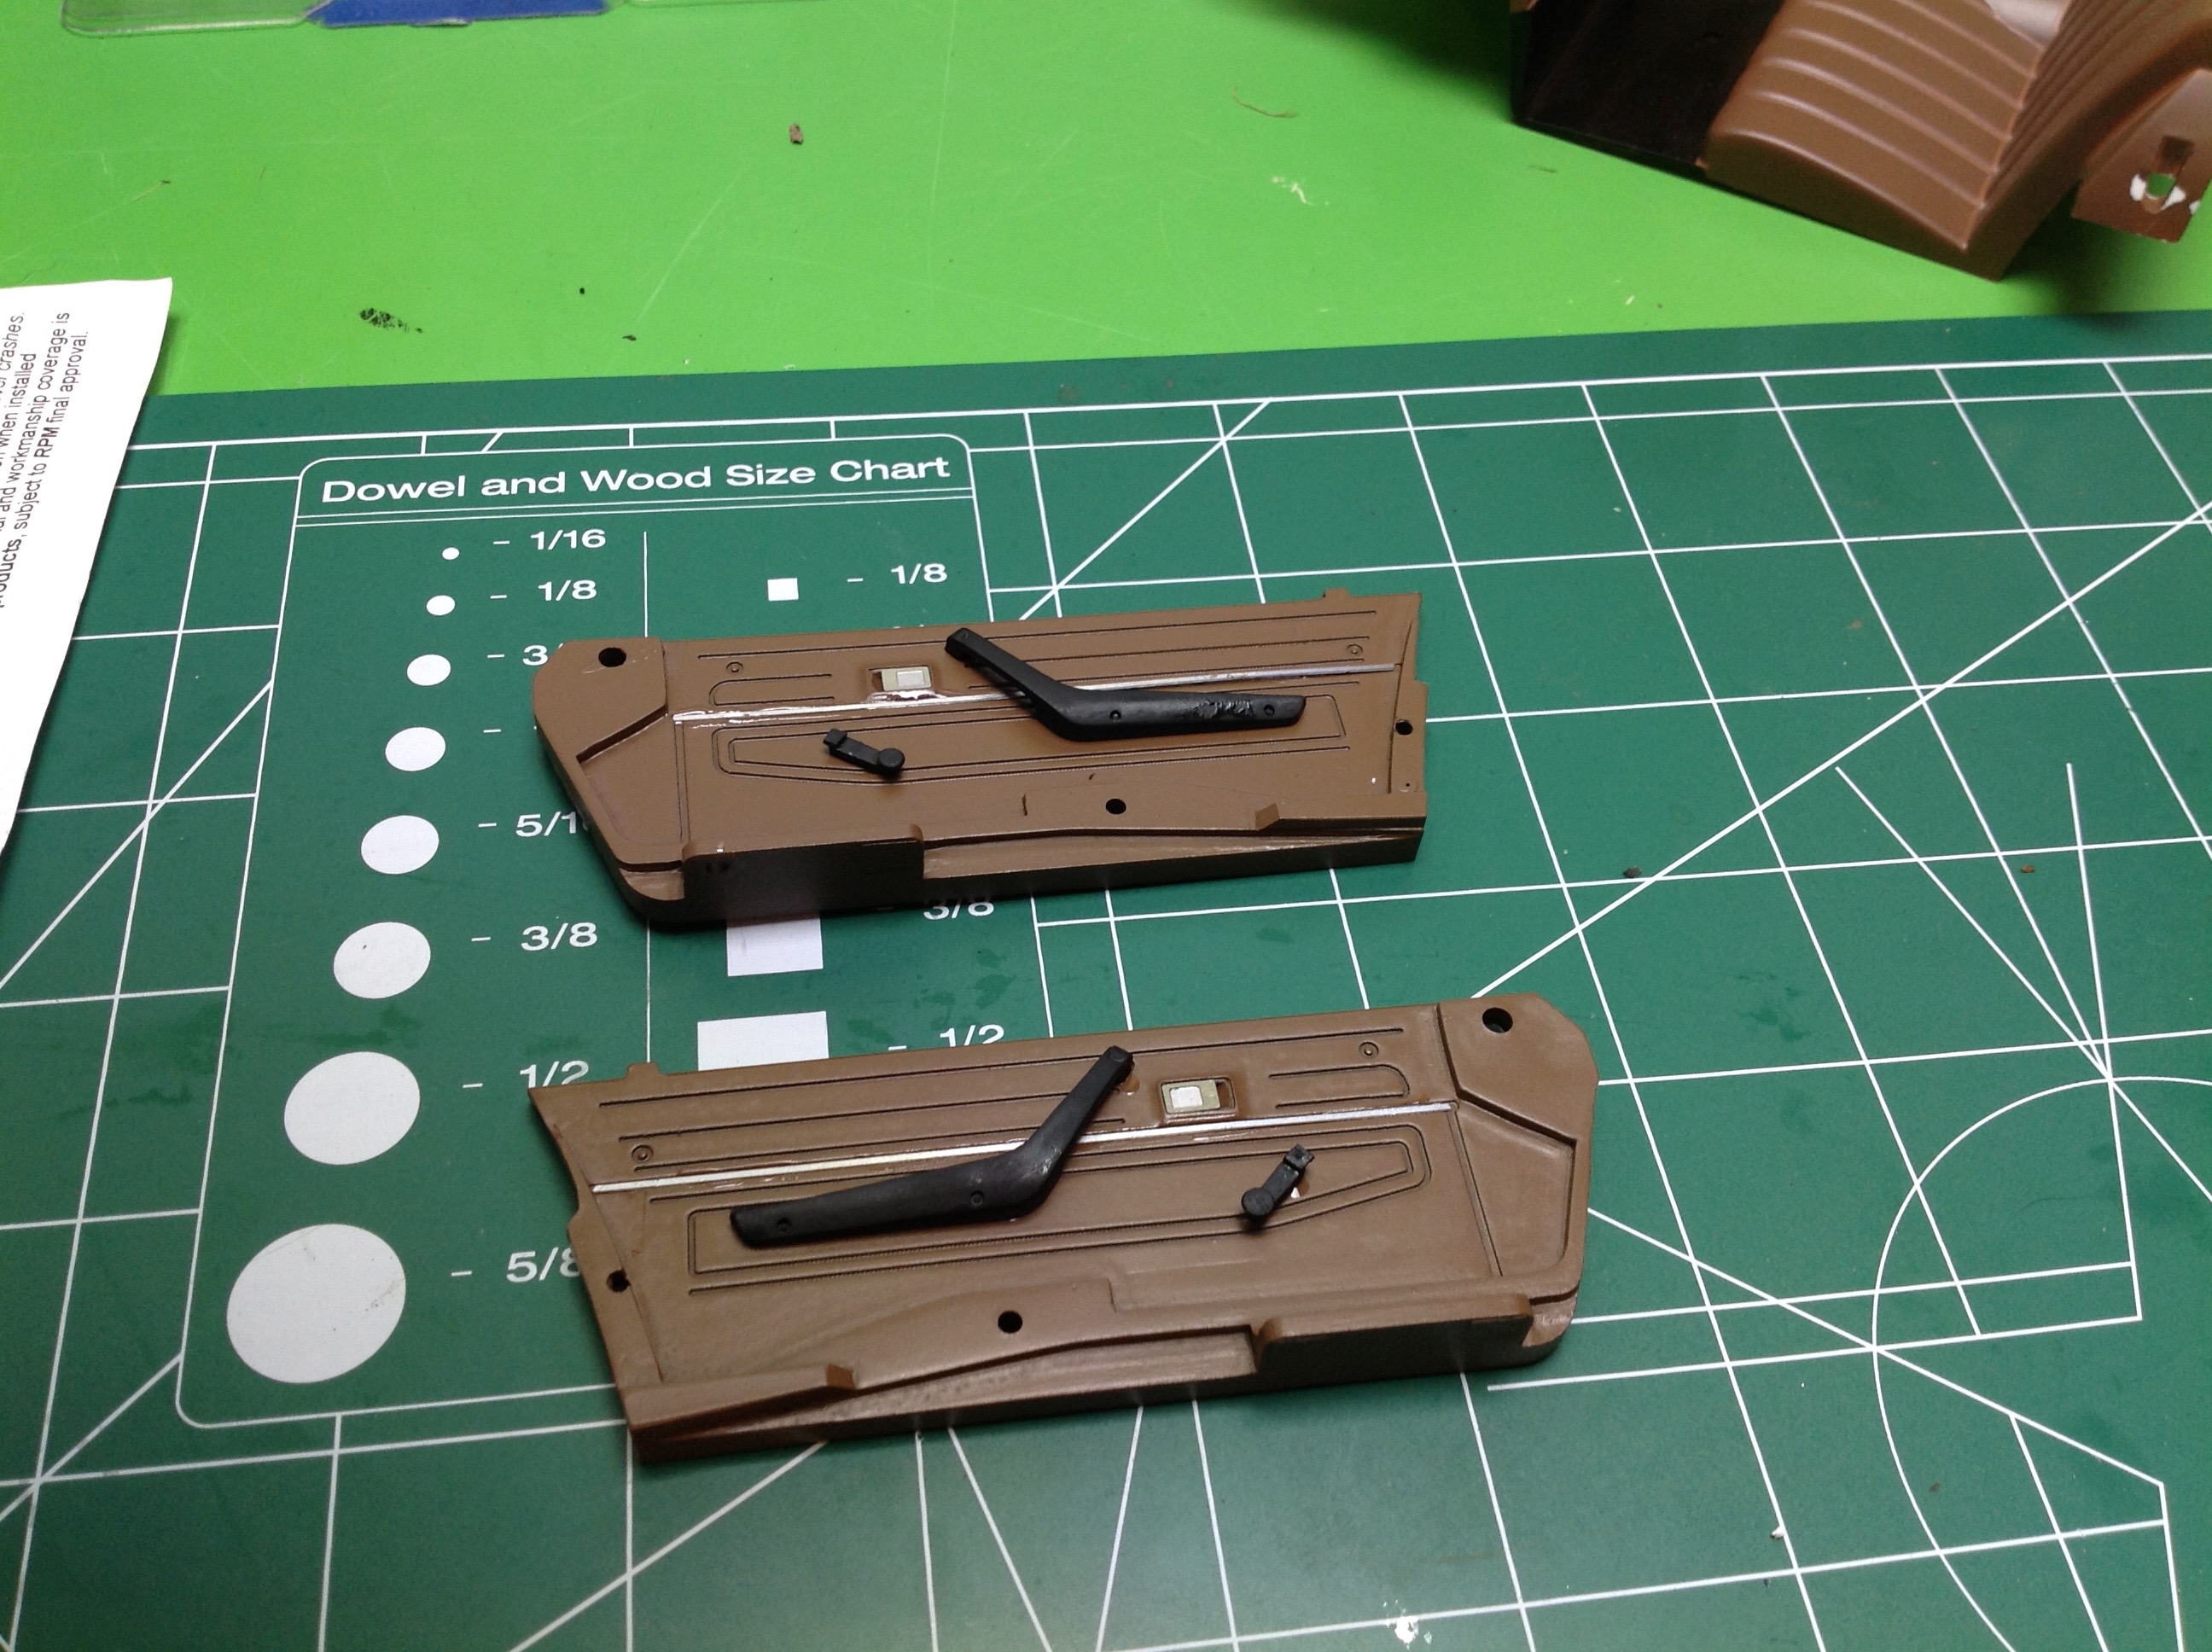
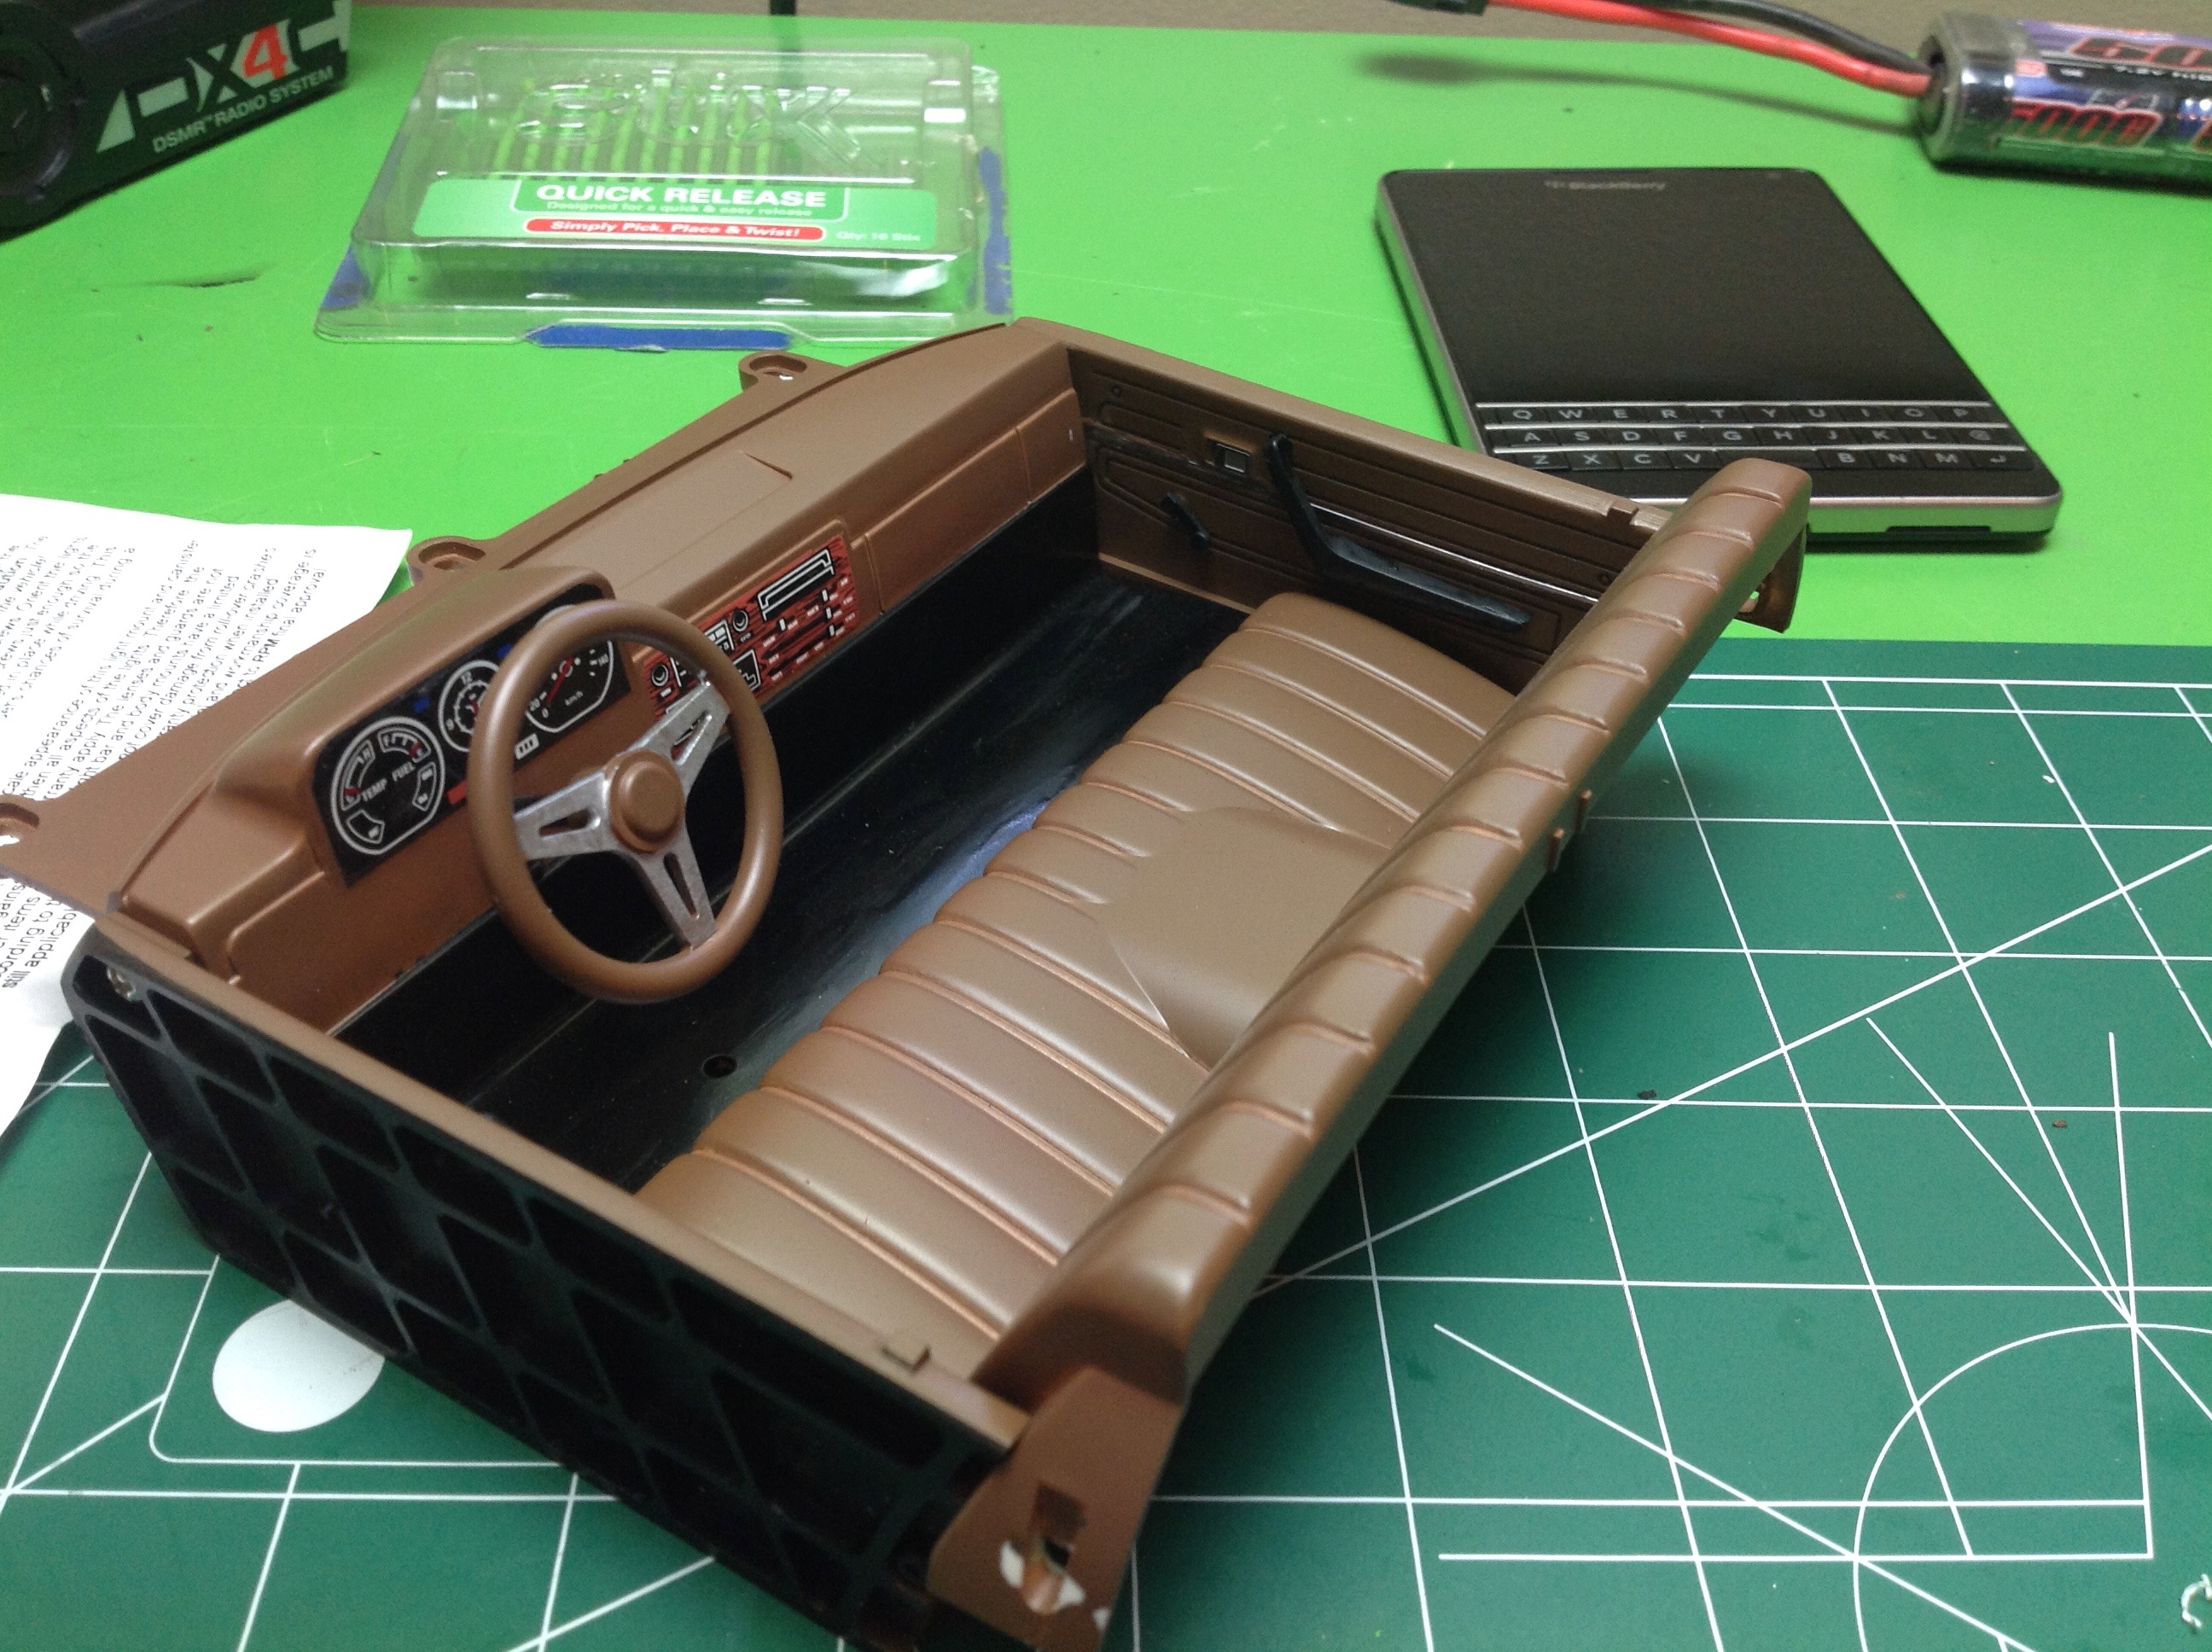
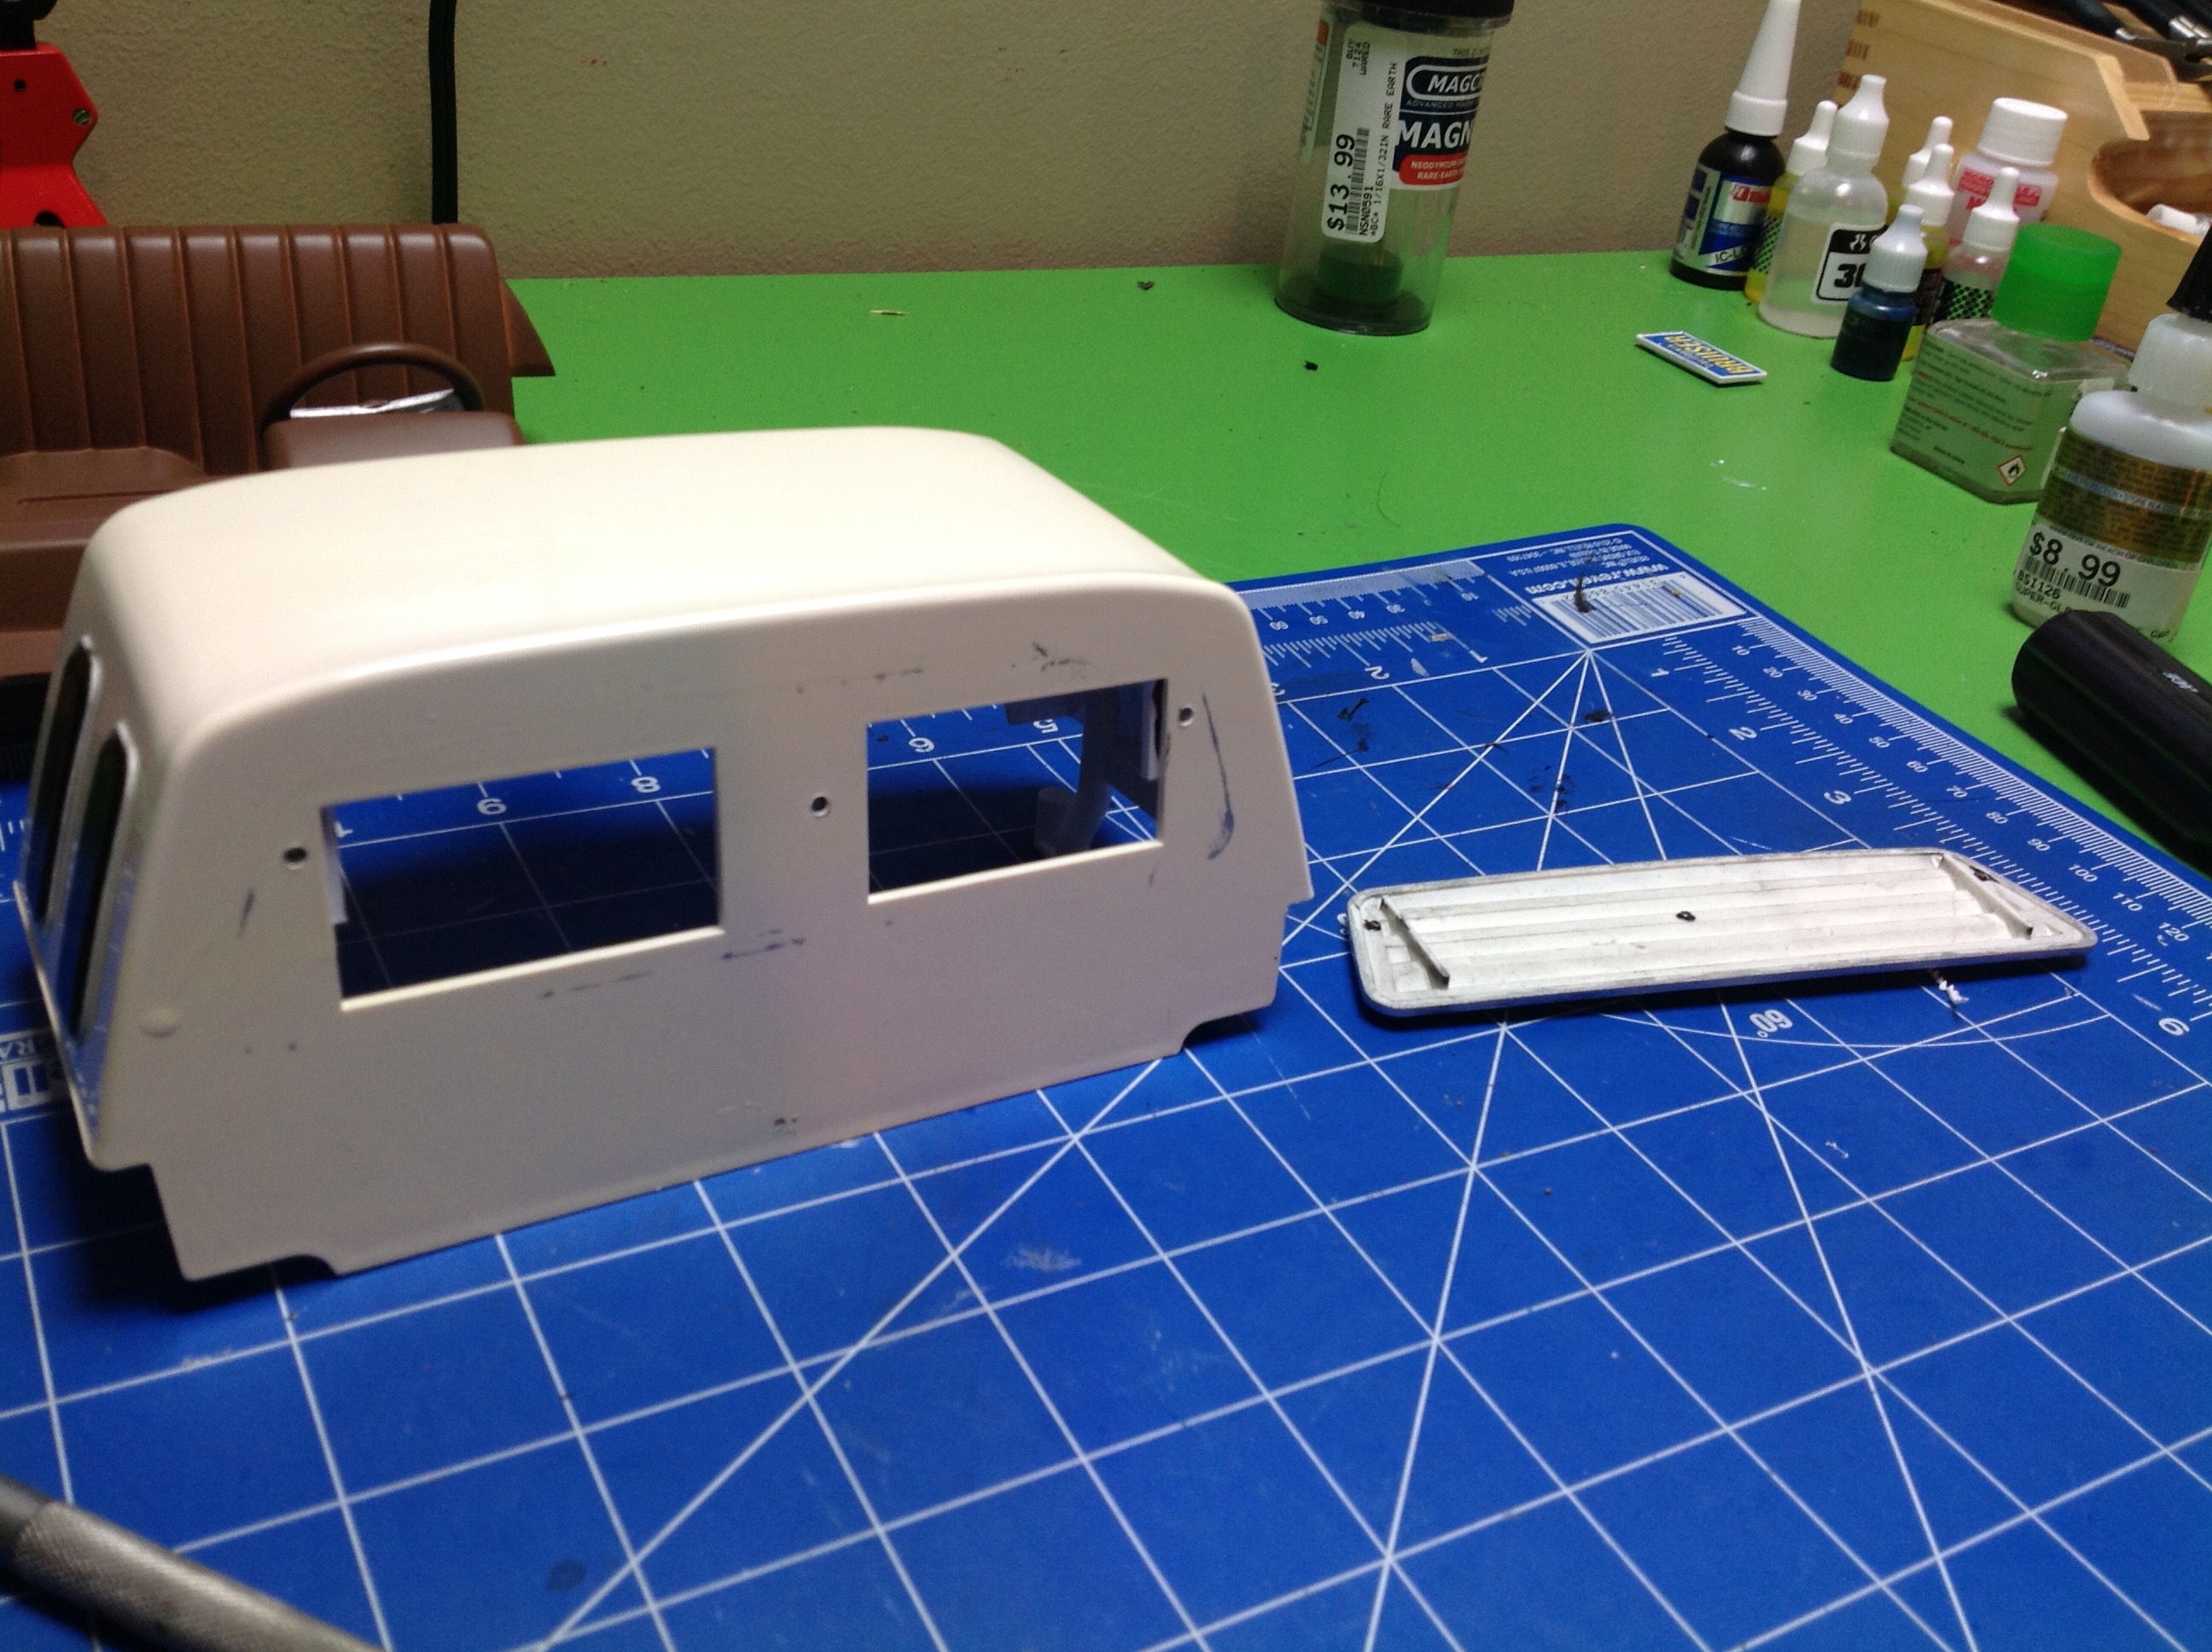
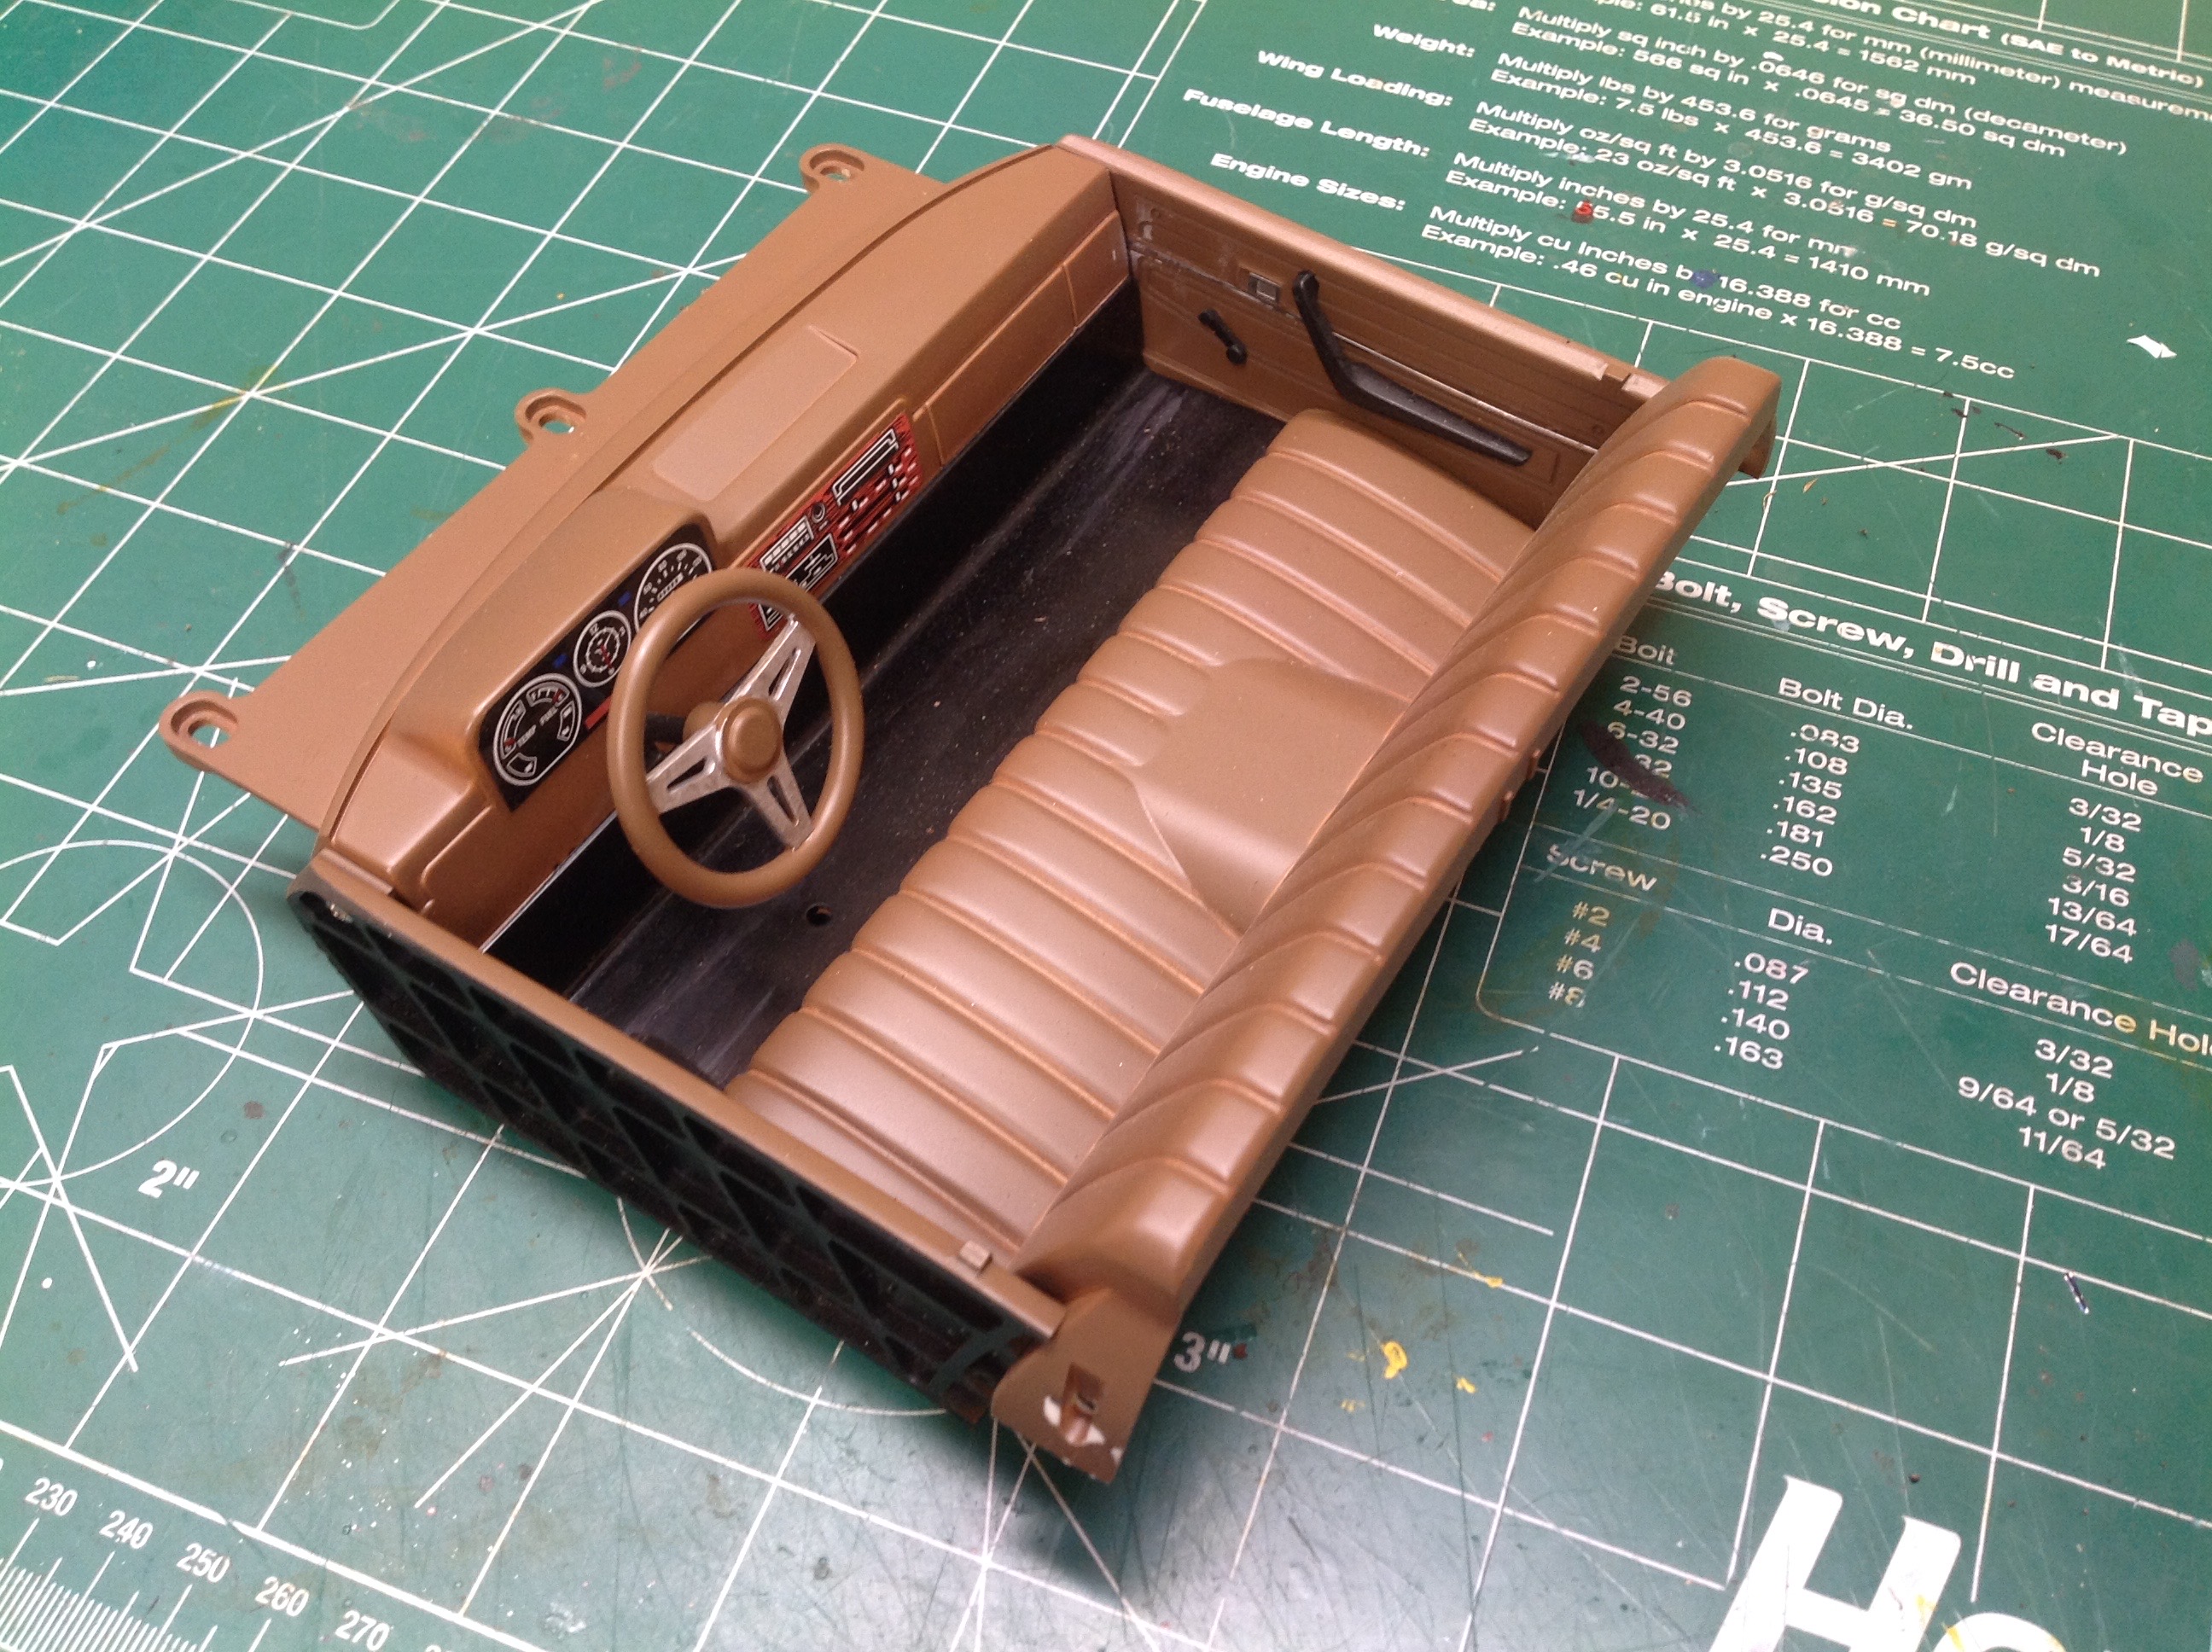
When I first bought the truck this next upgrade didn't even exist, but
the detailed interior door panels from RC4WD that came out and are very
nice. You can see how much they improve the realism of the
interior. At least as importantly, they ended up hiding all of the
wires that I had to attach to the side walls for lighting. I still need a scale driver though .....
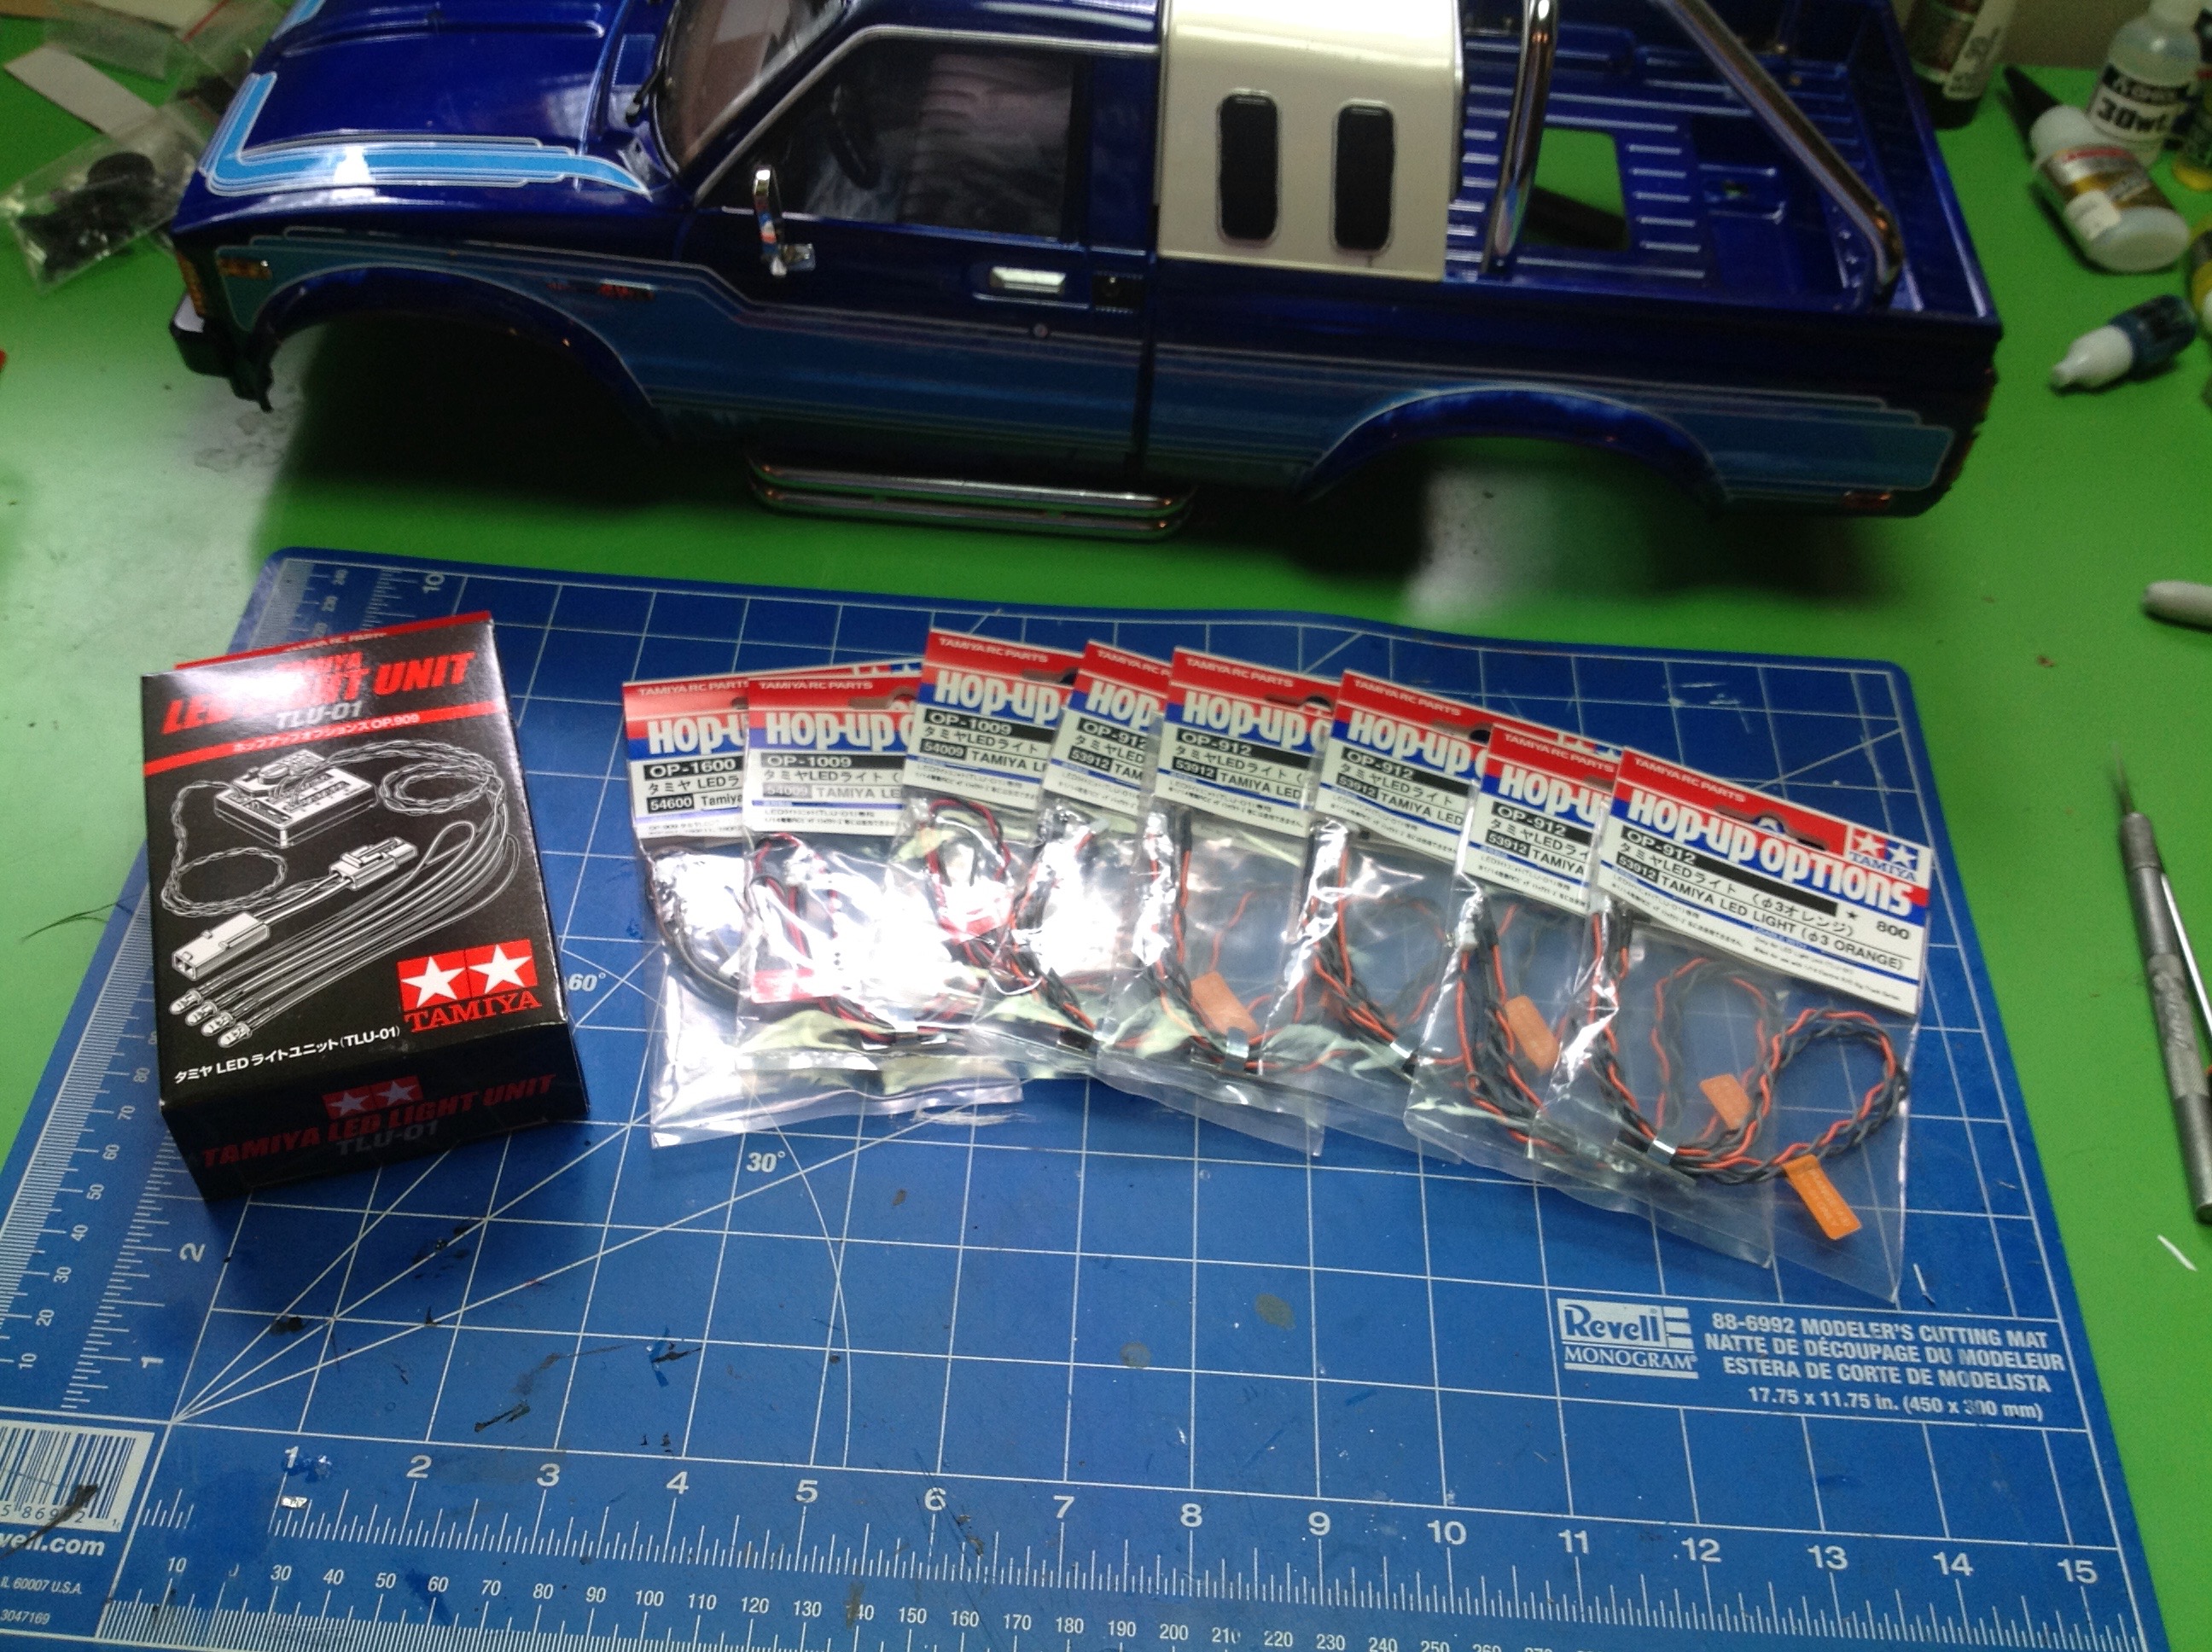
From the beginning I knew I wanted to add lighting to this model.
All of the light buckets are already part of the body, so it is just
screaming for an upgrade. But how far to go? The stock body
has these light buckets:
- 2 headlights
- 4 tail lights
- 4 side marker lights
- 2 front marker lights
- 4 turn signals
- 2 reverse lights
If you are counting that makes 18. The Tamiya TLU-01 light
unit supports 16. So which should I leave out? My original
choice was to leave out the reverse lights since I didn't want them on
all the time anyway, but I later came up with a better solution.
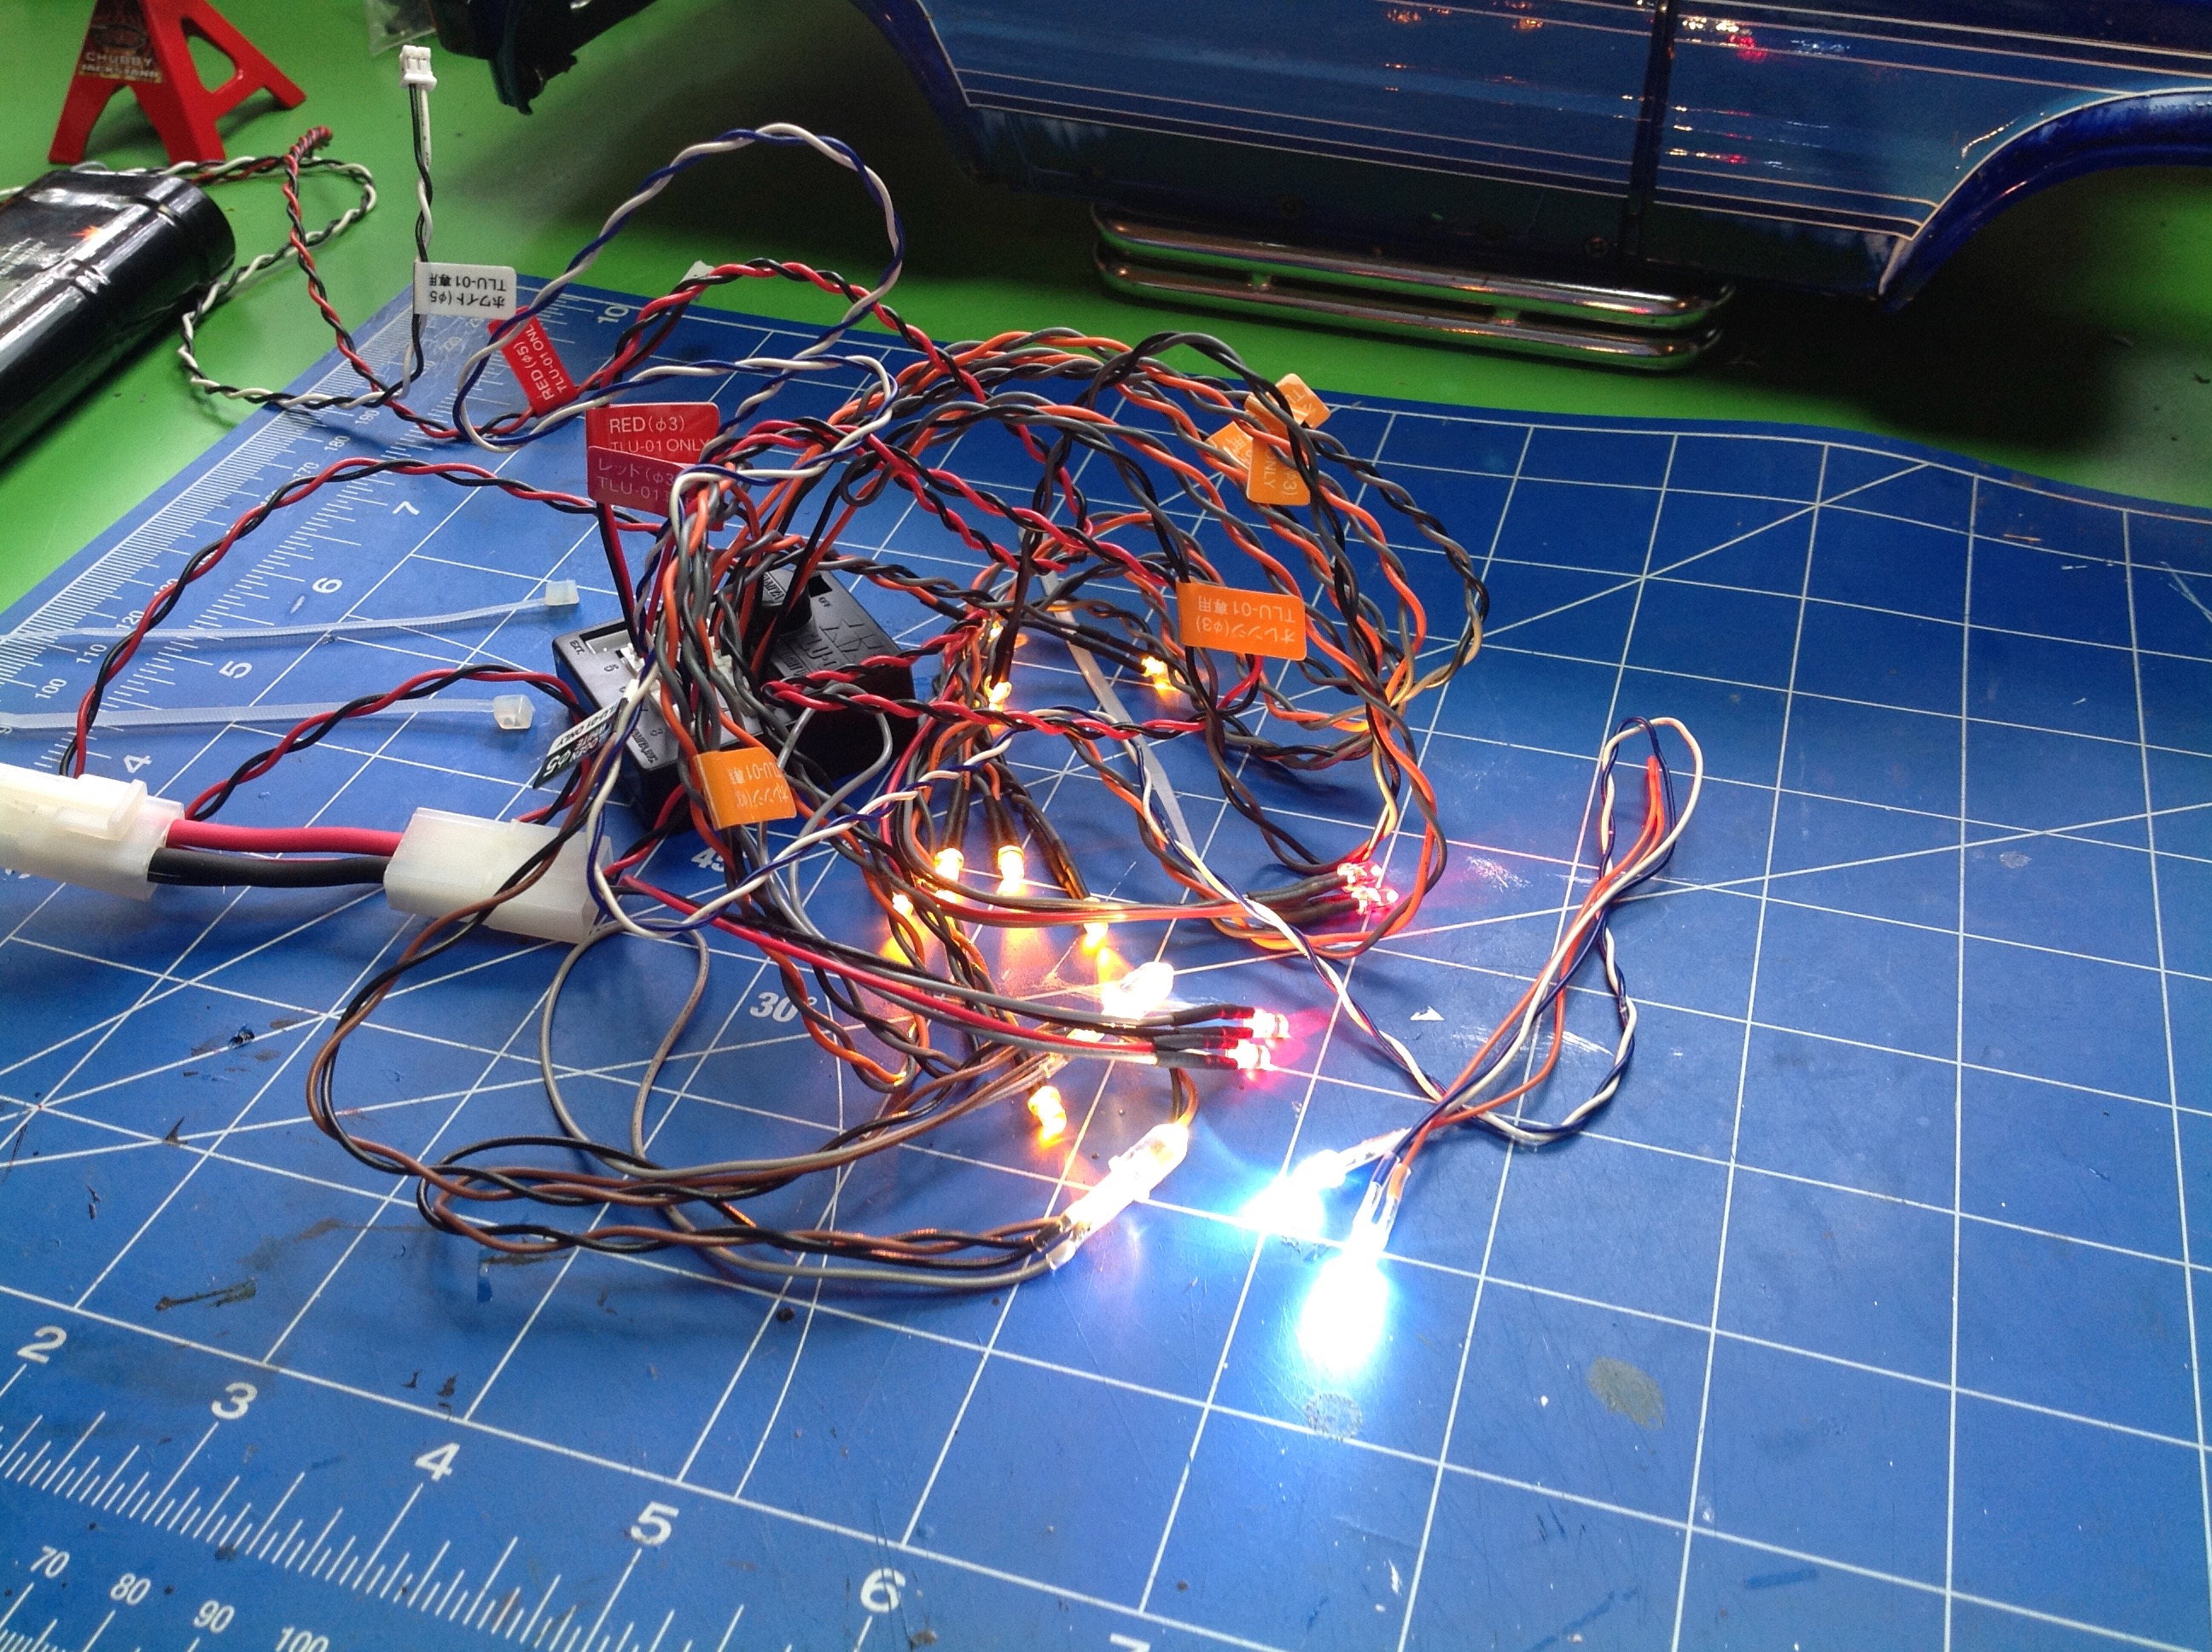
Here's my first attempt at a lighting installation. I was not at
all happy with the stretch in the wires and I knew they would up getting
snagged on something. Still, it was good enough to try it all
out.
Here's my first edition light system on the truck. Note that I
used halogen colored headlights instead of white which I think looks
much better. Tamiya had just released these so I was one of the
first to try them. I think they look perfect for a scale
appearance.
My lack of using two of the light buckets was bothering me, so I came up
with a crazy solution. You can use
two TLU-01 light units and control
them with a TLU-02. This costs a fortune, but it means that I
would now have 14
extra light channels instead of being two
short! I couldn't think of a use for all of them, but I did decide
to install some fog lights on the front bumper and on the roll
bar. This picture shows some of the wiring before the TLU-02
arrived. You can see the light bar lying on the right.
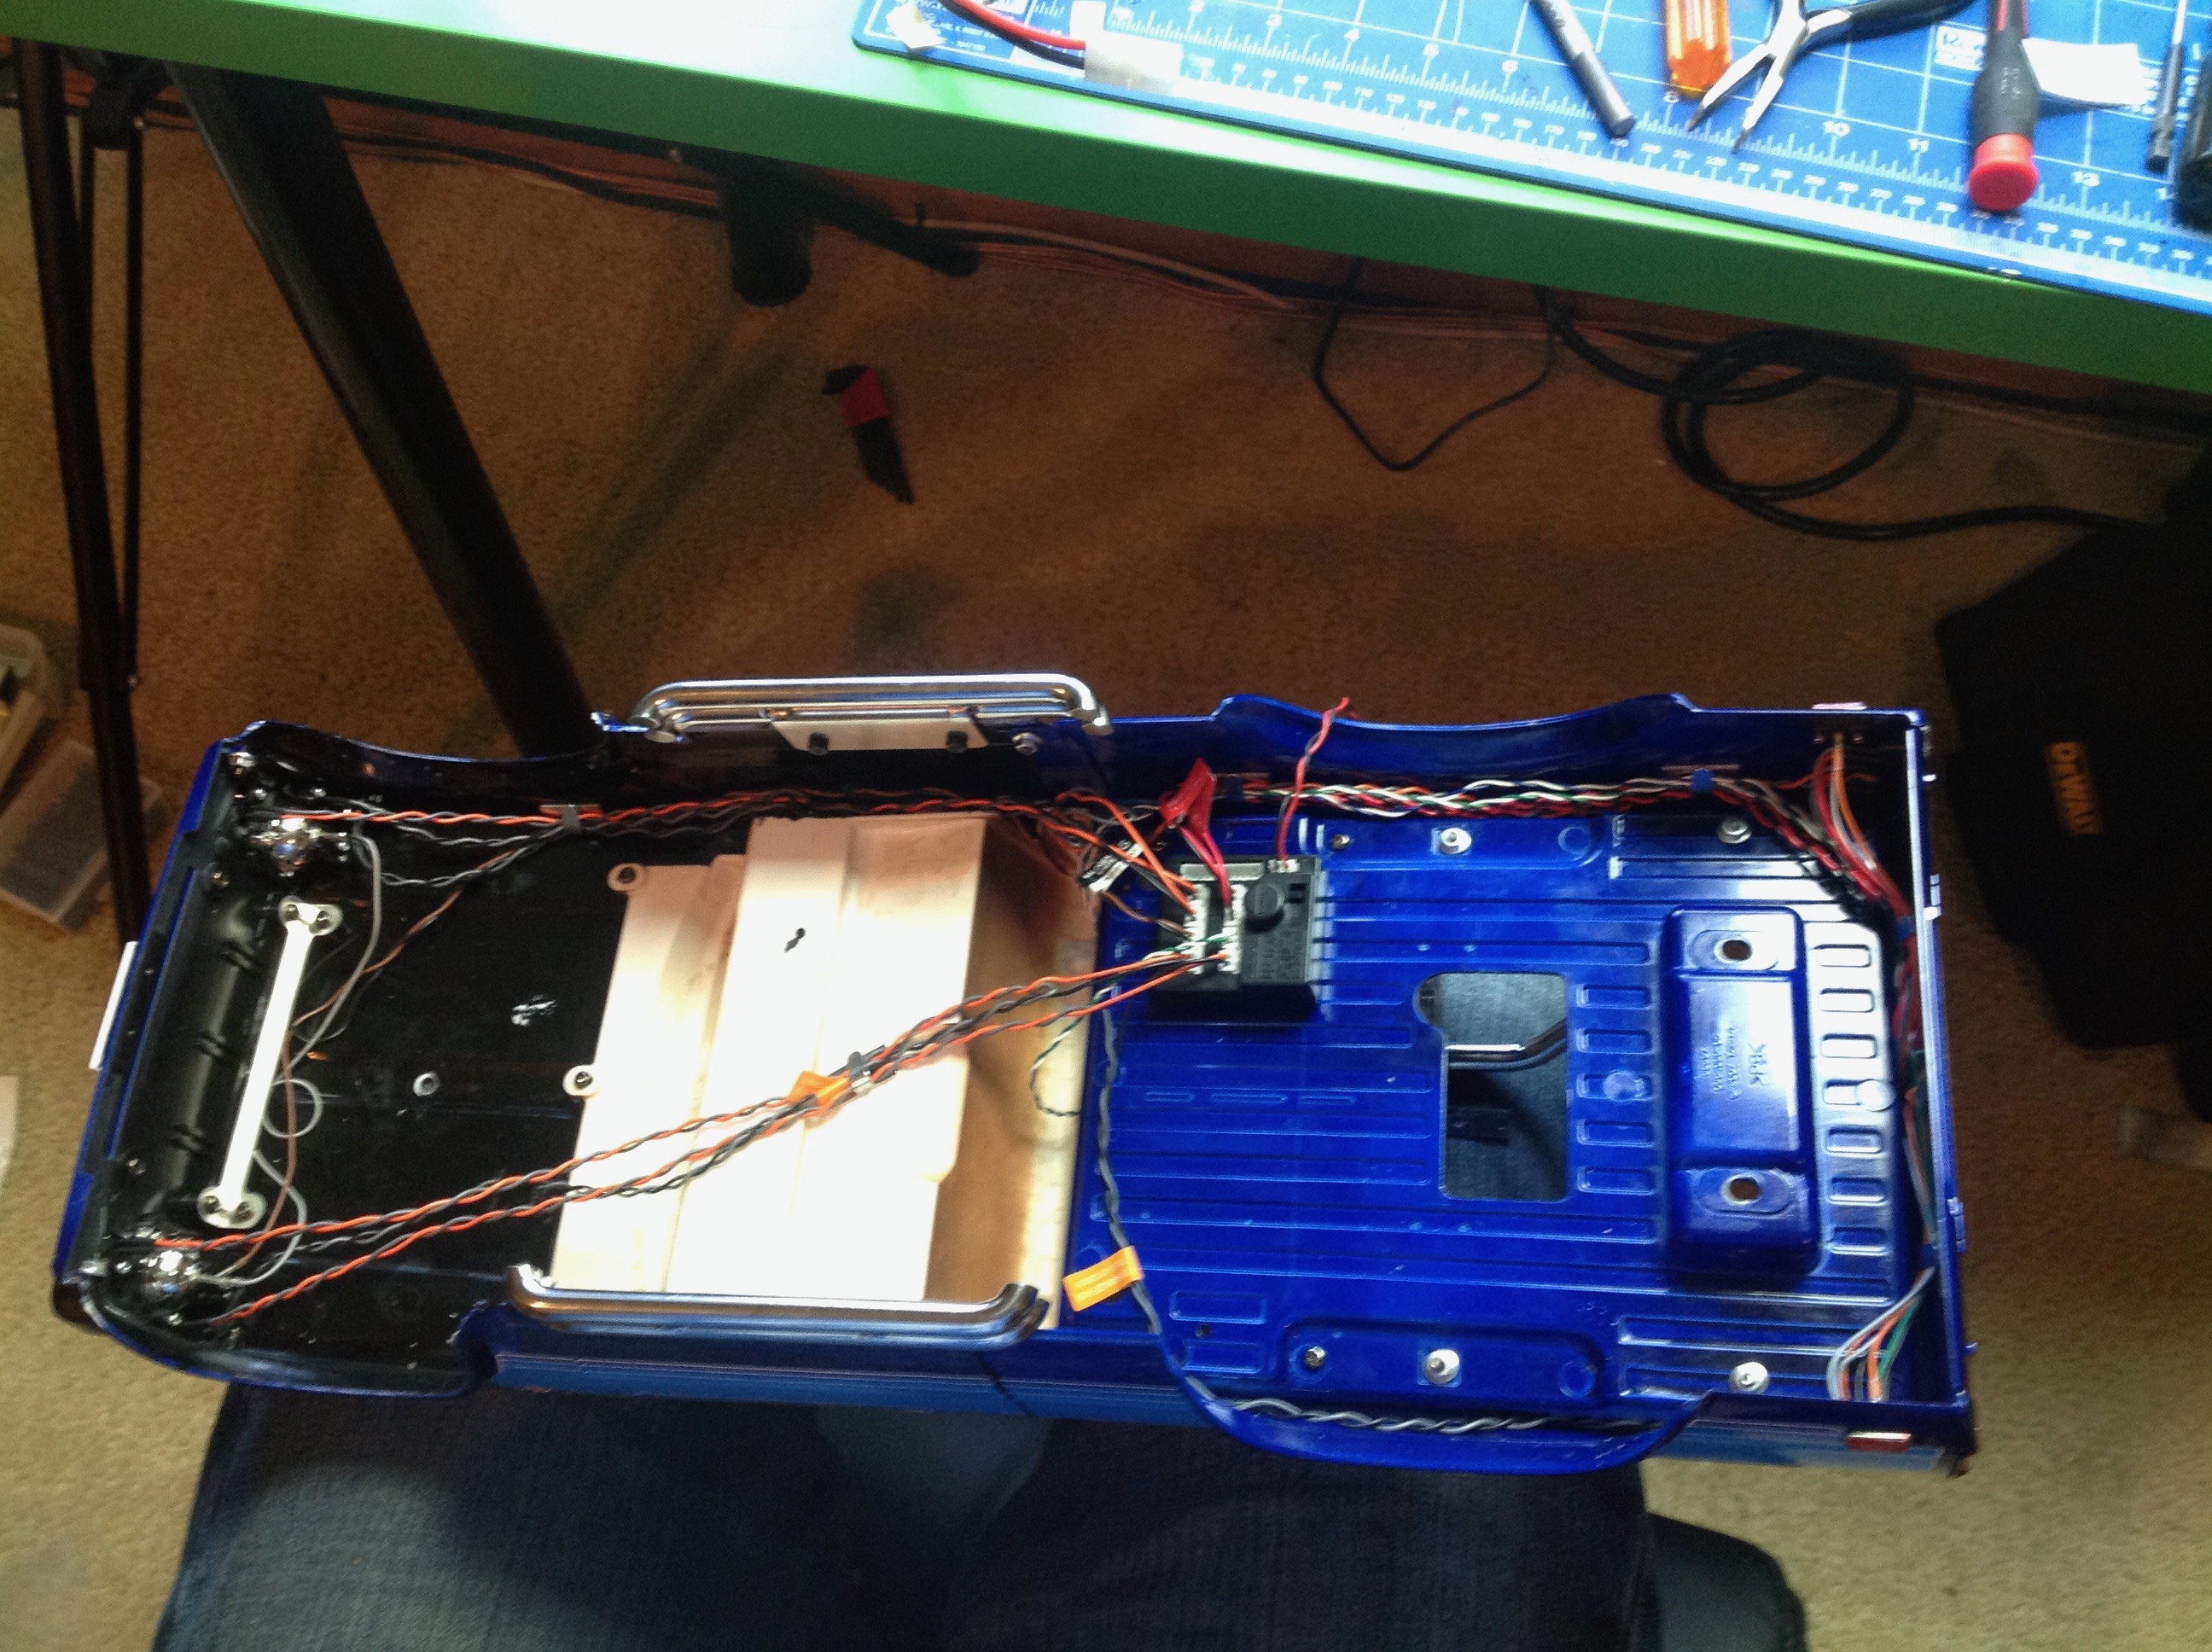
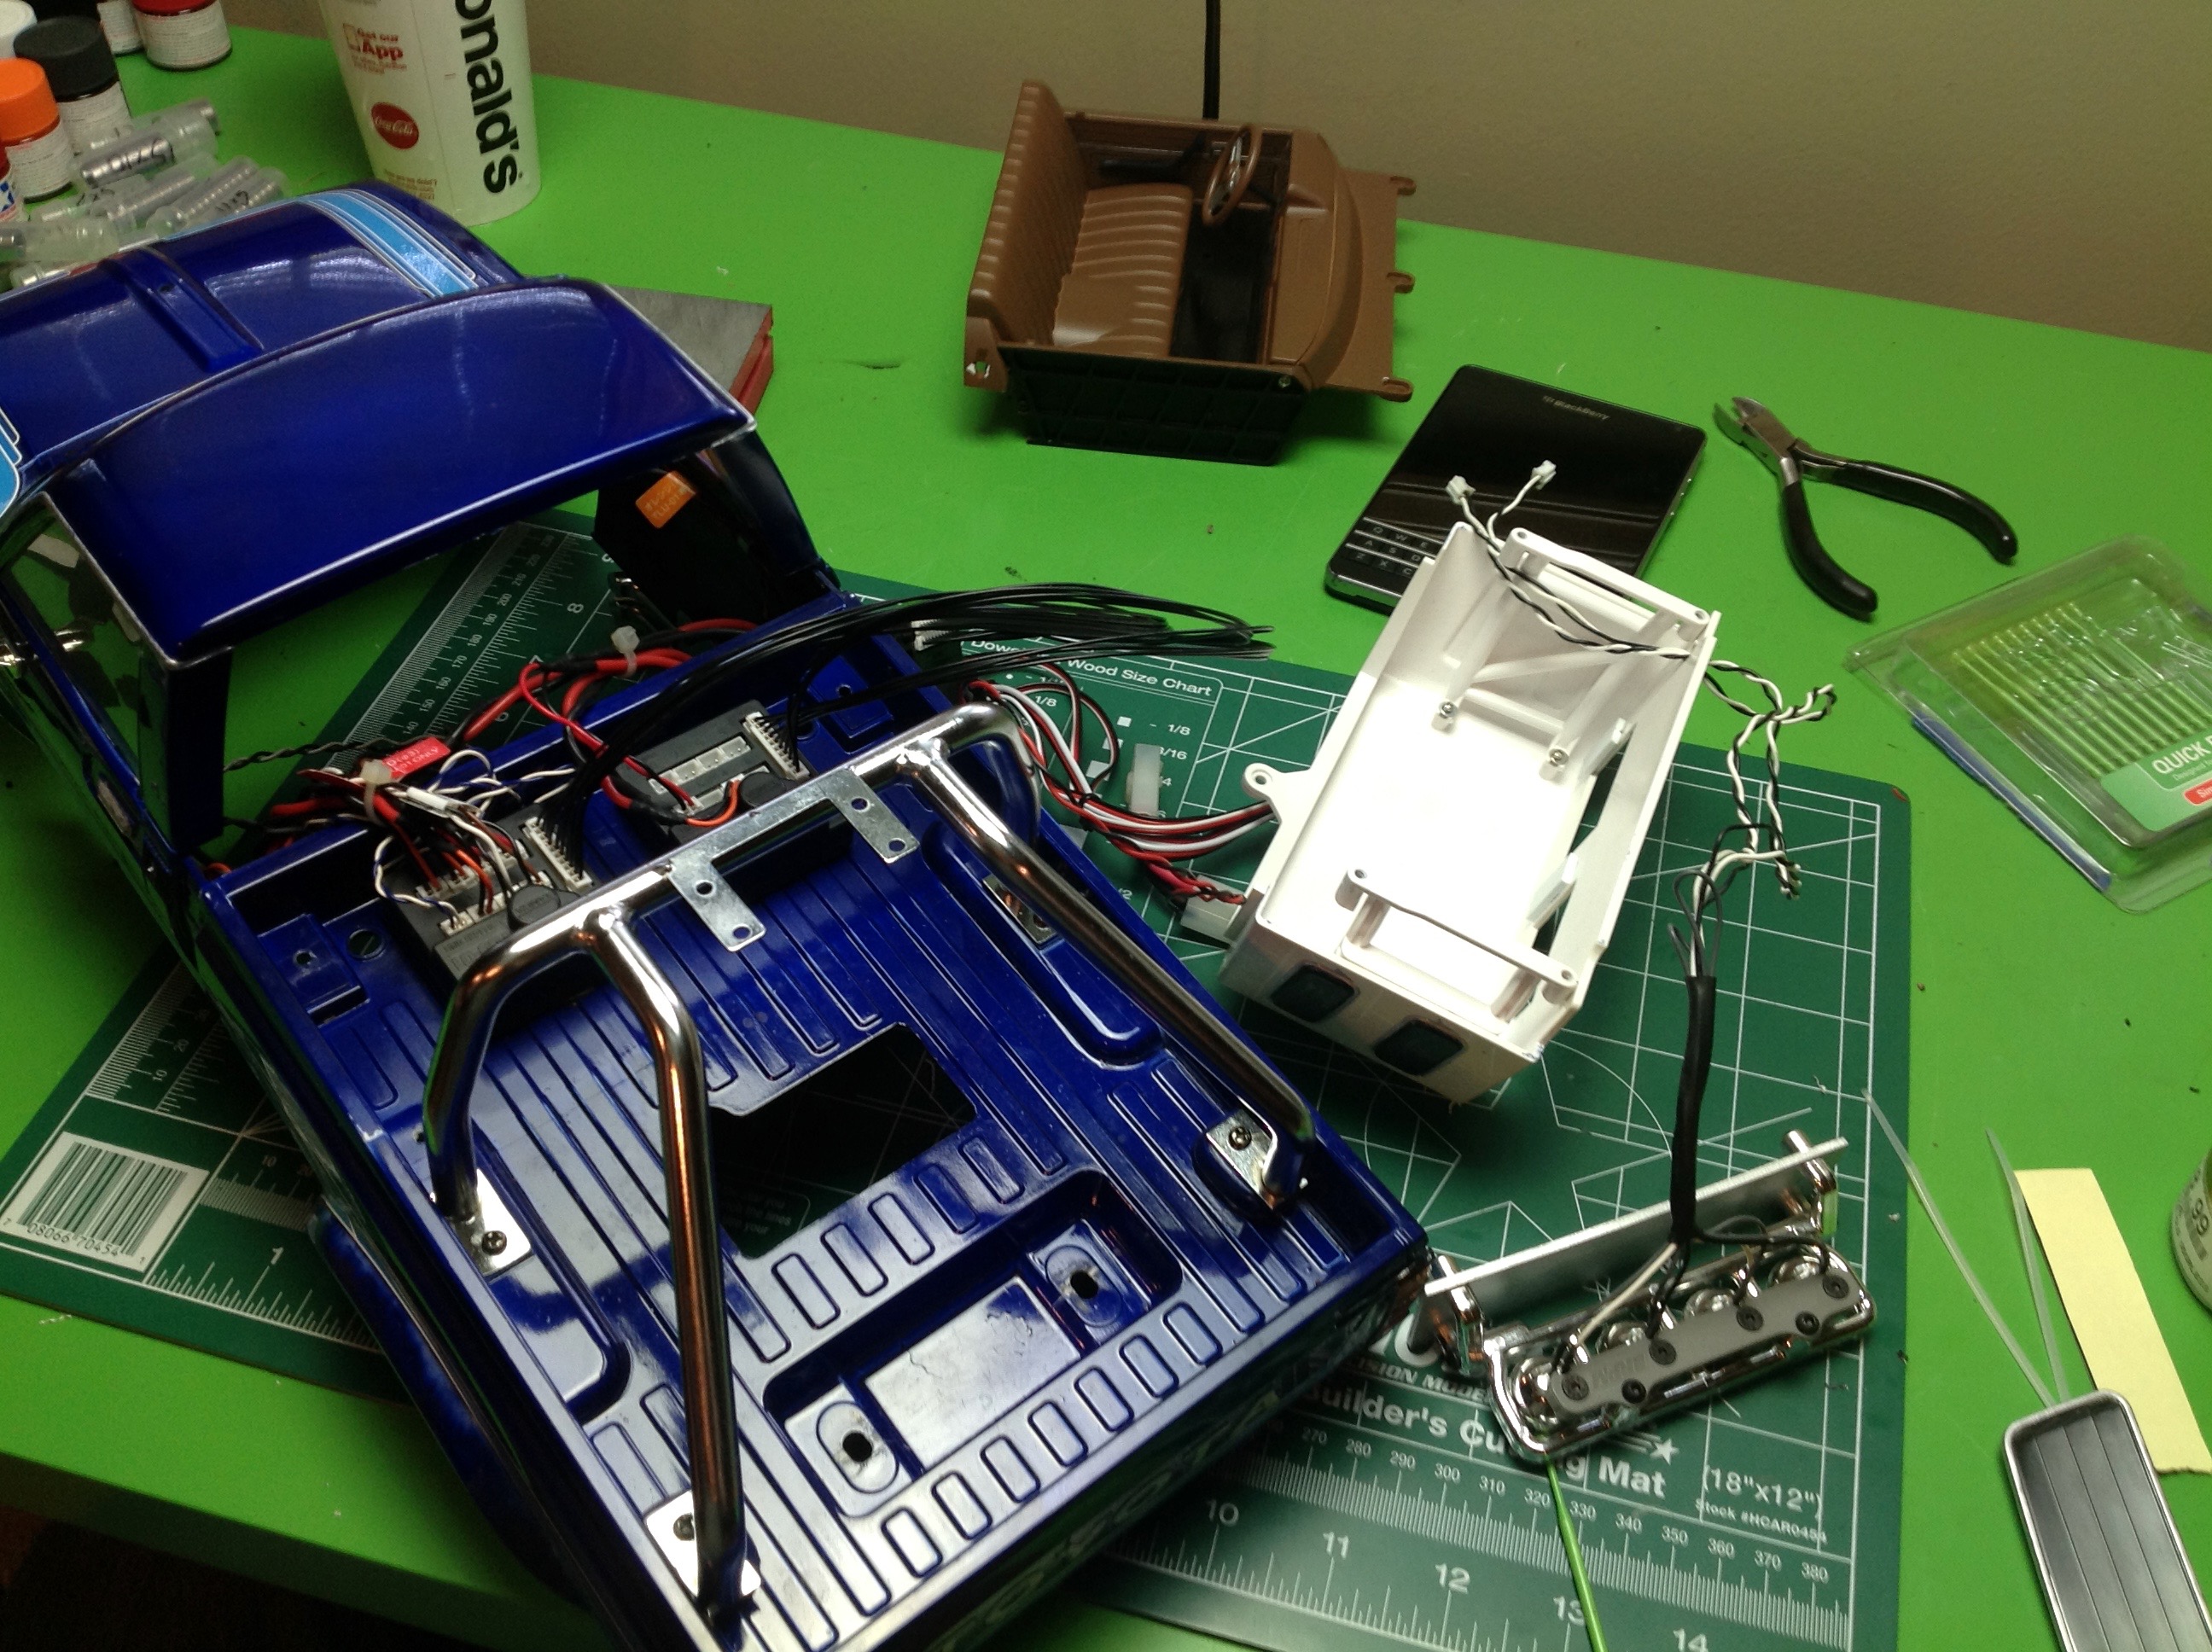
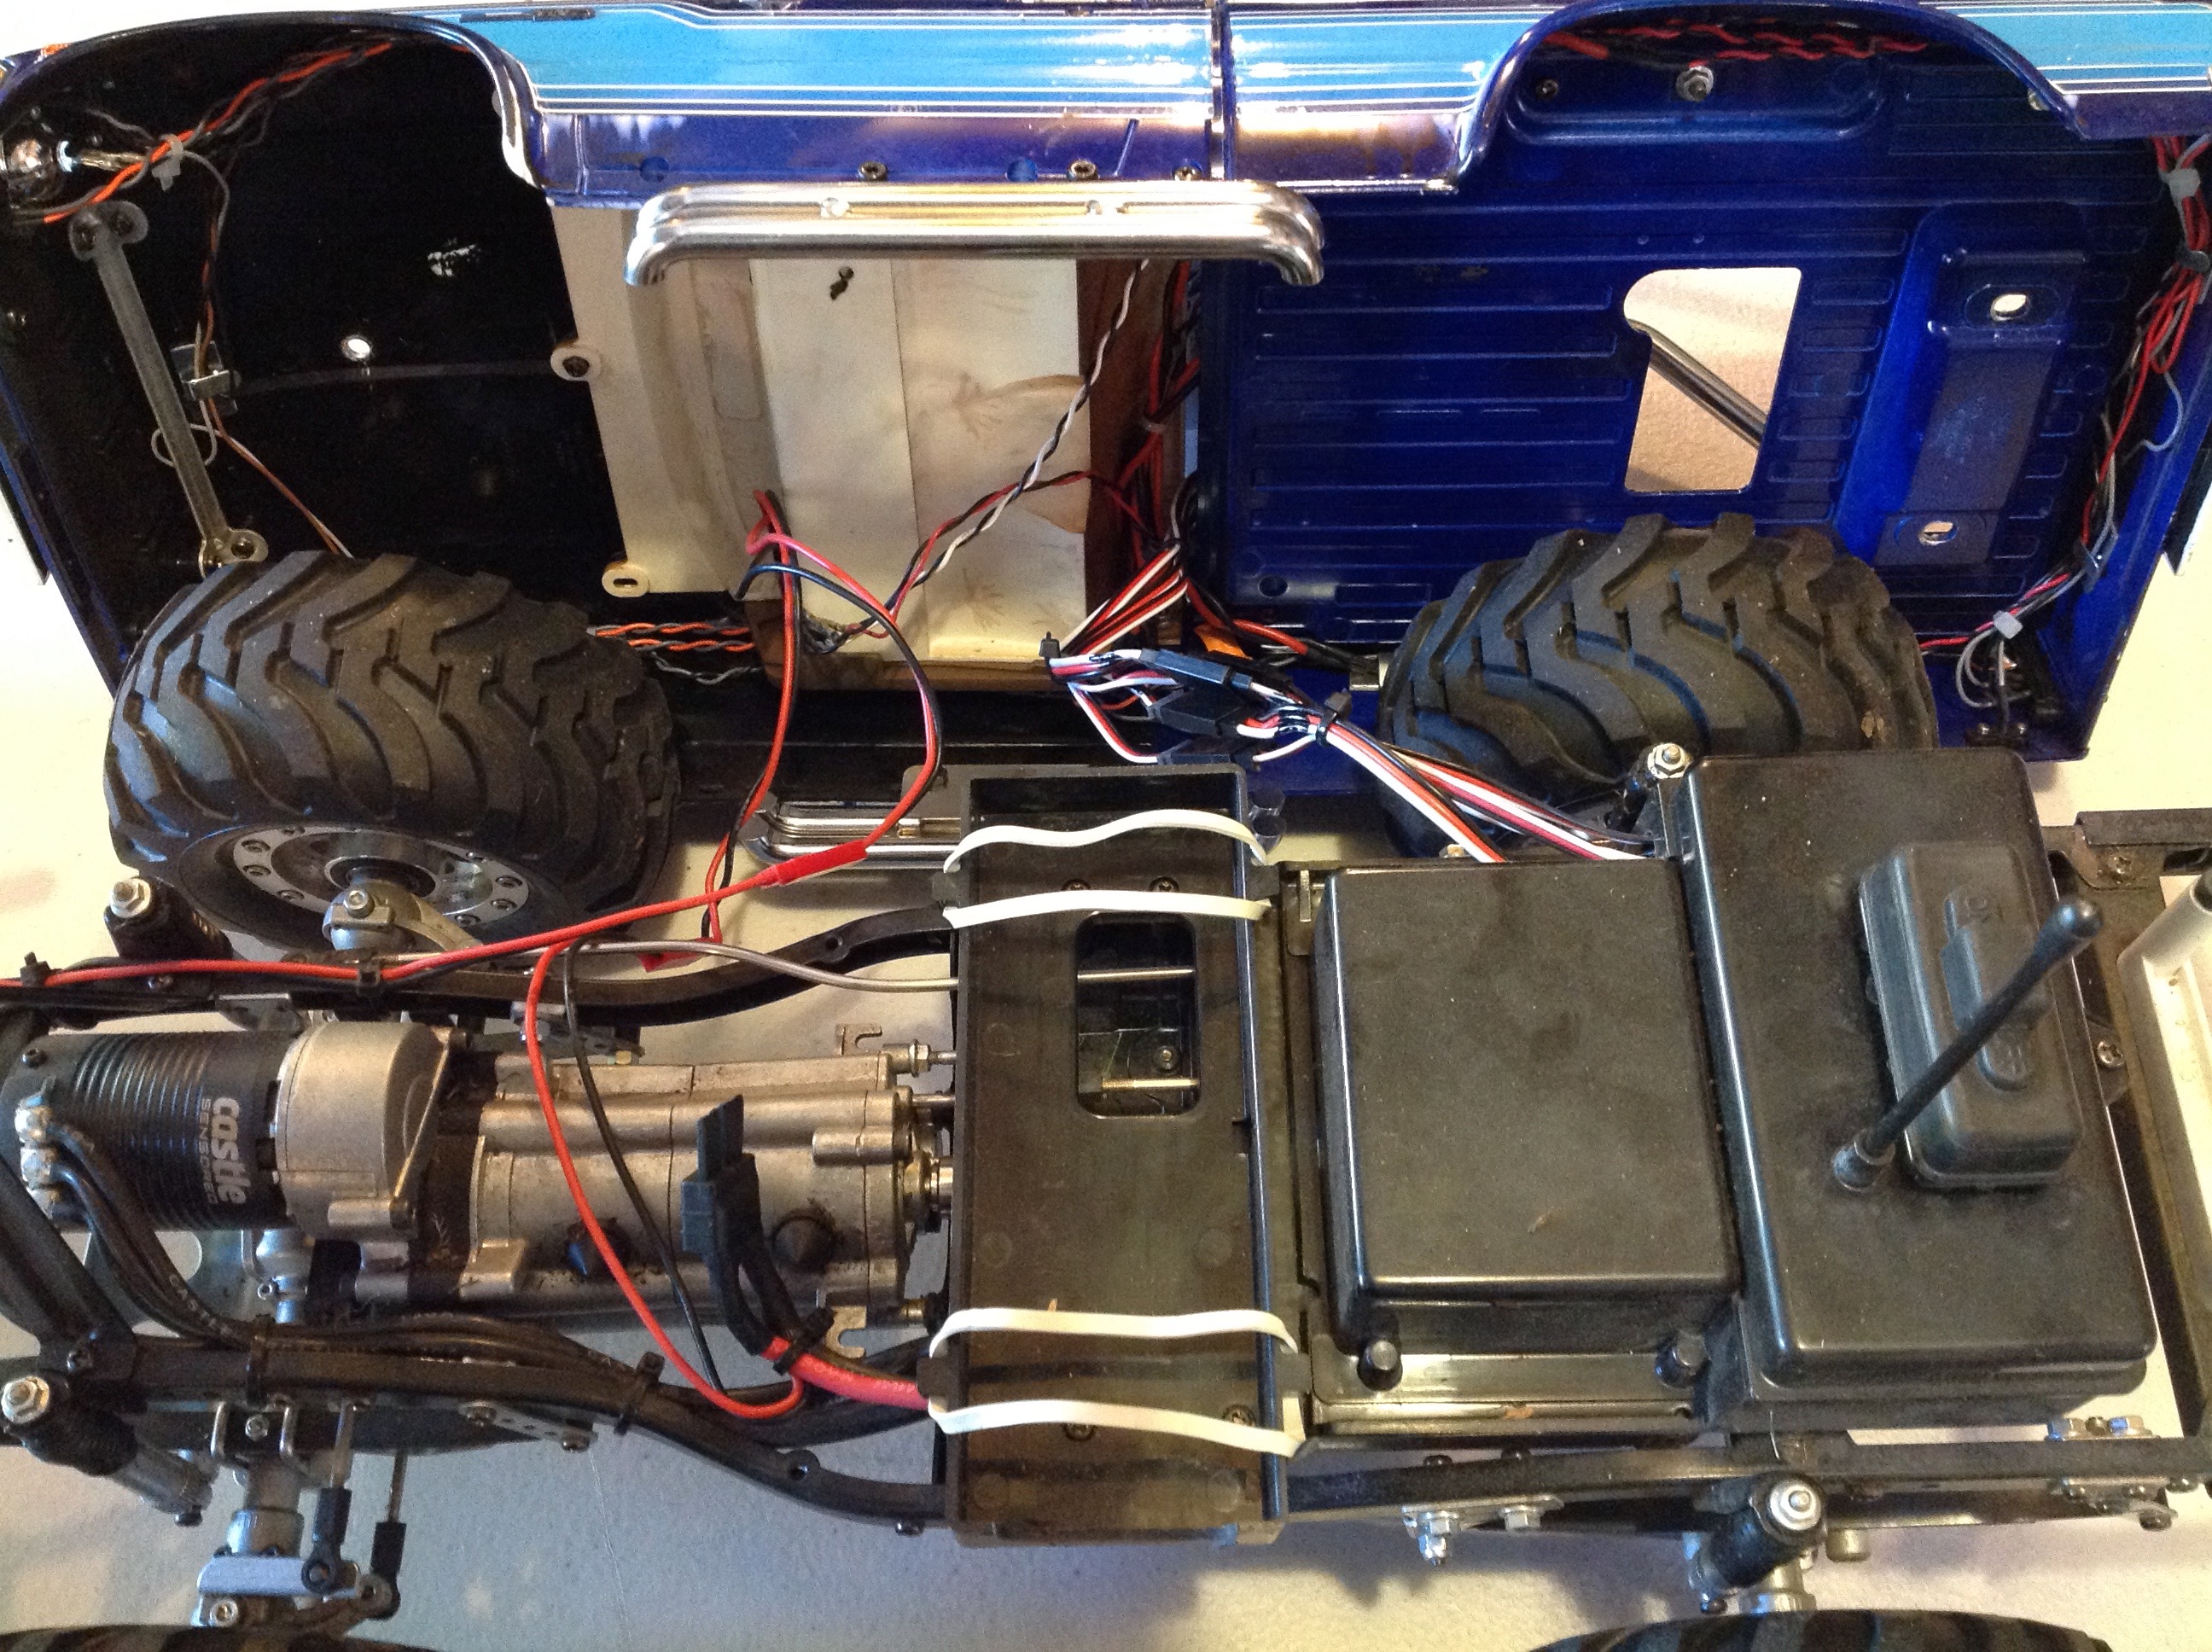
Figuring out where to hide all these electronics was a problem, so I
decided to use the sleeper. It has plenty of room for all three
light controllers, but it introduces two new problems. First
problem is that the TLU-02 needs to be connected to the servo wires to
control the lights. To solve this I needed to use a bunch of
extensions to go from the servo and ESC to the controller, then back out
to the receiver. They all needed to have connectors so I could
still remove the body. The other problem is that you need to
access the TLU-02 to turn it on and change modes. I solved this by
removing the louver on the back of the sleeper and then converting it
to install with magnets. This way I can easily remove it and reach
my finger inside to switch on the lights!
The TLU-02 needs to be
connect directly to the battery, so I also needed some detachable wiring
for that, and yet another connector for the front fog lights which are
connected to the chassis and not the body. Finally, I had to
solder extensions onto many of the LED wires because they were not long
enough. It was probably a good two weeks of soldering before I got
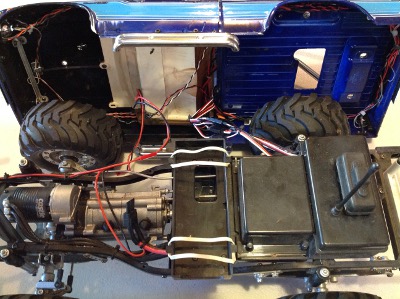
everything done and looking nice. The image on the left shows the
final wiring. You can see the
leads going from the battery and from the front fog lights to the
body through JST connectors. There is also a bundle of 4 servo
extensions.
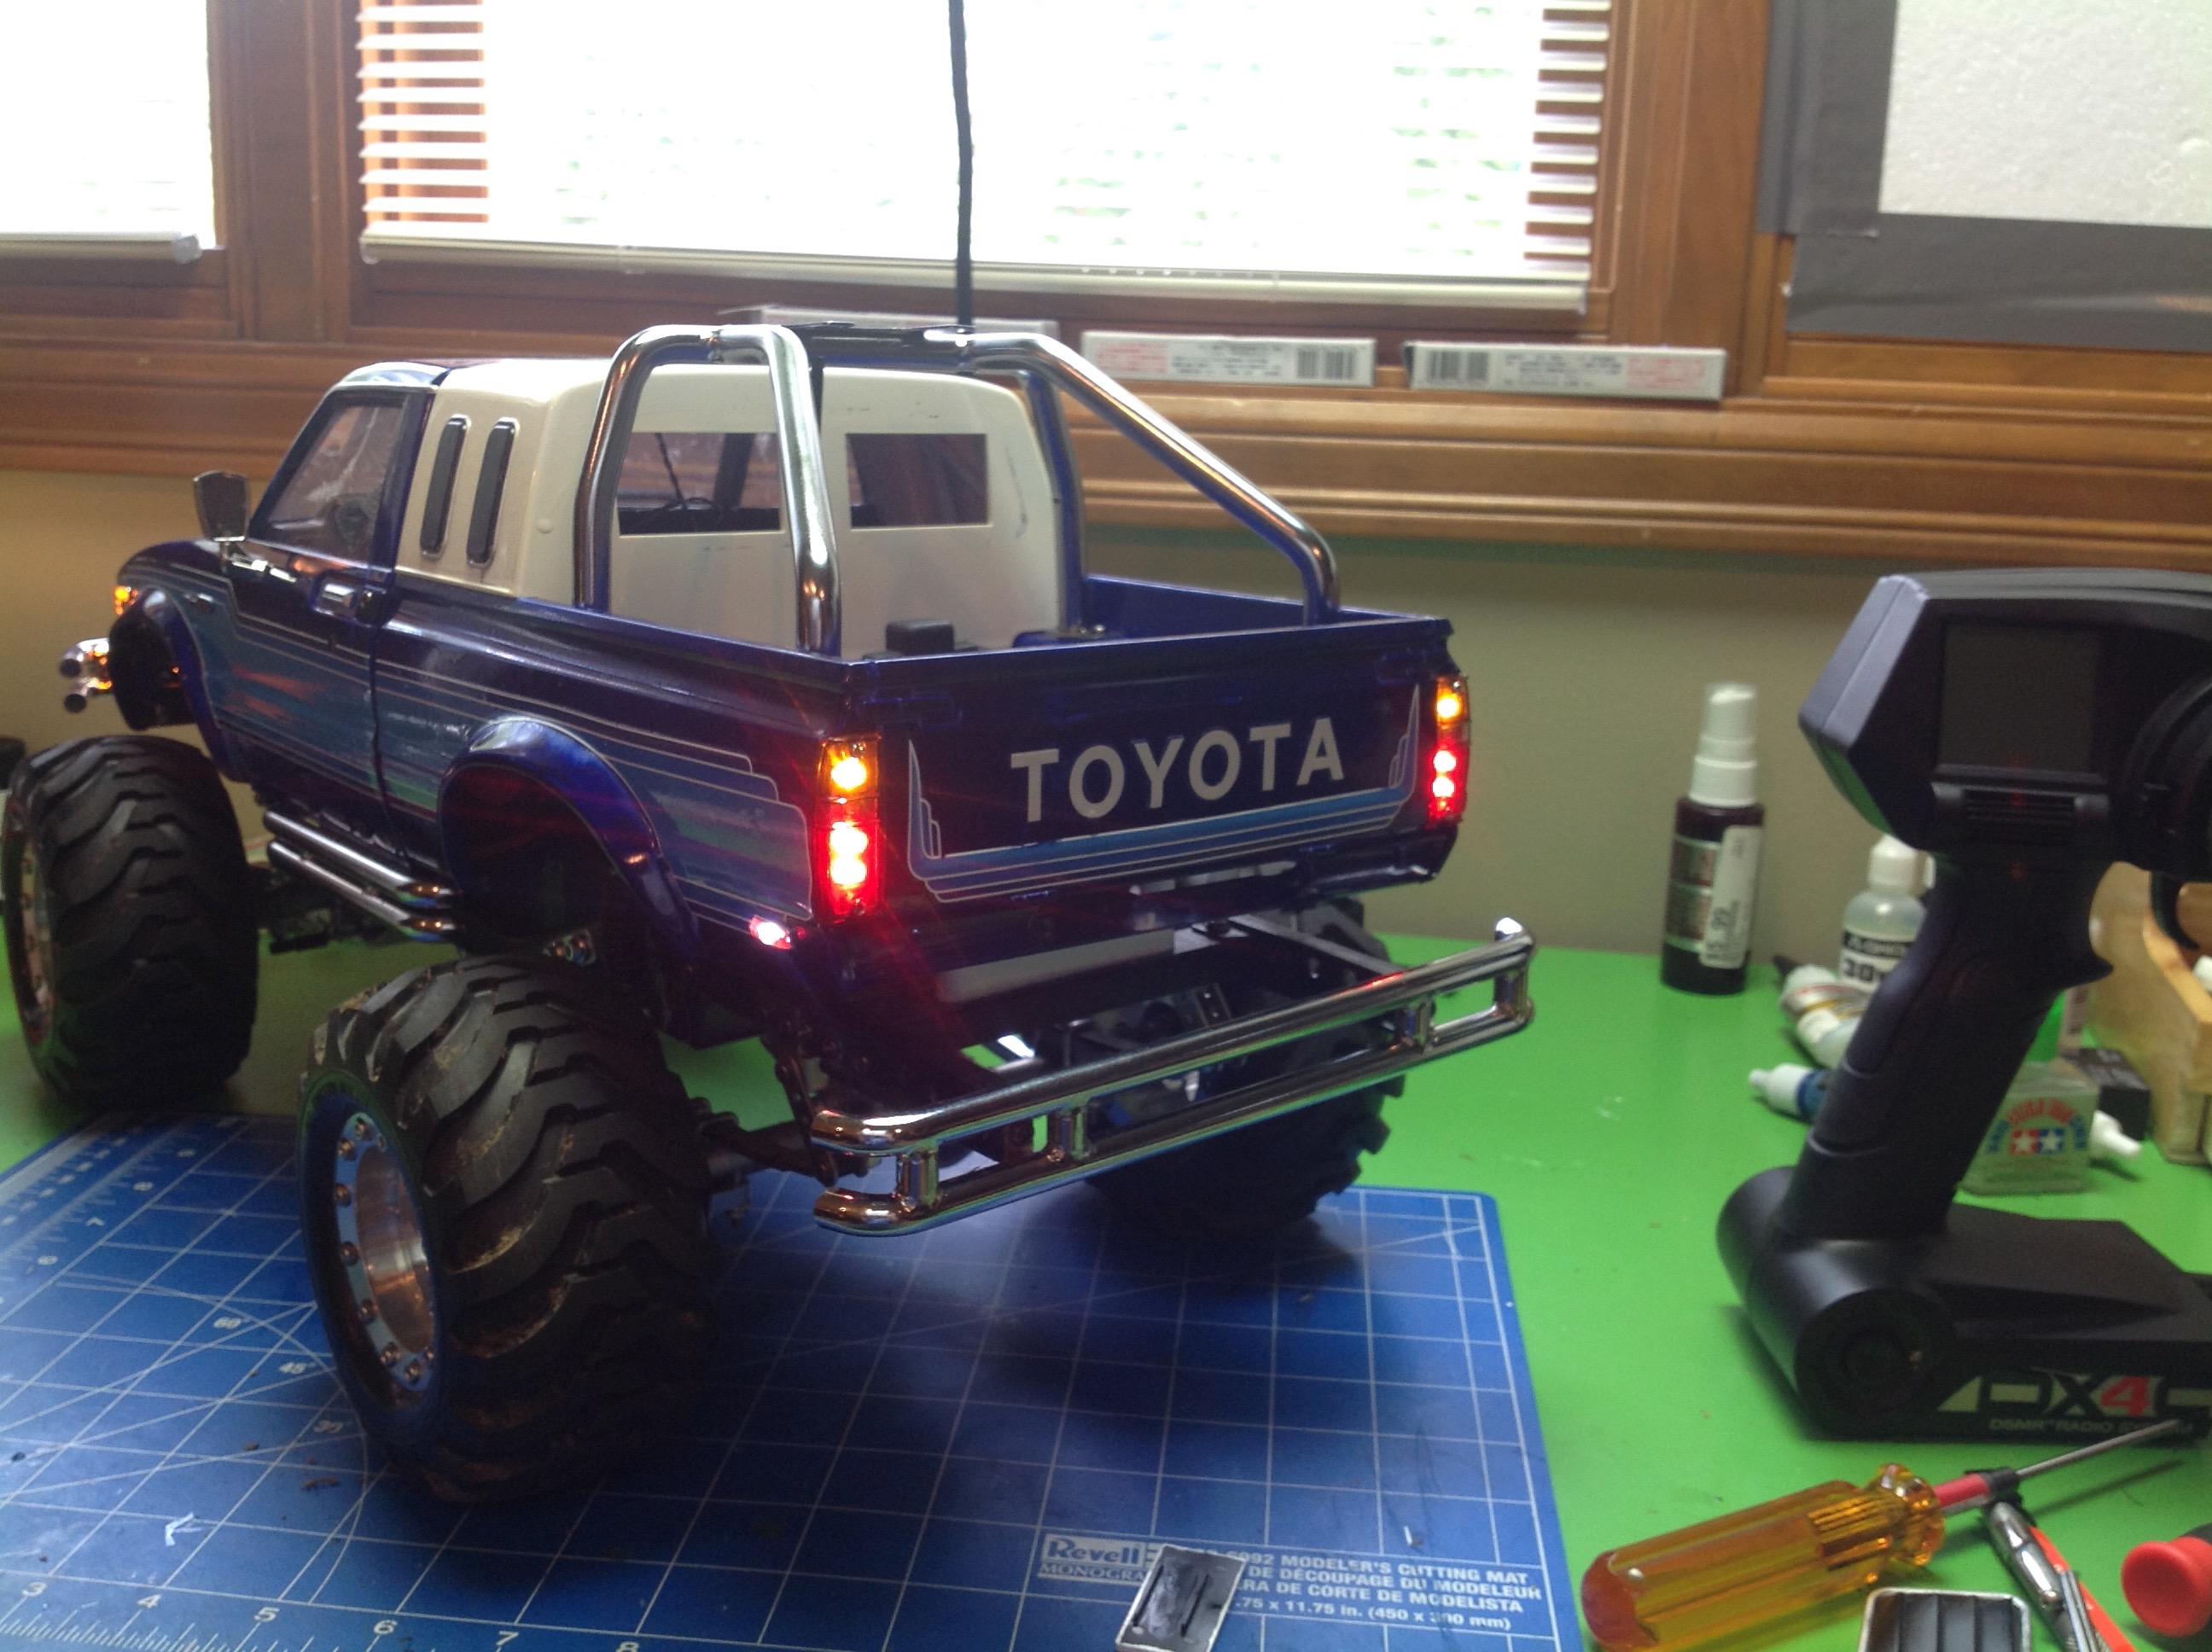
Everything is routed neatly enough and hidden that you hardly know what a
mess it was. When everything is hooked up and working, it looks
like the
picture on the right. The headlights are halogen colored, but the
foglights are white. At one point I also had 4 more fog lights on
top of the roll cage, but I didn't like the way they looked. They
ruined the scale appearance somehow so I took them off and also pulled
off the ugly brazed brass light mounting tabs from the roll bar.
There's one little bit of hidden trickery. The TLU-02 supports a
total of 4 running lights, but I needed 6. This means I needed to
wire the last pair into an AUX channel. Sadly, all the AUX
channels flash at full throttle which looked stupid. To solve
this, I set my radio to 120% on the throttle channel and then calibrated
the TLU-02 using the radio. When I set the radio back to 100%,
the TLU never registers full throttle and therefore never flashes!
Just what I needed. The turn signals blink when turning, the
hazards blink when stopped, the brake lights get brighter when braking,
and the reverse lights come on when backing. There are 3 modes so
you can have only the marker lights on, add the headlights, and then add
the fog lights. I usually run in Mode 2 with the fog lights off
unless it is night.
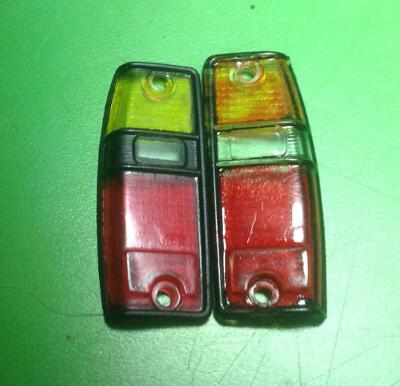
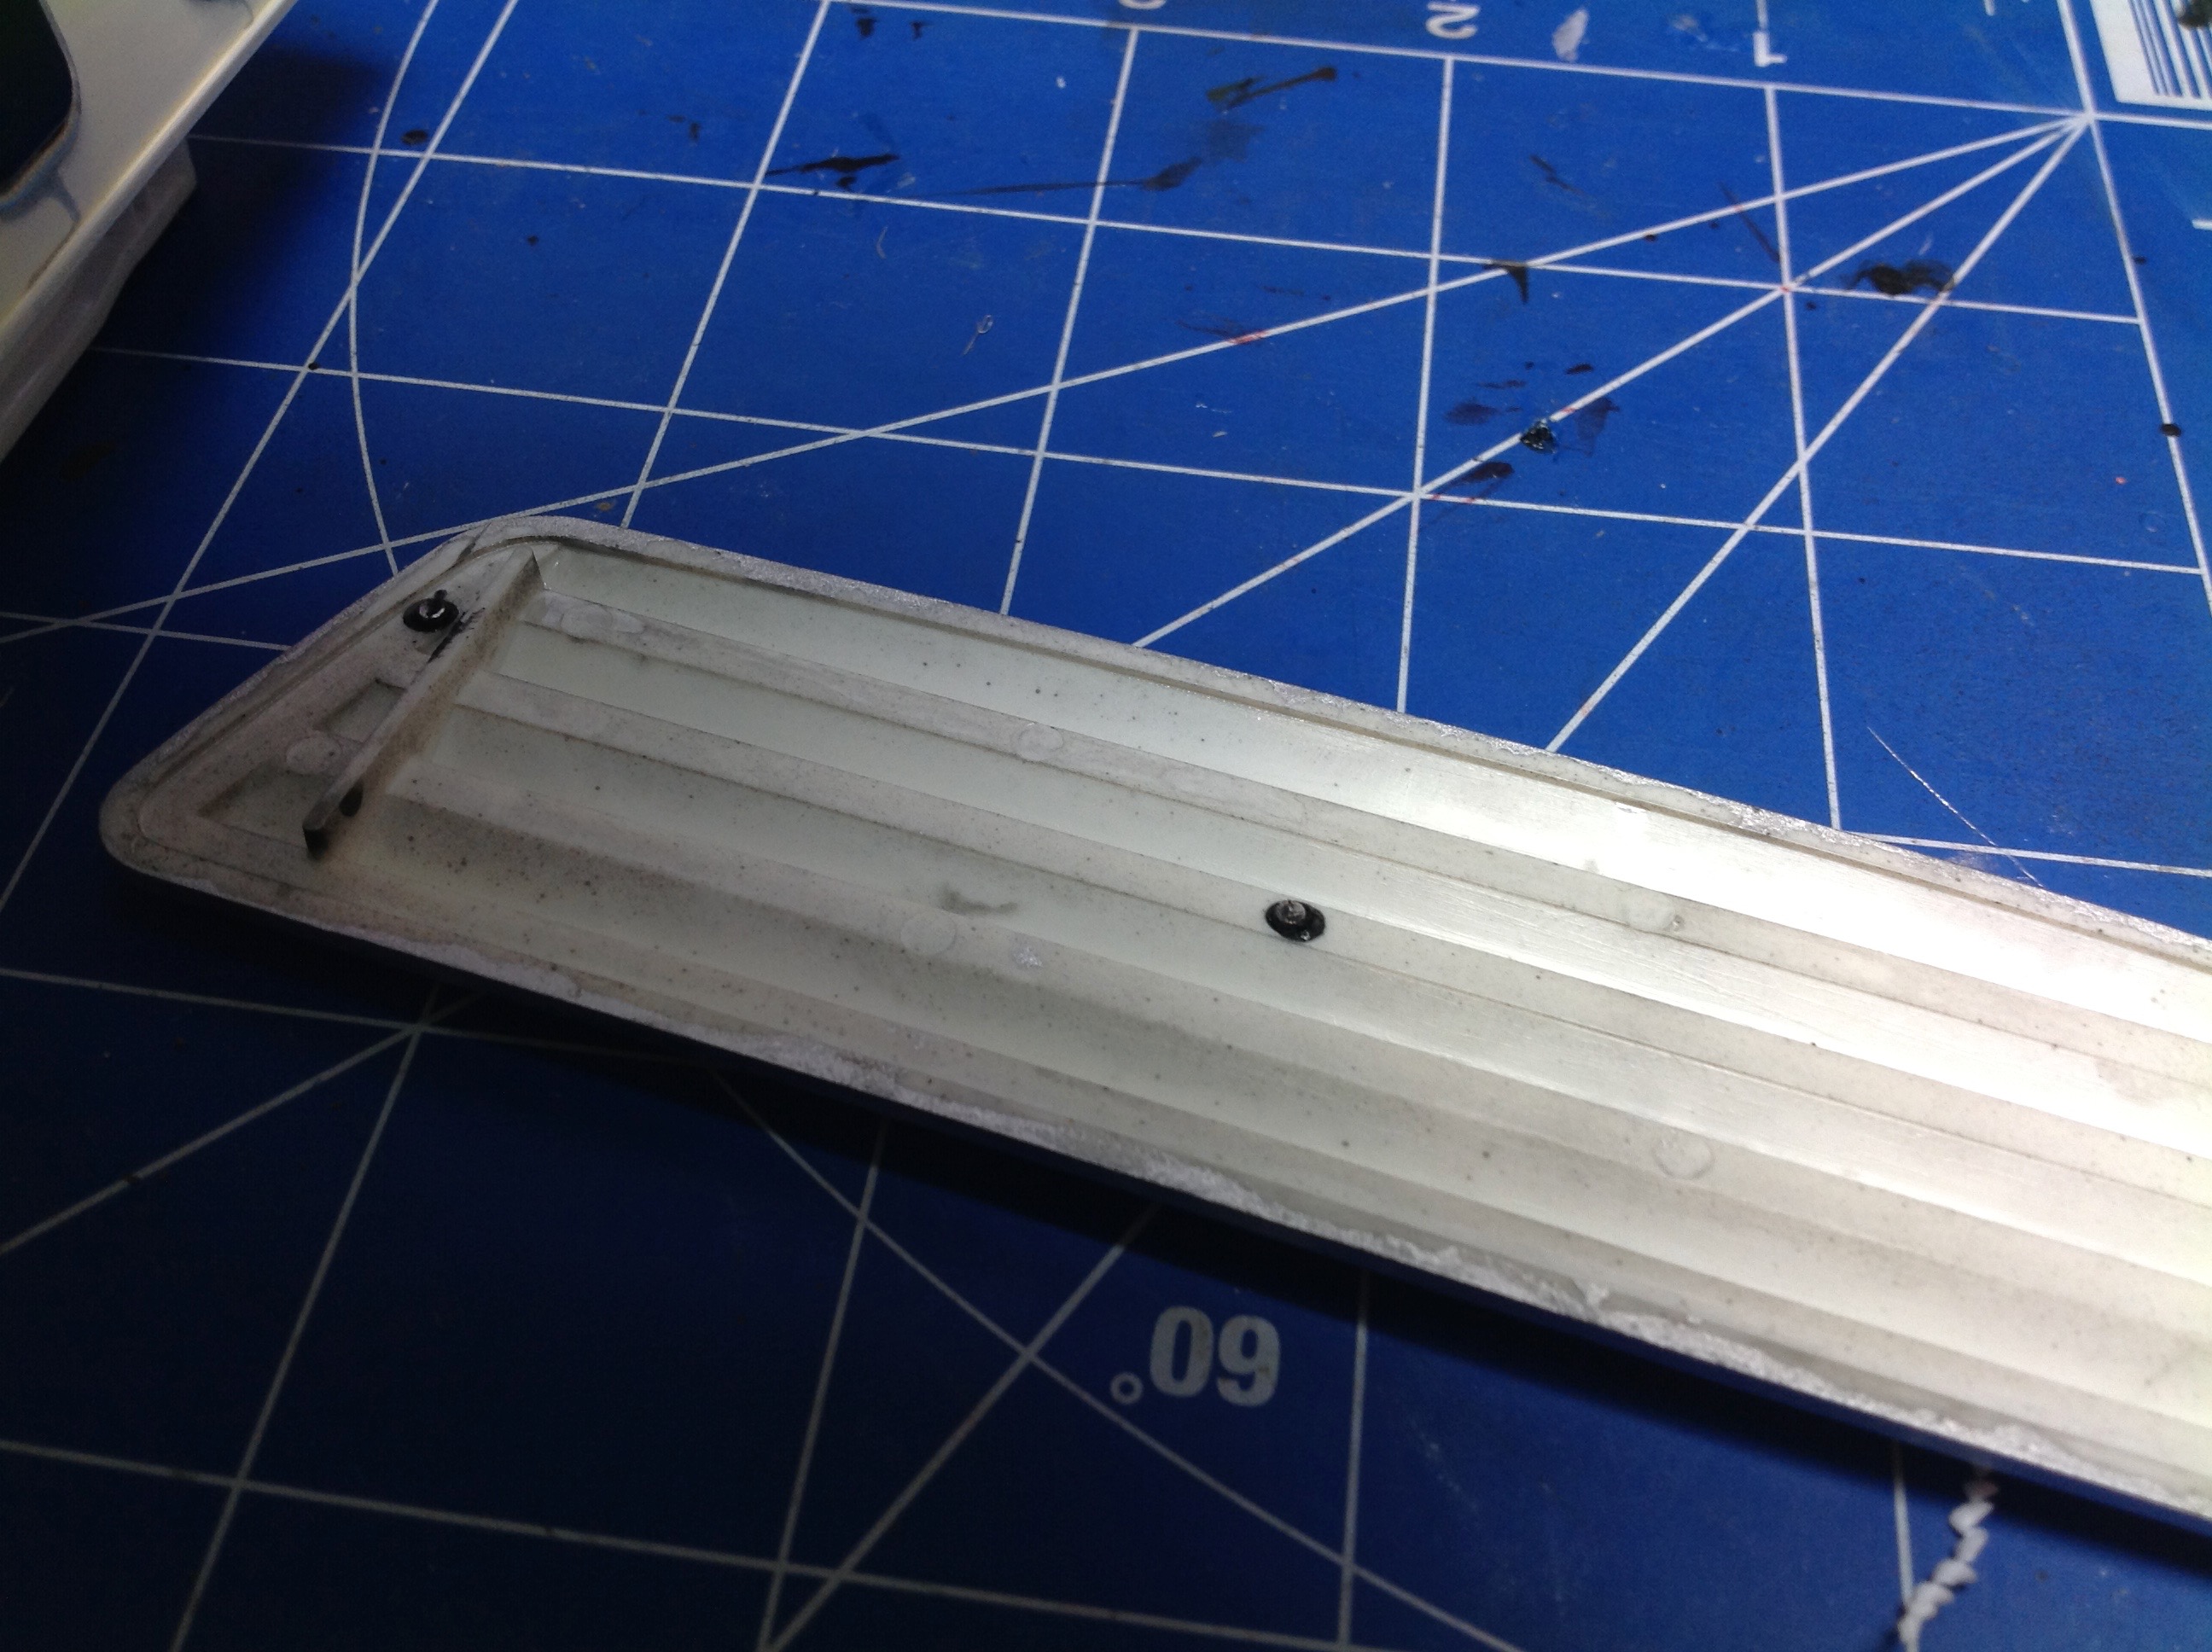
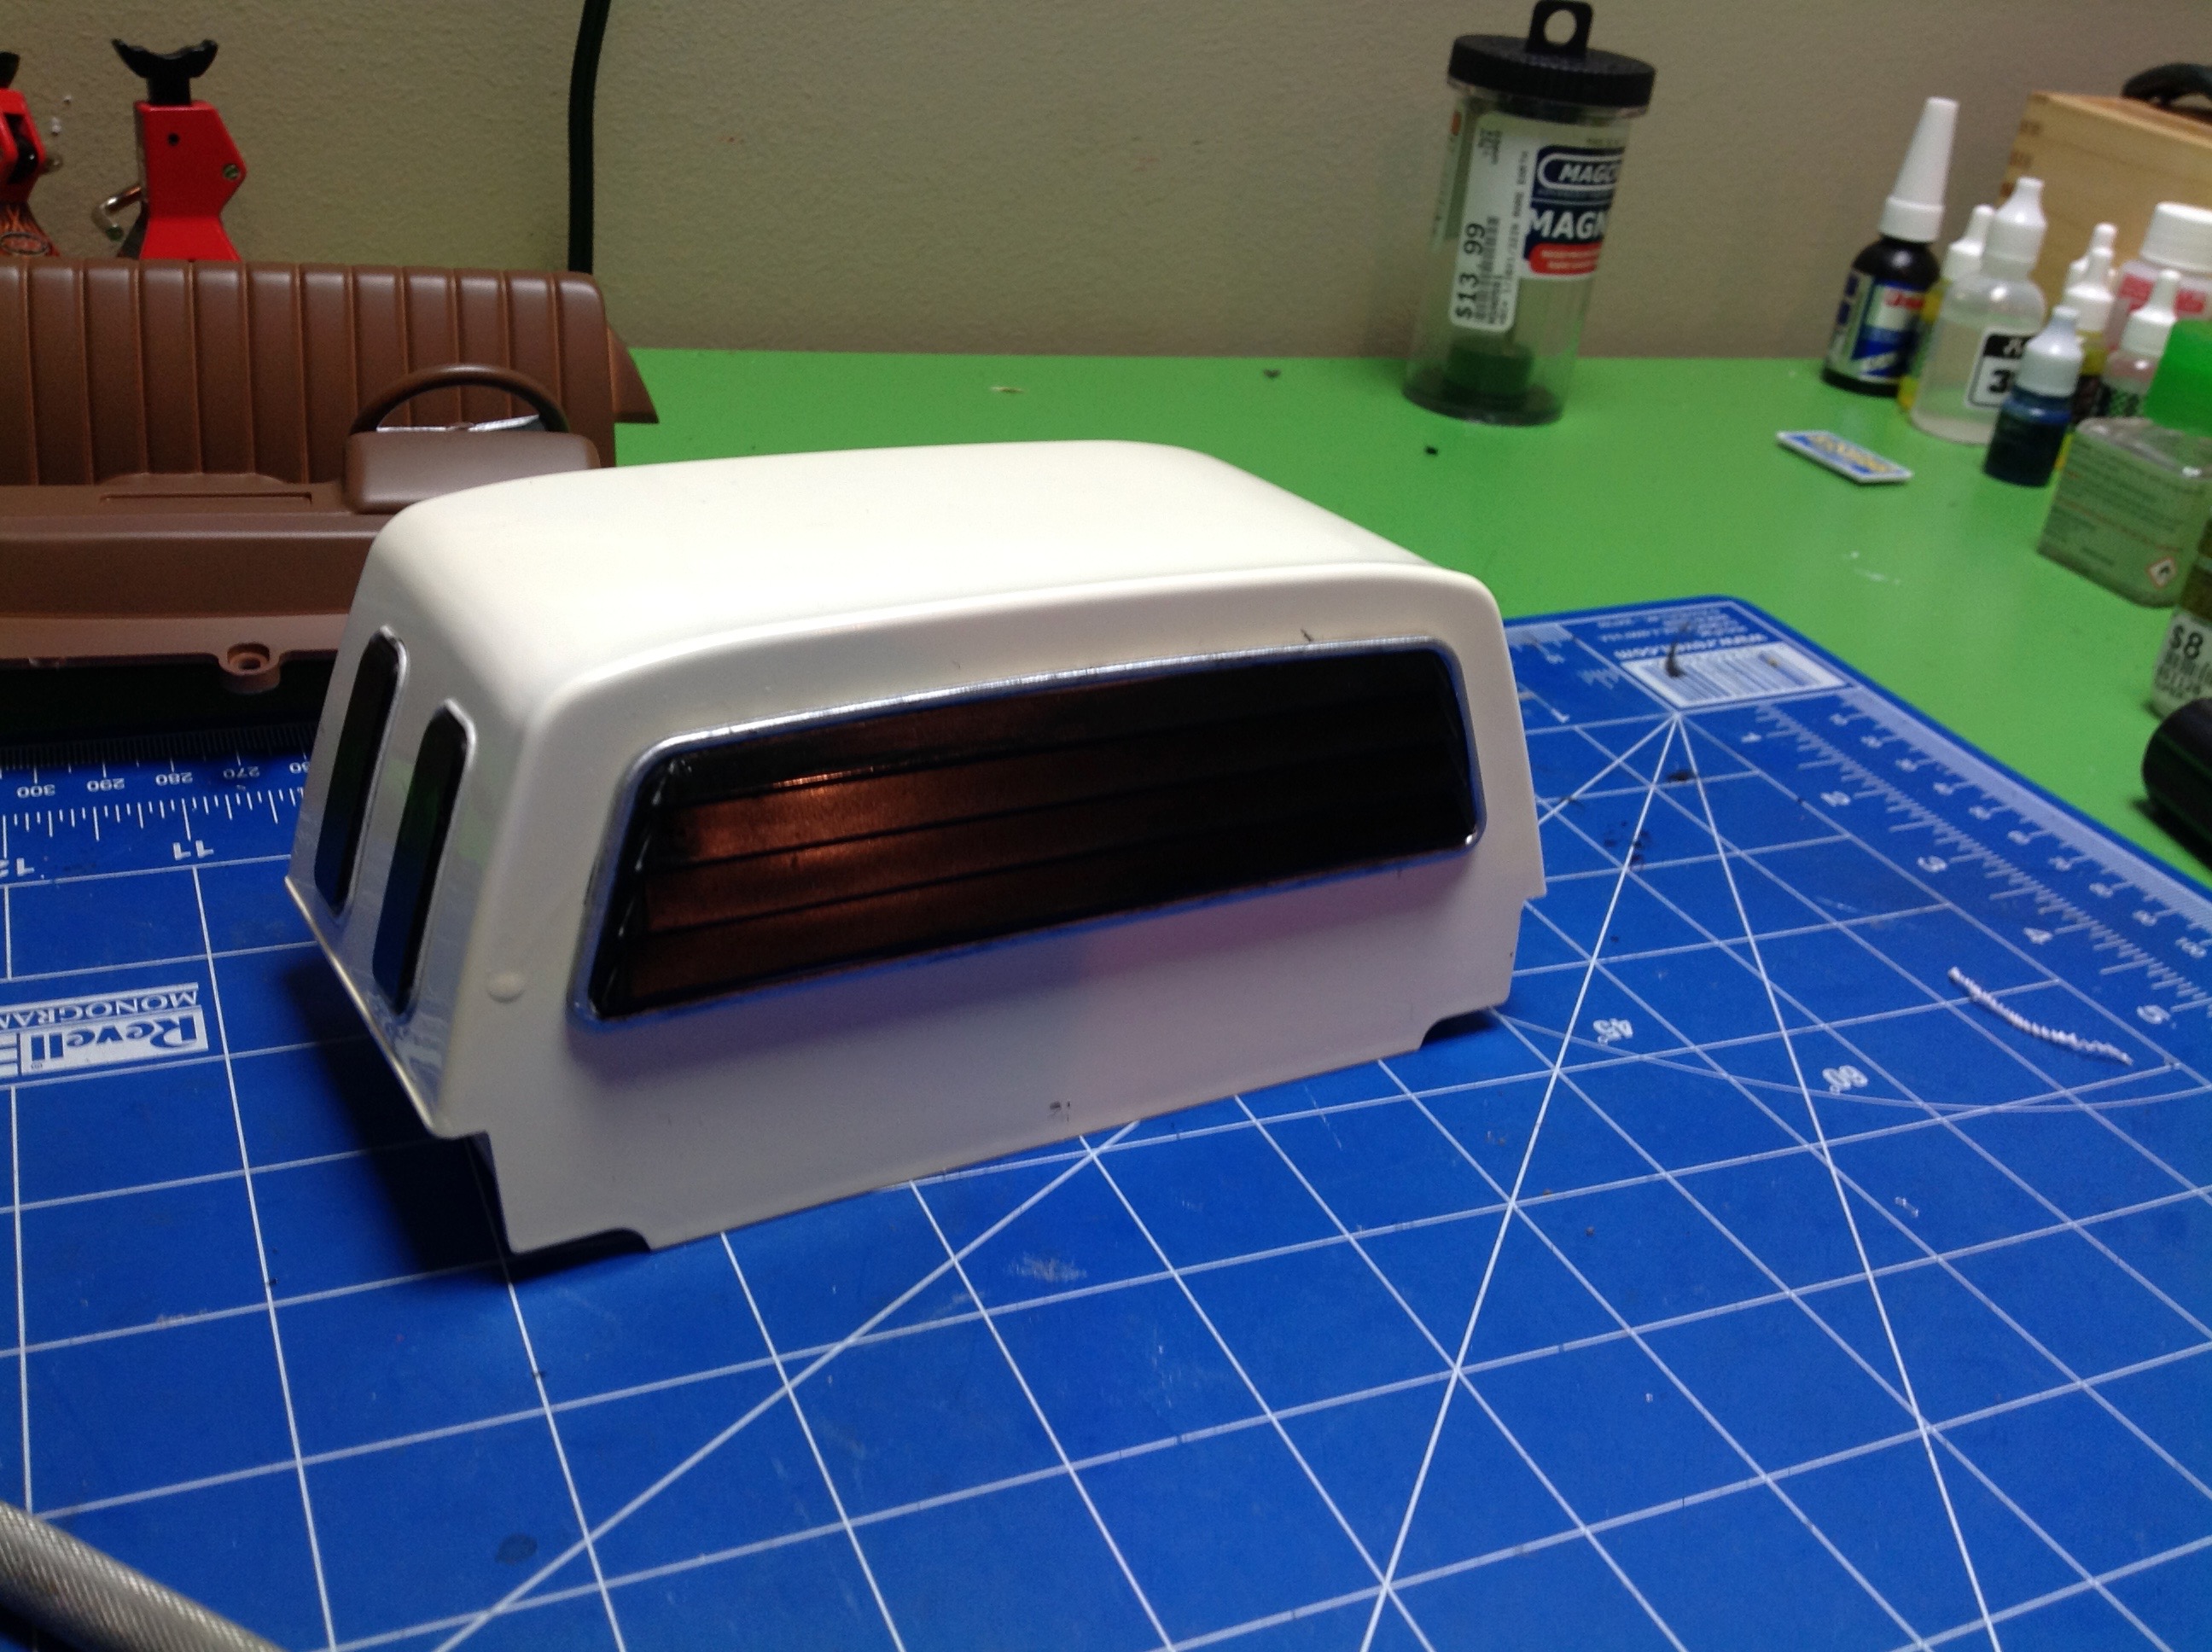
This image shows the very expensive RC4WD detailed tail light lens
(left) compared with a stock lens (right).
Sadly, as you can see, they are not the right size. They are too
small so when you install them they look bad. I had to revert to
my stock painted versions. These are really for the RC4WD Mojave
body and should not be advertised for the Bruiser or Mountaineer.
Phase 2:
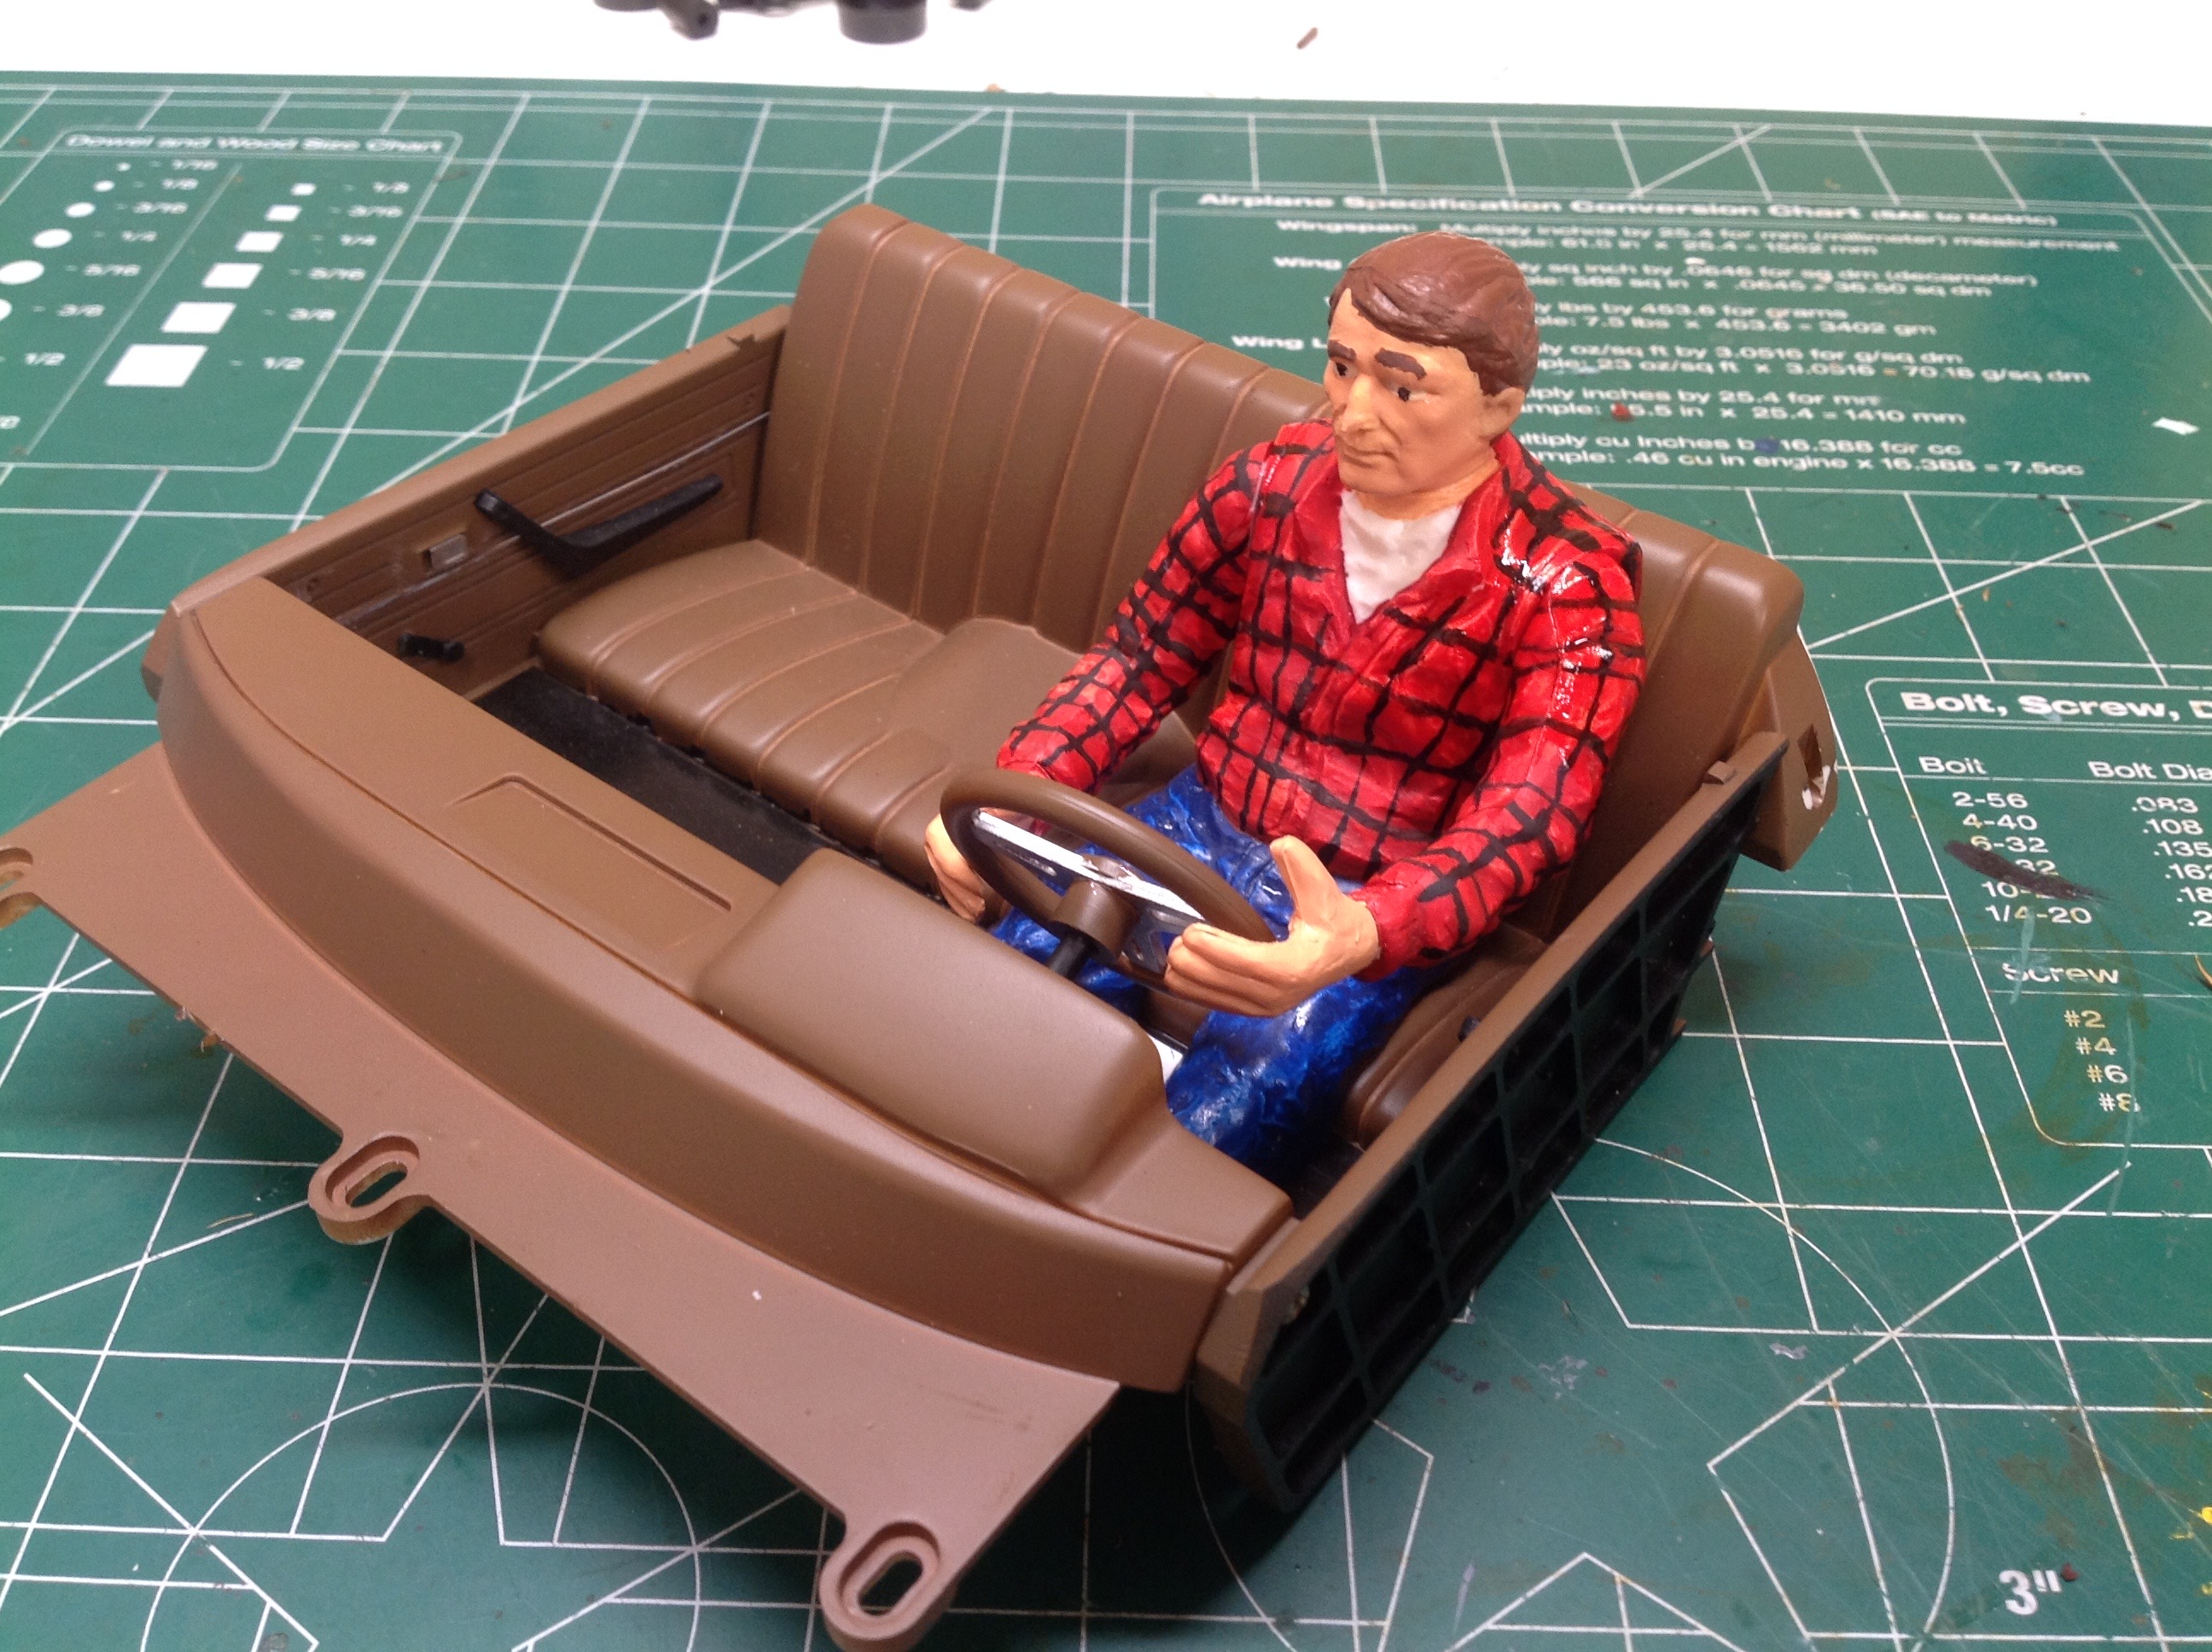
I don't know what took me so long, but I finally got around to putting a
driver figure in this truck. This is something that should have
been there from the start. My daughter (who has a steadier hand
than me) painted the plaid on the flannel shirt. The shiny area on
his shoulder is just CA accelerator. It dried flat.
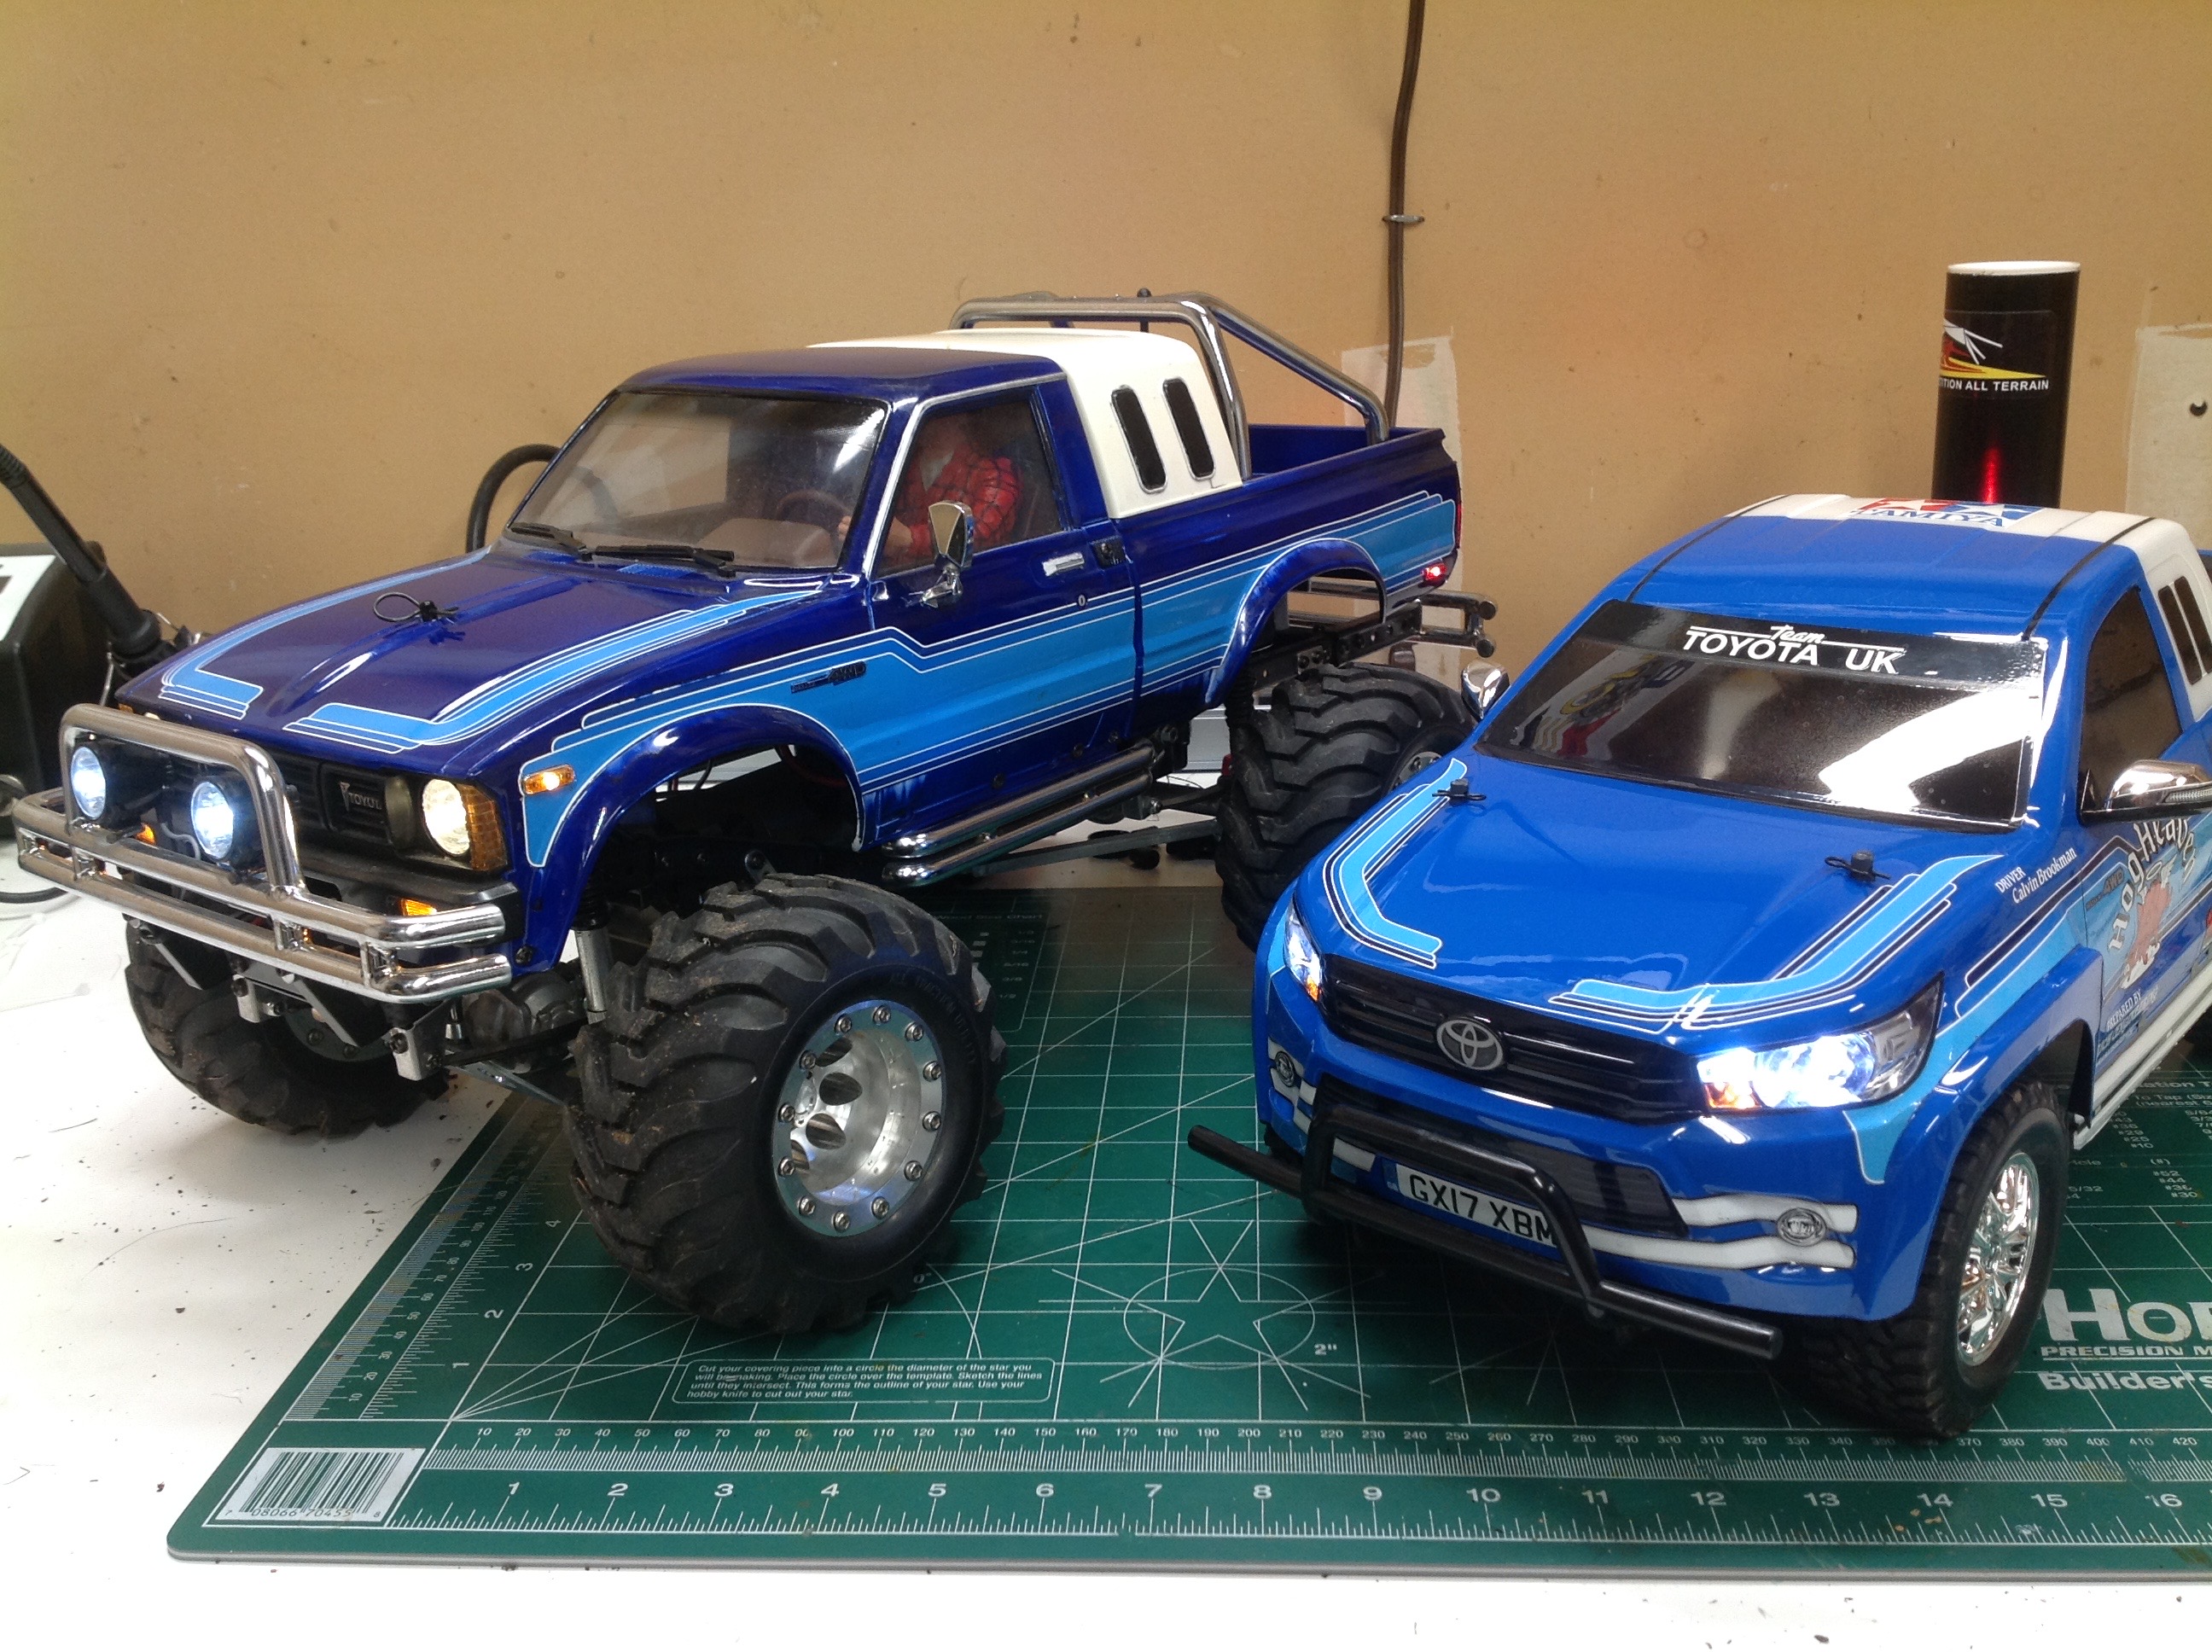
The only final photo I have of the driver installed is this comparison picture with the CC-01 Hilux.