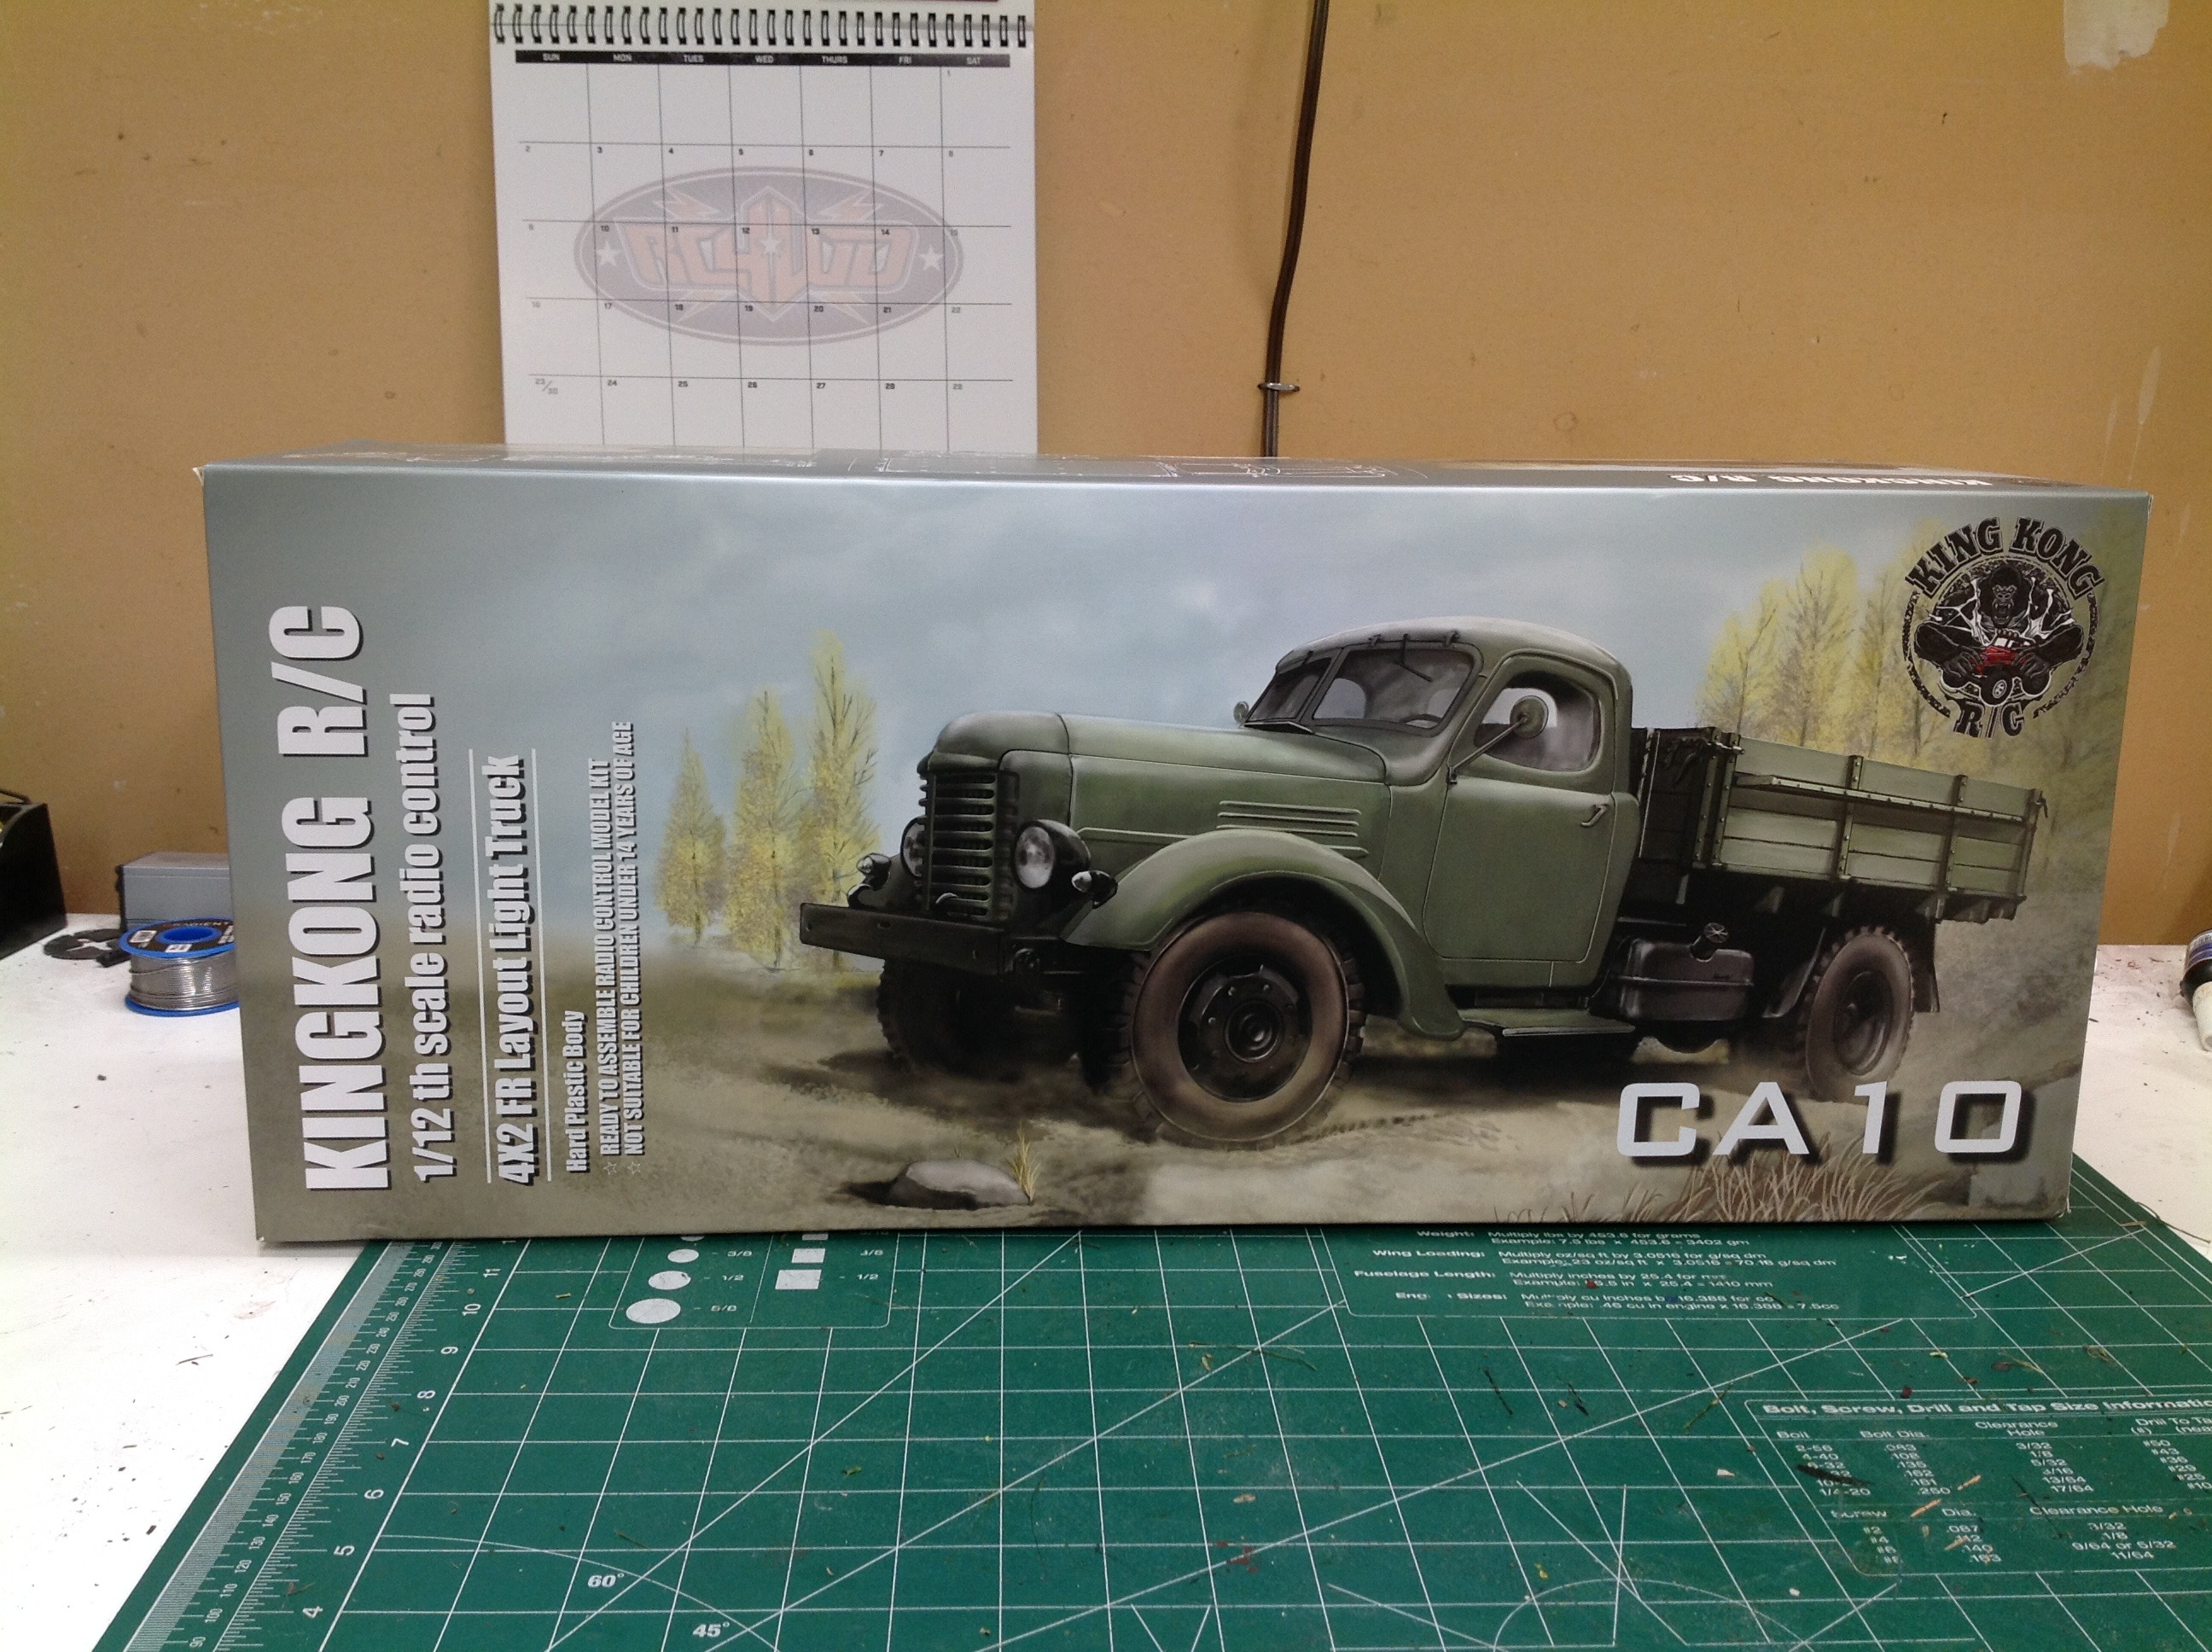
CA10 Project
Page 1: Building the Chassis
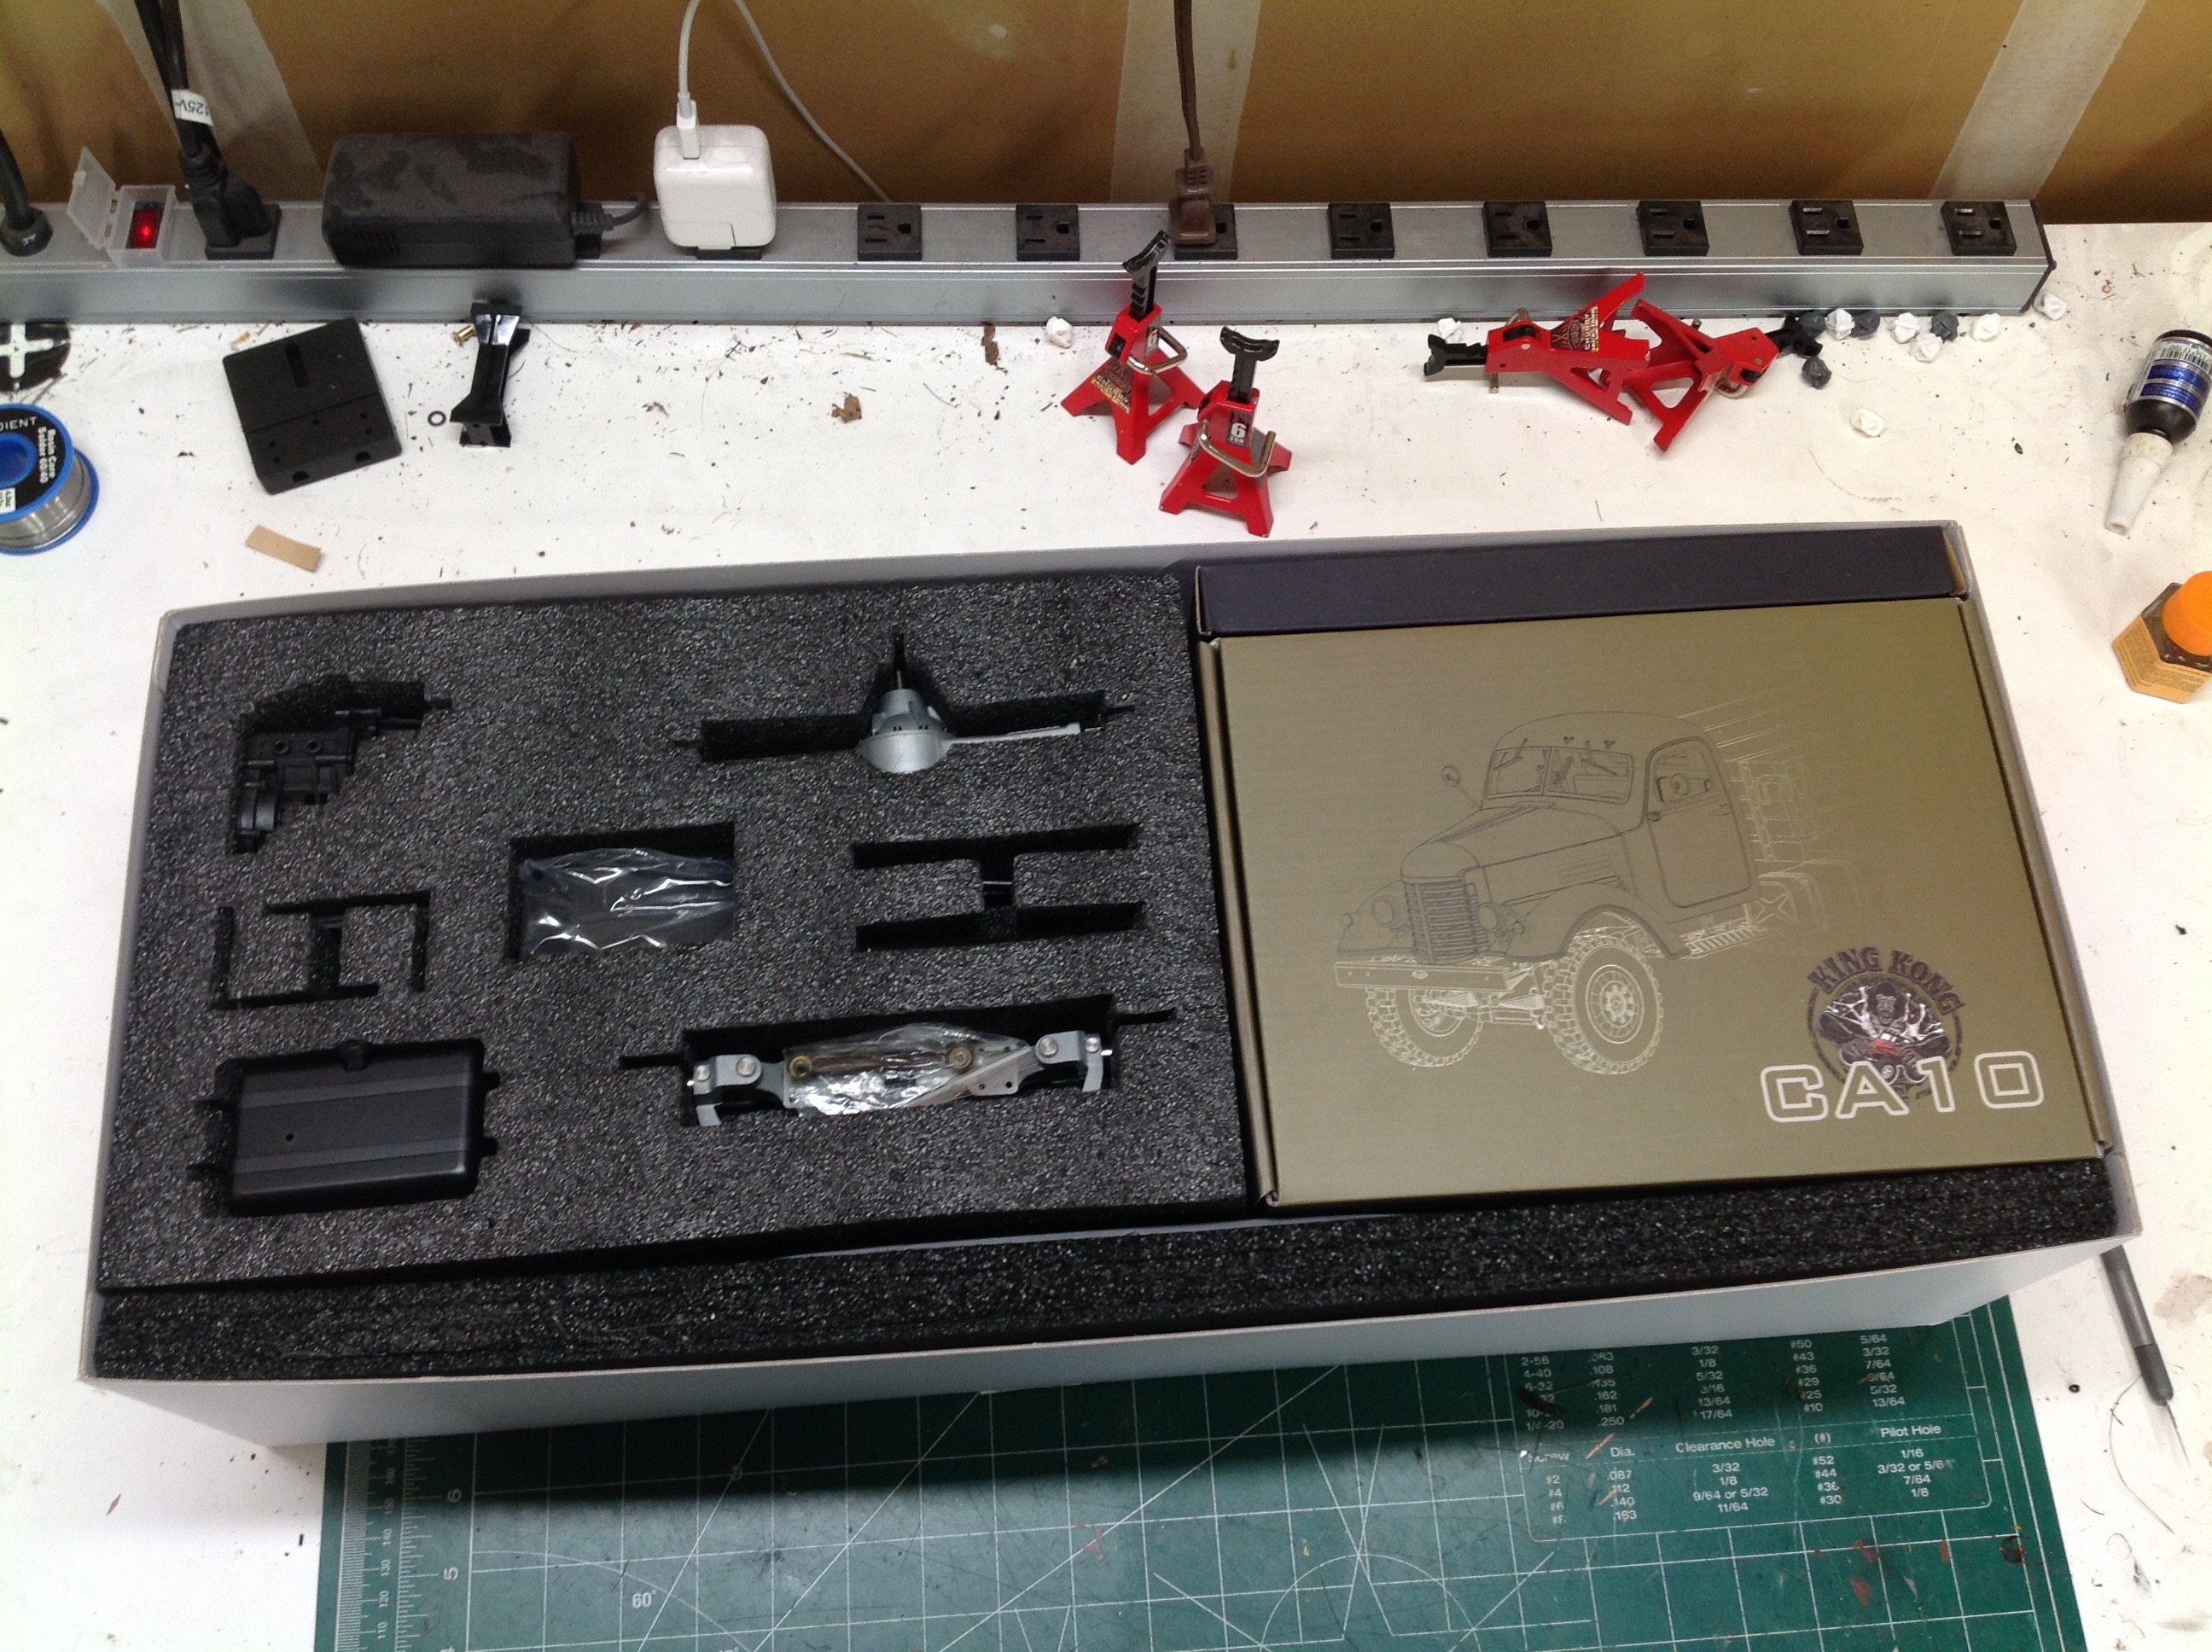
The CA10 comes in a deceptively small, but very heavy box. Inside
the contents are divided into chassis and body. The inner box on
the right contains everything needed for the cab.
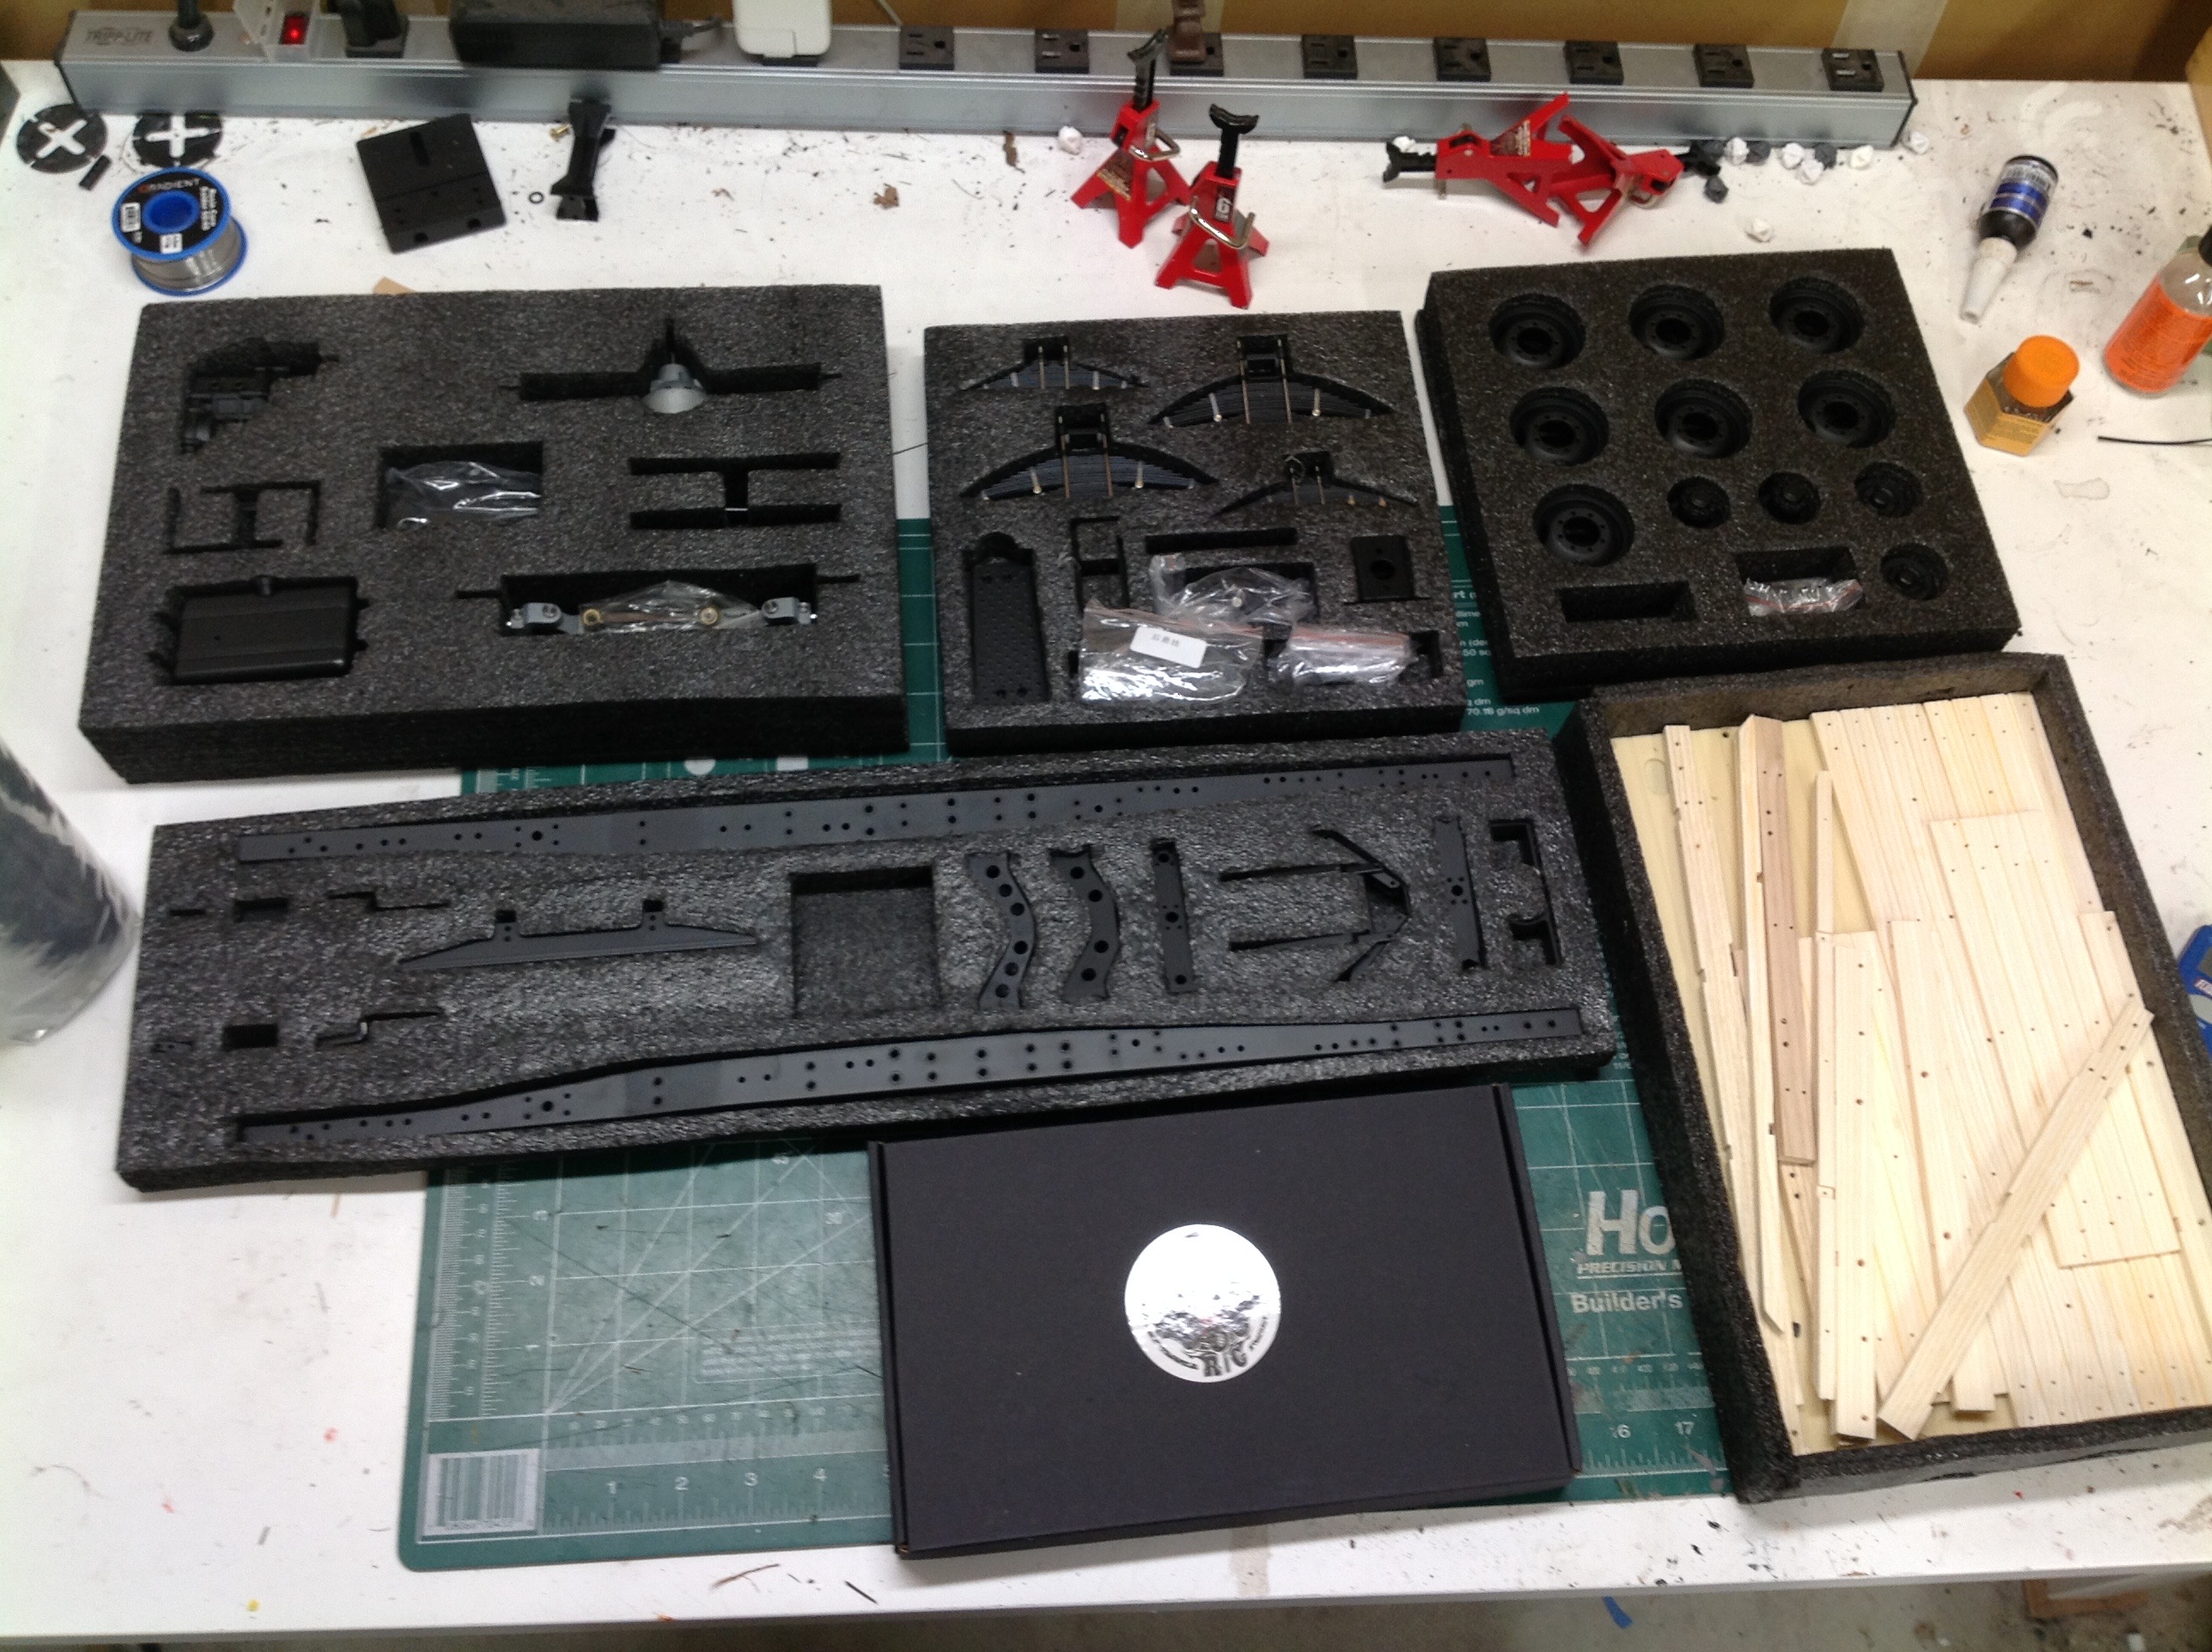
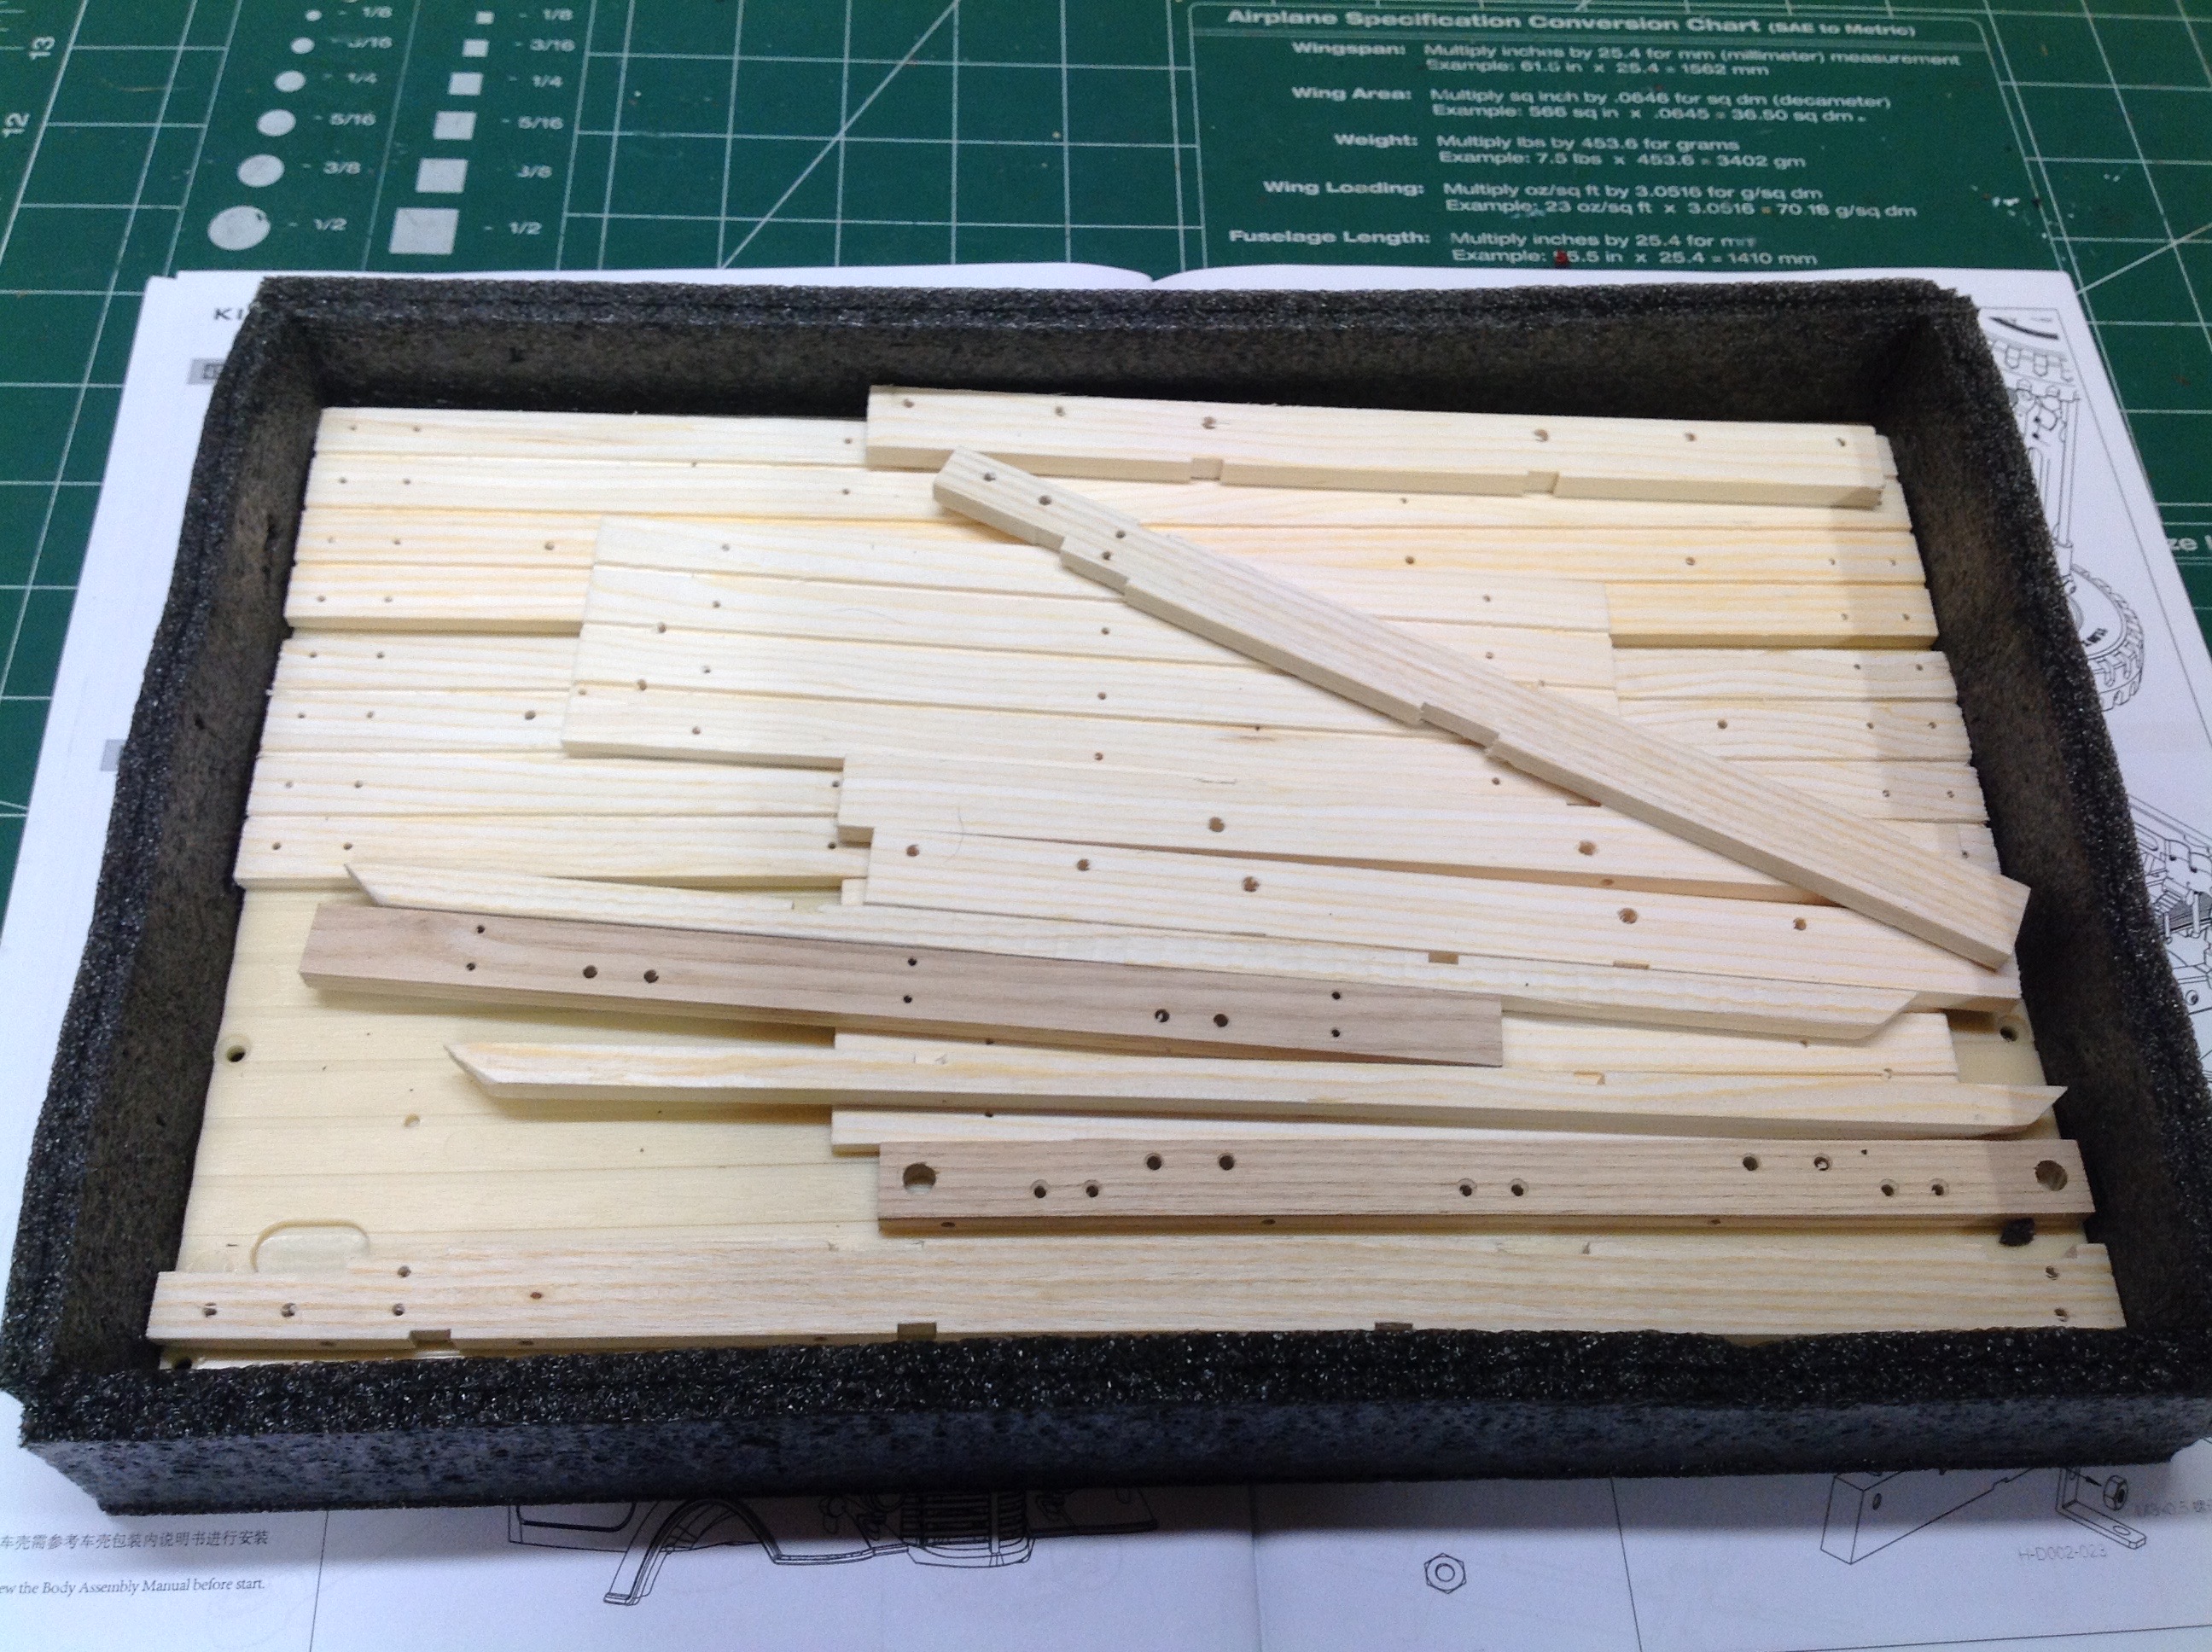
Virtually all of the parts for the chassis are packed in foam with
individual slots for each part. The bottom foam tray contains the
real wood parts for the bed. On the right you can see the huge
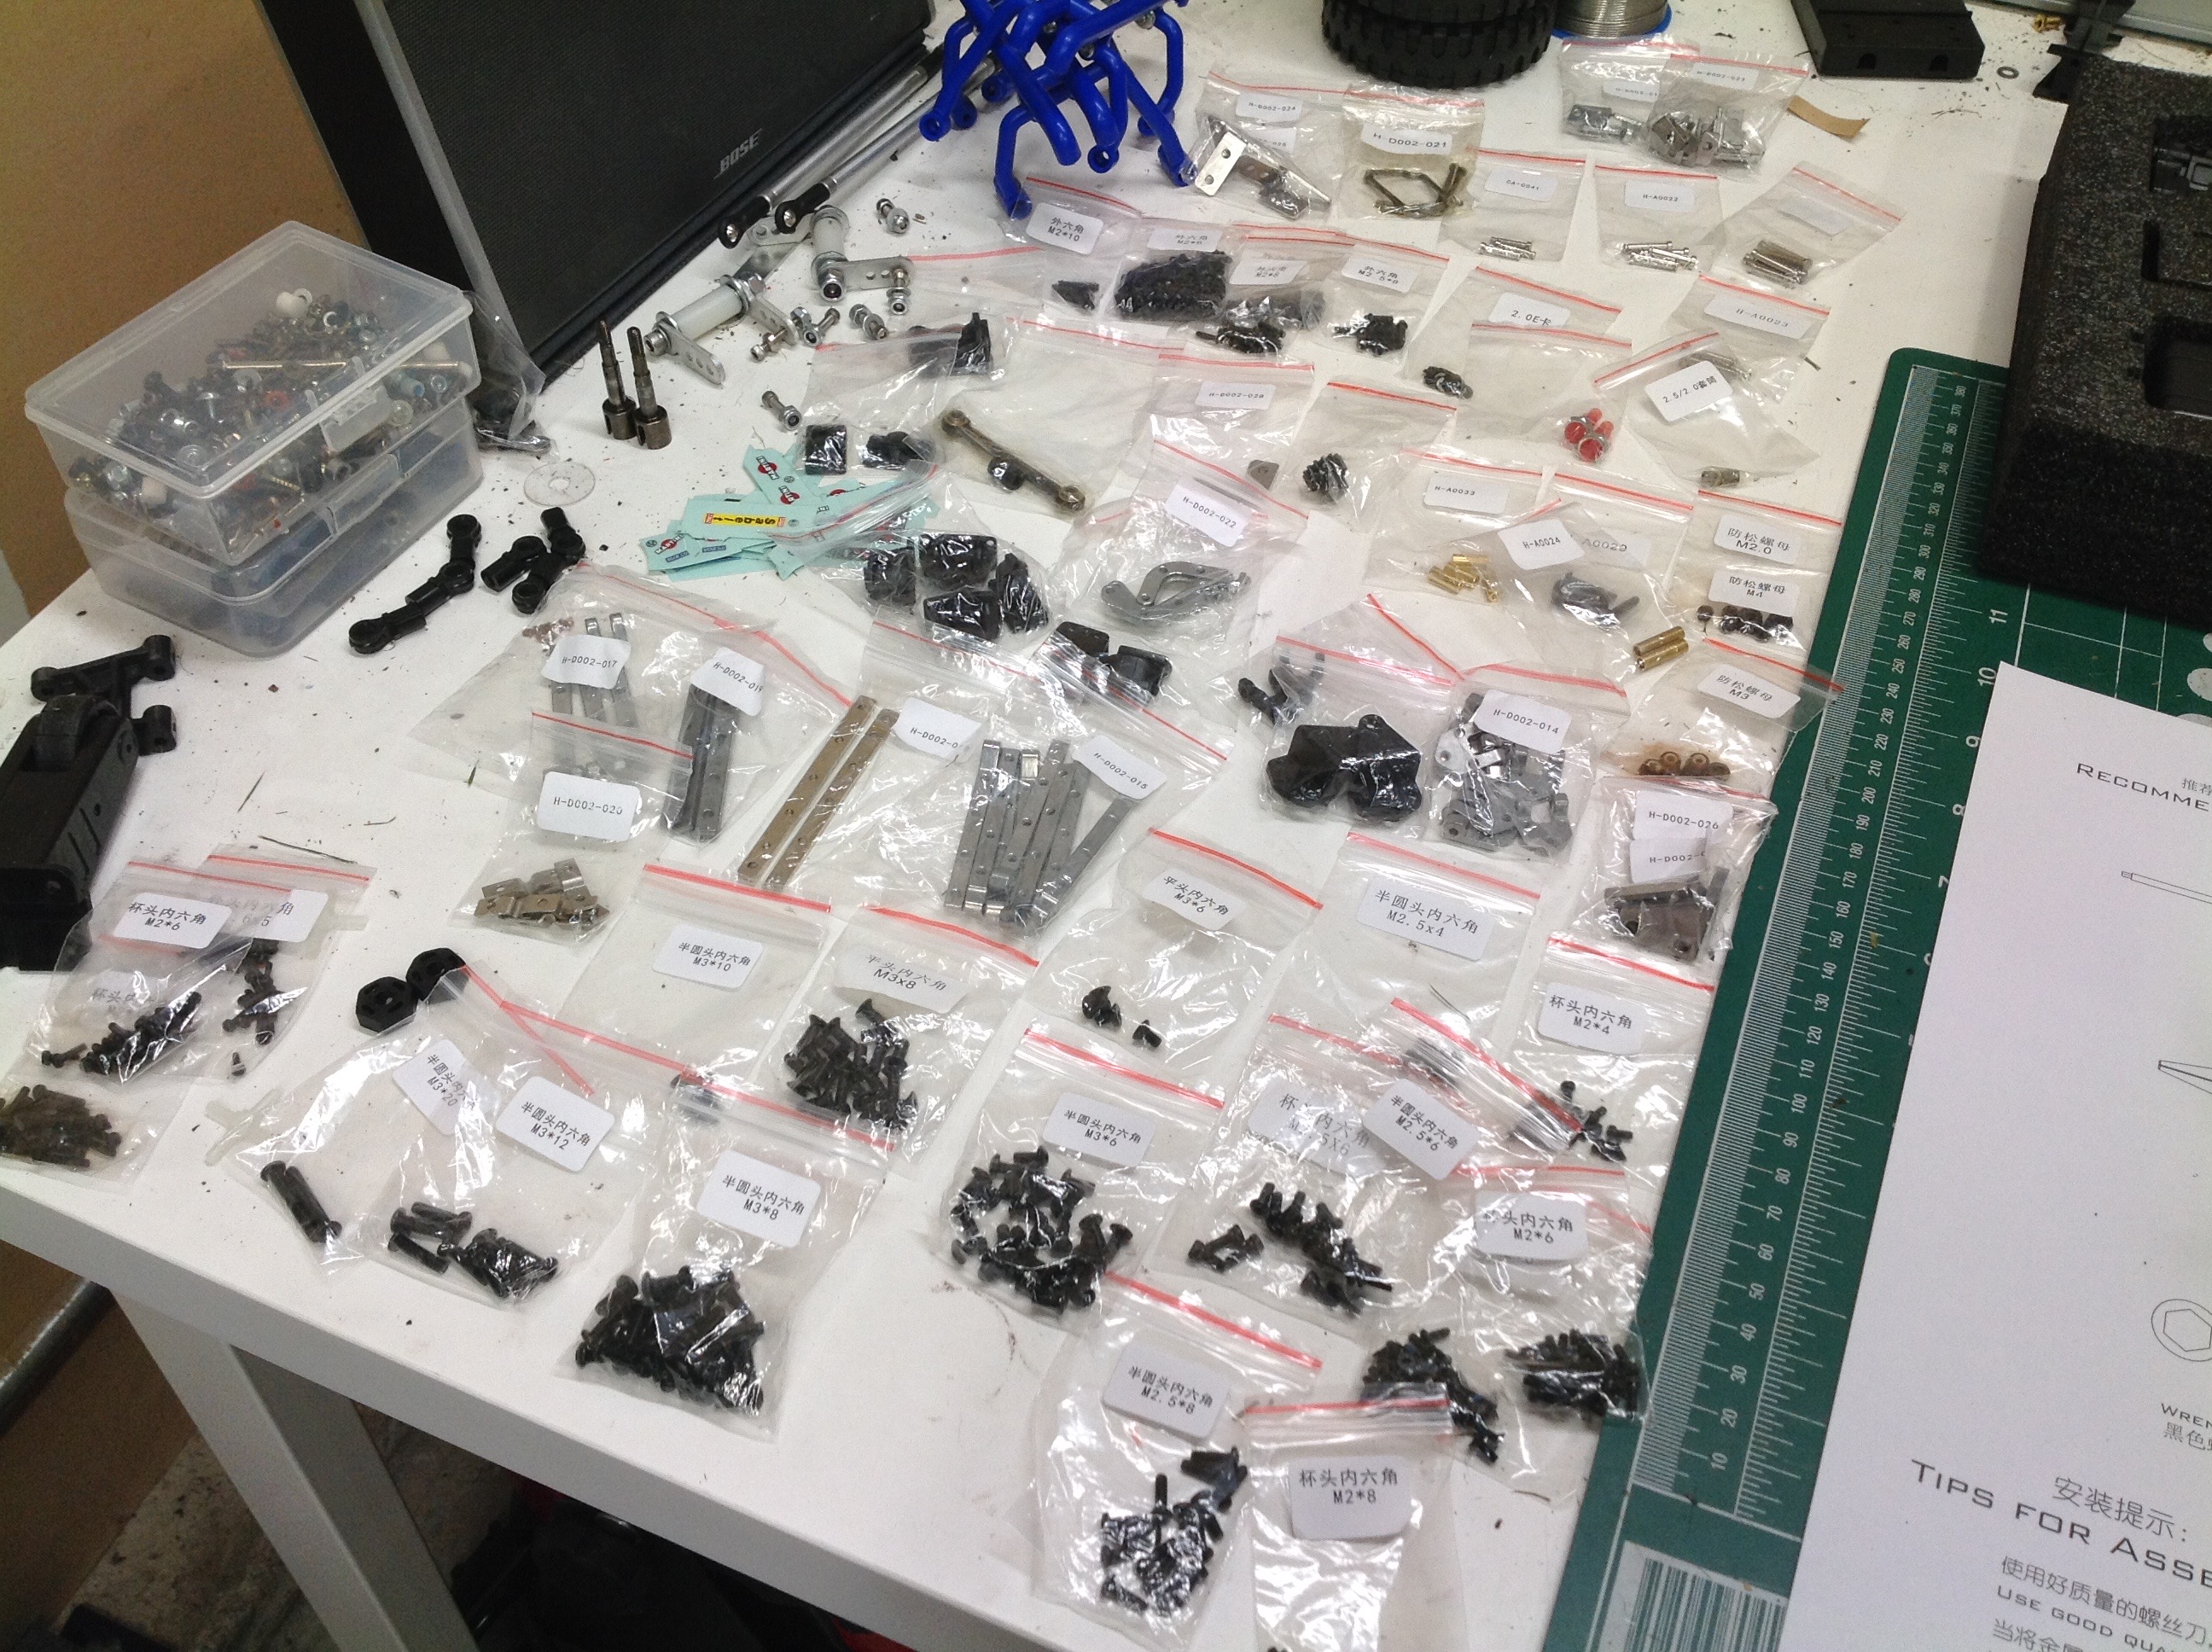
number of tiny hardware bags. Despite the small box, this is going
to be a serious build.
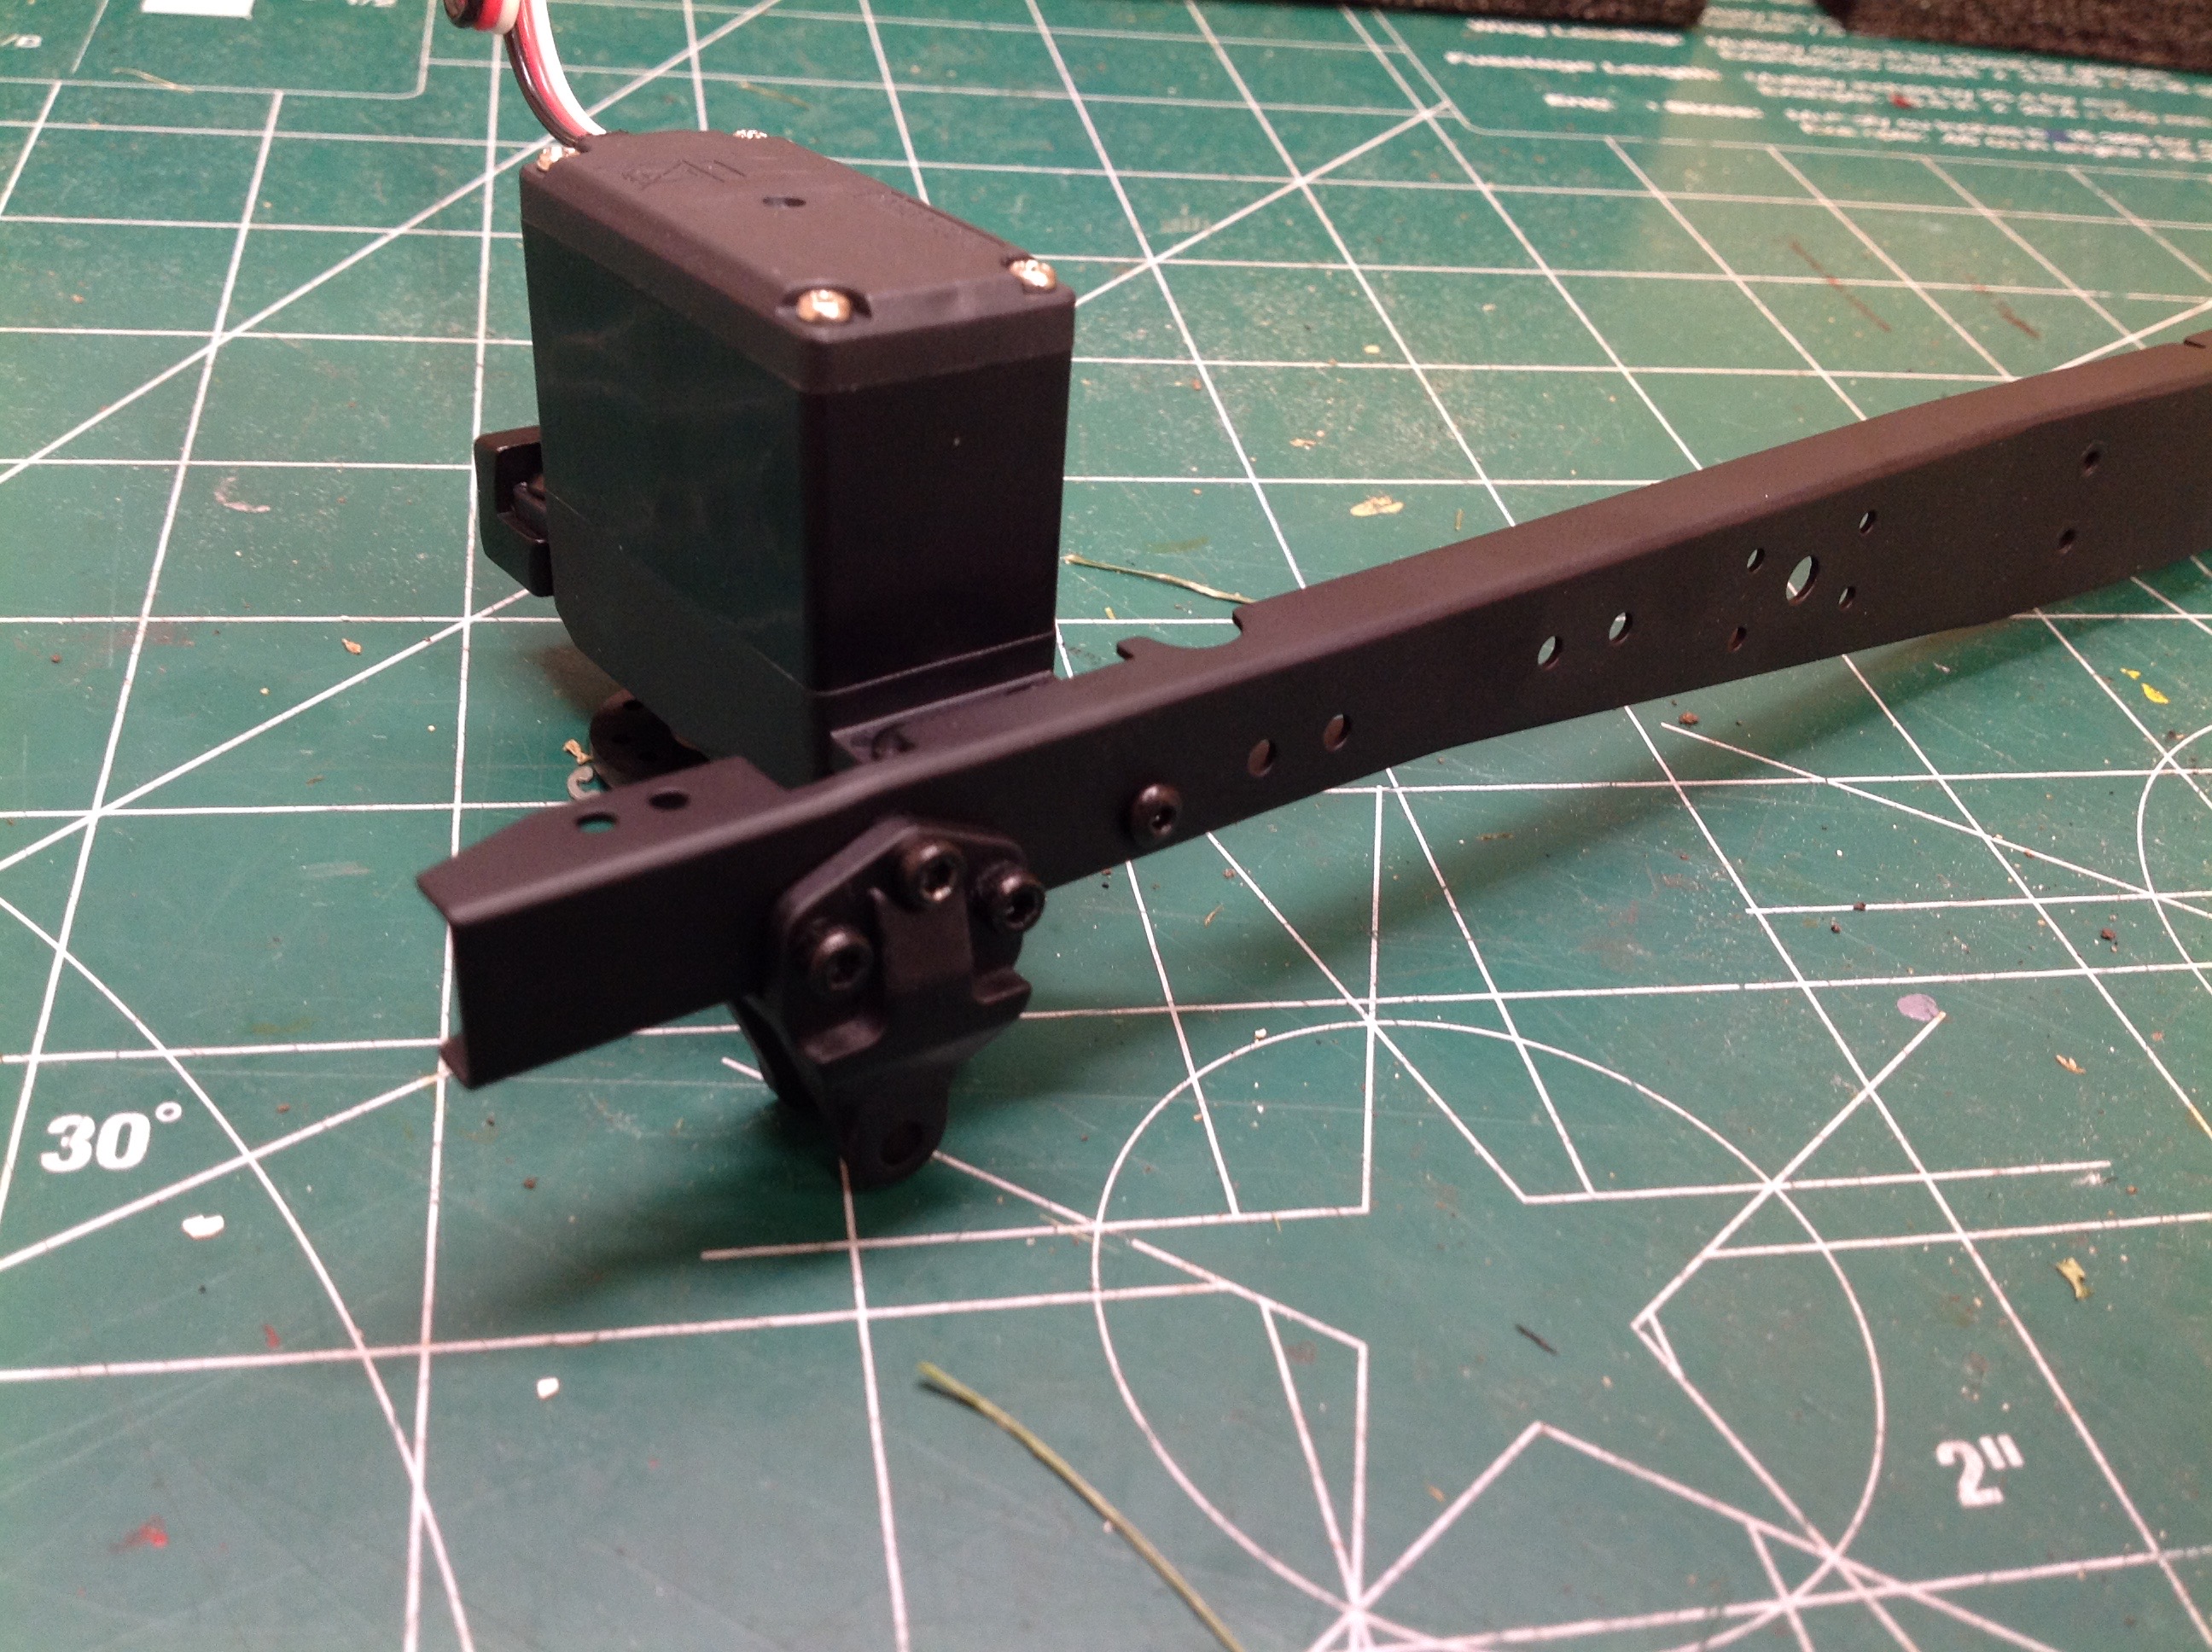
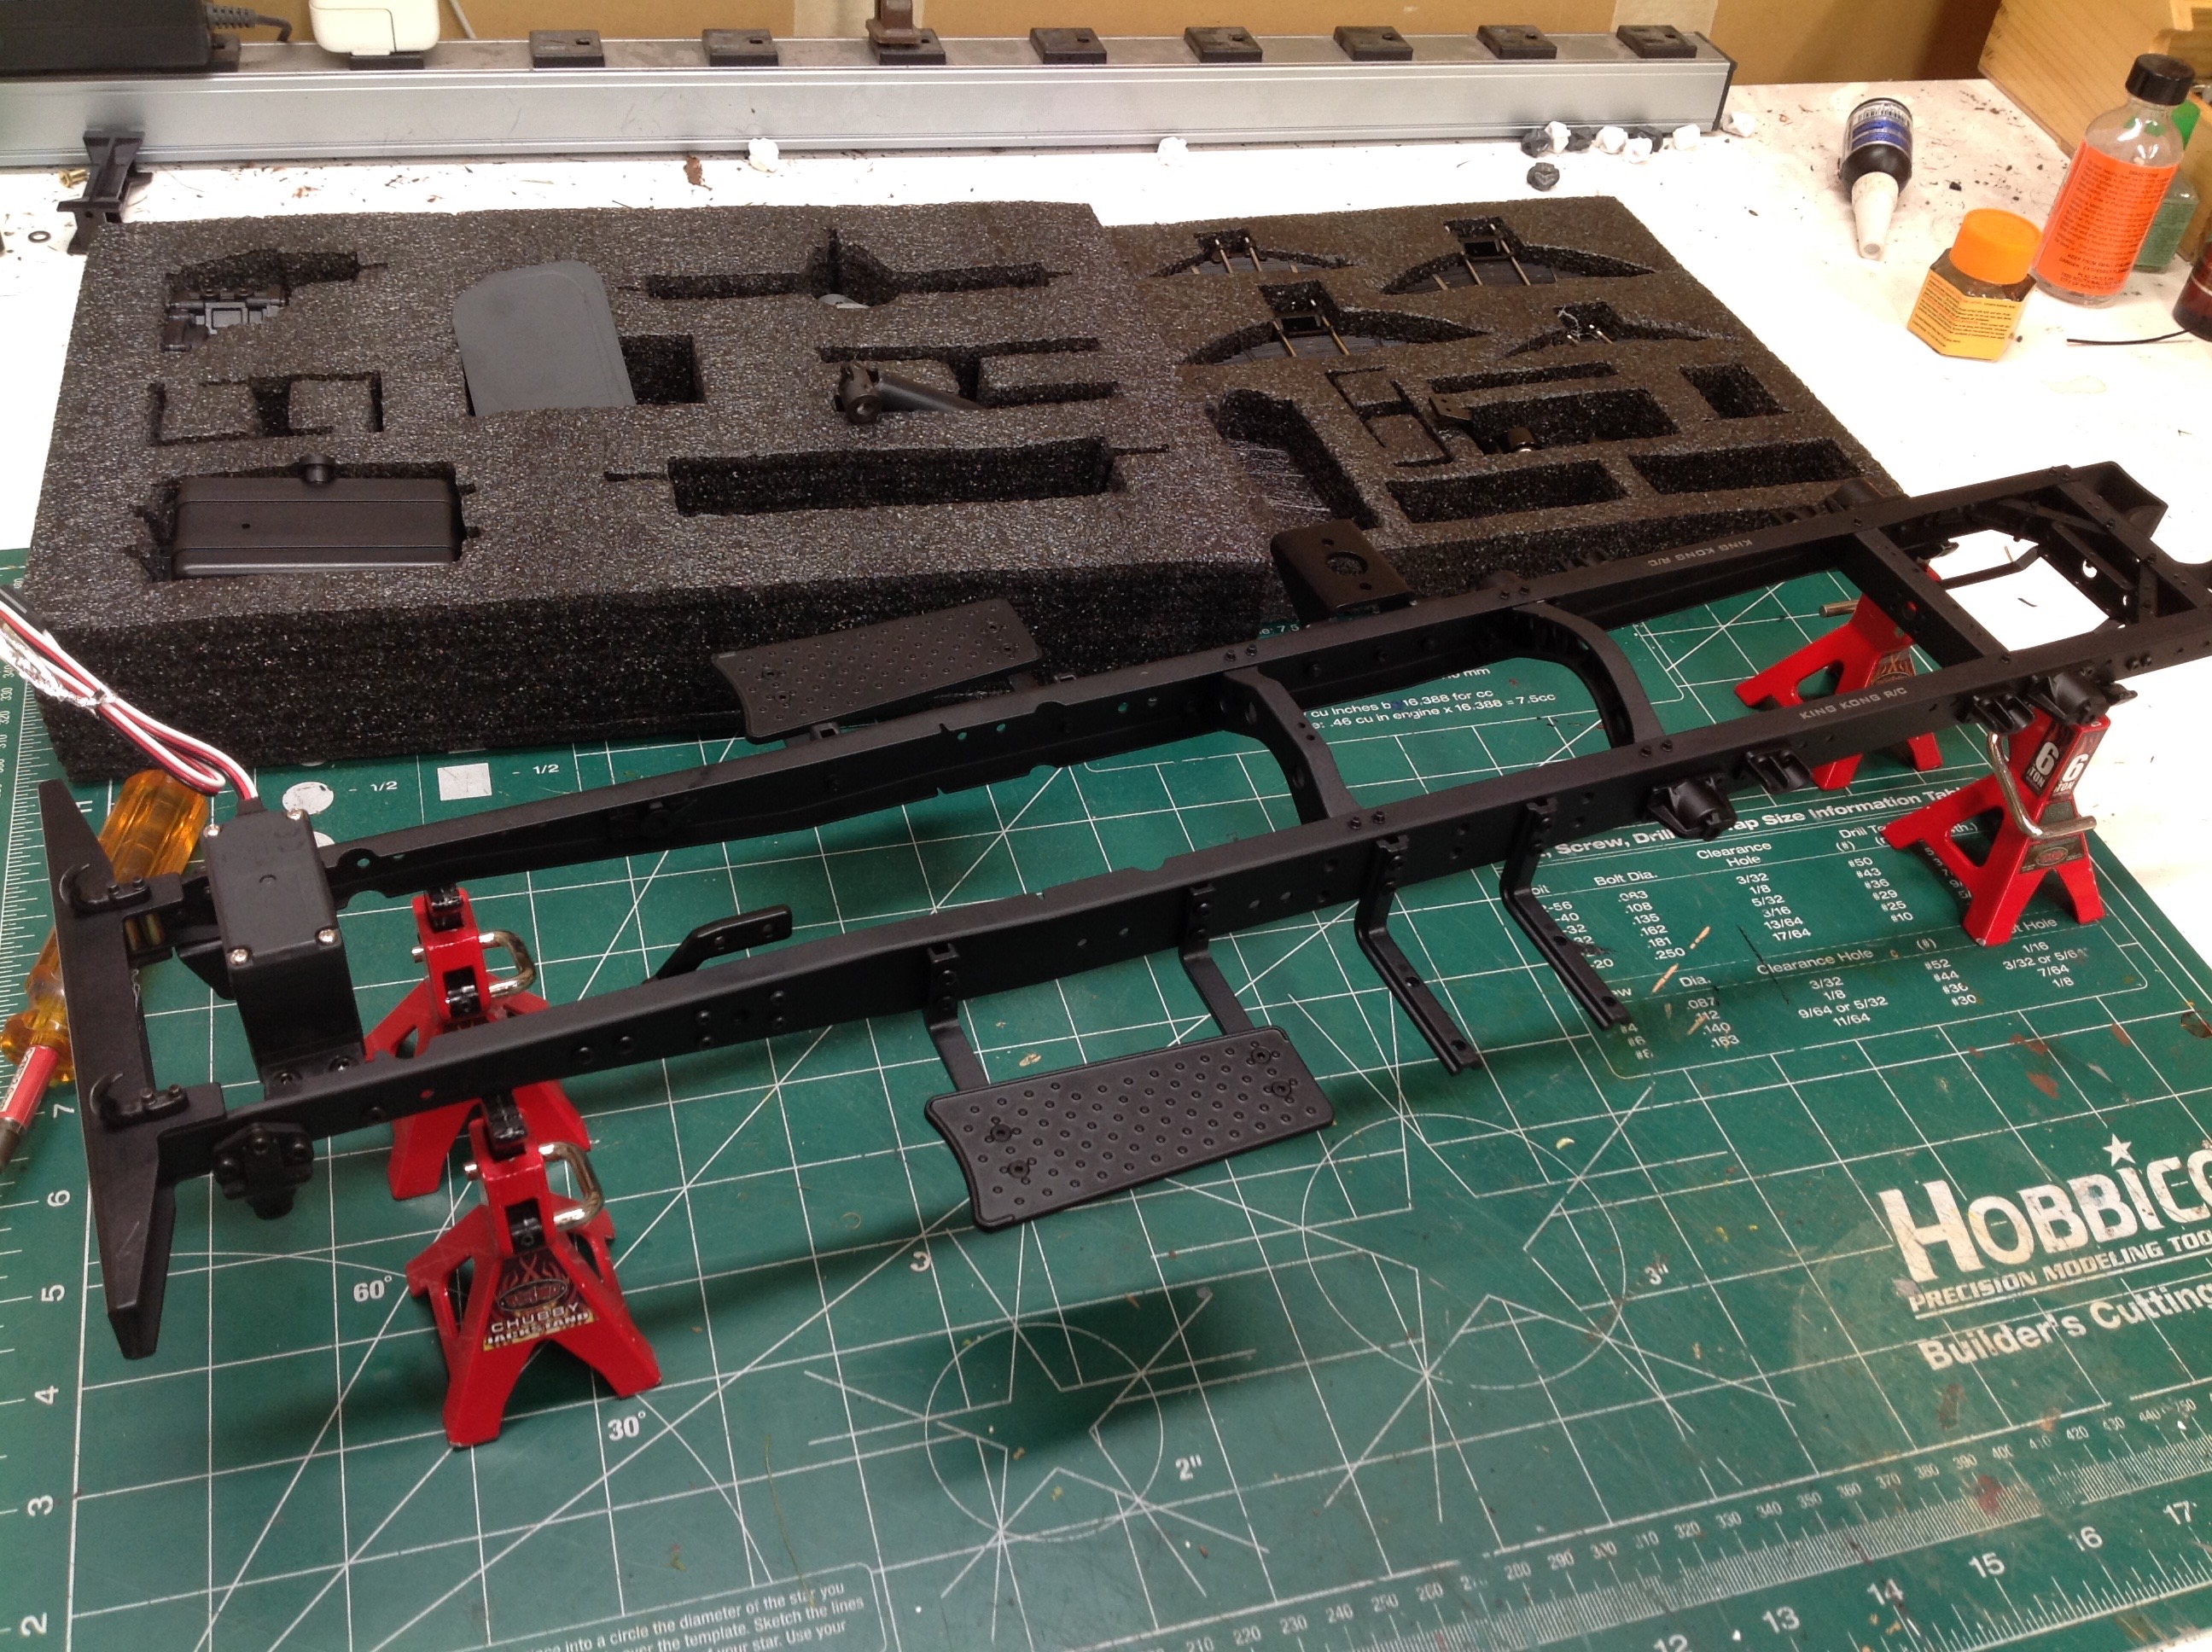
The build begins by installing the steering servo on one of the long
steel chassis rails. I chose a medium torque (but not waterproof)
Futaba servo. The bracket you see behind the servo will be used to
mount the transmission. Note that not only are all the holes in
the chassis rails predrilled, most have threaded inserts so no nut is
needed on the far side.
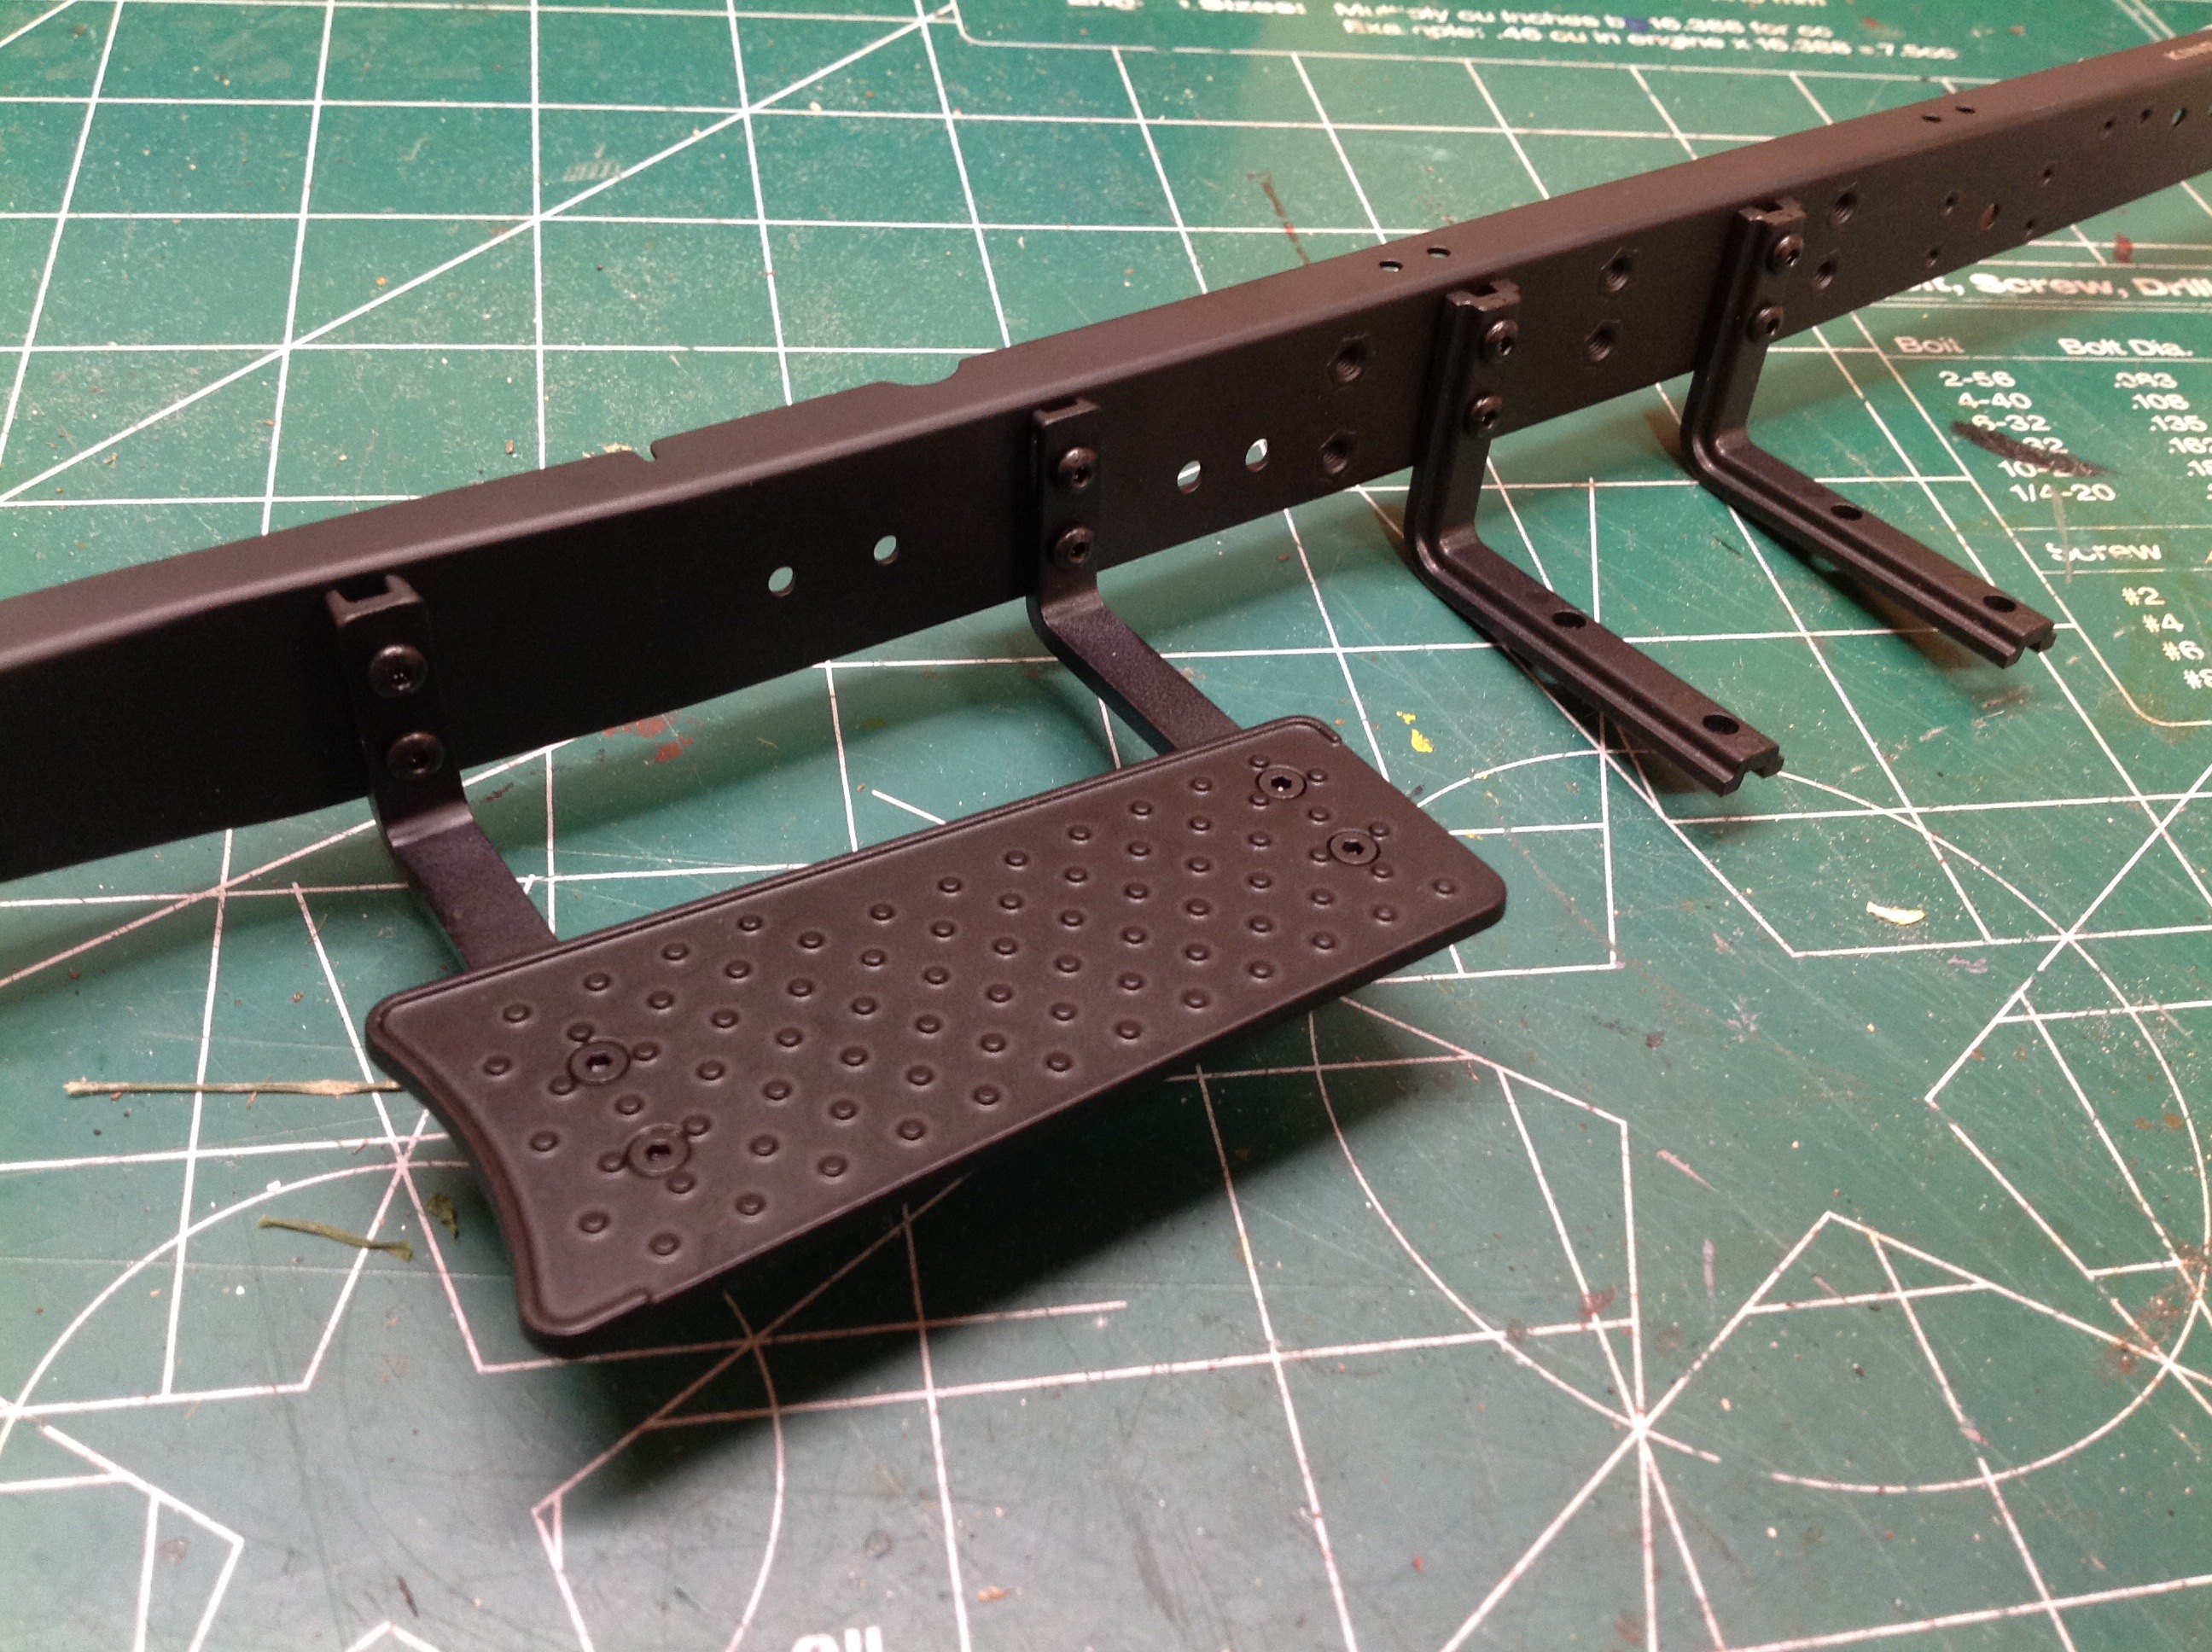
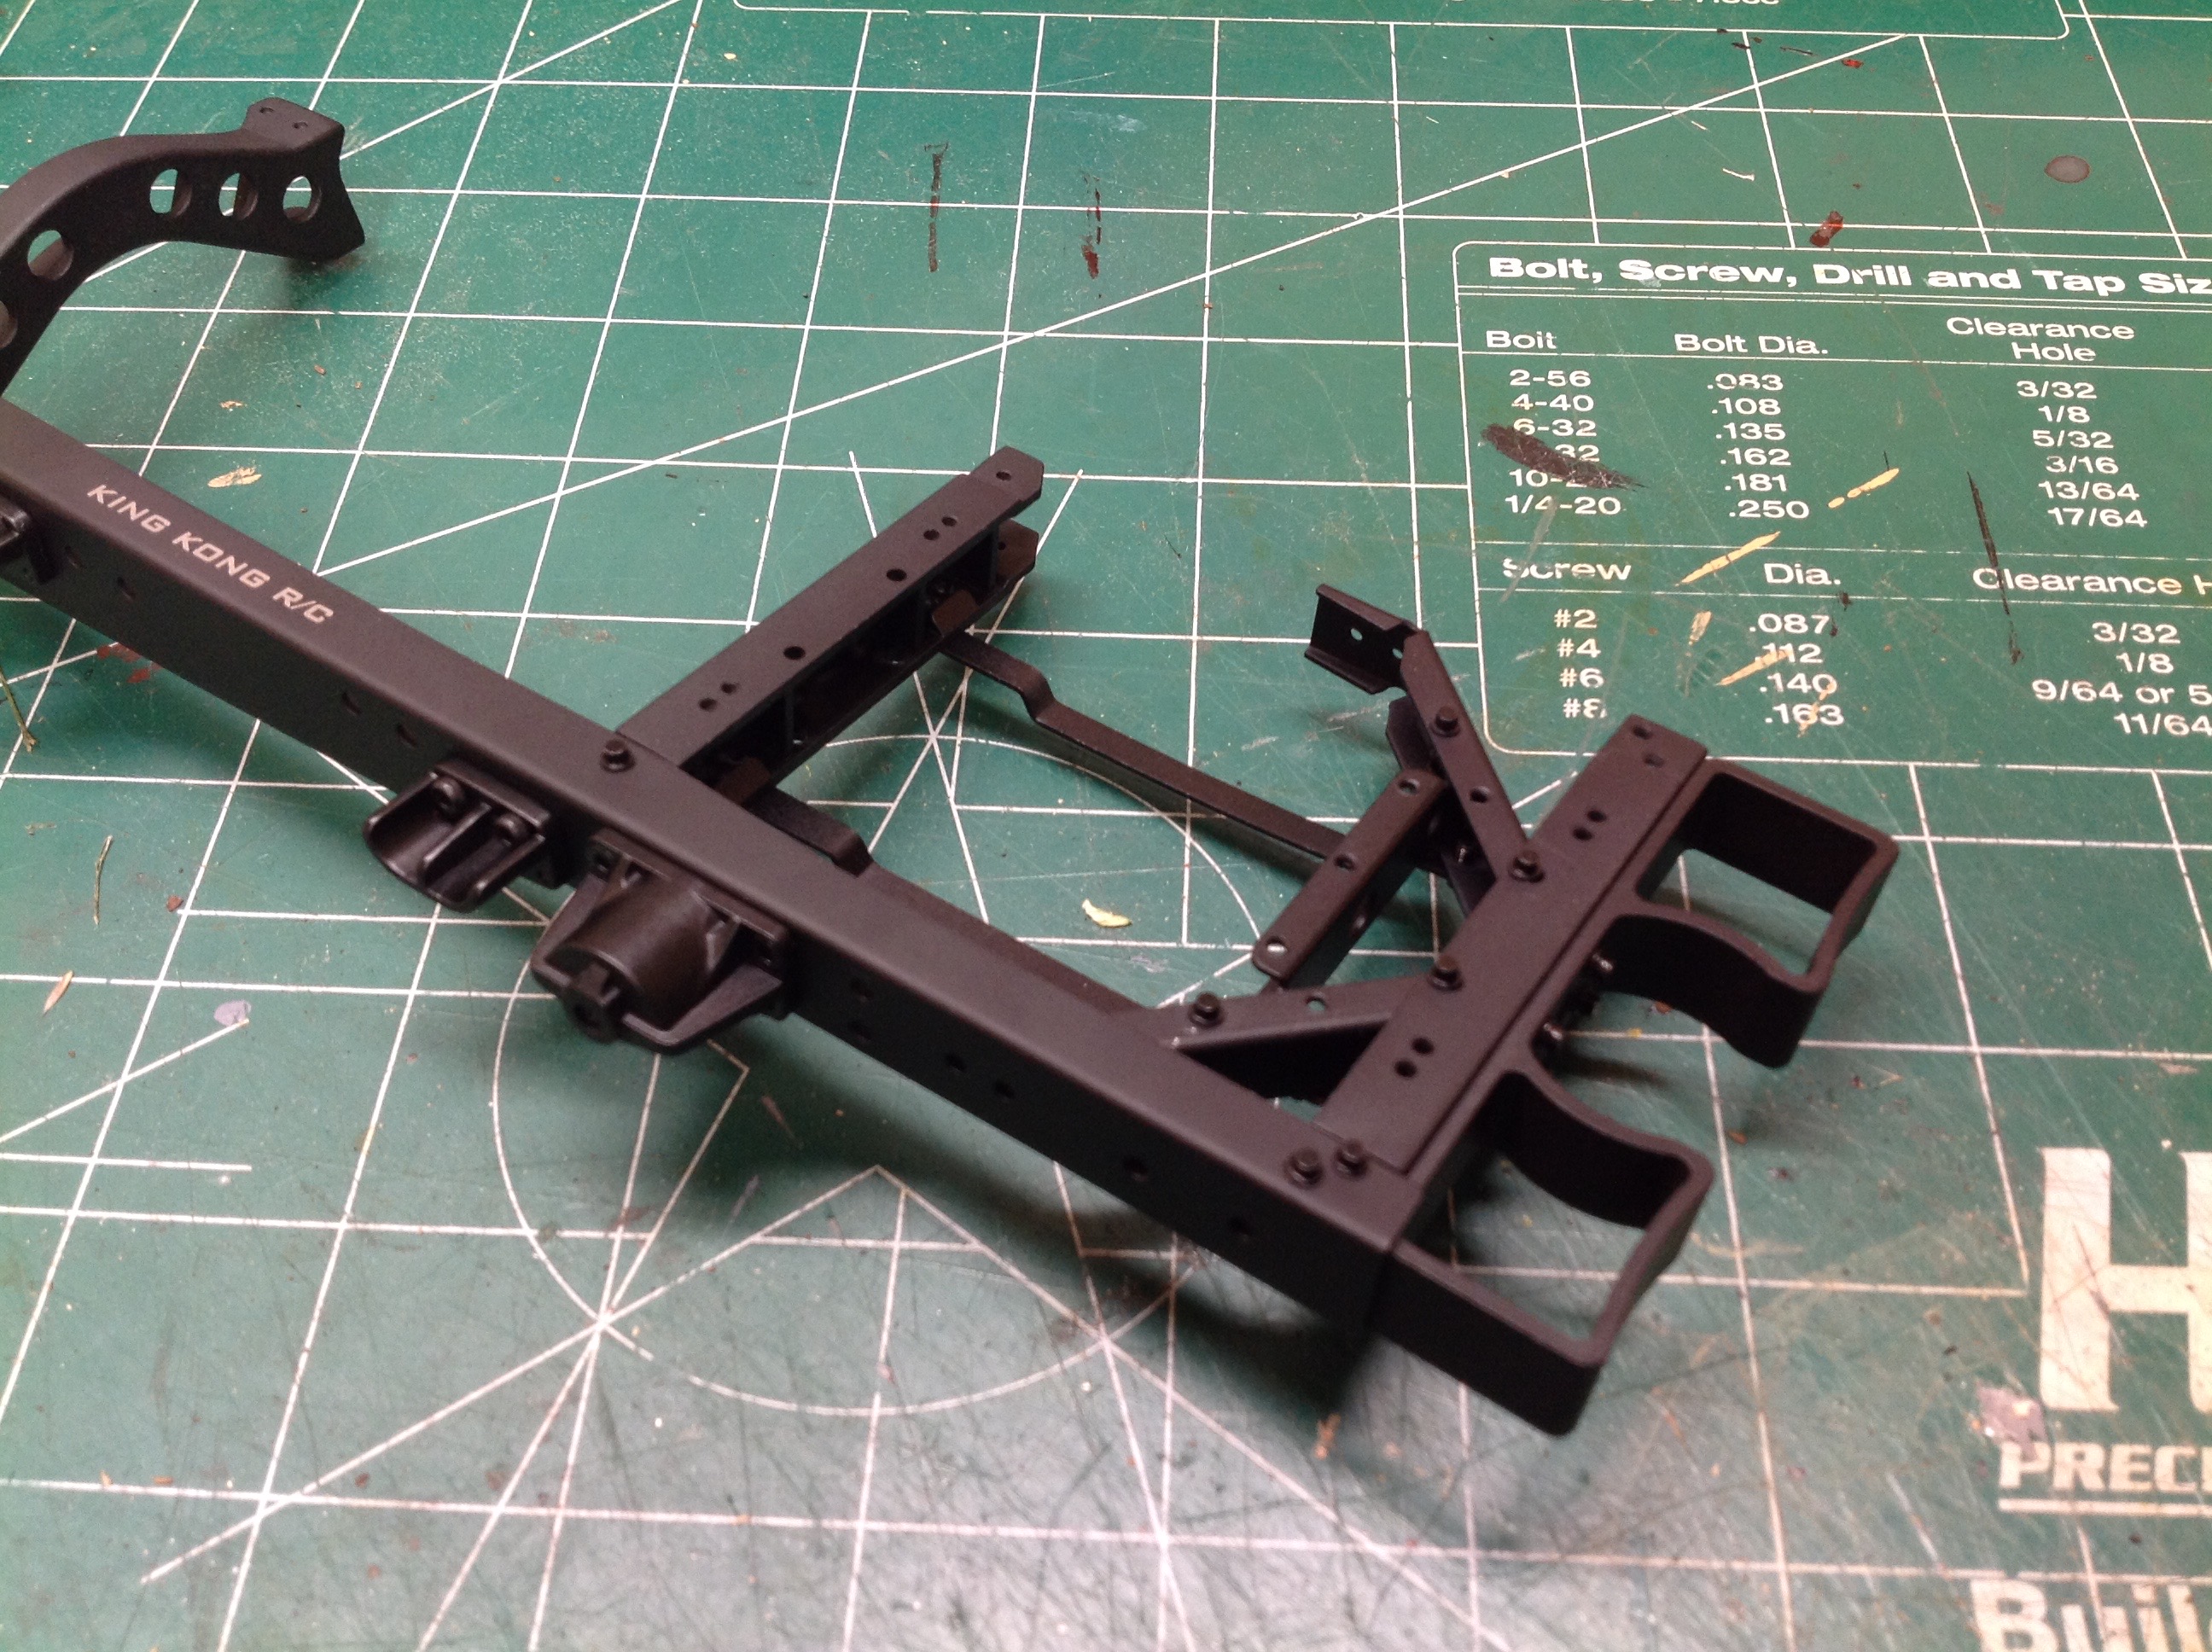
The chassis rails support plenty of accessories including this side
step. The brackets behind it are for the fuel tank. The
strange shaped assembly with the diagonal braces is the rear cross
member which contains the spring blocks used as a rear bumper.
Note the tiny scale hex bolts used for assembly which require a special
tool to install.
After the last of the cross members has been installed the other rail can be attached, completing the frame.
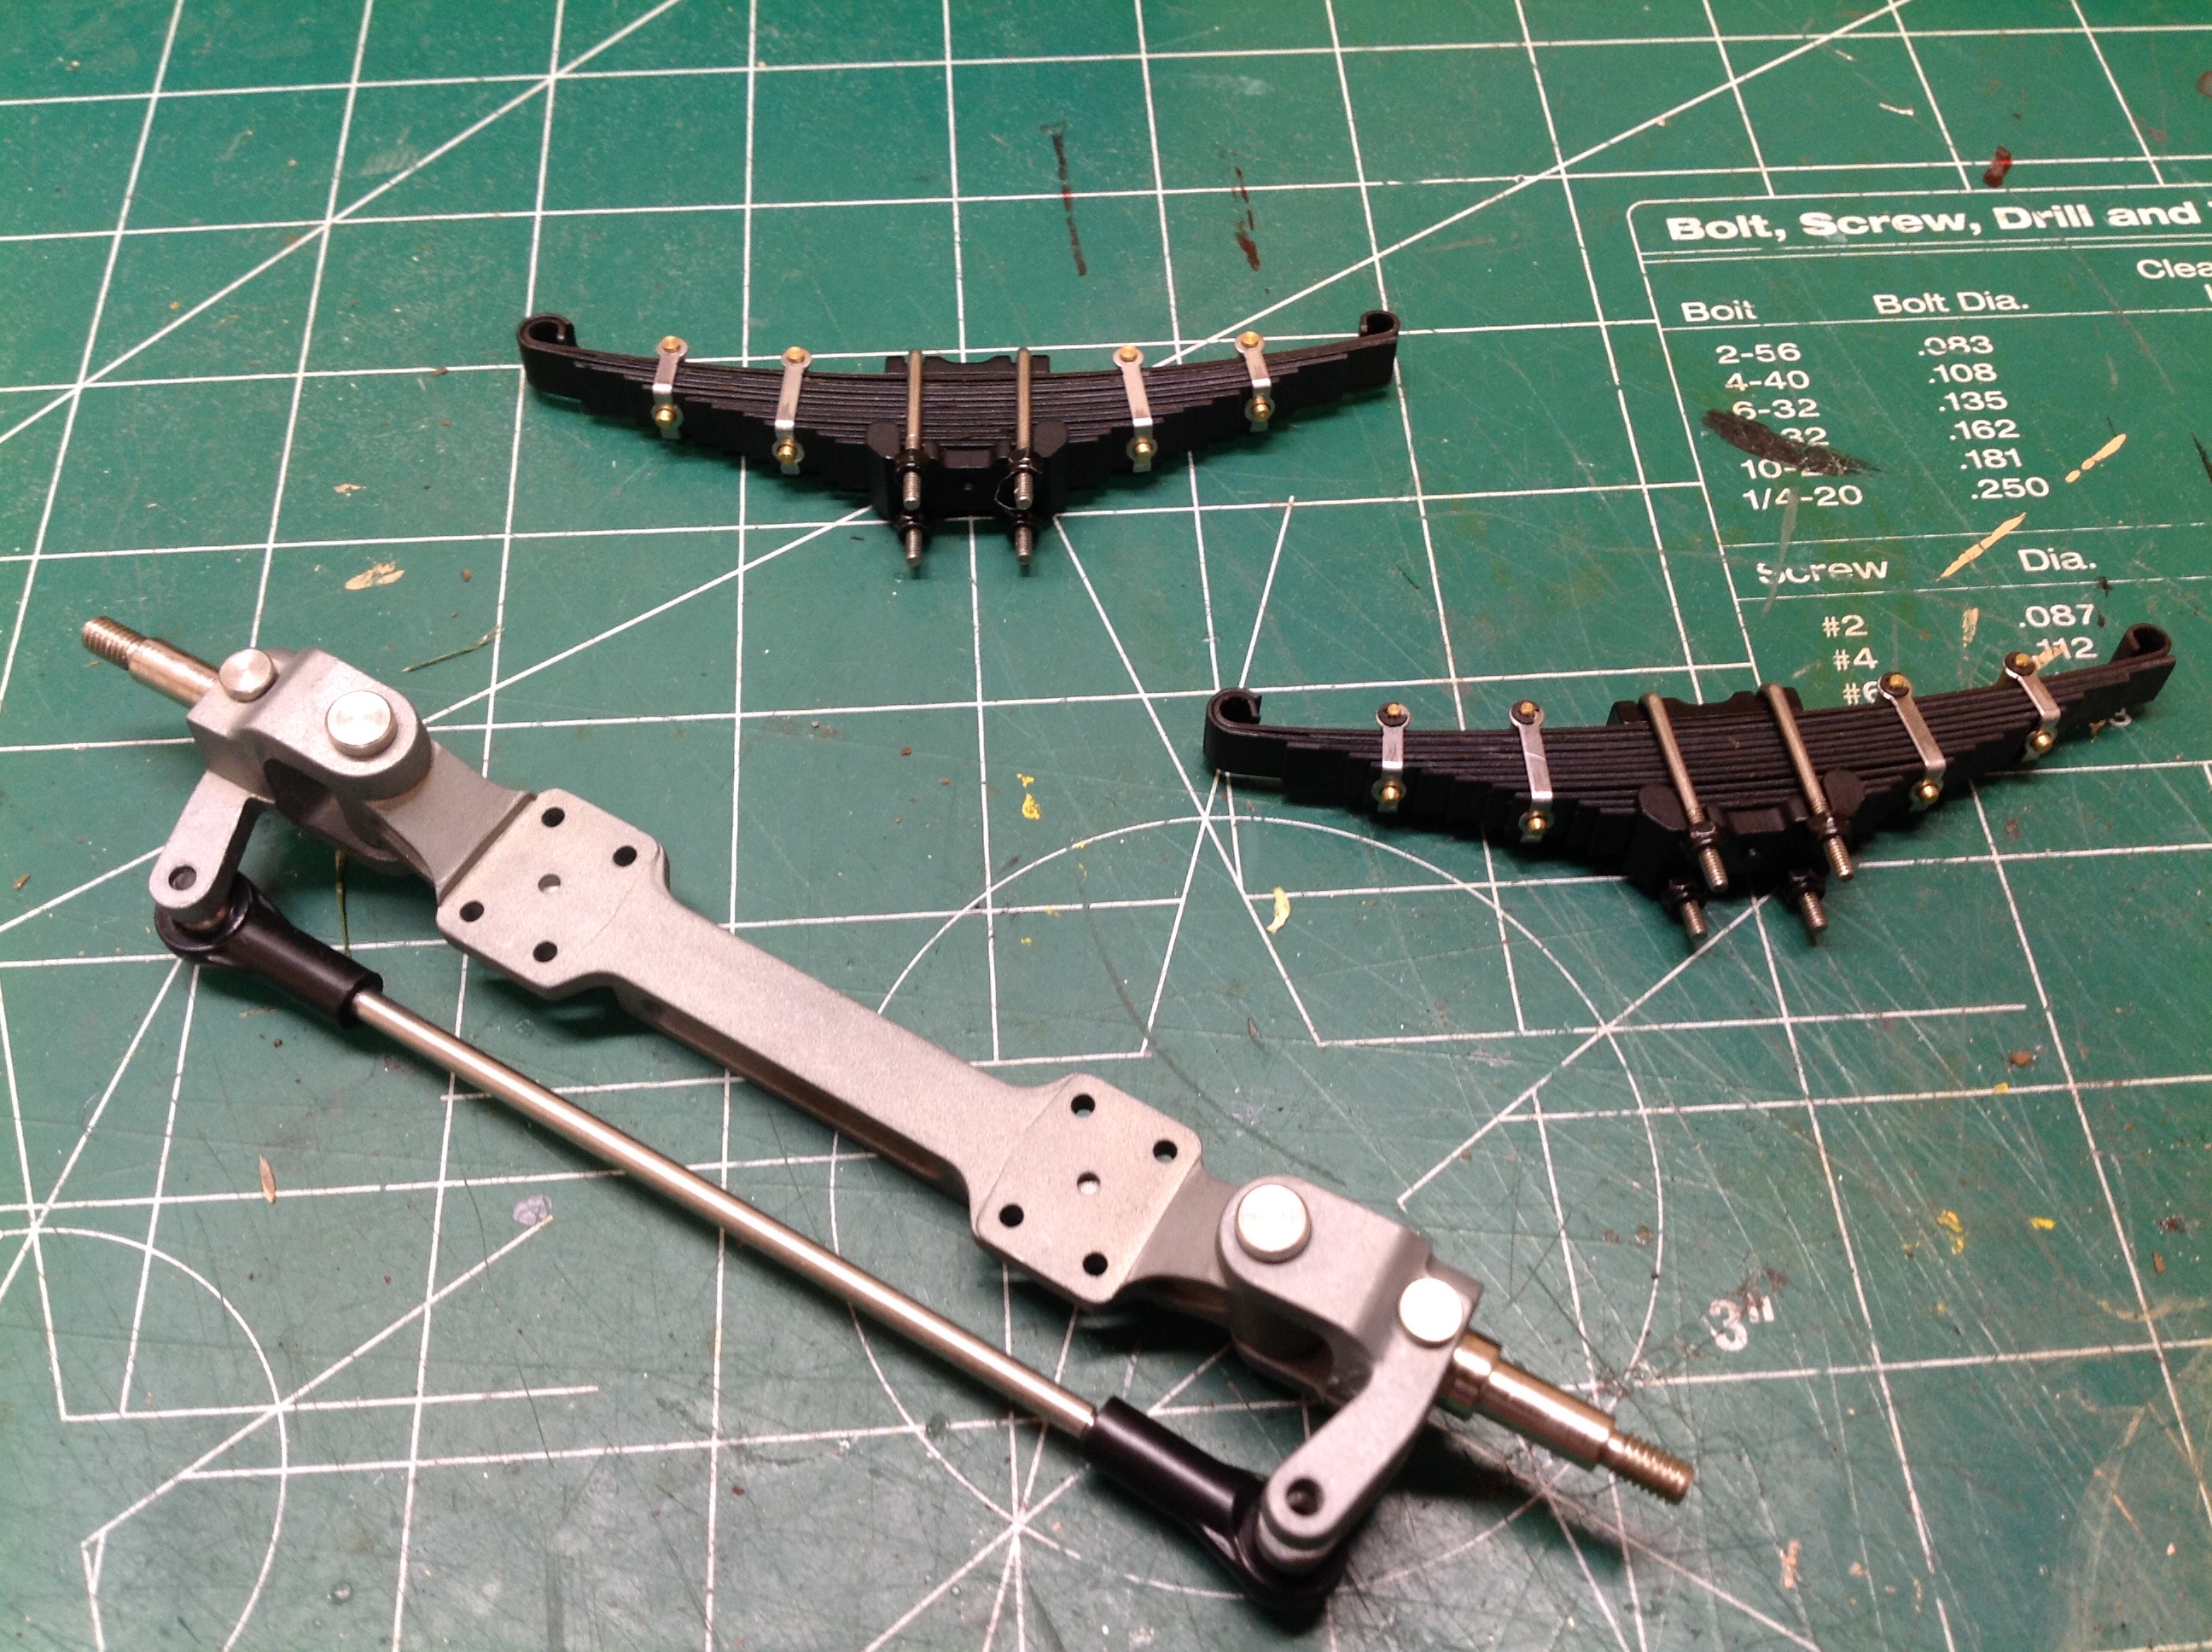
Now we can start on the axles. Because the front axle is not
driven, it is just a solid bar with kingpins. I do wish that the
steering link had been behind the axle rather than in front of it.
The axle connects to a massive stack of leaf springs. Most of the
leaves are plastic so the stack is not nearly as stiff as it looks.
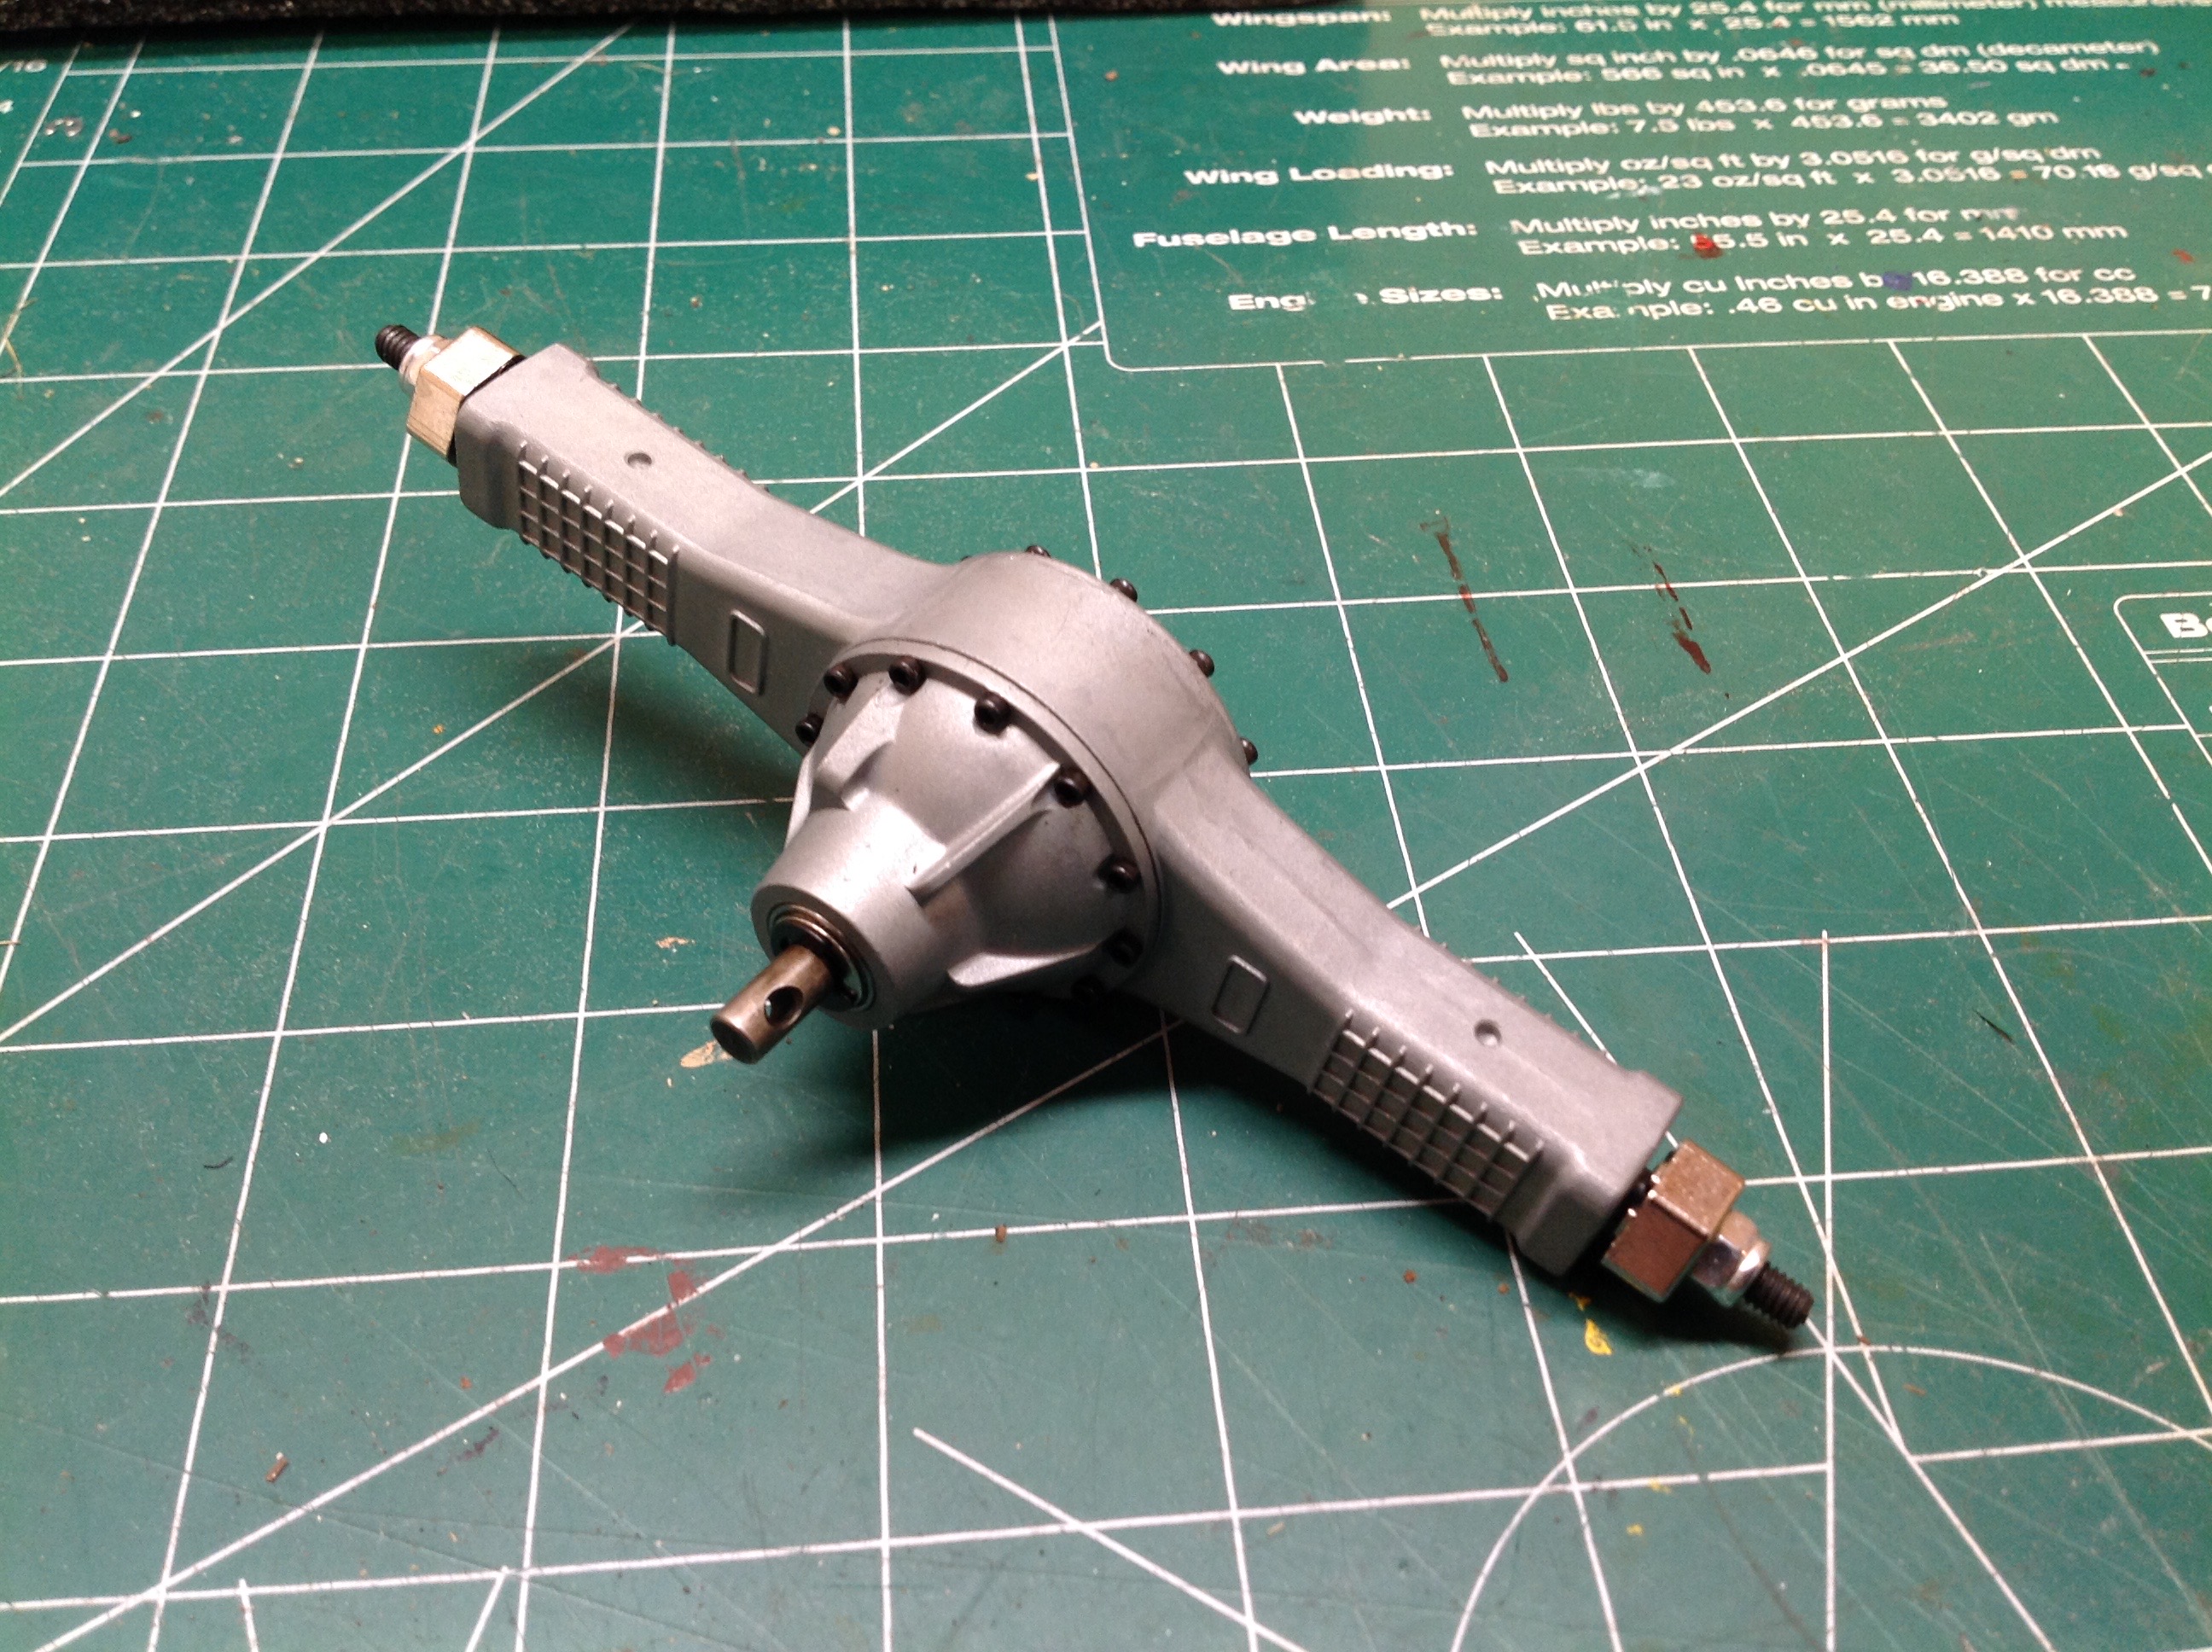
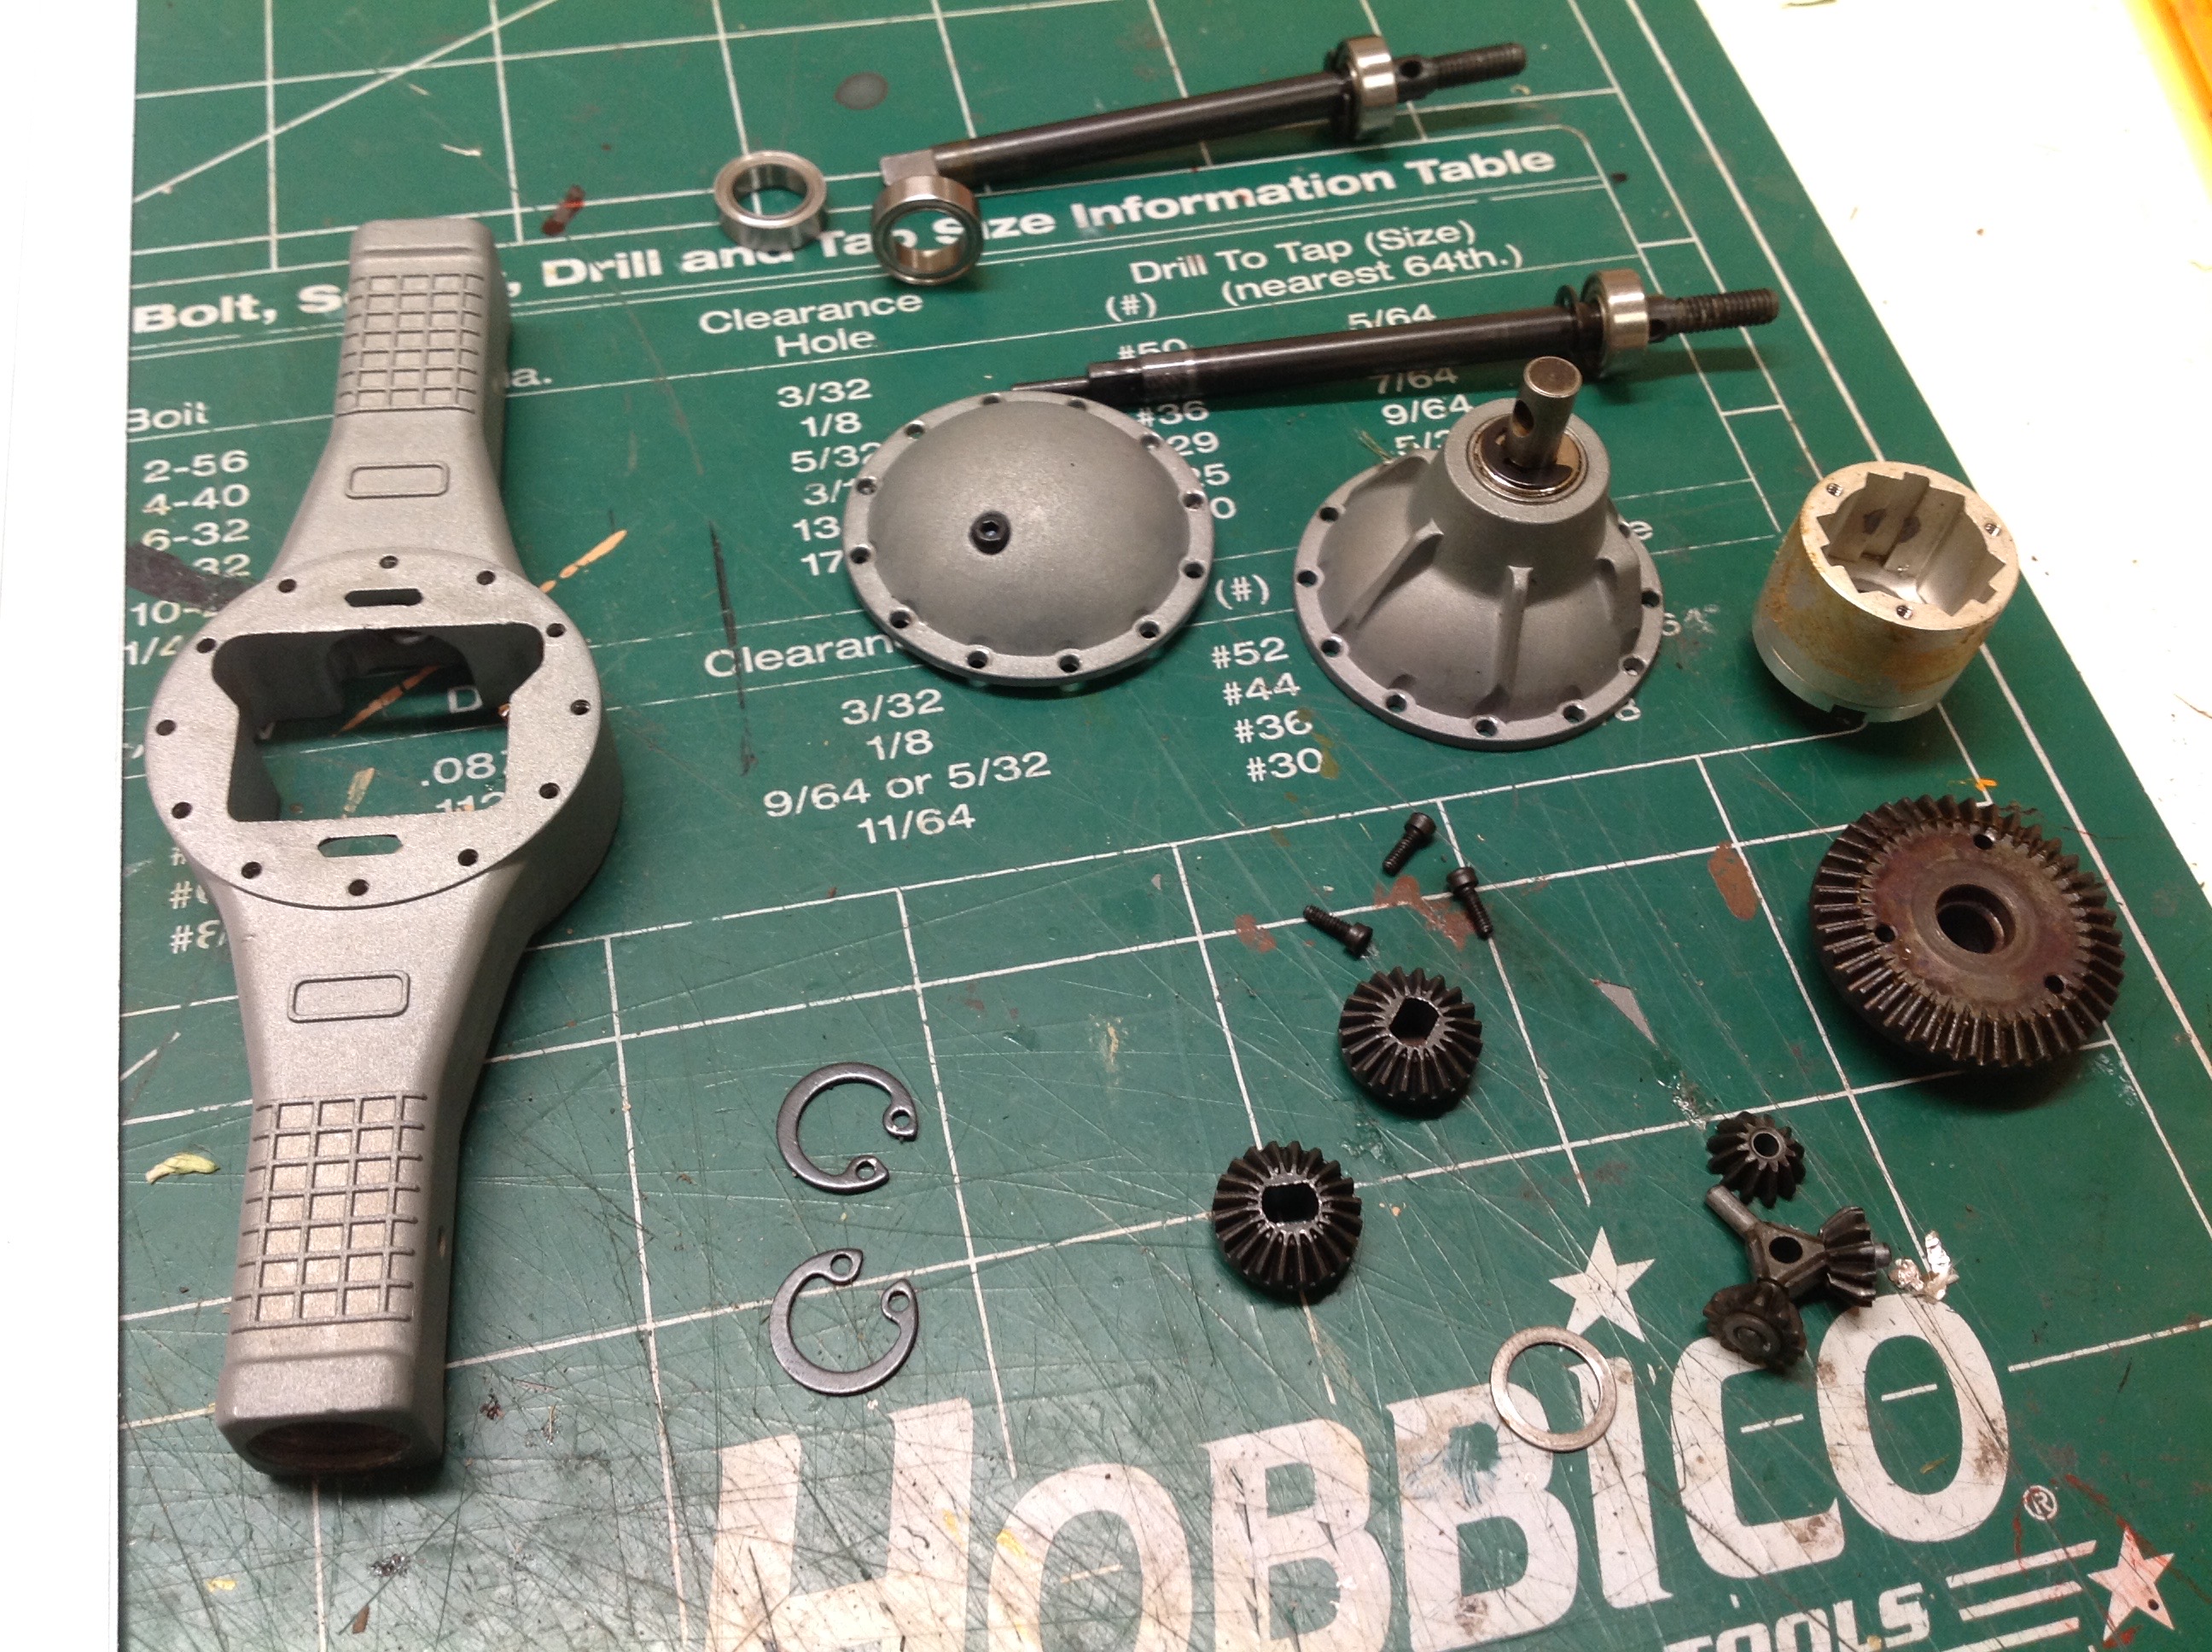
The rear axle comes assembled, but I took it all apart to make sure it
was properly greased and to add thread lock to all the screws. I
also wanted to see how it works, of course. The open gear
differential uses all metal gears including the 3 spiders. There
is no provision to lock this differential.
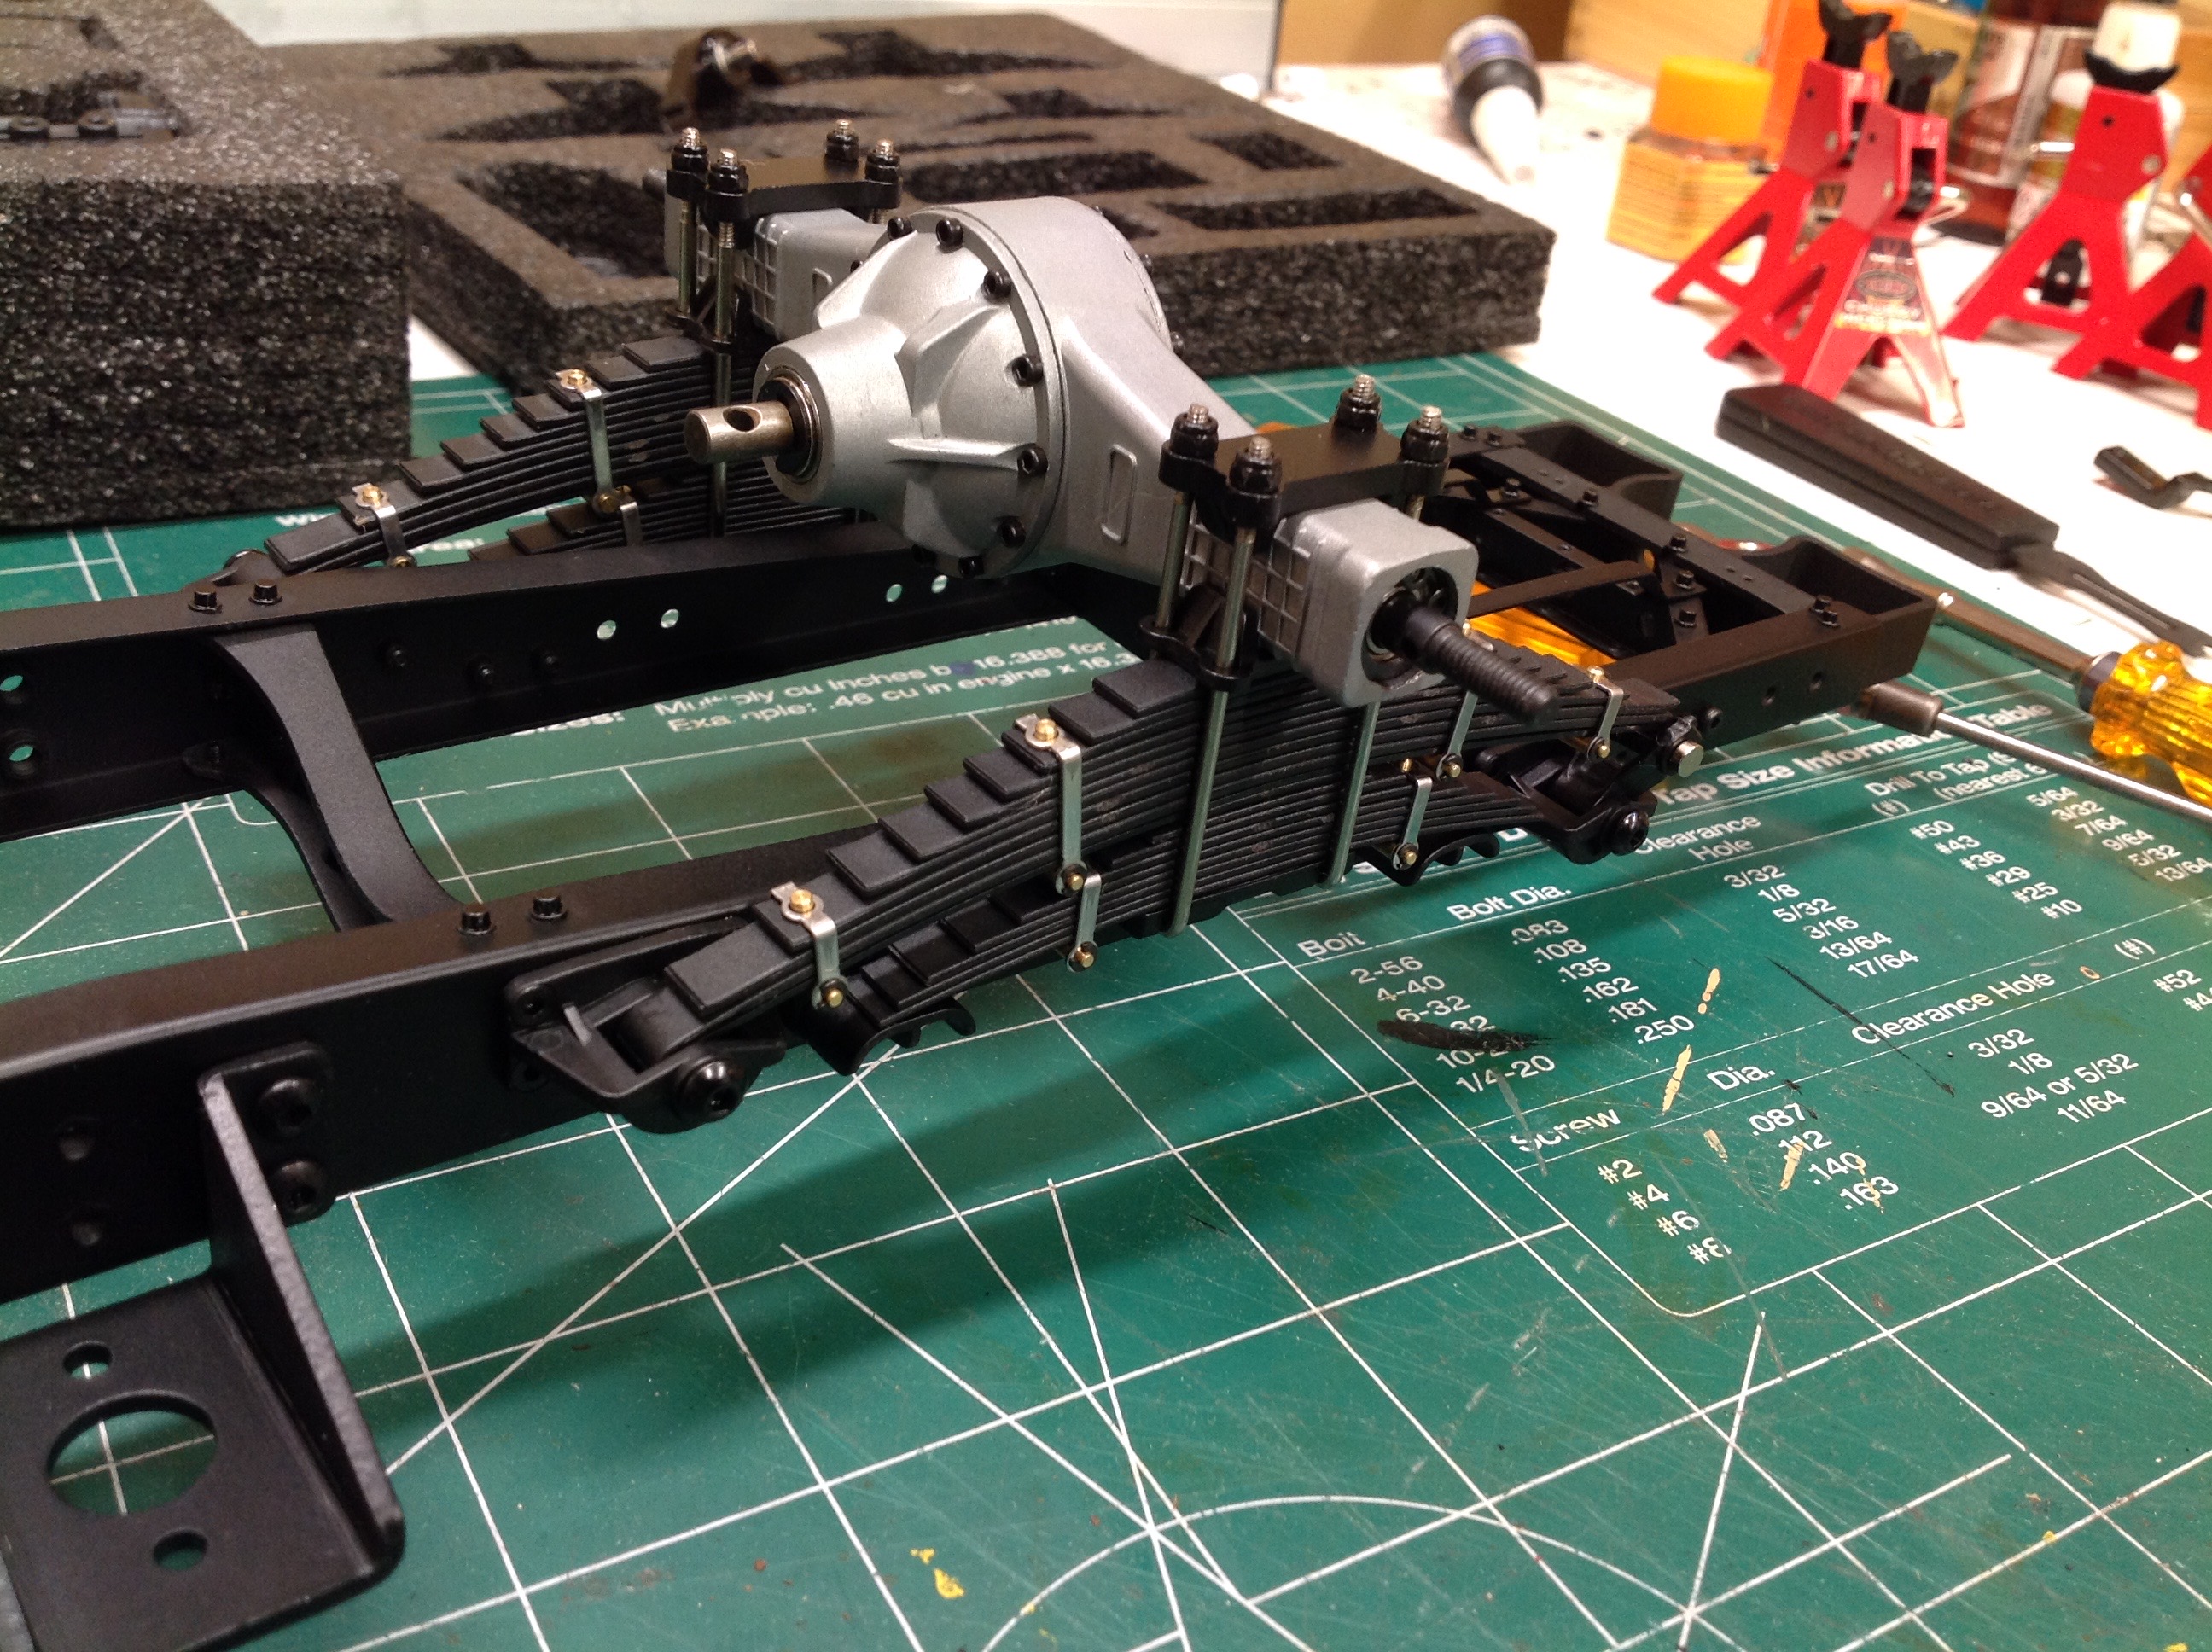
The rear suspension uses the largest leaf spring stack I have even seen,
and in a unique dual rate configuration. The lower stack attaches
to the shackles and acts like any other leaf spring system. The
upper stack doesn't touch anything until the suspension compresses
enough to contact a pair of brackets on the frame rails. This type
of system makes a lot of sense for a heavy truck since it would allow a
reasonably soft rate when unloaded, but also the support needed when a
heavy load is in the bed. On the model, all of this is irrelevant
since the suspension bottoms out under the weight of an empty truck.
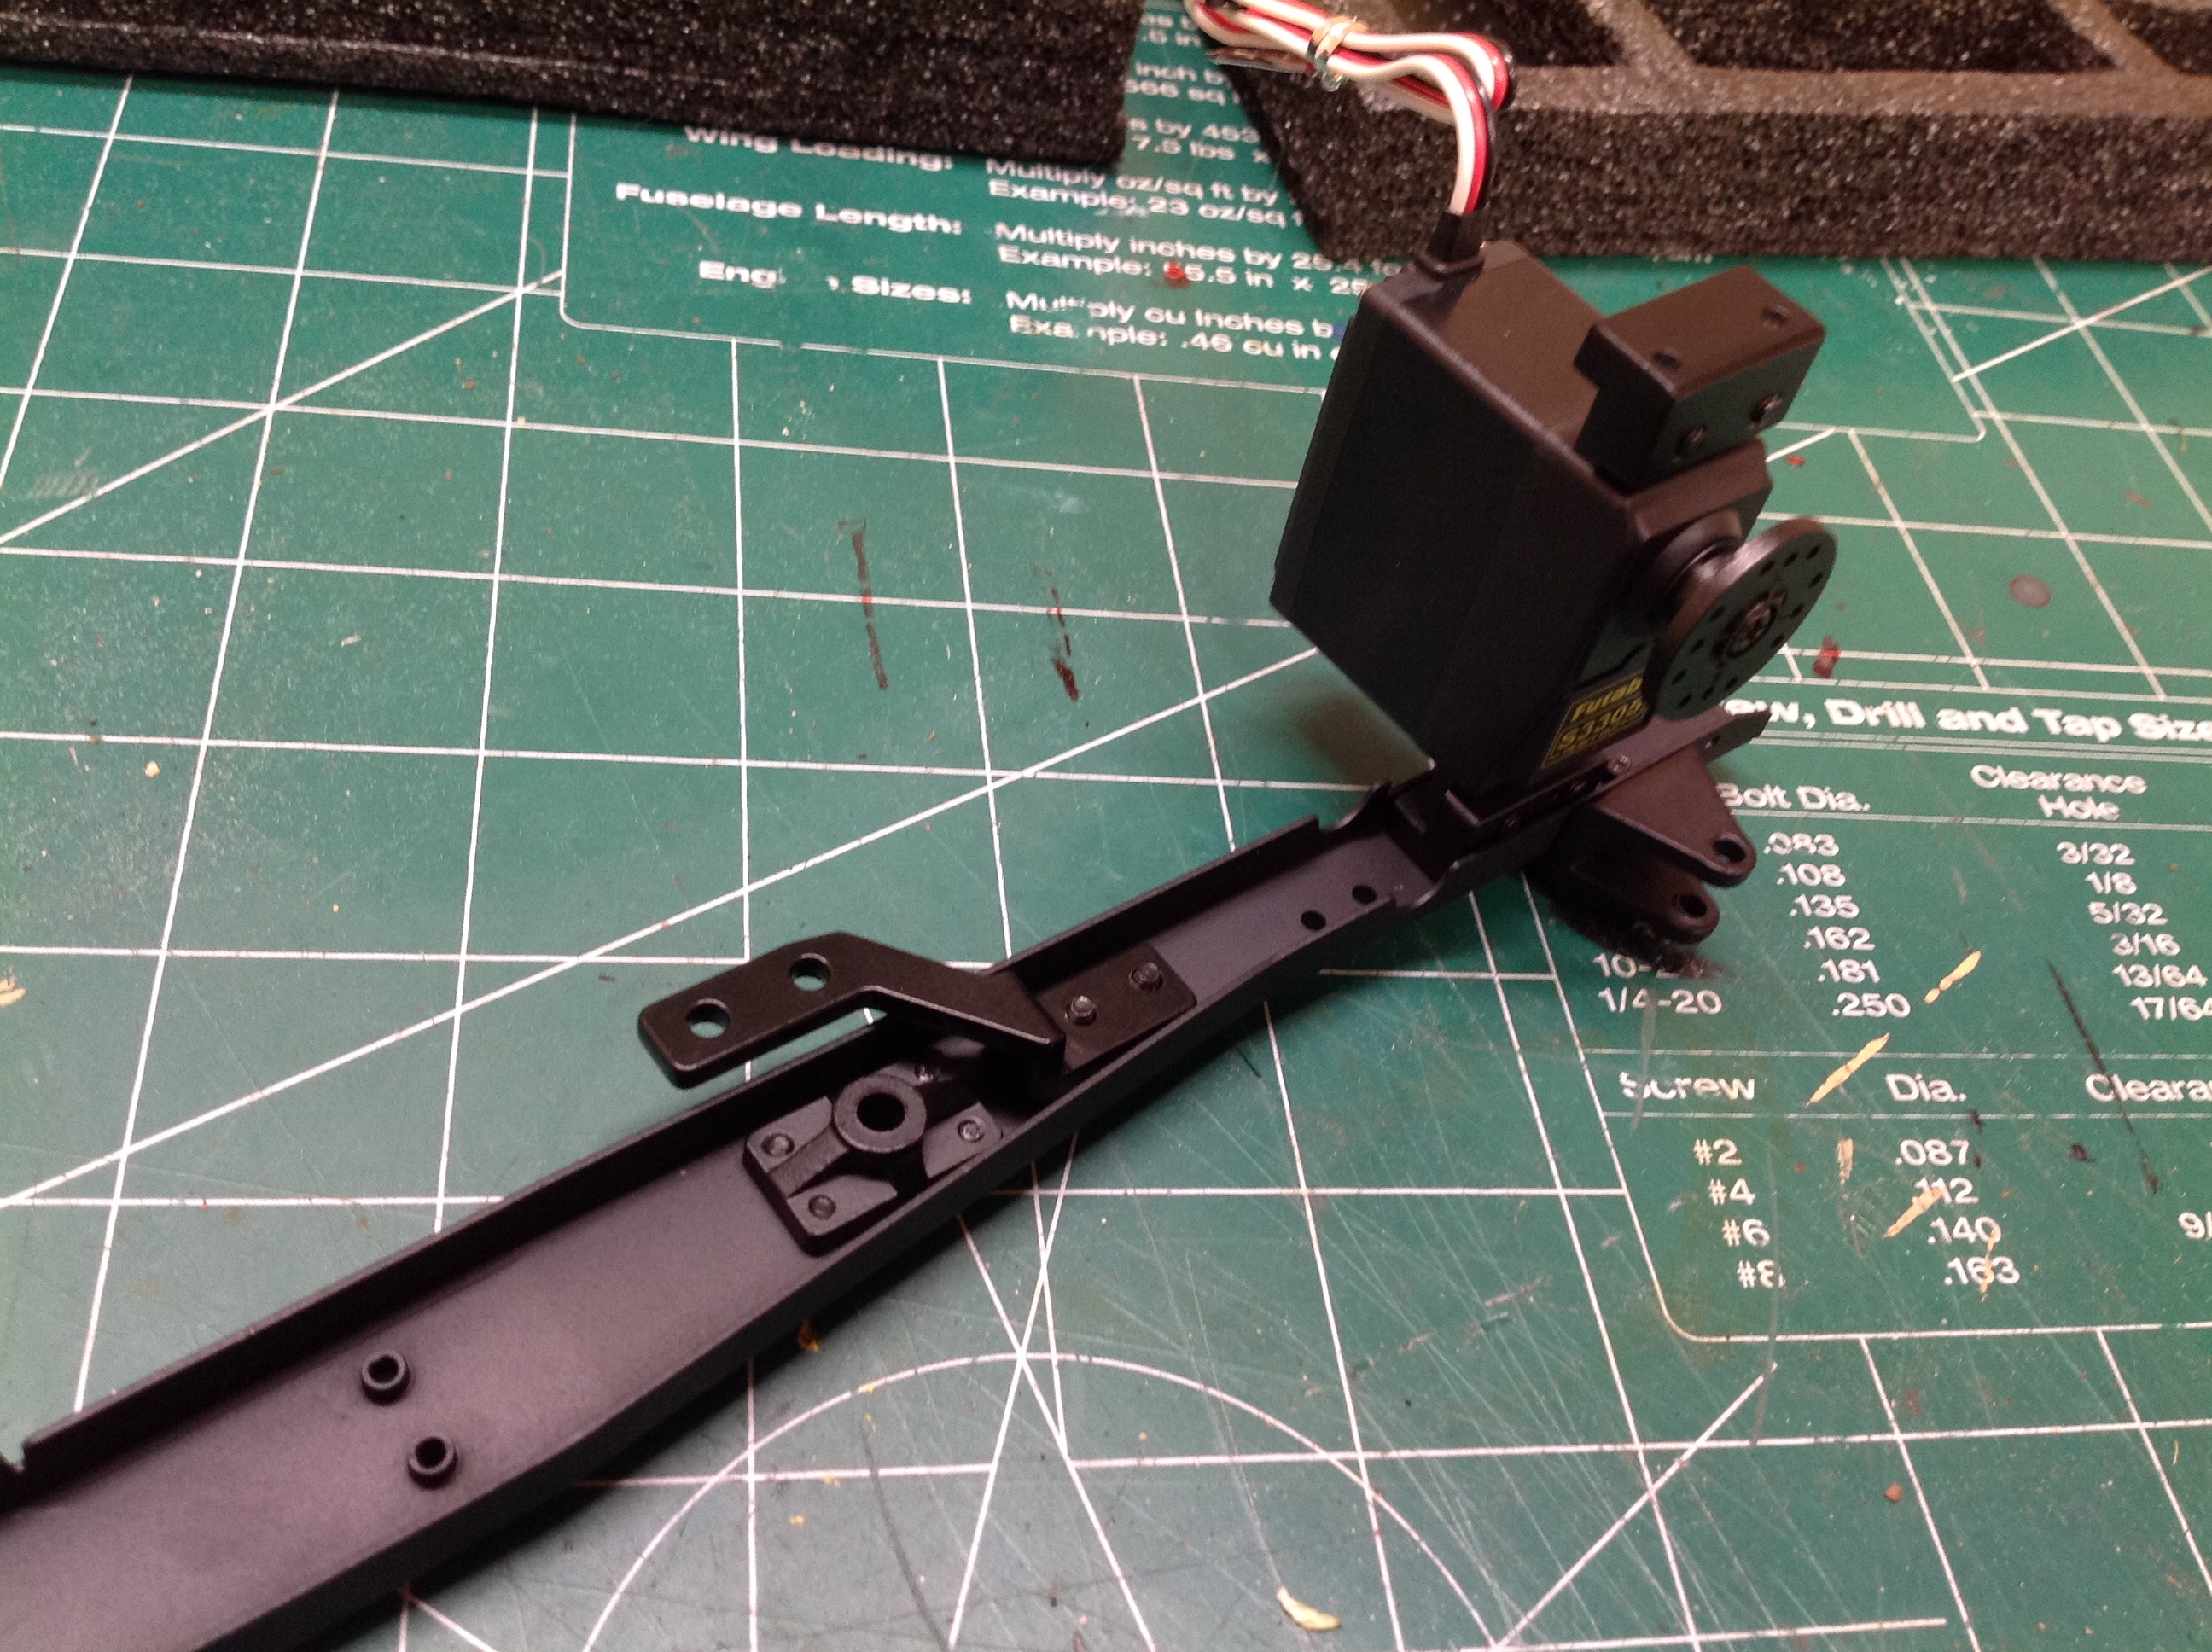
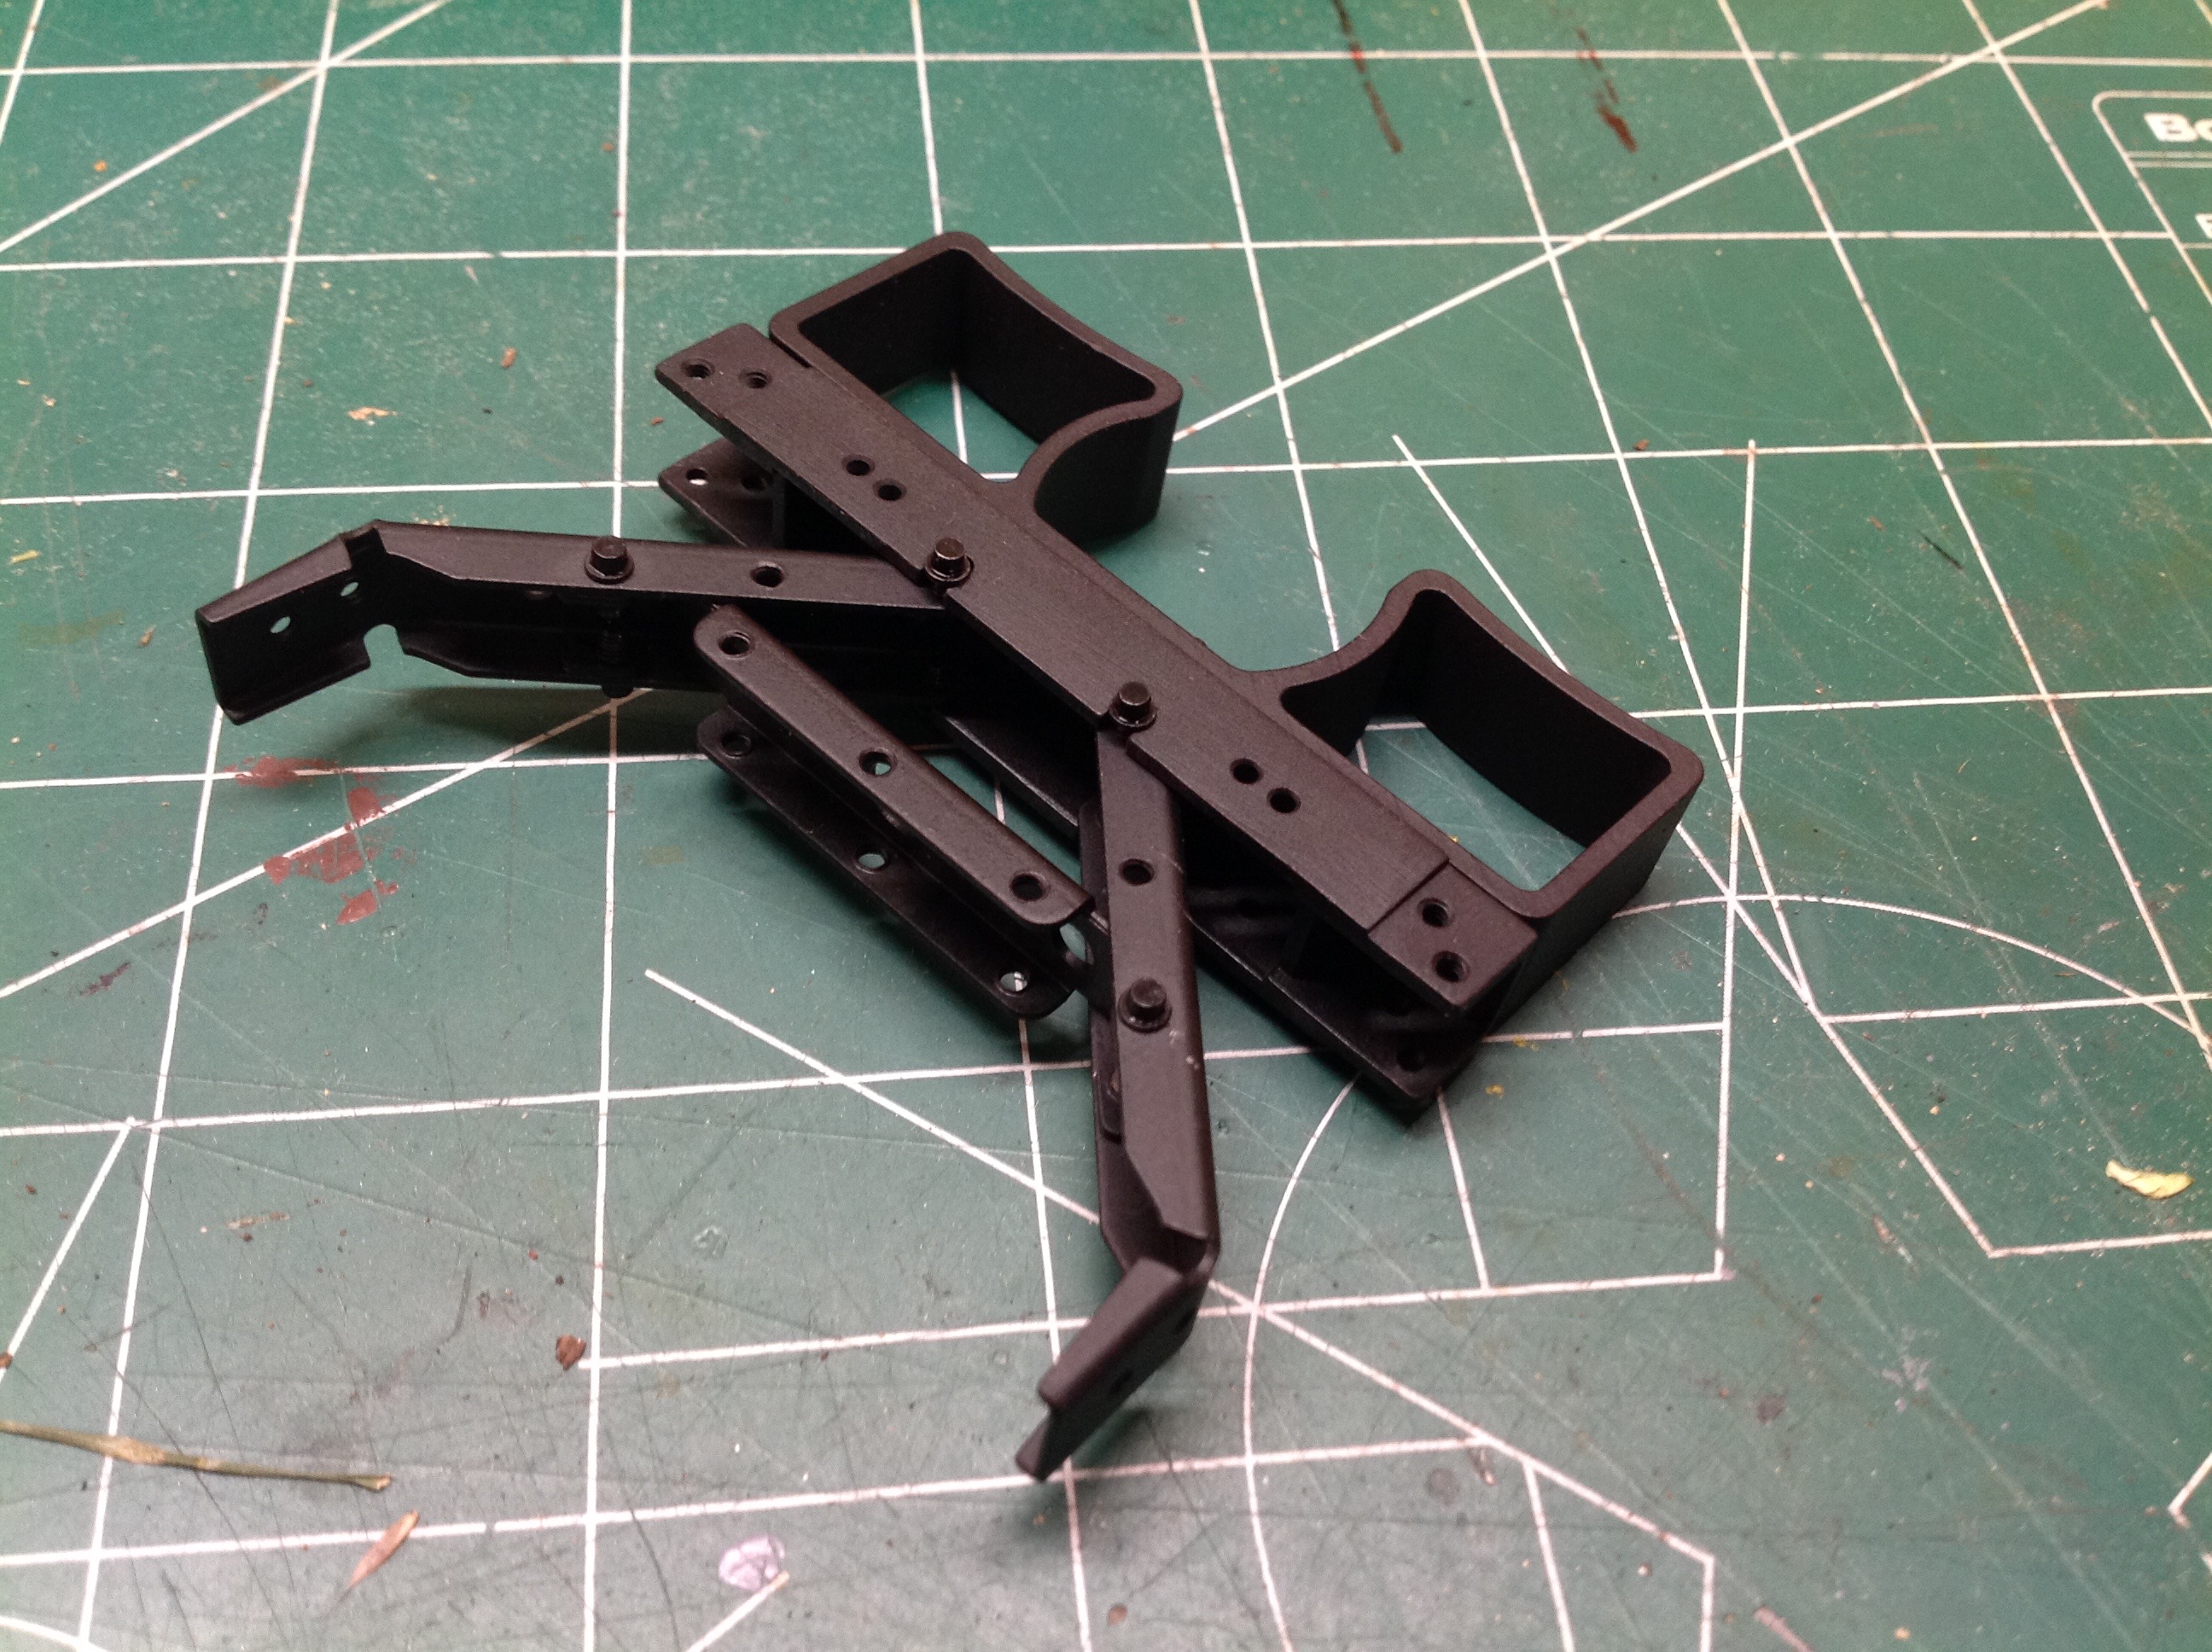
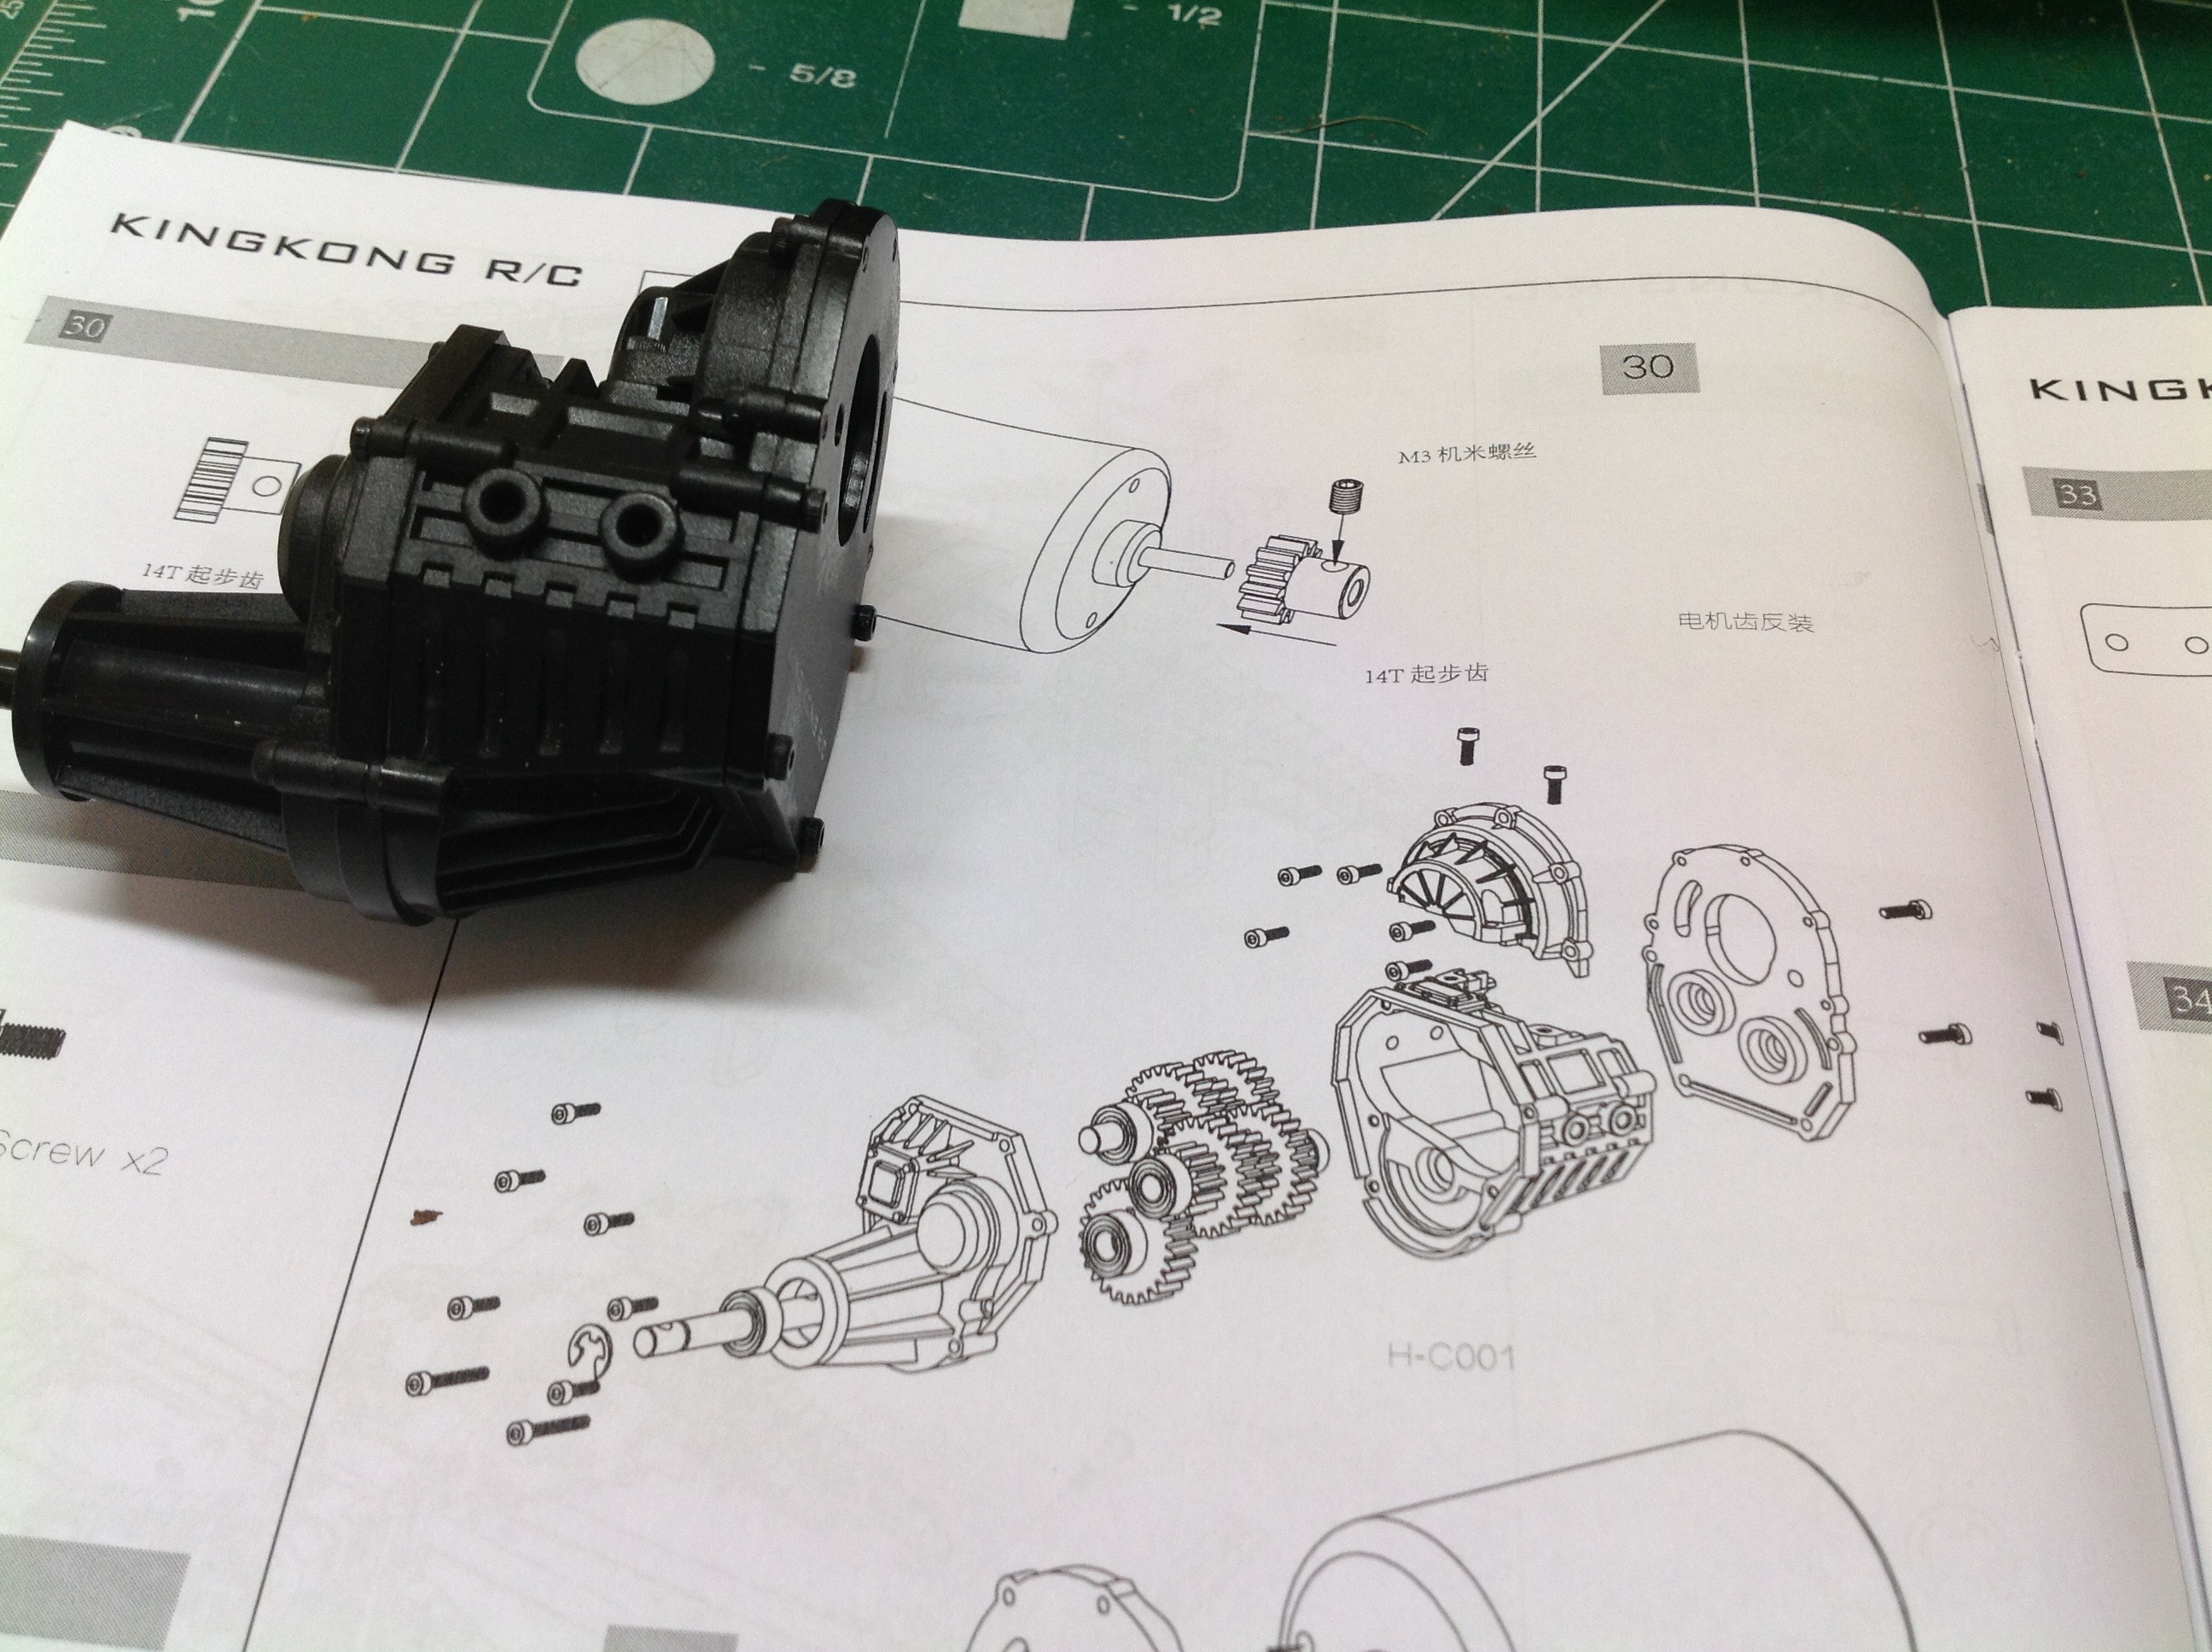
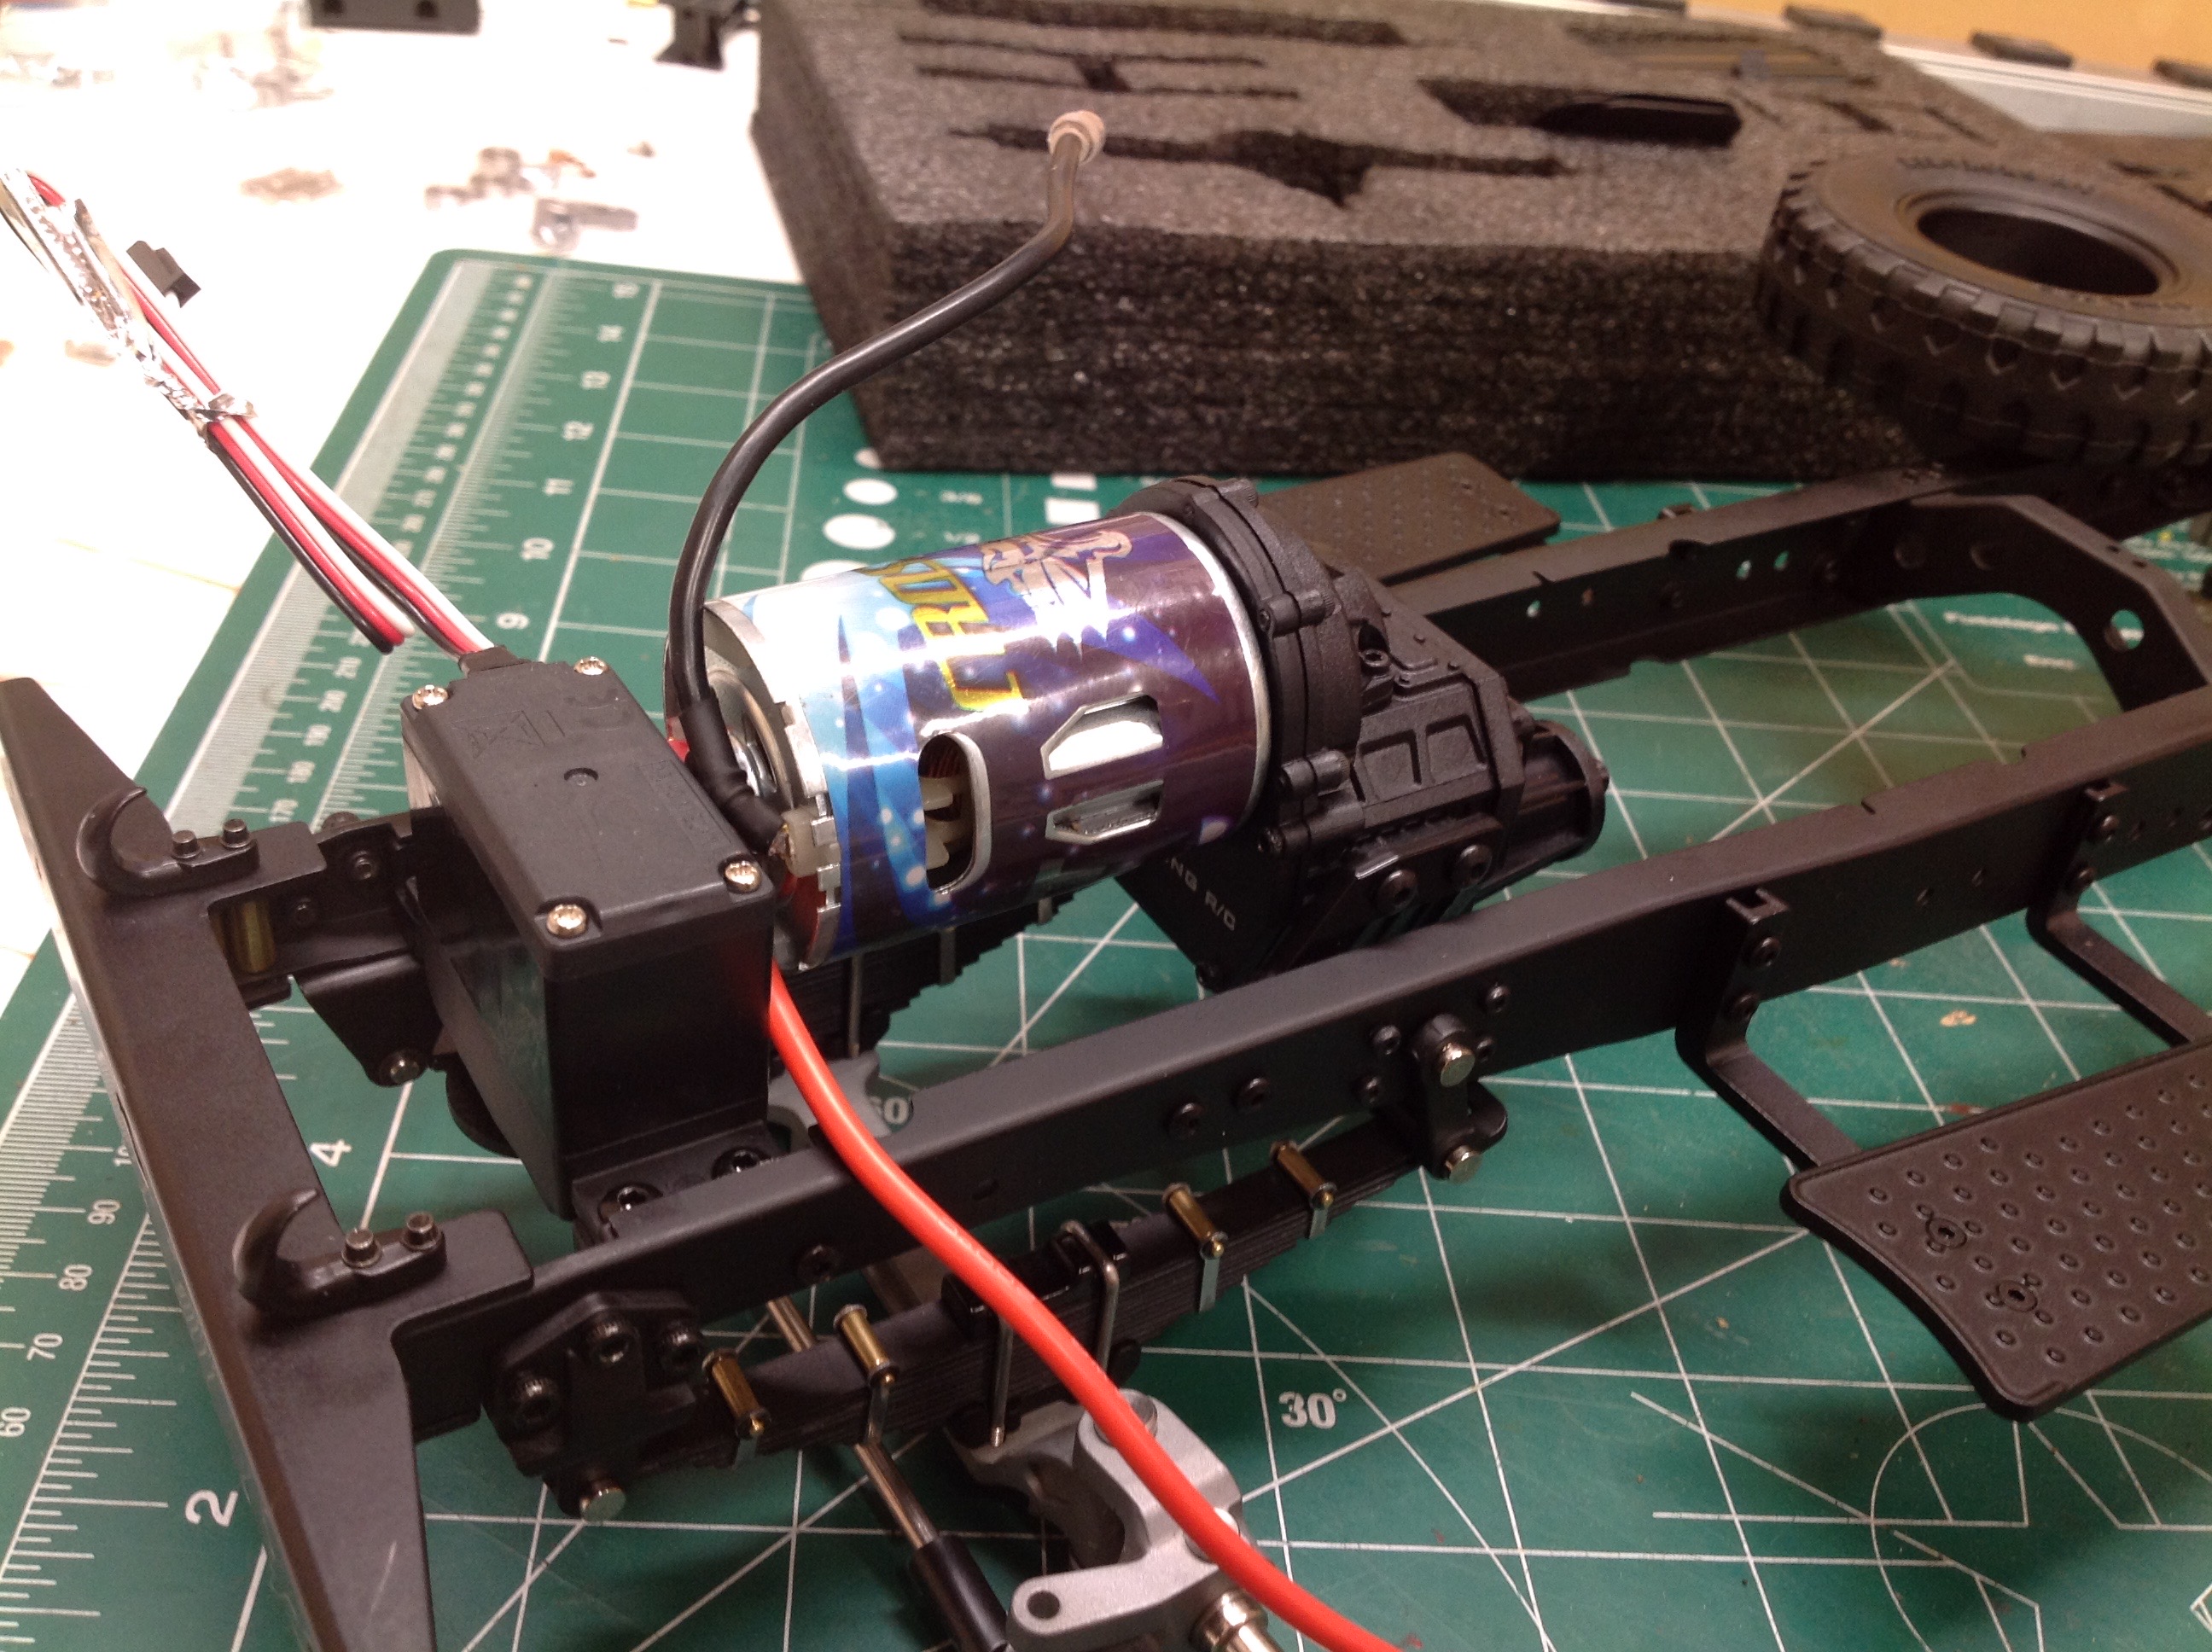
Like the rear axle, the gearbox comes pre-assembled. This is a
single speed transmission so there is nothing fancy going on. I
took the cover off to check the lubrication but since it looked good I
did not take it apart. The kit did not come with a motor but I had
a leftover 35T Cross RC motor from Demon which seemed like a perfect
fit. It was.
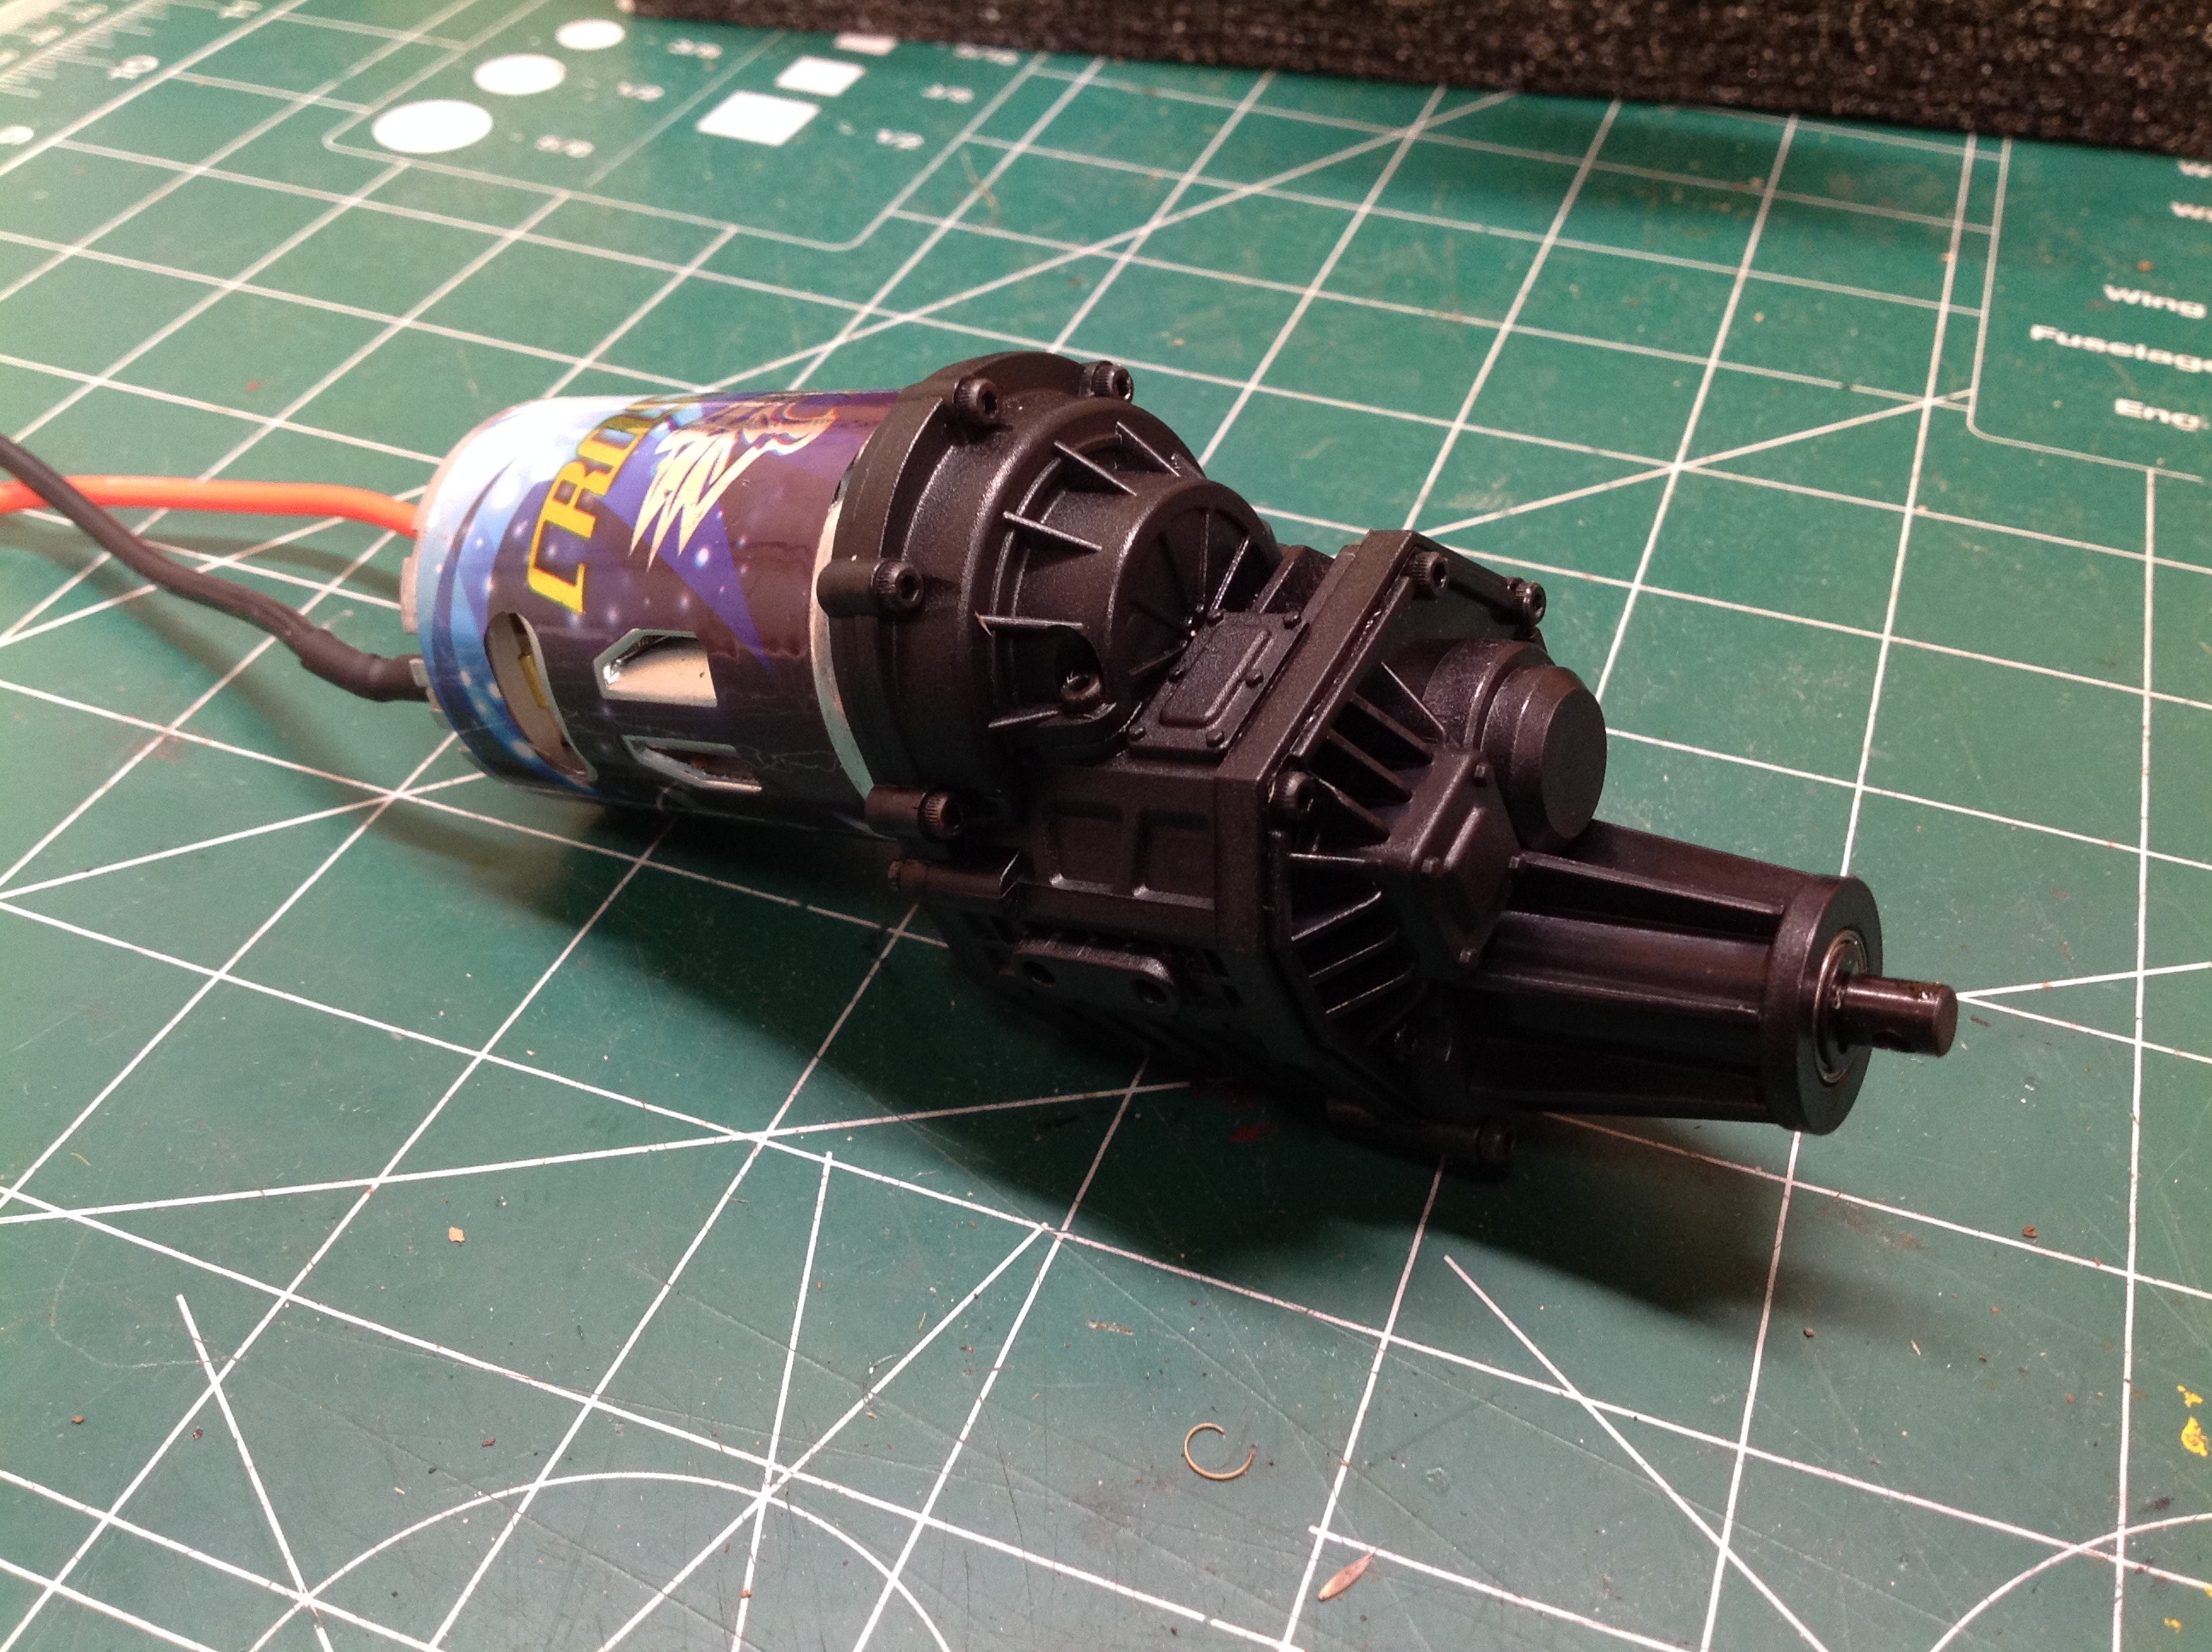
The motor and transmission assembly attached just behind the steering
servo, and there is not much room to spare. I had to bend the
wiring tabs heavily to make them fit. Luckily I used a plastic
bodied servo so I don't have to worry about shorts. The drive
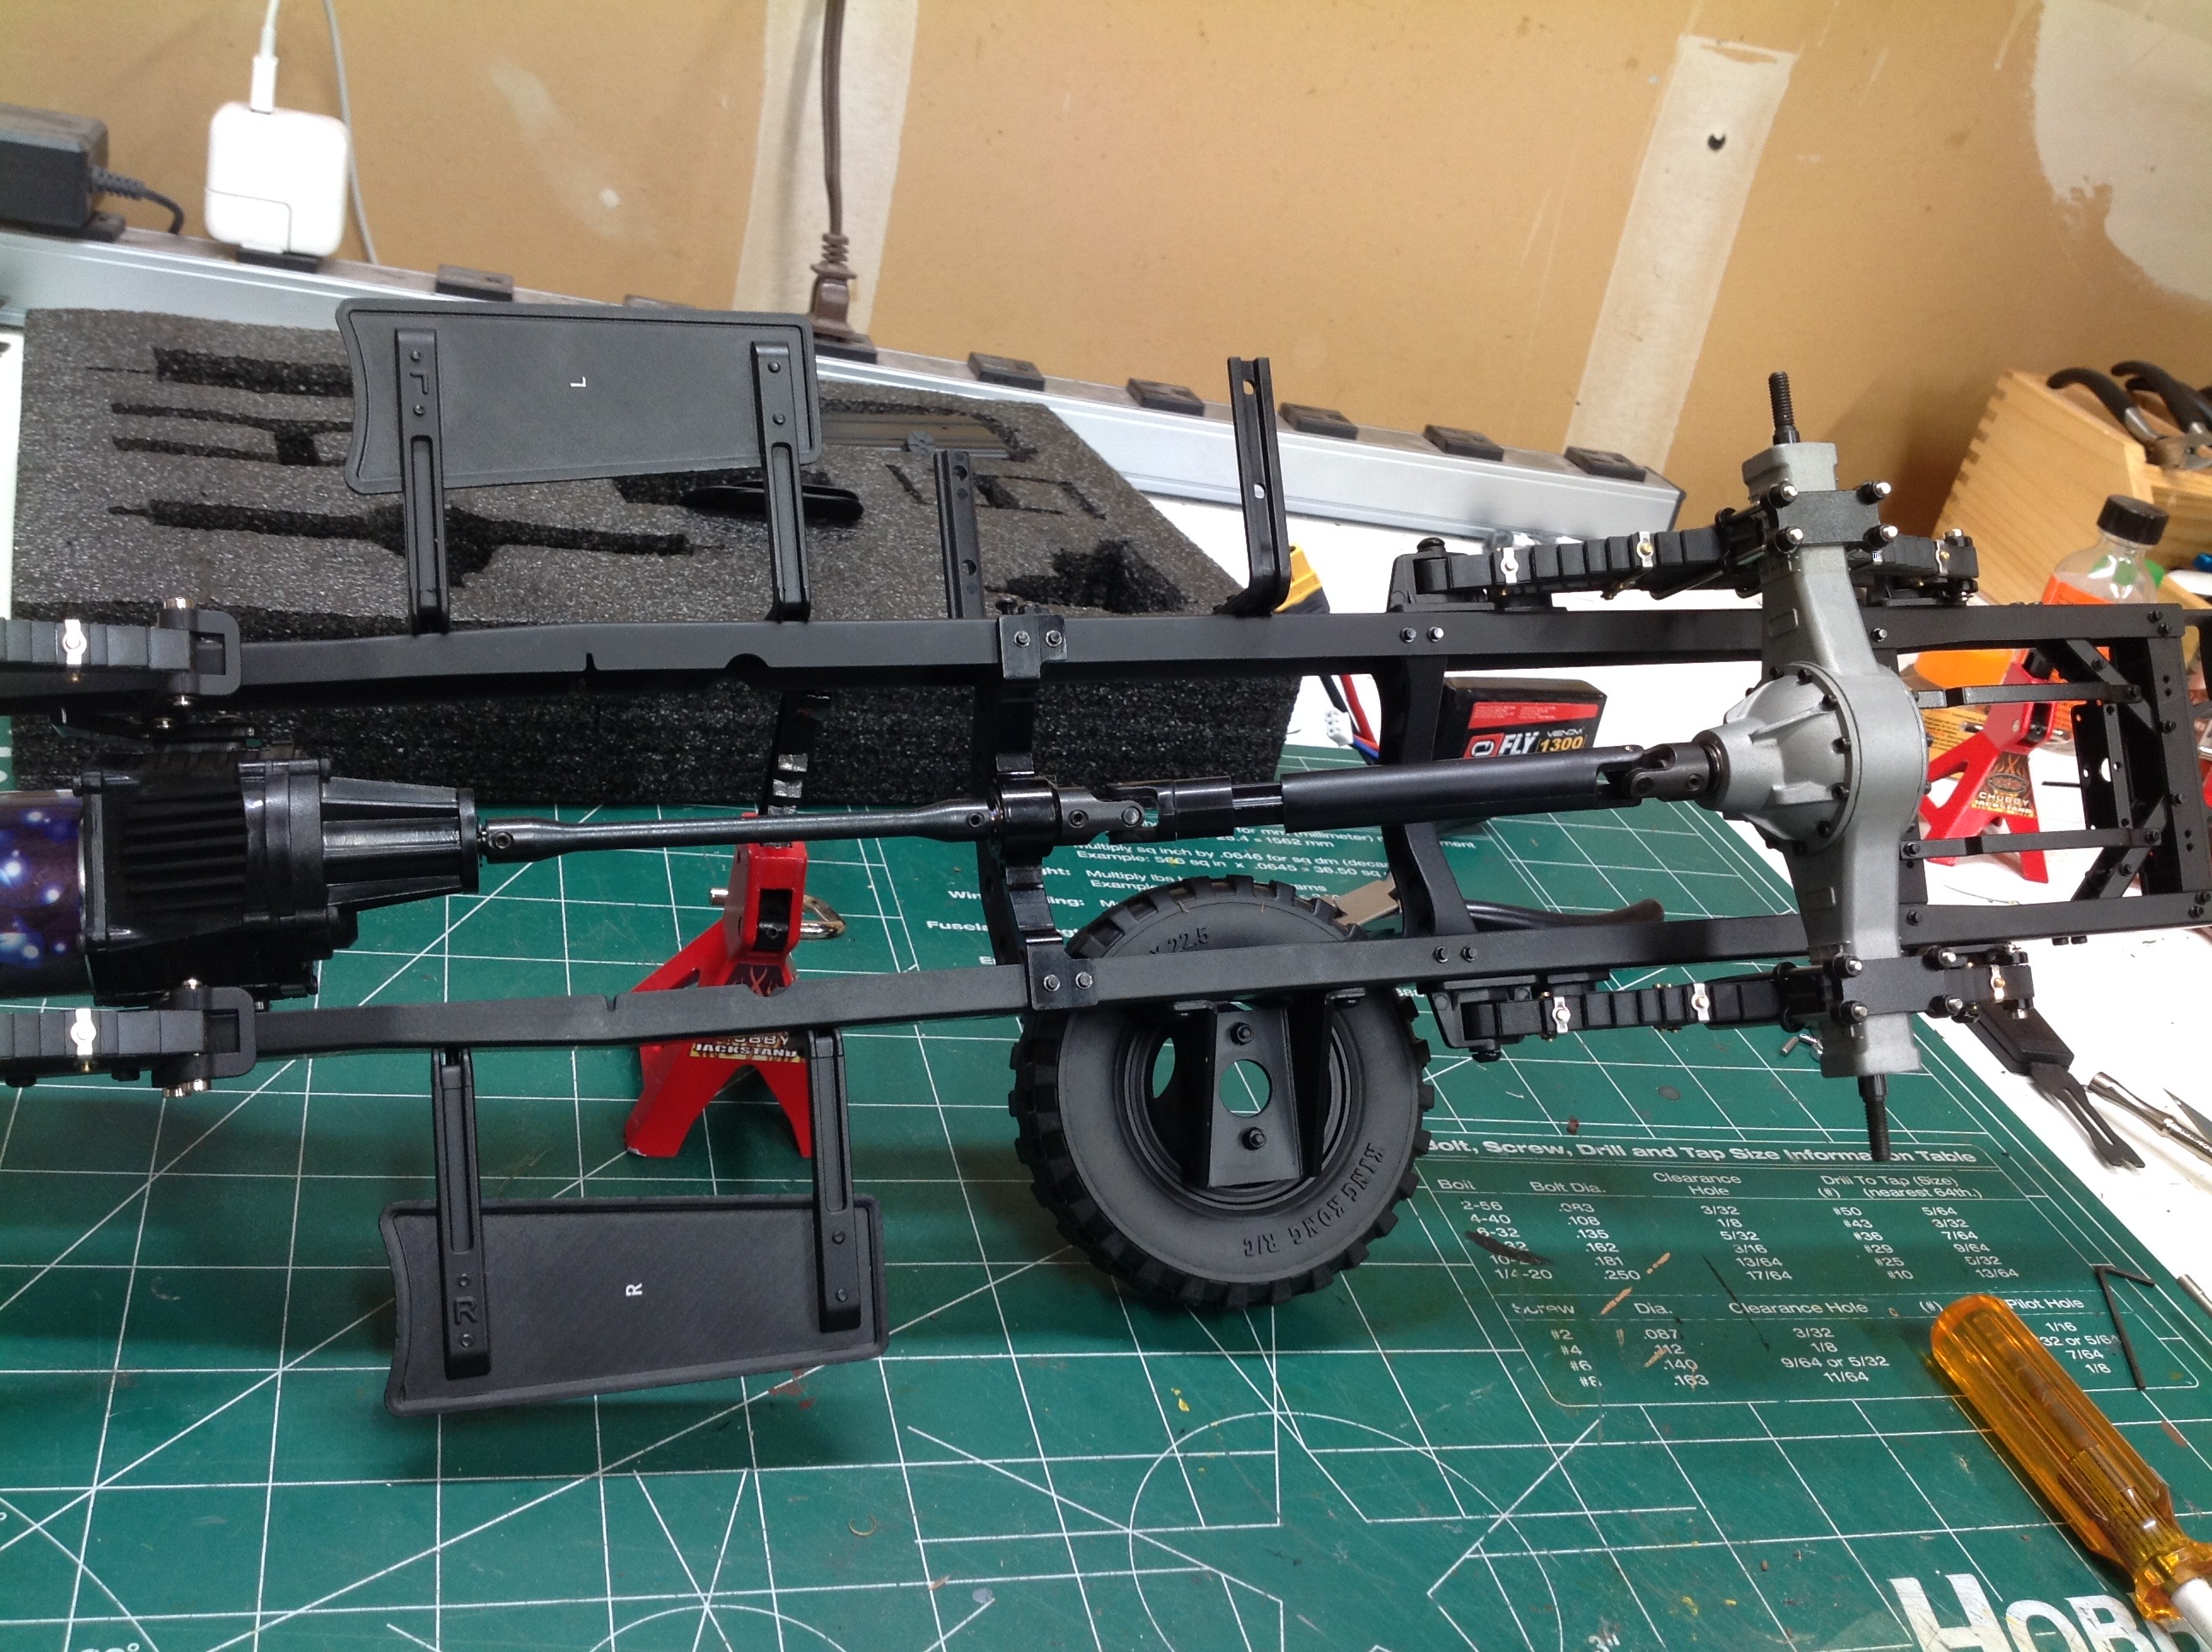
shaft comes in multiple parts. A rigid shaft connects the
transmission to an interim support which then connects to a plastic
universal shaft. I do wish the u-joints were metal because they
pop apart from time to time.
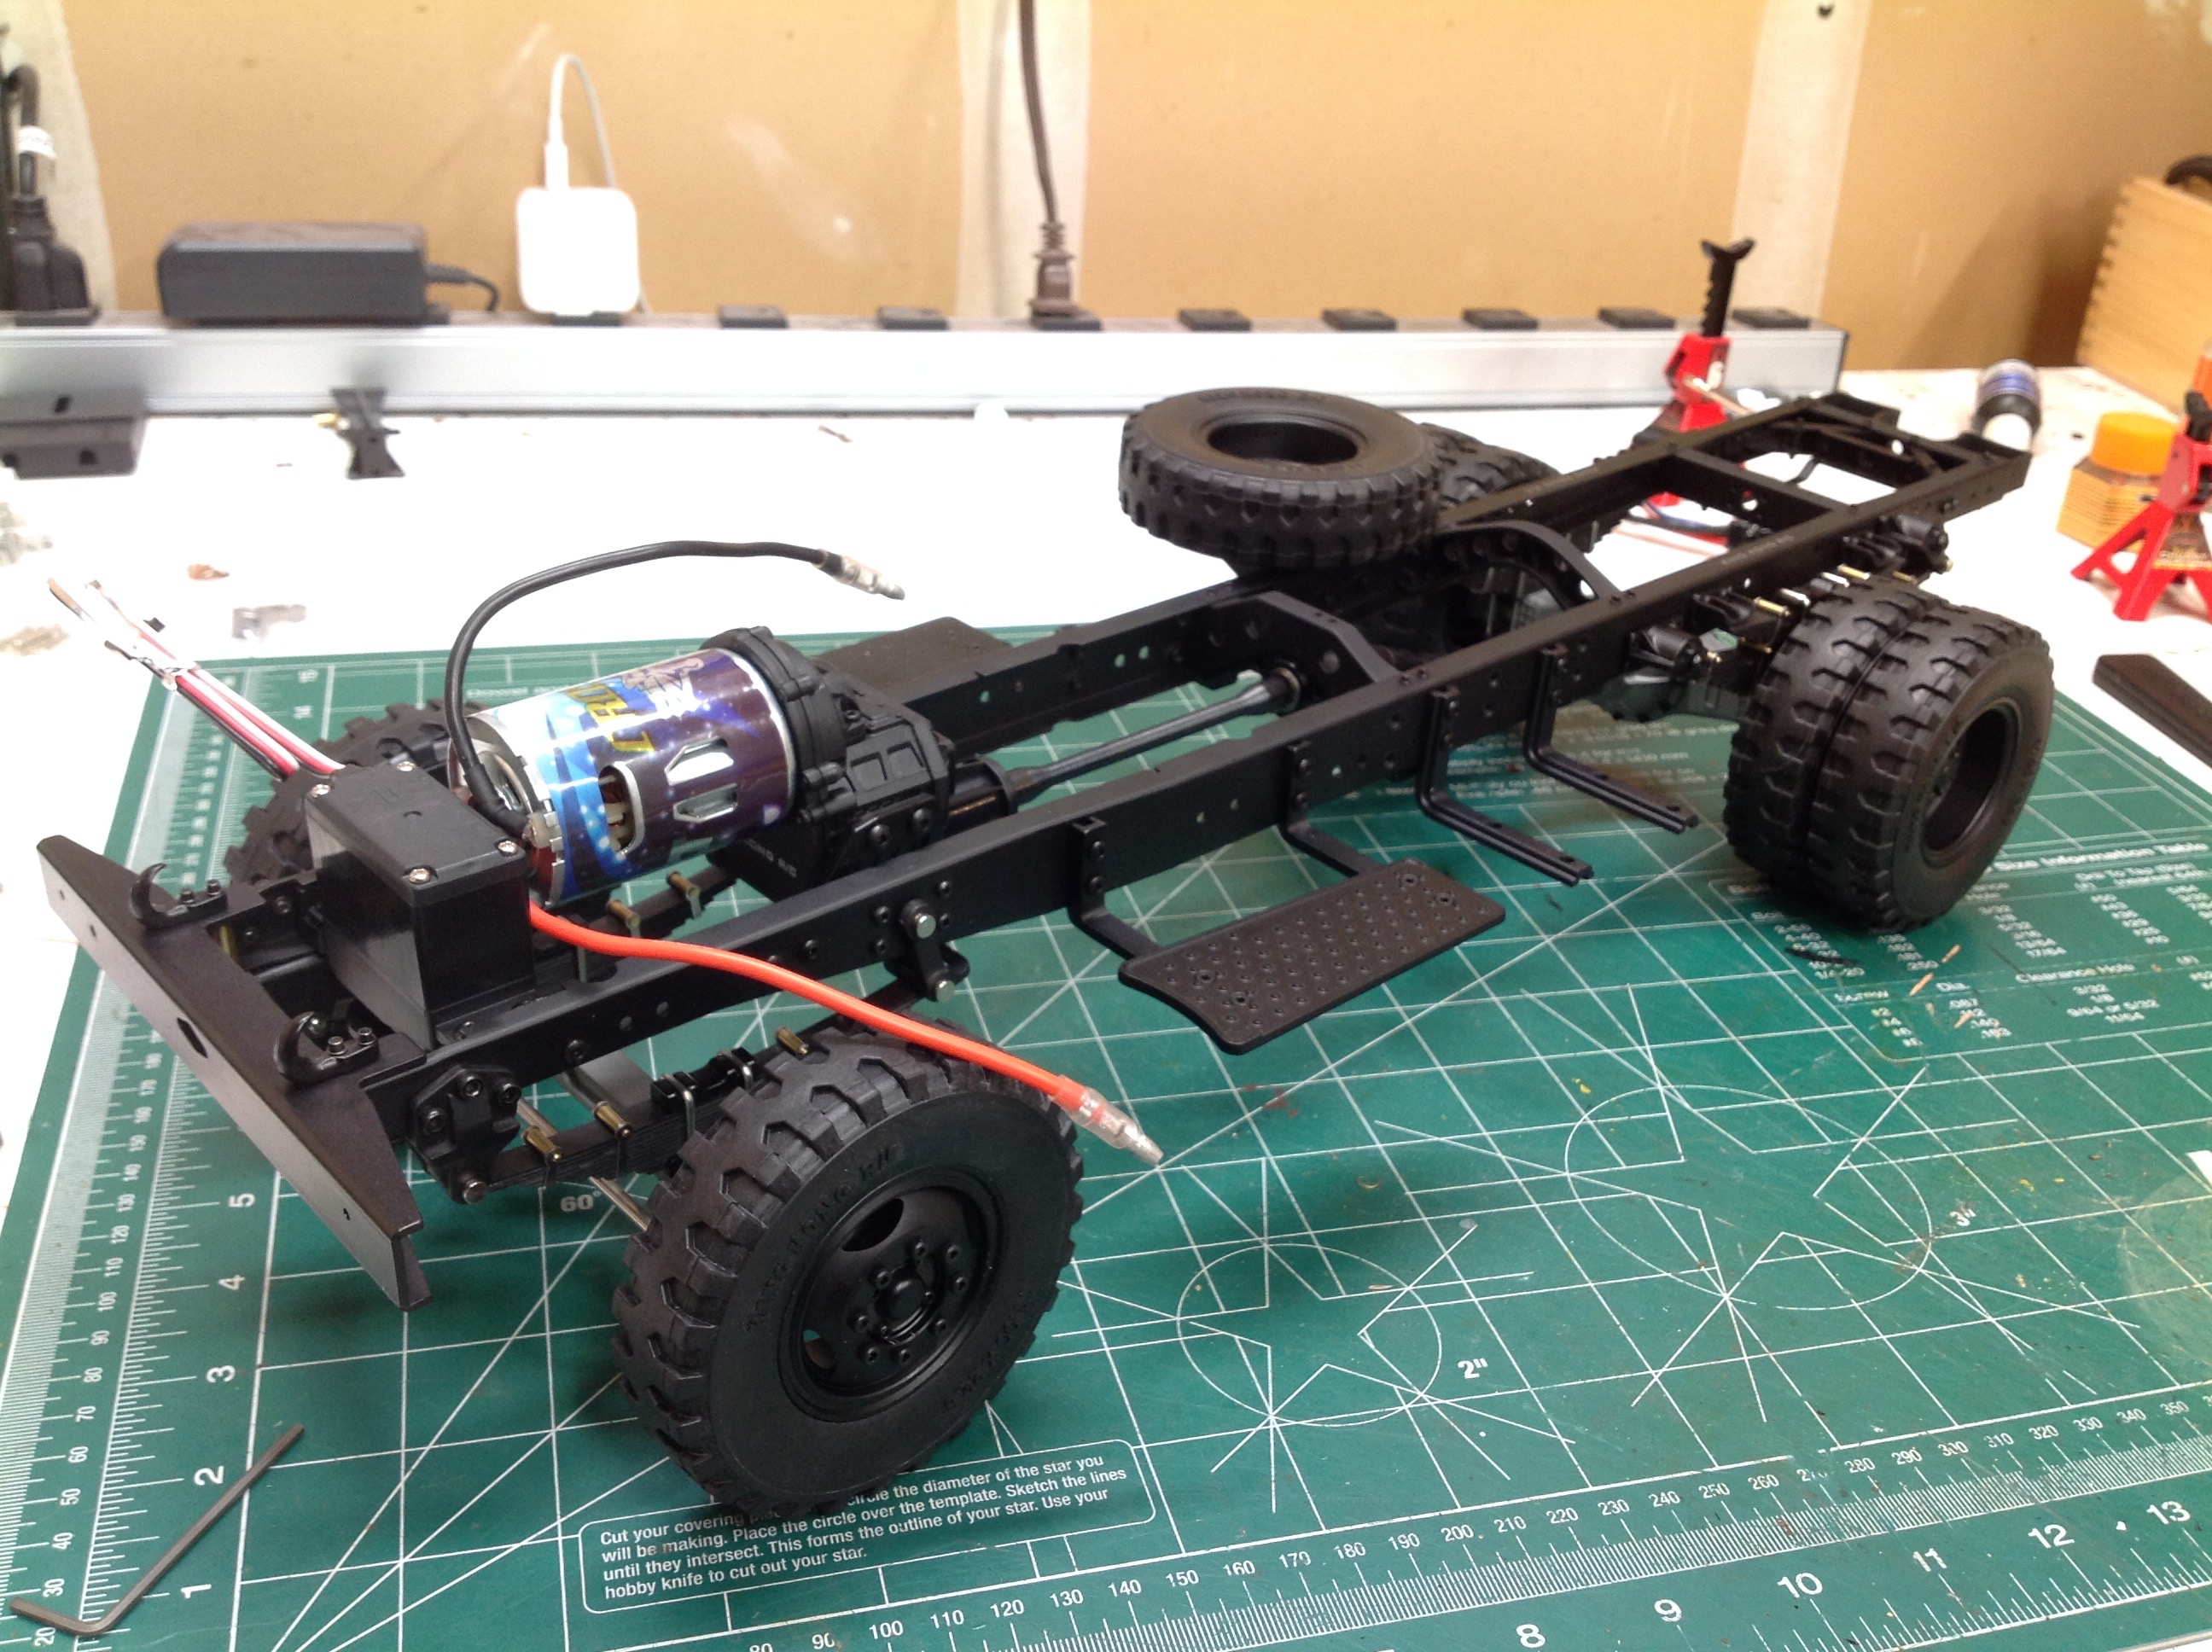
The installation of the wheels and tires completes the rolling
chassis. A close look will reveal the scale lug nuts in front and
planetary hubs in back making this look like the real thing. The
wheel nuts which attach the wheels to the axle are not visible.
The wheels are real steel but are not beadlocks. I managed to pack
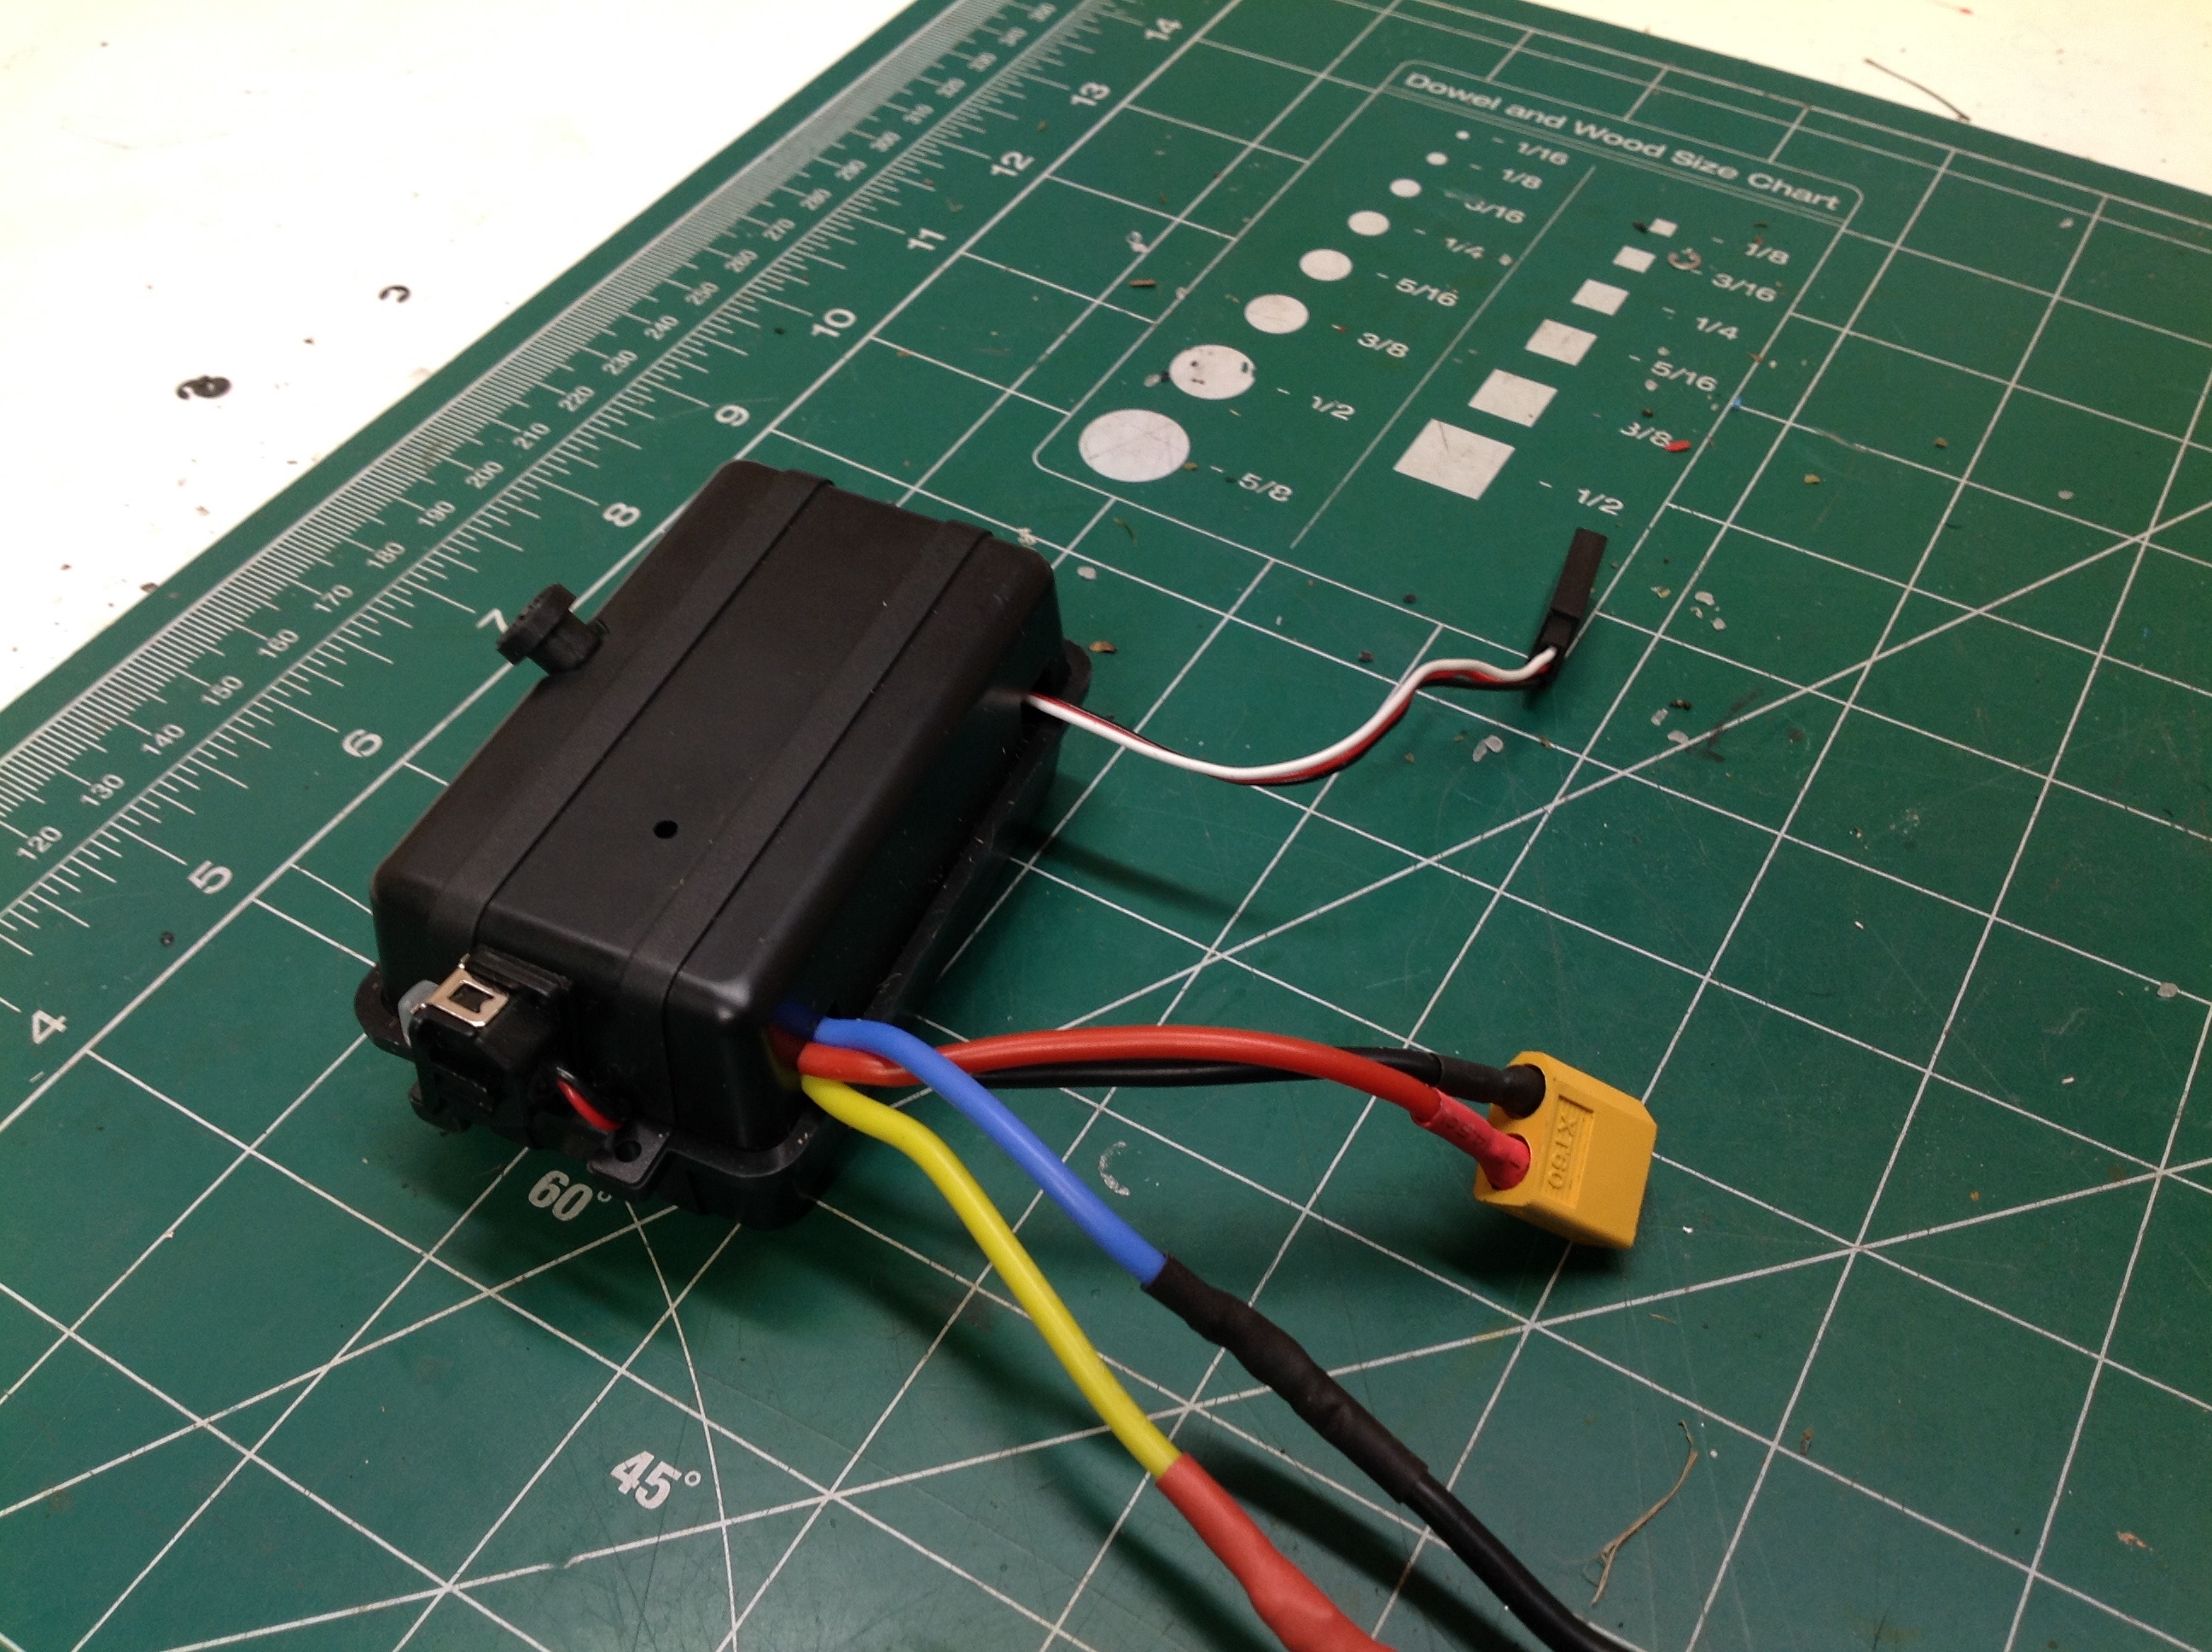
the receiver and speed controller inside the gas tank so that they
would be hidden when installed.
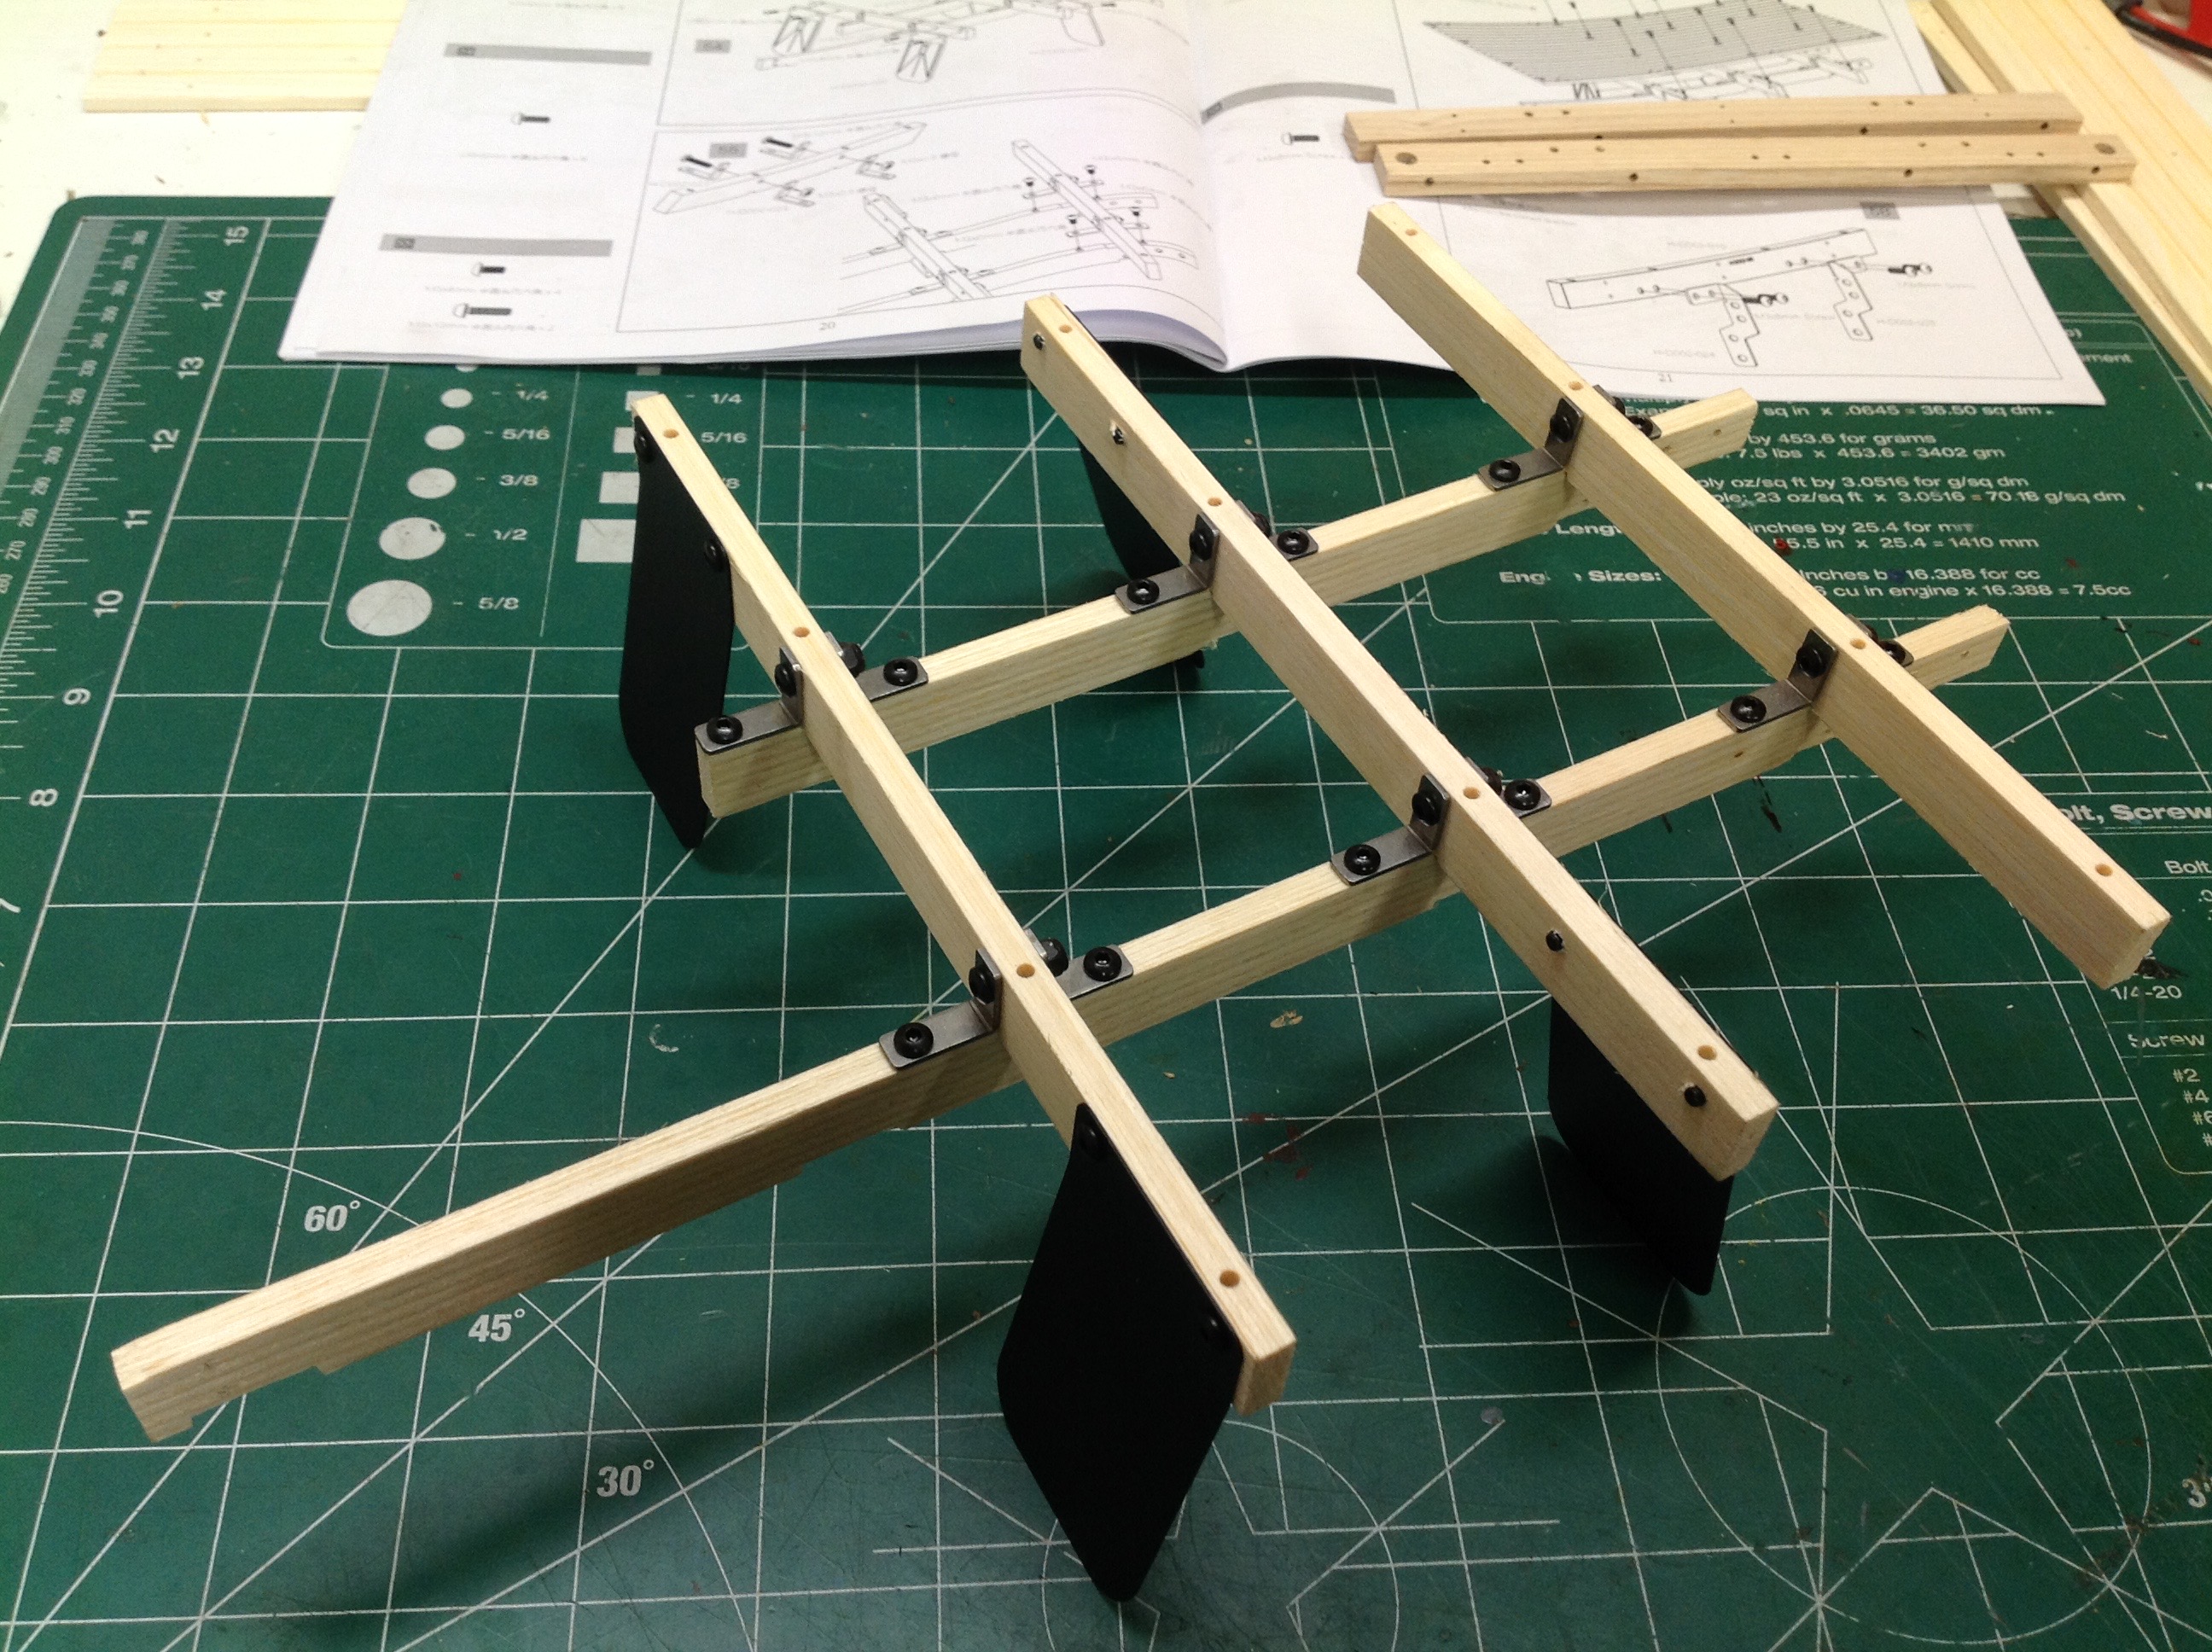
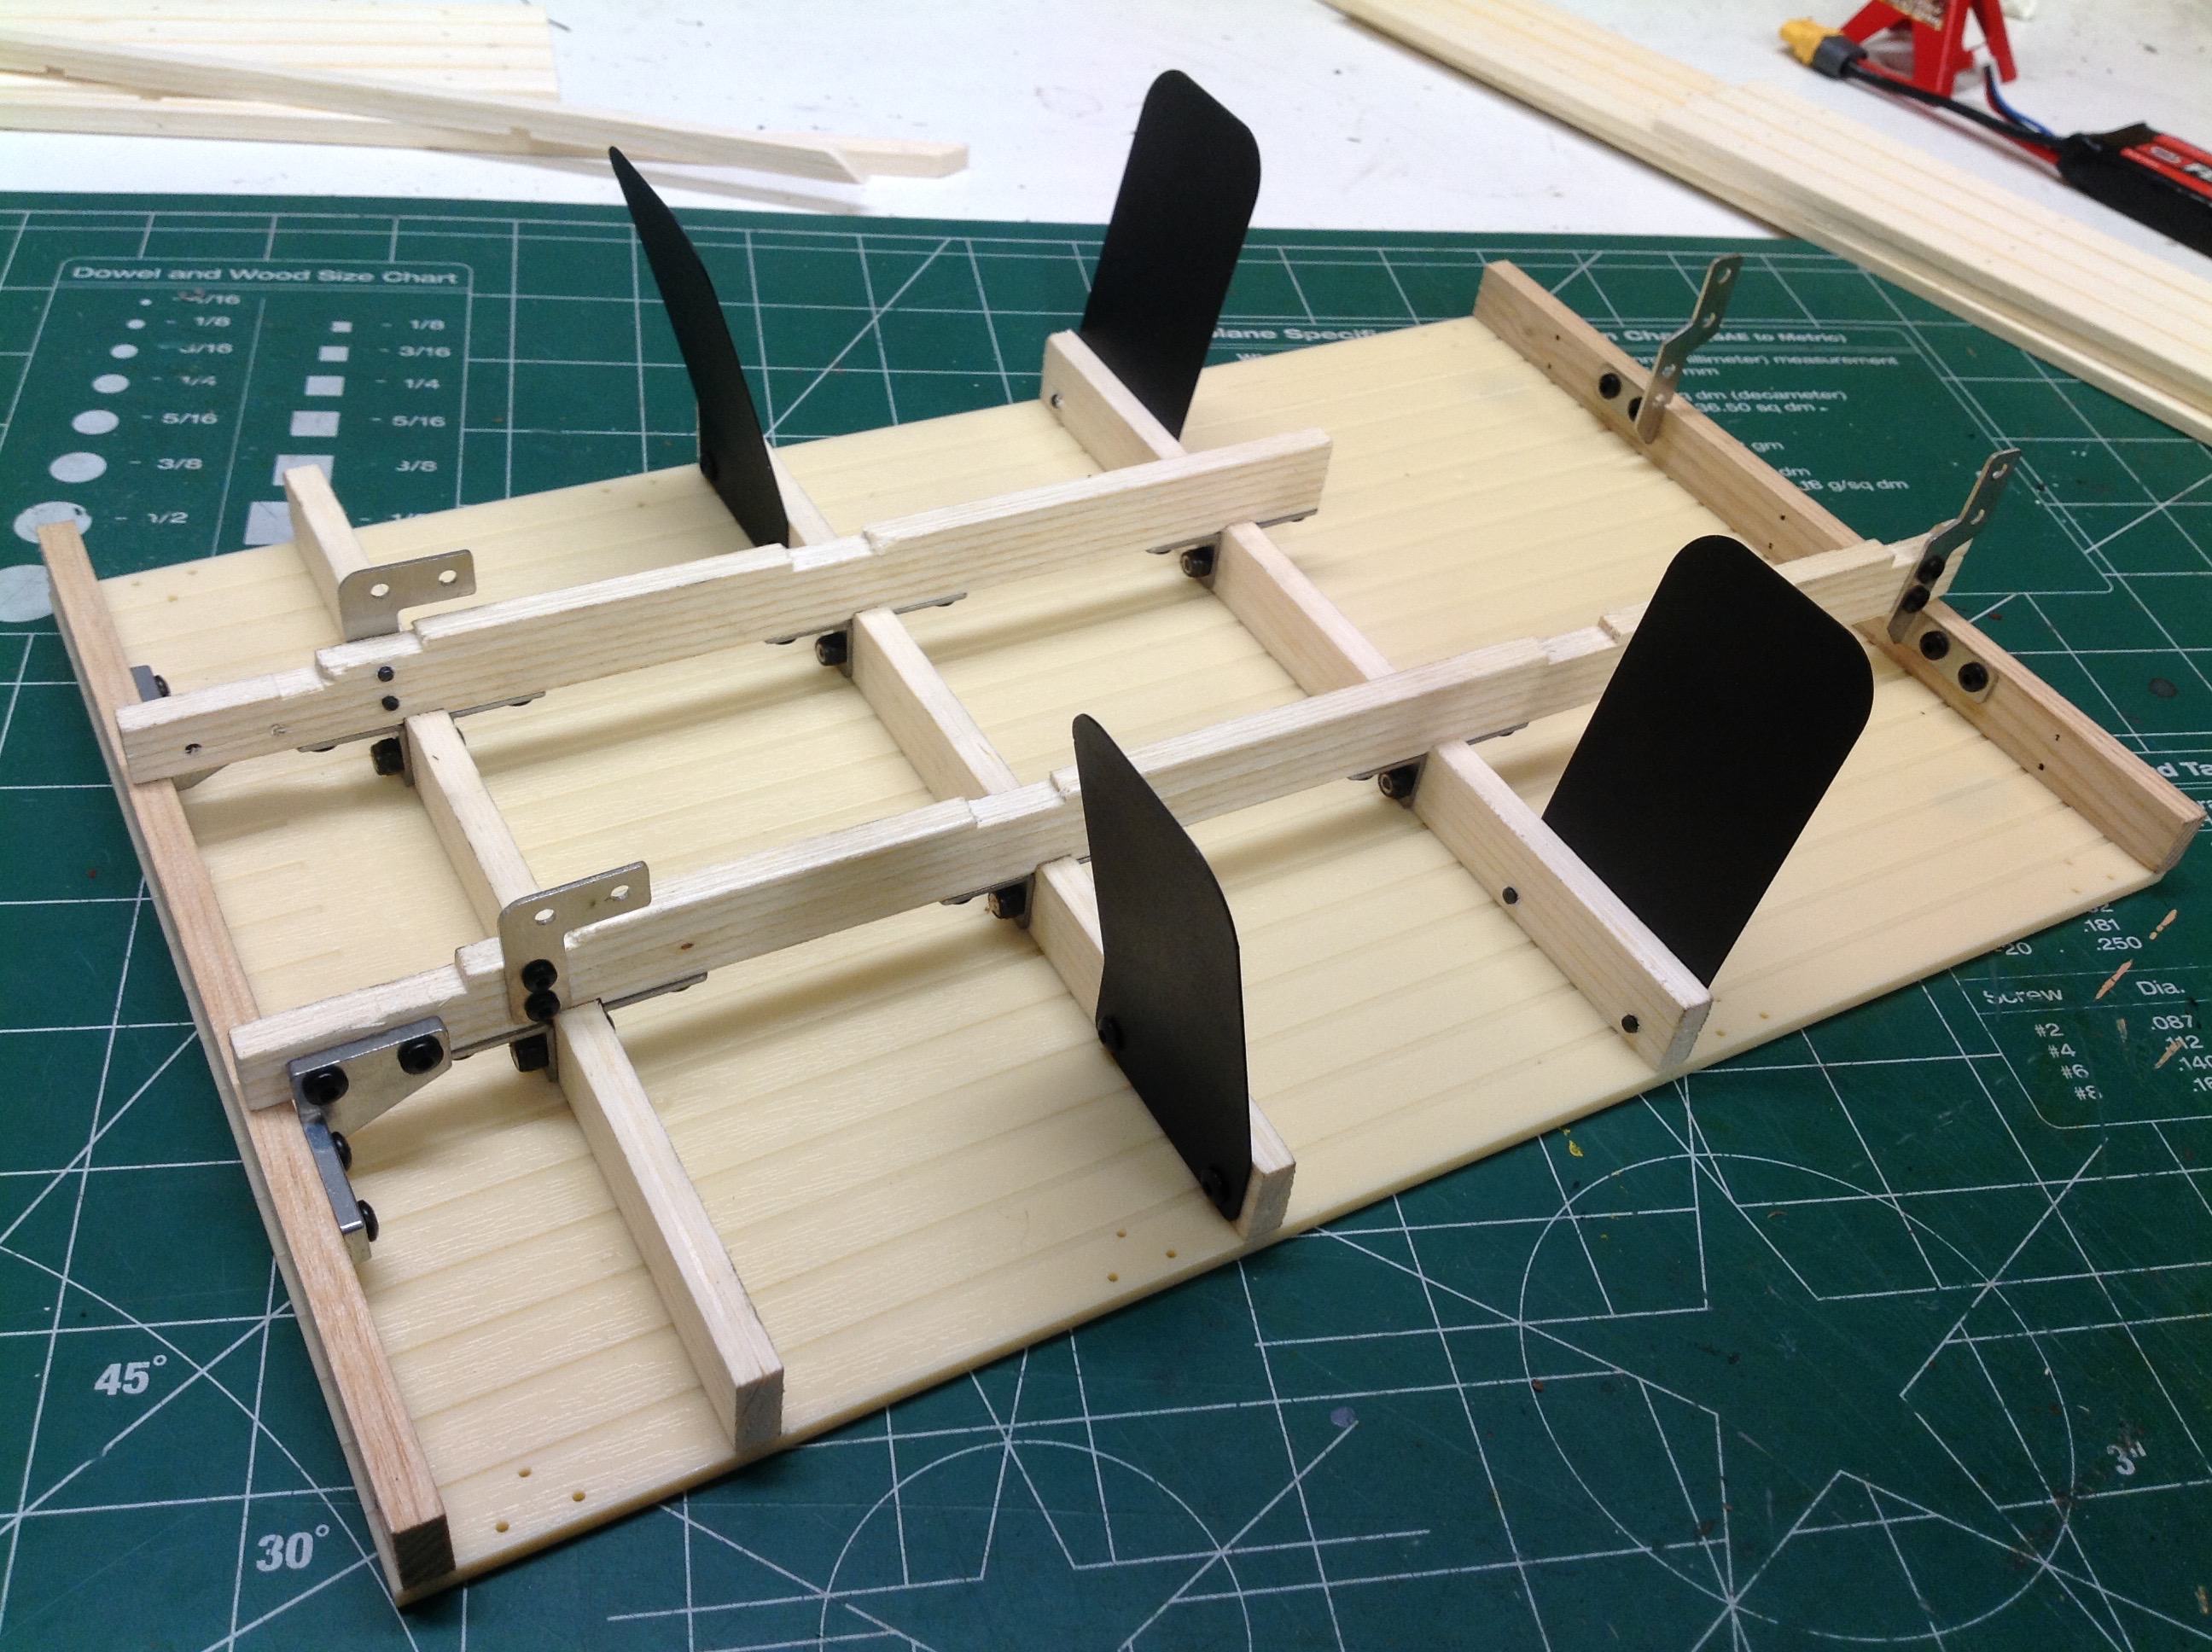
To complete the chassis, we need to build the wooden bed. All the
slats, beams, and joists are real wood. Sadly, the bottom panel is
plastic. This makes for a nice flat surface but makes it
impossible to use wood stain on the box for a realistic look. The
right hand picture shows the supports which will go below the
floor. The main rail is shorter on one side to allow space for the
spare tire which sits under the bed.
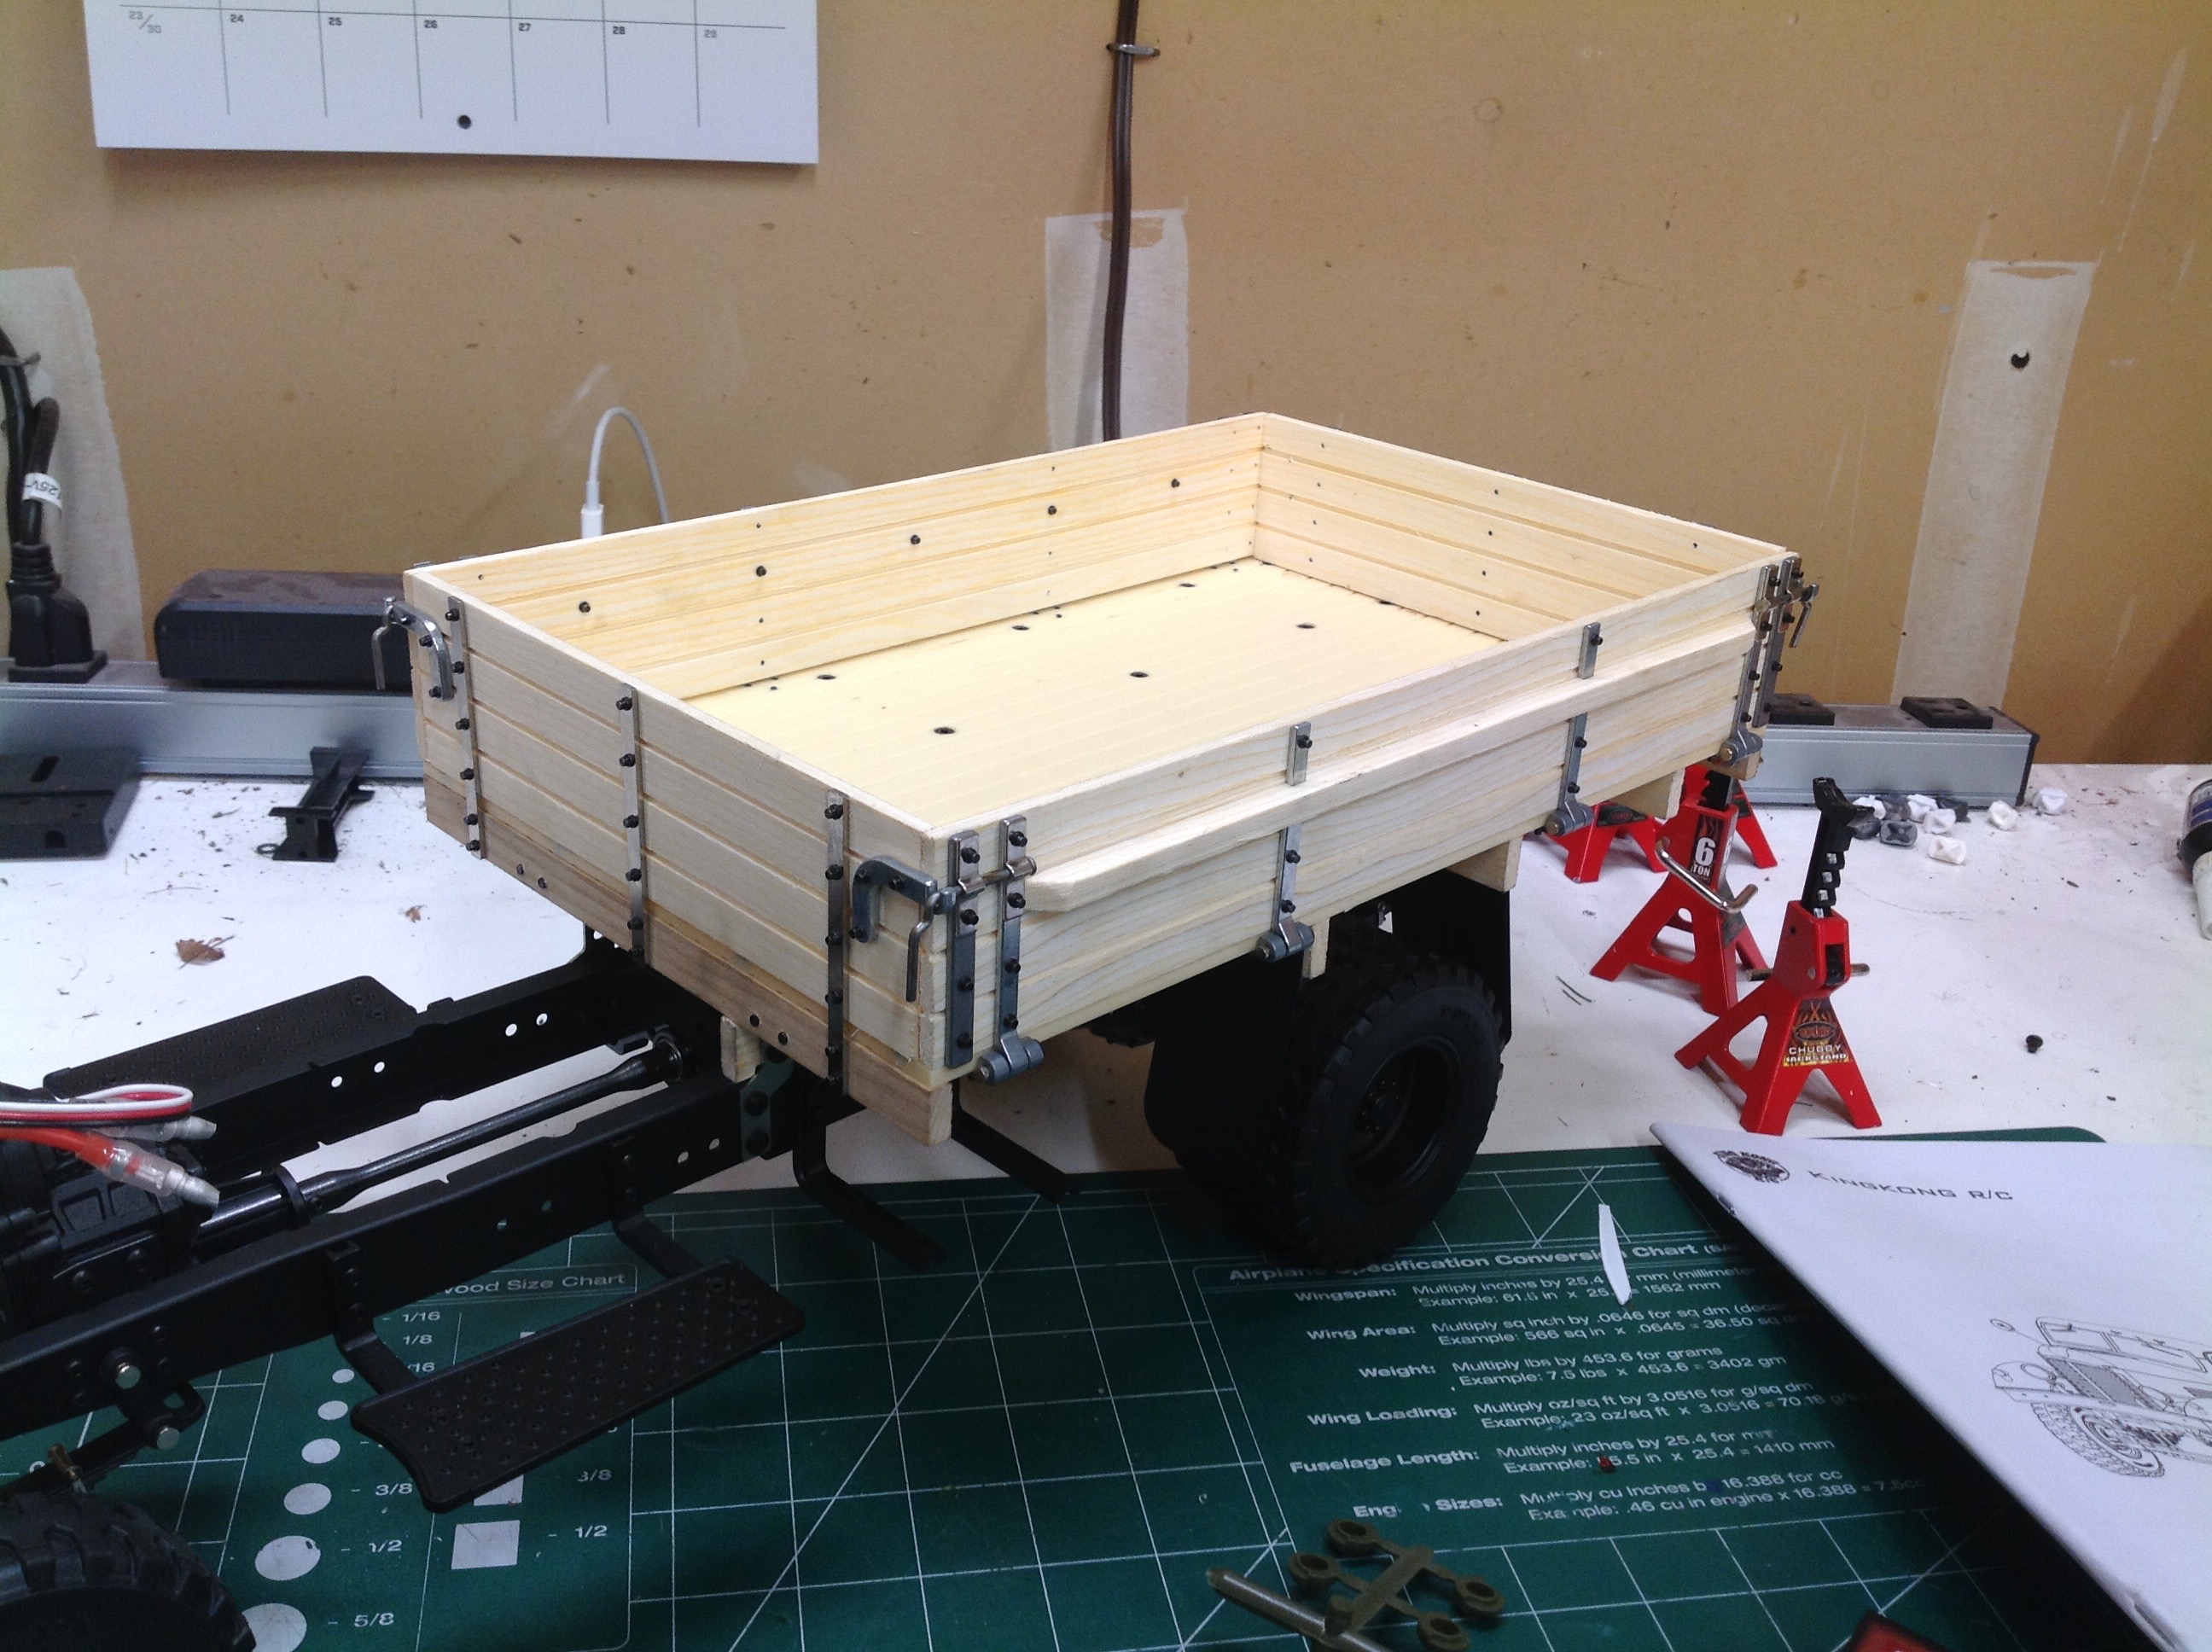
The mud flaps are sheet metal and the support brackets are stamped
steel. Getting access to install the tiny hardware on the mud
flaps is quite difficult. Once the box is complete, it can simply
be screwed to the chassis. Both the sides and the tail gate swing
down by releasing the catches in the corners. The front panel is
fixed in place.
©2019 Eric Albrecht