Tamiya Mitsubishi Pajero Project
Page 1: Stock Assembly
Because I have already built several other CC-01's, I did not record most of the build process here.
For those interested in more information about the build of this
chassis, a detailed build record of another CC-01 can be found on my Land Rover Defender page.
I hardly took any pictures of this while I was building. I built
this as a learning project with my 12 year old daughter and we were
concentrating on the parts rather than on taking pictures.
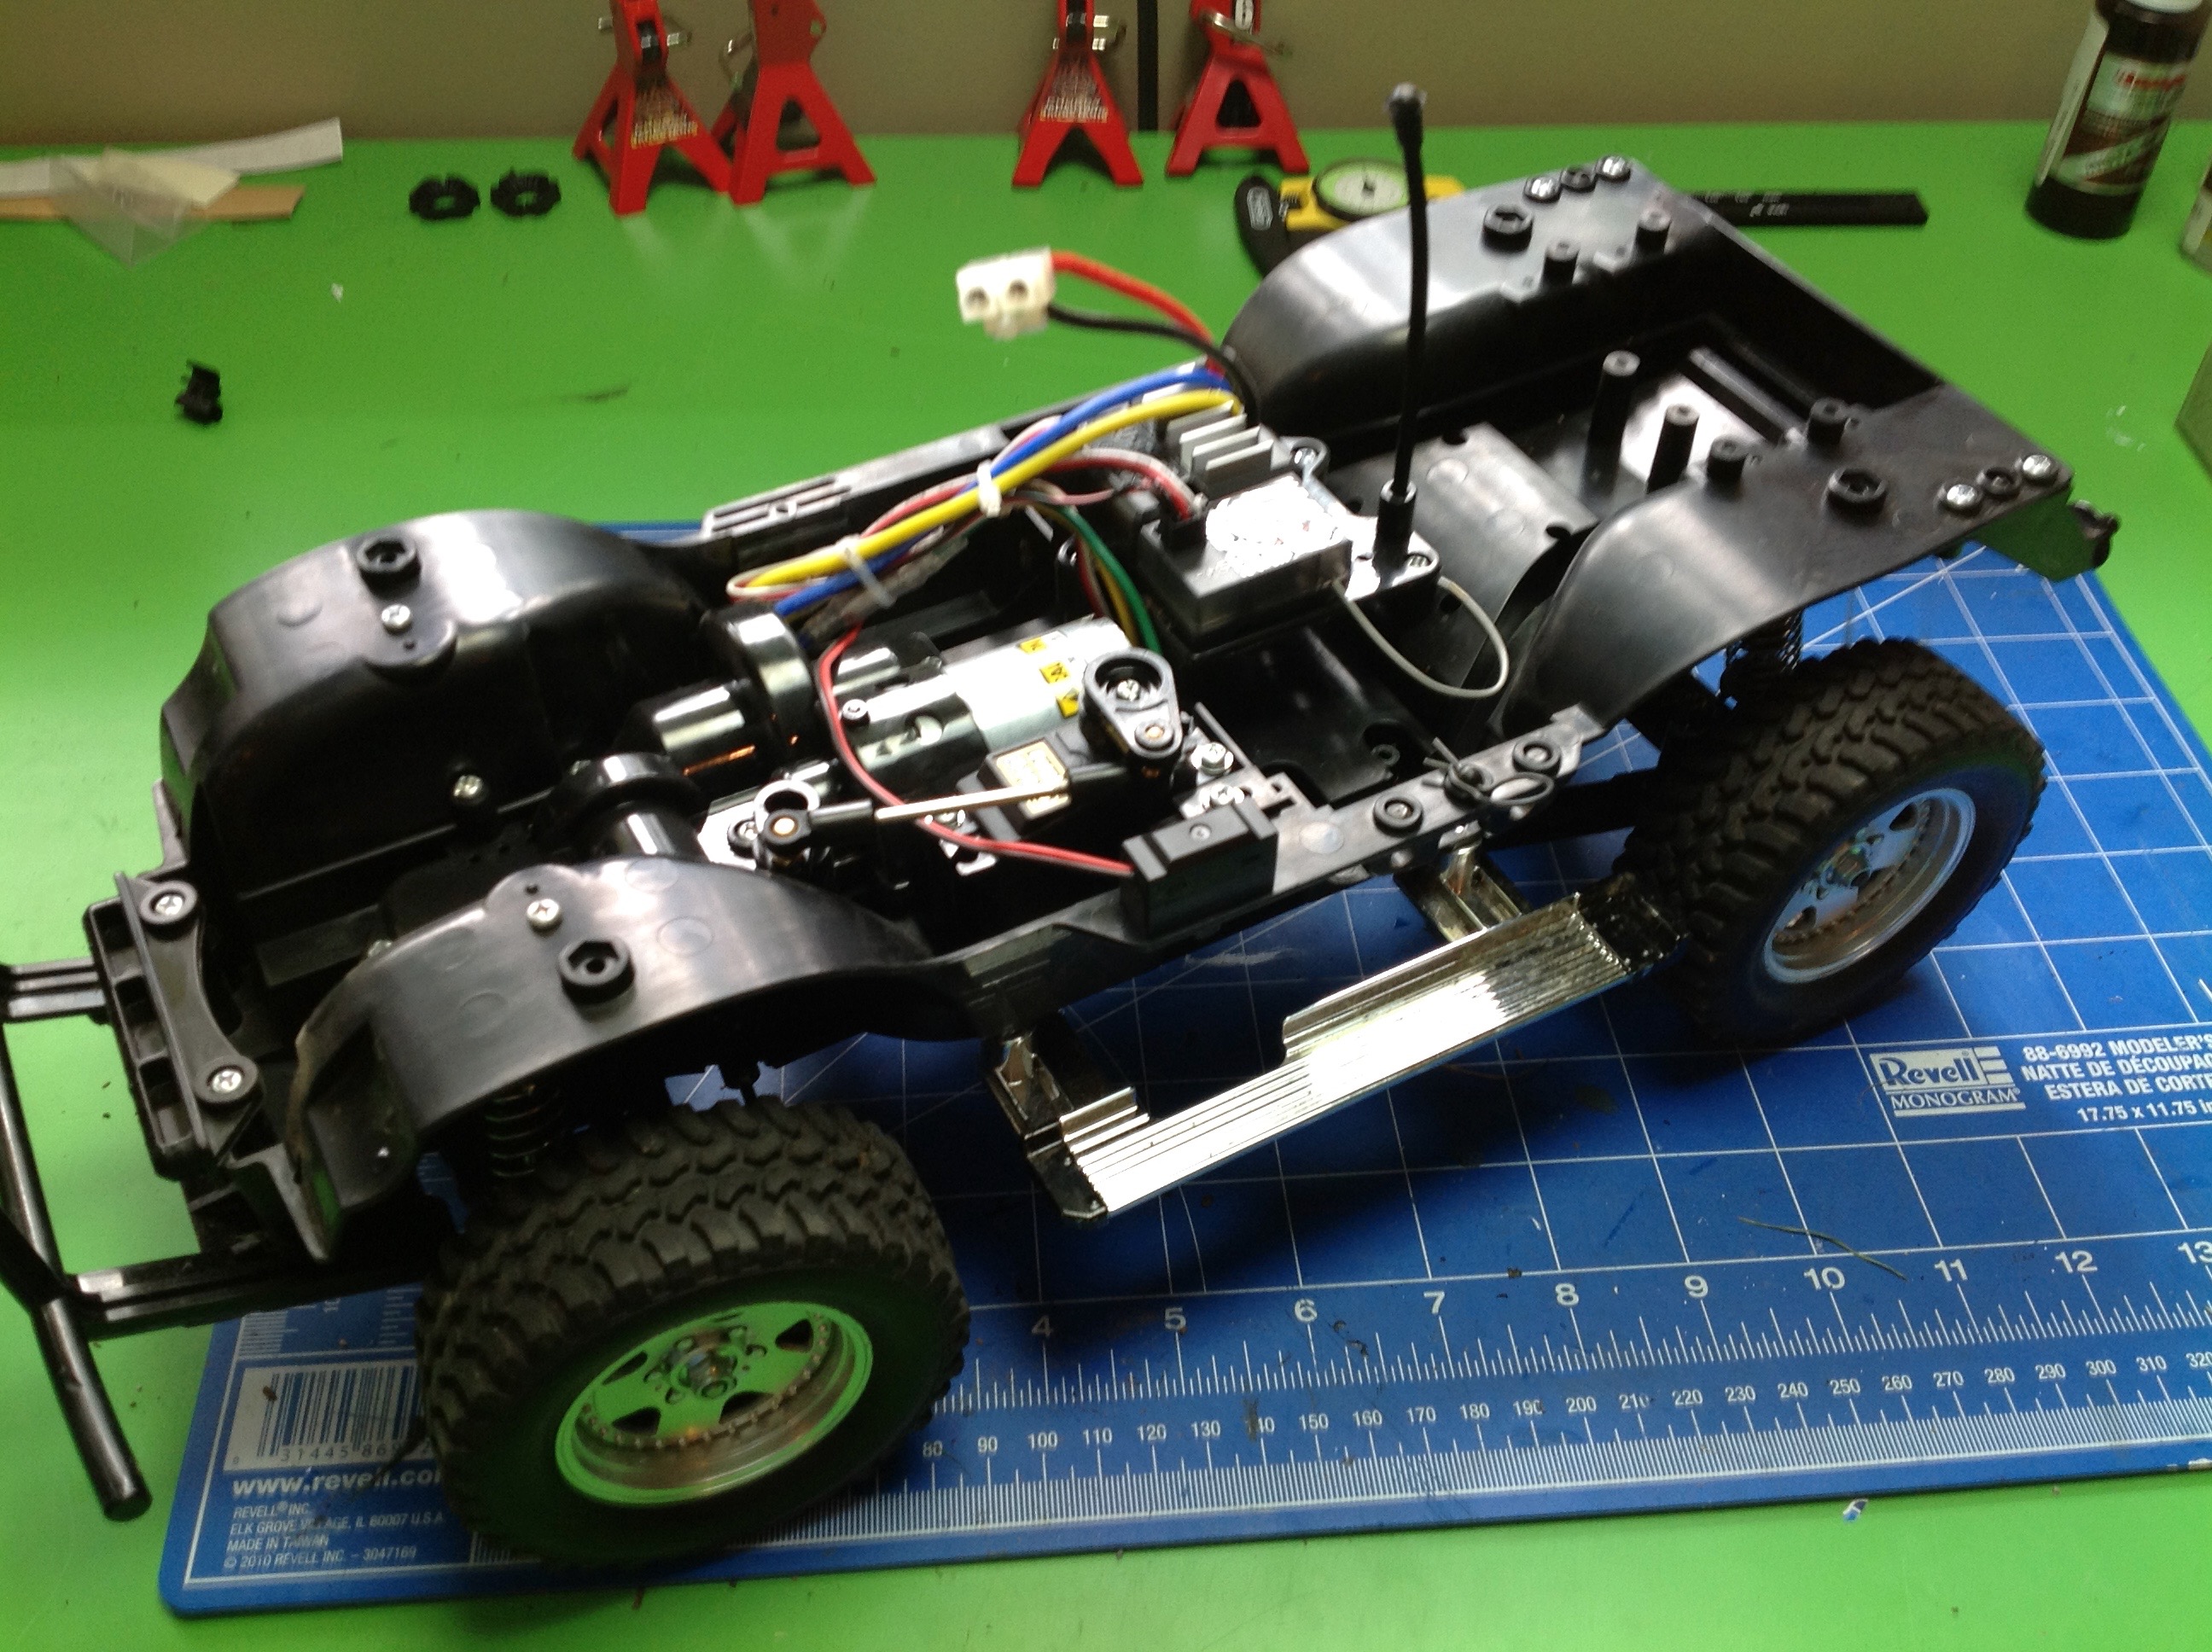
Therefore, the first picture is the completed chassis! You can see
that the main chassis is a single piece bathtub style design which
makes it very stiff and durable. The gearbox is integral to the
chassis and is located just ahead of the motor. The gears are very
wide for a car of this size and are made of nylon. They should
last almost forever. I really like the scale wheels and tires as
well. The wheels and running boards are not chrome but a dull
metallic silver color. The integrated wheel wells help keep debris away from the electronics.
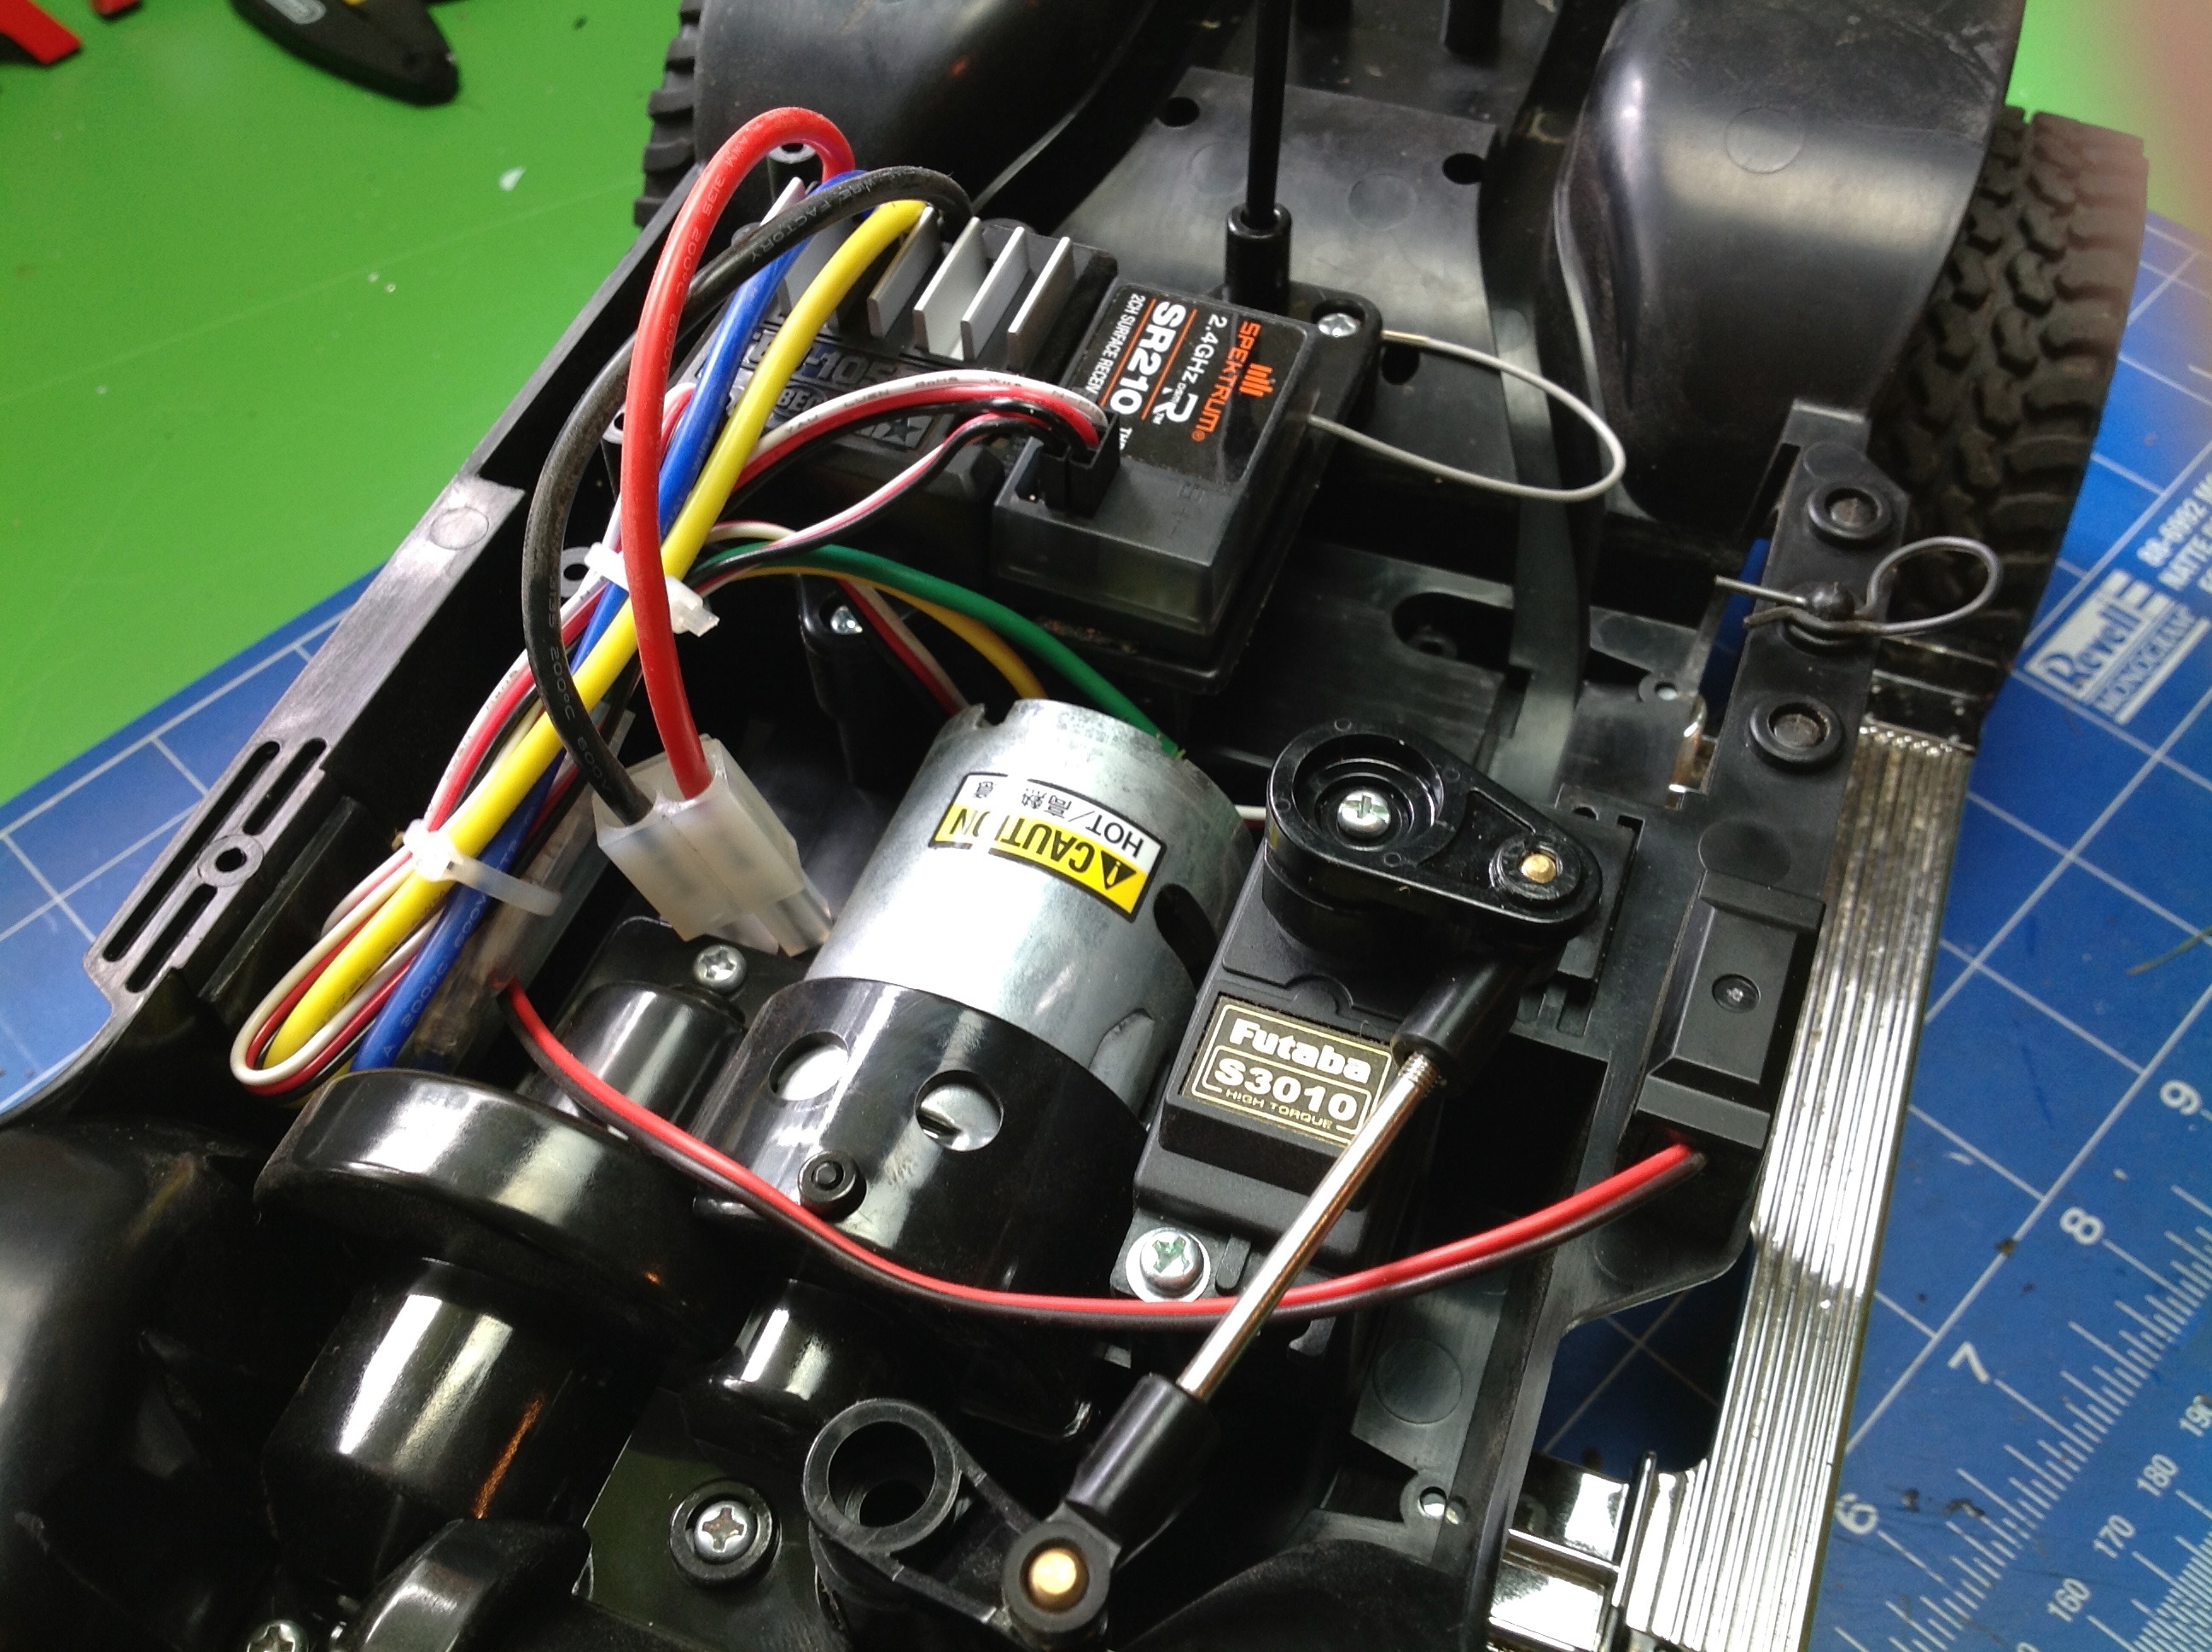
Here is a closer view of the electronics installation. The 540
motor is mounted centrally aligned with the chassis. A tray behind
the motor holds the speed controller and receiver with the steering
servo beside the motor. The battery sits in a lateral slot under
the electronics. Because the battery slot is specifically shaped
to fit a 6-cell NiMH pack, you really can't fit in anything else unless
it is the same size. NiMH is fine for this model anyway. The
weakest point of the design is the steering crank. The steering
crank has only a single long axis which runs from the top where the
steering servo is to the bottom of the chassis where is connects to
another link going out to the wheels. This single long axis is
pretty loose and does not ride on a bearing. It connects to the
lower cranks with a couple of flats which do not fit tightly. This
makes it hard to drive the vehicle in a straight line.
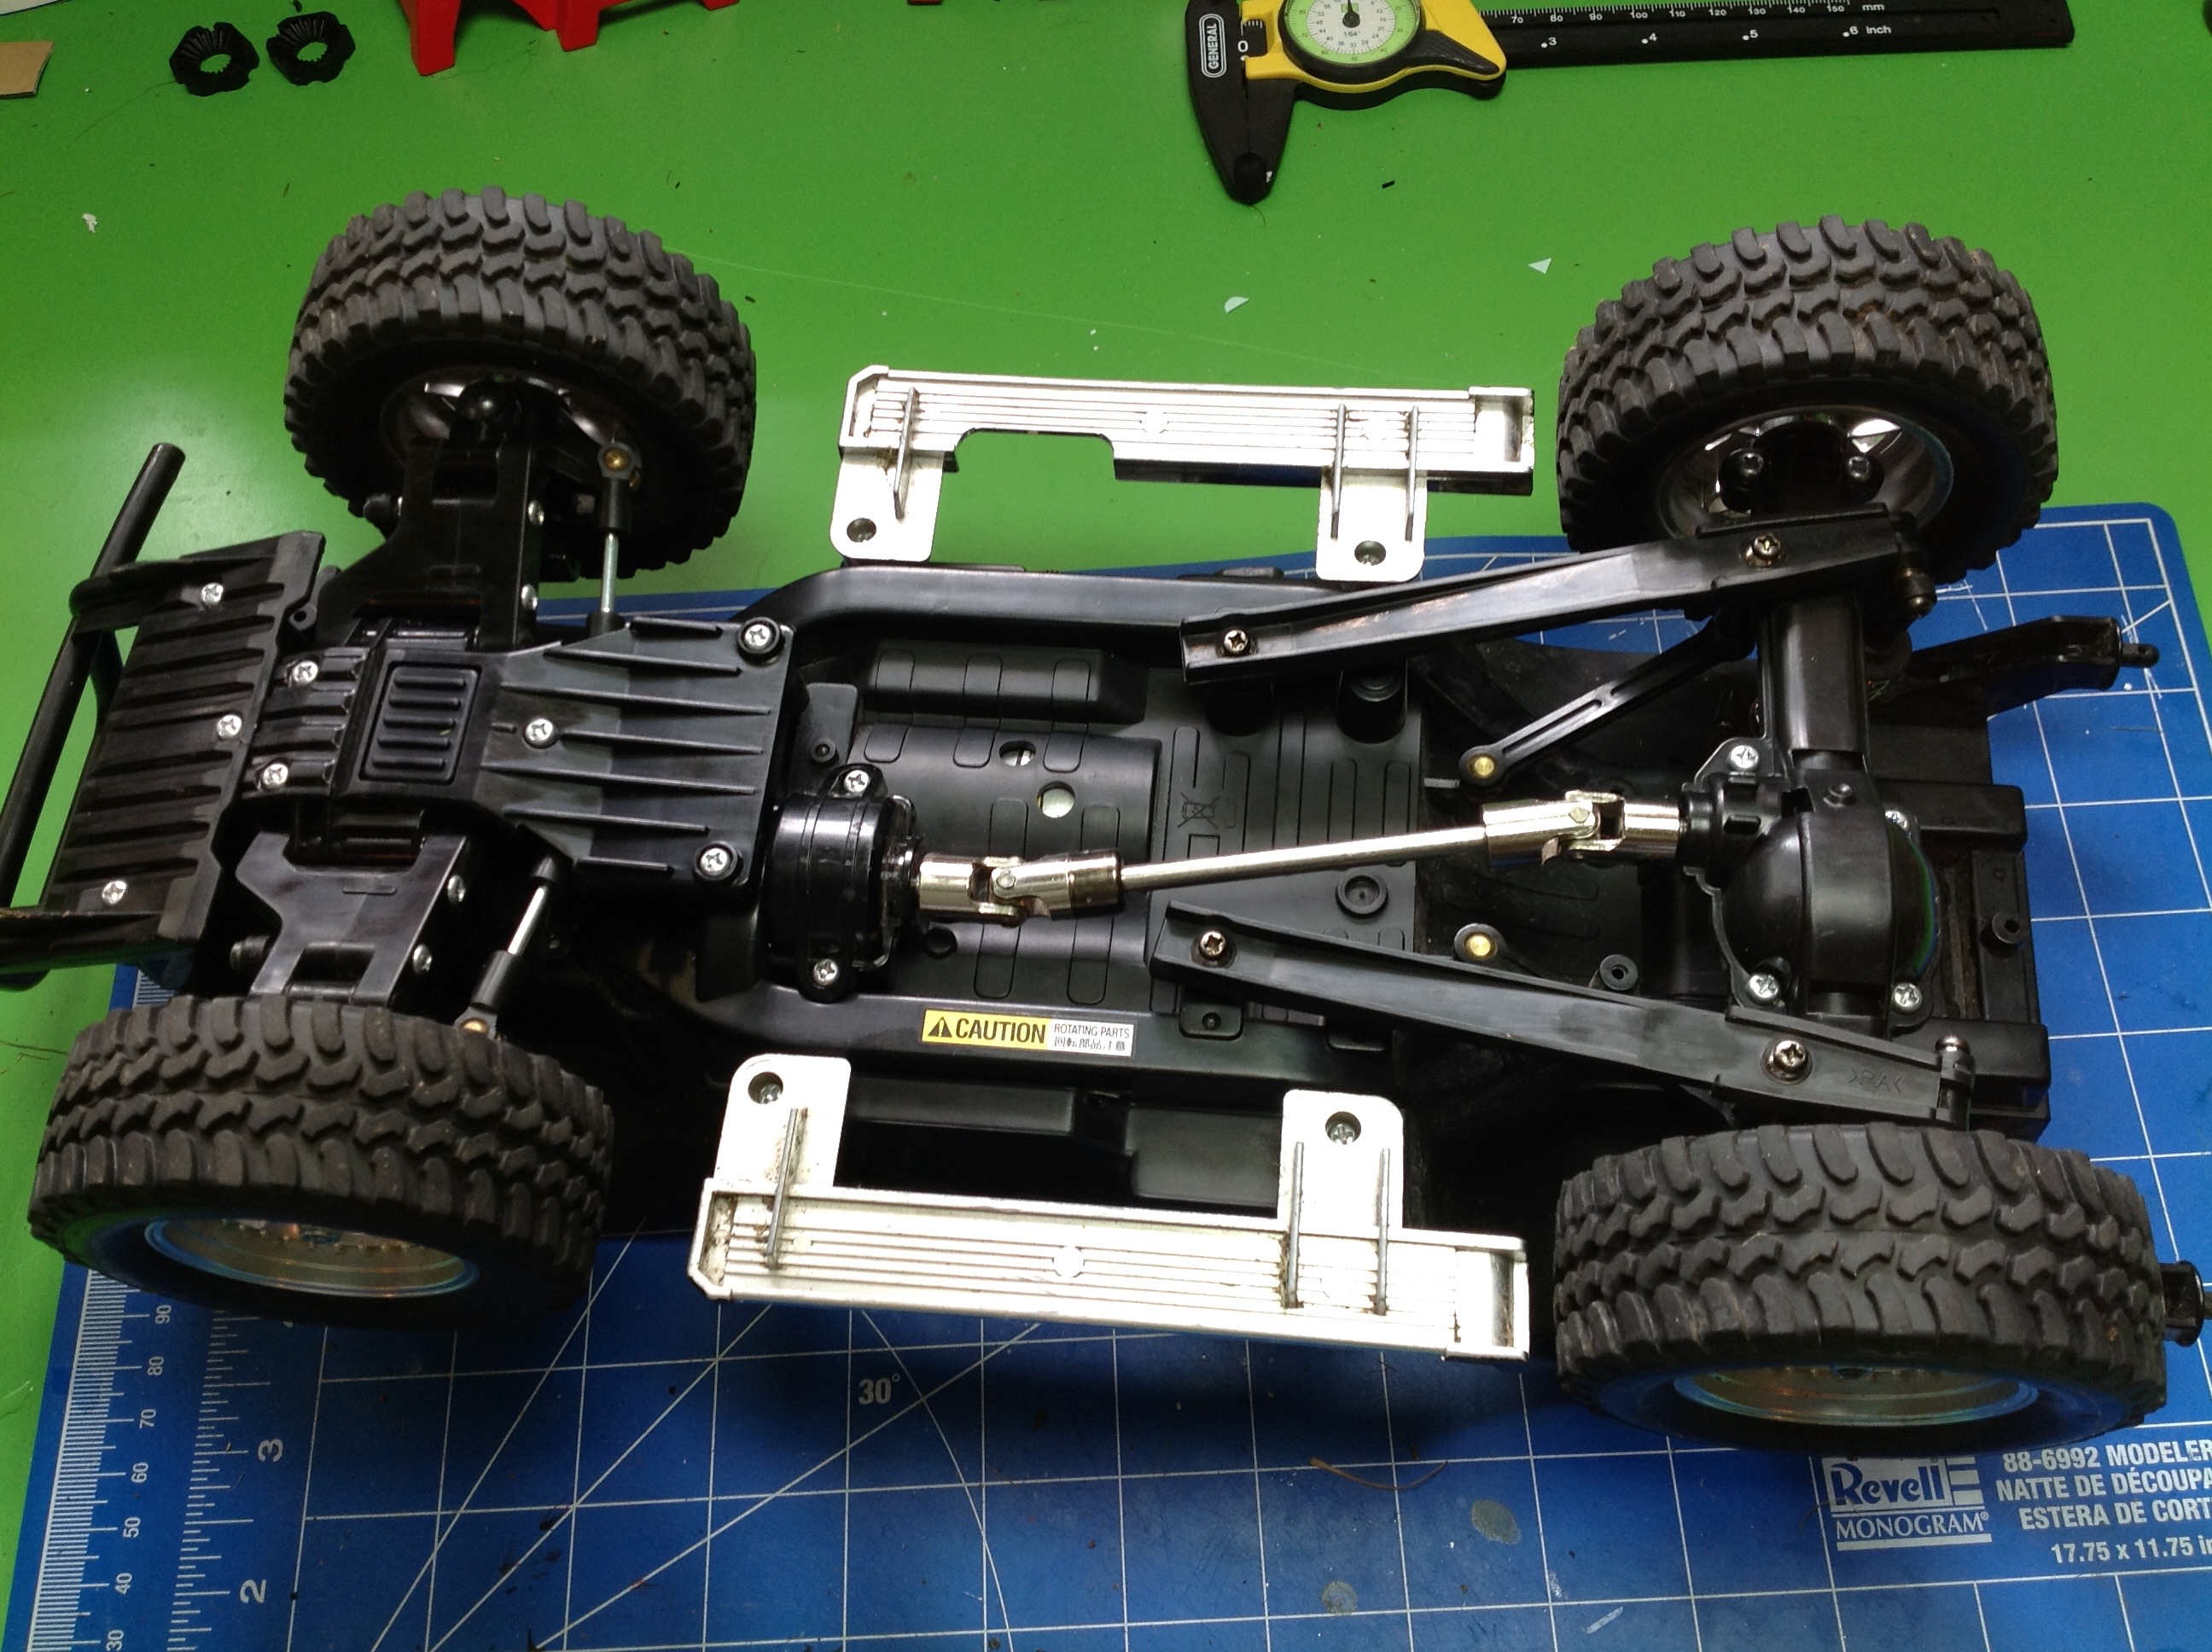
From the bottom you can see the suspension and drive line. The
front suspension is independent double wishbone type. The rear
uses a solid axle with 4-bar links. The shocks are oil filled
plastic CVA all around. The rear shocks attach in an odd way,
connecting to the lower suspension links behind the axle instead of to
the axle housing itself. The rear drive shaft is a very nice
sliding steel unit with universal joints. There is no front drive
shaft because the gearbox is integral to the front chassis. Front and rear differentials are unsealed gear type.
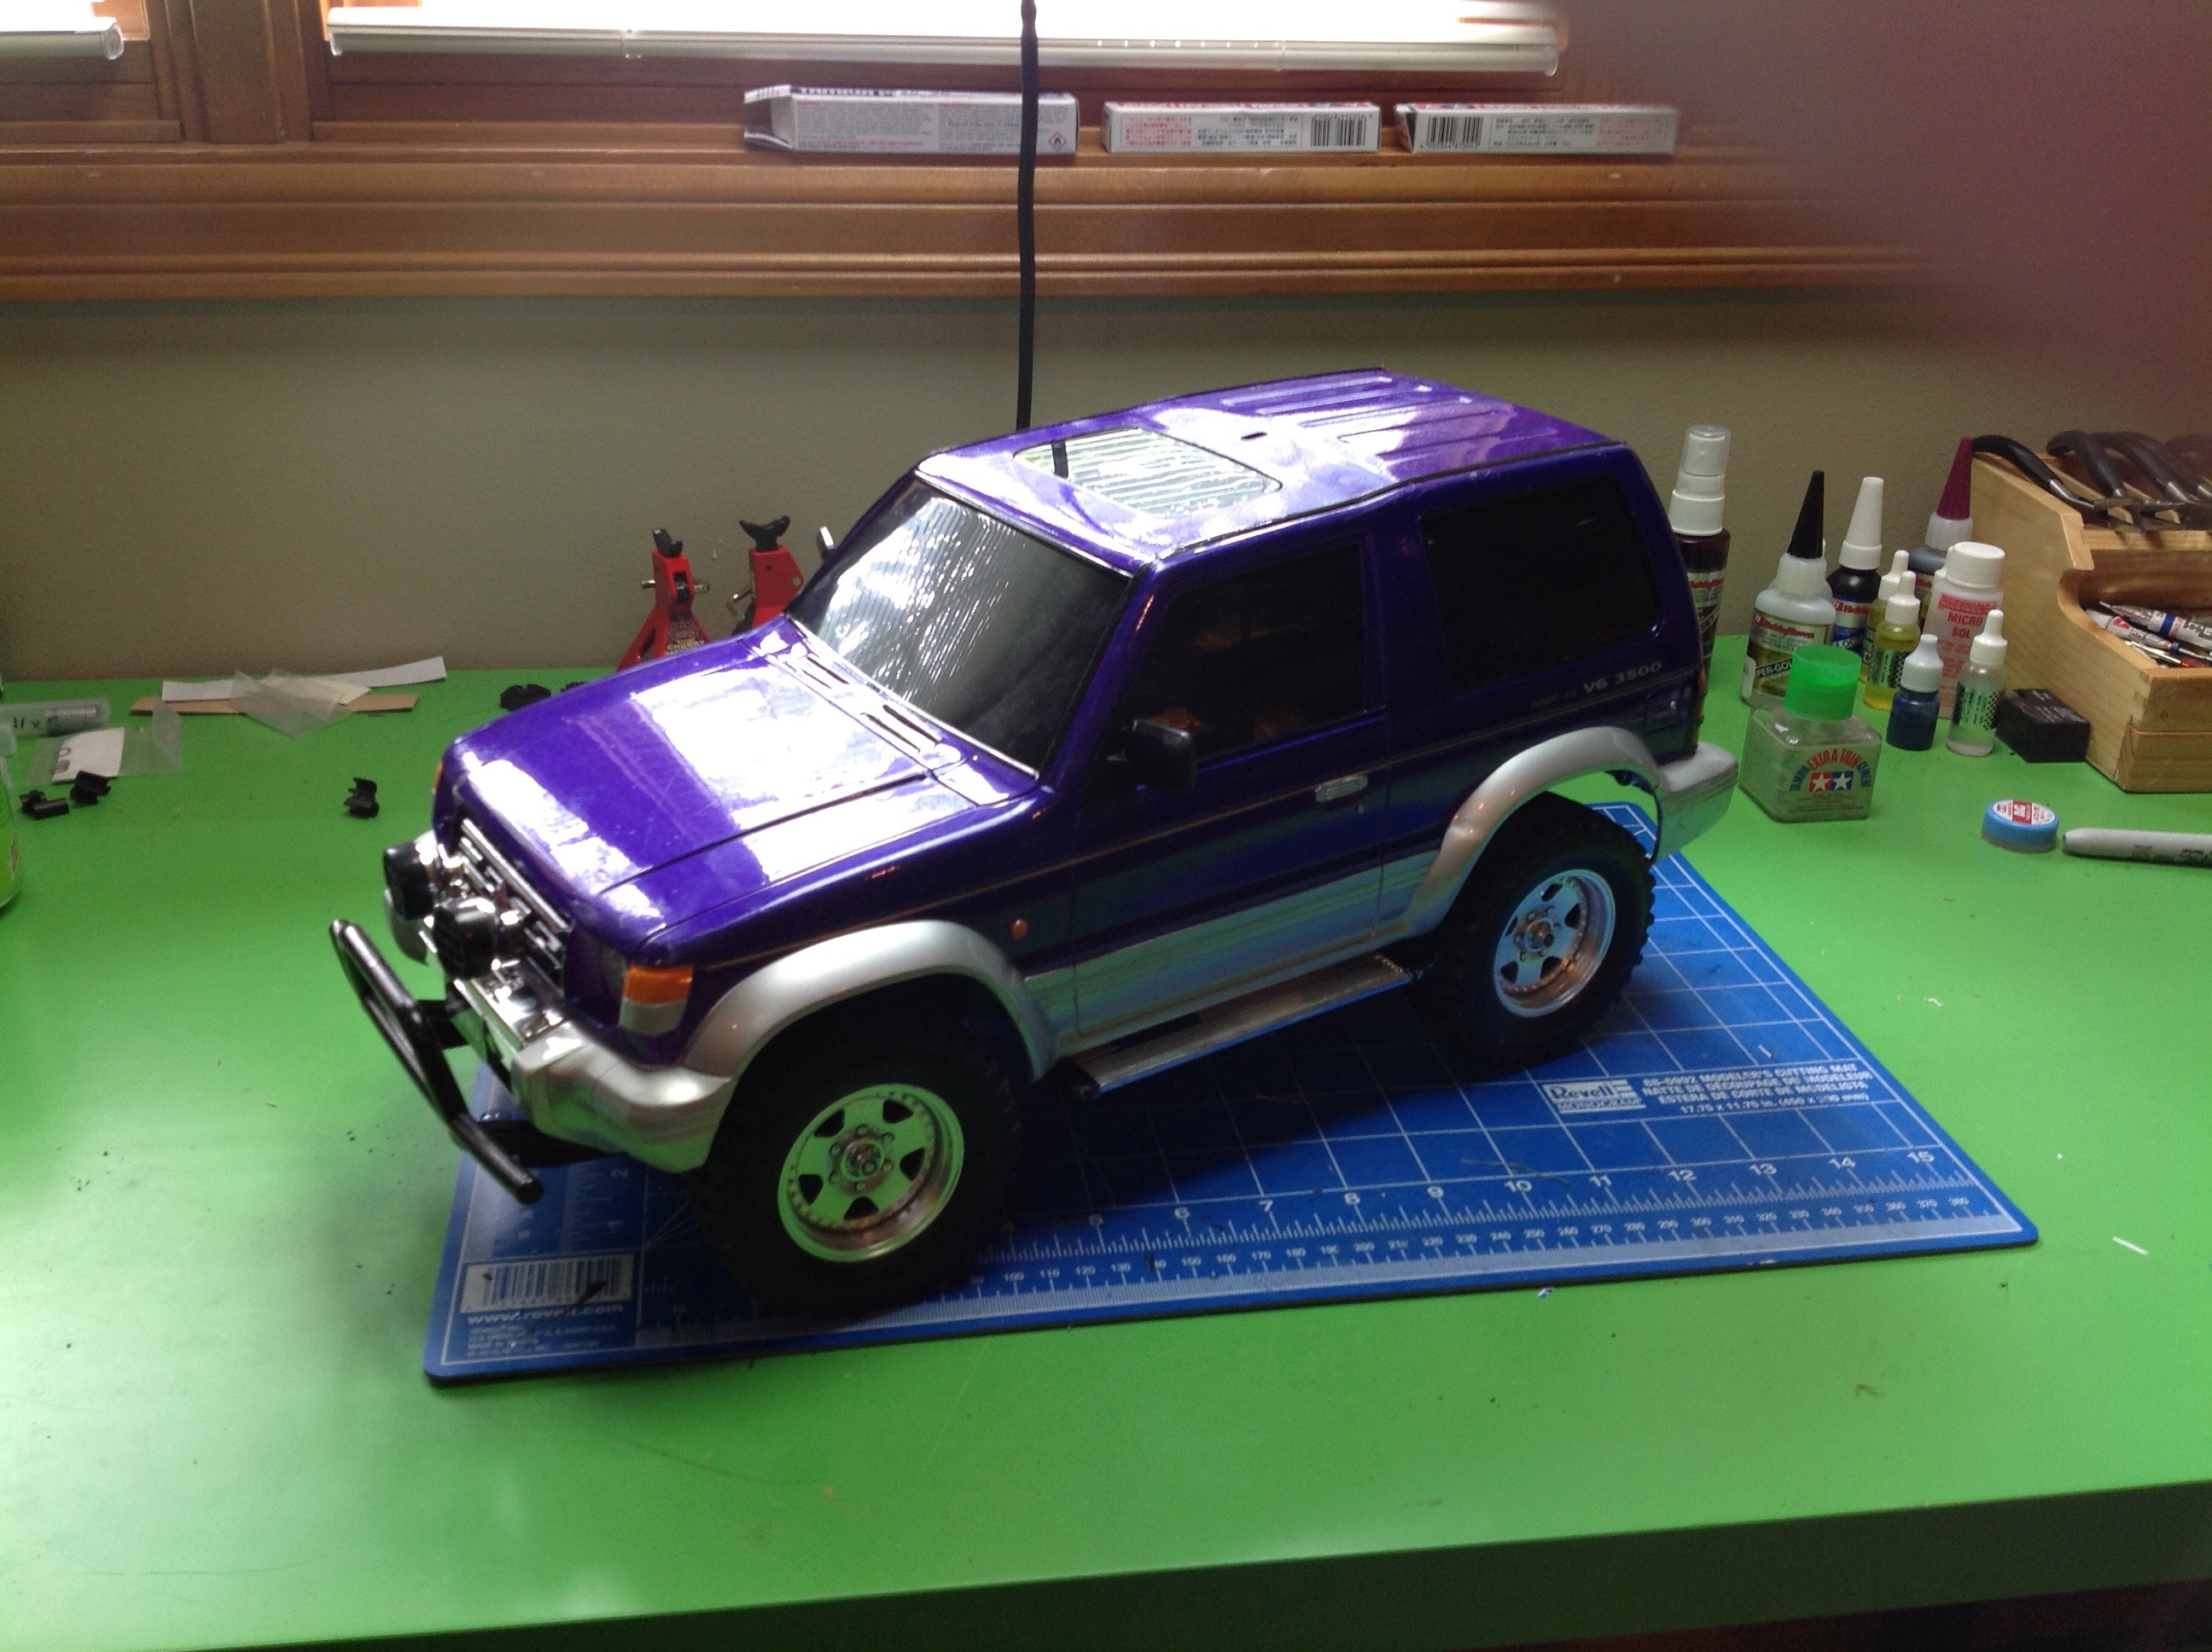
Here is the completed model. The hard shell body has been painted
with a Model Master metallic purple (my daughter's choice) and silver
along the bottom. I was pretty happy with how the masking came out
this time. Nice sharp line. The front light buckets came with the
kit and so did the spare tire cover on the rear. The body does
not use traditional body posts to mount. There are two body posts
in the back but they point aft. You slip the rear of the body over
these rear posts, then deform the front bumper forward until it pops
over a feature on the chassis, locking the body in place. Makes
for a nice smooth outer shell.
©2017 Eric Albrecht