Tamiya Mercedes G500 Project
Page 1: Painting the Body
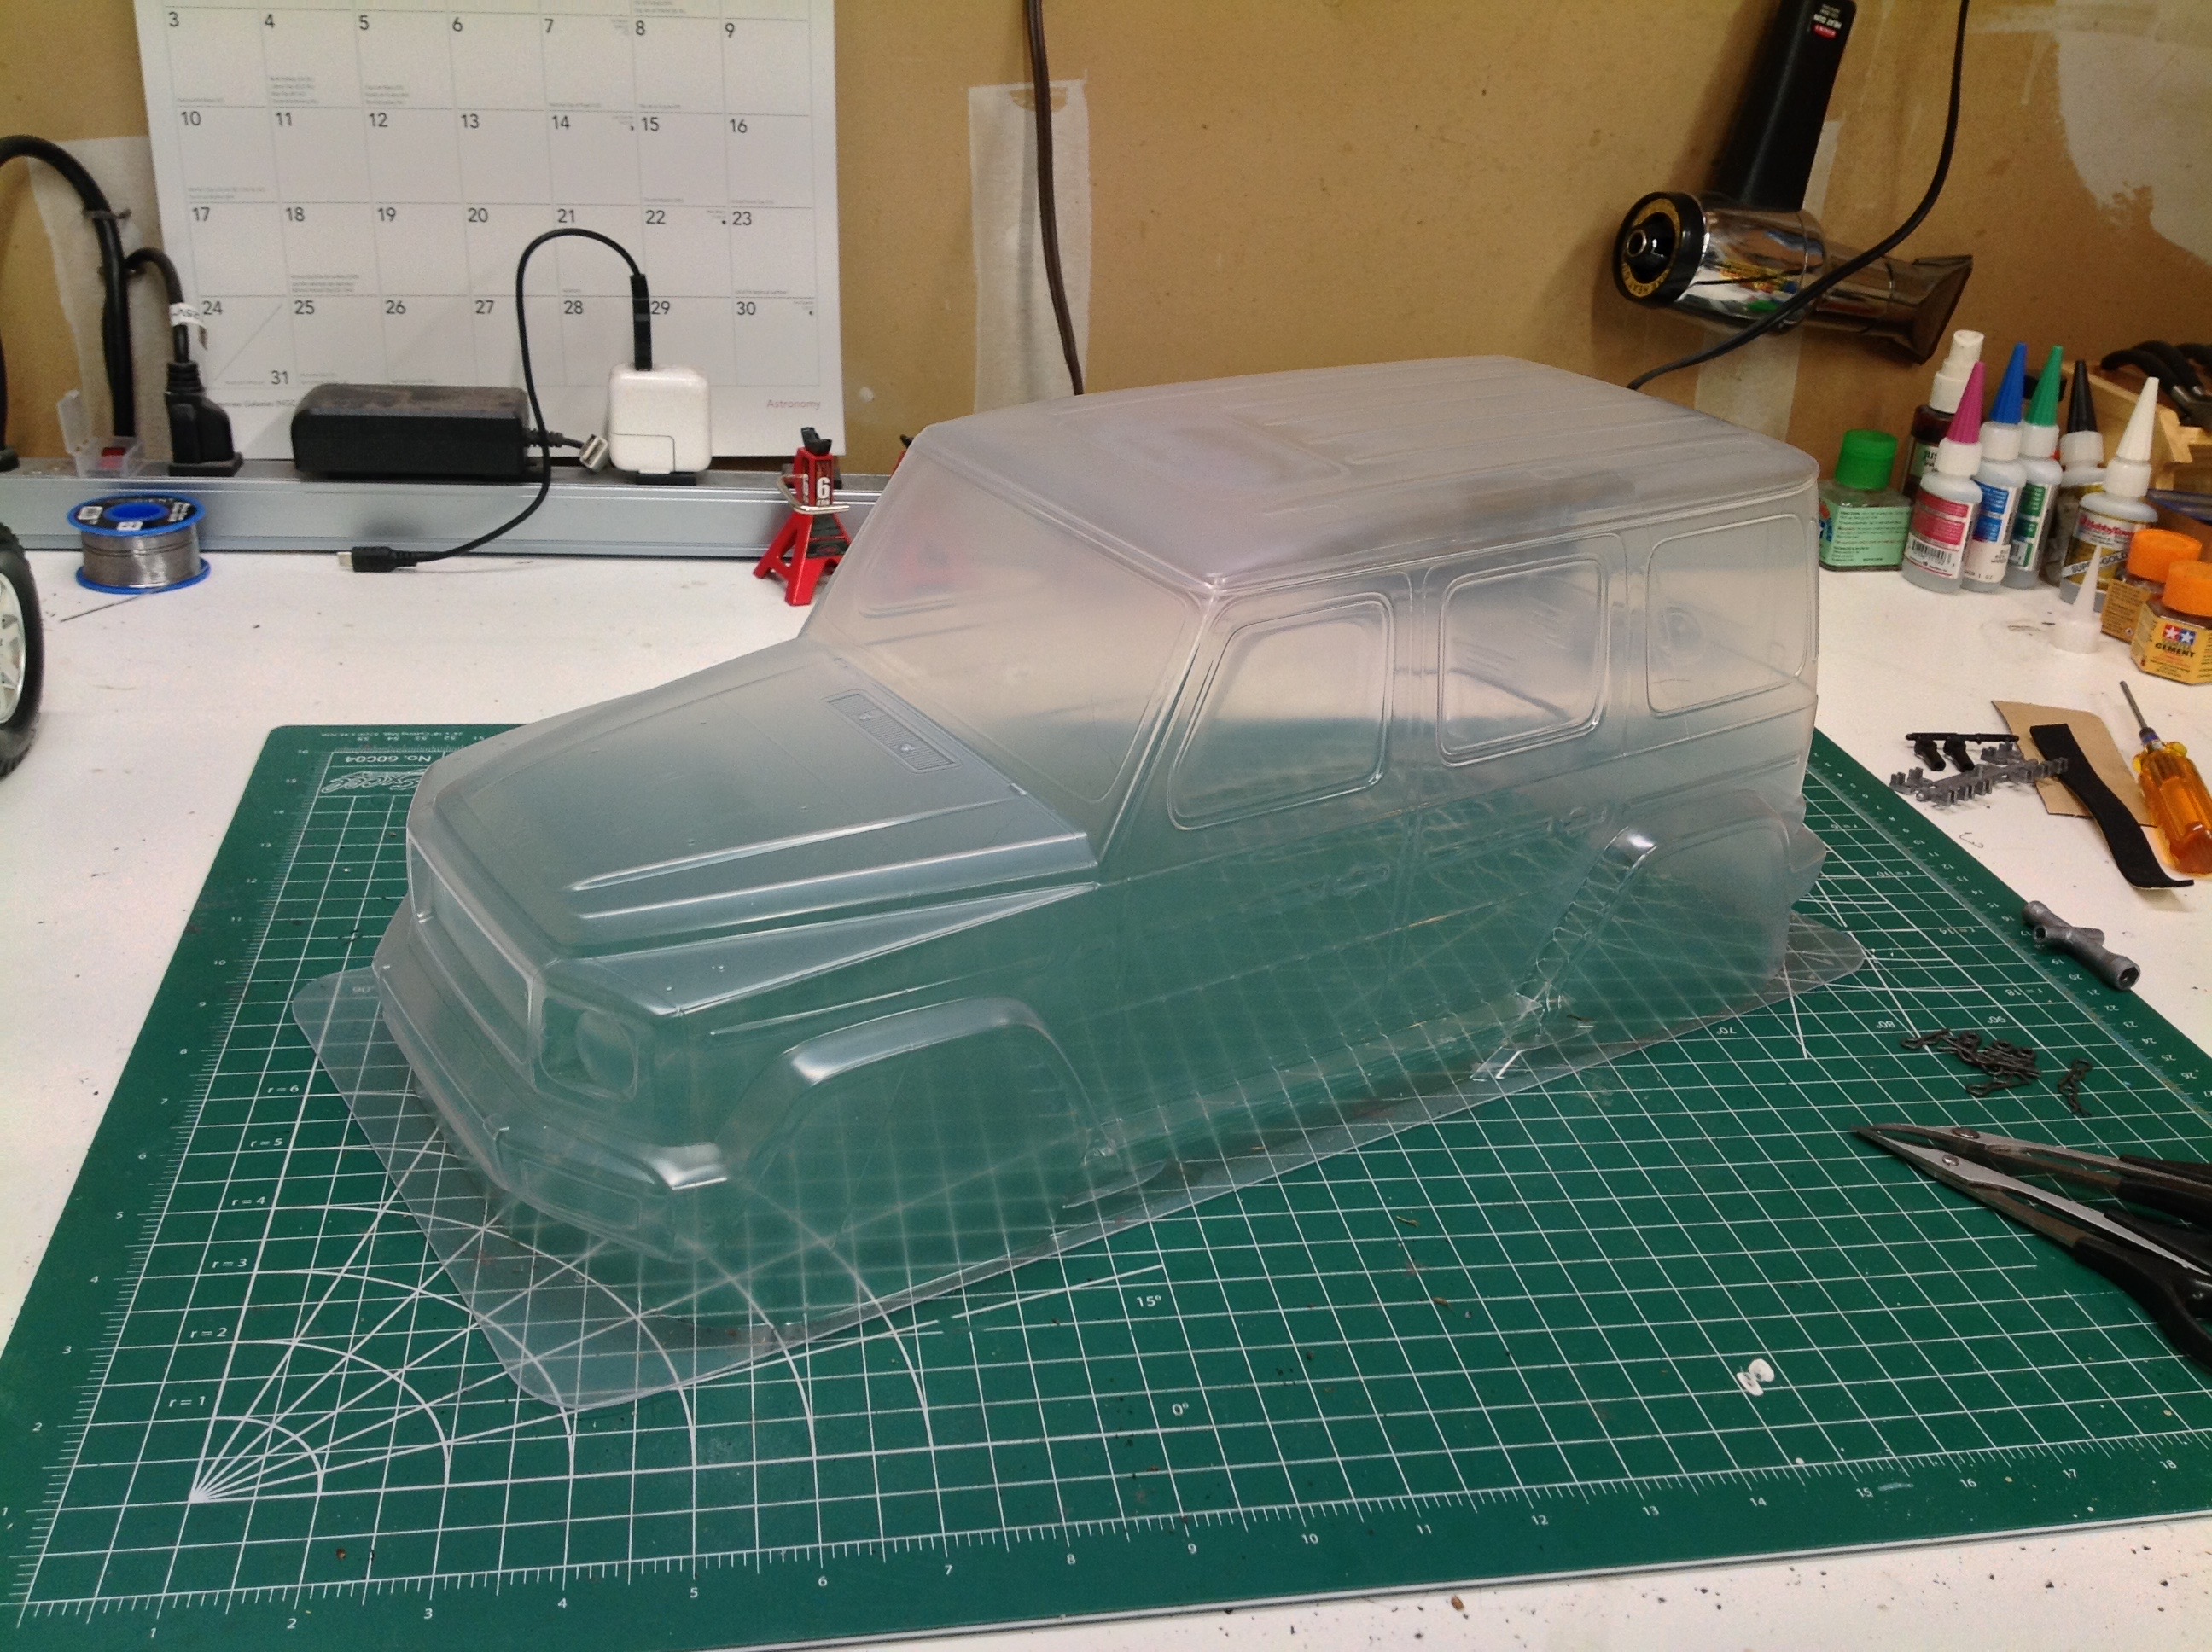
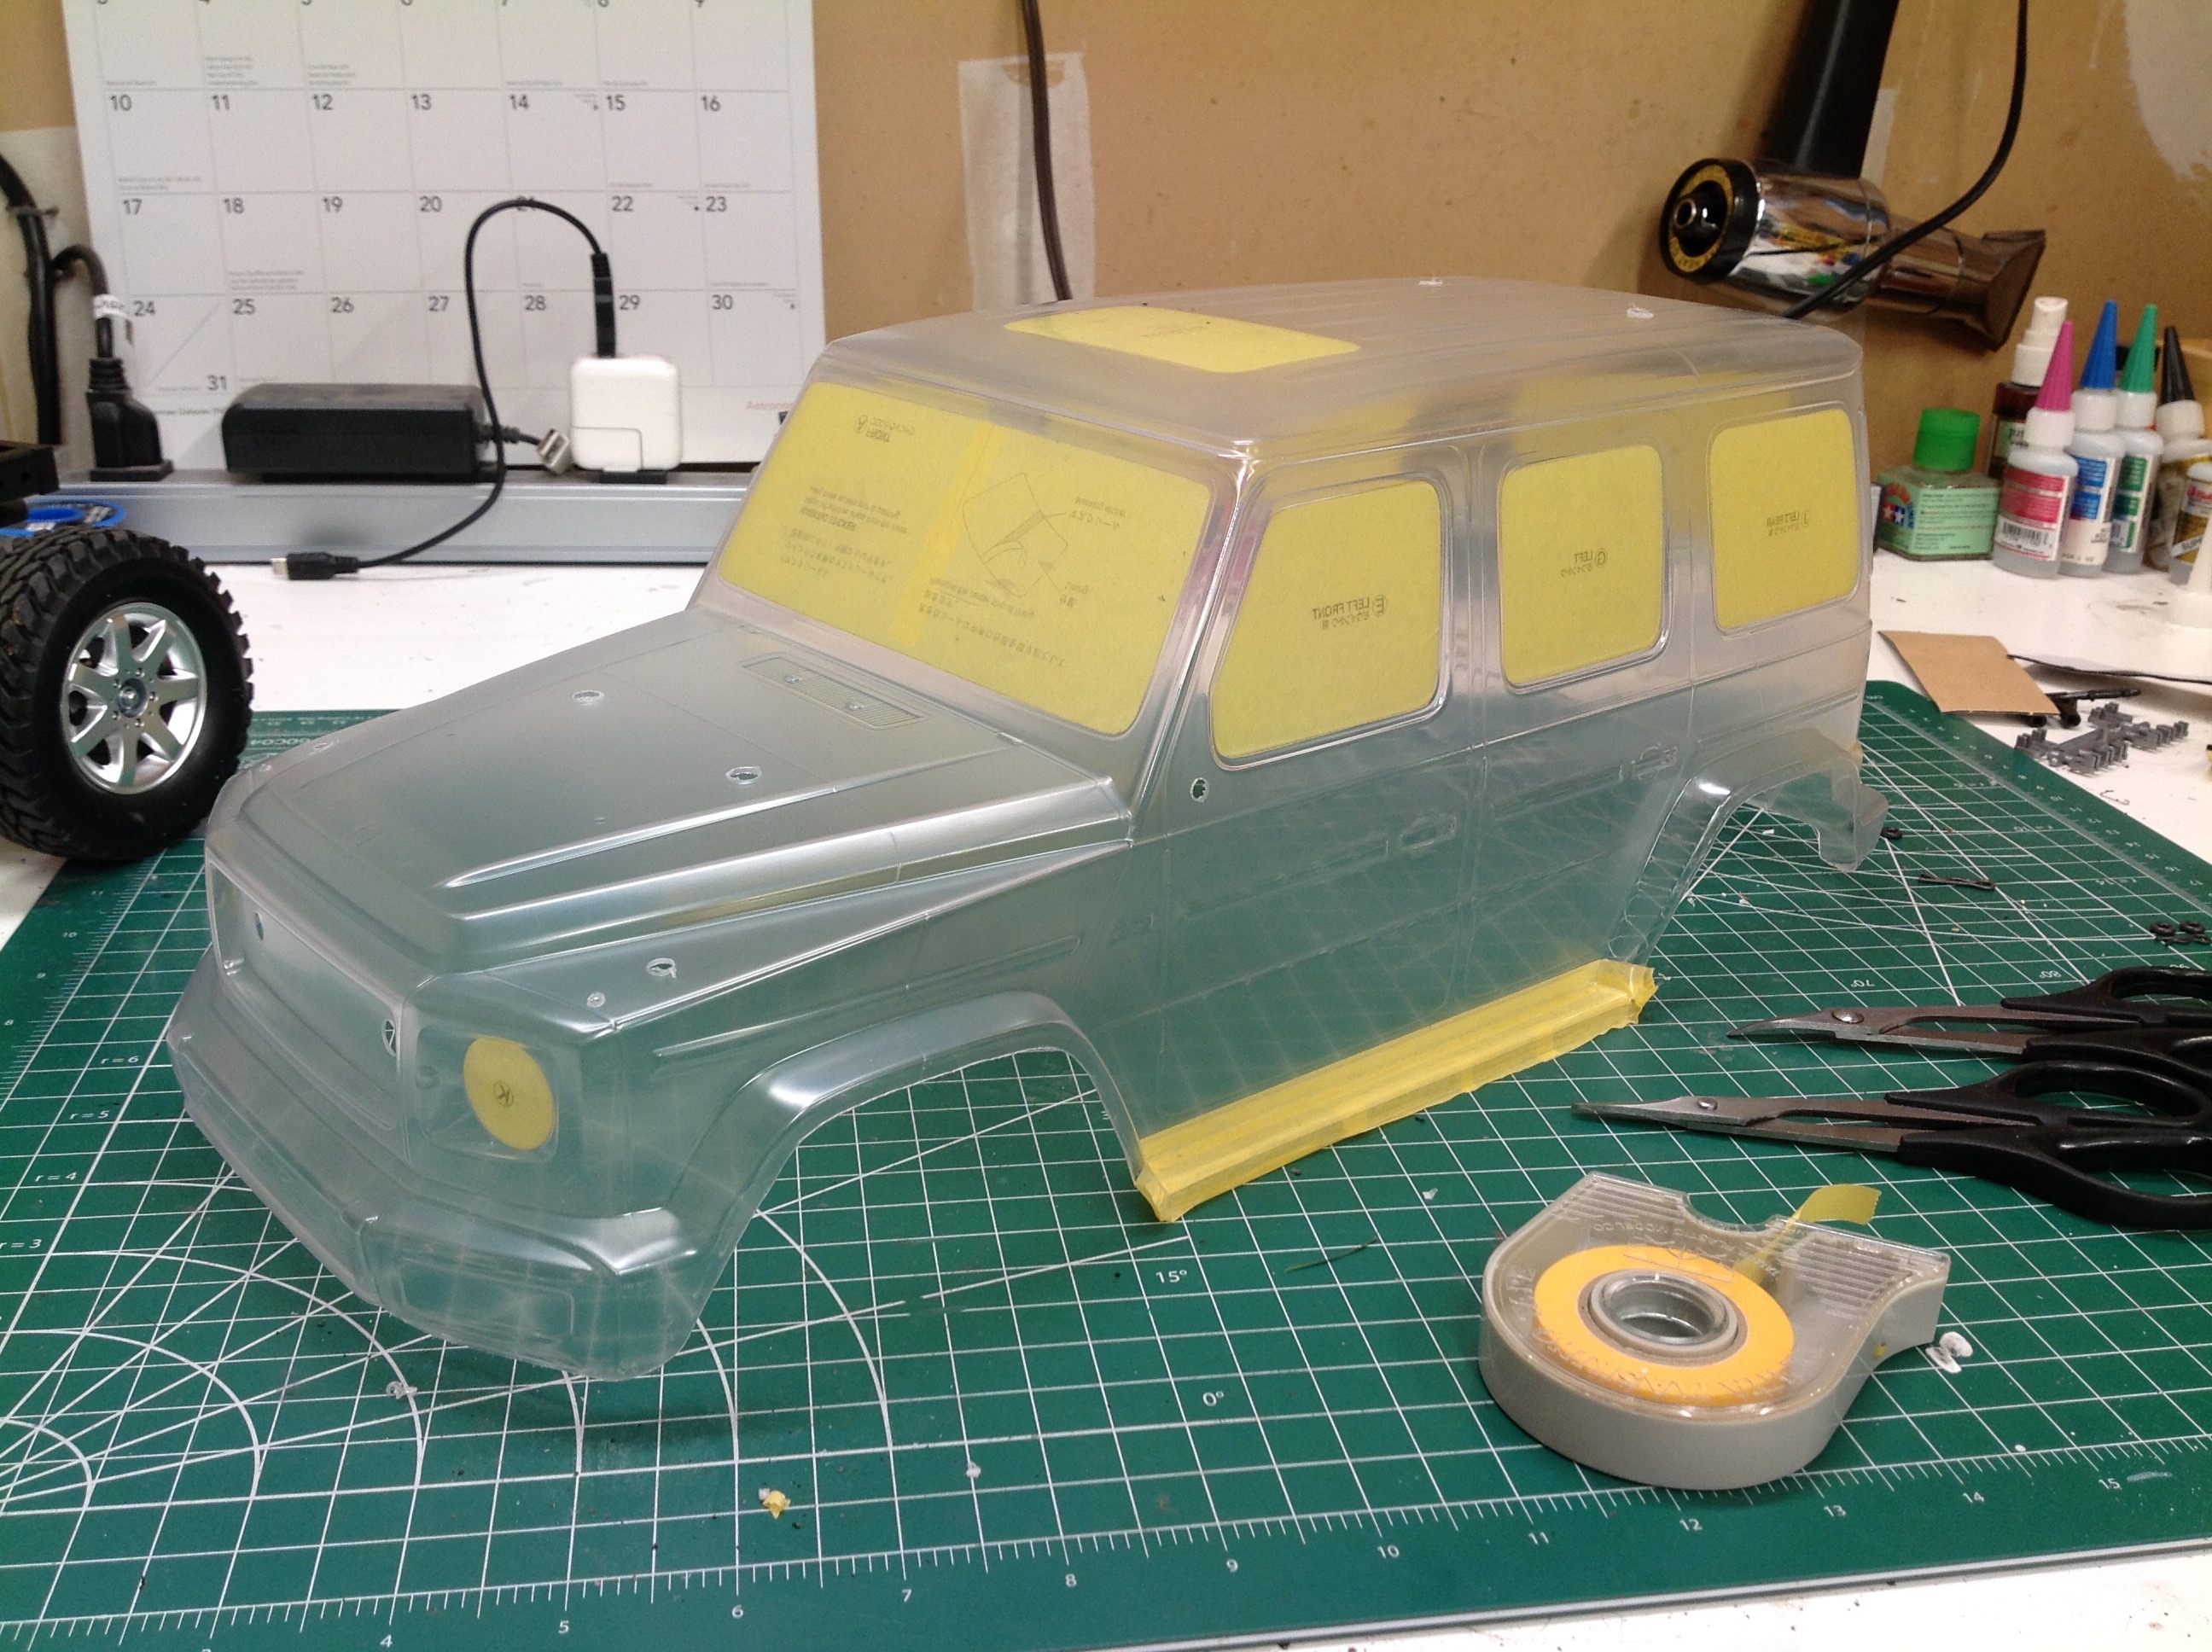
Even though this body looks a bit like a big, simple cube, there is
still a lot involved in preparing, painting, assembling, and mounting
it. The picture at the left shows the body as it came out of the
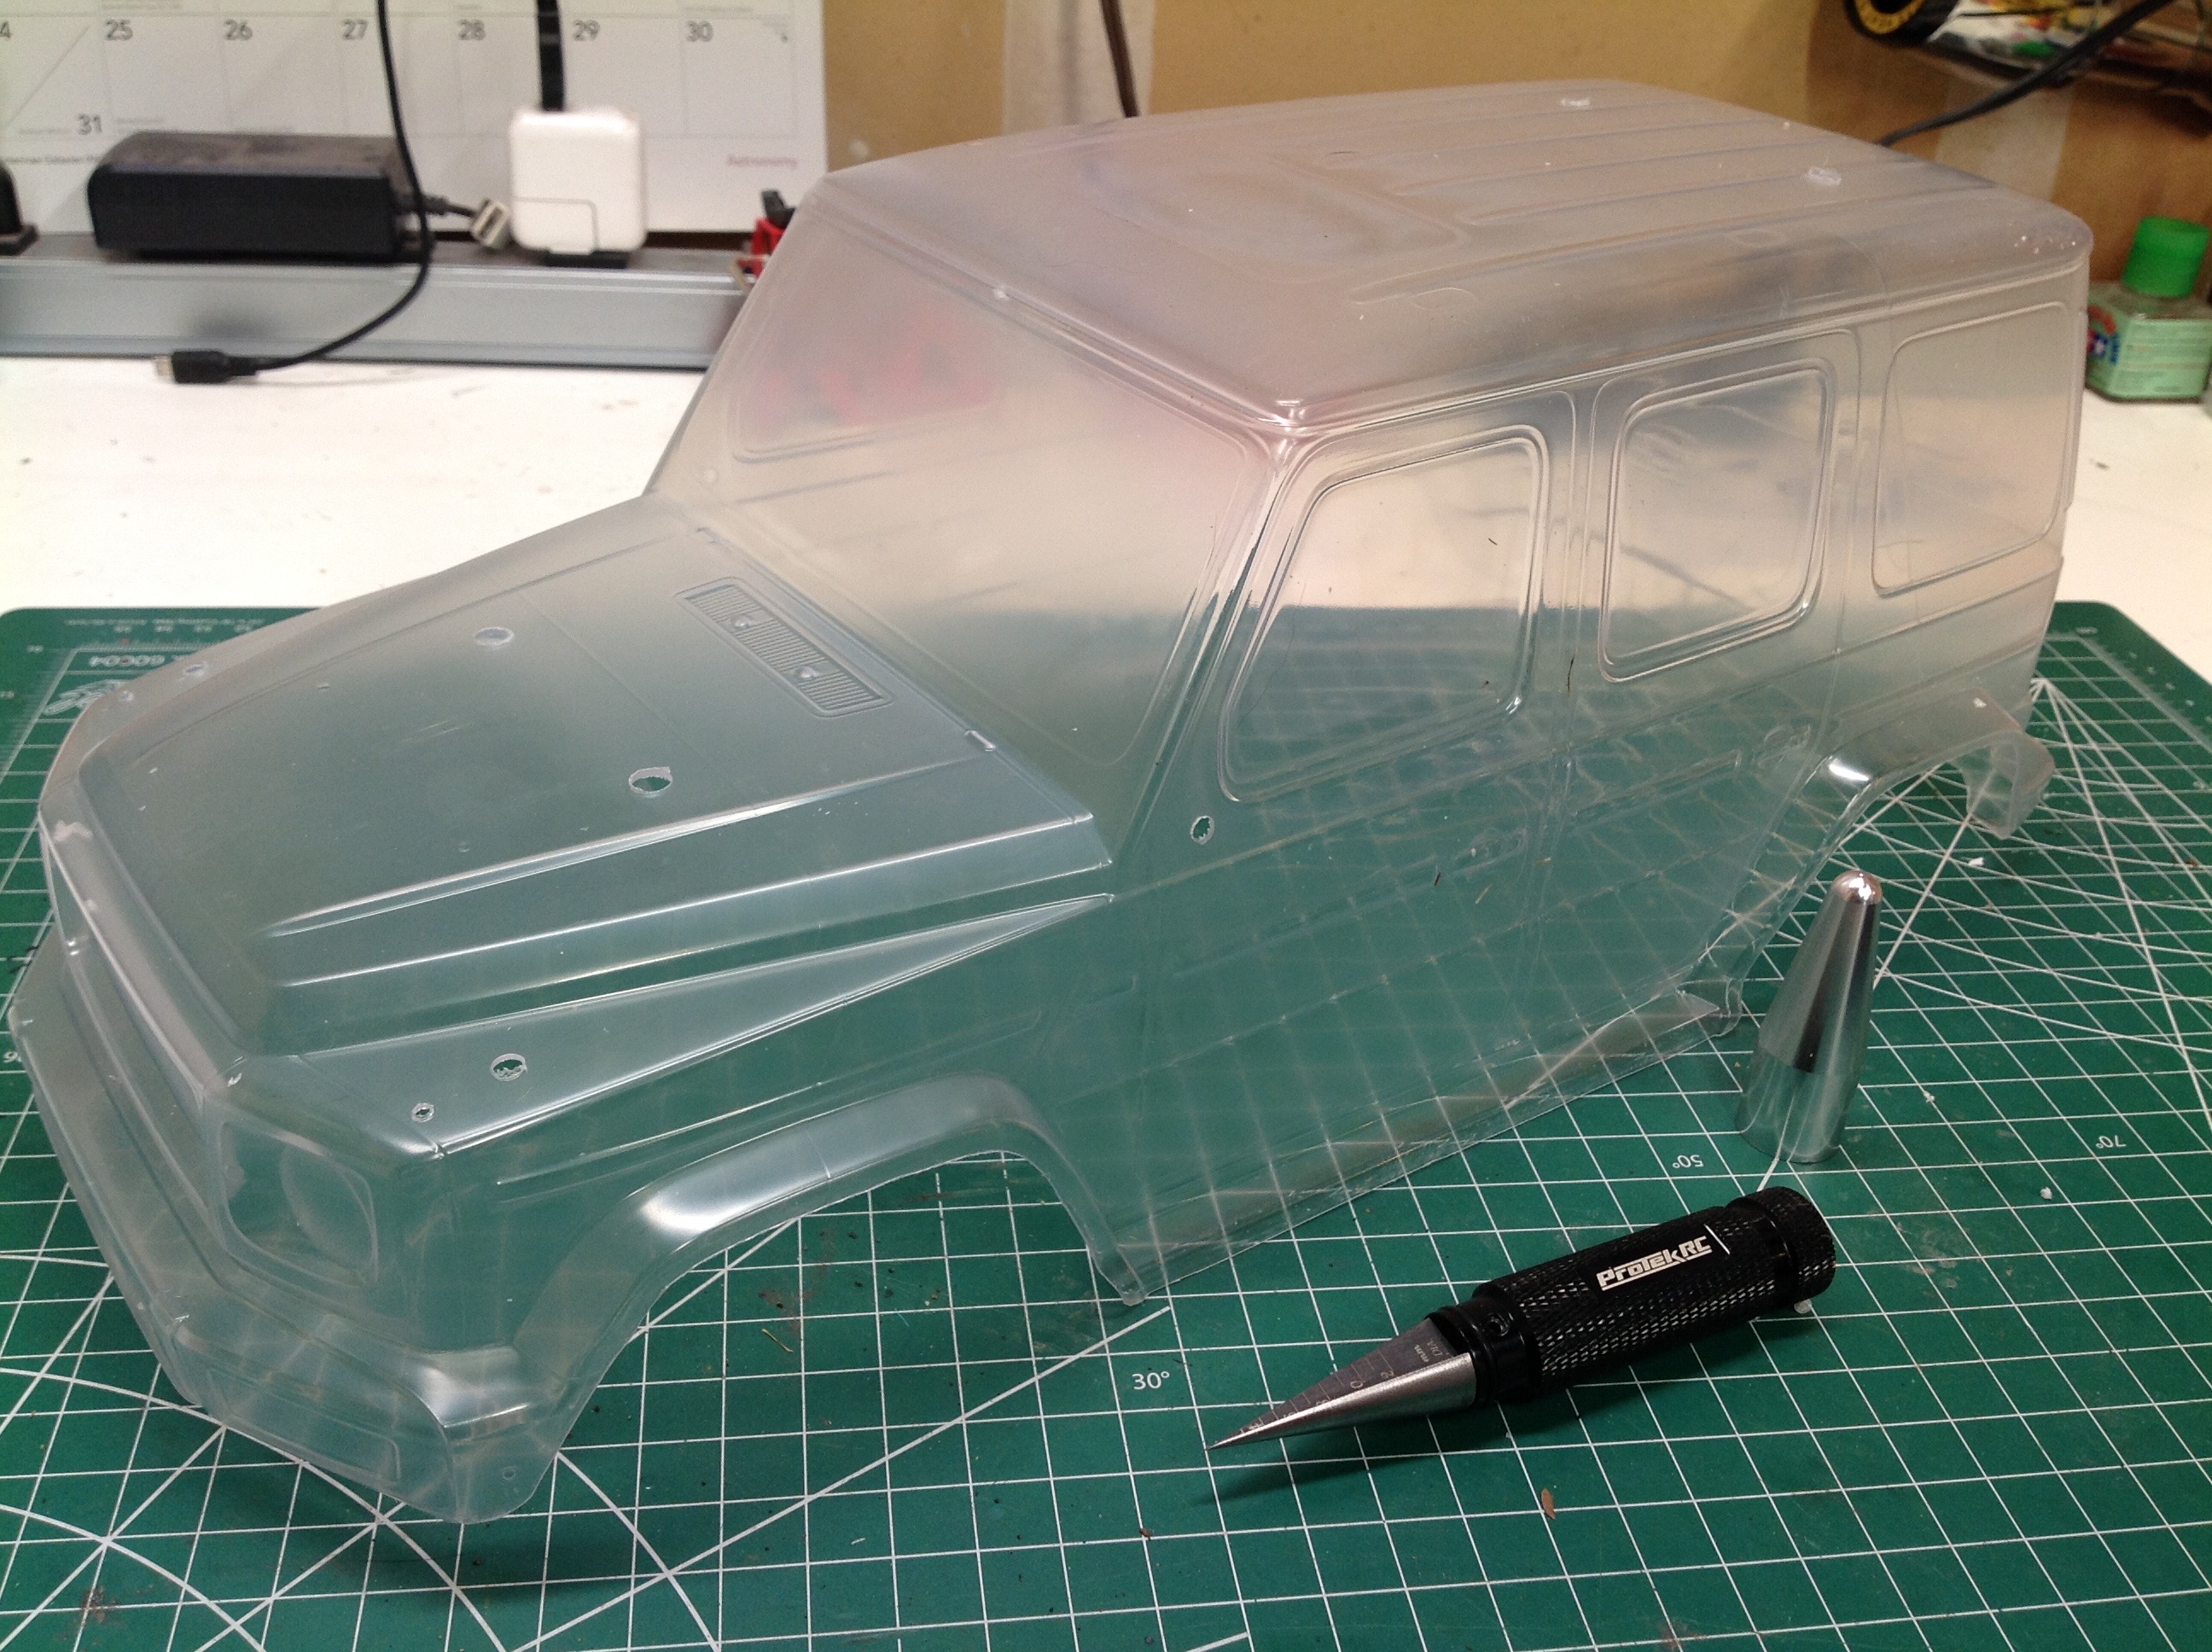
box. On the right, I've trimmed it all out. Less obvious are
the 15 different holes I had to ream into the body.
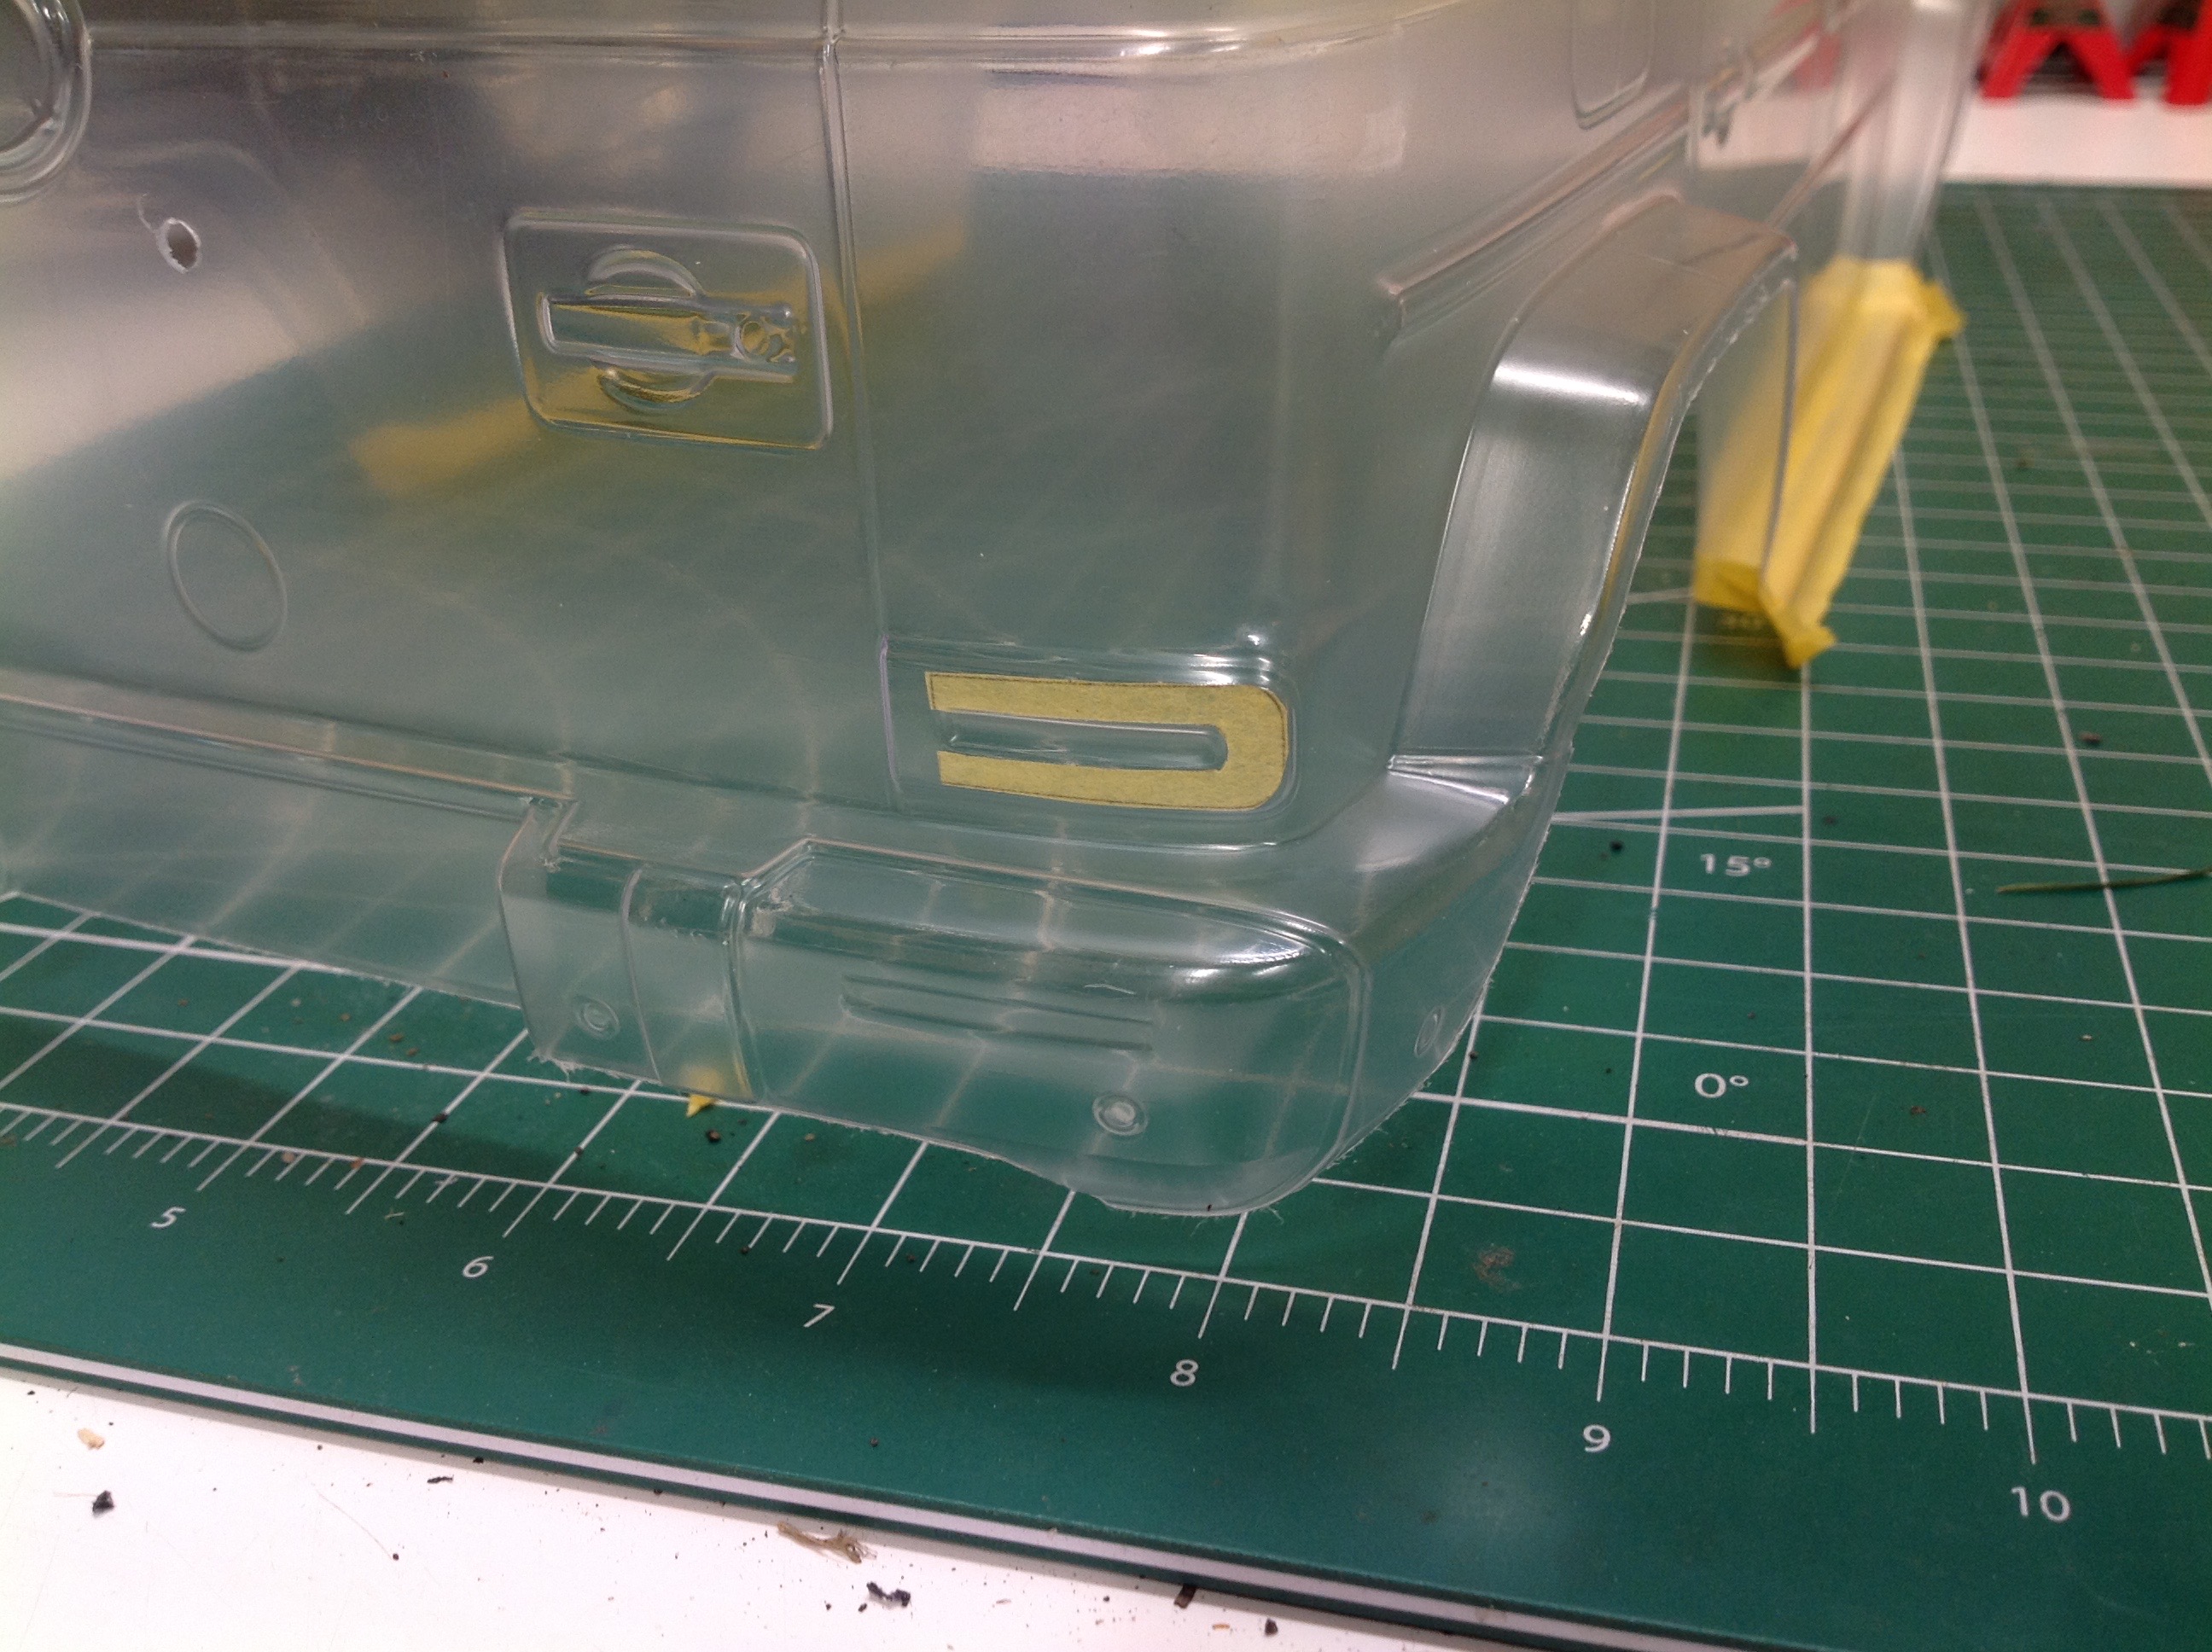
There is almost always something I screw up on each model. In
this case, I was happily following the lines to cut out the body before I
noticed that you are NOT supposed to cut out those notches in the
bottom of the rear bumper. Those lines are just showing detail but
are not intended to be trimmed, so I ended up with an asymmetric bumper
as shown. Luckily, this area is pretty much invisible on the
trail and it doesn't look that bad anyway. The picture on the
right test fits the body on the chassis. The mounting posts seem a
bit tall.
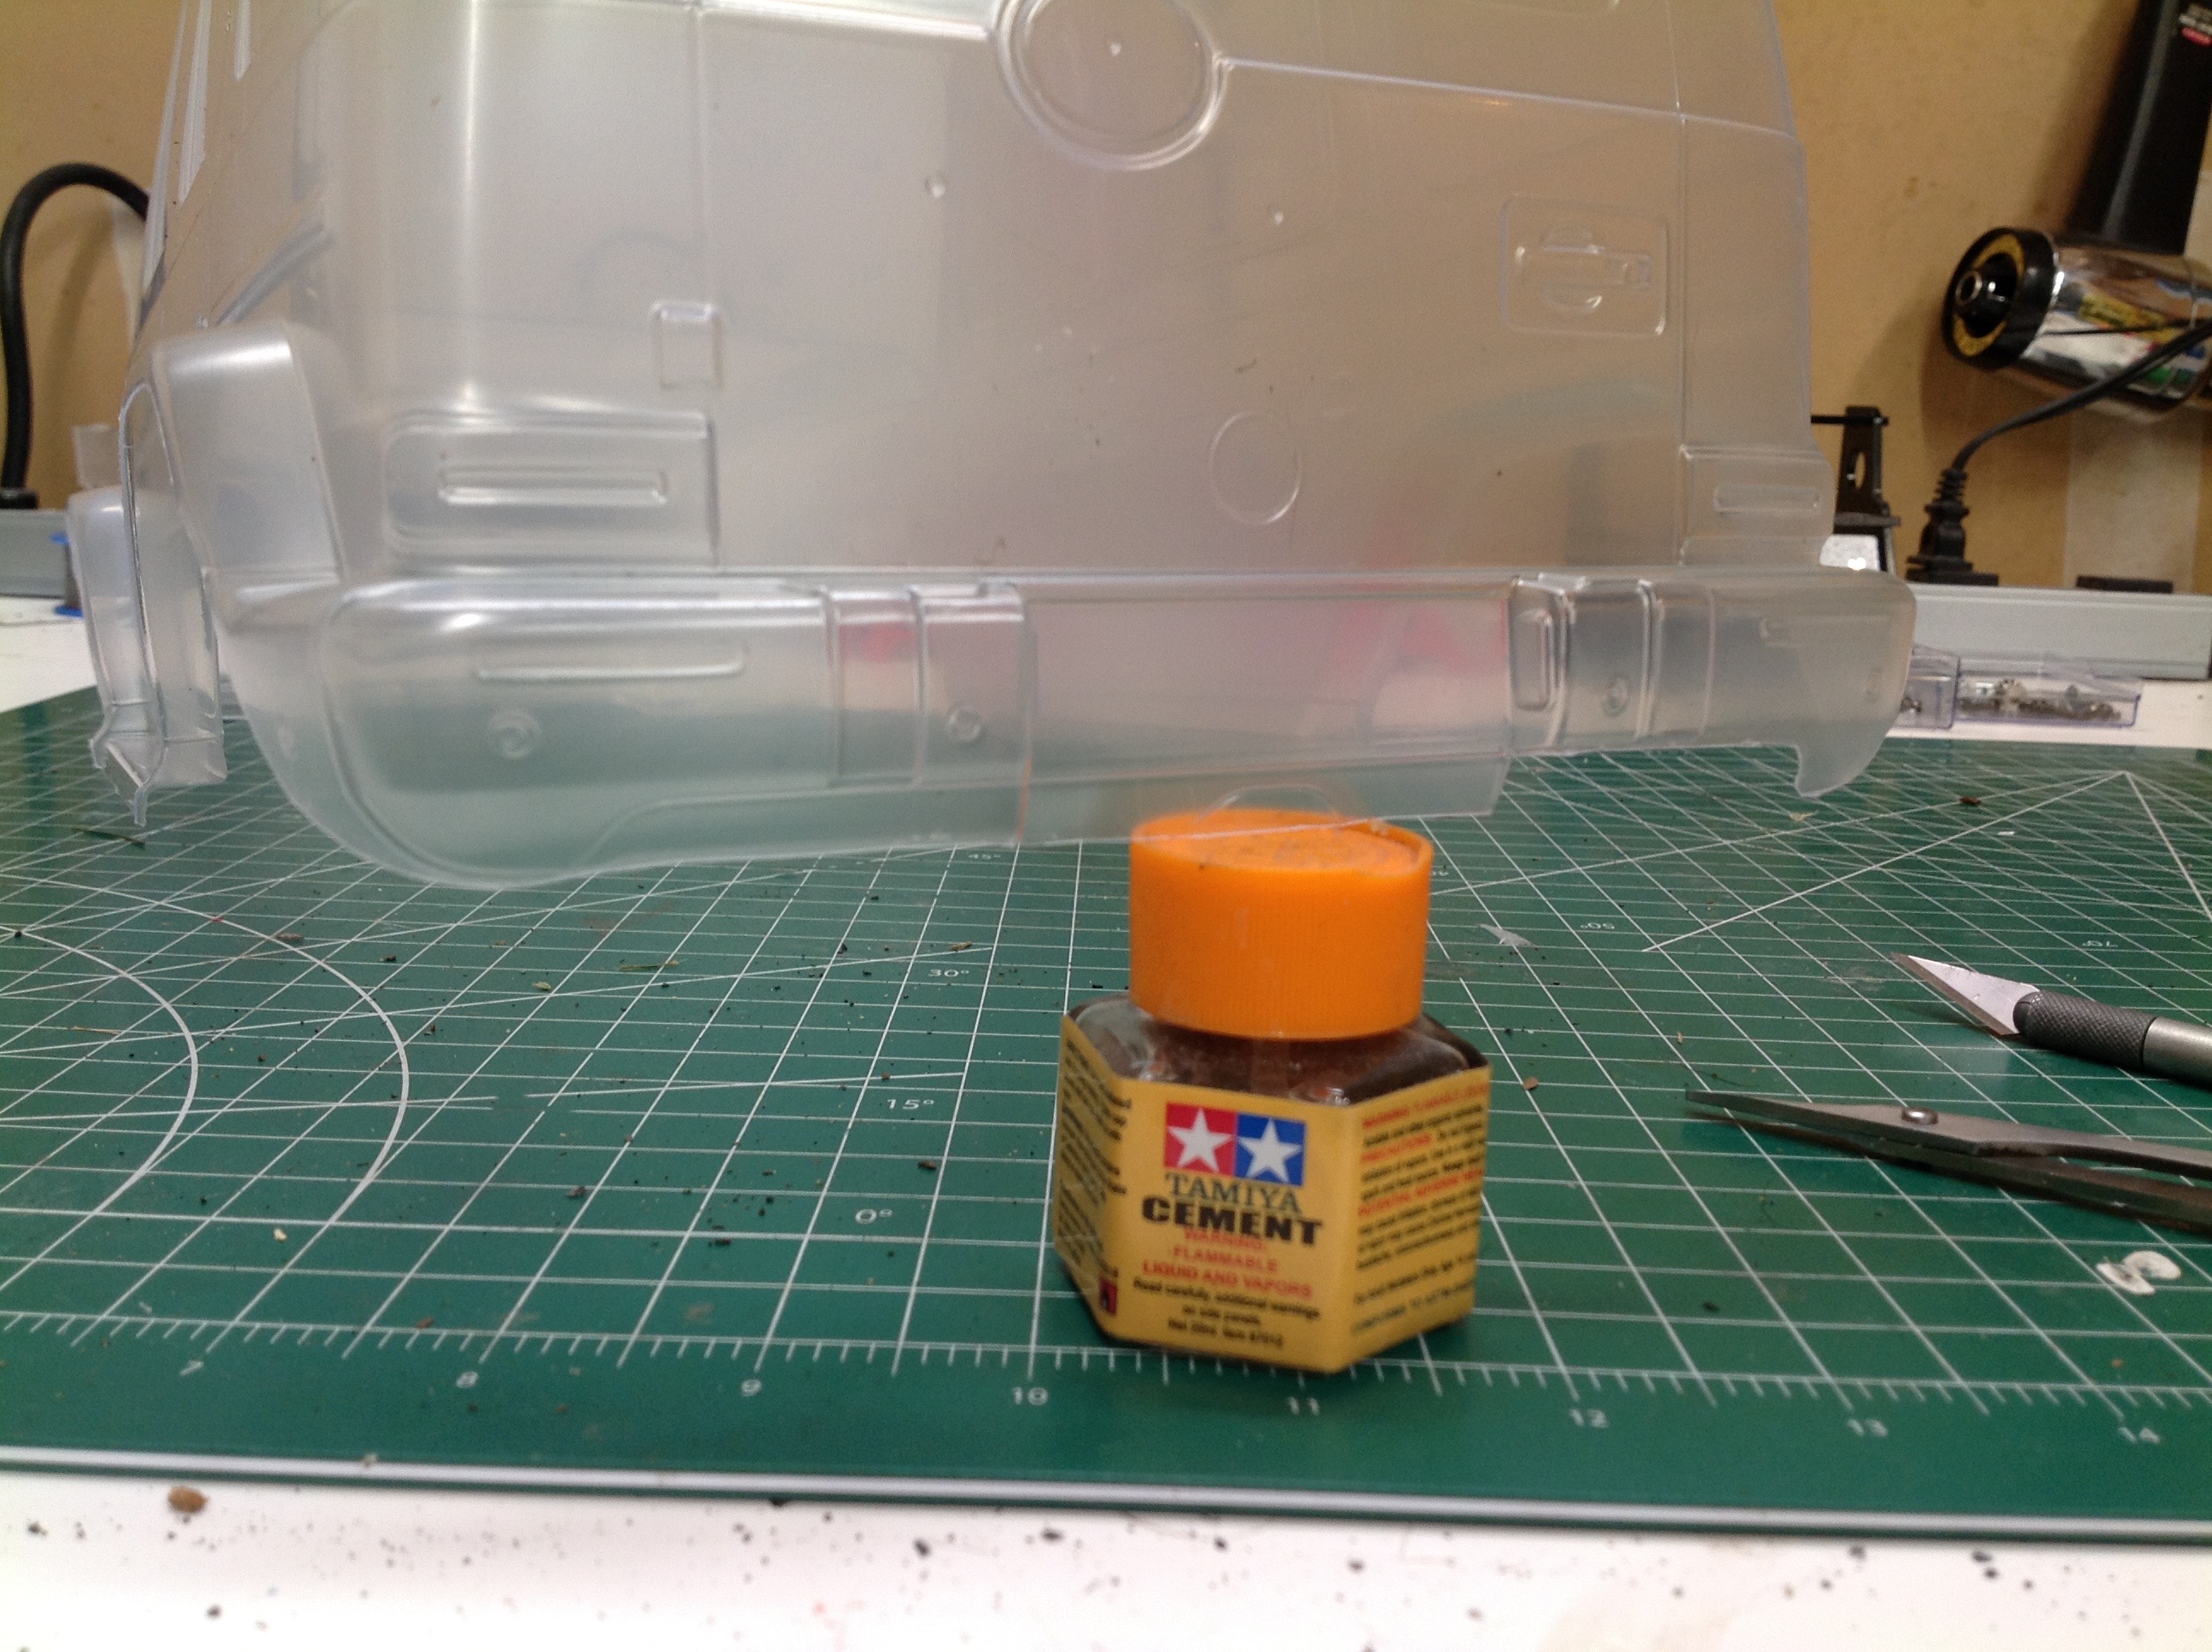
There is a lot of masking to do as well. There are 9 total windows
when the sun roof is included, and the headlights and tail lights are
also masked. Note the fiddly C-shaped masks required for the tail
lights shown on the right. I also chose to mask and paint the
running boards.
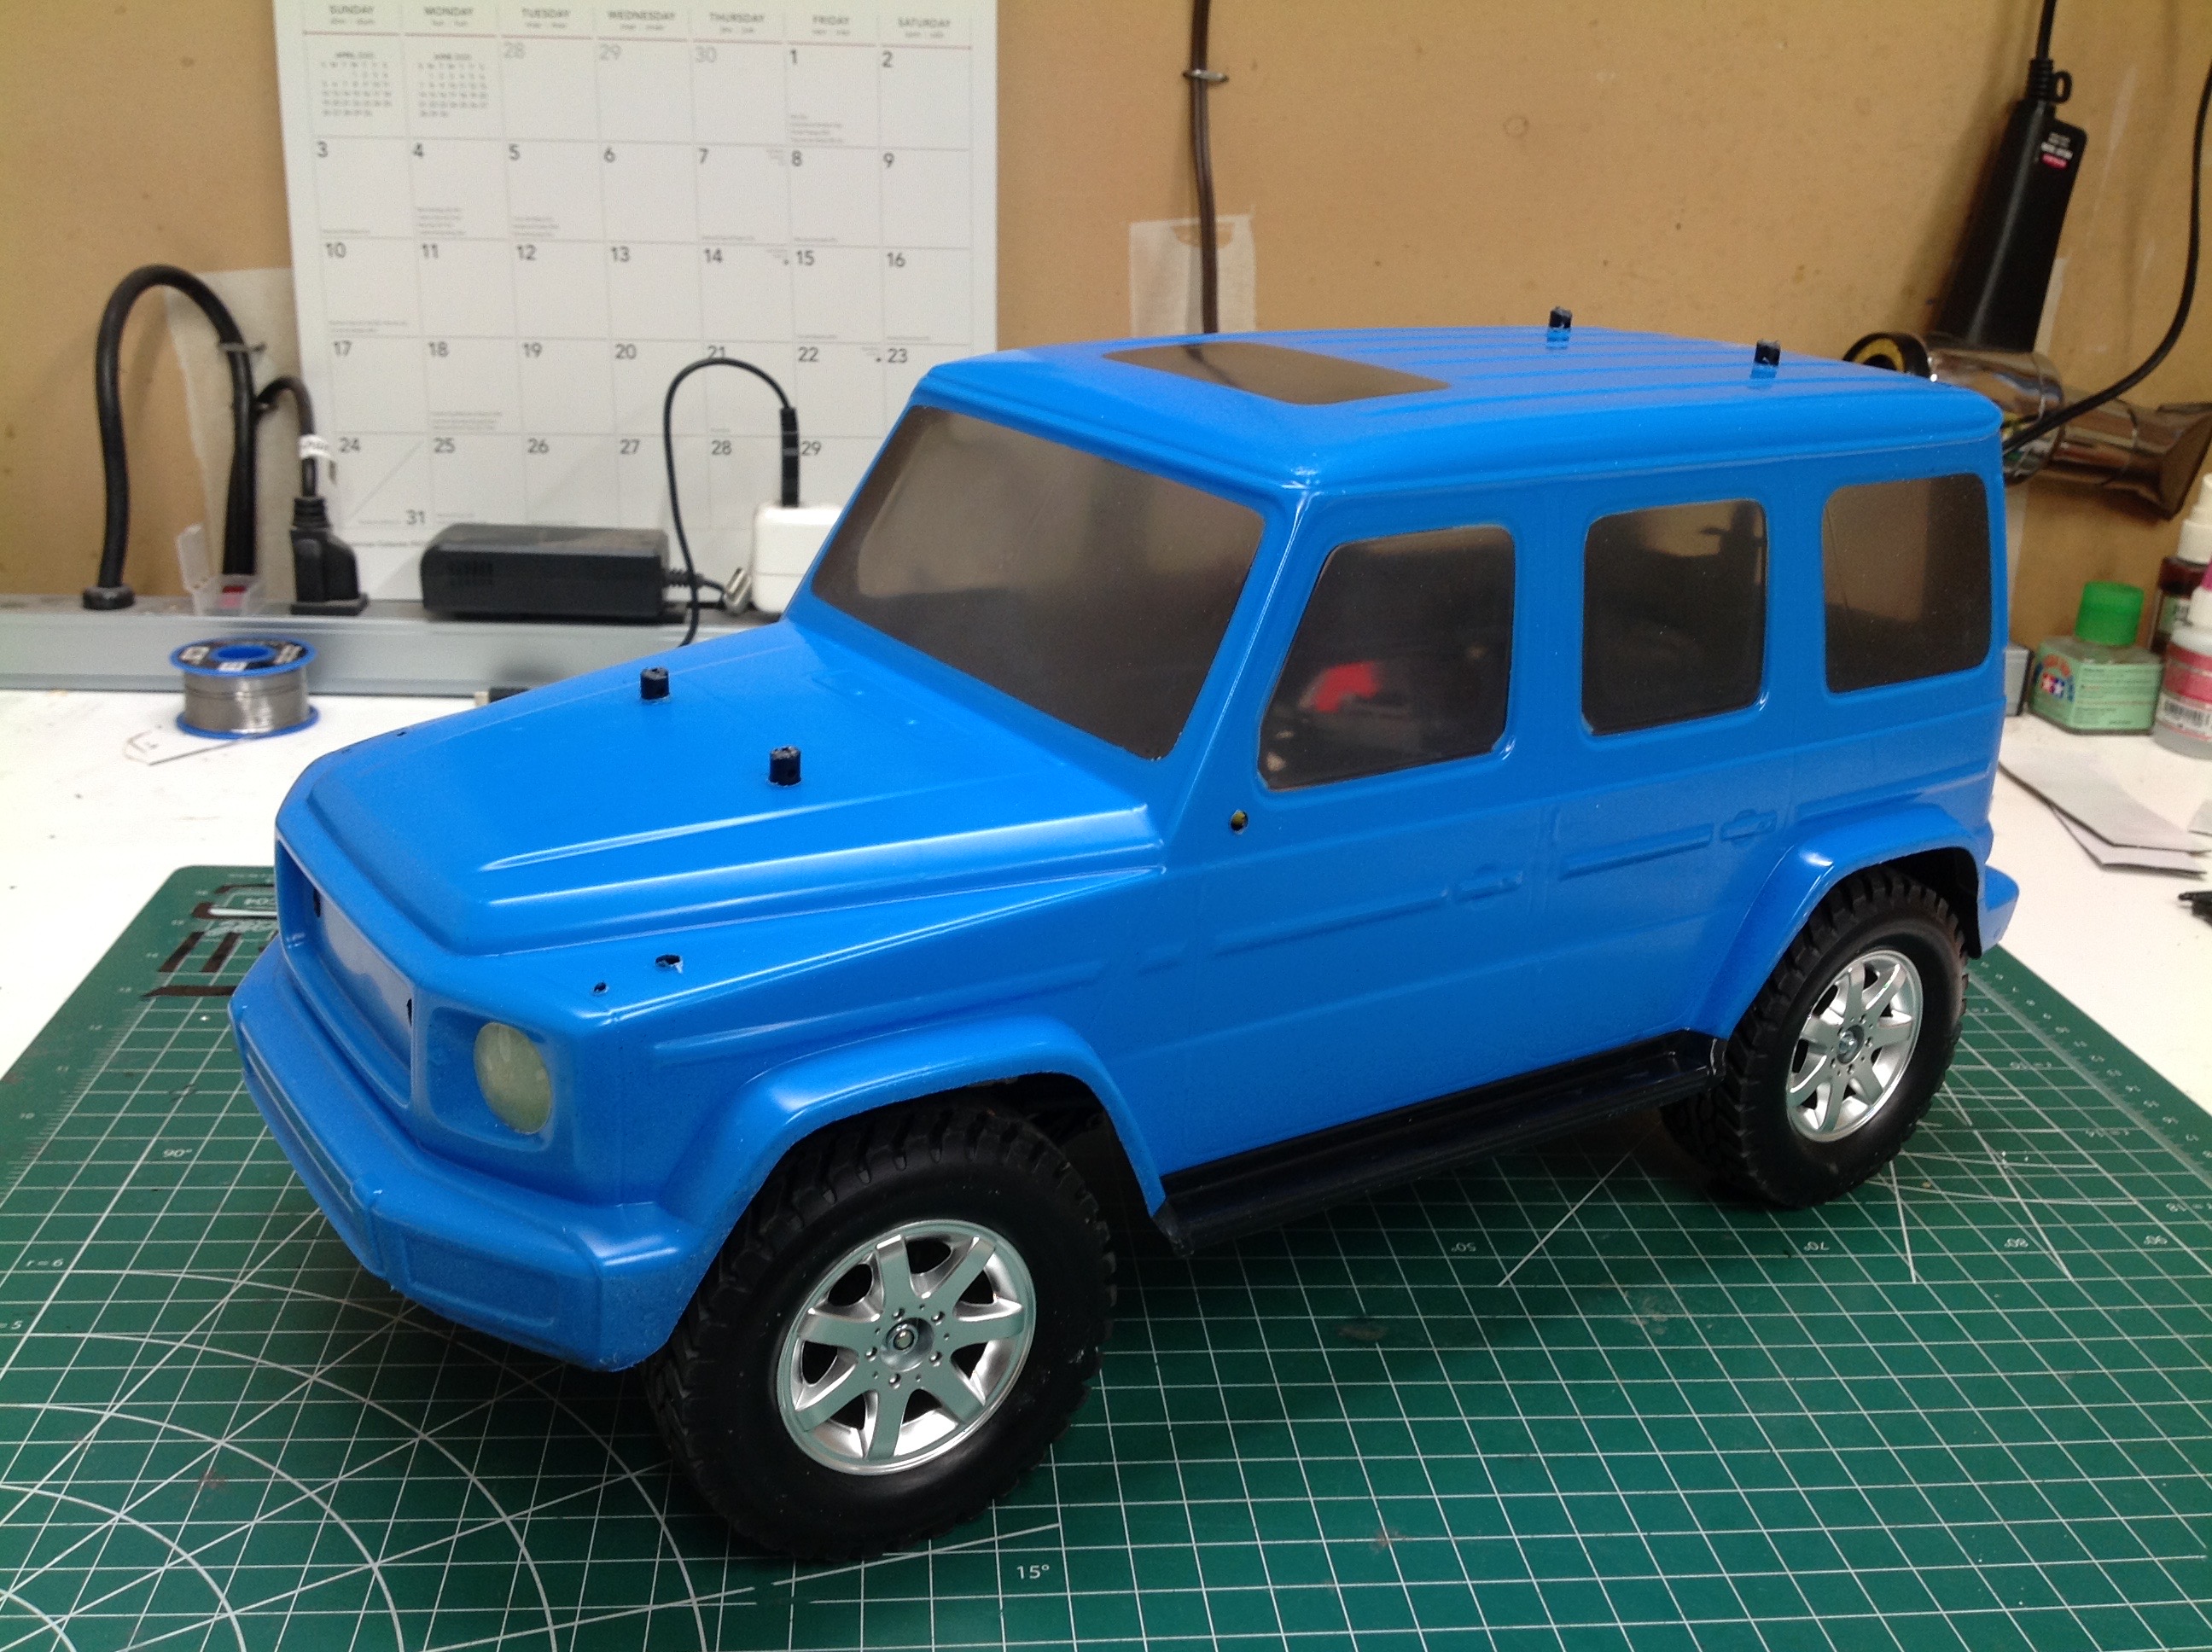
I've got several gun metal colored models already and didn't feel the
color was wild enough for a G500 anyway, so I surveyed my collection and
tried to pick something I hadn't used before but would still look
good. I went with light blue. After spraying the solid color
as well as the black running boards we have the intermediate result
shown here.
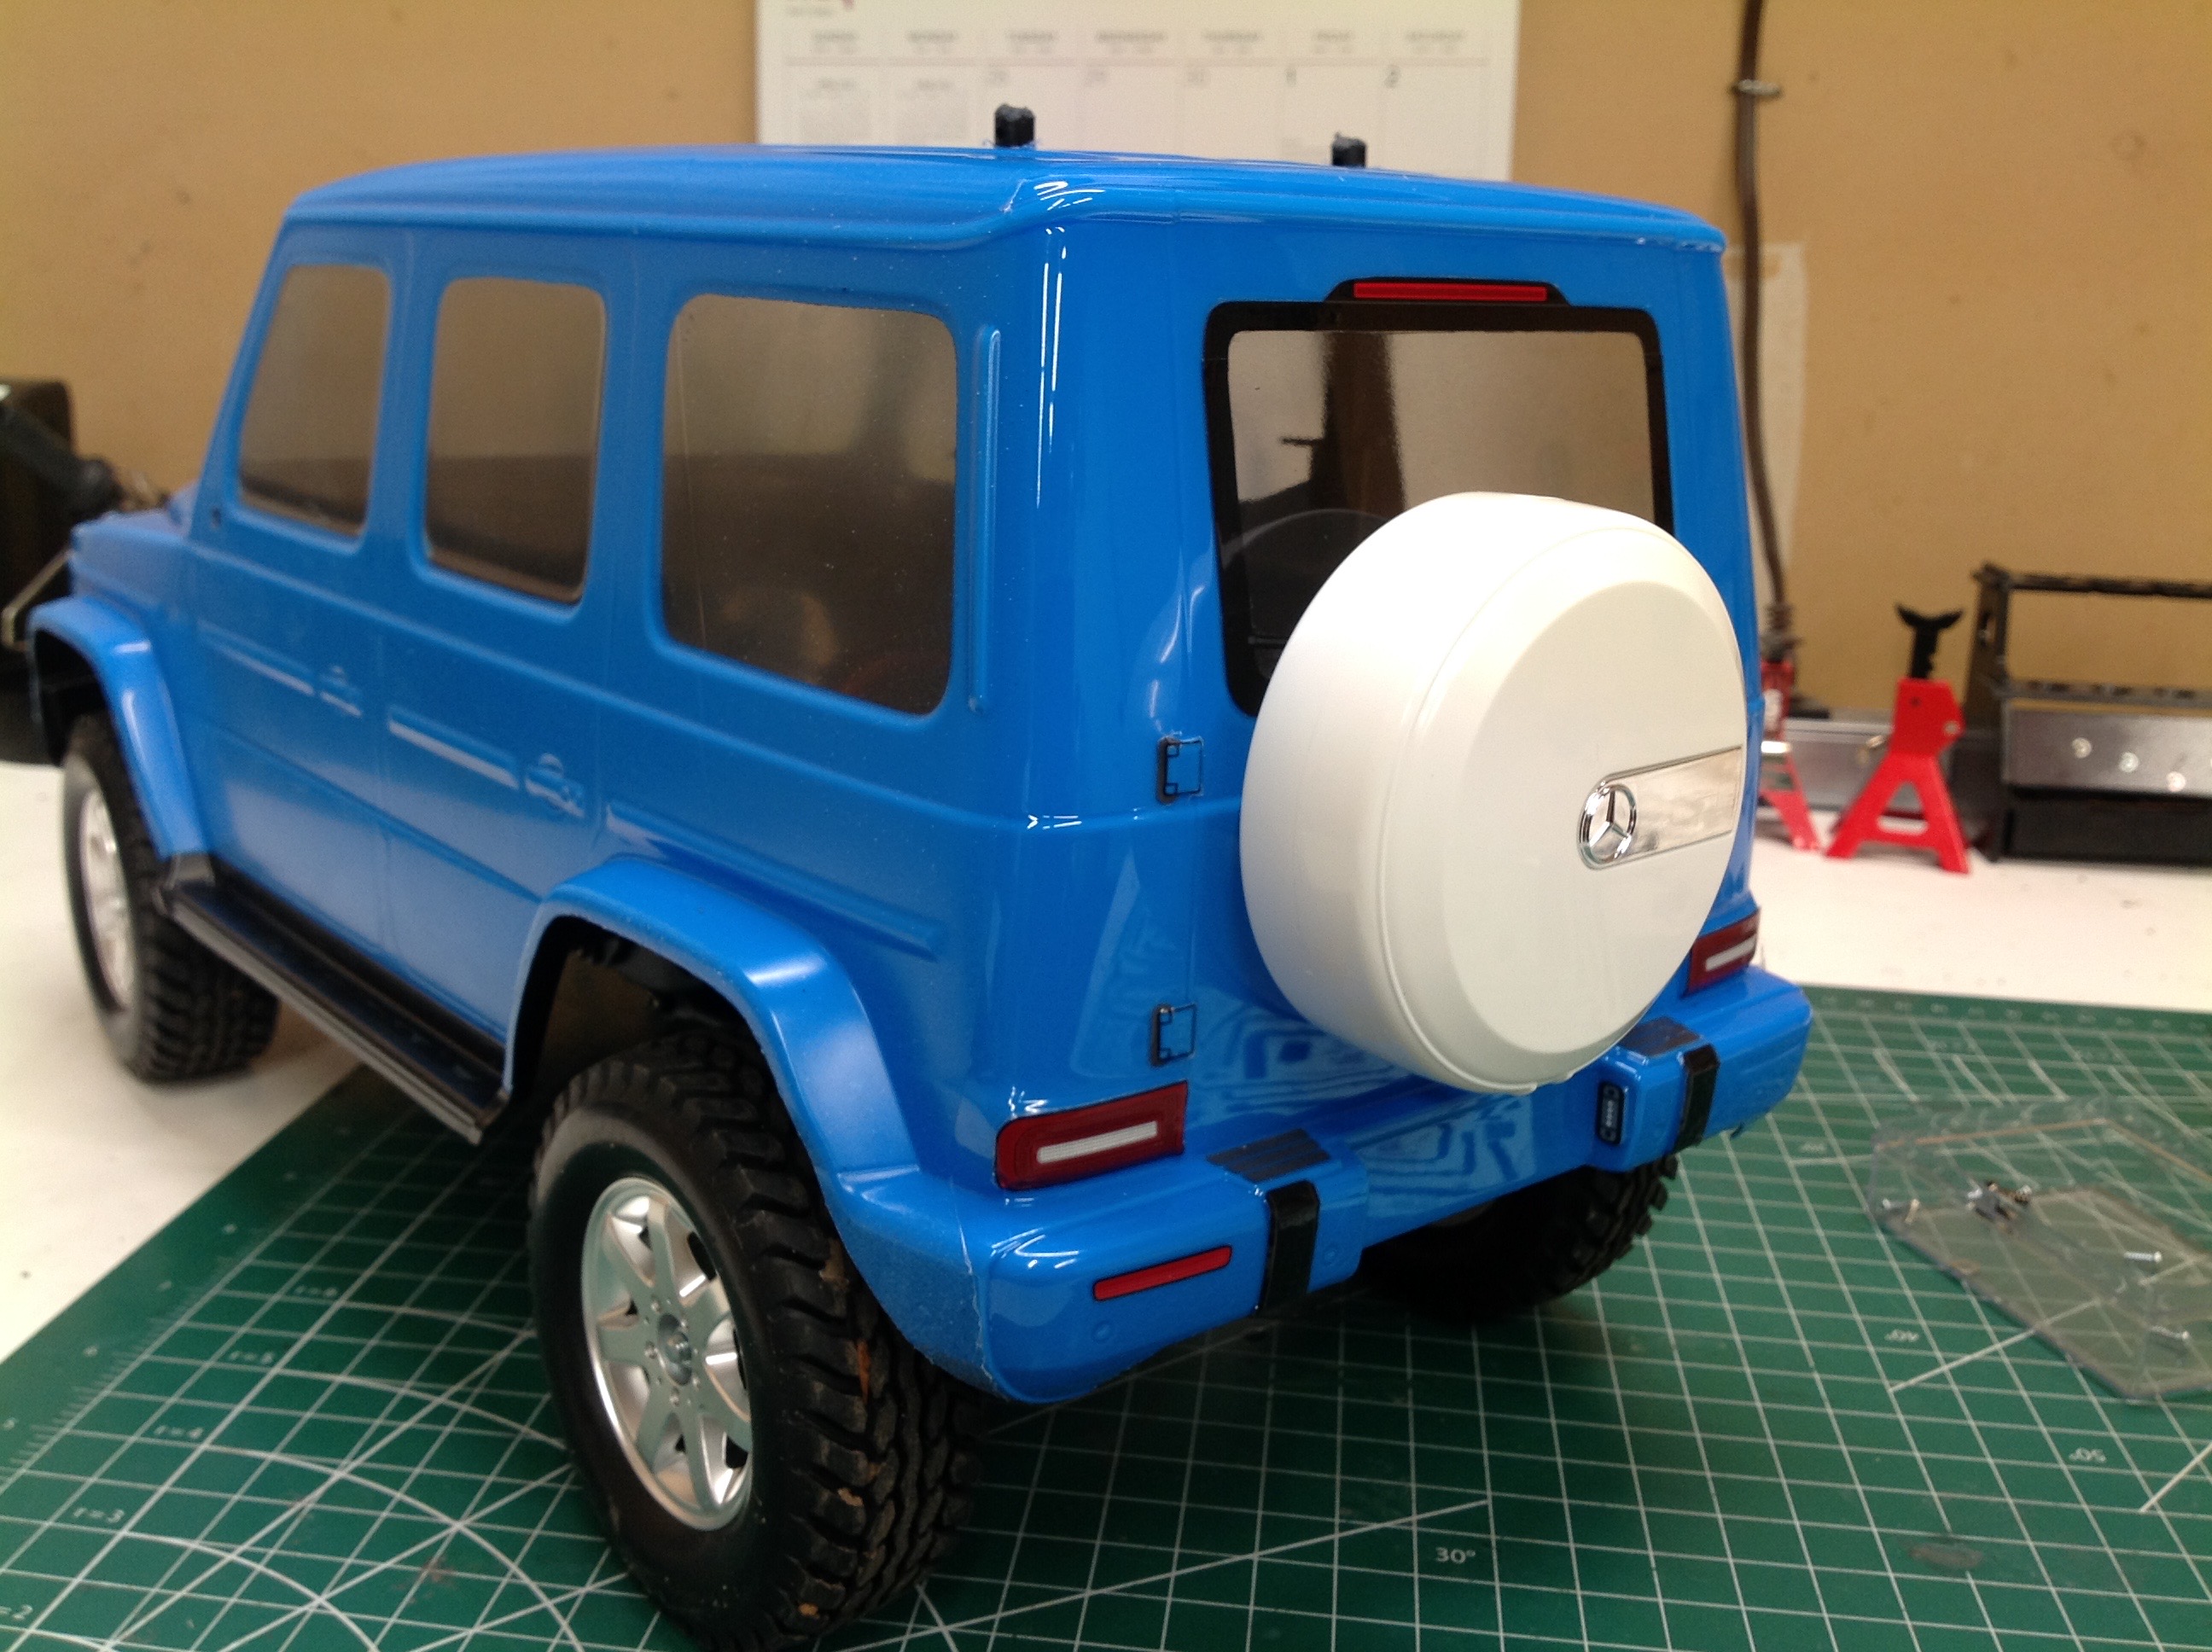
The sticker project seemed too daunting to attack all at once, so I
decided to start in the rear. On the left you can see the stickers
surrounding the rear window, the tail lights, the hinges, and the
bumper. On the right I've test fit the spare tire to see how it
looks. I was waiting on matching TS paint to arrive.
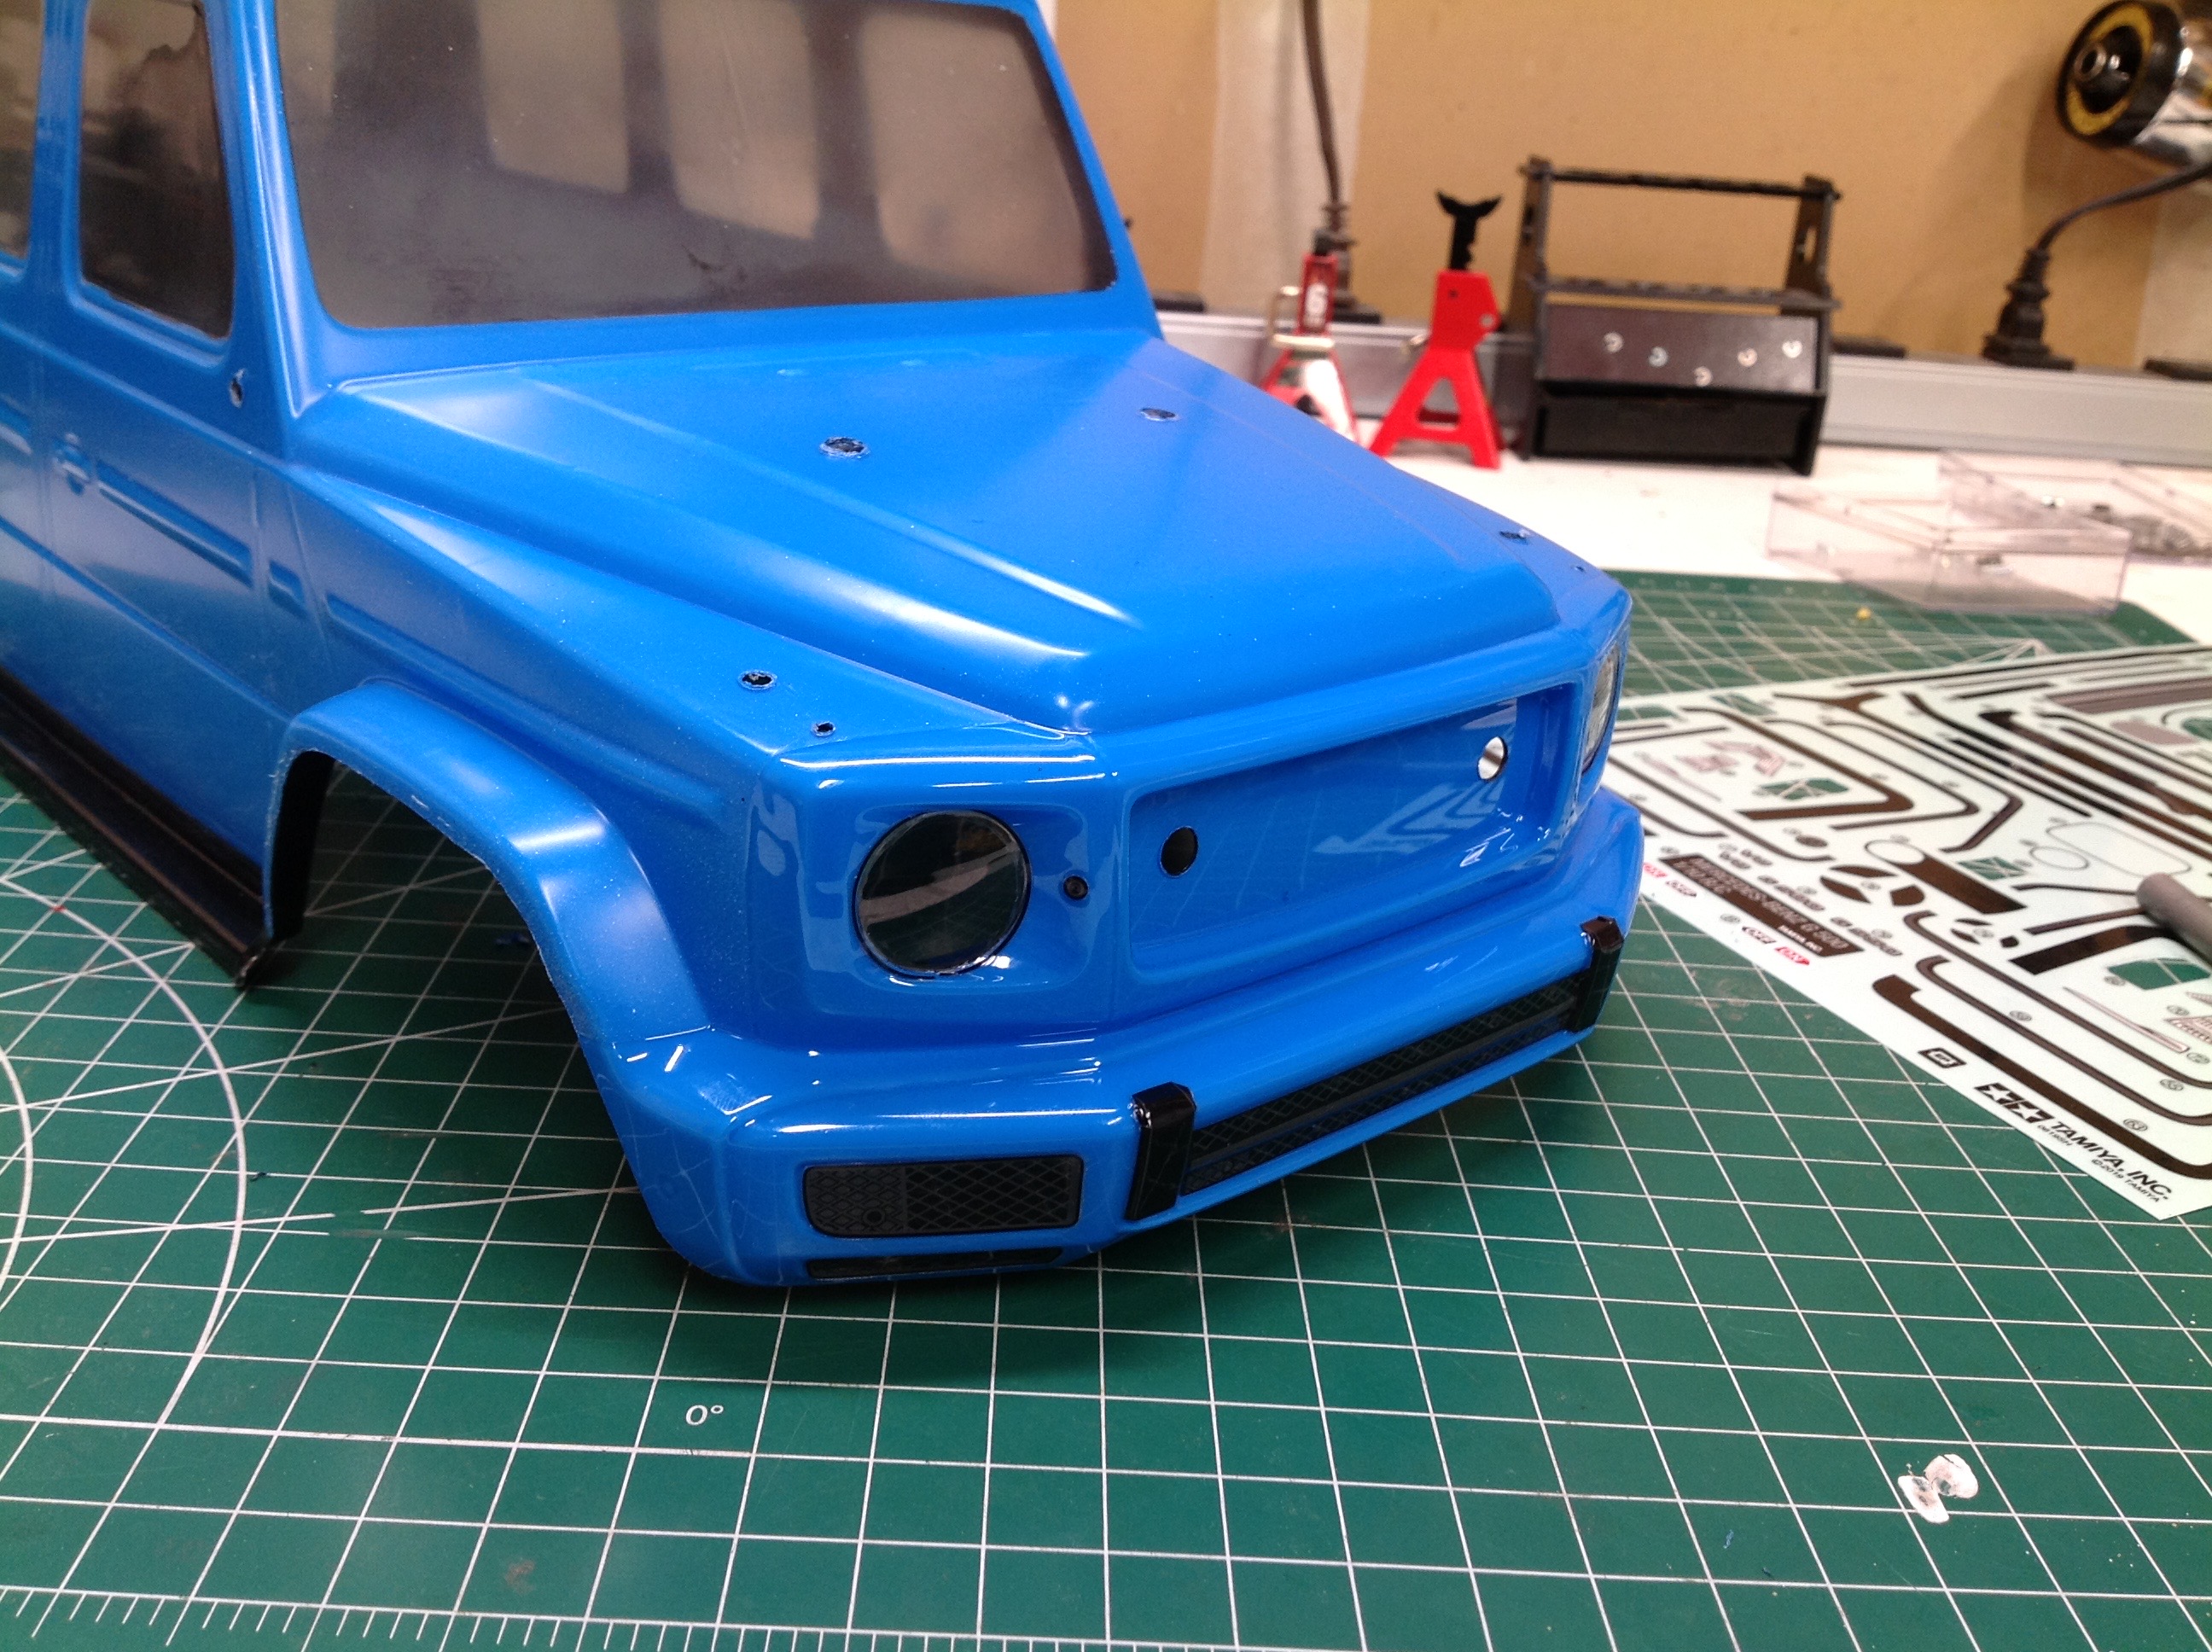
Now I've moved on to the front. On the left I've applied the
little rings around the headlights and the details to the front
bumper. On the right I've test fit the lights buckets and the
grille.
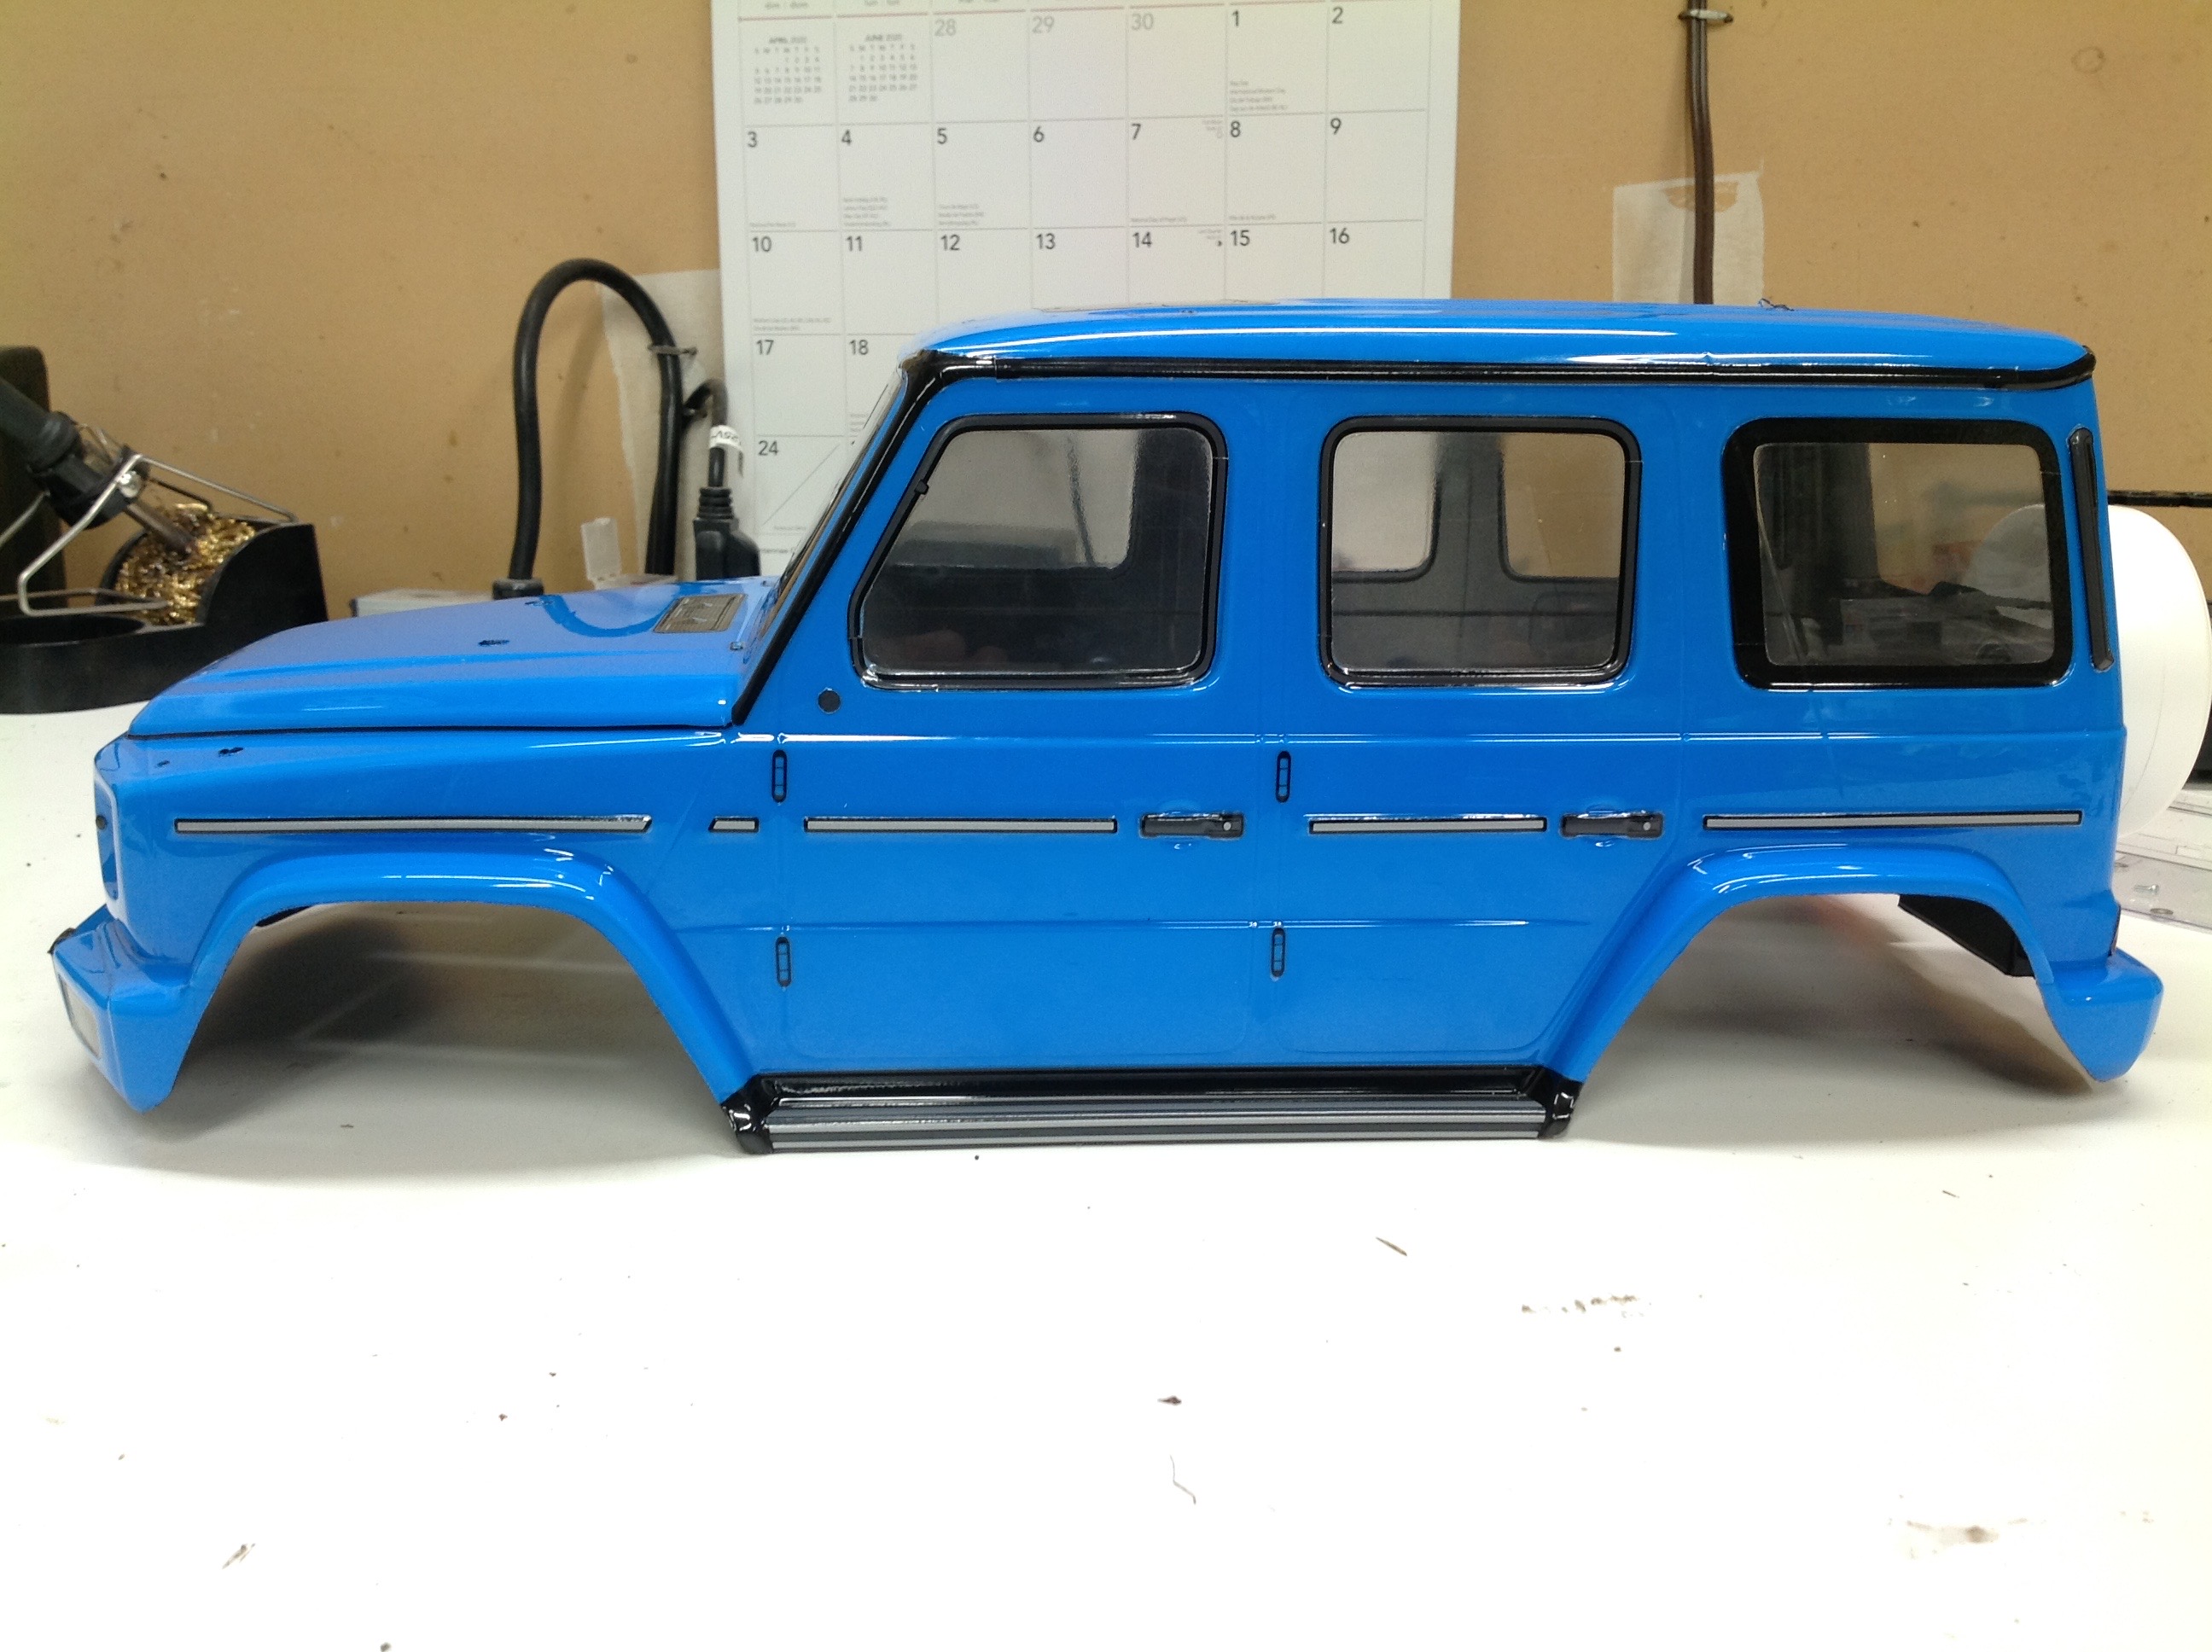
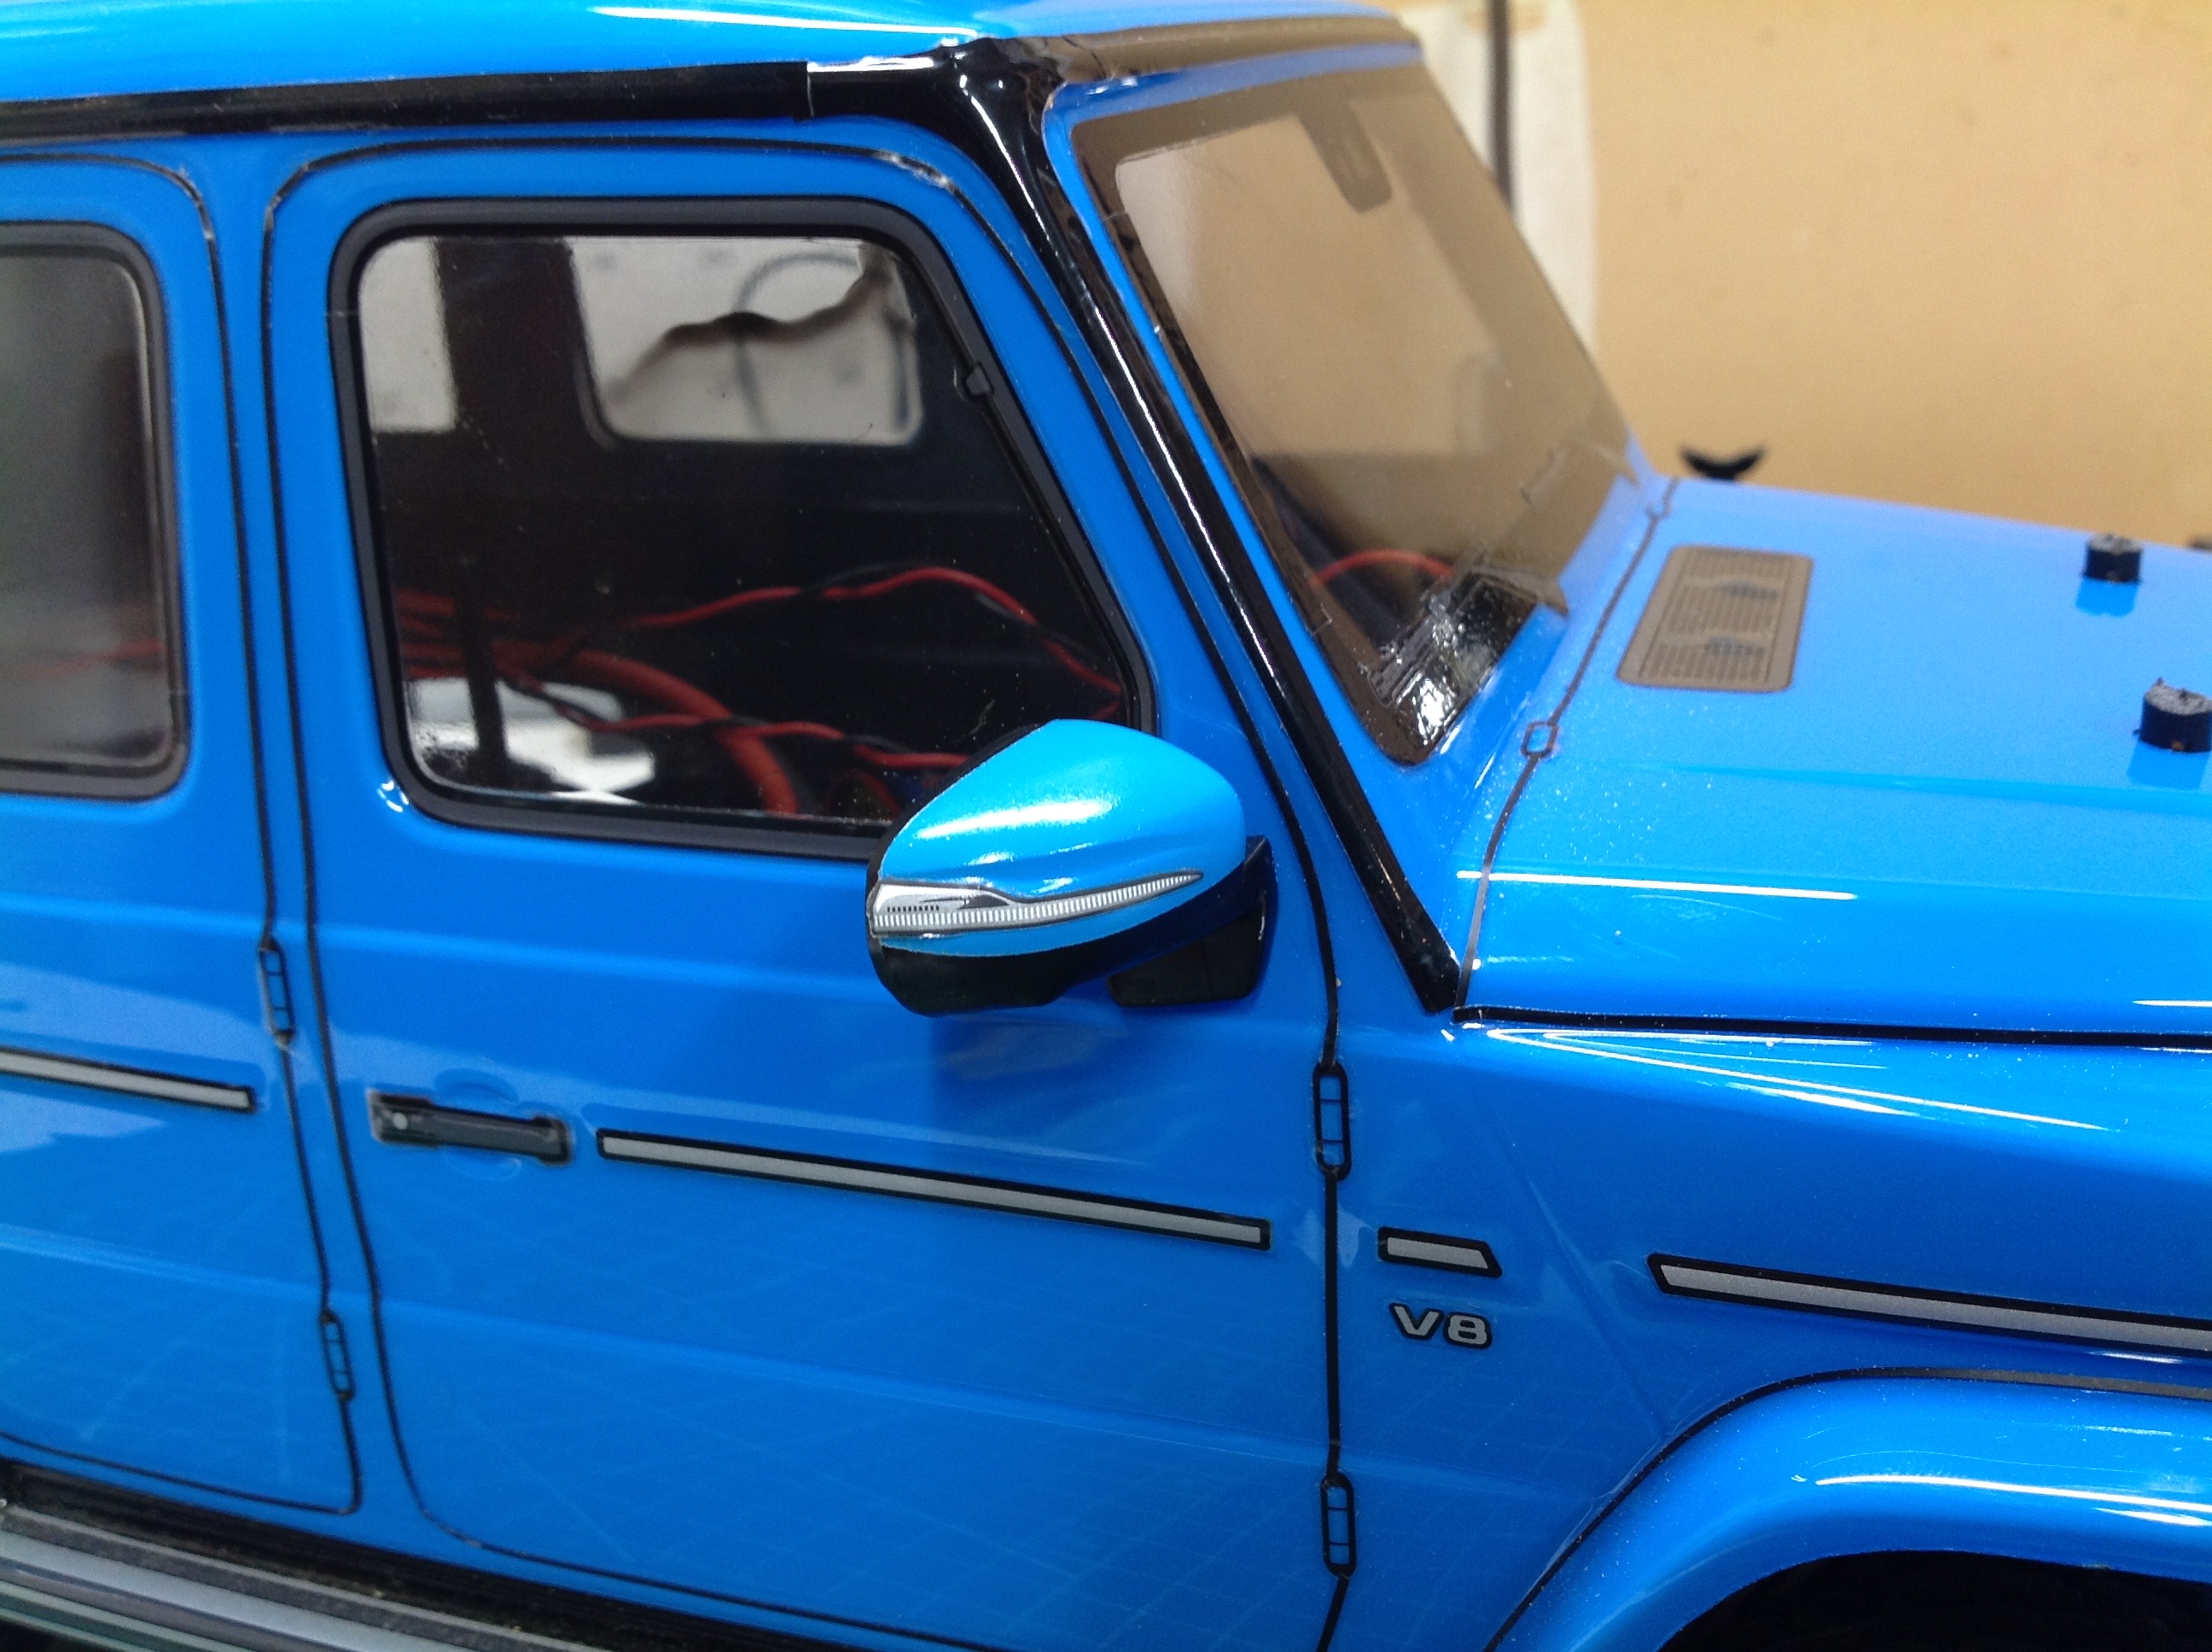
On the left I've completed all the decals including surrounding all the
windows, the hinges, door handles, pin striping, and running
boards. Even after all that work I still felt it was lacking
detail though, so I went over the whole model with trim tape and
outlined the doors and body panel lines. The result is on the
right. I think it looks a lot better. I've also test fit the
mirrors and turn signal markers.
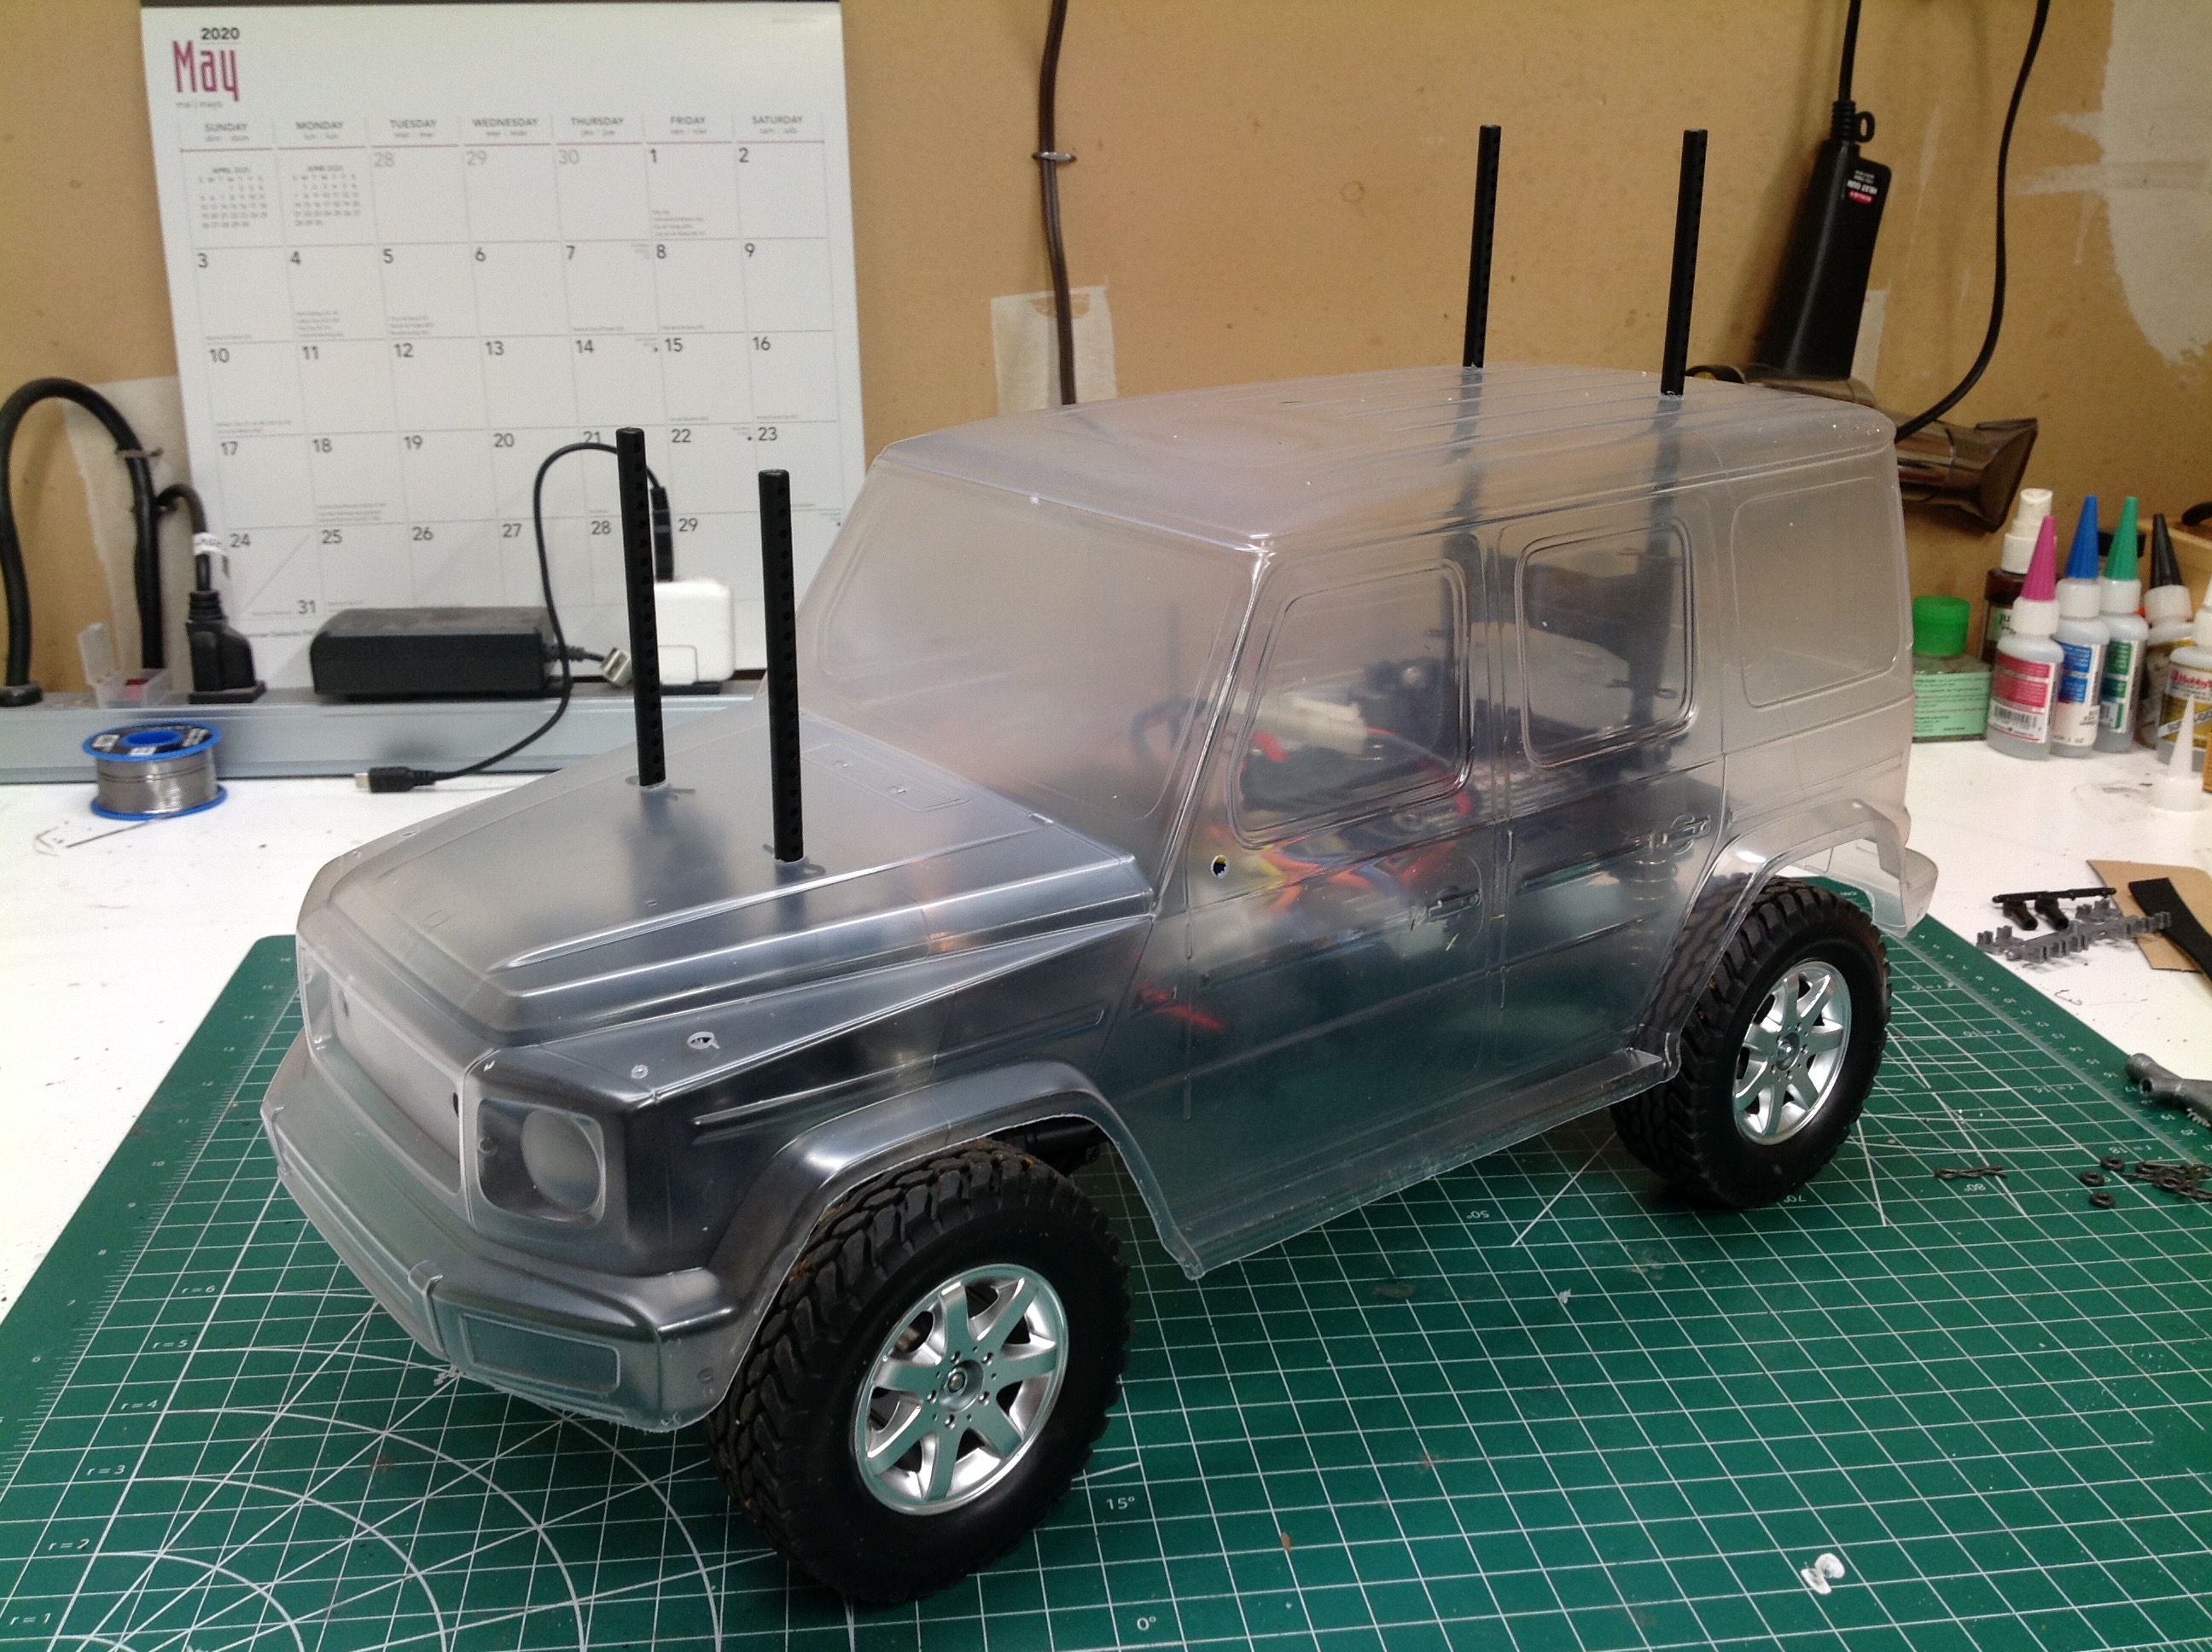
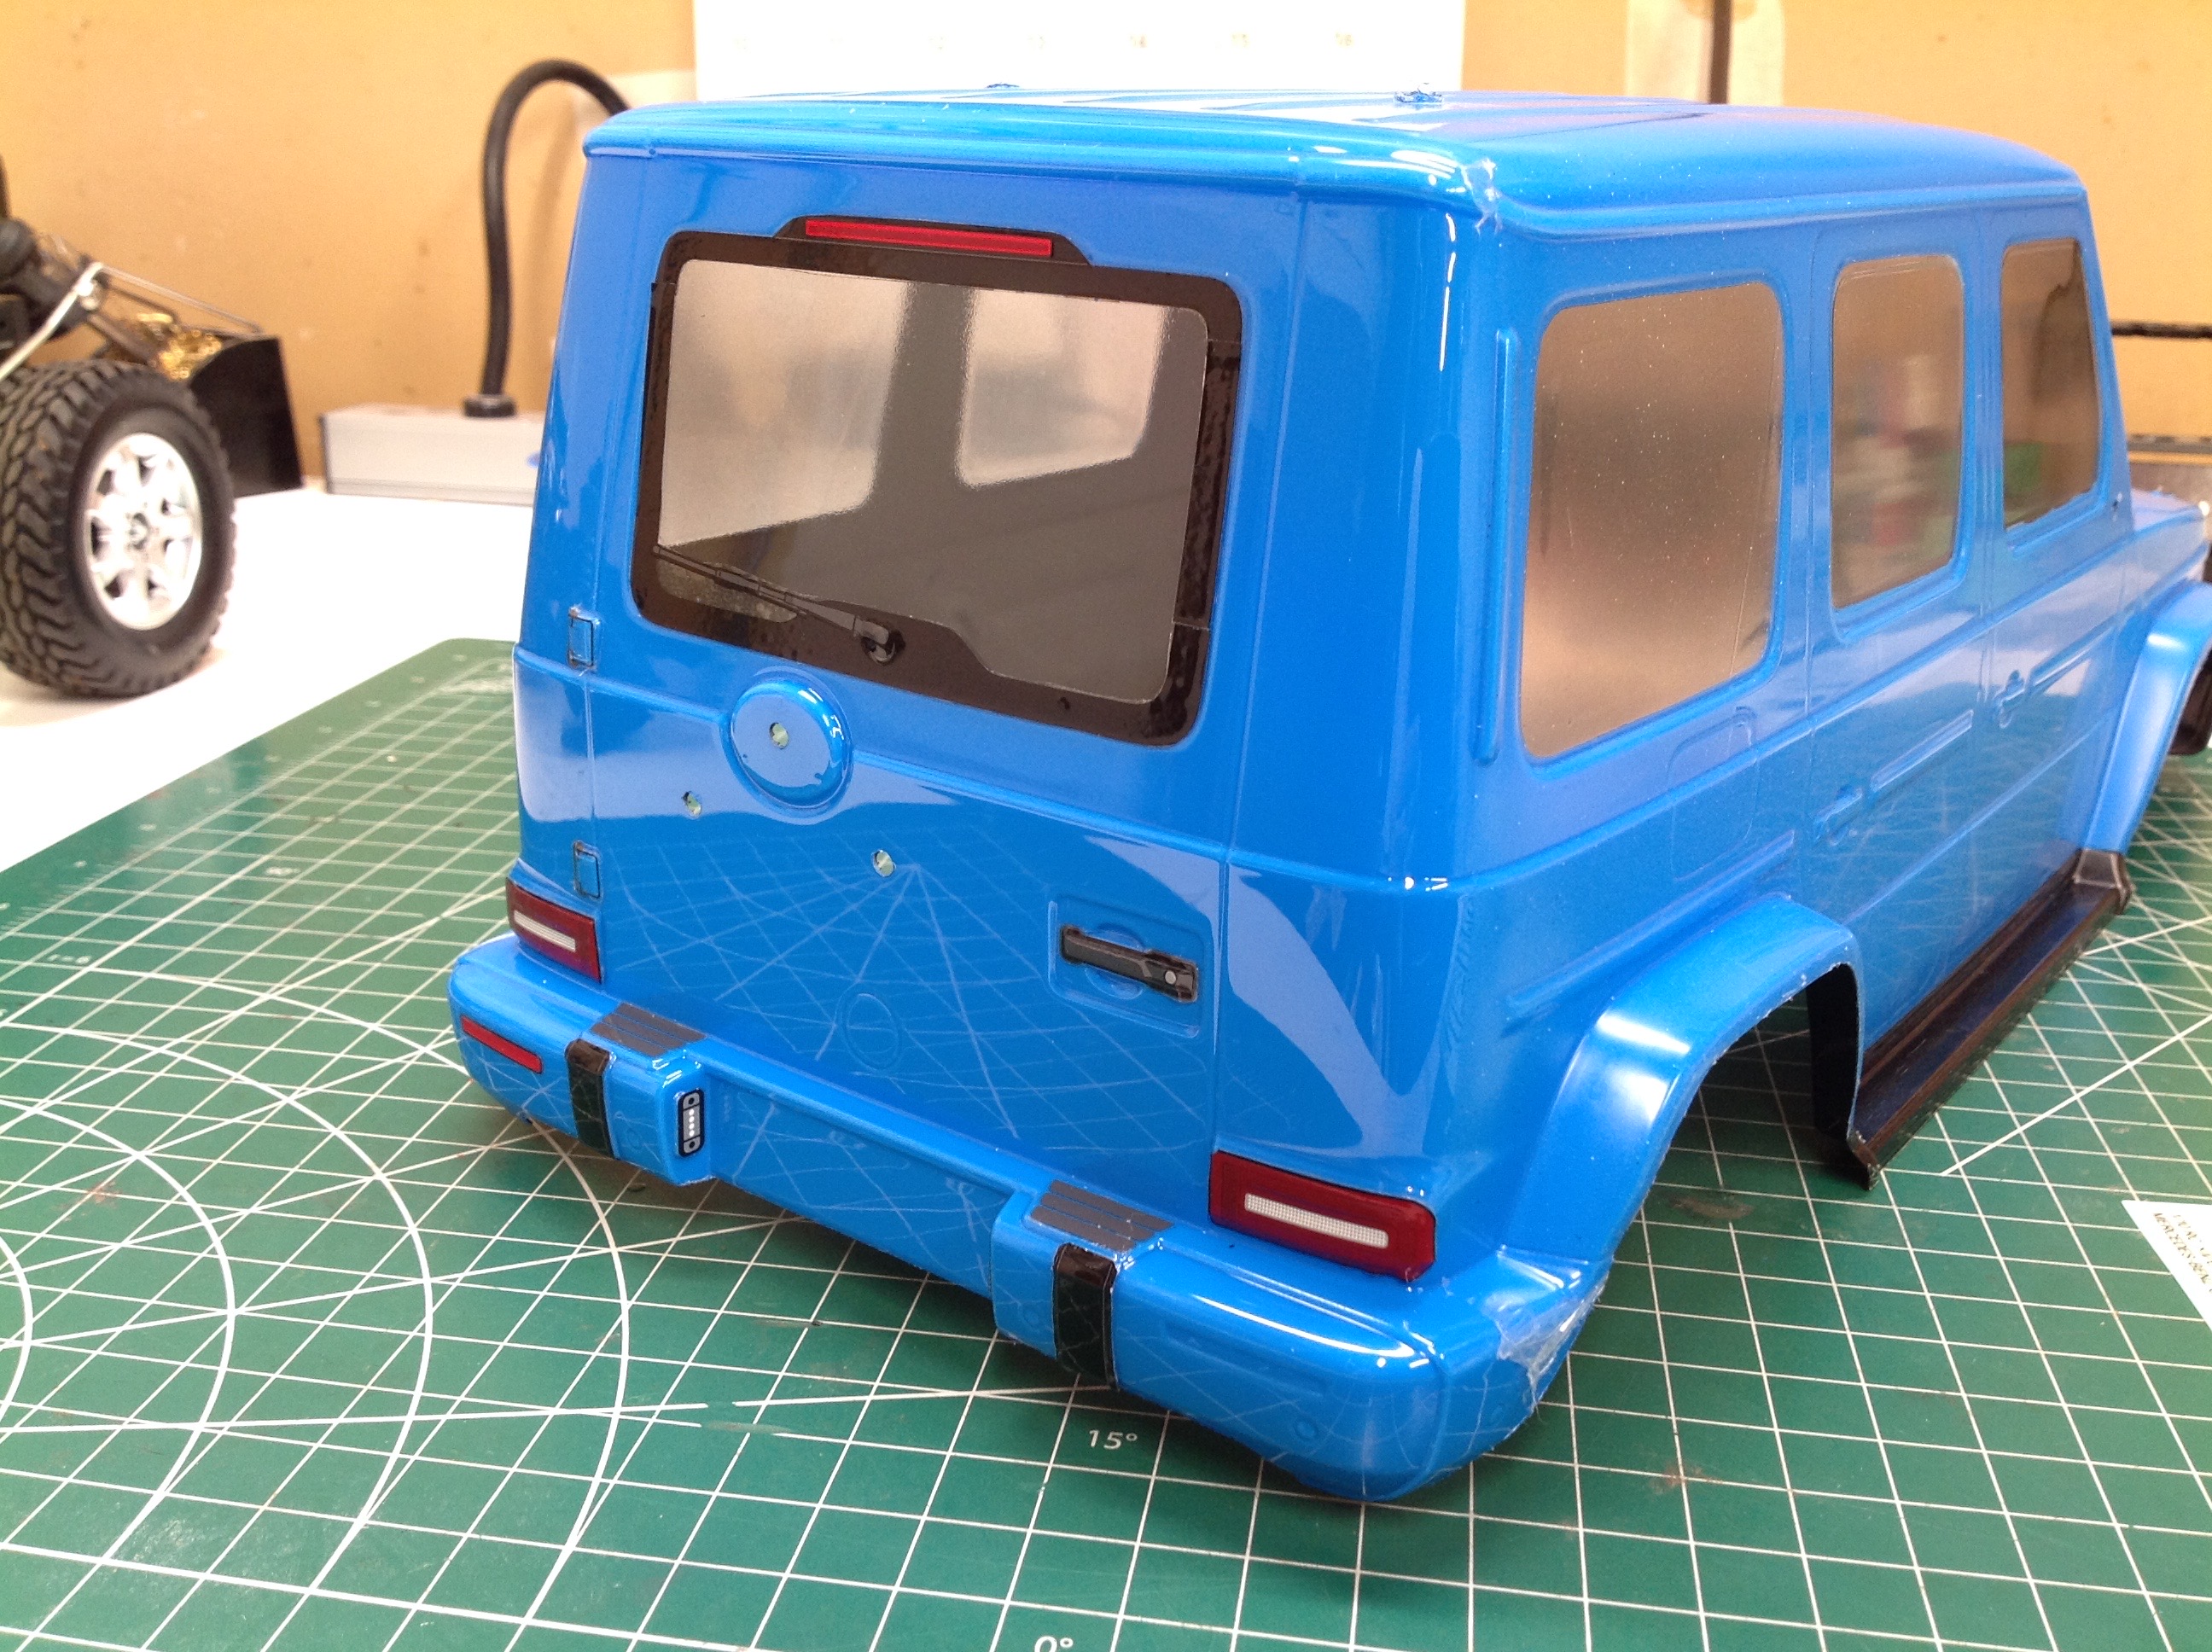
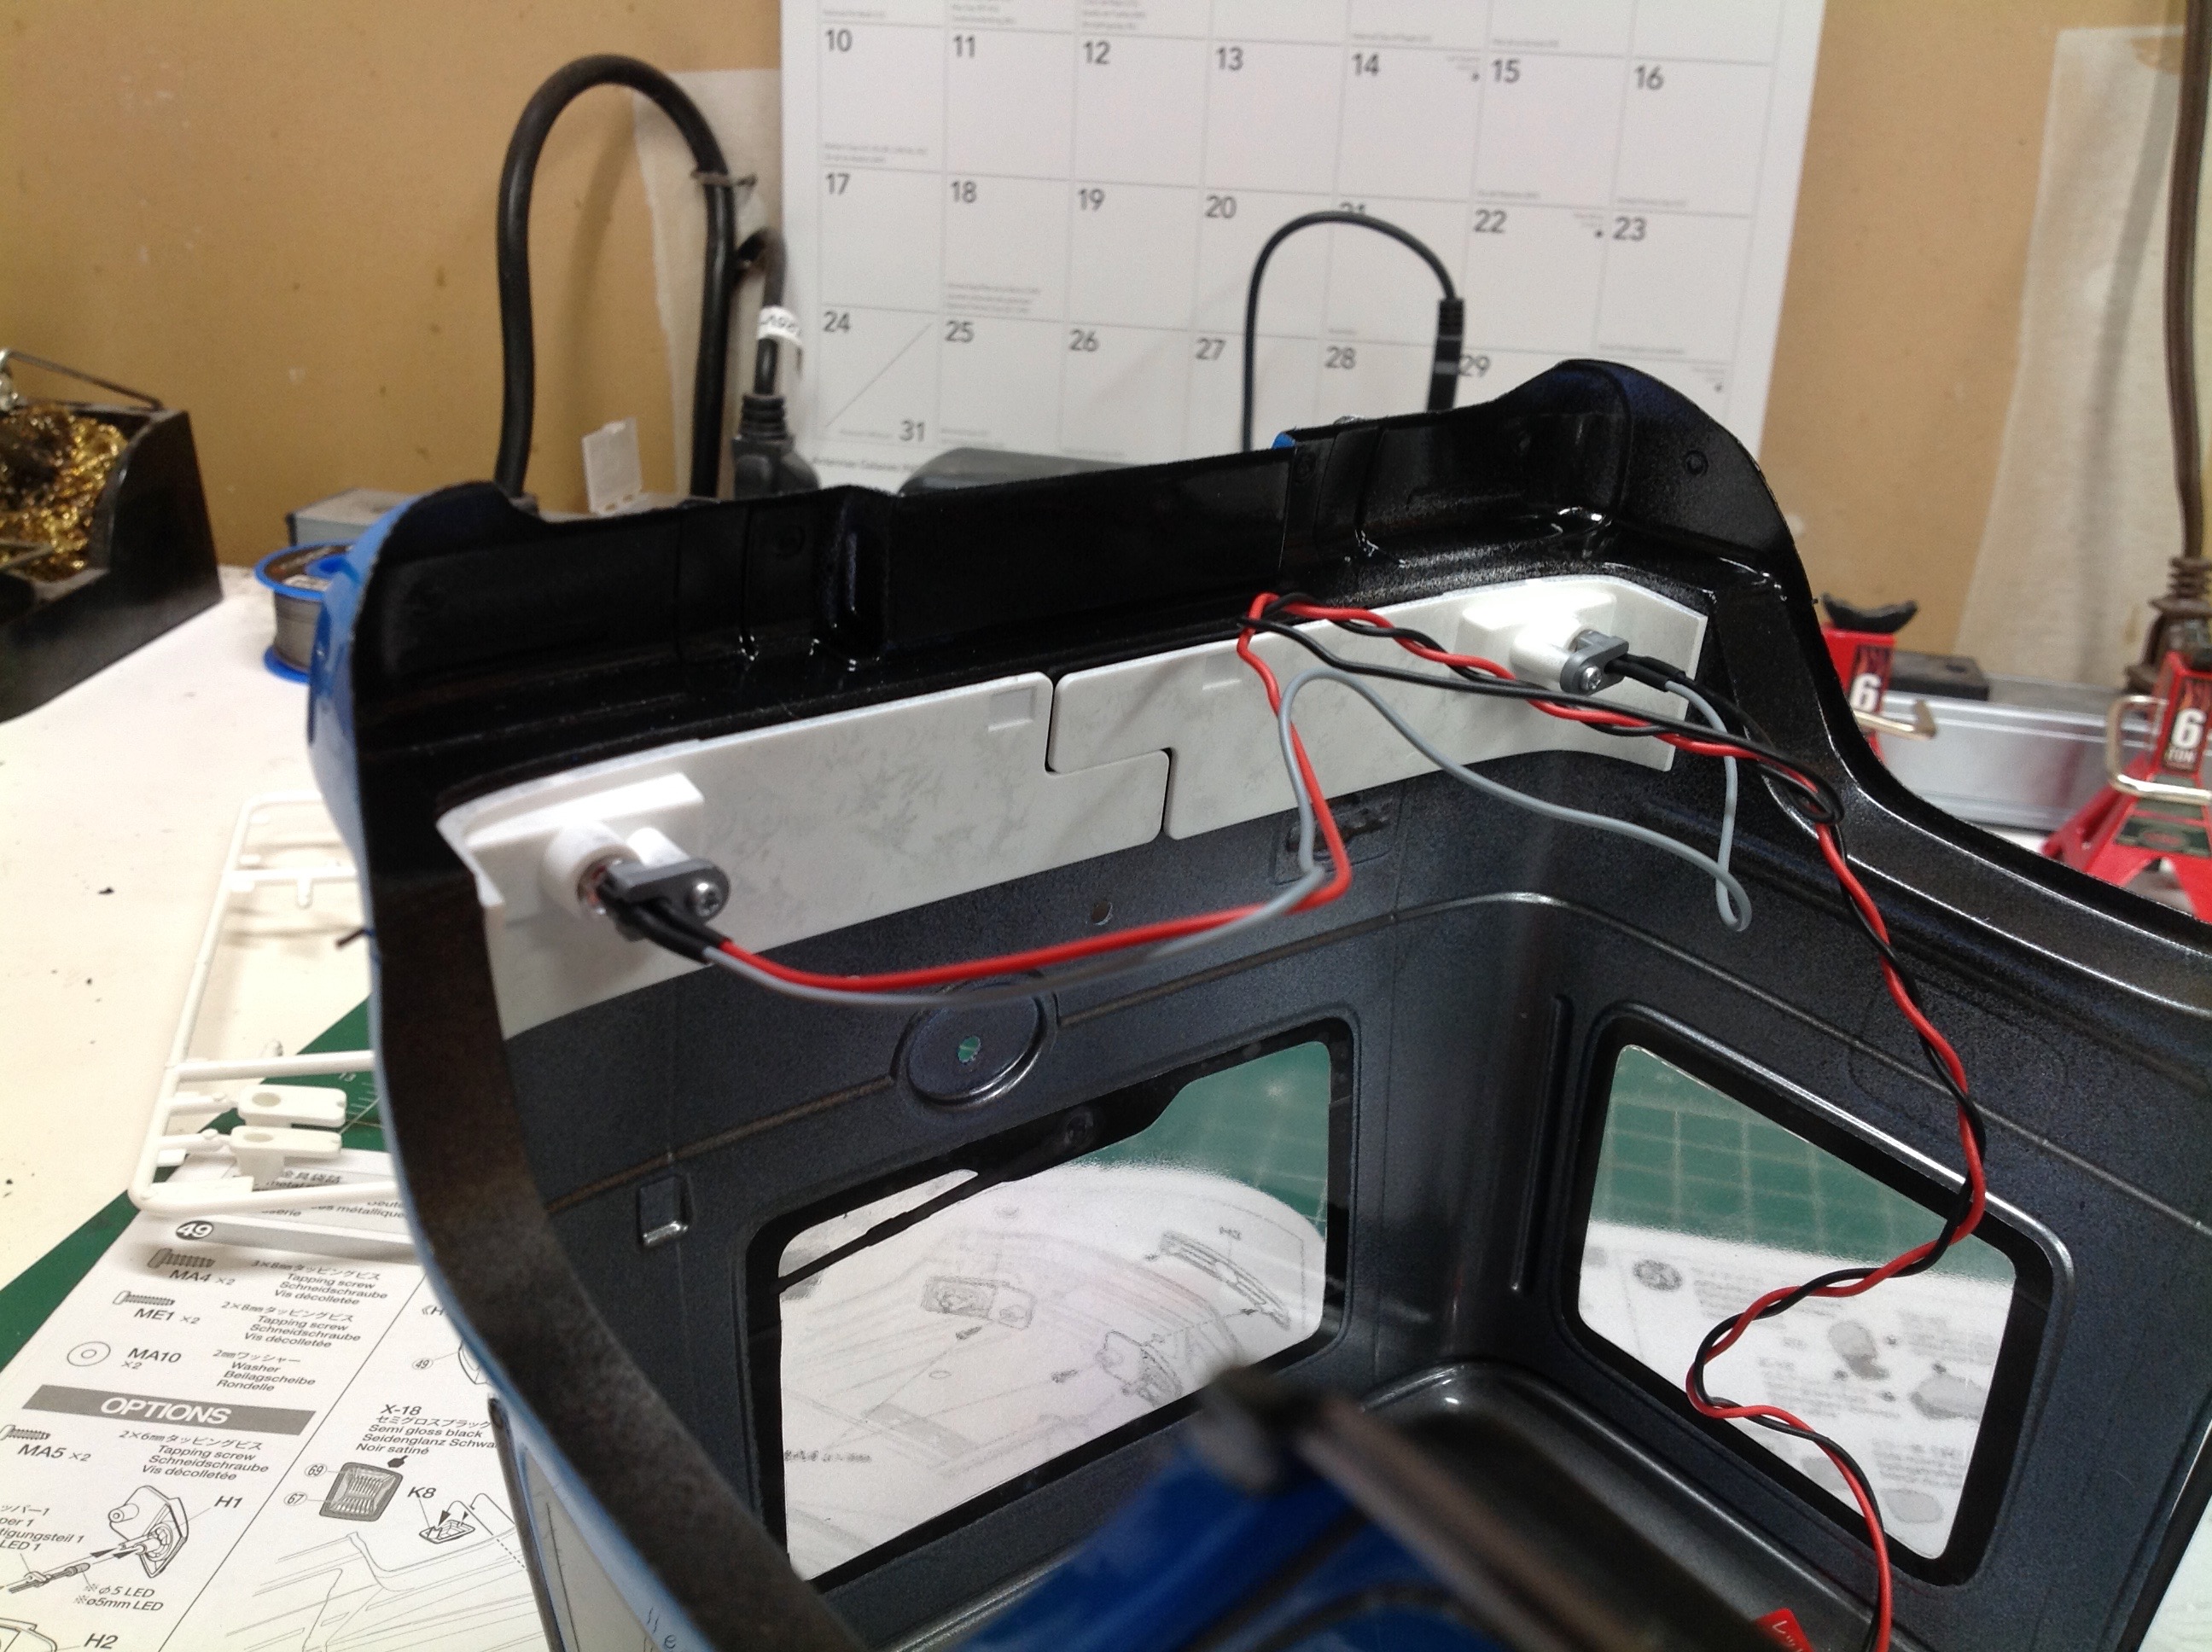
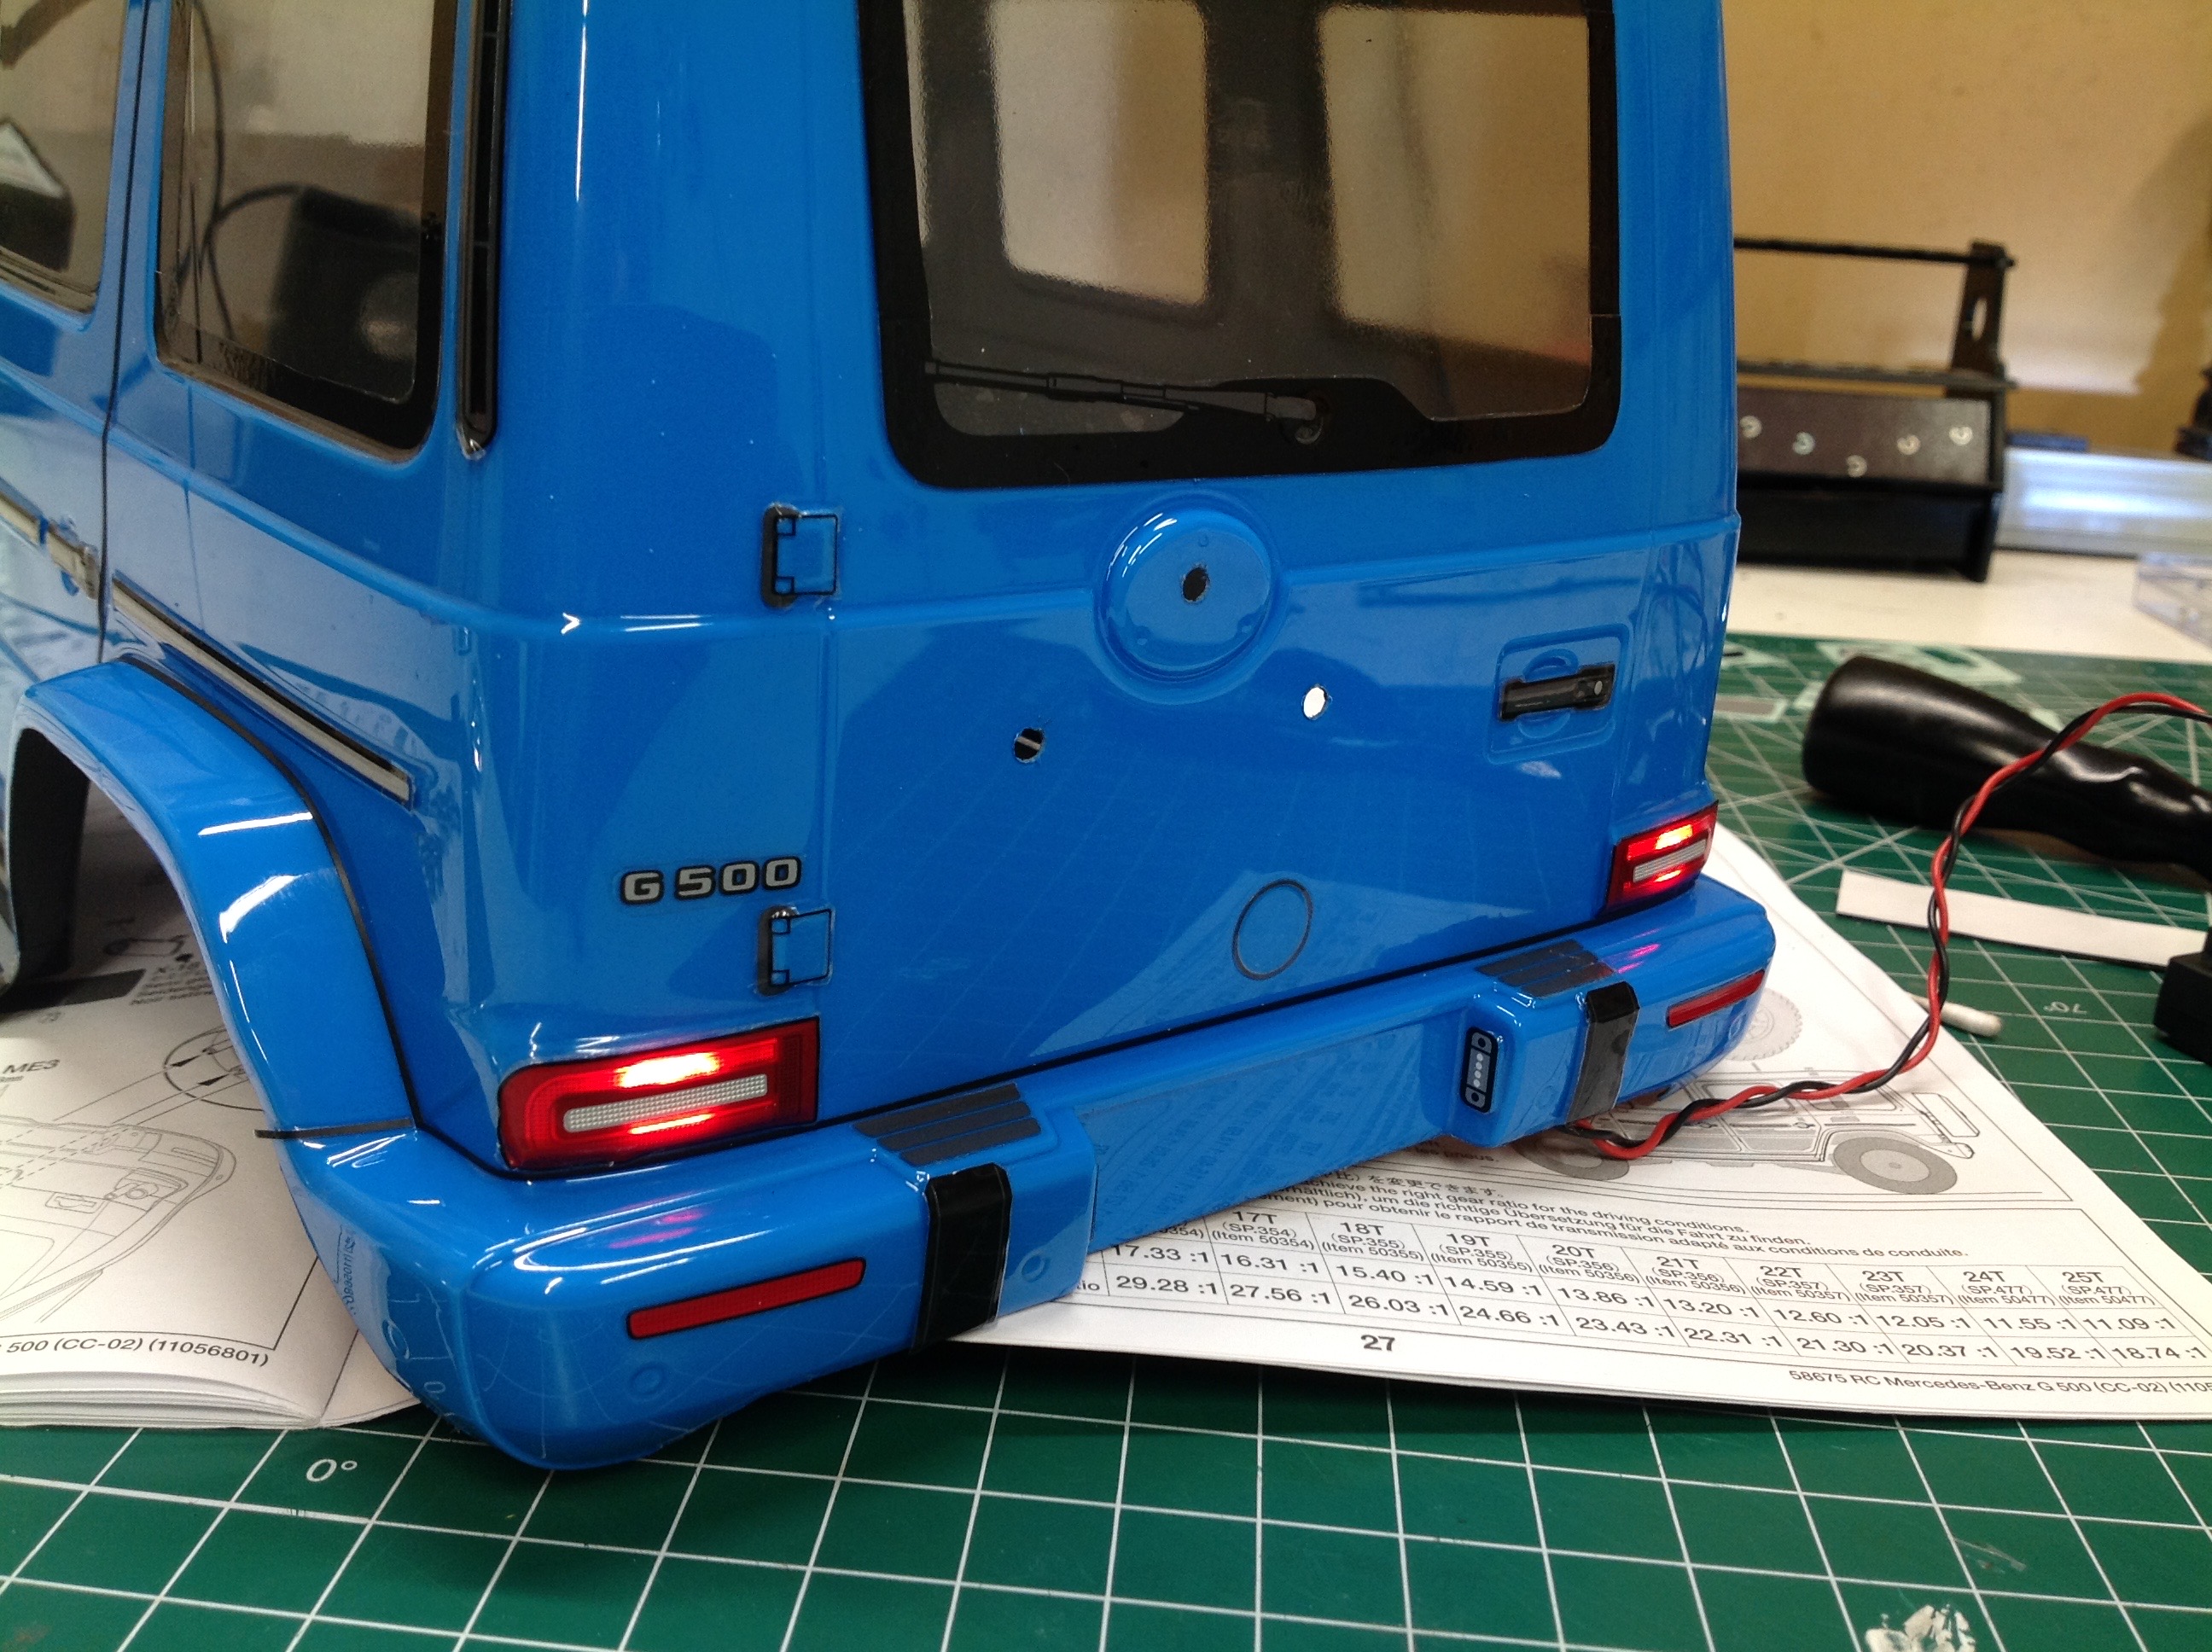
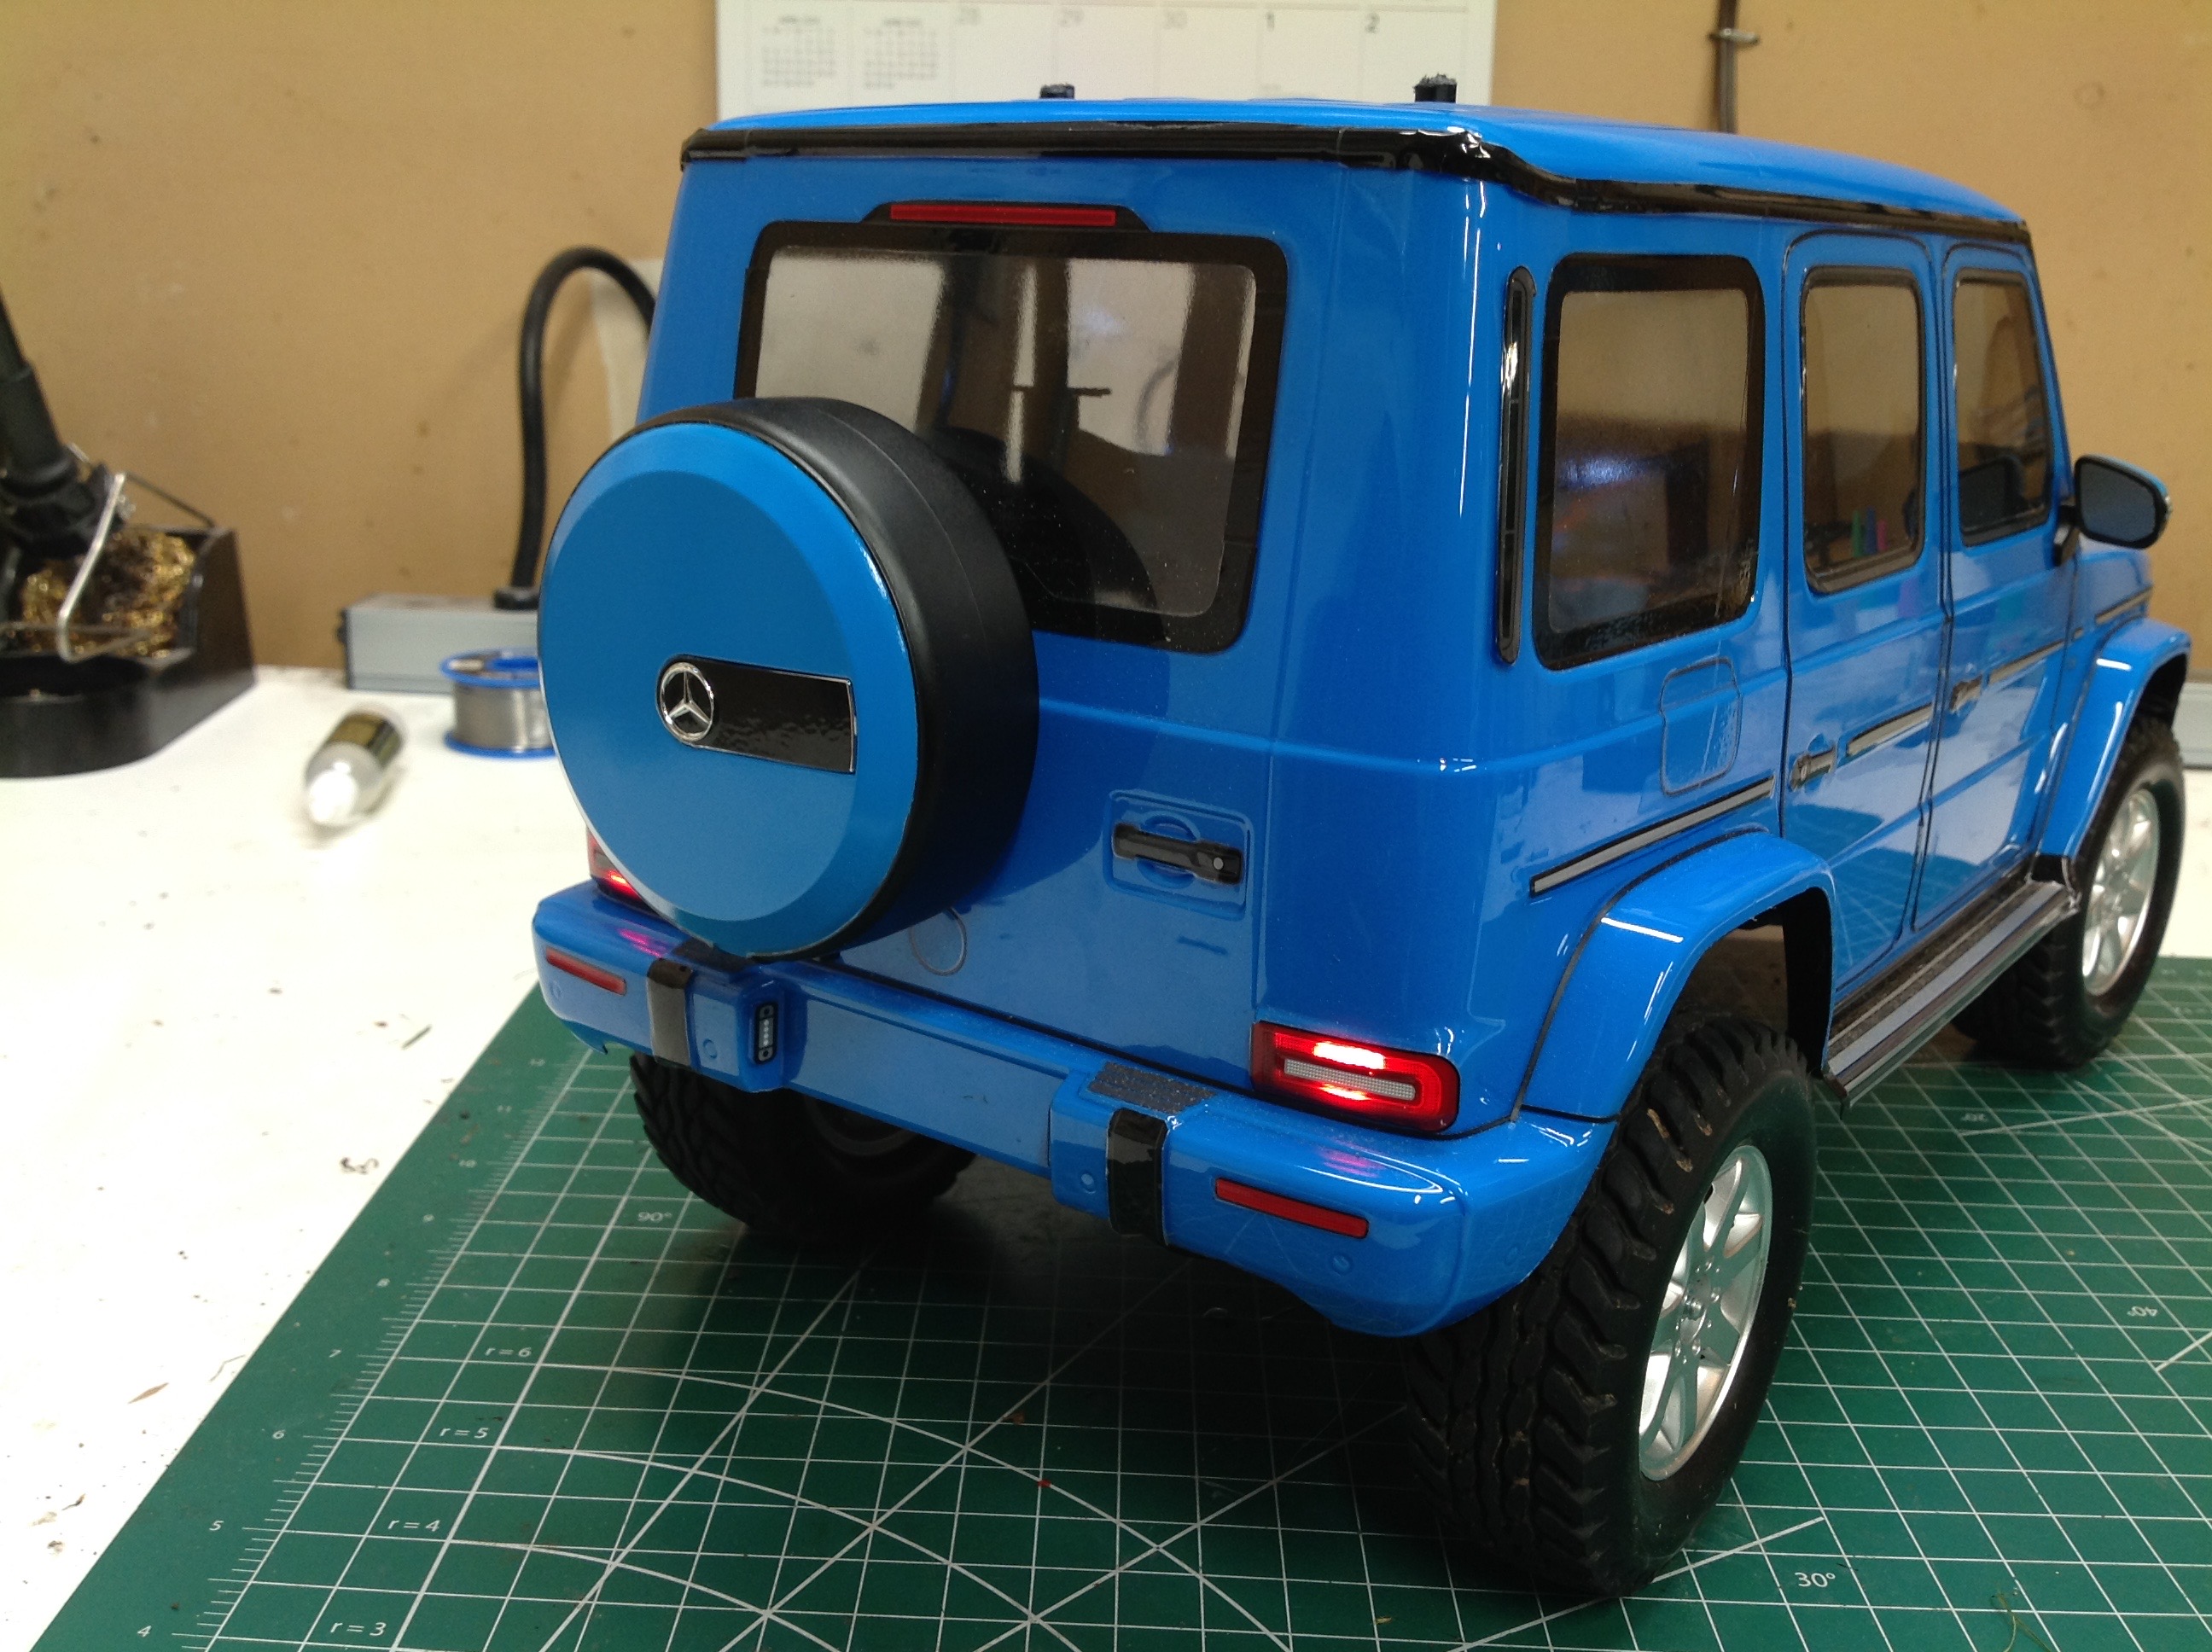
This kit came with a full TLU-01 lighting system, but only one pair of
white and one pair of red LEDs are used. The light buckets in the rear
double as body stiffeners. The white parts shown span the whole
rear of the body and make it more rigid so it won't flop around on the
trails: a great idea. The picture on the right shows how the
installed tail lights look illuminated.
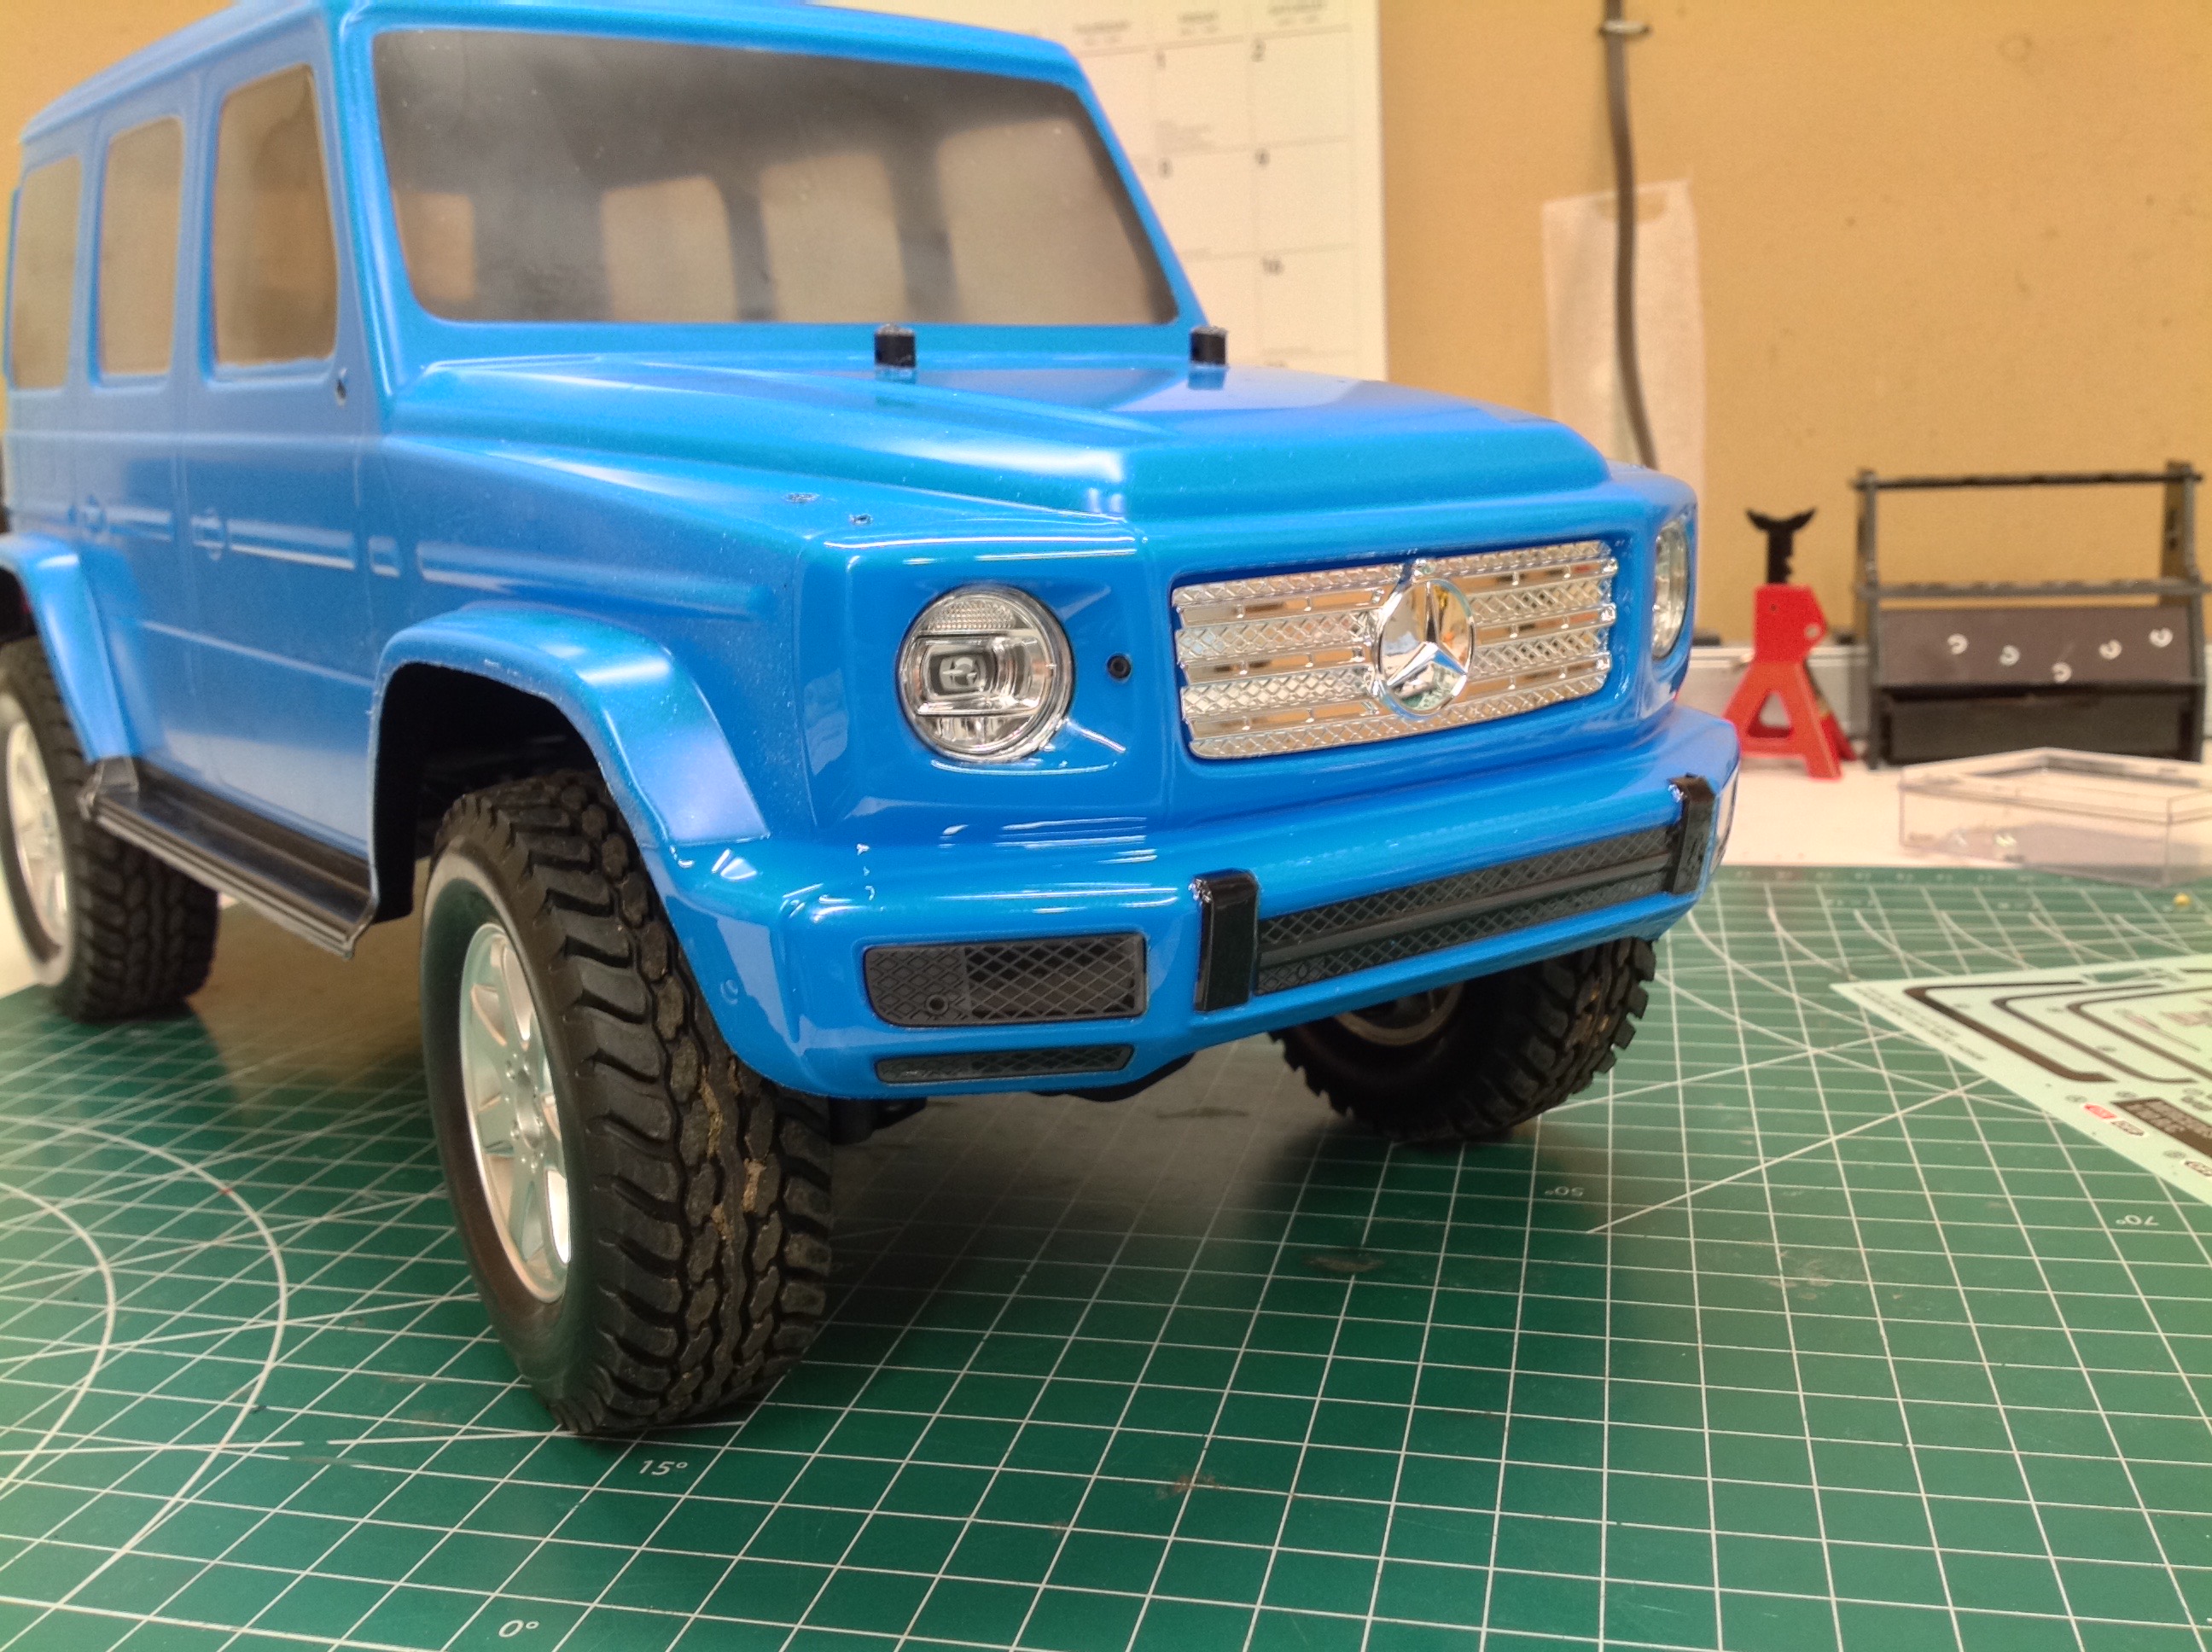
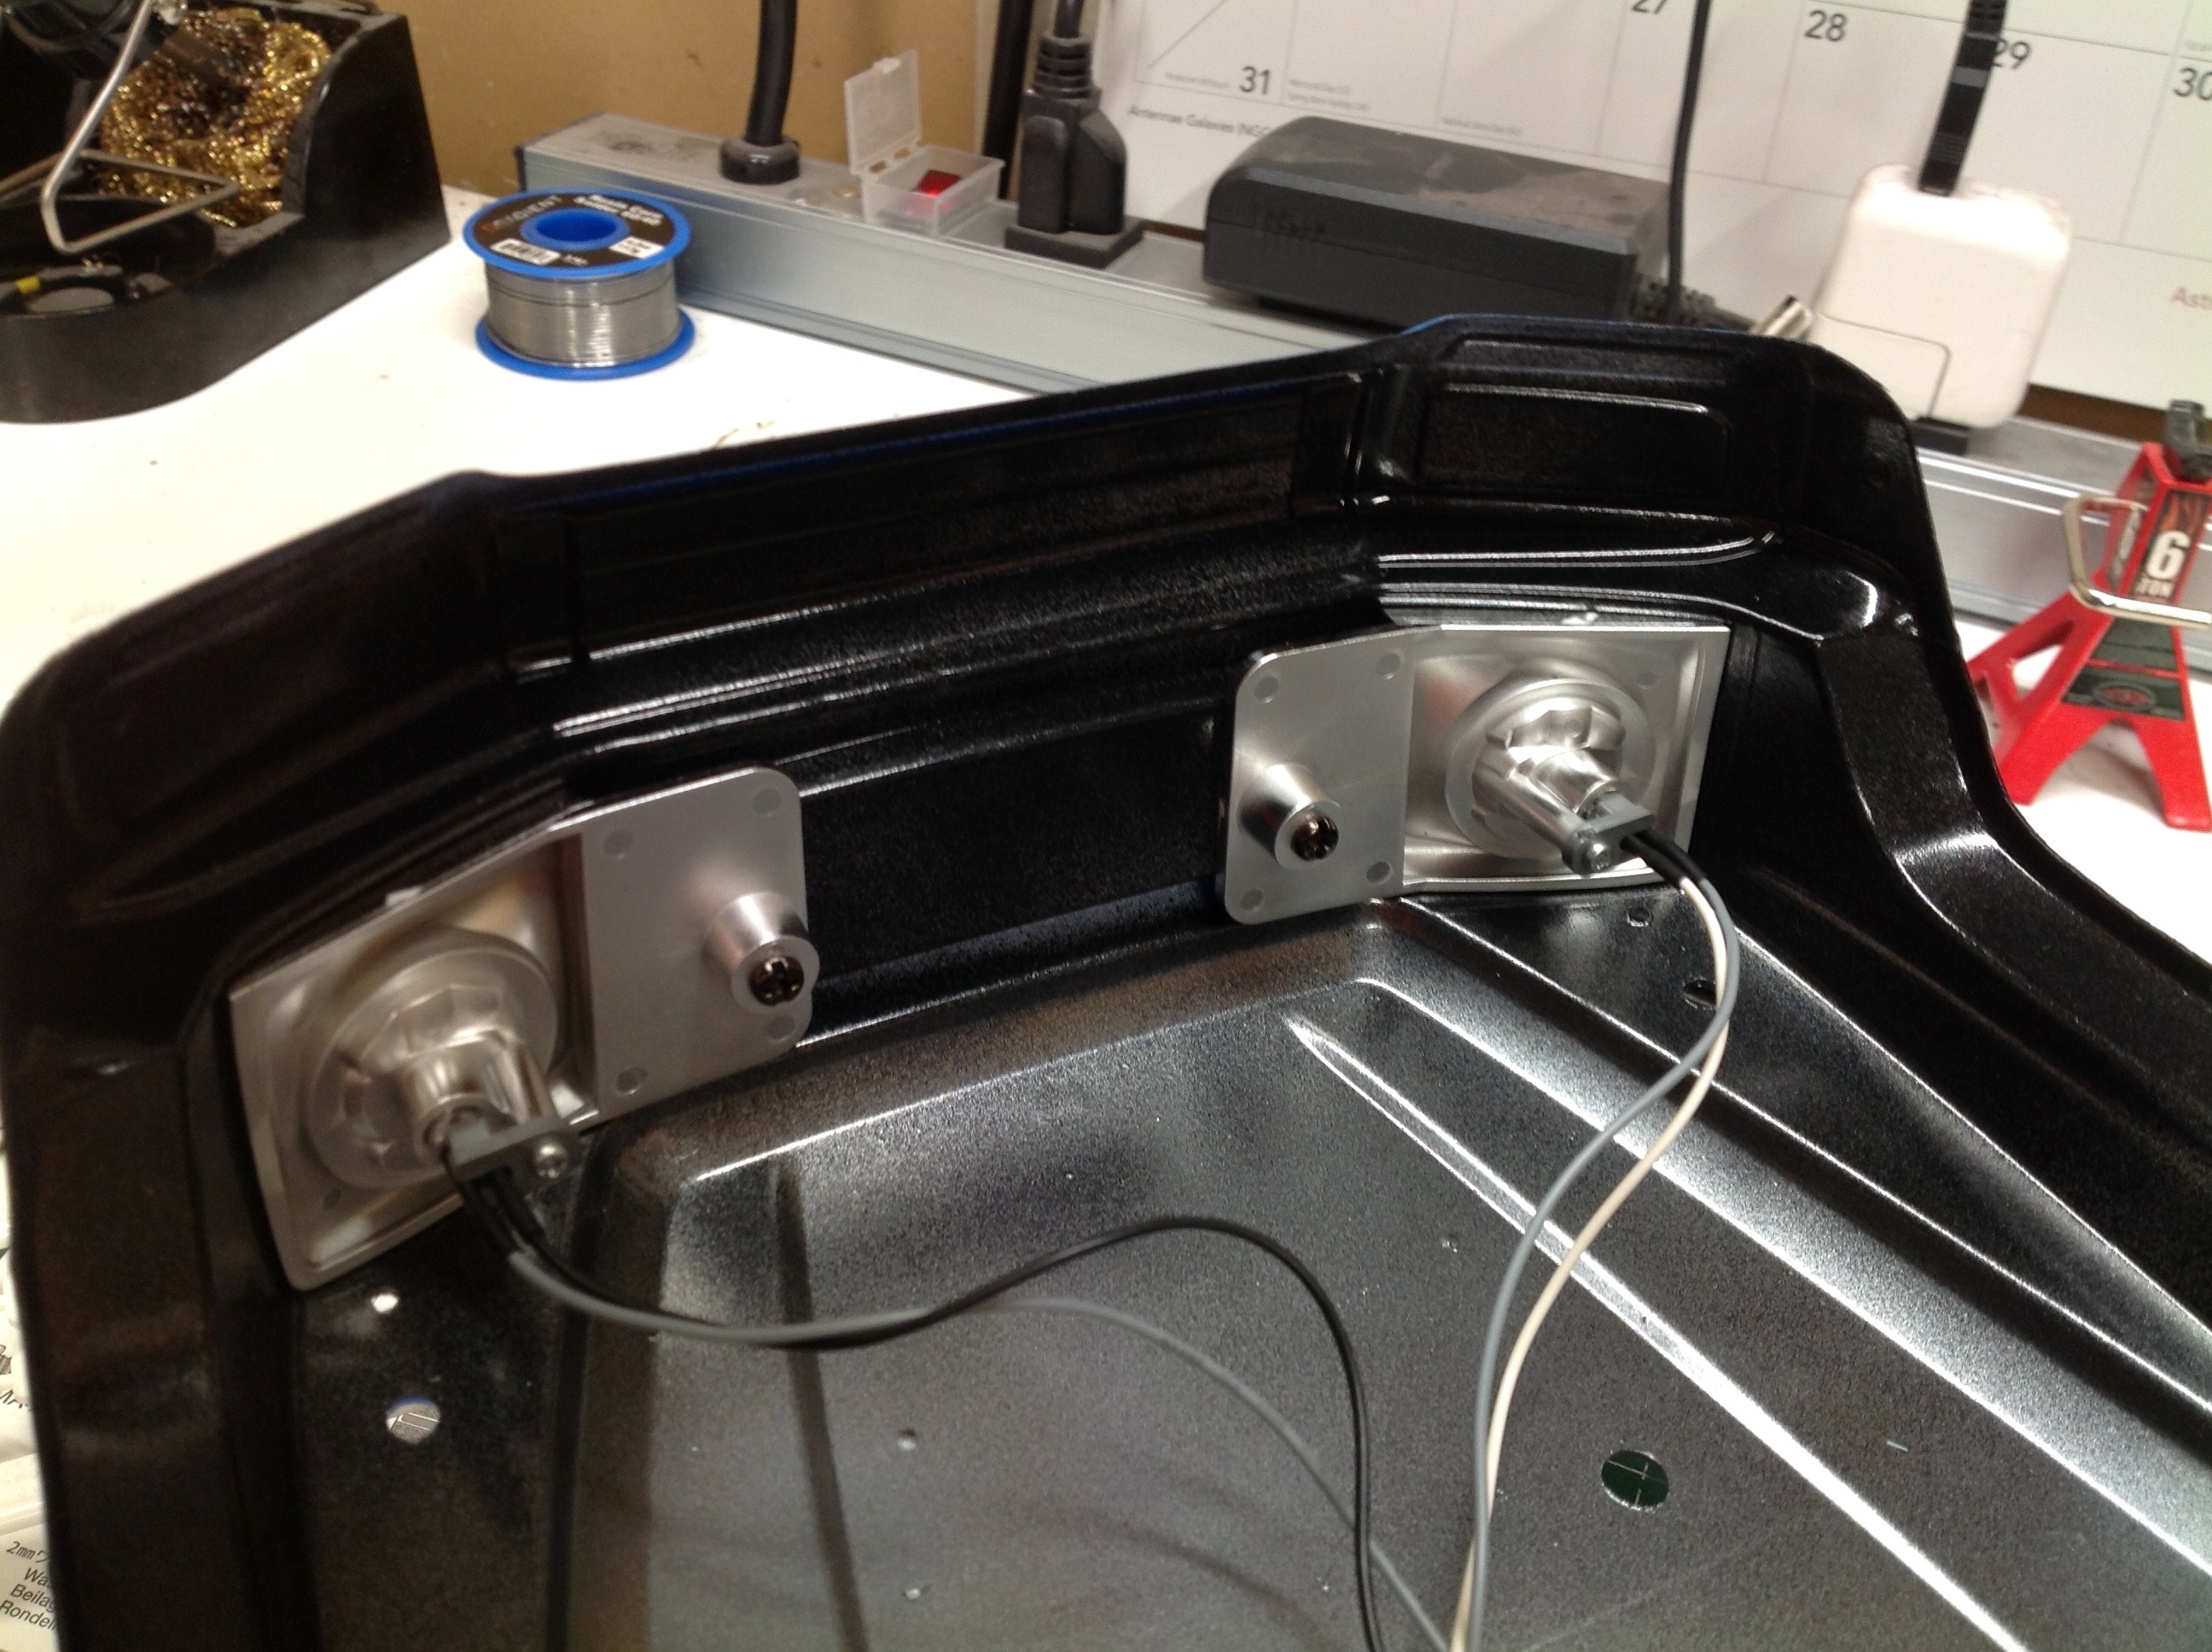
Now I've given the front the same treatment. The headlight buckets
are chromed to improve reflection. The right hand picture shows
not only the completed lights but also the painted grille. Compare
it to the picture with pure chrome from earlier so see how much better
is looks with most of it blacked out.
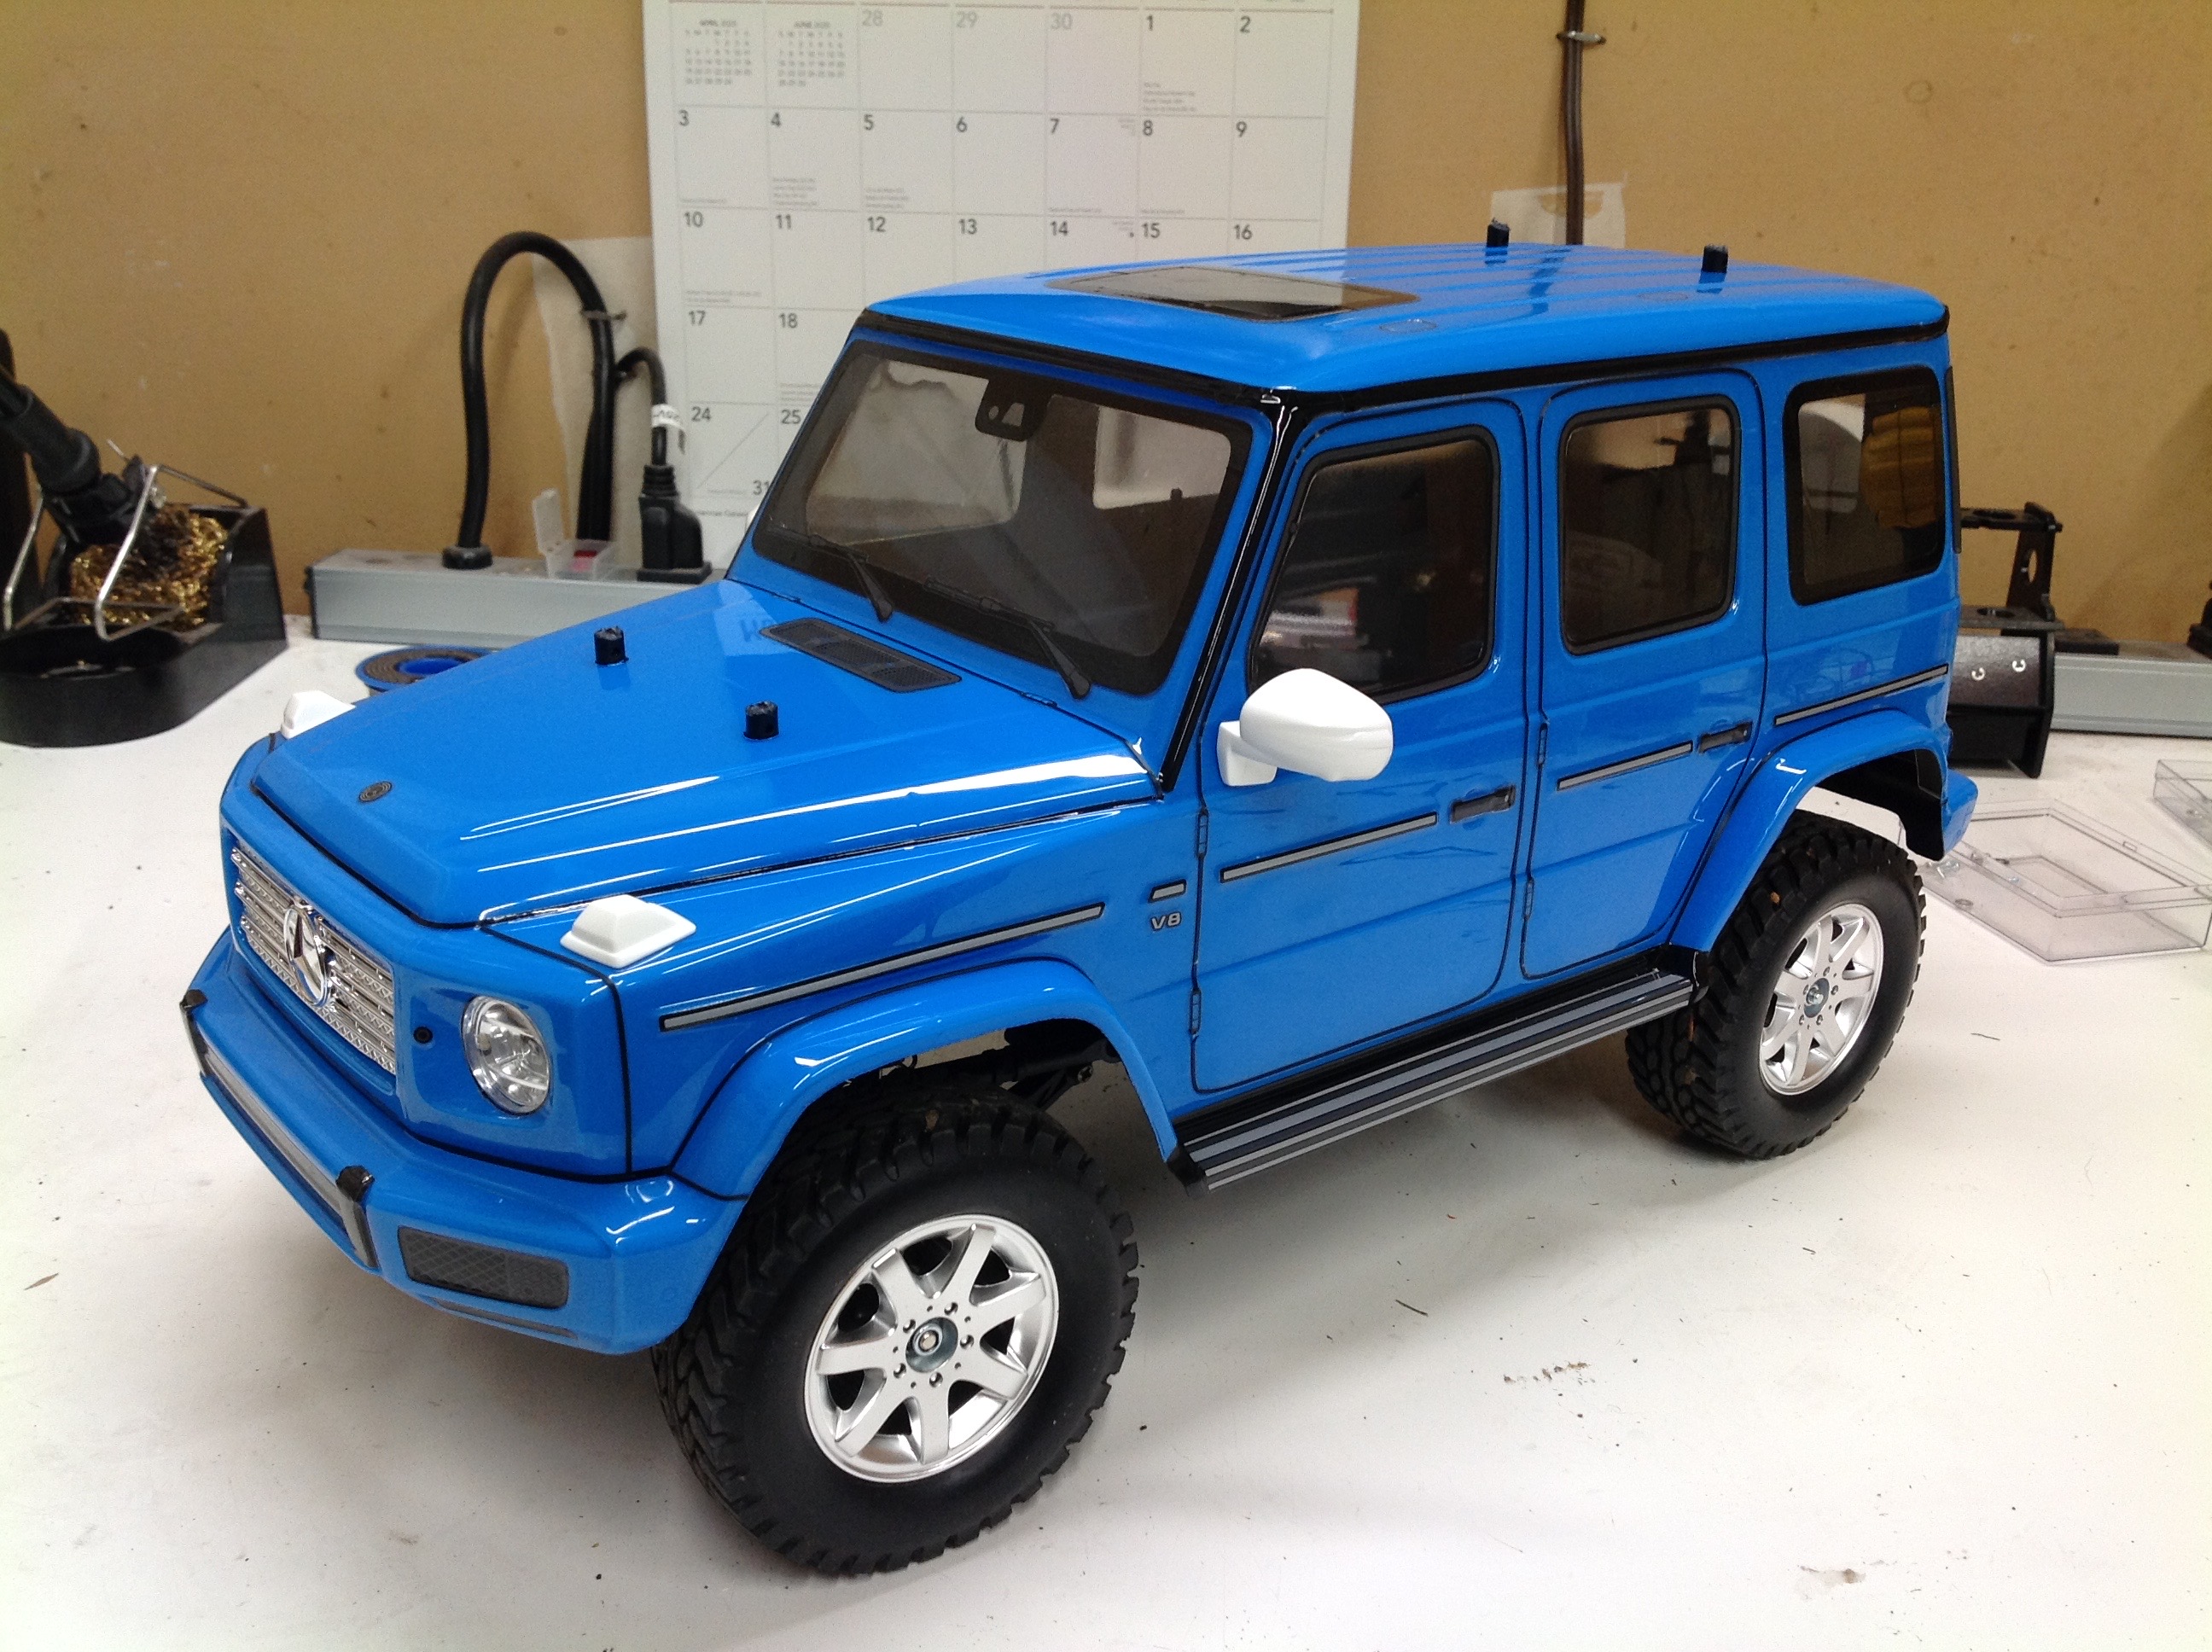
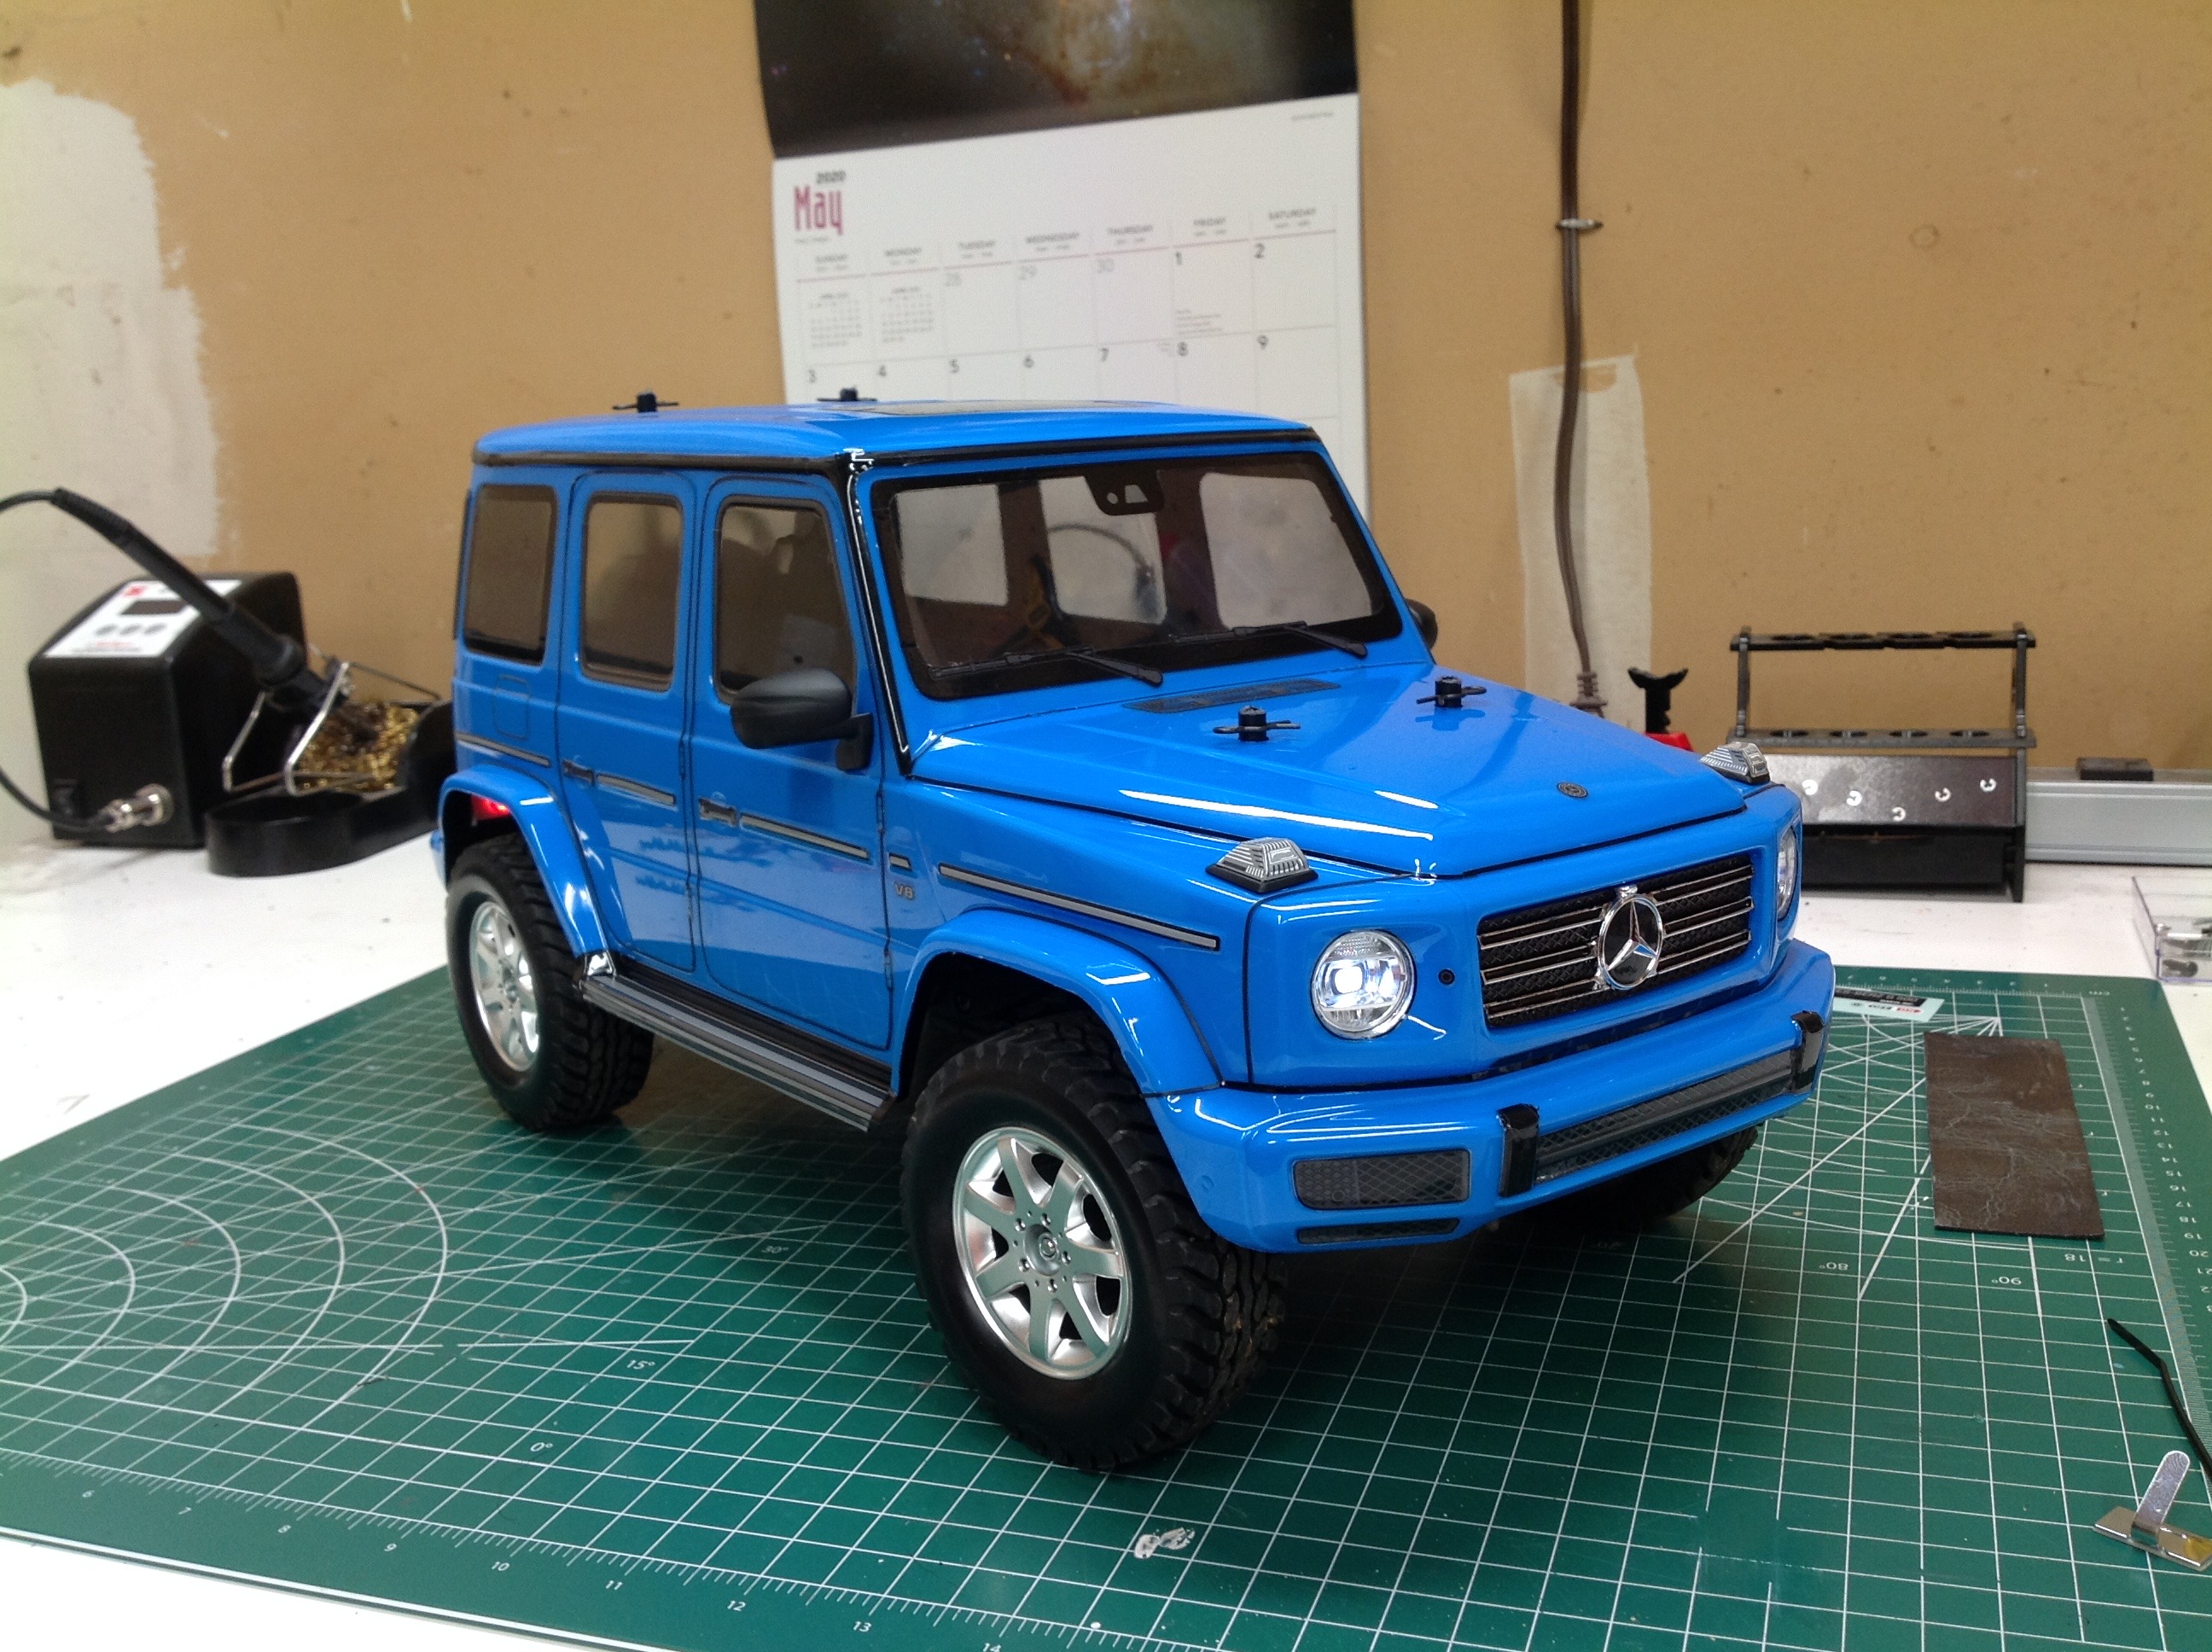
Done! Now we can examine the completed model. All the decals
have been applied, all the painting is done, the panel lines are on,
and the lights are installed. You can see that I've now also
painted the spare tire case in two-tone. I think the back of the
truck looks just as good as the front.
The picture on the left shows the detail on the mirror which required
two tone paint and stickers. It looks really good. I
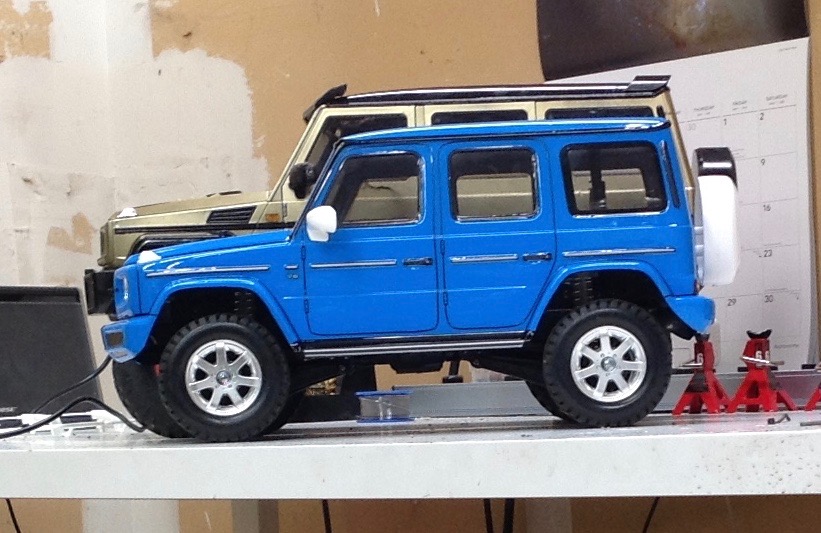
couldn't help but compare the completed model to my G65 on the MST CFX-W
chassis. The gold version seems like it is a much larger scale, but
it is actually almost all just due to a higher lifted chassis on the
G65. The body itself is only slightly bigger. These two
models also represent two different generations of G-wagen.
©2020 Eric Albrecht