Tamiya Juggernaut 2 Project
Page 1: Restoration
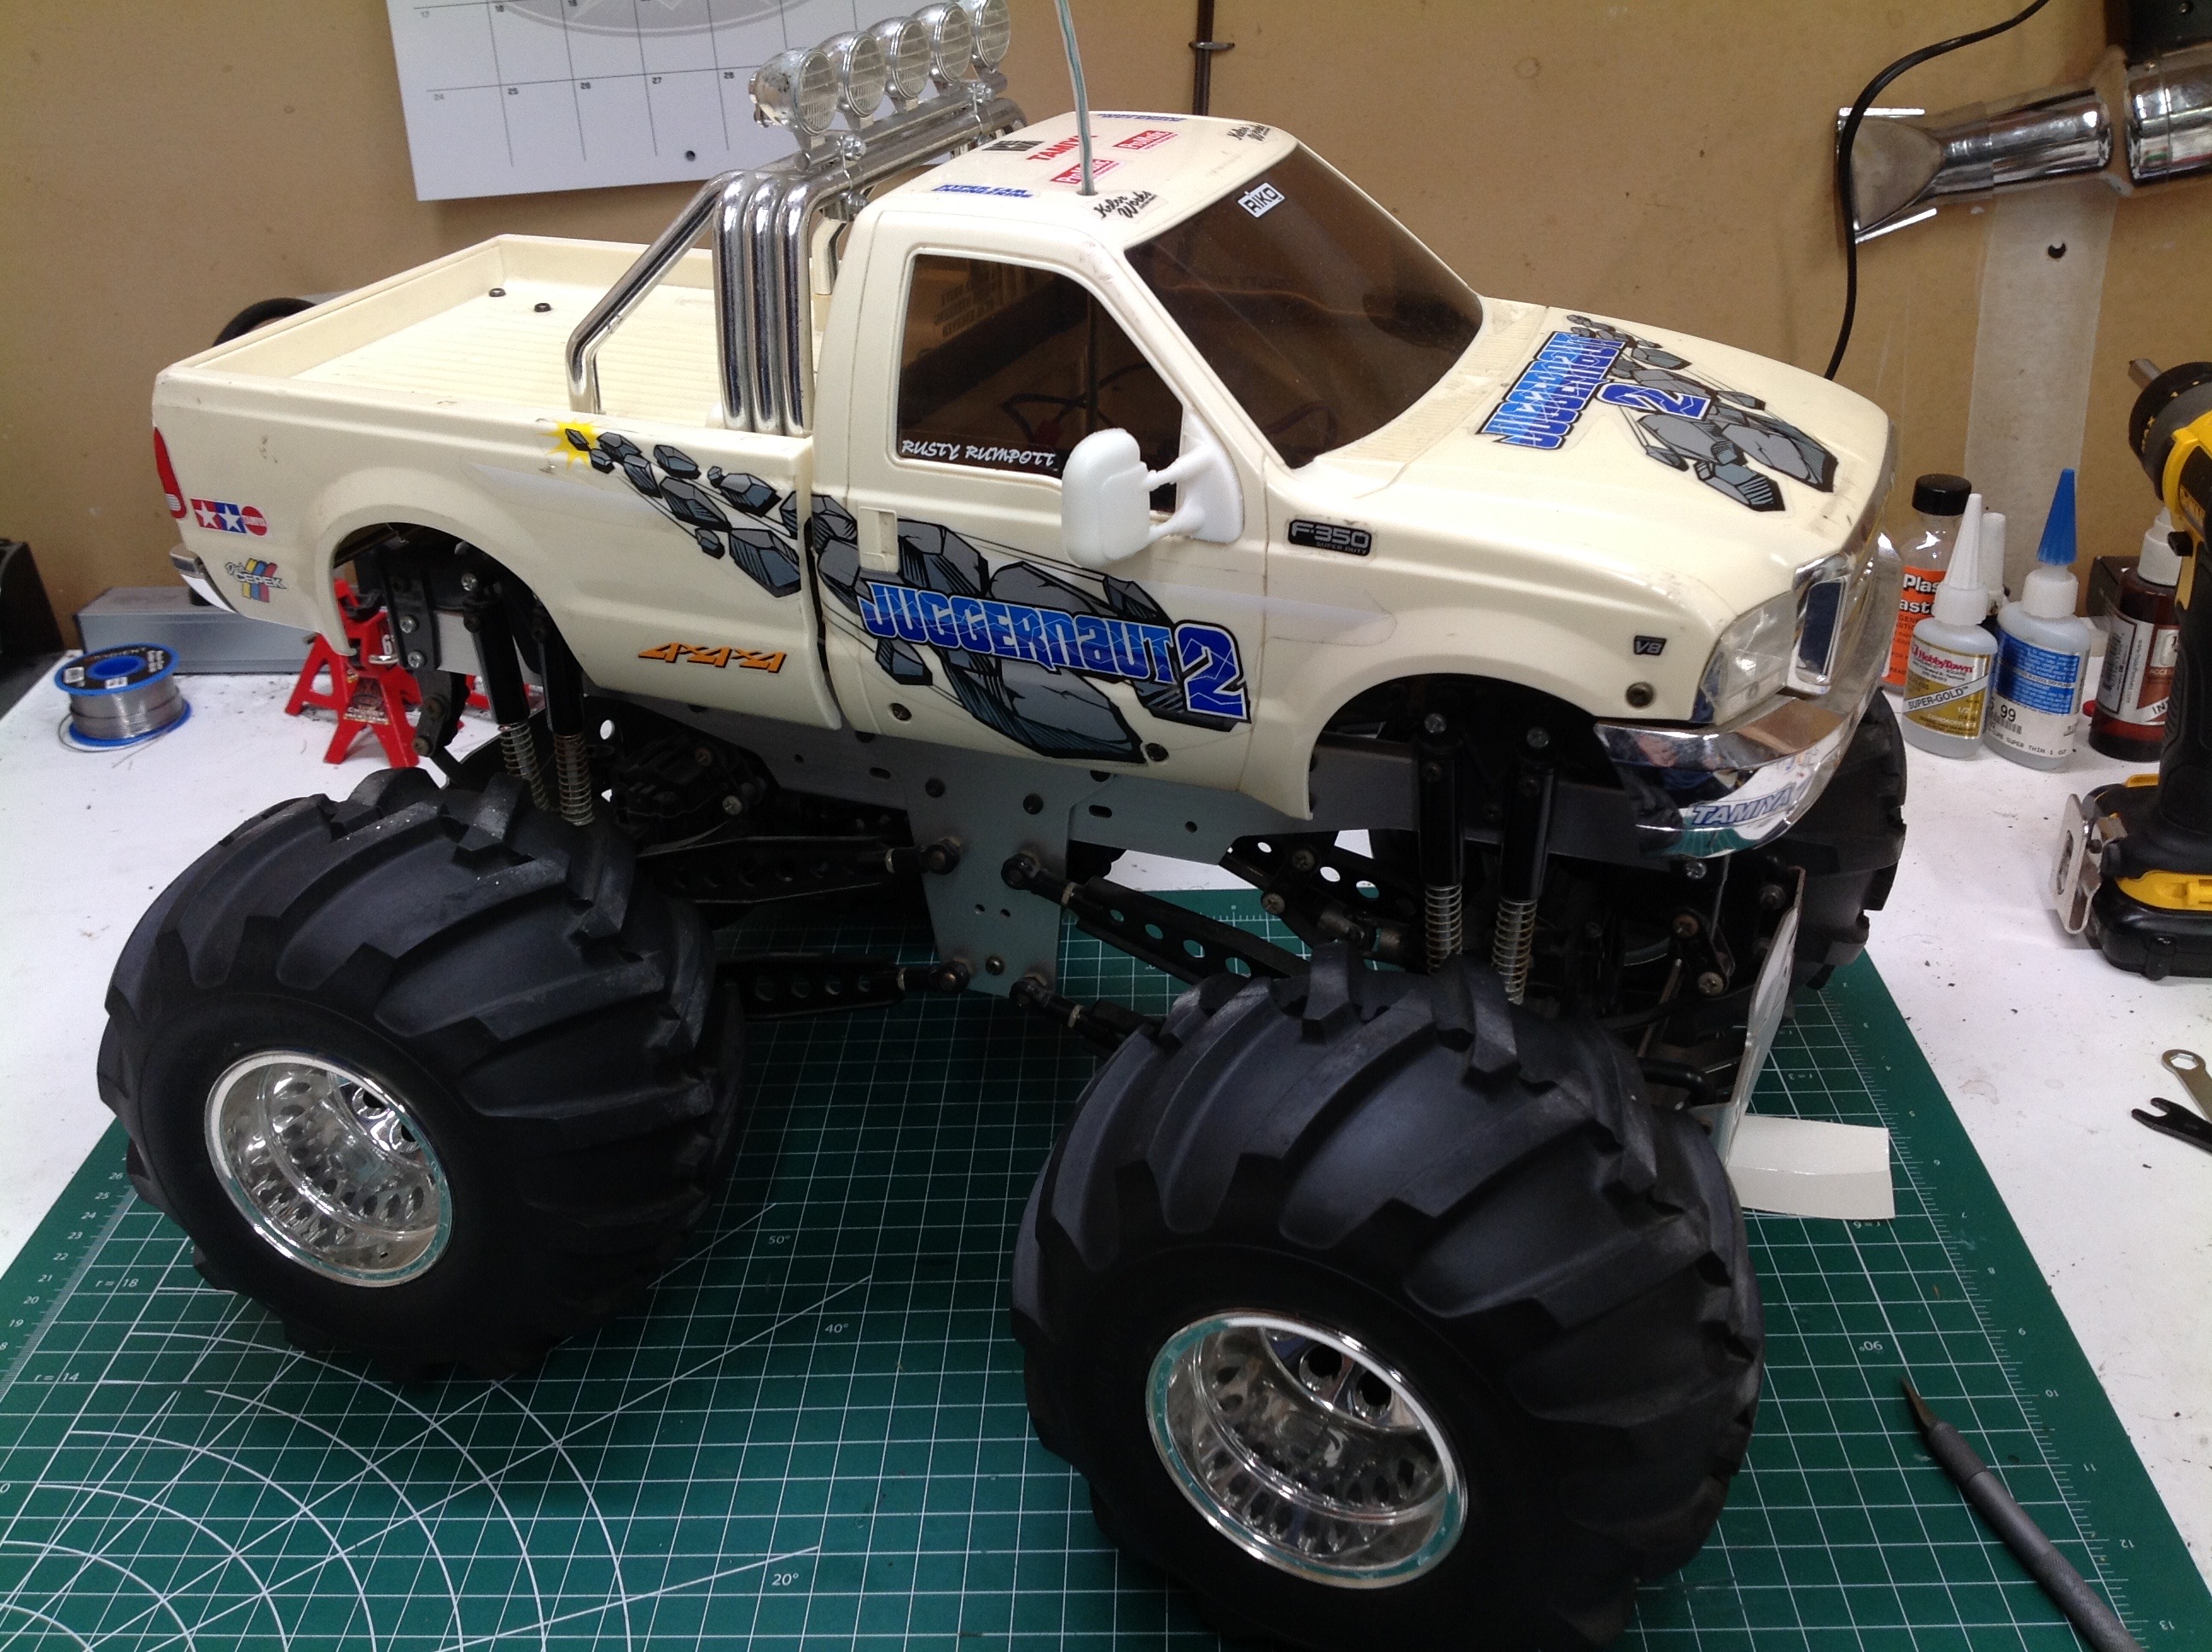
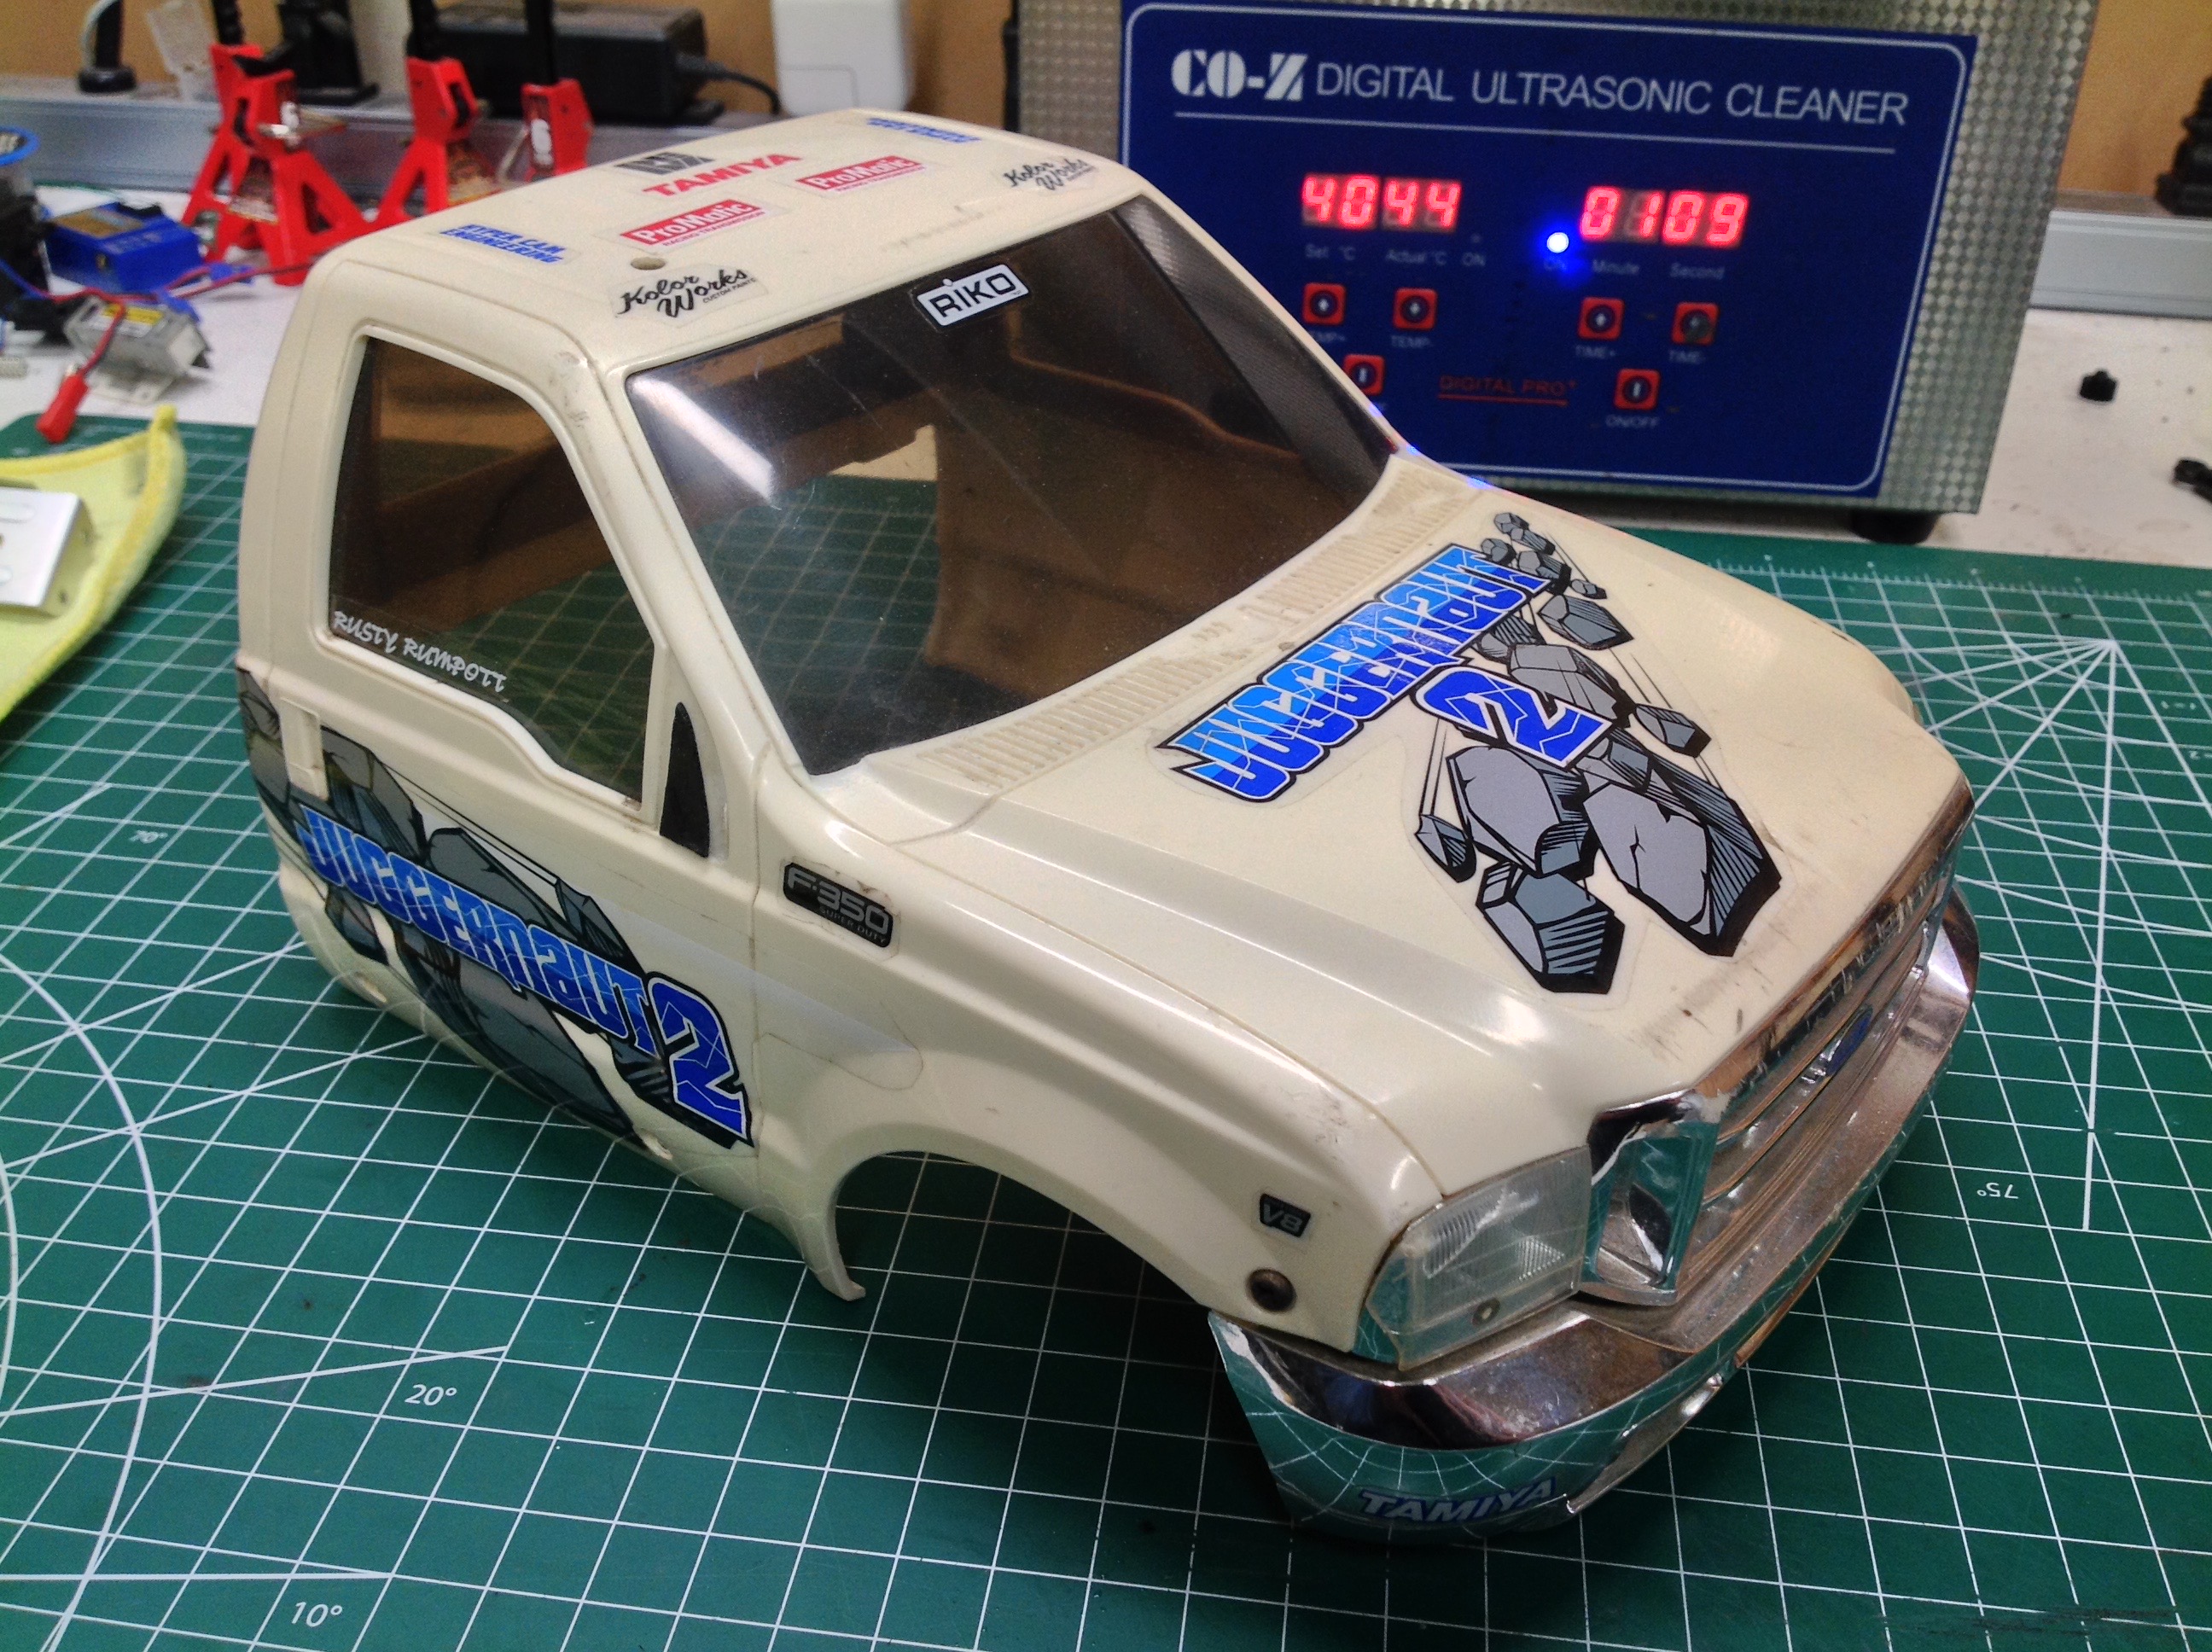
Here is the Juggernaut 2 in the state I received it. The stickers
have been applied but the body was never painted. There are some
scratches, especially in the chrome, but mostly the body shell is in
good condition. One of the tires has a big crack in the side wall
but these irreplaceable tires otherwise look good. The chassis is a
bit dusty but looks to have hardly ever been used. In fact, I was
able to plug in a battery and use the truck with the original
electronics and mechanical speed controller with no problem.
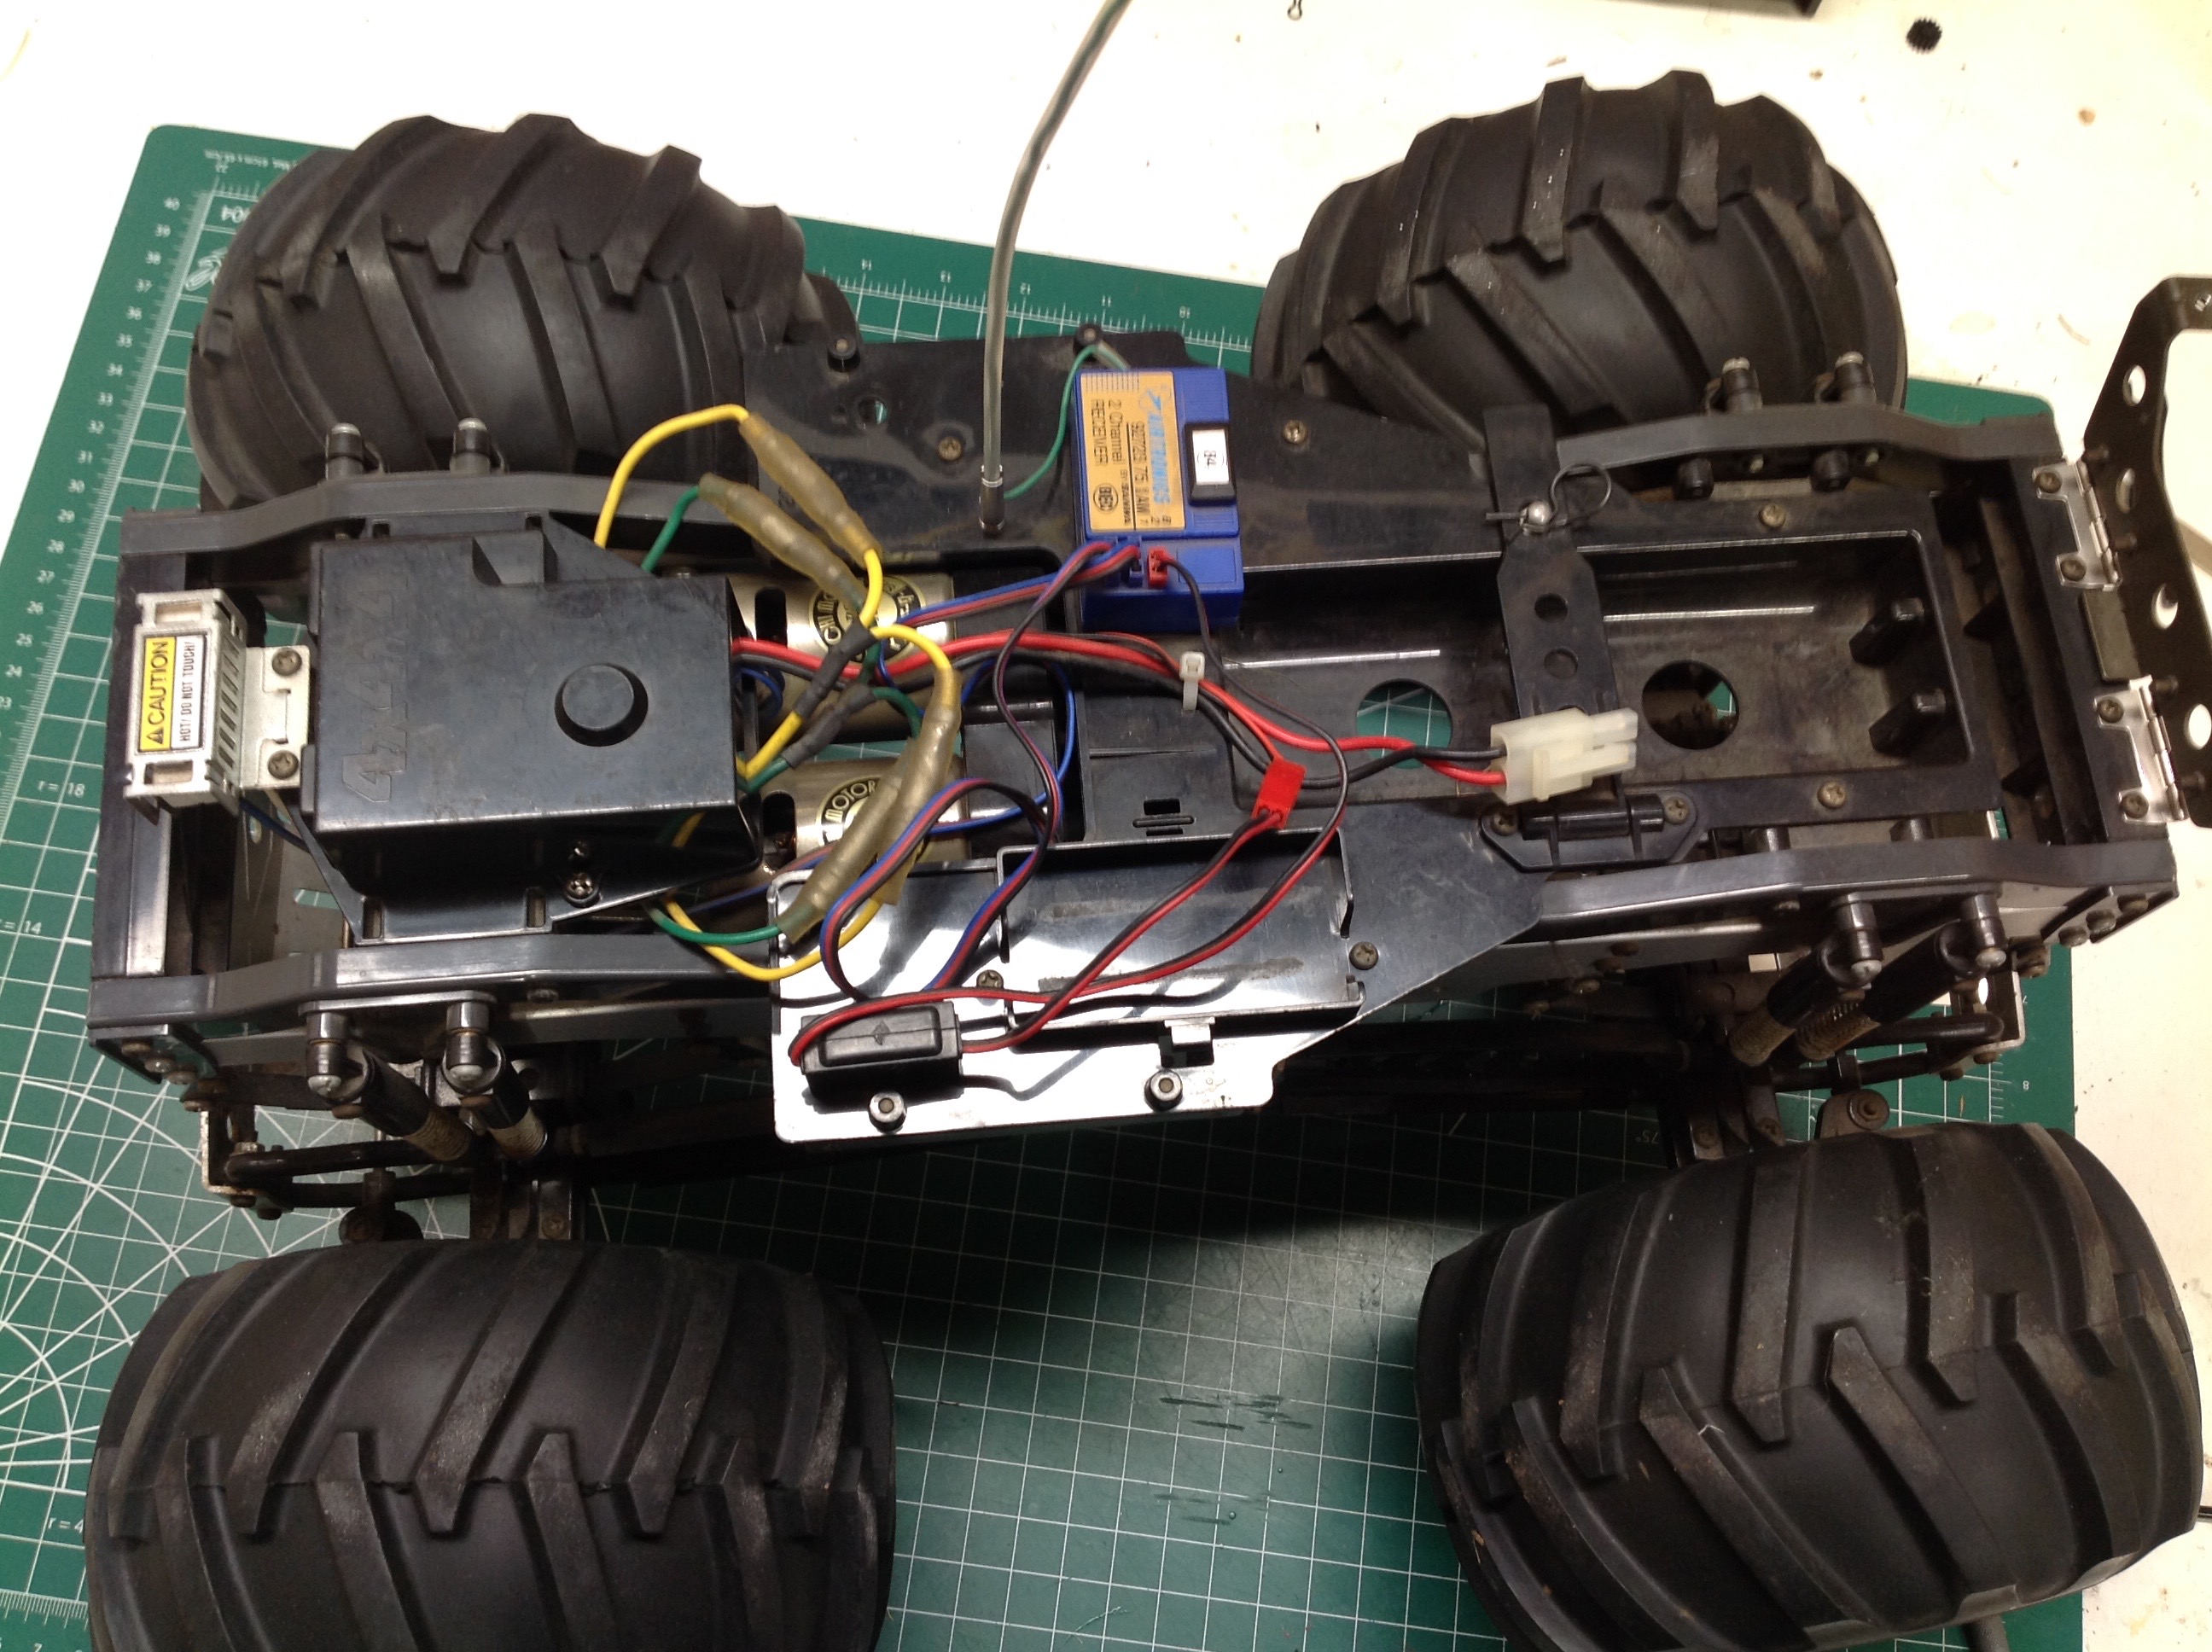
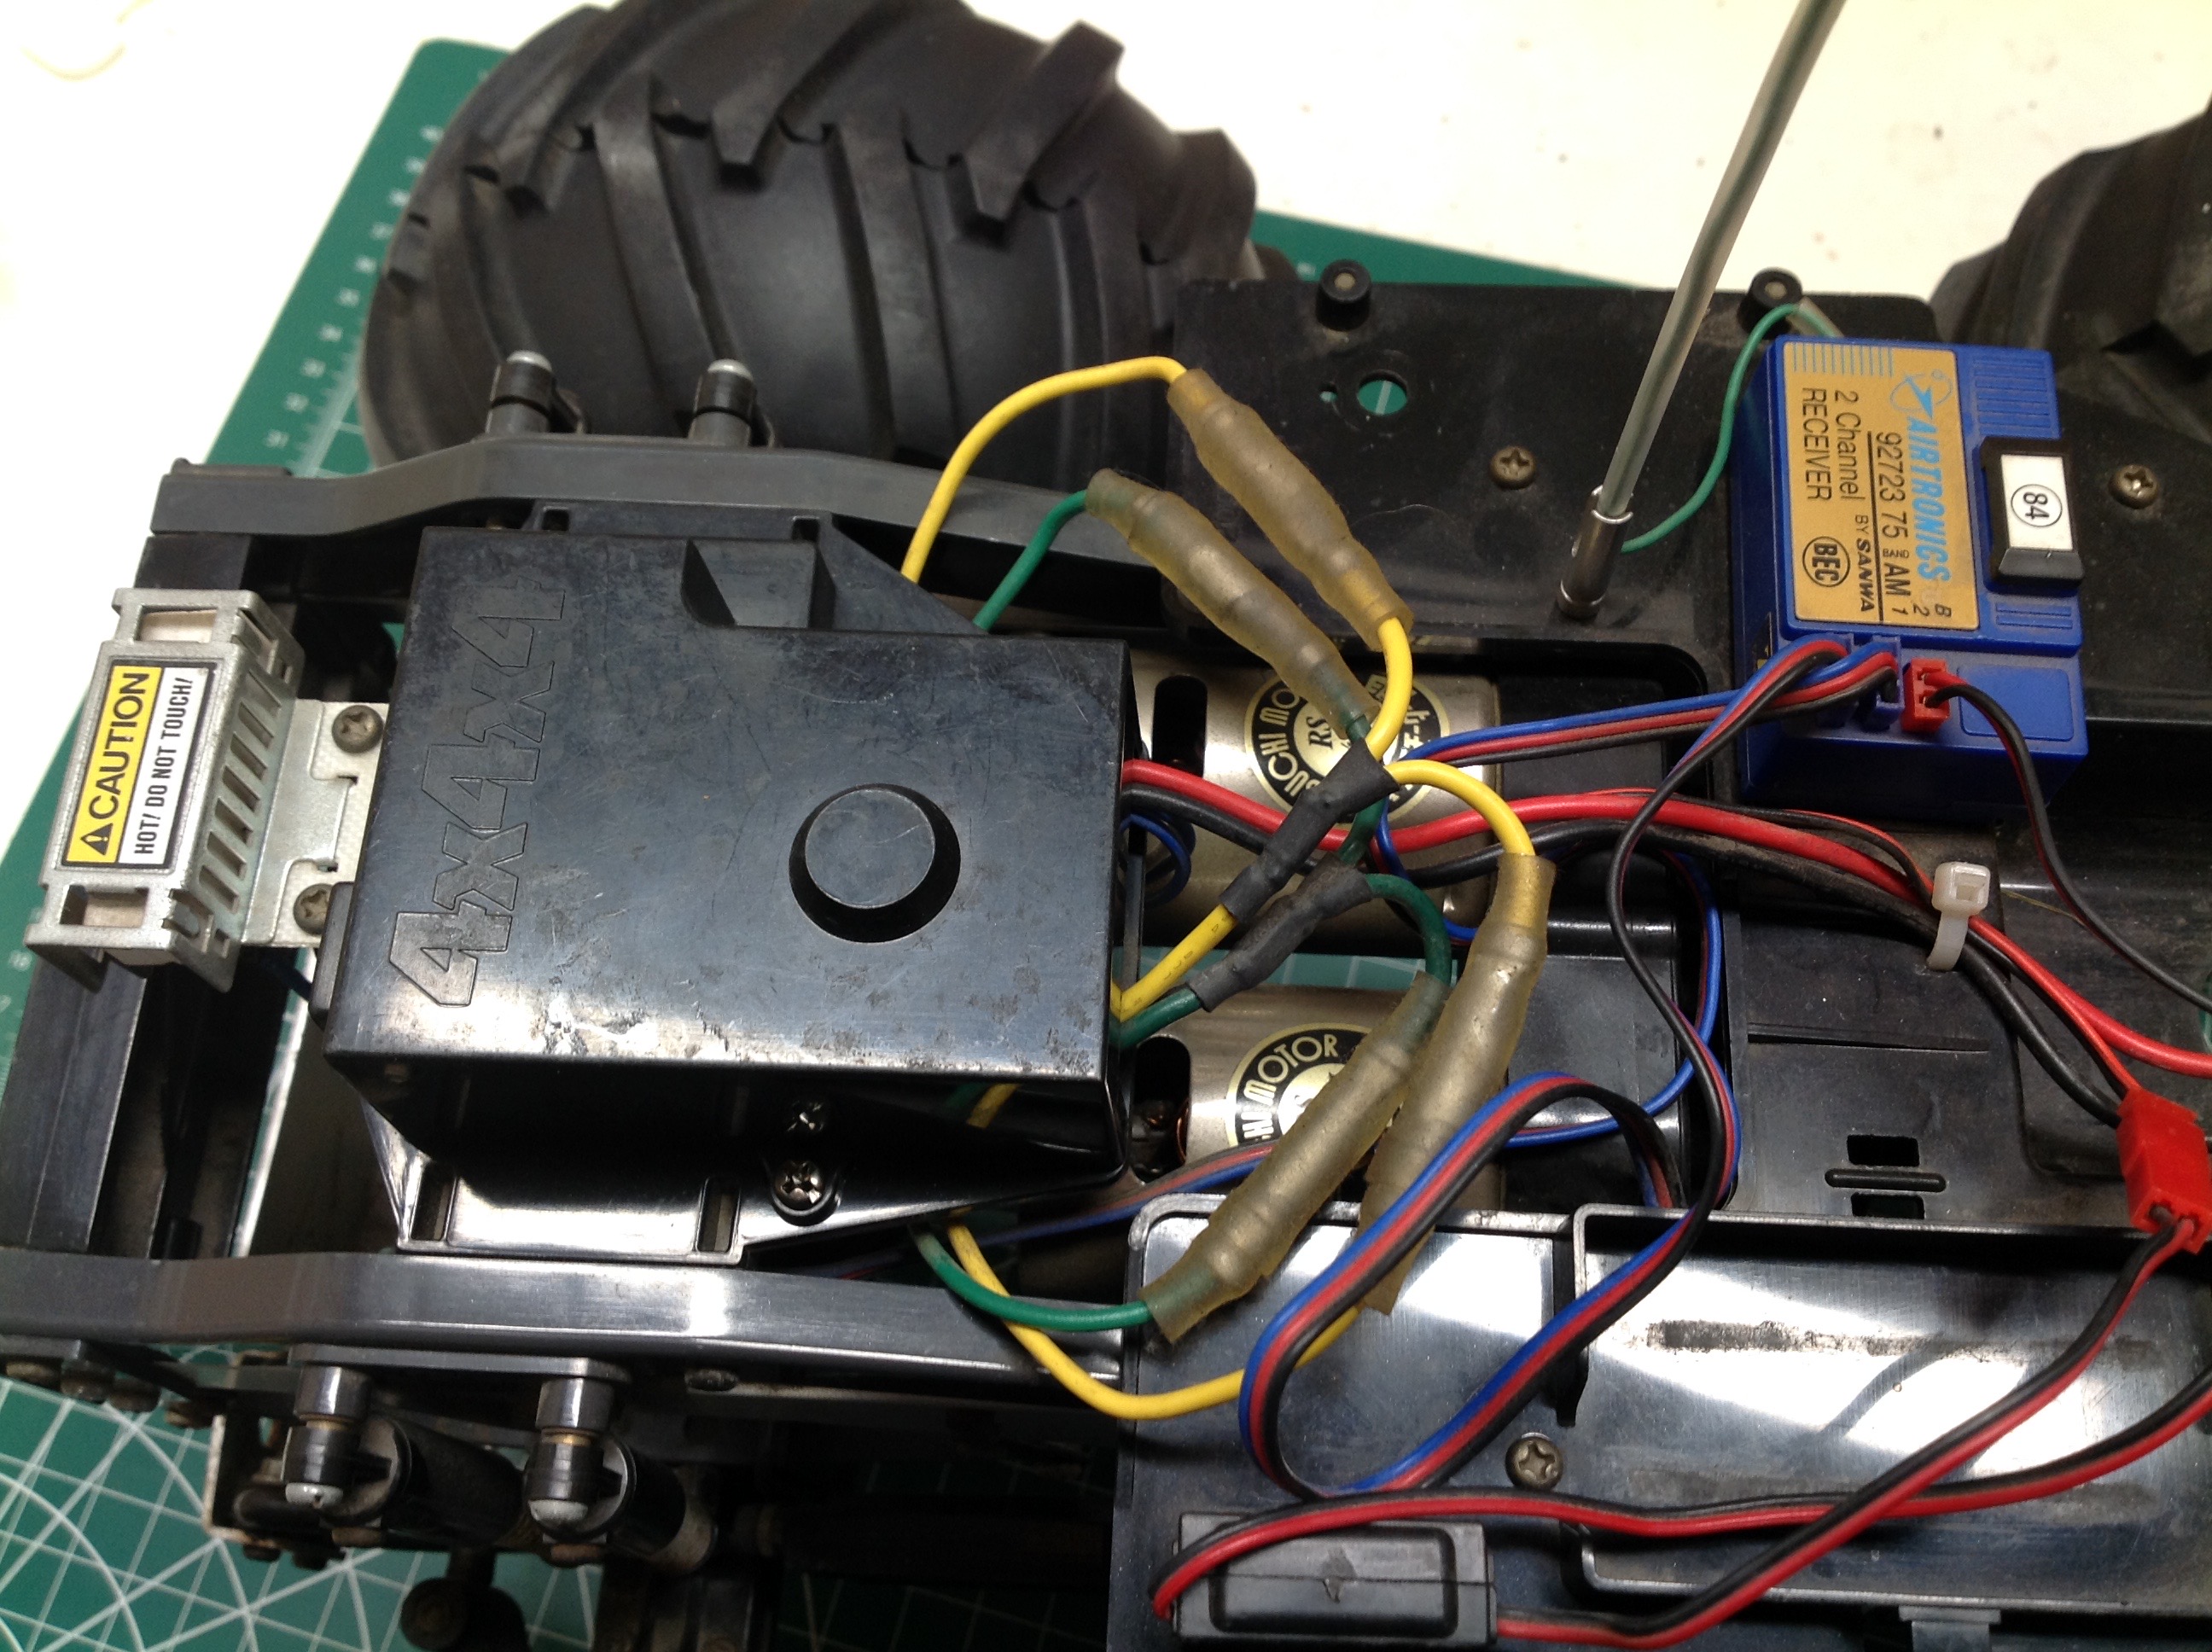
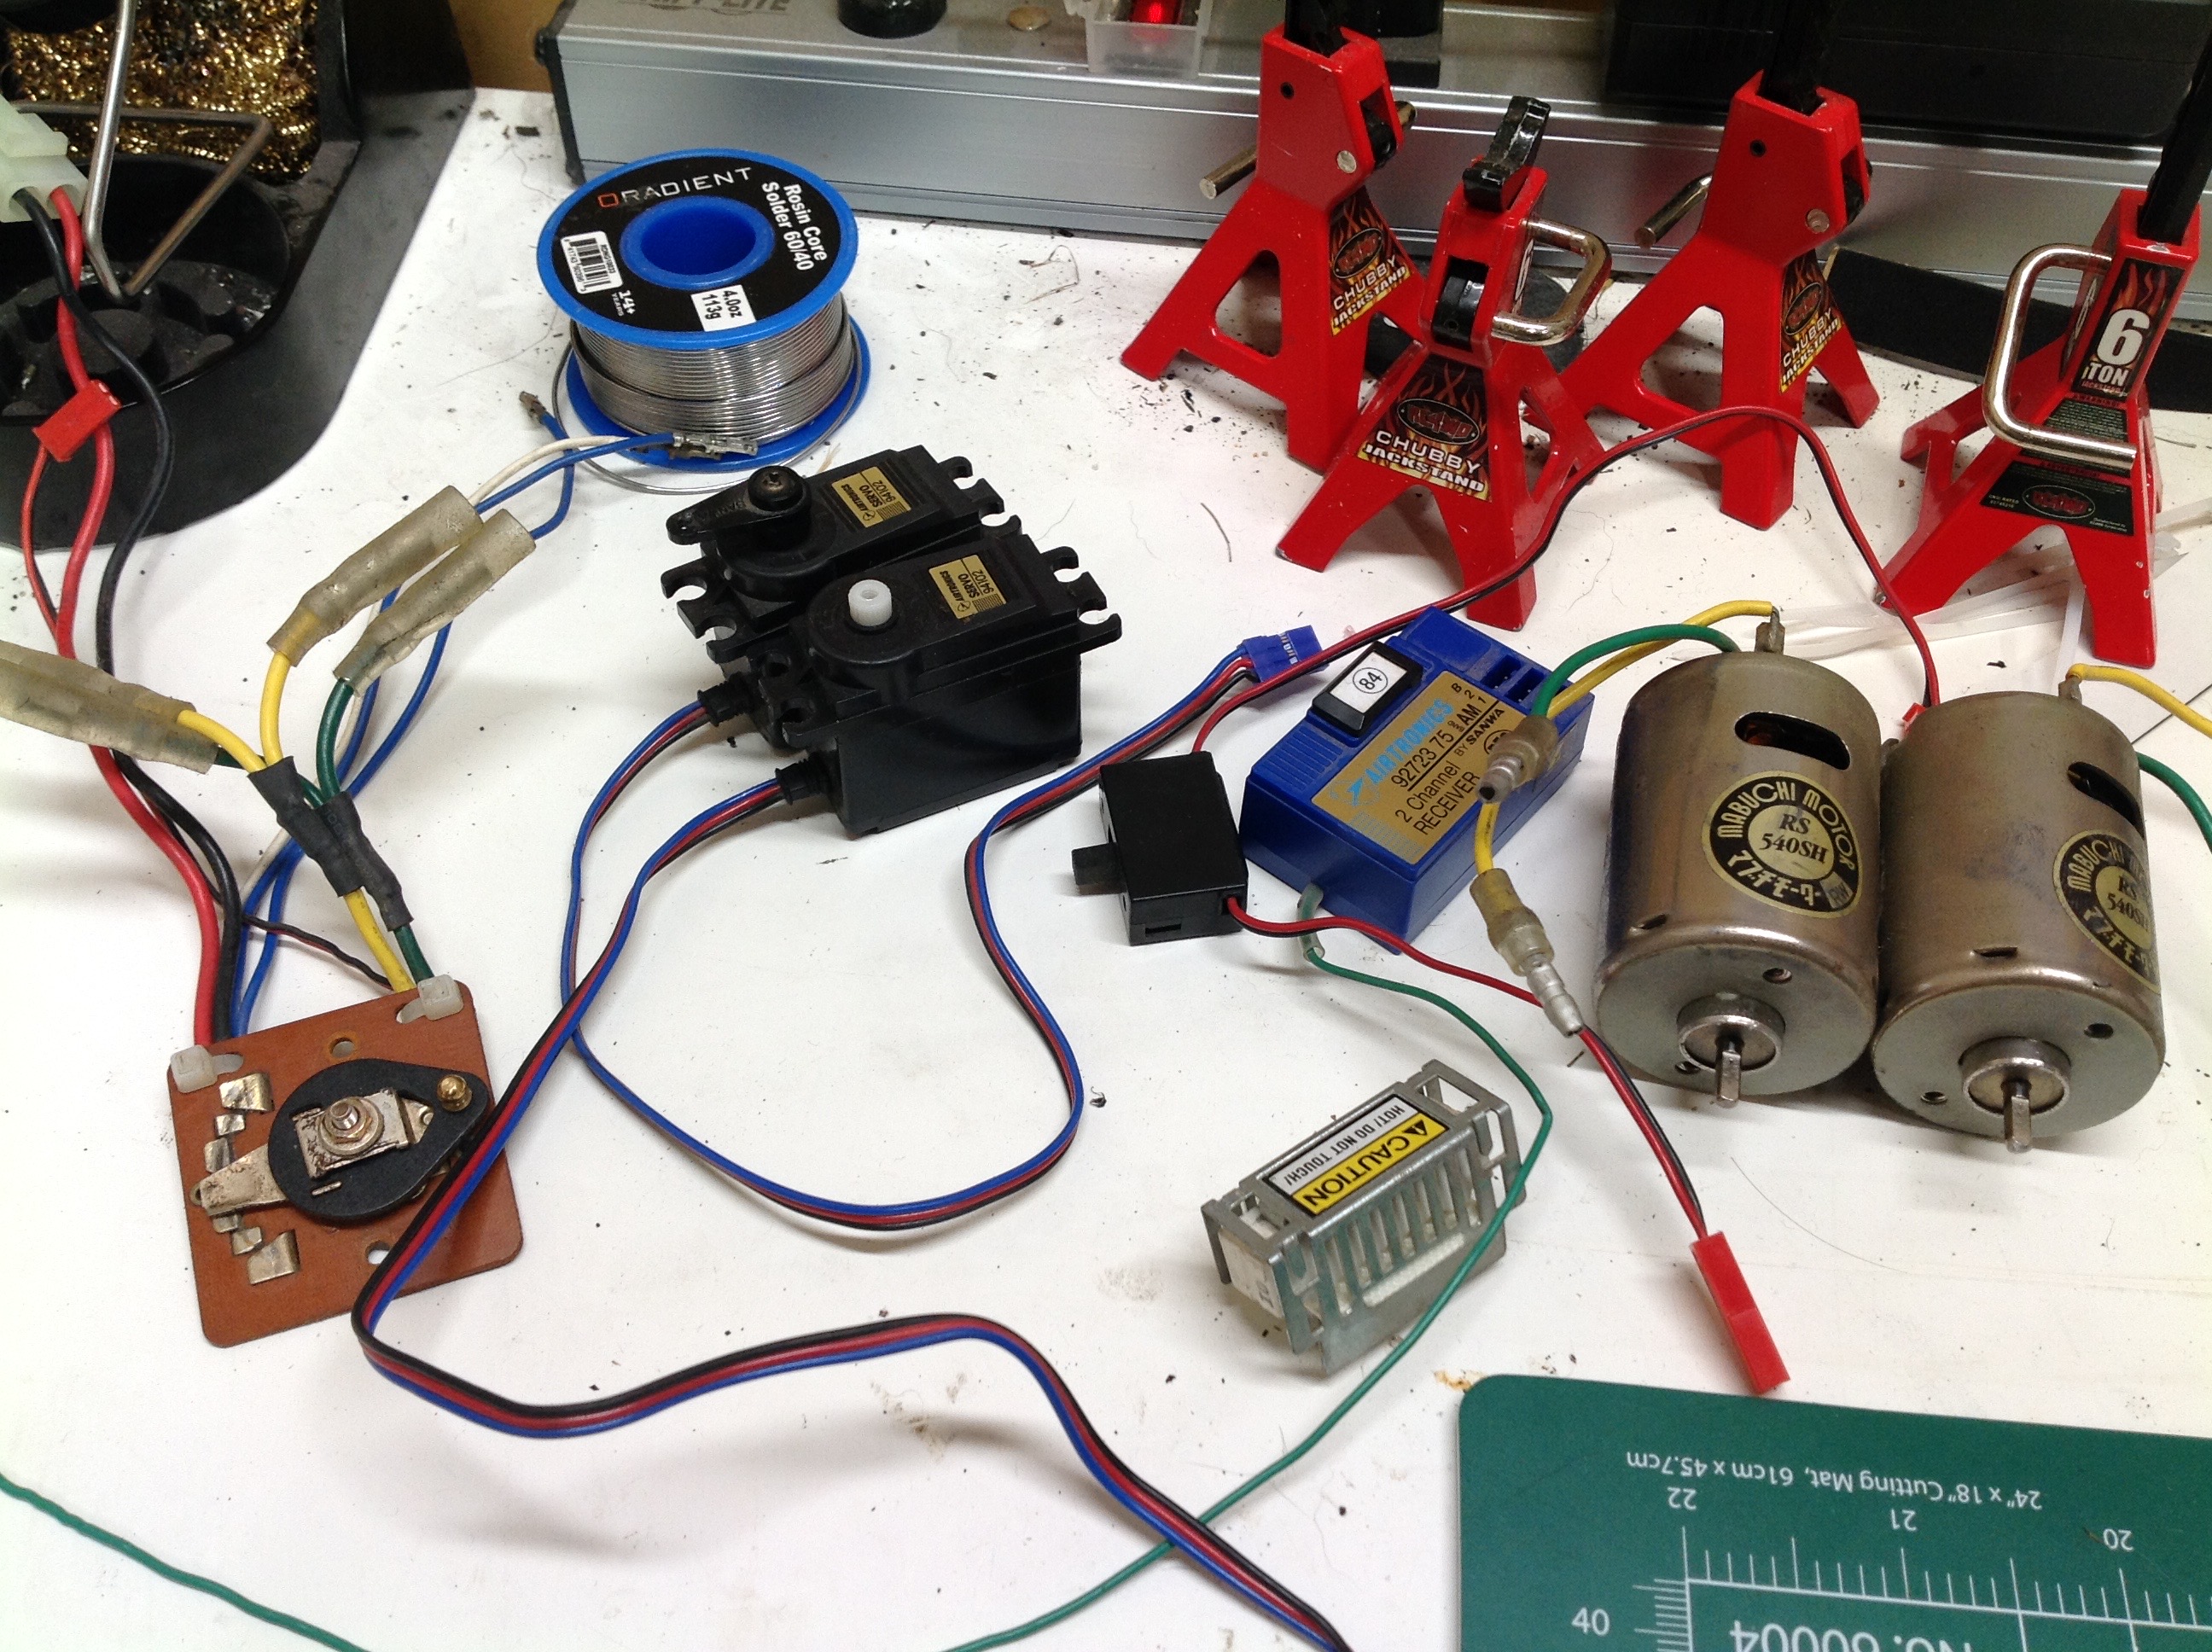
Here is a closer look at the original electronics. The resistor
sits at the very front of the chassis. The 3-speed mechanical
speed controller and throttle servo sit under a plastic cover behind
that. There is a slot for a 4-AA battery pack for the radio, but
the original builder used an Airtronics receiver with a built-in BEC so
this was not needed. The original servos were Airtronics (Sanwa)
as well, a fact which will become important later.
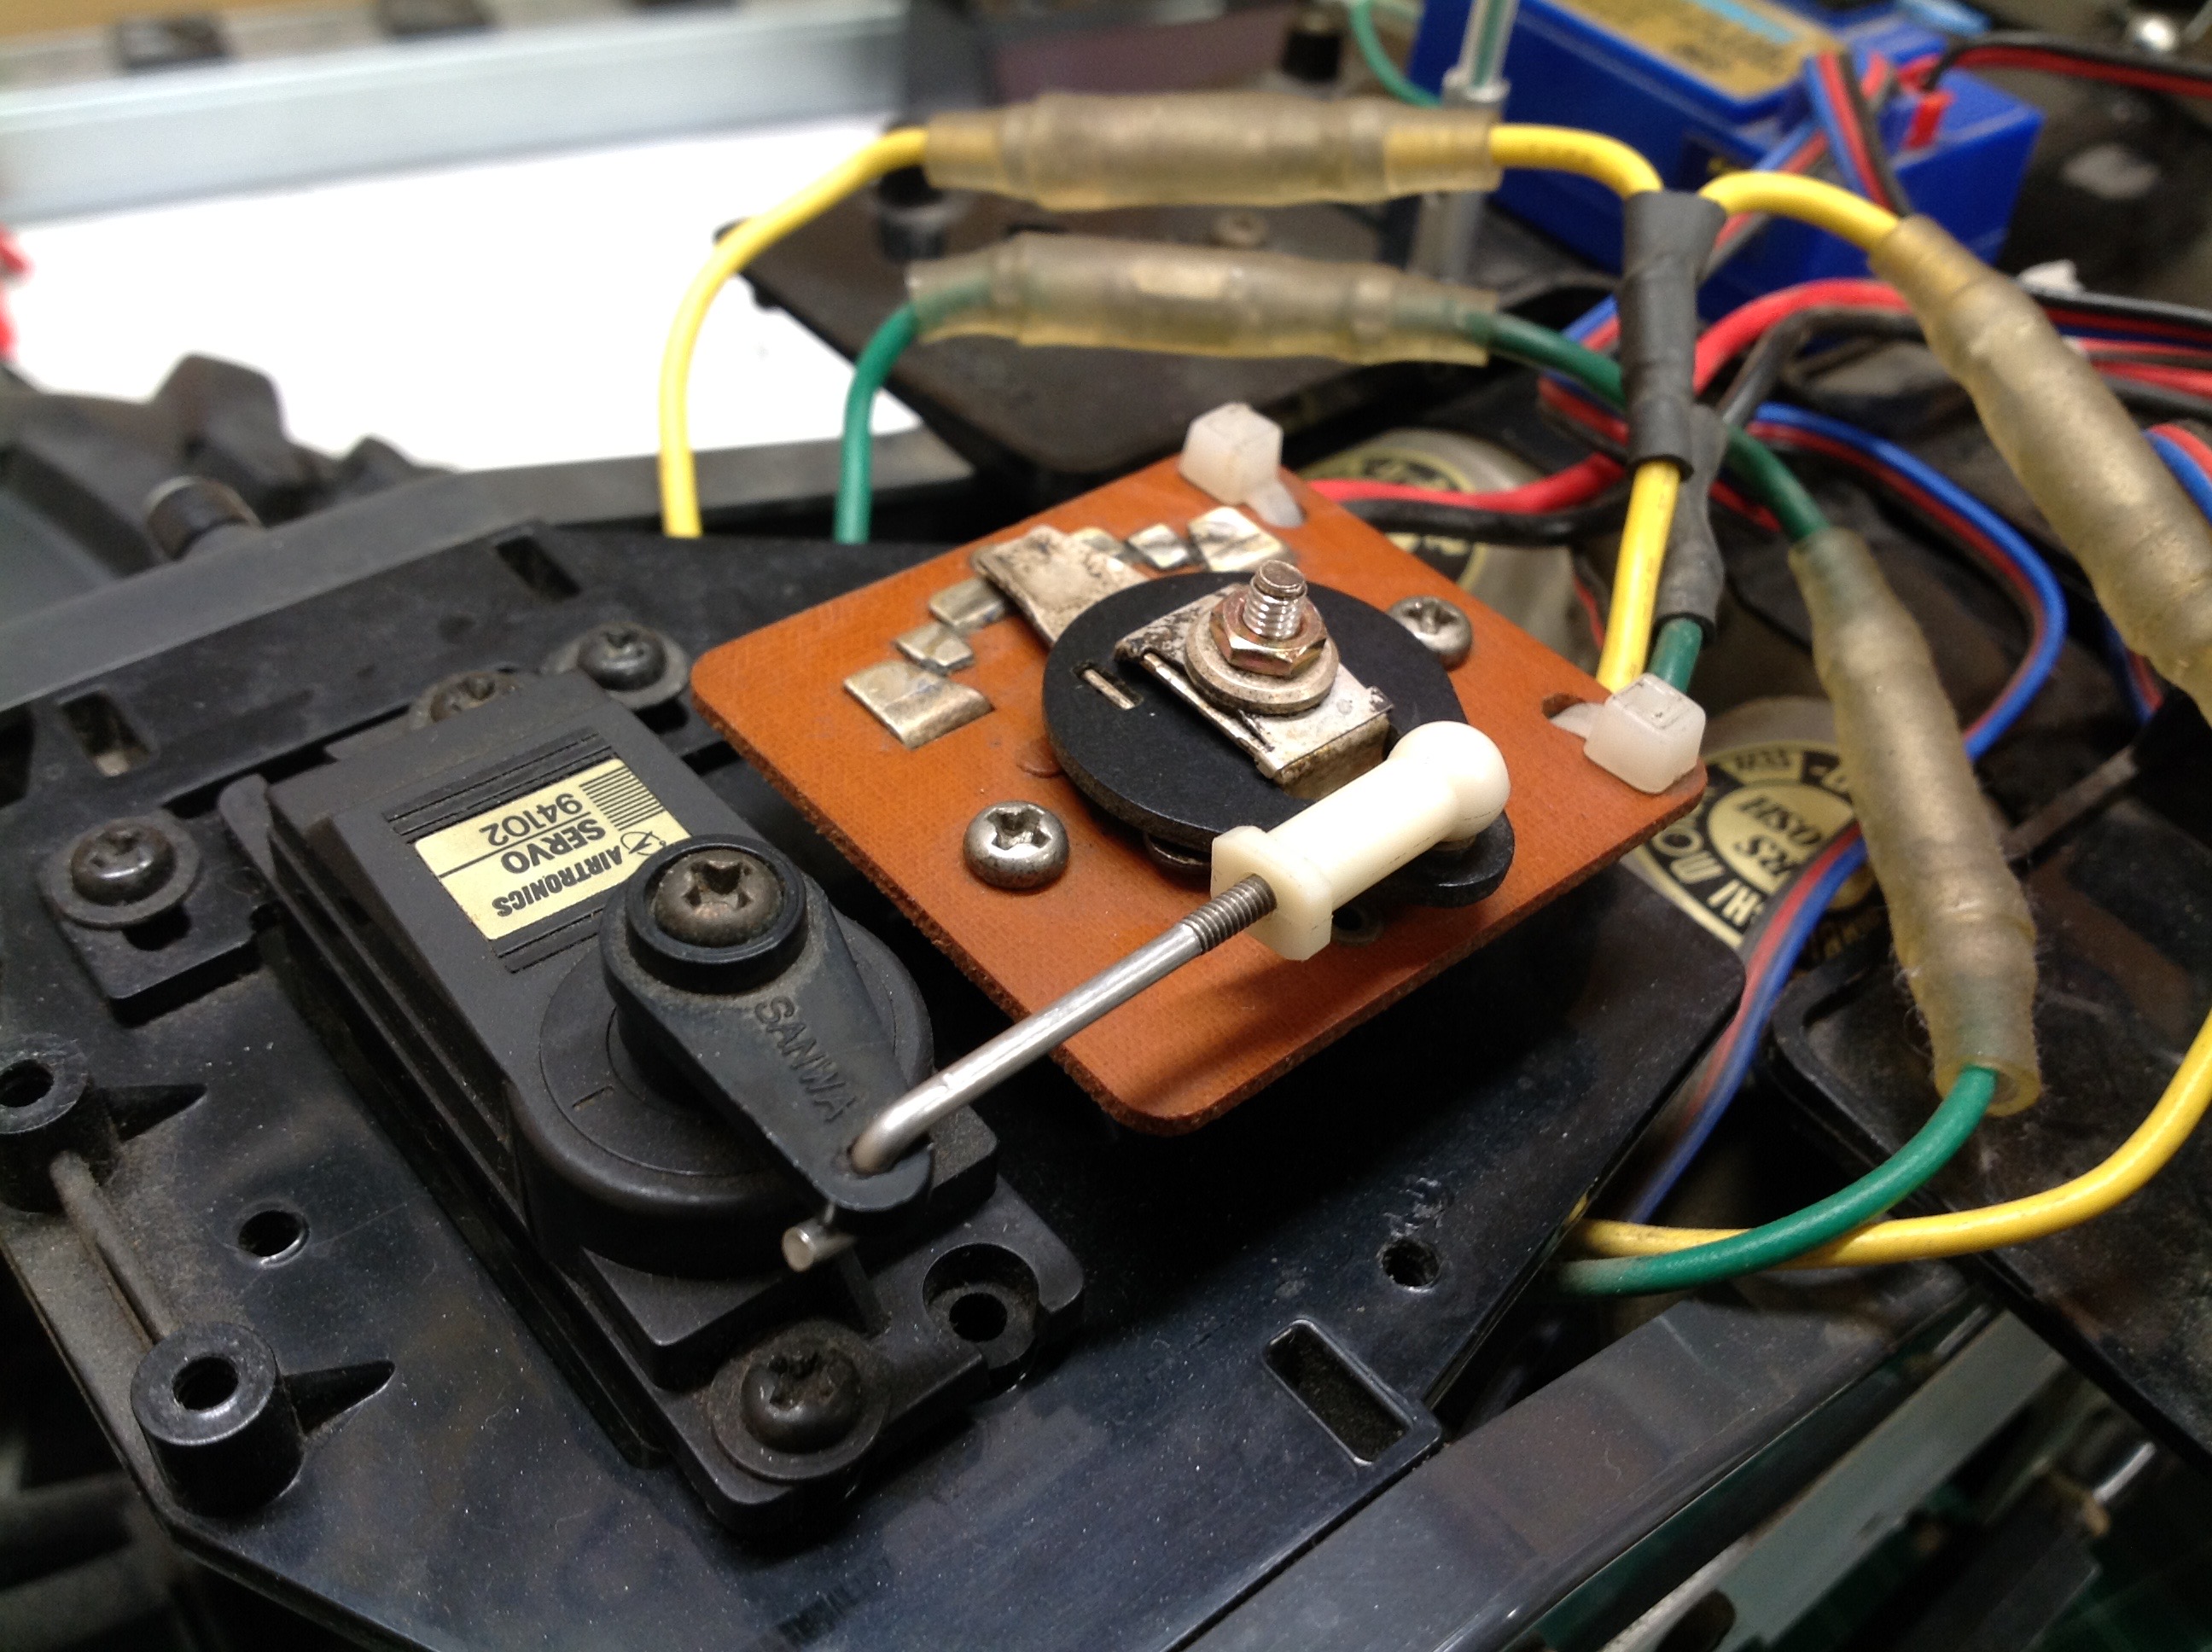
Here is the full electronics package removed from the vehicle. My
original plan was to re-use the original silver can motors but replace
pretty much every thing with modern electronics. I'll keep the
original MSC and resistor in place for posterity, but they won't be
connected to anything. With a rated torque of 42 oz-in (3 kg-cm),
I'm surprised the original Airtronics 94102 servo was able to steer the
truck at all. Keep in mind that a single servo drives all 4
monster wheels.
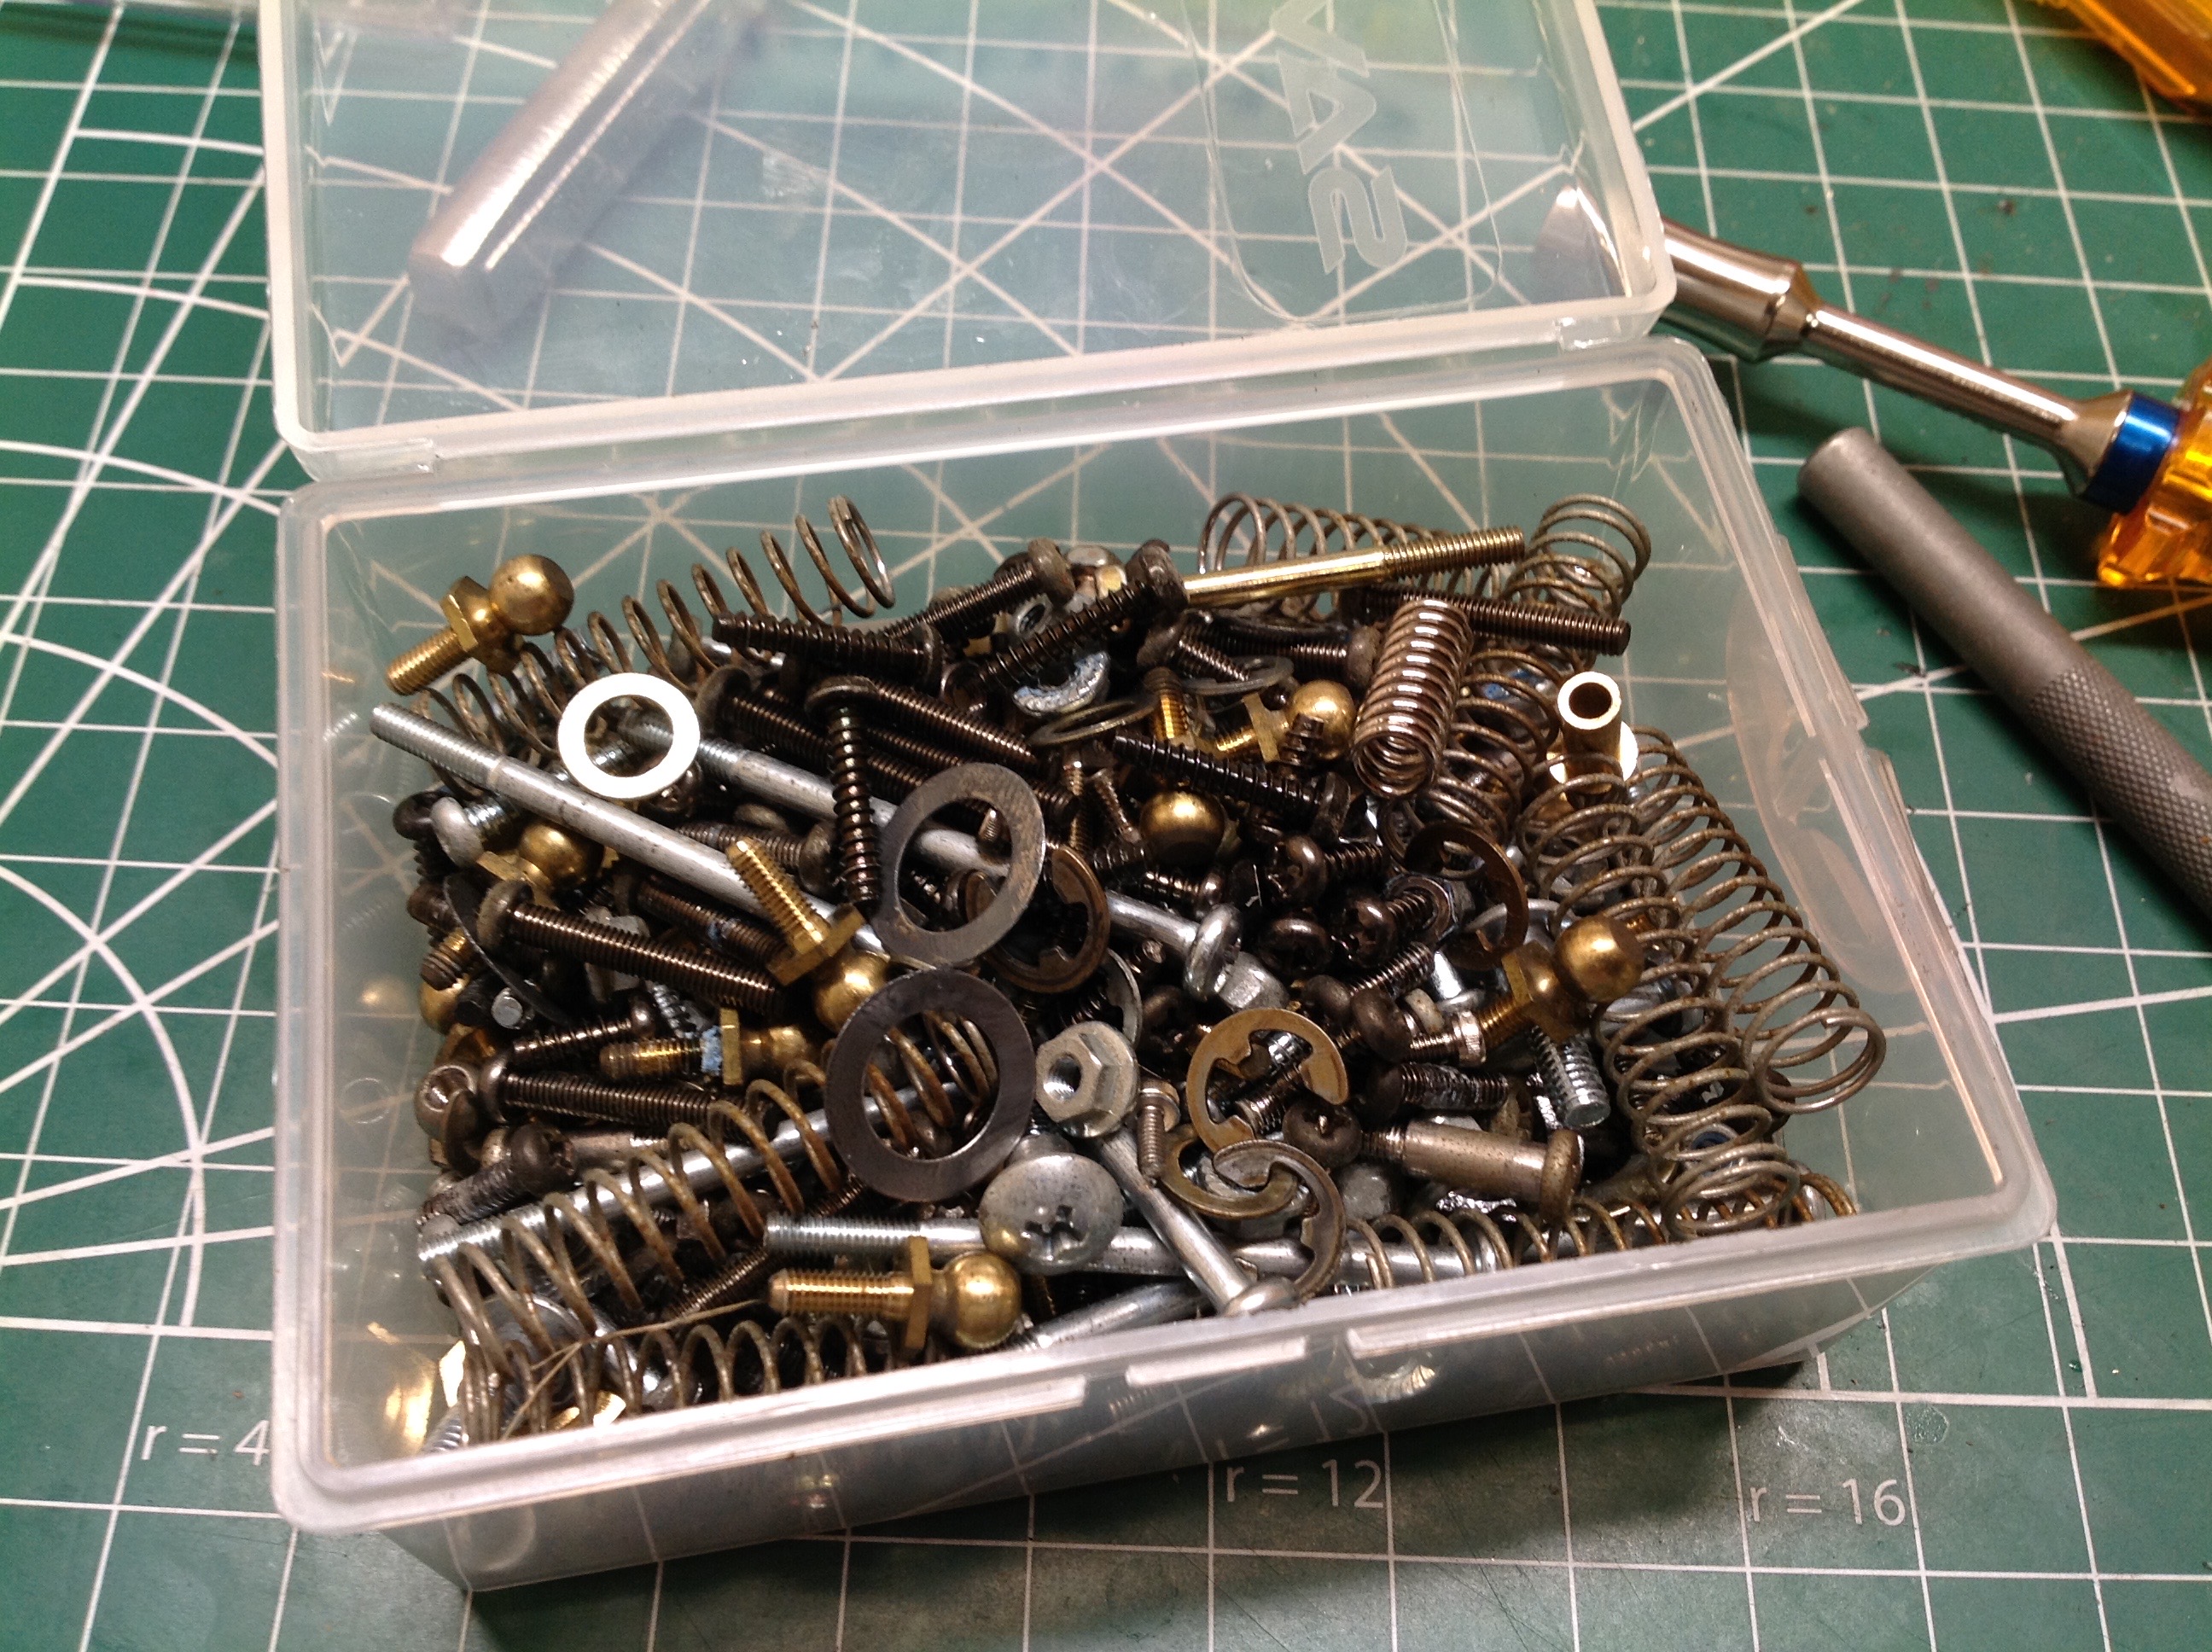
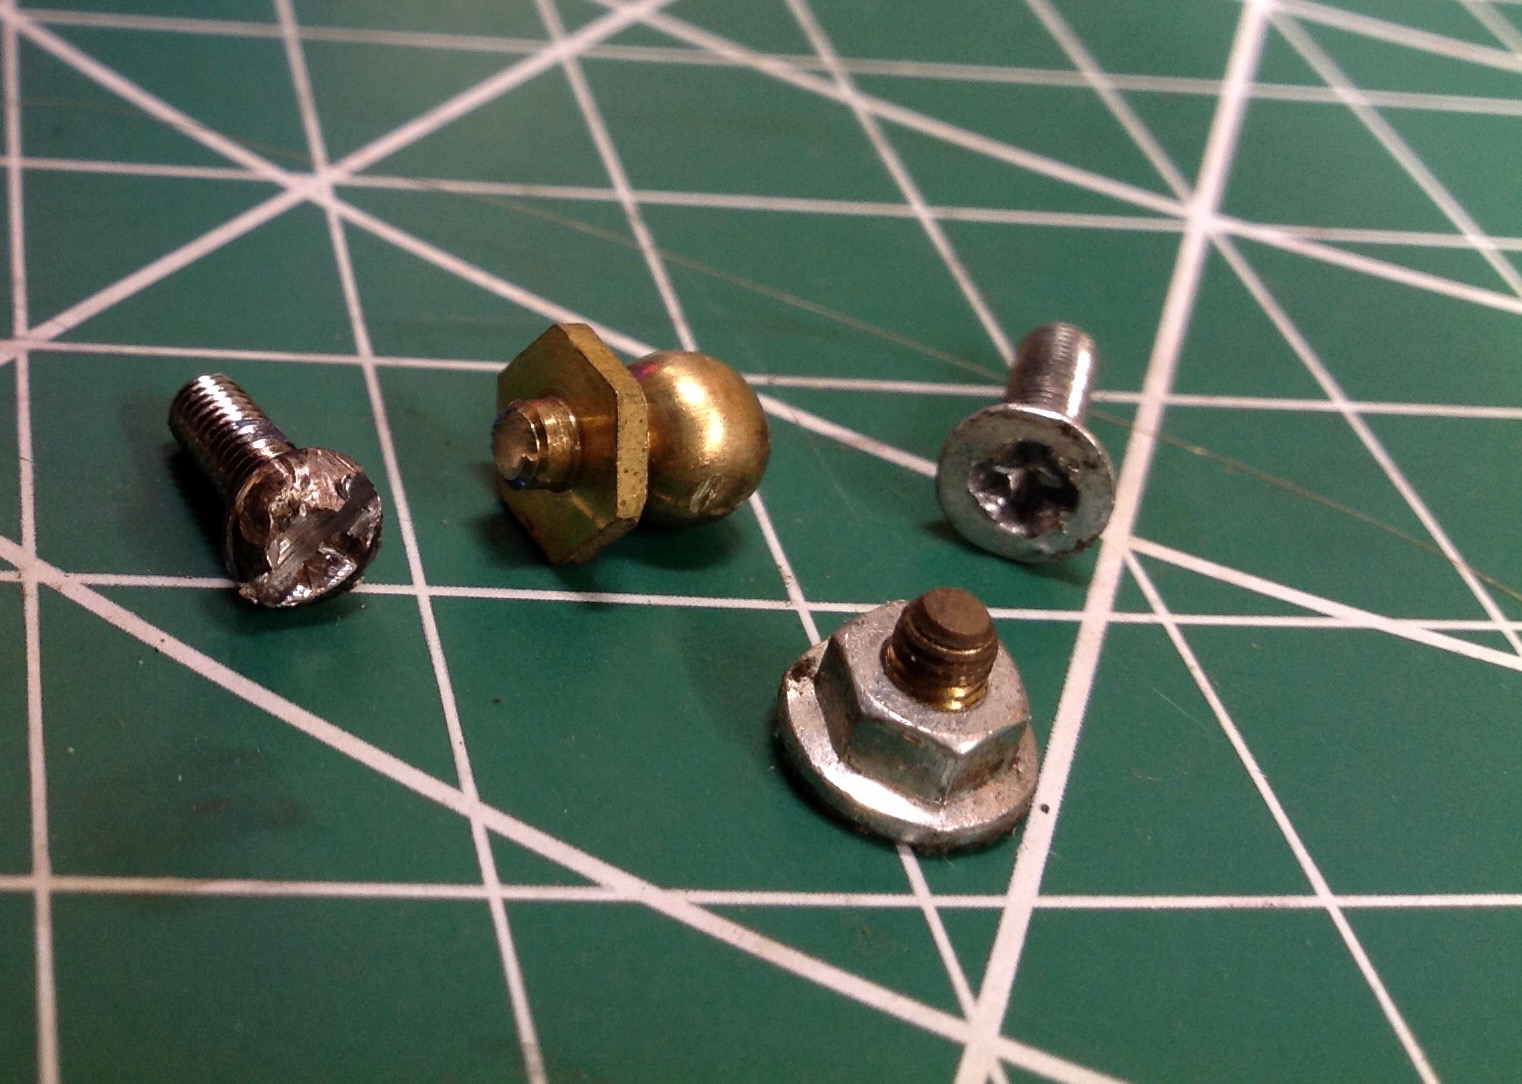
All right, let's tear this thing apart. There is a LOT of hardware
in a Juggernaut. Seen on the left are all the nuts, bolts,
screws, clips, washers, ball joints, and springs. Time (and an
over enthusiastic use of thread lock) had taken its toll on some of the
hardware. Shown at right are a sampling of the parts which broke
or stripped during disassembly. Luckily, all are common parts and
were easily replaced.
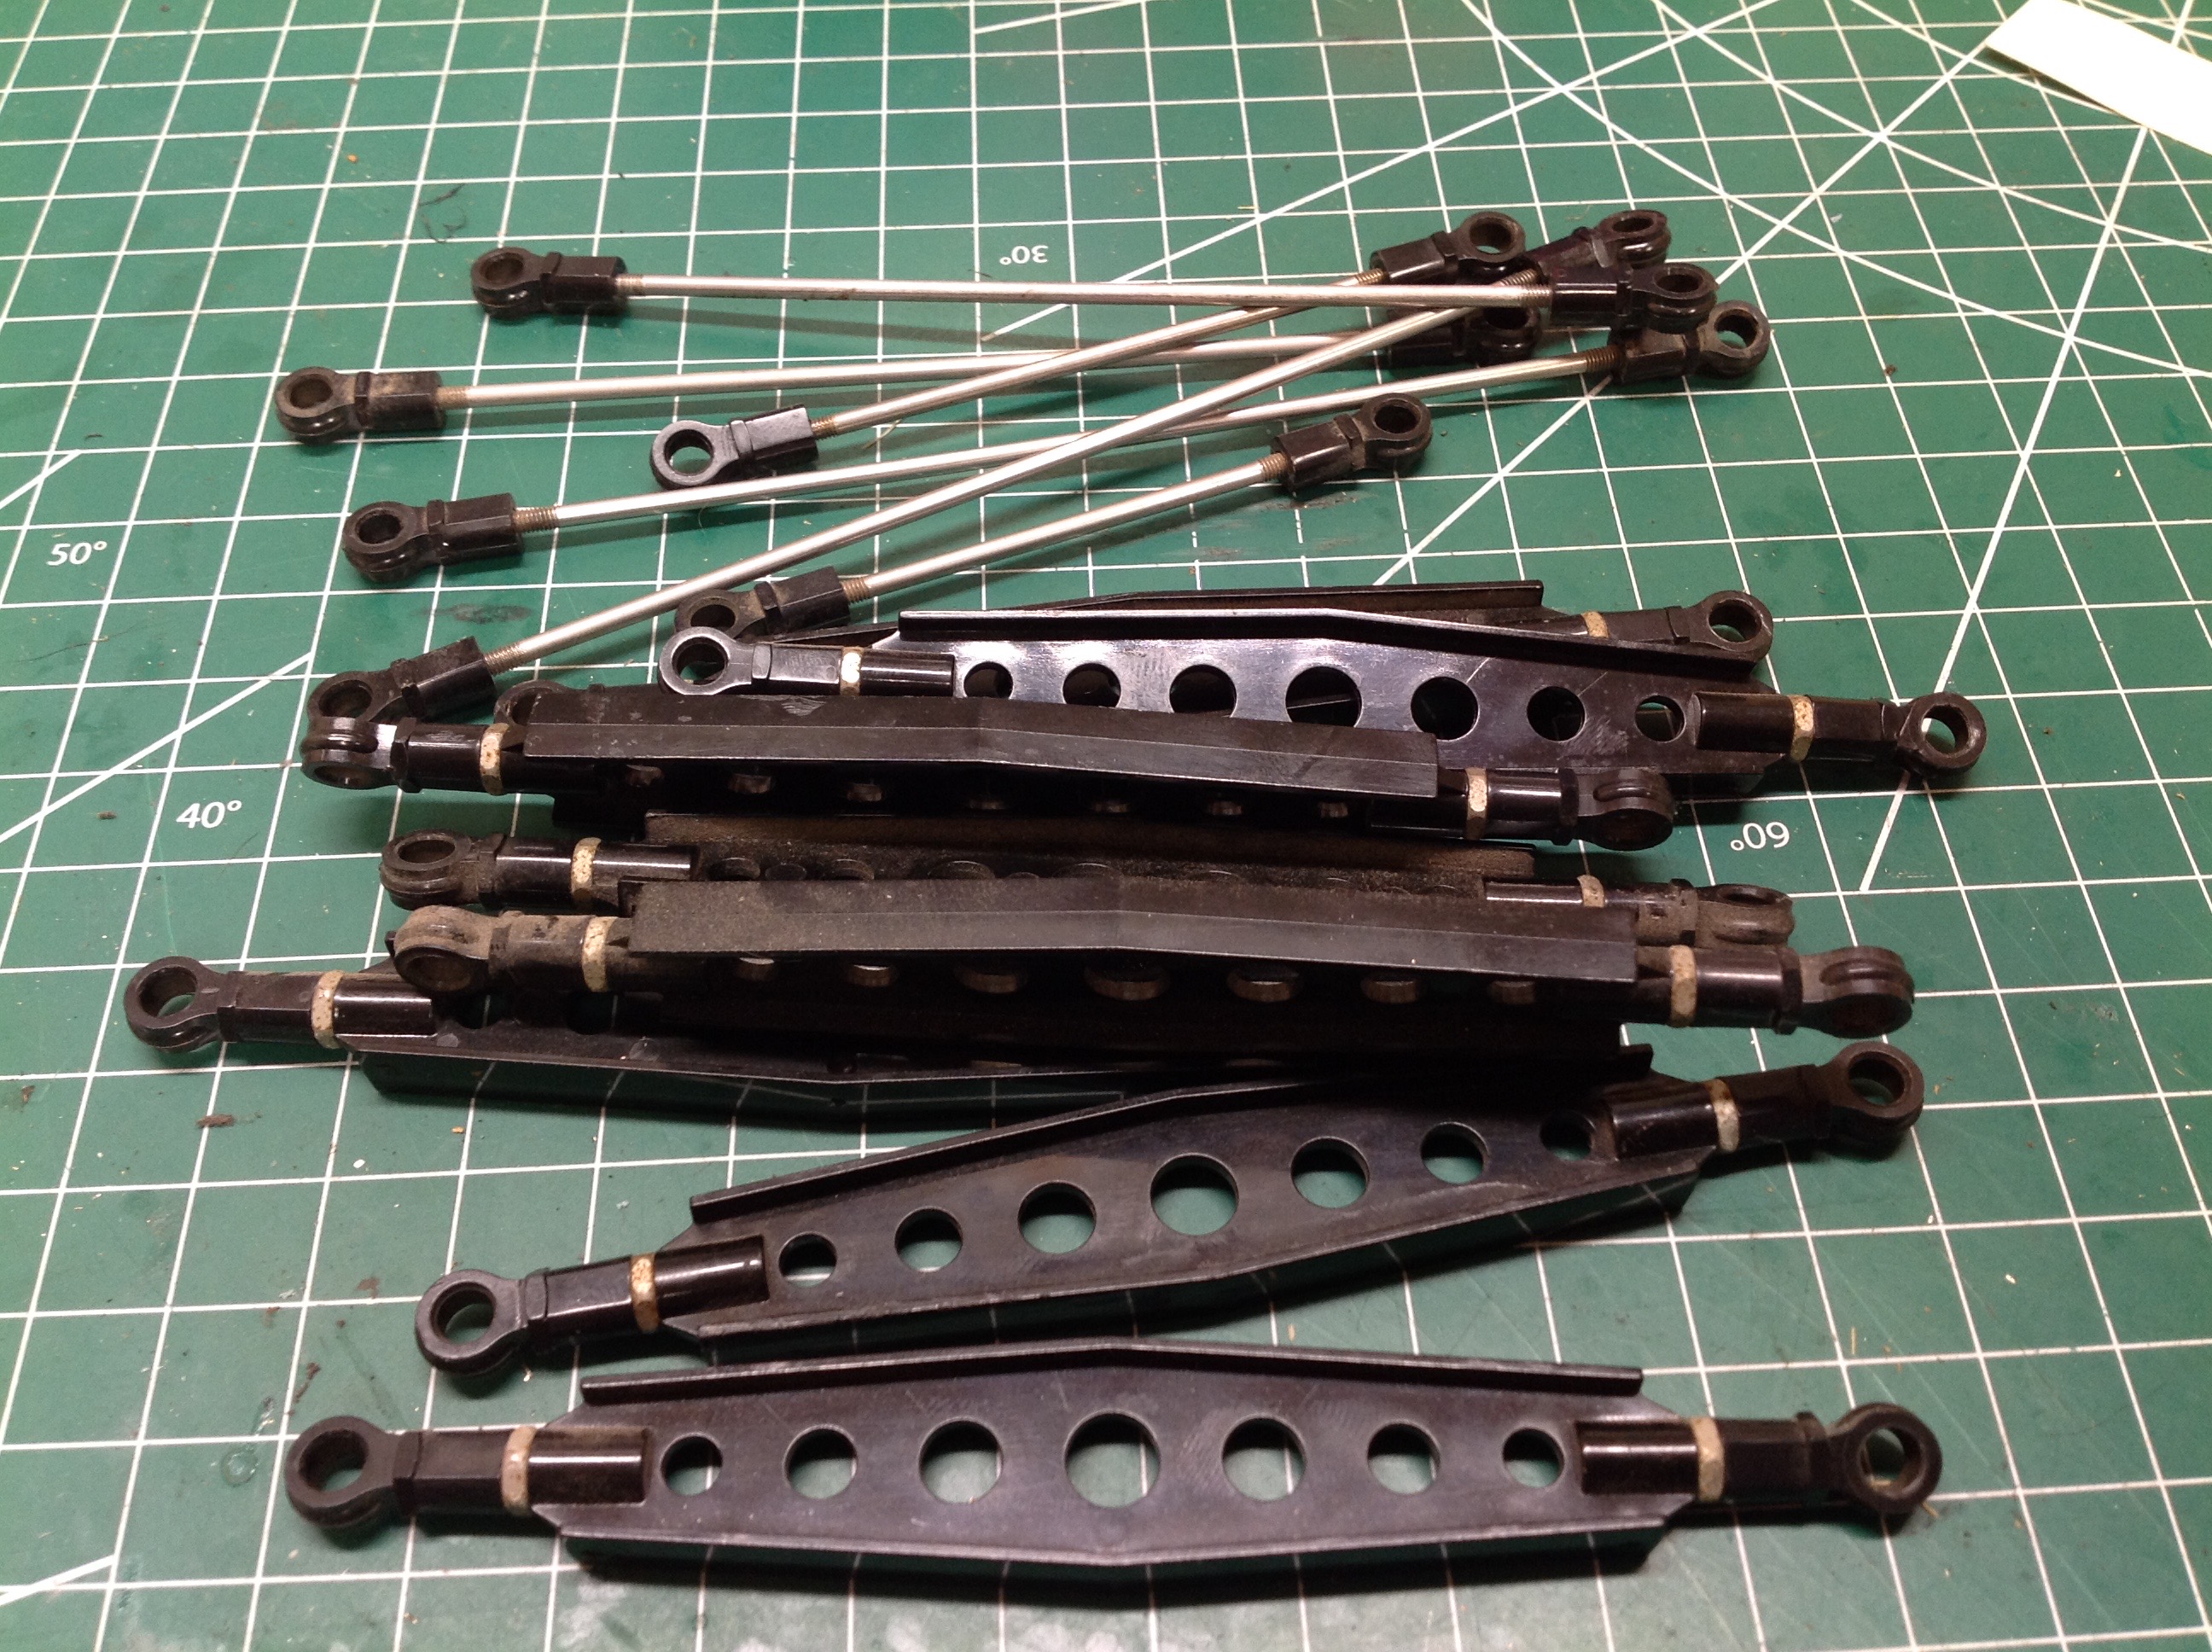
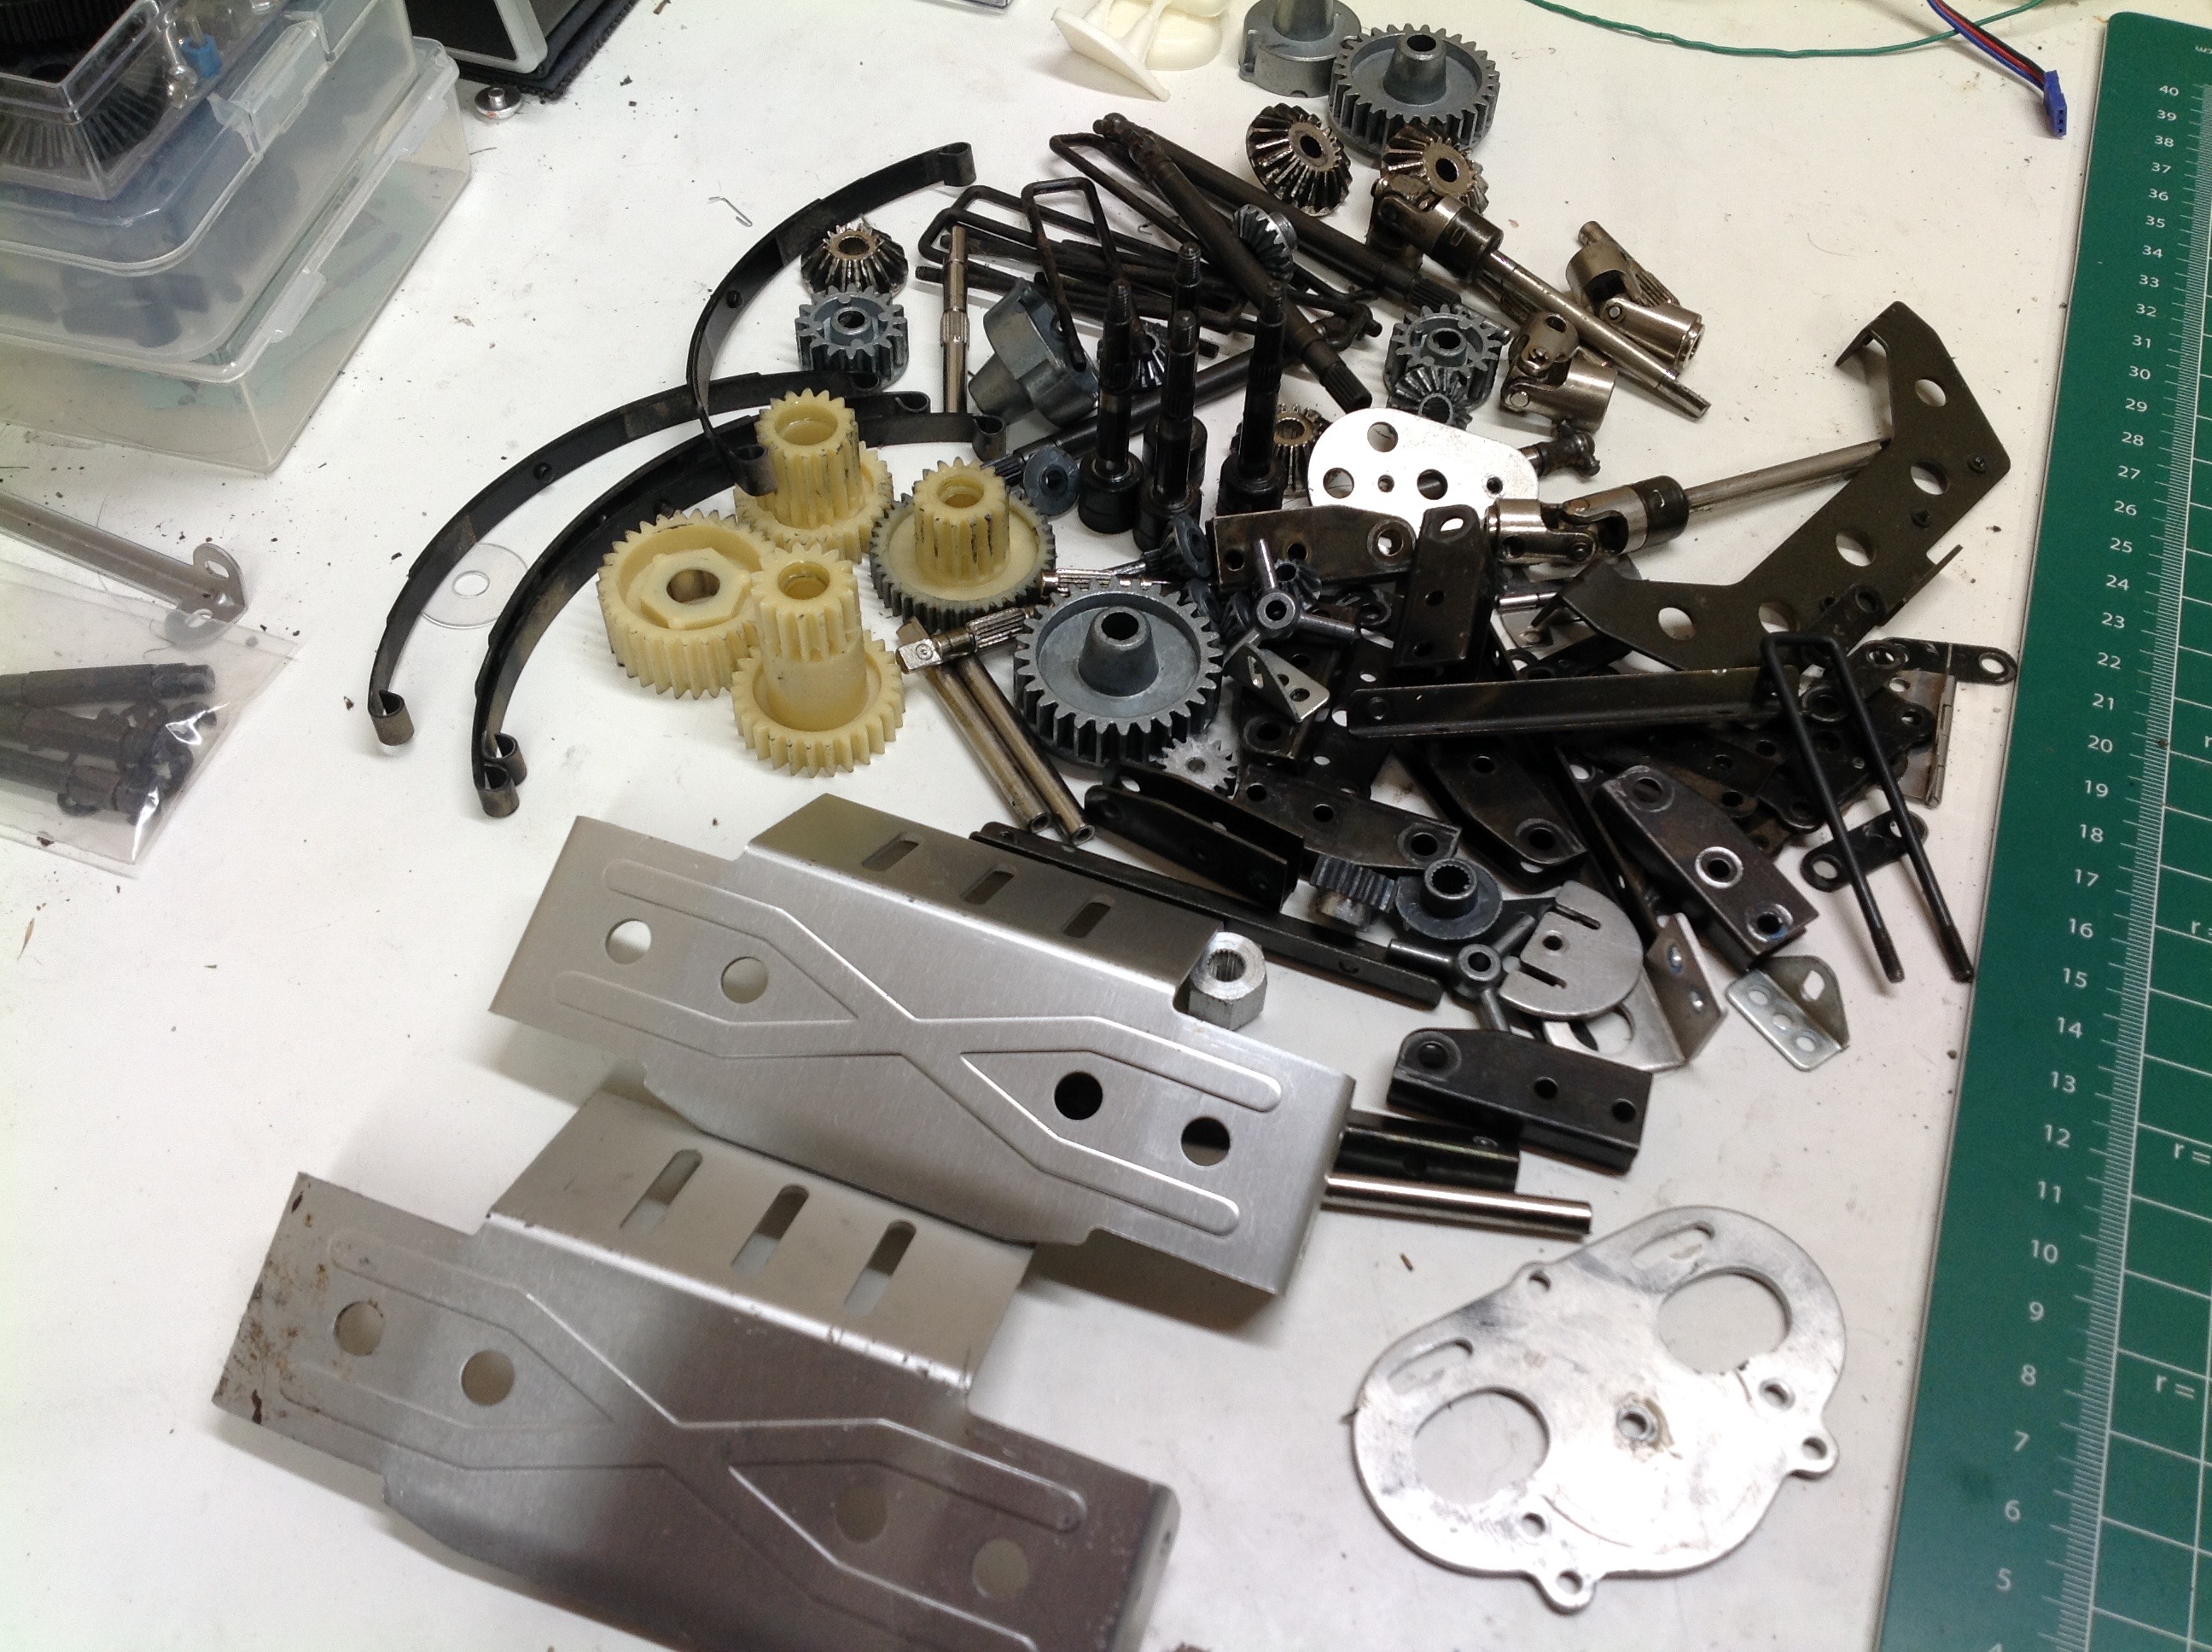
On the left are all the original links. There are 8 identical
suspension links and 6 steering rods. I did not bother removing the
rod ends from the links as all were in good condition. I only
adjusted the lengths as necessary. On the right are all the
non-fastener hardware bits, mostly all metal. Represented we have
gears, bumpers, leaf springs, axles, motor plates, and lots more good
stuff. This is the heaviest section of parts.
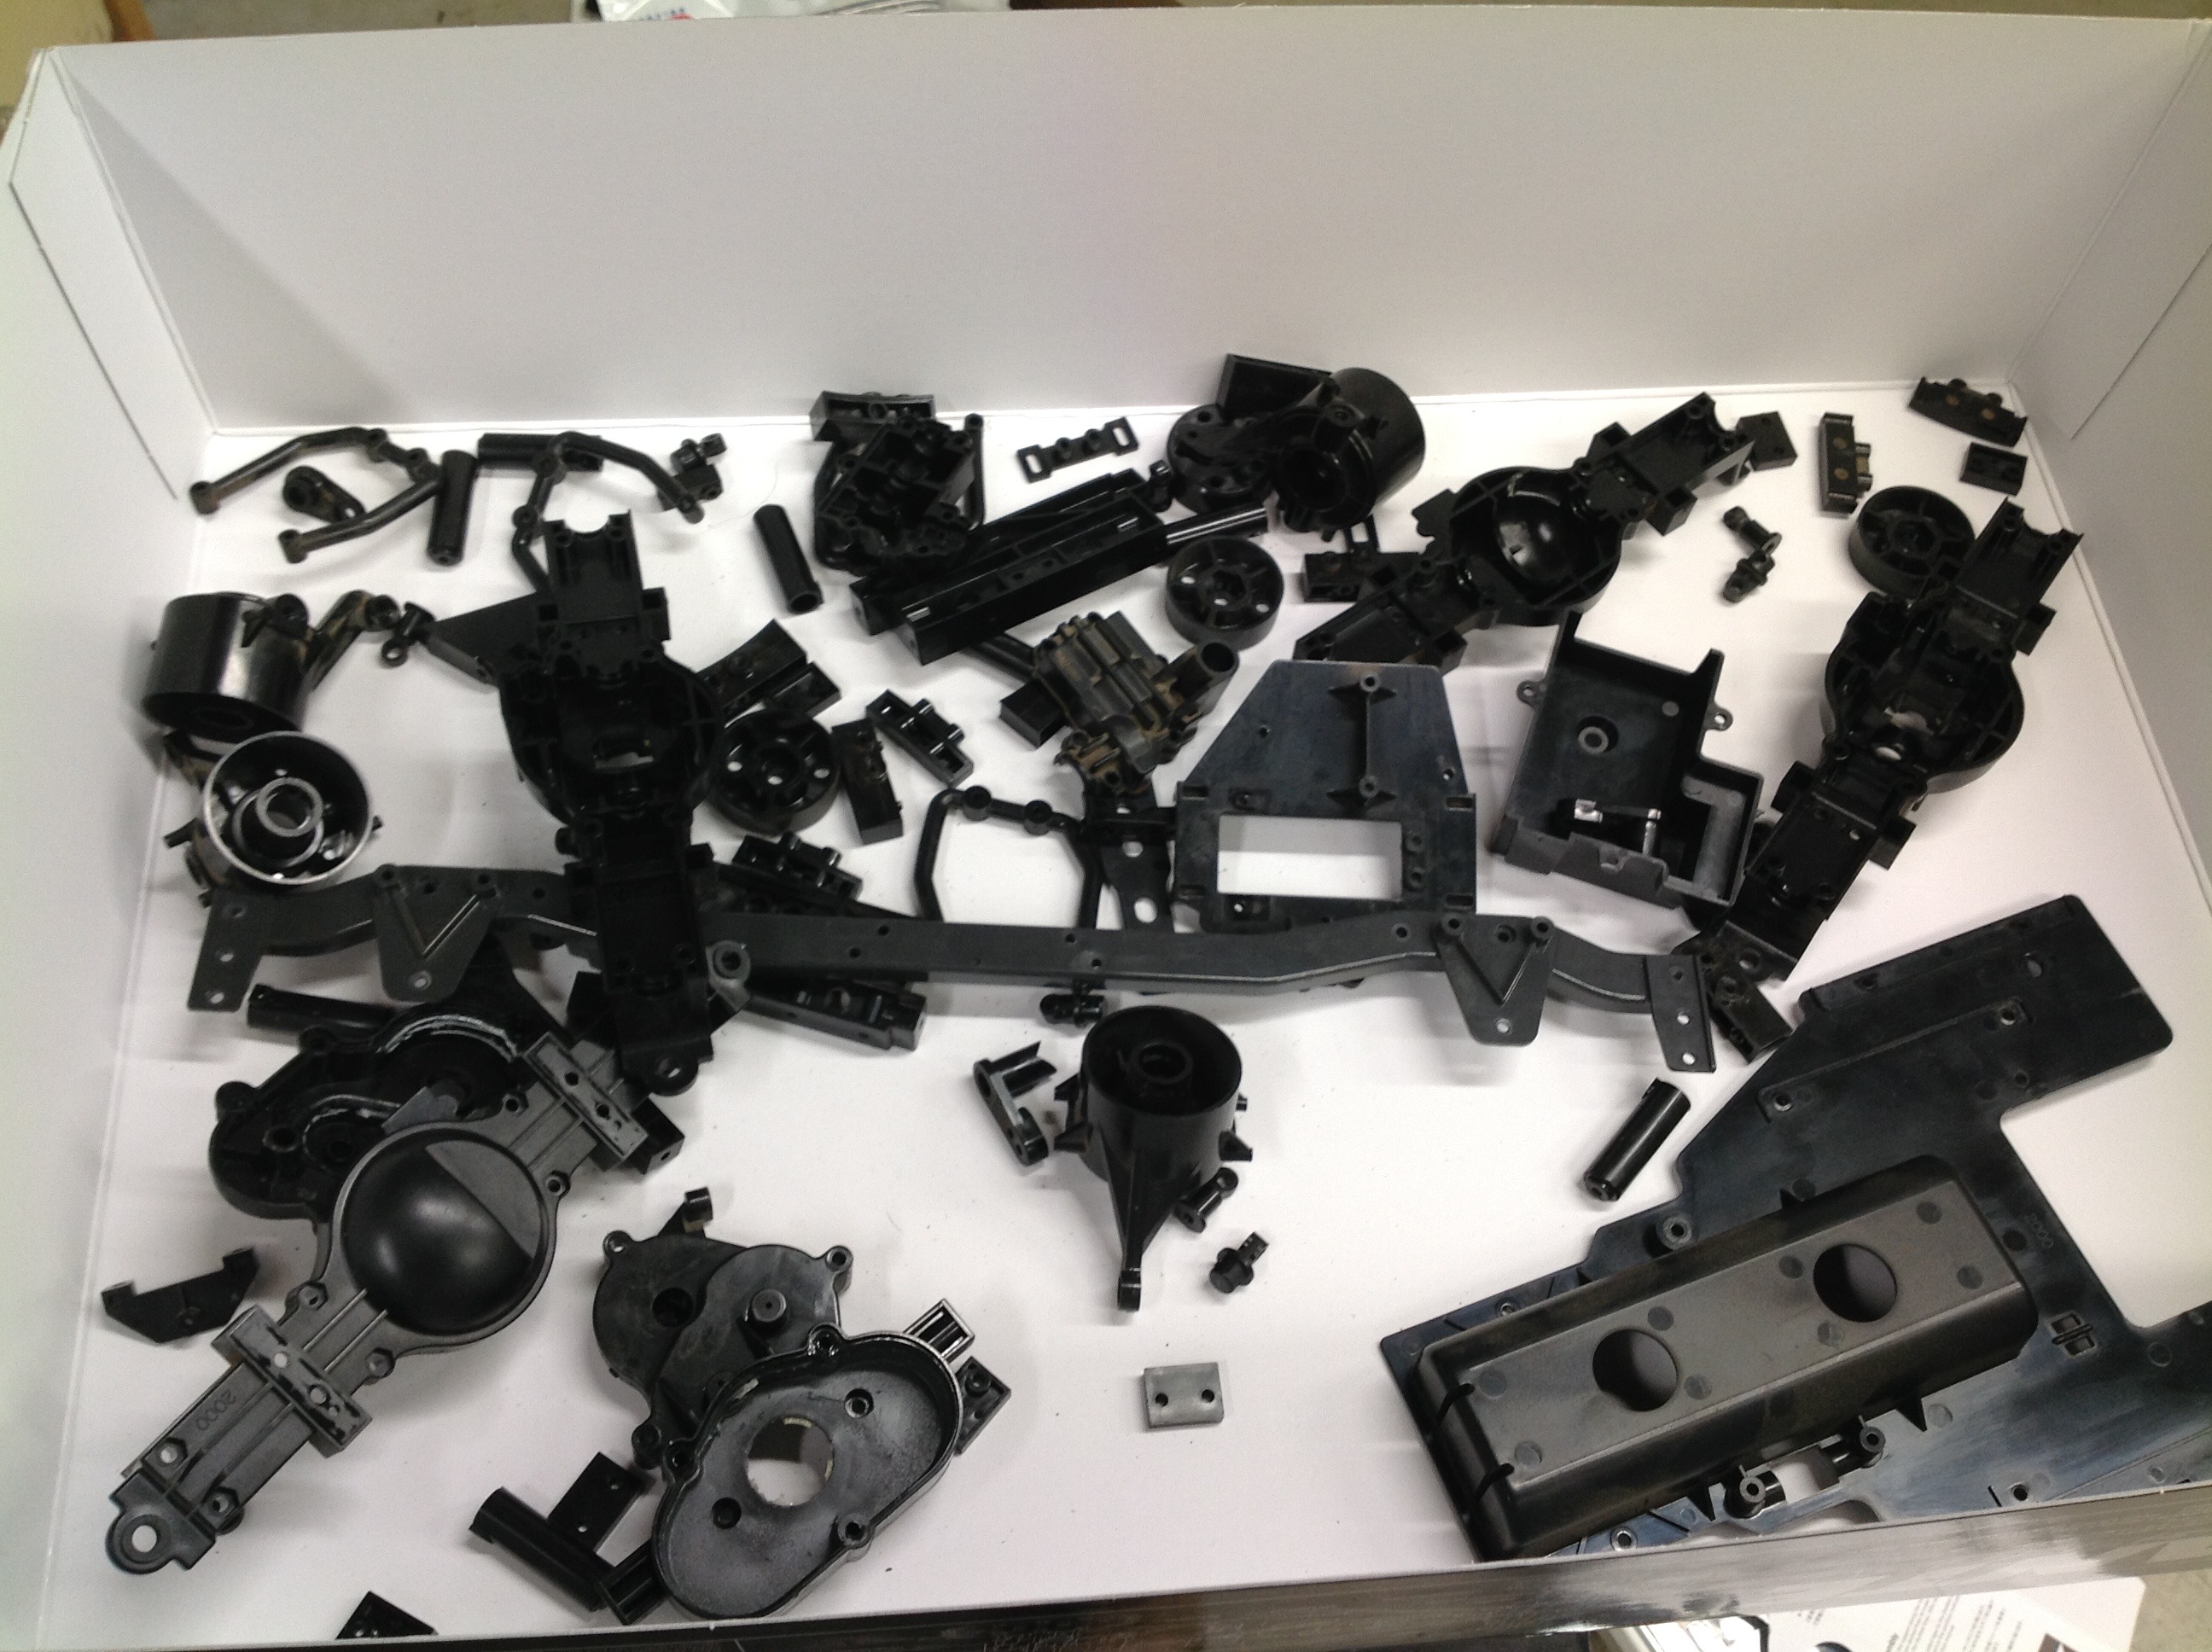
This may not look like all that many plastic parts (and it isn't), but
many of them are very large including the axle housings and battery
tray. There were no broken plastic bits to my great relief.
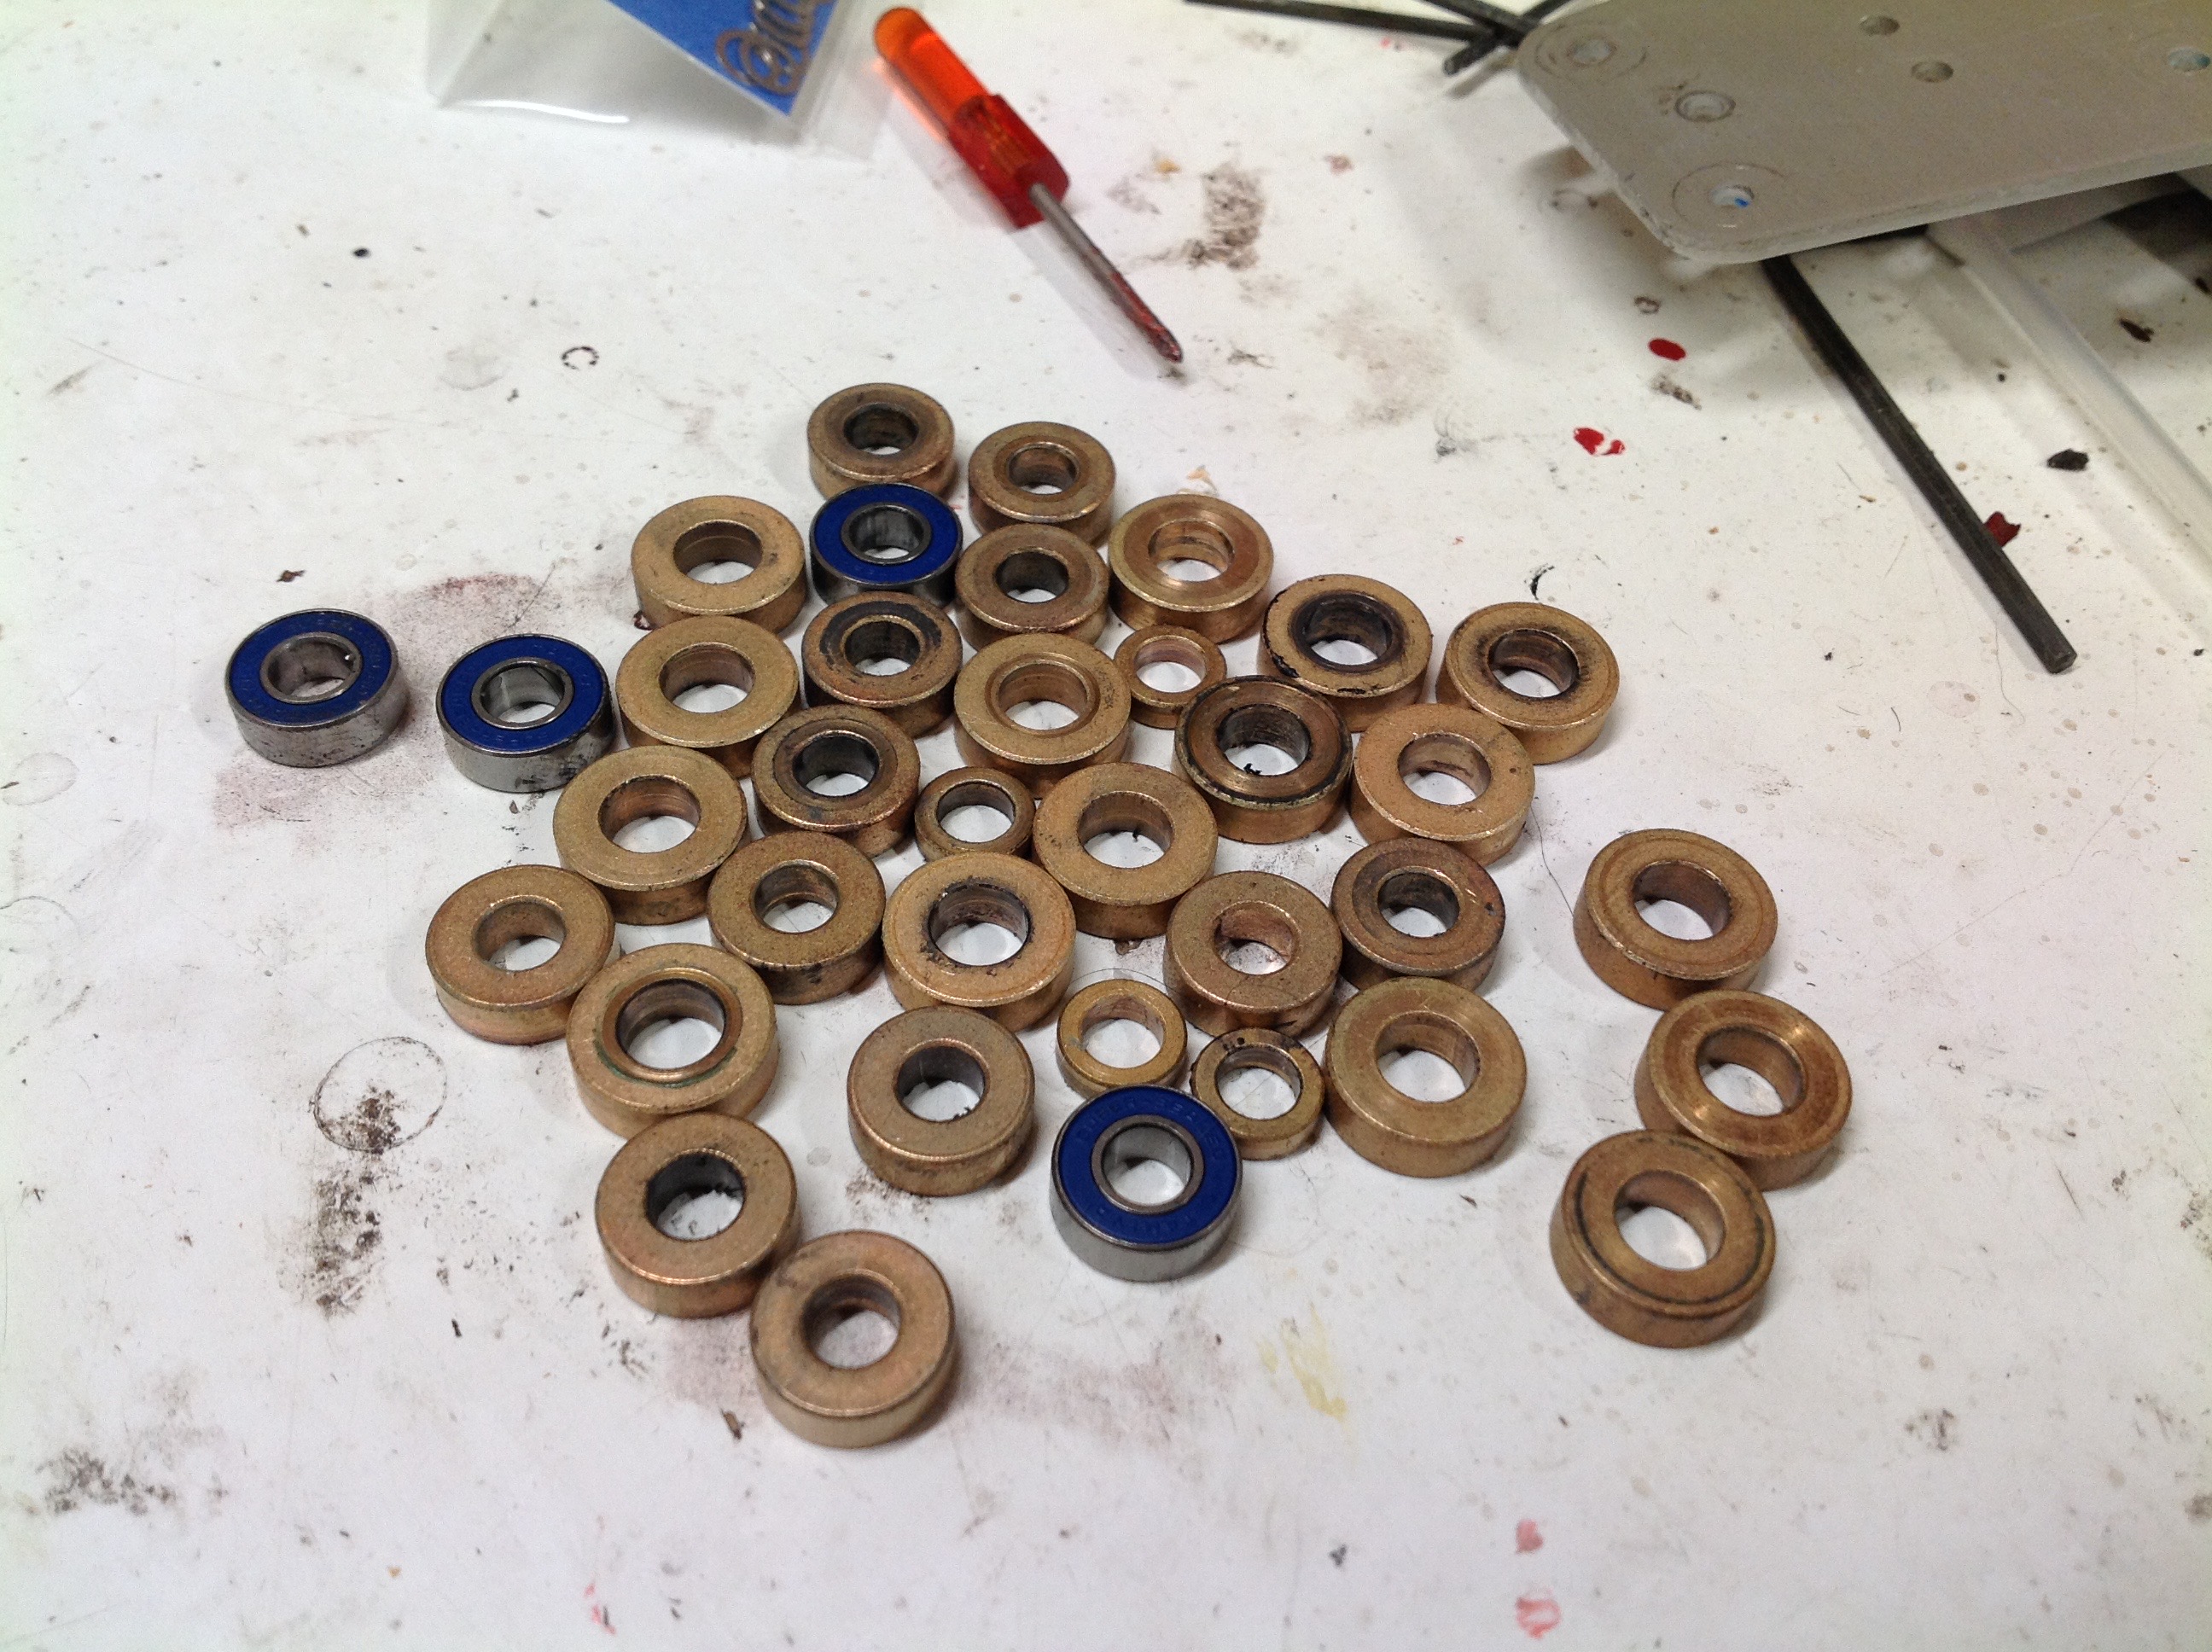
On the right you can see the pile of original bushings. Only 4
ball bearings were used in the original kit, but I replaced everything
shown with brand new rubber shielded ball bearings.
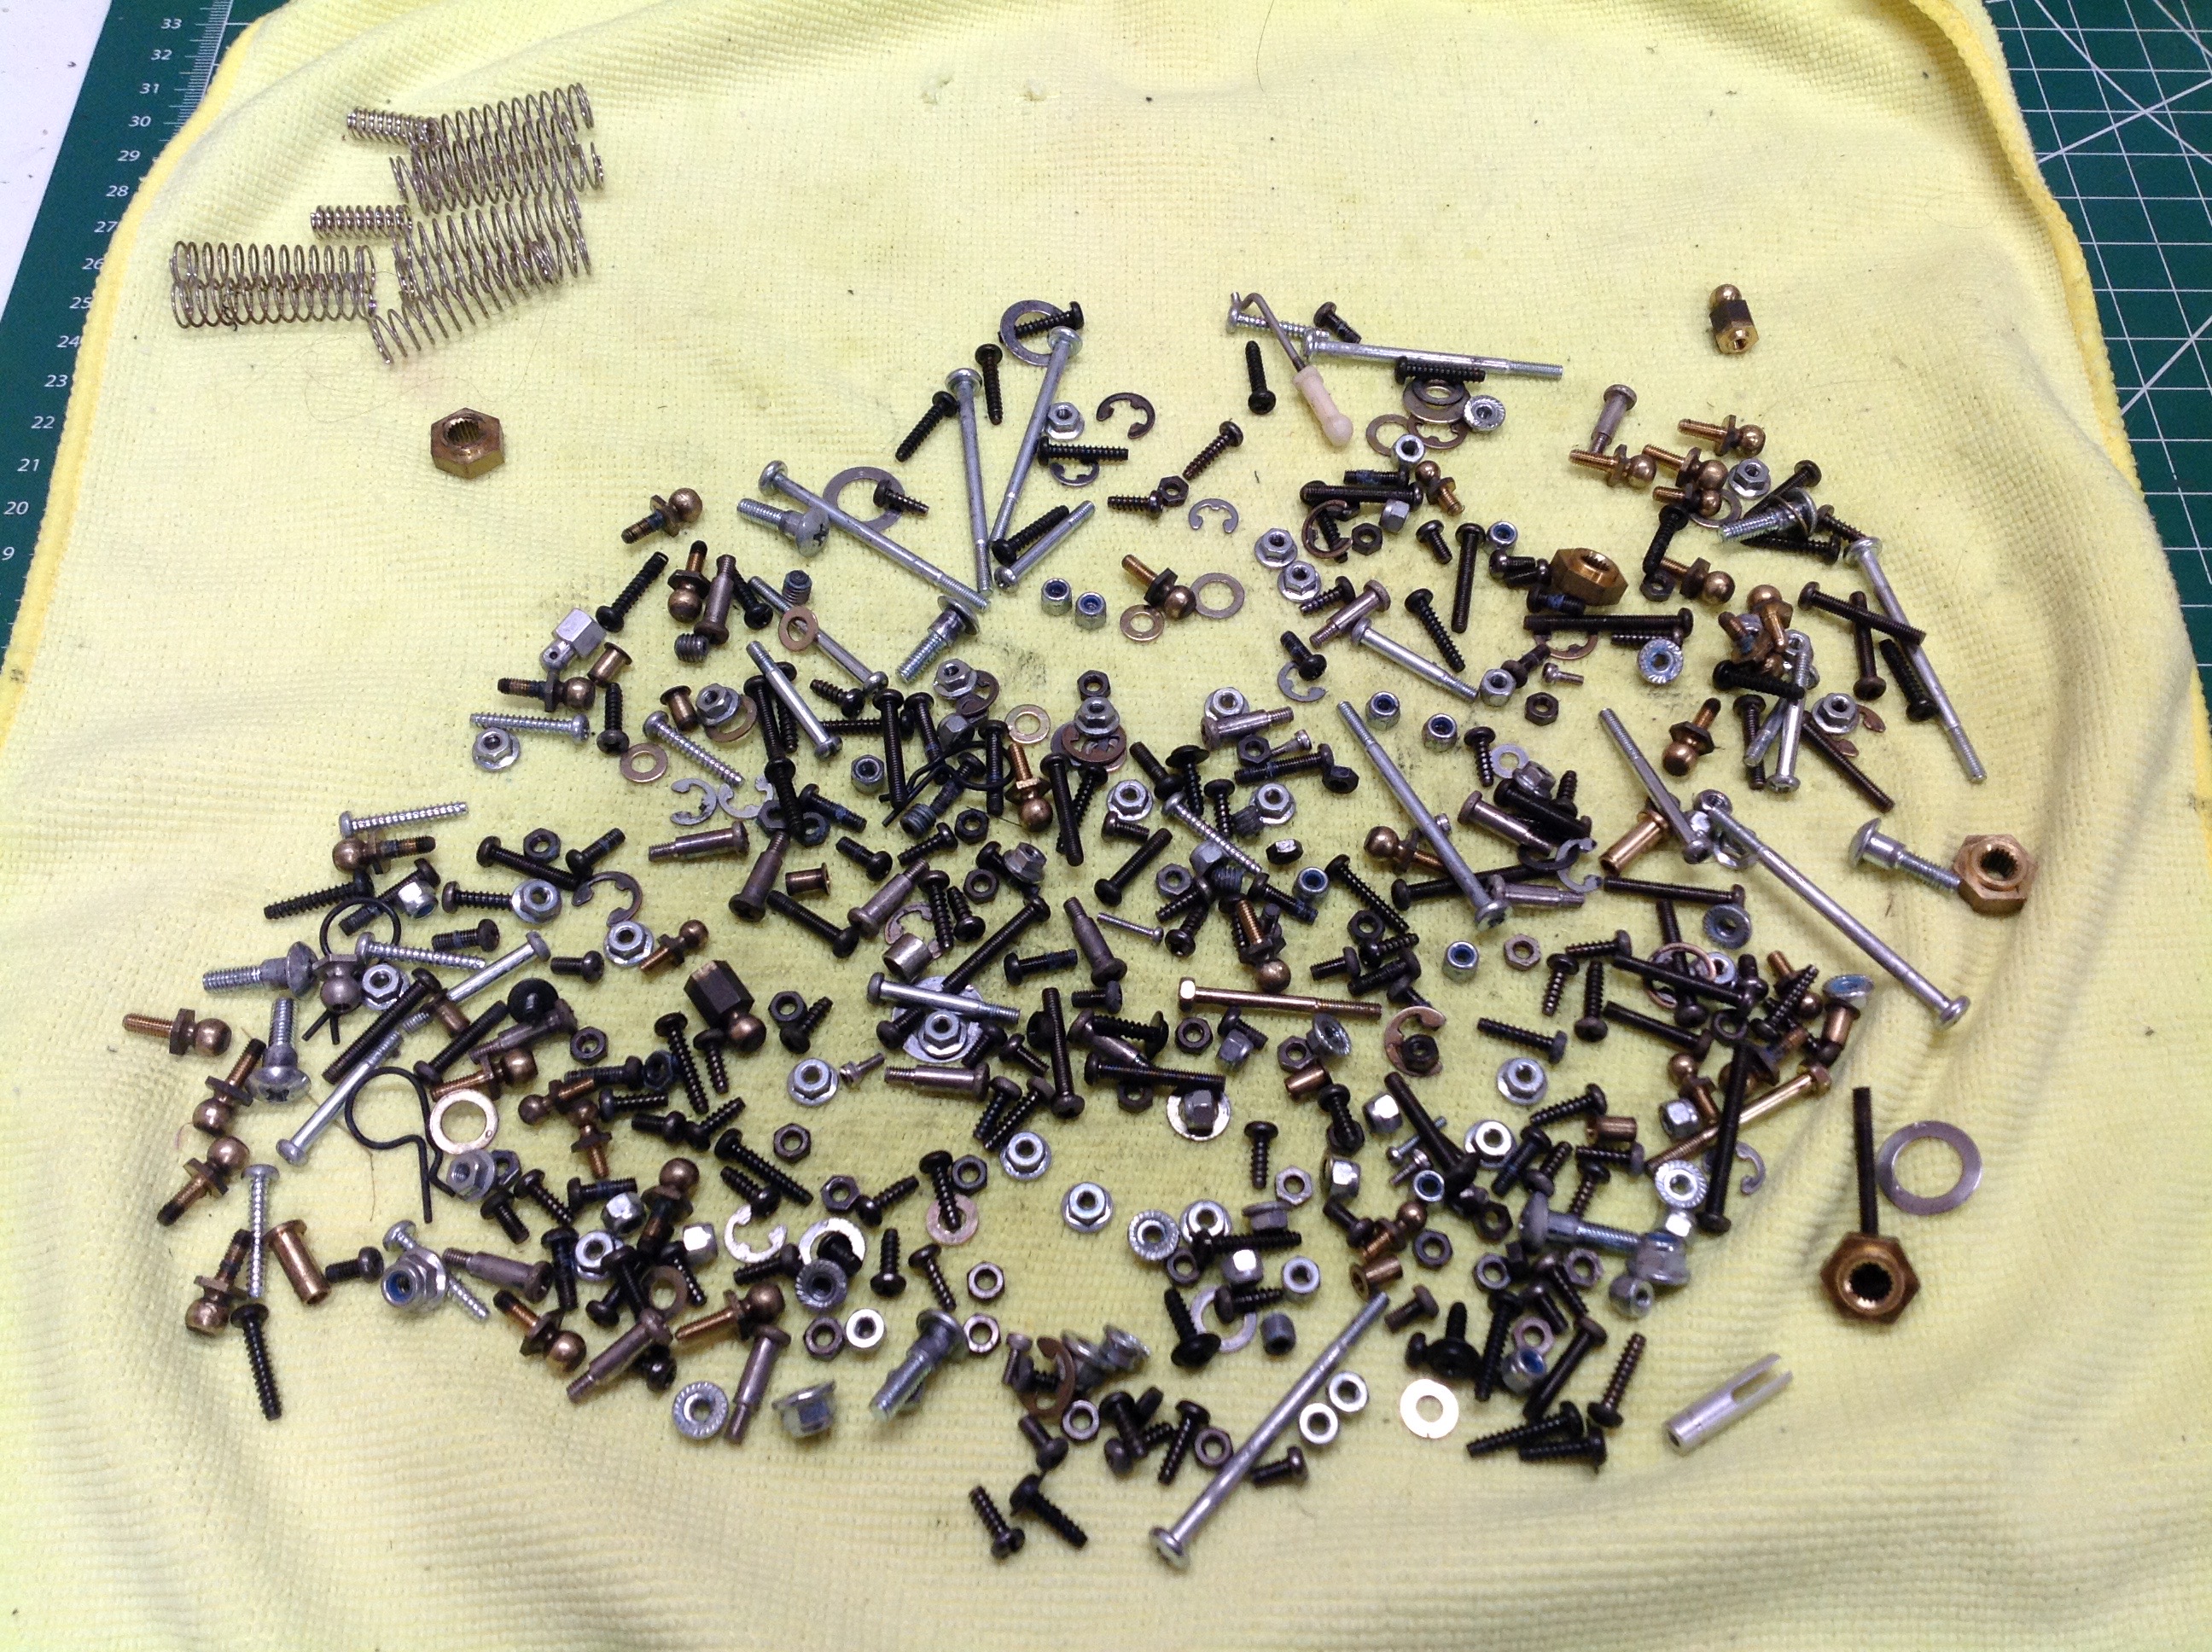
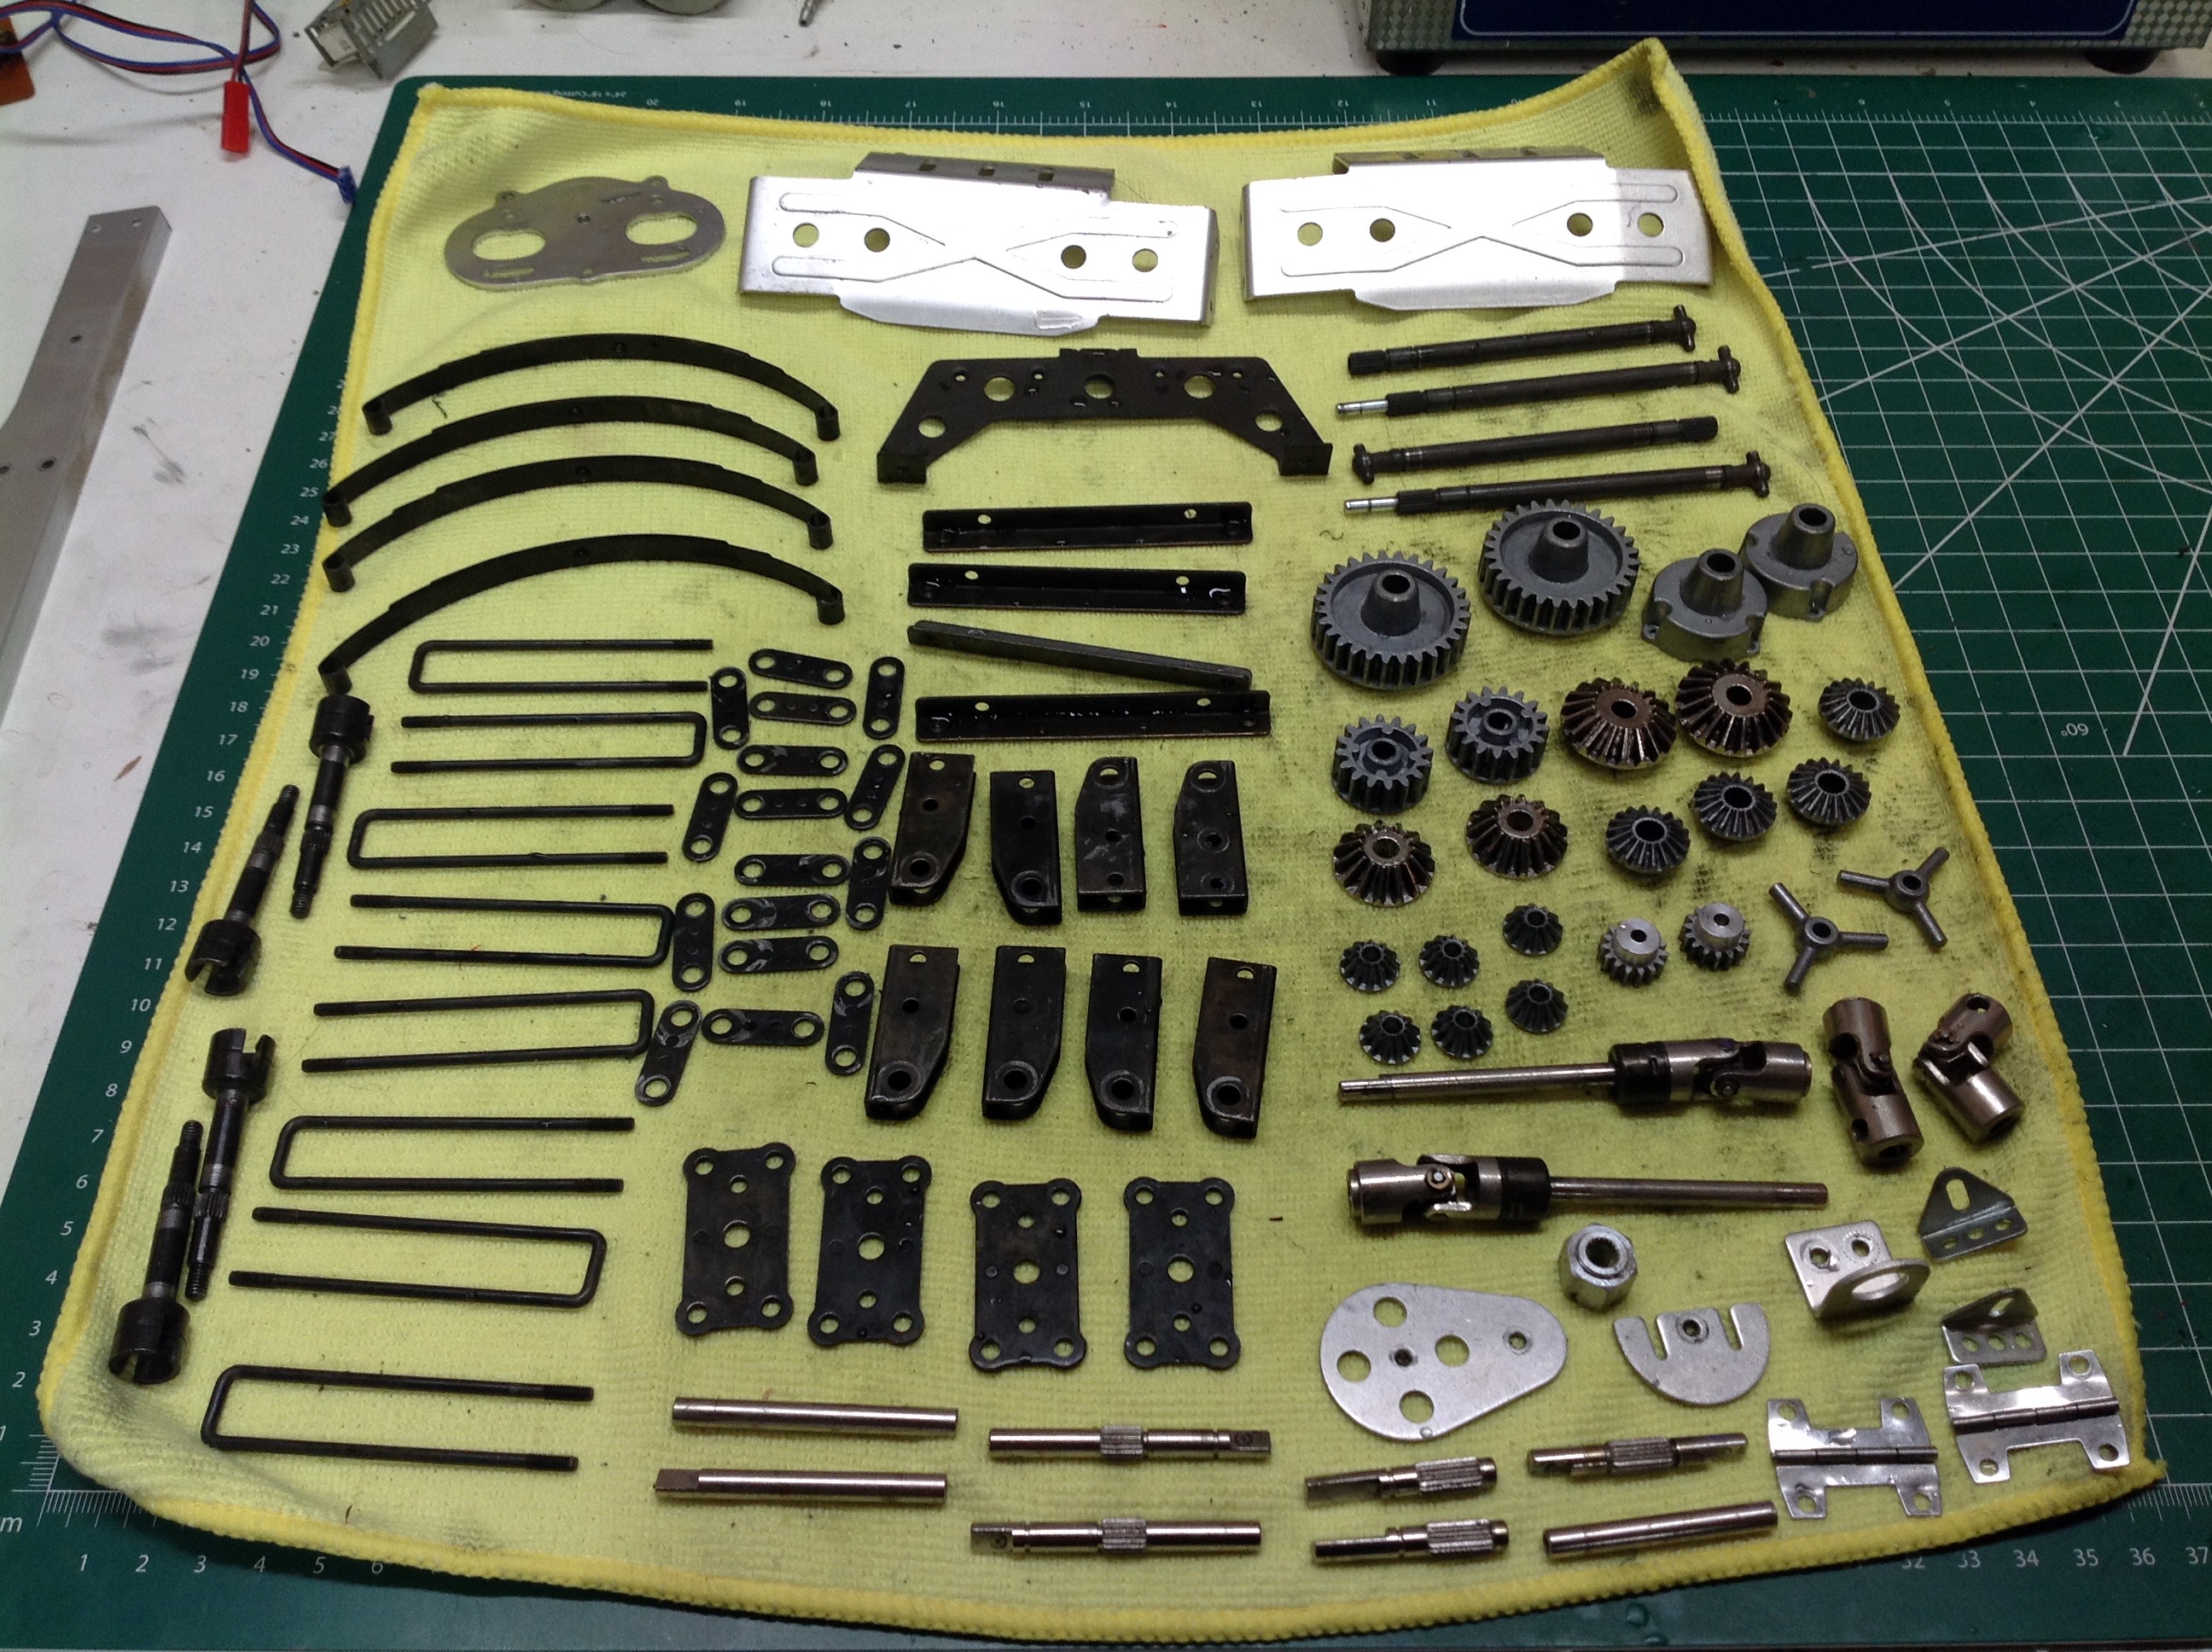
Working in batches, I loaded everything into the ultrasonic cleaner and
tried to get all the old dirt and grease removed to make the parts look
as new as possible. The results are shown above. On the left
are all the fasteners and on the right are the rest of the metal parts,
fully knolled.
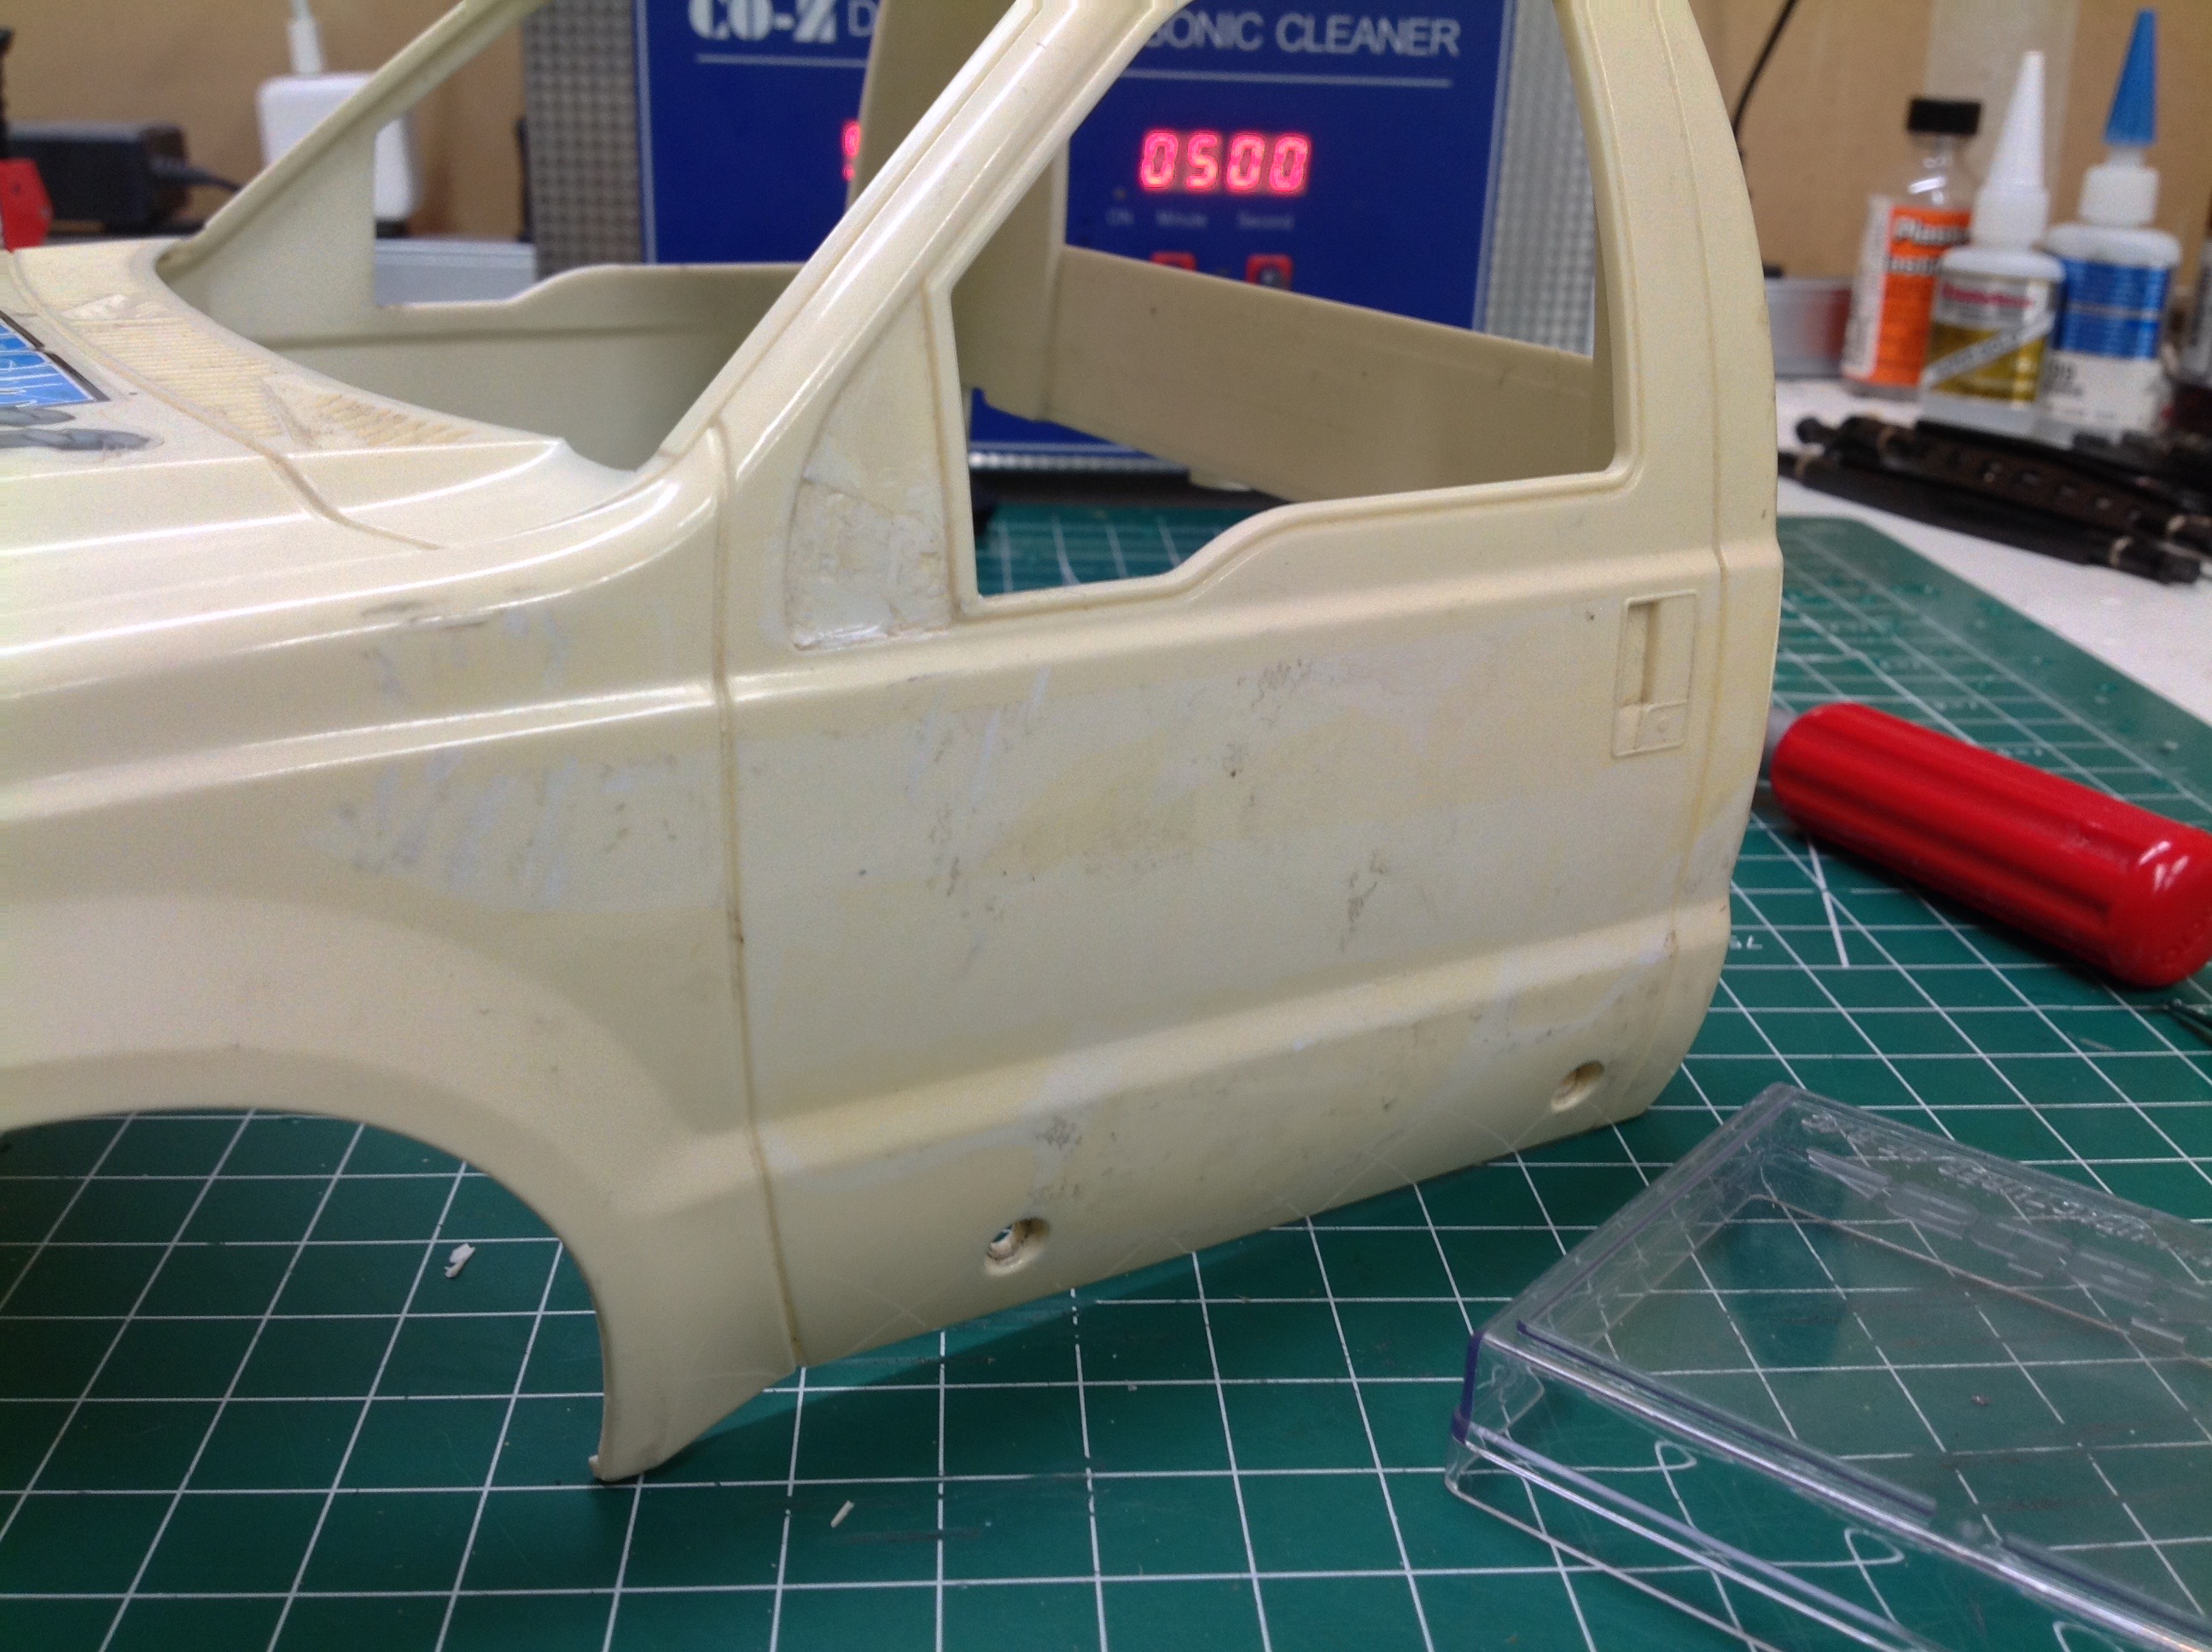
One of the biggest problems with vintage RC bodies is the tendency of
the stickers to lift and peel. That means that intentionally
removing them should be easy, right? That's what I thought, but I
was very wrong. The stickers proved to be incredibly stubborn and
had to be individually chiselled free with a wedge tip blade. It
took me hours. The result is shown on the right. You can see
discoloration where the stickers were. Actually, what you are
seeing is yellowing everywhere else but protected areas behind the
stickers. No matter, I am going to paint this anyway.
For some reason I did not take any pictures of my tire restoration
project, but it probably consumed the most time. Given that the
tires are unique to this model and cannot be replaced, I wanted to make
sure they were soft and supple, not hard and cracked. The best way
to do this, as I've been lead to believe, is to soak them in
glycerin. Sounds simple enough, but these are very big tires and
they were not actually made to be removed from the wheels. The
Juggernaut shipped with the tires and wheels already assembled for good
reason; they don't stretch and are pretty much impossible to
remove without destroying them. That meant I needed to soak them
as an assembly, but the only way to get the glycerin to flow inside the
tire was to vent them and then submerge them for many hours to allow the
viscous fluid to bubble in. Then I had to try to squeeze it all
back out of the now incredibly heavy tires, a process which took even
longer. It took me the whole weekend, but I finally got a set of
new looking tires. I wasn't able to patch the tear in the sidewall
of the single damaged tire without access to the interior, but it seems
to be stable and not growing. The cleaned tires are pretty
slippery and will sometimes spin in the wheels. It's like a free
slipper clutch.
©2020 Eric Albrecht