Tamiya Juggernaut 2 Project
Page 2: Assembly
The Mammoth Dump Truck shares the same chassis as the Juggernaut 2
and I've already had the opportunity to build one brand new from the
box, so most of the details about the building process and the
differences from the original Juggernaut and Clodbuster chassis can be
found on that page. Here I will concentrate on any differences or interesting aspects of this particular build.
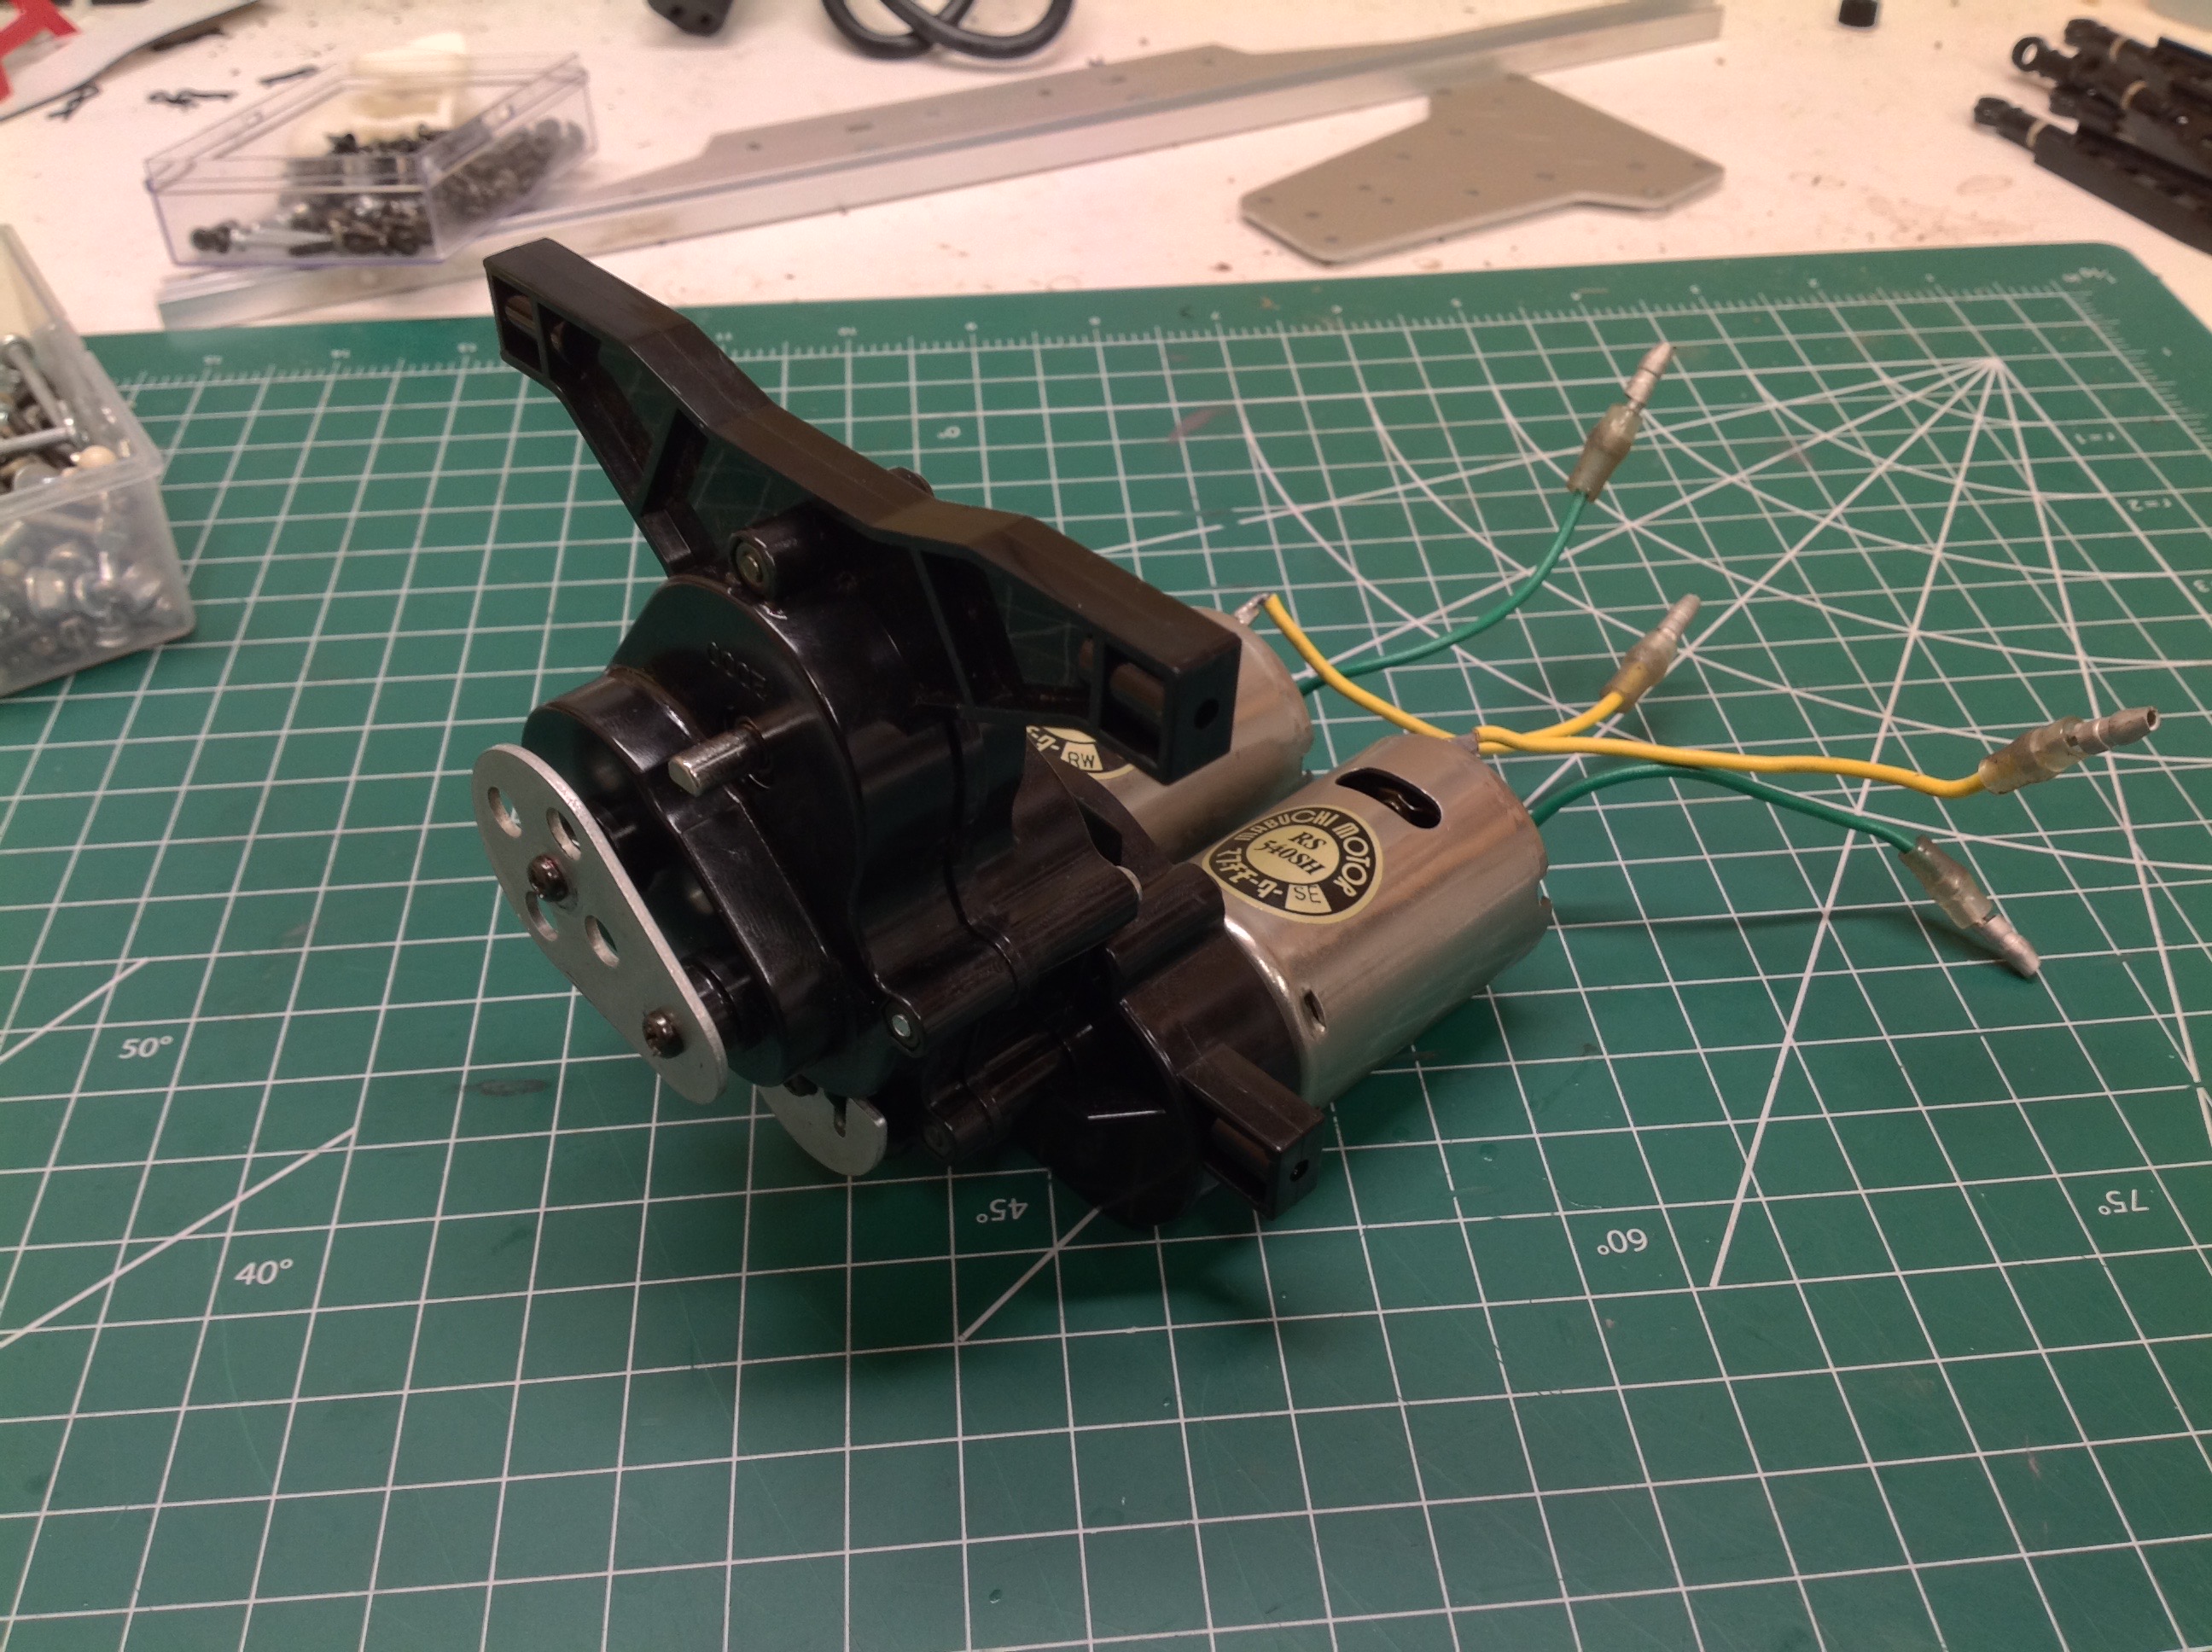
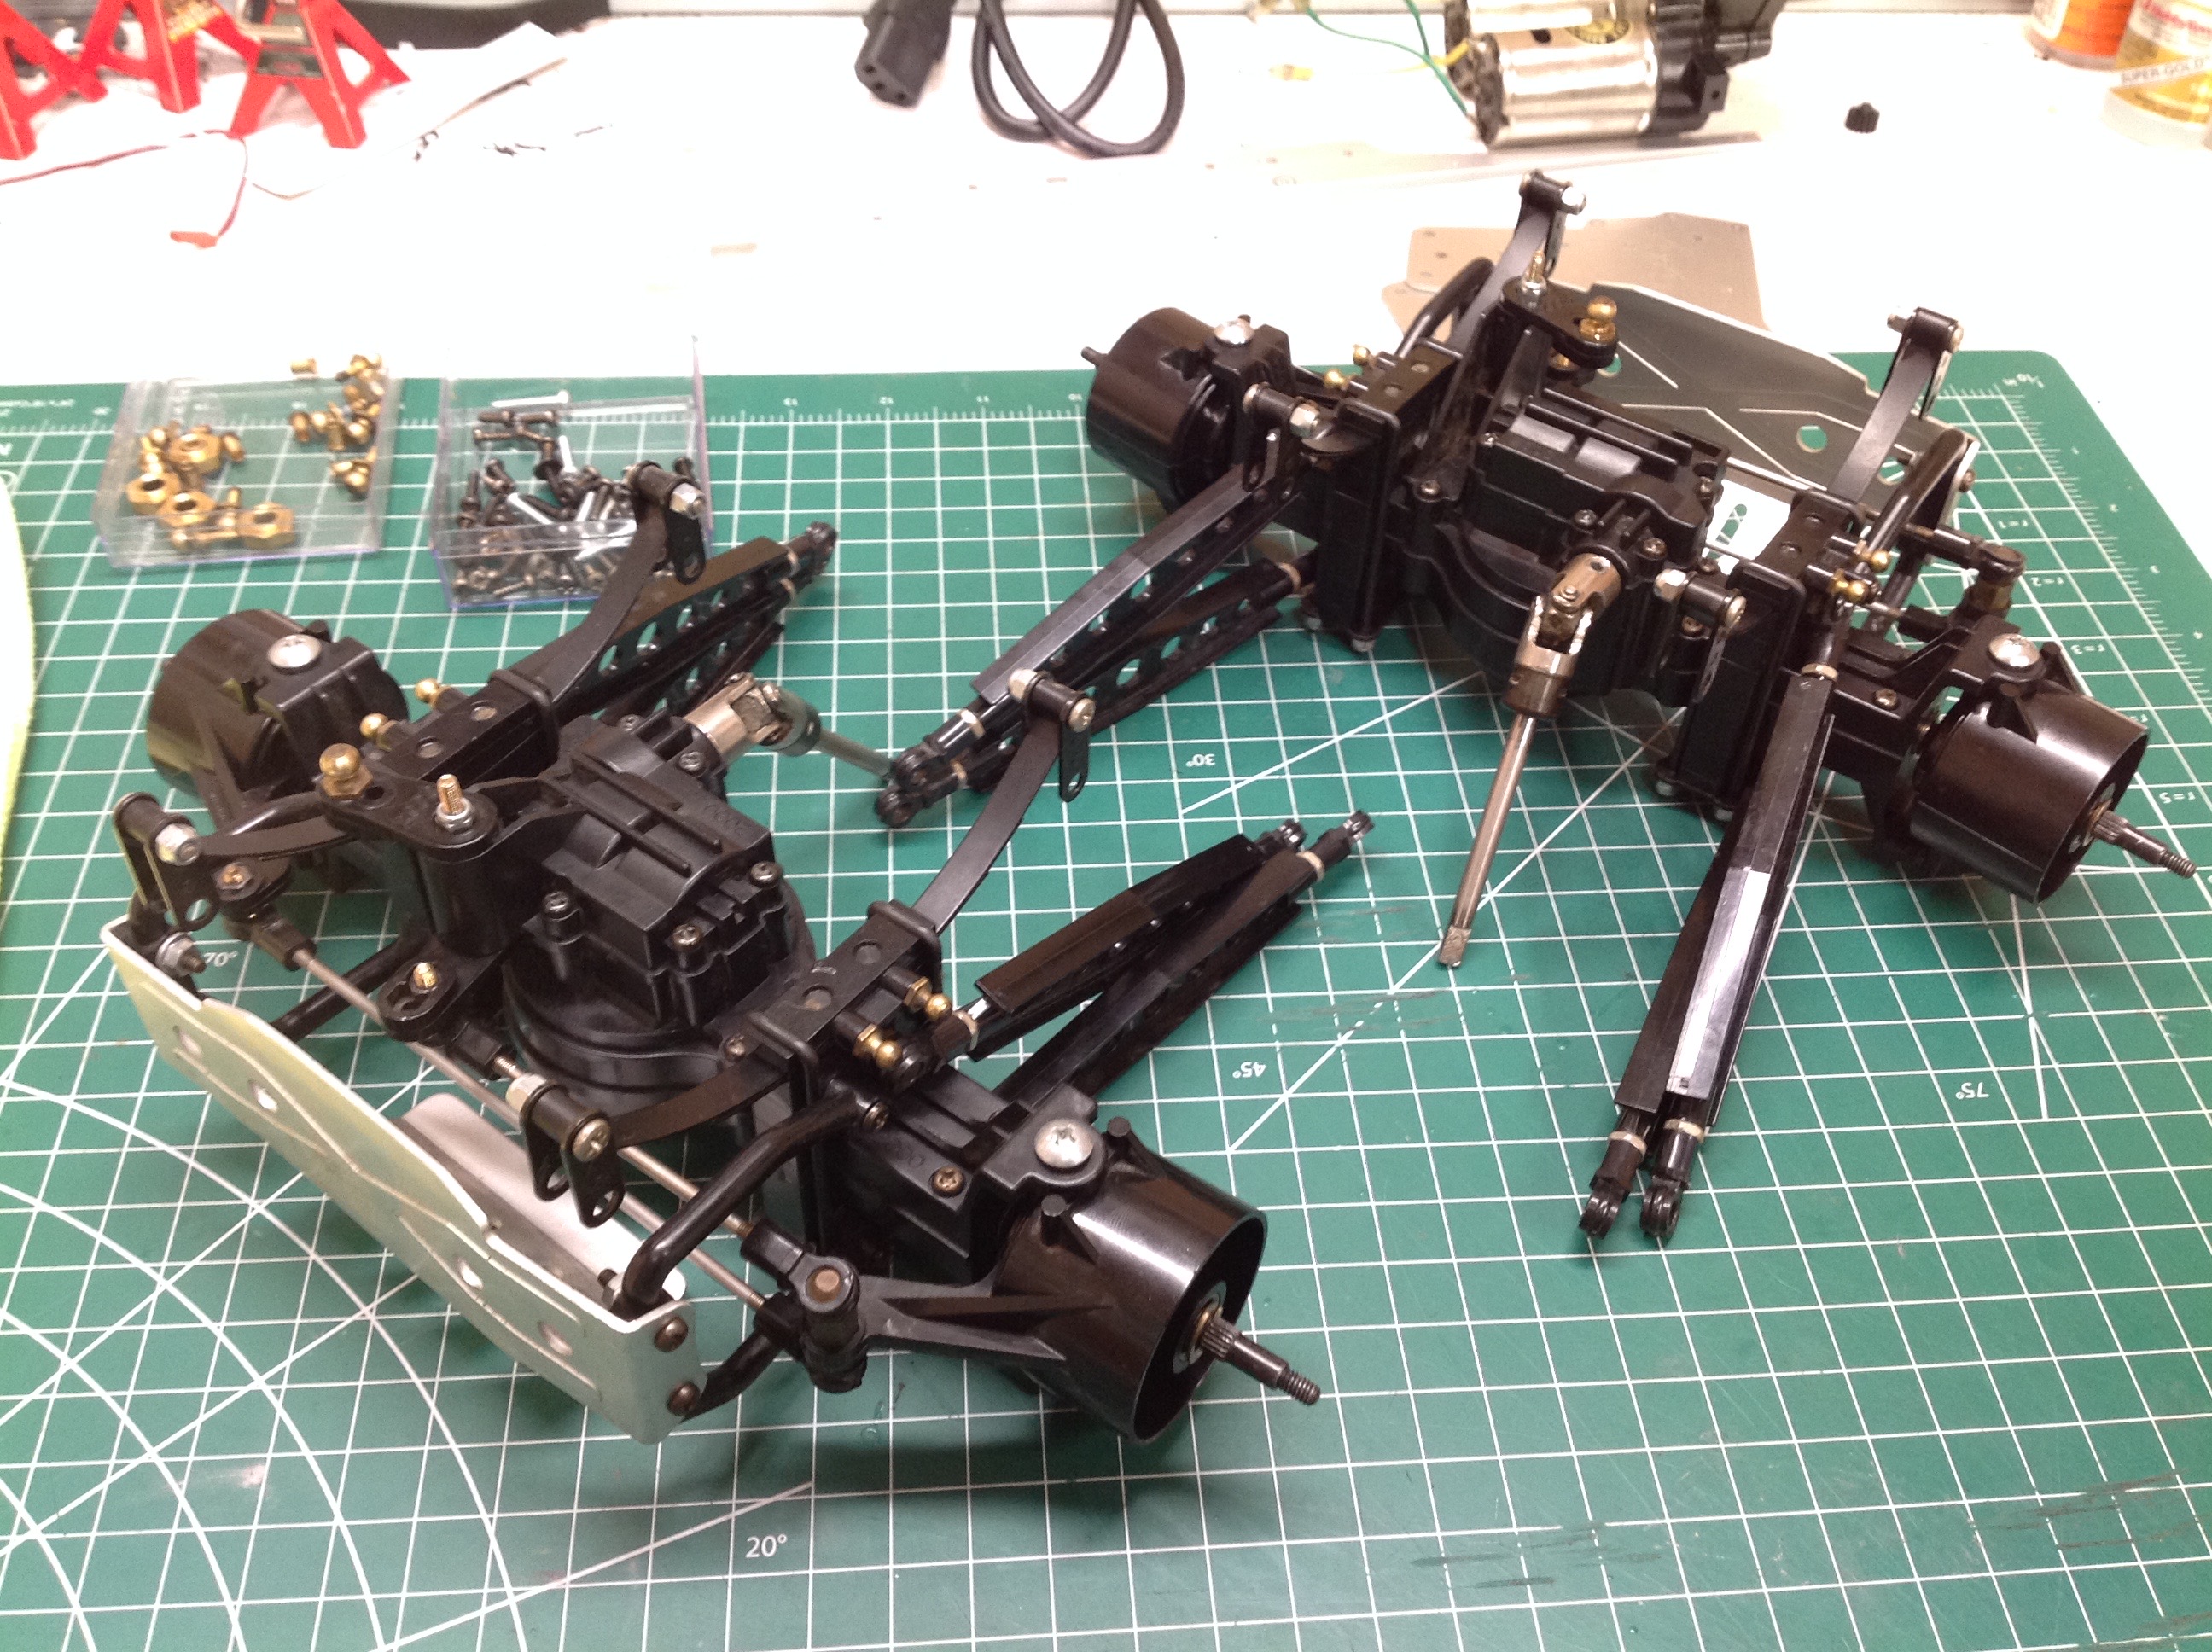
The major difference between the Juggernaut and the Mammoth is that the
Mammoth uses only a single motor with an extra stage of gear reduction
while the Juggernaut uses two motors. The Jugg also uses a
slightly larger 15T pinion. The Mammoth therefore has a final
drive ratio of 91.6:1, making it very slow, while the Juggernaut has a
ratio of 34:1 as well as the extra torque of a second motor. The
transmission assembly is shown on the left while the completed axle
assemblies are shown on the right. Note that the rear axle of the
Jugg has steering while the rear on the Mammoth locked out the rear
hubs. Everything went together cleanly with no problems.
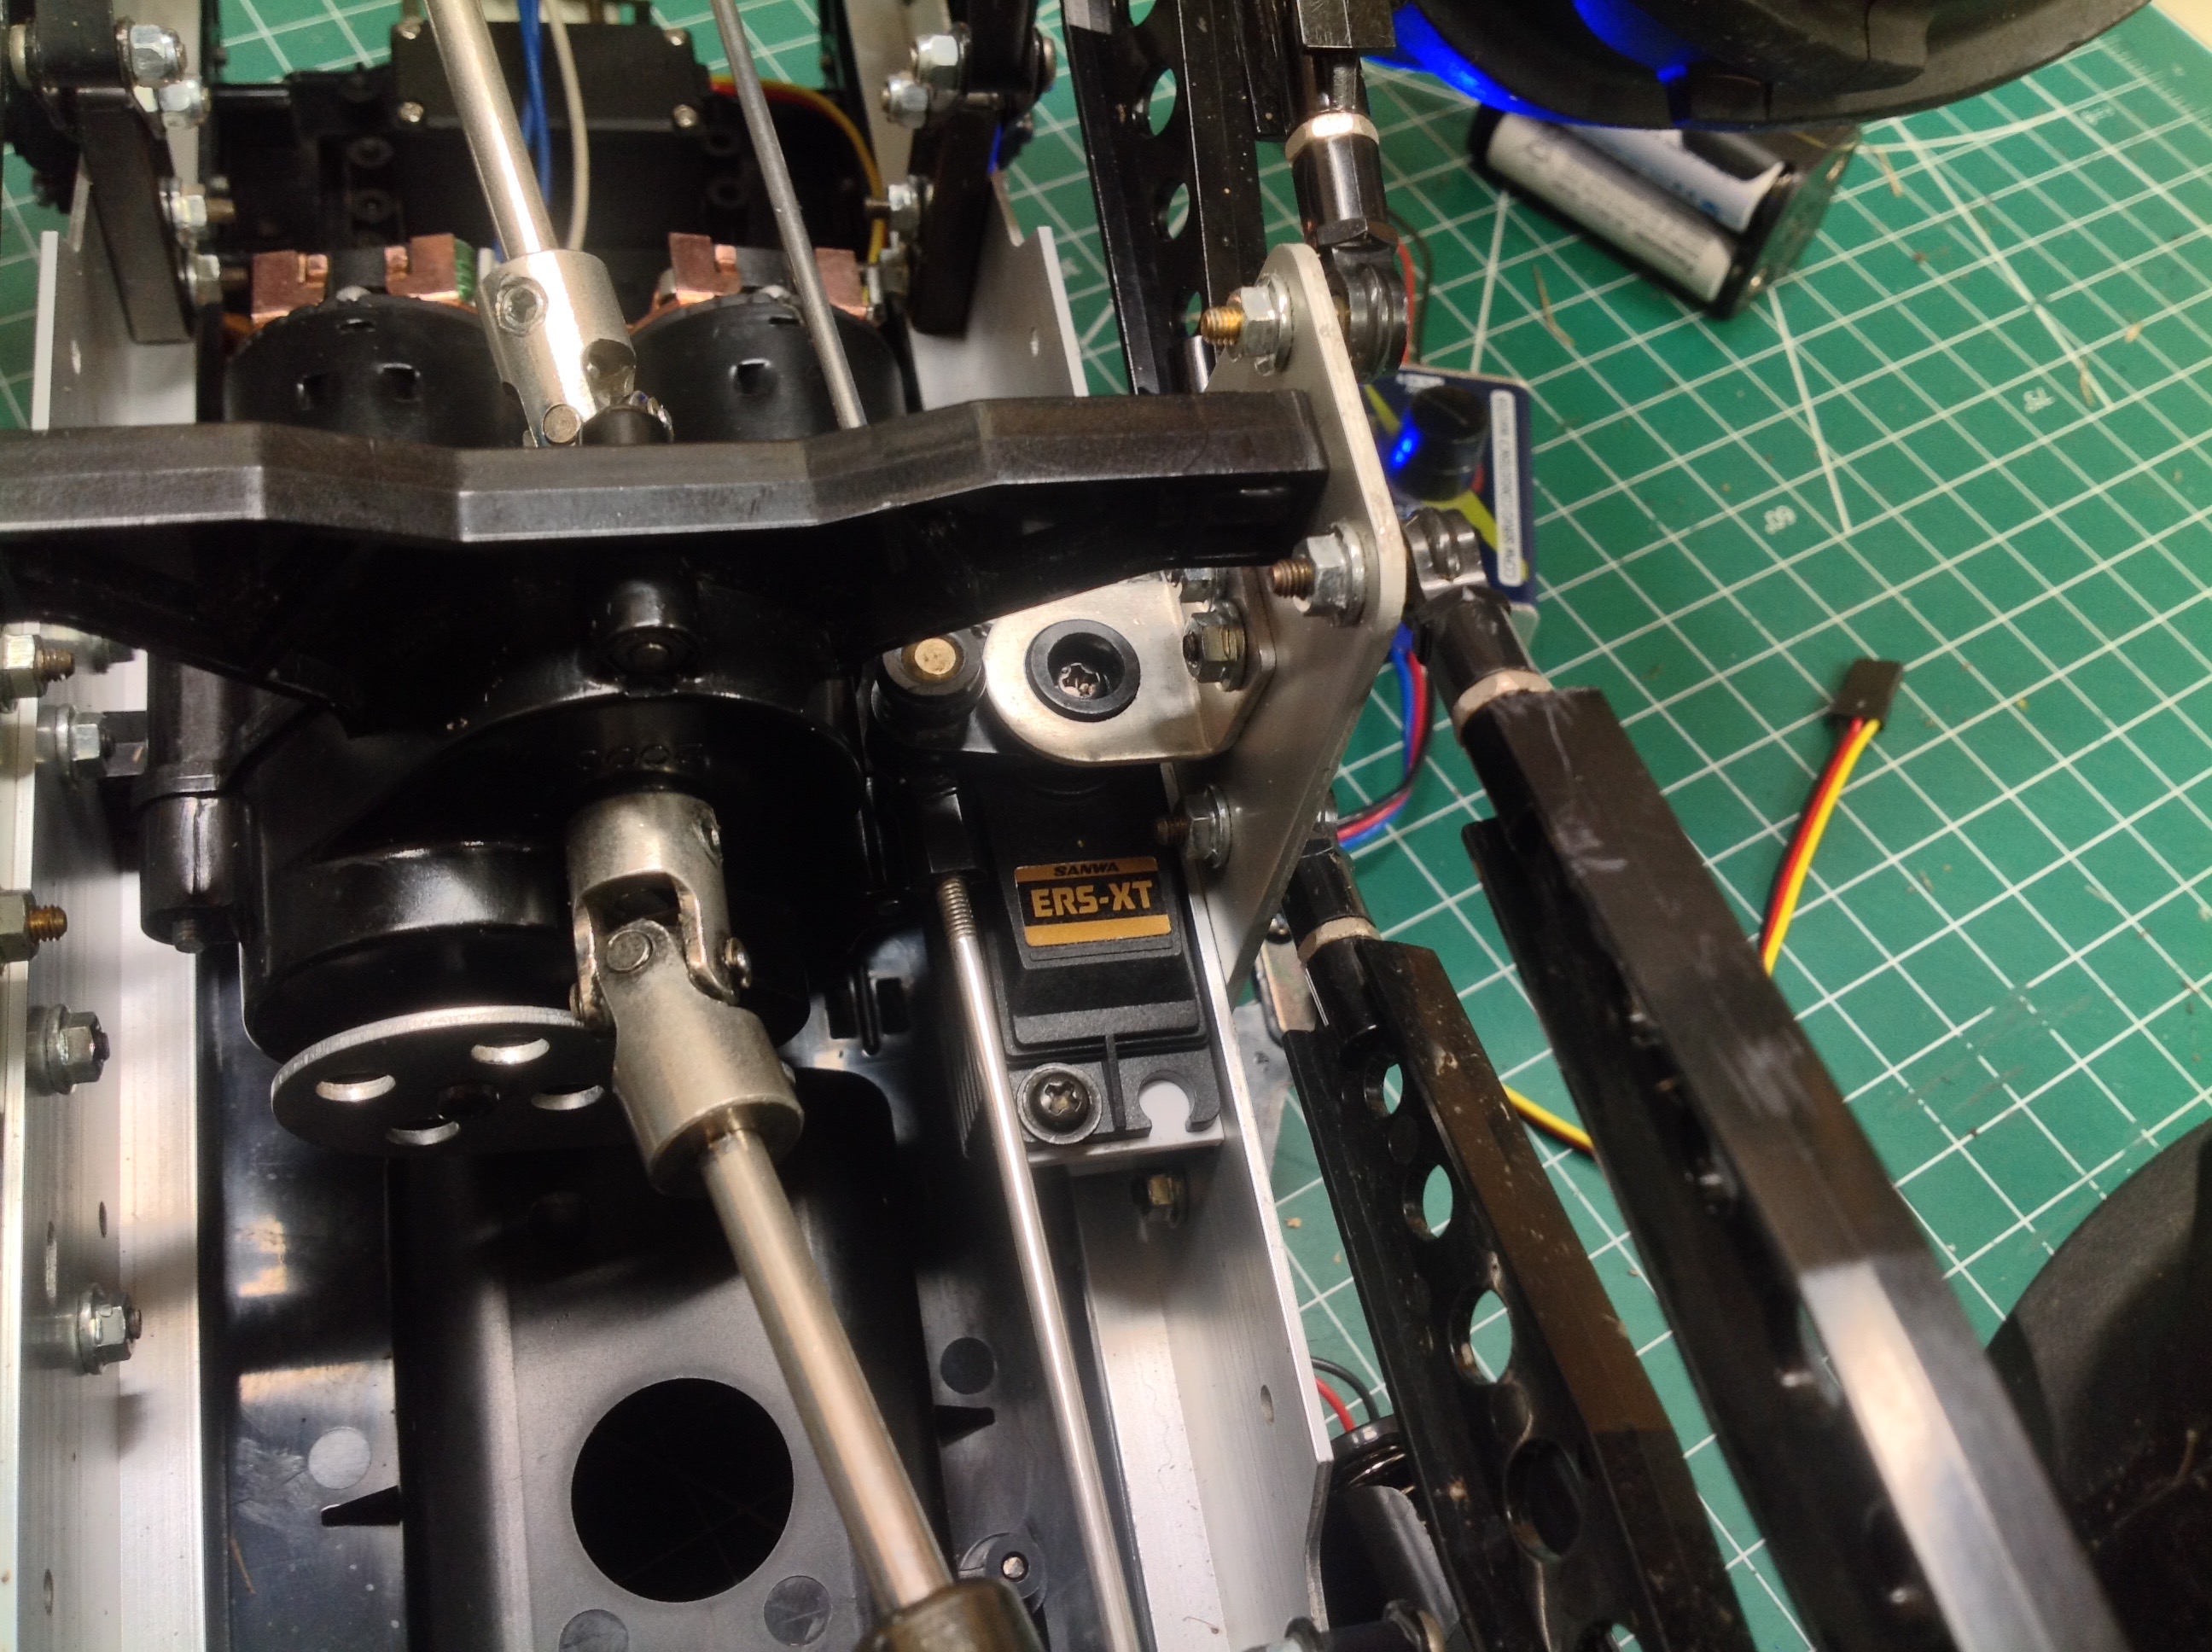
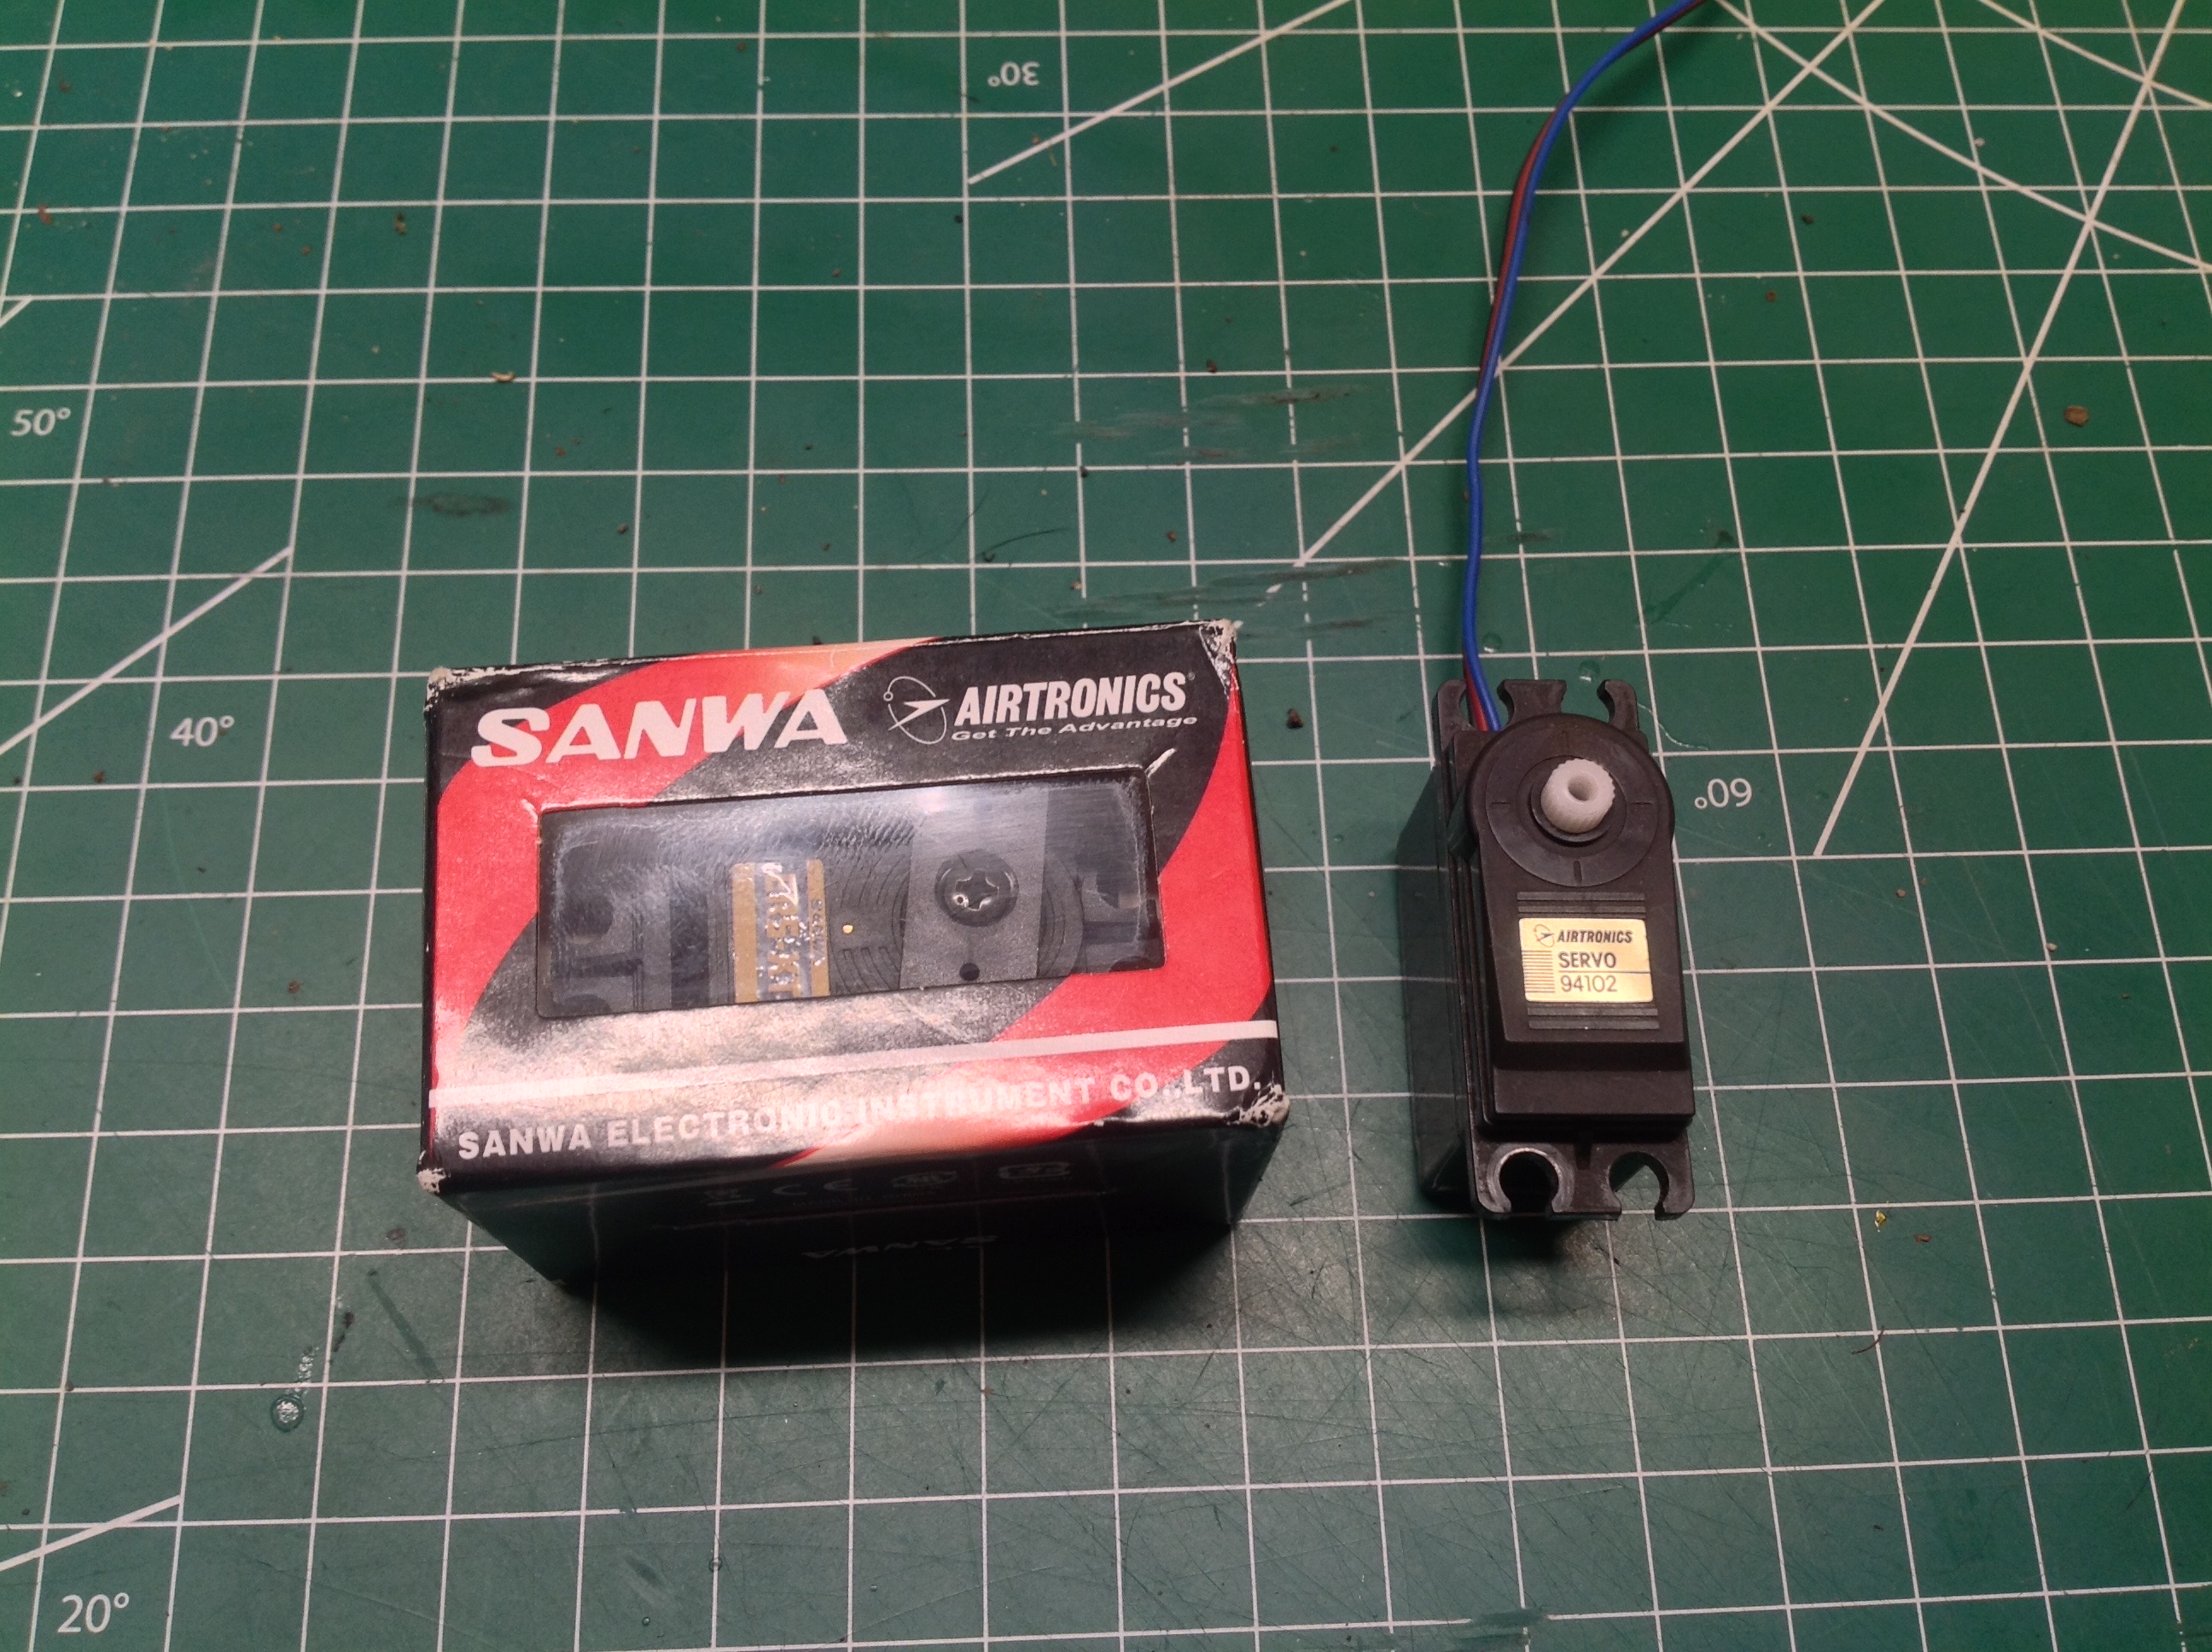
The steering servo presented me with a particular problem. The
Juggernaut chassis does not use a typical servo horn, instead it uses a
custom horn which is braced by a metal bracket with a round guide as
shown on the left. The model I bought used an Airtronics servo
which had a 23 tooth spline. All of the servos I would normally
use have a 25 tooth spline. No problem if you are building from
scratch since the kit comes with both 23T and 25T horns, but because I
bought the model second hand I did not have the alternate 25T
horn. Since this parts tree is unique to the Juggernaut, getting a
replacement horn is not viable. This meant I needed to find a
modern Airtronics servo with a 23 tooth spline so I could use the old
horn. This brand virtually does not exist in the USA, but I was
able to order a digital Airtronics servo from a seller in Italy shown on
the right. It took a month to arrive, but my Juggernaut now has
8.5x more steering torque than when I bought it.
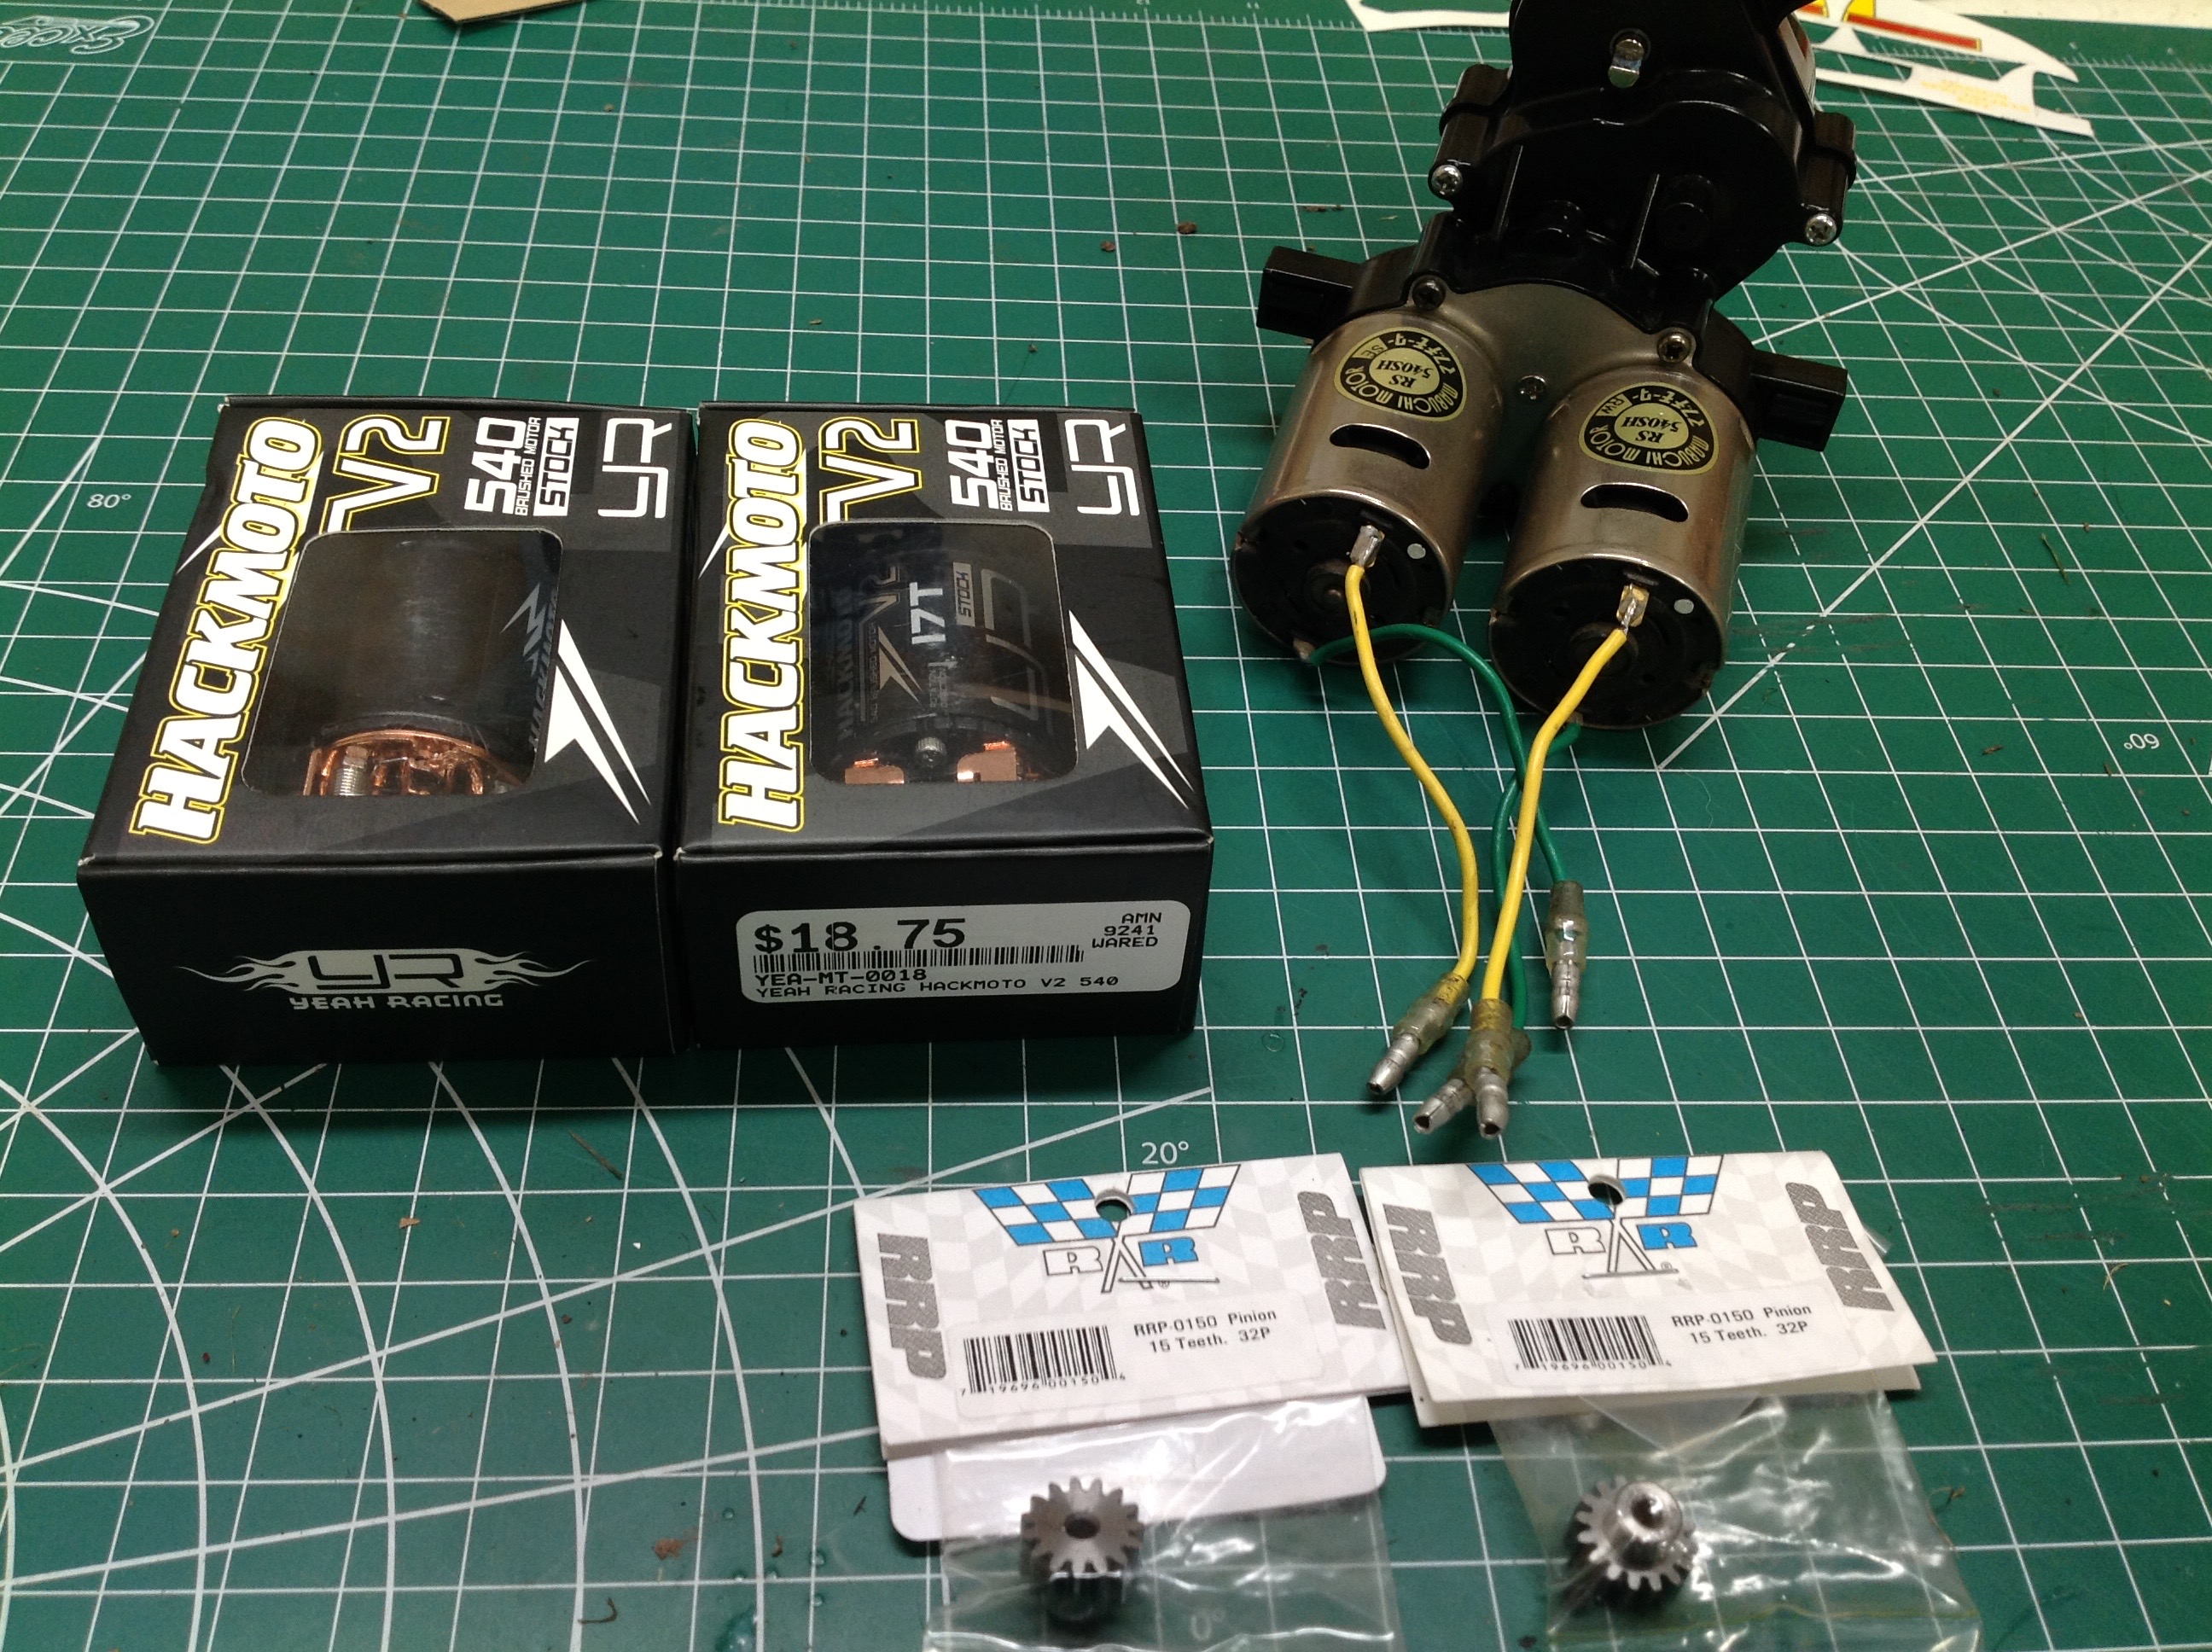
While bumbling about my local hobby store one day during the build, I
noticed these inexpensive new brushed motors from Yeah Racing. I
thought putting in a pair of 17 turn motors along with steel pinions was
a good opportunity to improve the speed and torque of my model given
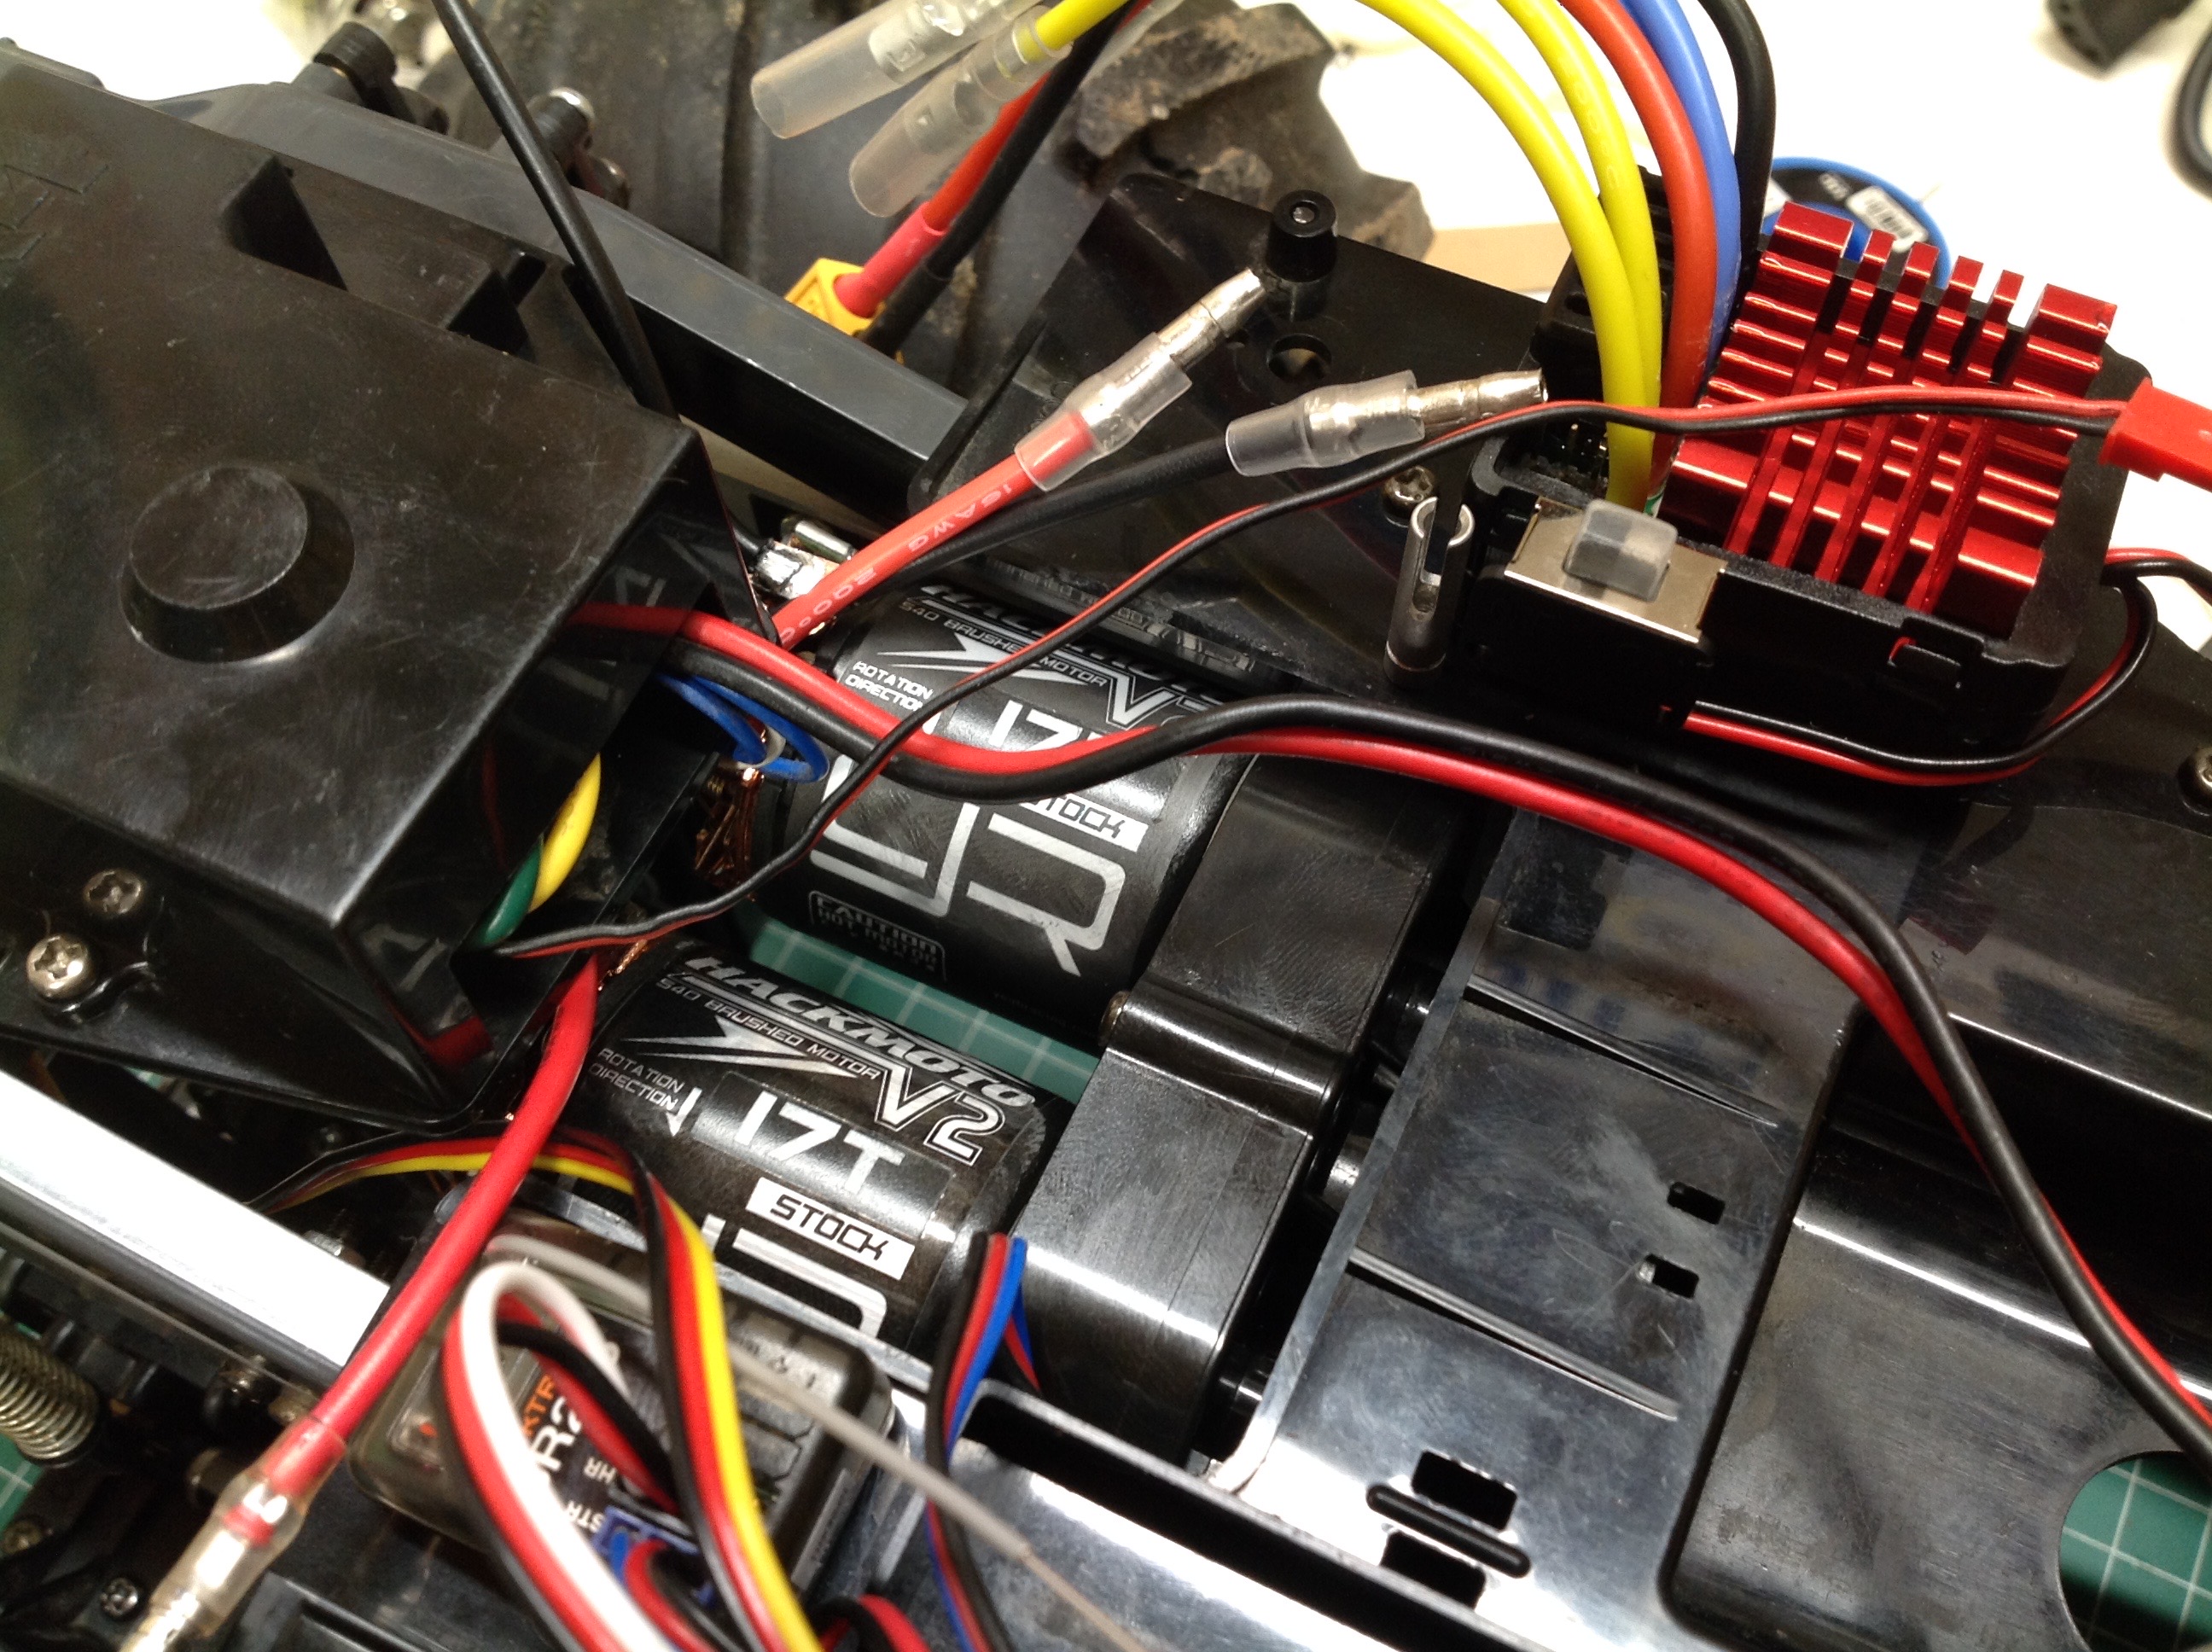
that the Hobbywing dual motor ESC I am using could support the
current. It was a good call. These motors may be cheap but
they bring the performance of the truck to a whole new level.
Highly recommended. Note that a Tamiya TEU-106BK dual motor
controller like the one that comes with the Super Clodbuster would not
be able to drive these motors.
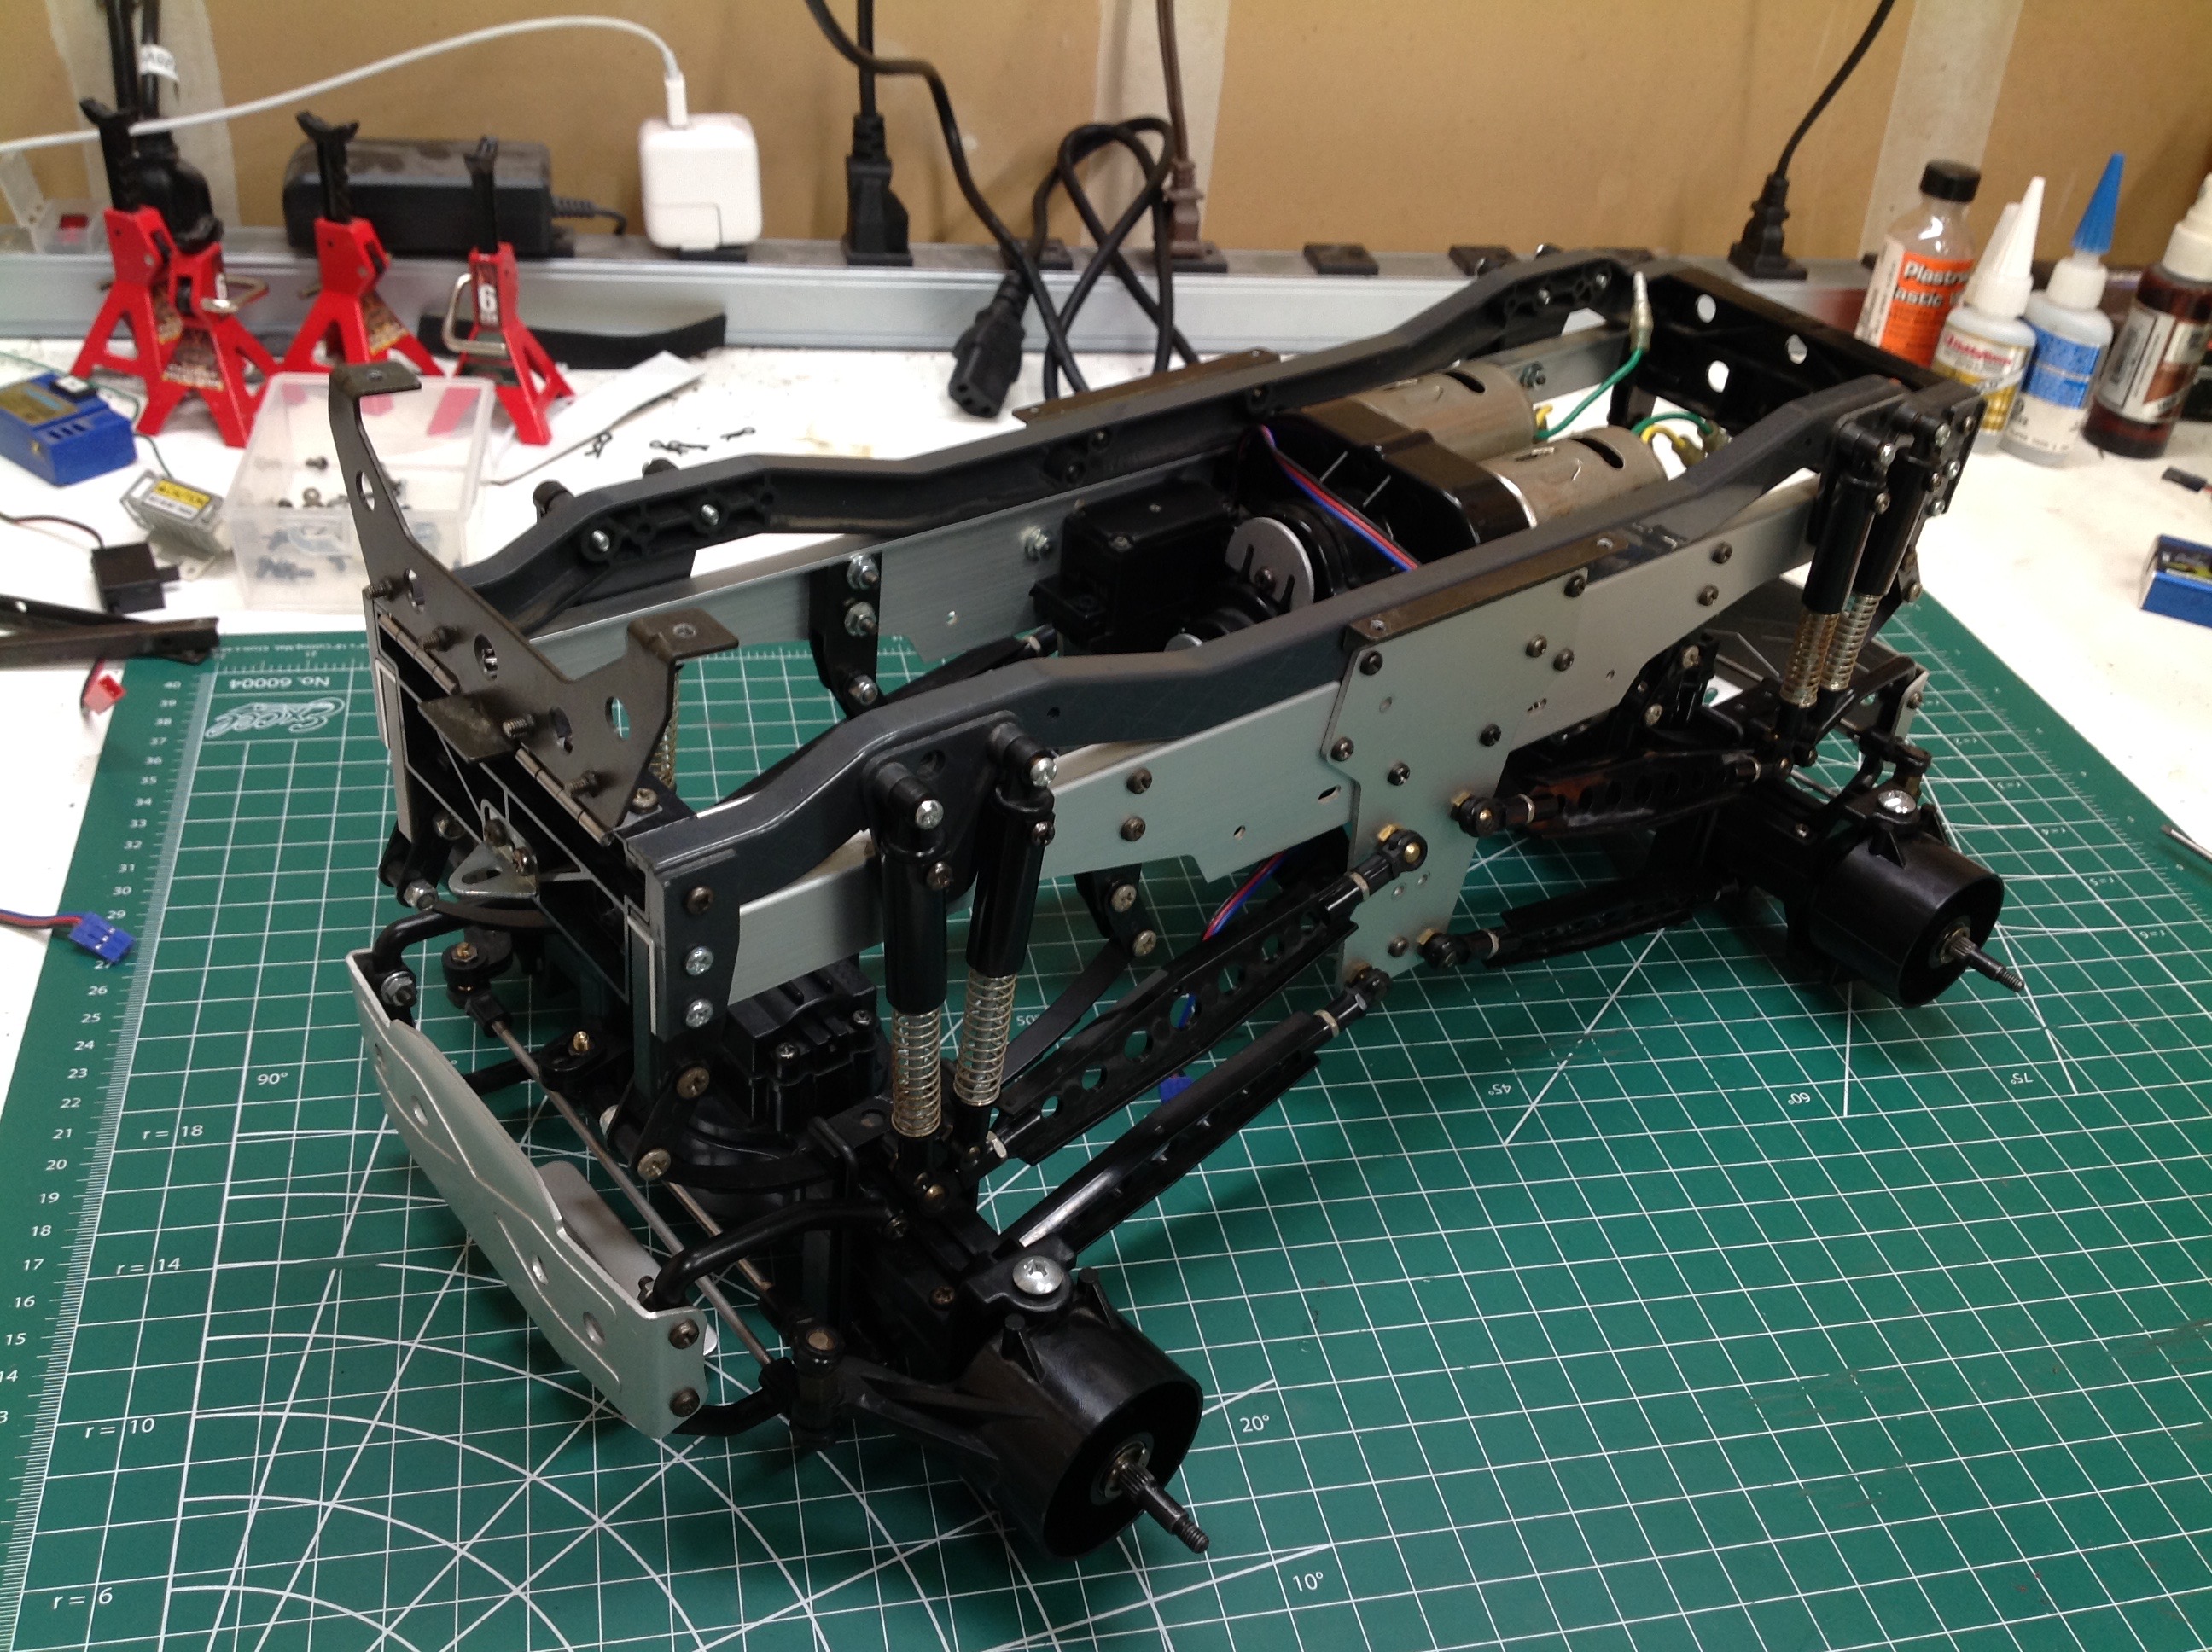
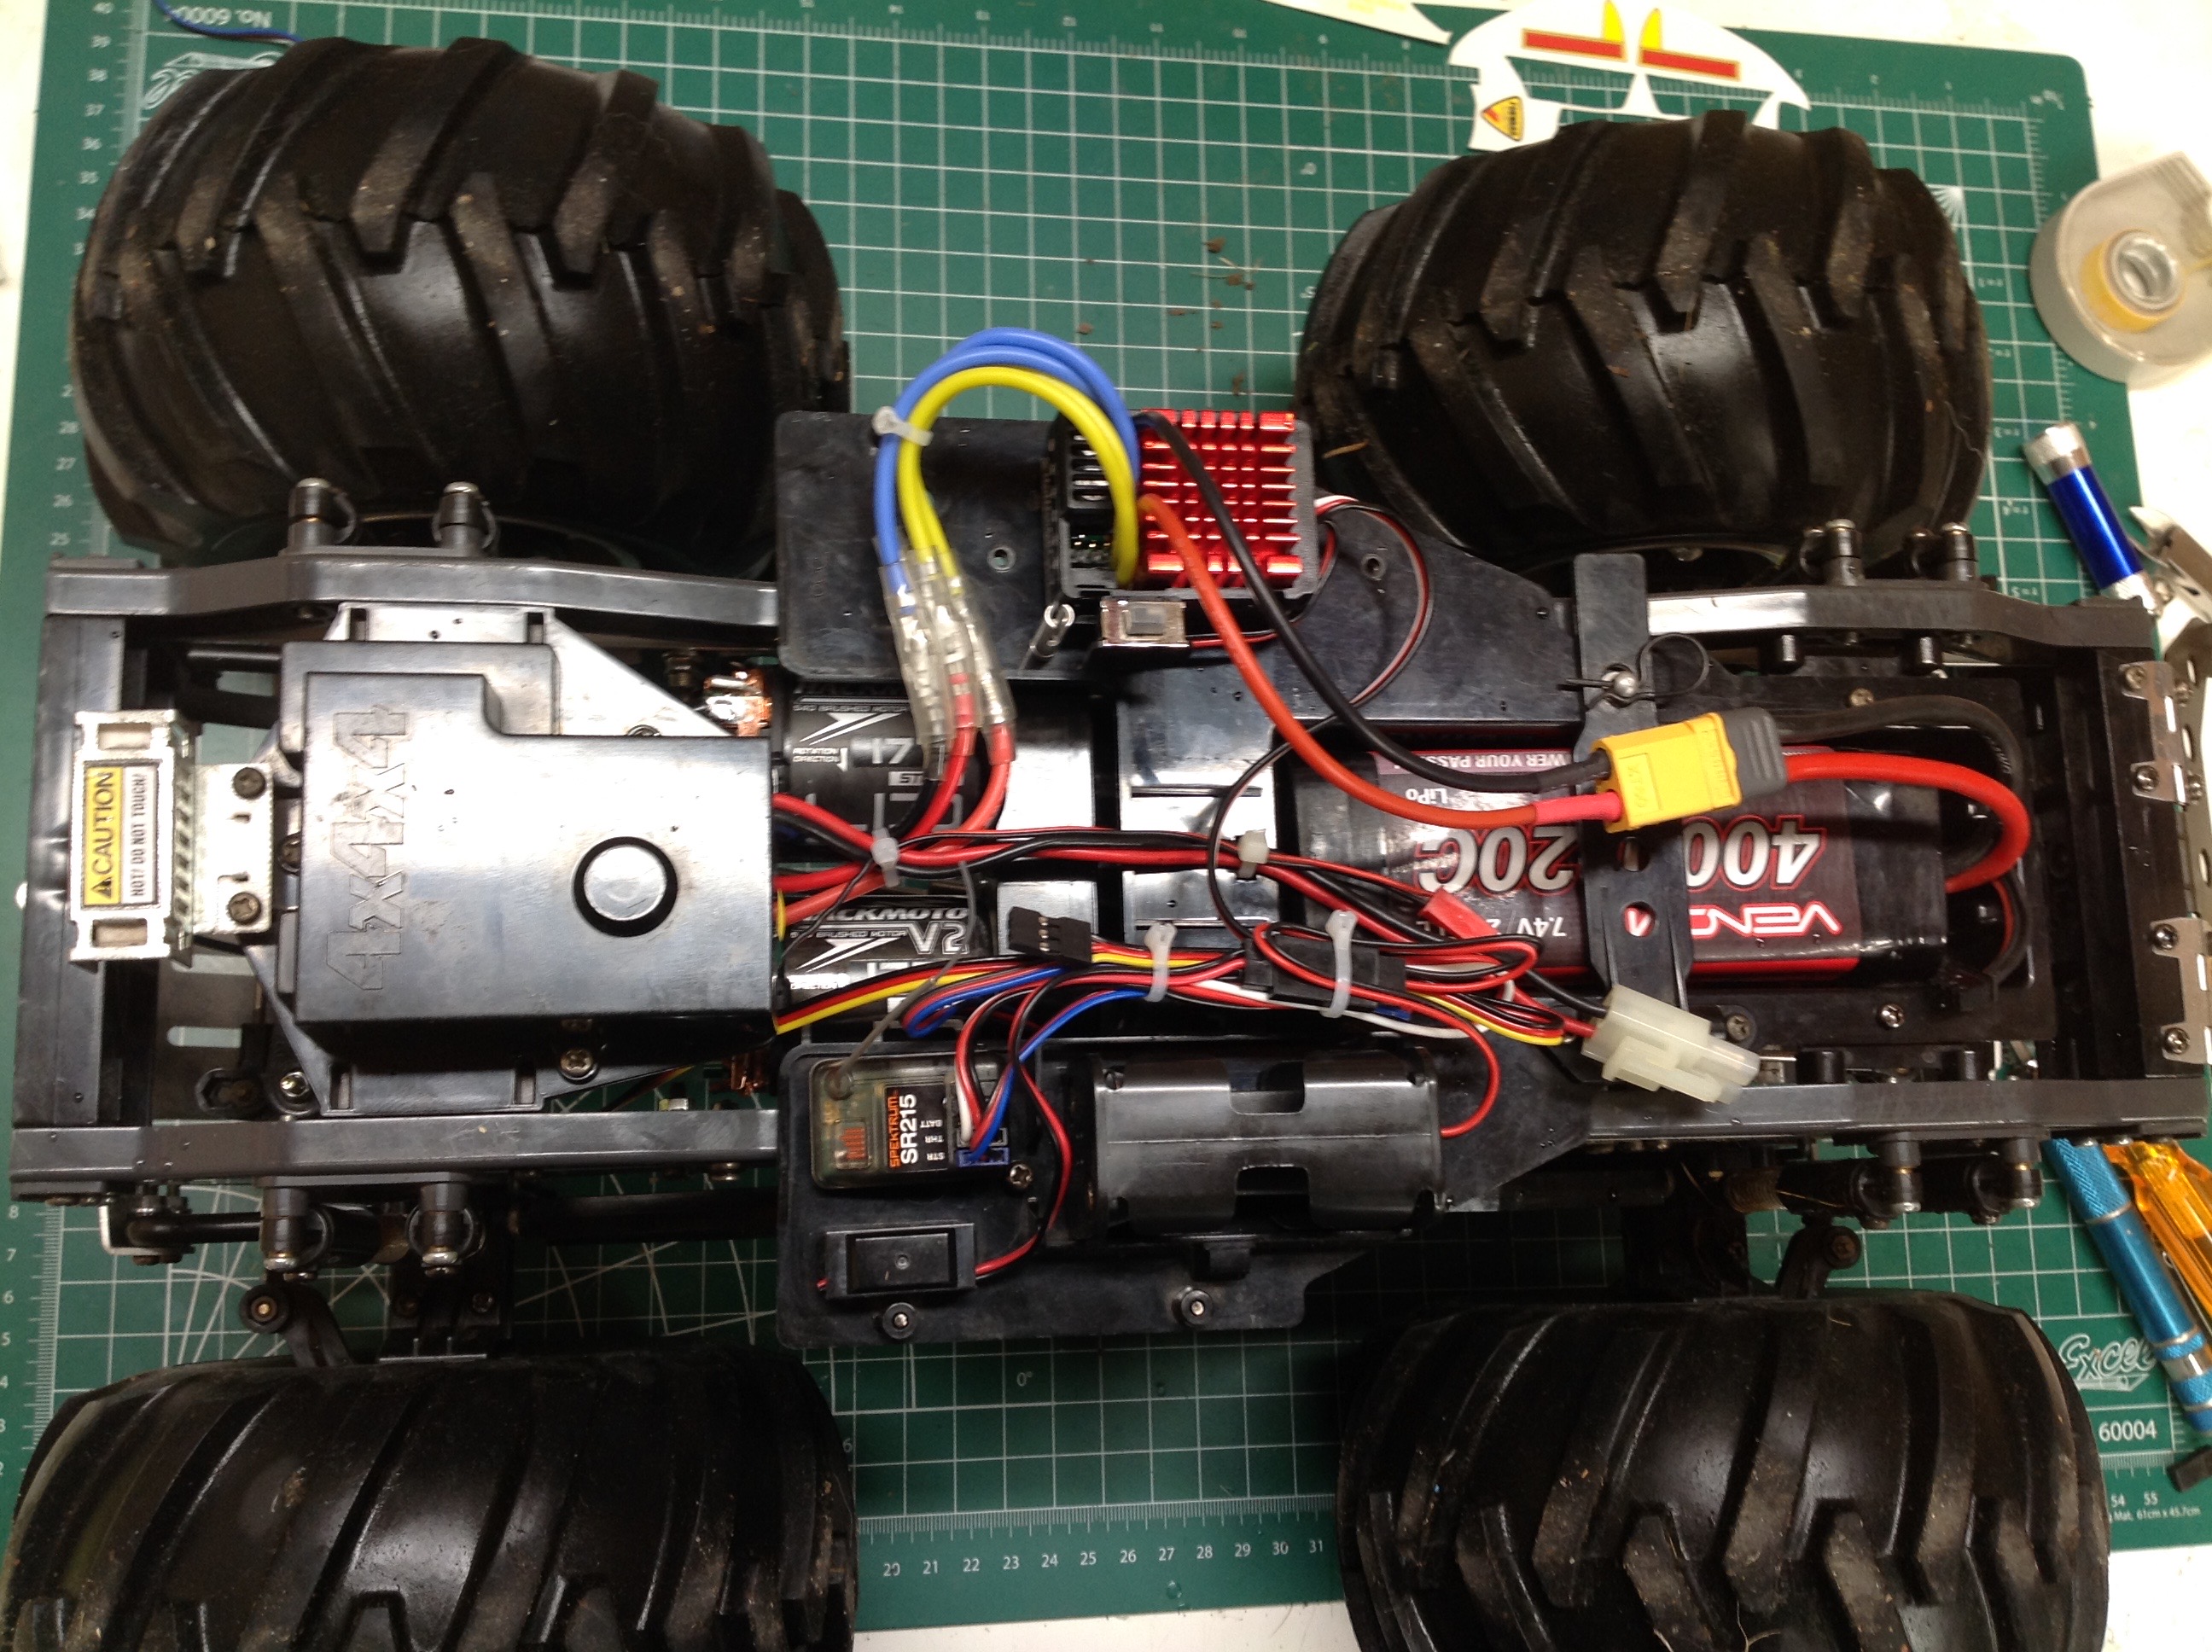
Here's the completed chassis before and after the electronics were
installed. Most of the wiring you see is vestigial from the now
defunct MSC system. The shine you see on the tires is the residue
of the glycerin I used to revive them. At the time the Juggernaut was
new, you could get upgraded metal suspension links and oil shocks for
it, but they have become very difficult to find and expensive if you can
find them. For now, I am stuck with plastic links and useless
friction dampers. Given how stiff the leaf springs are, the
dampers are pretty much irrelevant anyway.
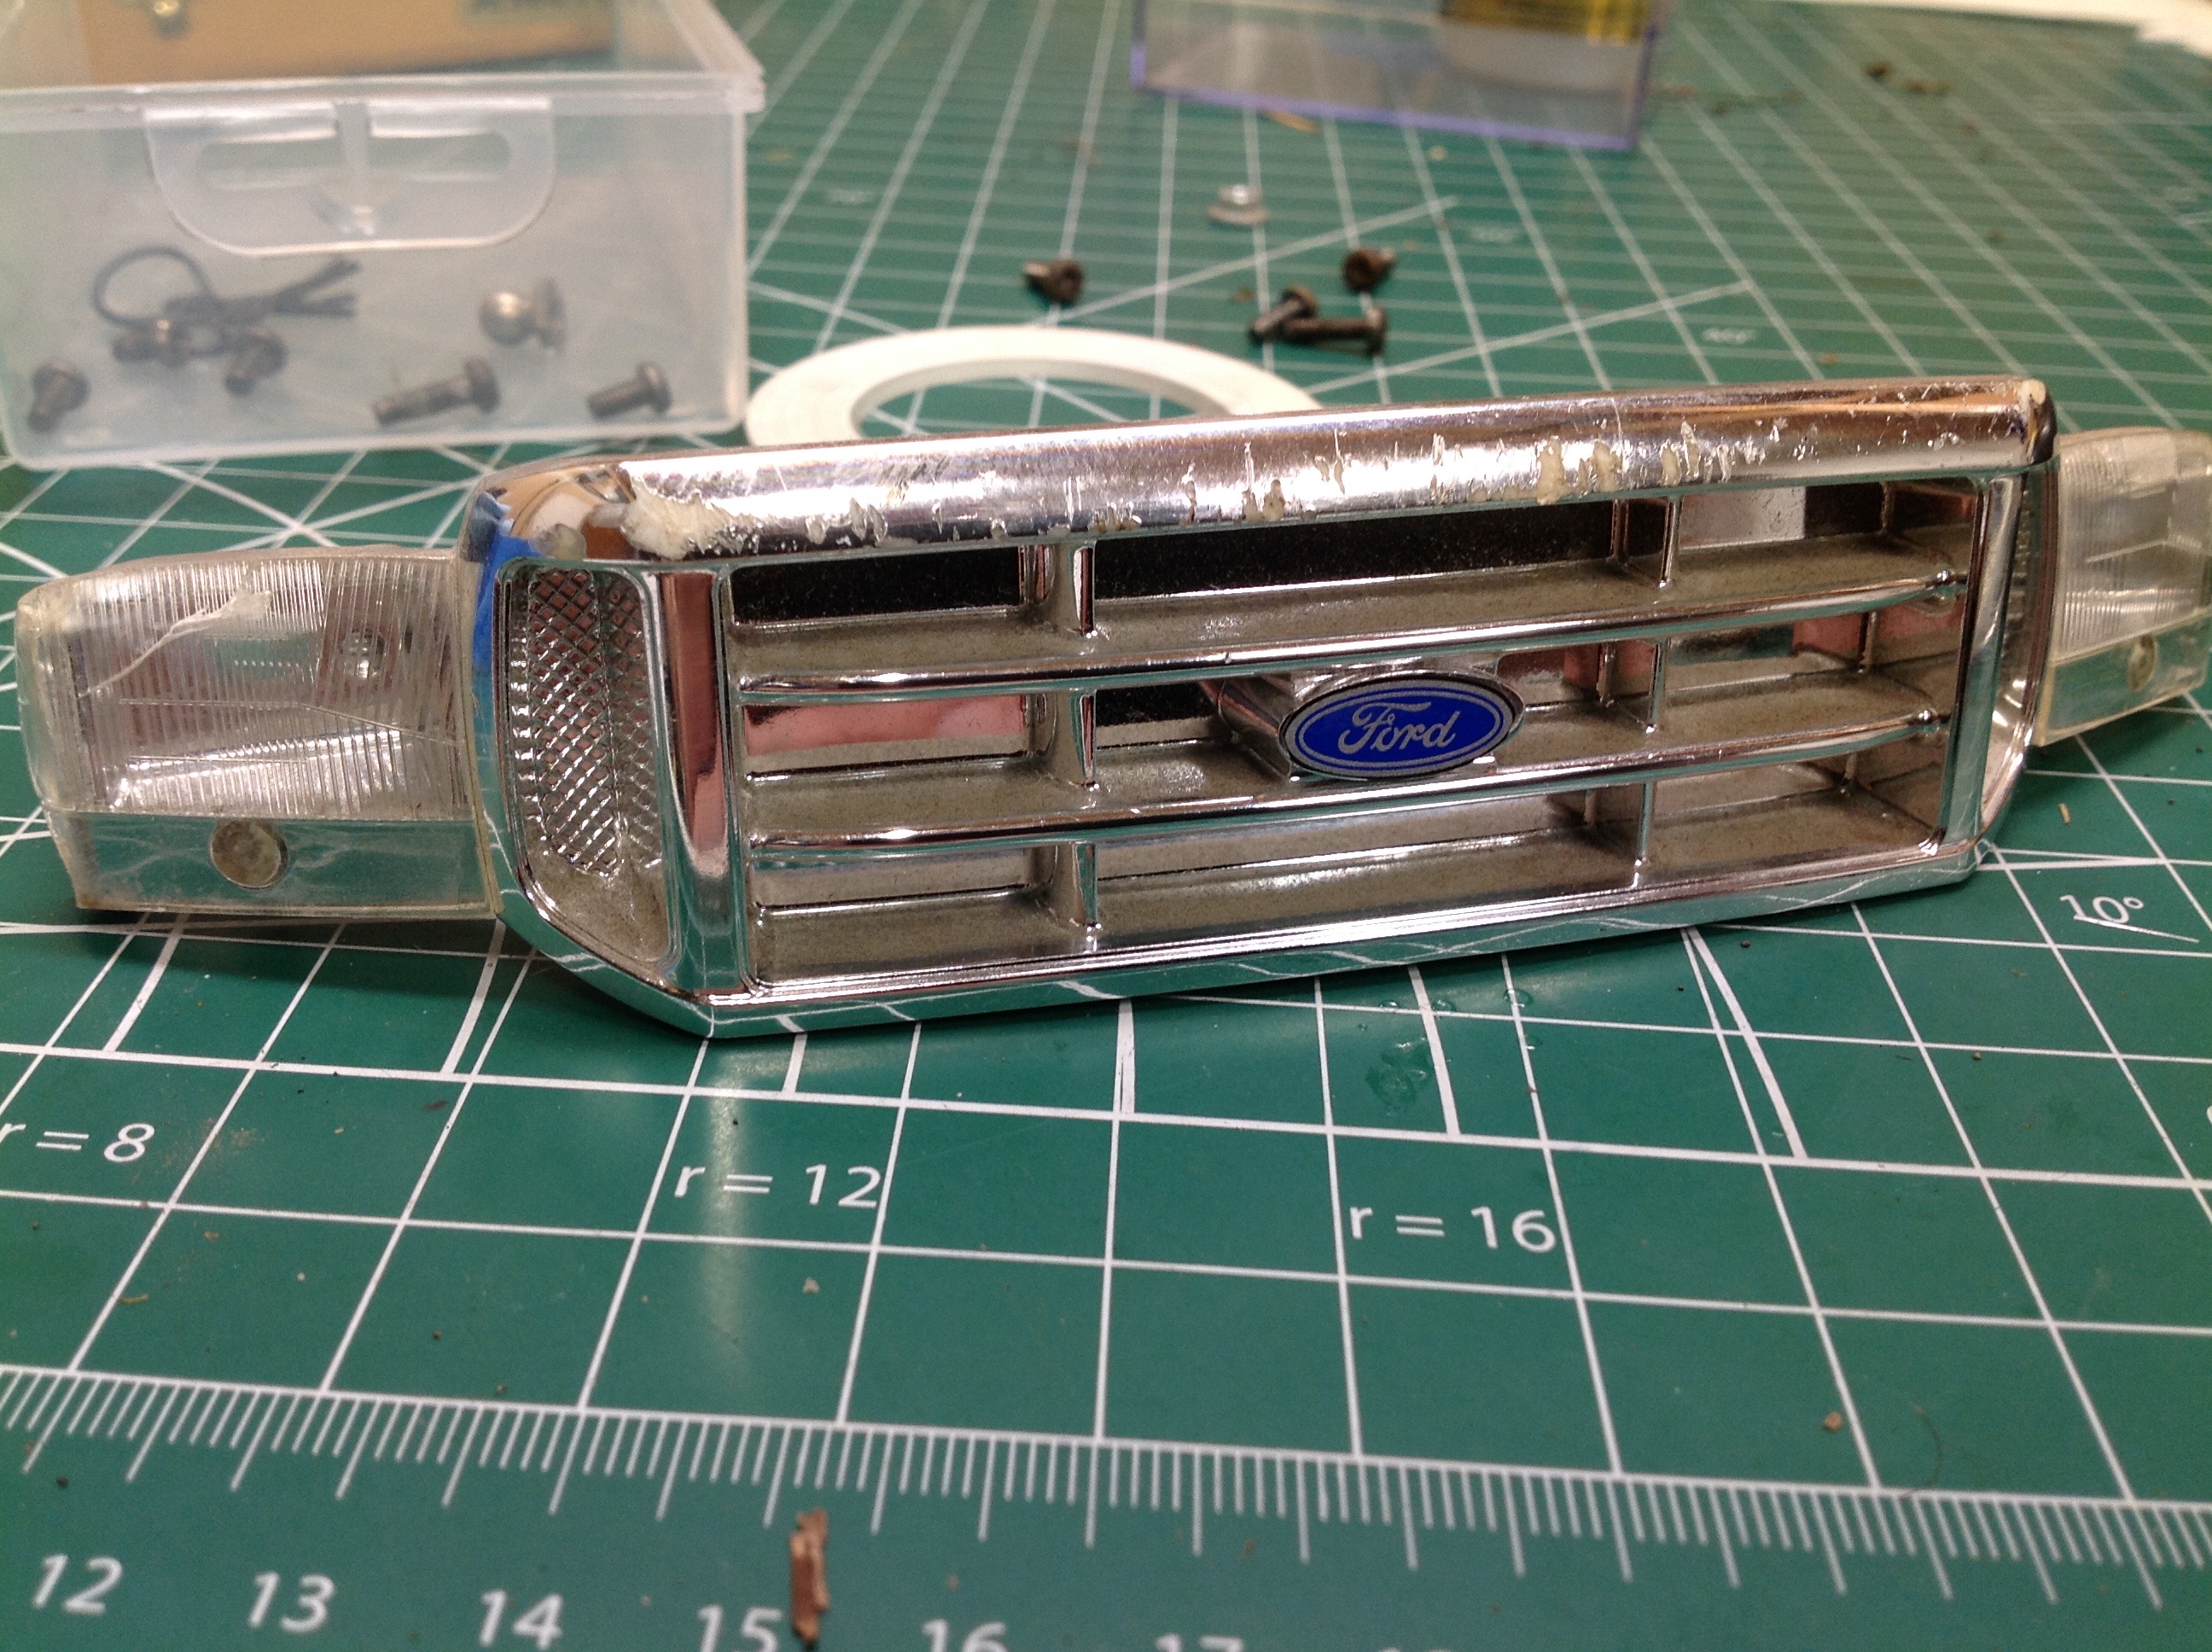
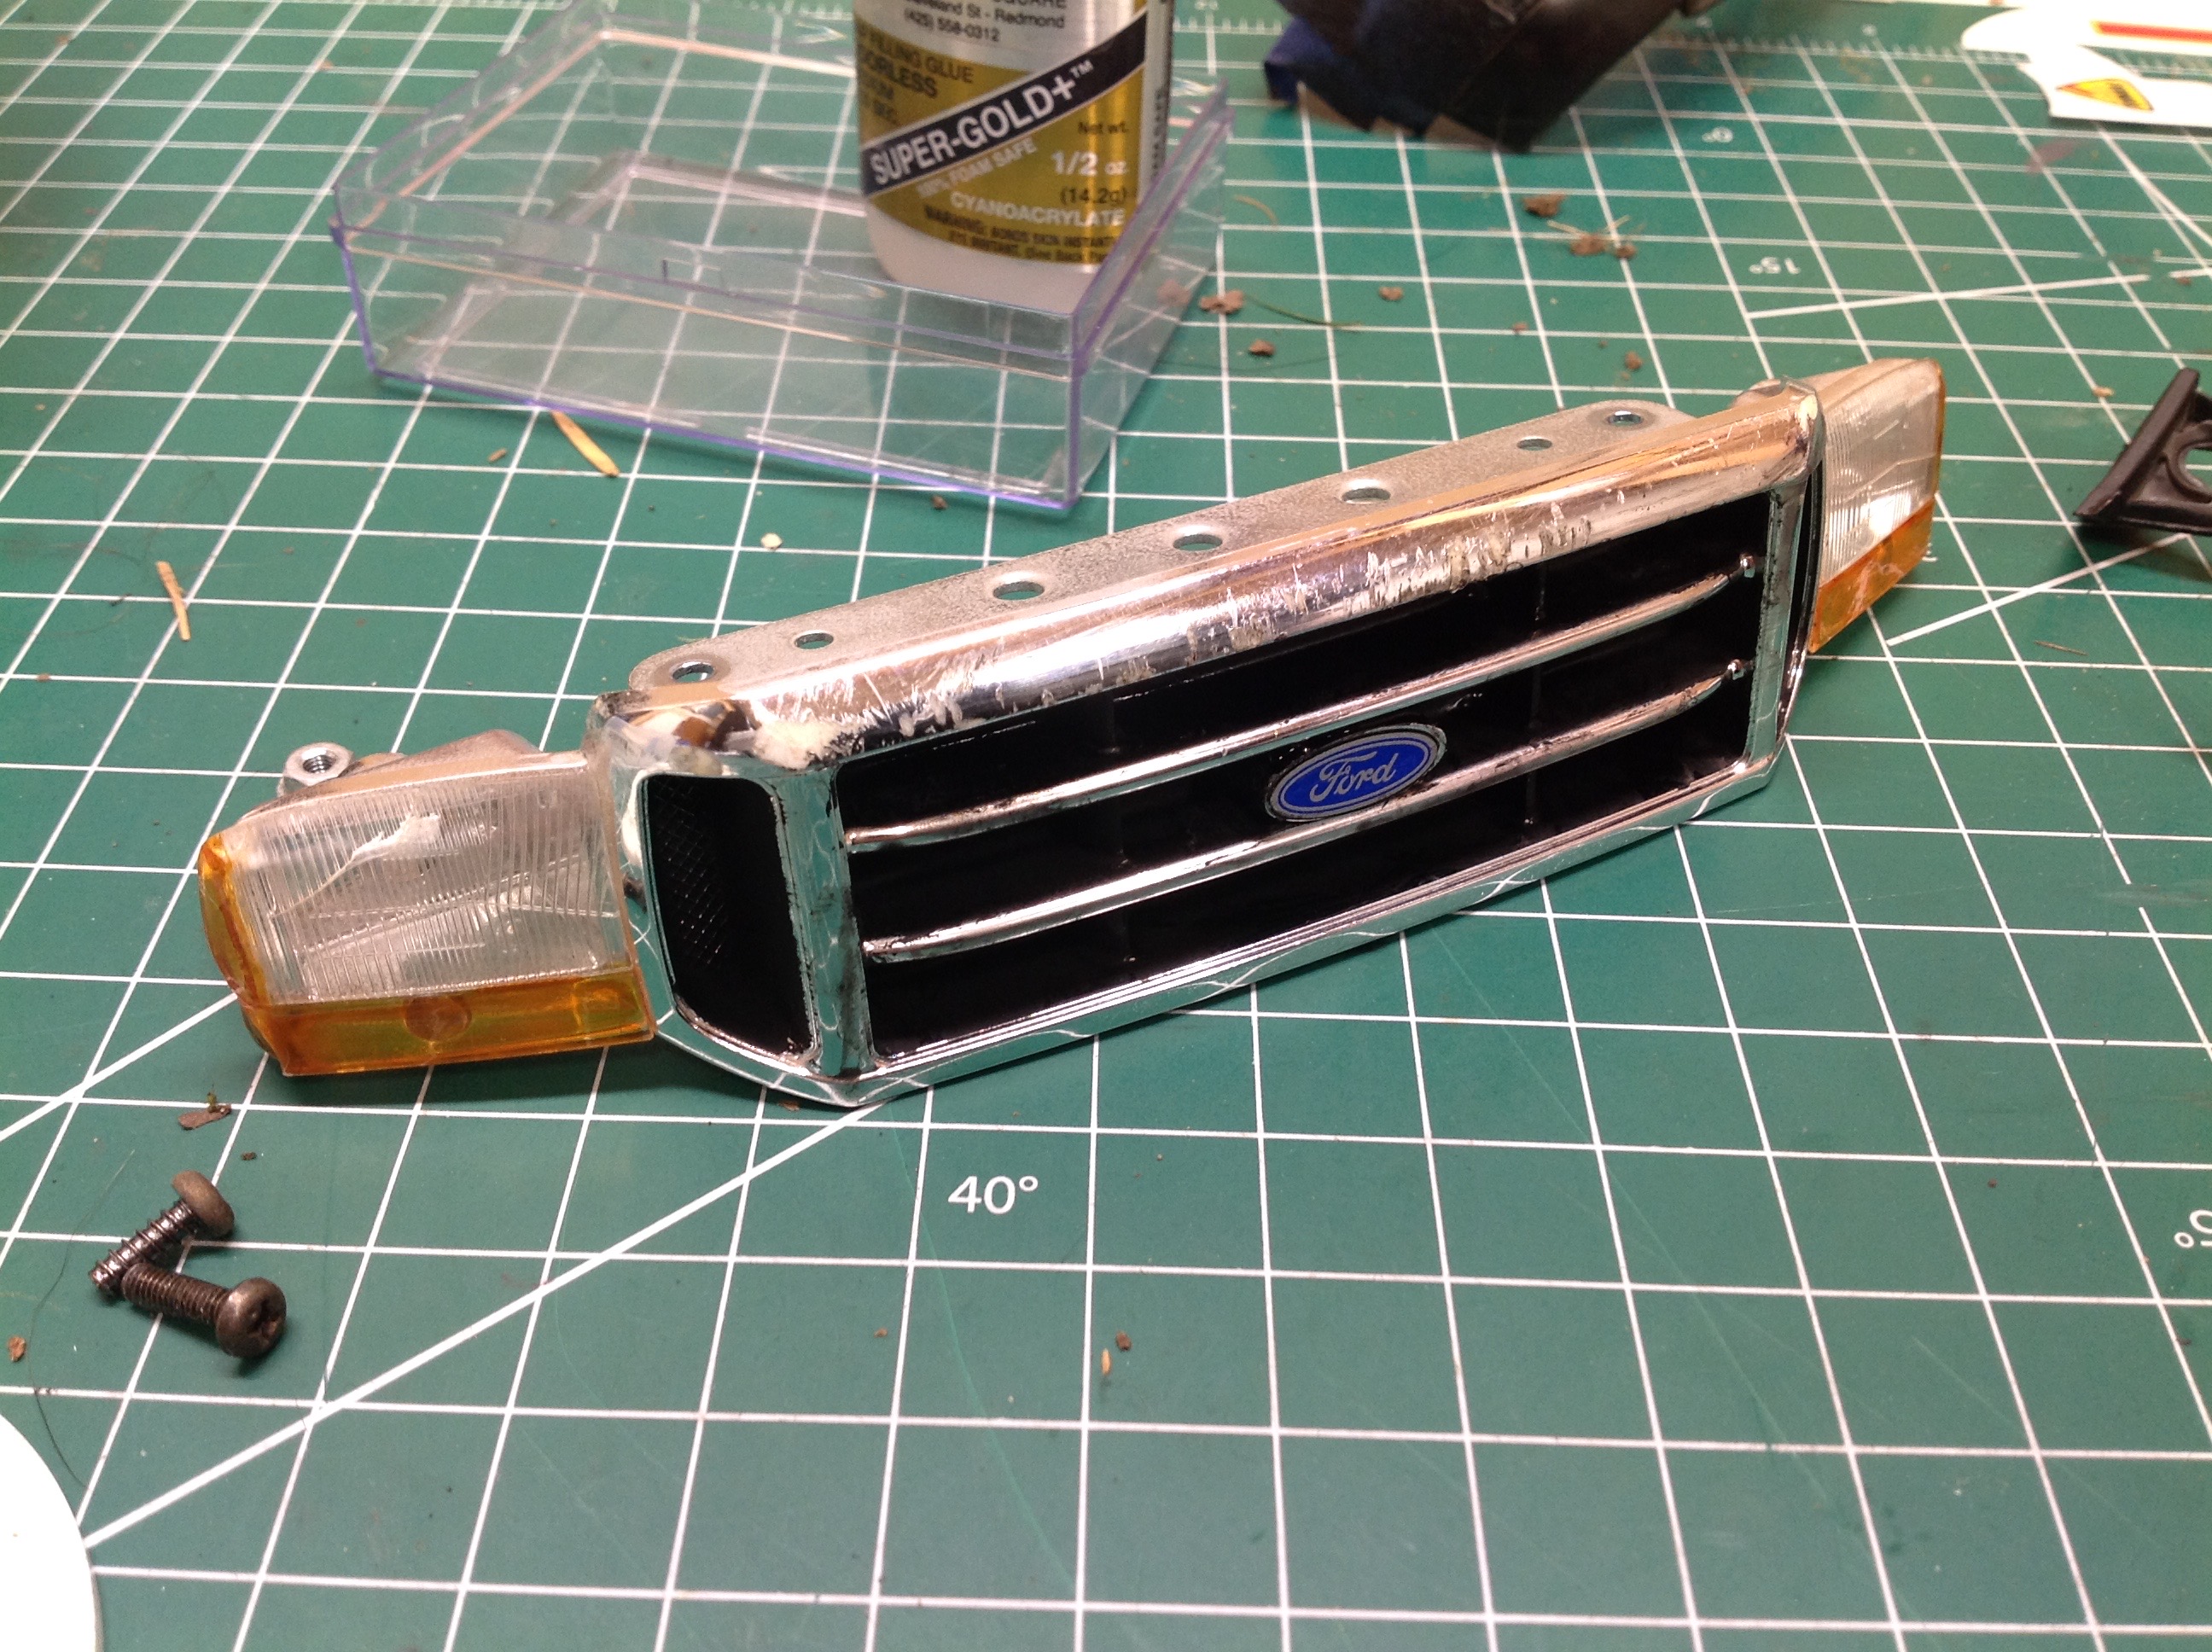
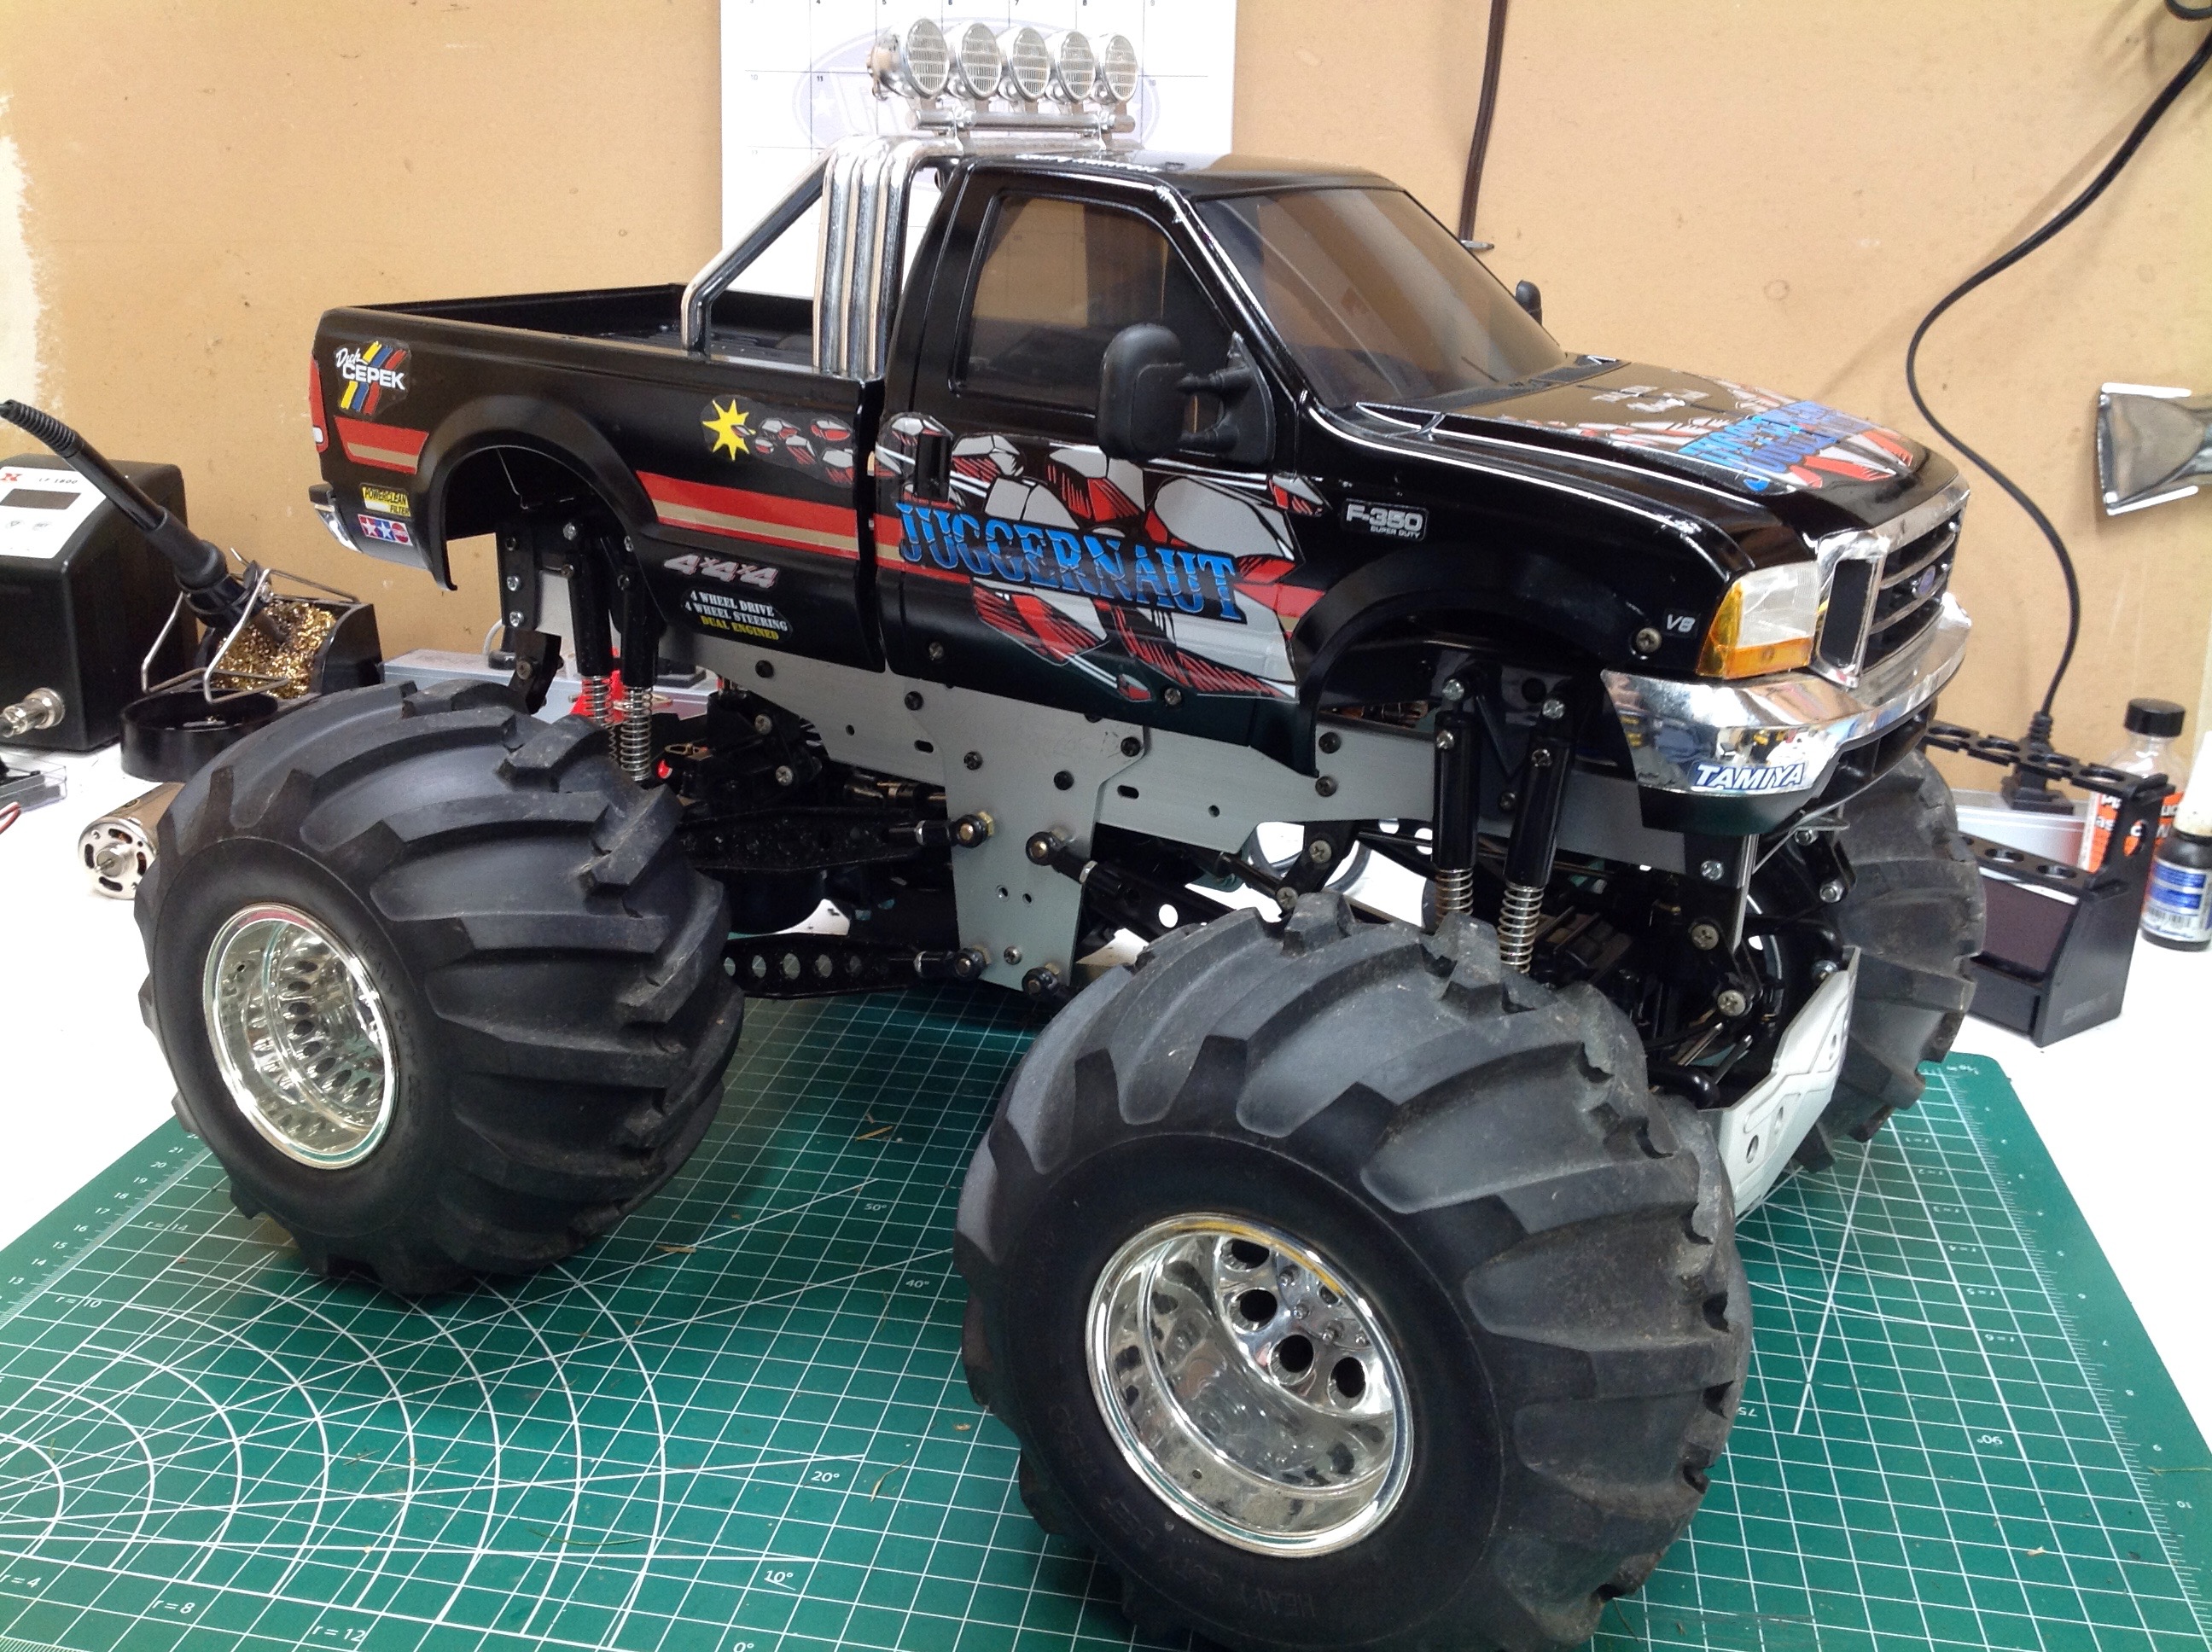
The original grille had never been painted. The MCI sticker sheet I
bought did not include the Ford logo, so that meant I needed to reuse
the old one. I removed it as carefully as I could and preserved
it, then painted the black areas and the amber on the light
lenses. The turn signals are intended to be stickers, but I like
the look of transparency much better.
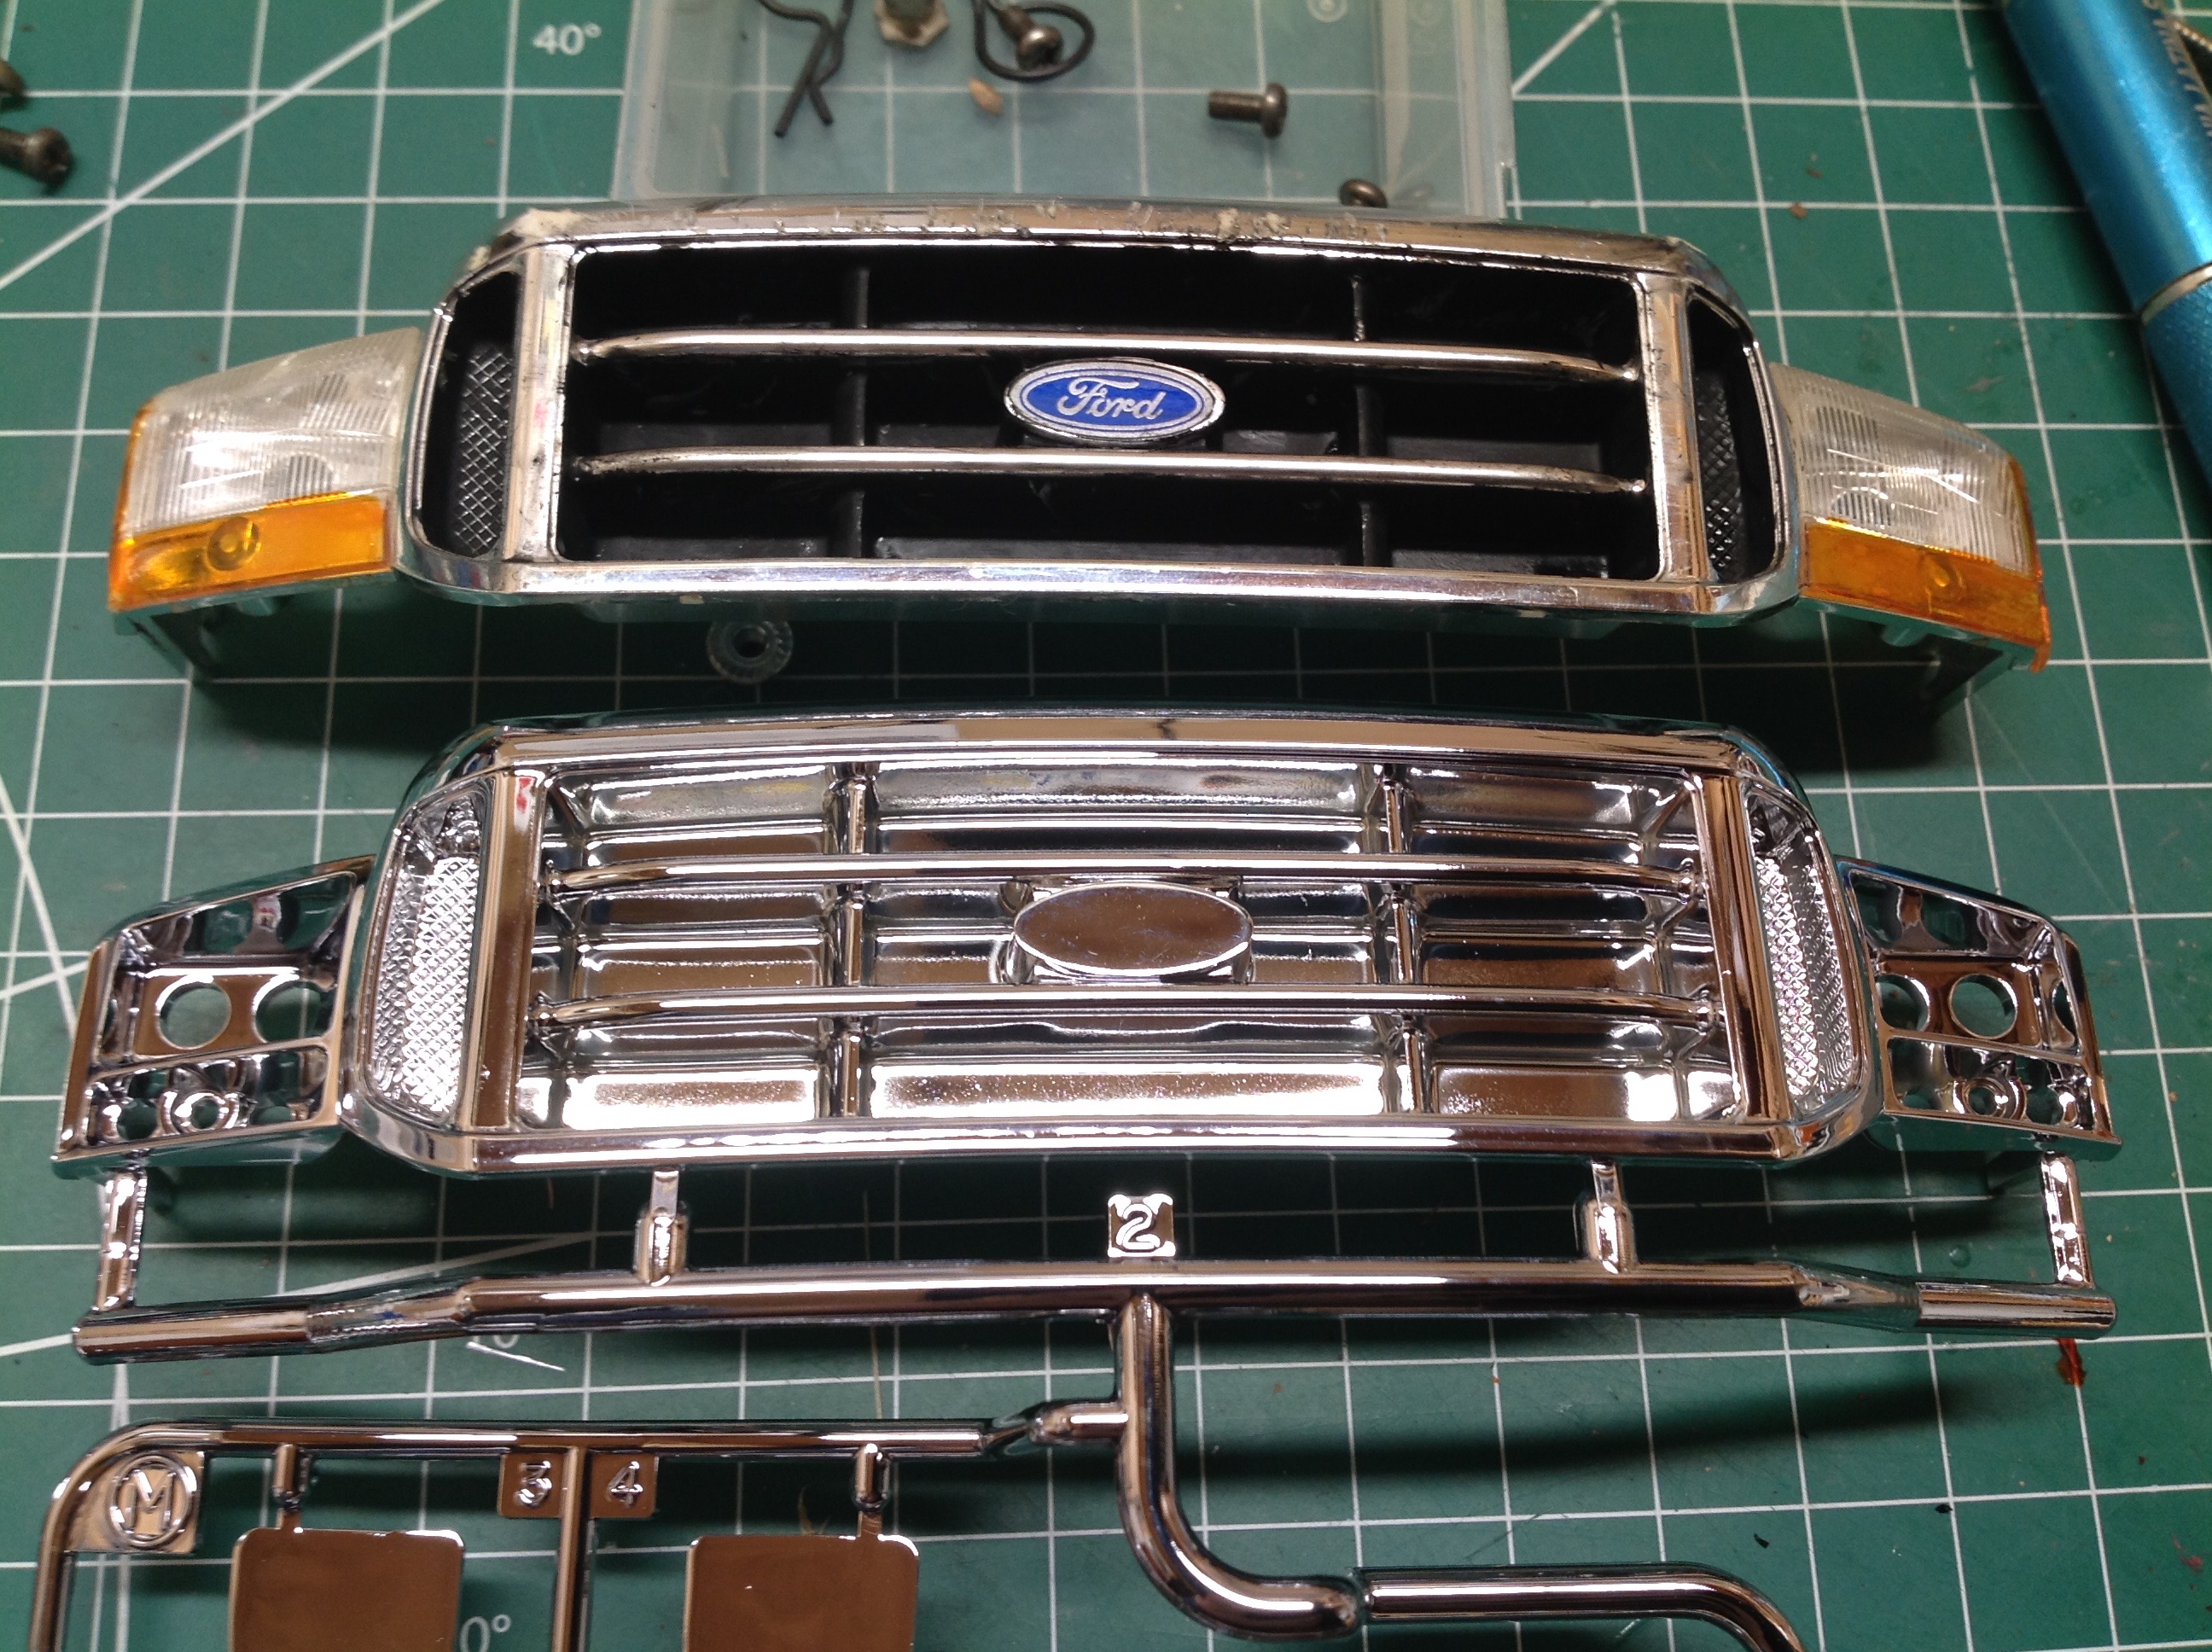
Because the Juggernaut 2 chrome is so scratched, I had originally
intended to replace the bumpers and grille with new parts from the
Highlift F-350 and had acquired the parts for that purpose.
However, it turns out the parts are not the same. On the left you
can see the grilles. The upper is from the Jugg, the lower is from
the Highlift. Apart from the obvious fact that I haven't painted
the bottom one, the distribution of light buckets is also
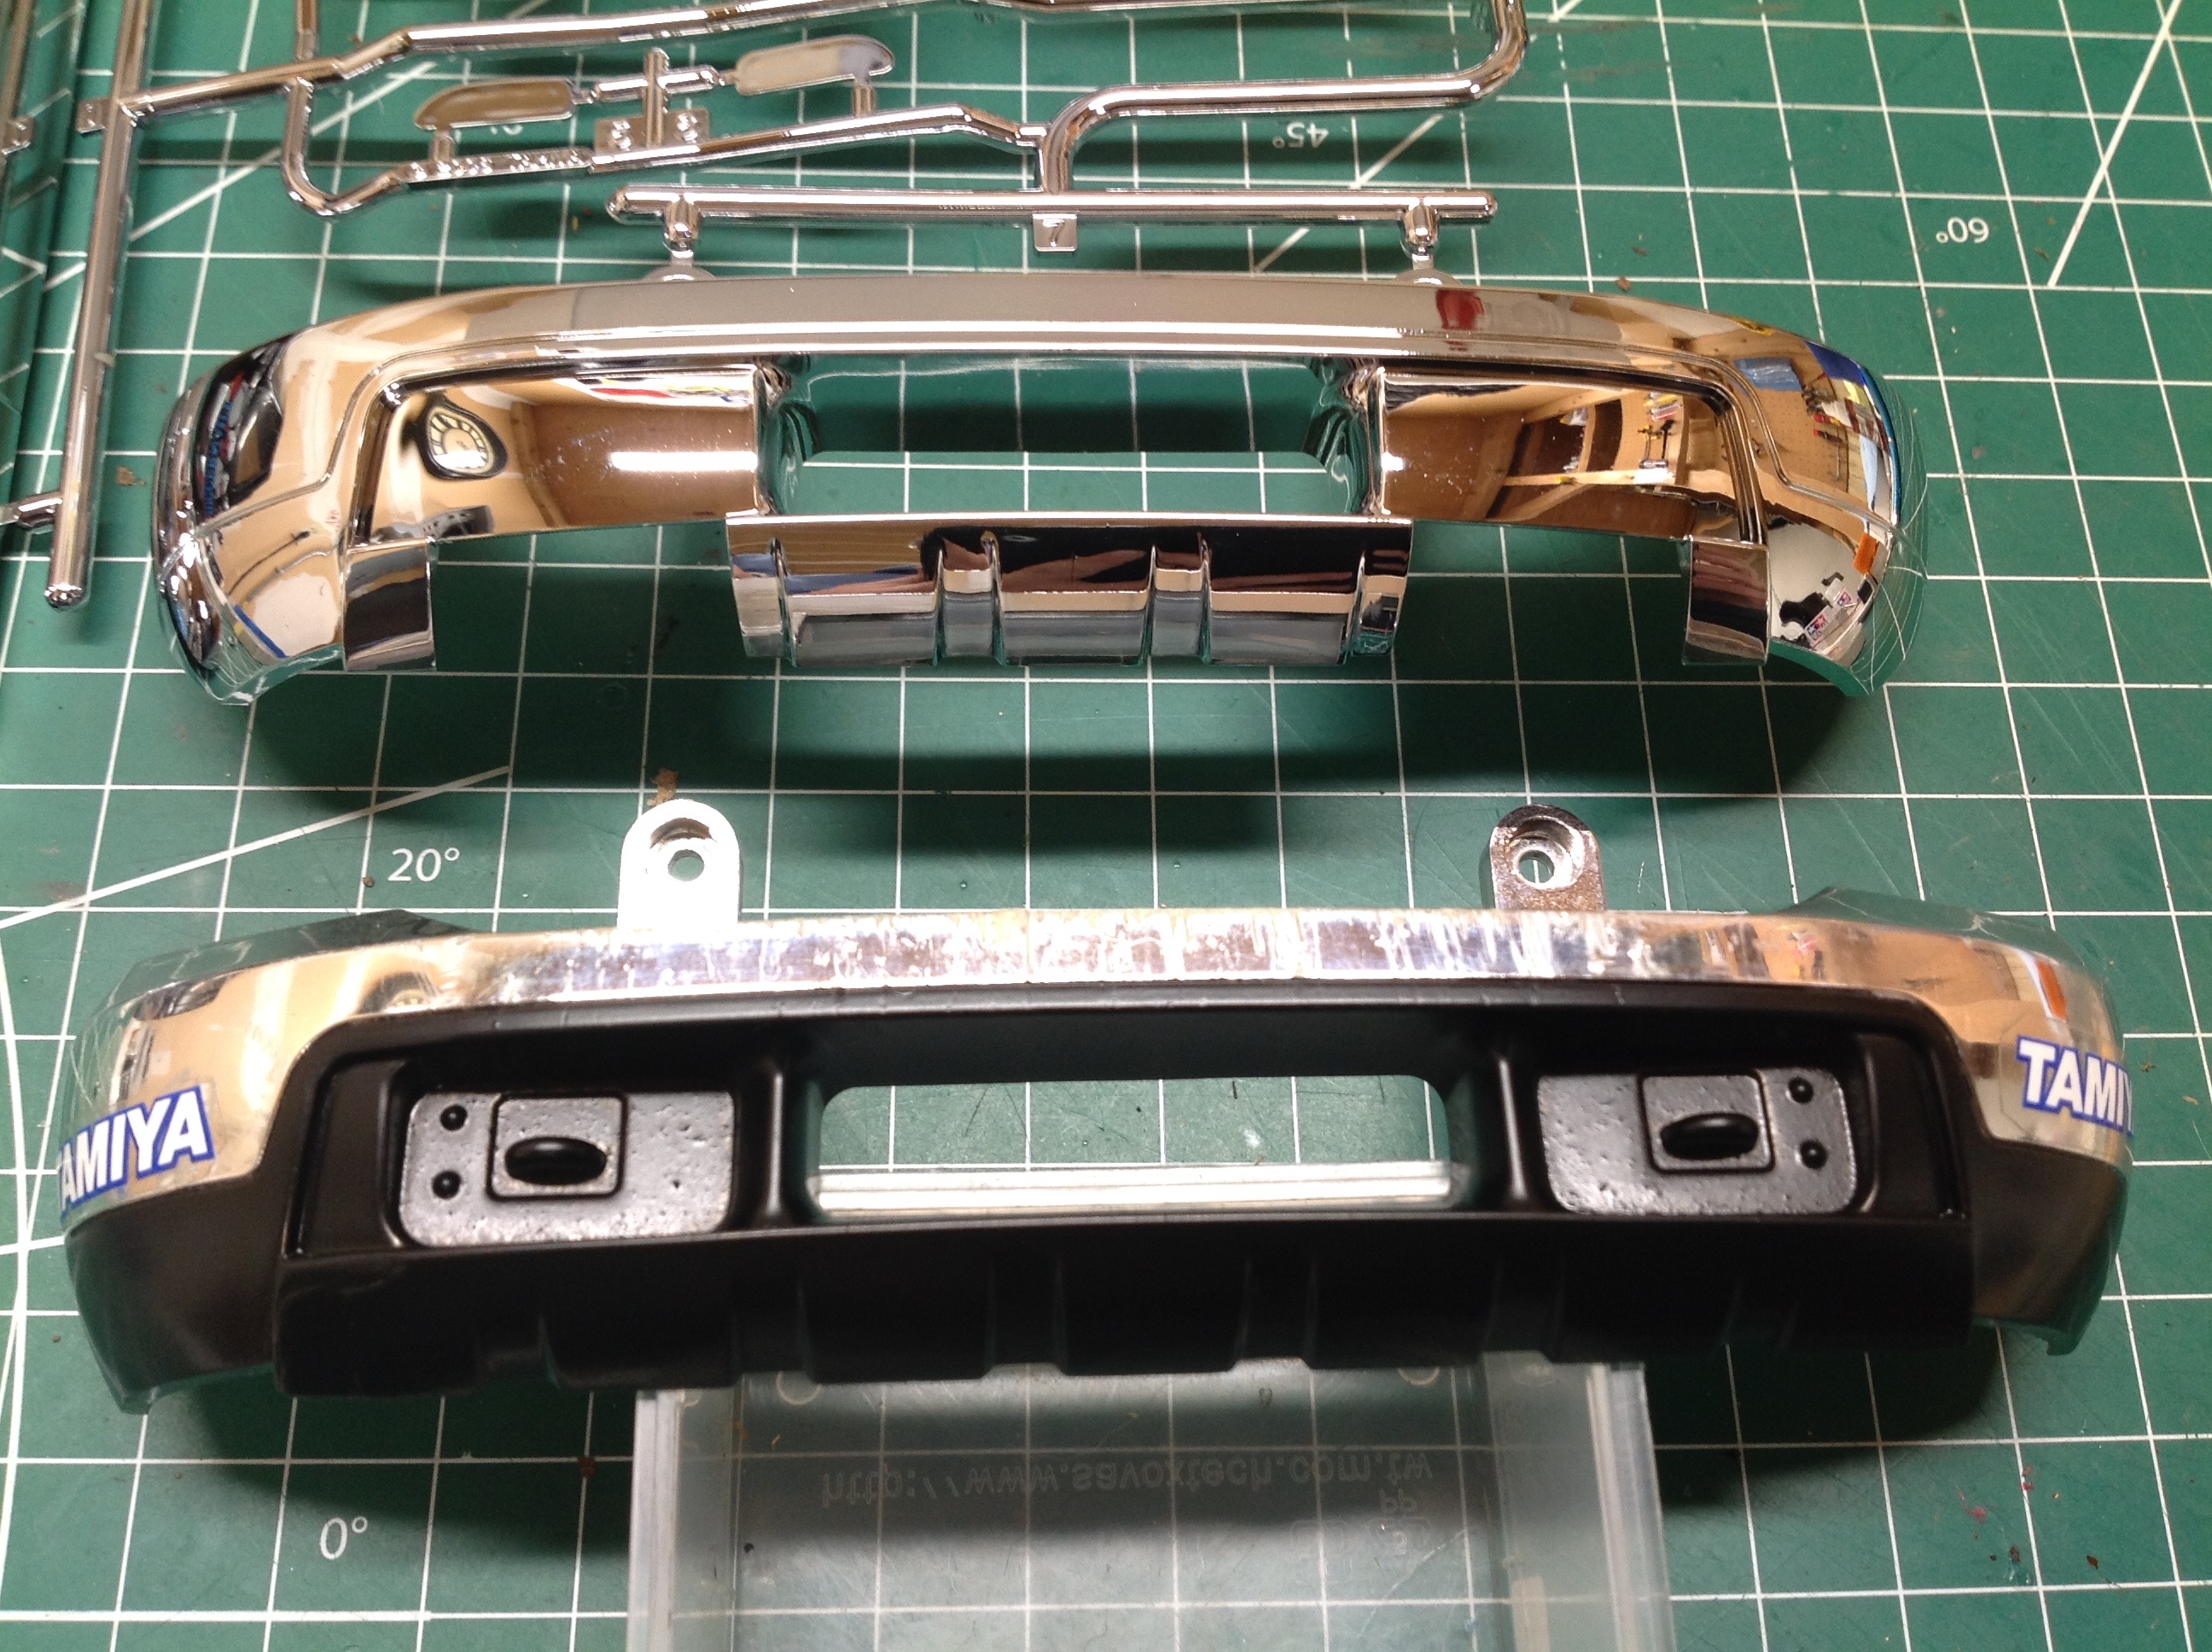
different. There are even bigger differences in the front bumpers,
shown on the right. The lower version from the Jugg has molded
tow hooks. The upper version from the Highlift has cutouts for the
brush guard. I decided to keep the original which I painted with
semi-gloss black as shown. The rear bumpers seem to be identical,
so painted and kept the original.
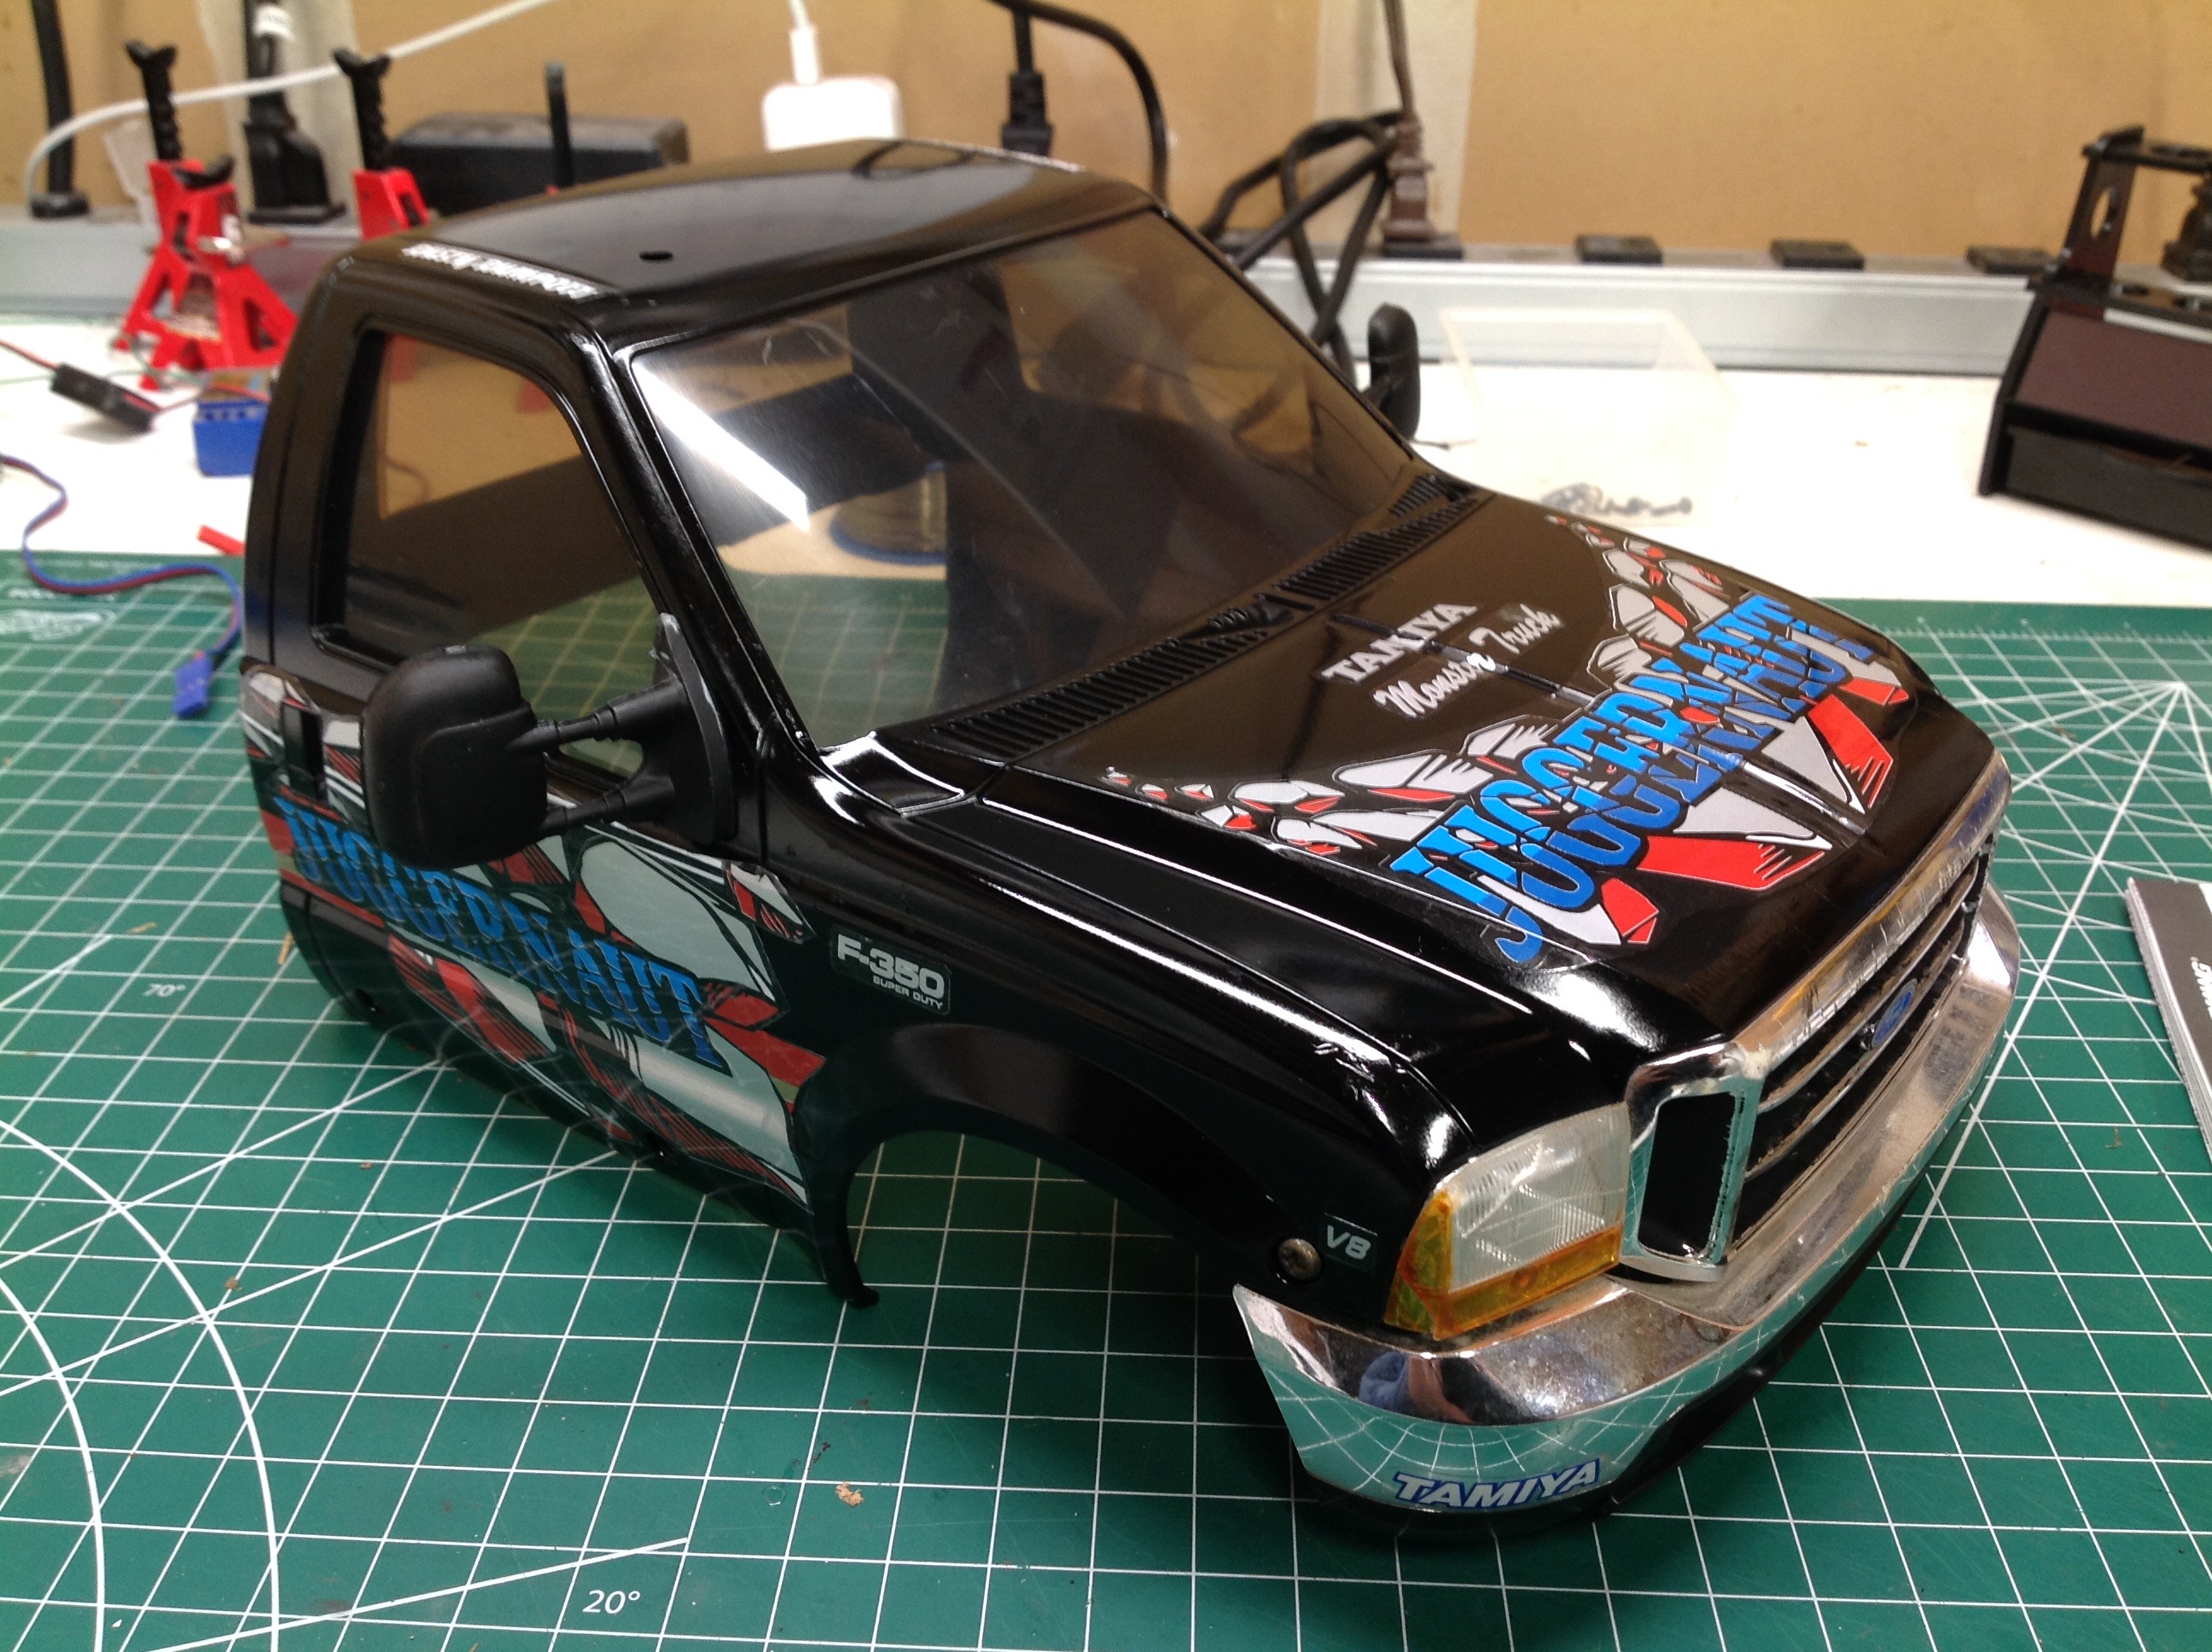
Even though this is a Juggernaut 2, I decided to paint it black like the
original. The left shows the cab after the first coat of
black. On the right the MCI reproduction decals have been applied
with a few coats of clear over the top. I painted the mirrors flat
black.
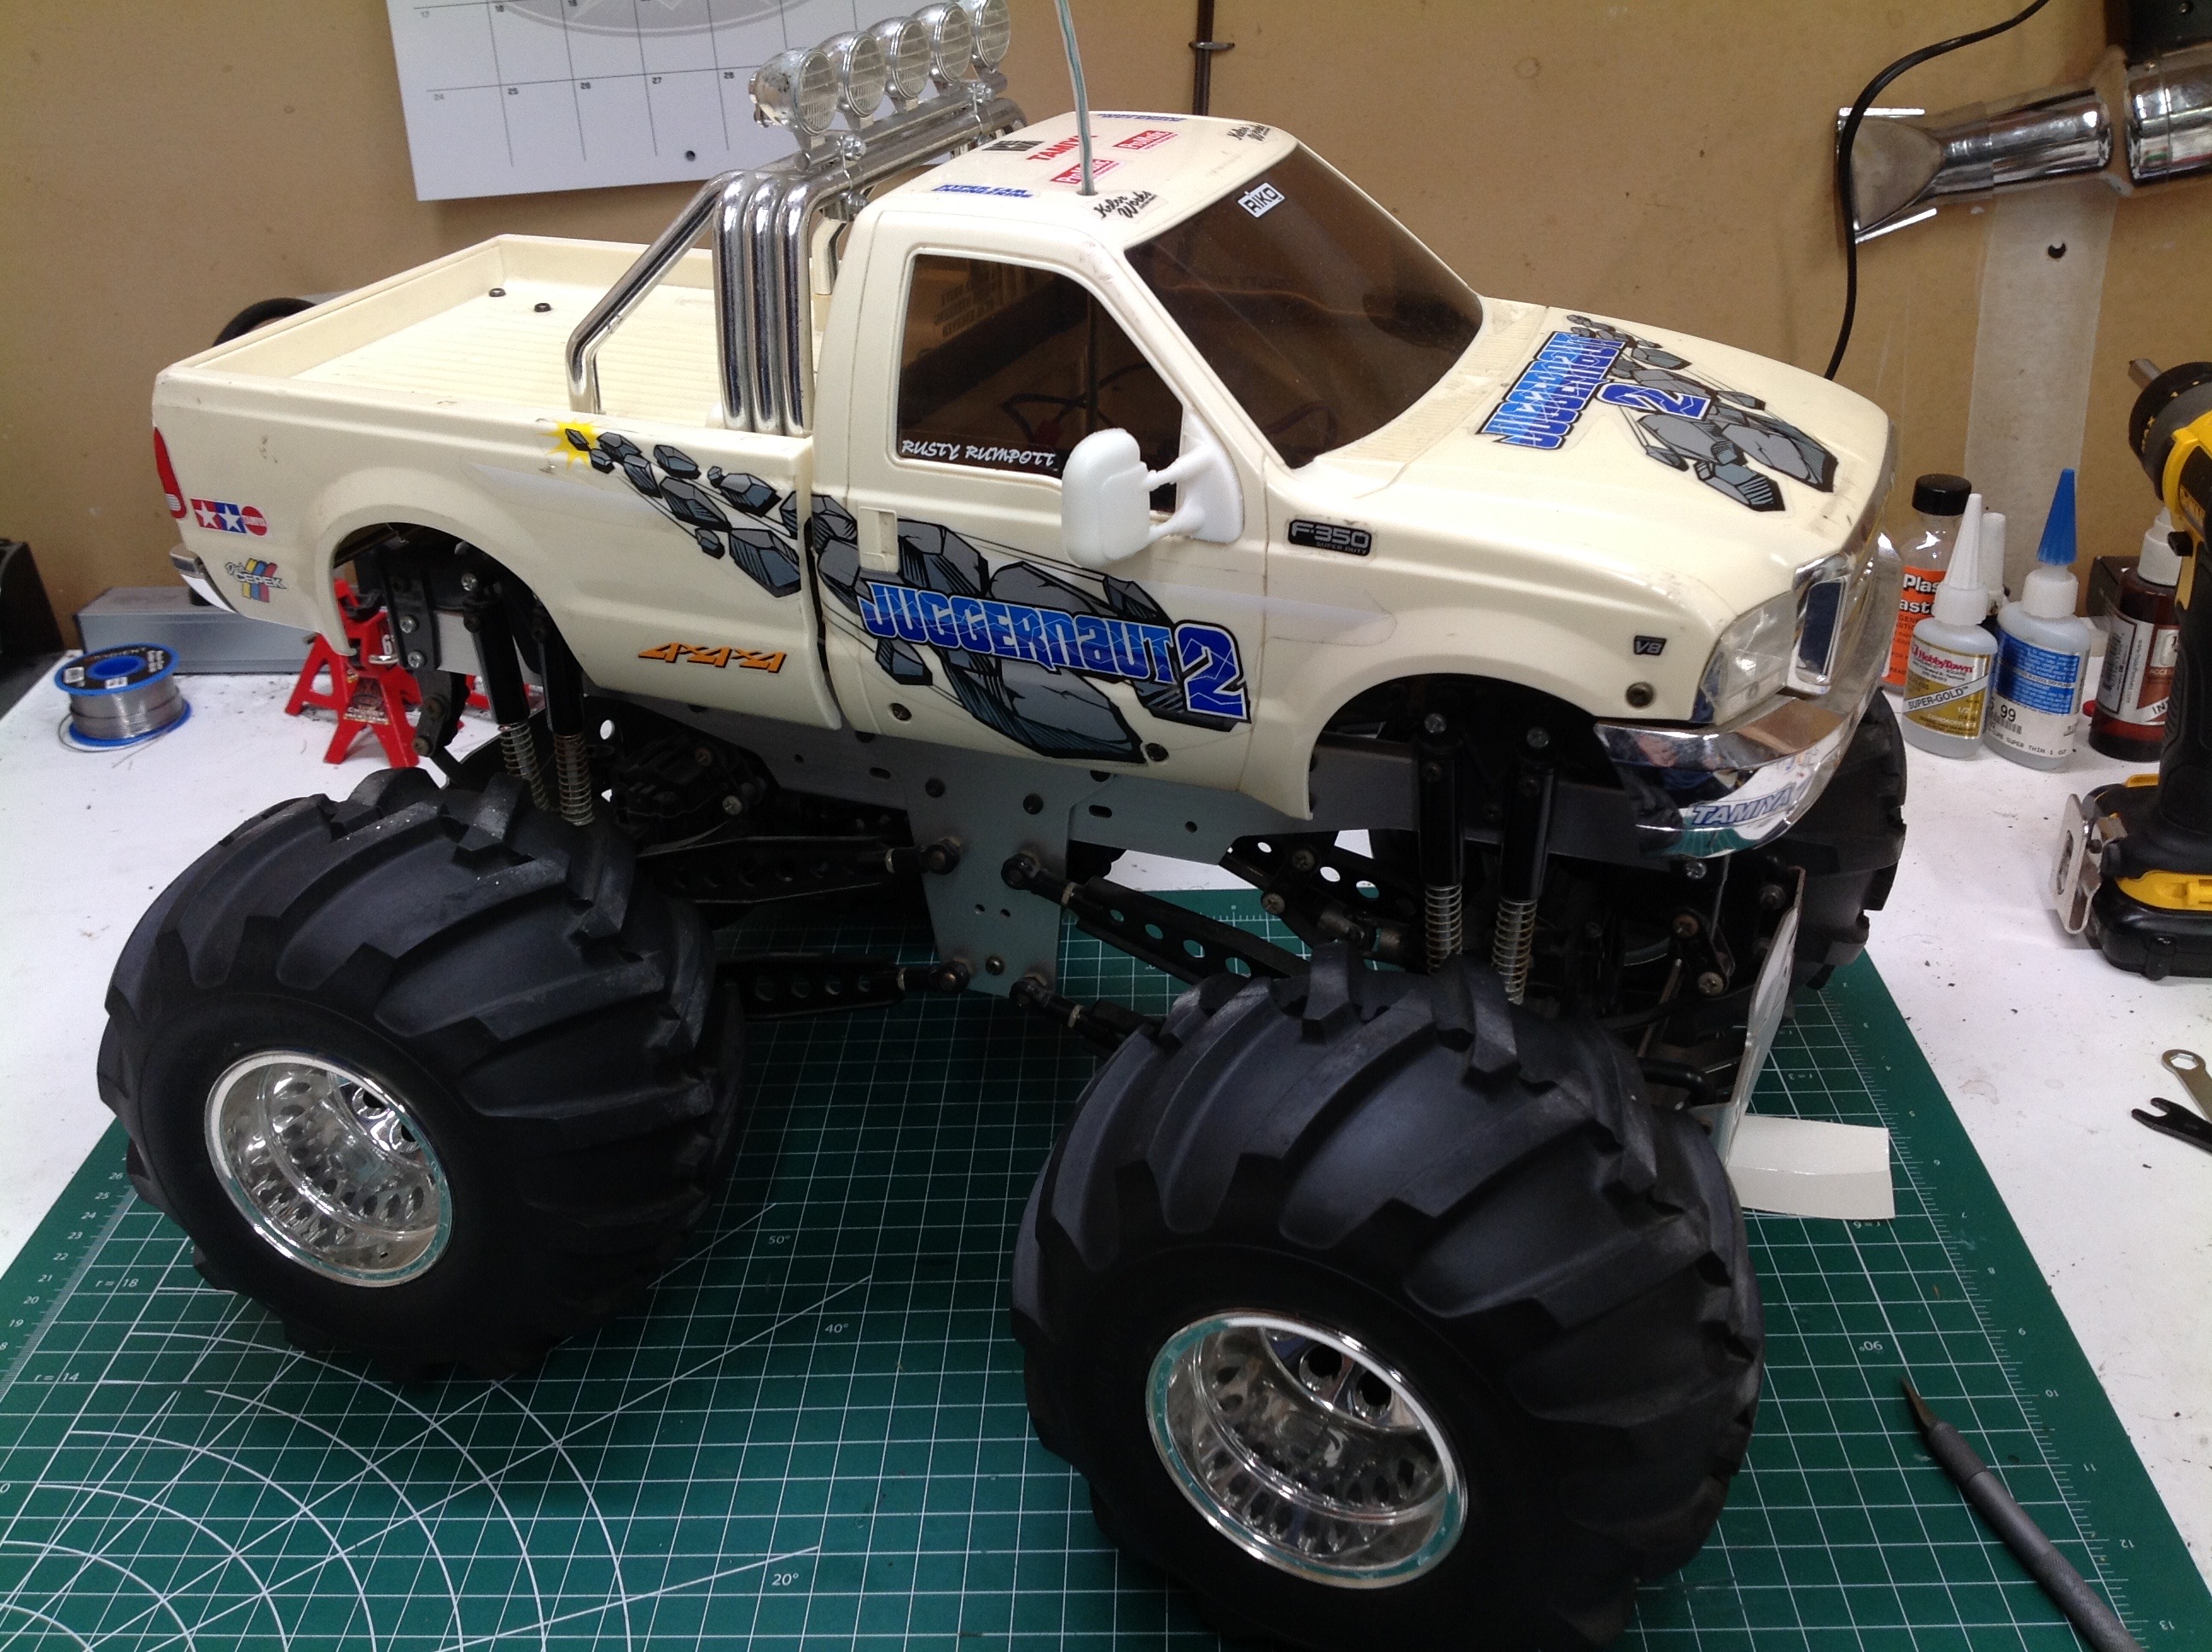
These images compare the truck as I received it to my completed
Juggernaut restoration. I vastly prefer my version, but I suppose
I'm a bit biased.
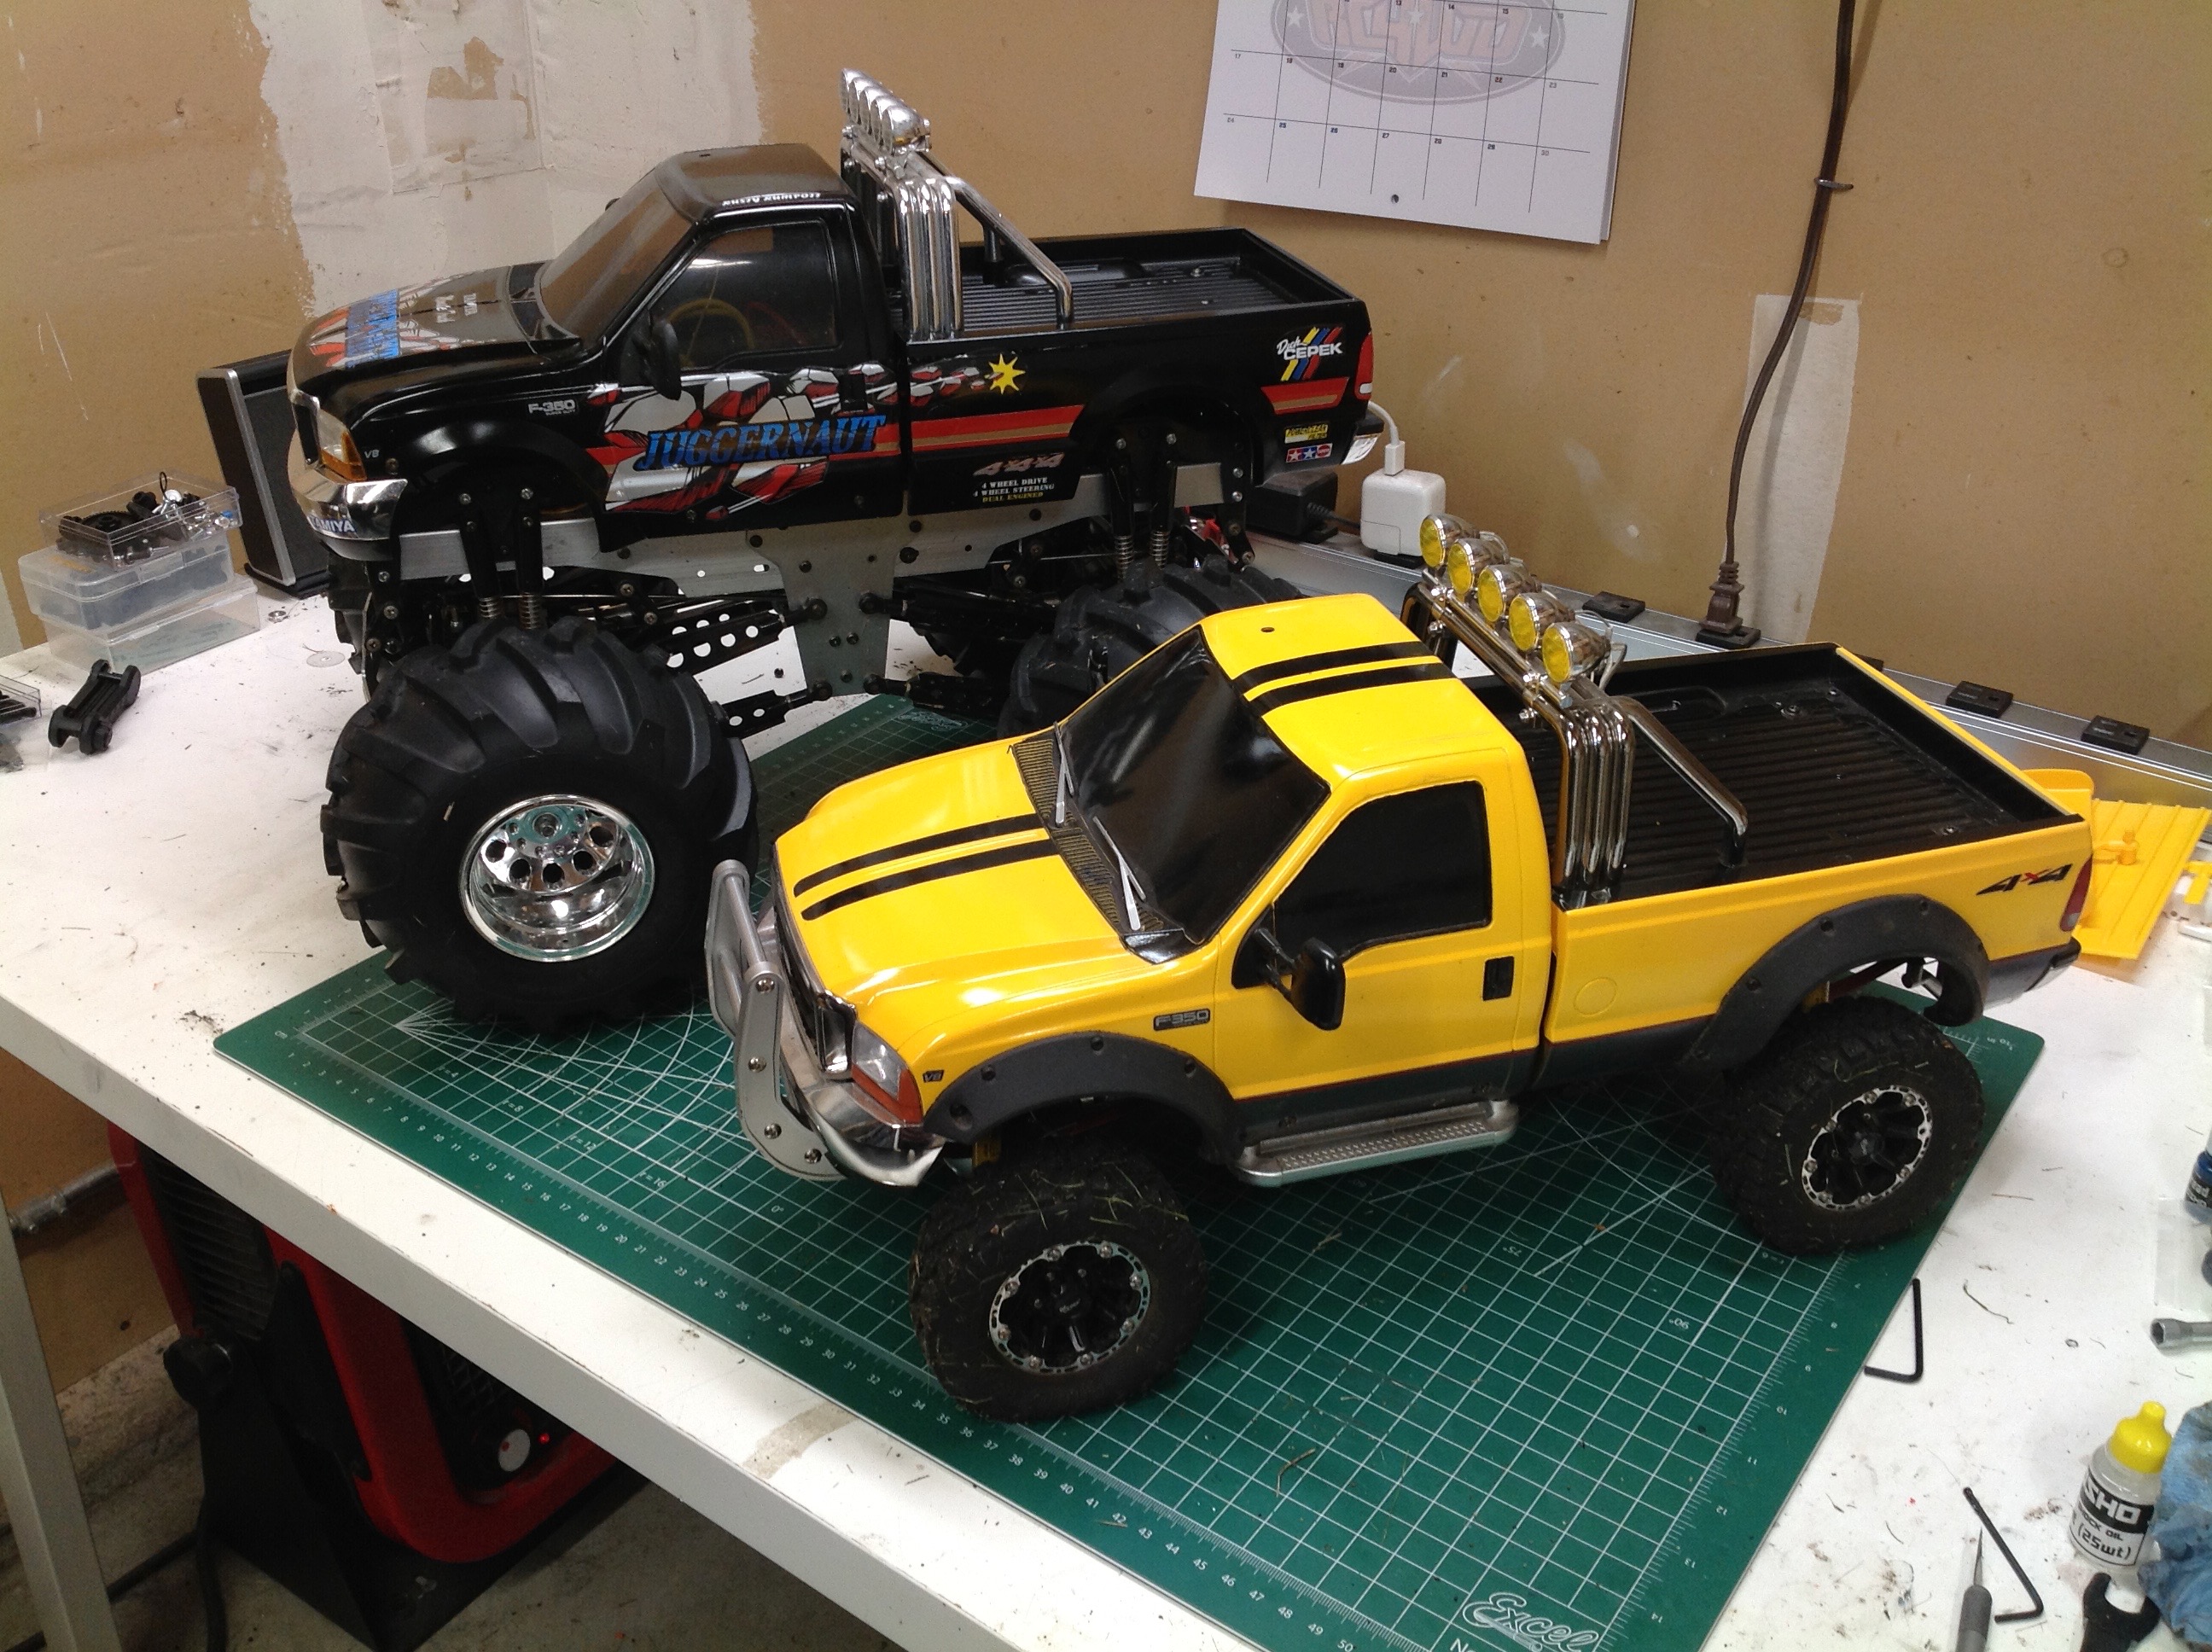
I thought it would also be interesting to compare the Juggernaut F-350 to the Highlift version which uses almost the
same body. You have to look closely to see that the Highlift has
much larger wheel arches to make room to the wheels to turn with the
lower suspension. The arches are somewhat masked by the rubber
flares I added. There are differences in the bumpers and grille as
discussed earlier, and the Highlift version also has wipers.
©2020 Eric Albrecht