Tamiya Porsche 911 GT1 Project
Page 1: Chassis Assembly
This was an interesting project. Because I took the Porsche
GT1 body from a brand new Street Version kit, I was lucky enough to
have both a standard TA-03 R-S chassis and a TRF version, both new in
box, at the same time. I decided to build both and take the same
photos of each which allowed me to compare the two directly and
highlight all the differences in the TRF model. It turns out that
there are a lot of them. The TRF version represents a substantial
upgrade. For each step (except where noted), I've shown the
standard chassis on the left and the TRF chassis on the right.
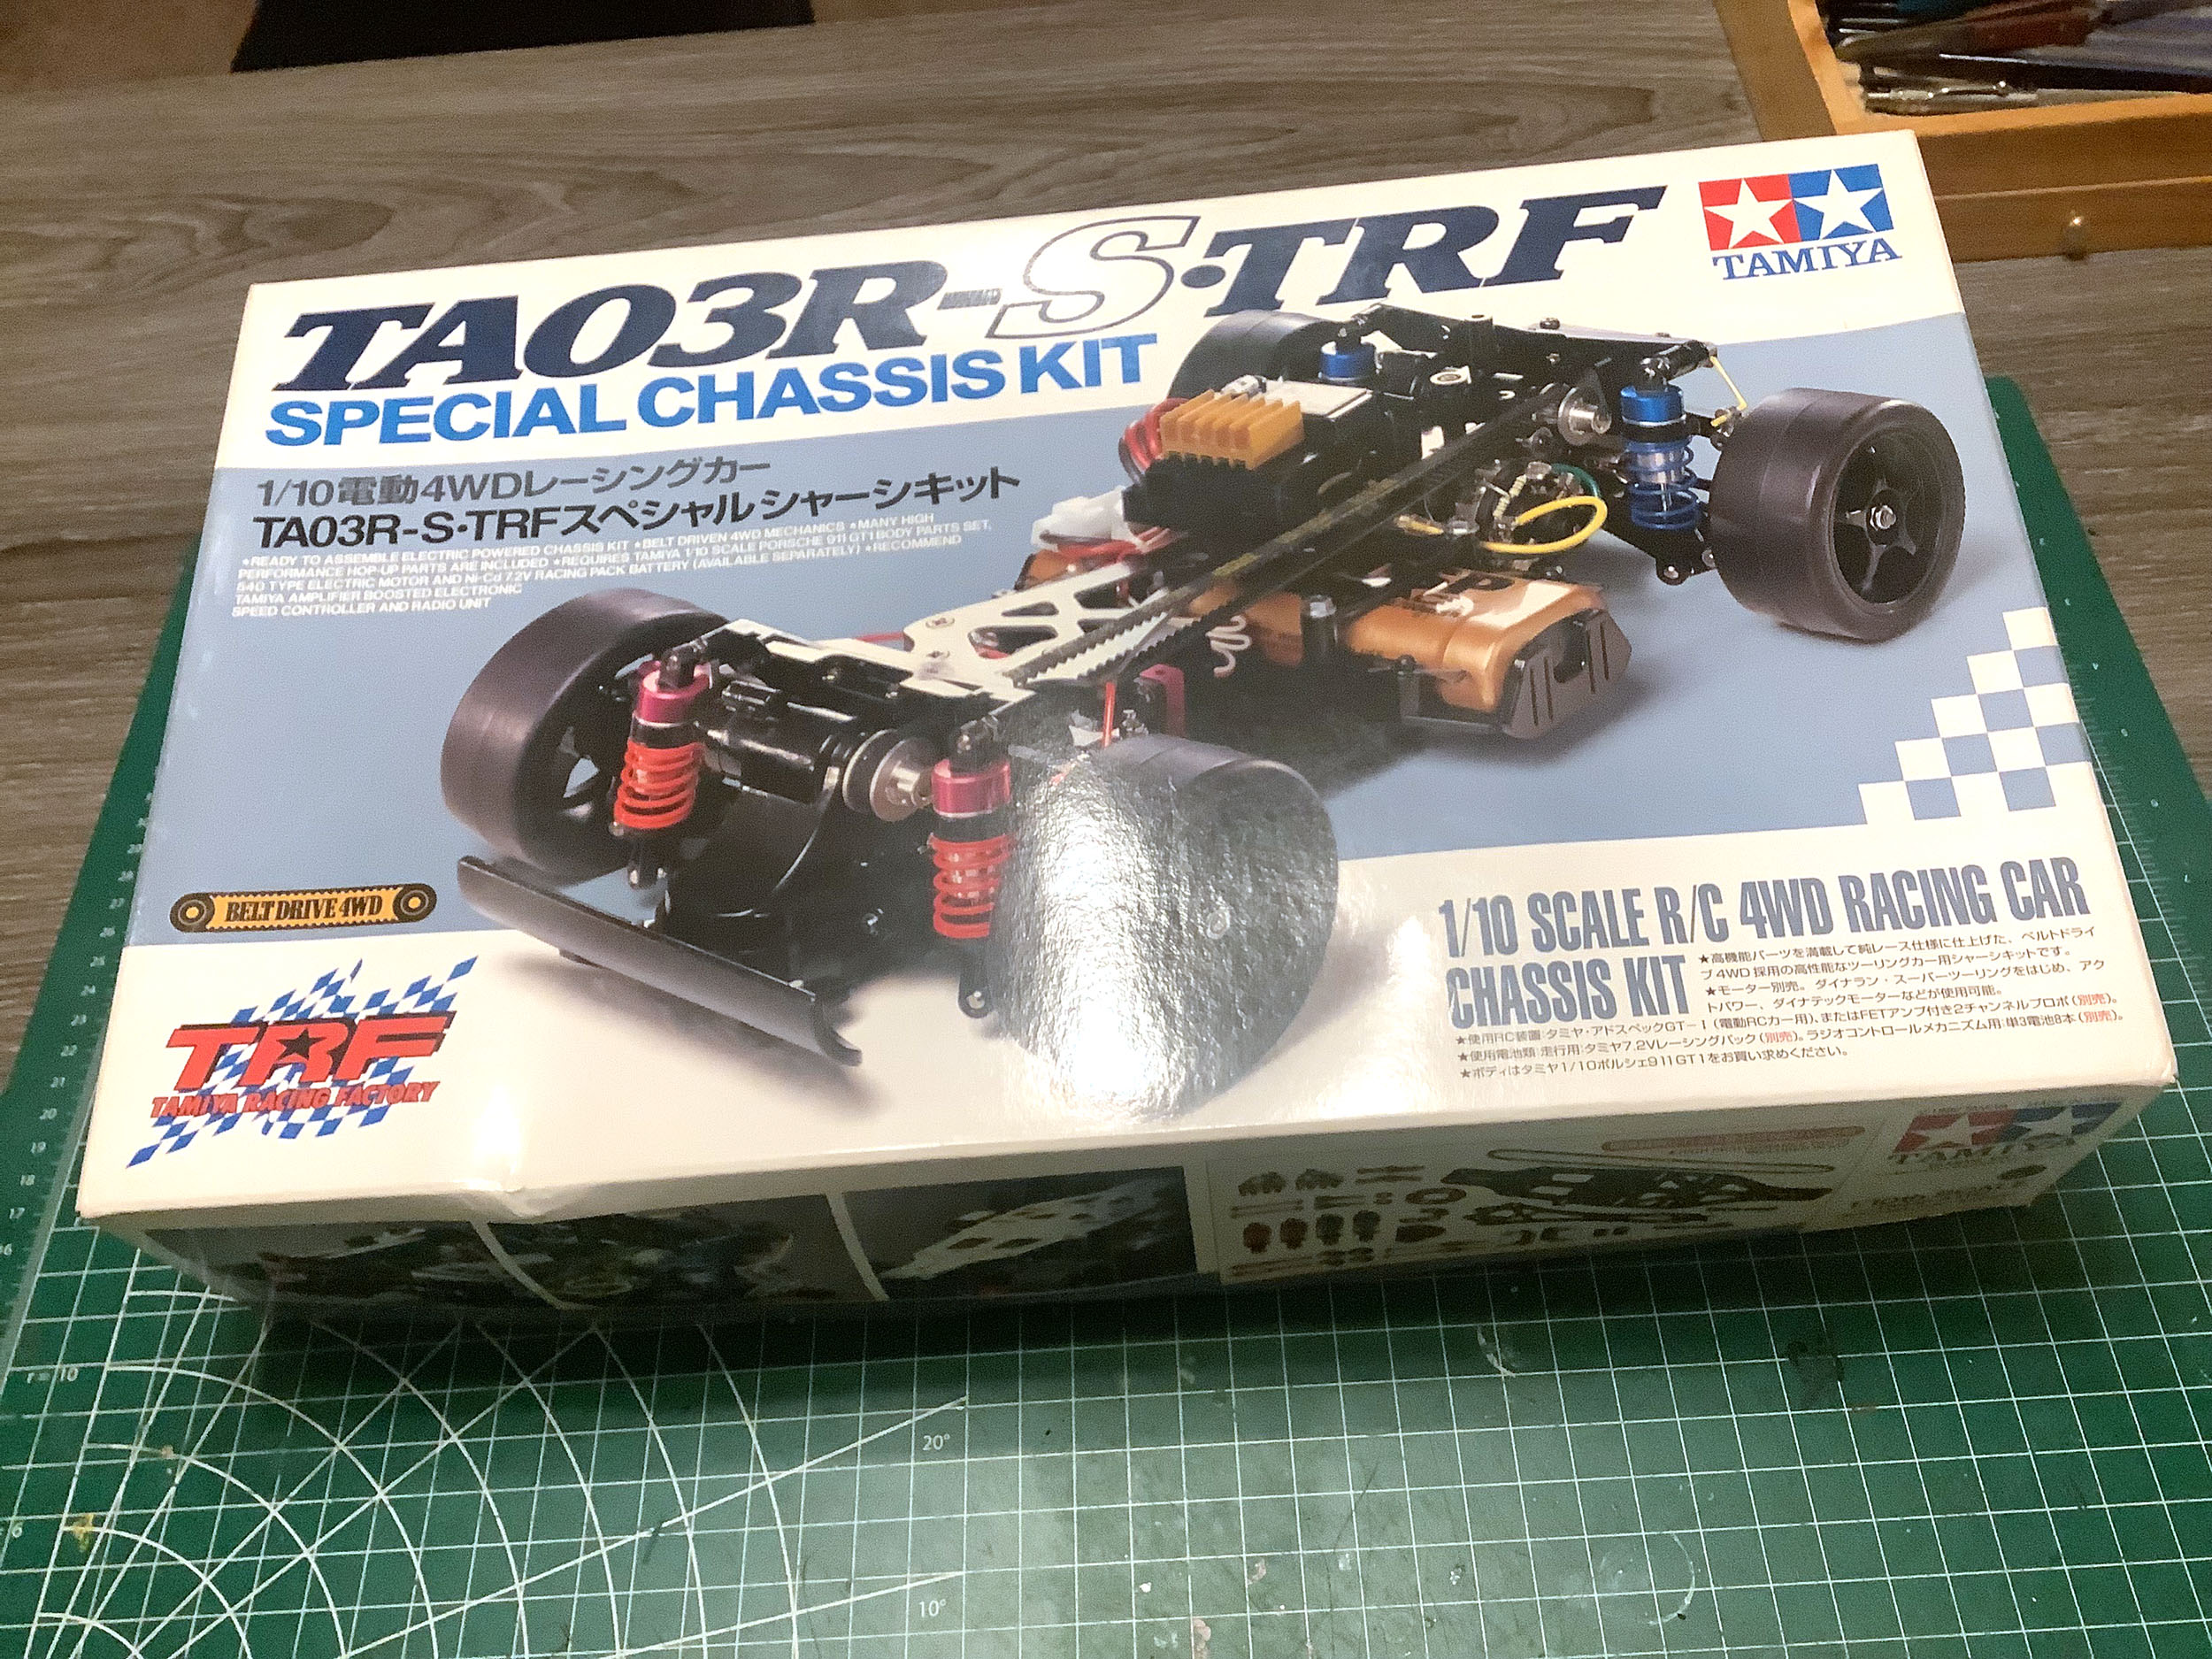
I was lucky enough to get this car new in the box. The size and
shape of the box is different from any other Tamiya I've owned. It
is much smaller than a buggy box, and not shaped like a typical touring
car box.
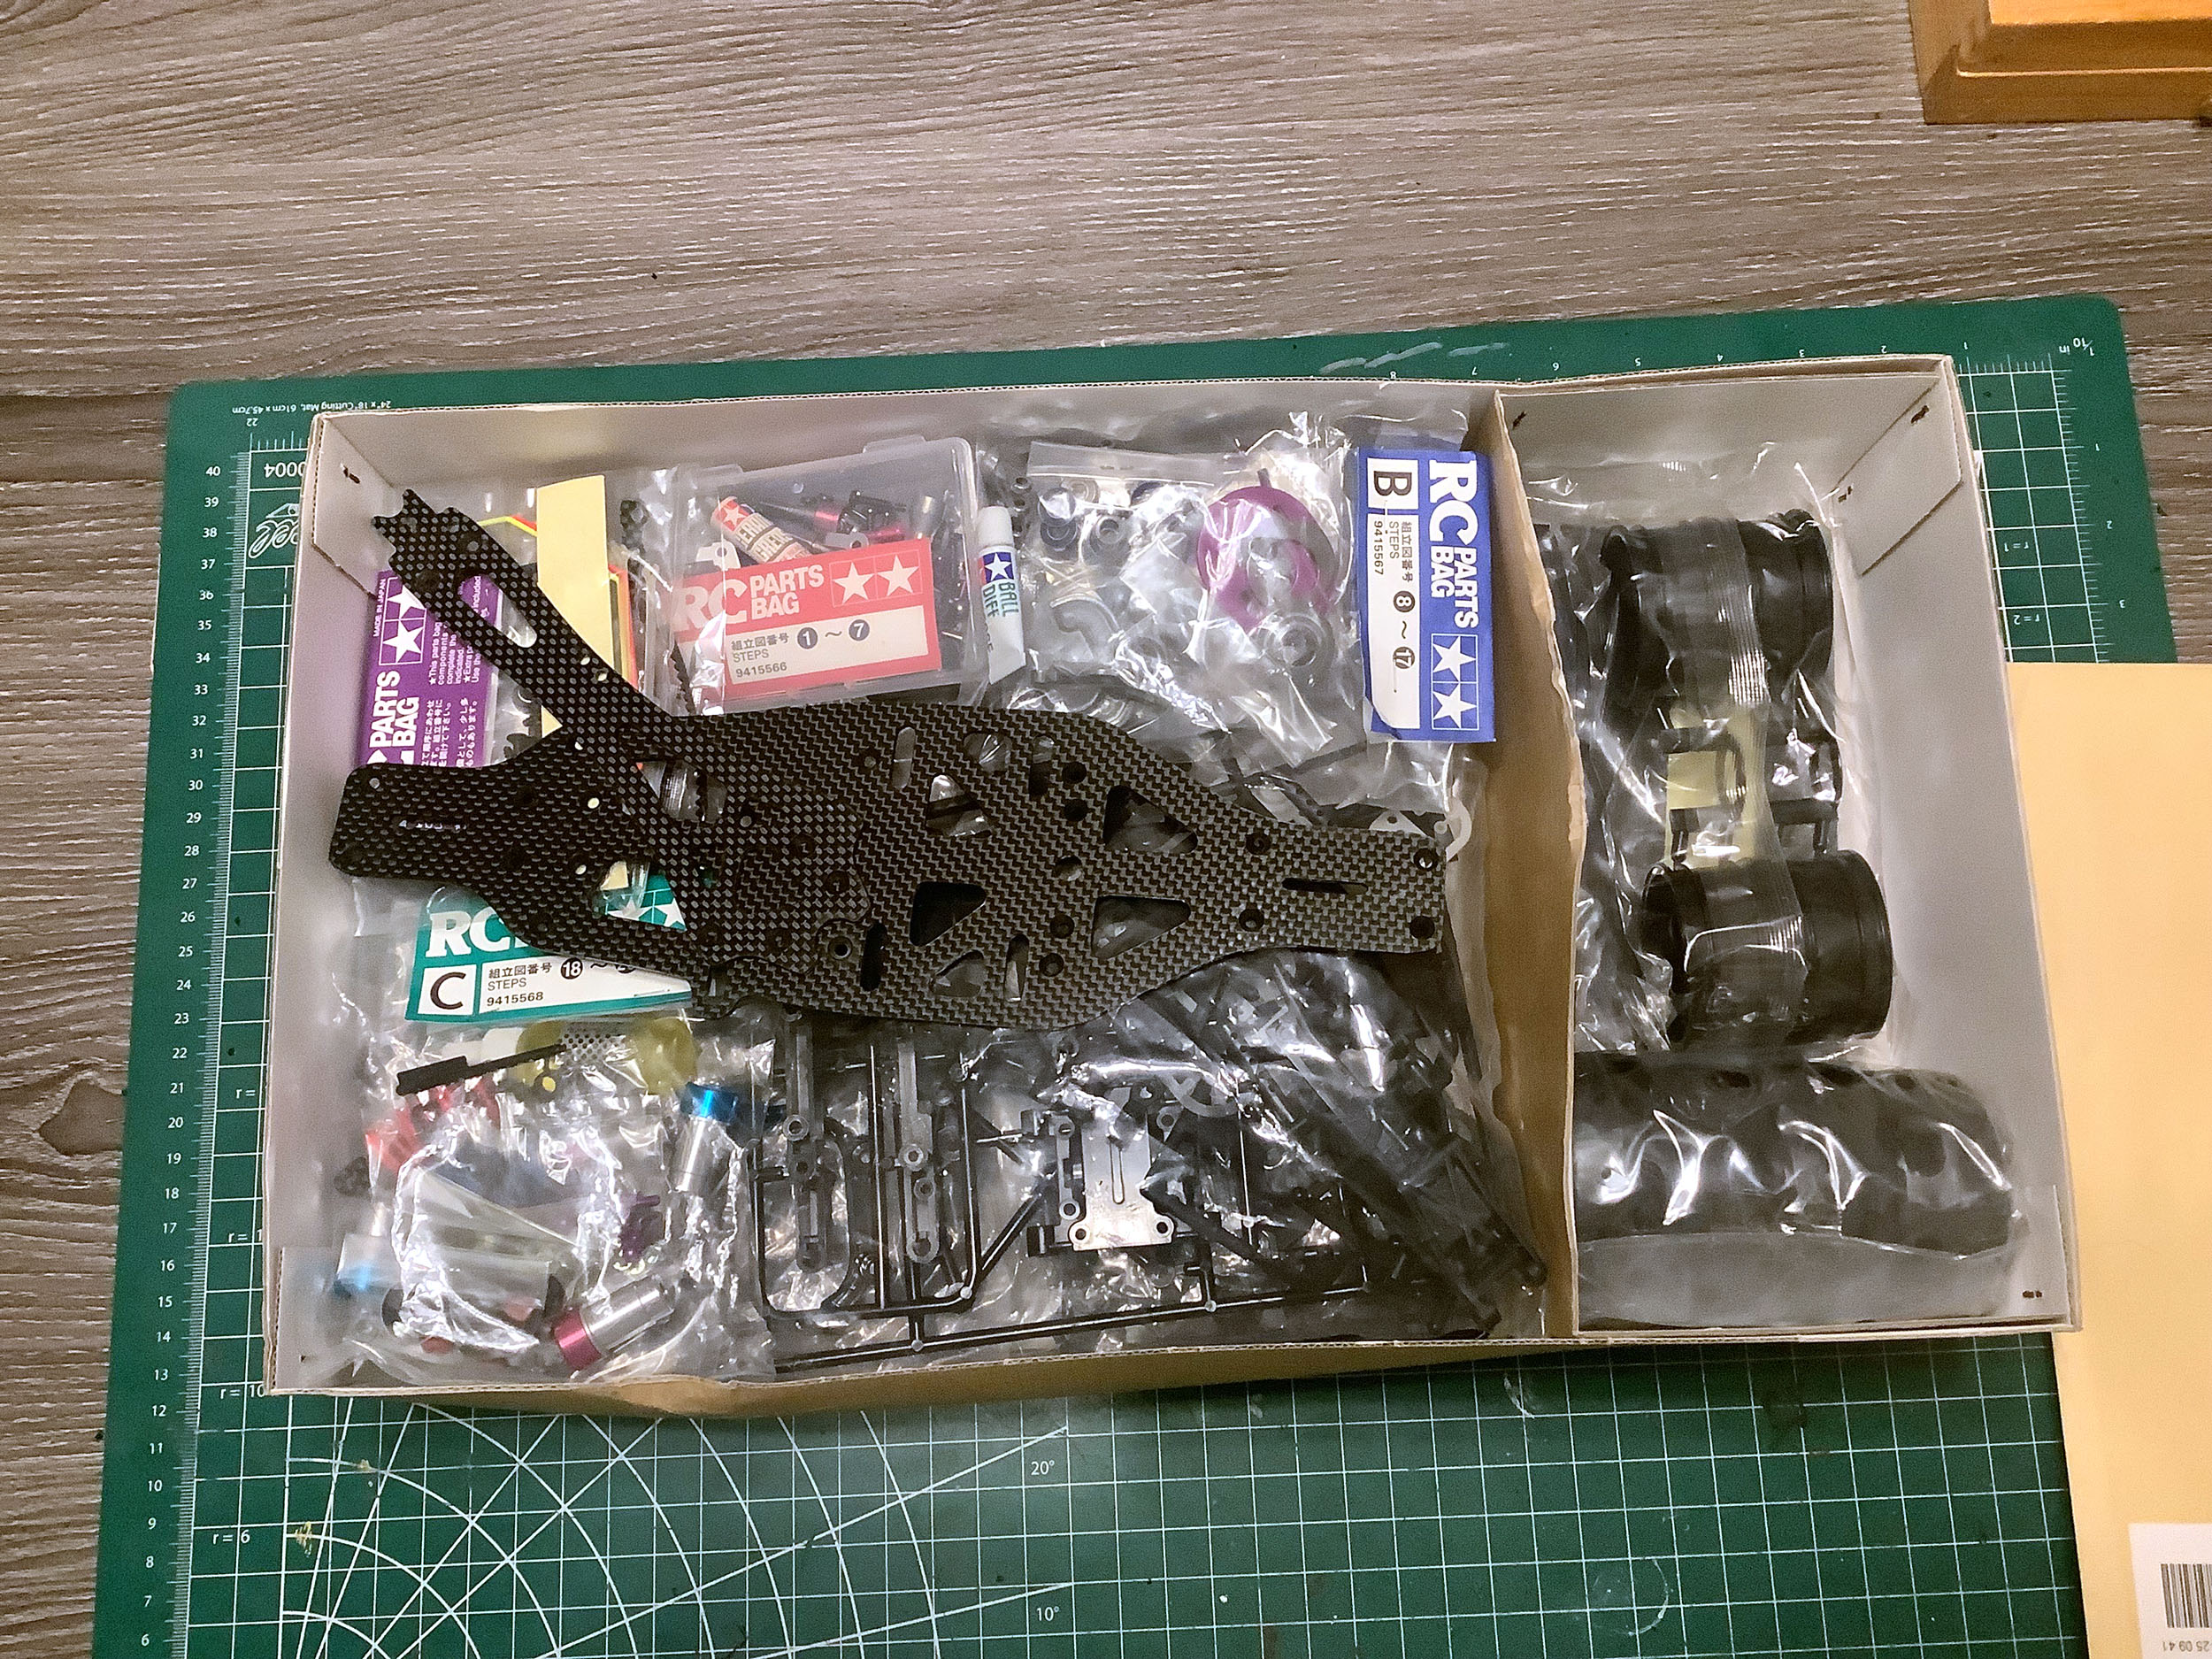
These photos show the contents of the box. There are no fancy
internal boxes or blister packs here, just a single lateral
divider. As usual, all of the parts trees are individually bagged
and the hardware is split into 4 bags labeled A-D. The carbon
chassis plates are loose in the box. On the right I've knolled out
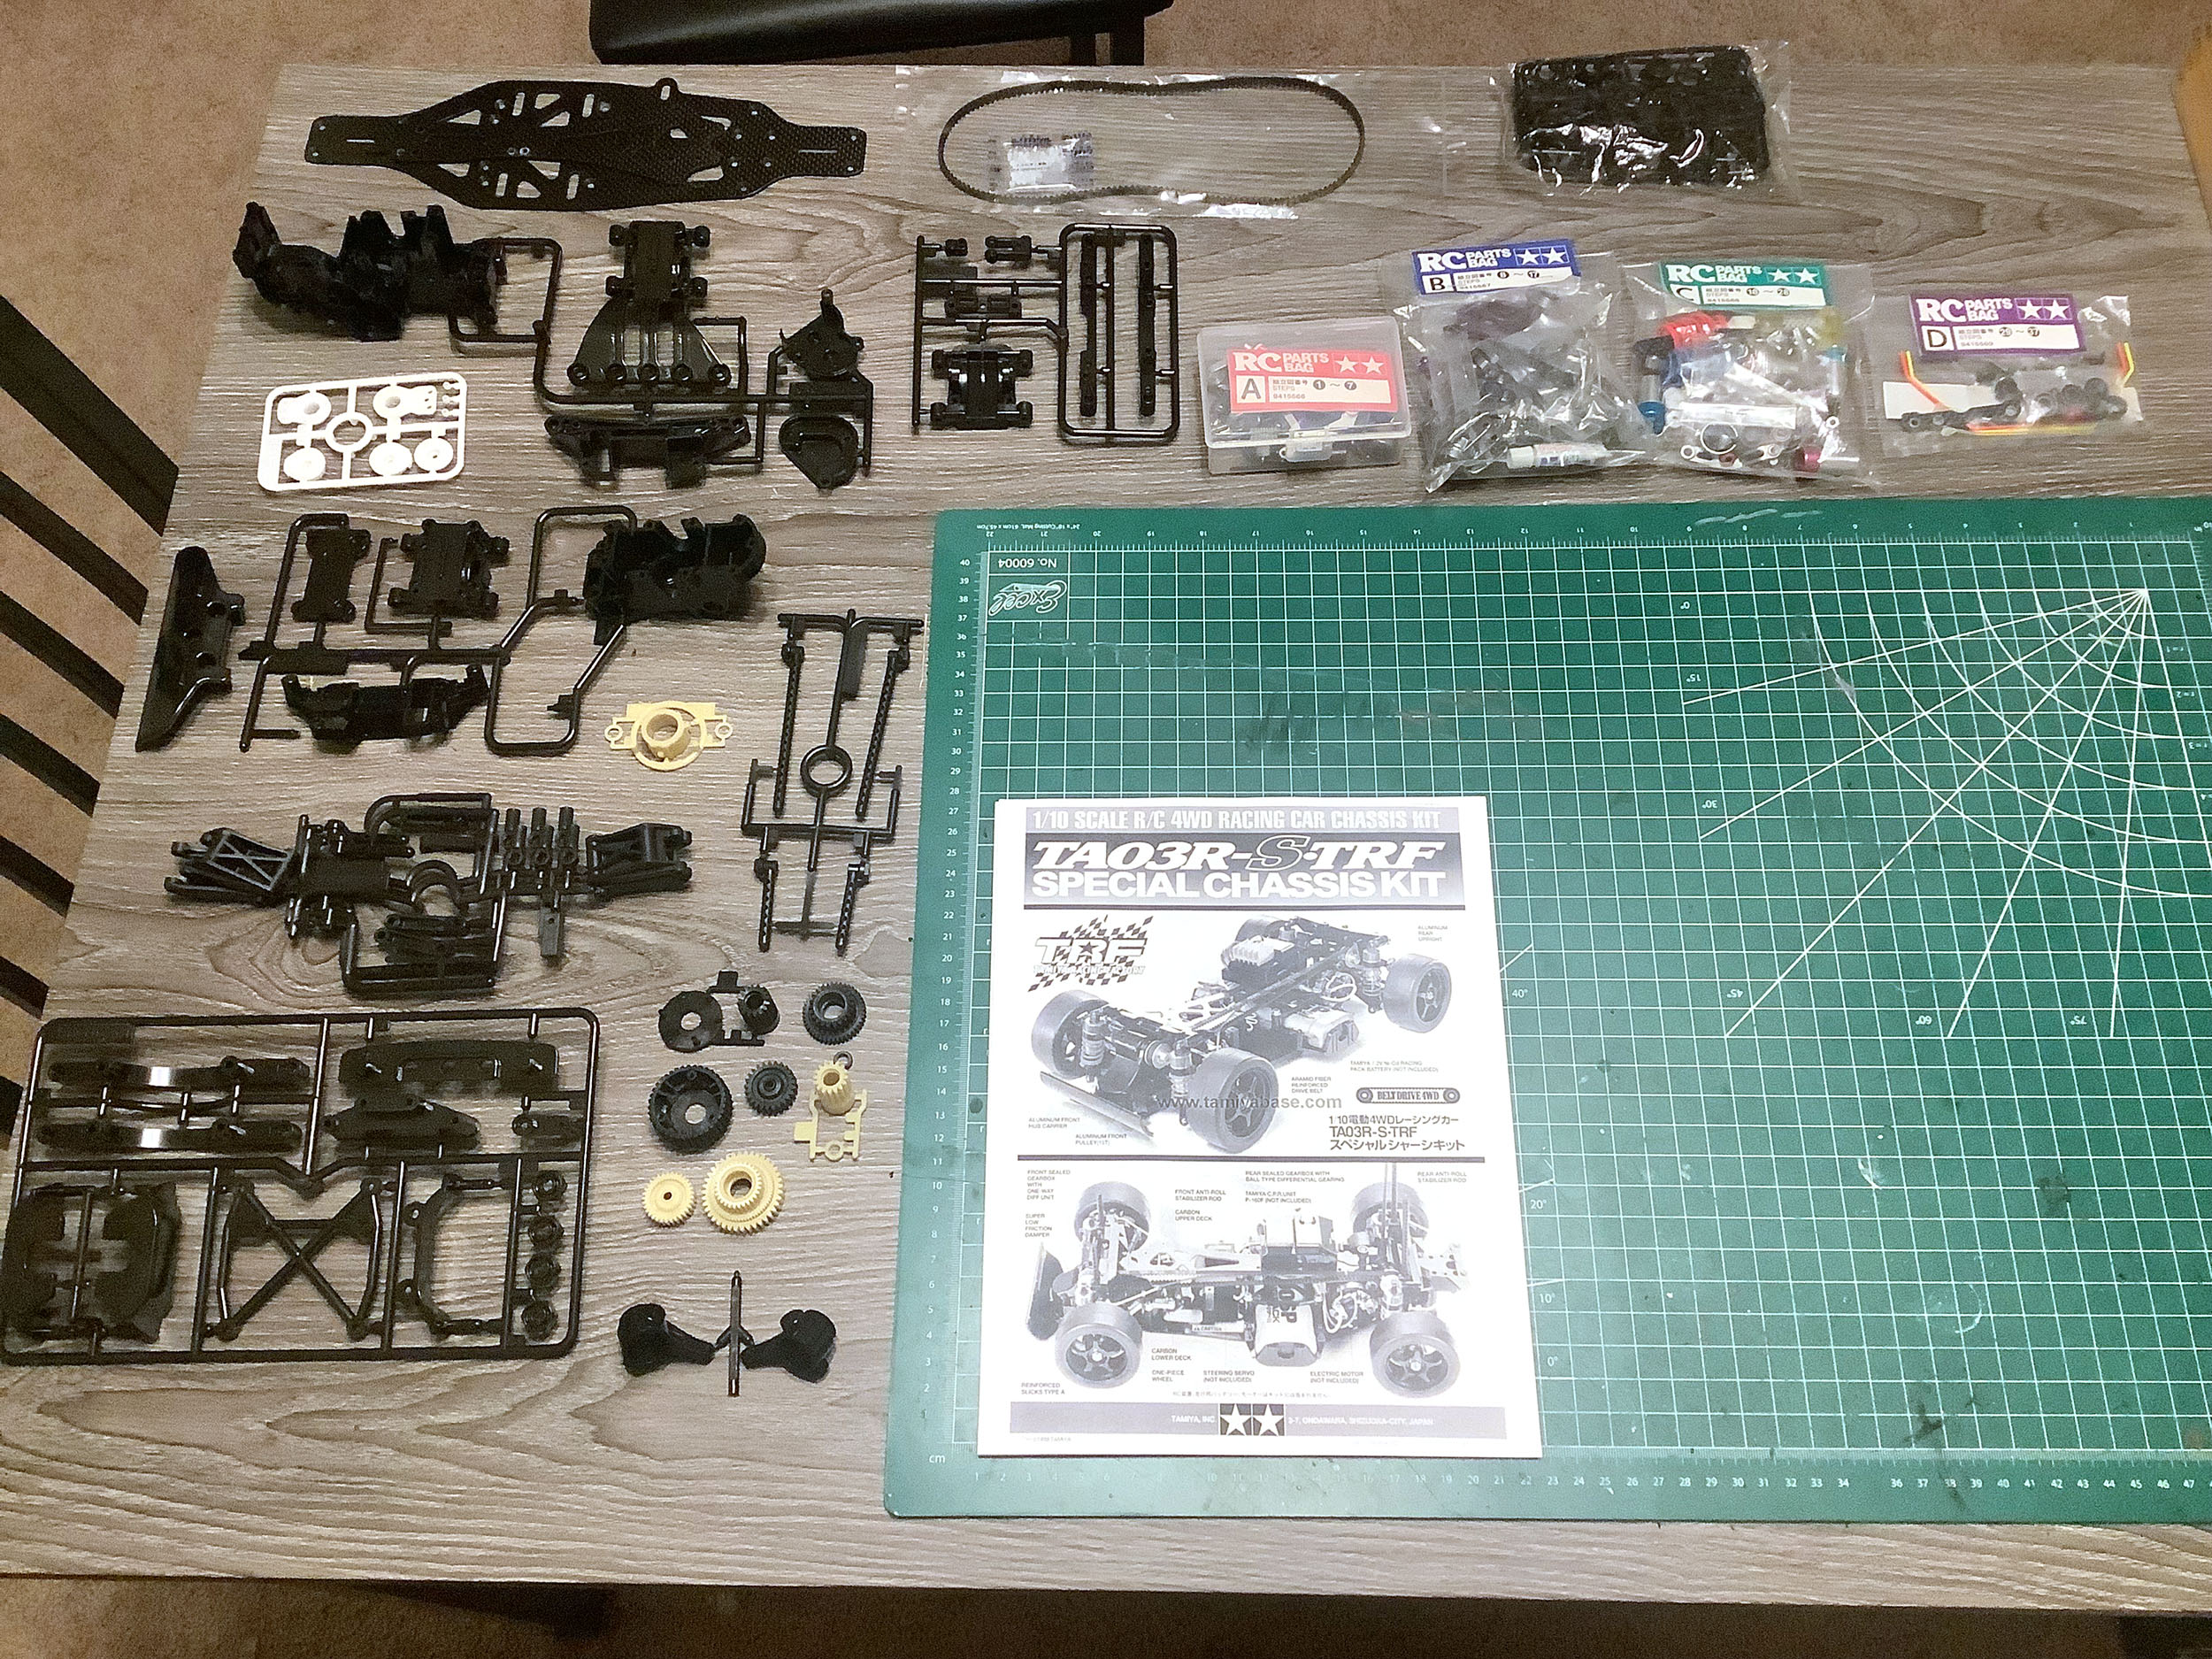
all of the parts on my build table. It doesn't look like much
because most of the interesting parts come from the hardware bags.
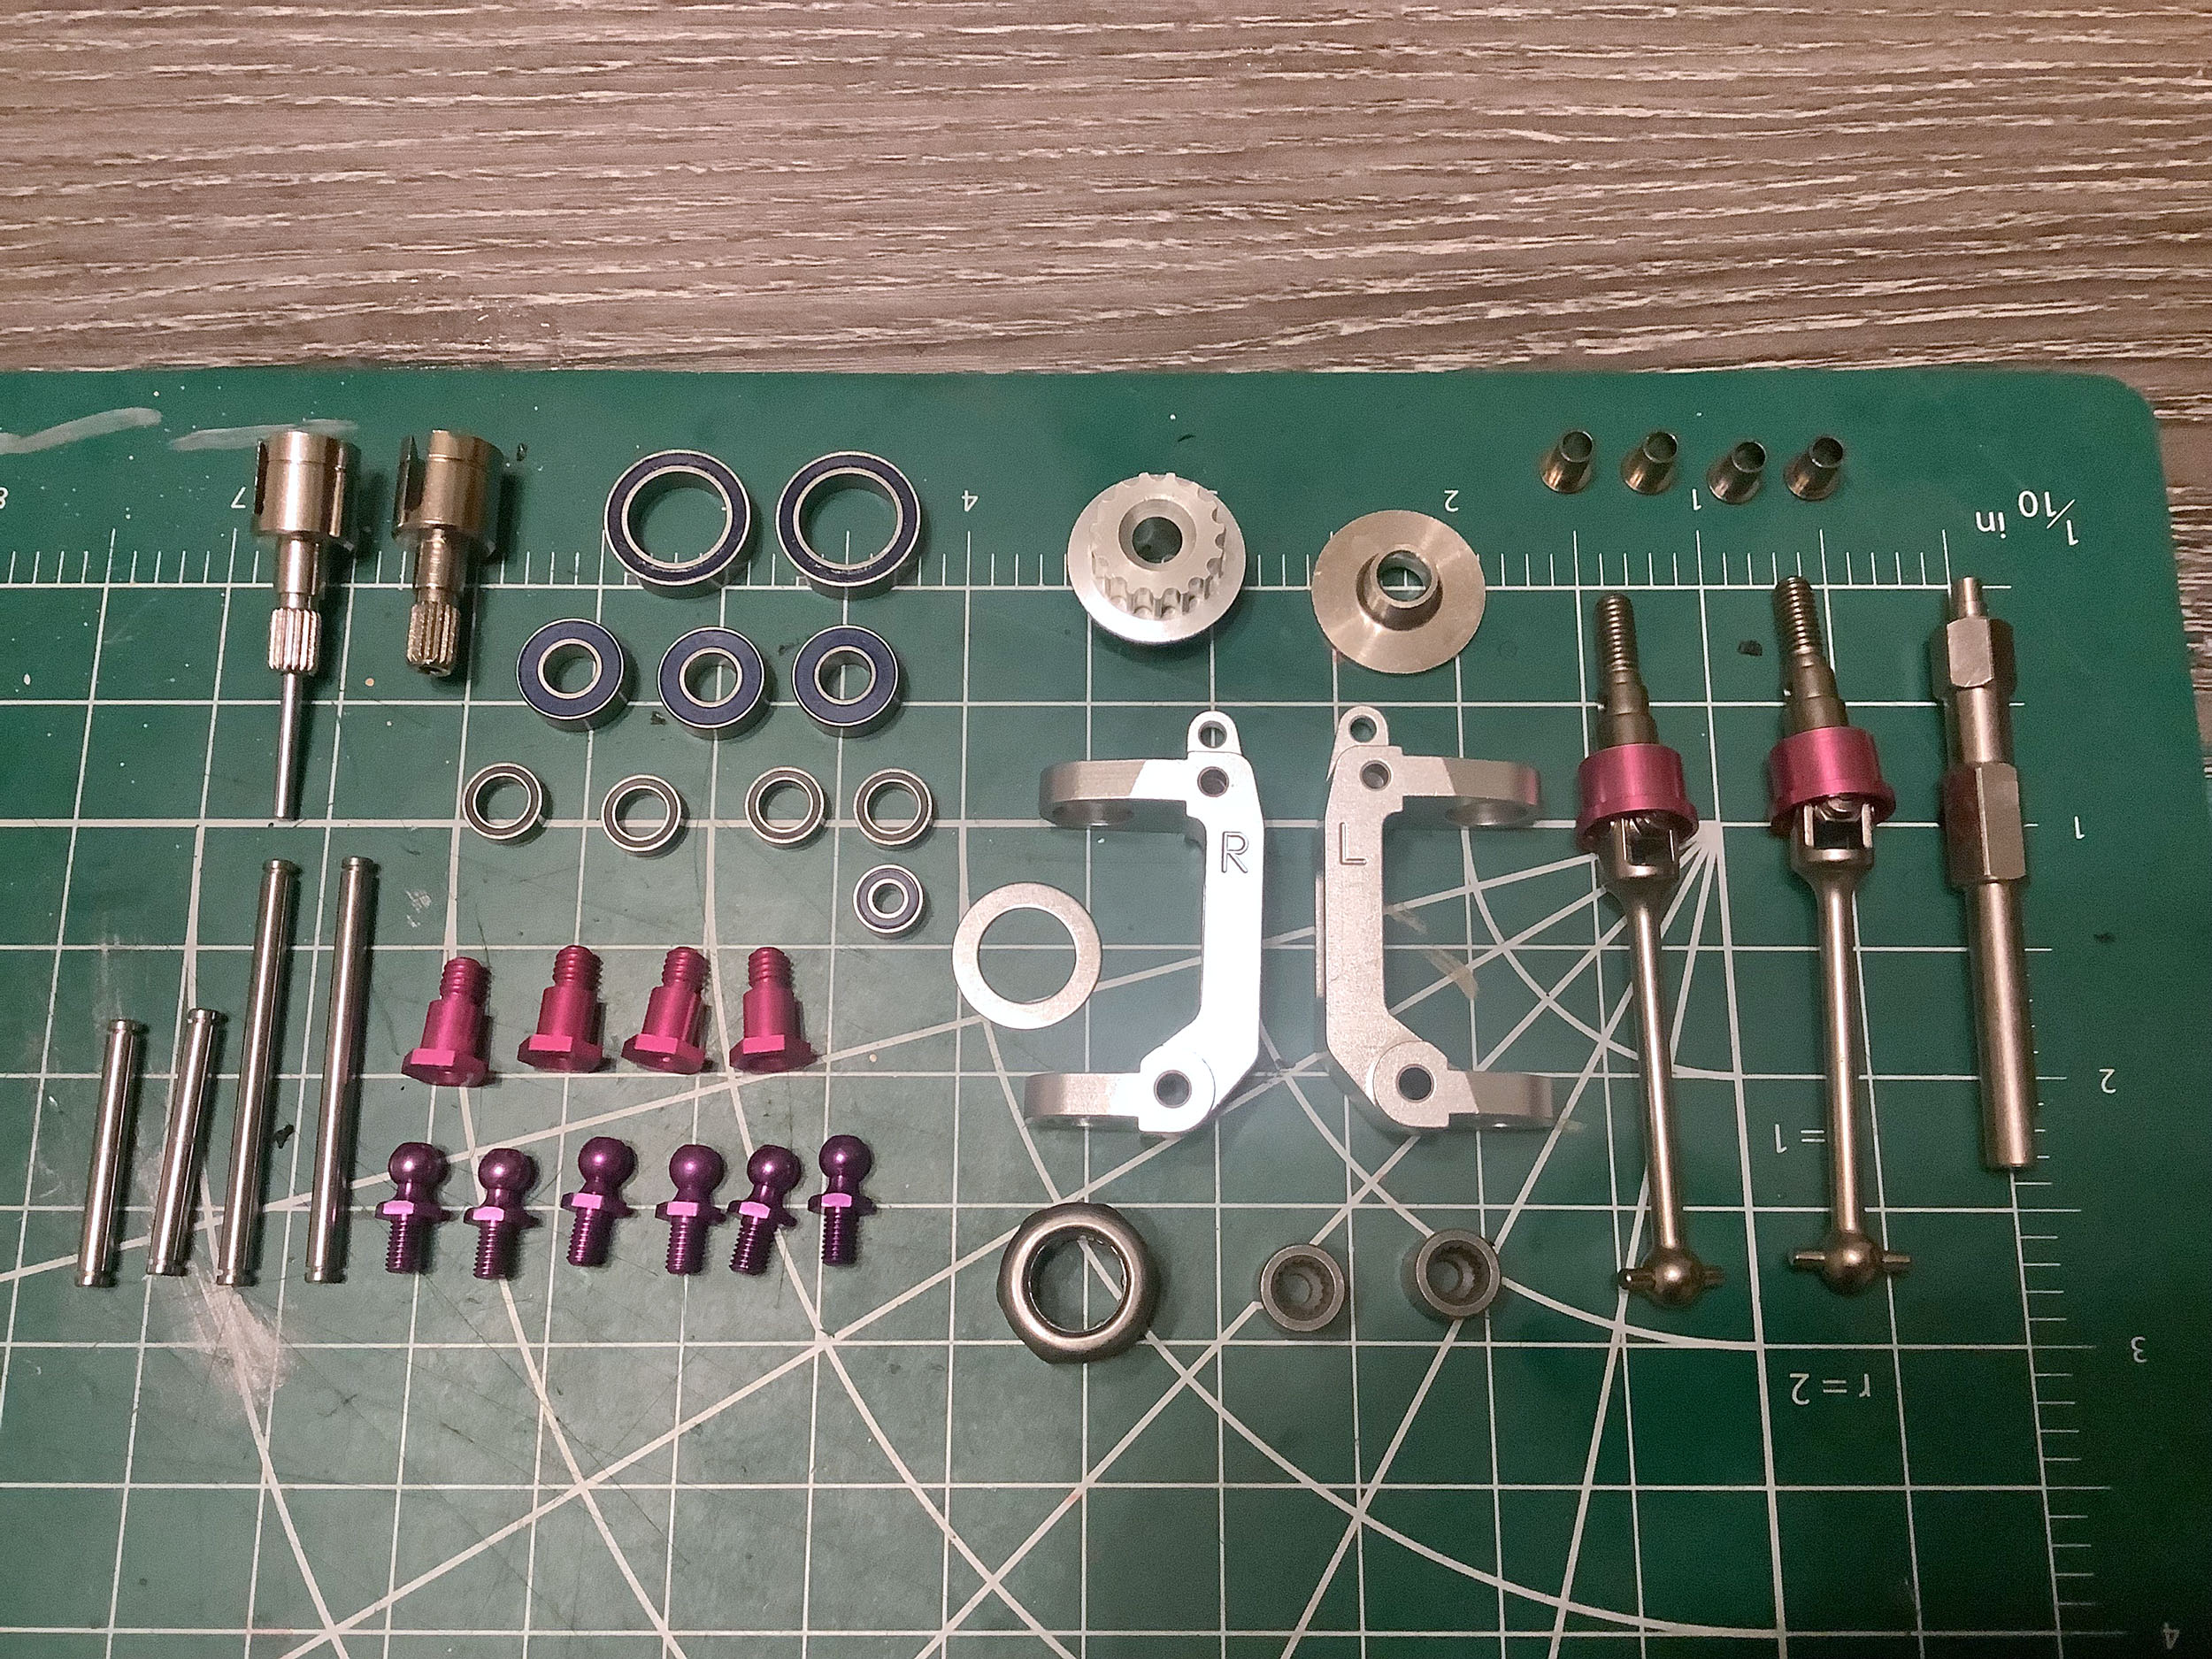
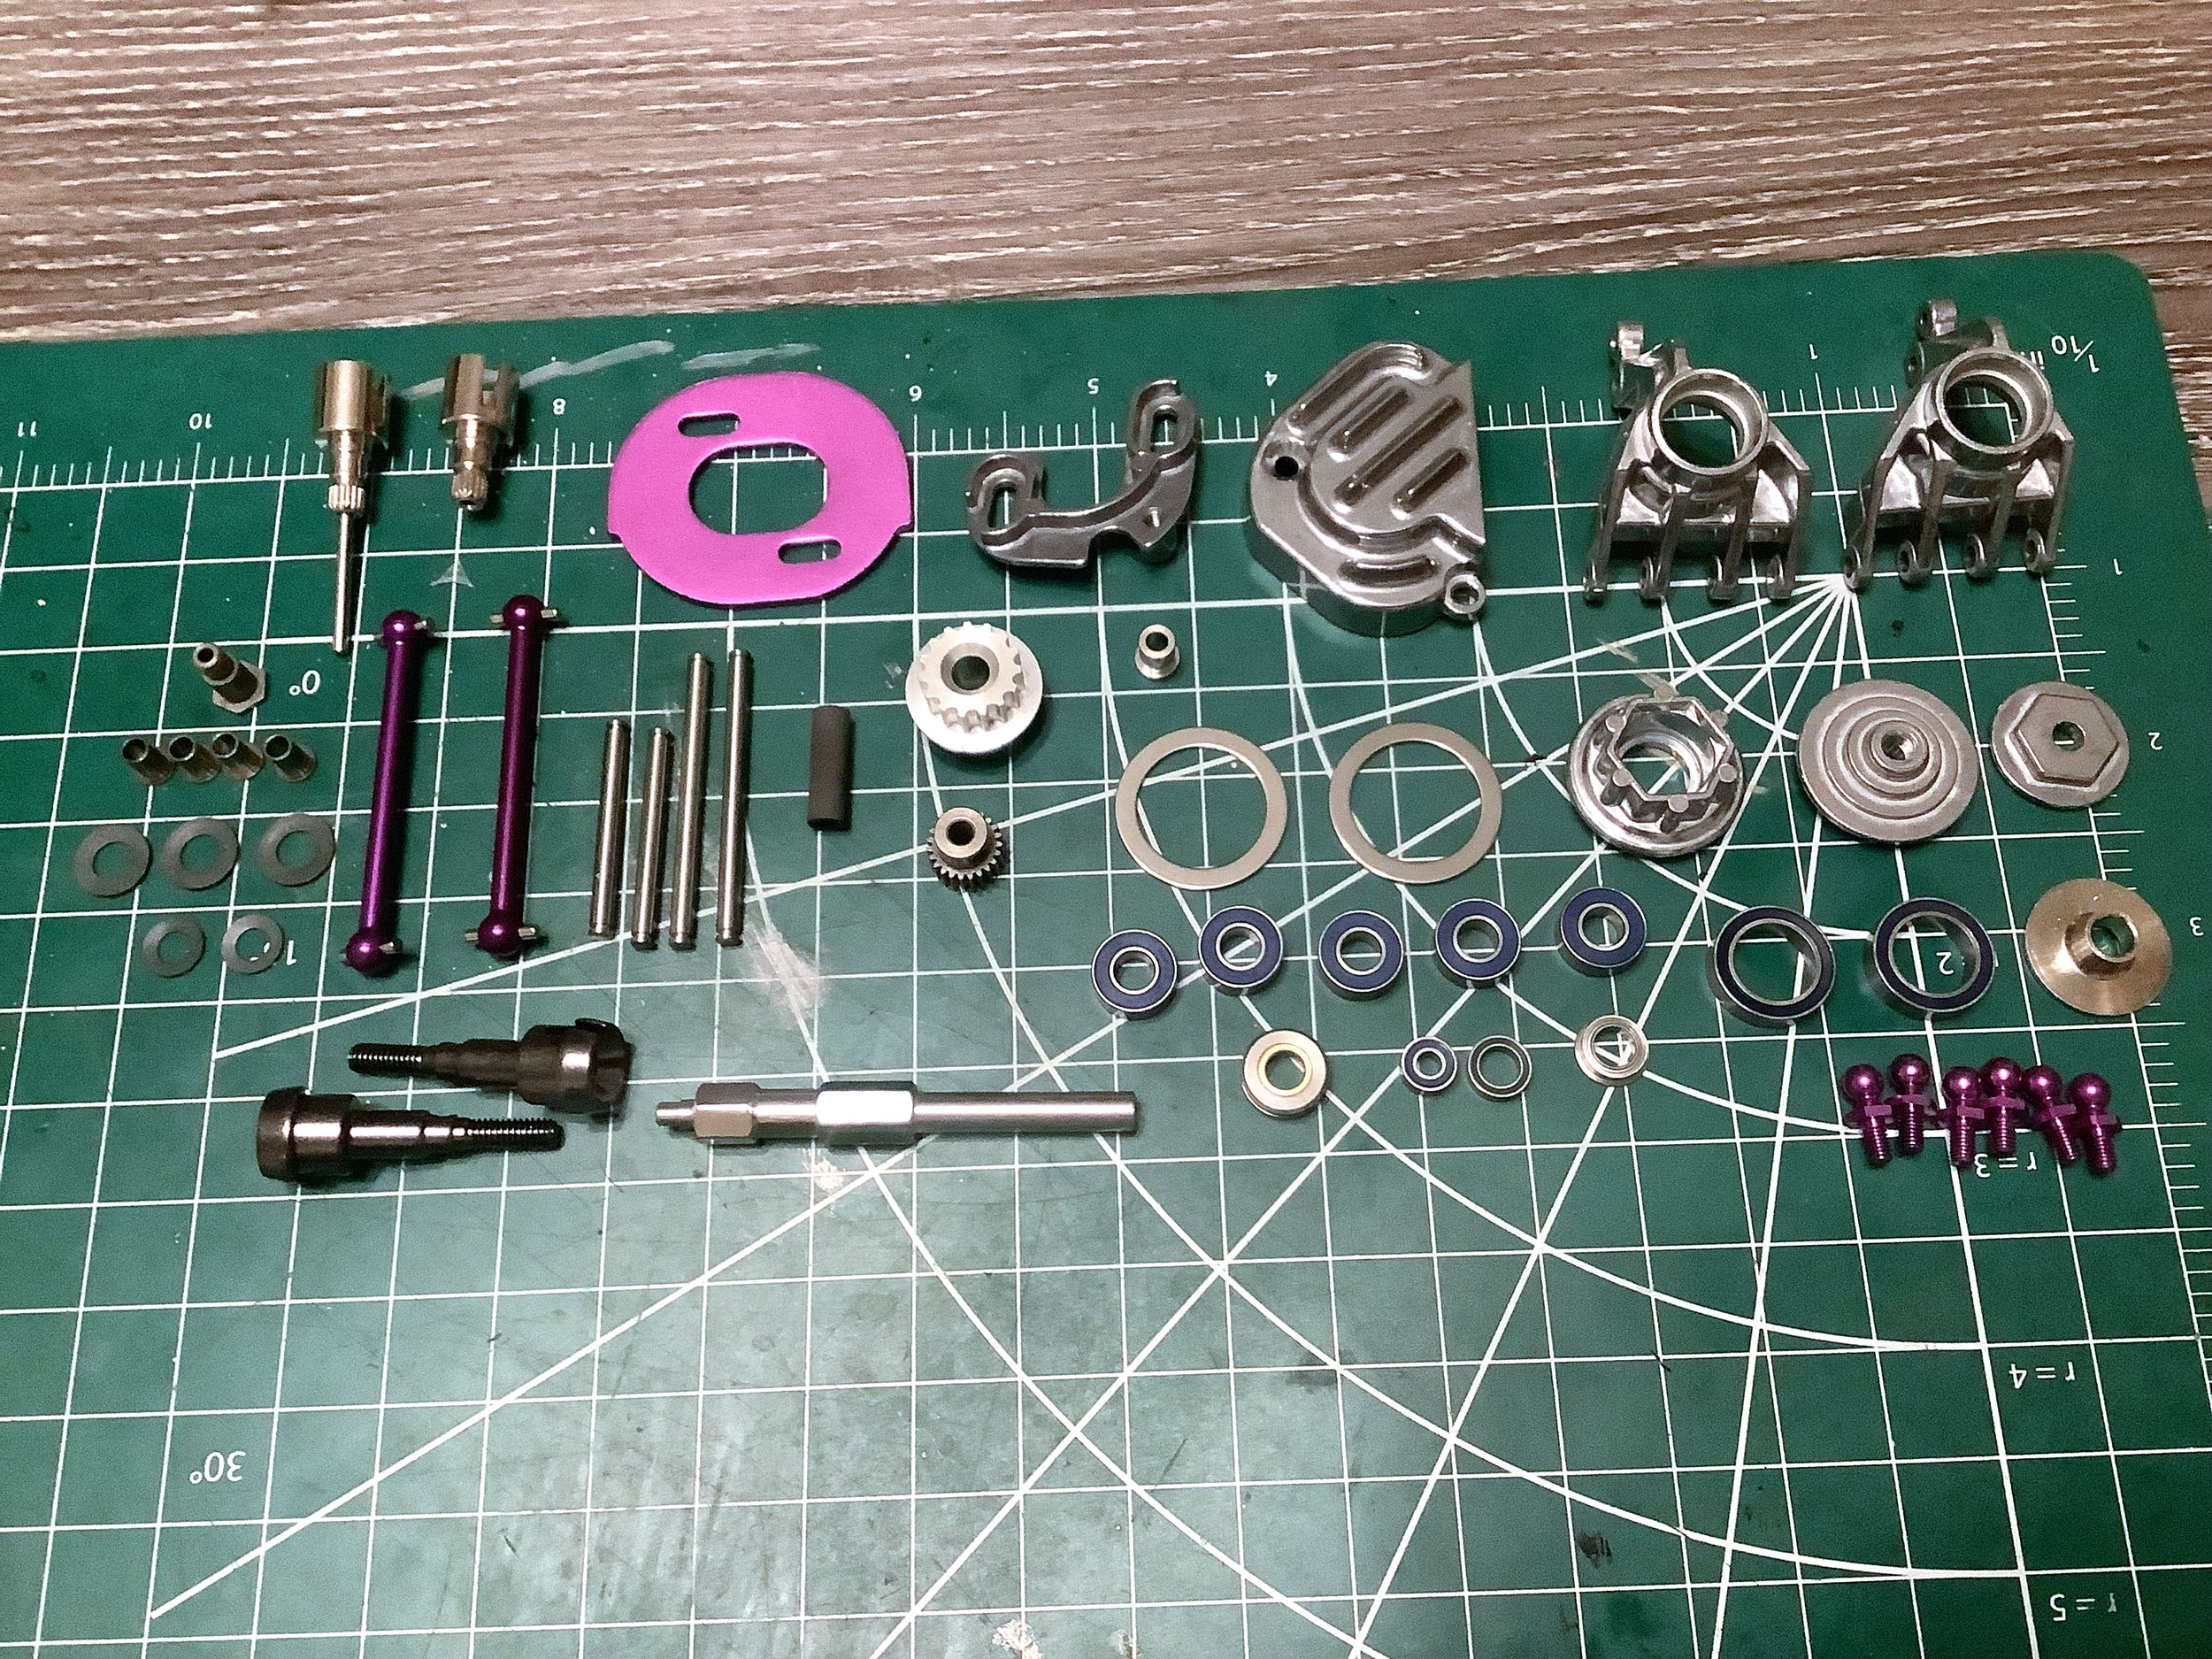
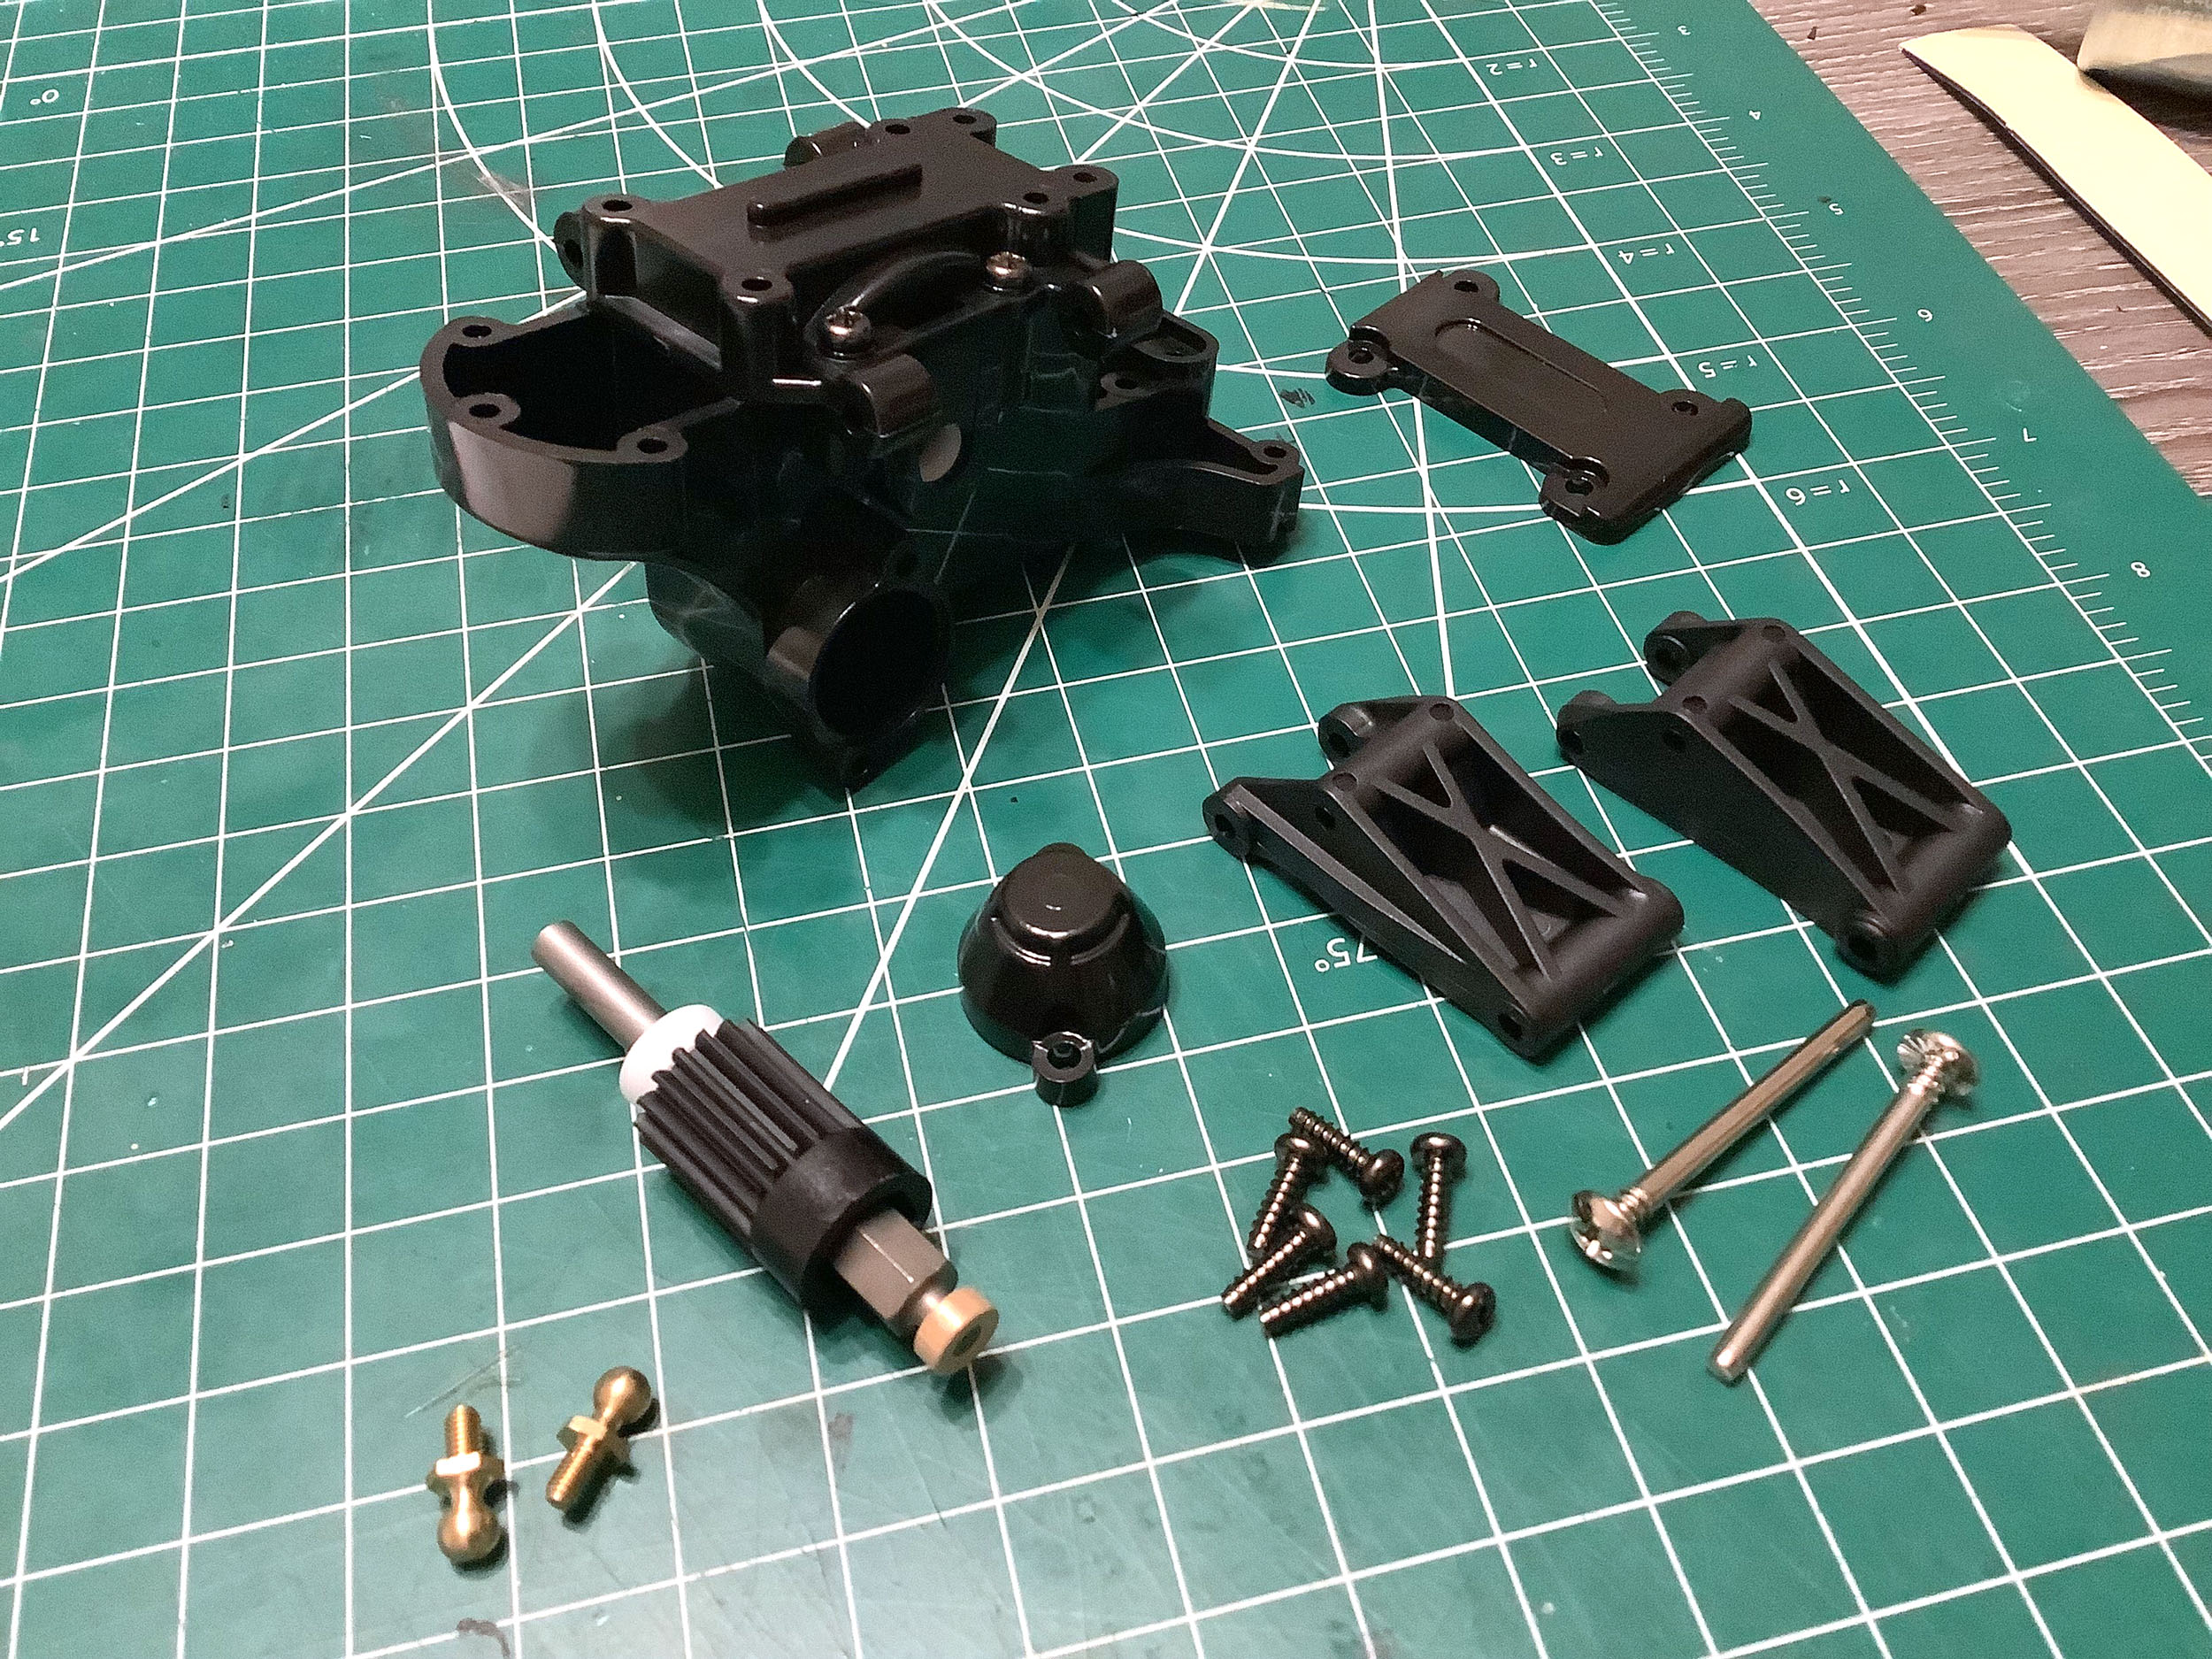
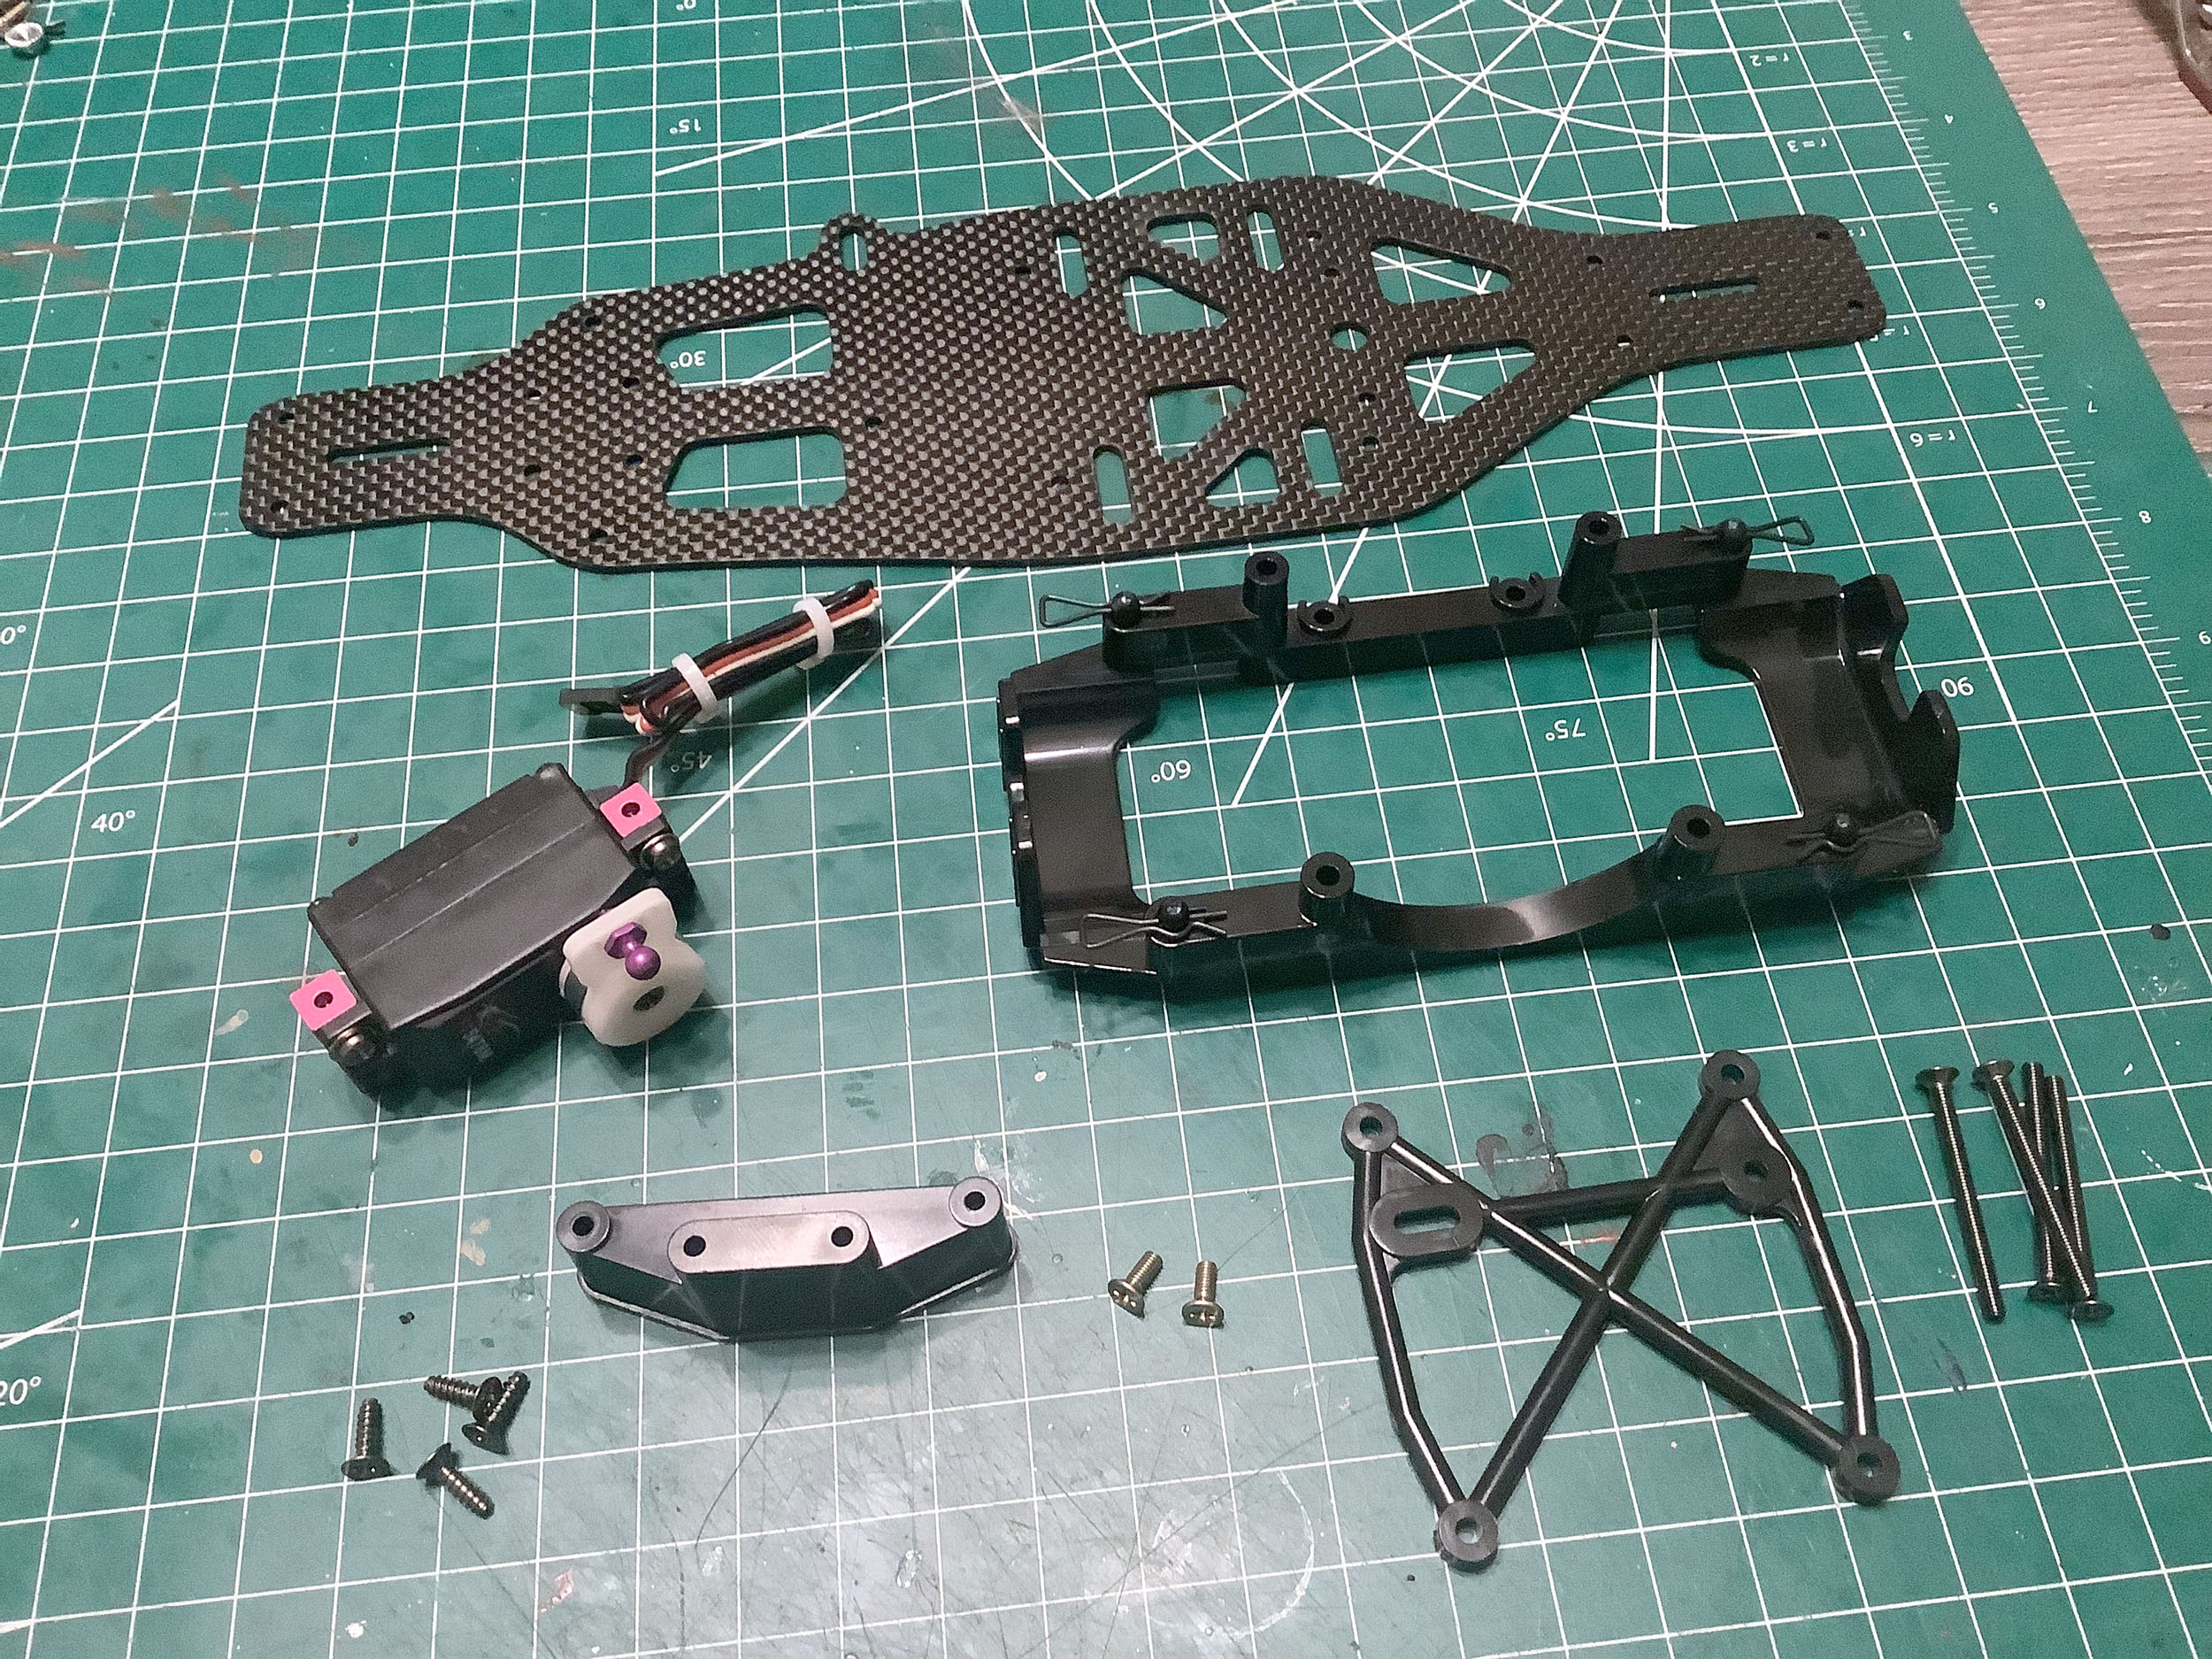
All of the parts shown on the left are from hardware bag A and are
unique to the TRF version of the chassis. The picture on the right
shows the parts from hardware bag B. This begins to give you an
idea of the vast number of special parts in this chassis kit. The
purple anodized aluminum parts are very unusual for Tamiya which hadn't
settled on their signature electric blue yet.
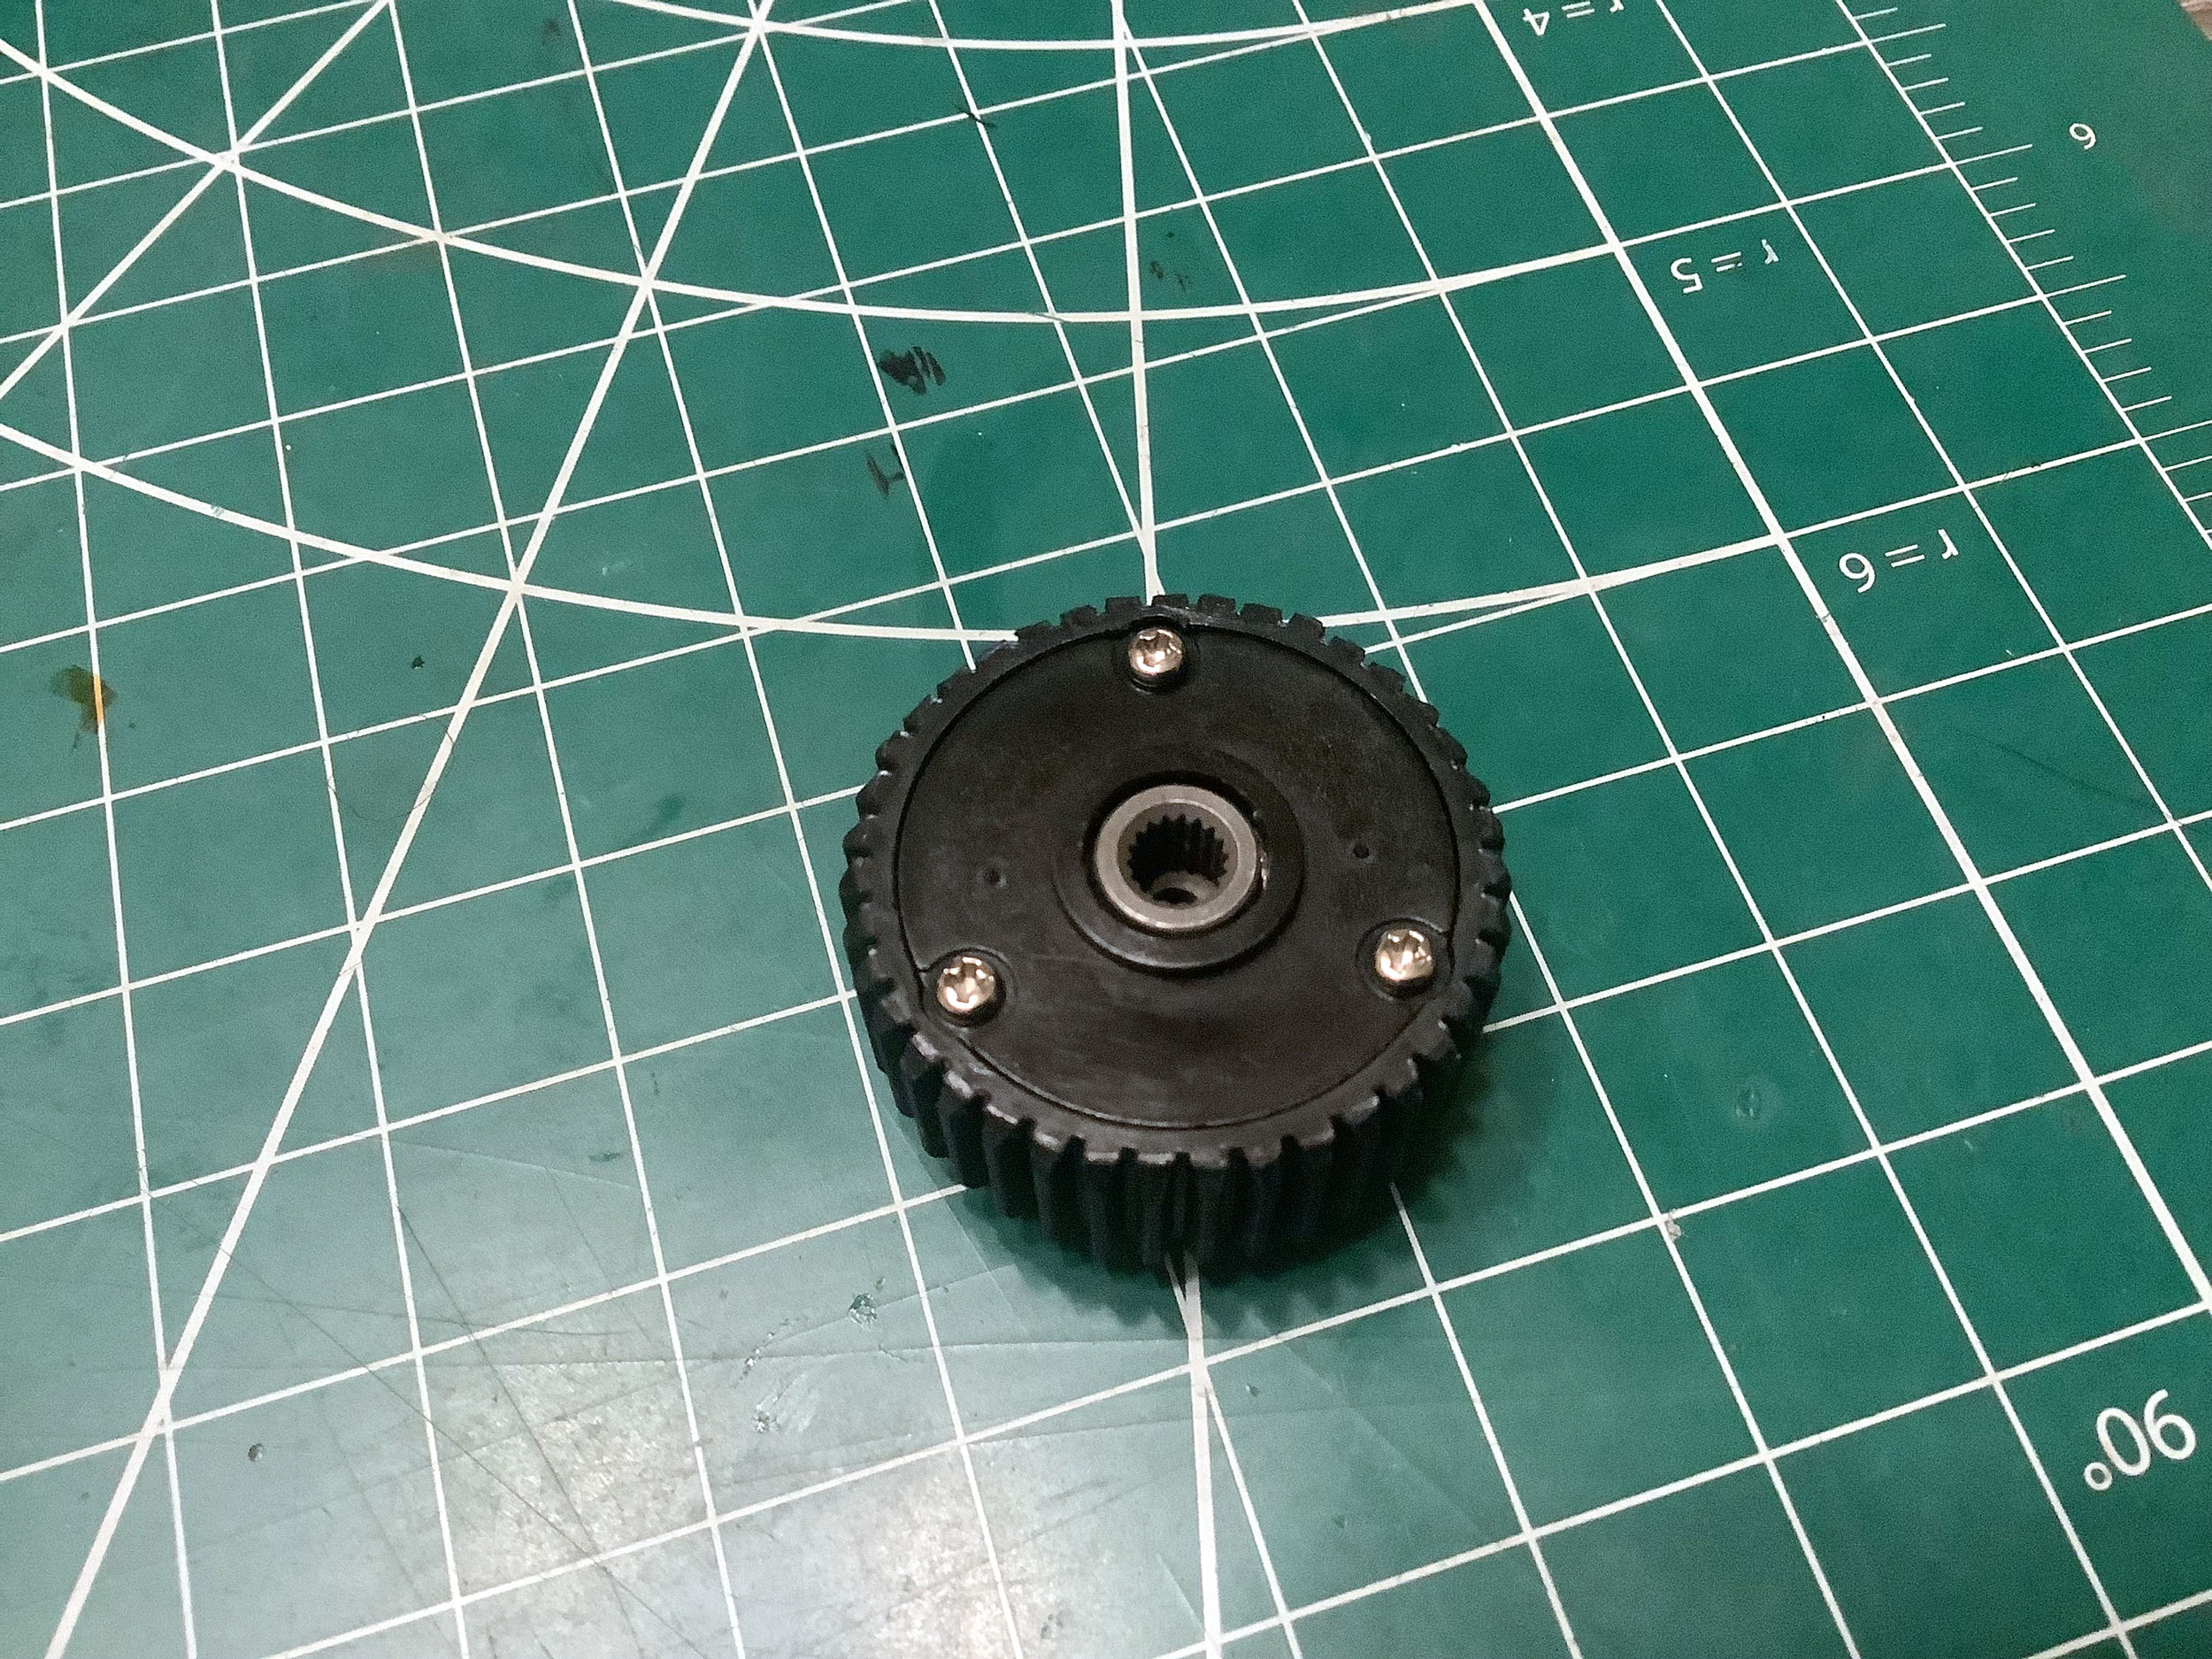
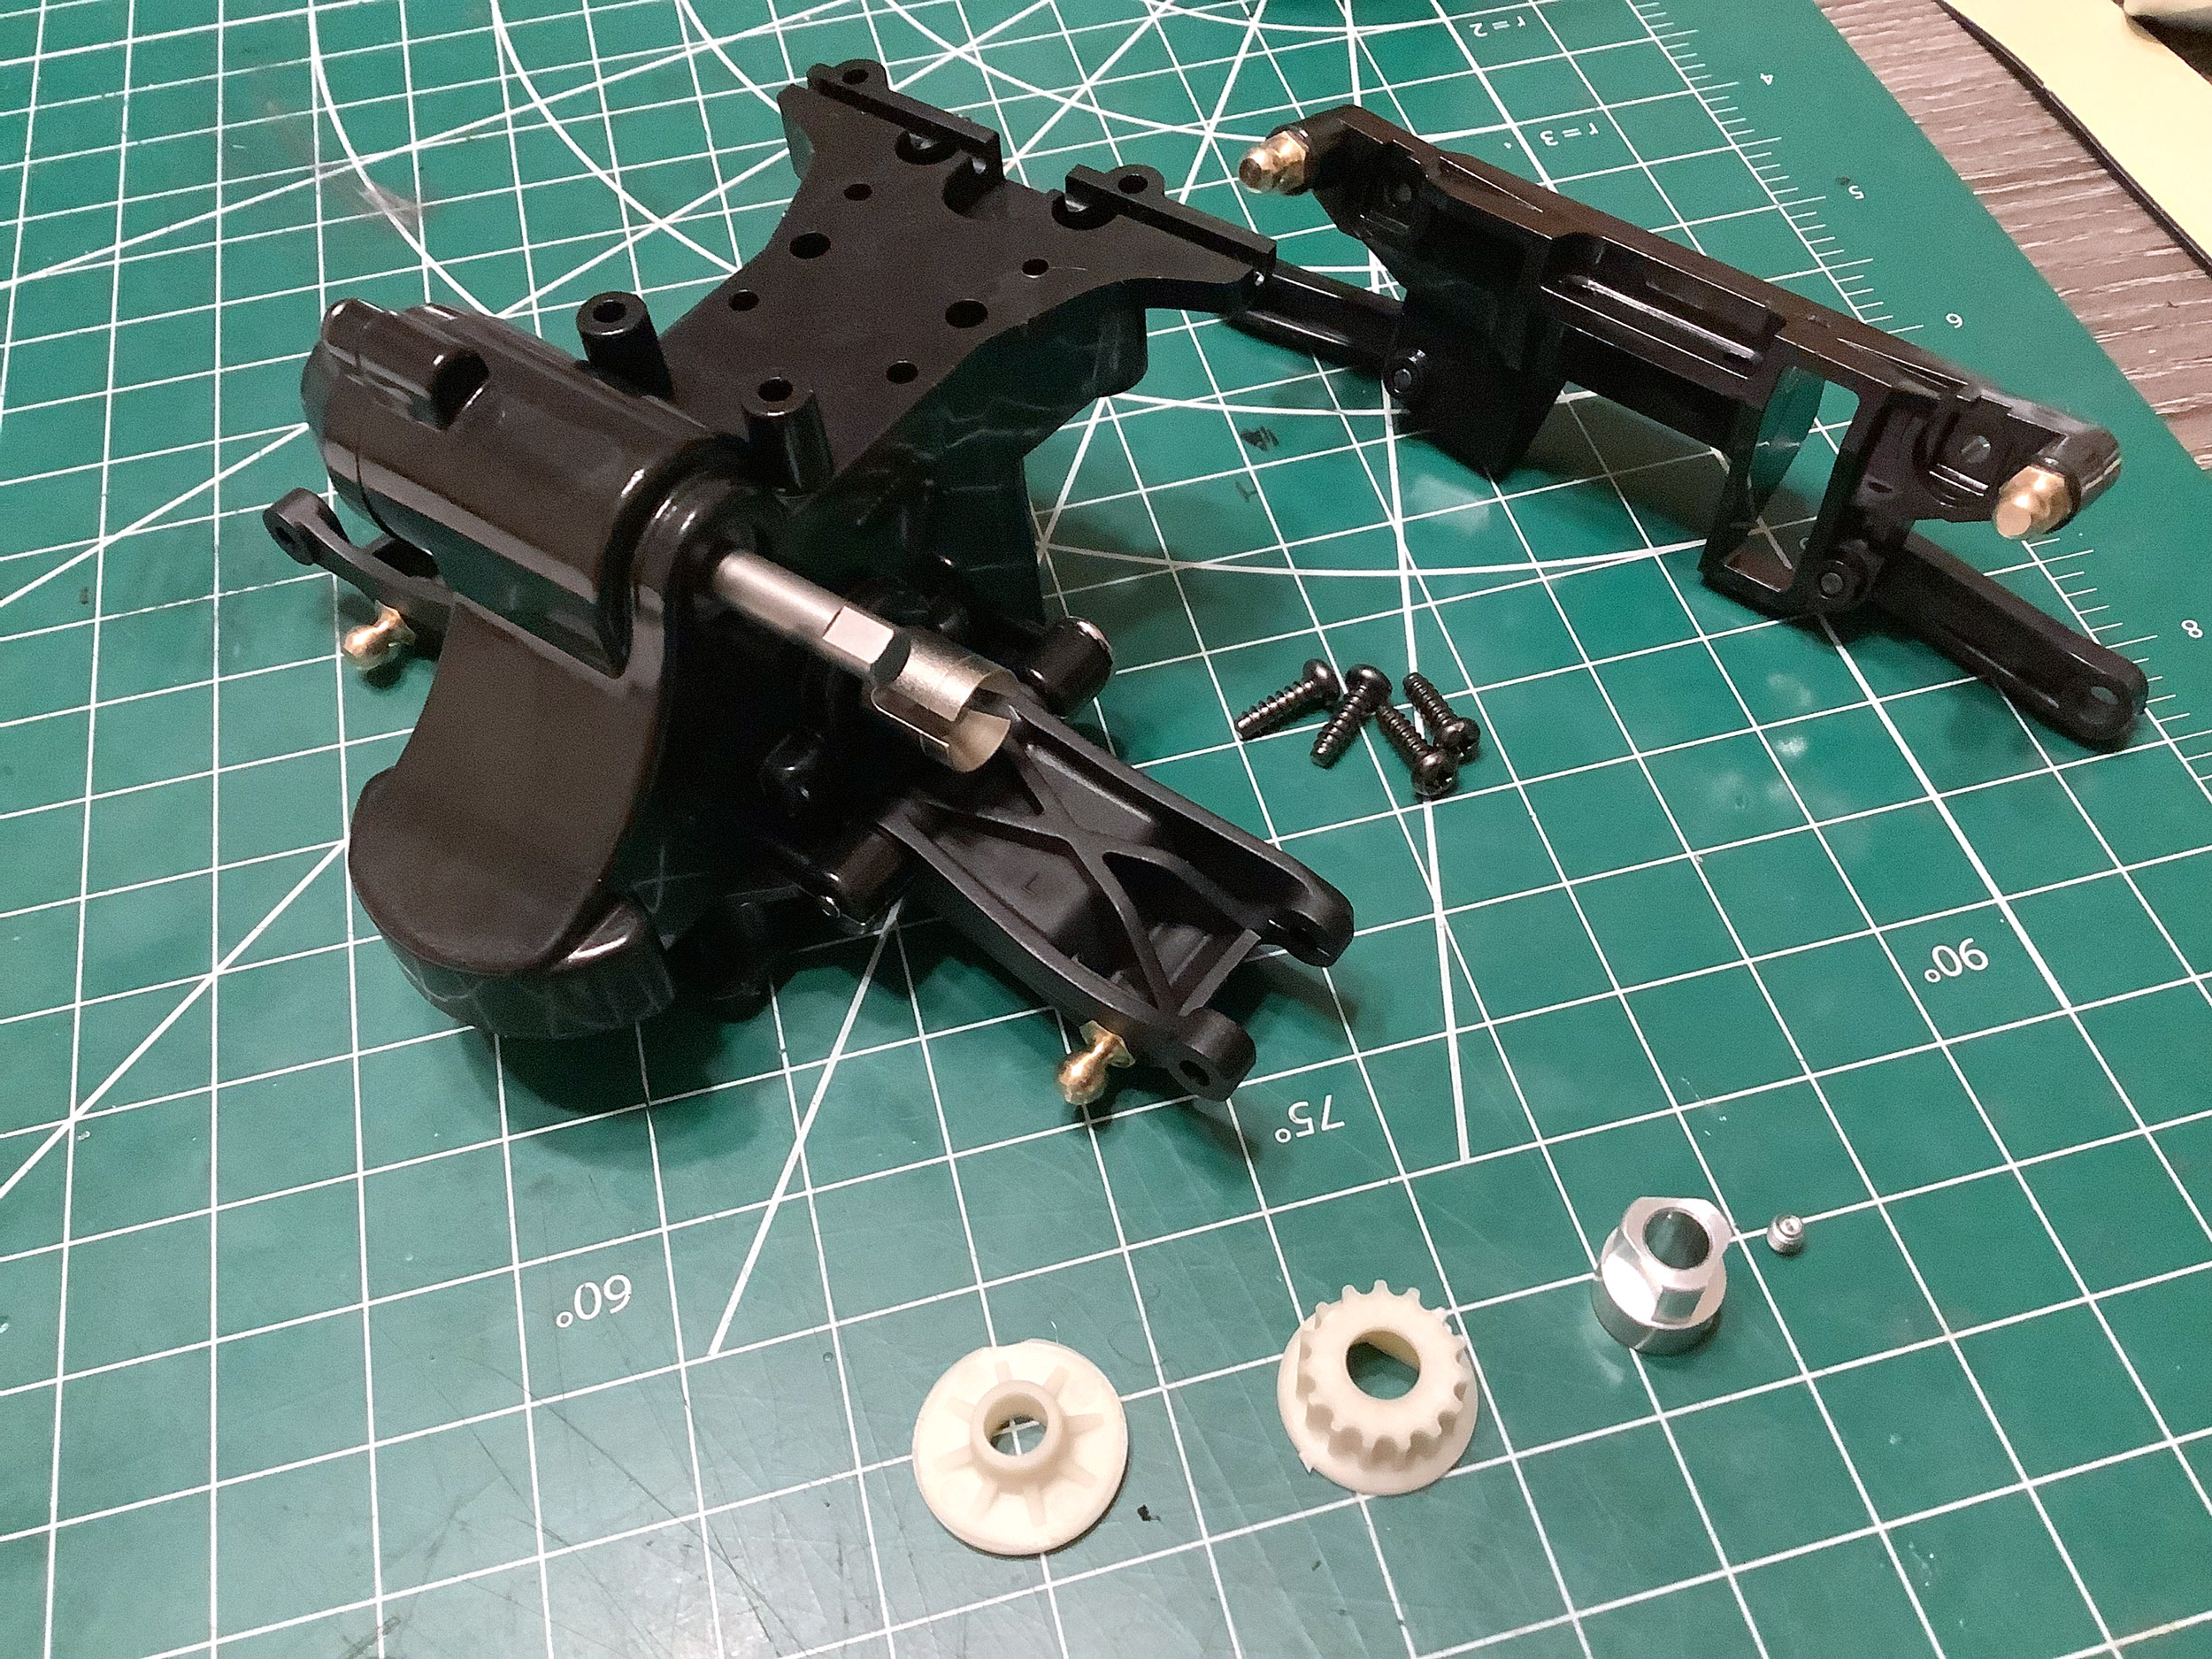
The standard chassis uses open, unsealed gear differentials front and
rear. This is a standard Tamiya differential with sintered metal
side gears and 3 spider gears. The gears are lightly greased and
provide very little resistance to differential motion. The TRF
model, on the other hand, uses a front one-way gear. This means
the axles are connected to the drive system when powered forward, but
slip when braking or reversing. Personally, I don't like these
because it means the car only has rear wheel braking, but it is better
for accelerating out of a corner. Good for racing, bad for general
driving.
Here are the two assembled gear diffs for the standard model which are
the same in the front and rear. The front one-way on the right
looks nearly the same, but you can see a slight difference in the size
of the output spline. The external dimensions of the housing are
the same (39T) meaning it can fit in the same bulkhead and use the same mating
gears.
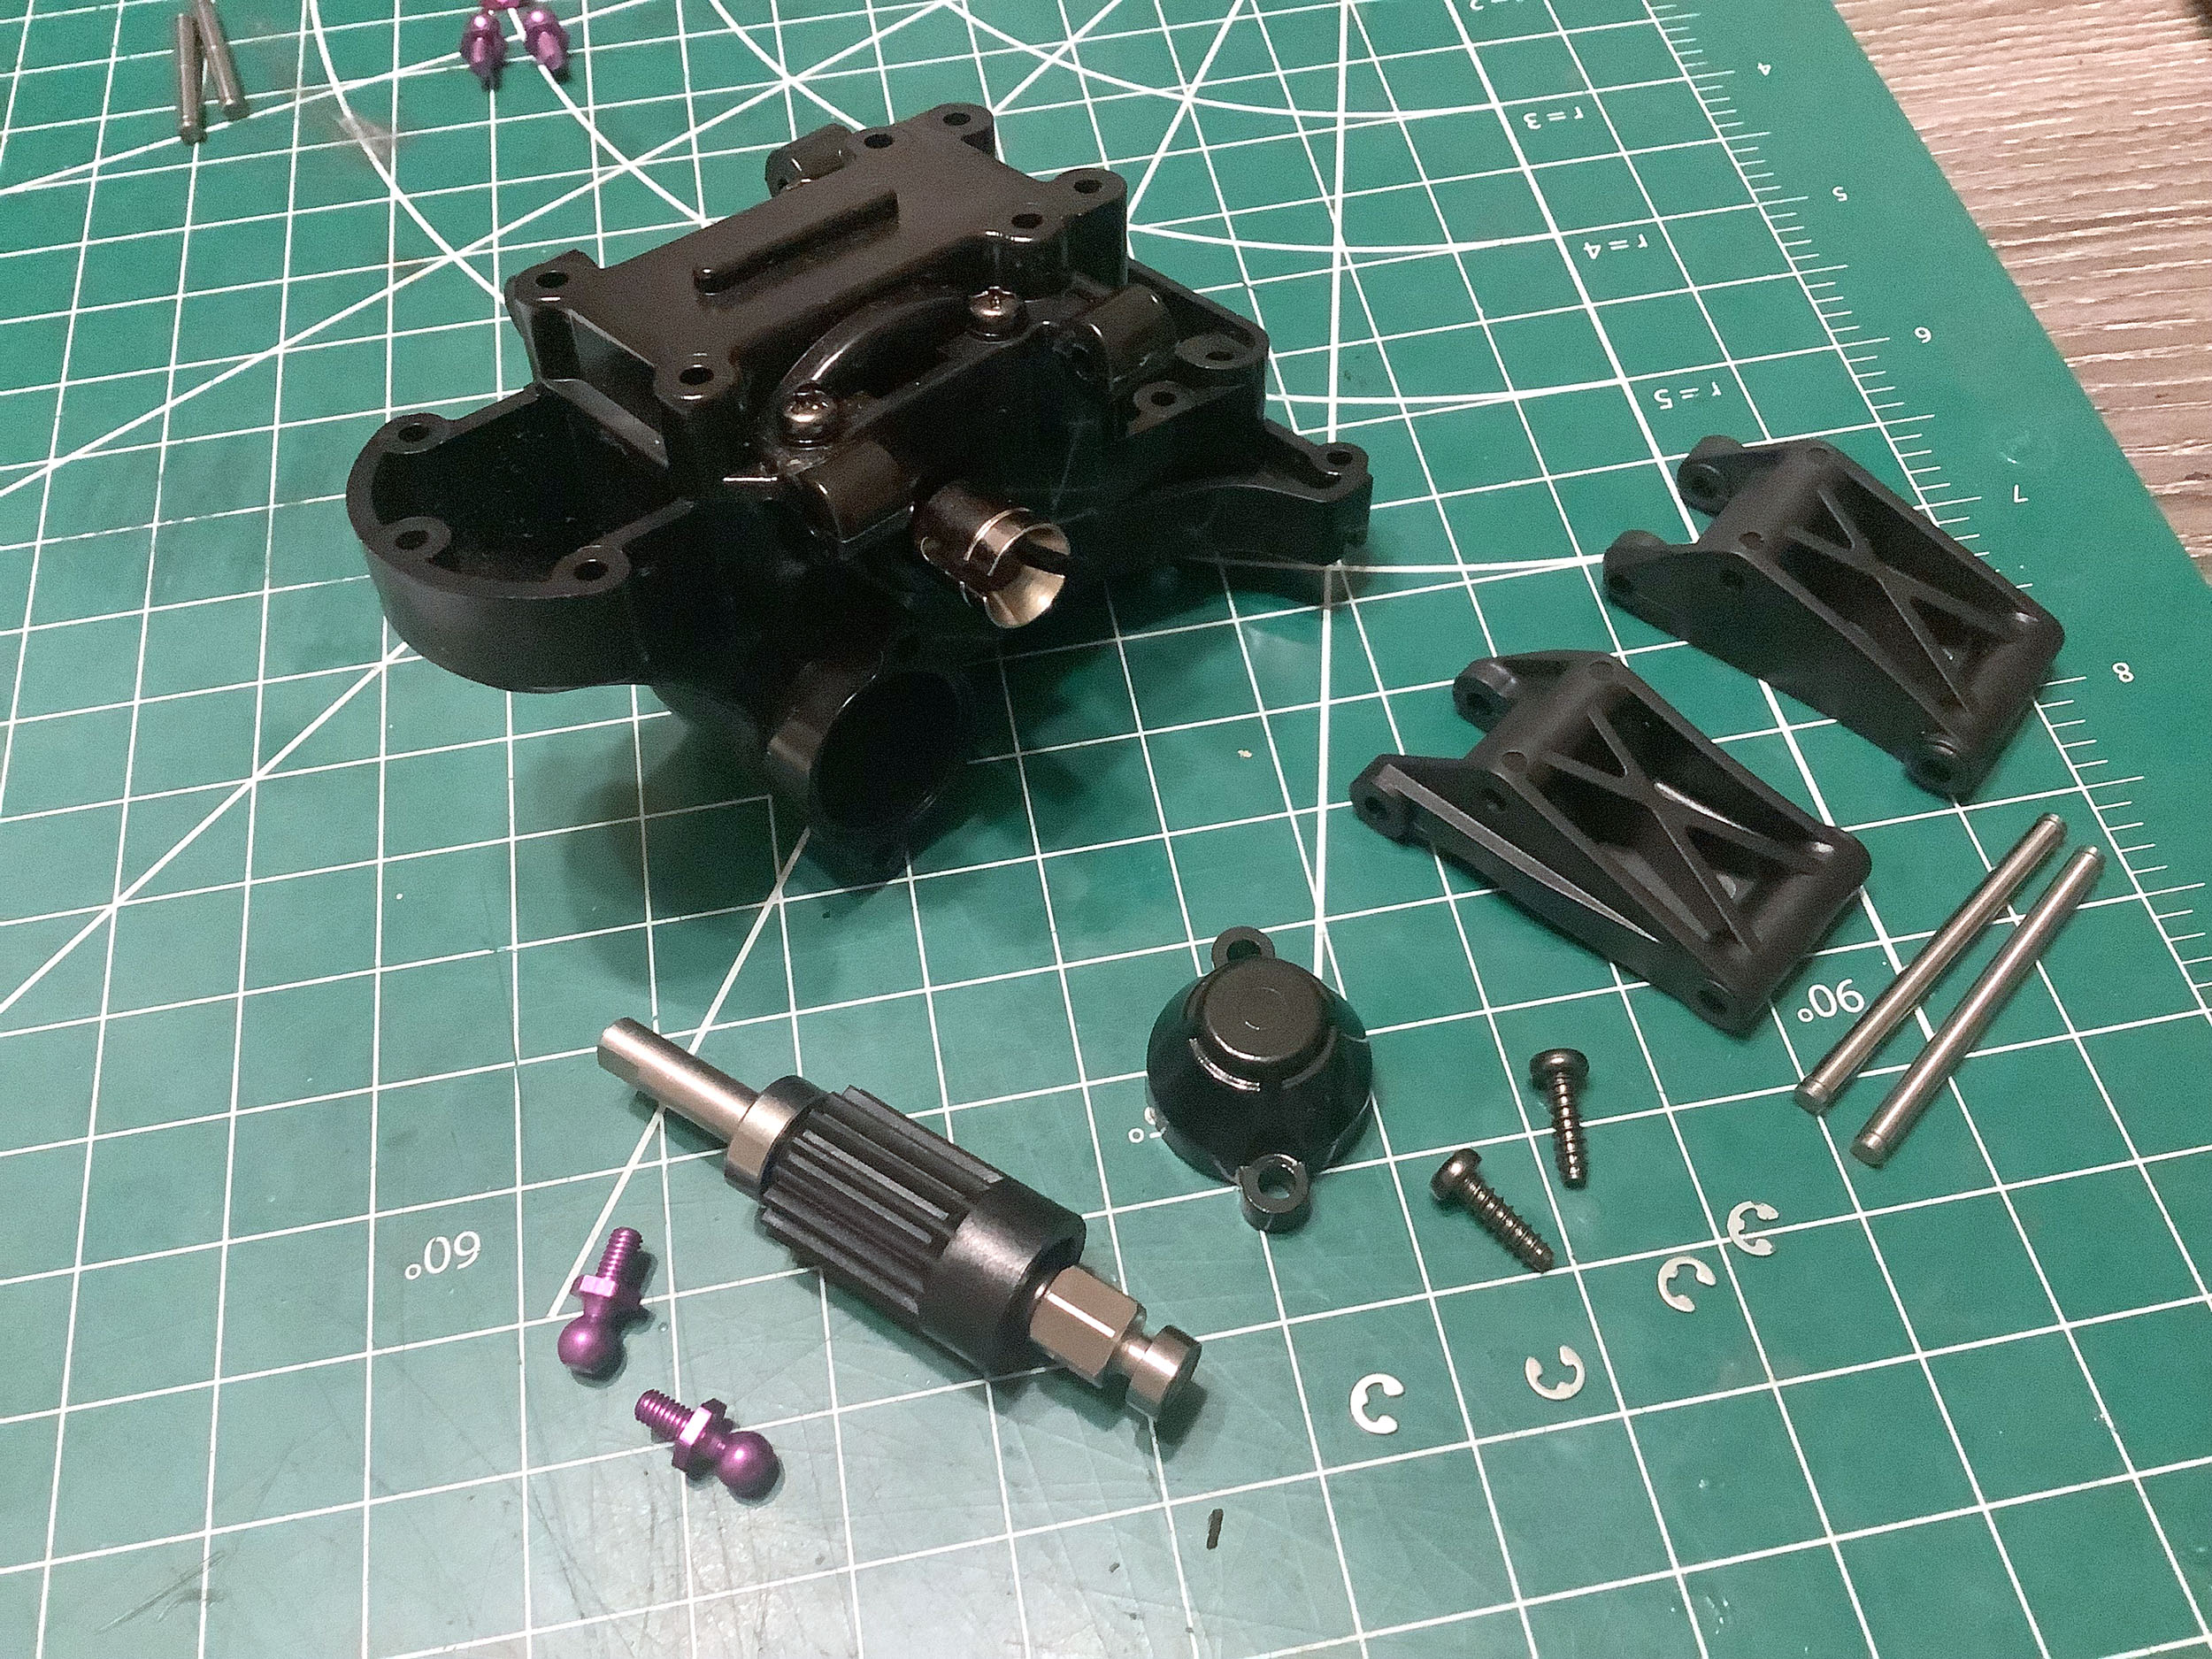
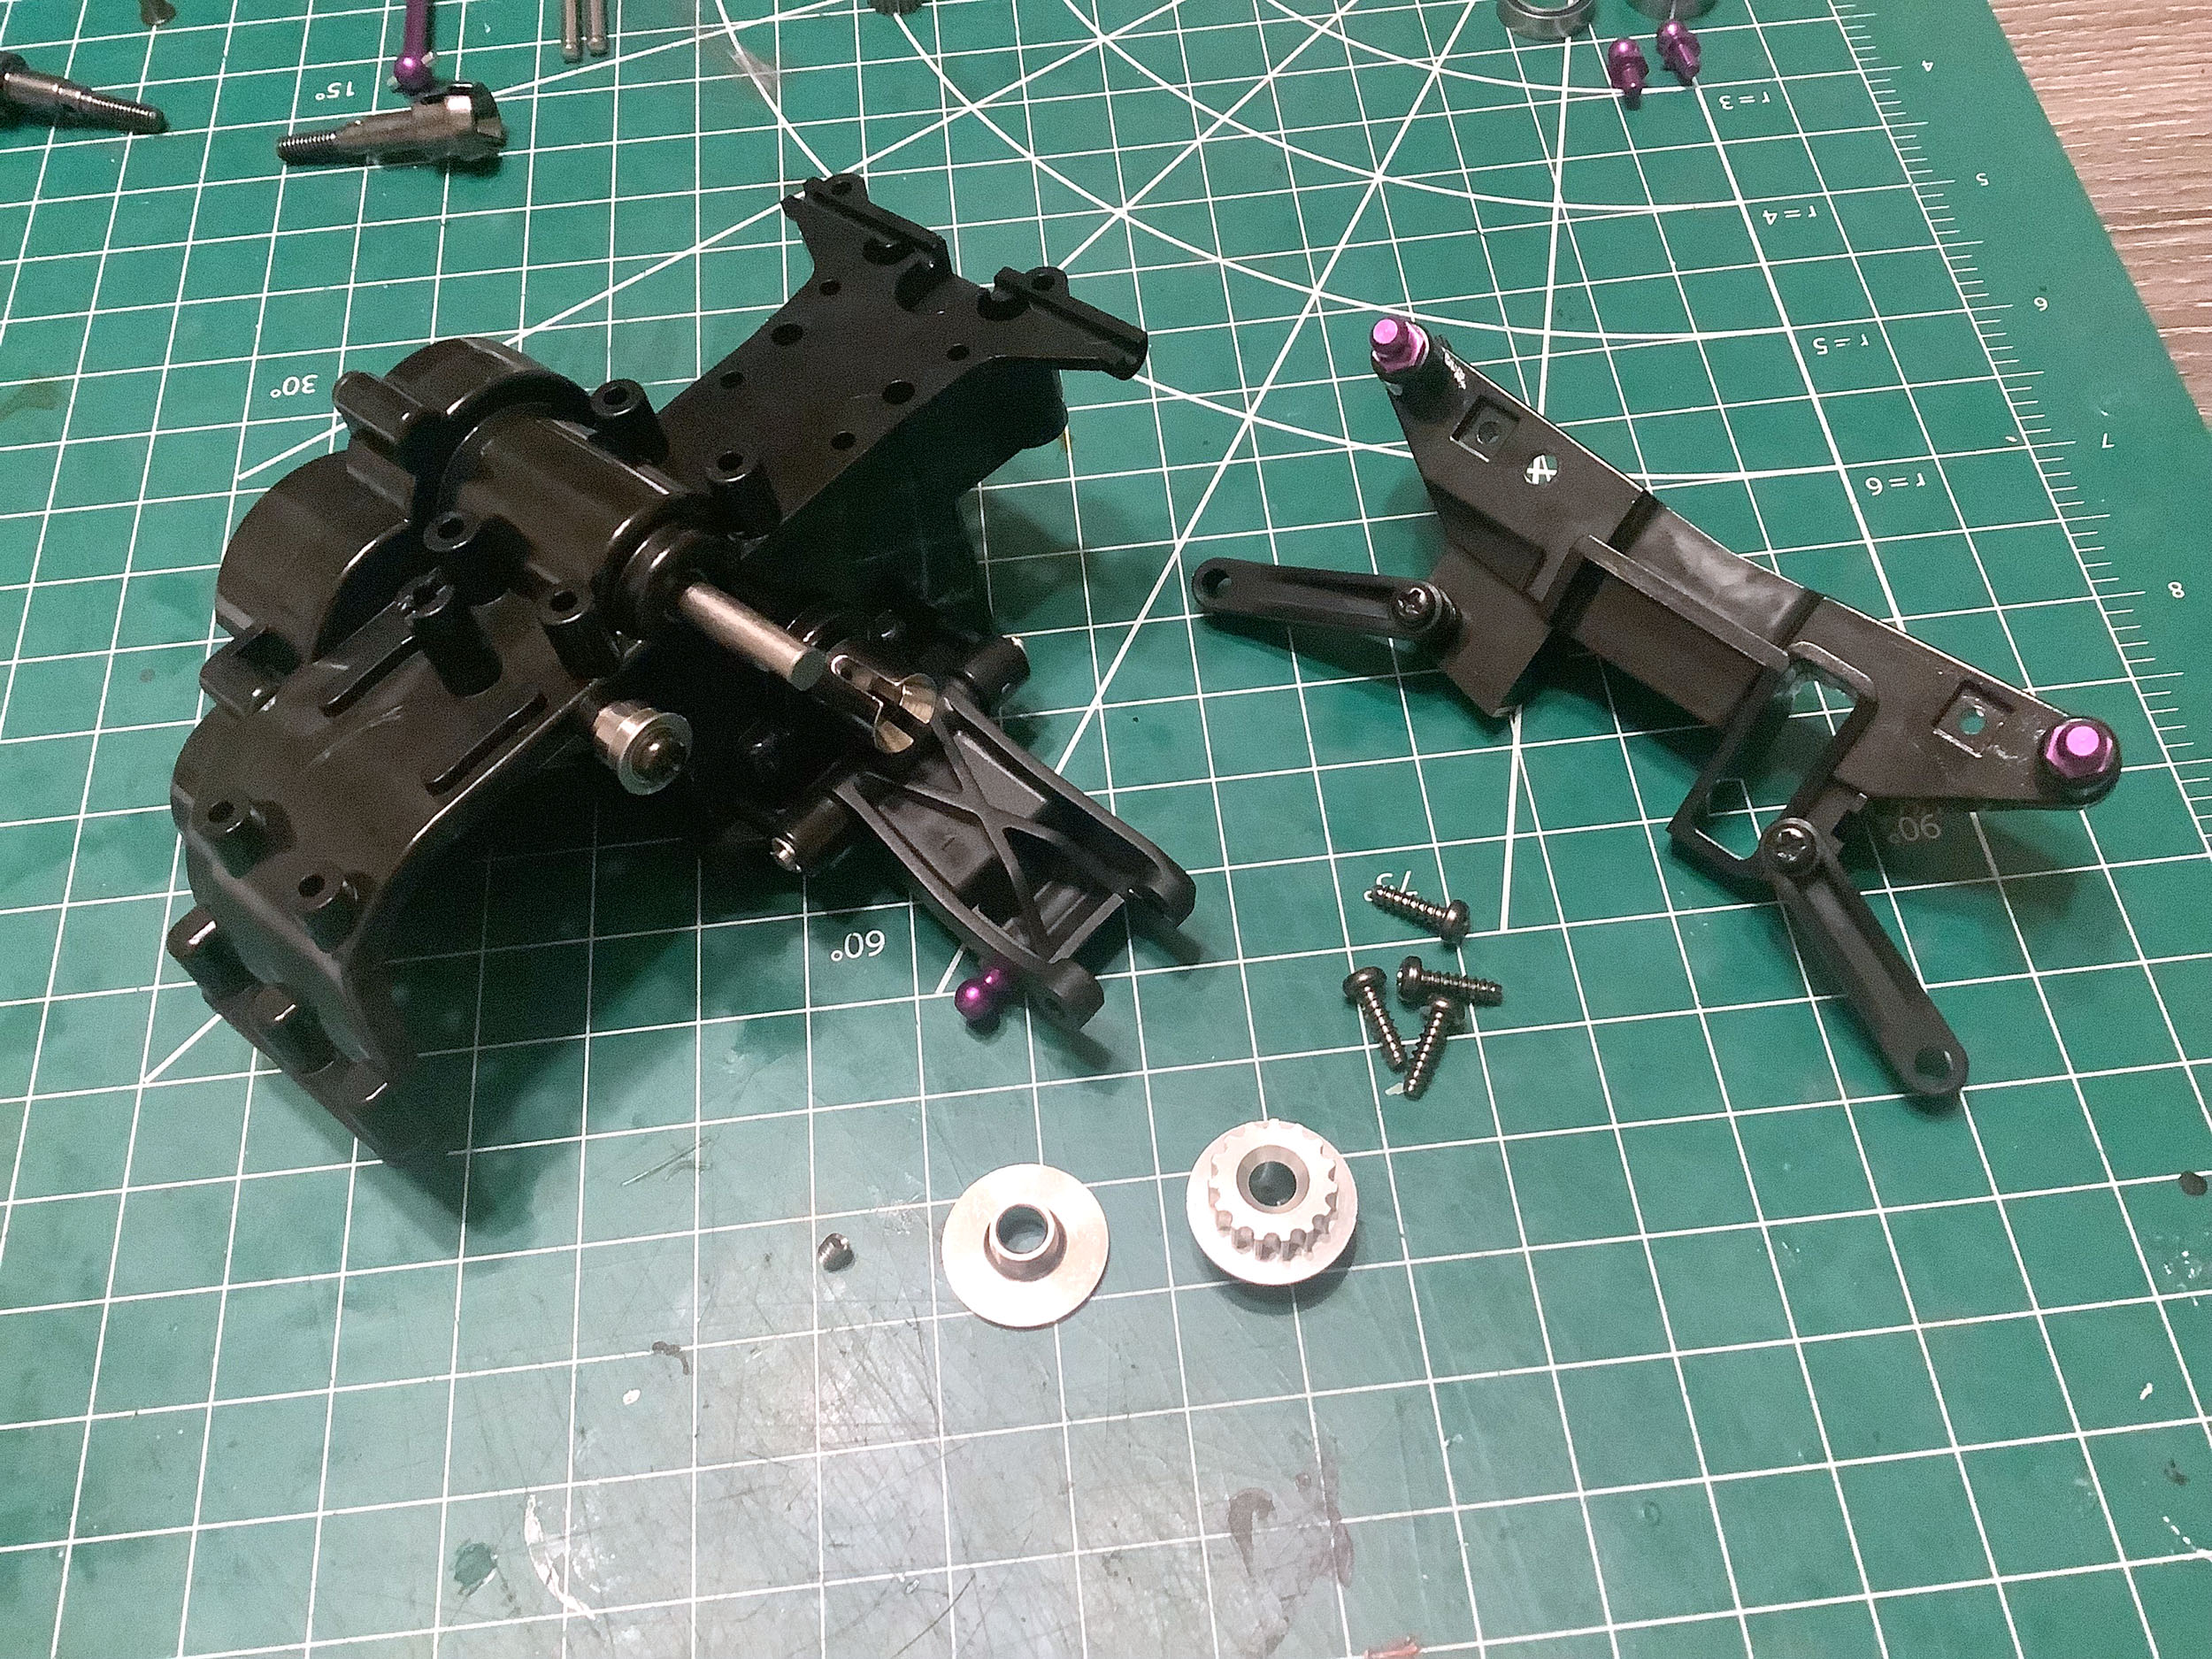
Now we'll assemble the front bulkhead. The primary plastic housing
parts are the same between the chassis versions. The only
difference is the use of shielded ball bearings on the TRF version
instead of plastic bushings.
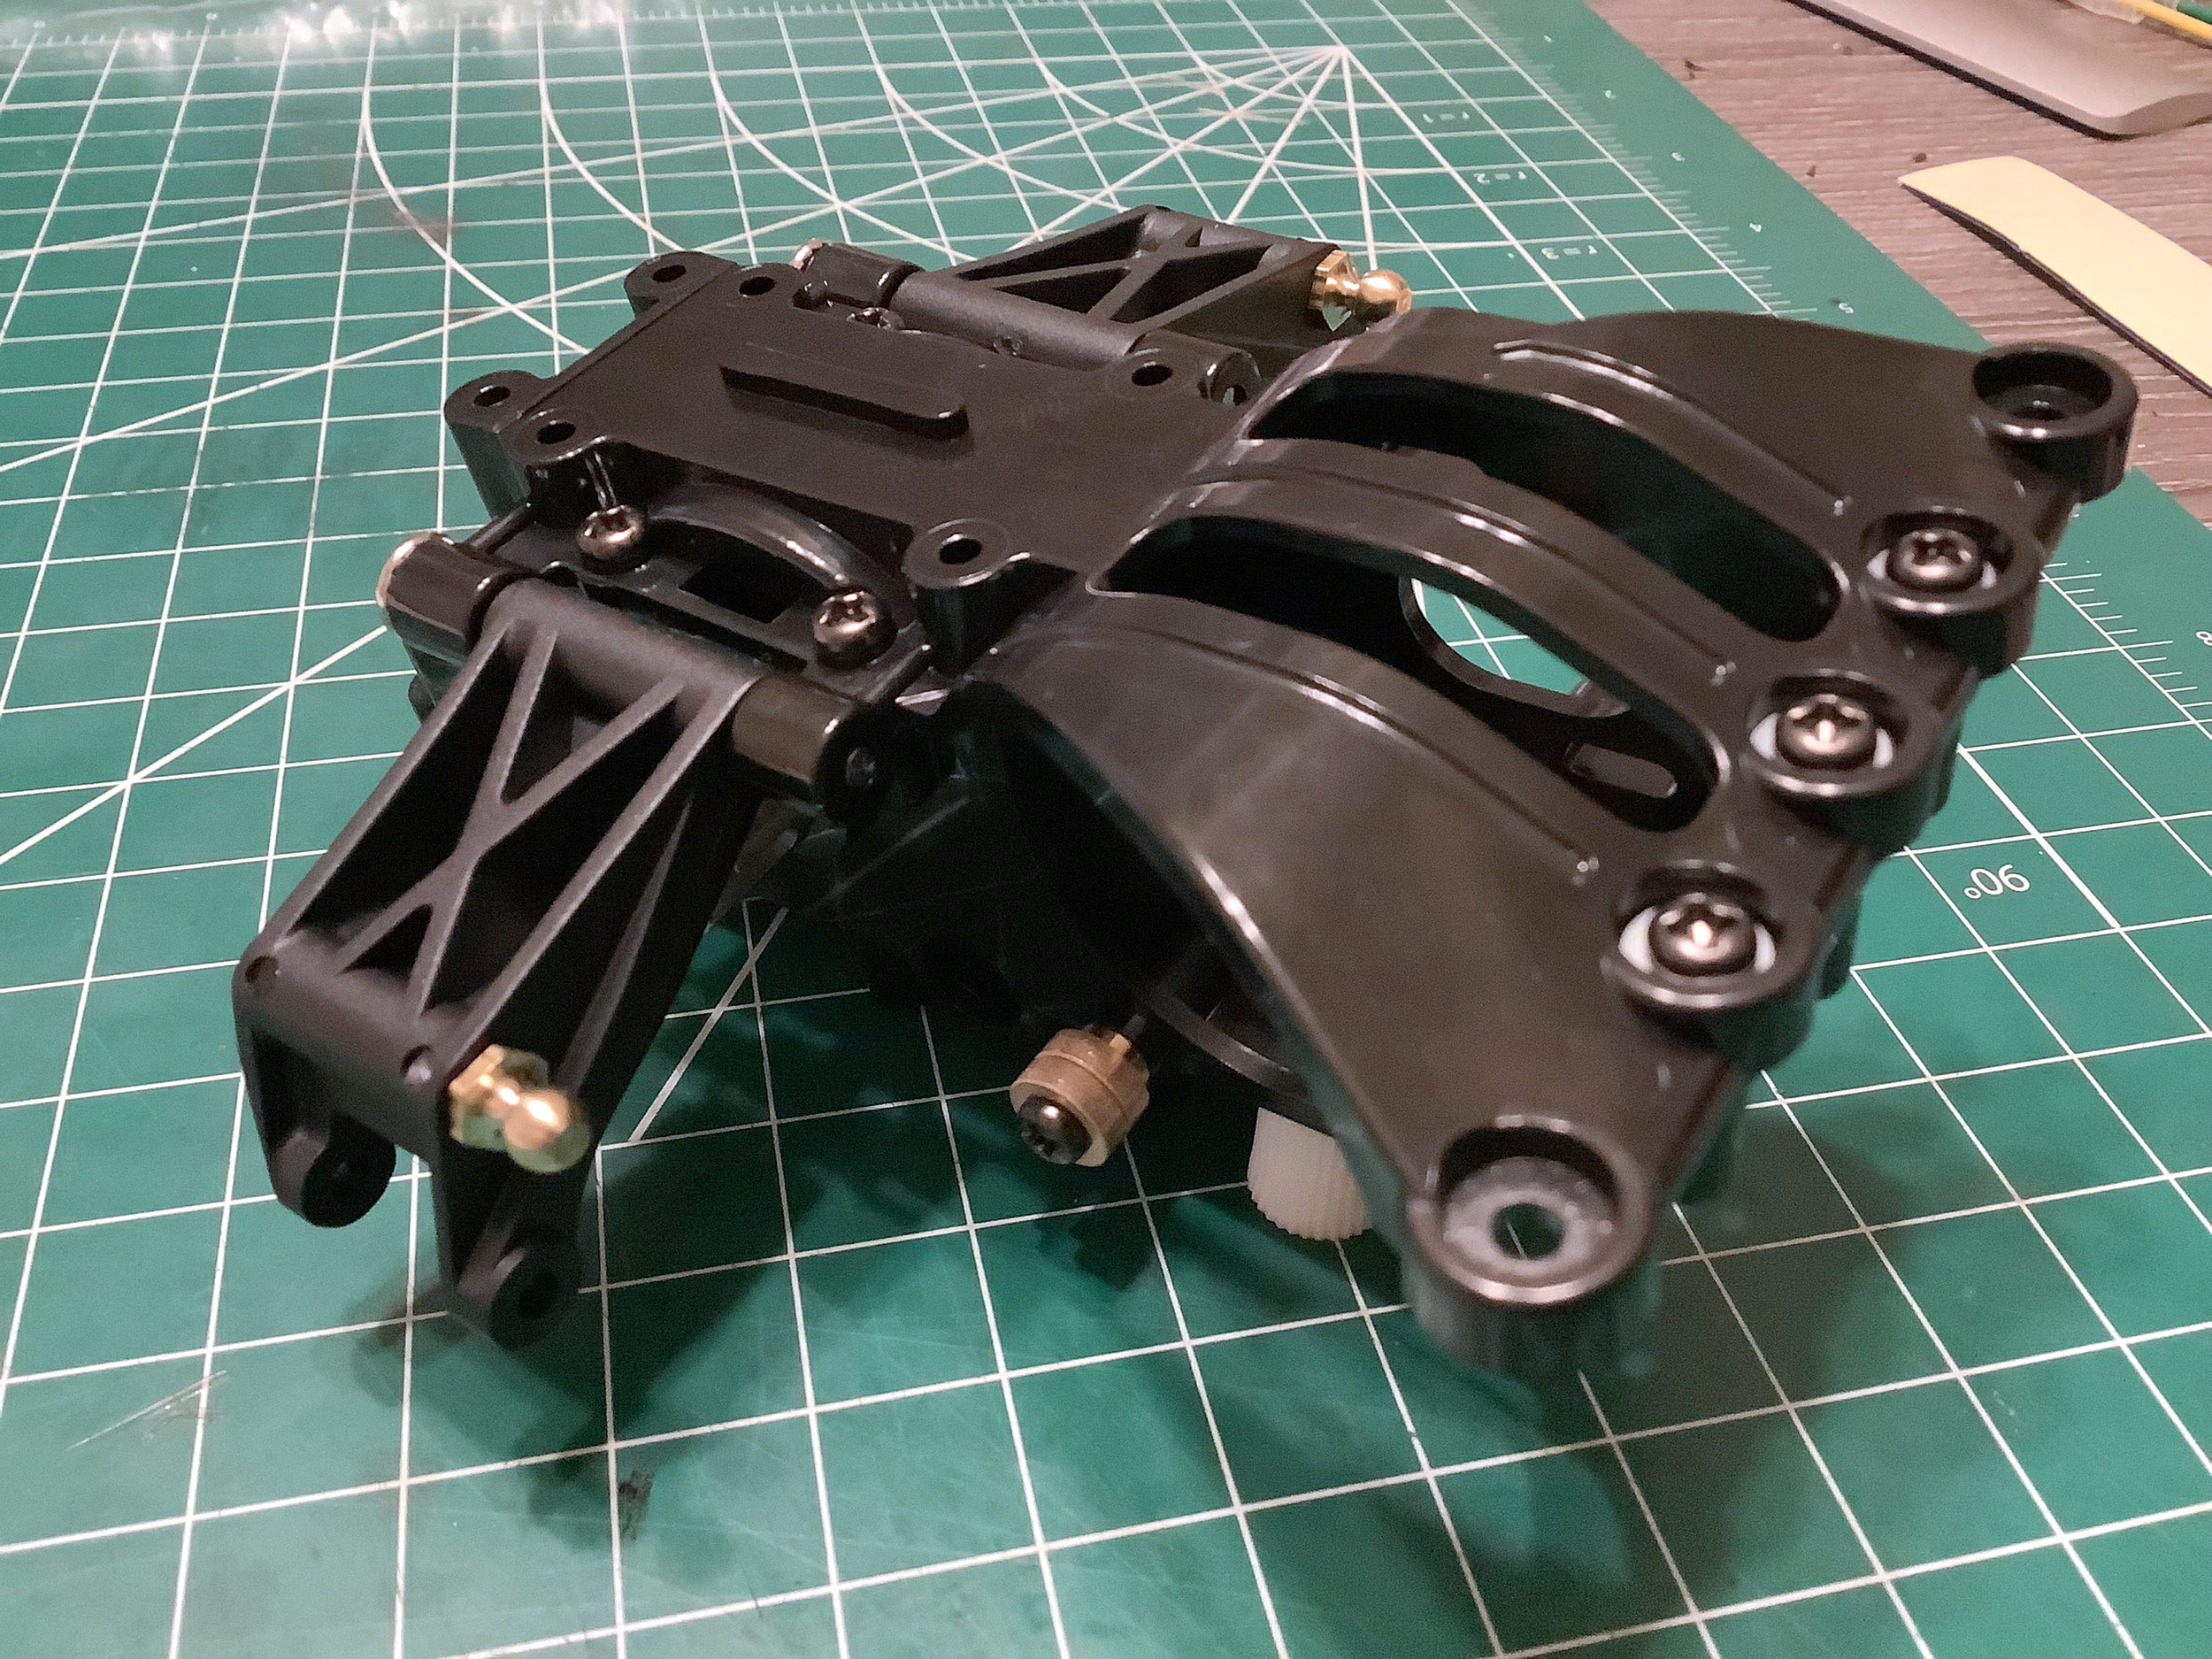
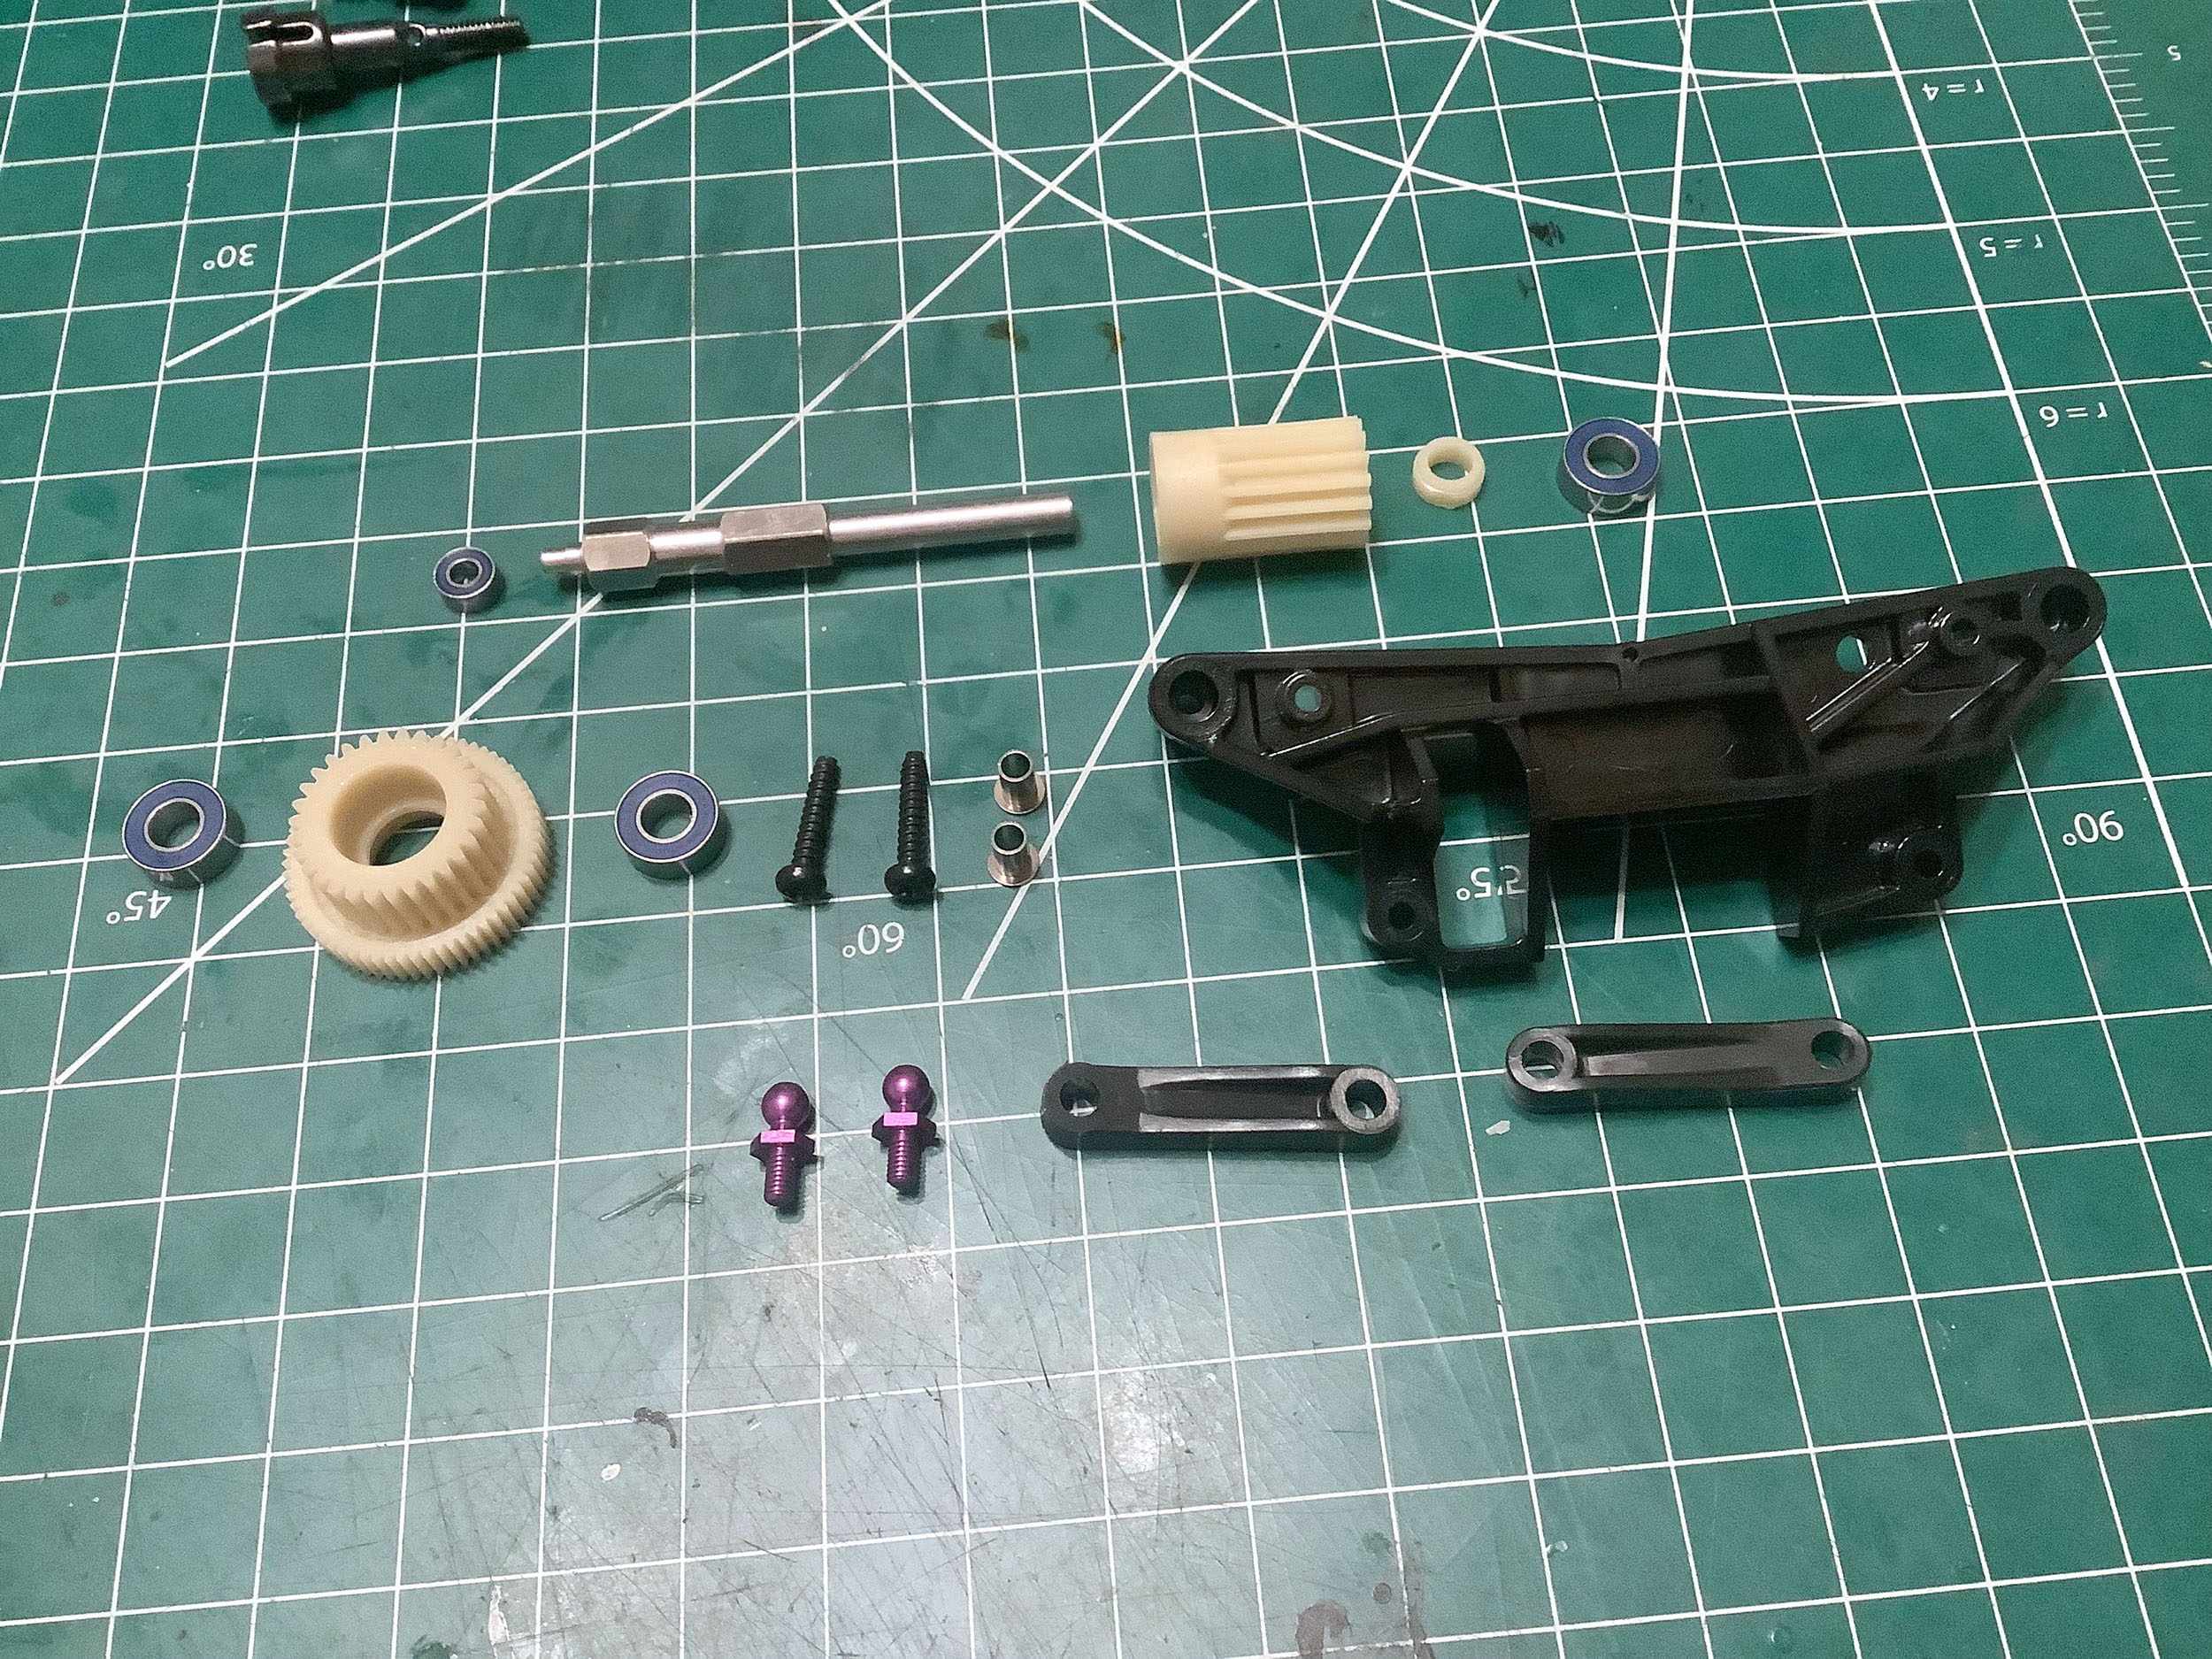
Here is the assembled front bulkhead. Externally, you can't really see any difference between the two.
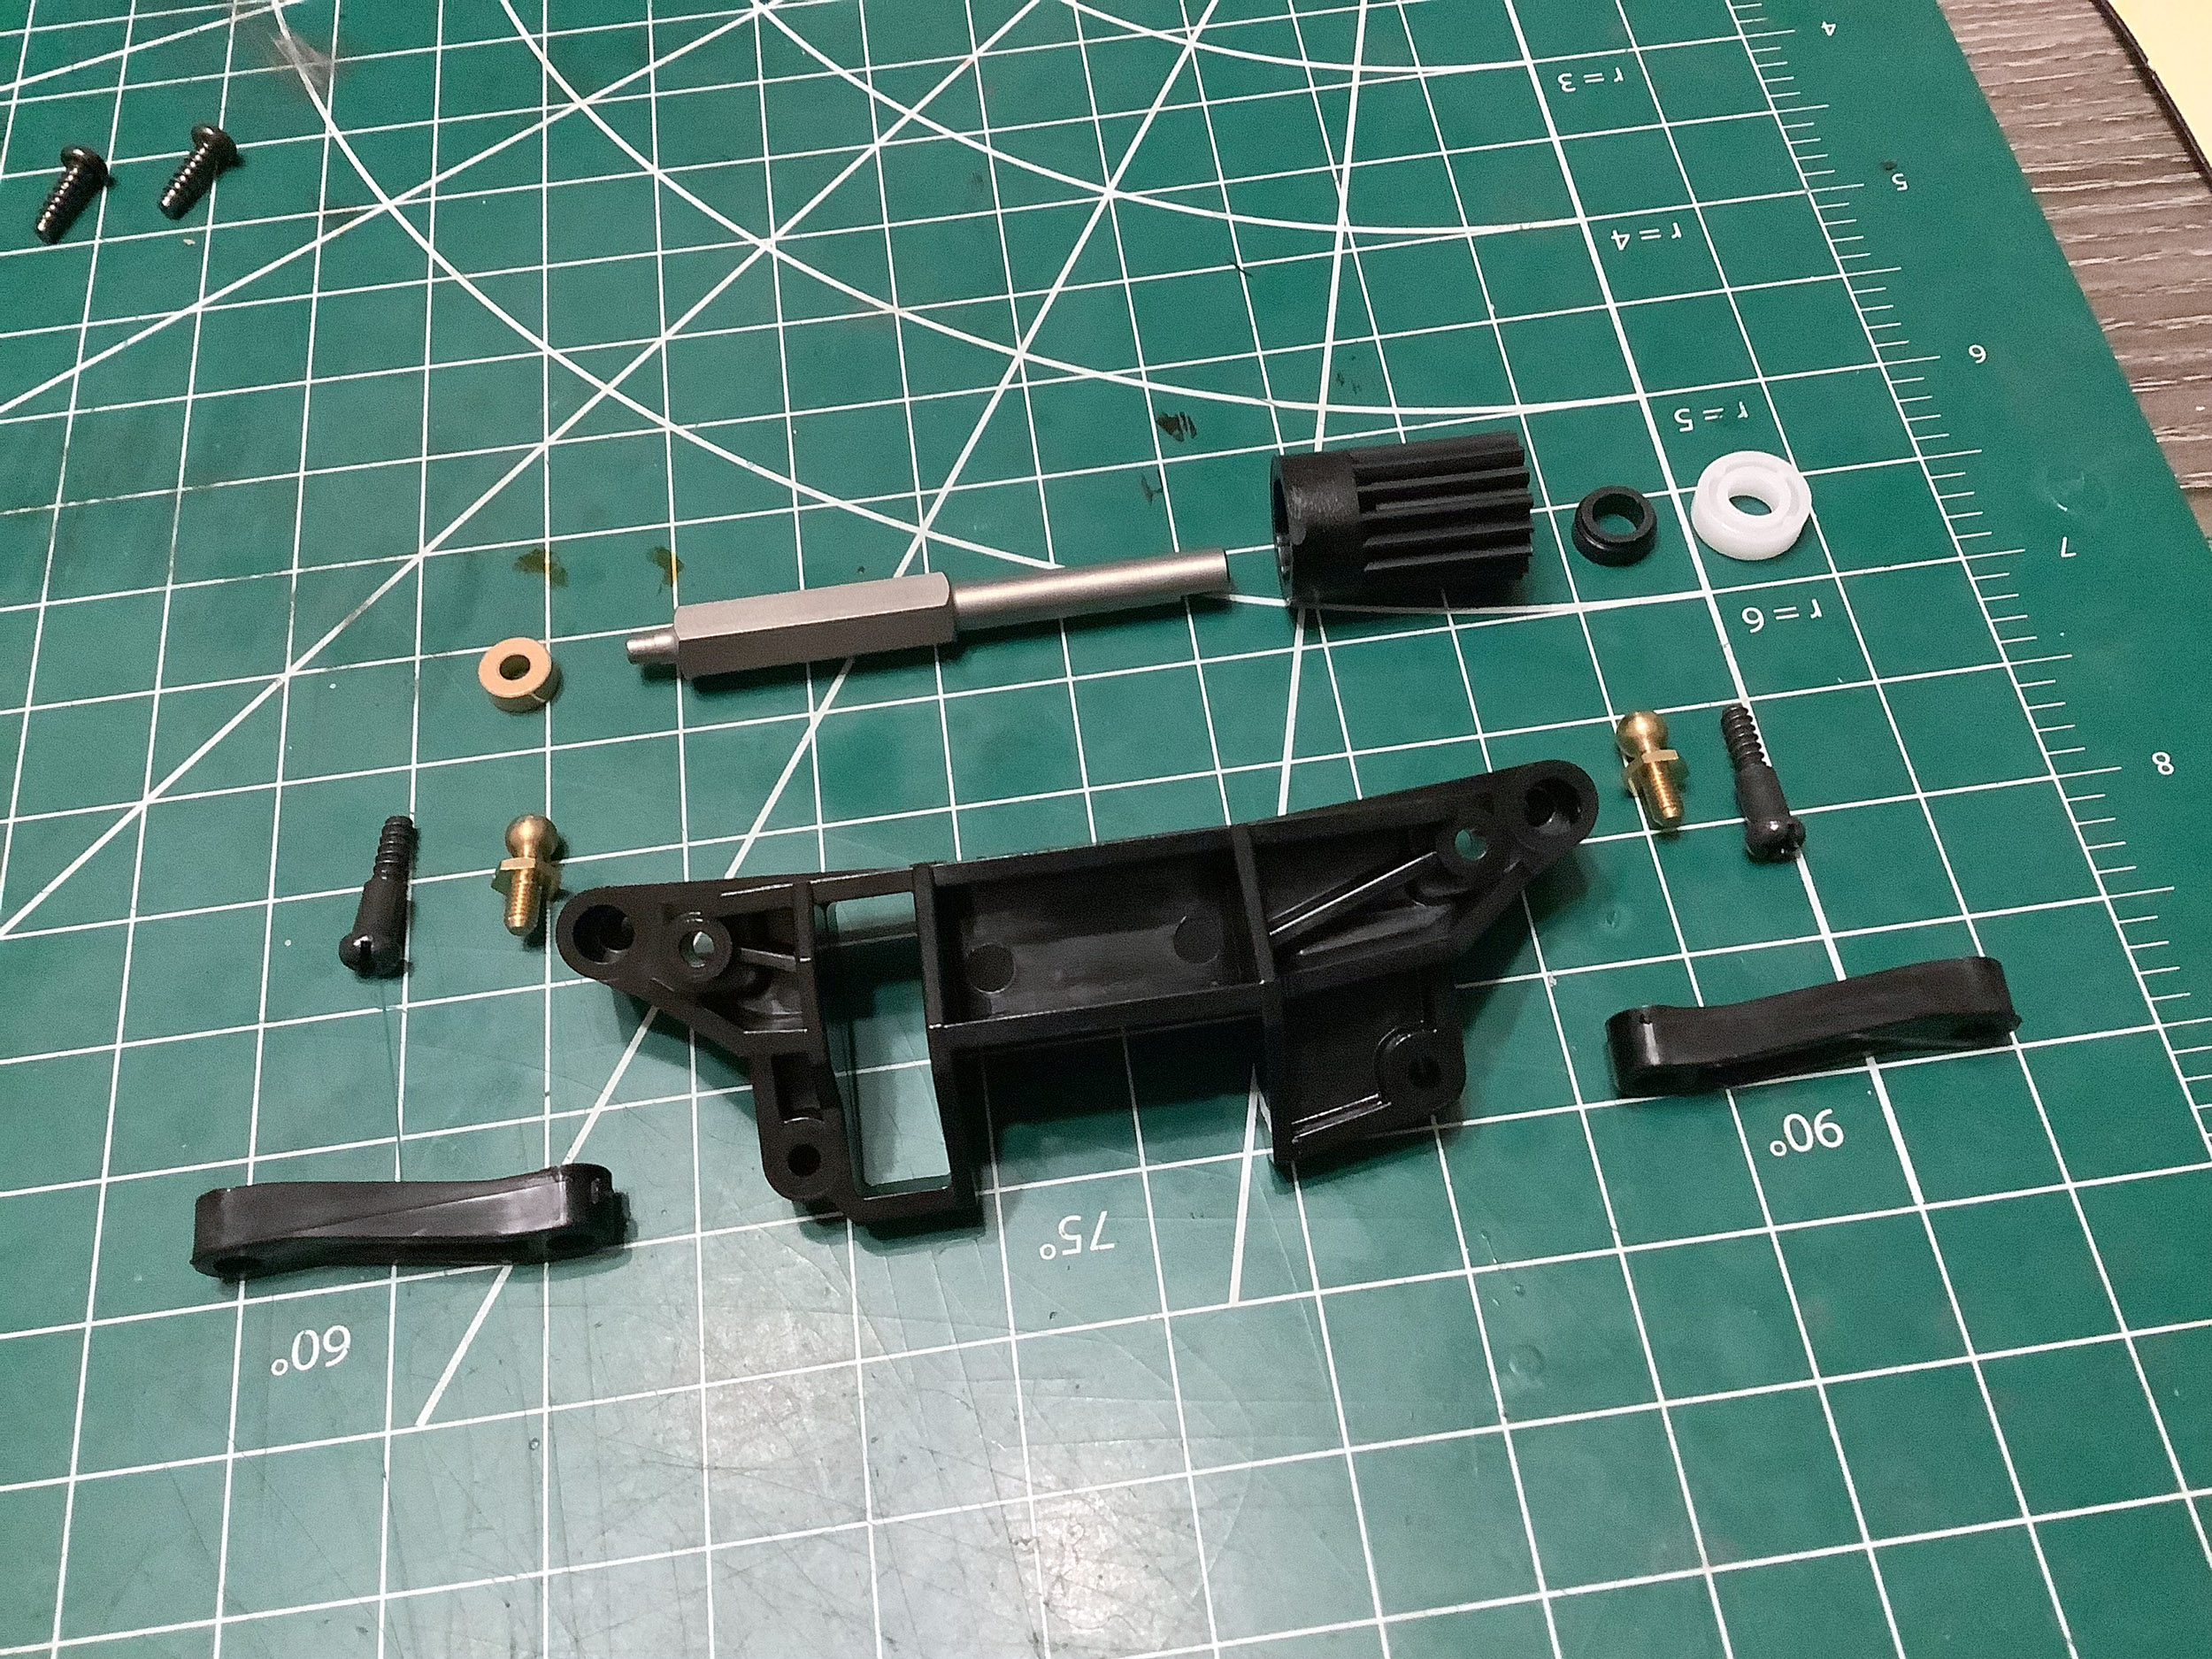
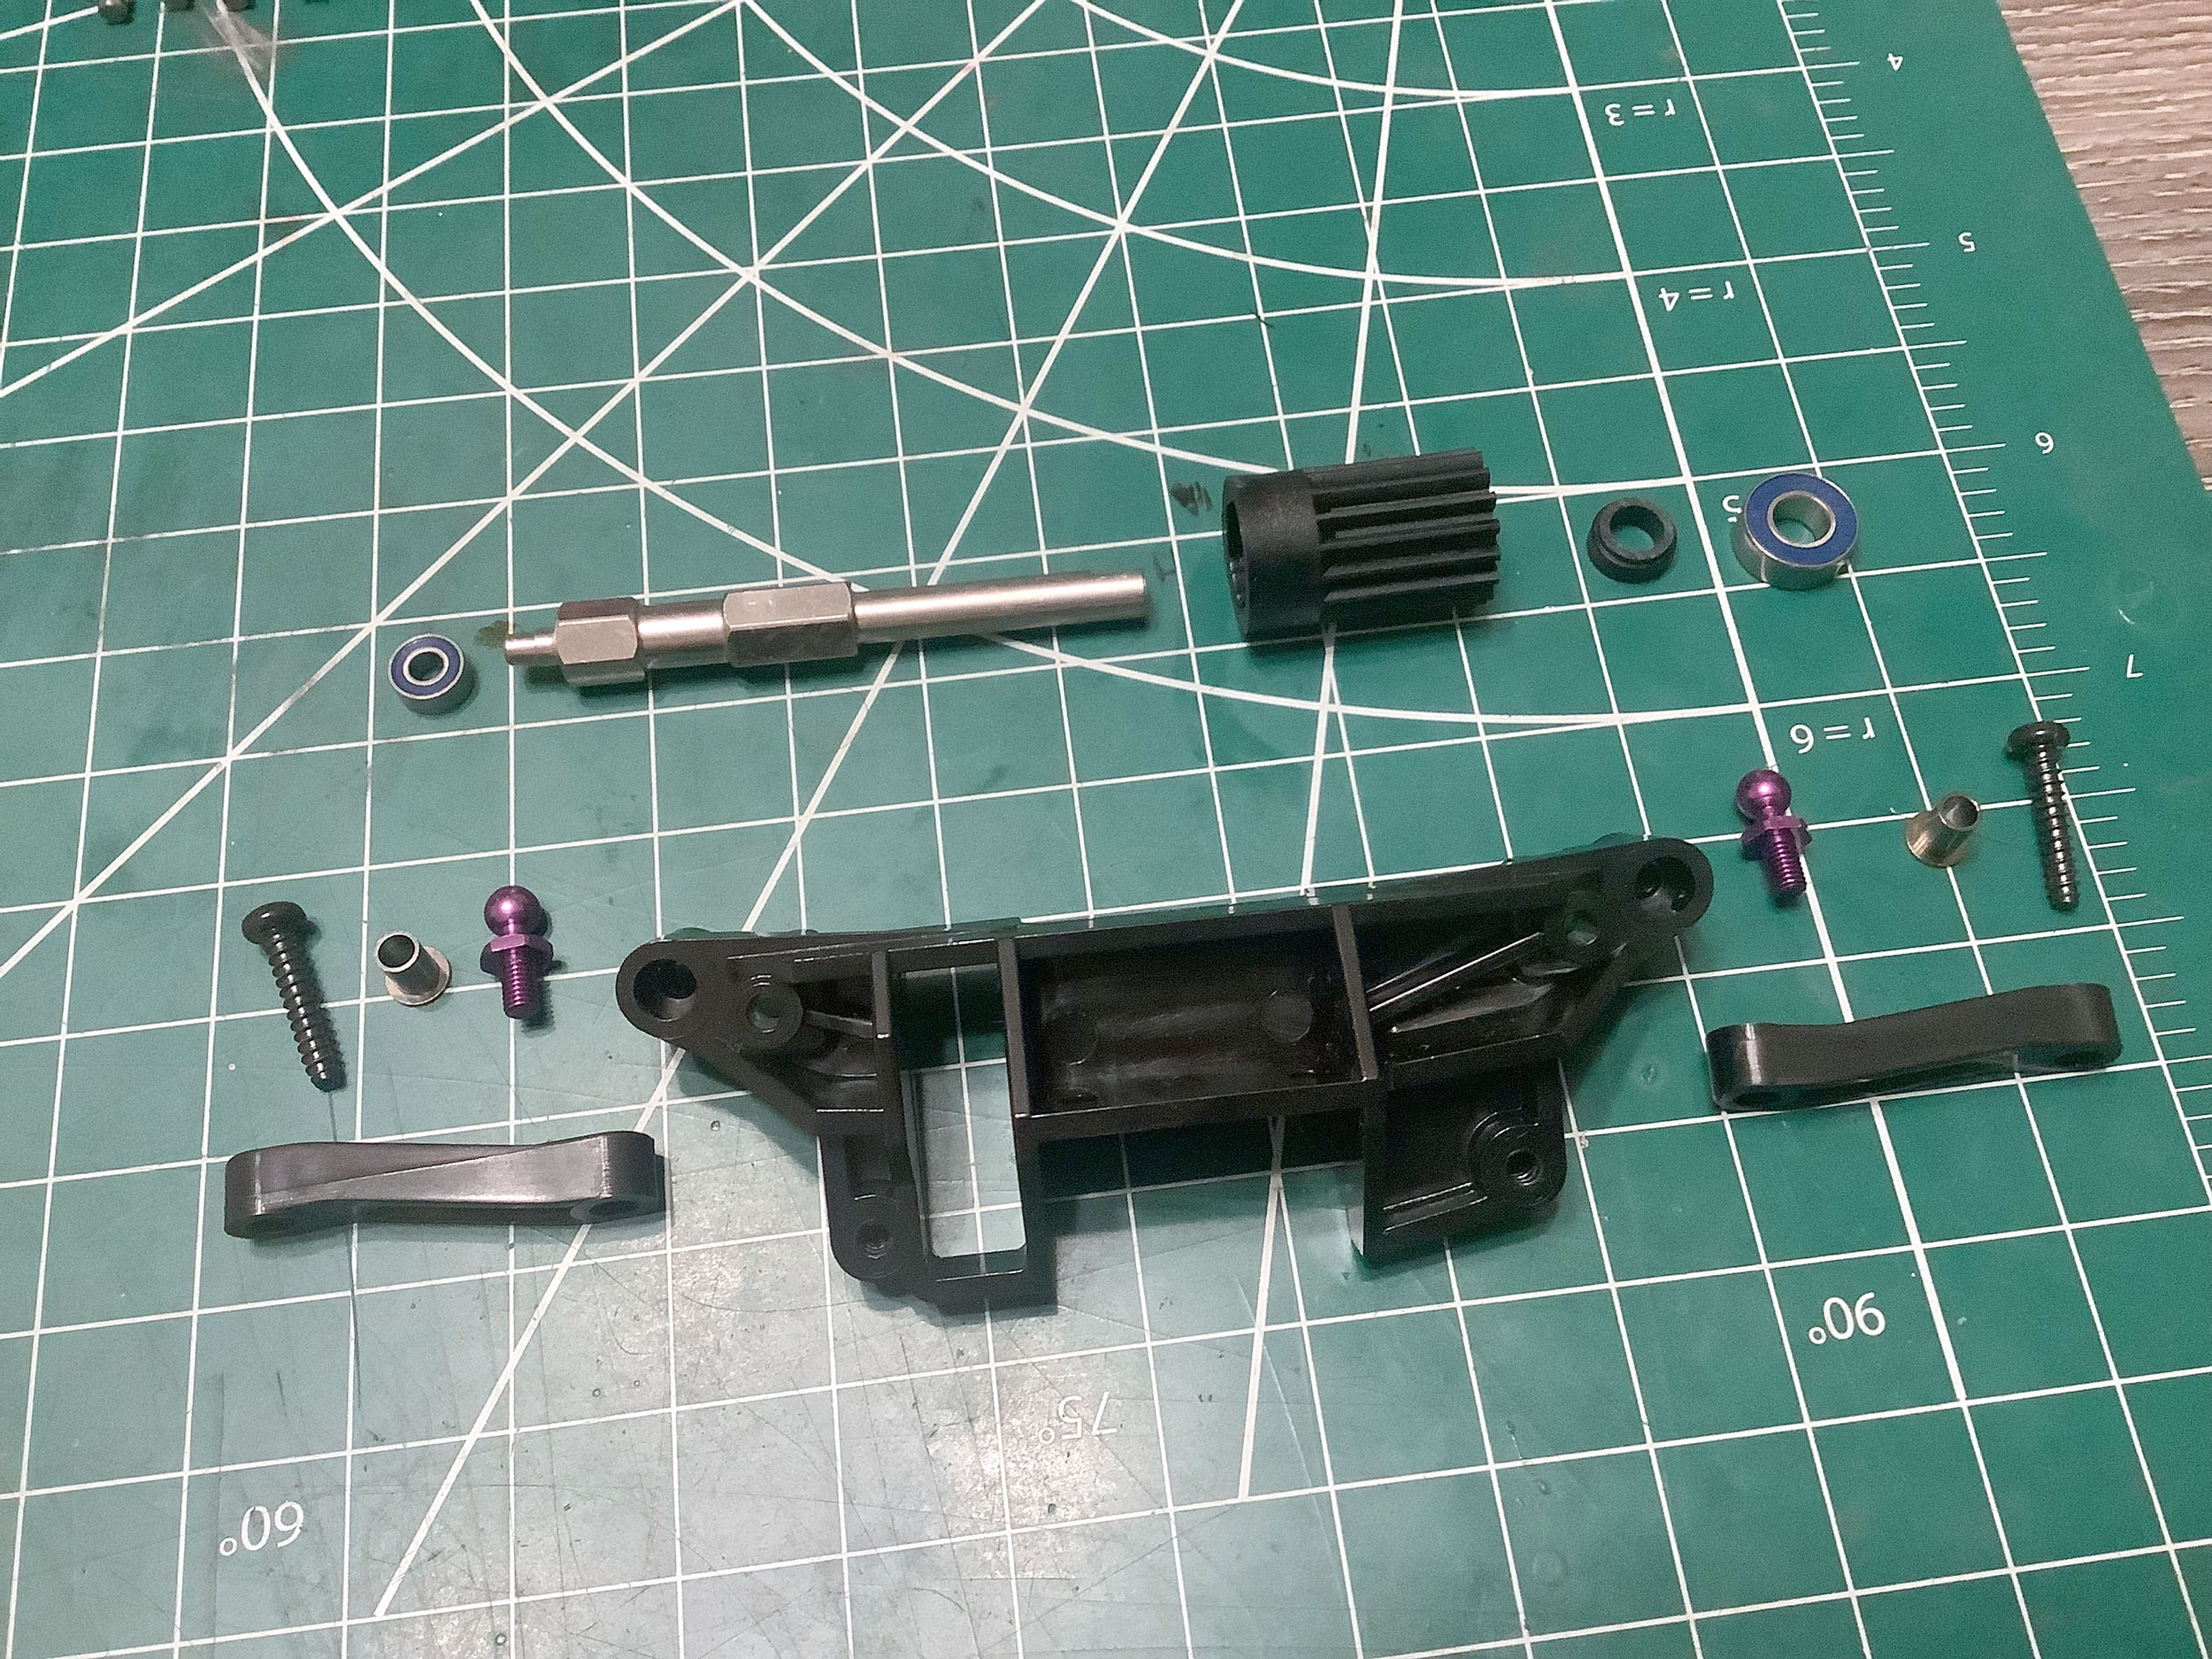
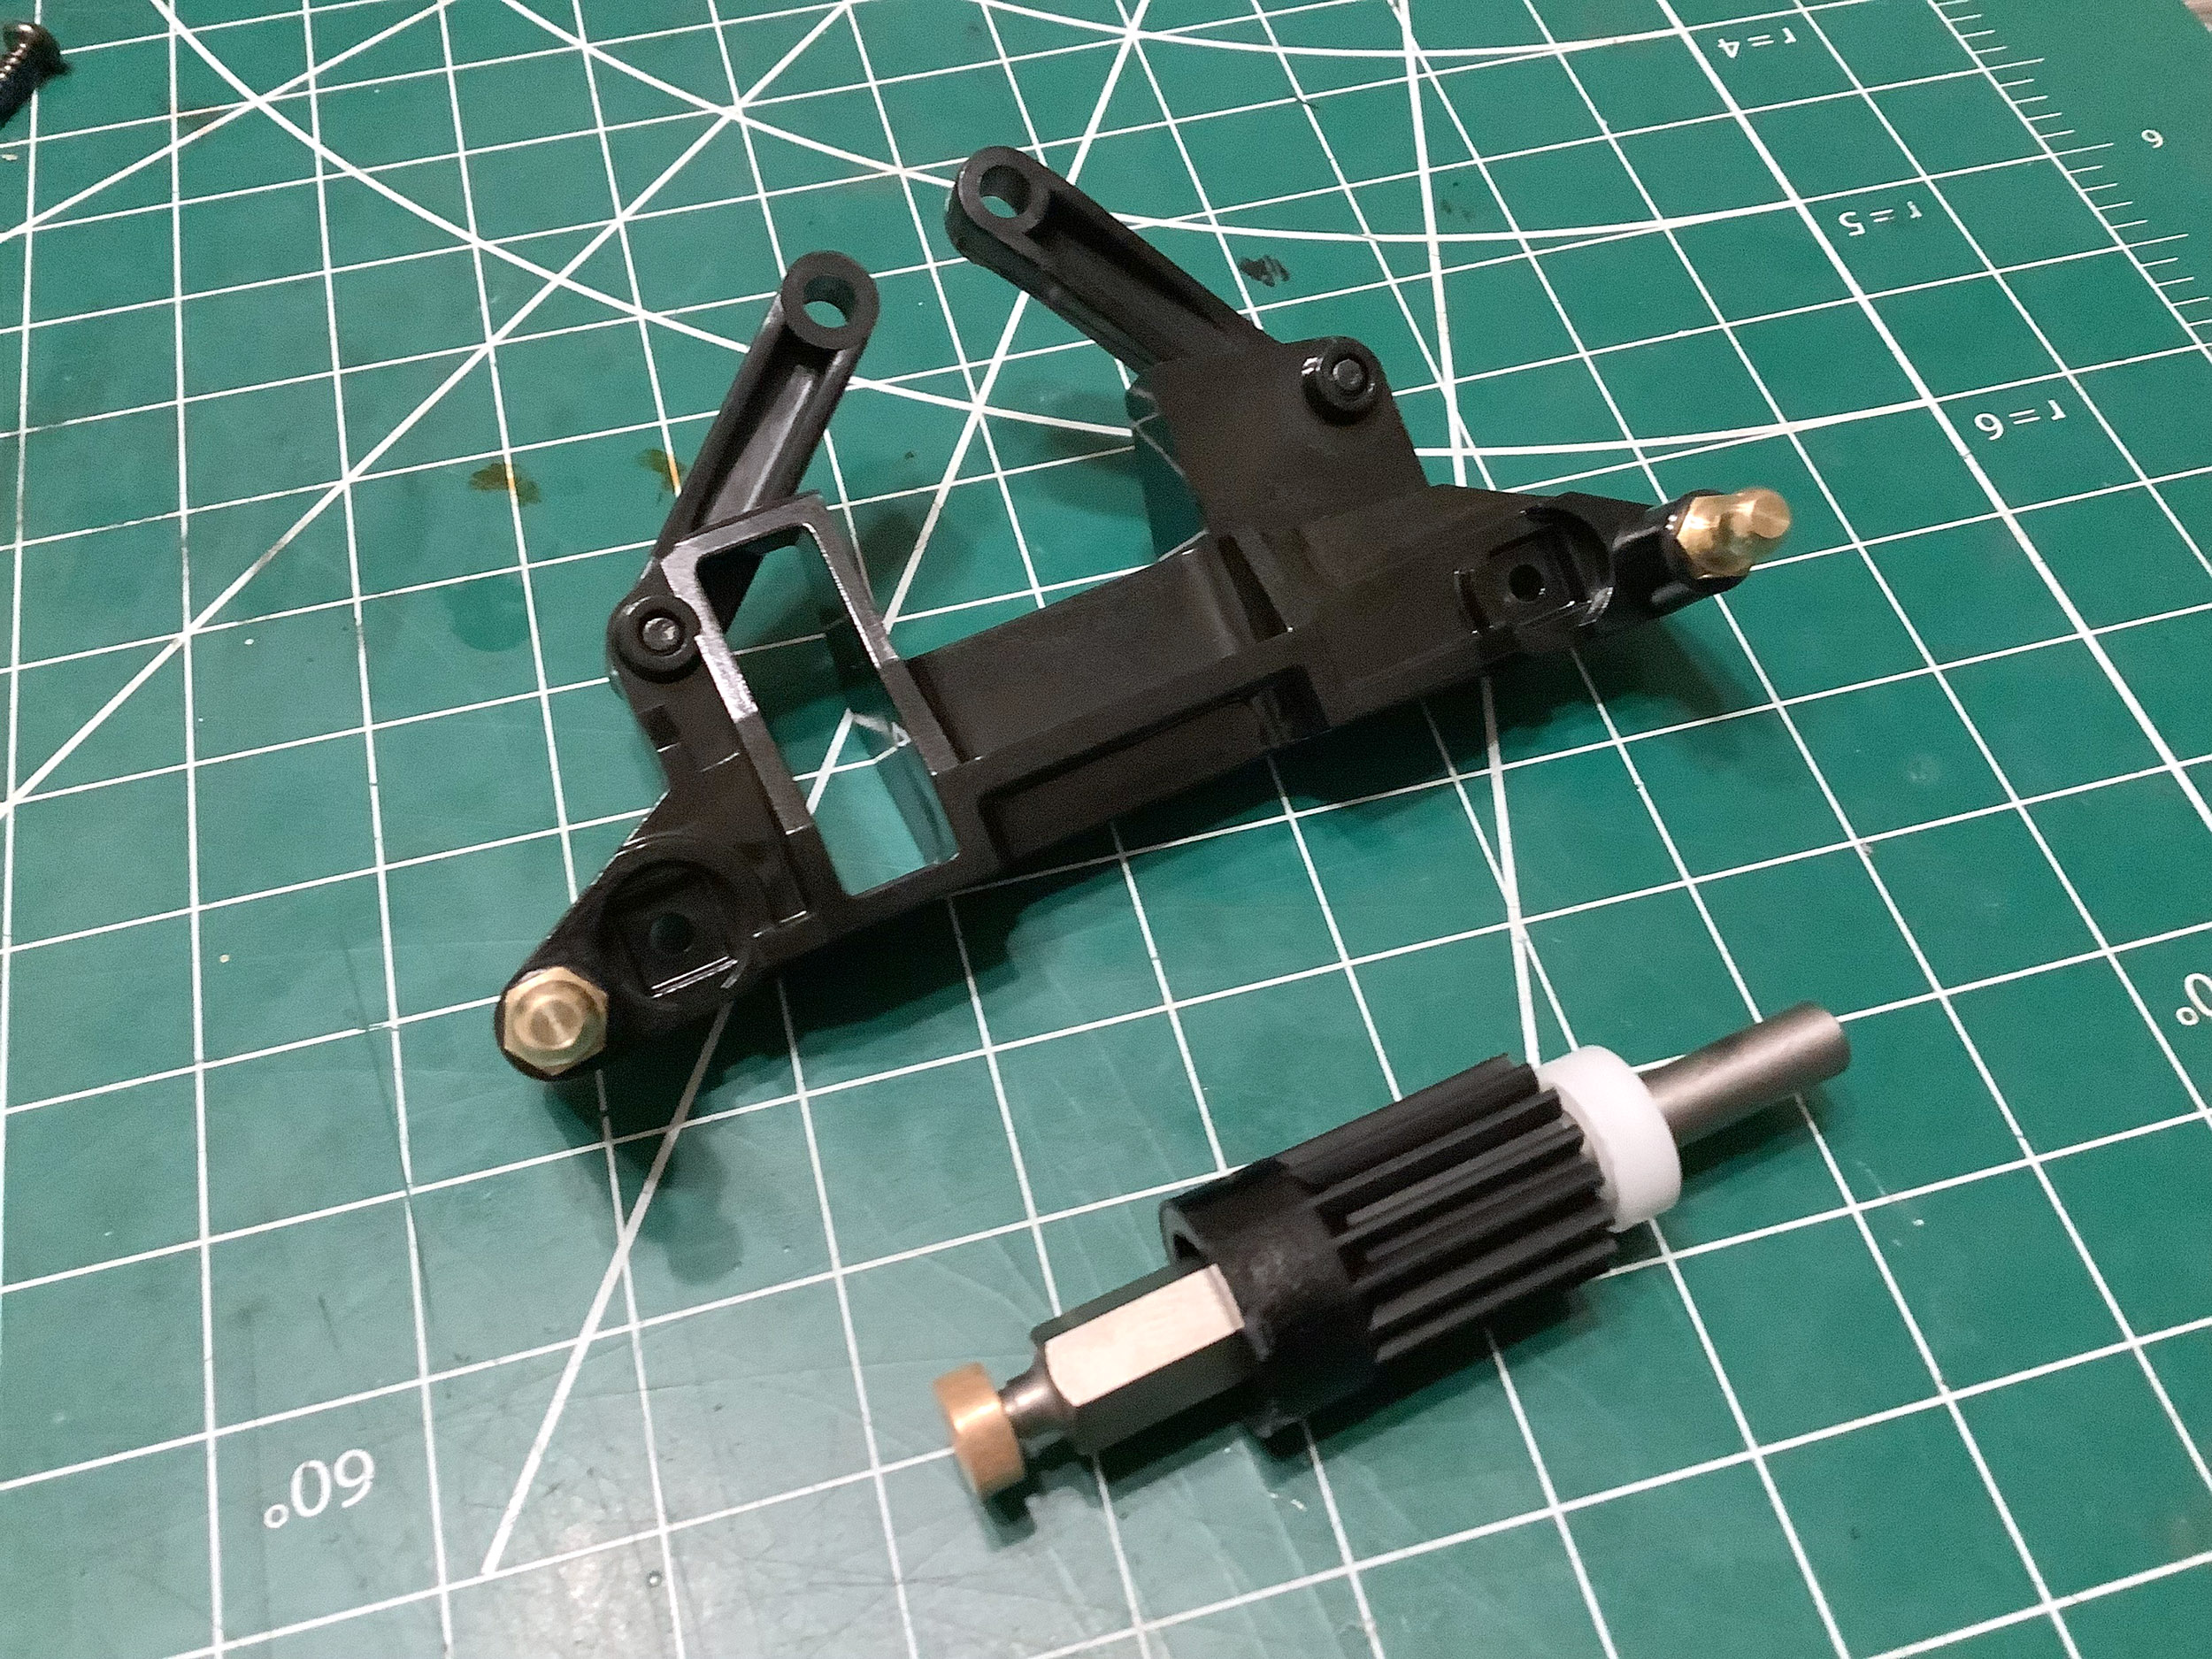
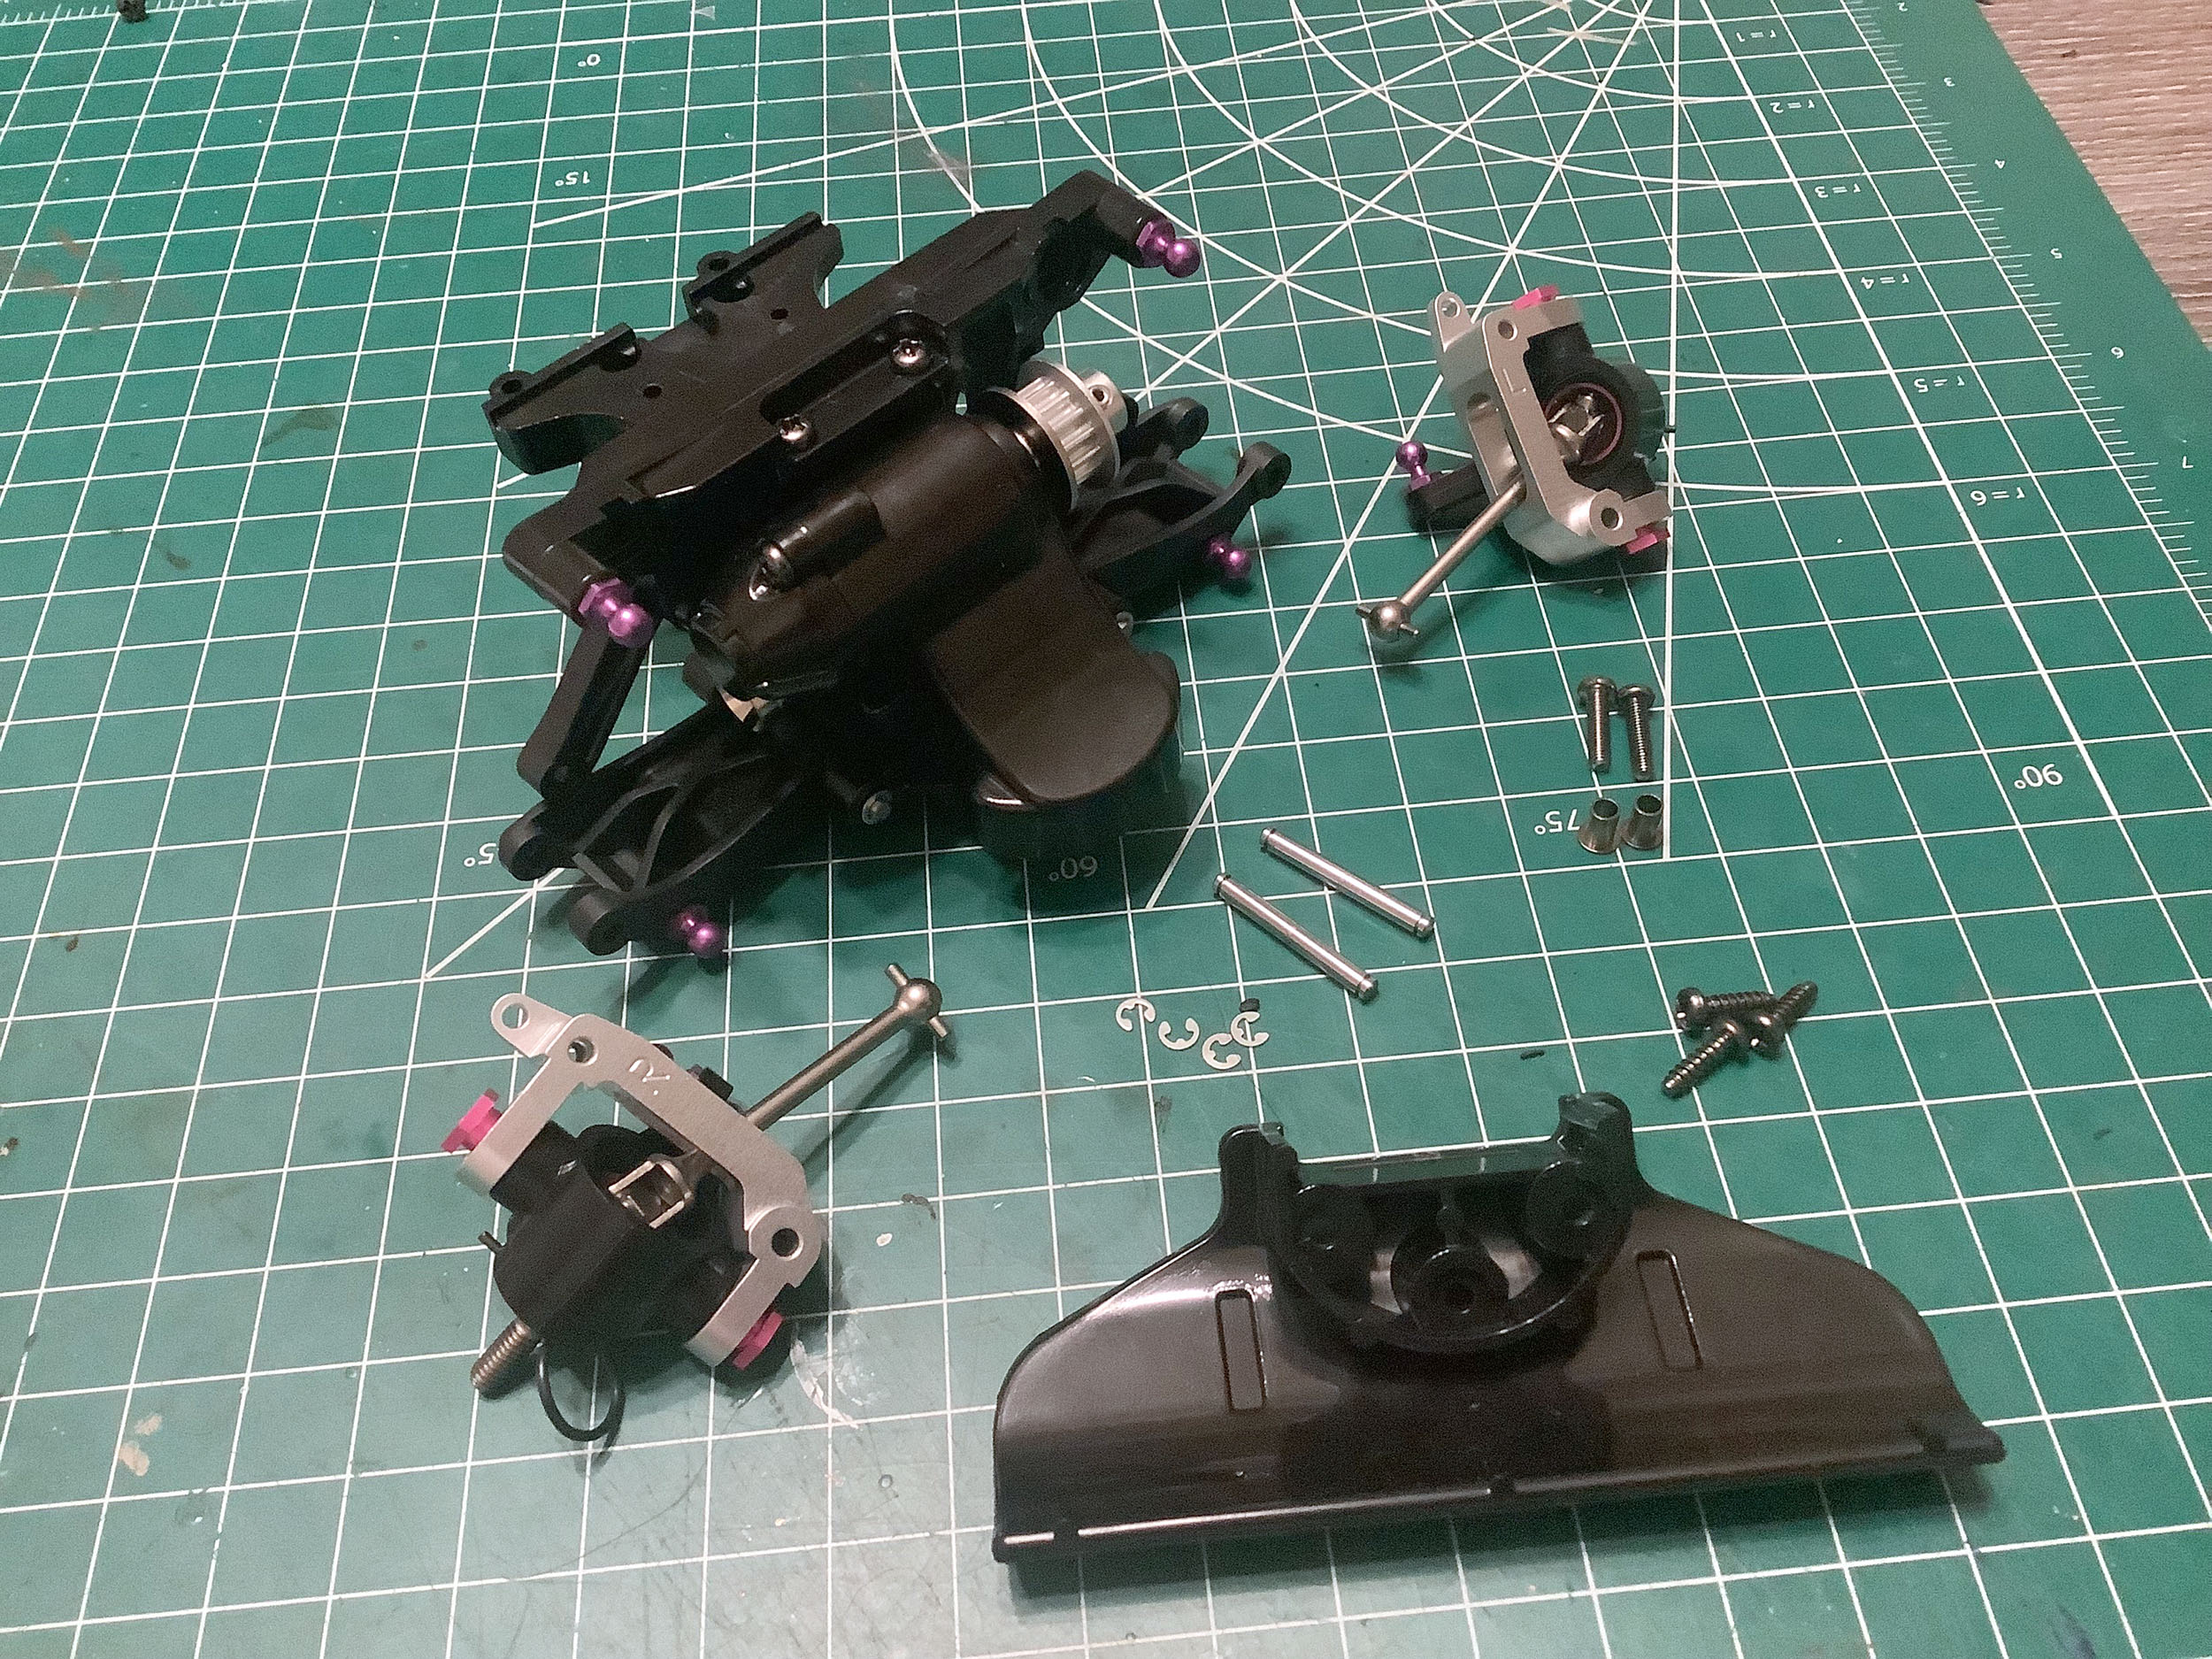
Here are the parts for the front counter gear assembly and upper
suspension assembly which is combined with the shock tower.
Differences in the TRF model include ball bearings, sleeved upper arm
pivots instead of step screws, and purple anodized aluminum ball studs
instead of brass. Note also how the hex on the counter shaft is
split on the TRF model but continuous on the standard model. I'm
not really sure why this is different, but the hexes on the TRF shaft
are 1/12 turn out of phase with each other.
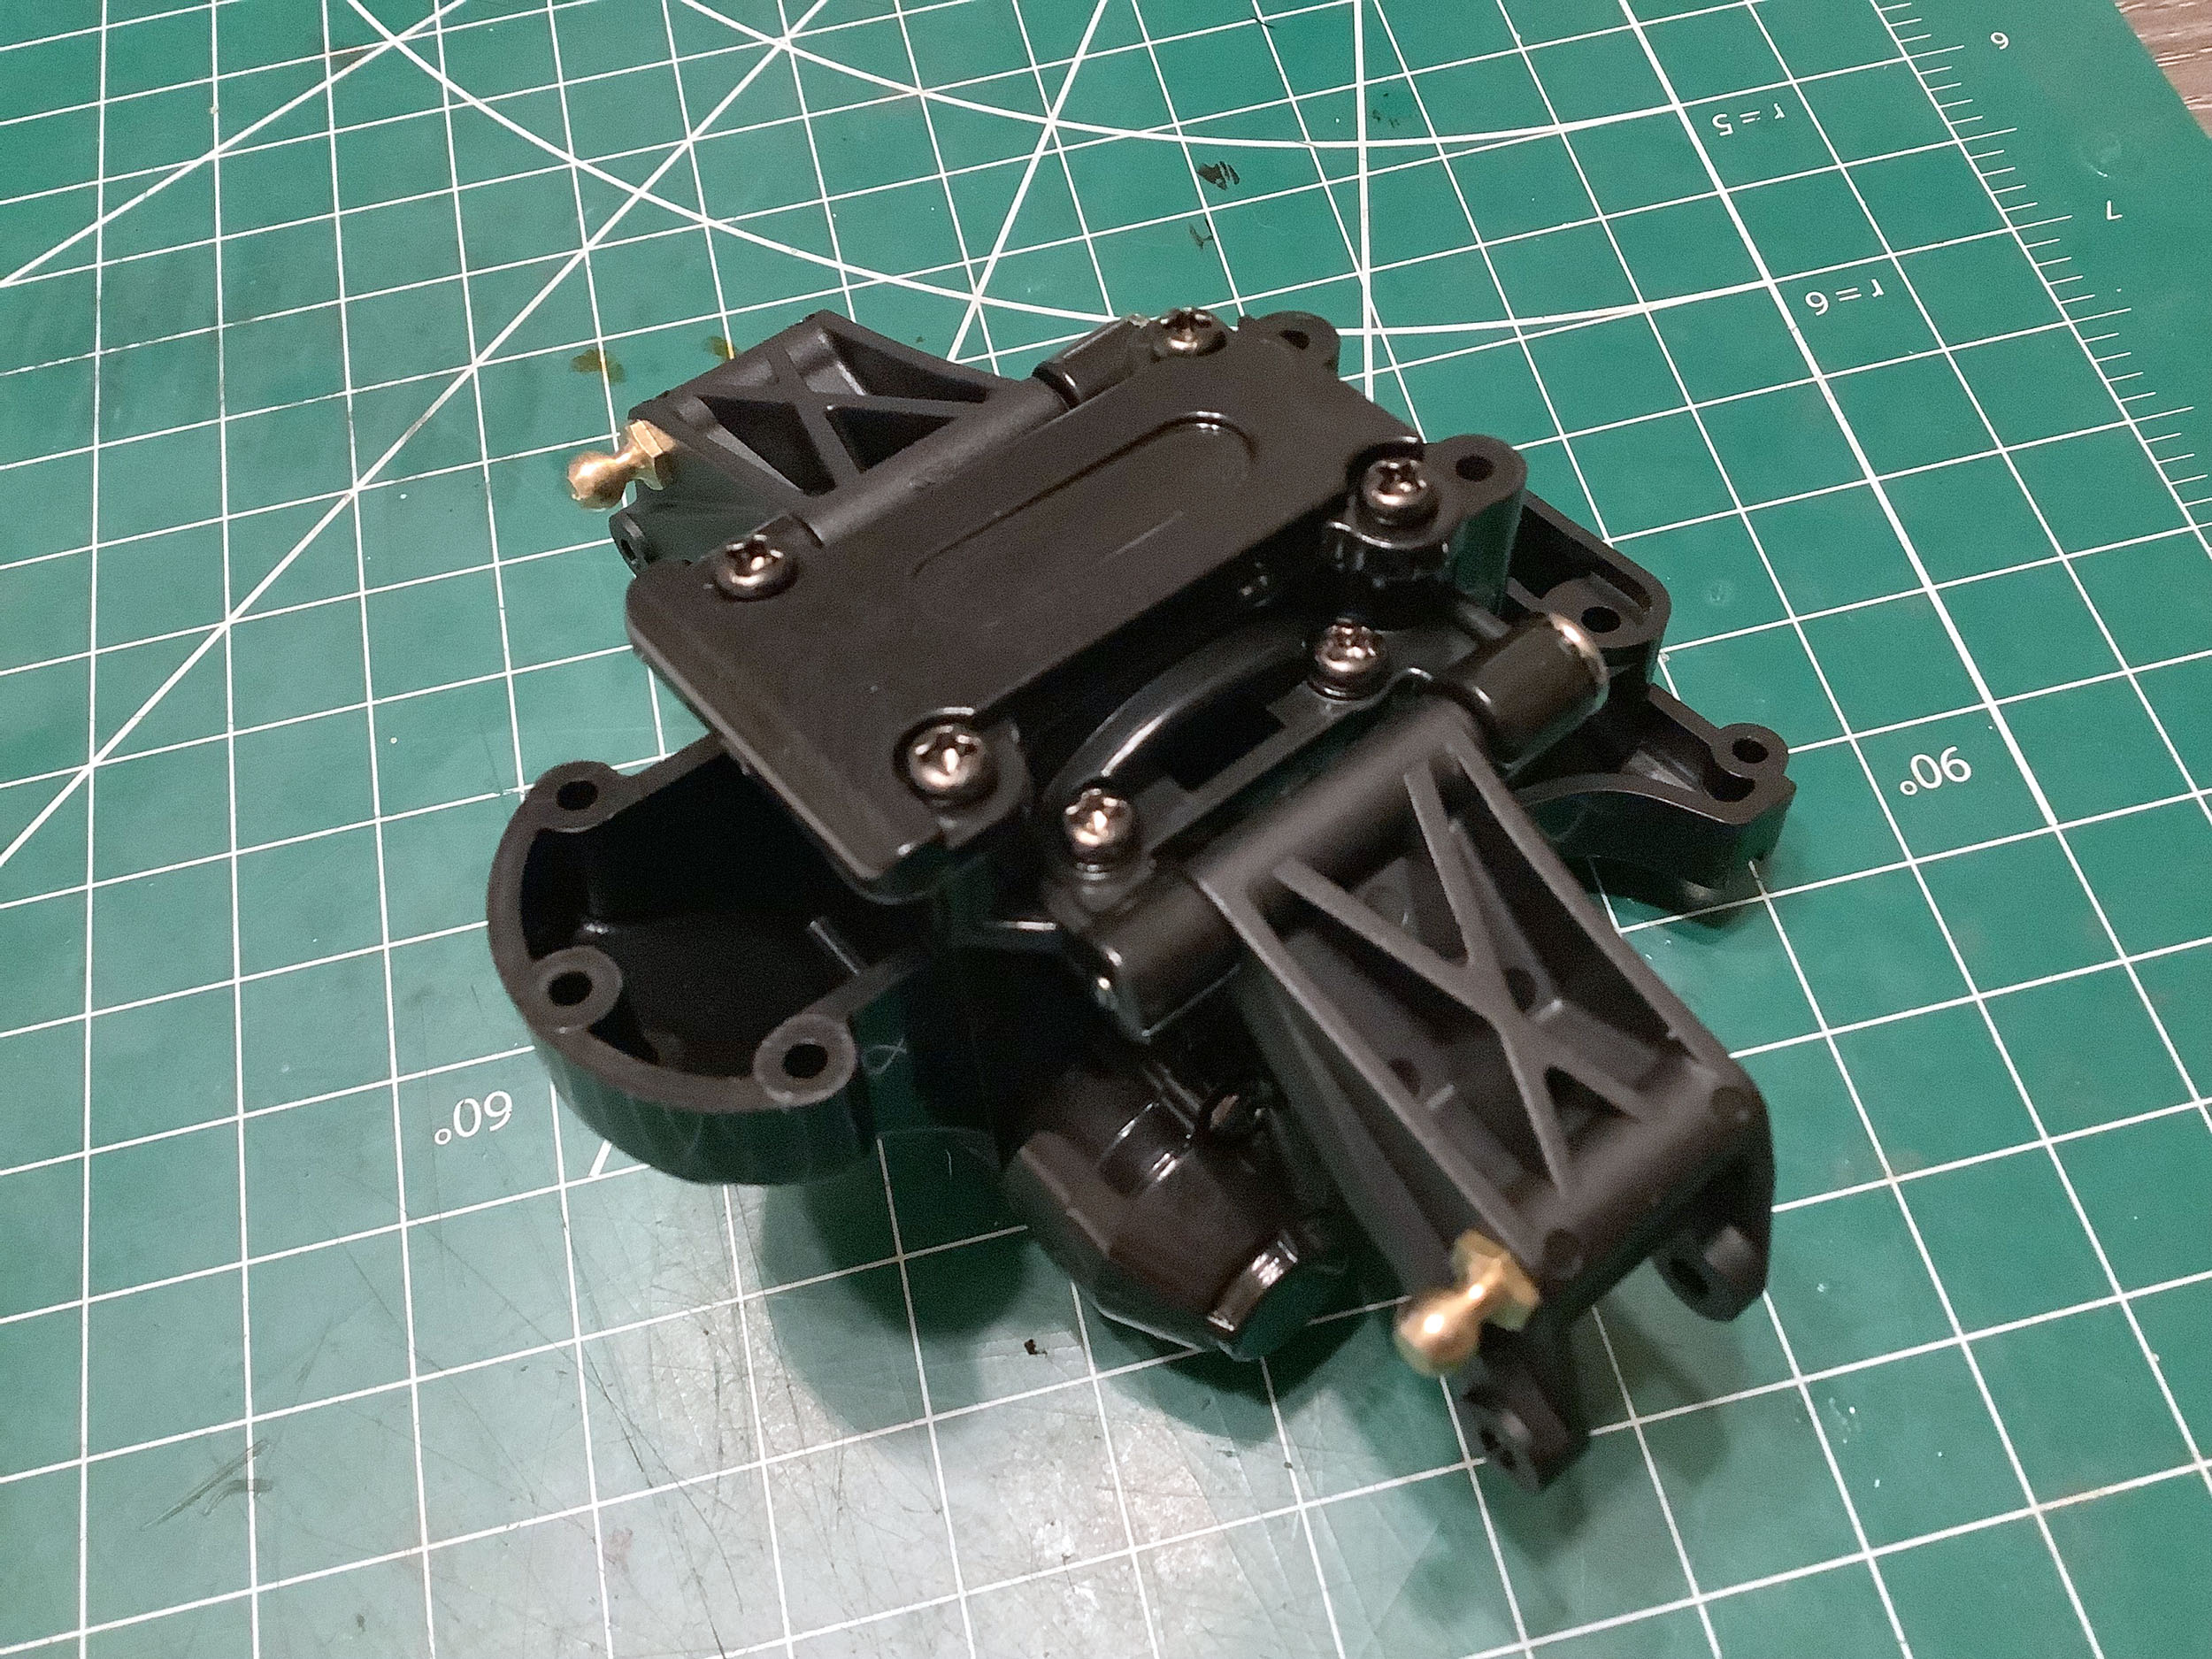
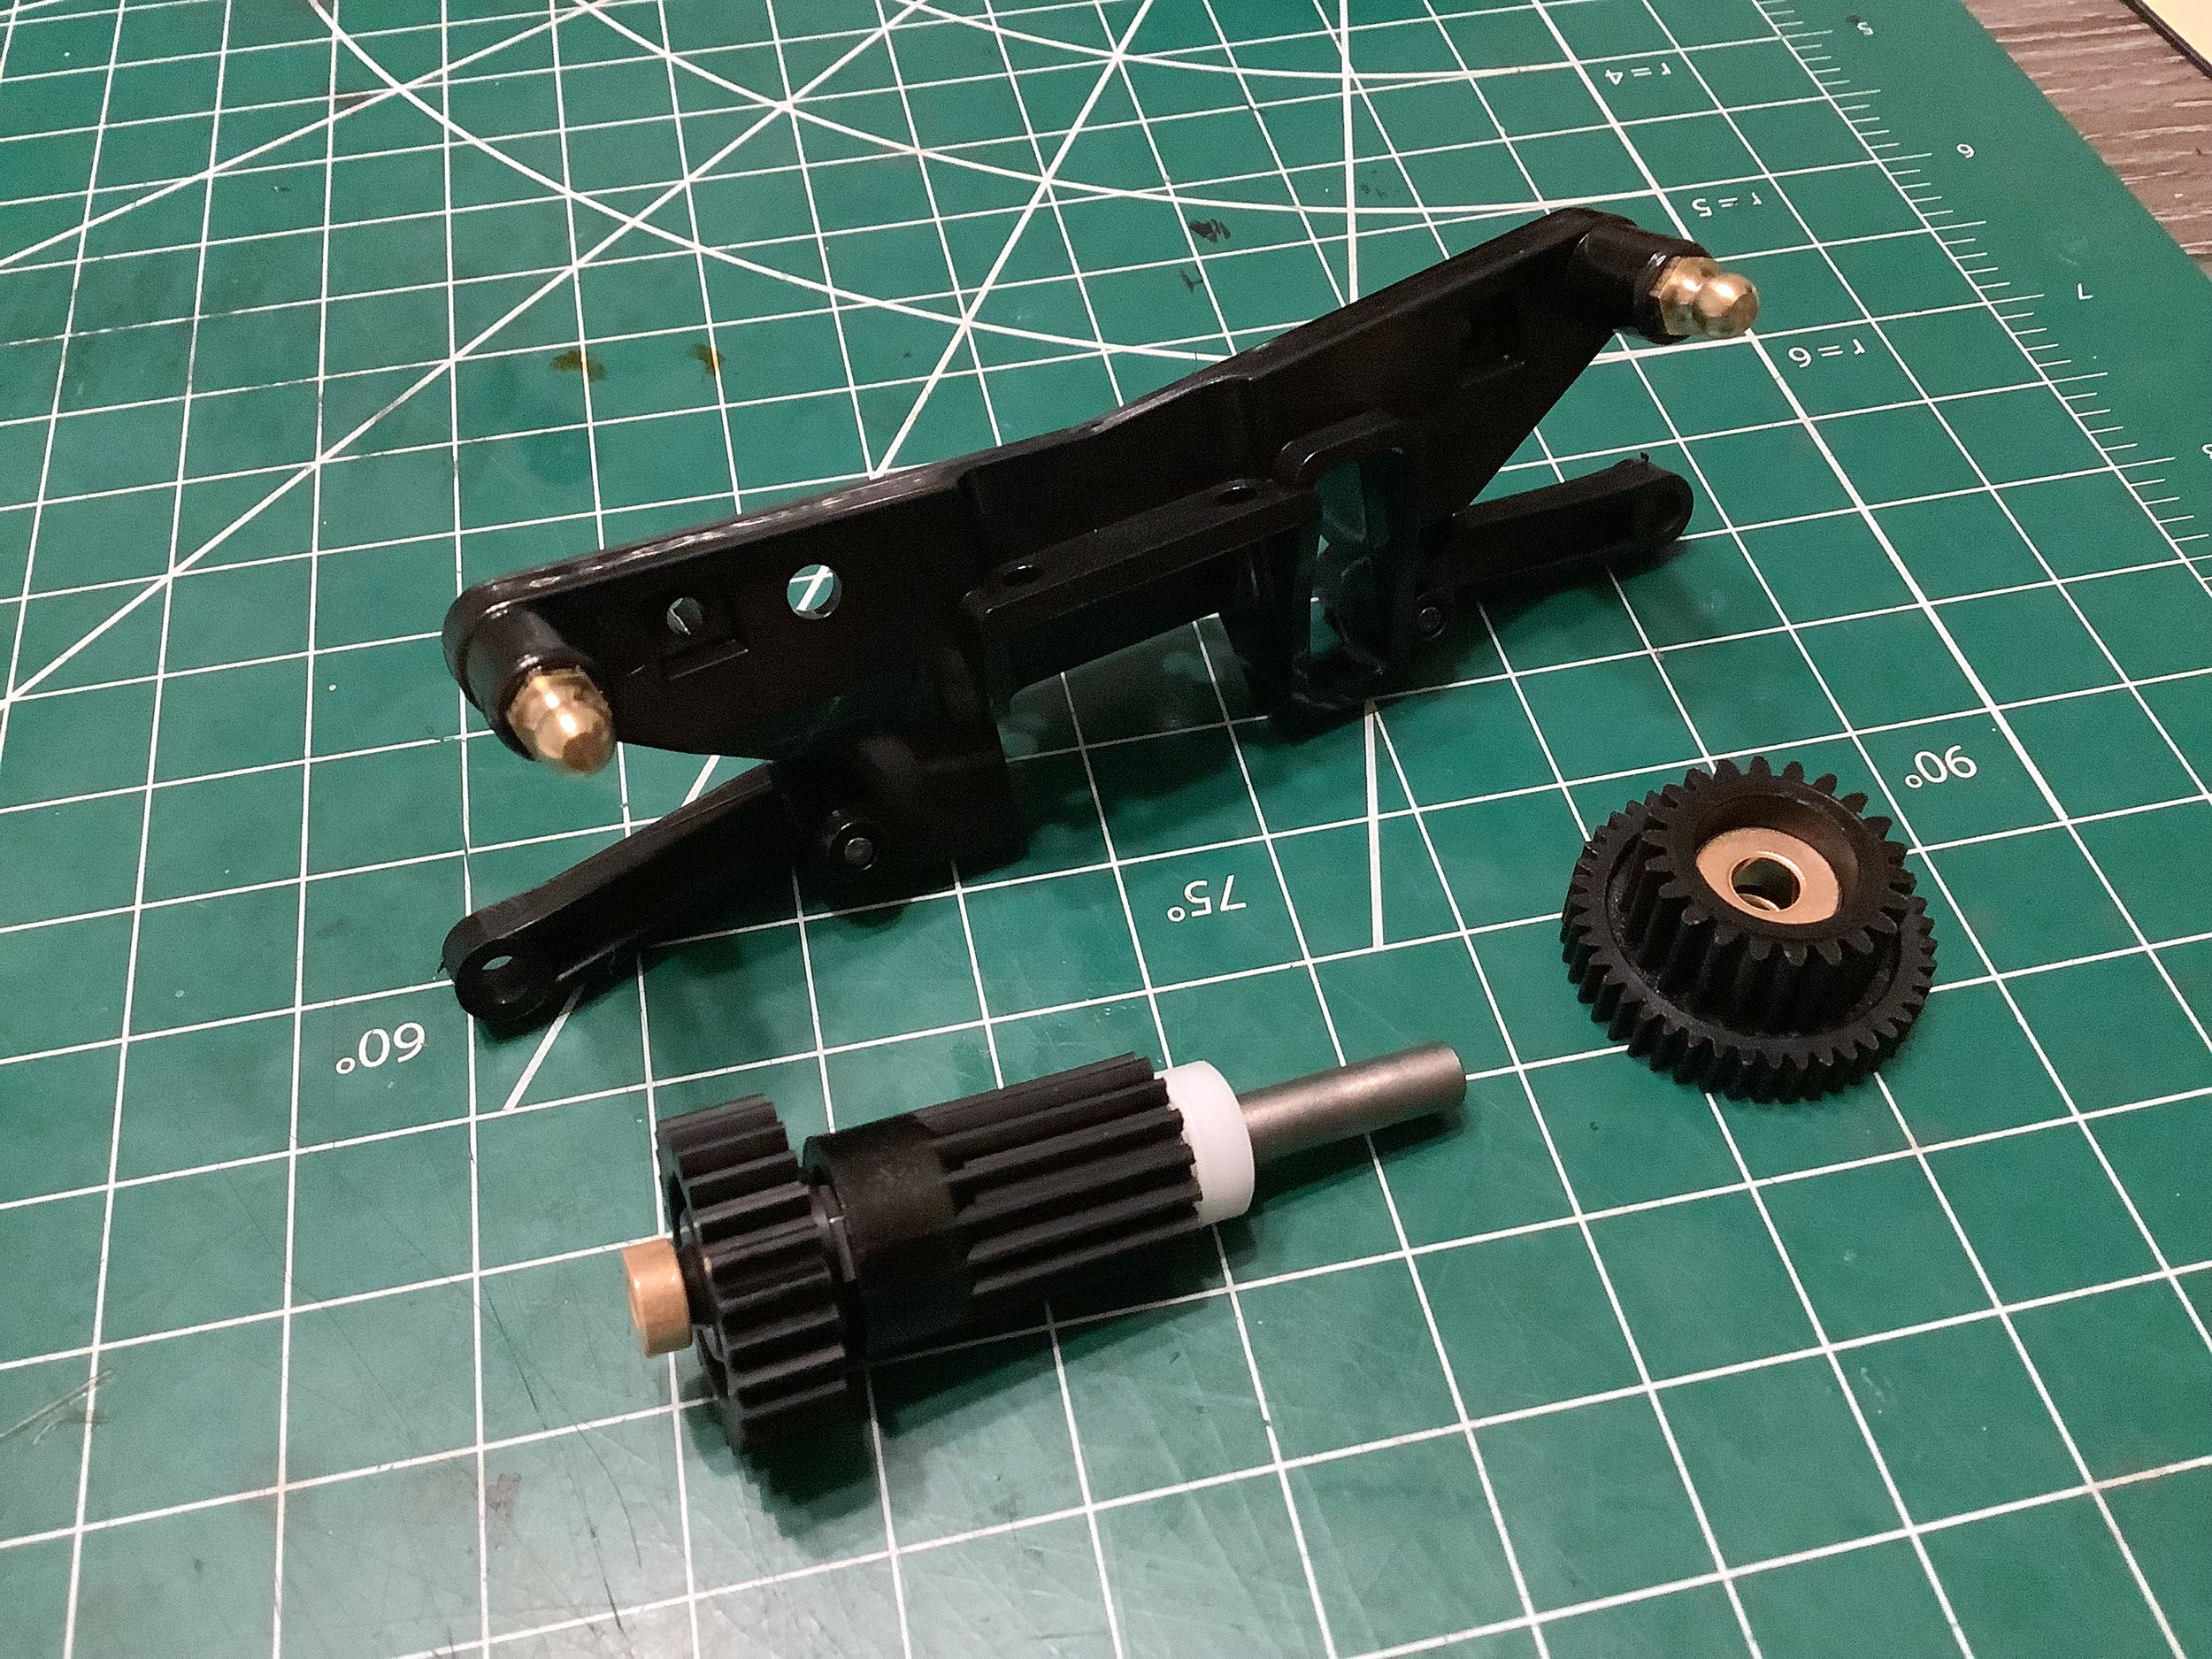
Here are those same parts assembled. The rectangular gap in the
shock tower is for the belt to pass through. The black plastic front drive gear (16T) is identical on both models.
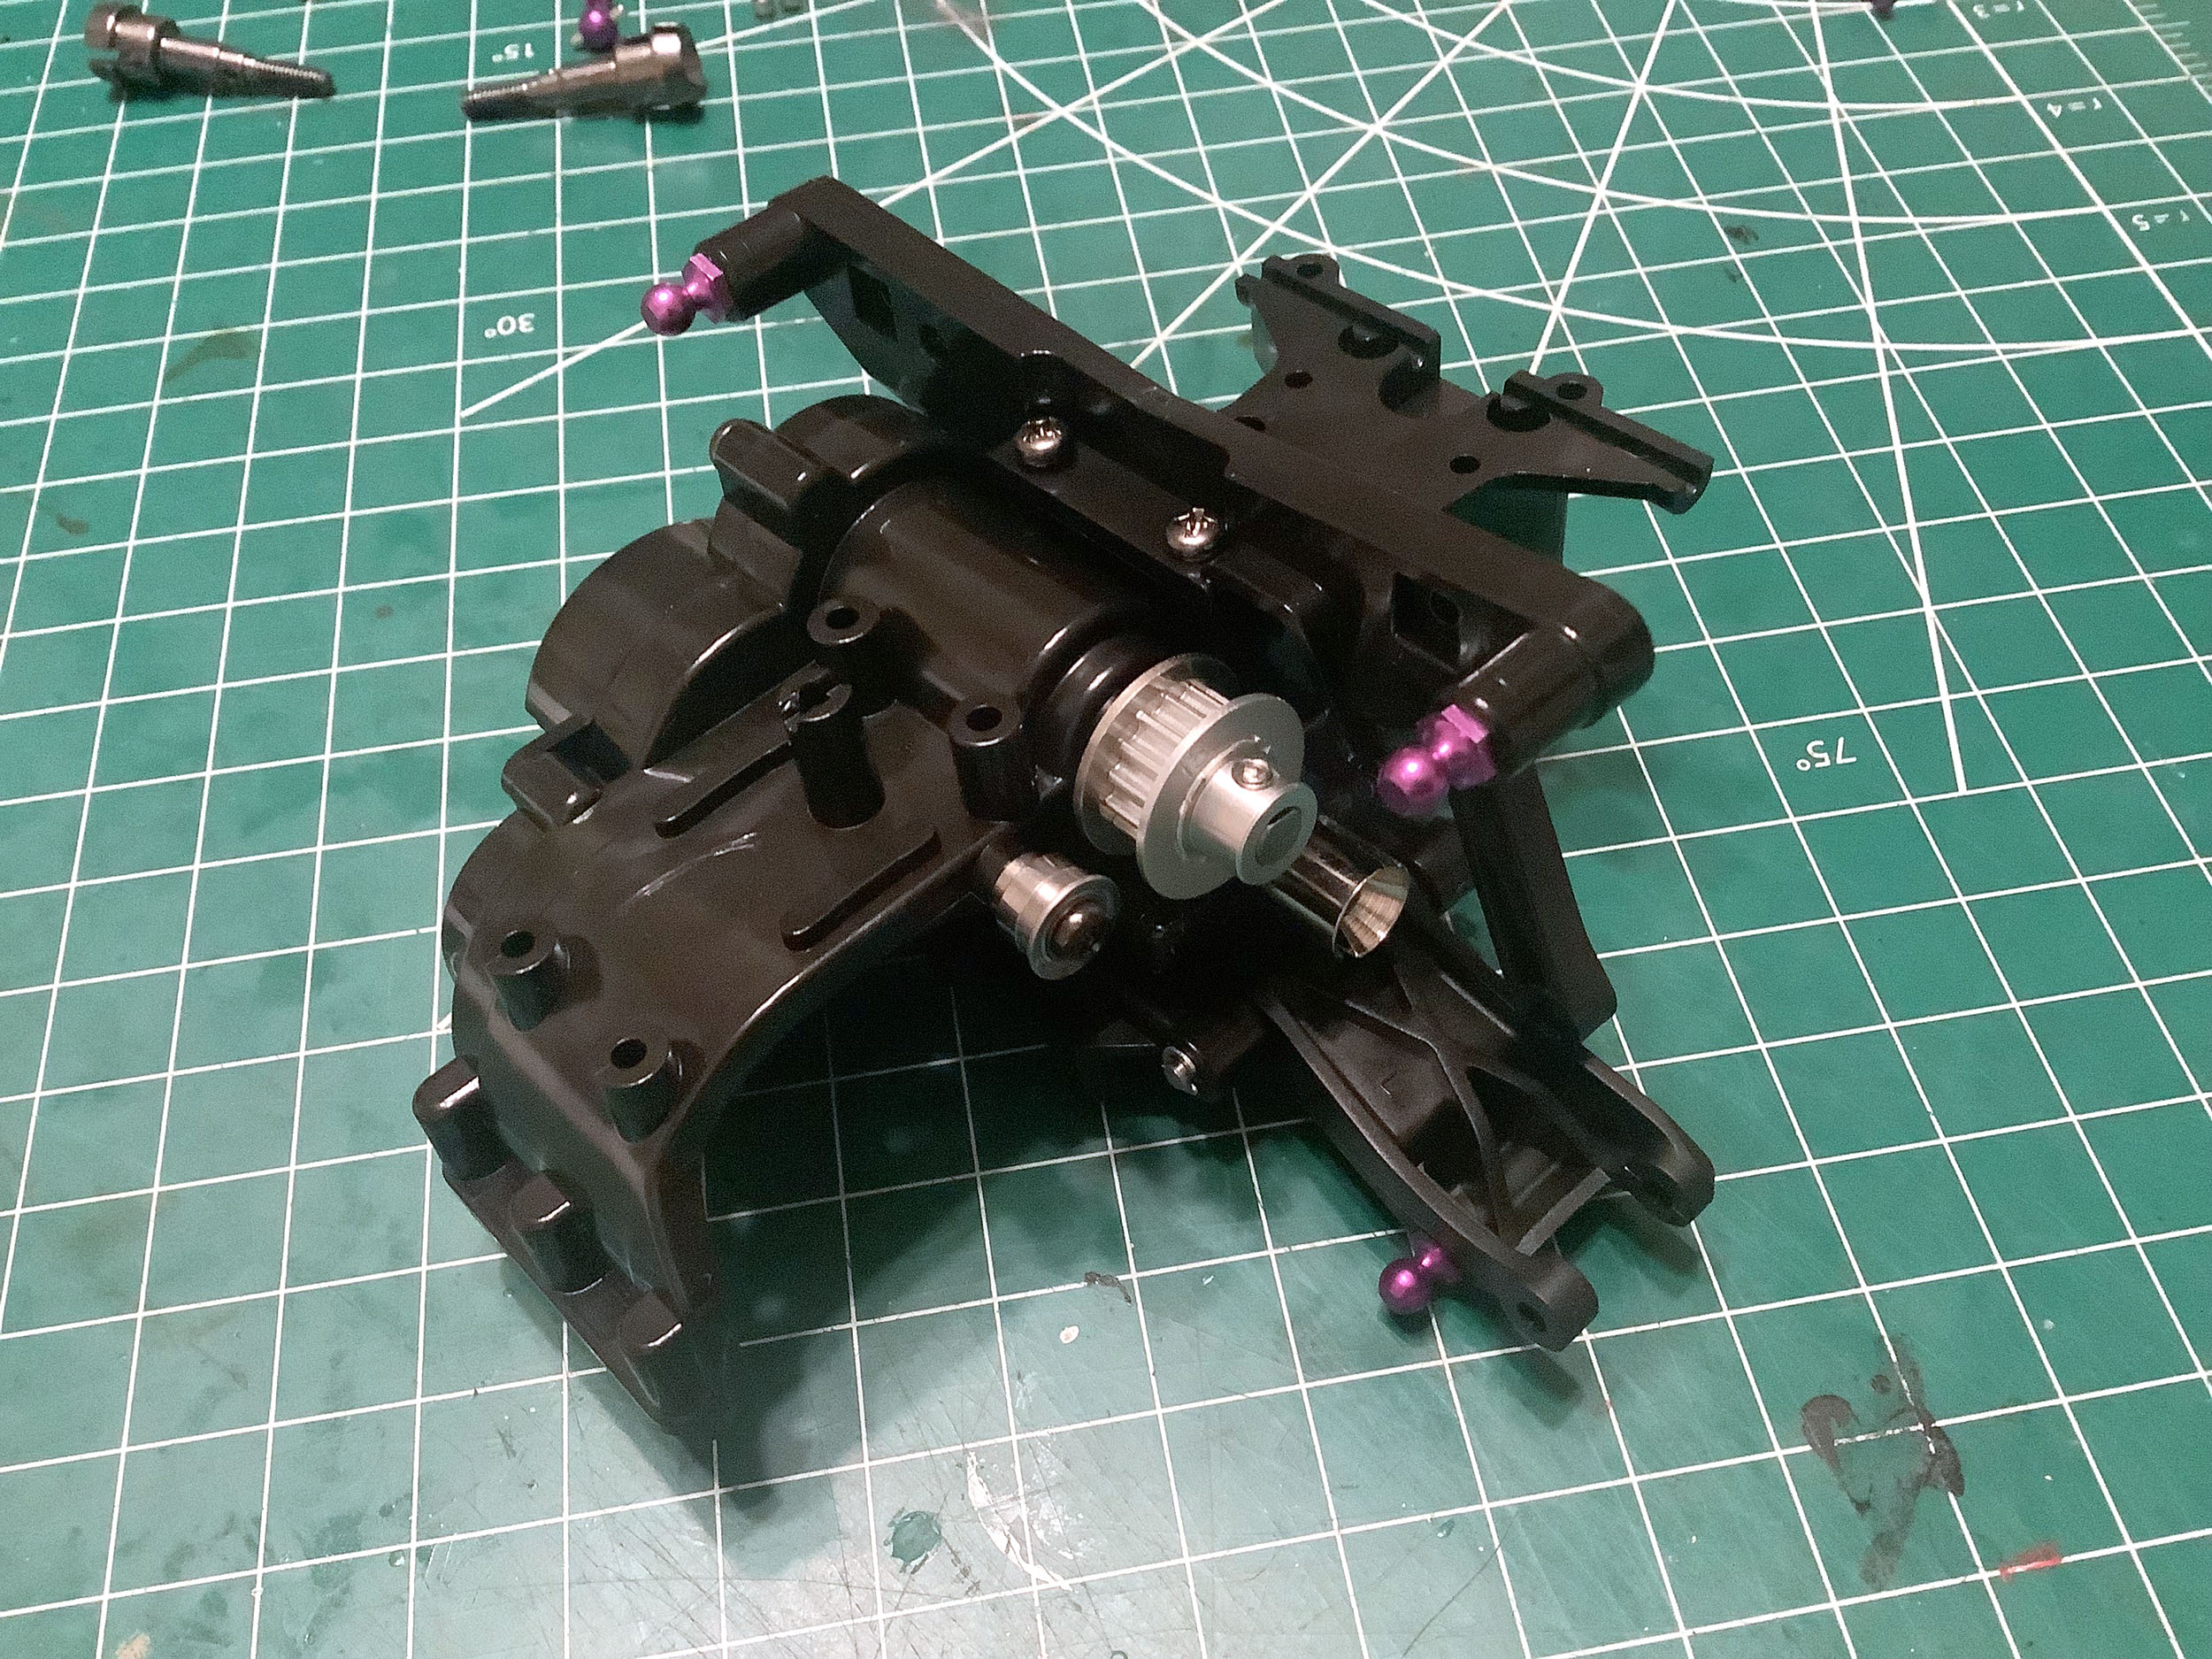
Now we can prepare the lower front suspension assembly. The lower
plastic arms are the same between models, but the TRF model uses smooth
hinge pins with E-clips instead of screw pins.
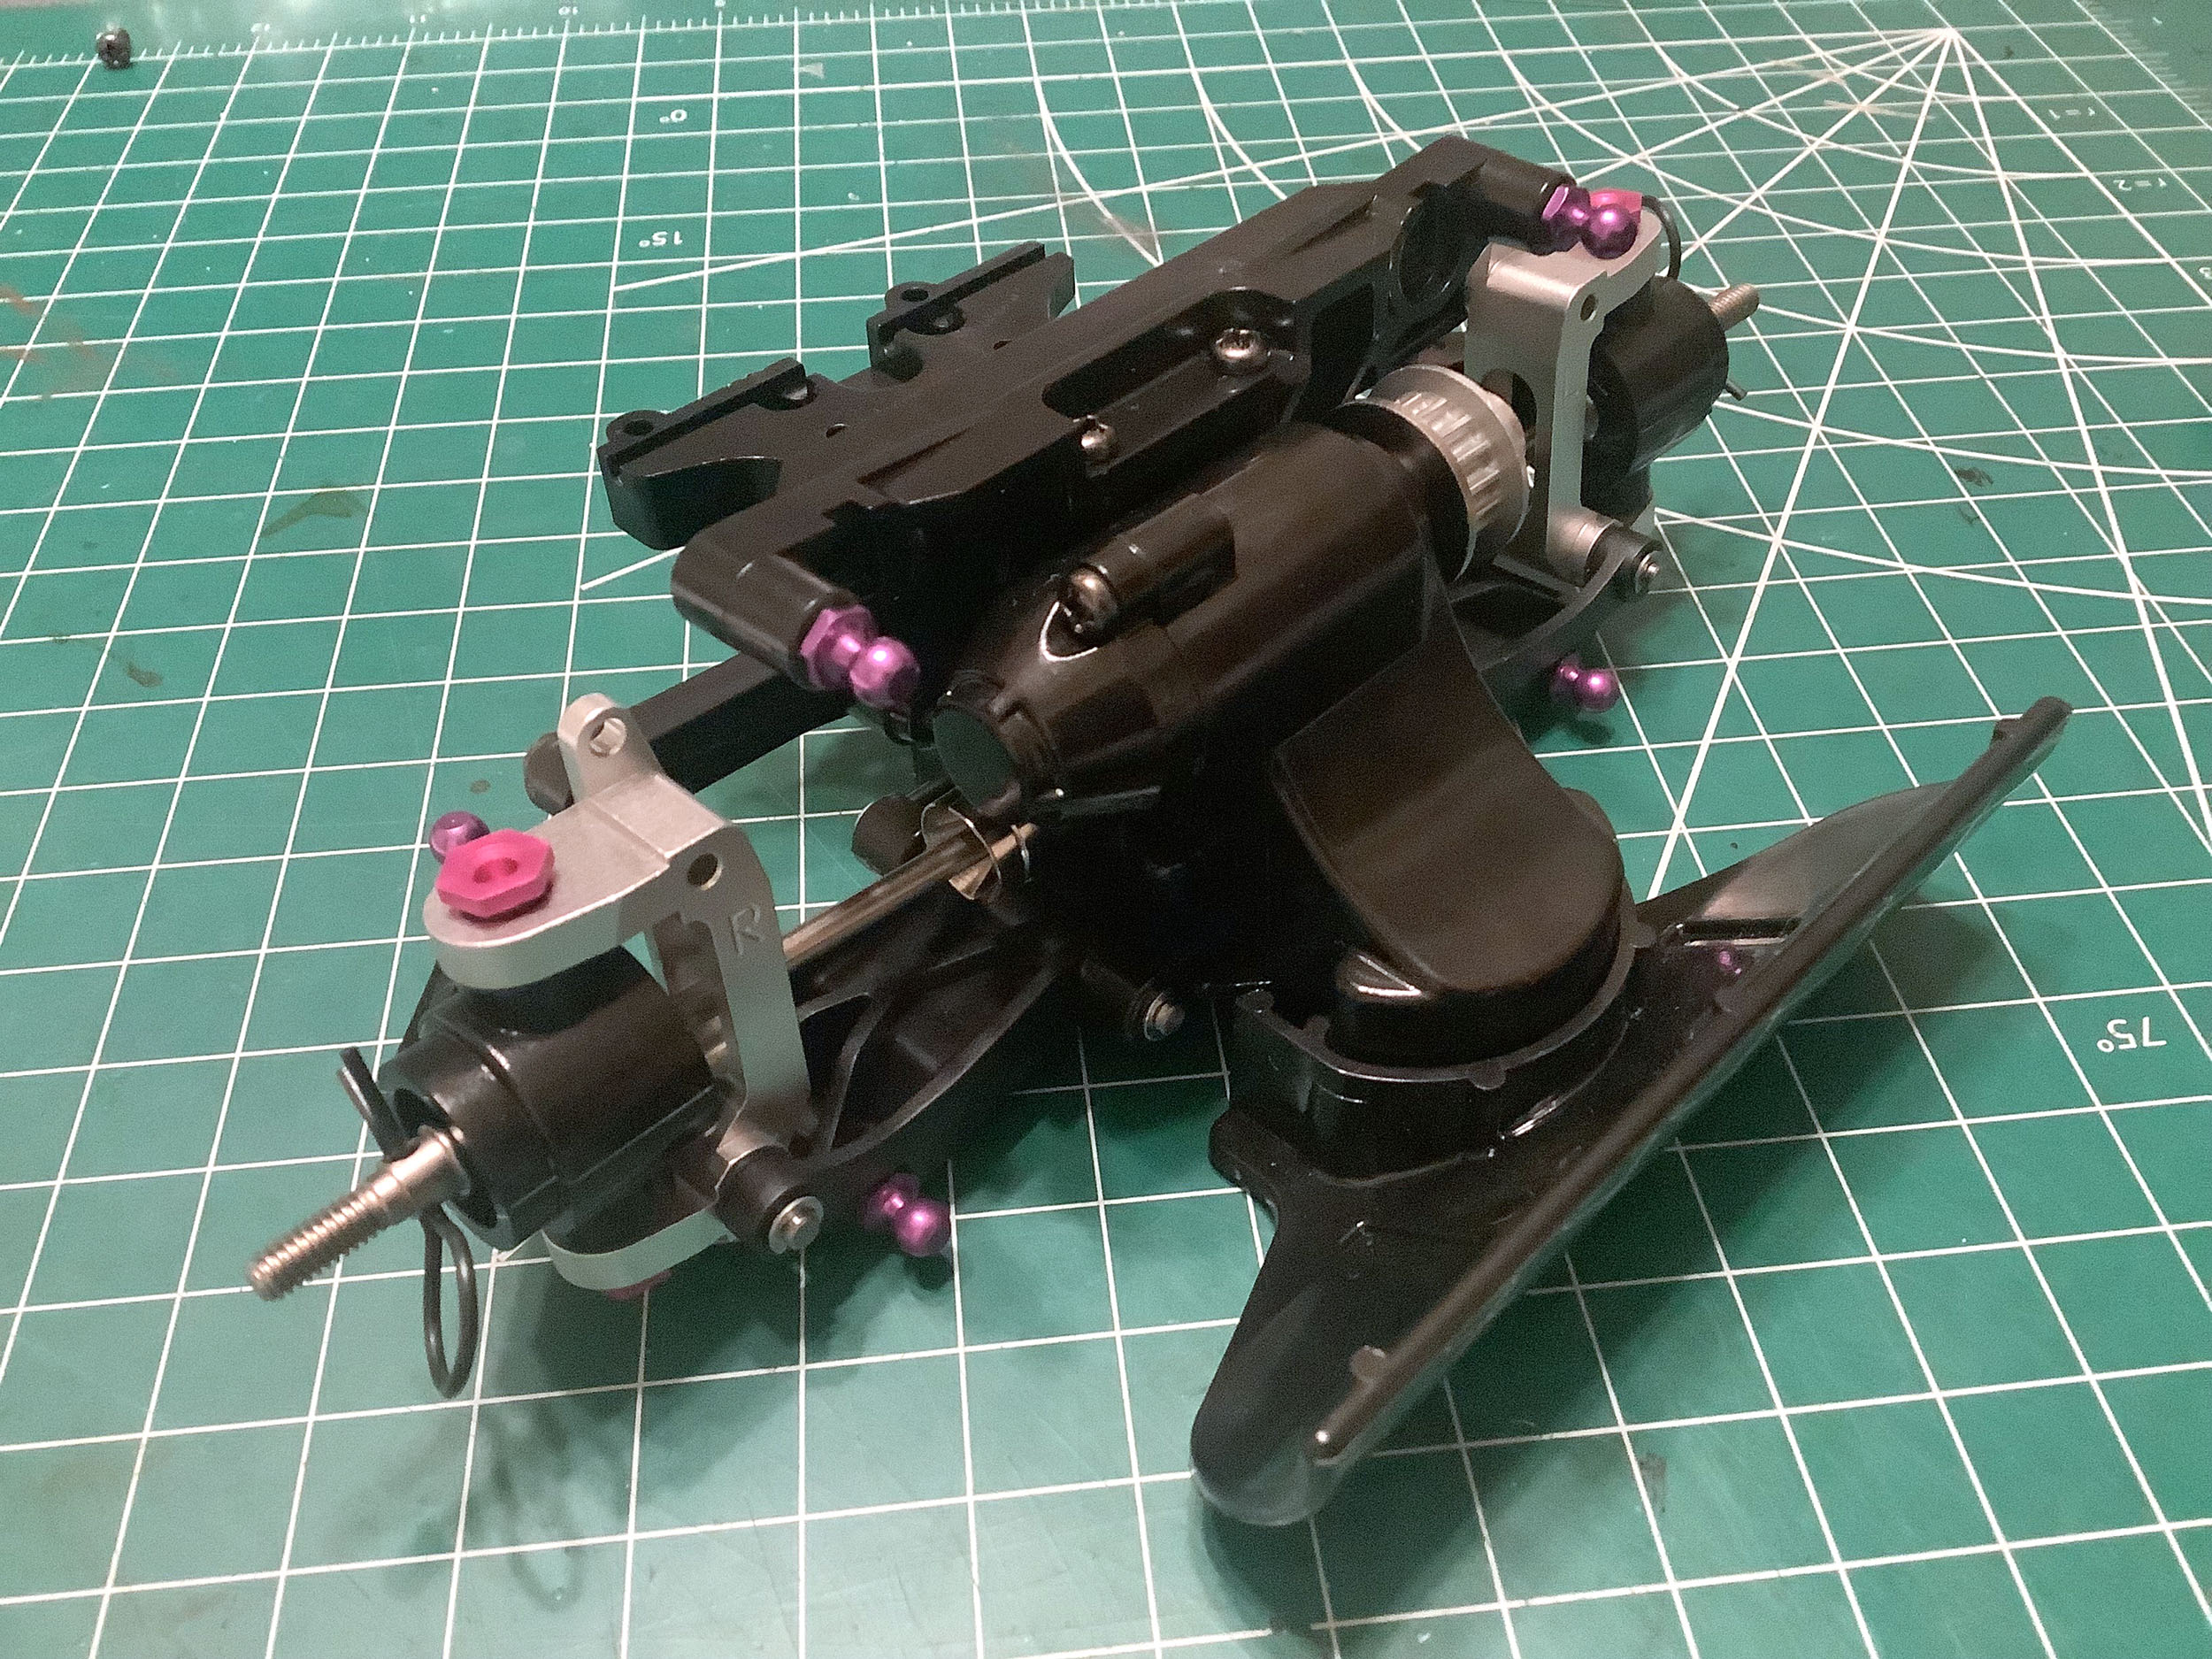
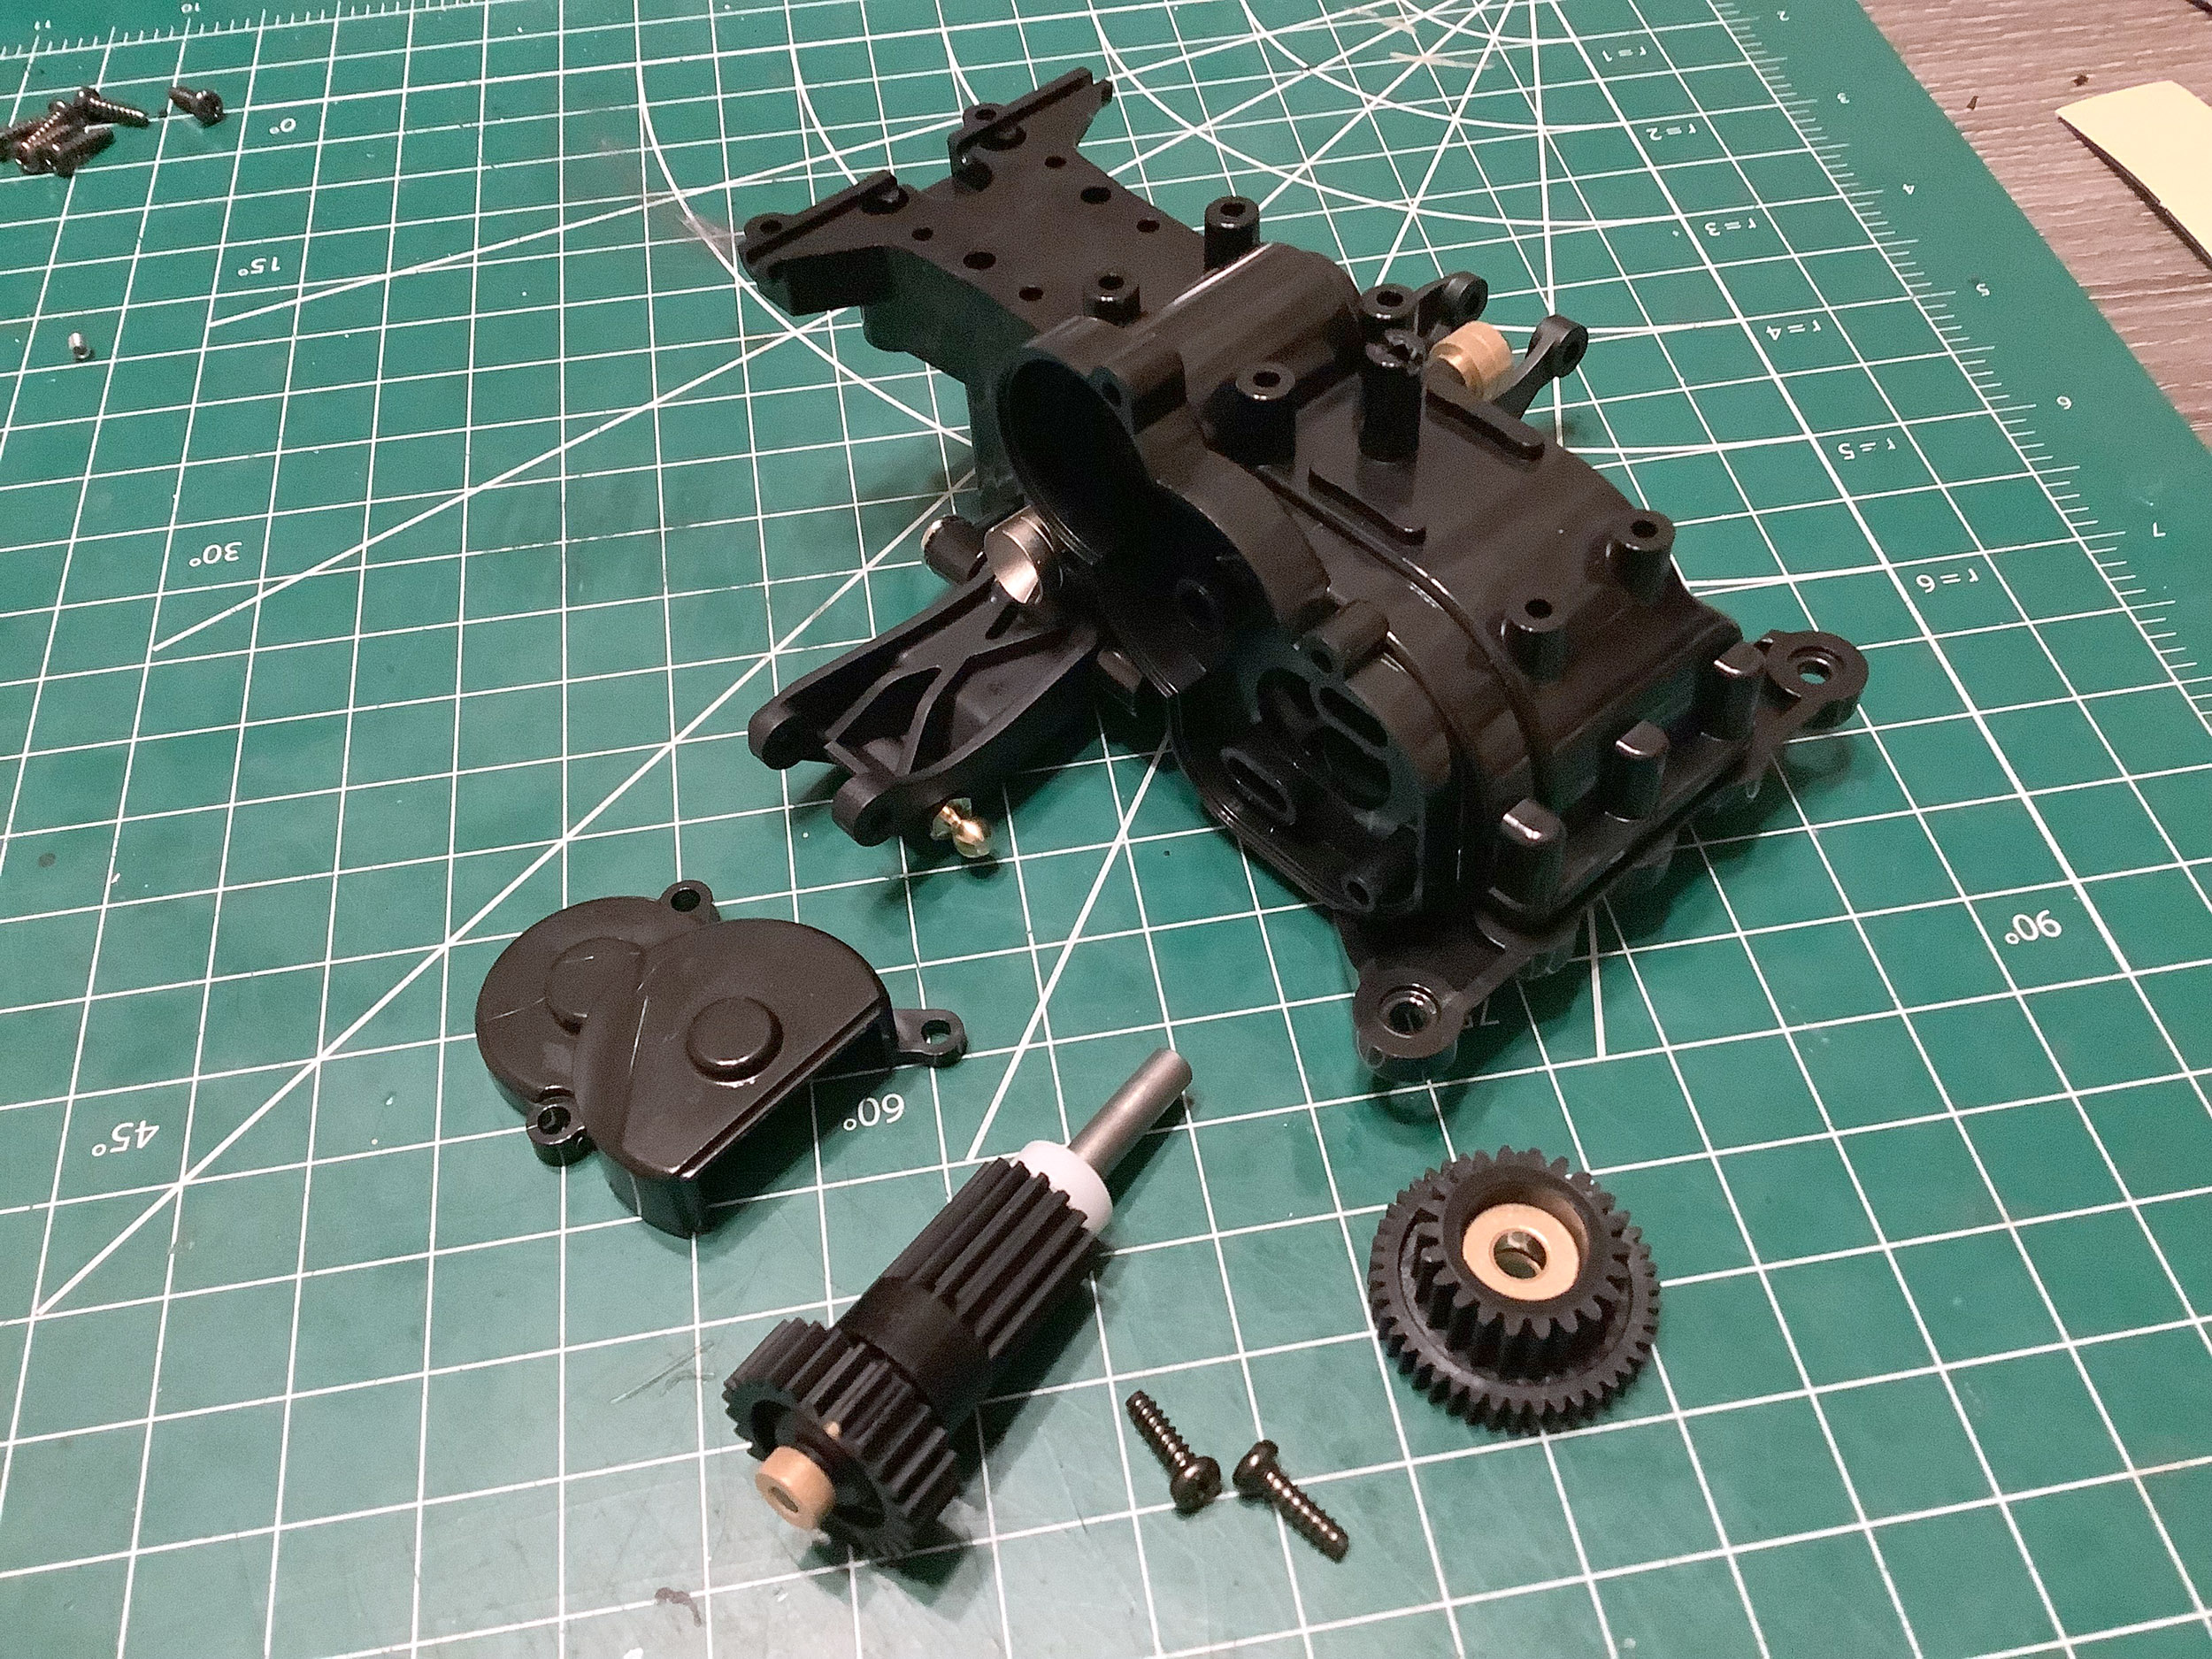
Here the counter gear has been installed, closed out with a cover, and
the lower suspension assembly has been attached. Only the purple
ball studs reveal which assembly is which on first glance.
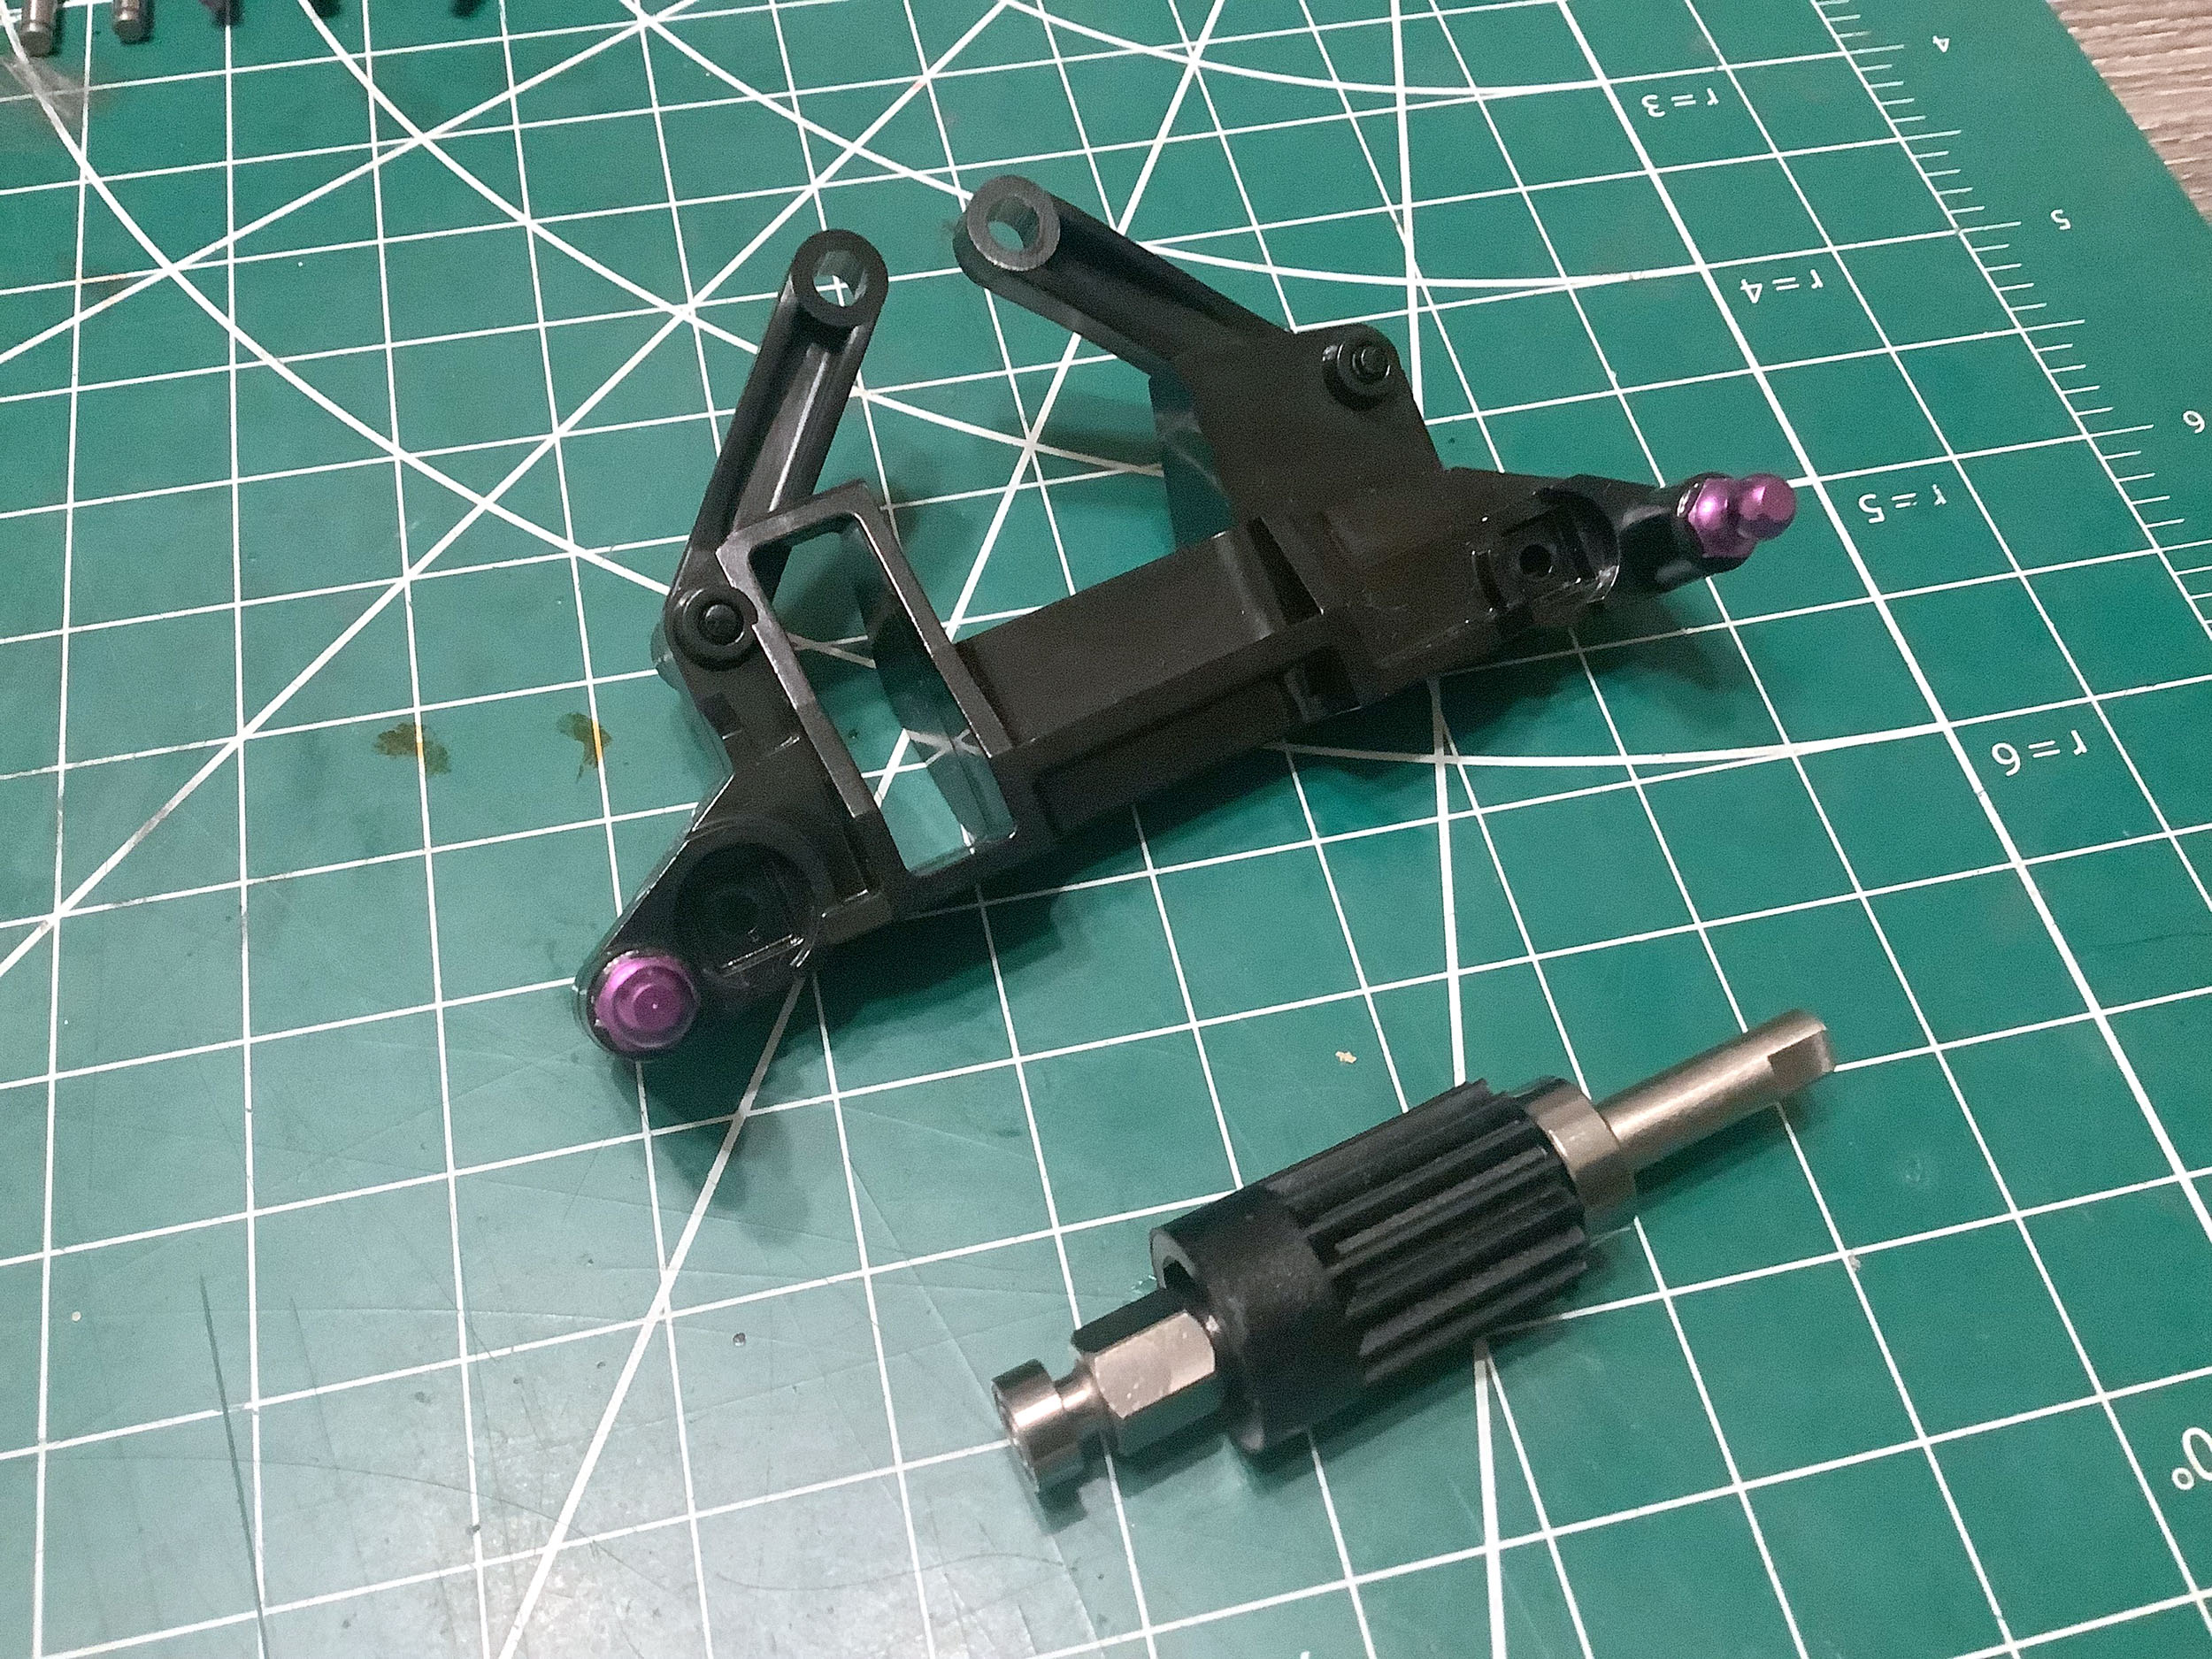
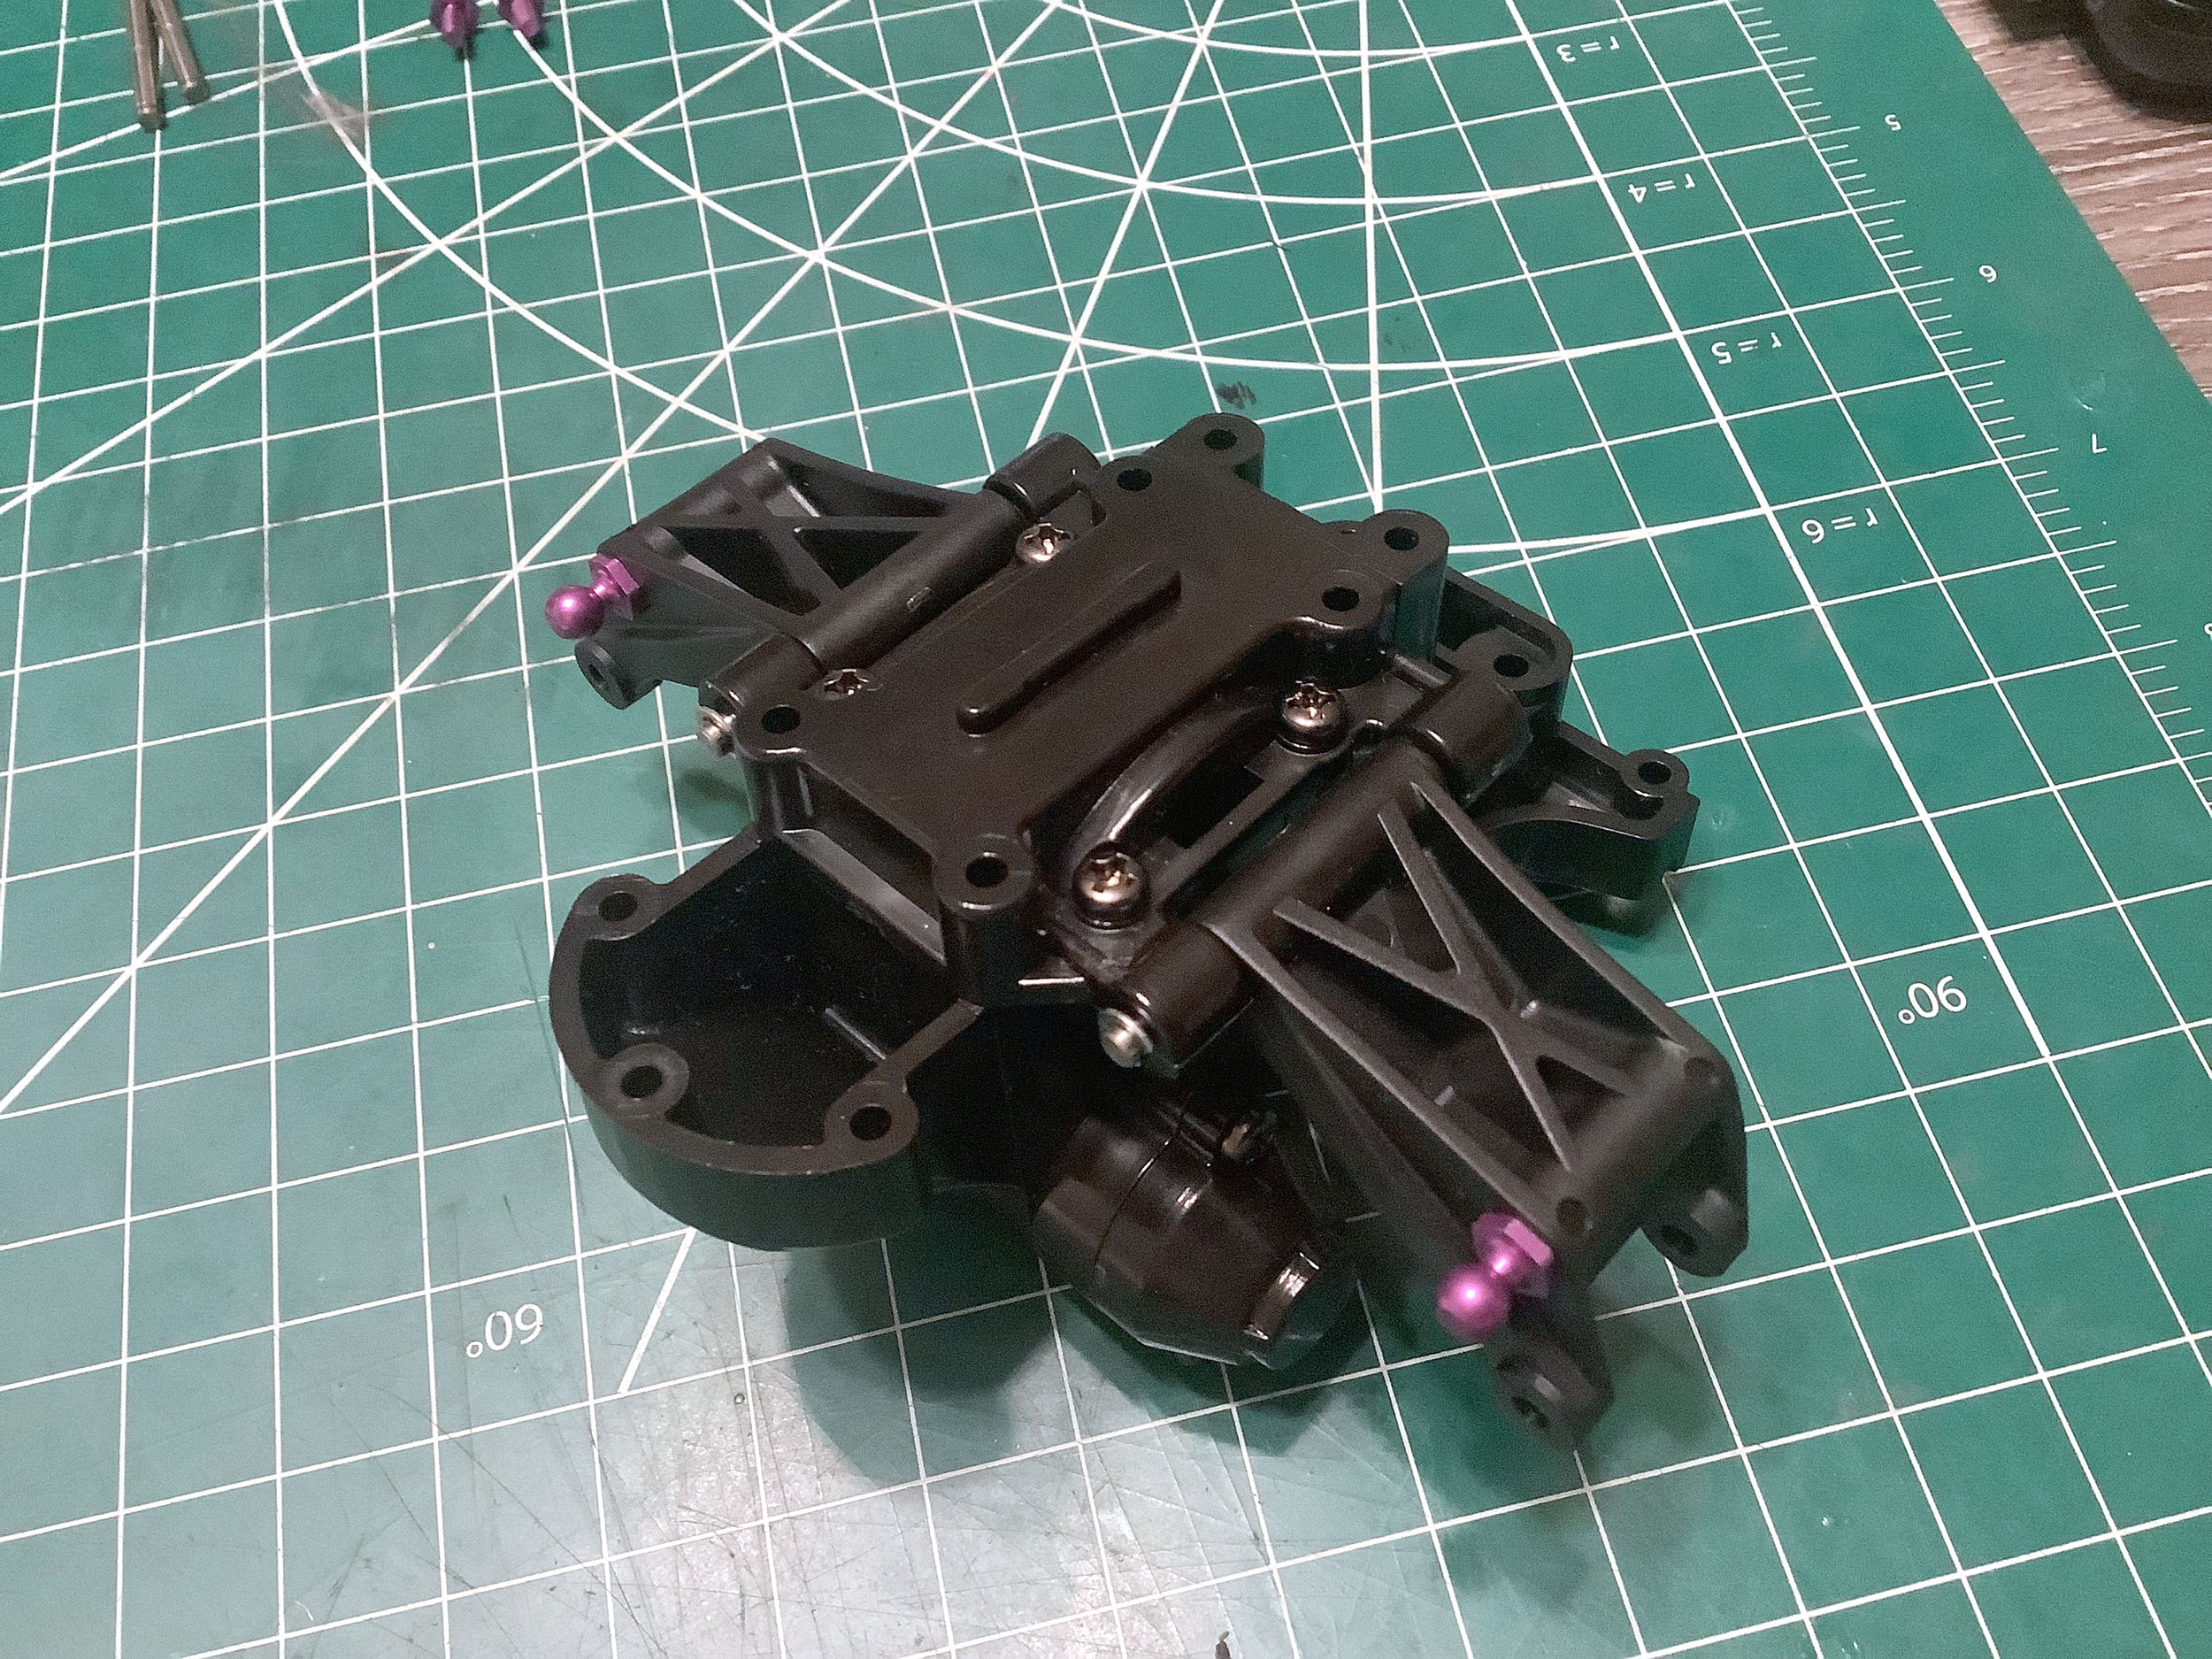
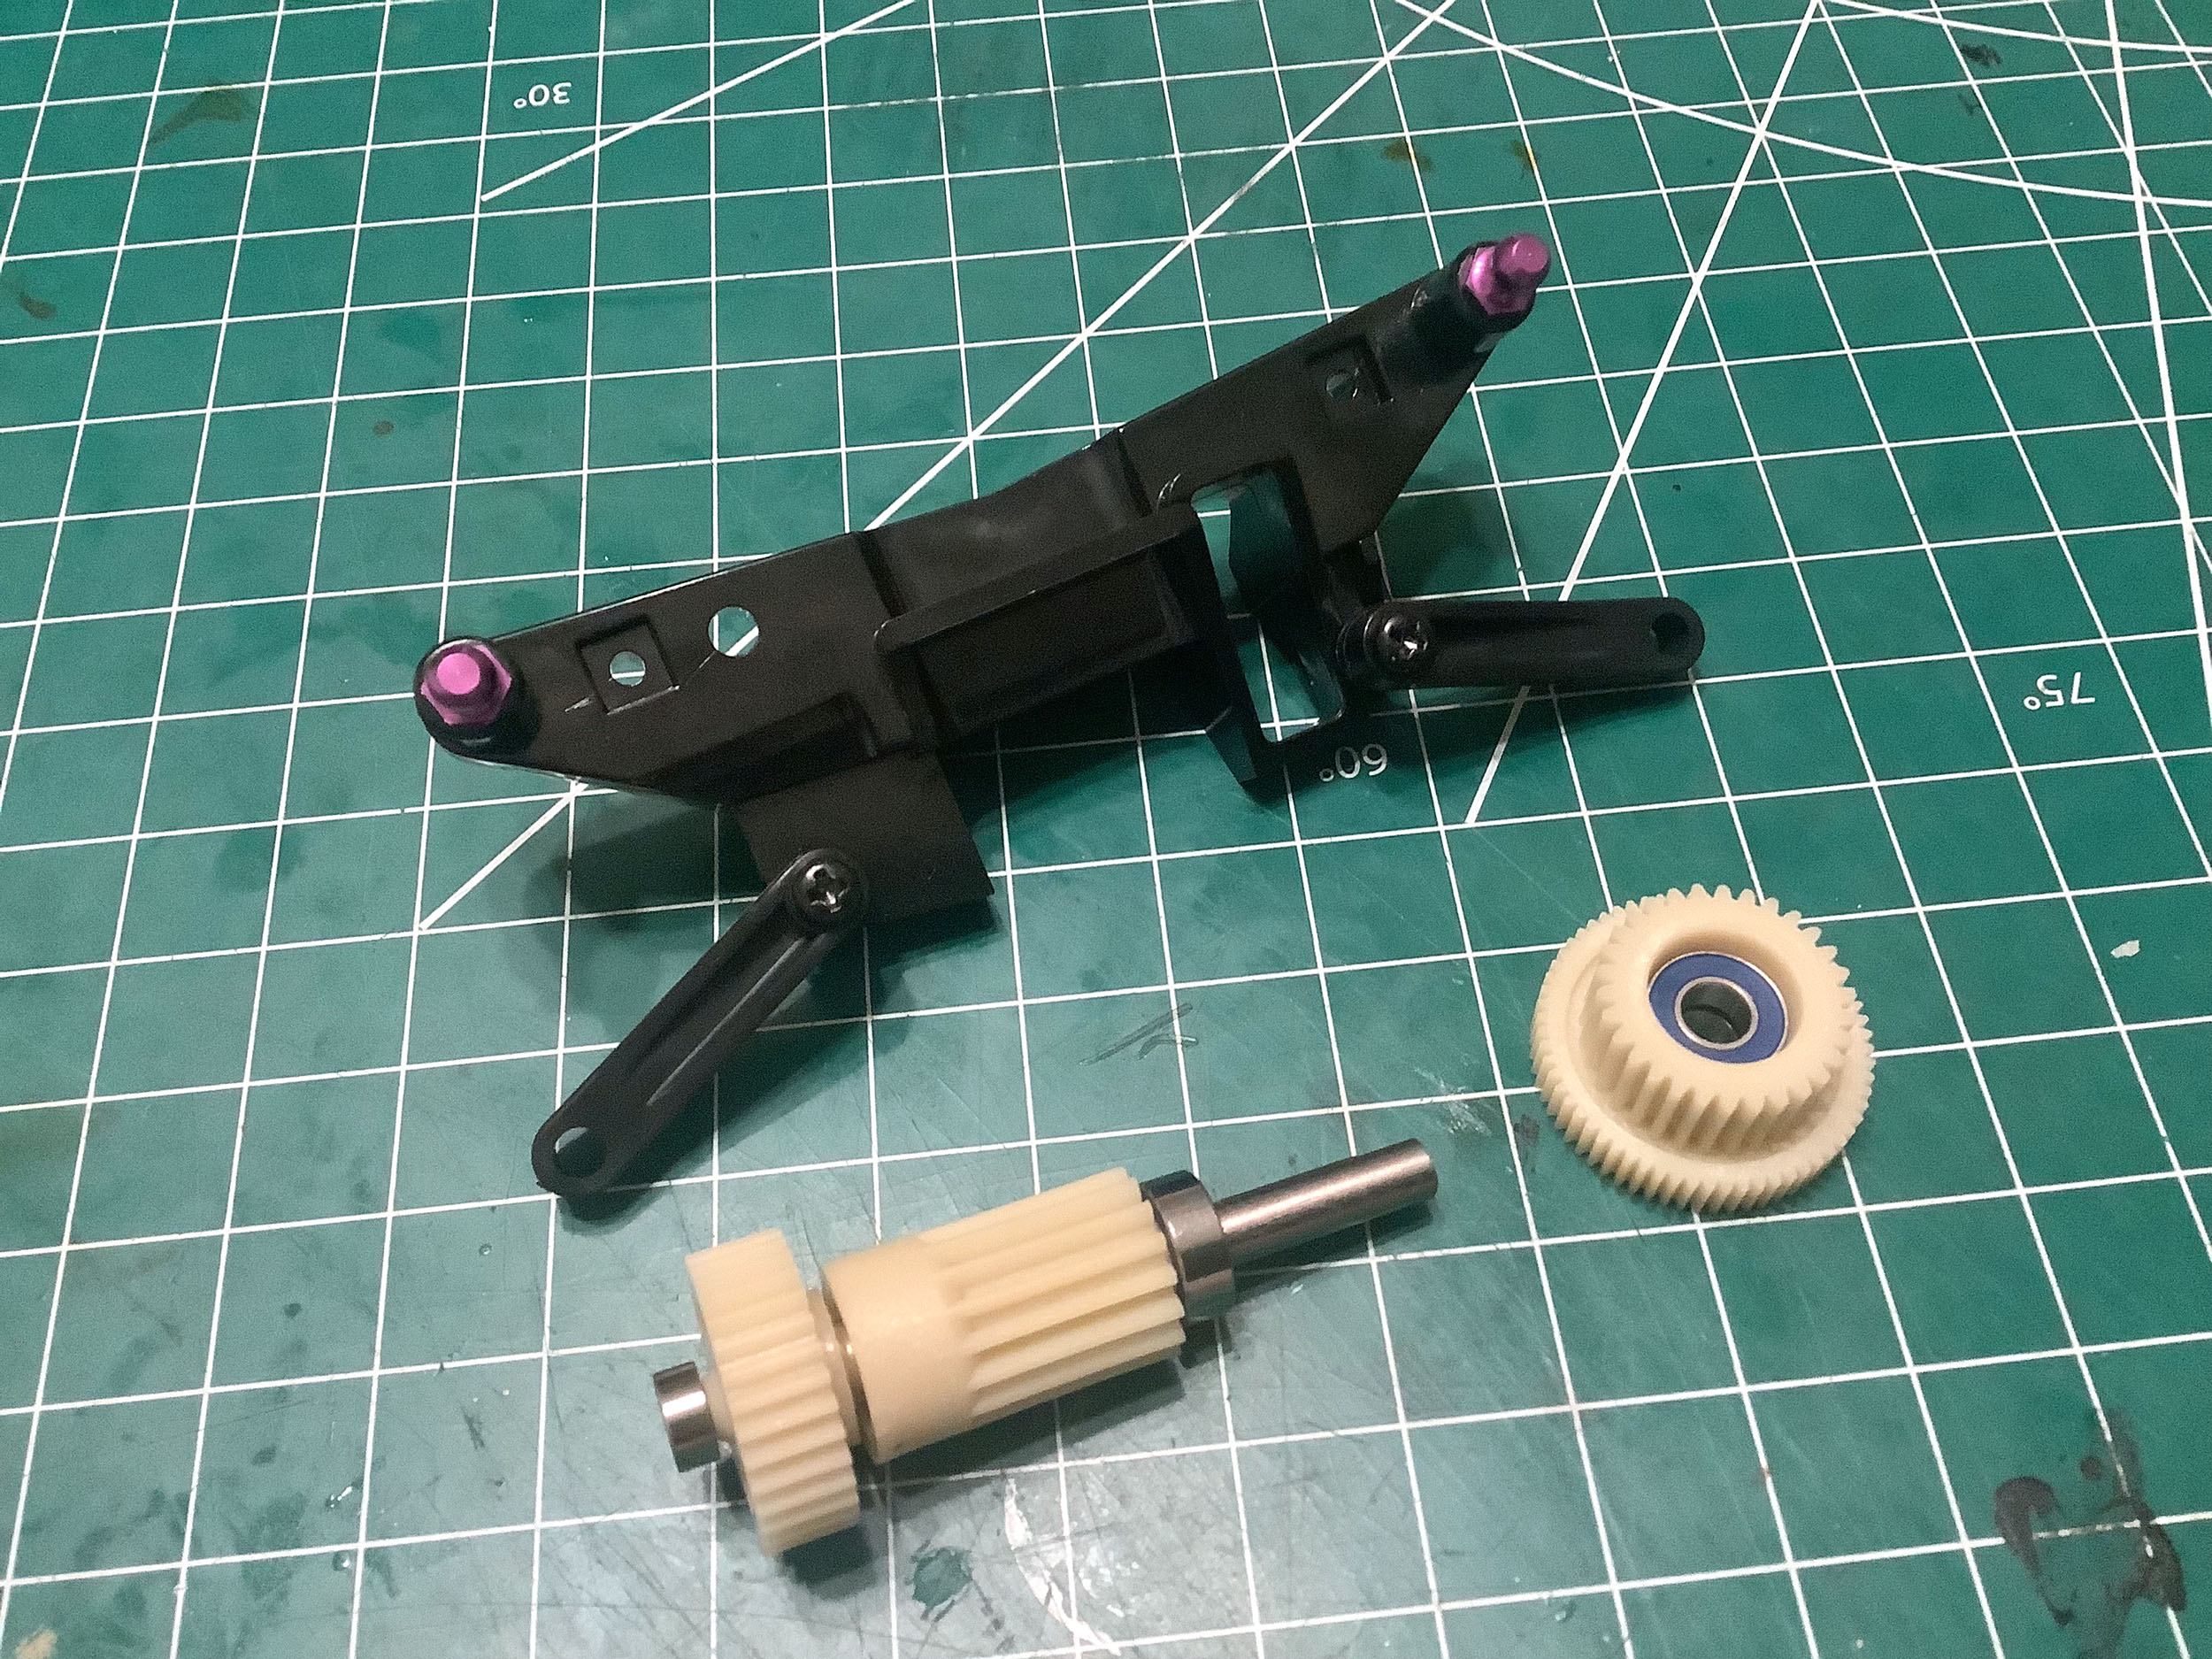
The standard model uses plastic pulleys while the TRF model uses
aluminum. The diameter and number of teeth (15T) are the same.
With the pulleys installed and the upper arm mount attached, the front
bulkhead assembly is complete. The appearance is very similar, but
there are important differences inside.
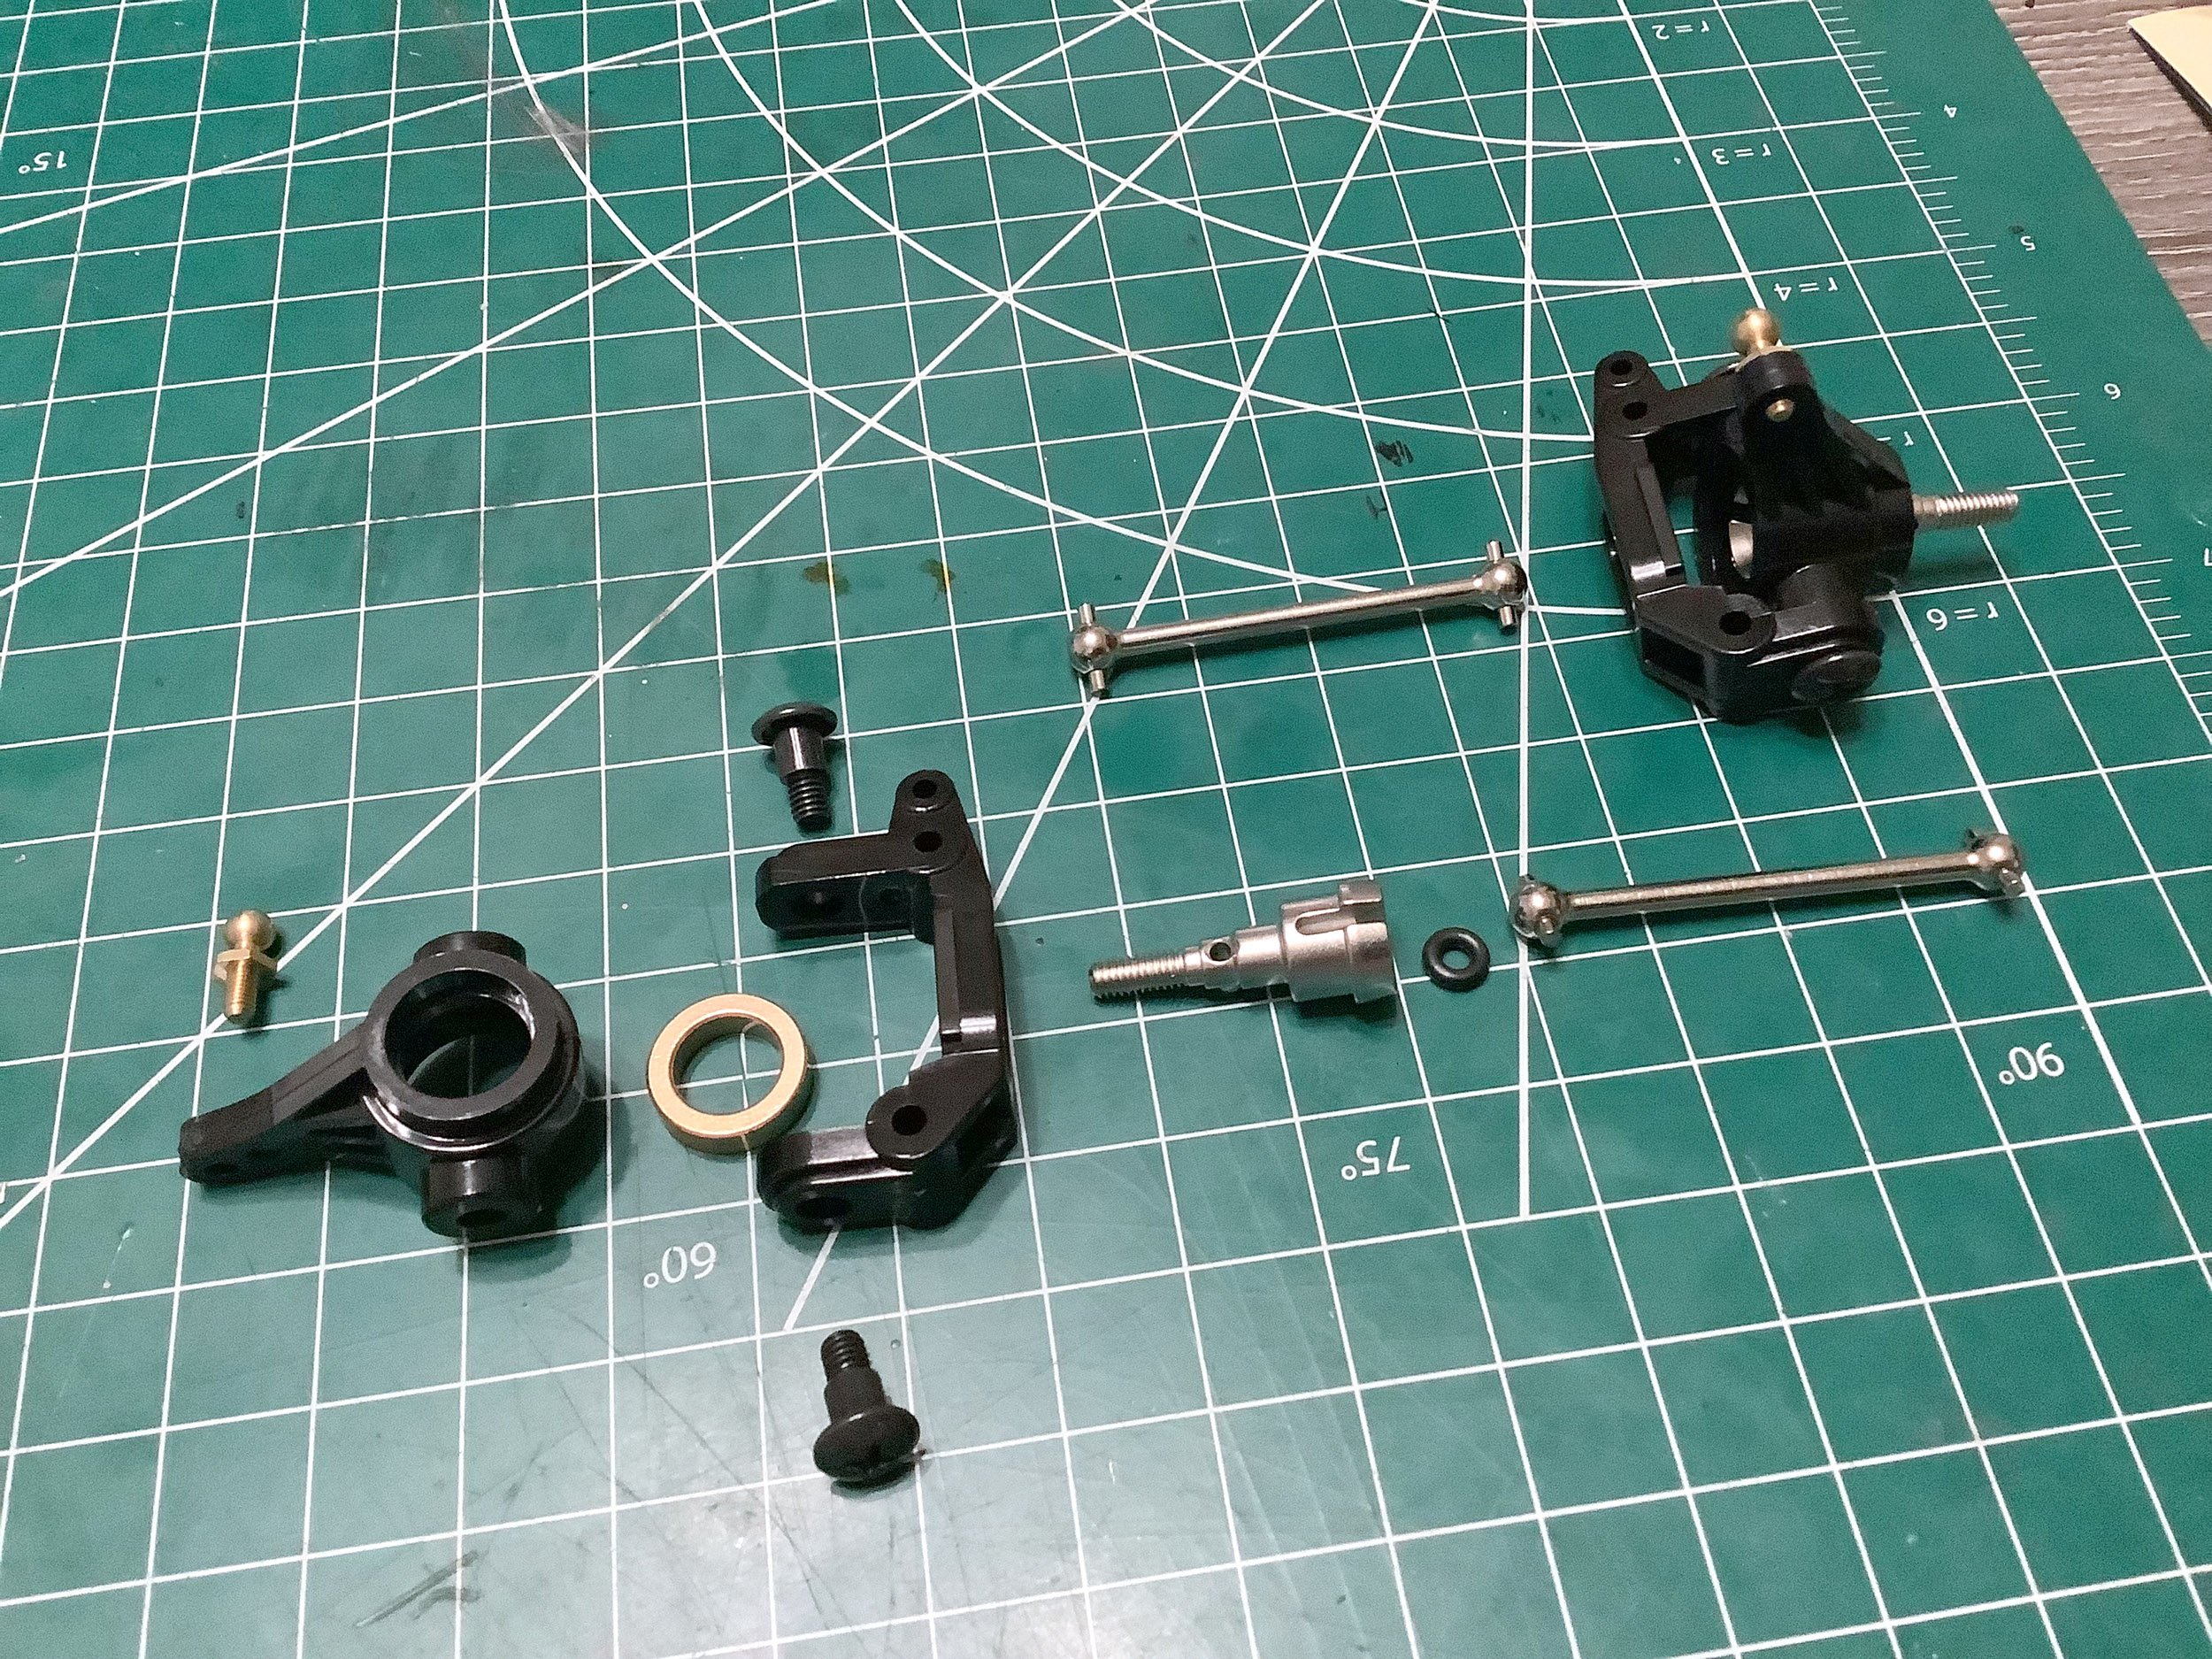
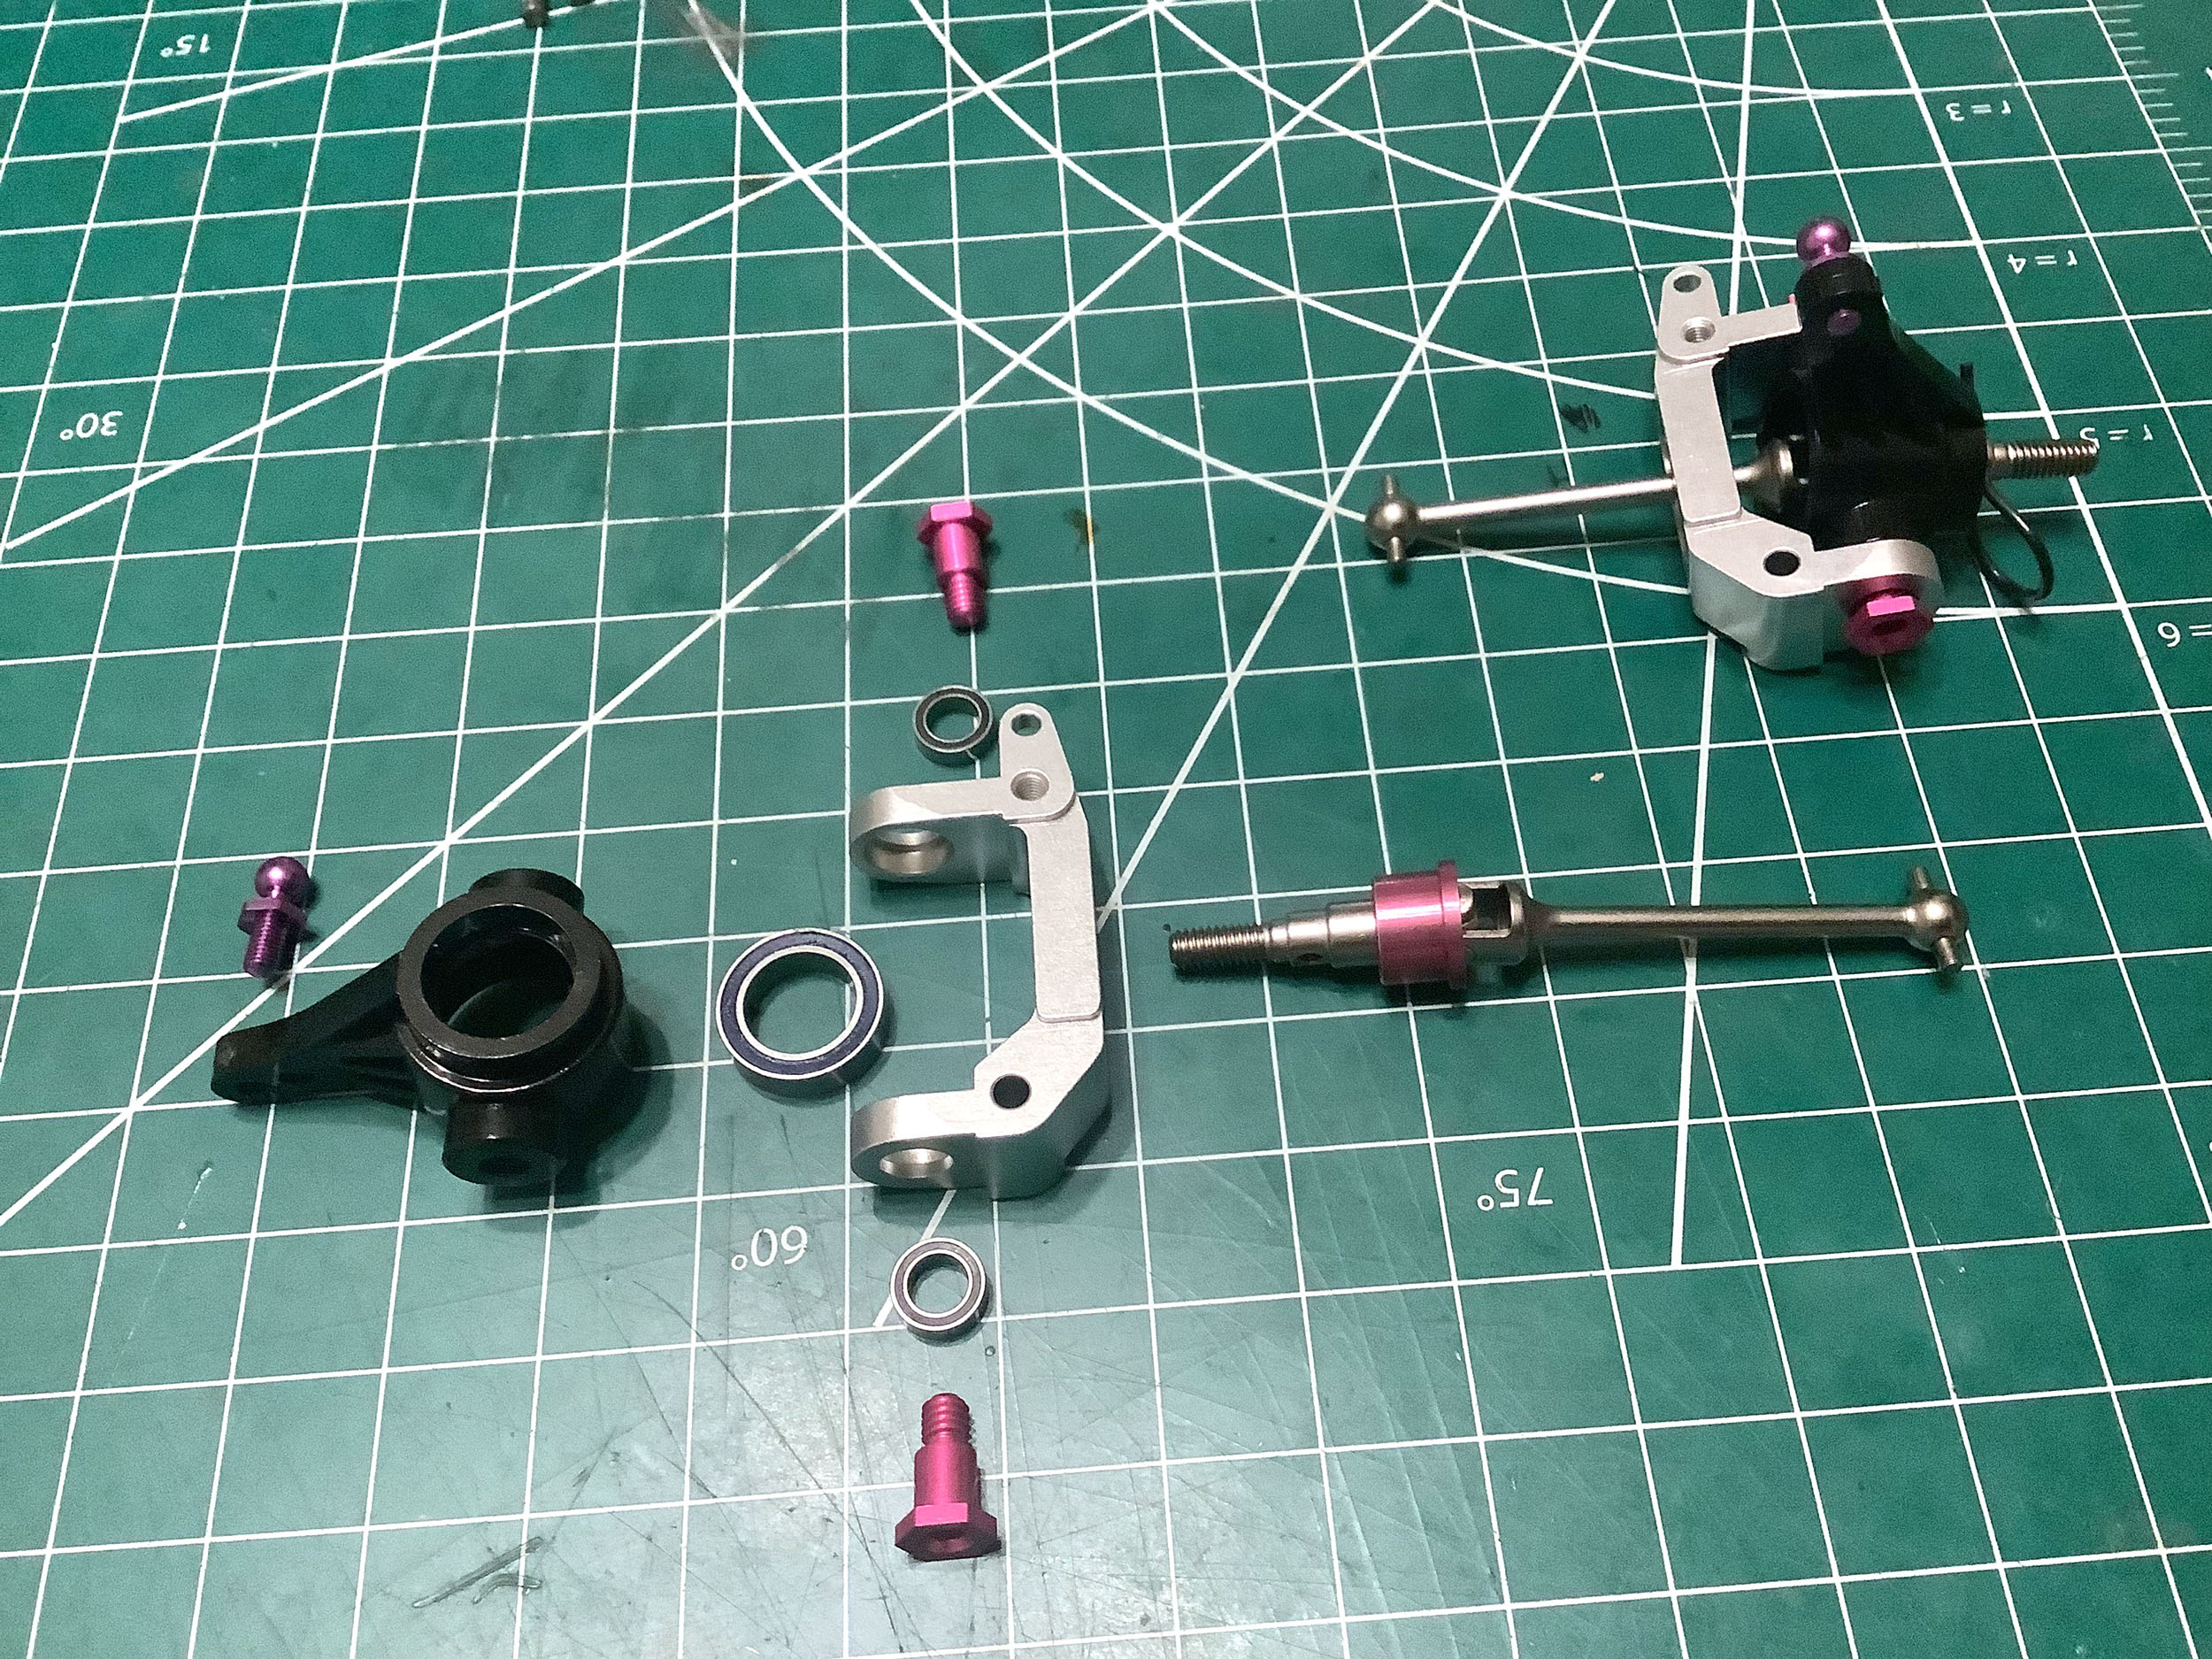
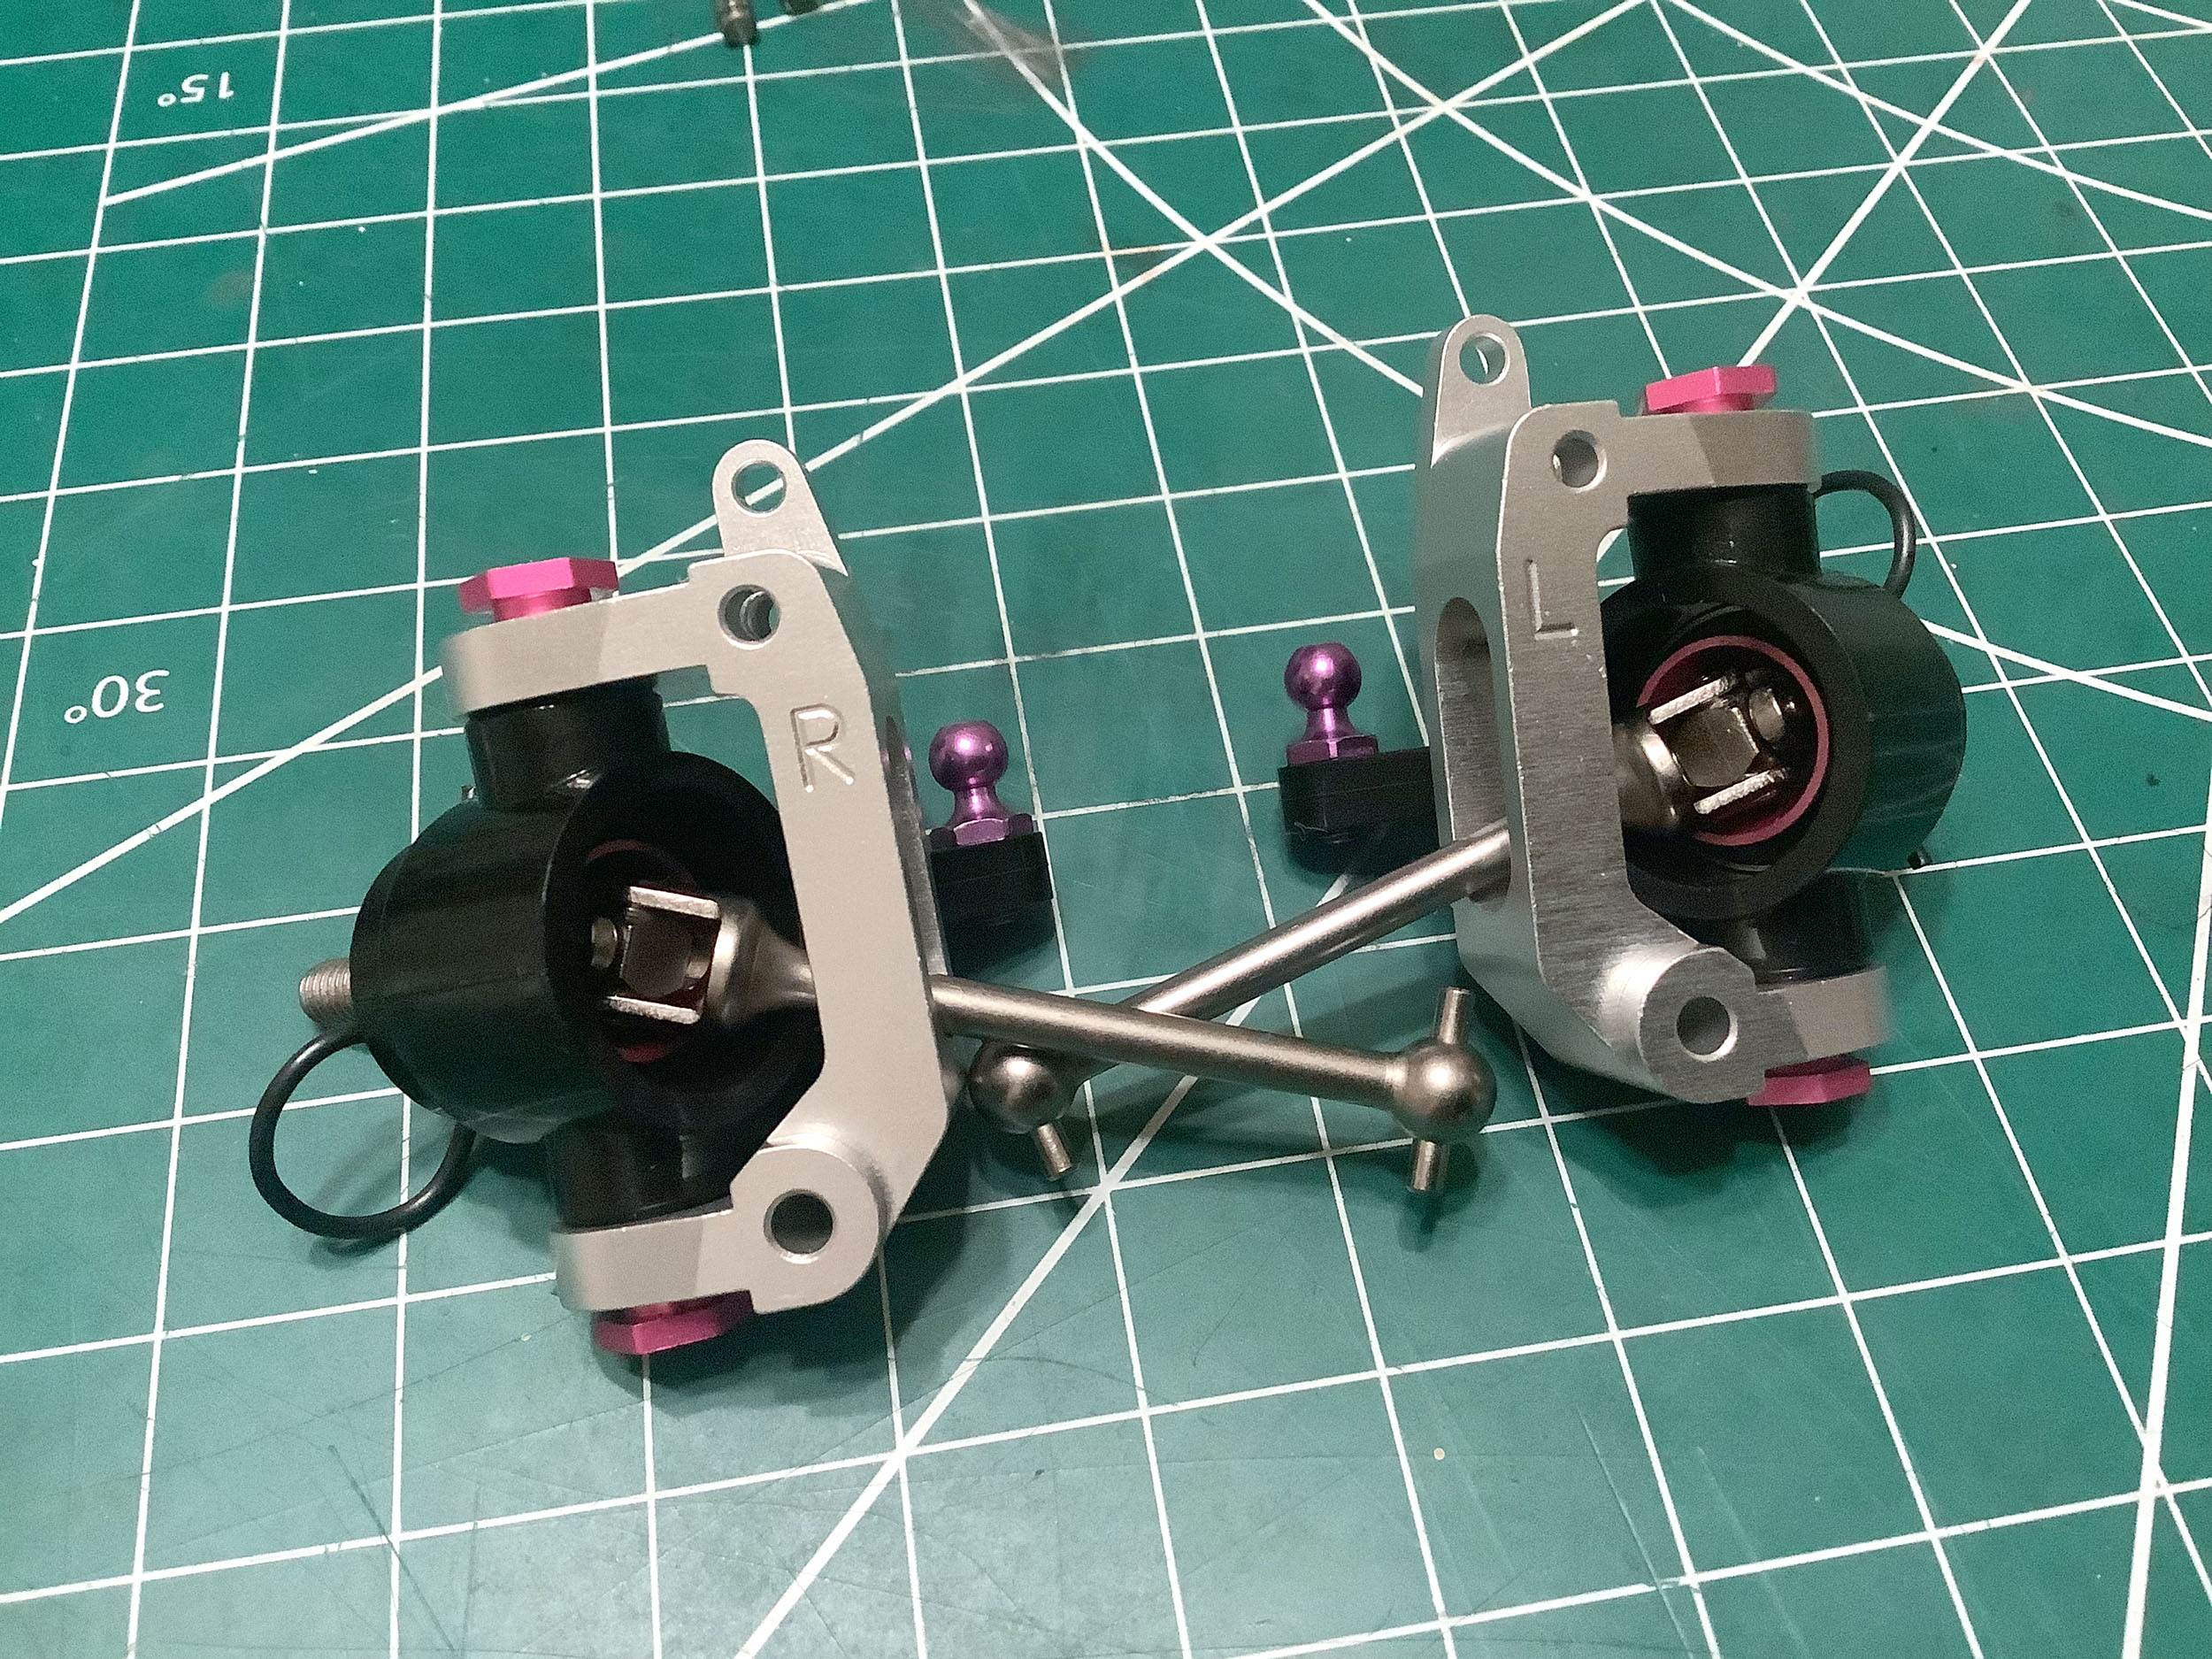
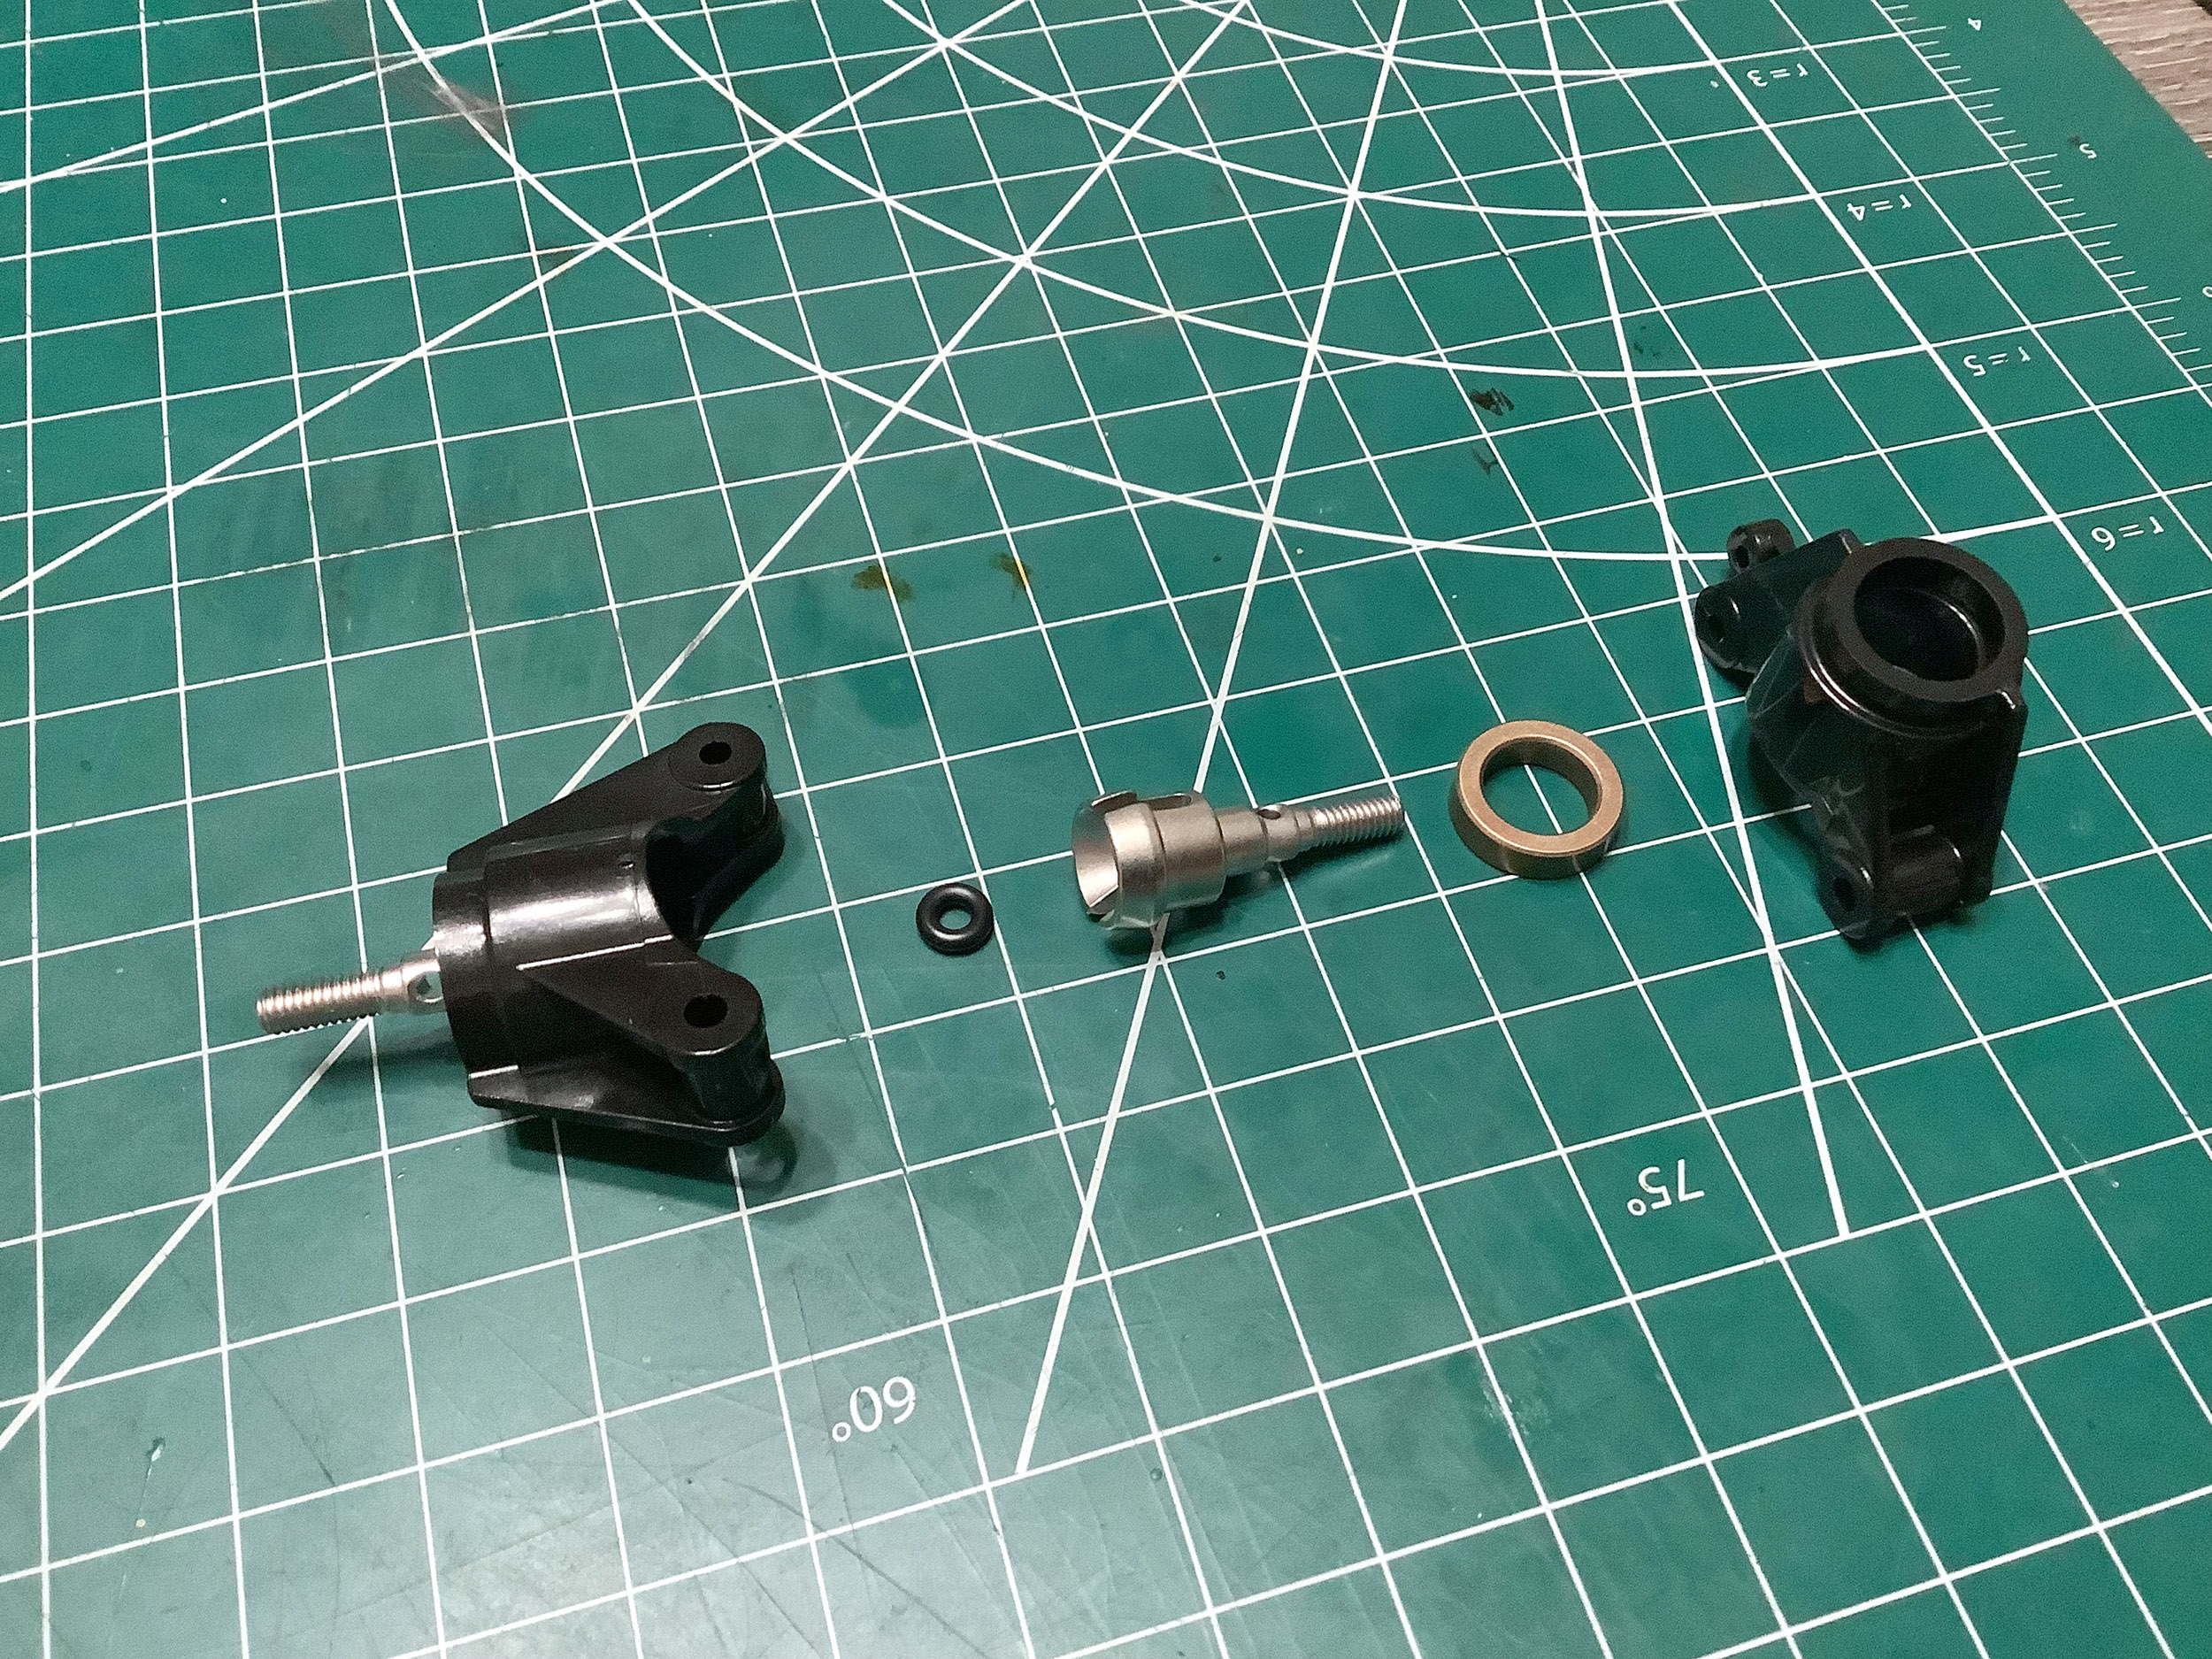
You can see substantial differences in the front hub and steering
assemblies. Both models use the same plastic steering knuckles,
but the TRF uses bearings, machined aluminum uprights, aluminum stepped
king pins, and pre-assembled universal style axles instead of
dogbones. Completed assemblies and exploded views are shown
above. Note that the TRF model even has ball bearings on the king
pins.
Take a look at these lovely steering assemblies. It is very easy to see
that this is a special model with non-standard parts based on this
photo.
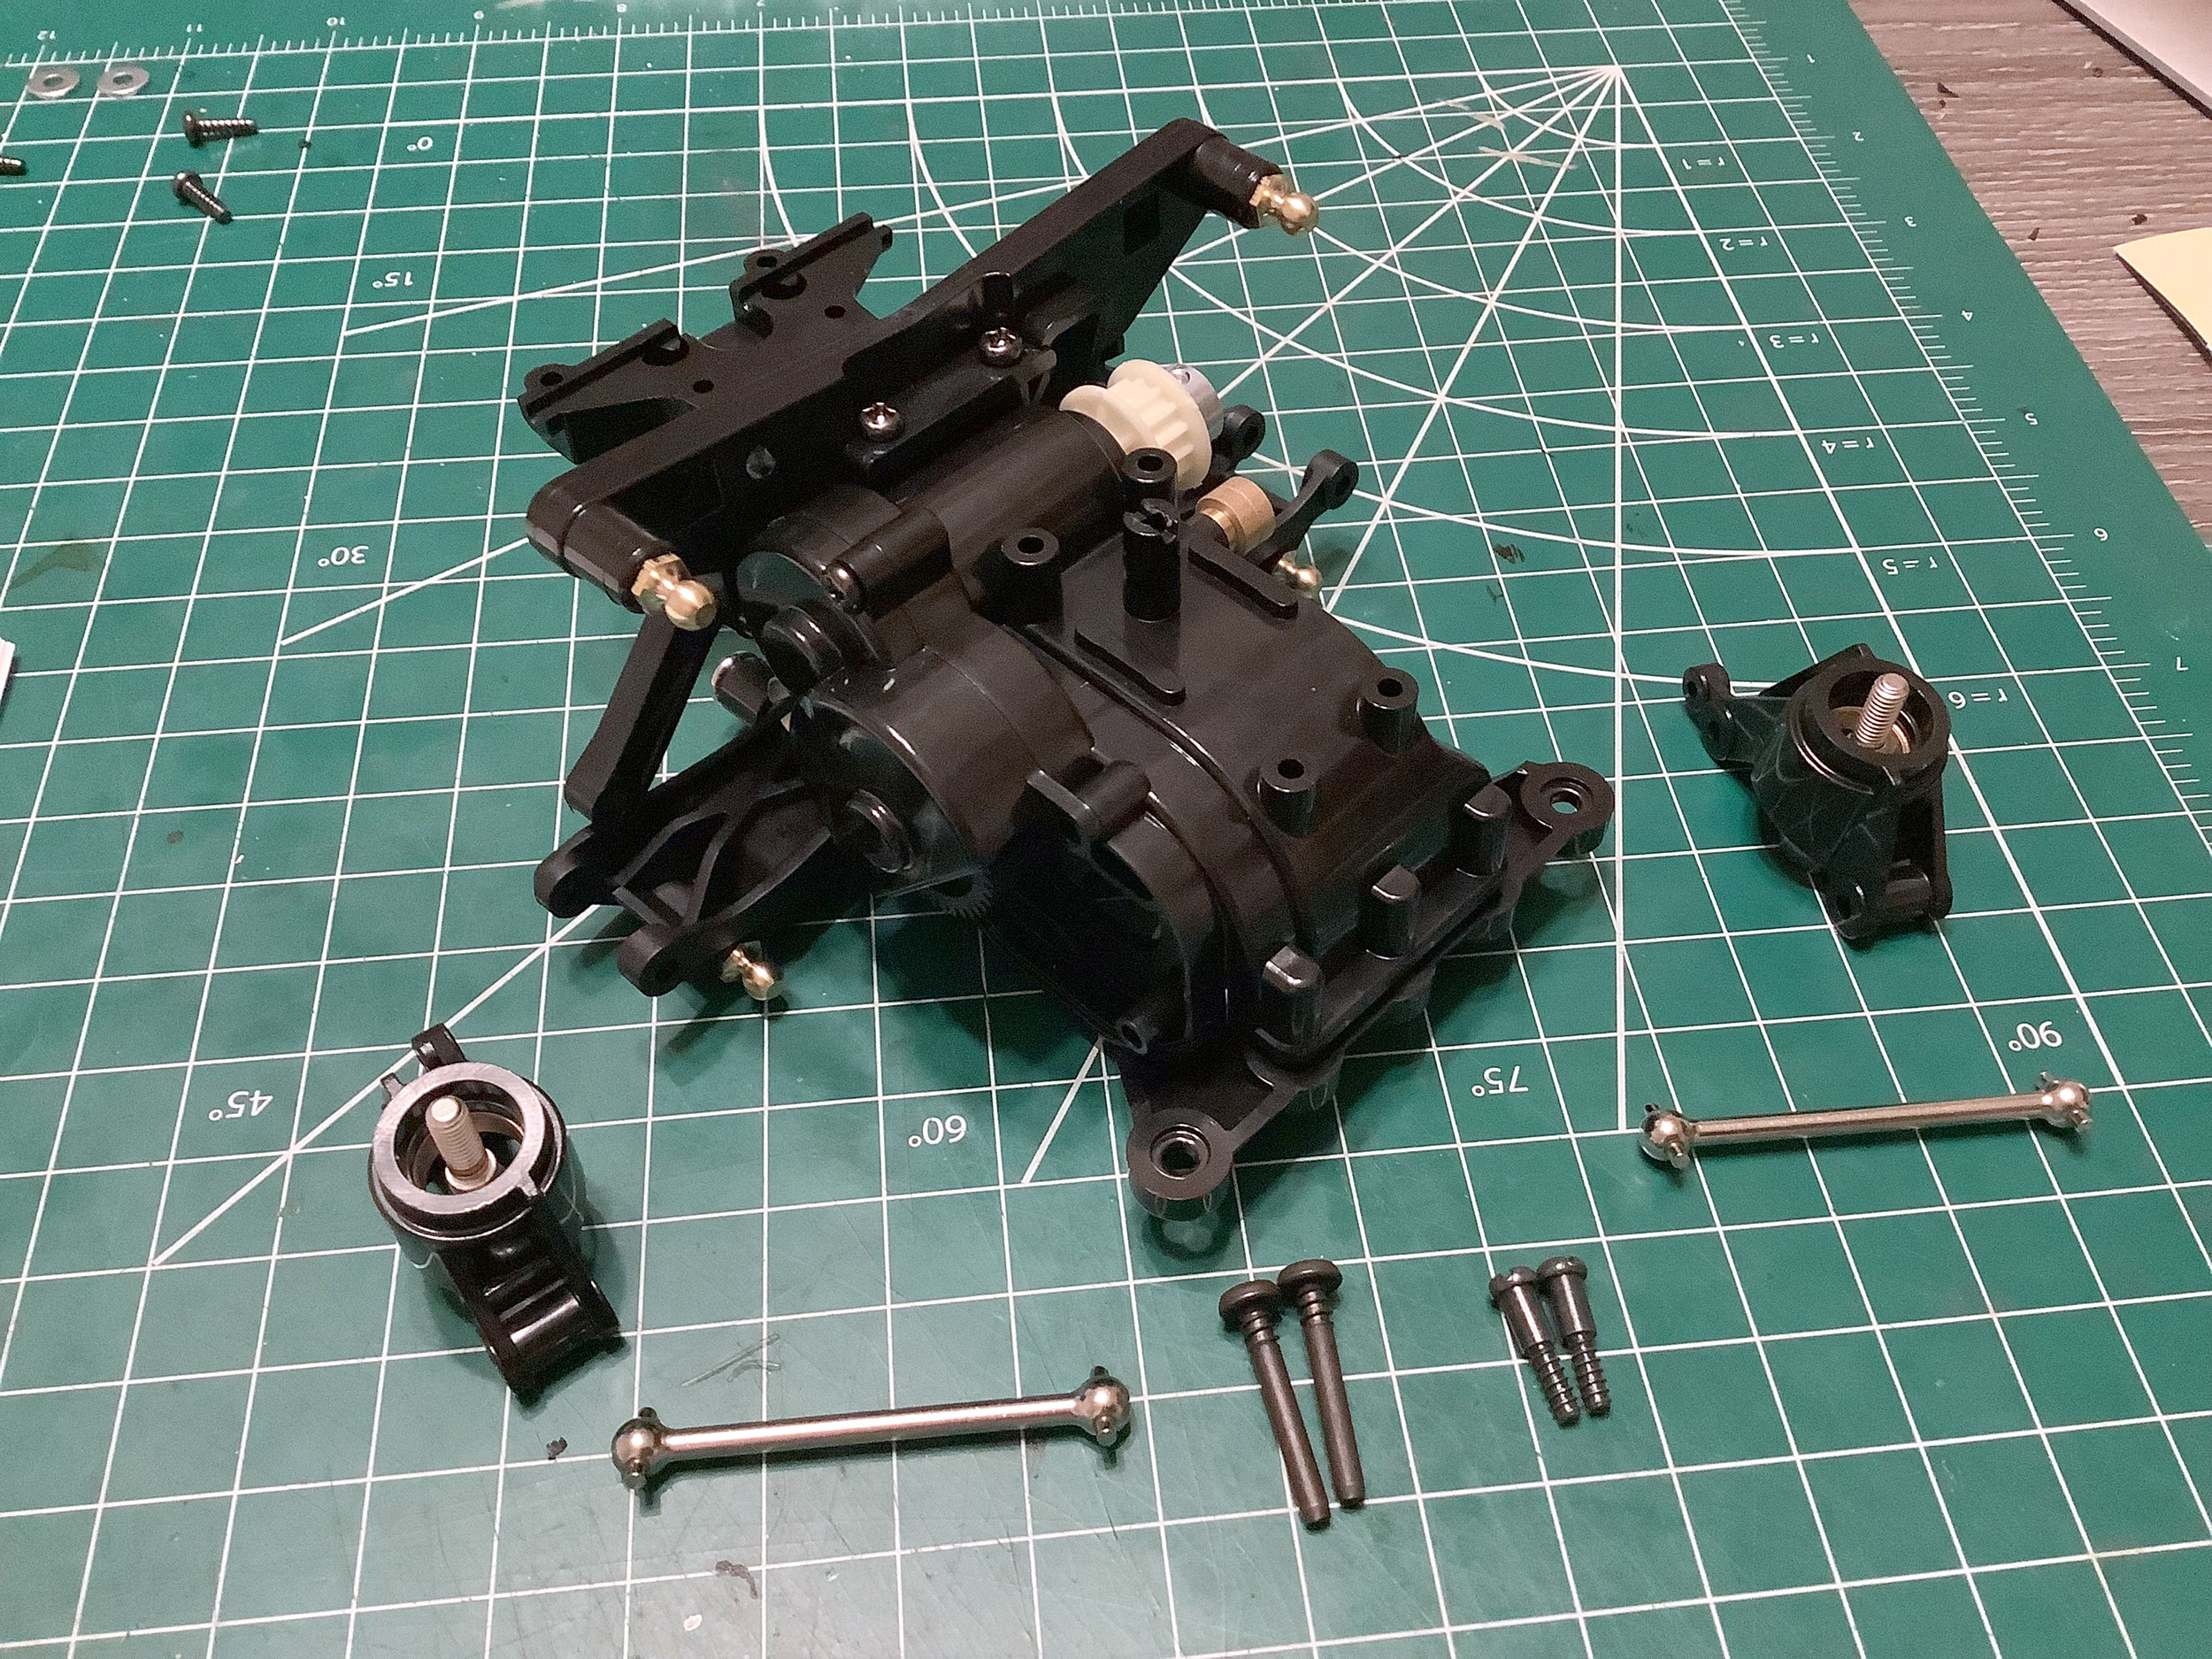
It's time to complete the front bulkhead and suspension assembly.
Note again the hinge pins instead of screw pins. Because the TRF
model doesn't use a chassis tub, it needs to install the front bumper at
this point as well.
Here is the completed front suspension assembly sans shocks.
Clearly very different, and there is no question which version is more
expensive.
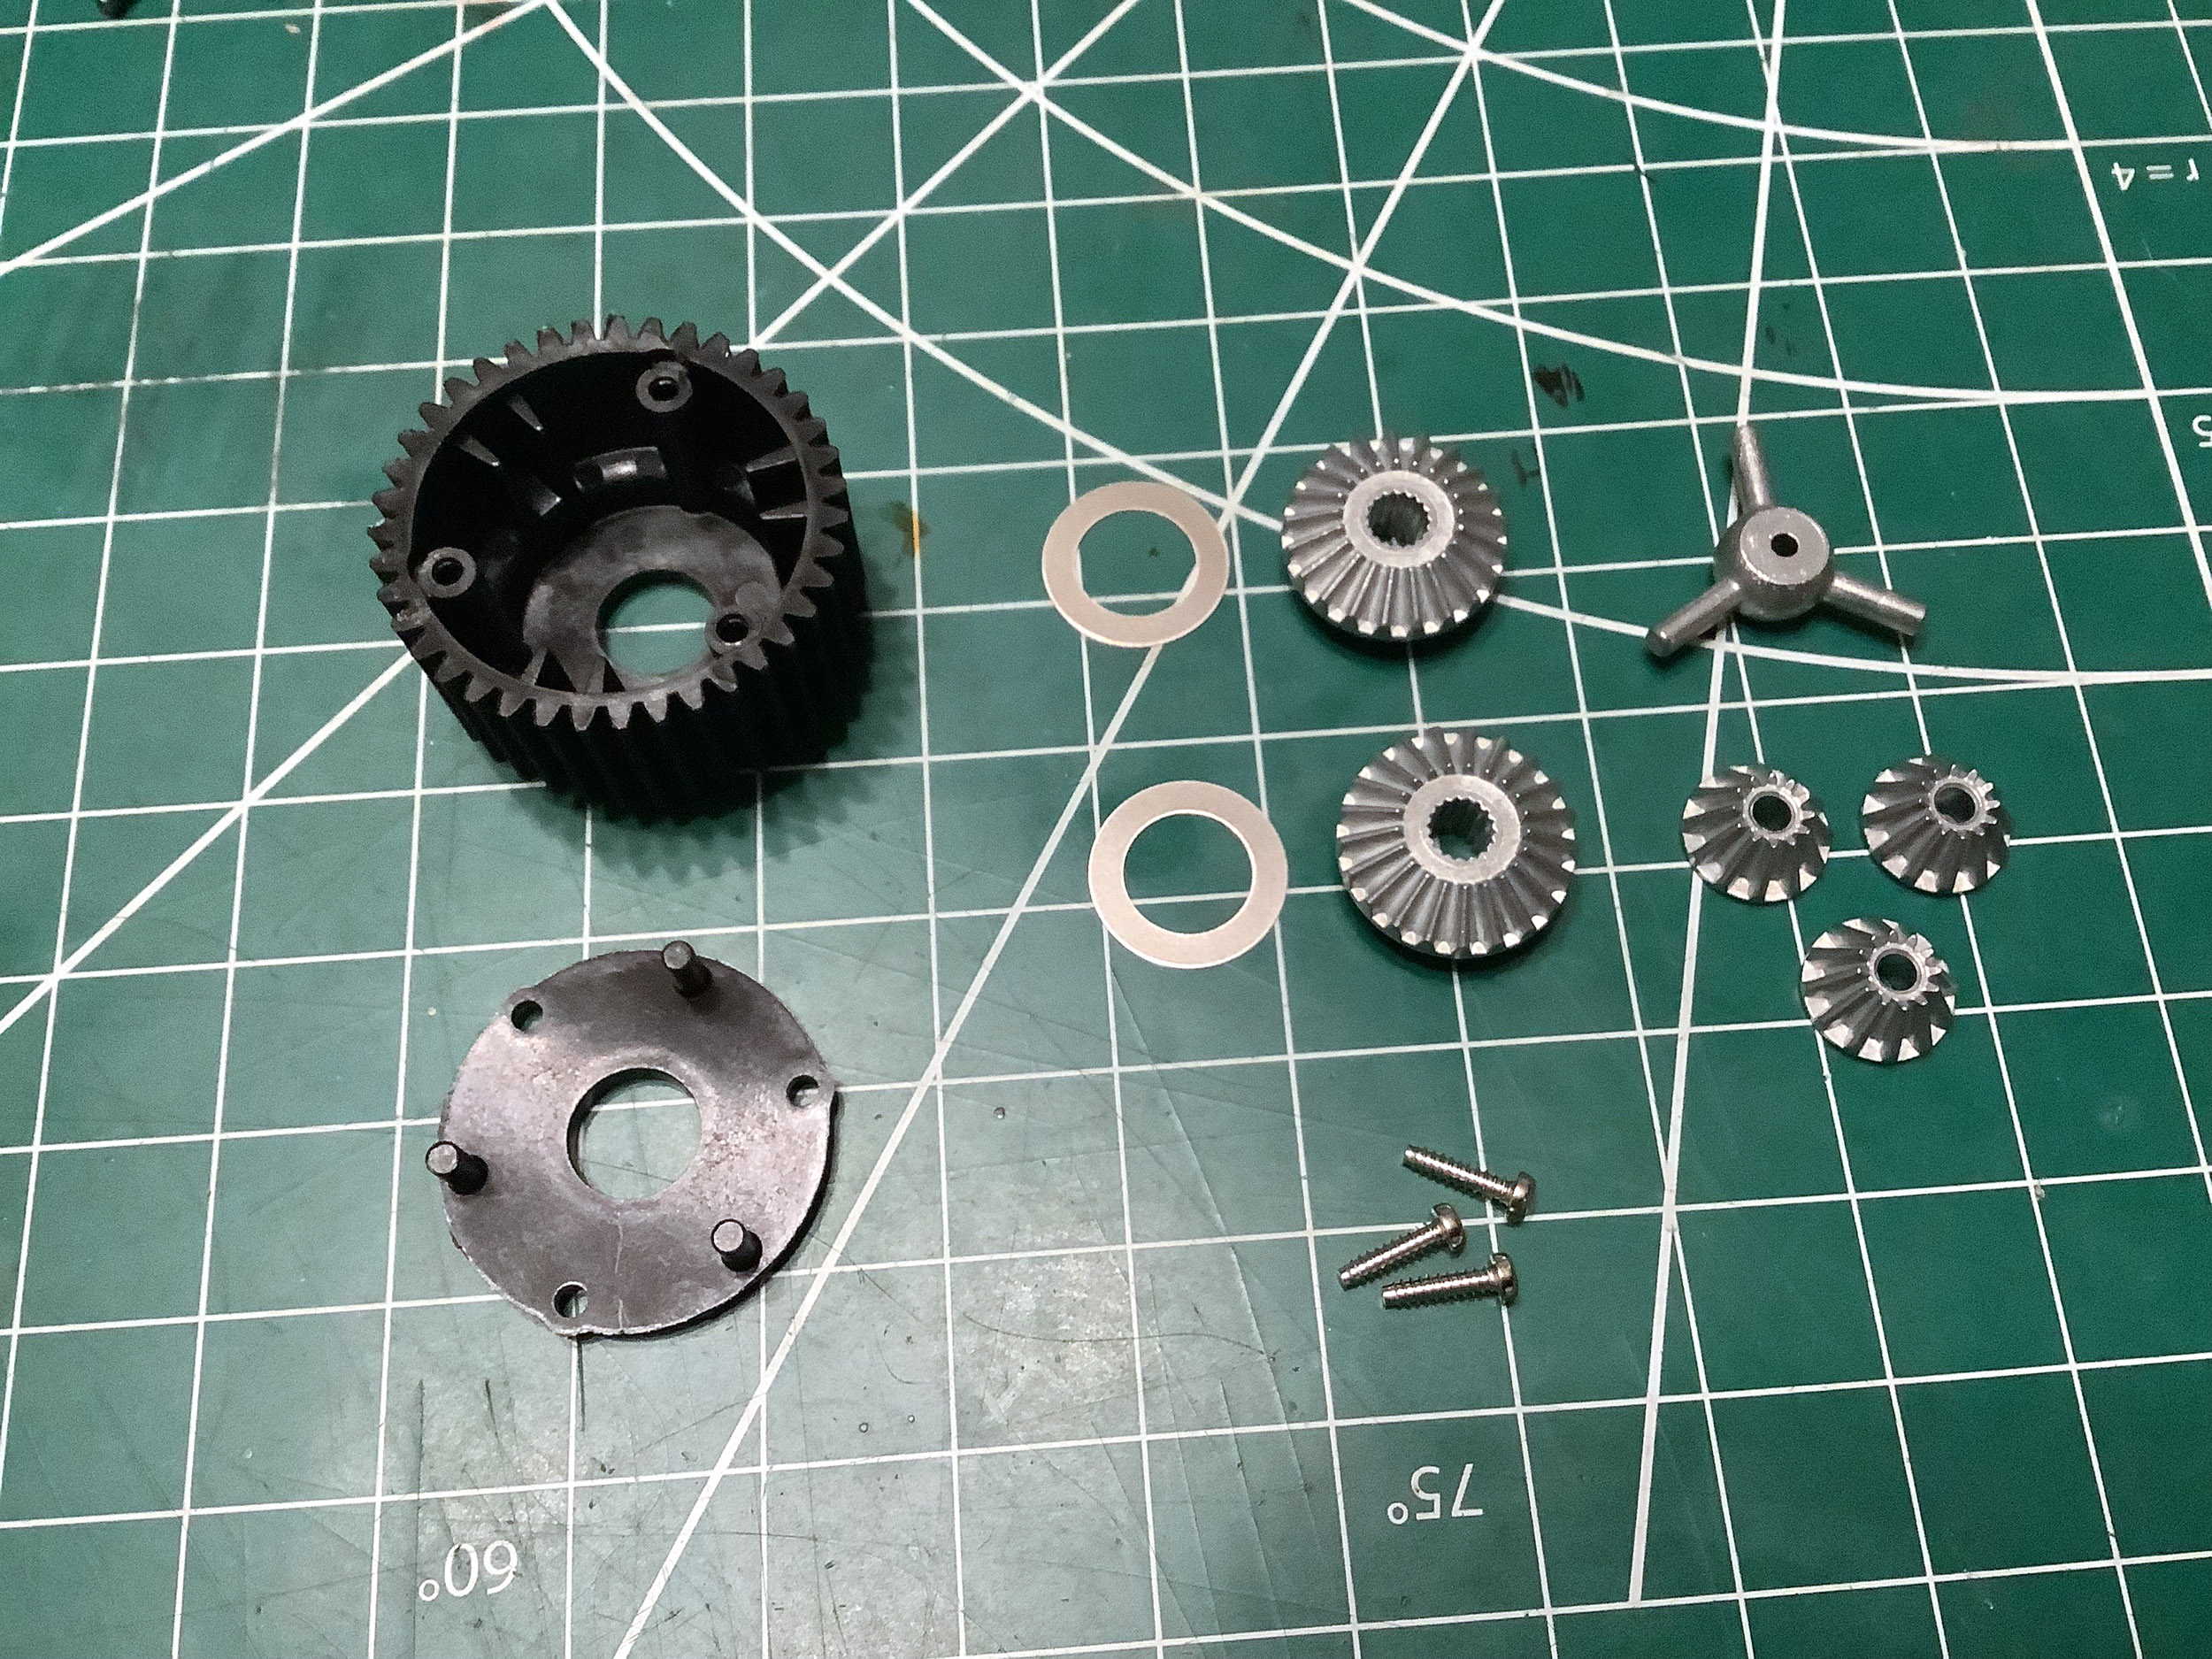
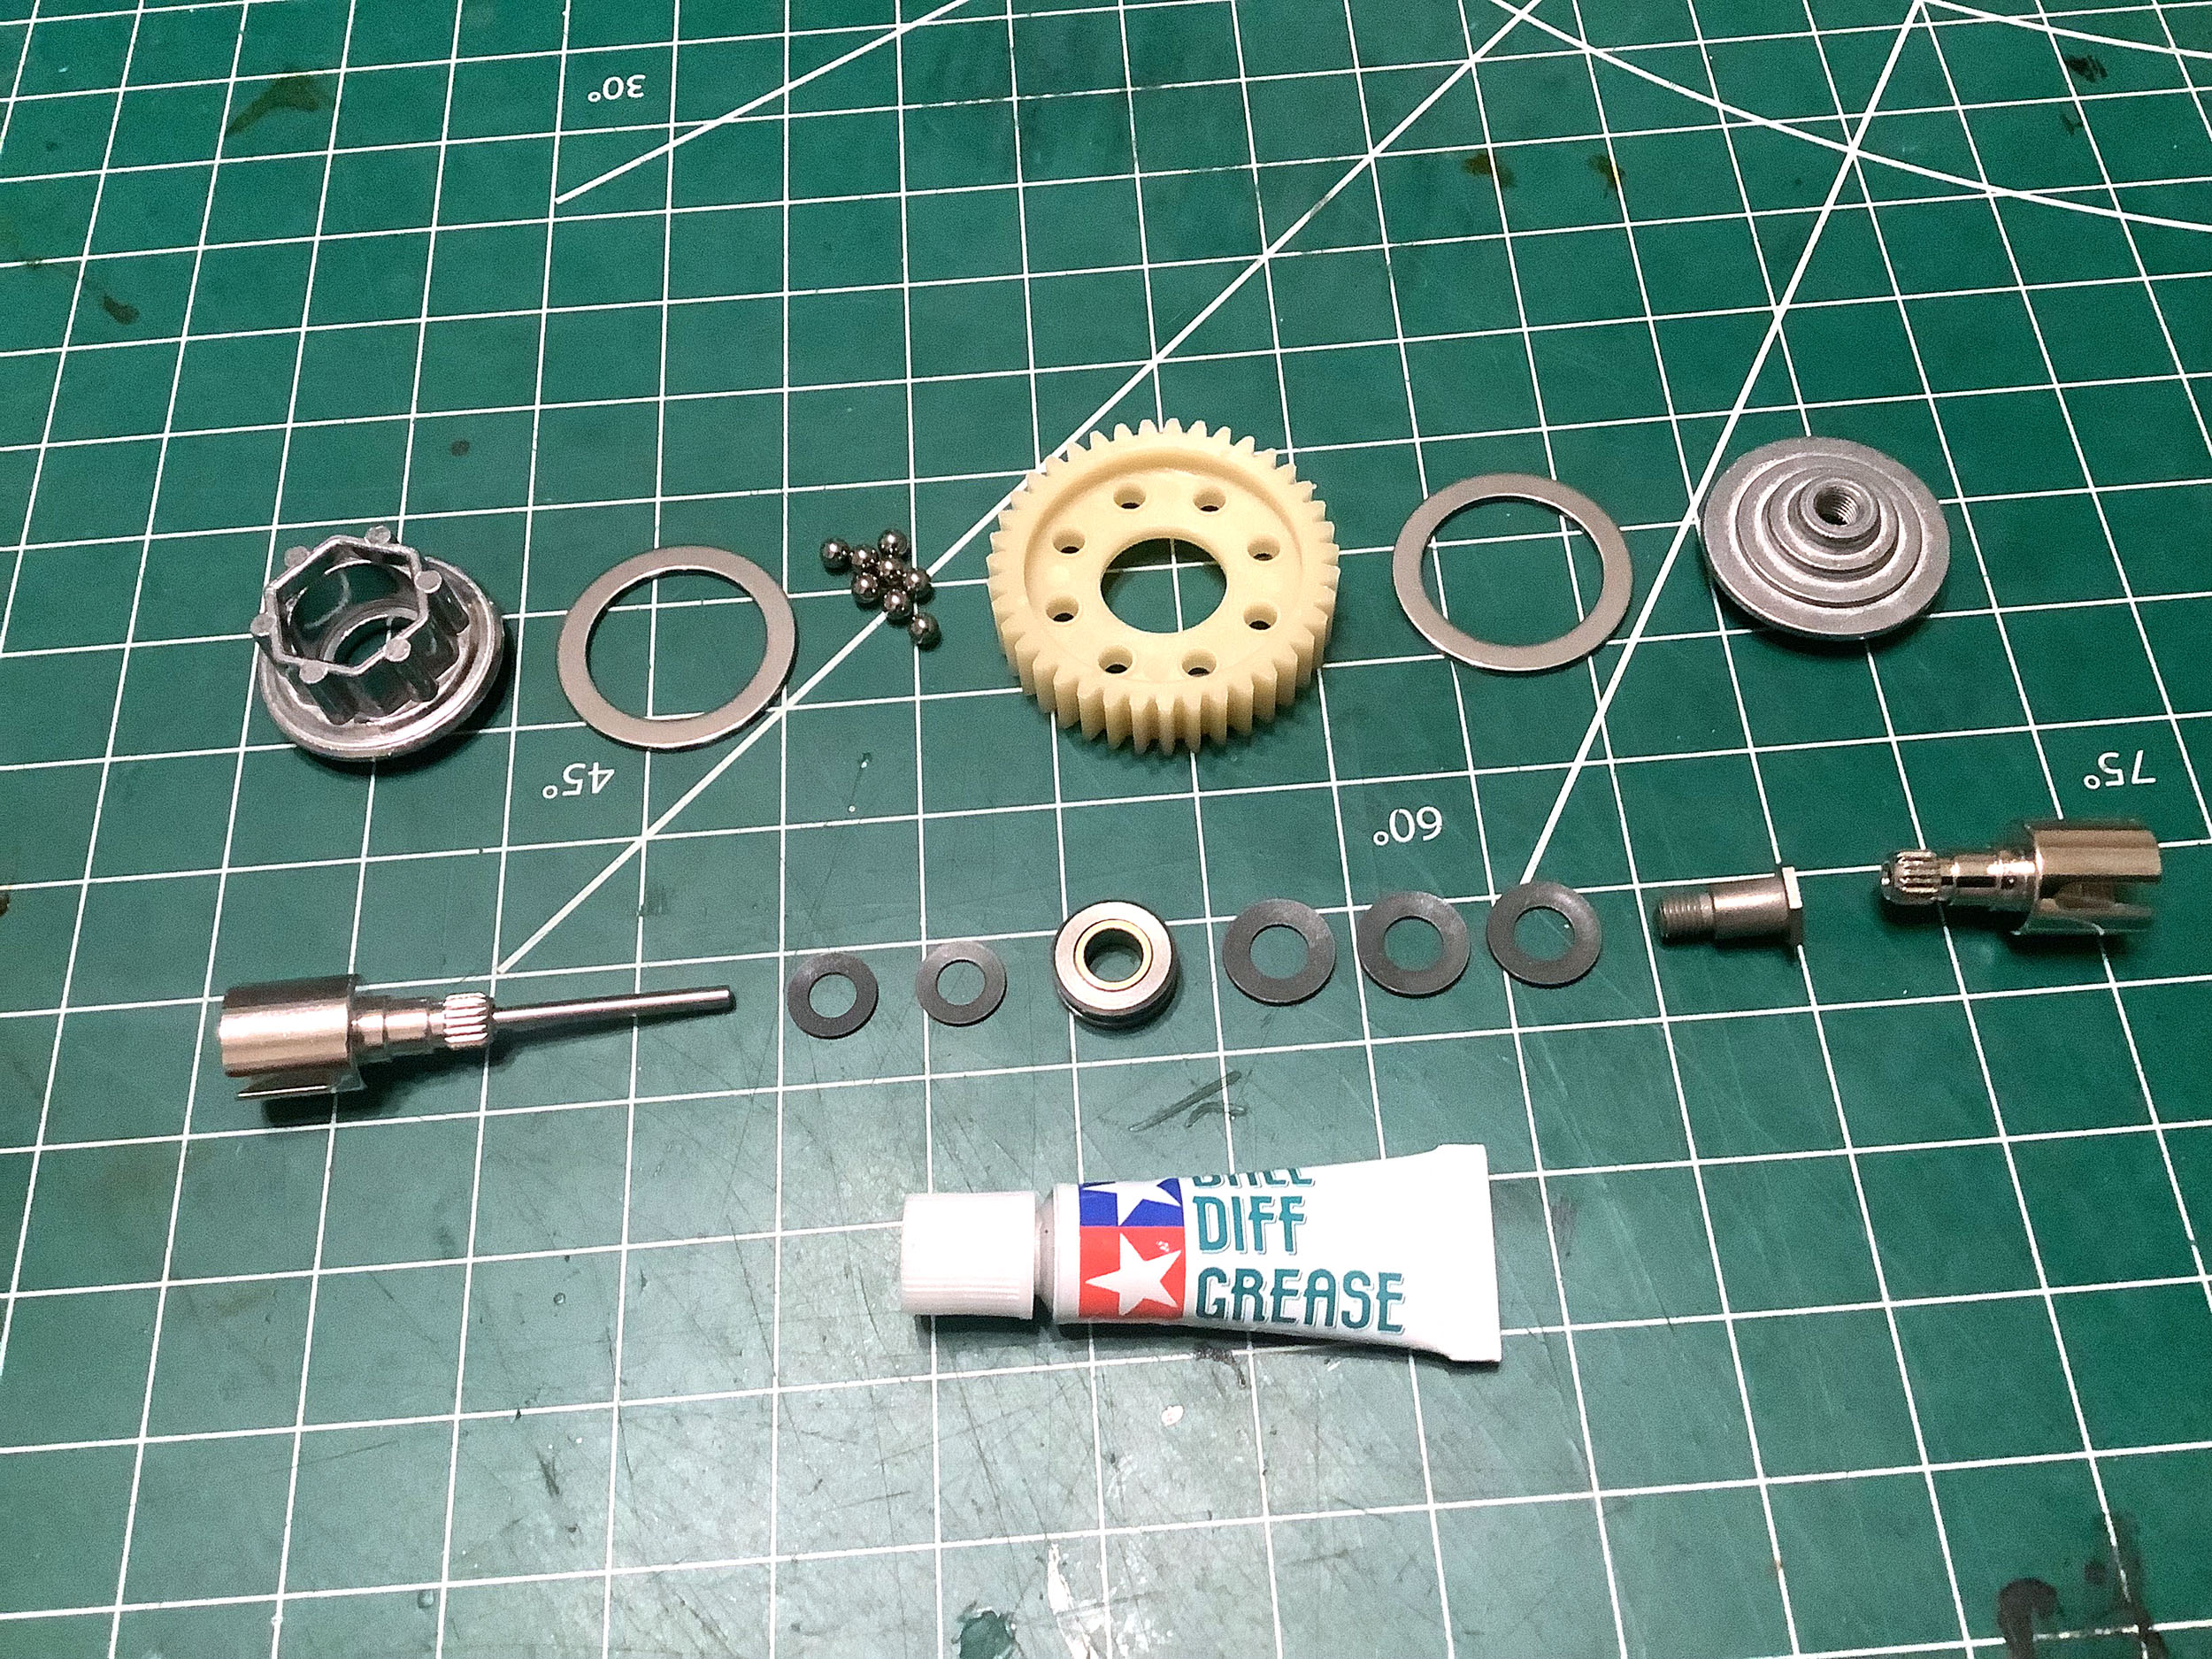
Both of these pictures are of the rear ball differential assembly of the
TRF model. The standard model uses the same gear diff in the
front and rear so it was completed in Step 1. The rear ball diff
can be tuned much more easily for different amounts of resistance to
differential motion. This ball diff uses a pre-assembled thrust bearing,
five Belleville washers (disc springs), and eight 3mm balls. The
differential spur gear uses the same number of teeth (39T) as the basic
differential so it fits in the same space and could be swapped if
desired.
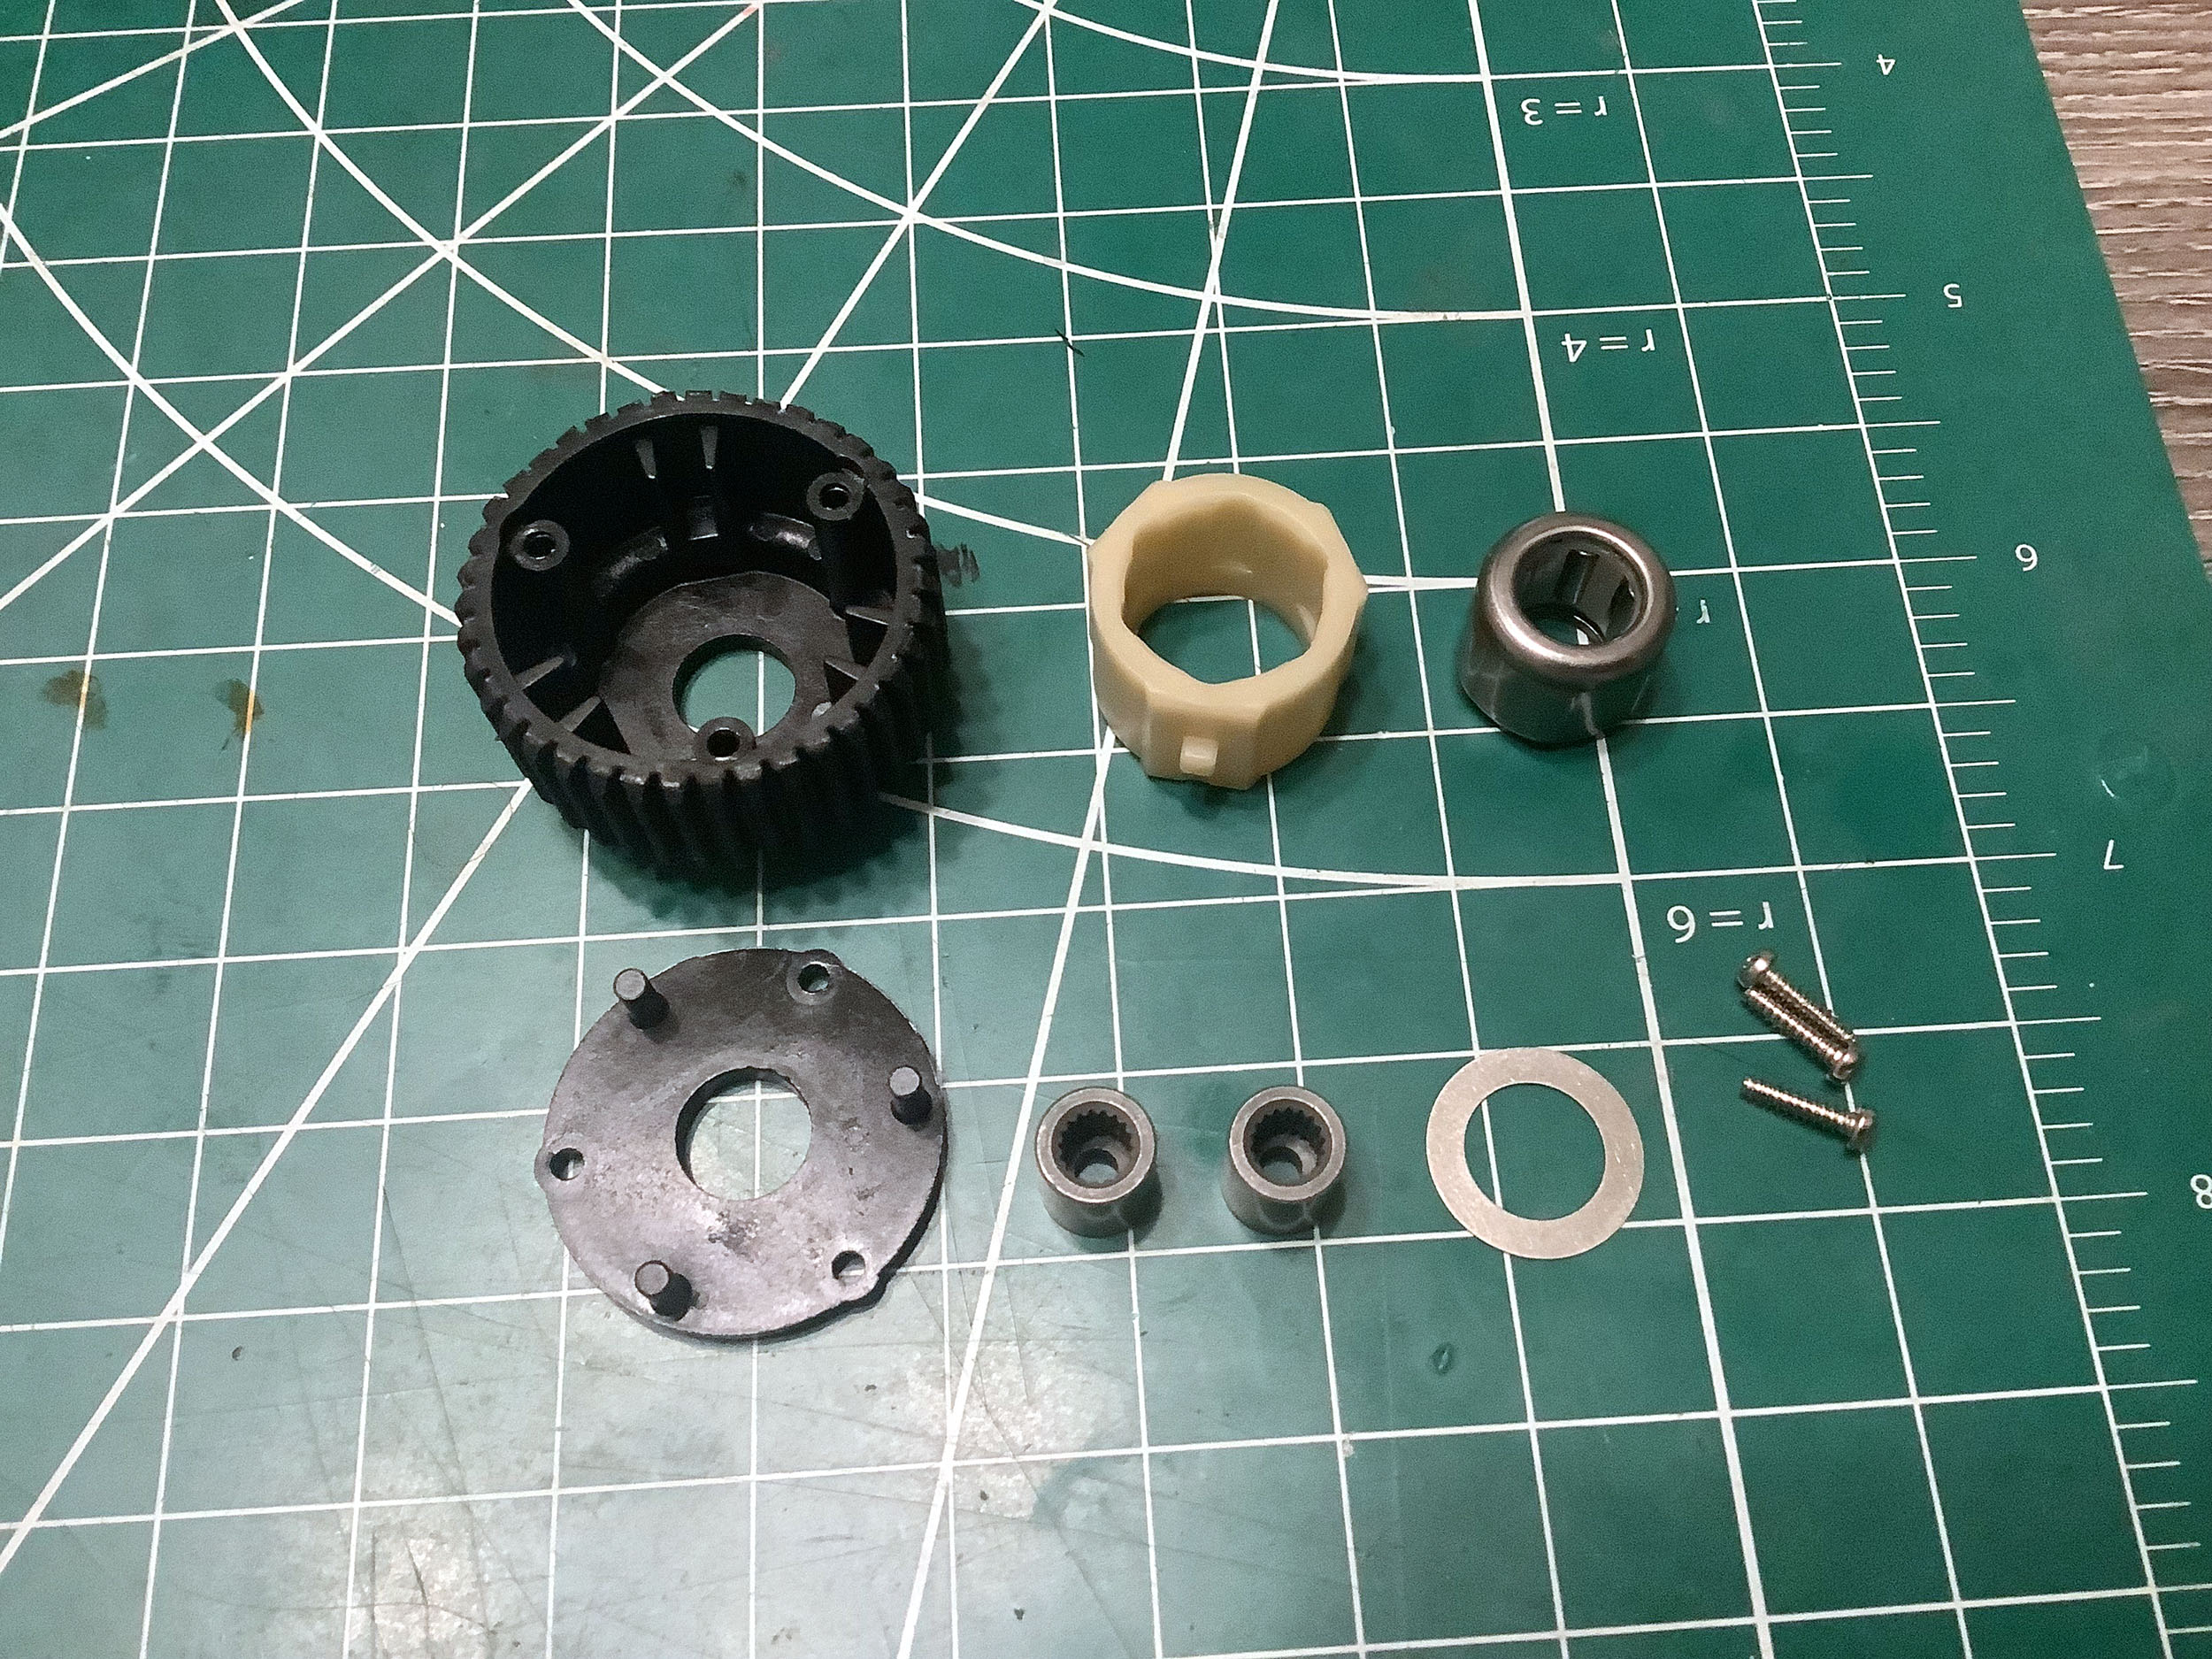
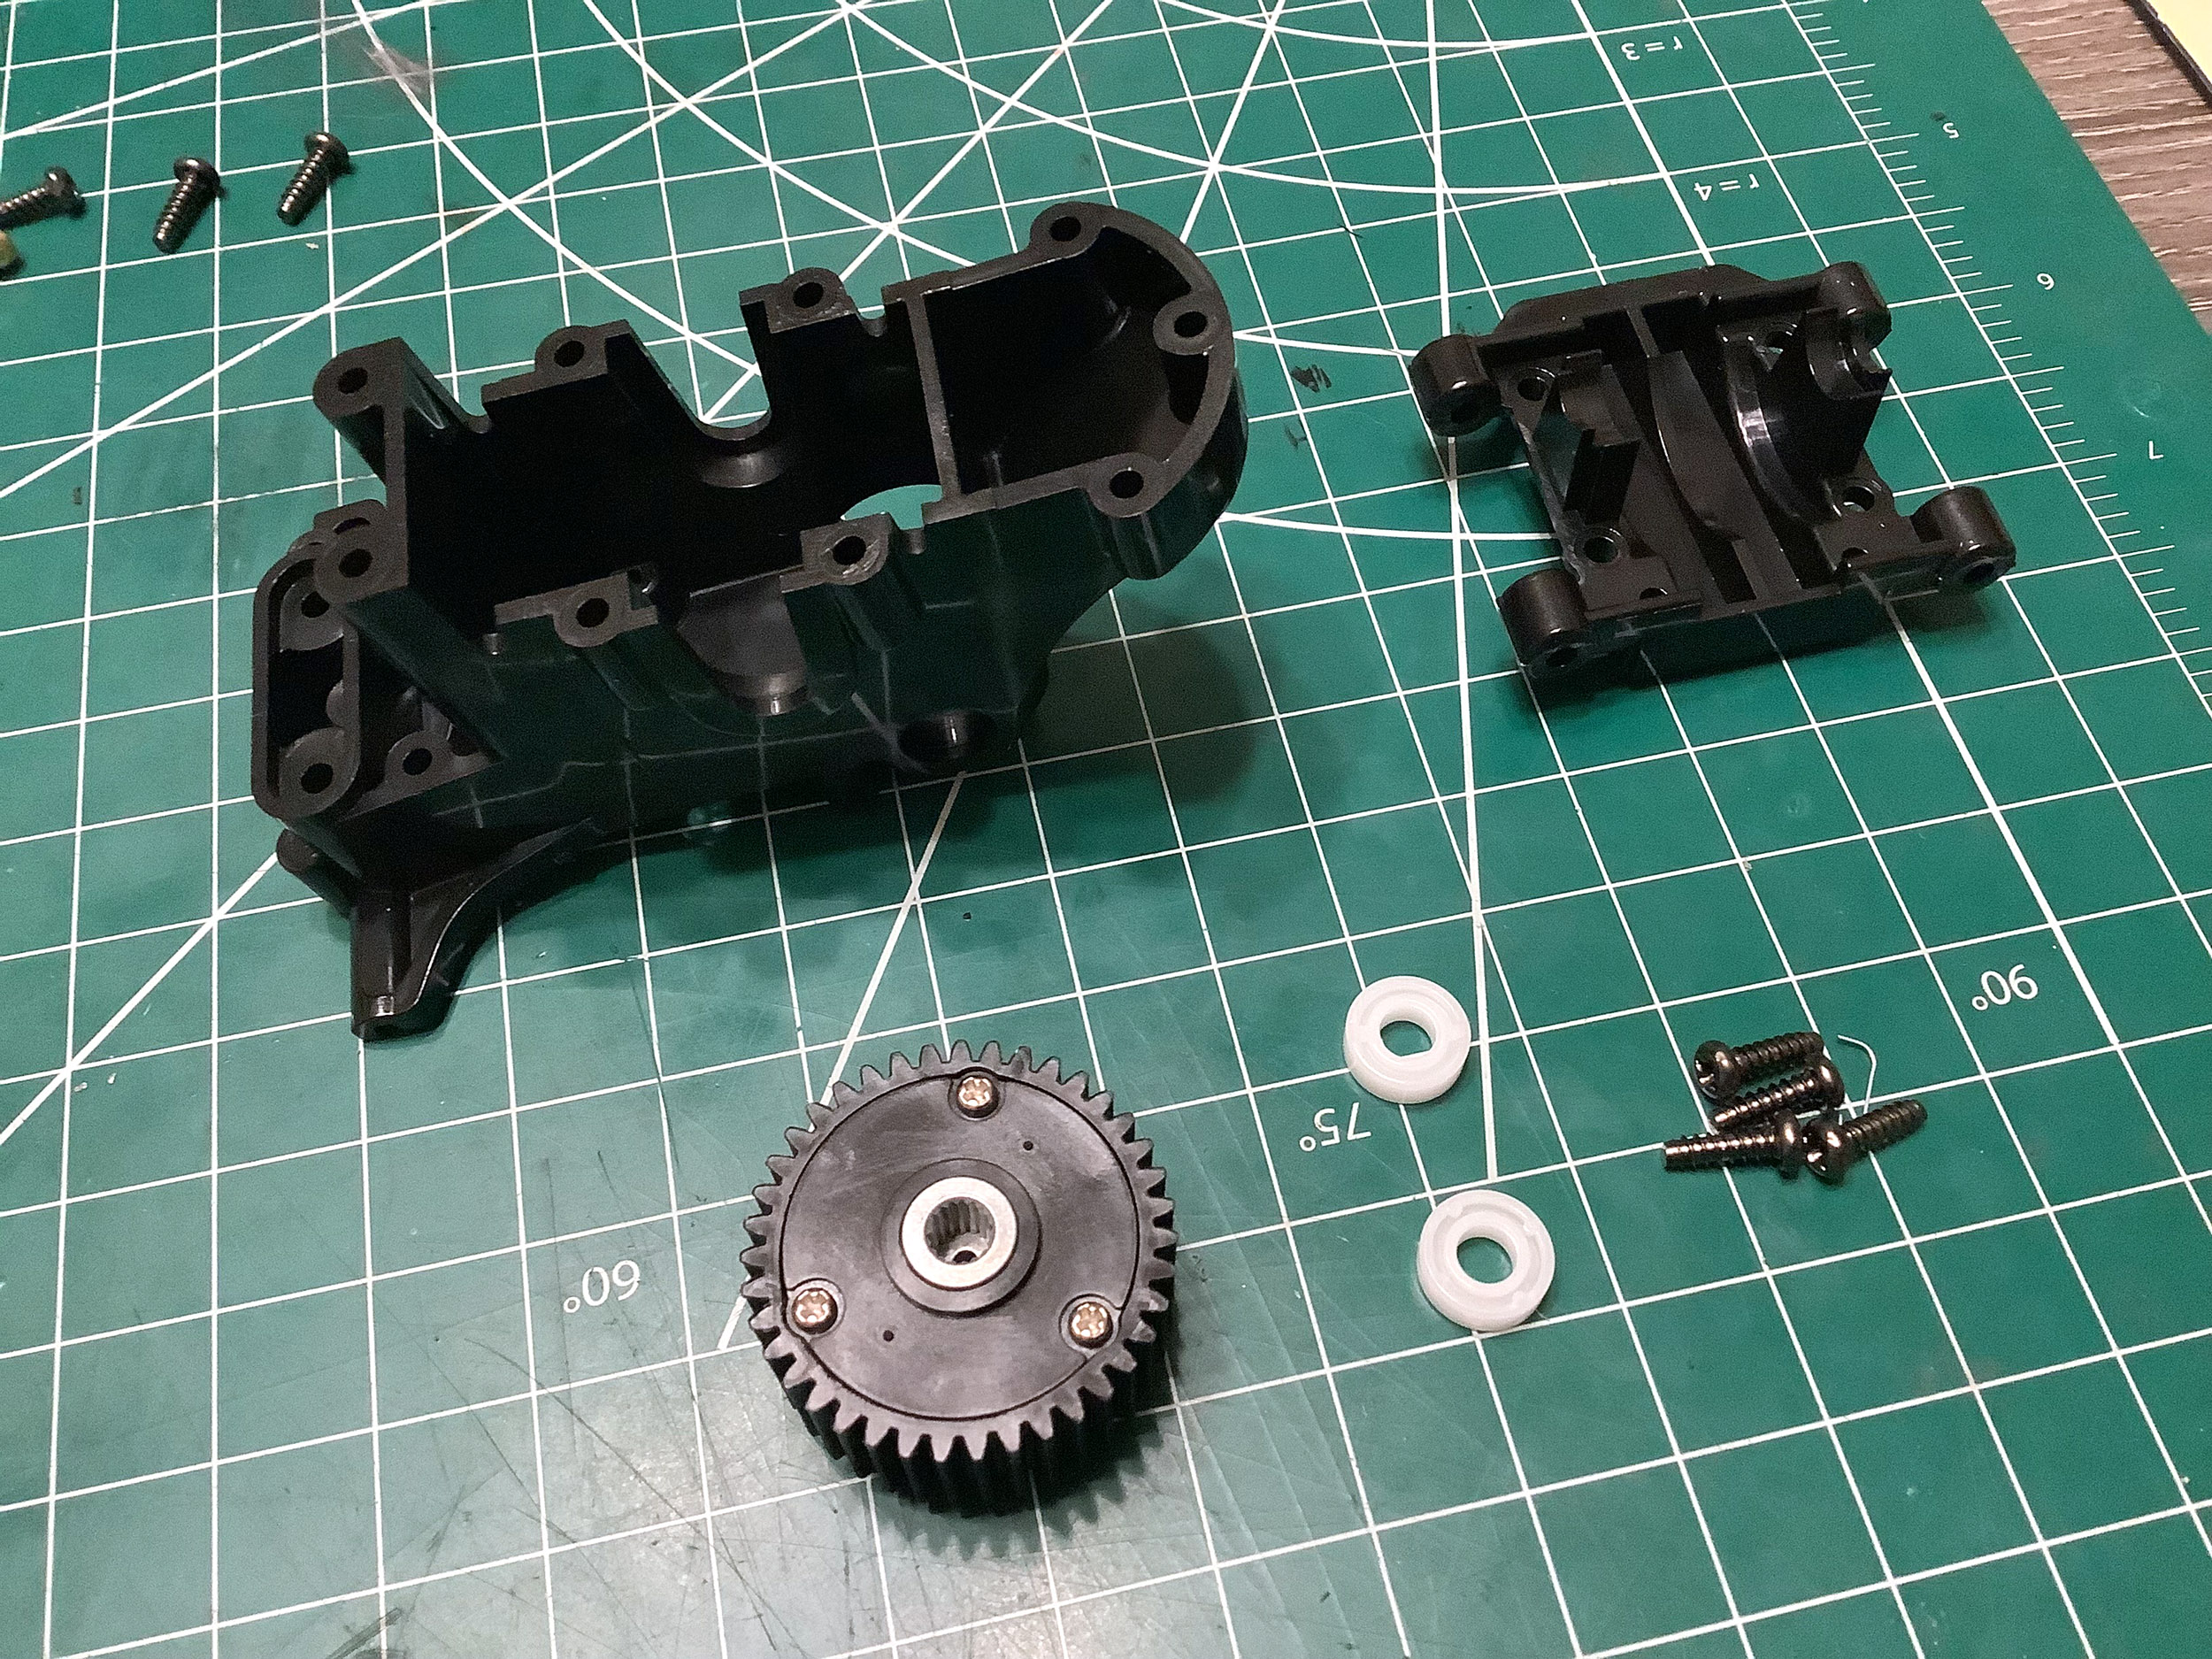
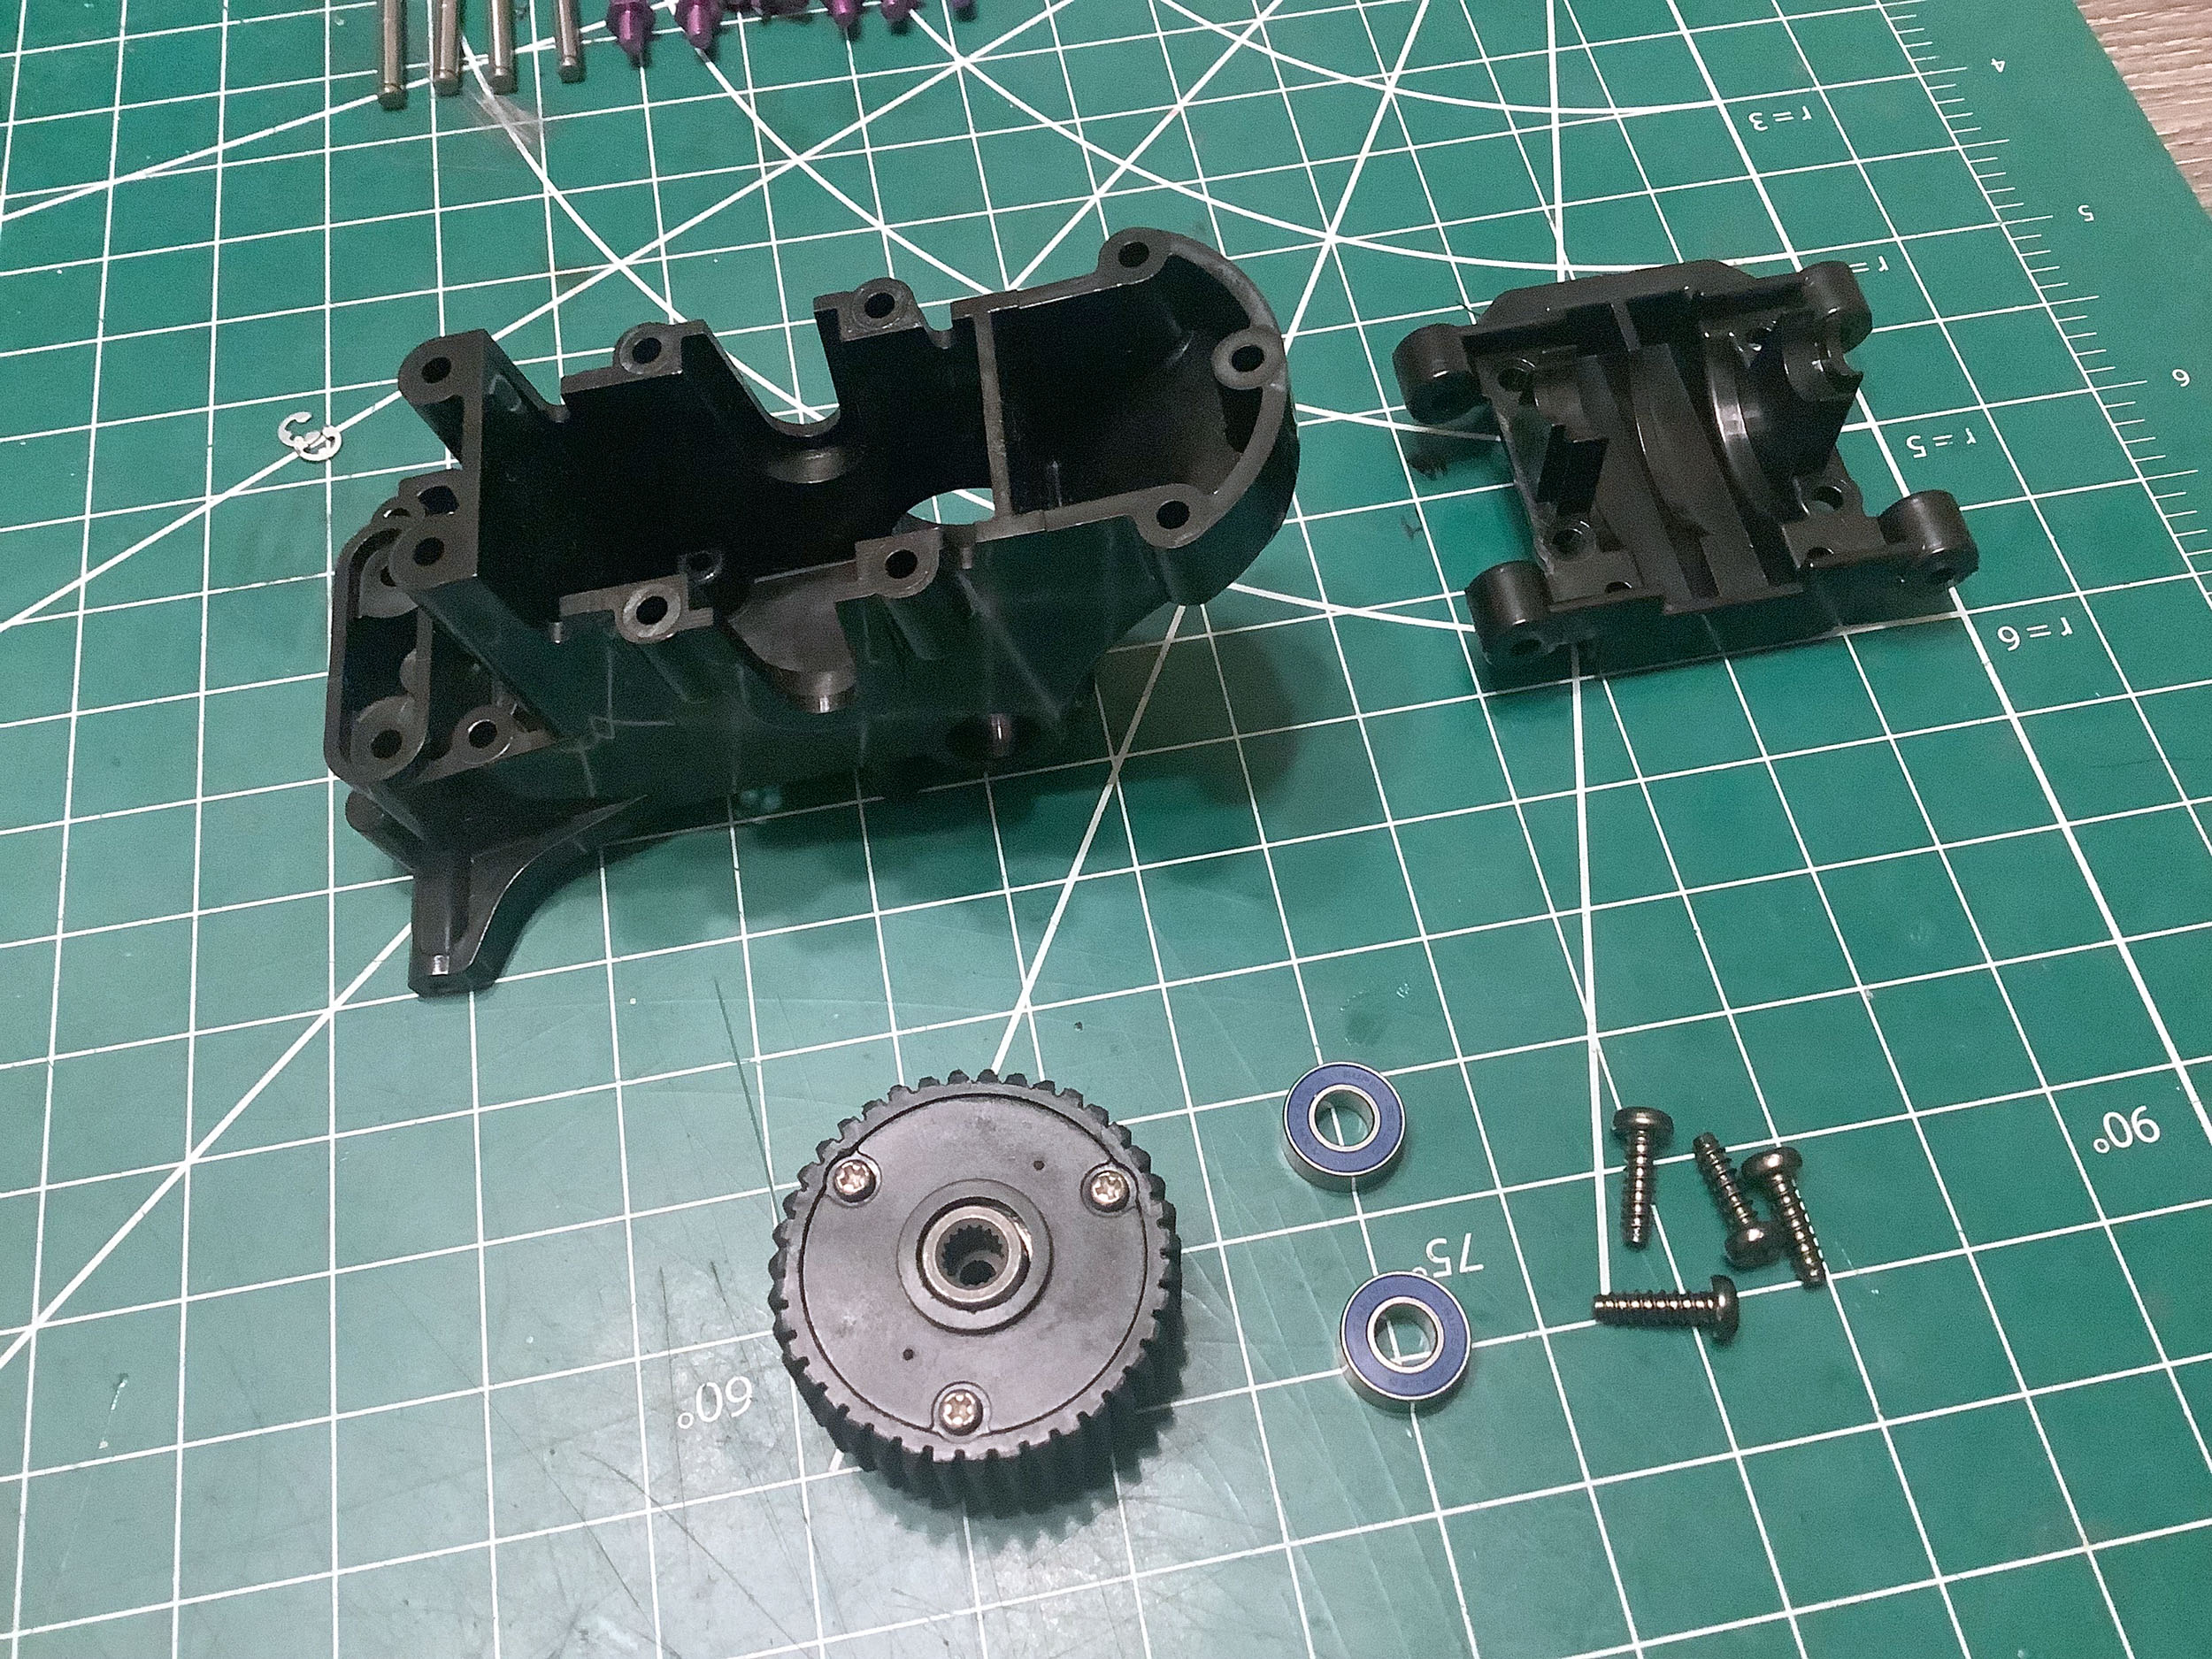
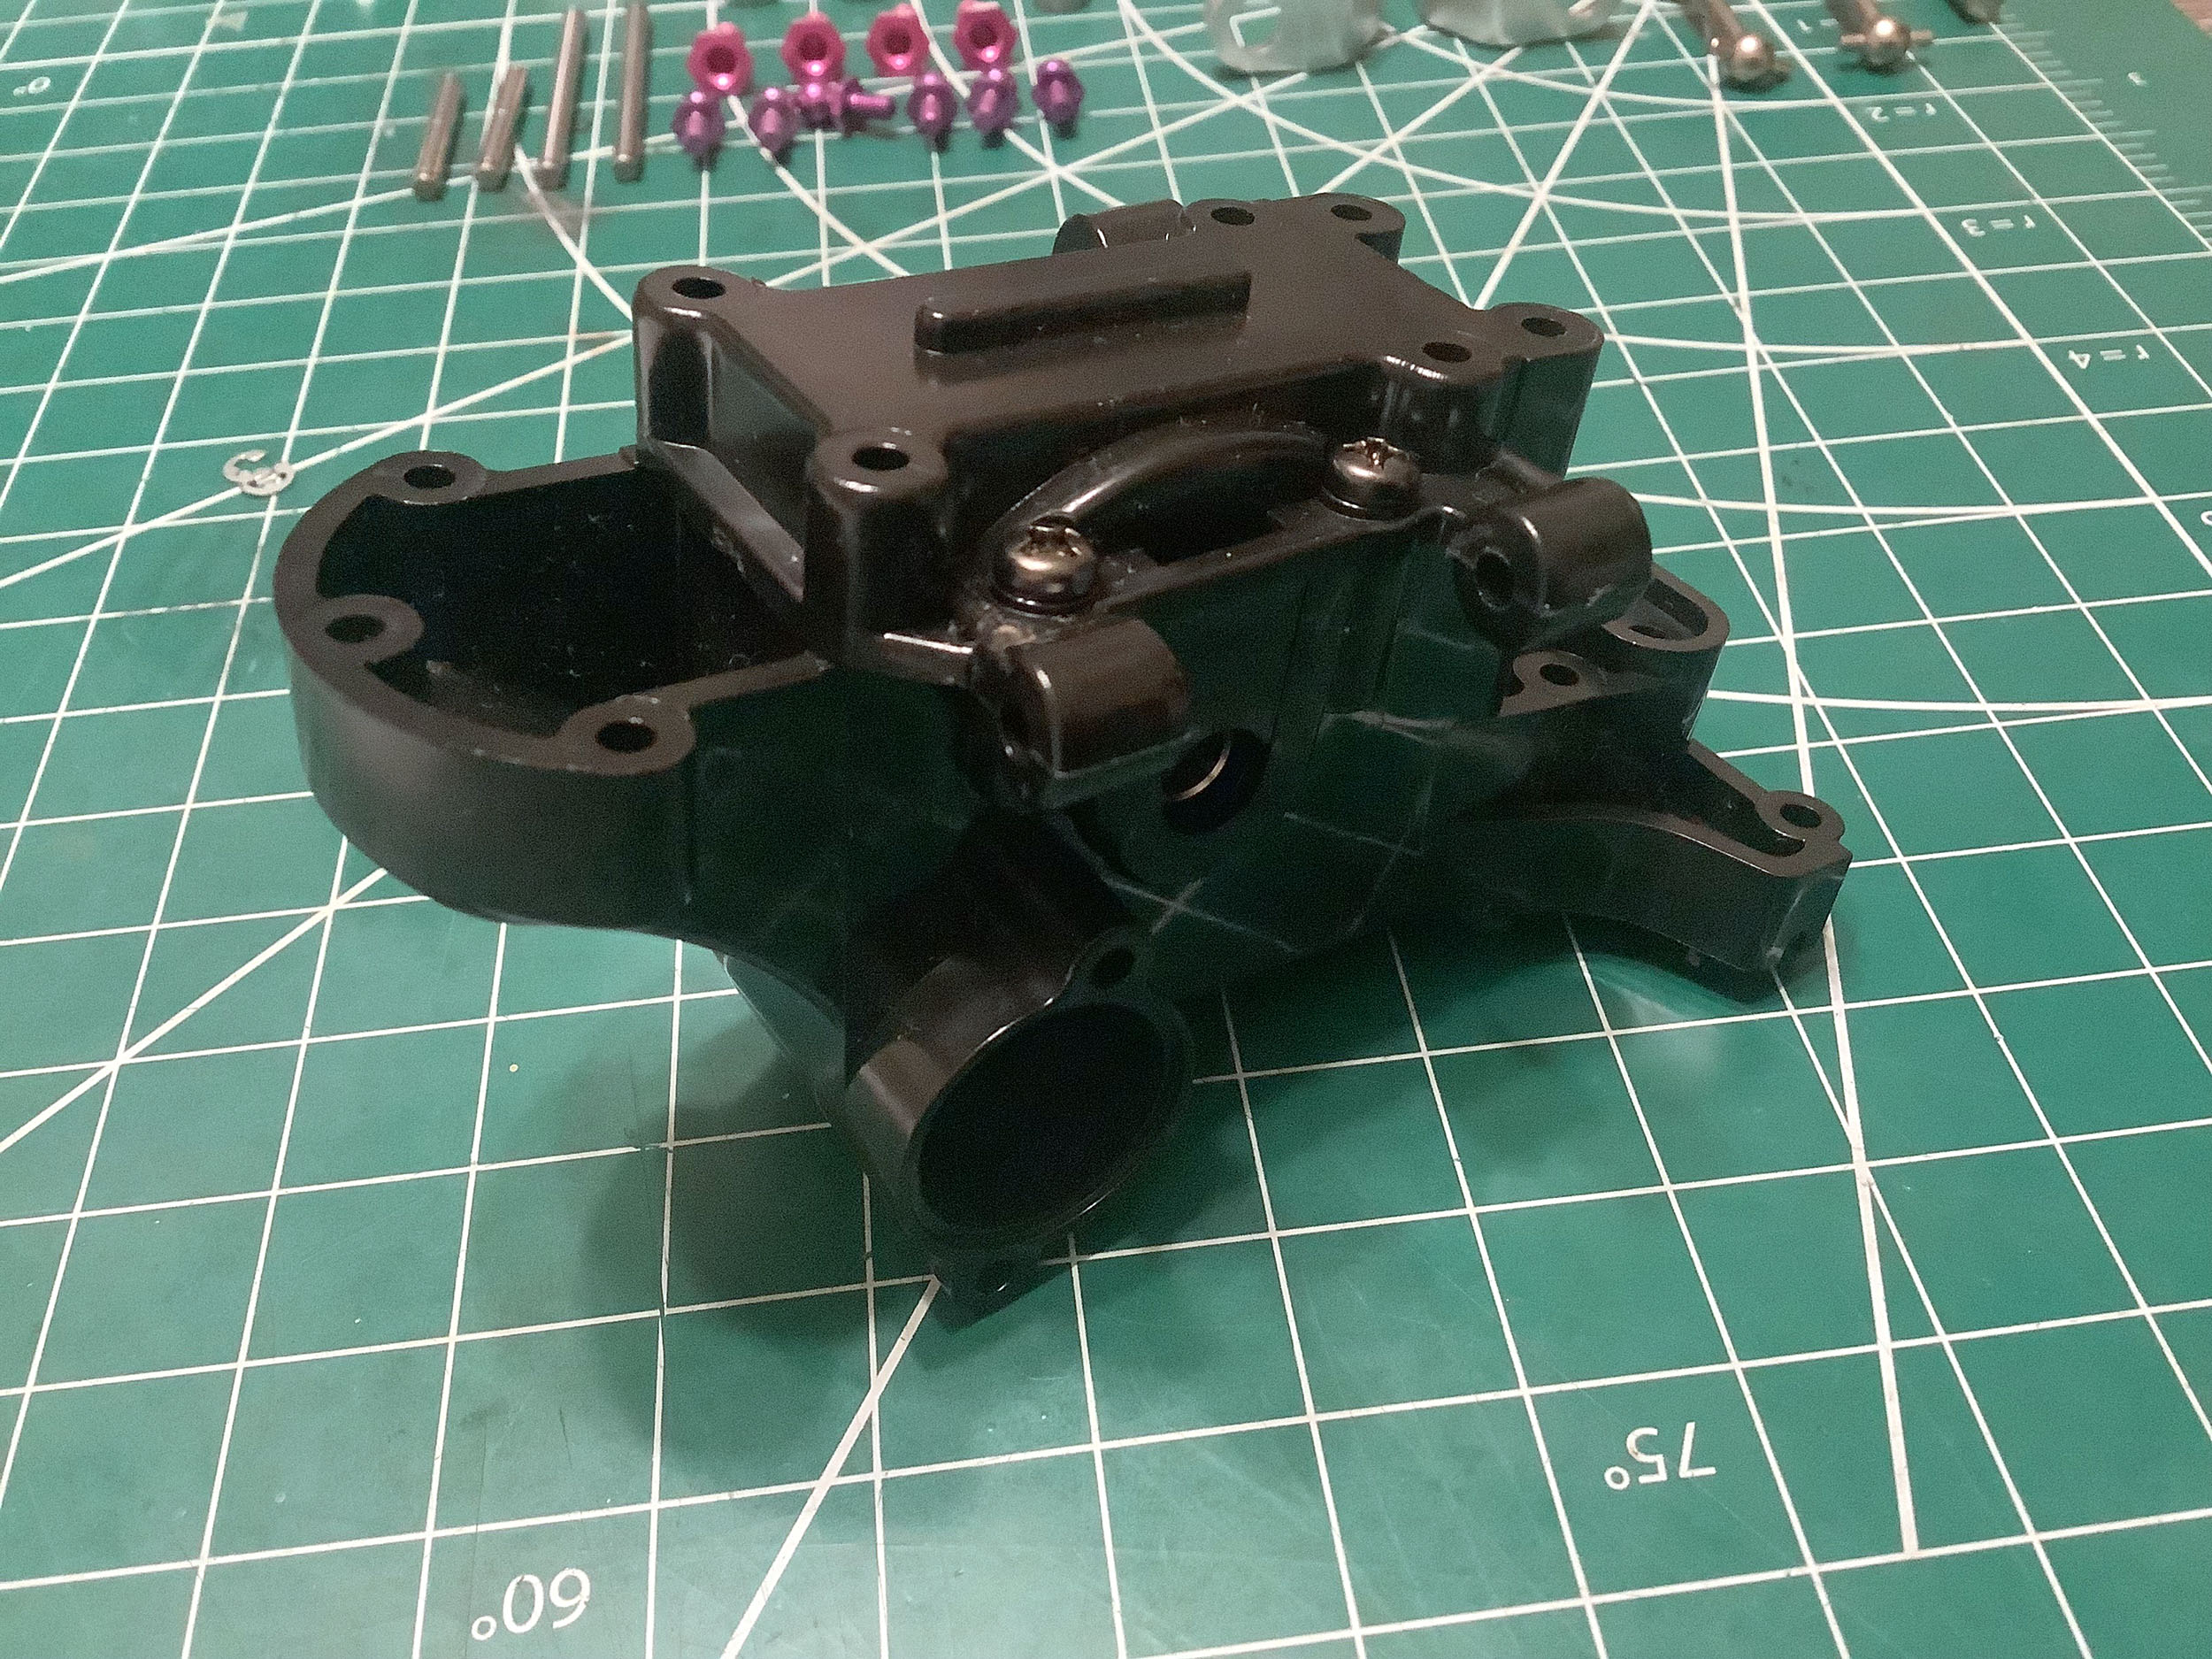
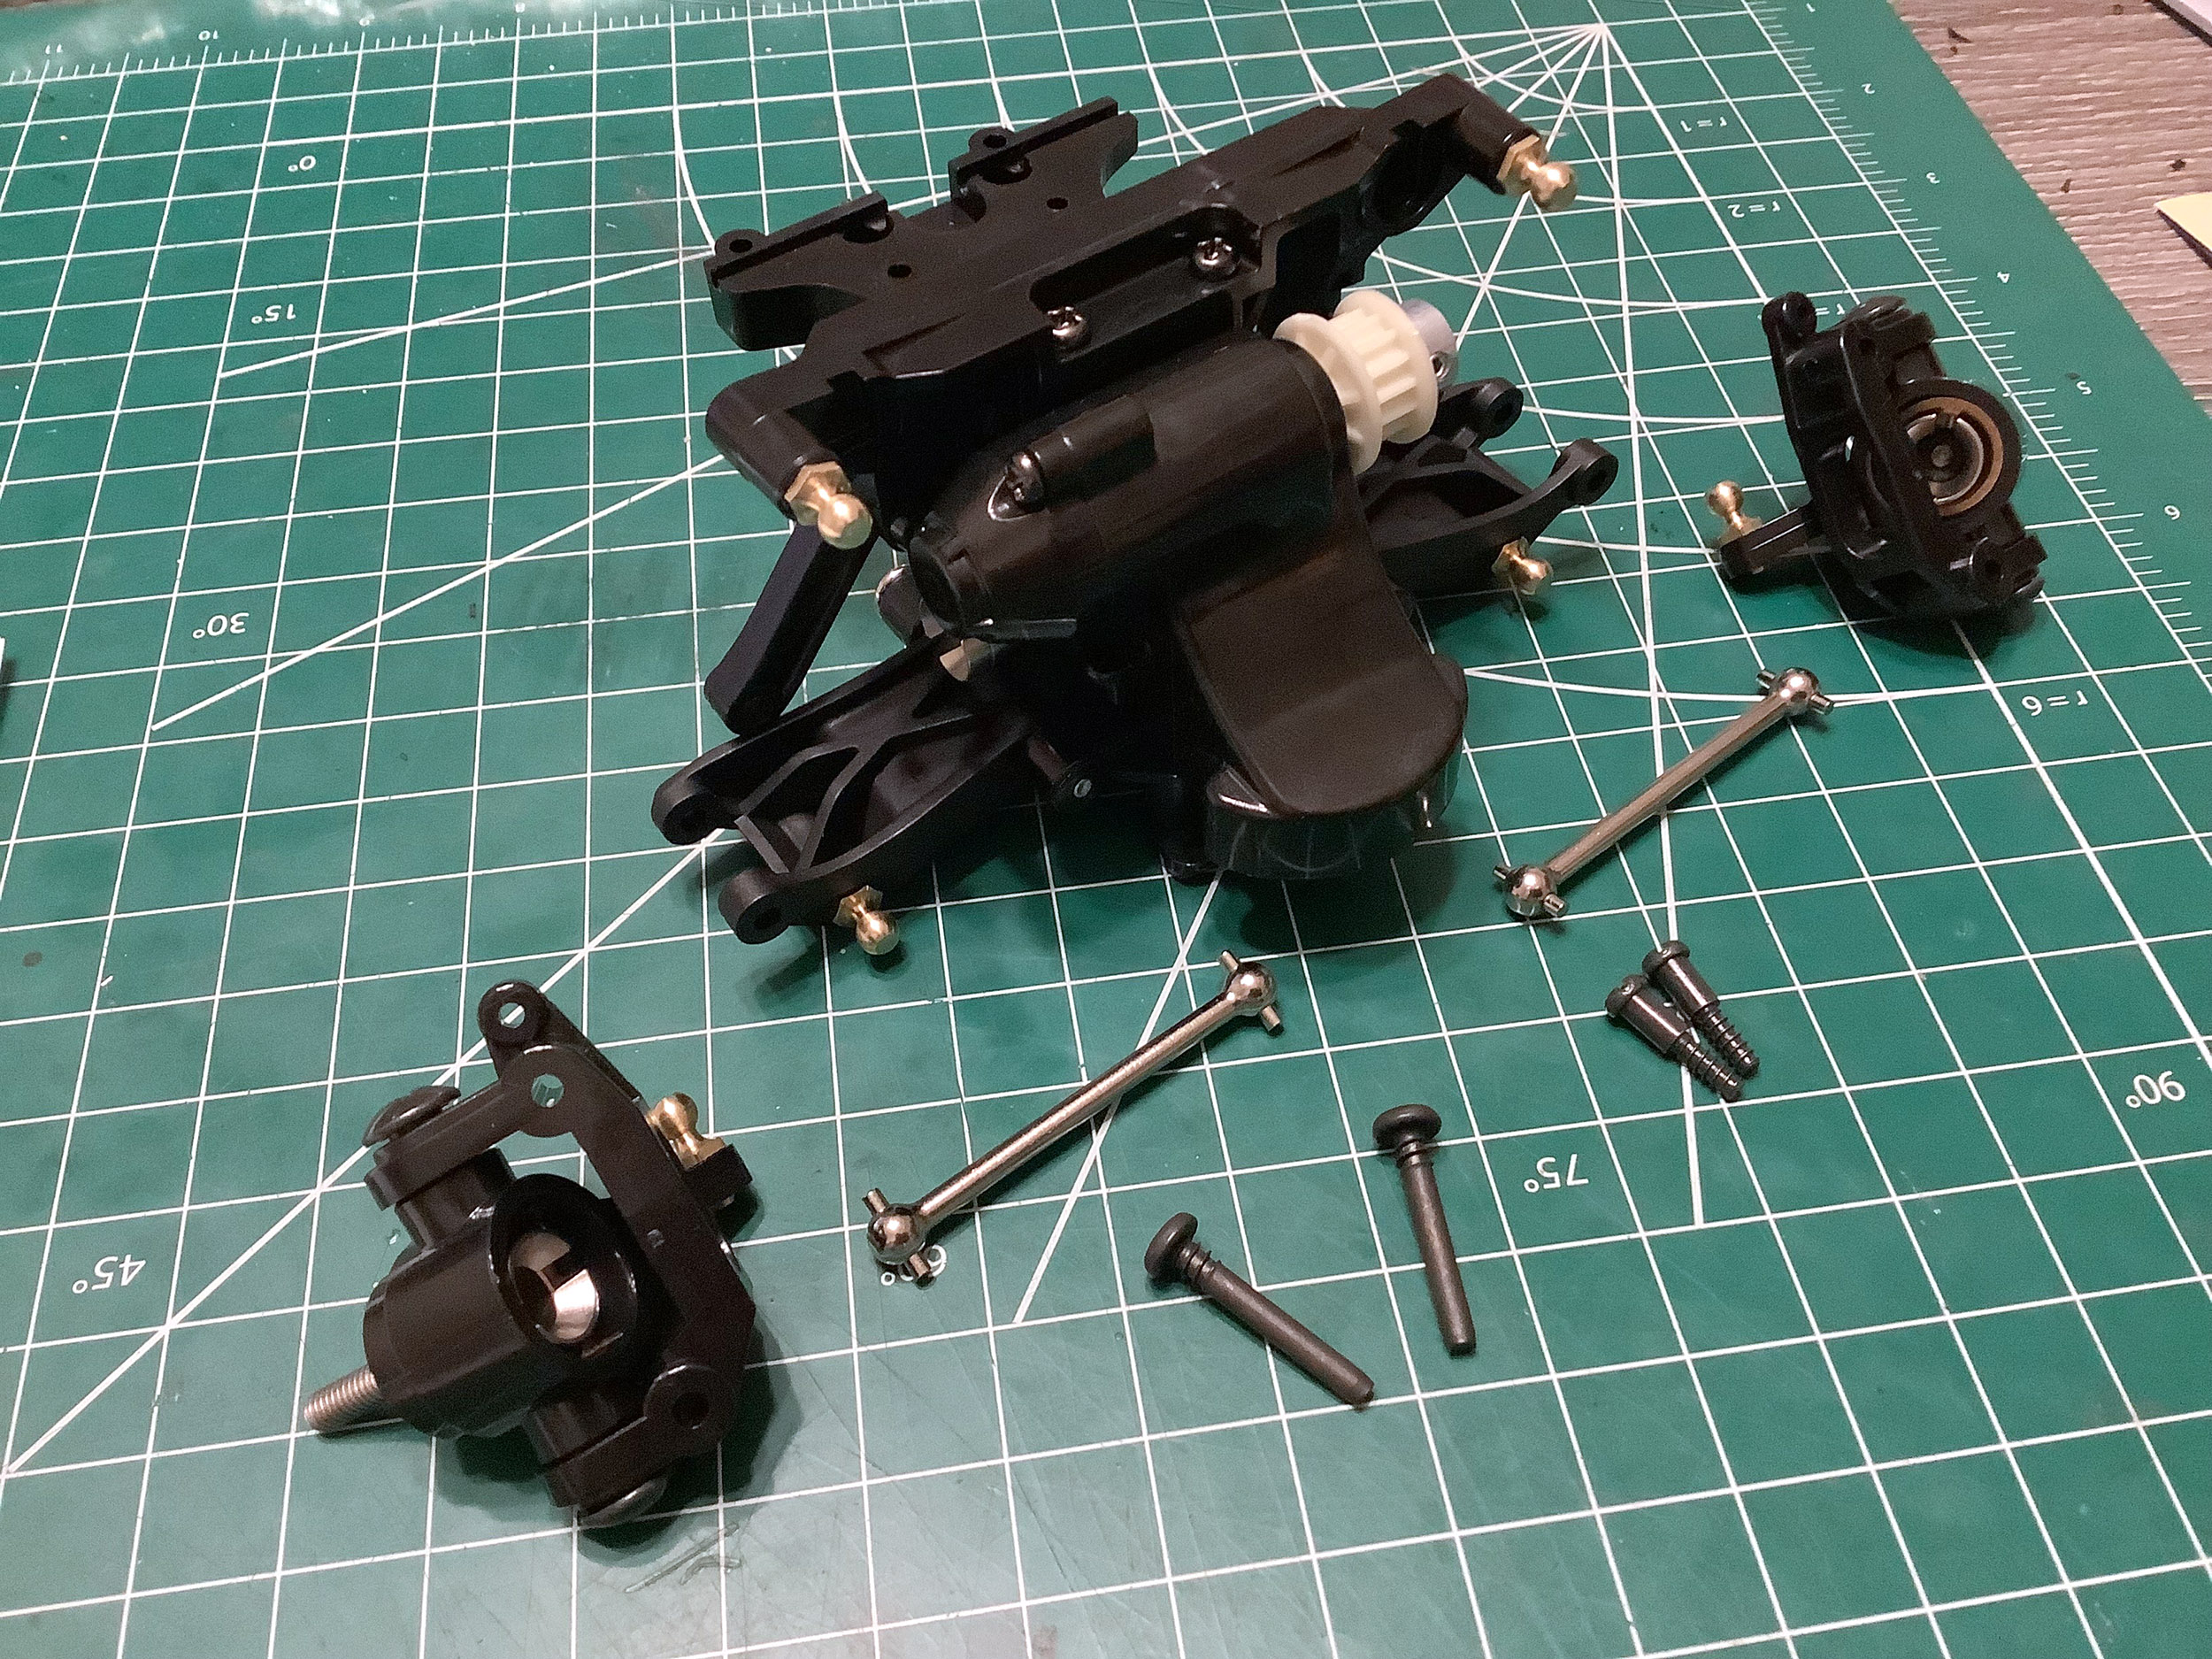
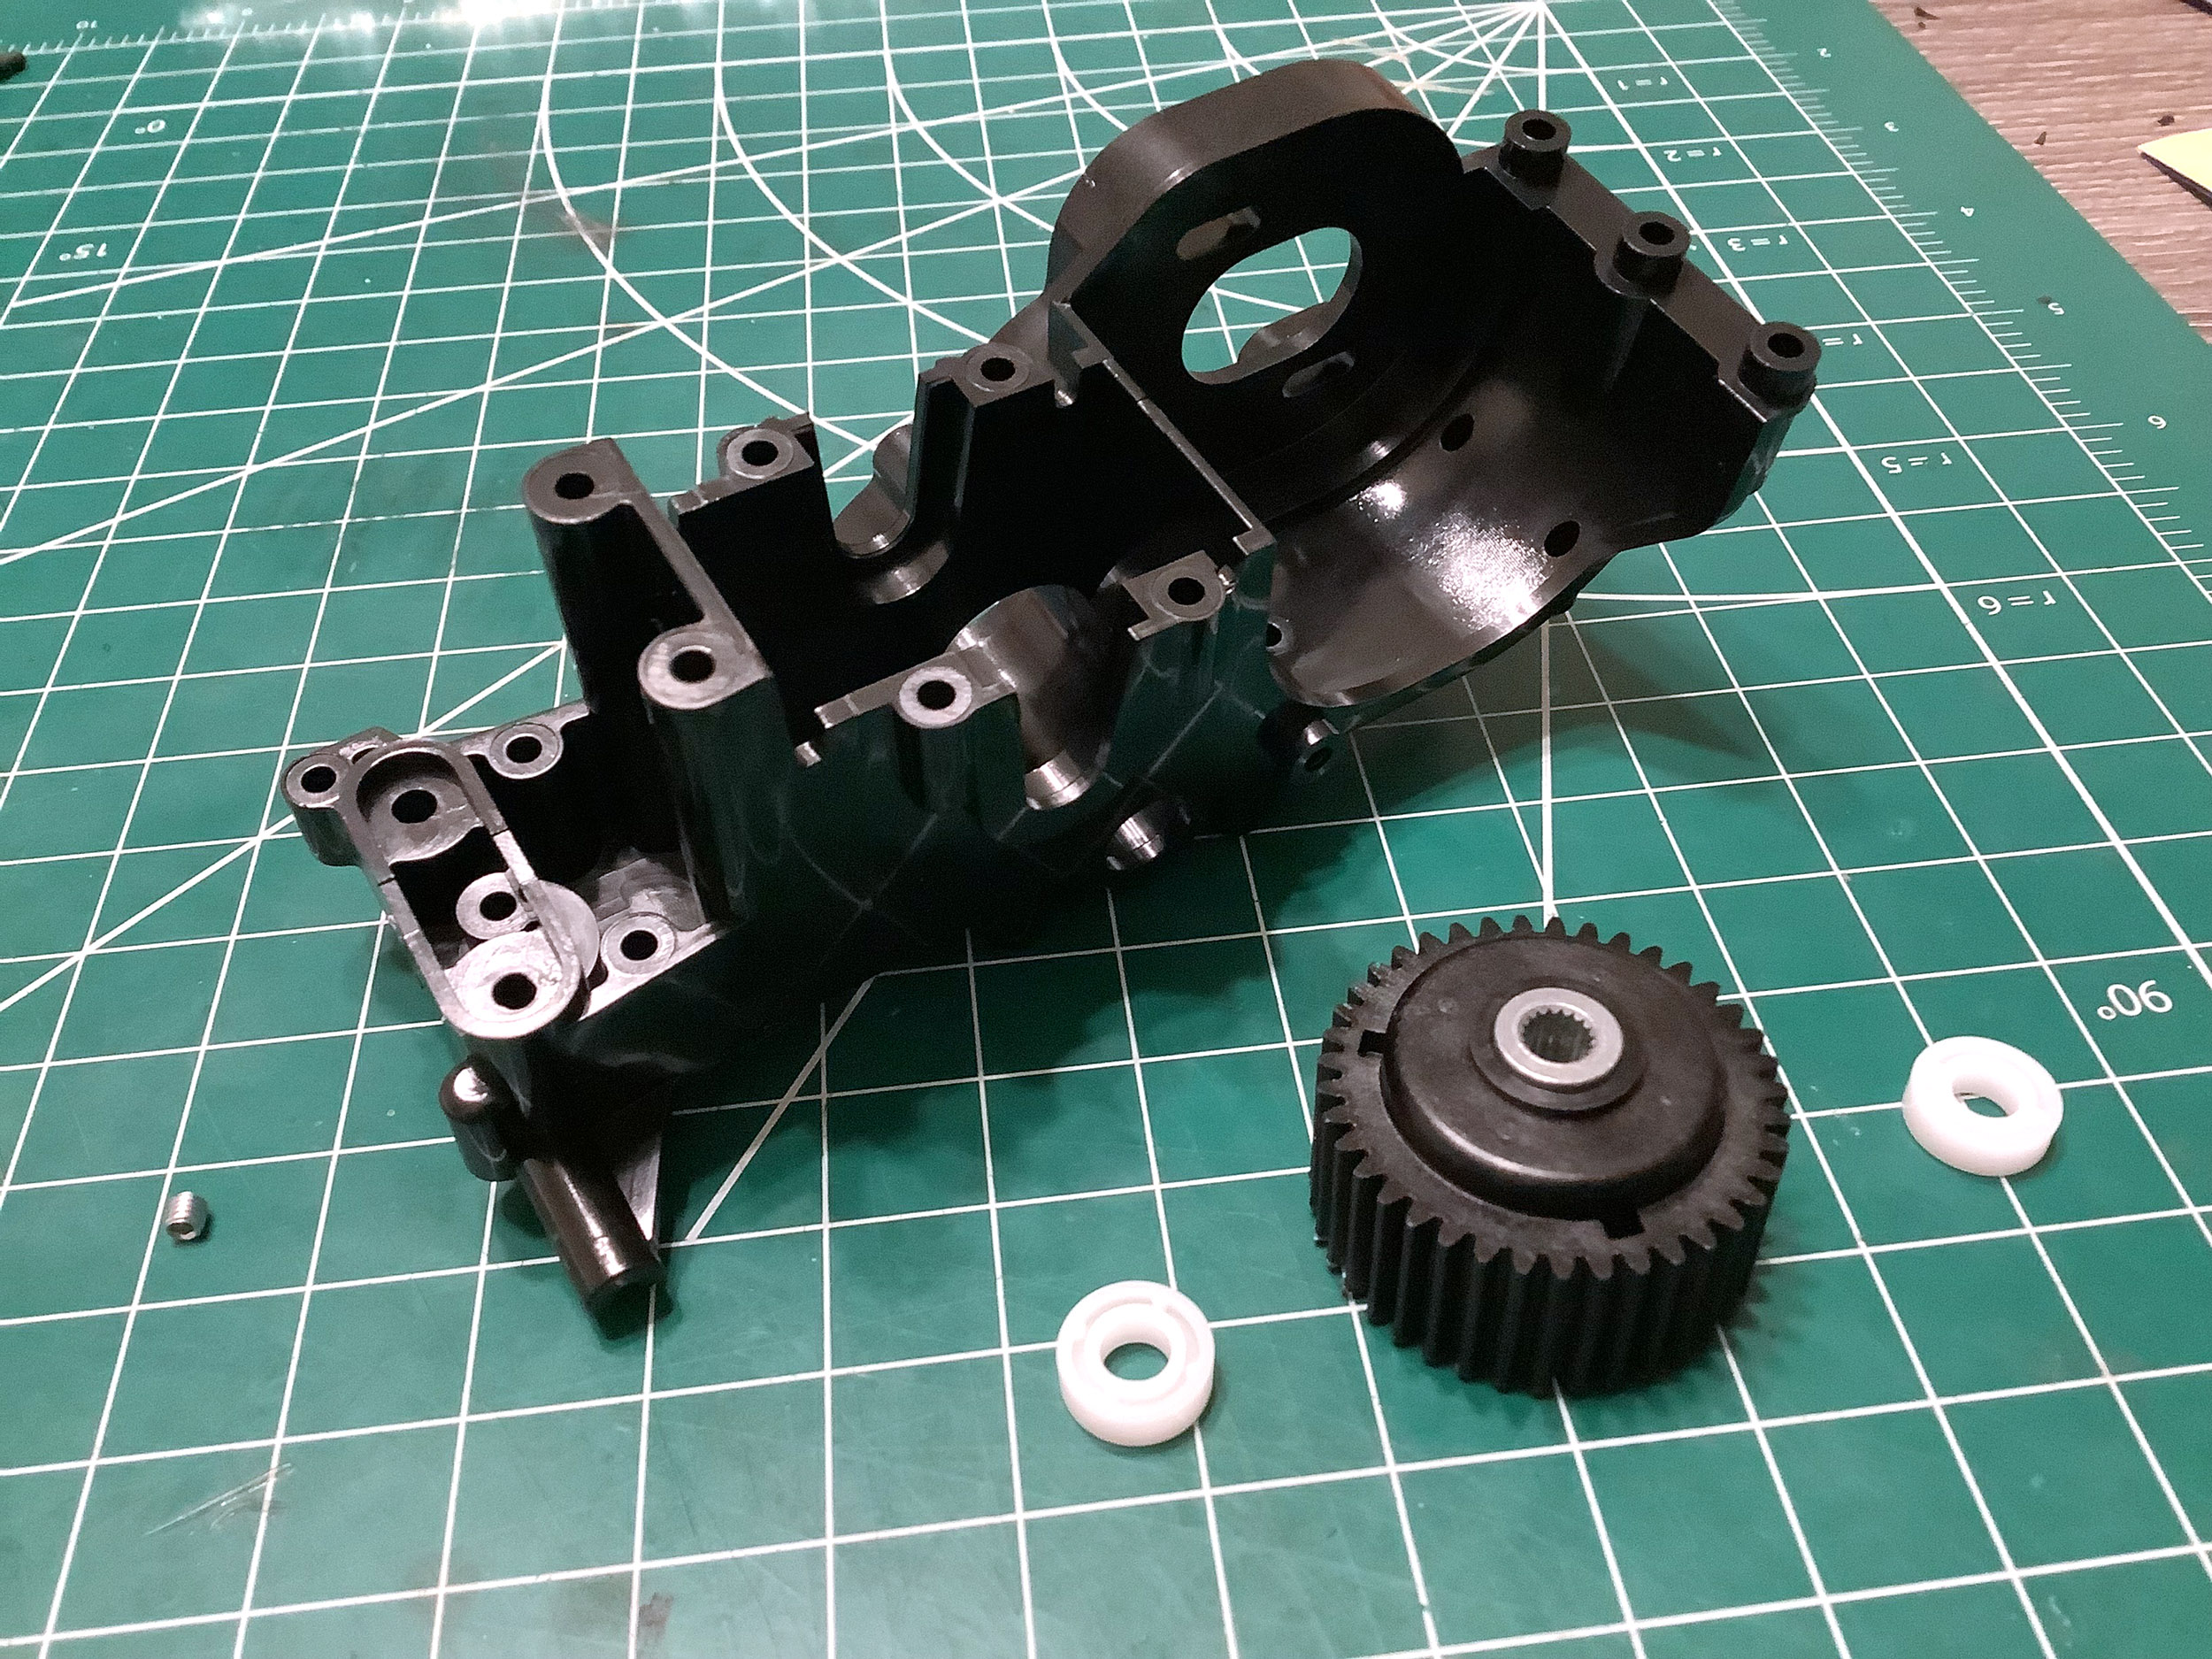
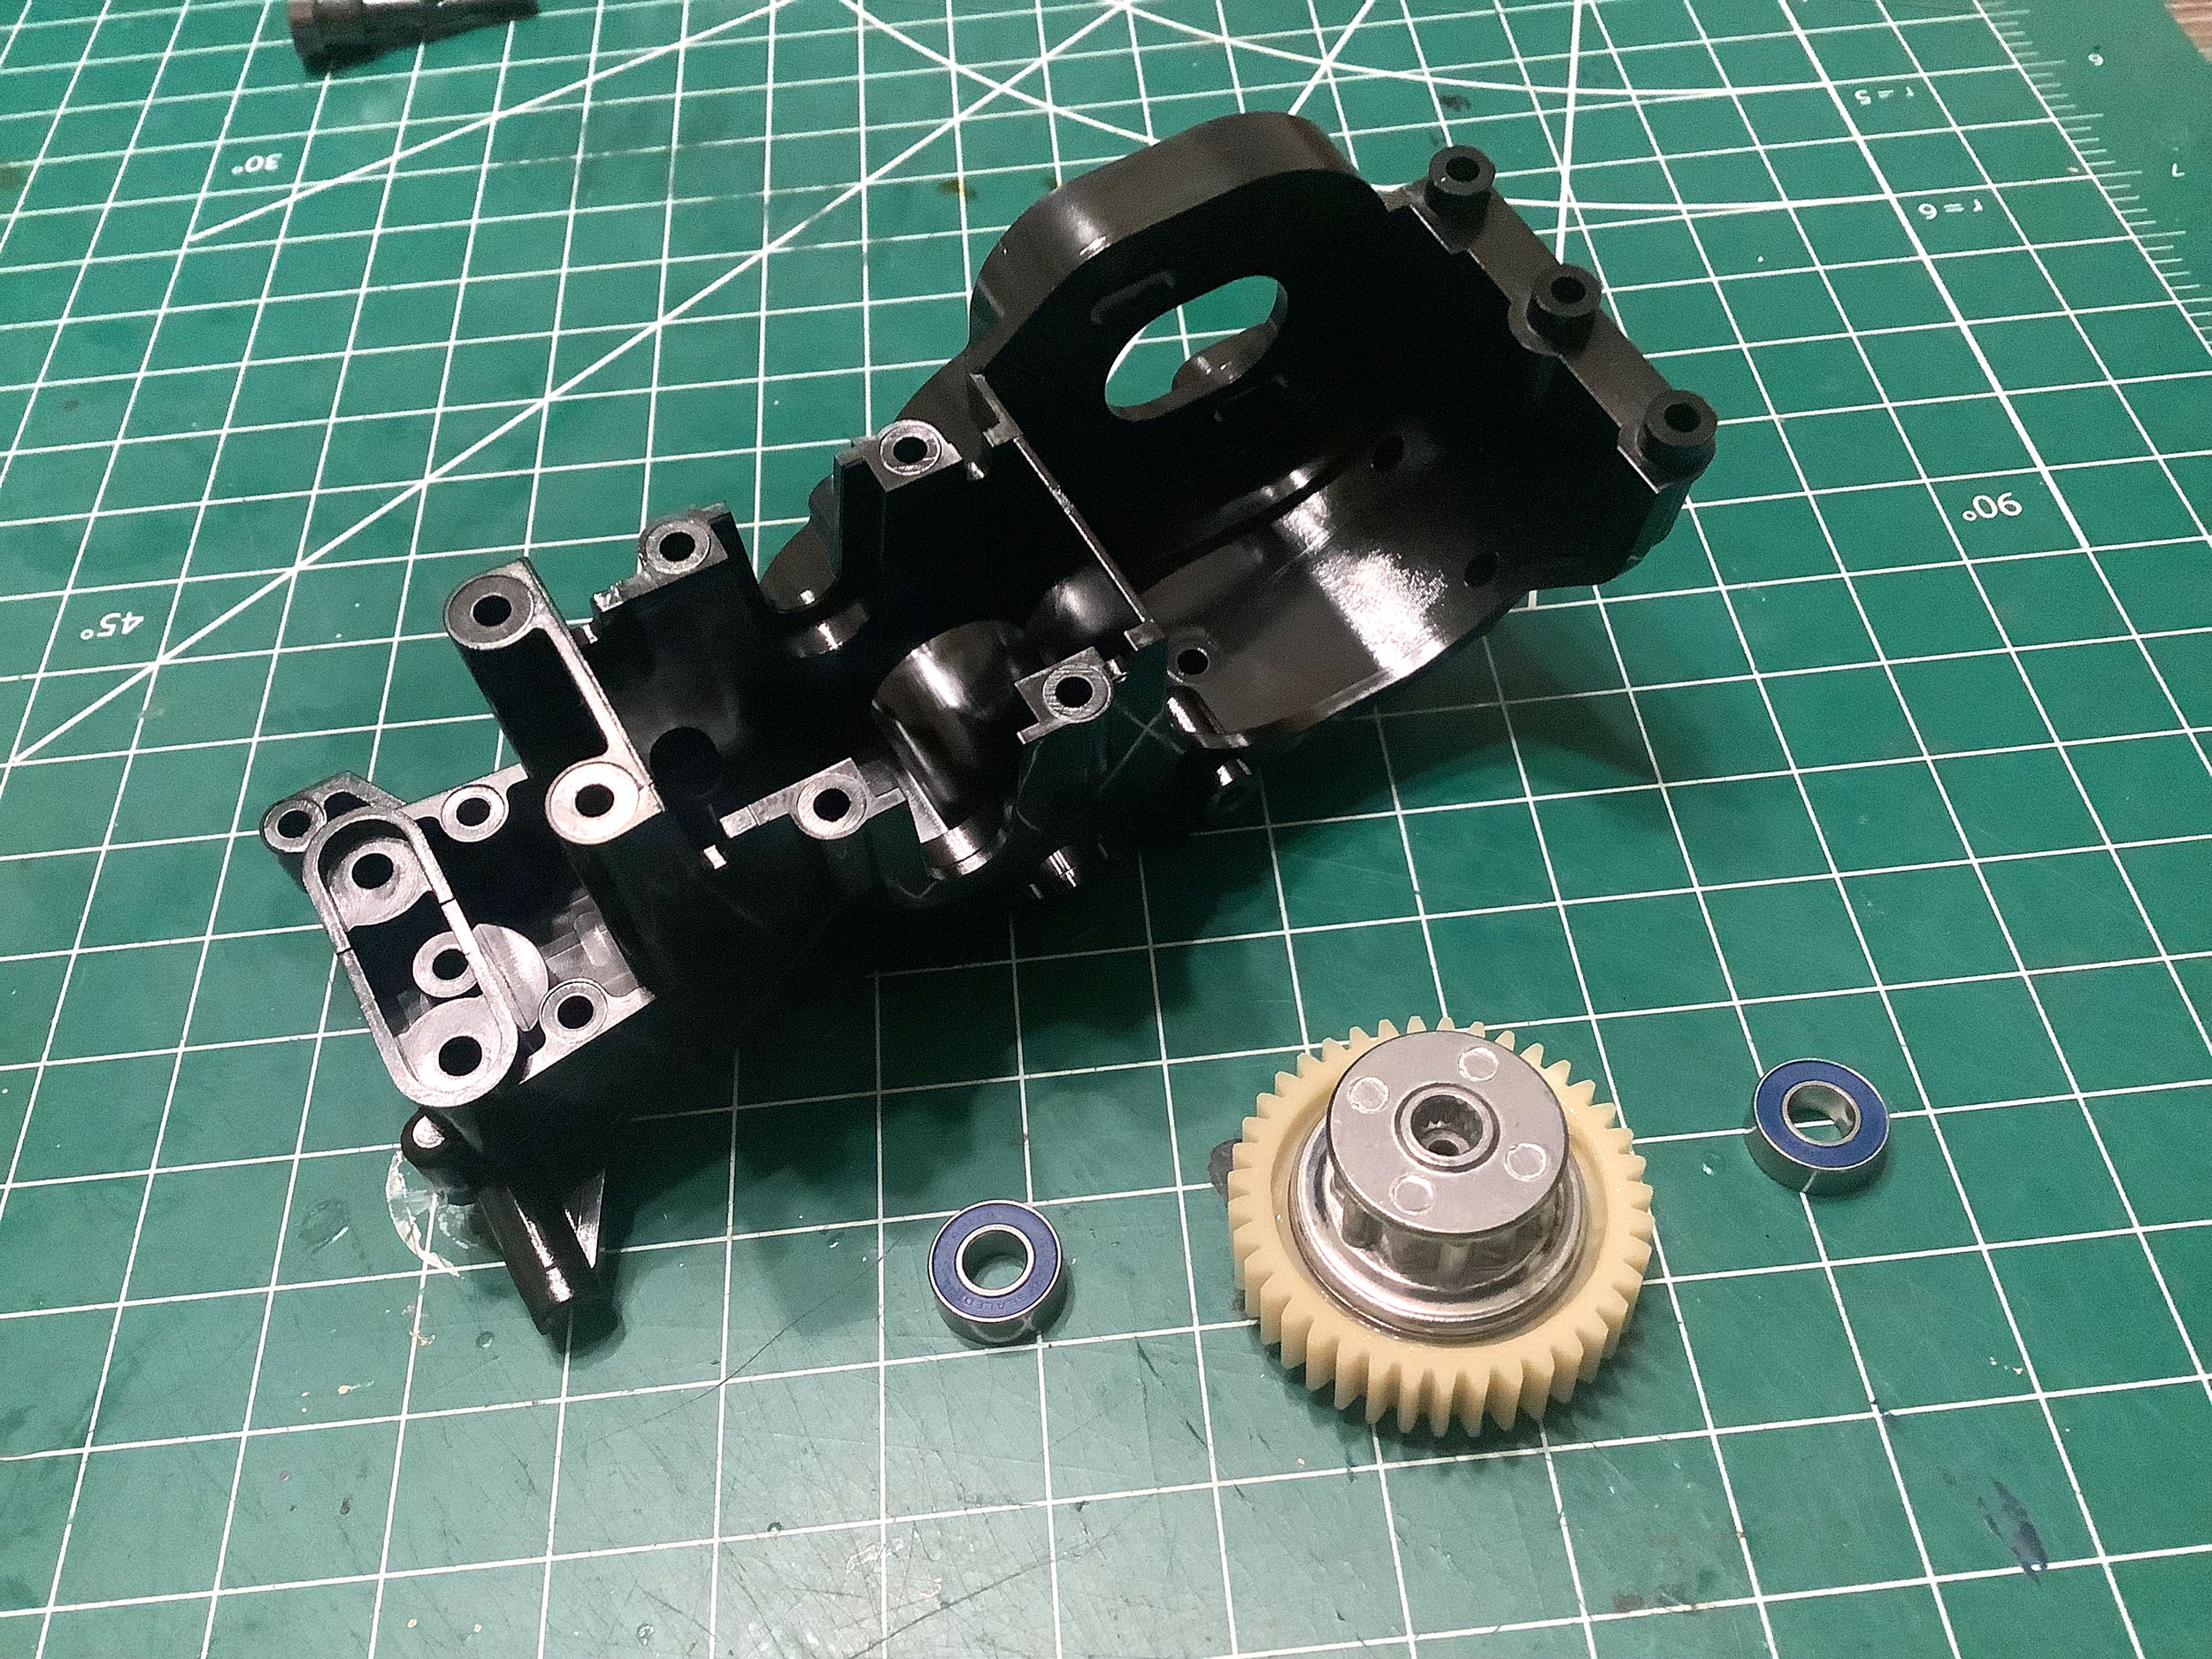
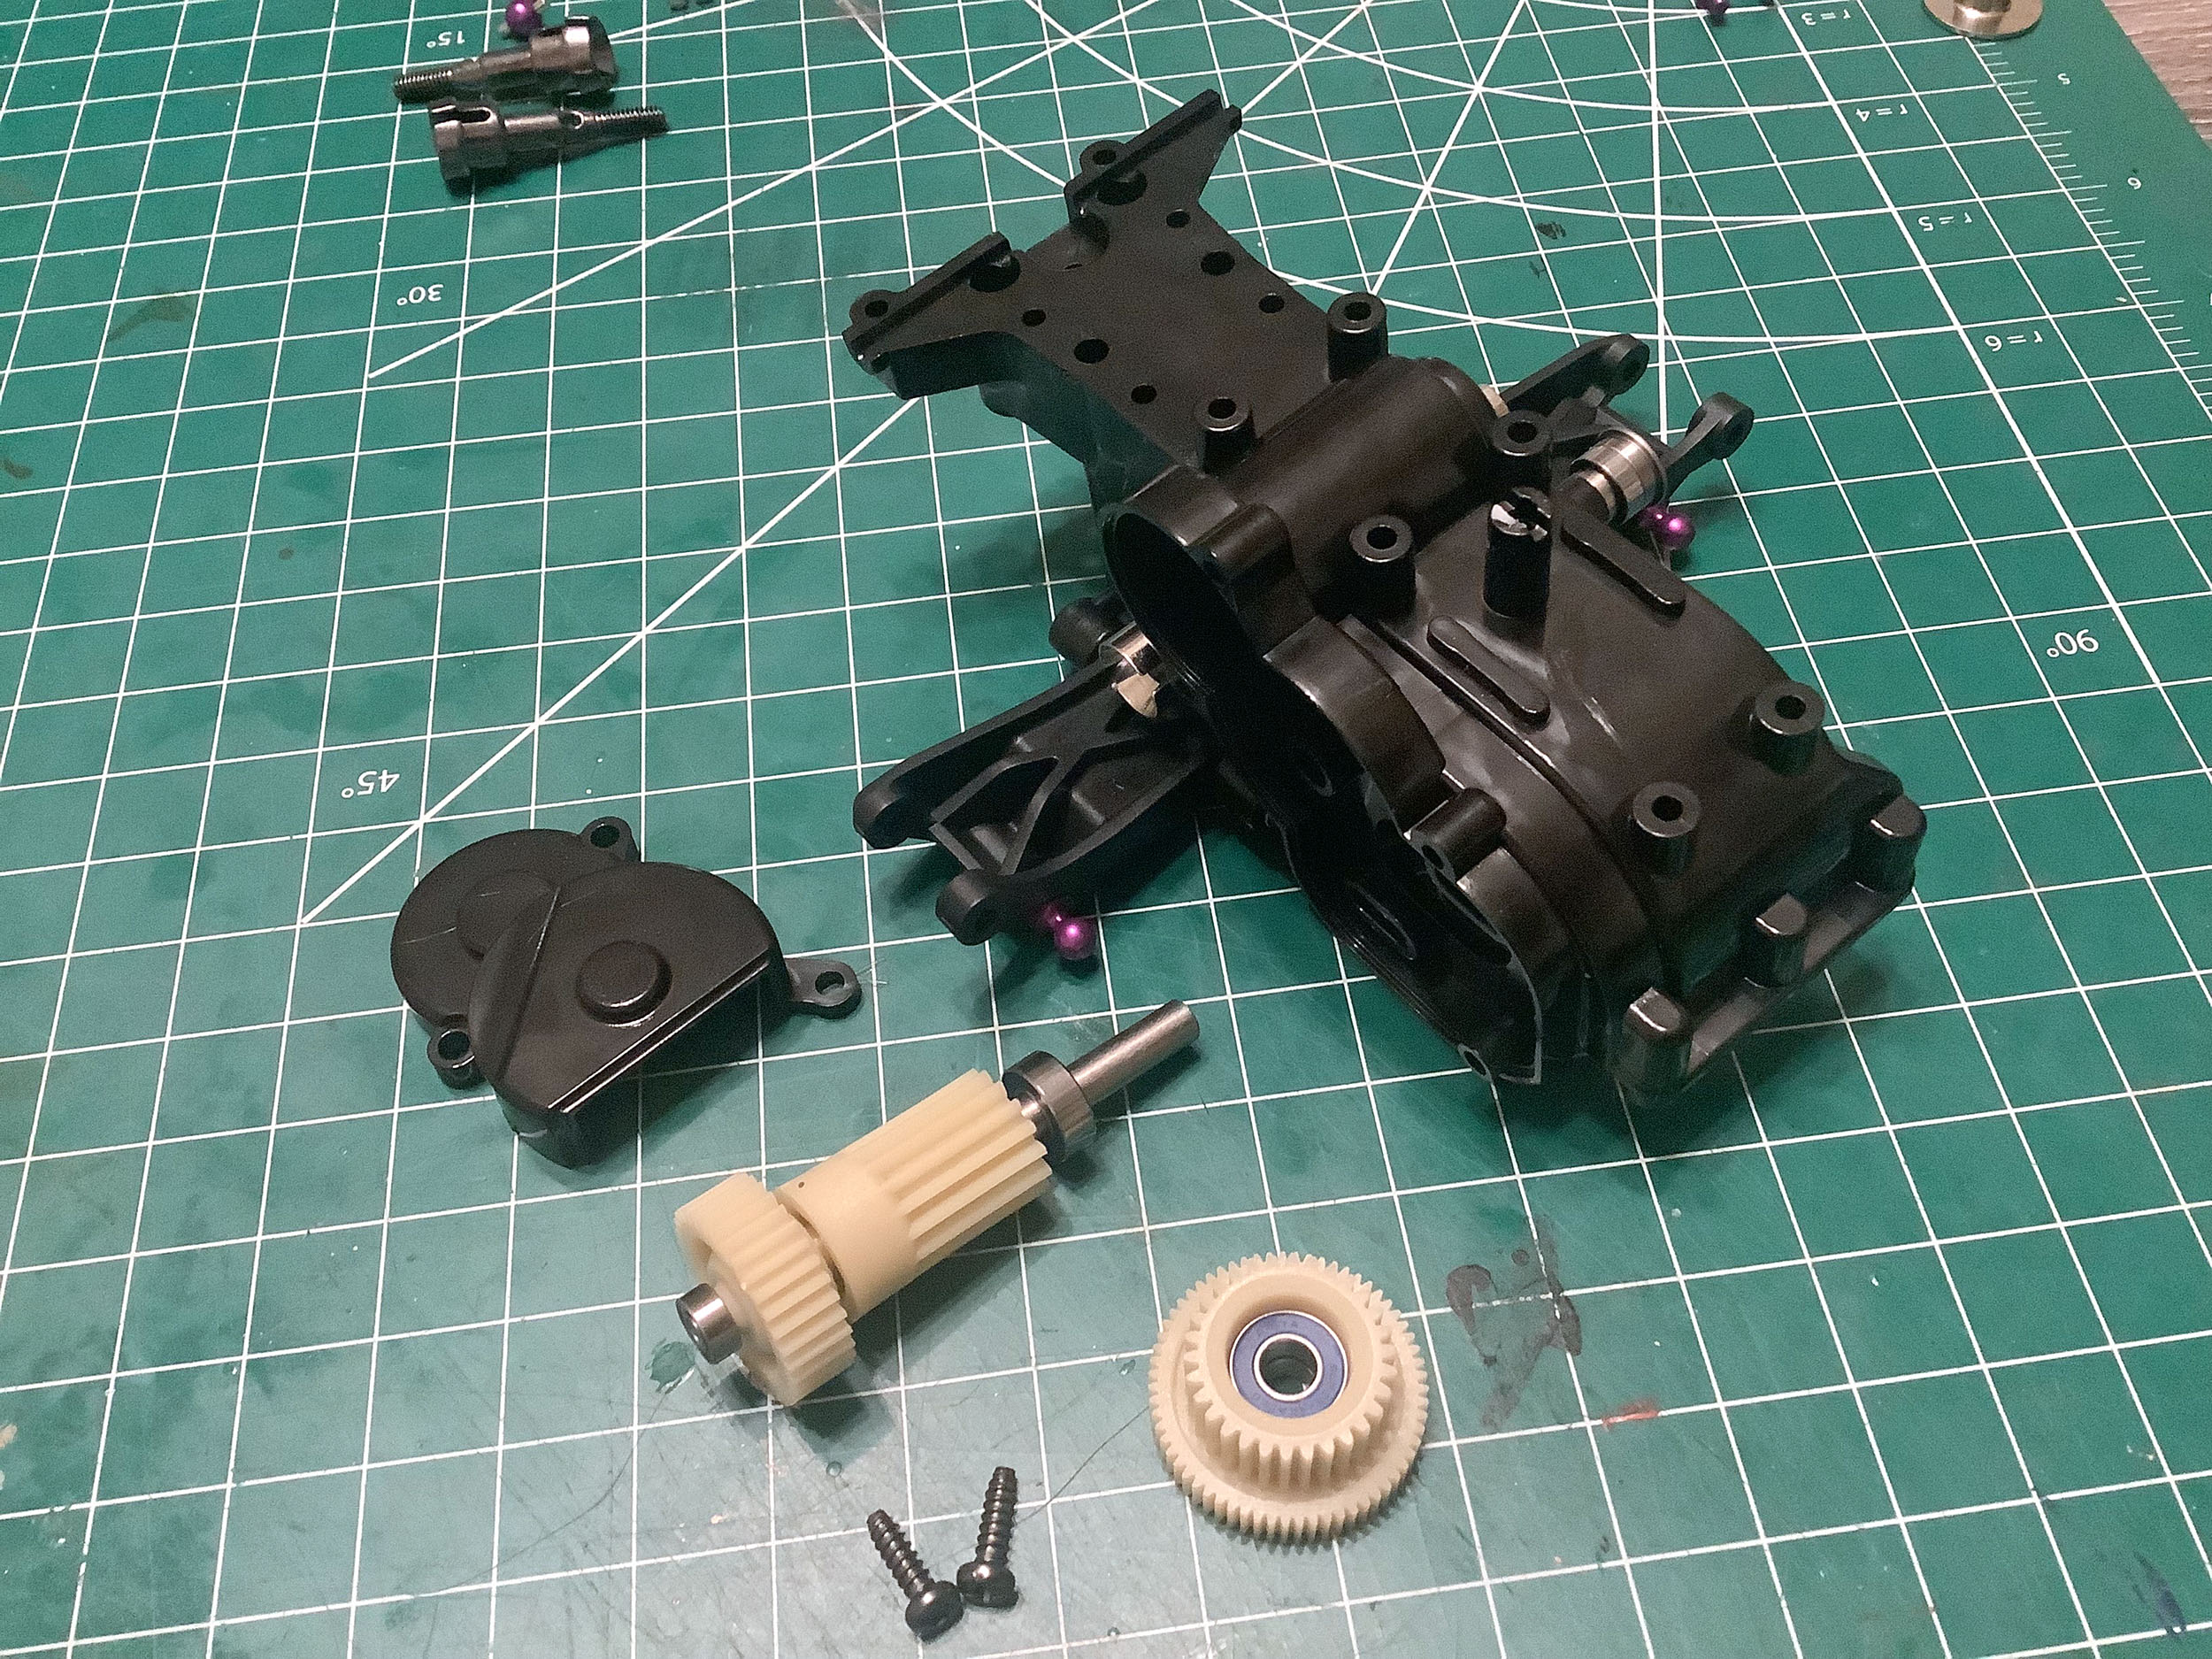
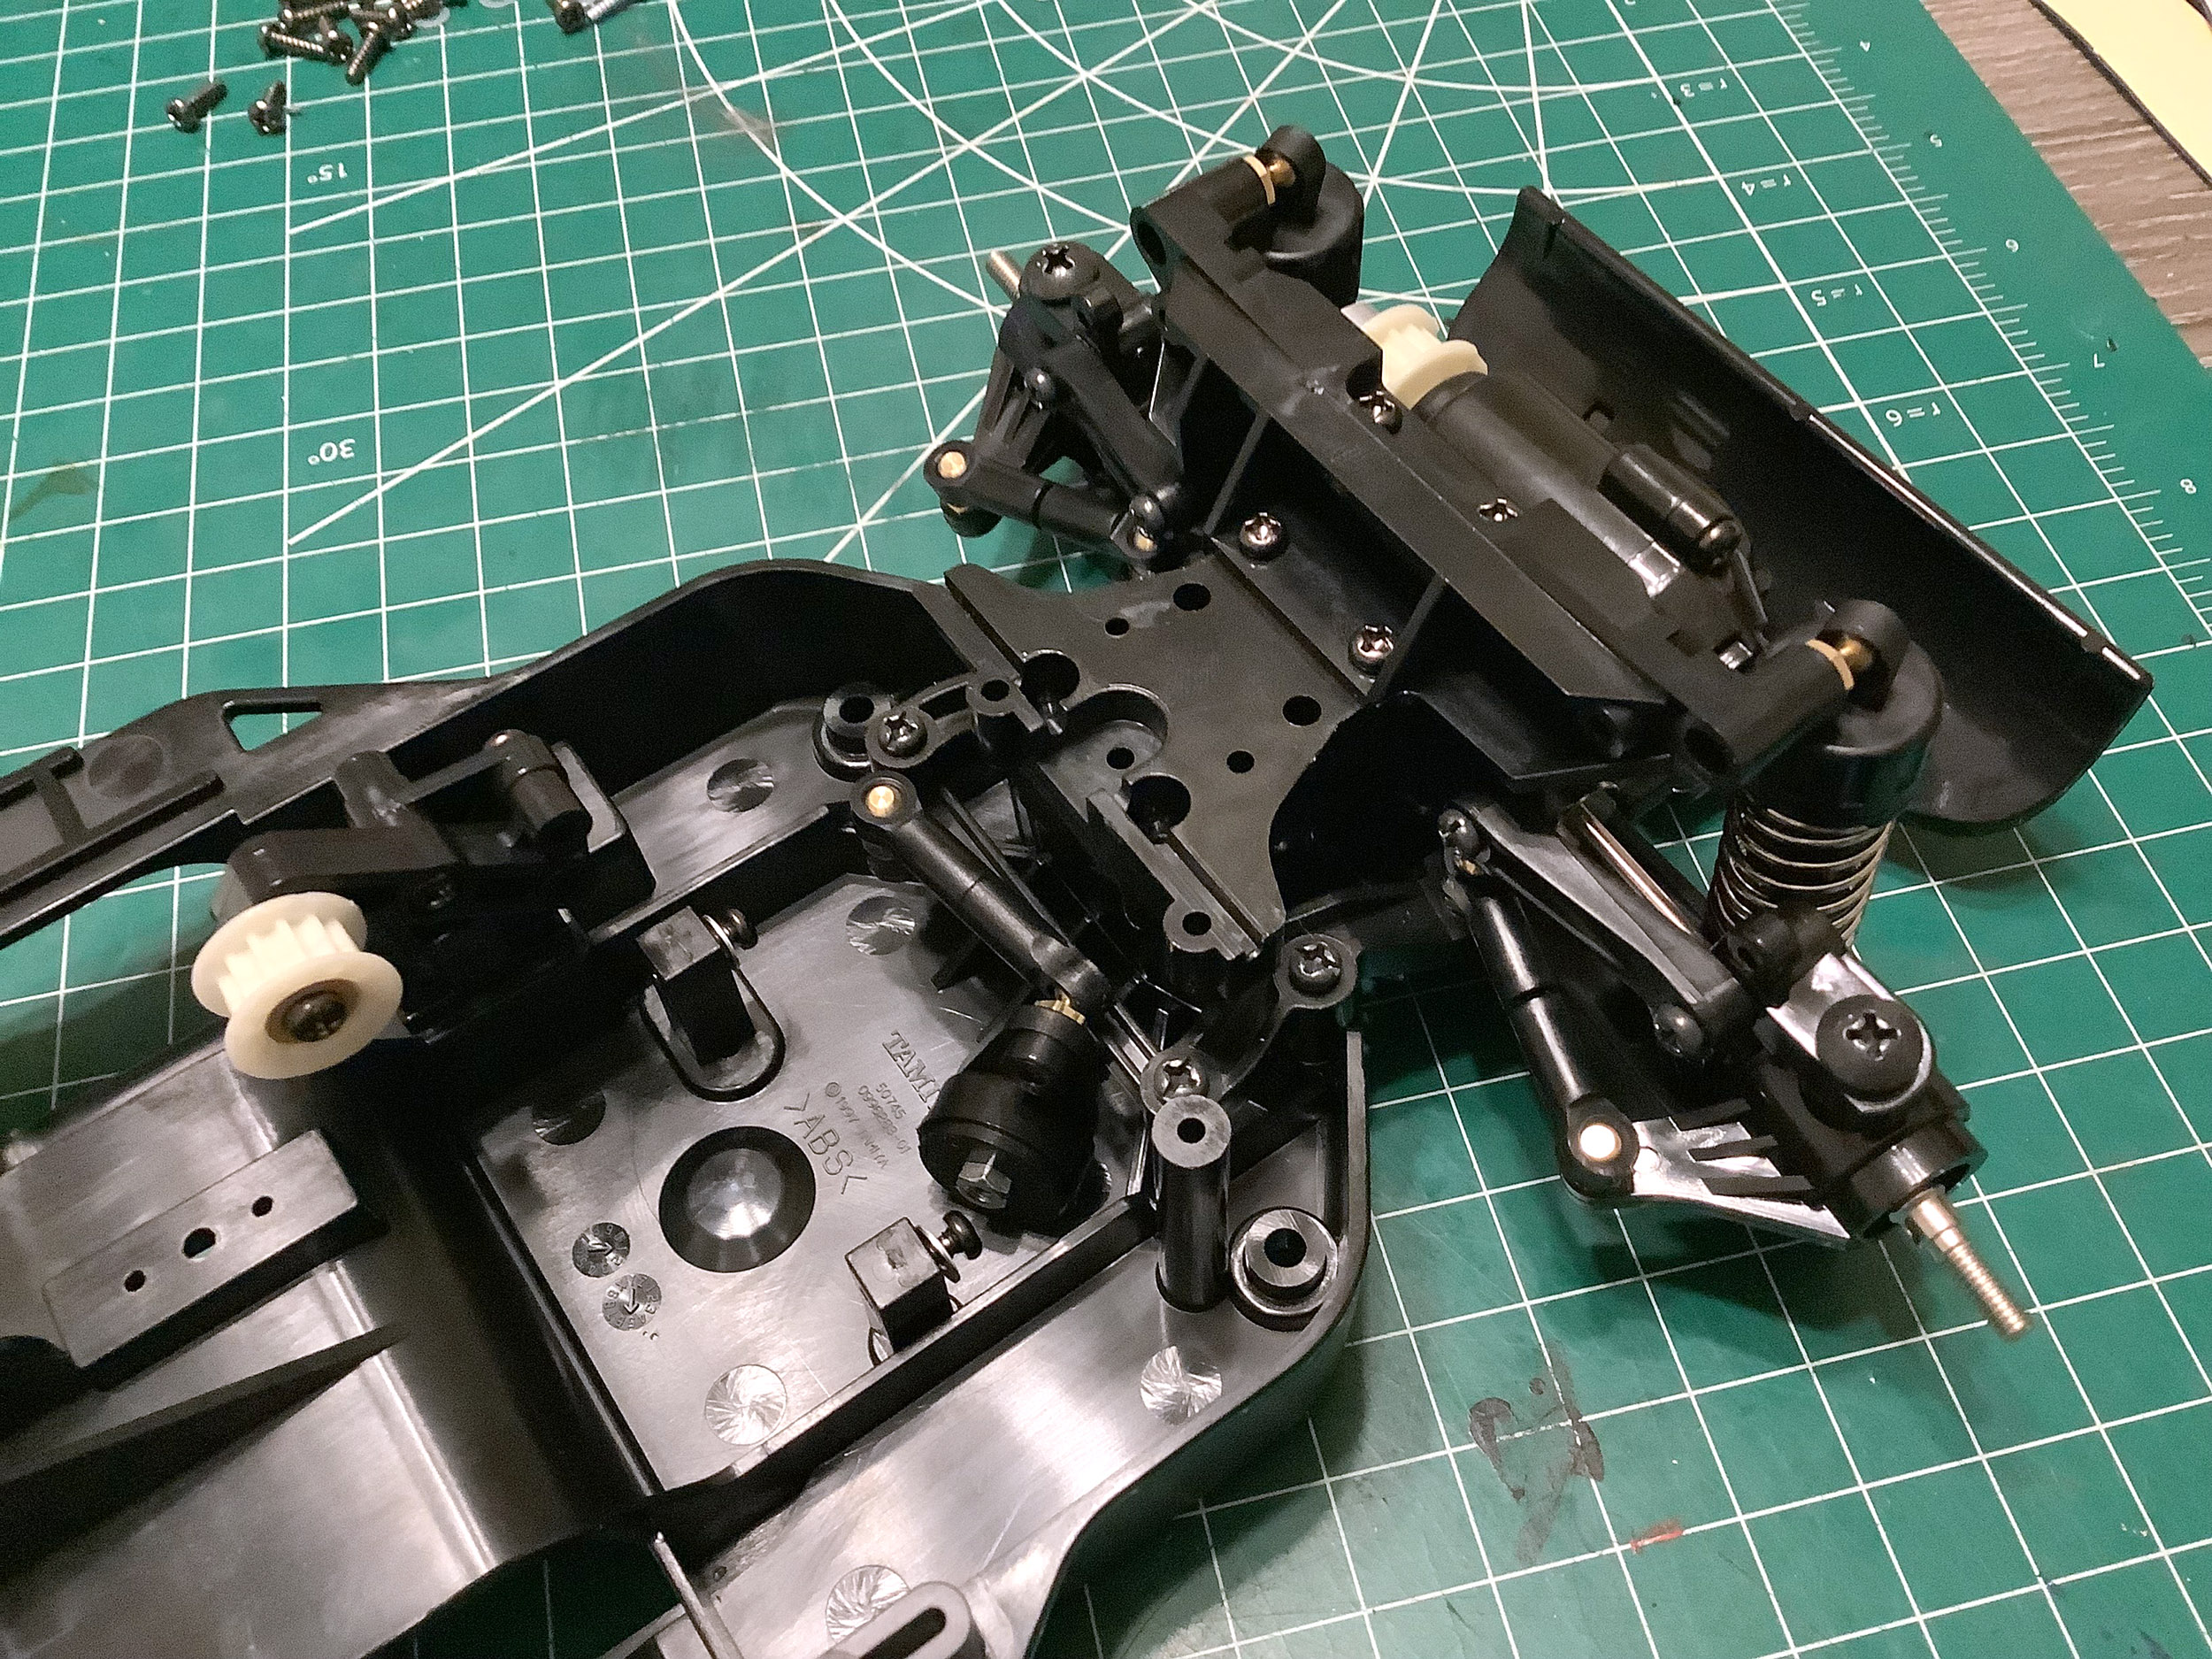
Now we can start on the rear gearbox assembly. The plastic housing
is the same, but the difference in the differential is very
obvious. Again, the TRF model uses ball bearings.
Here is a pretty big difference. The lower part of the standard
rear bulkhead includes a large curved section to attach it to the
chassis tub and protect the motor. Since the TRF model uses a
carbon plate instead, it has a different lower panel. The lower
suspension arms are the same, but the usual difference in attachment
hardware applies.
The lower suspension assemblies have been fastened. There is no getting these two confused for one another.
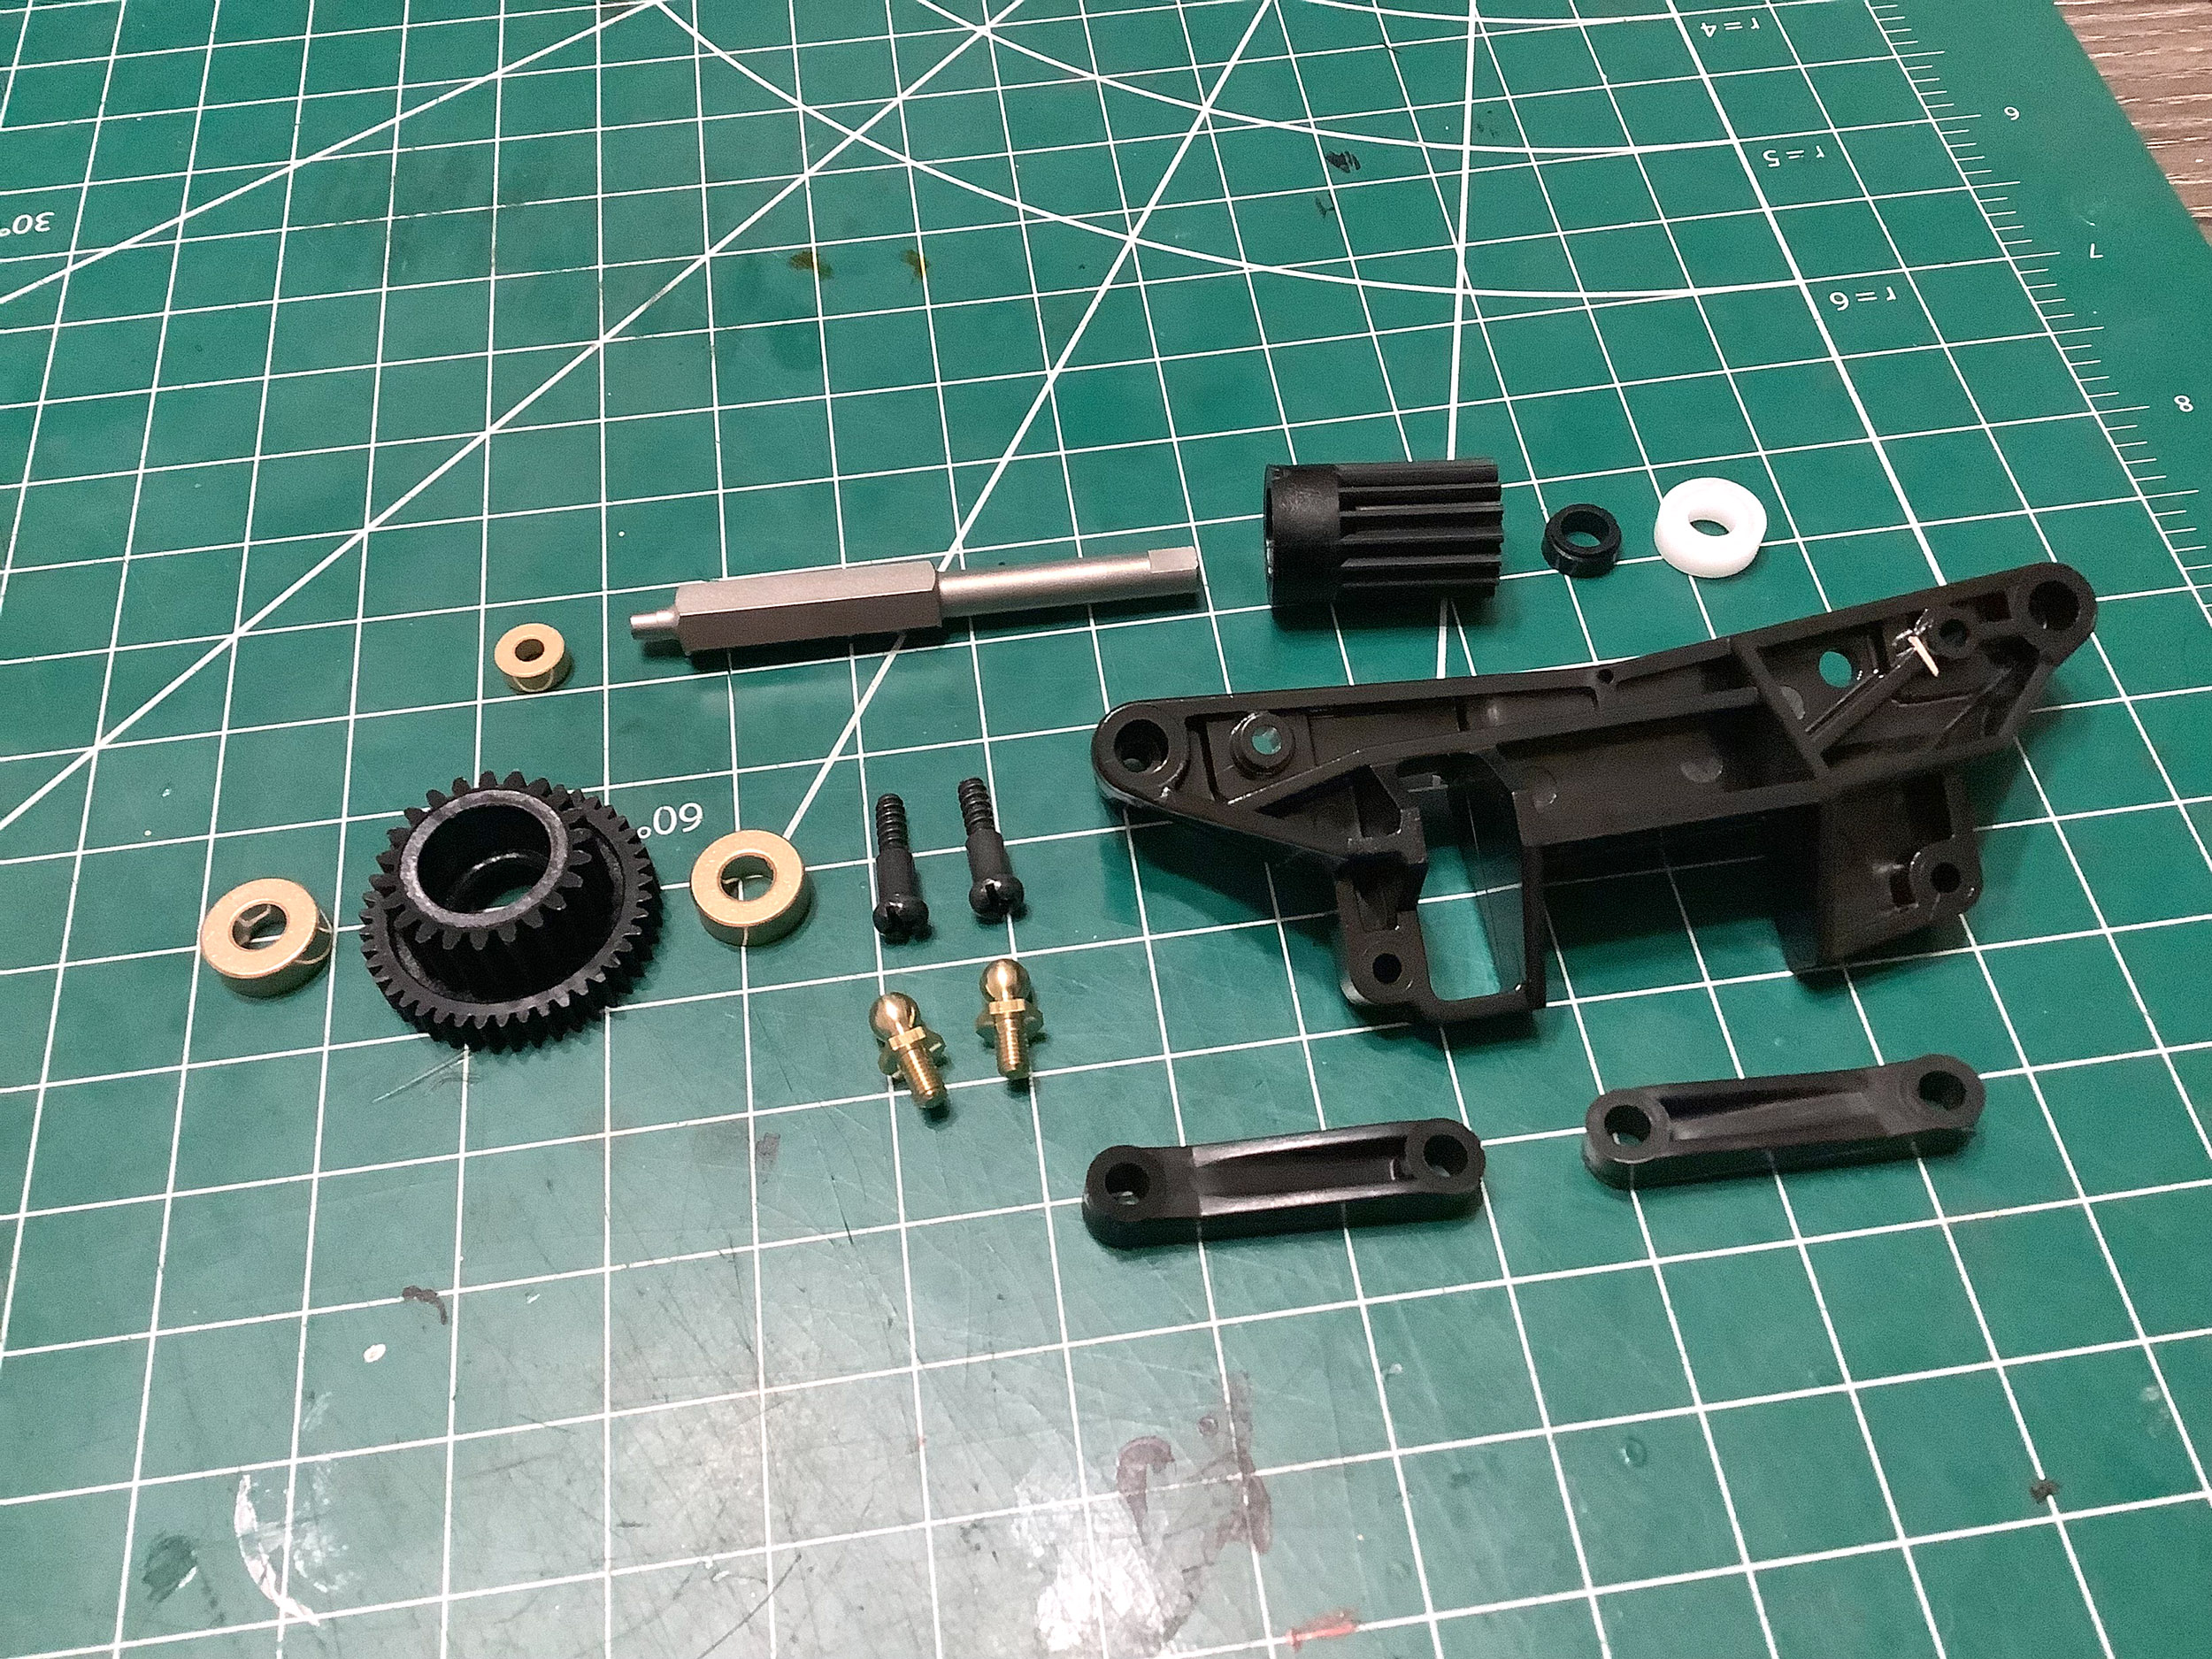
Here is the hardware used to attach the lower suspension assembly to the
gearbox housing. The tiny bearings shown on the TRF photo are for
a belt idler.
The lower suspension assembly has been installed. The reason for
the different geometry of the lower panel will be much more obvious once
these are attached to the chassis.
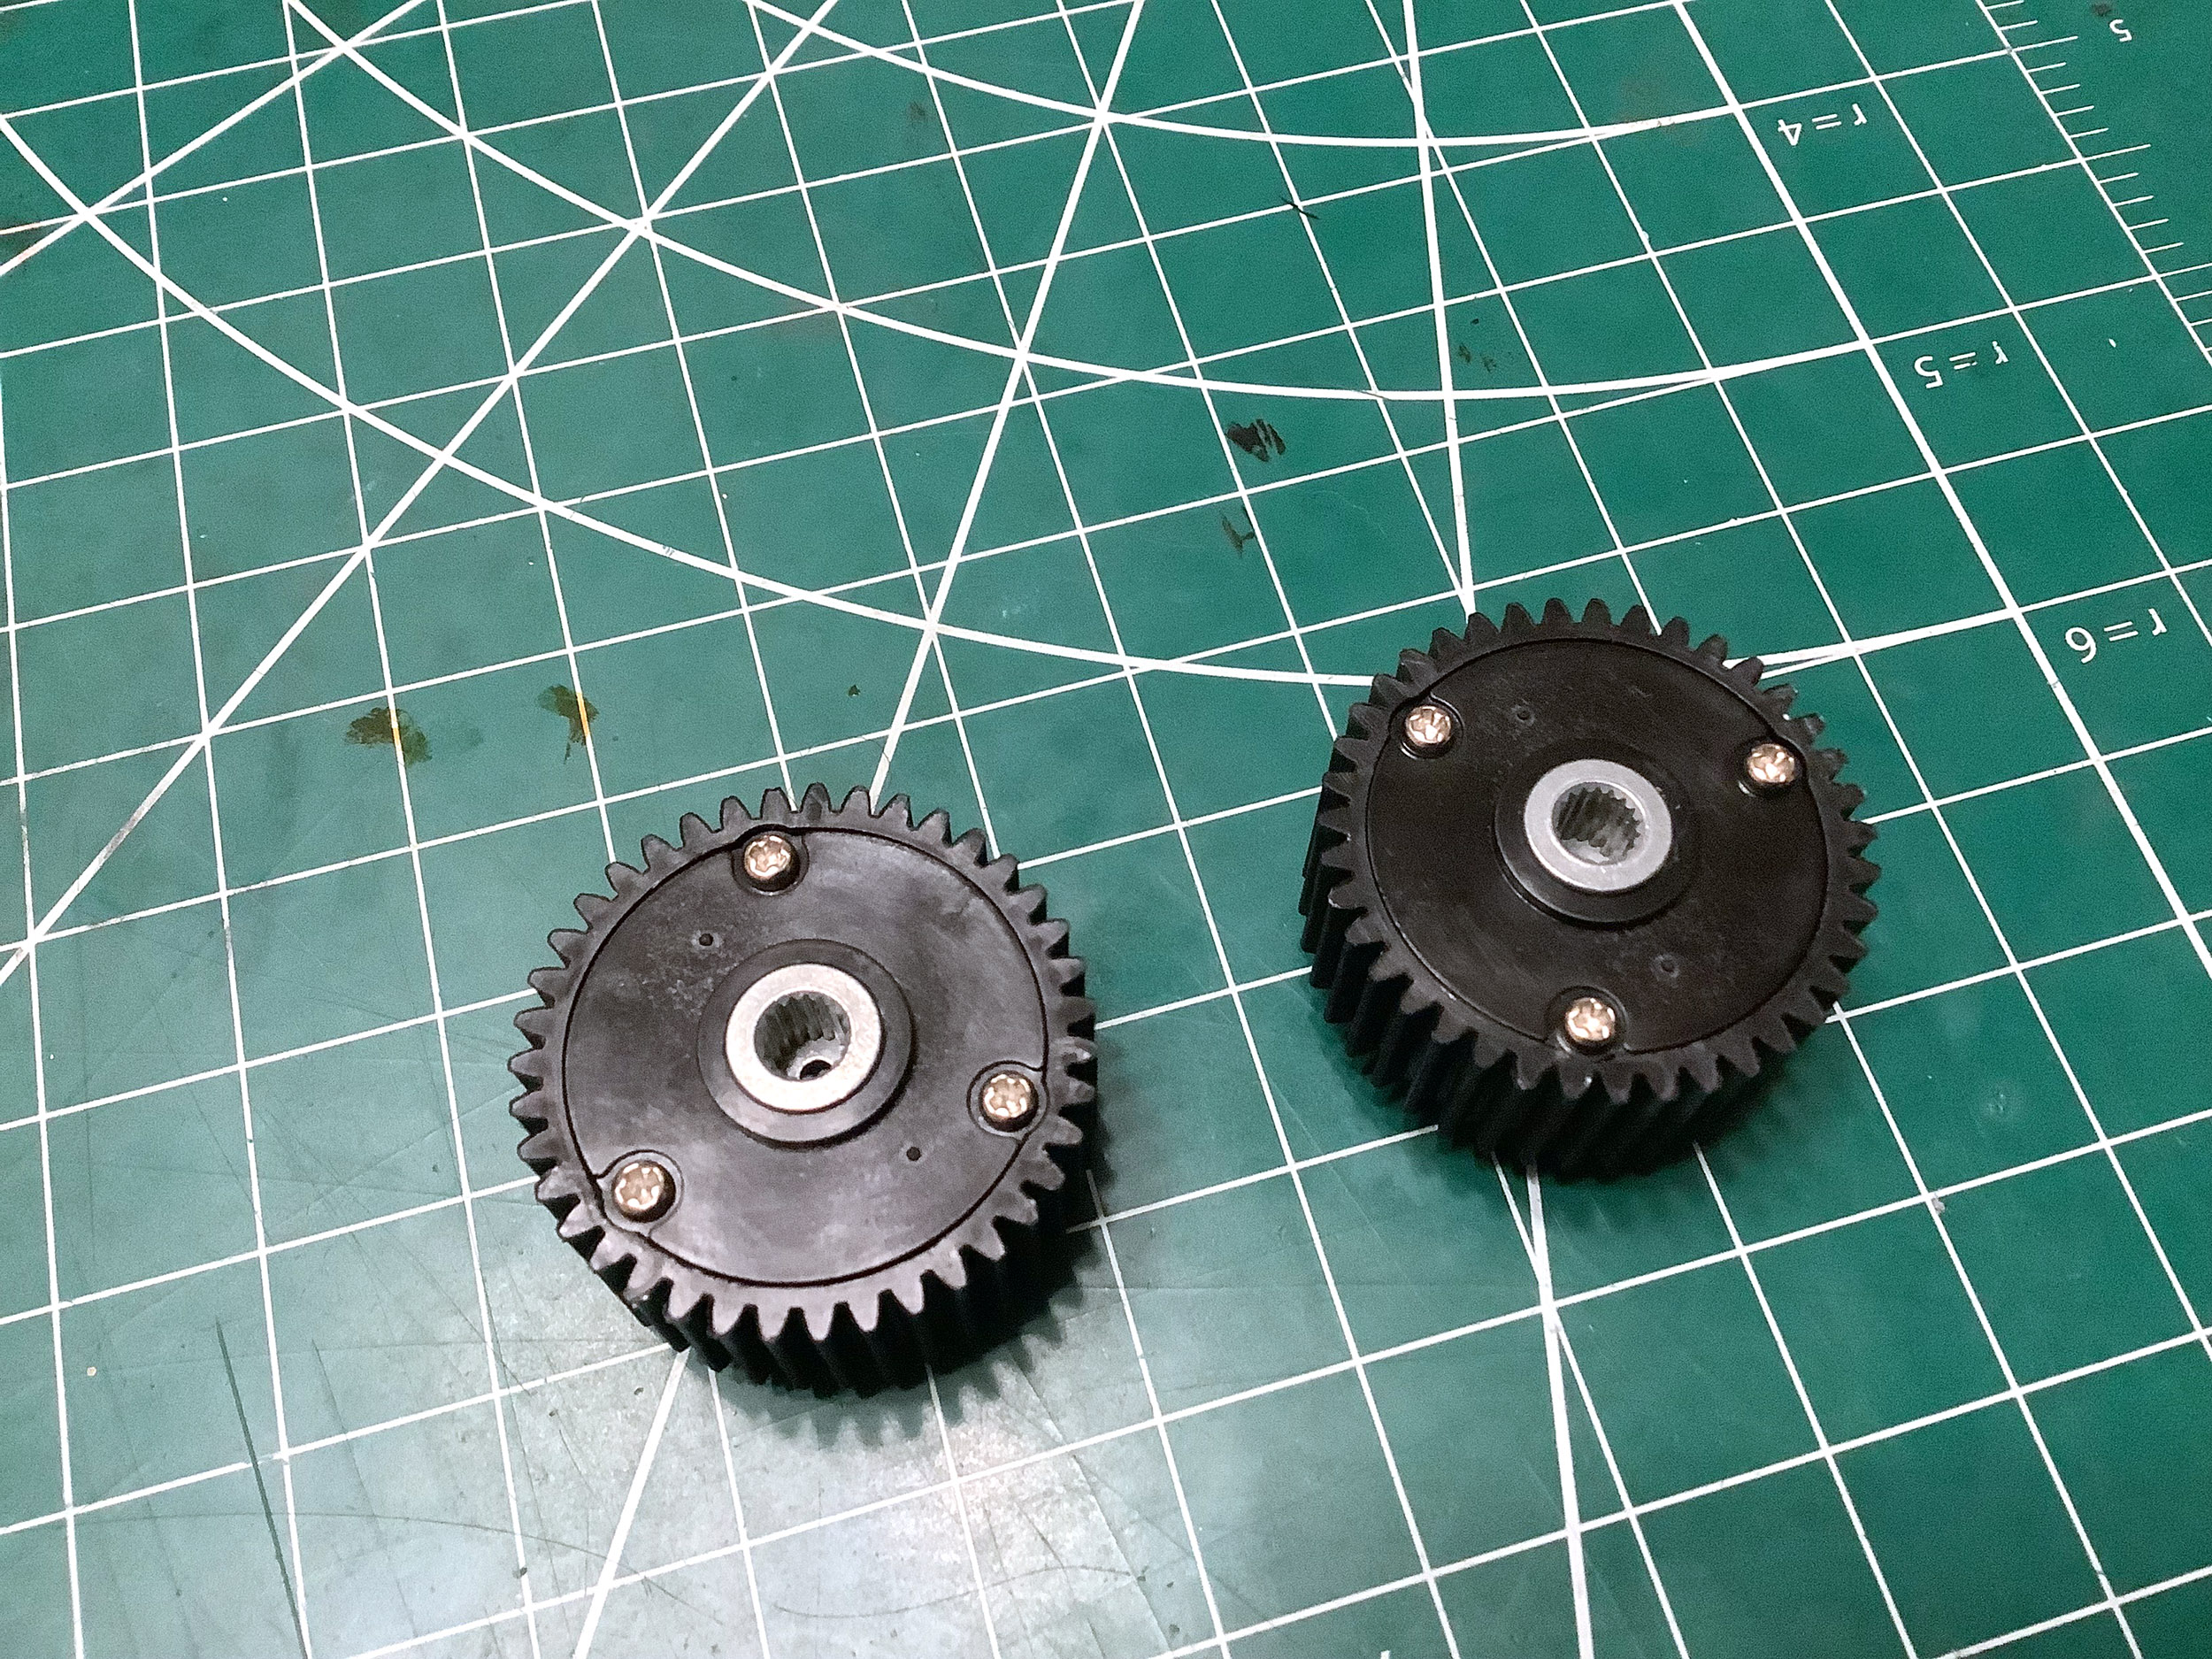
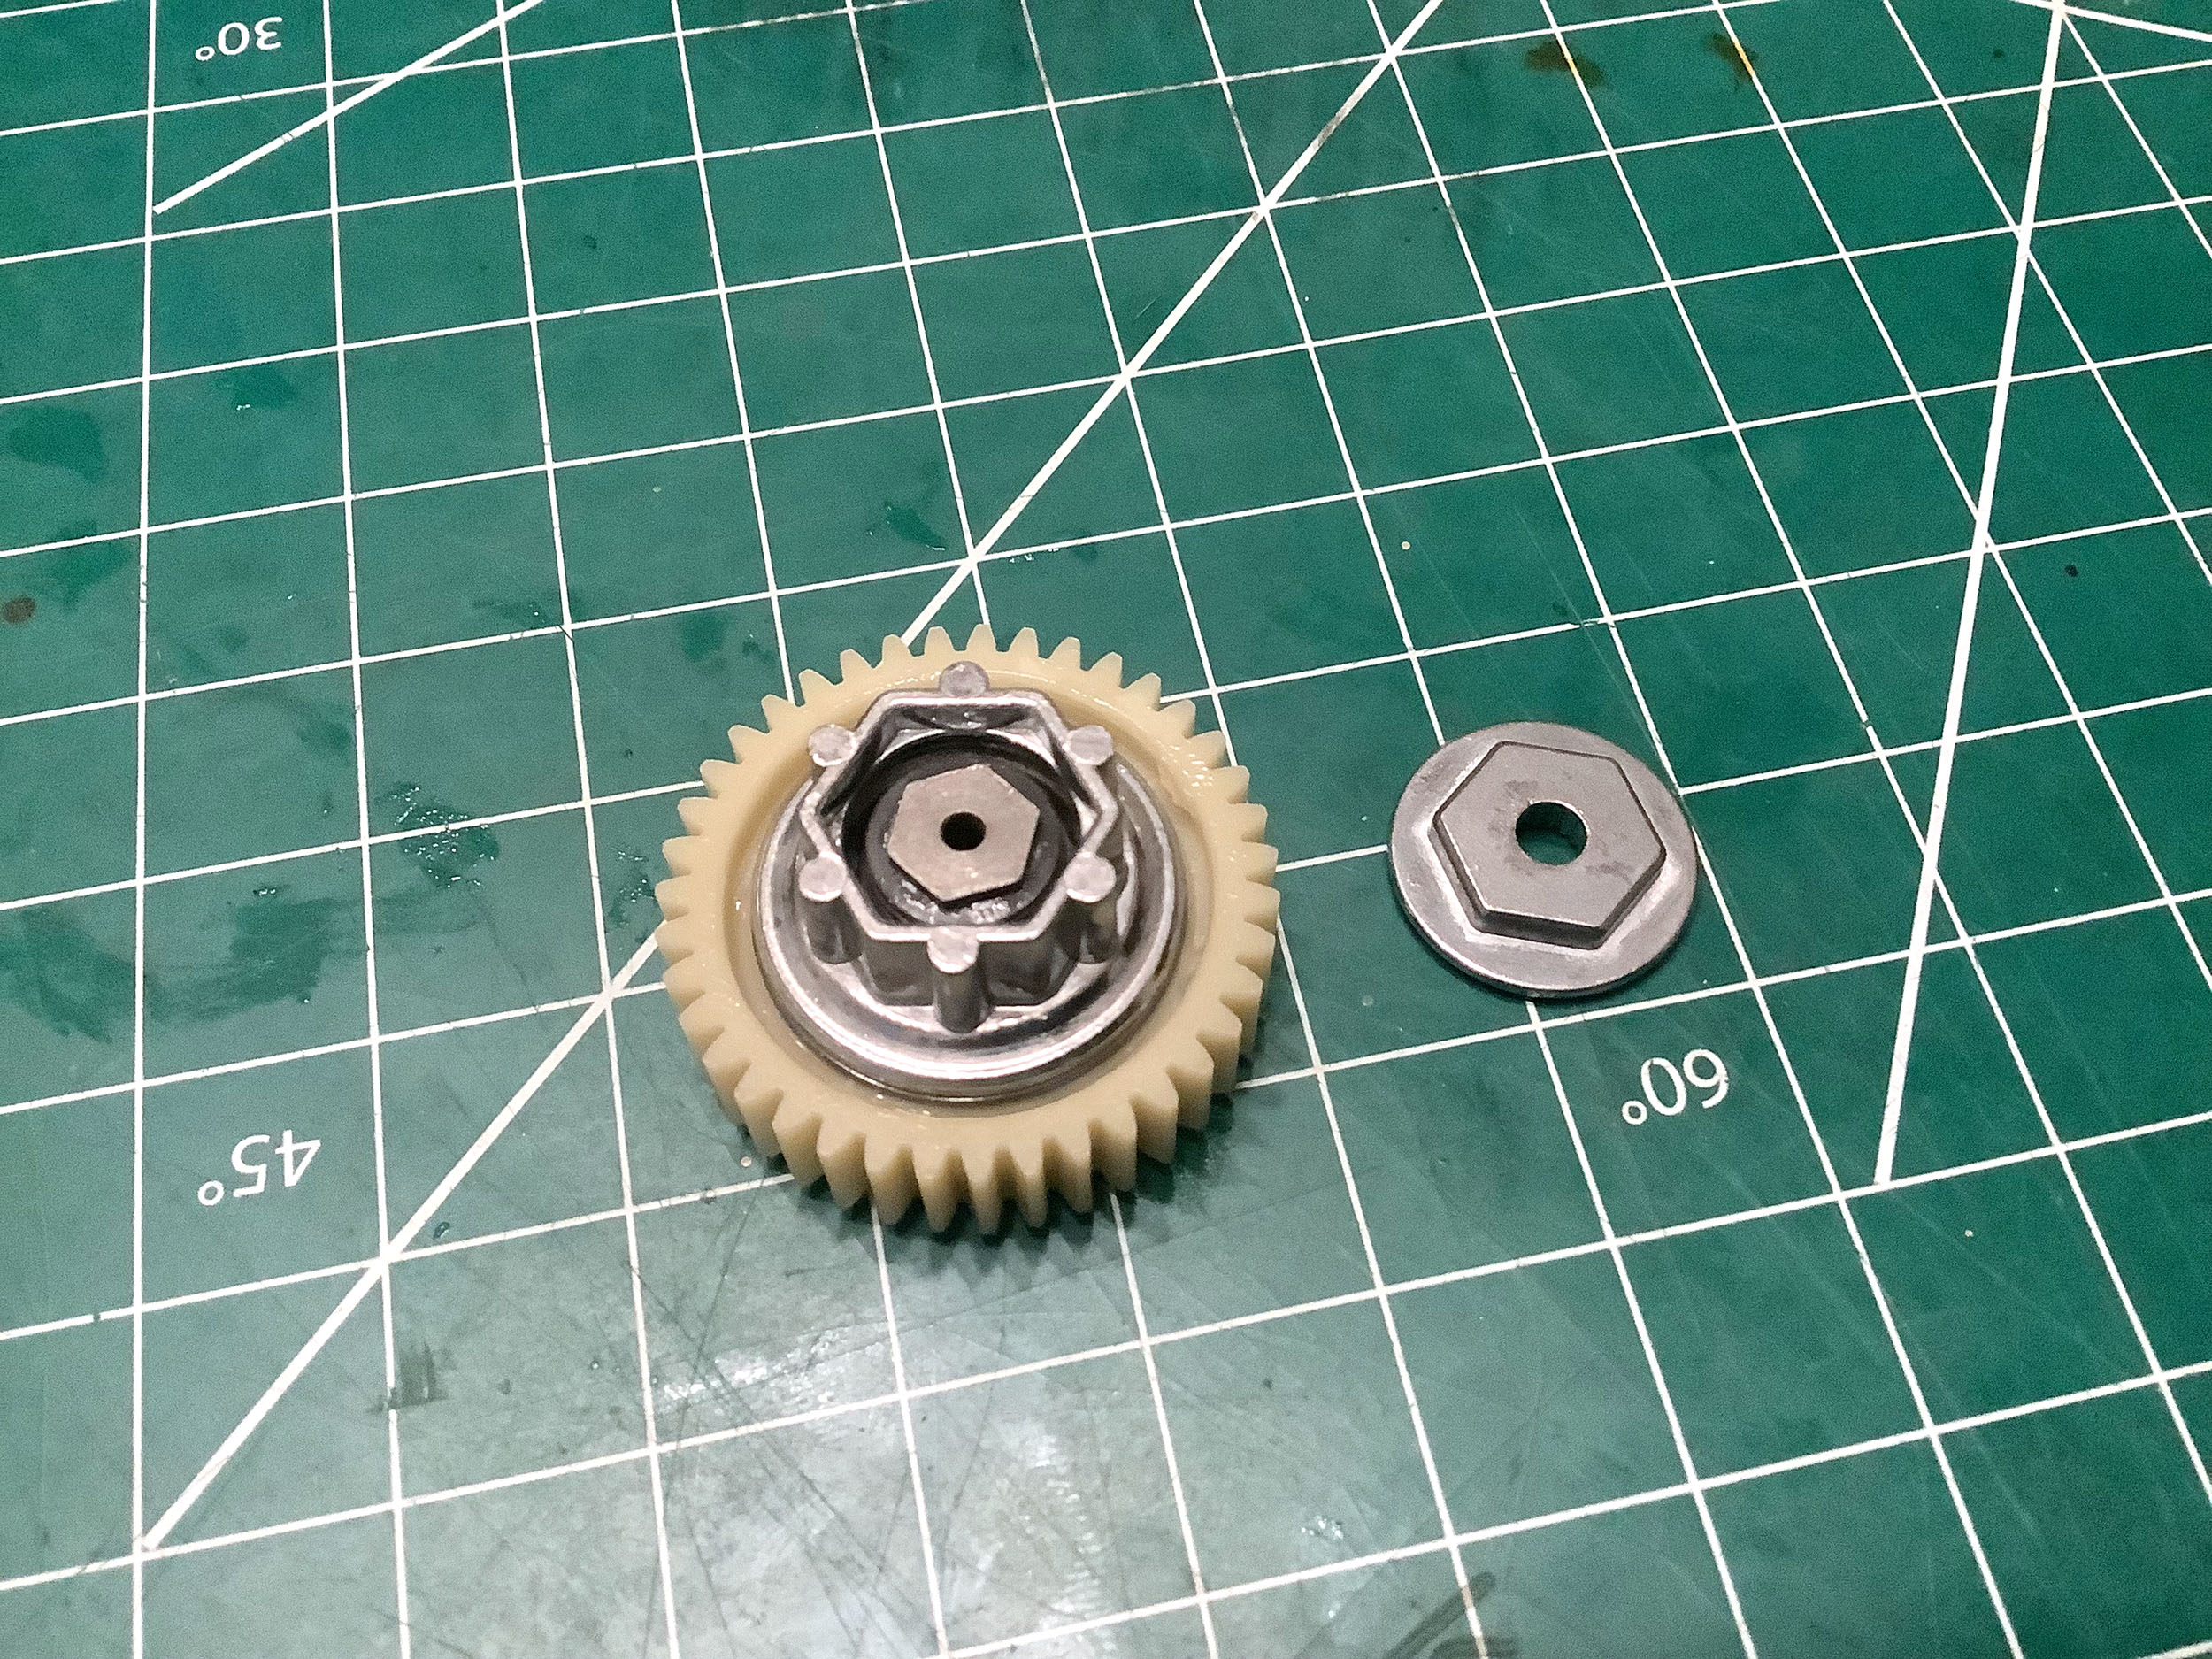
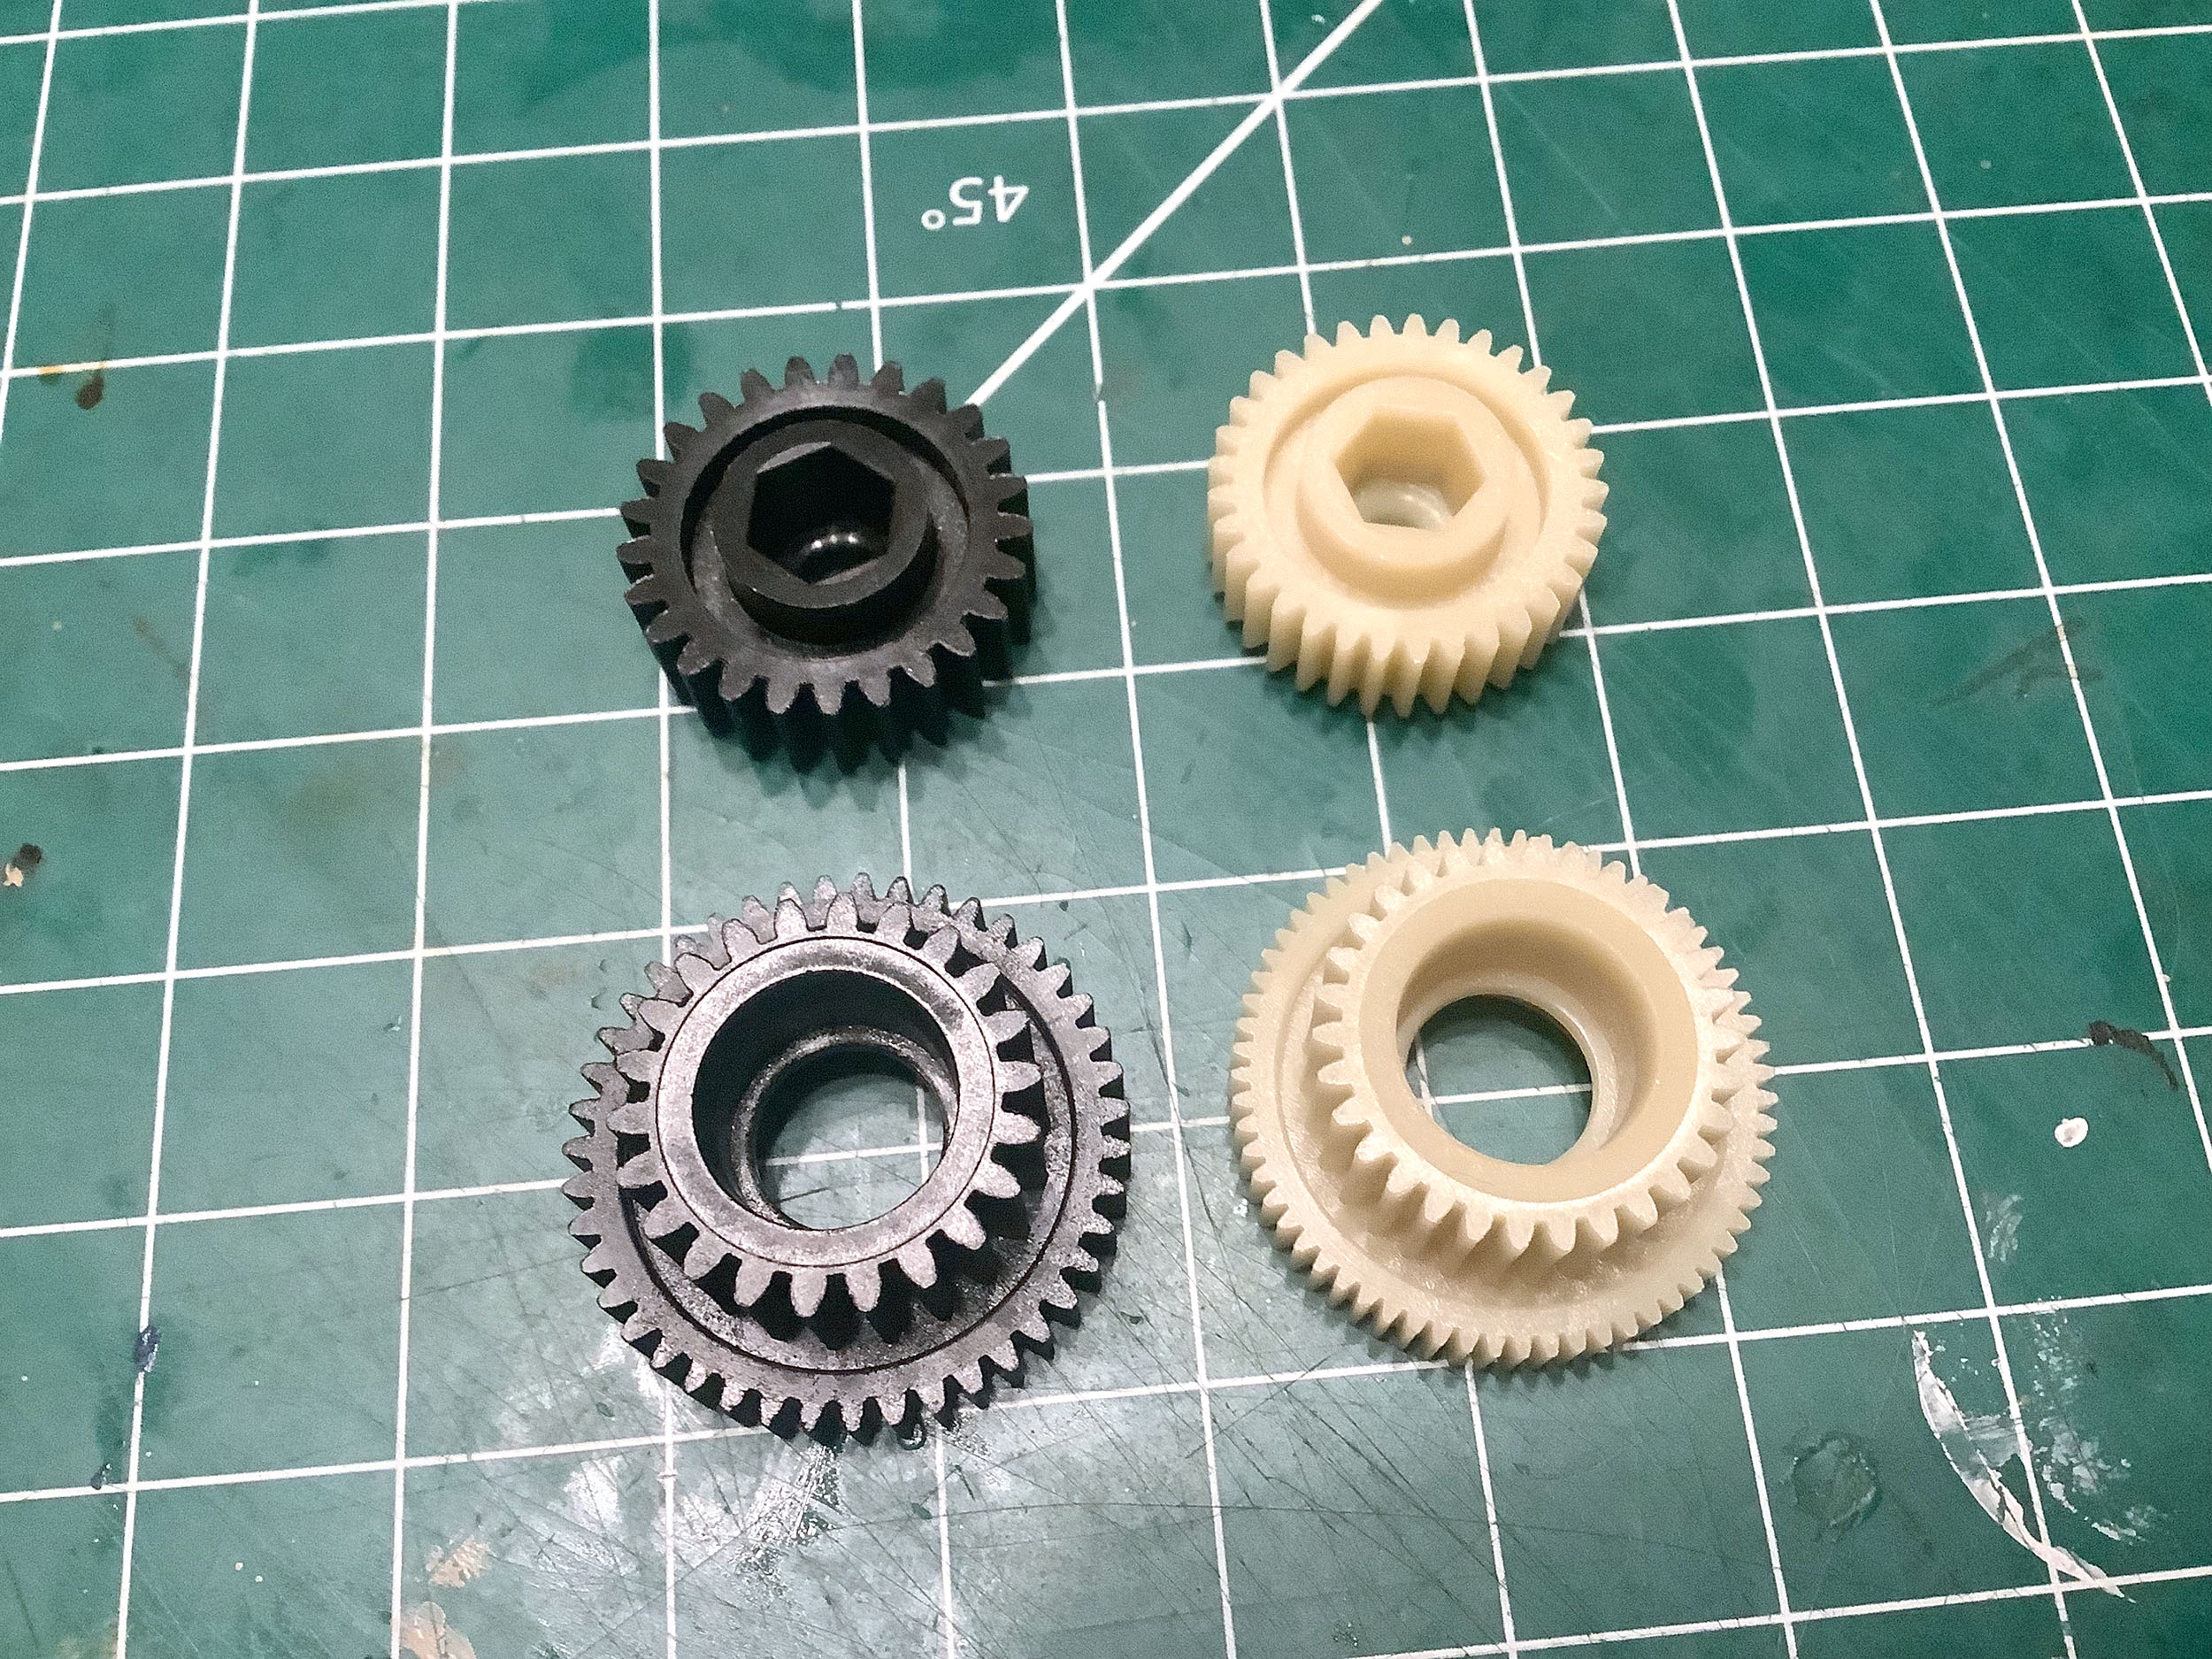
The TRF model comes with two sets of gears. The black gears are
from the standard model, are made from regular ABS plastic, and use a
combination of 0.8 mod gears for drive and 0.6 mod gears for the
spur. The white gears are Nylon and use a finer combination of 0.6
mod gears for drive and 0.4 mod gears for the spur. Only the
white gears are used for the TRF model. The finer gears are
quieter and offer more pinion options, but are also less strong.
The Nylon should offer better wear and friction properties as
well. It was a good idea for Tamiya to make these gears a
different color because they cannot be mixed.
|
Standard
|
TRF
|
Counter Gear
|
25T
|
33T
|
Spur Gear (inner)
|
22T
|
30T
|
Spur Gear (outer)
|
43T
|
63T
|
Here you can again see the difference in gears, the ball bearings, the
purple ball studs, and the split hex on the counter shaft. The
white drive gear mates with the differential so it is the same pitch and tooth count (16T) as the standard gear.
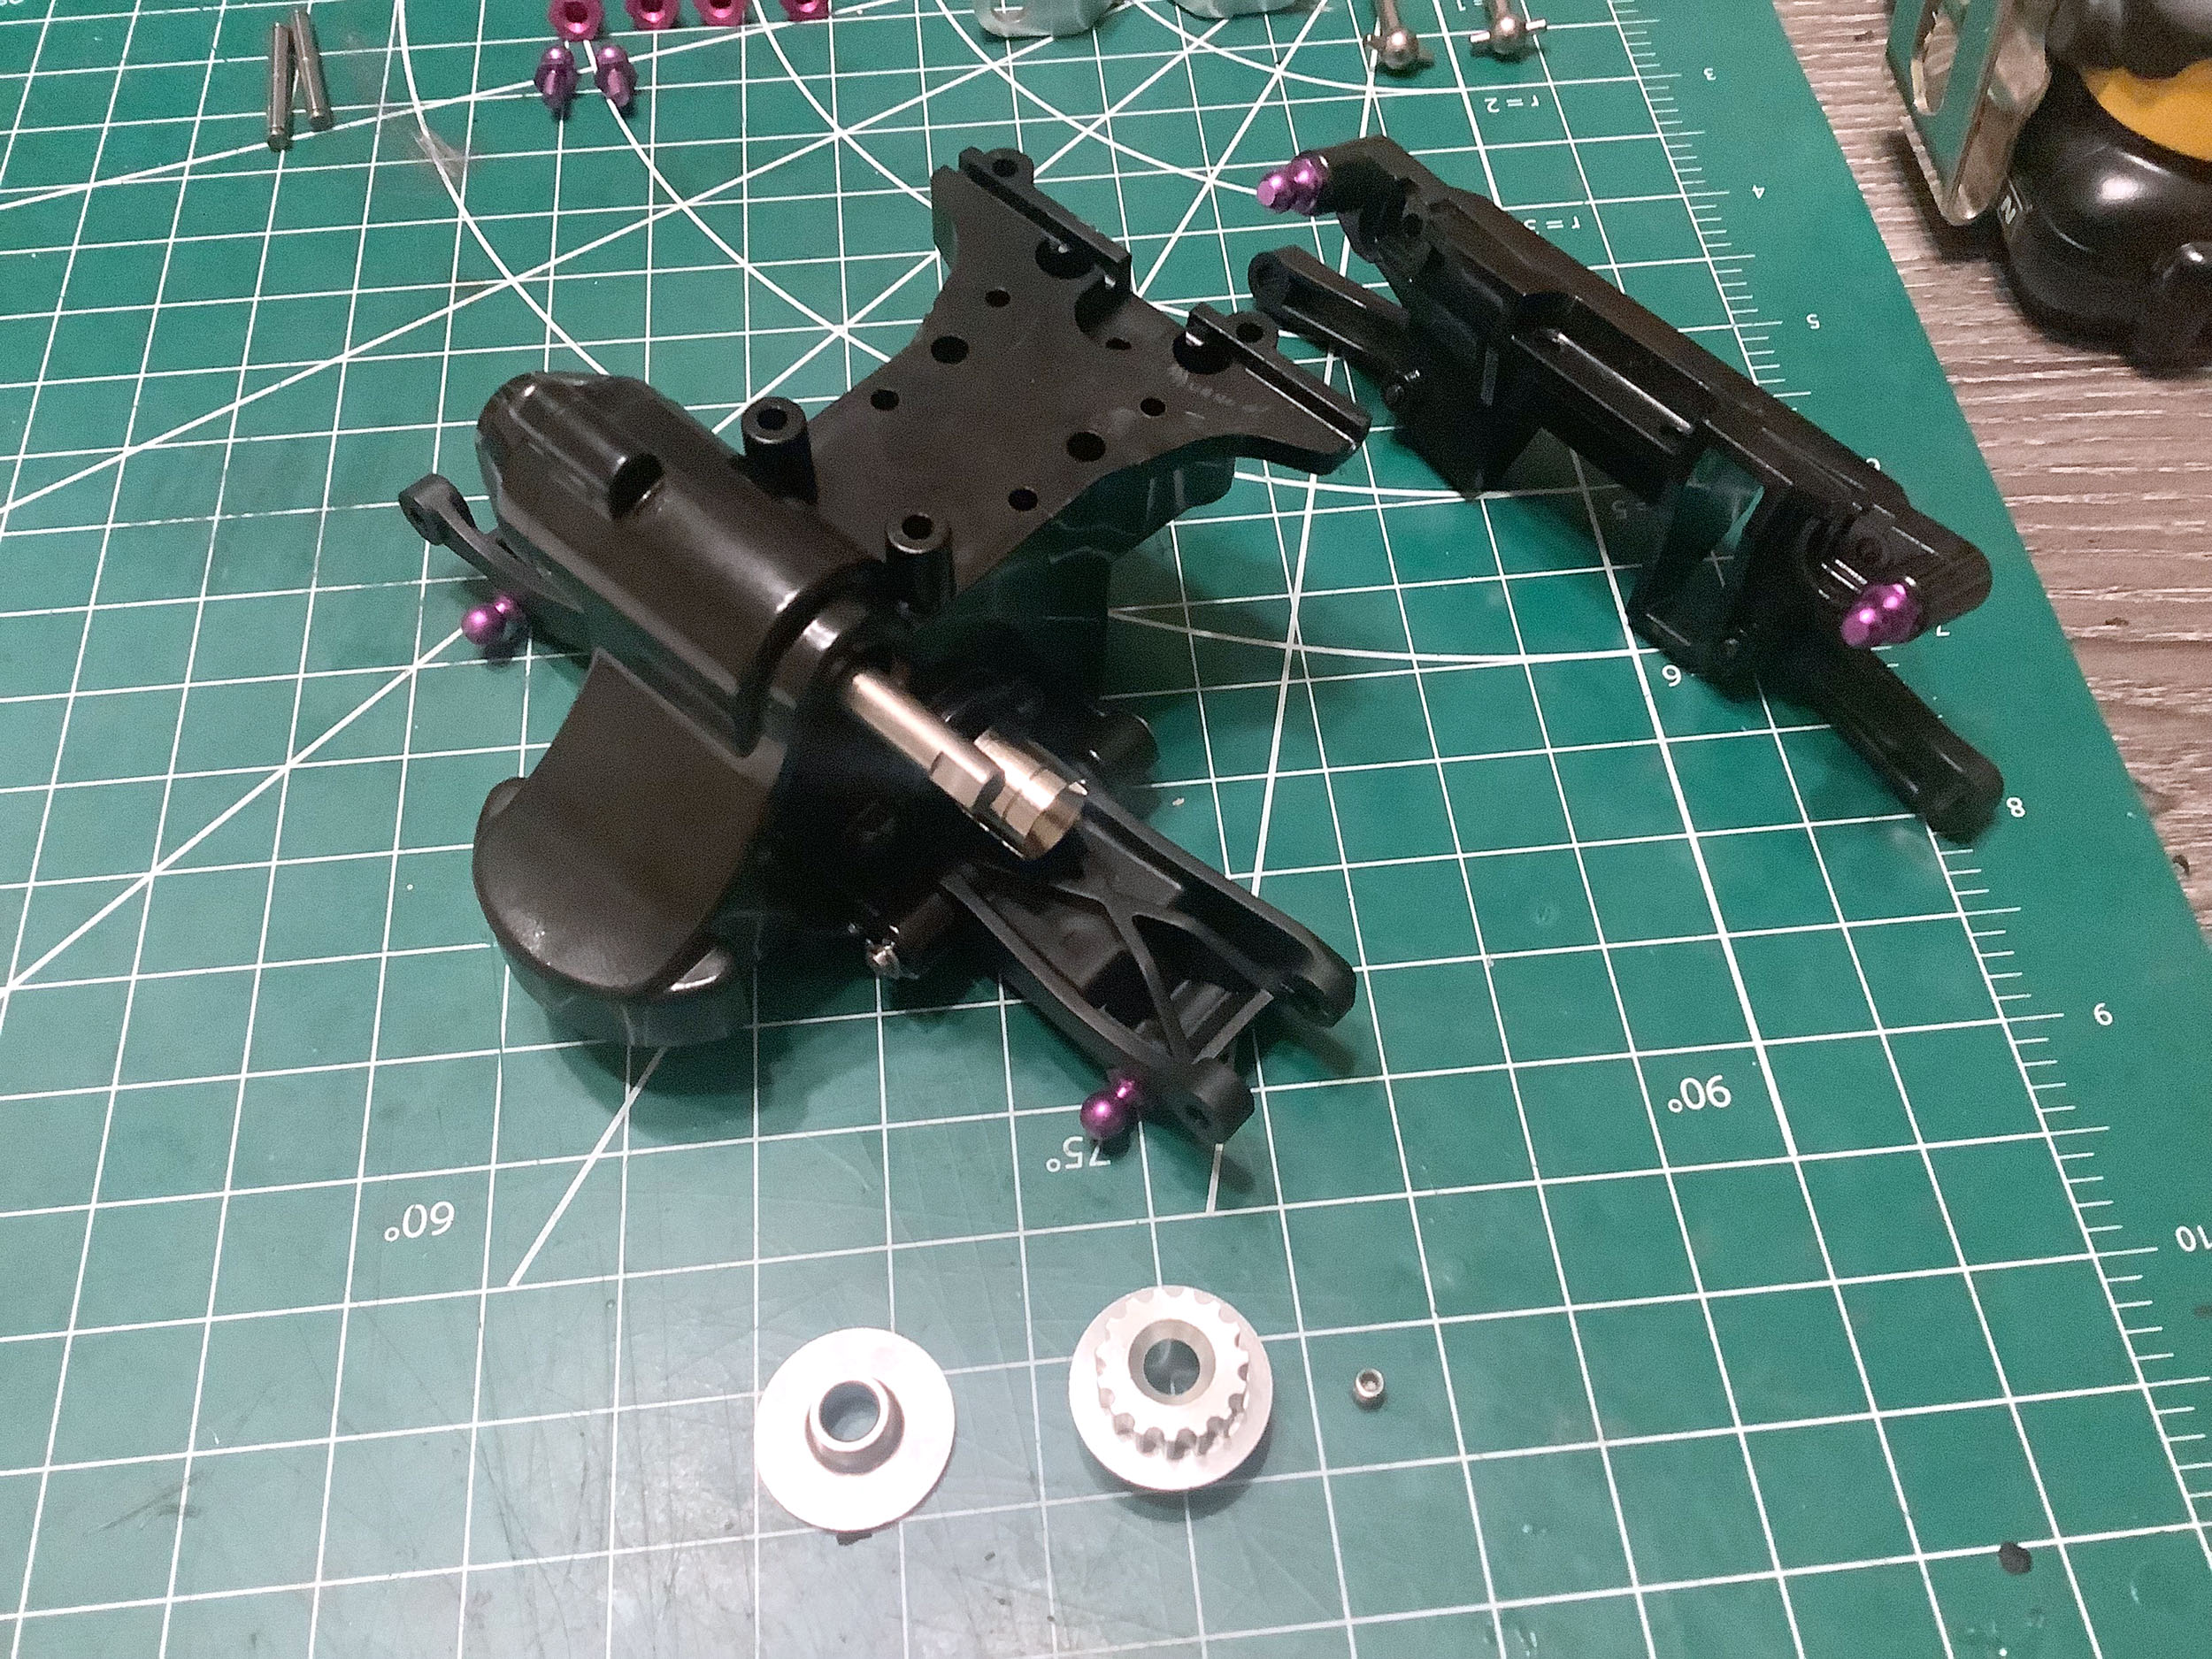
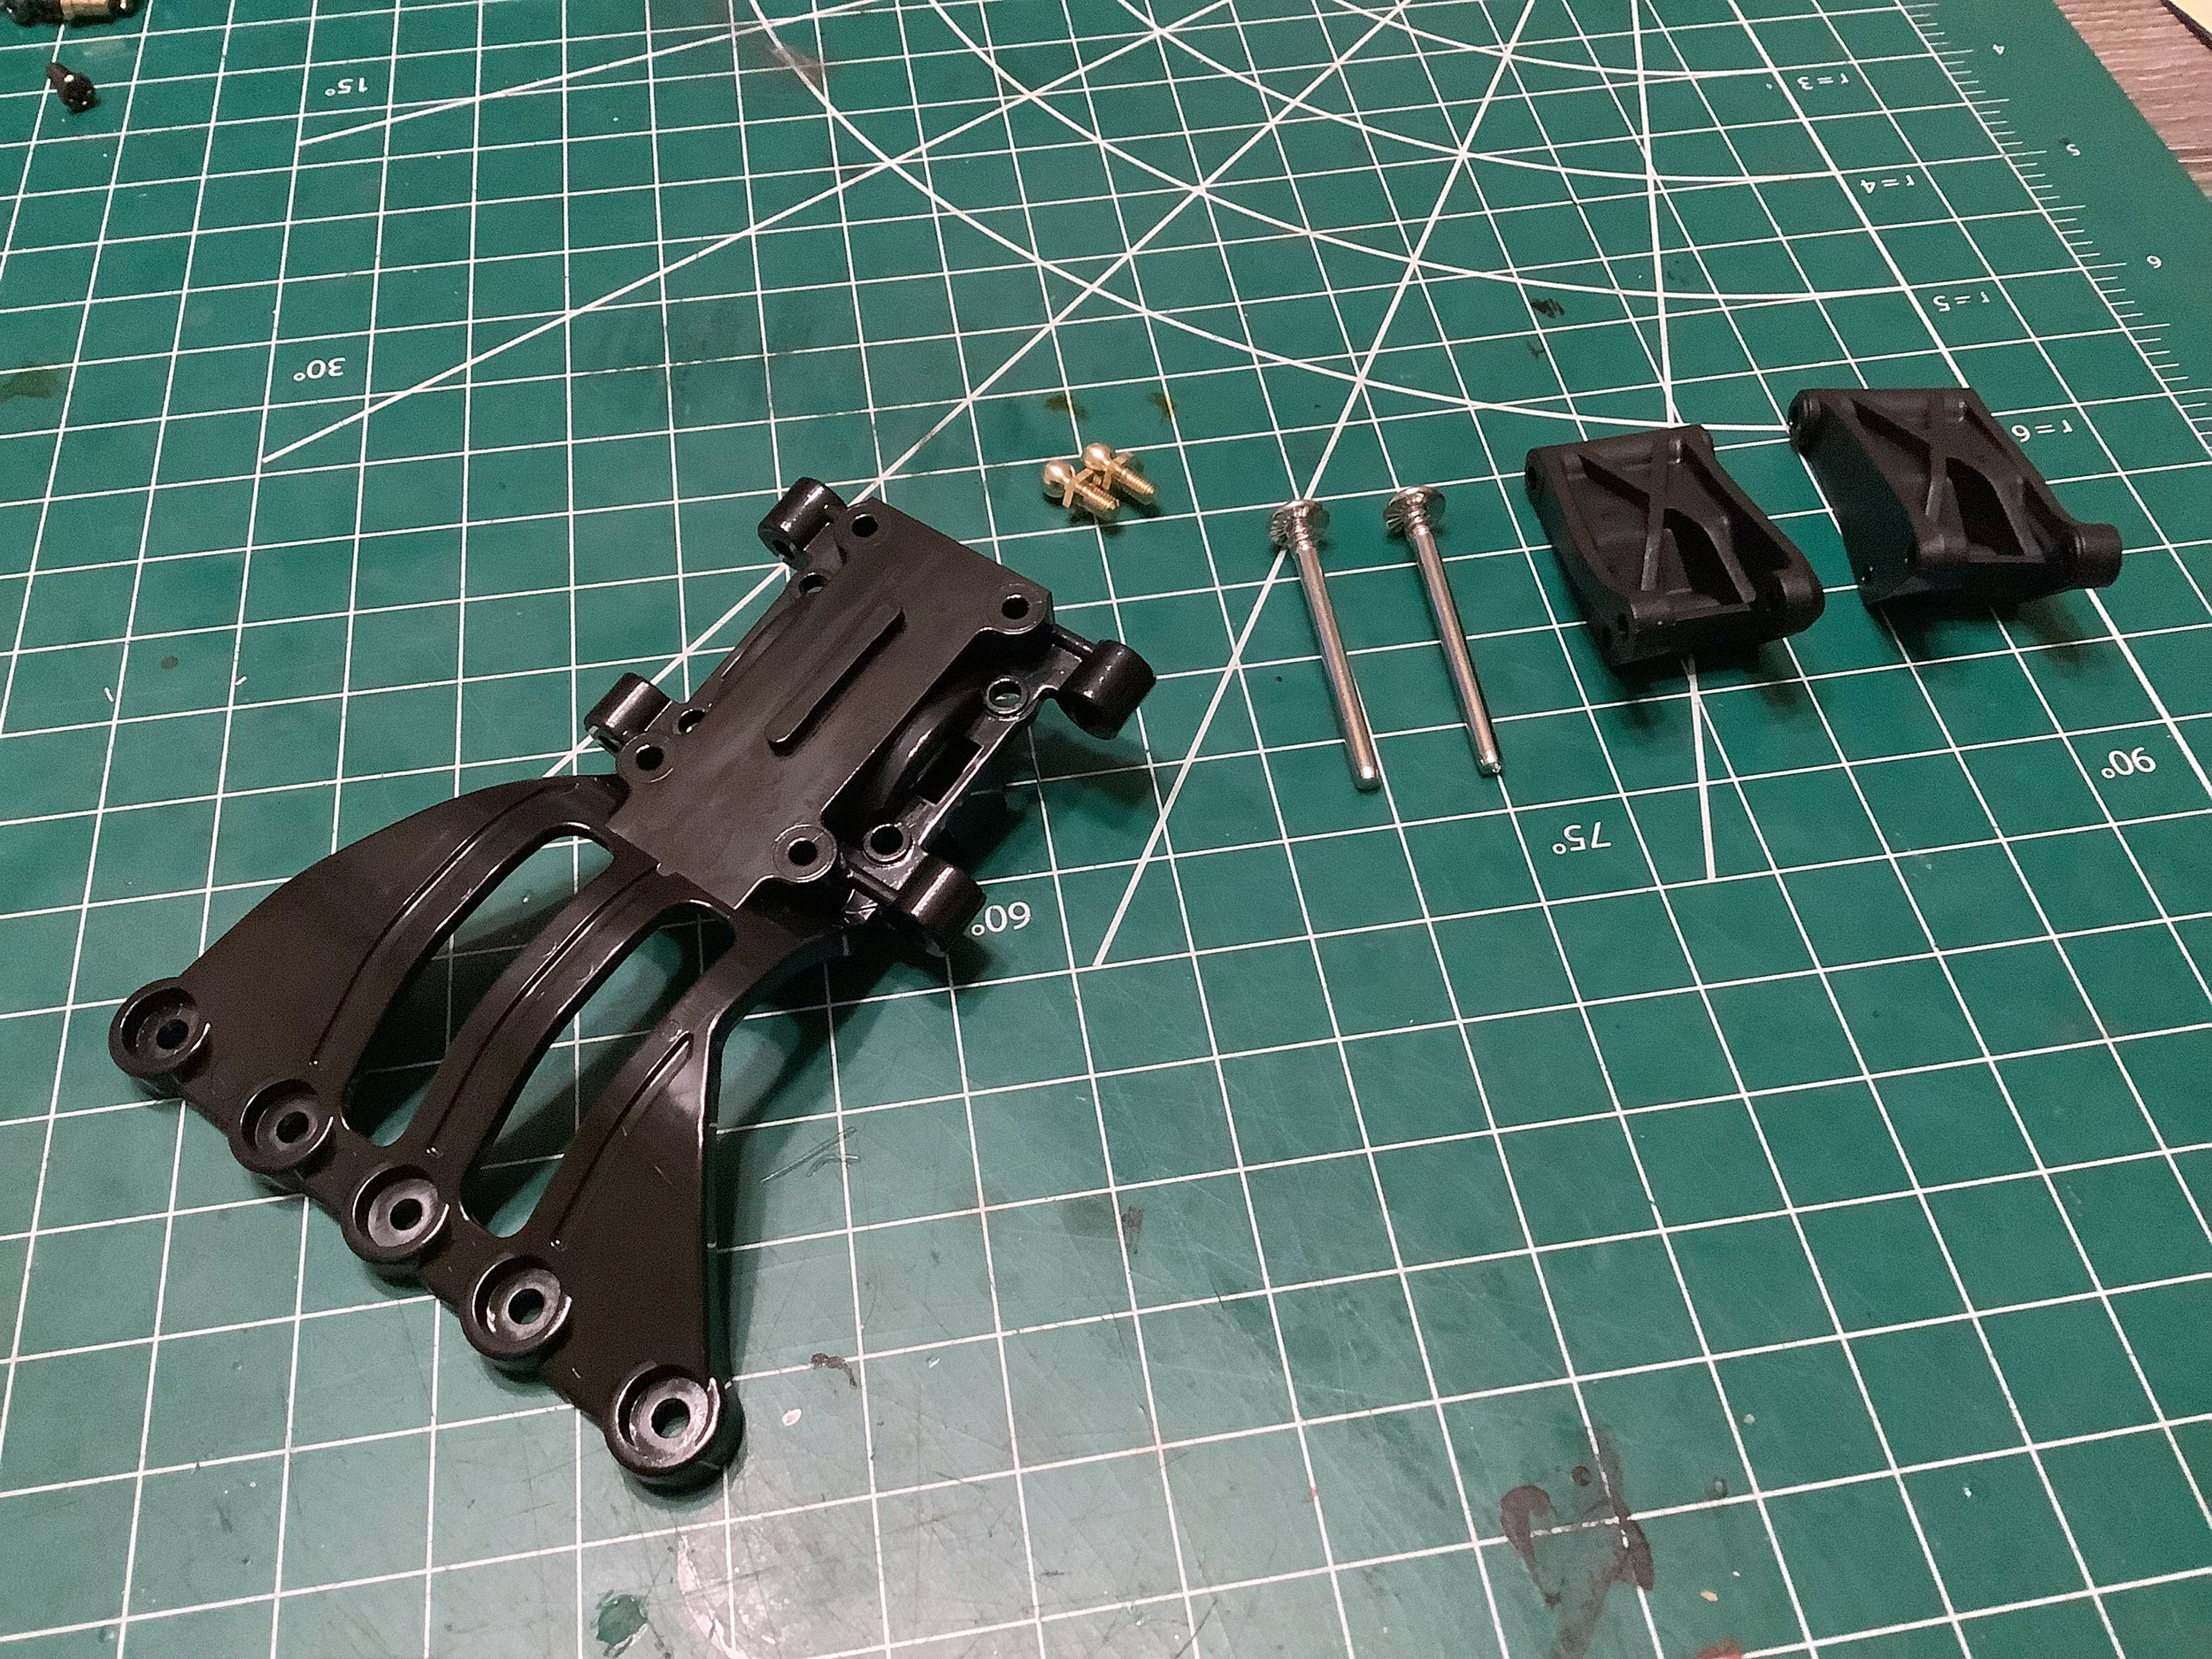
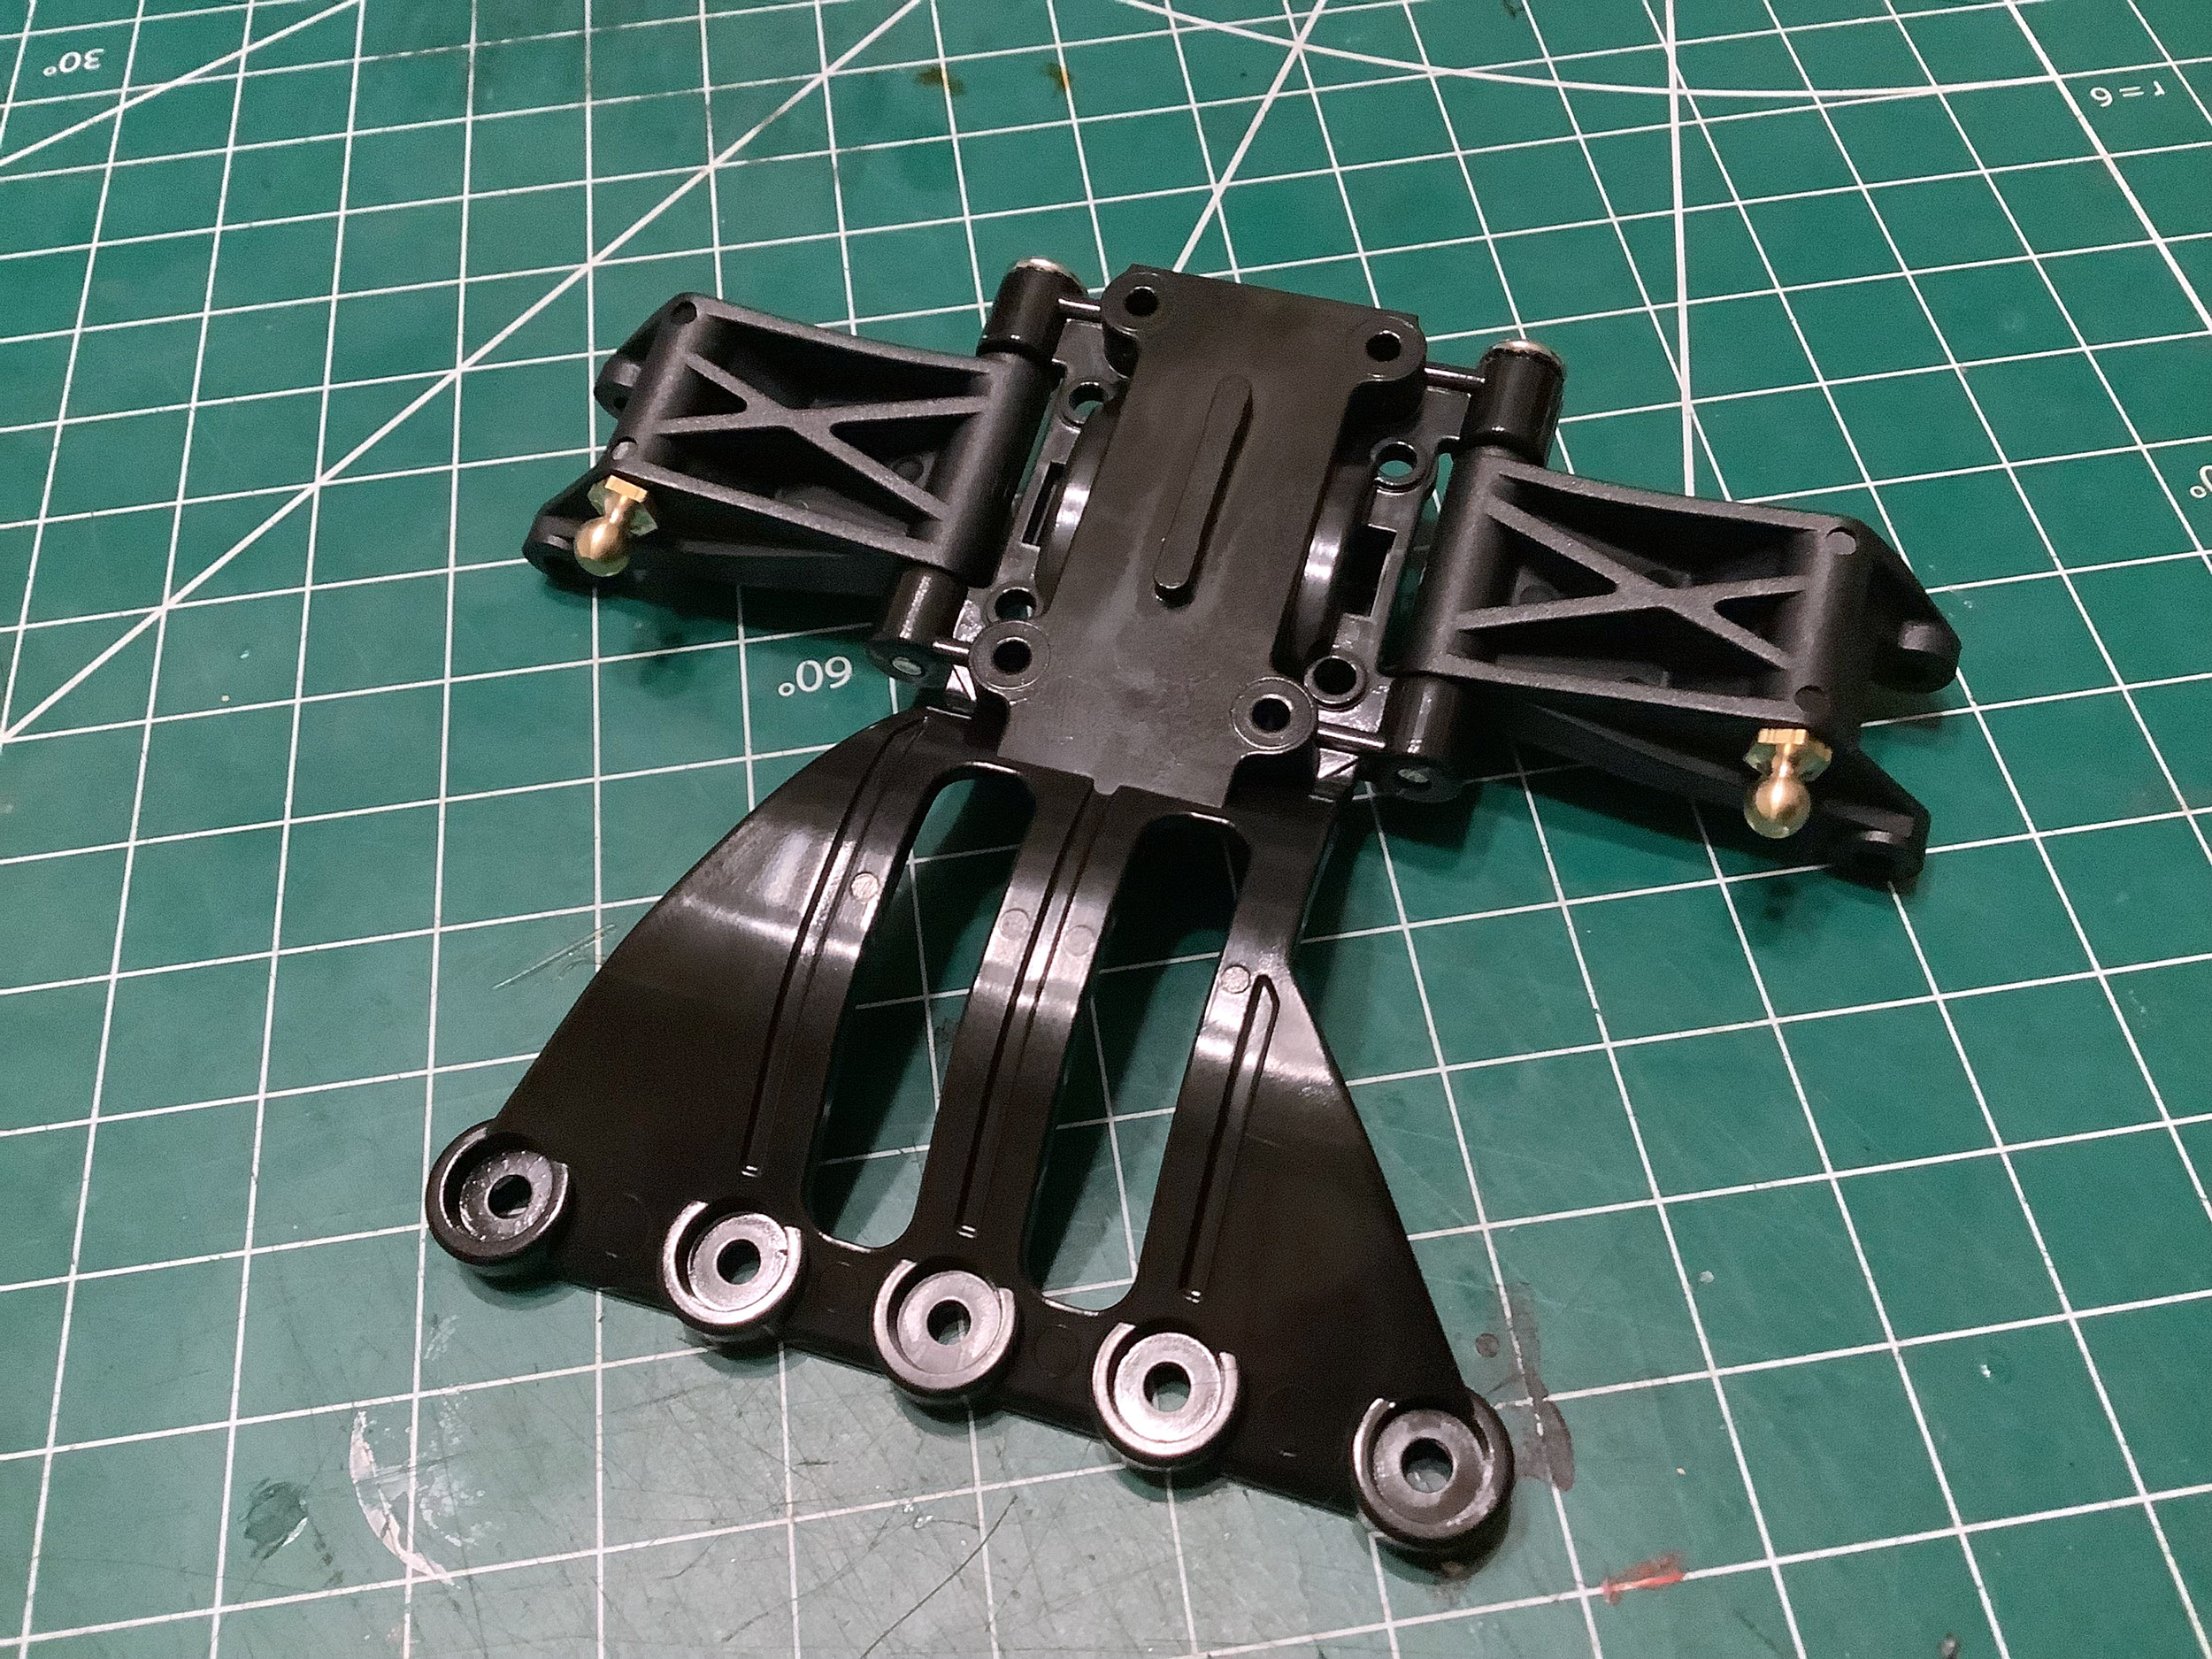
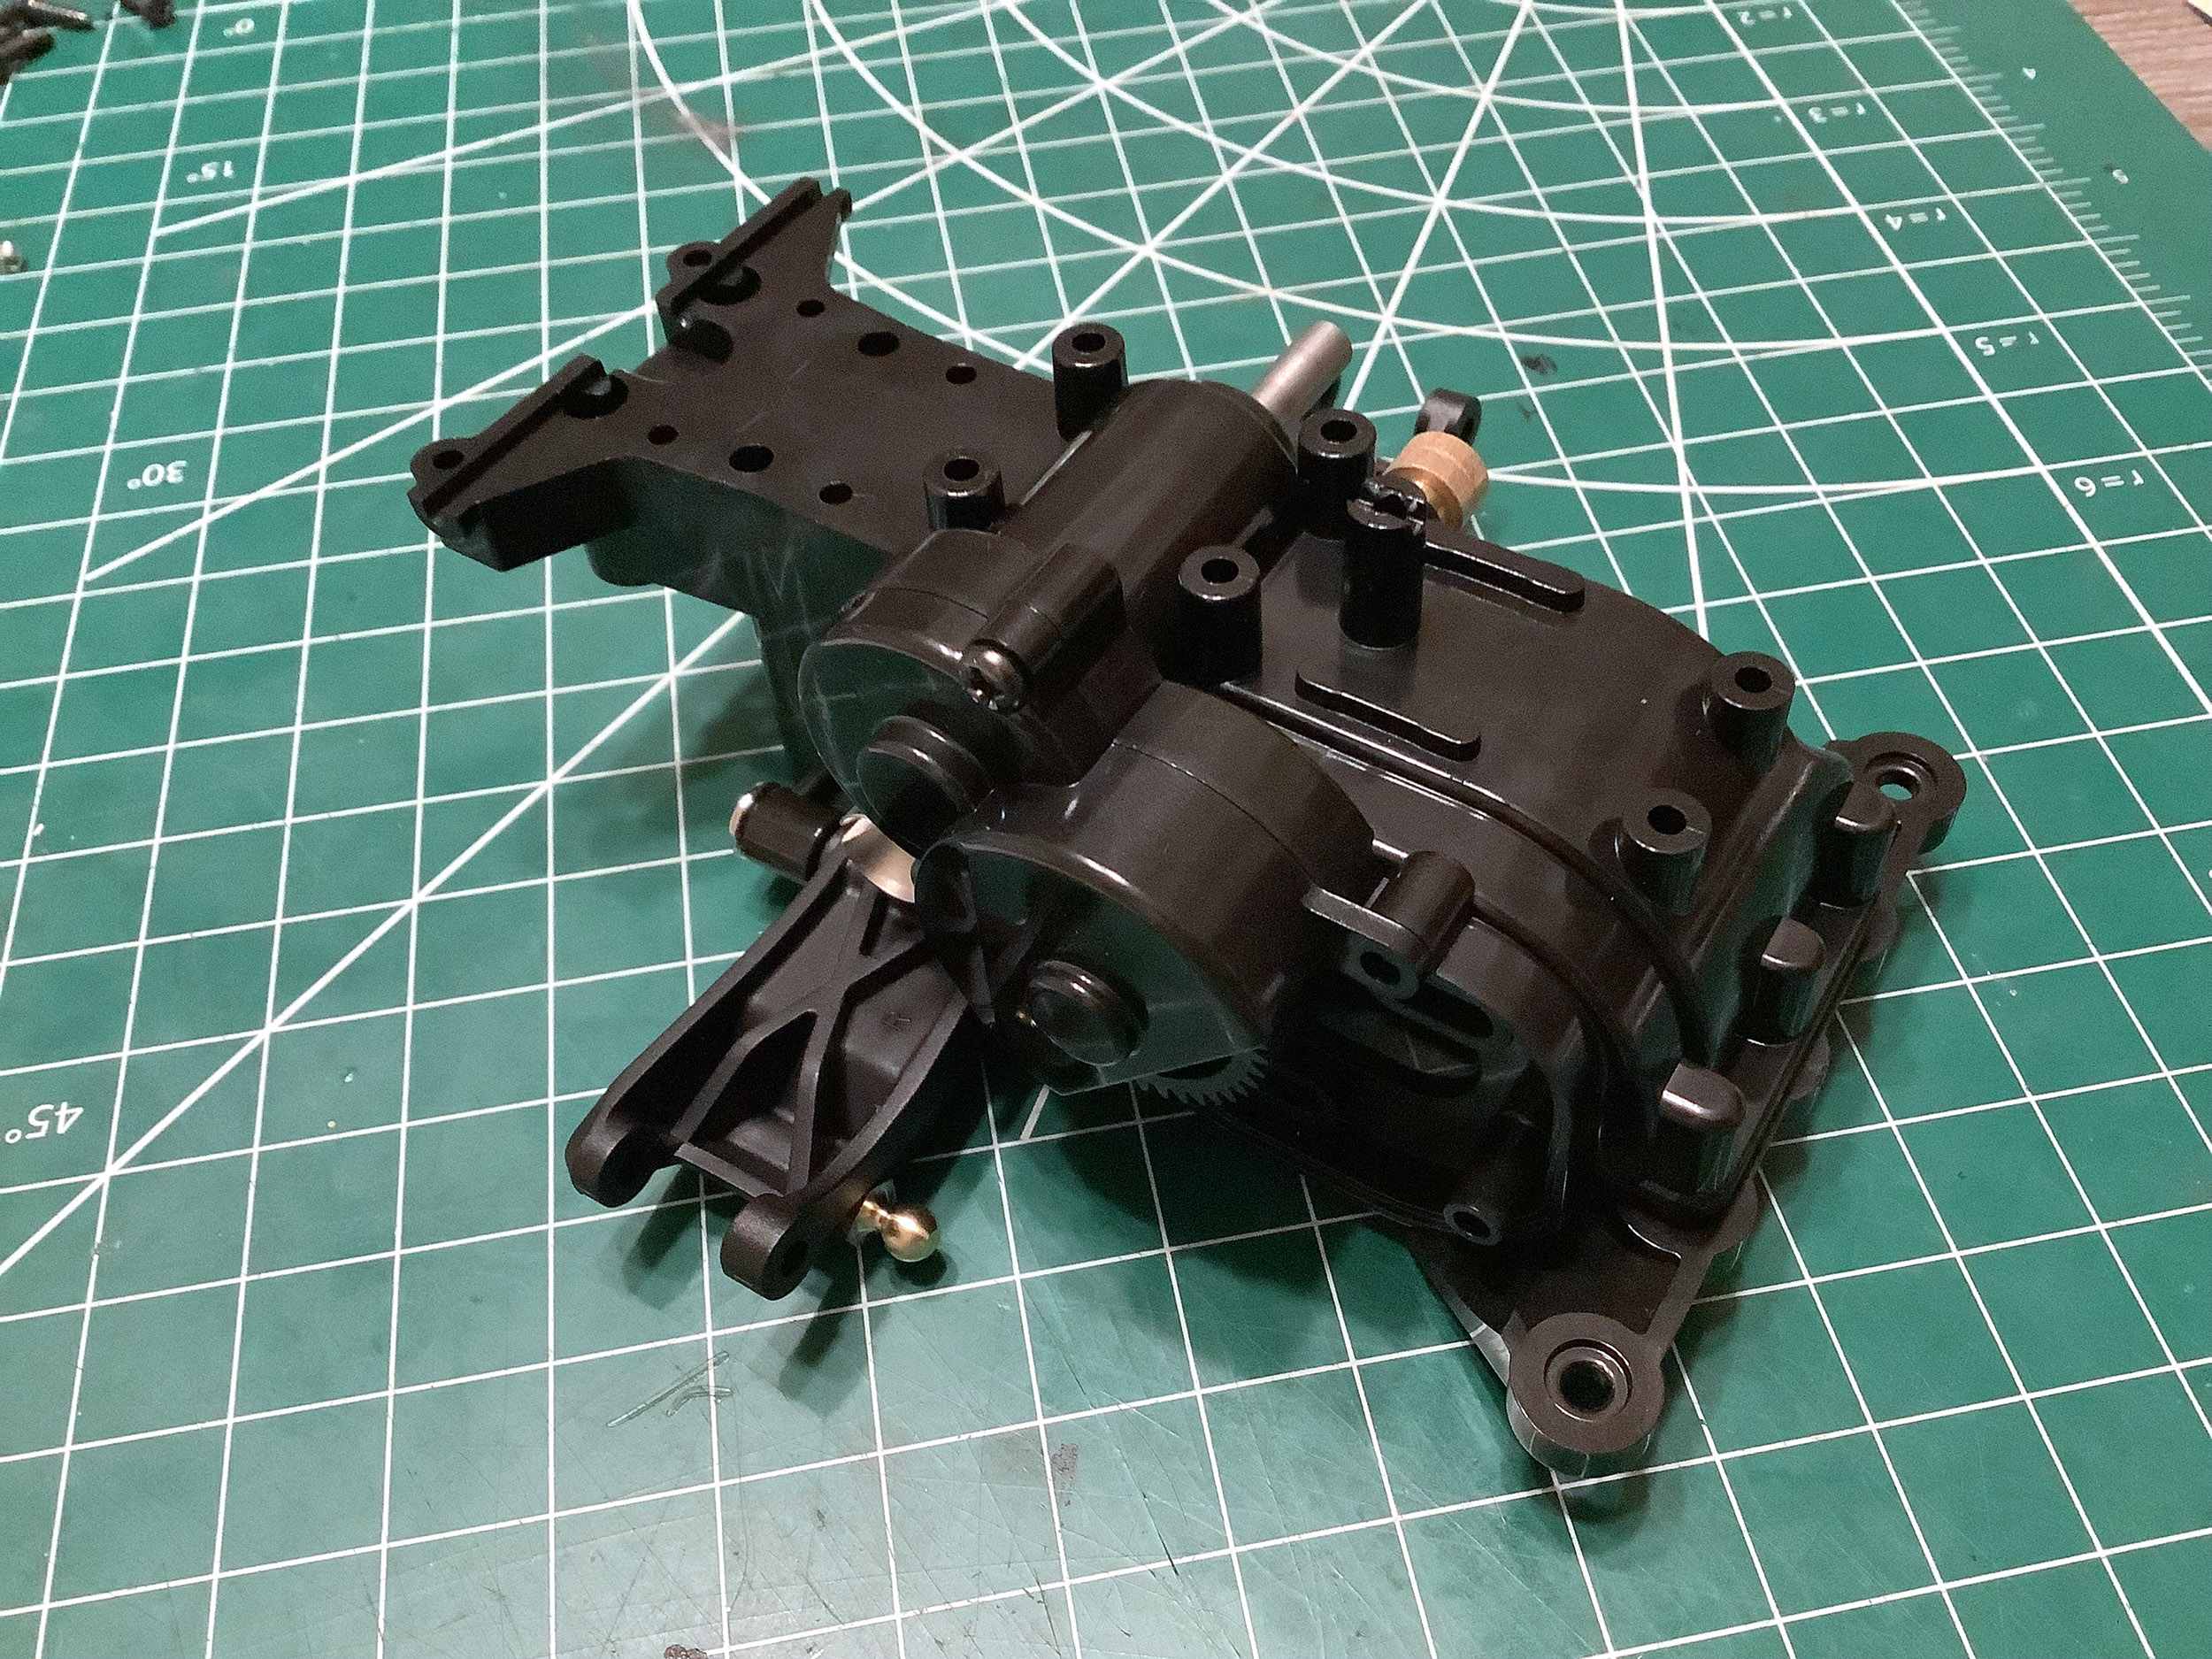
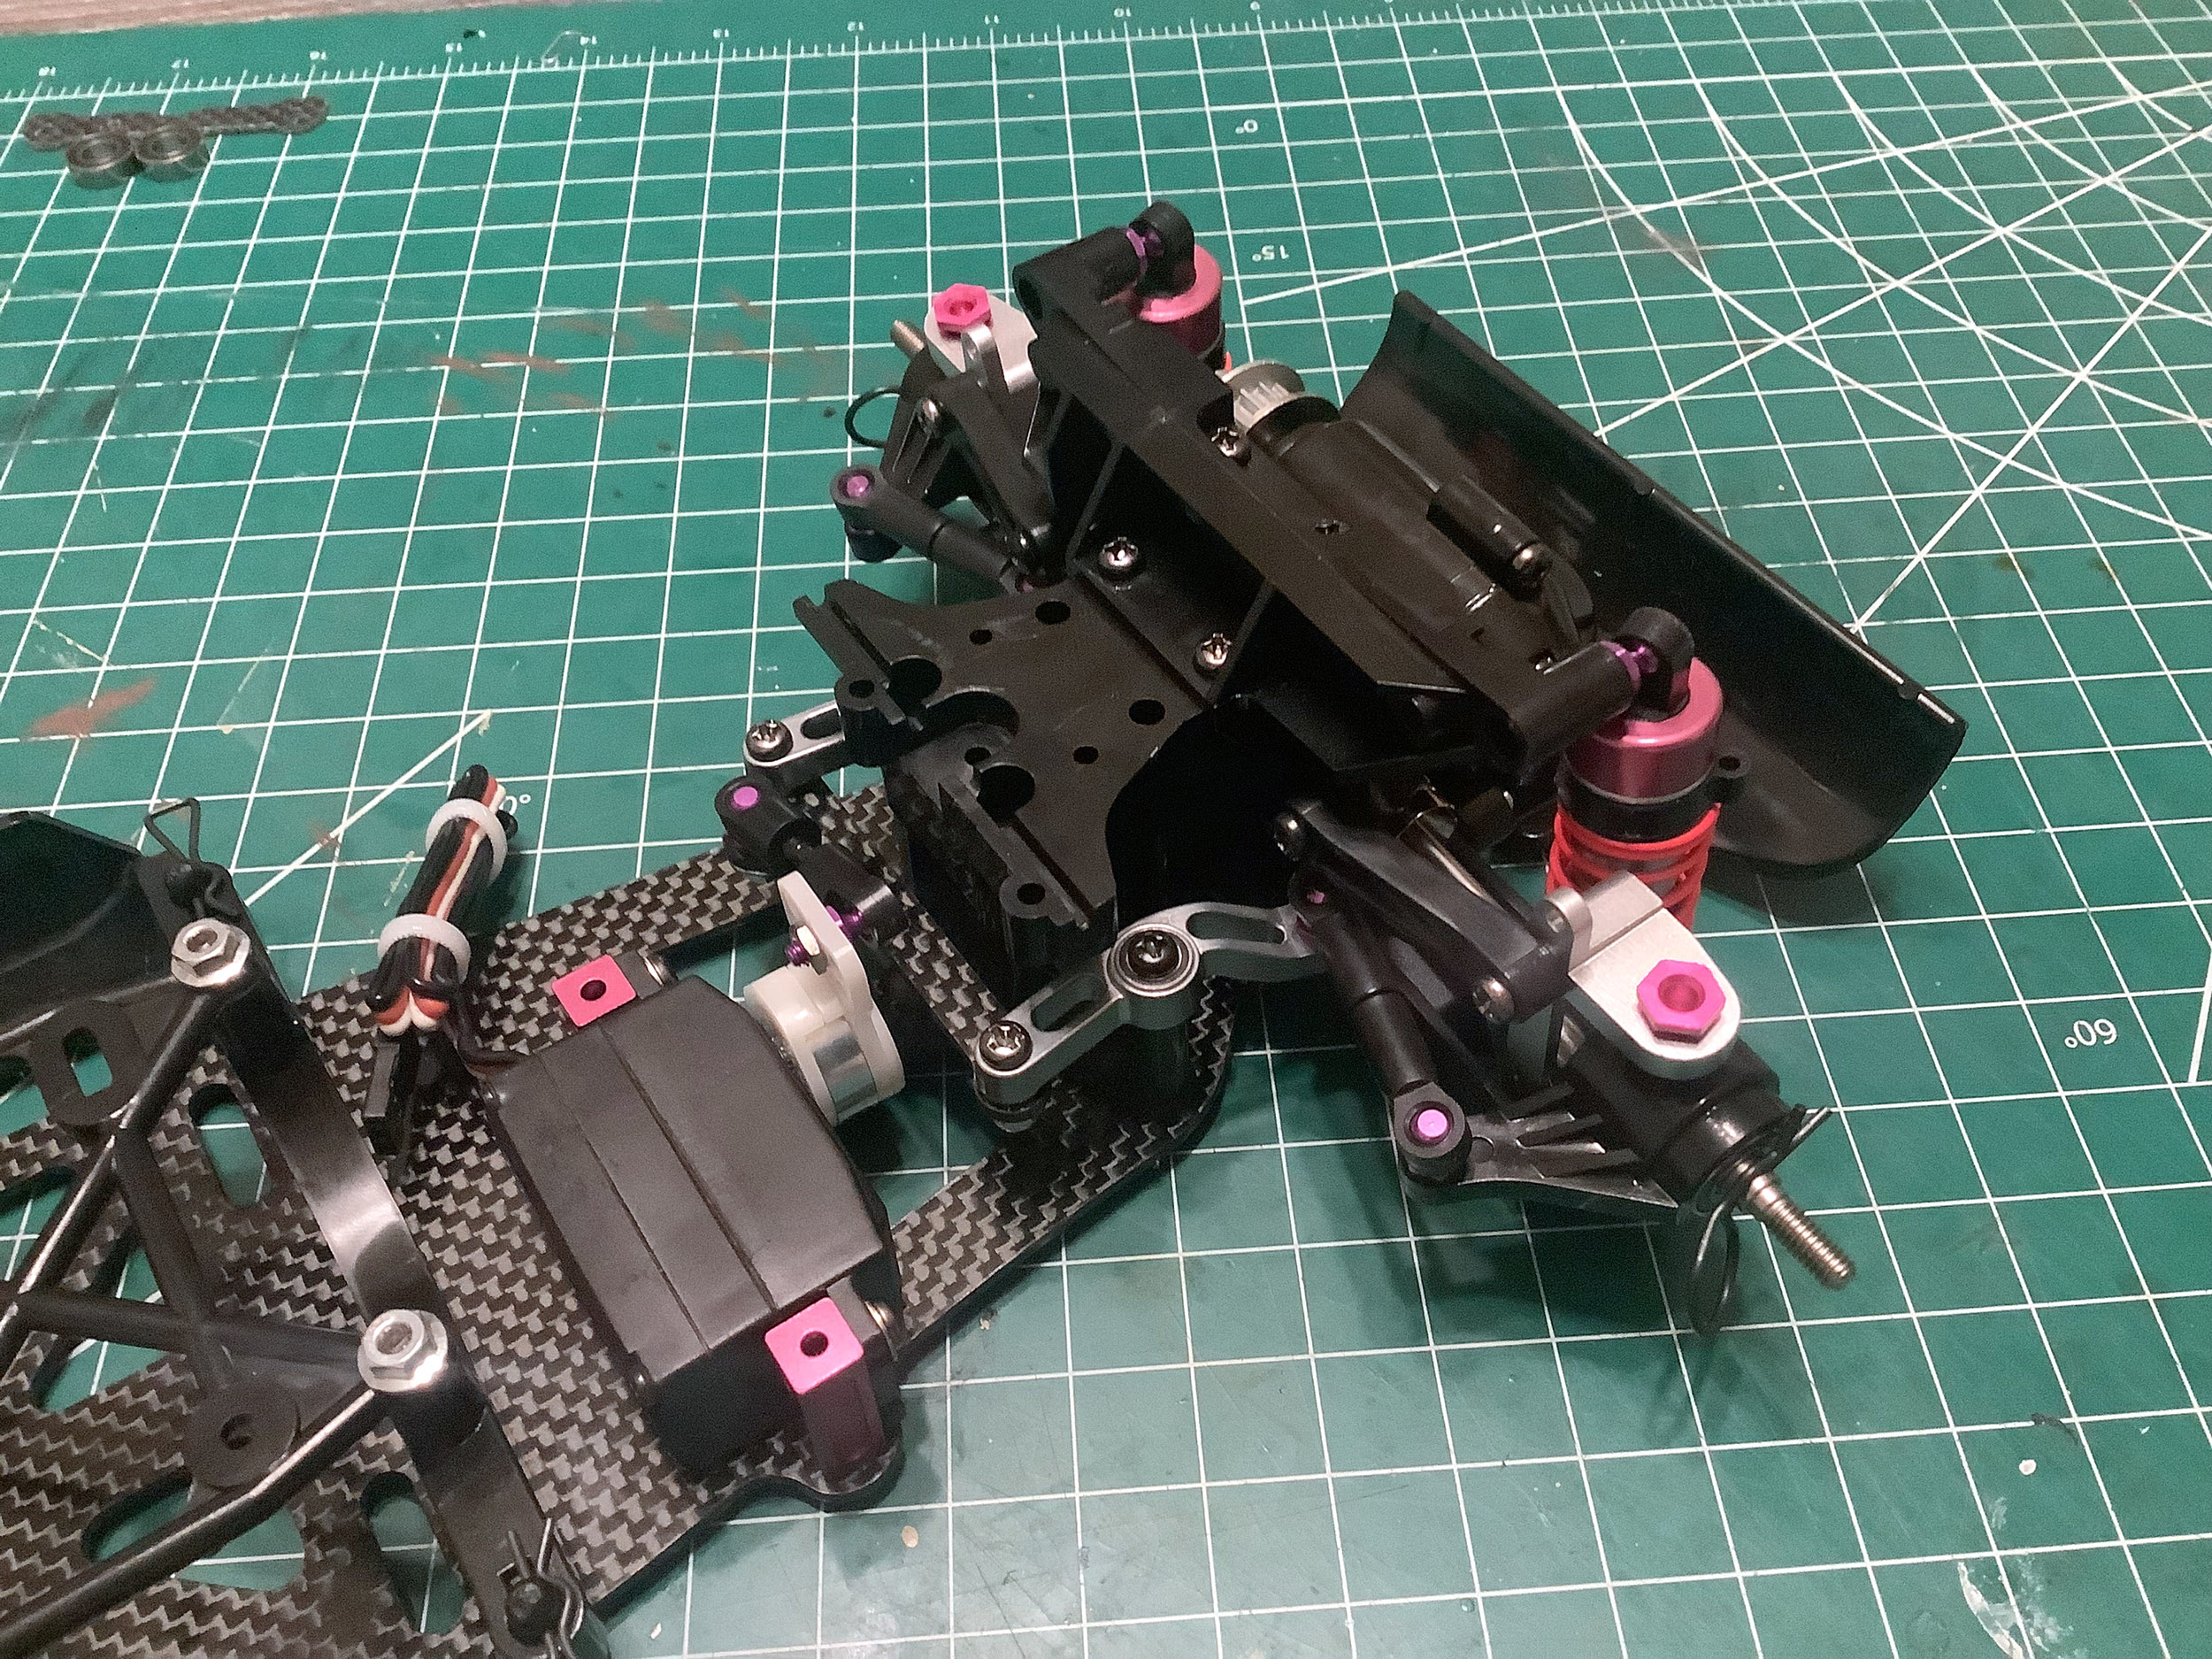
Here are the assembled rear shock towers with upper suspension links and the gear sets for the rear transmission.
An exploded view with the gears, fasteners, and cover is shown
here. The other differences have been explained in previous steps,
but the fasteners and gear cover are the same between the standard and
TRF versions here.
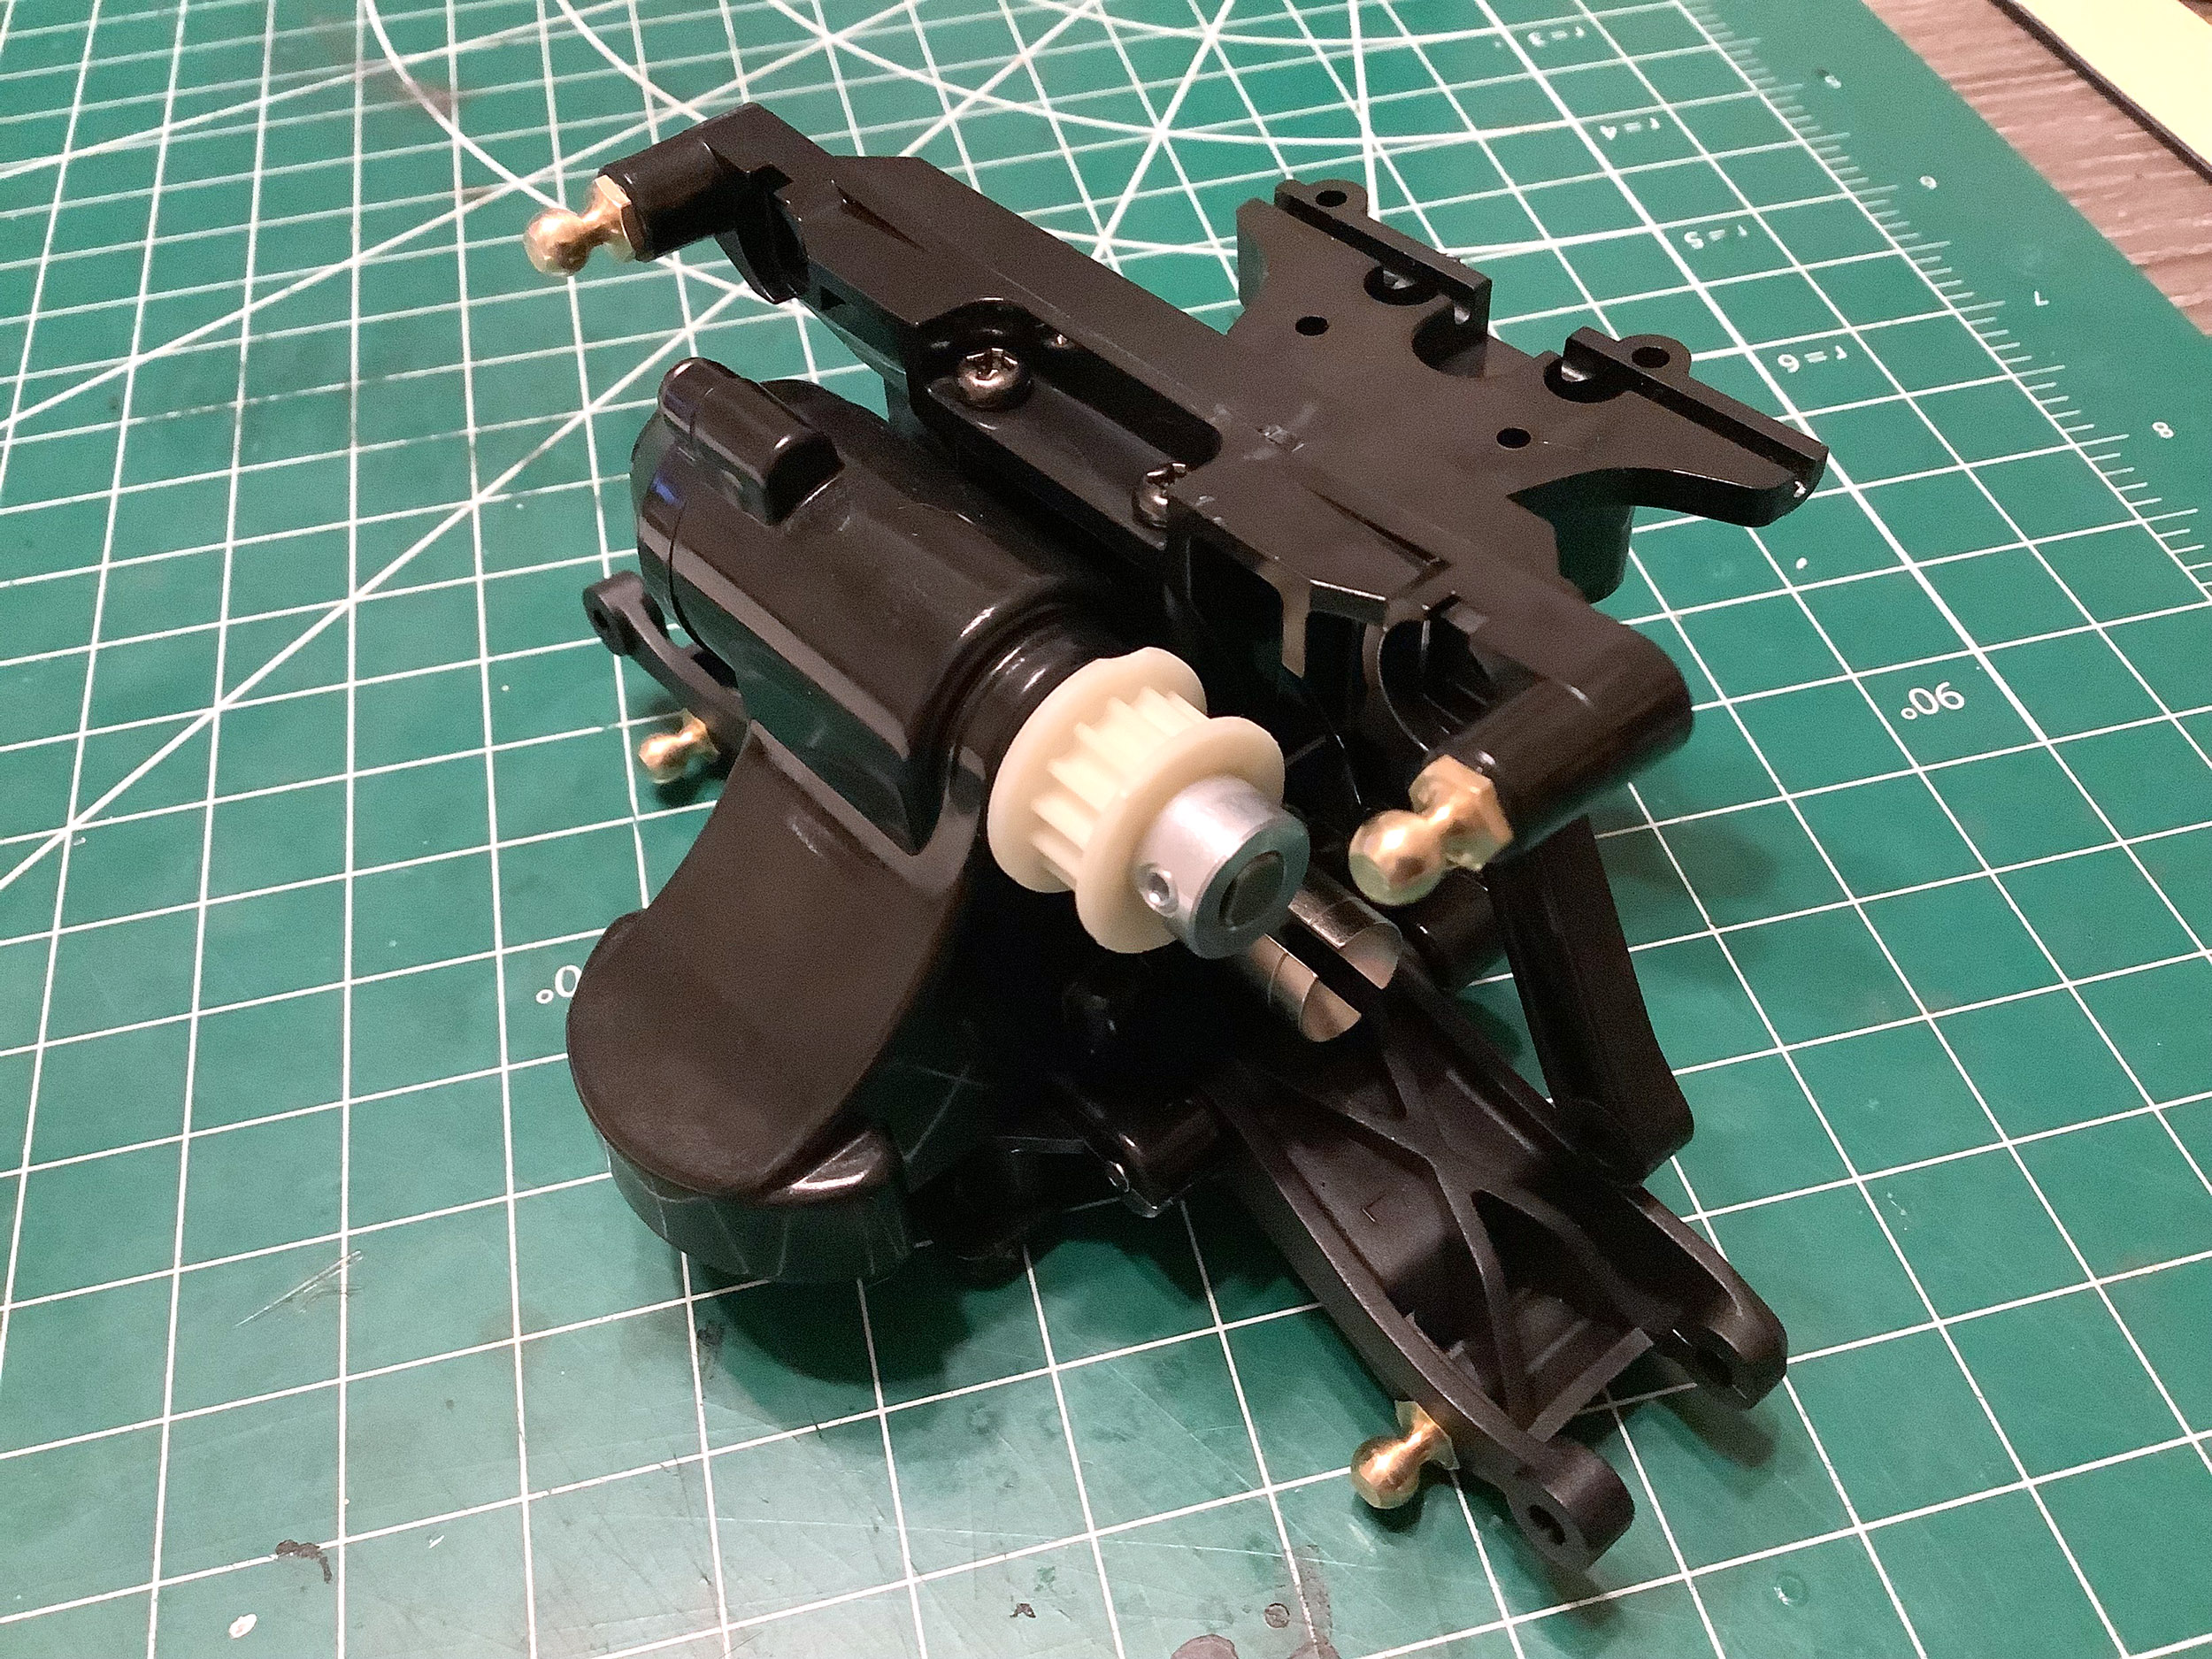
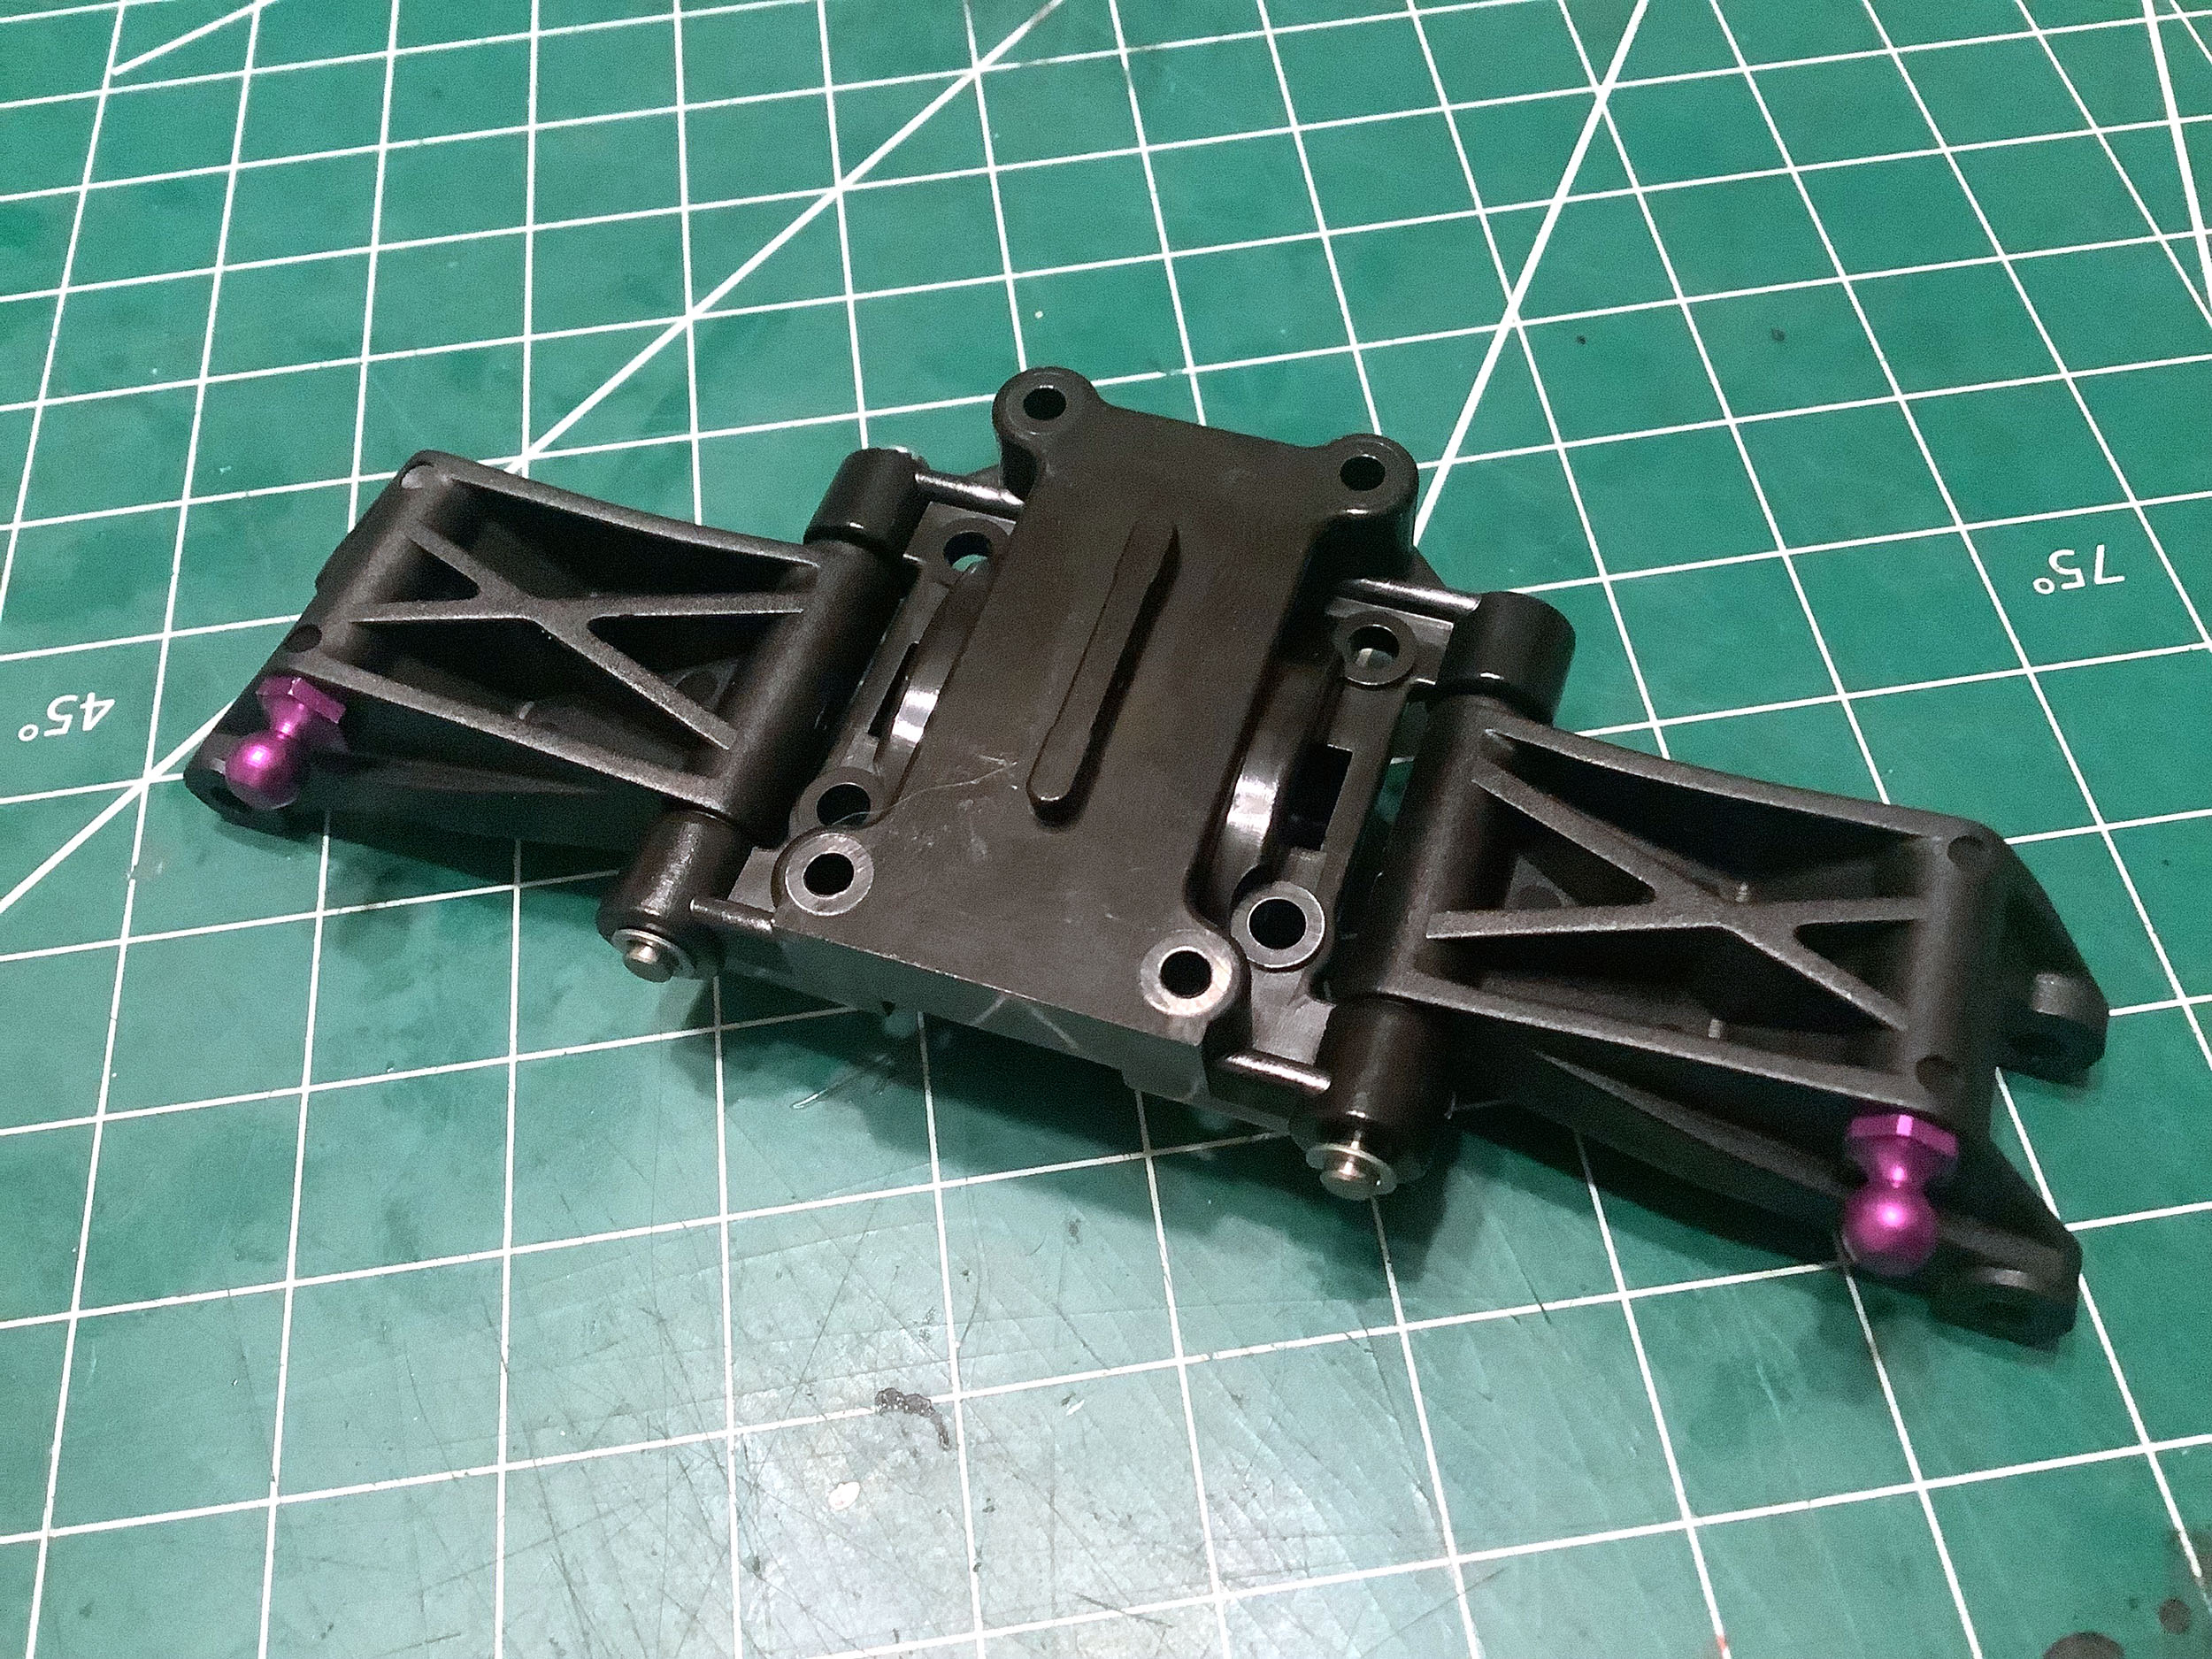
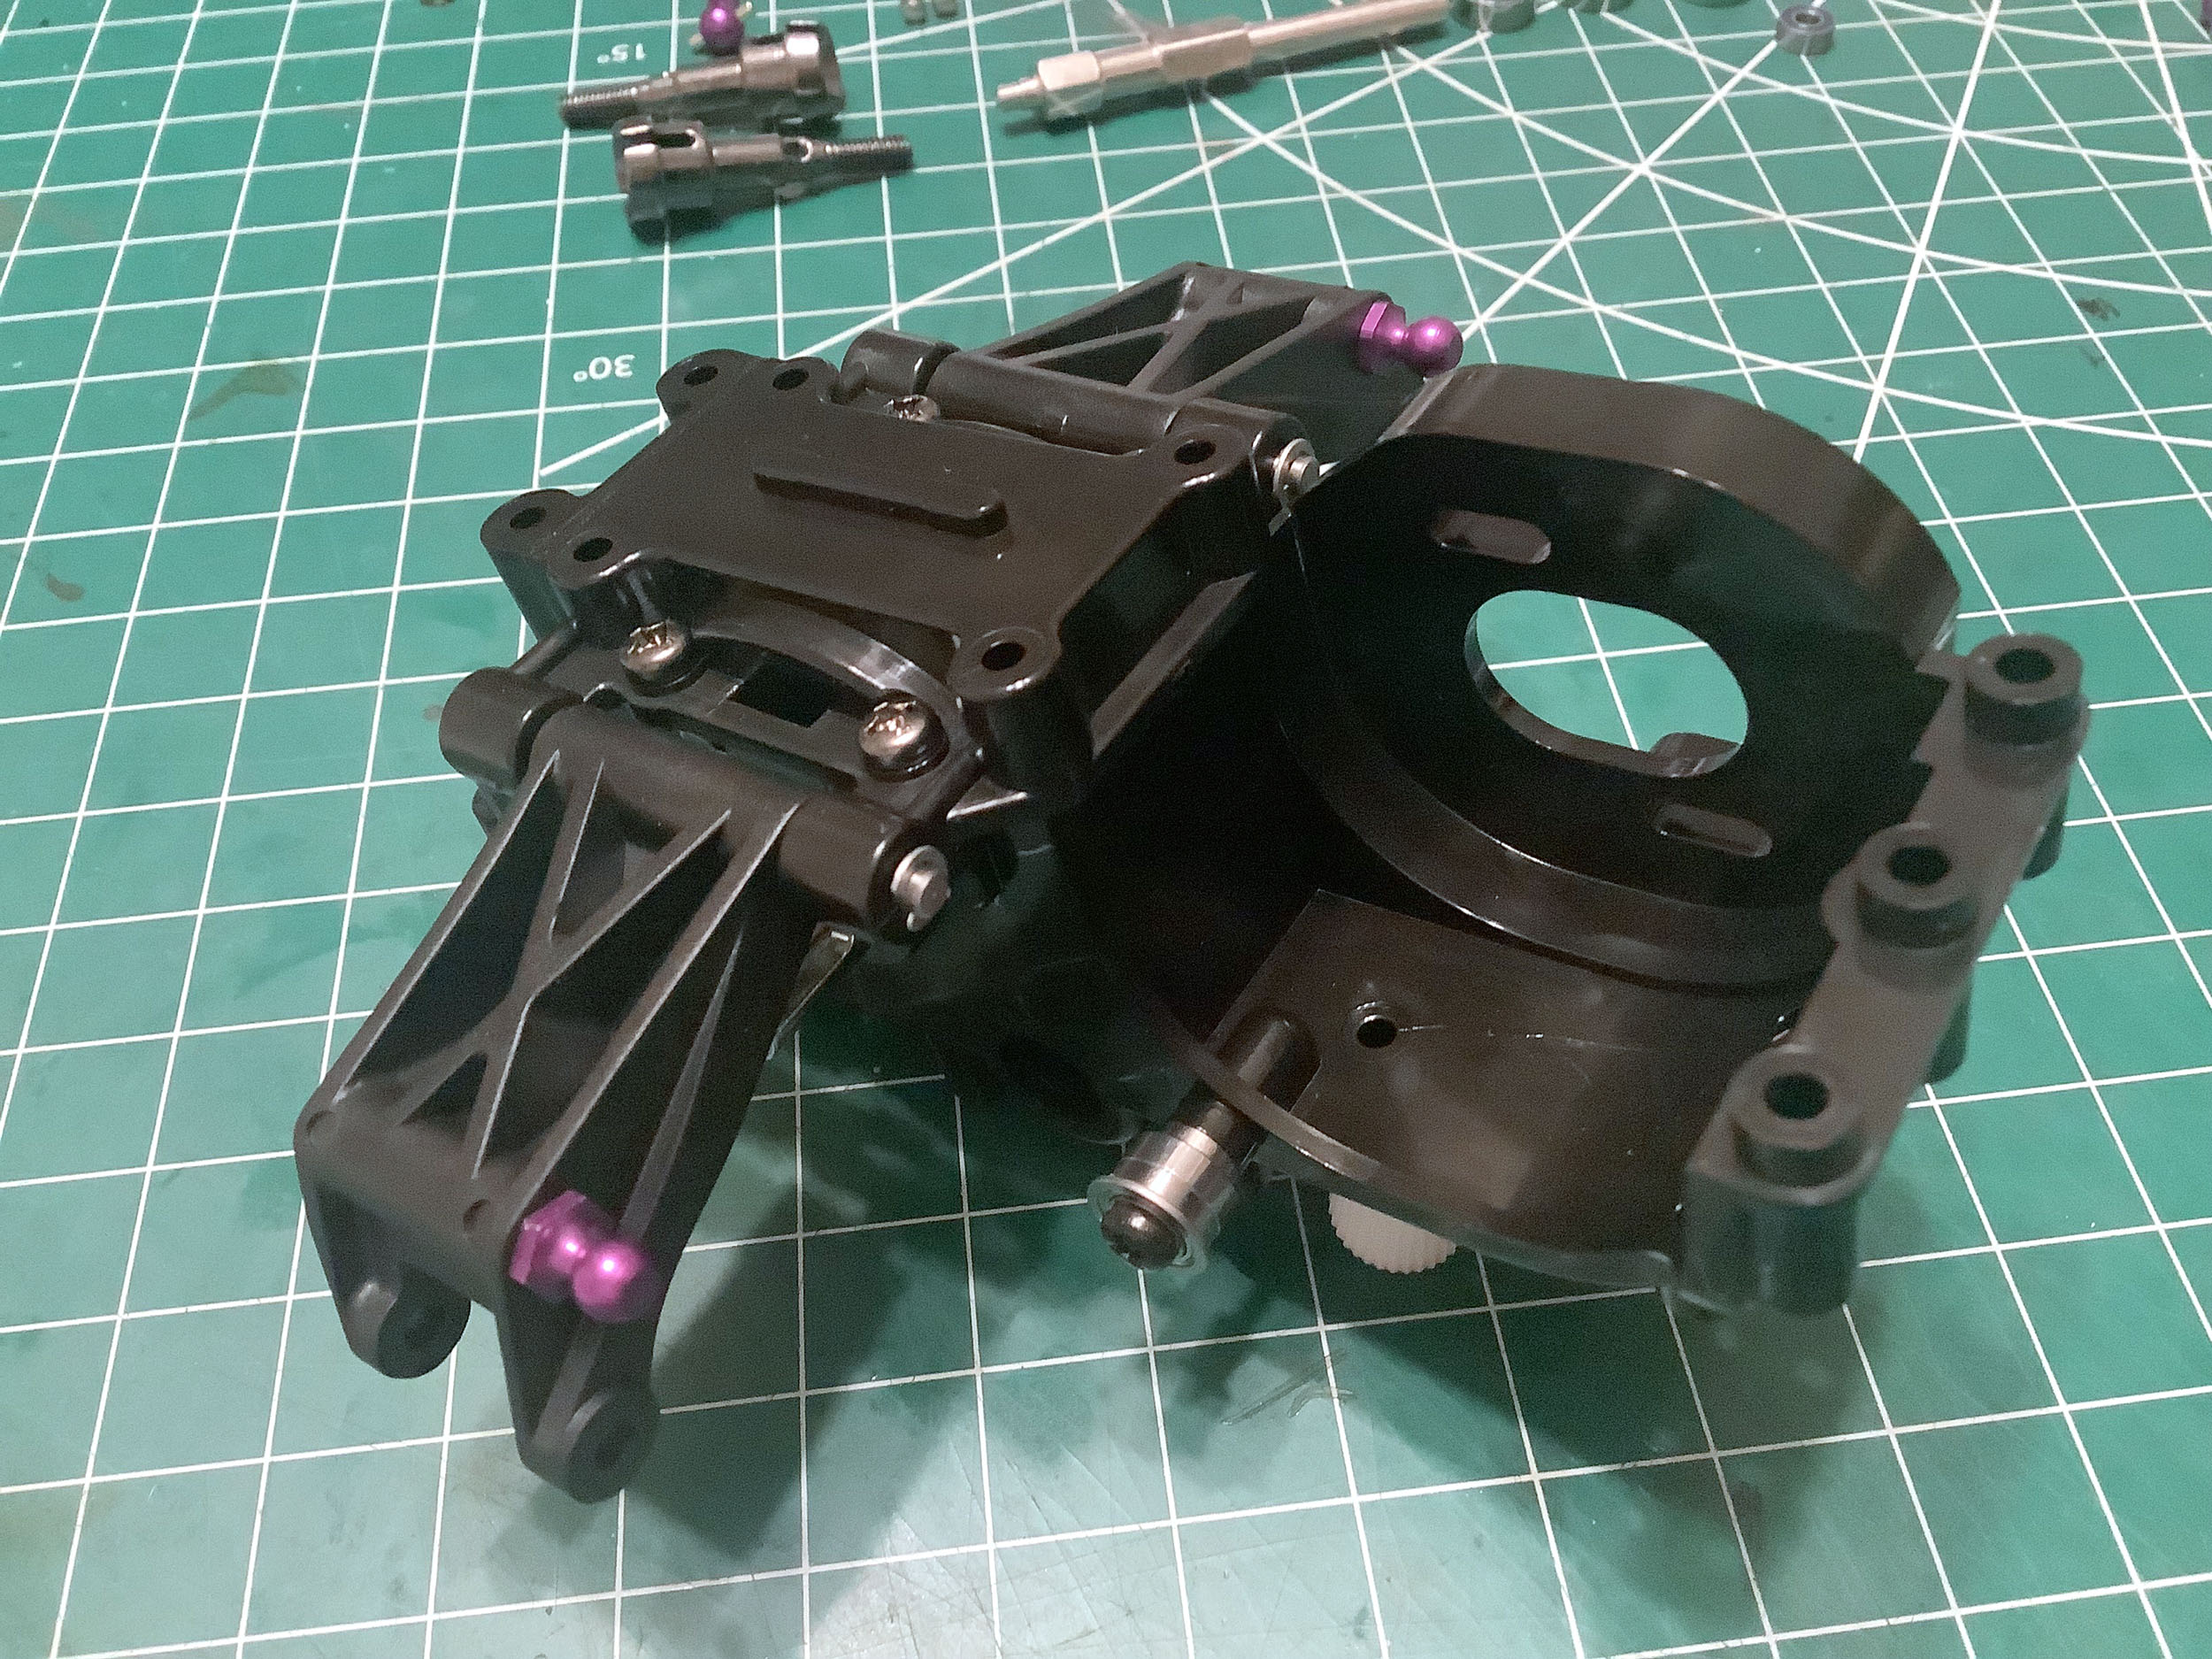
Once the gearbox and suspension assemblies are complete, most of the
differences are well hidden. Only the purple ball studs and a peek
at the white gears give away the TRF model.
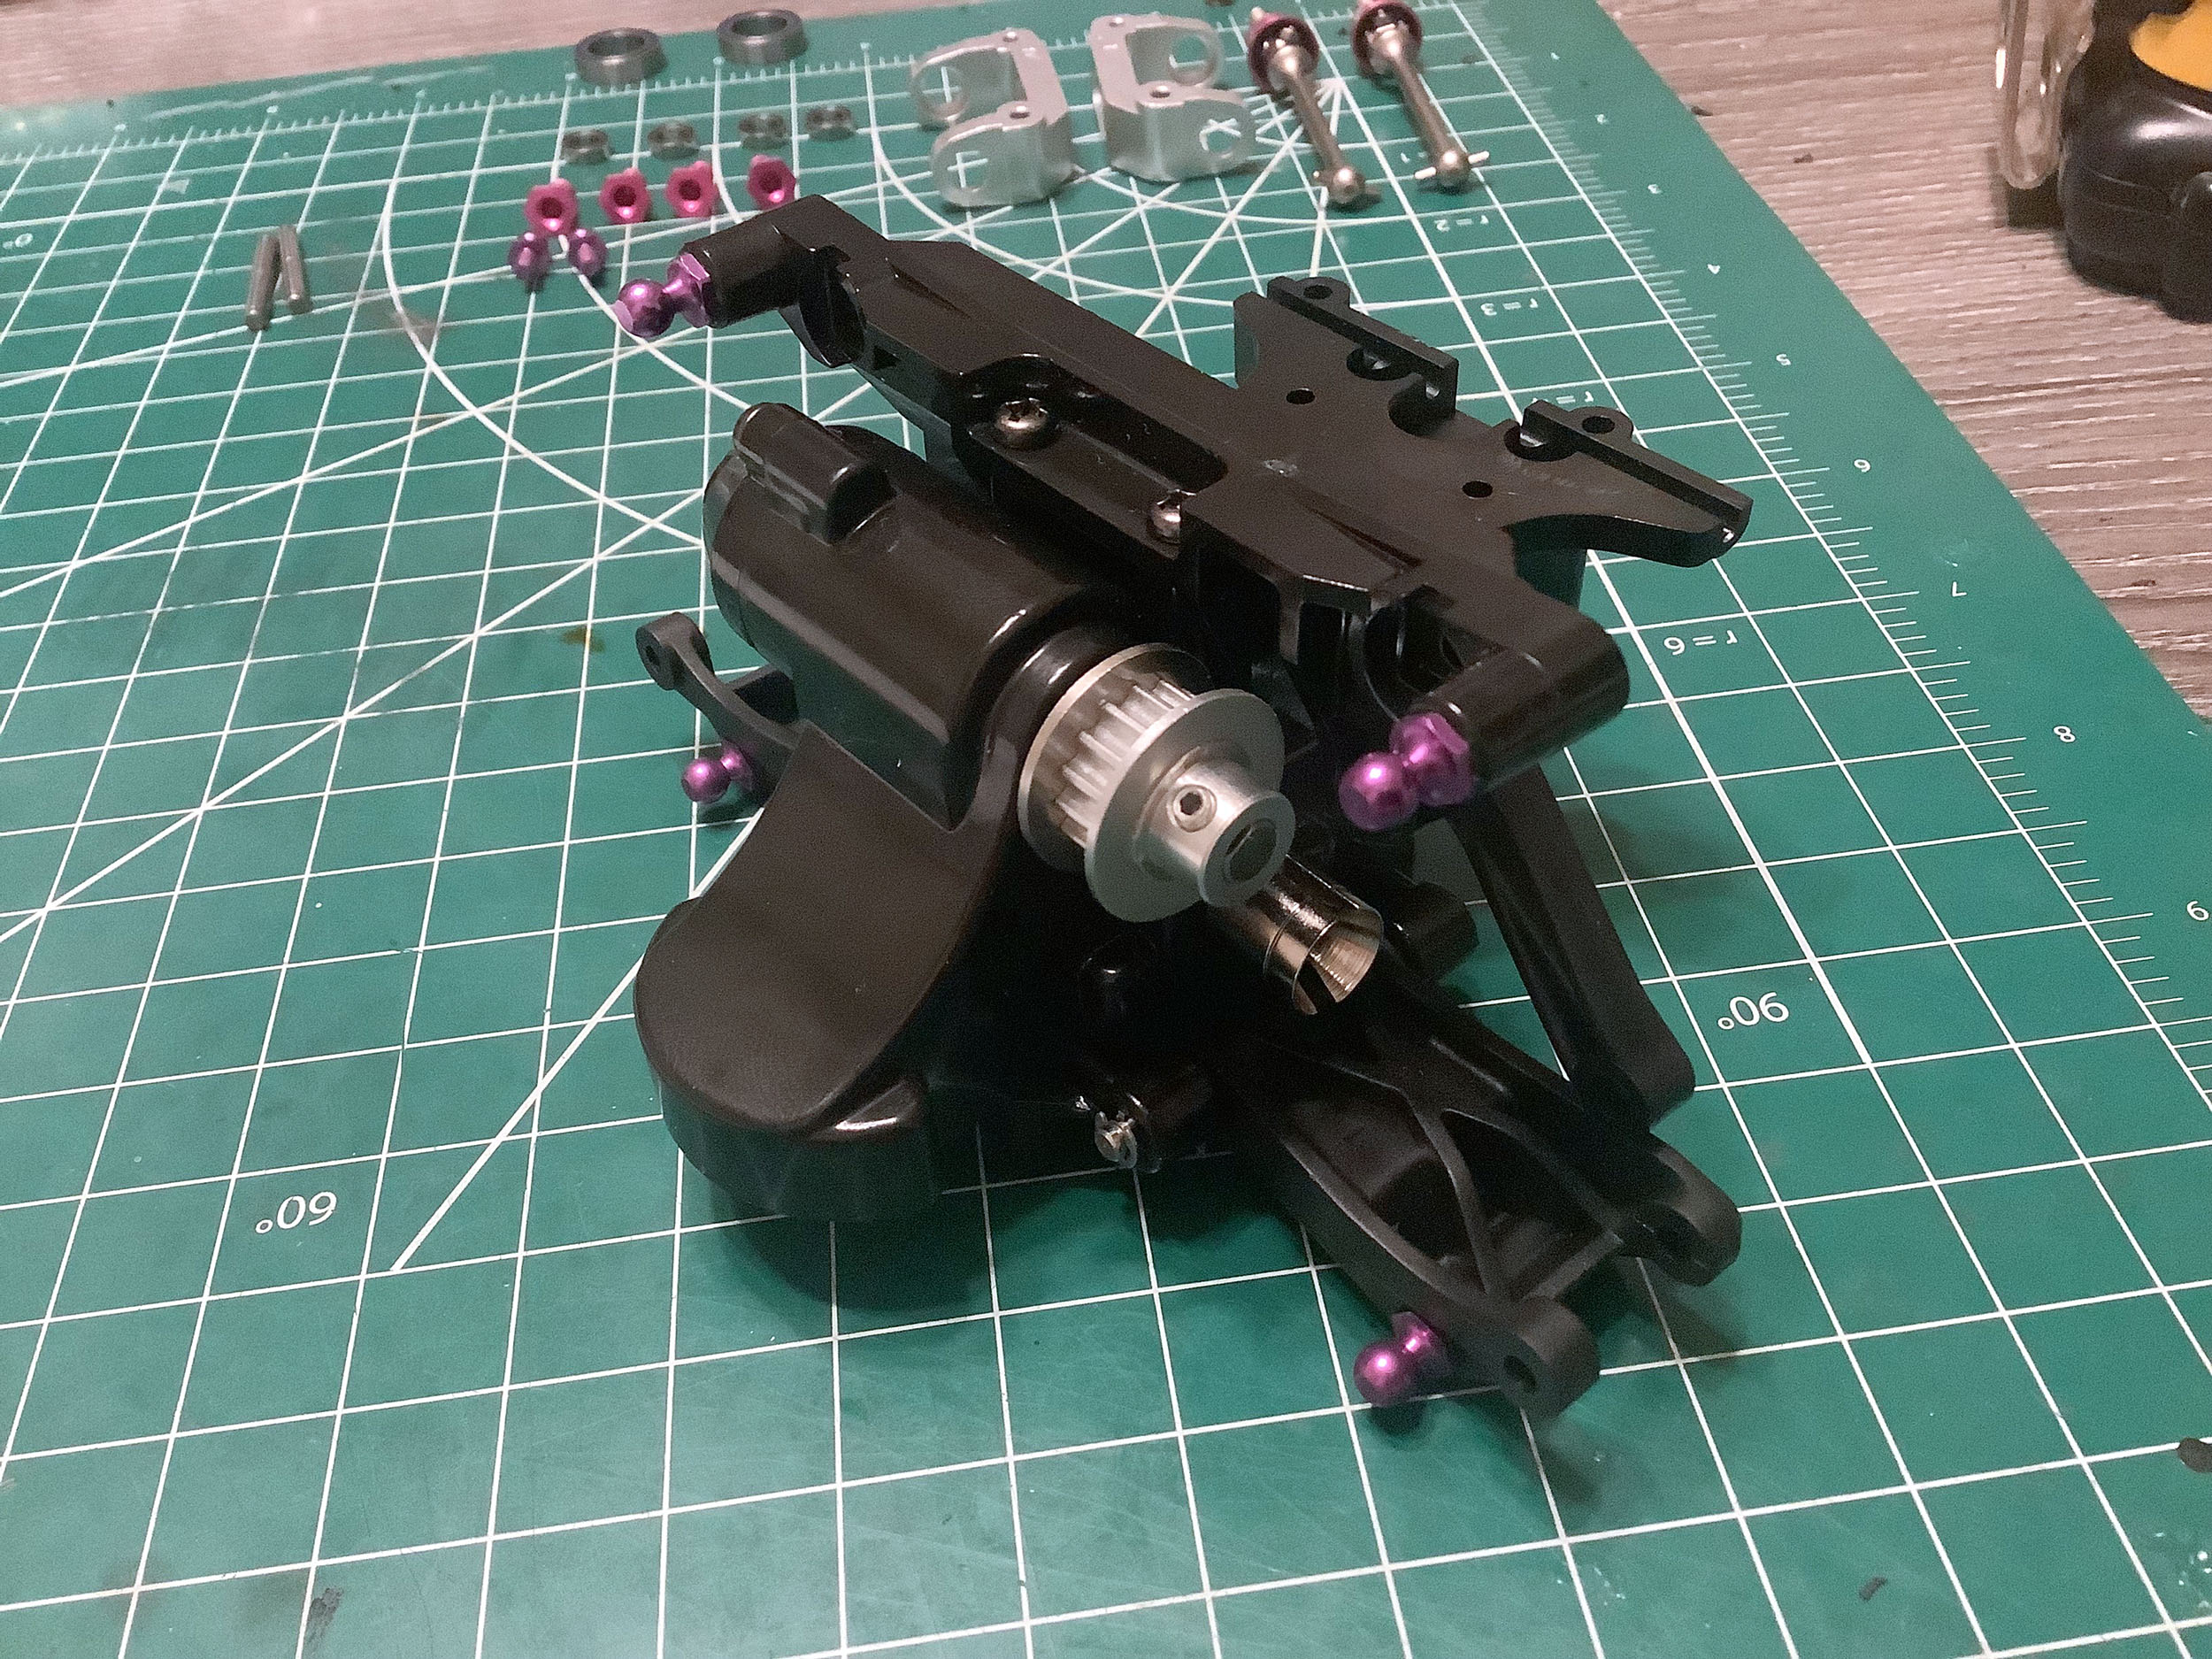
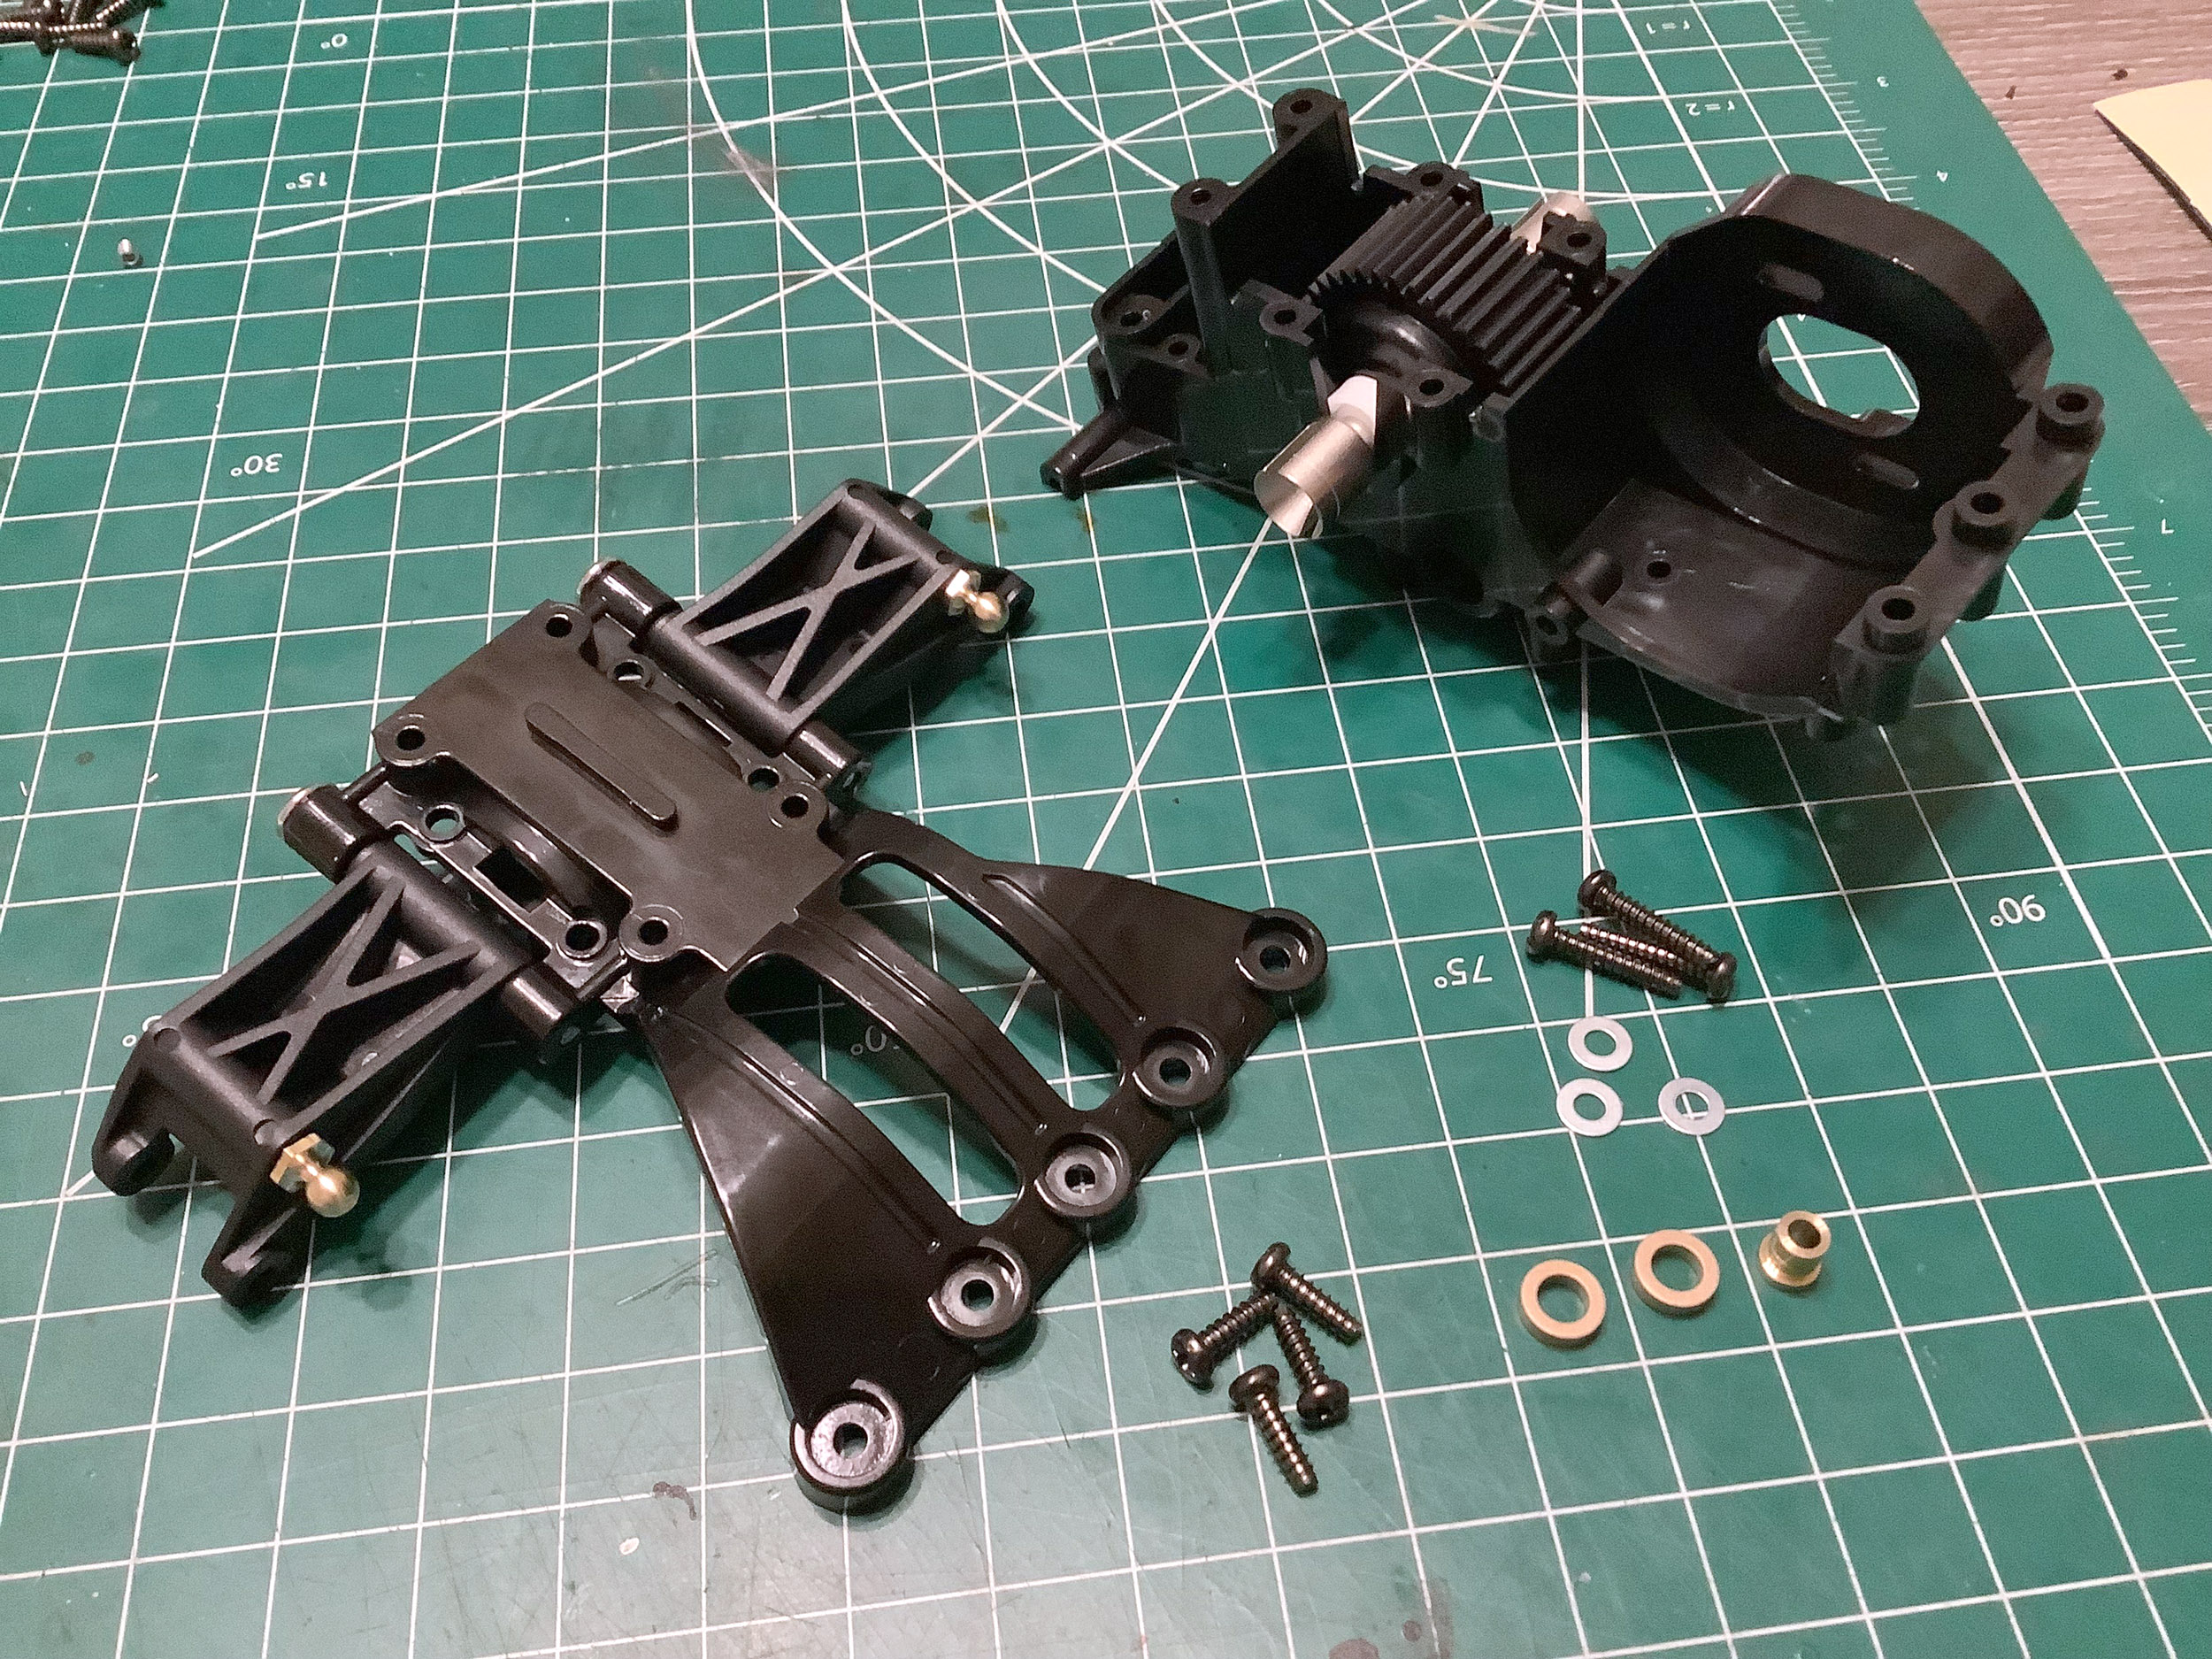
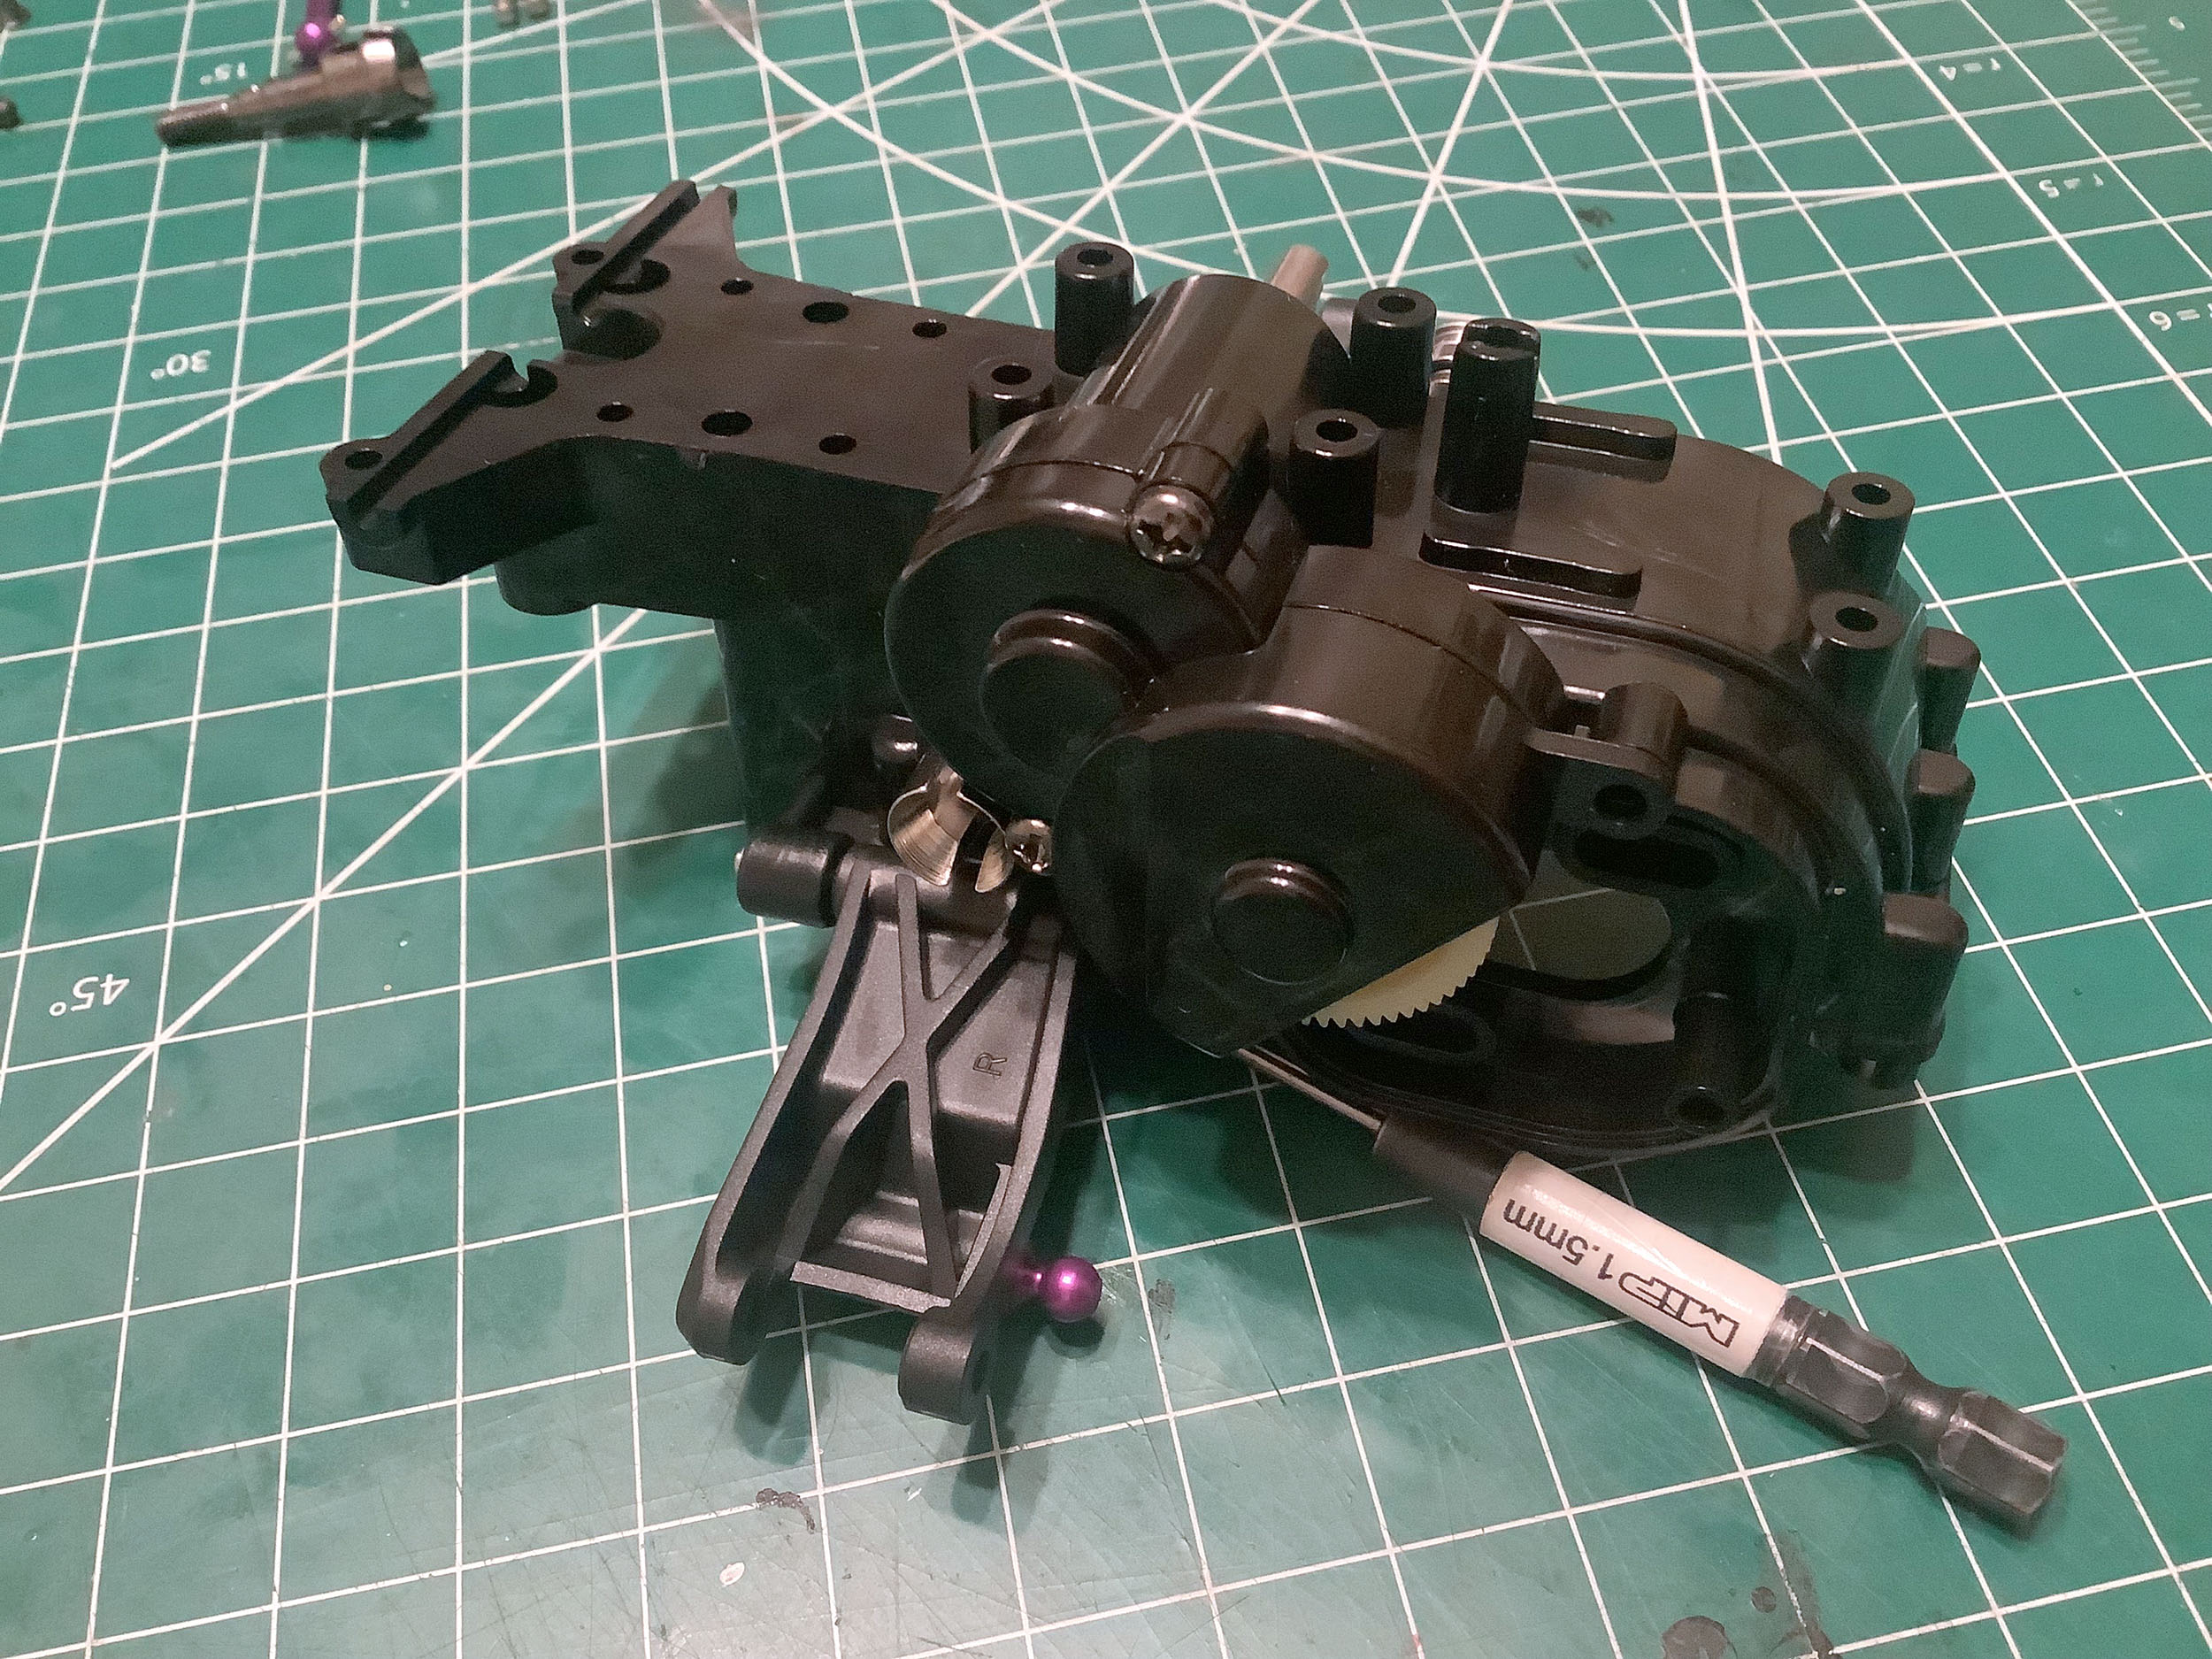
Now the shock tower and upper suspension arm assembly can be
installed. This step also installs the rear pulley for the drive
belt which is clearly different (metal) on the TRF version.
A few more little details differentiate these two assemblies if you know where to look. Pretty subtle though.
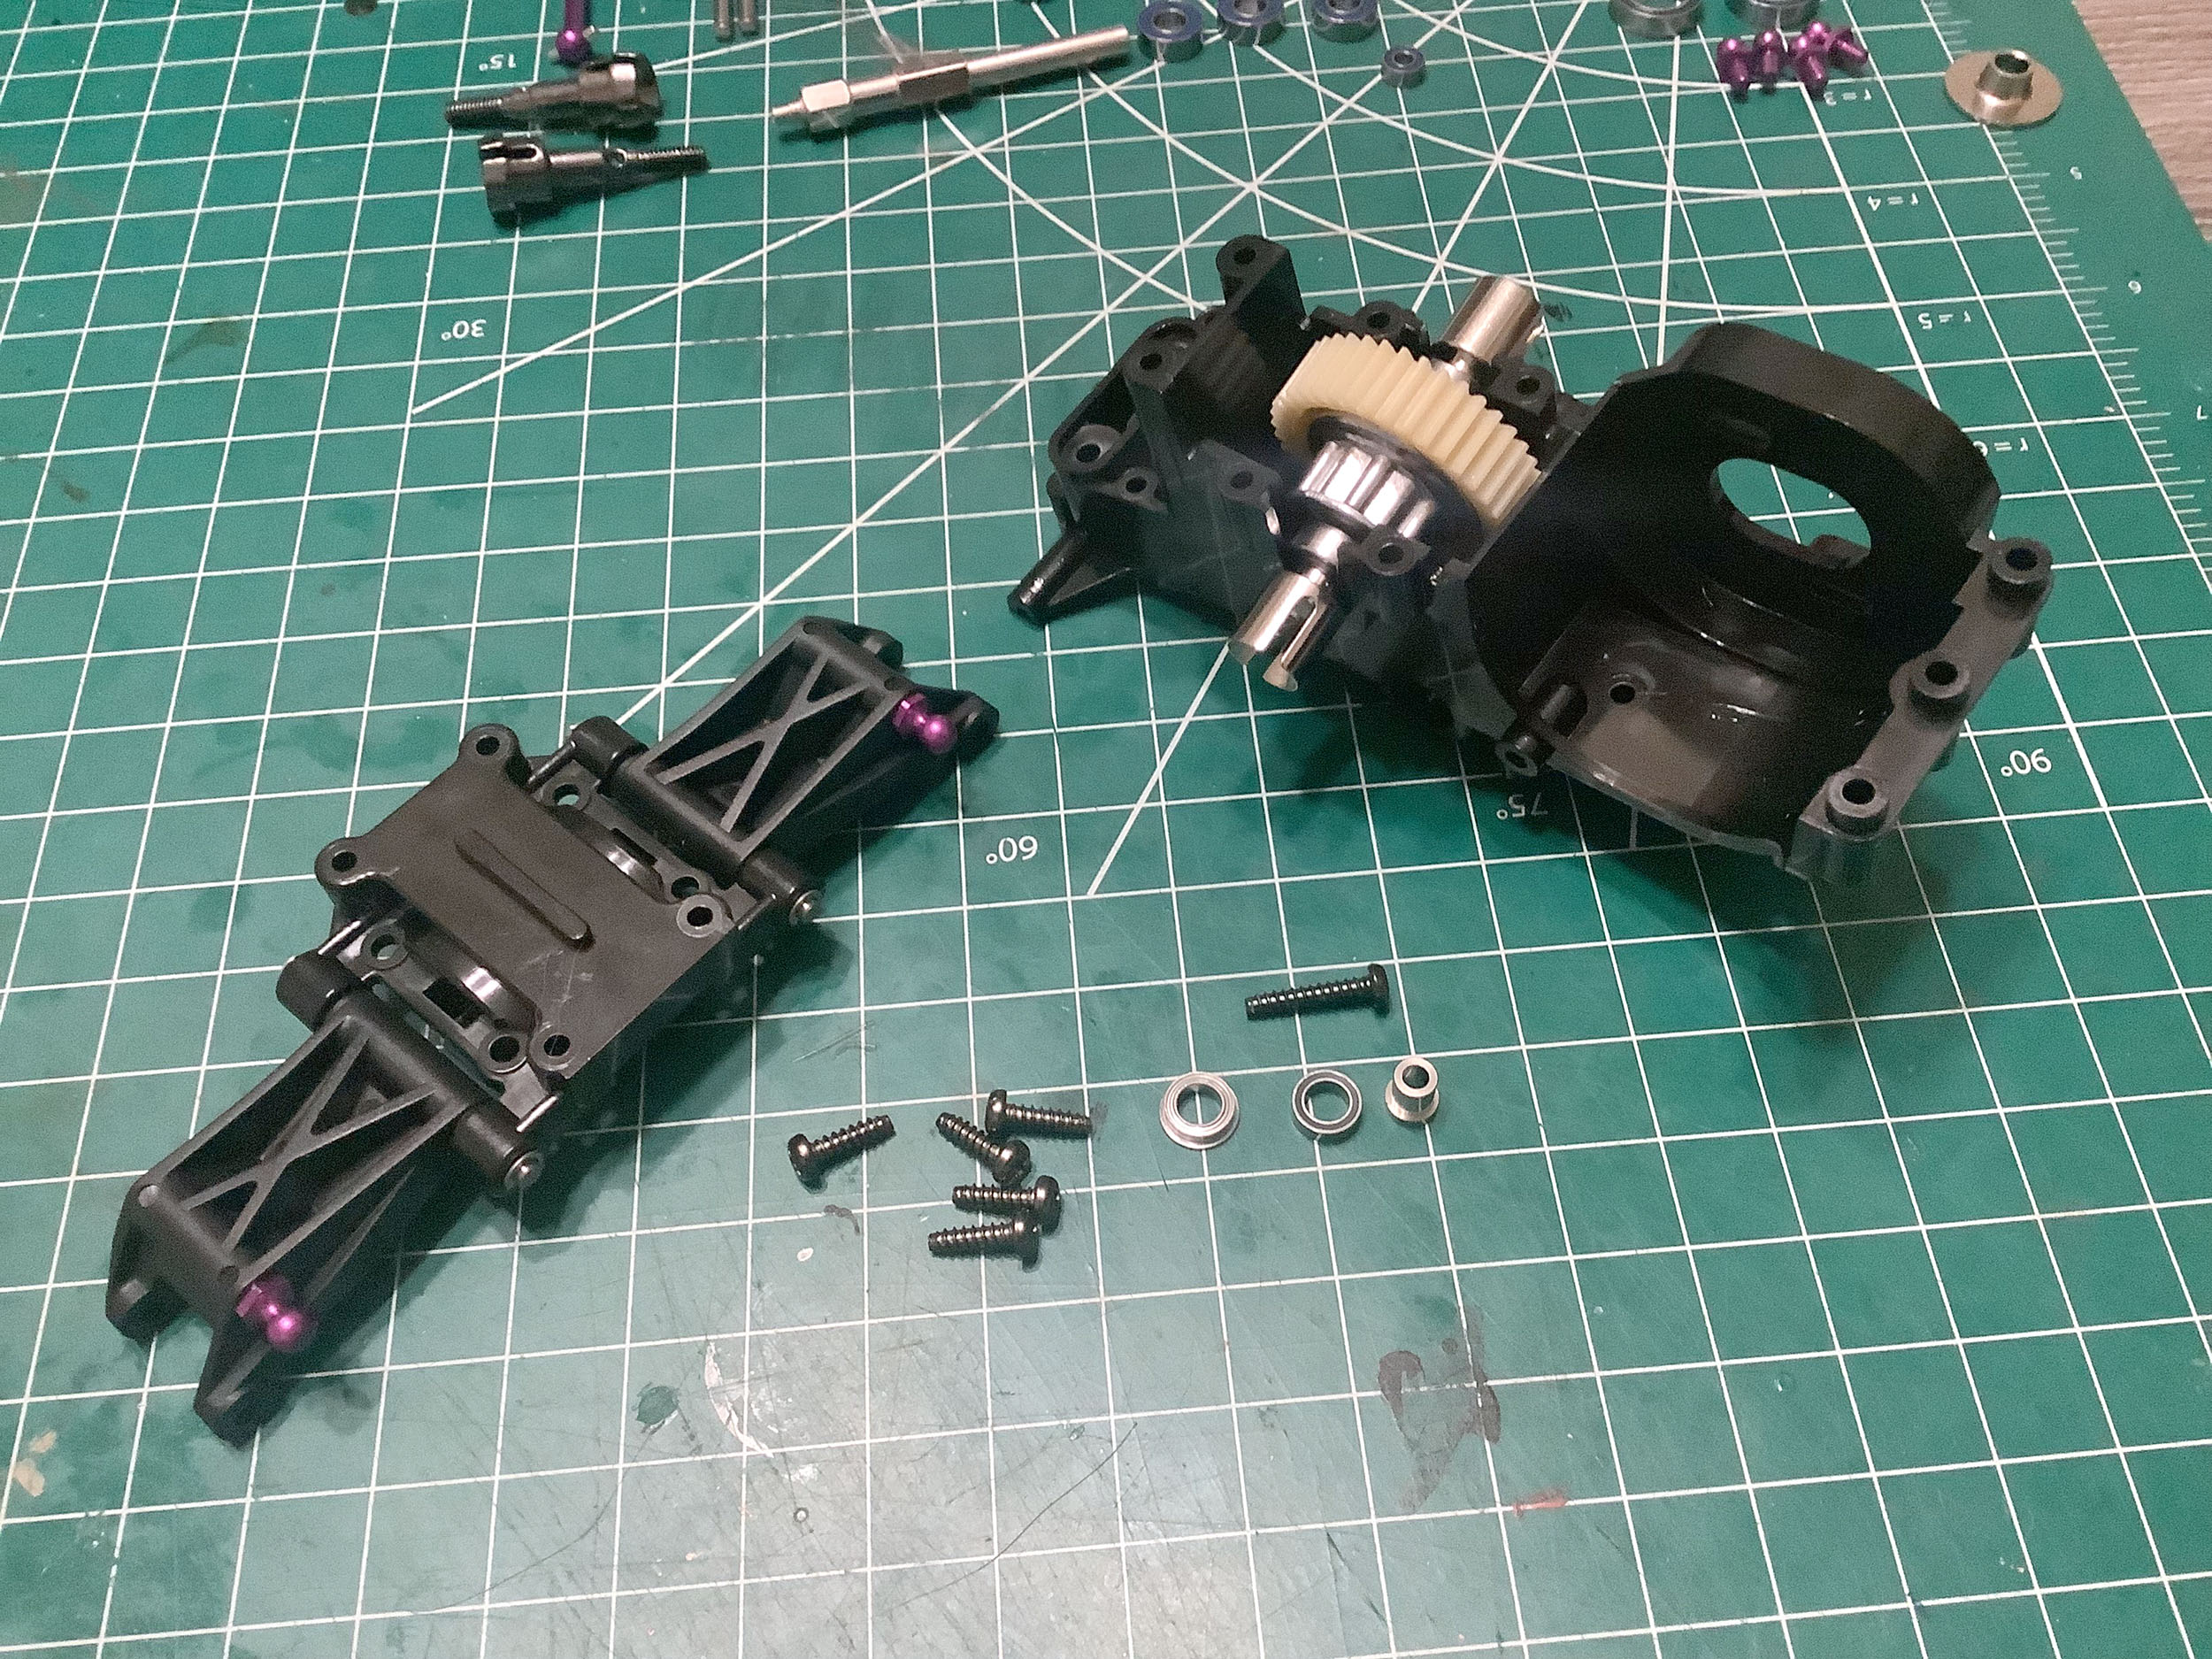
You can't miss the difference between the plastic rear uprights of the
standard model and the complex cast metal parts used on the TRF
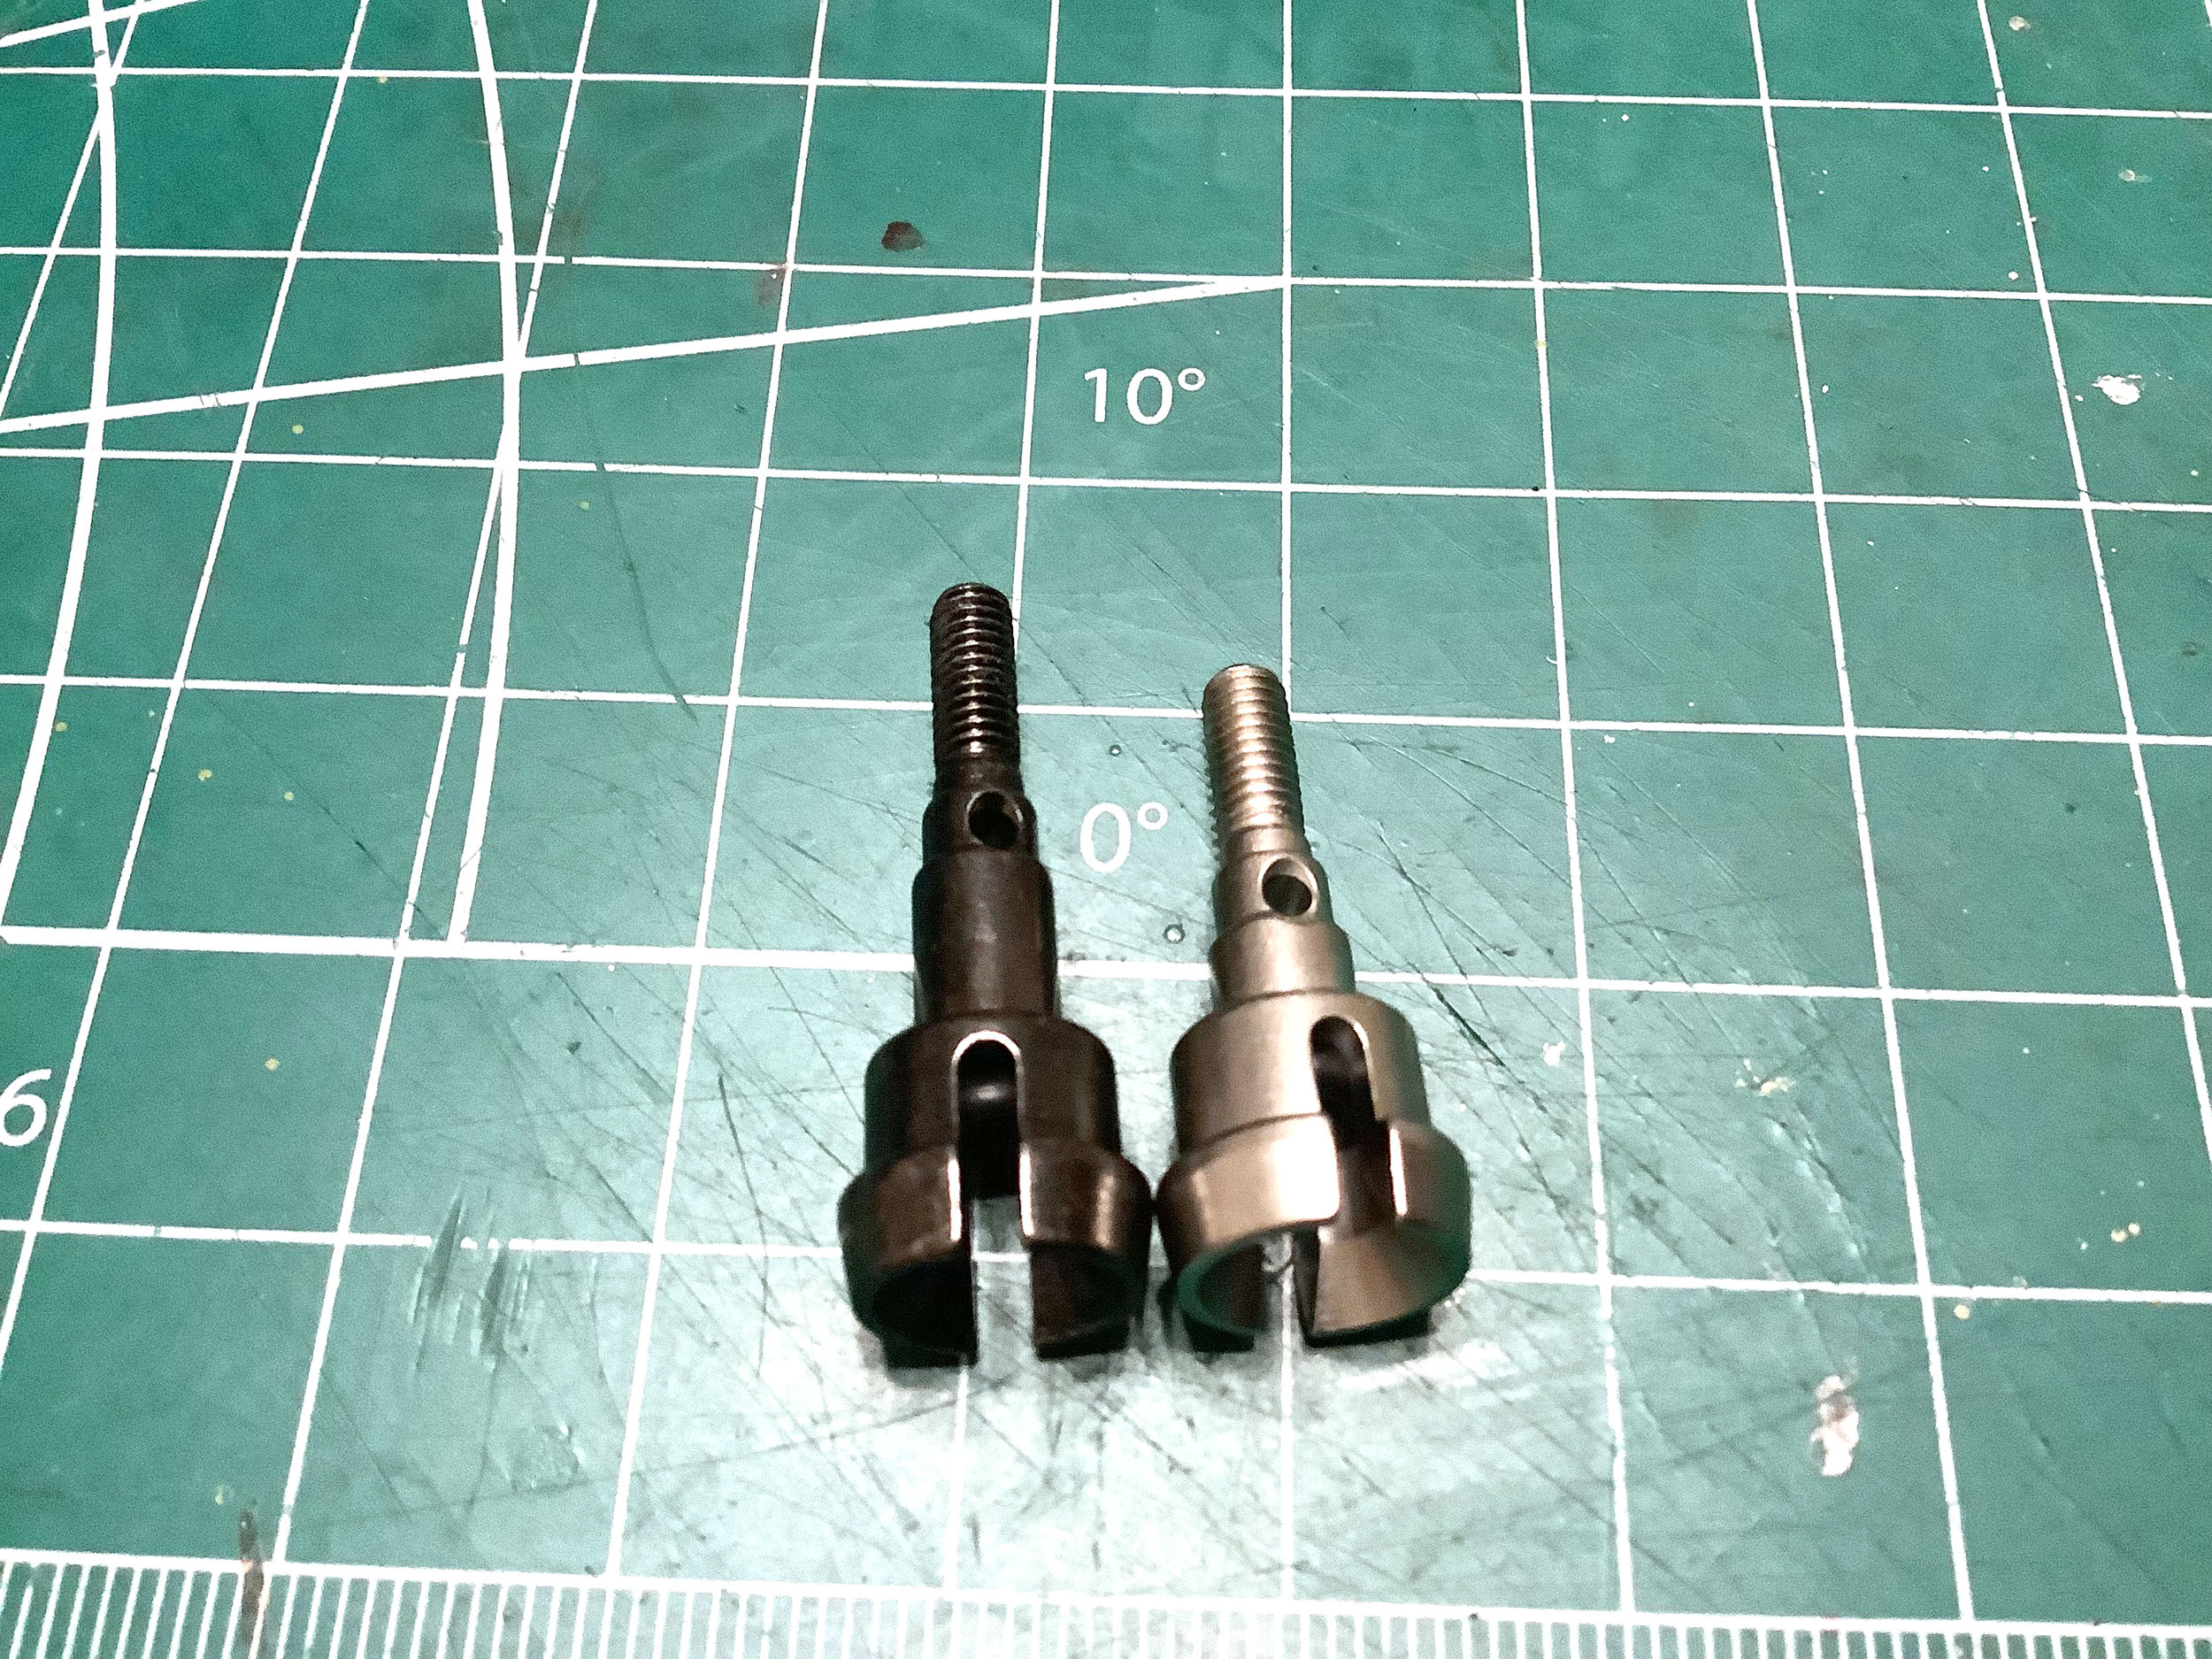
version. A less obvious difference is the longer drive cup on the
TRF which results in a mildly wider rear track. More on that
later.
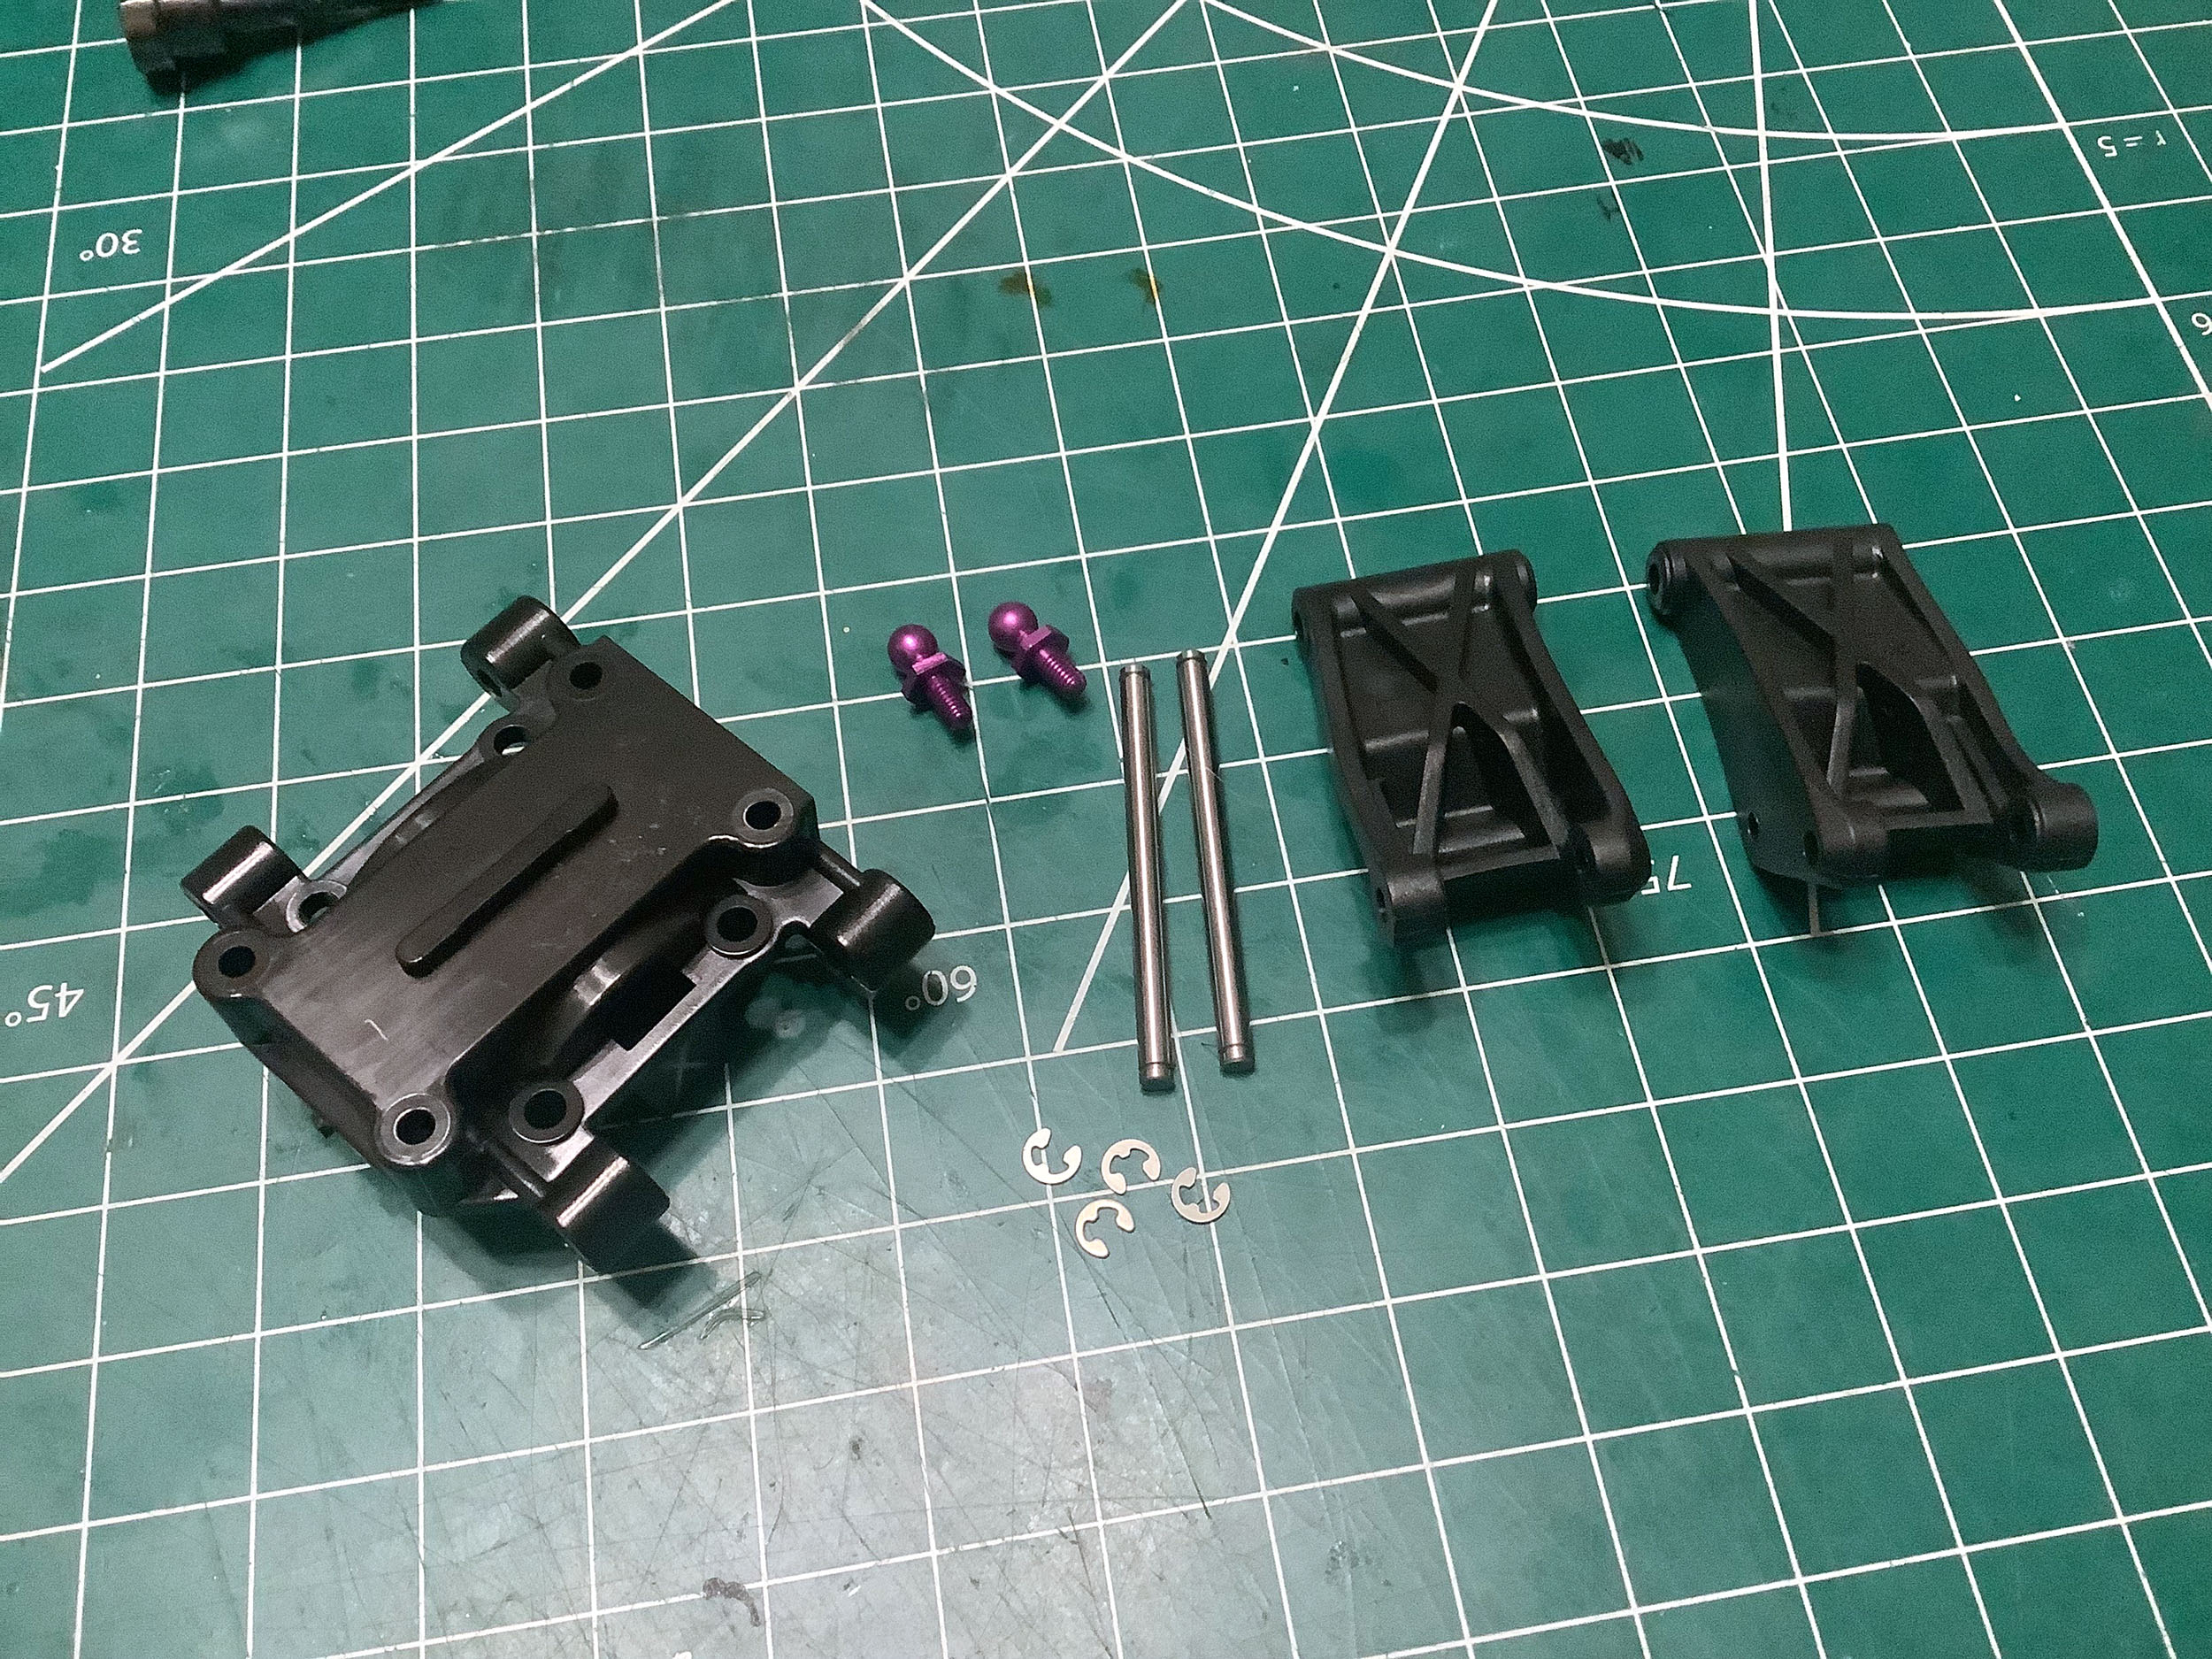
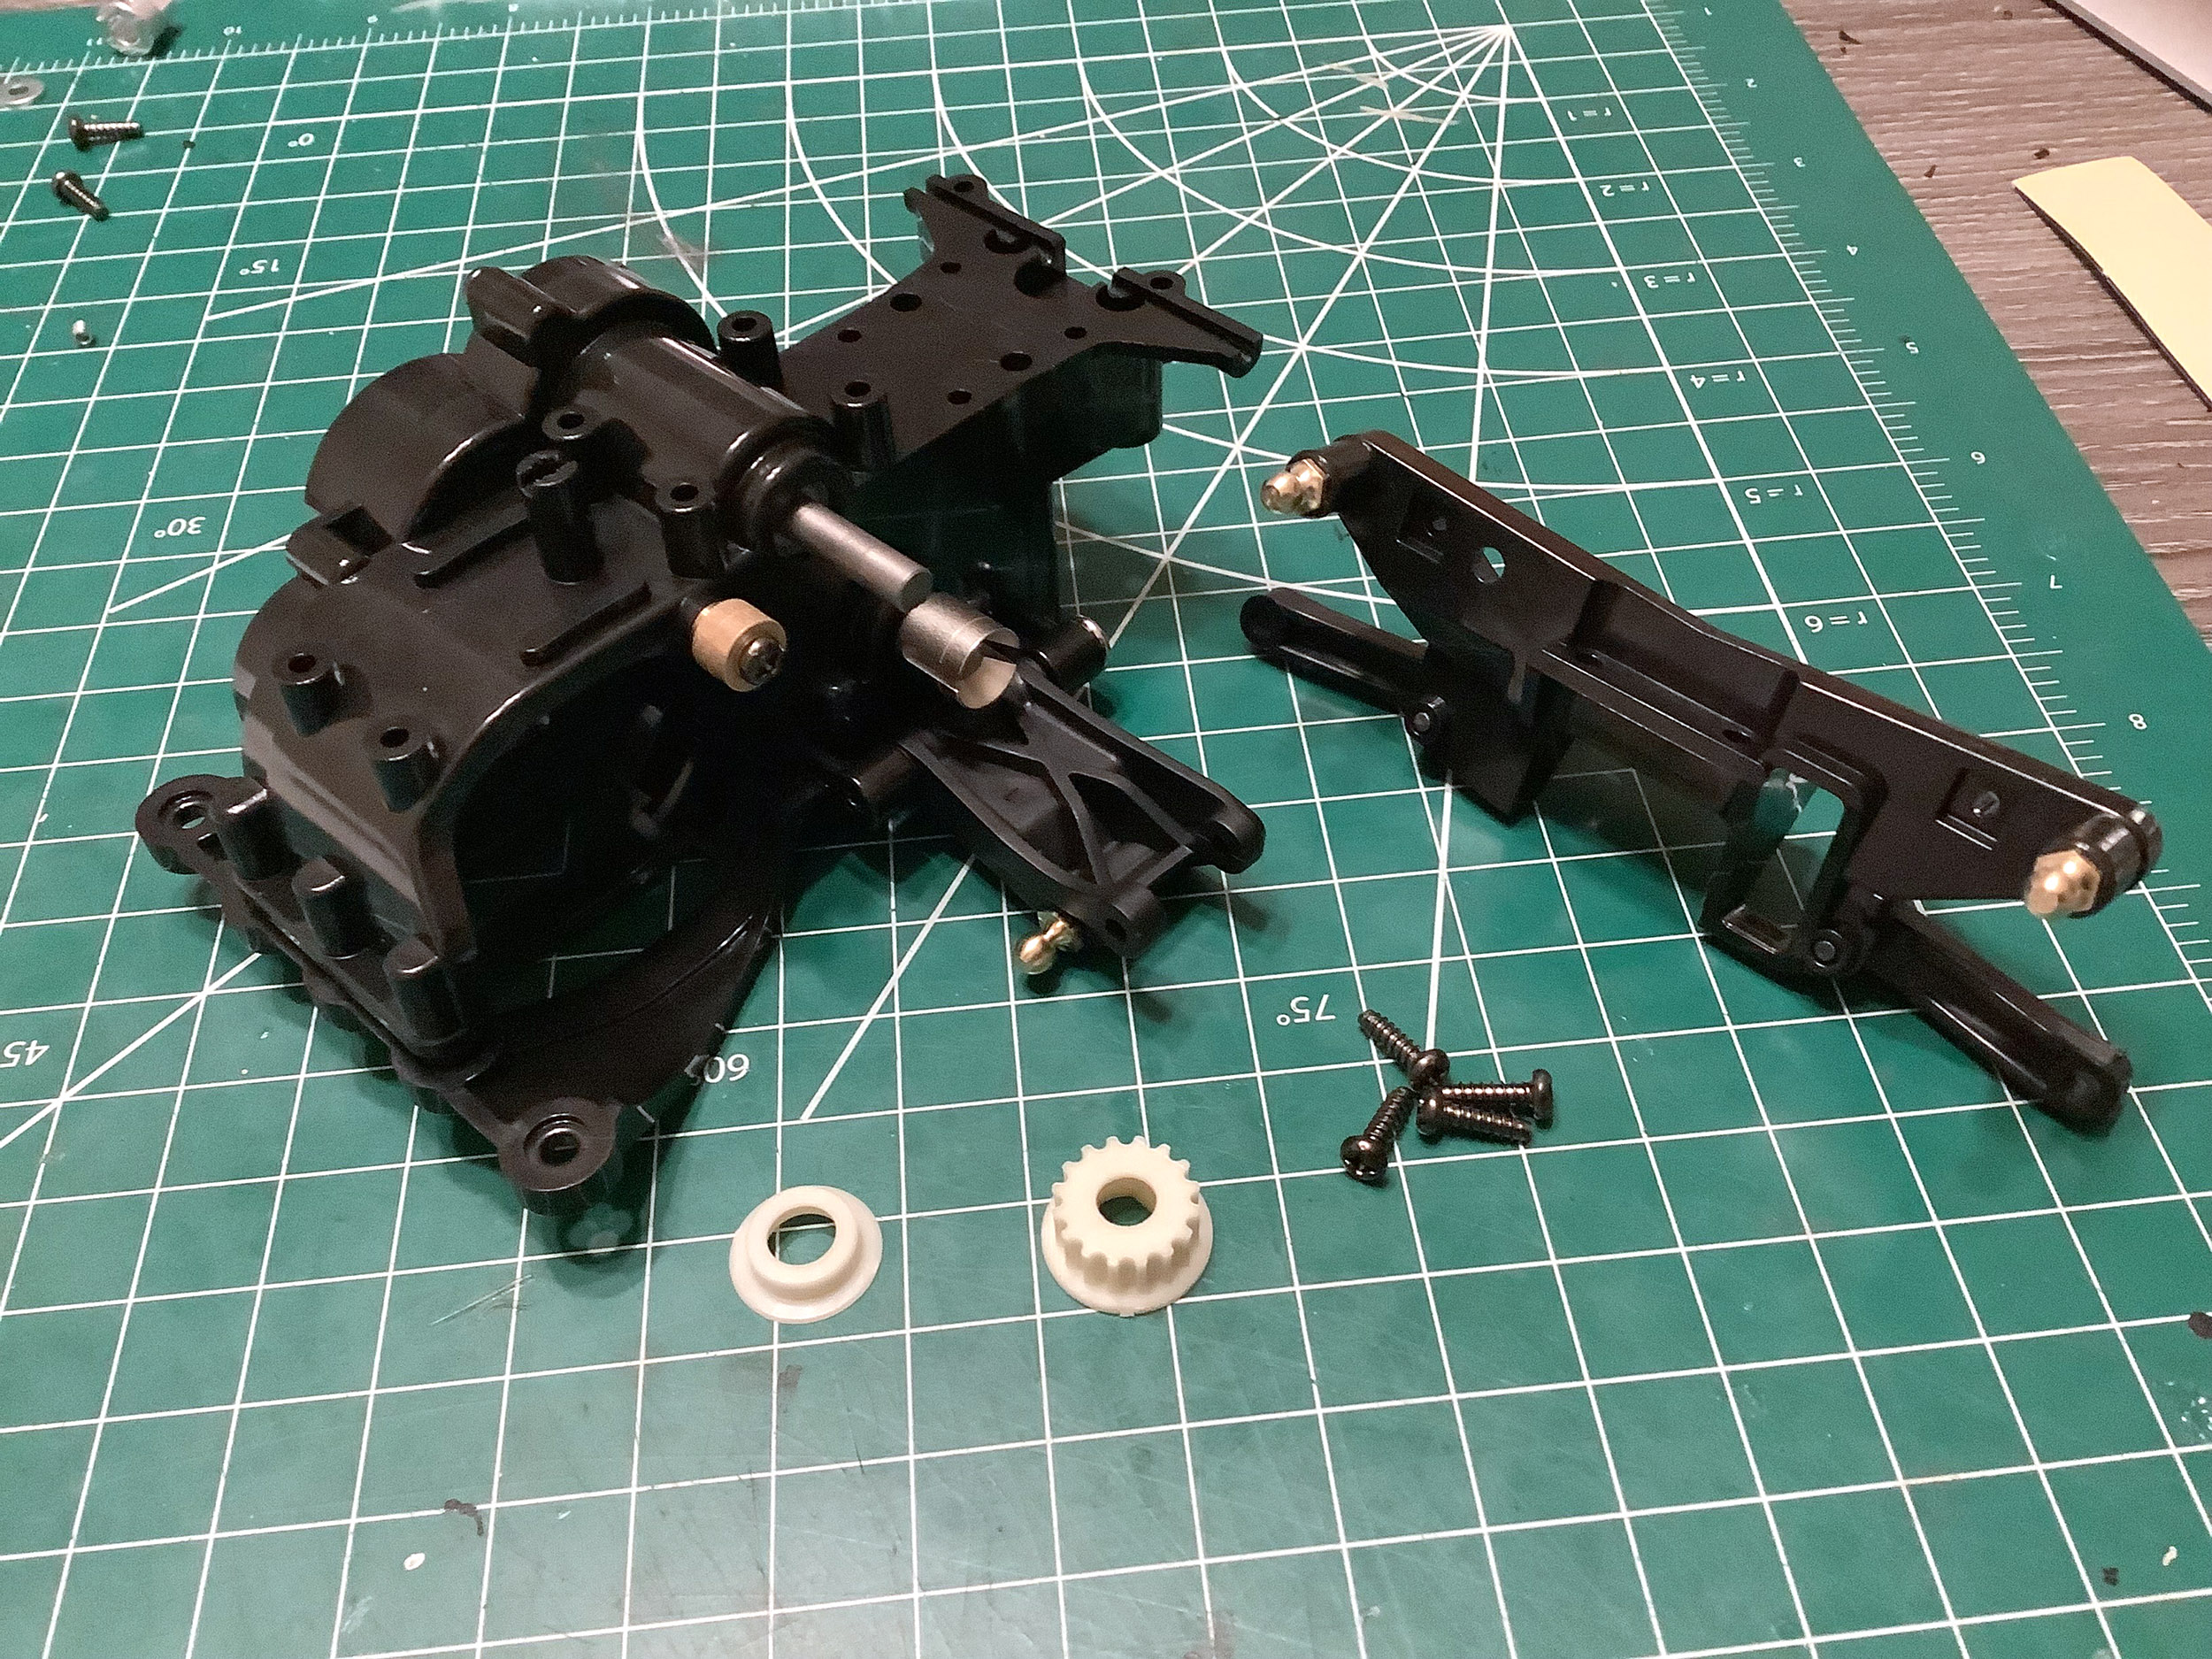
Here are the parts needed to complete the rear suspension. Apart
from the uprights already discussed, virtually every other part is also
different. The TRF version uses lightweight aluminum dog bones,
steel hinge pins with E-clips for lower pivots instead of screw pins,
and flanged bushings for upper pivots instead of step screws.
Now that the uprights are installed, the differences between the
standard and TRF versions are much more obvious. They can't really
be conflated at this point. The difference in the lower housing
is also pretty clear from this angle. The standard lower panel
connects to the chassis tub while the TRF lower panels connects to a
carbon chassis plate. This will be shown clearly later.
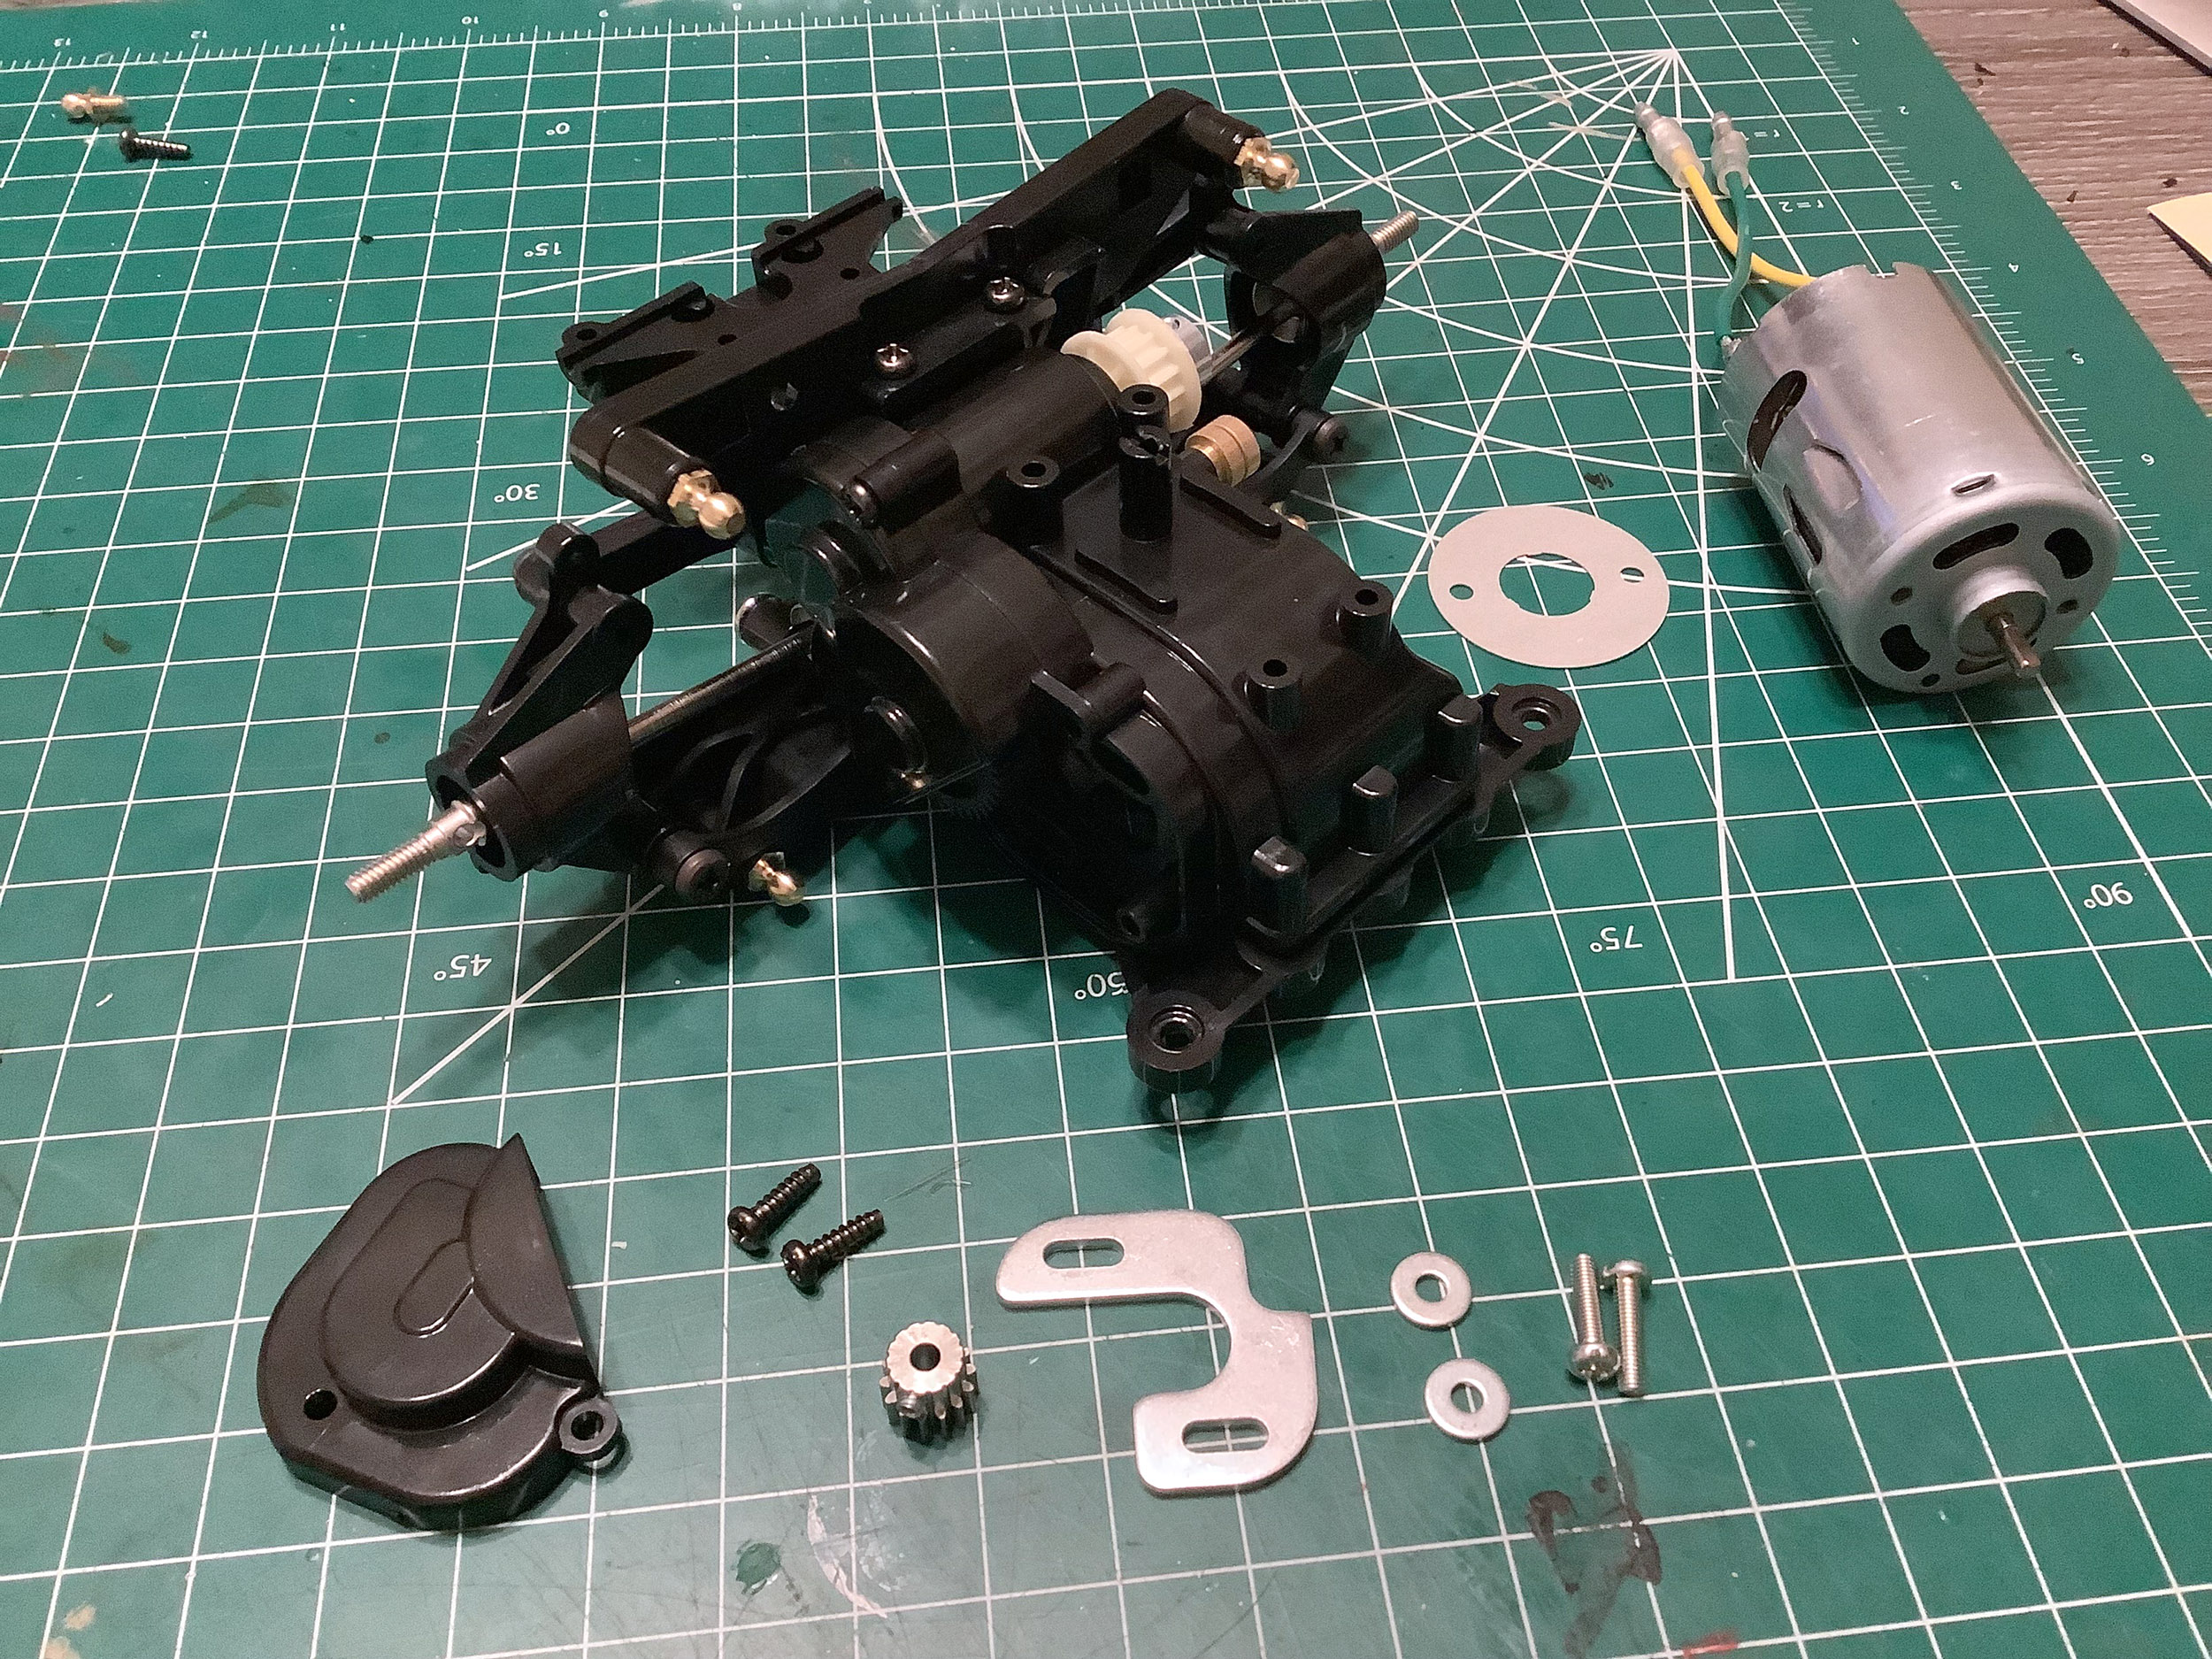
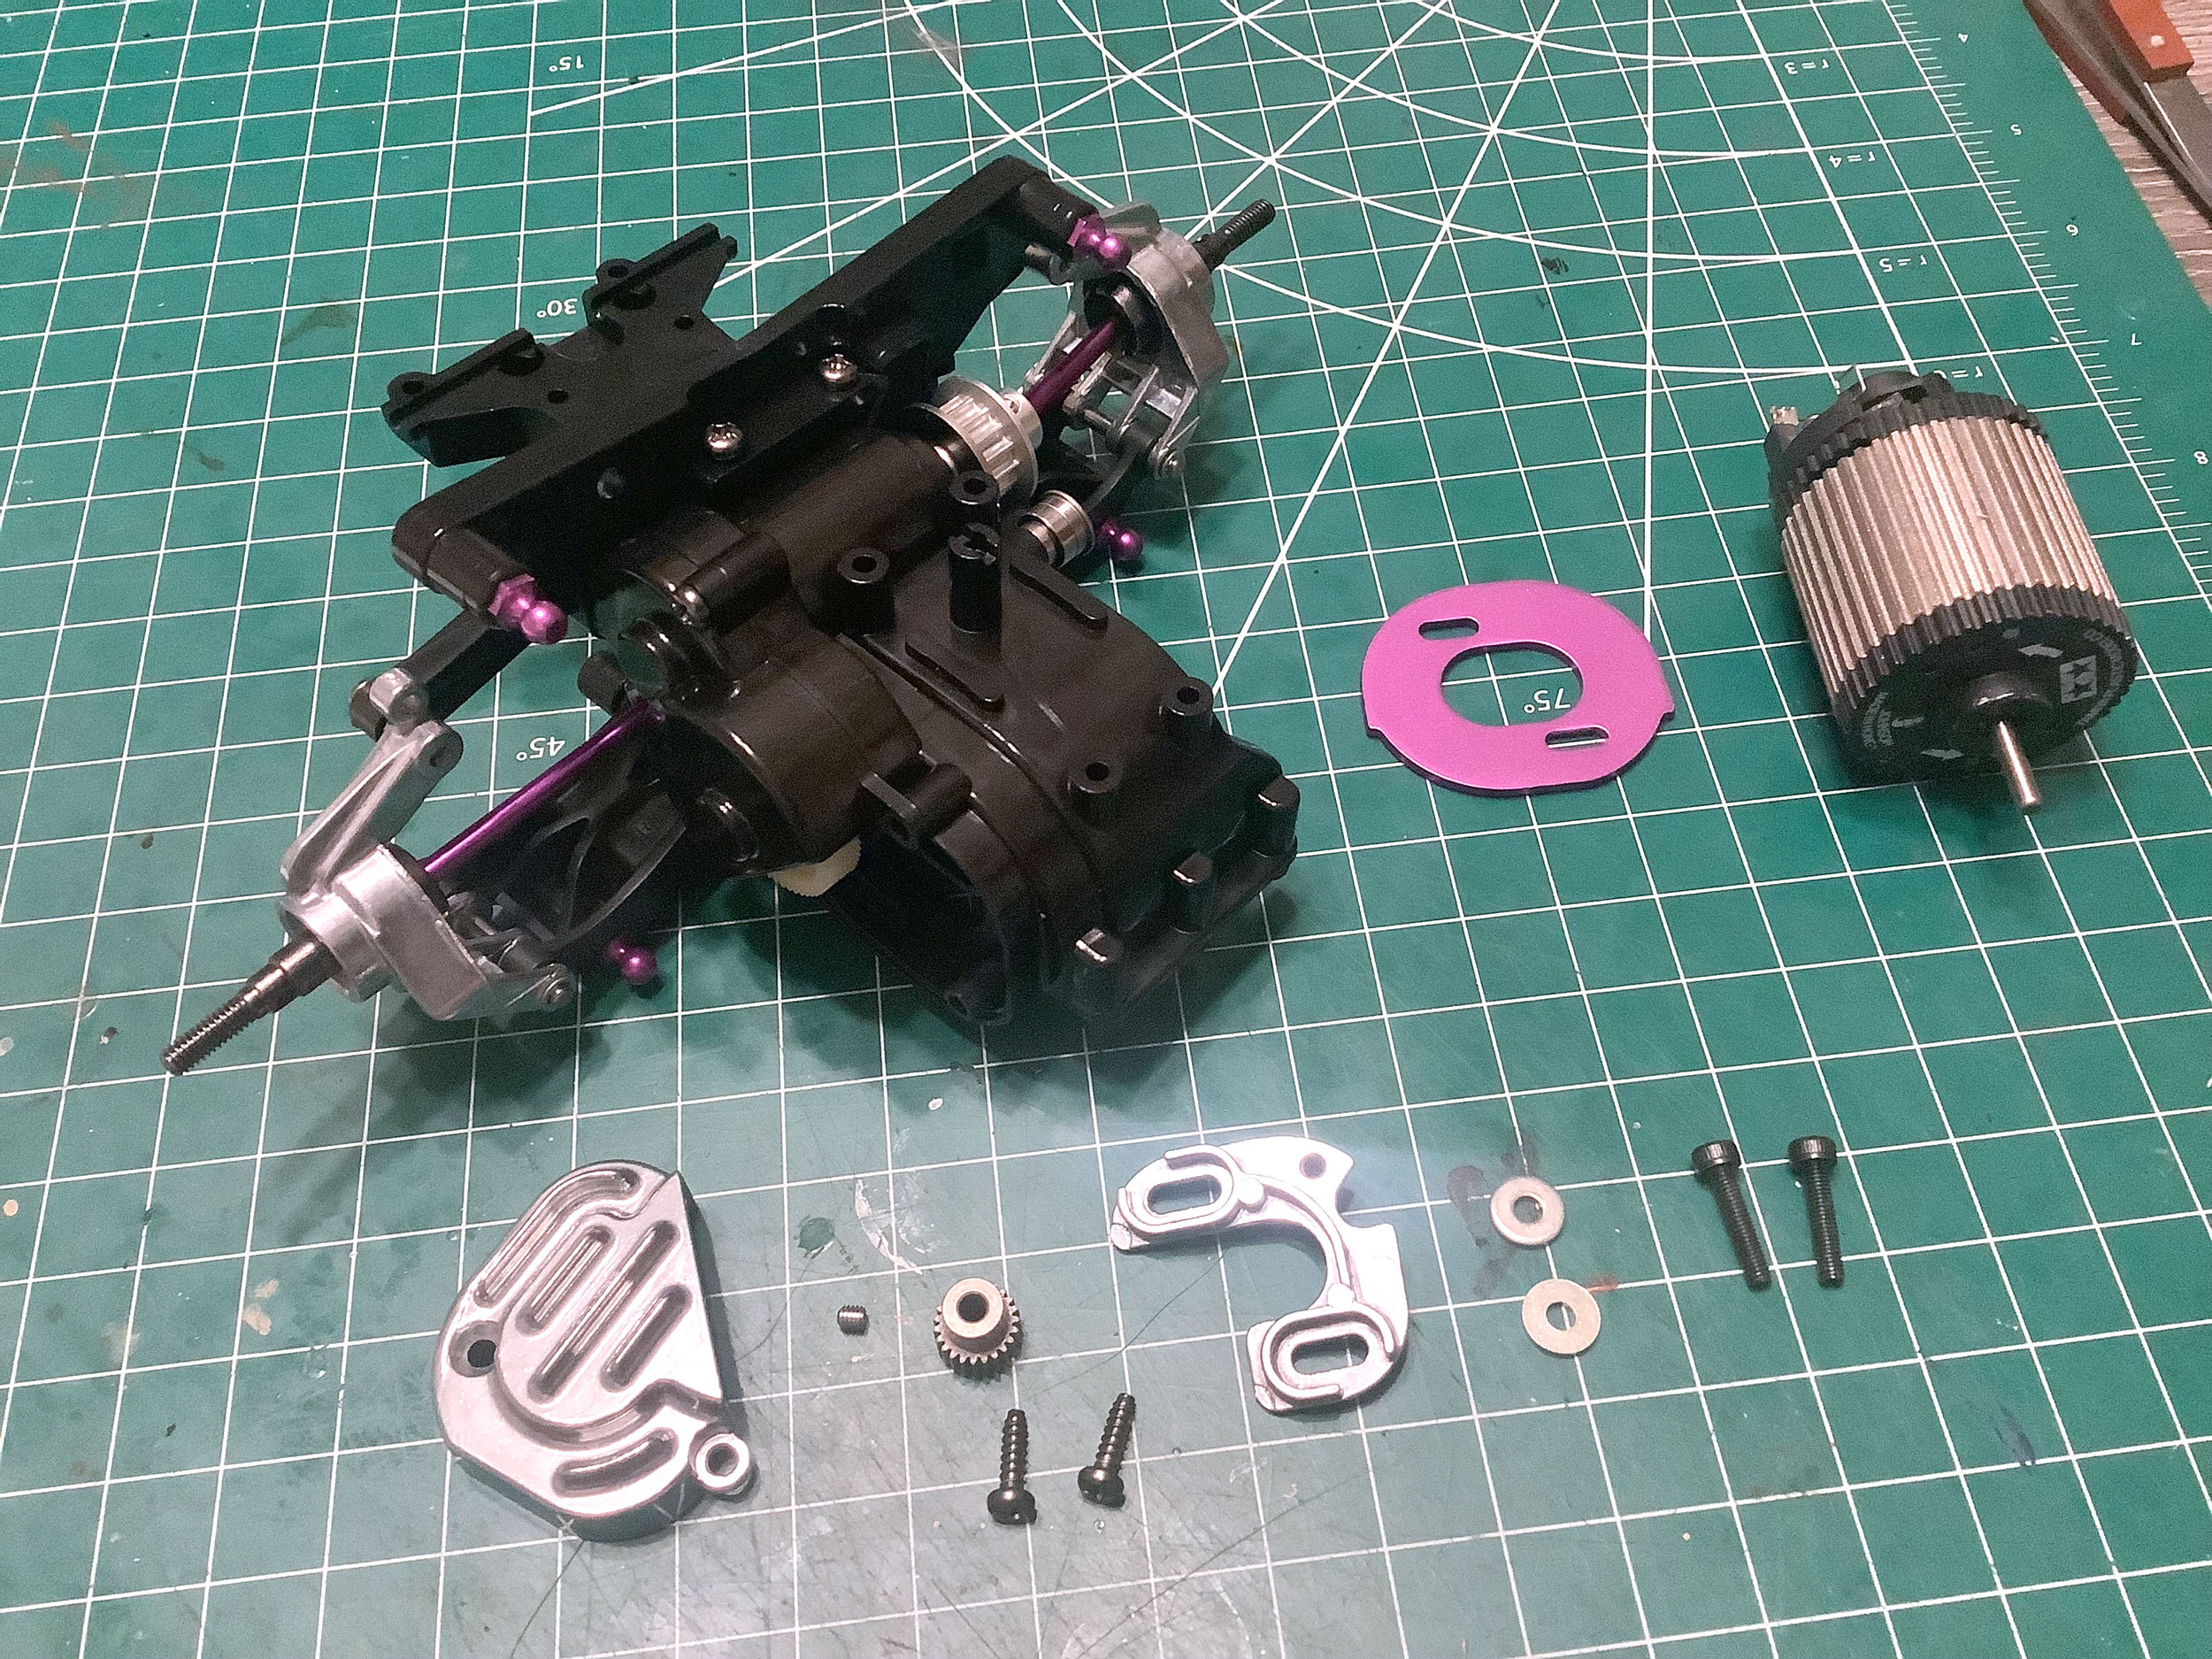
Both models use a C-shaped metal motor mounting plate, but while it is
stamped on the standard model it is cast metal on the TRF. While
the standard models use a regular paper washer as a spacer, the TRF
model adds the purple anodized aluminum plate shown. The TRF motor
is mounted with hex cap screws instead of JIS machine screws.
Finally, the standard plastic pinion gear cover is replaced on the TRF
model with a nice metal heat sink version, though I'm not sure much heat
is going to make it from the motor to this cover.
As previously discussed, the pitch of the spur gear is different between
the models so the pinions must change to match. The standard
model uses a 14T 0.6 mod pinion (14T-25T possible) while the TRF model
uses a 23T 0.4 mod pinion by default instead (20T-29T possible).
The standard model comes with the smallest possible pinion for the
highest possible gear reduction ratio (8.51:1) which results in the
slowest speed with the standard 27T silver can motor. The TRF
model does not come with a motor, but the stock 23T pinion results in a
lower 7.34:1 ratio with the recommended 13T Dyna Run Super Touring
motor, but the hotter motor more than makes up for the difference and
results in a much faster car. Interestingly, if using a silver can
the TRF manual recommends using the largest possible pinion (which
makes sense) instead of the smallest possible pinion used in the
standard model (which seems odd). (The Dynatech 02H motor shown is
just a placeholder until the right motor arrives).
For those who like to see the numbers:
- Standard
- 43:14 x 25:22 x 39:16 = 8.51:1
- Wheel speed based on 12,500 rpm standard silver can motor = 1469 rpm
- TRF
- 63:23 x 33:30 x 39:16 = 7.34:1
- Wheel speed based on 33,200 rpm Dyna Run Super Touring motor = 4523 rpm
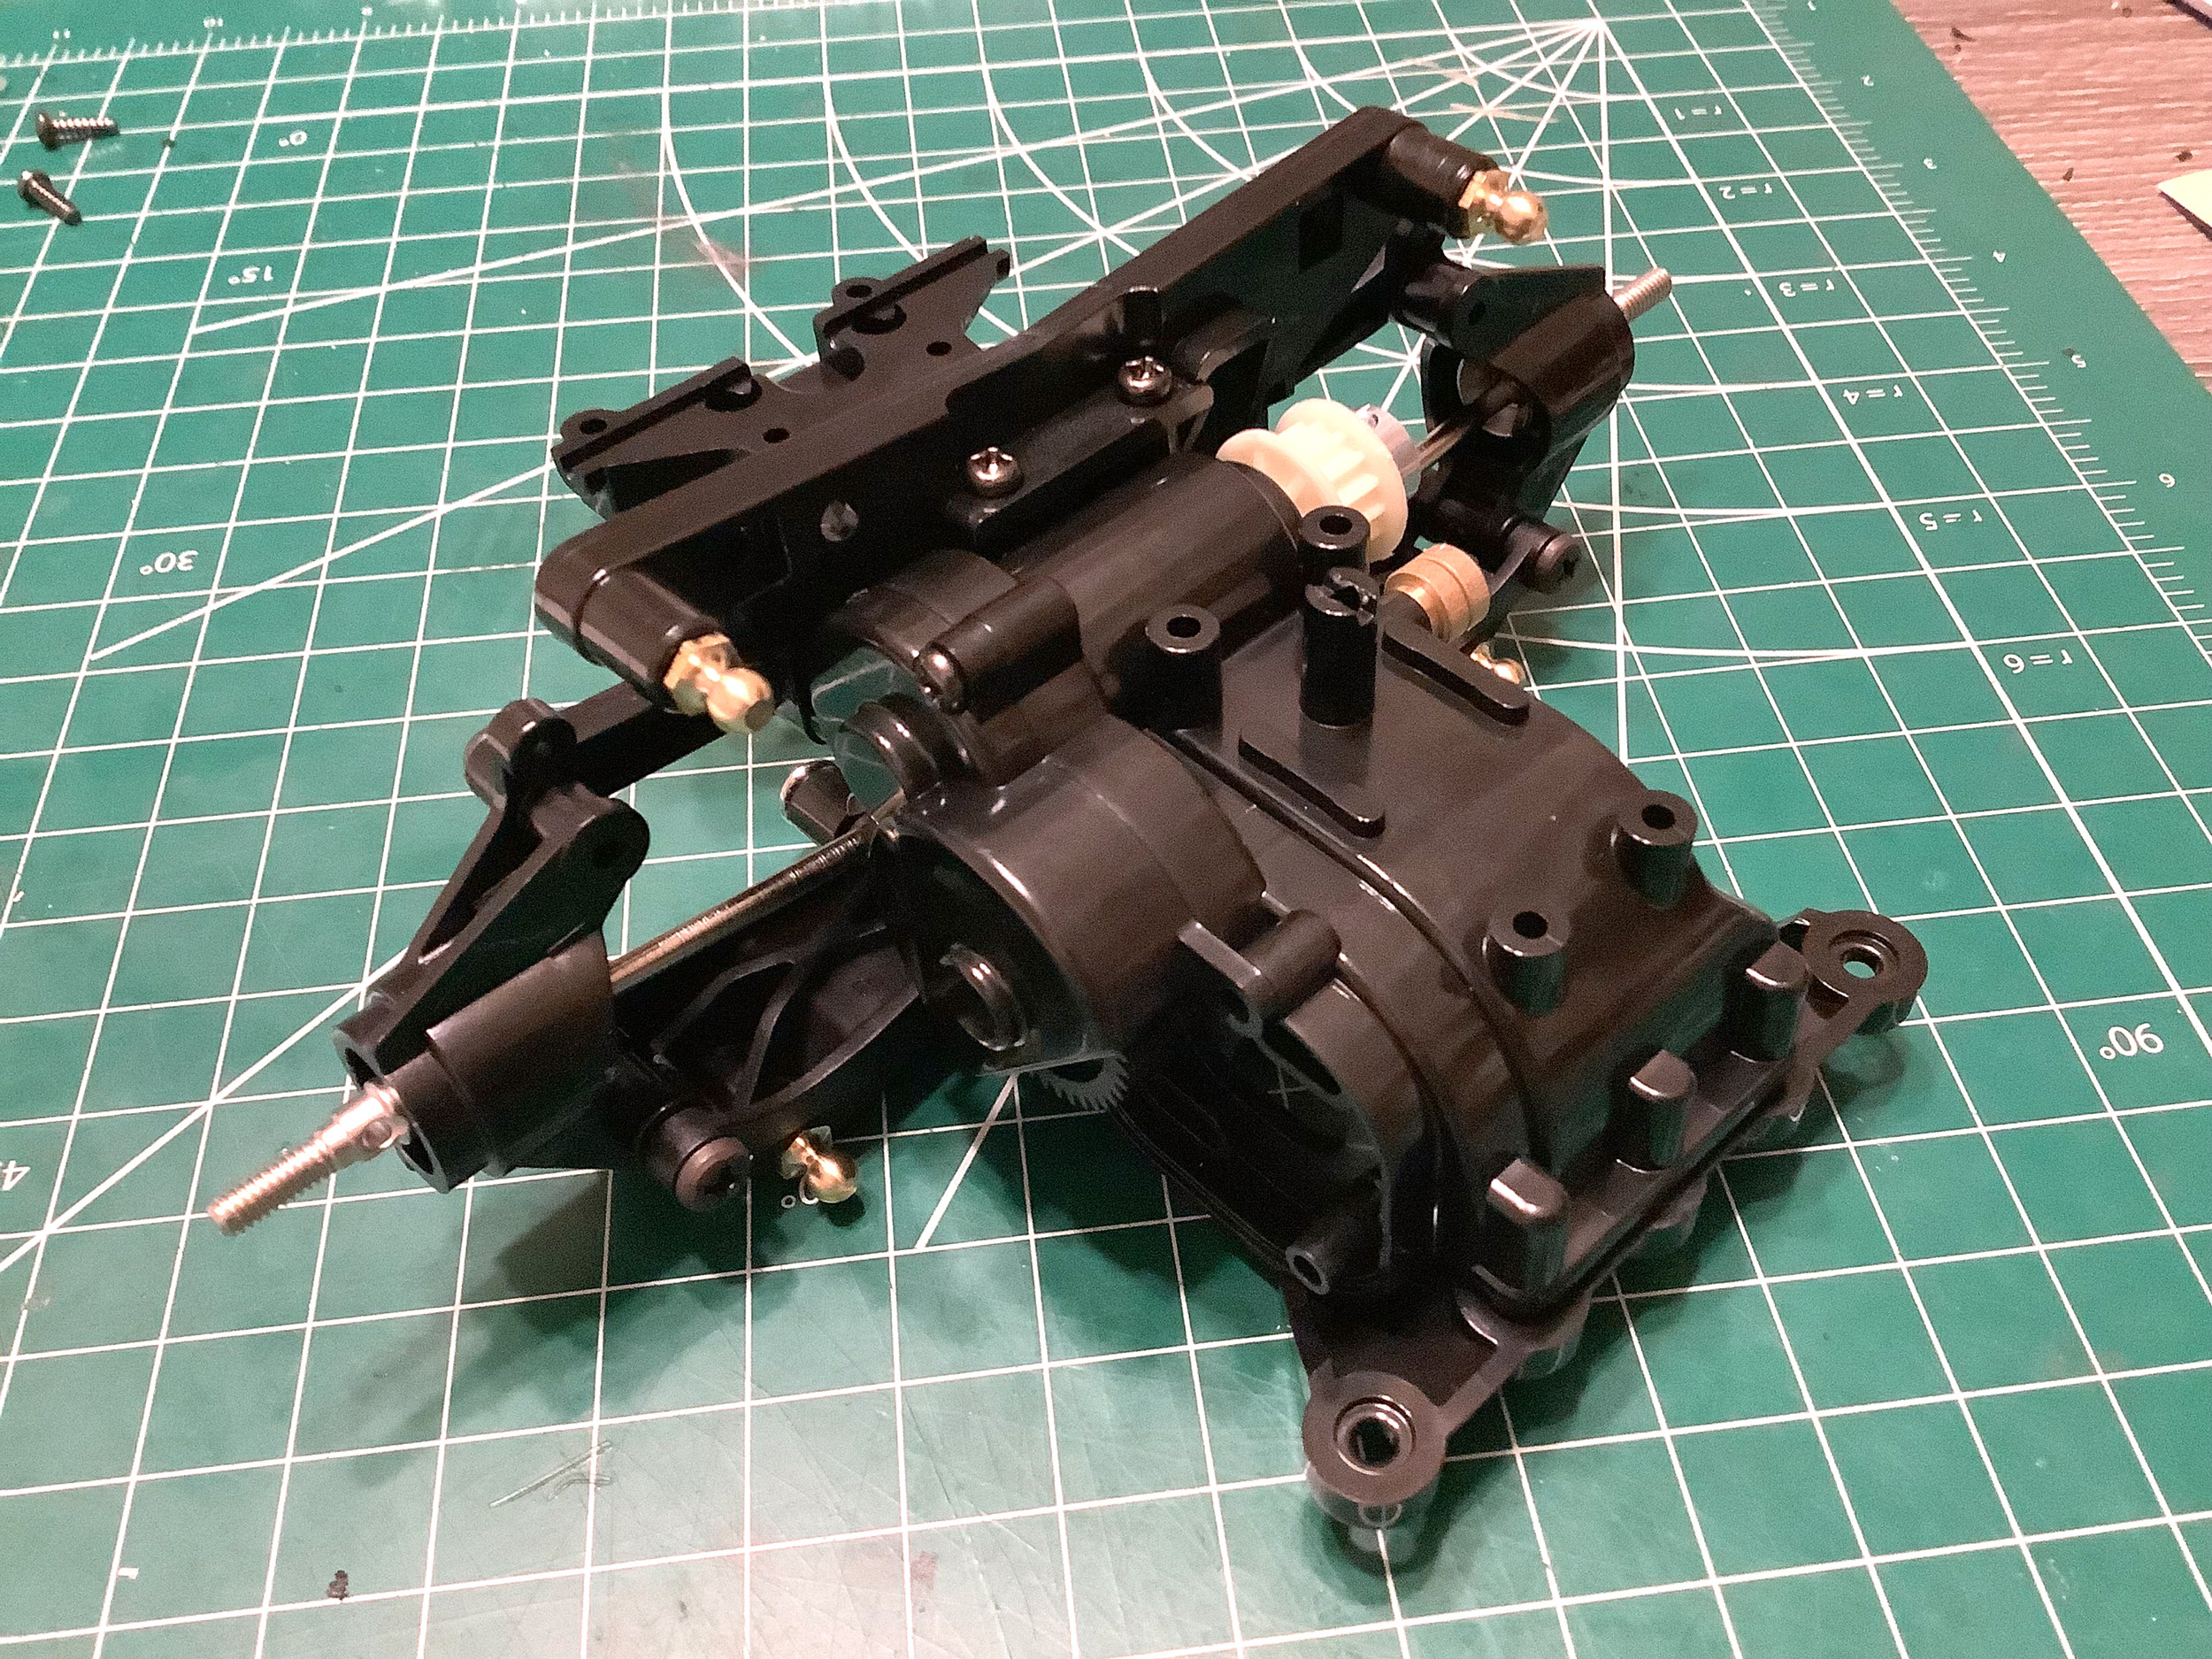
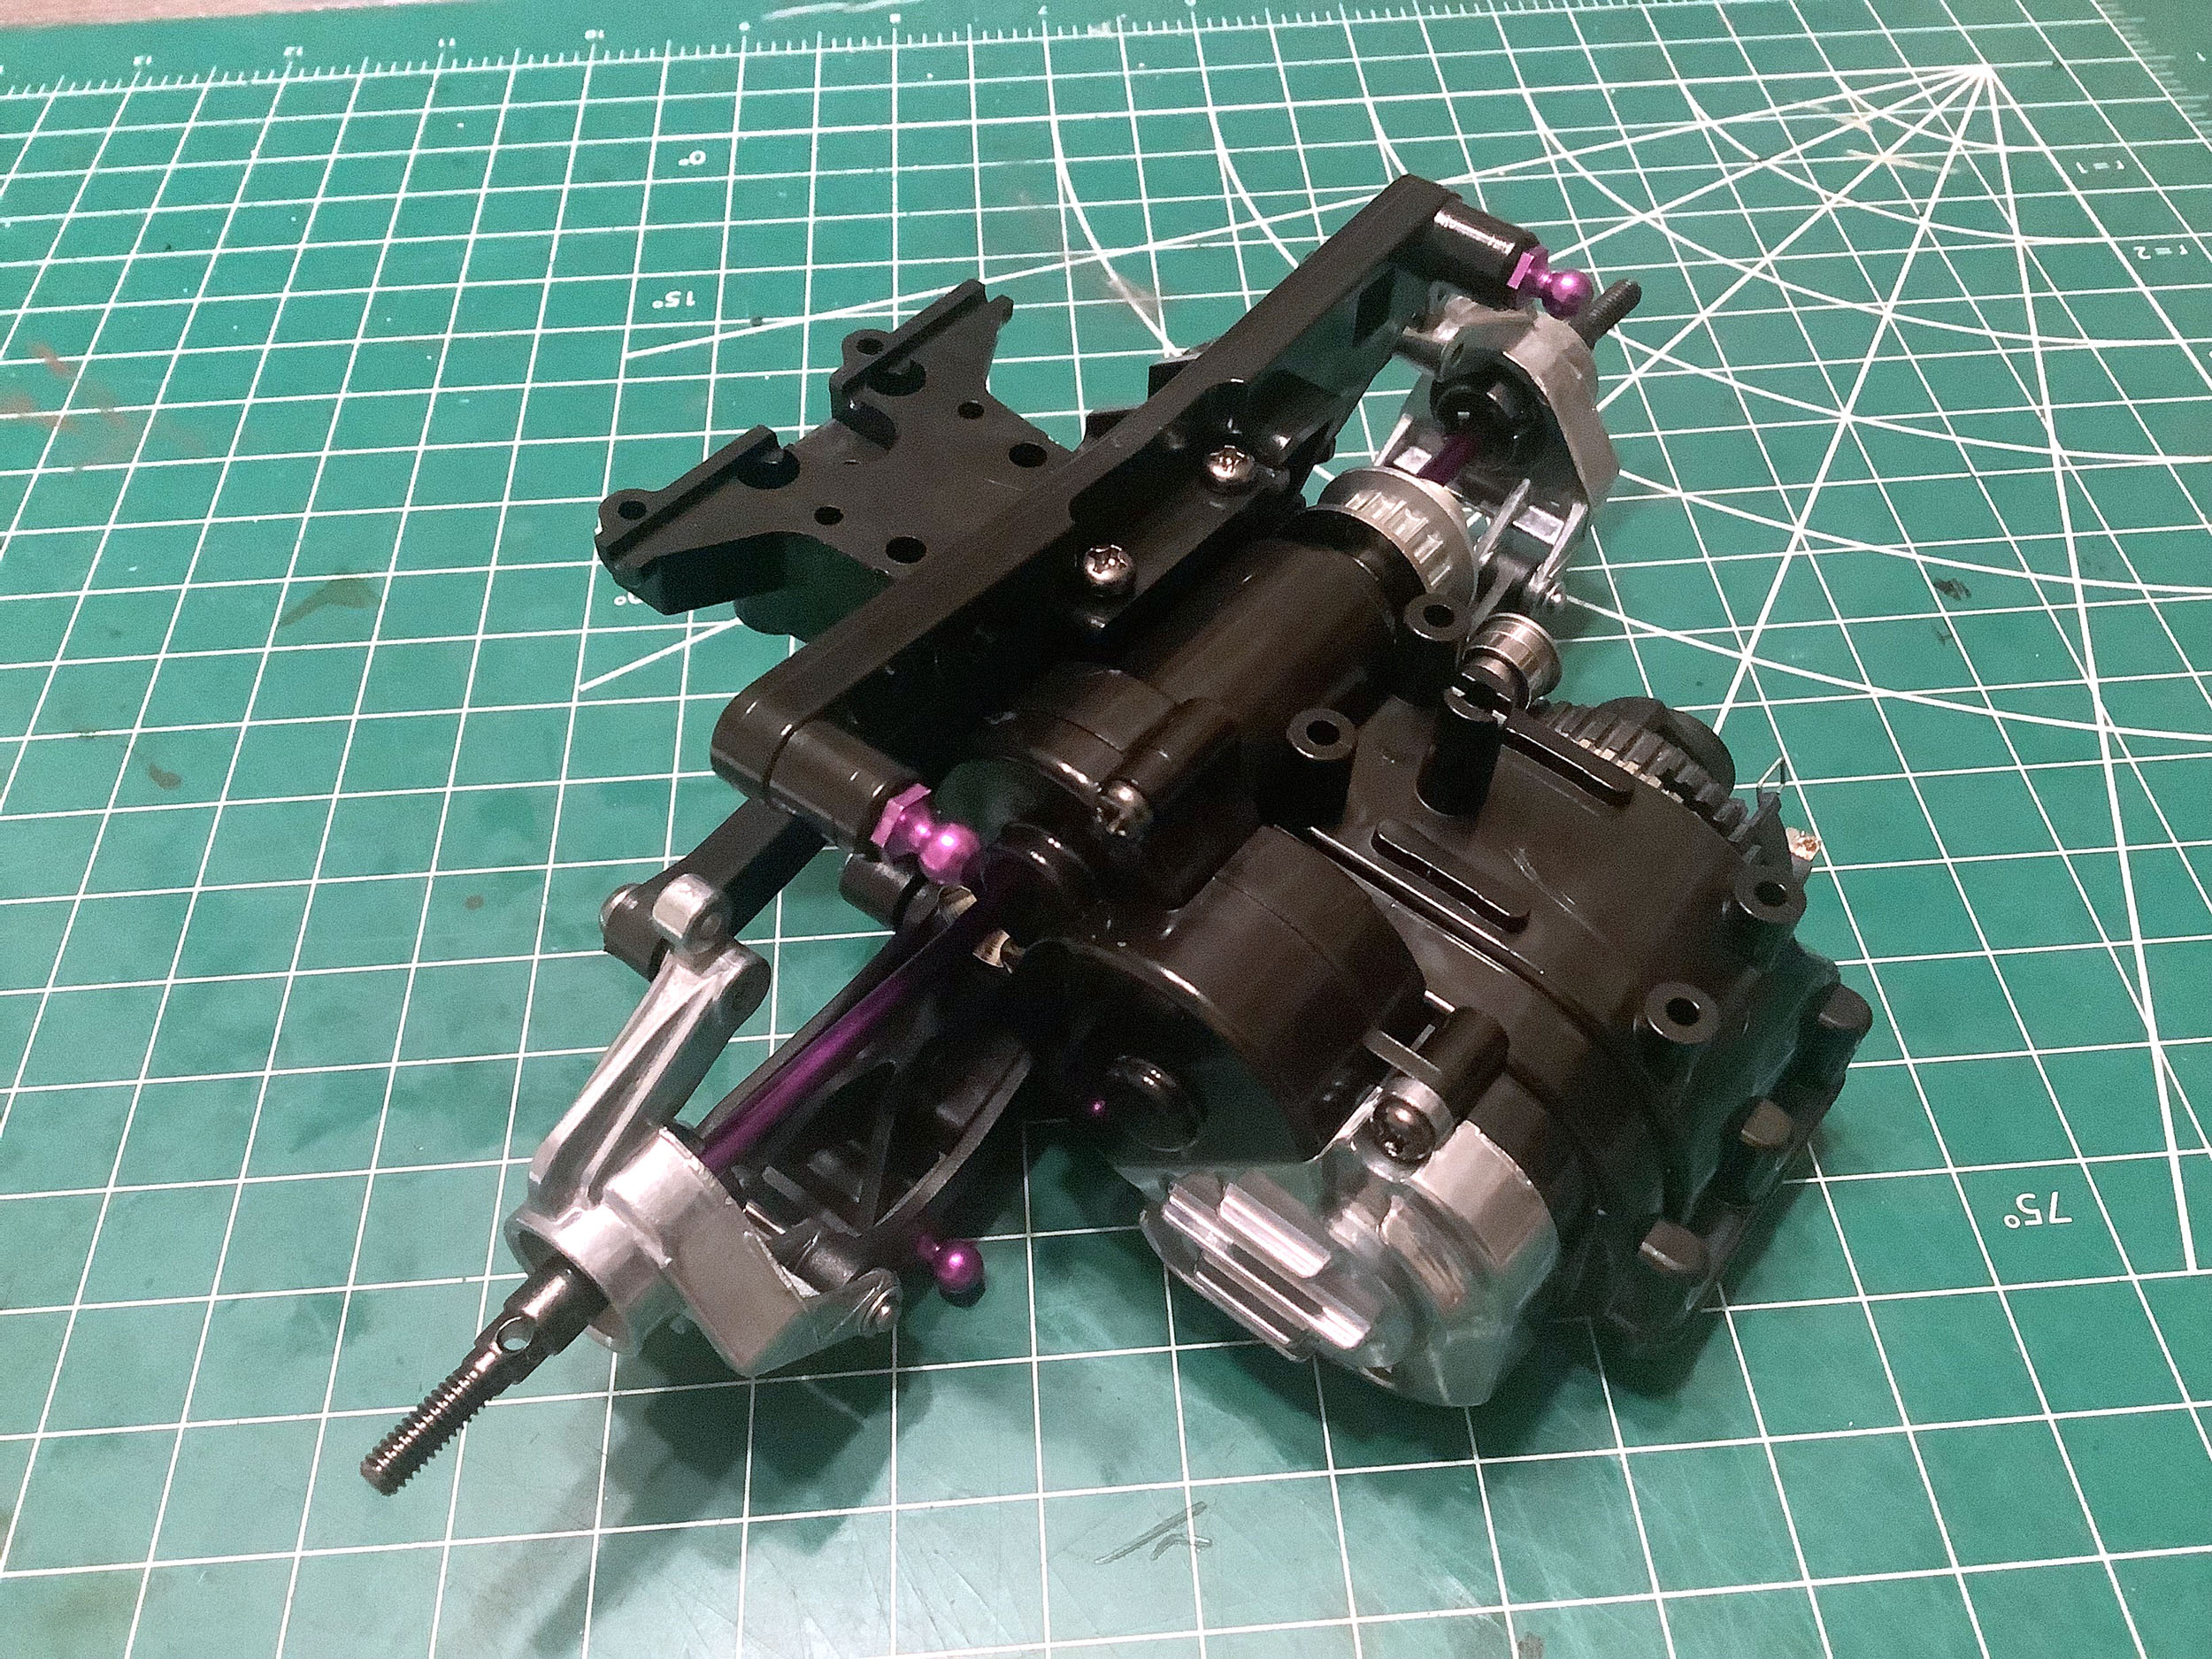
That's the completed rear bulkhead, gearbox, and suspension
assembly. Most of the mechanical guts of the model are right here.
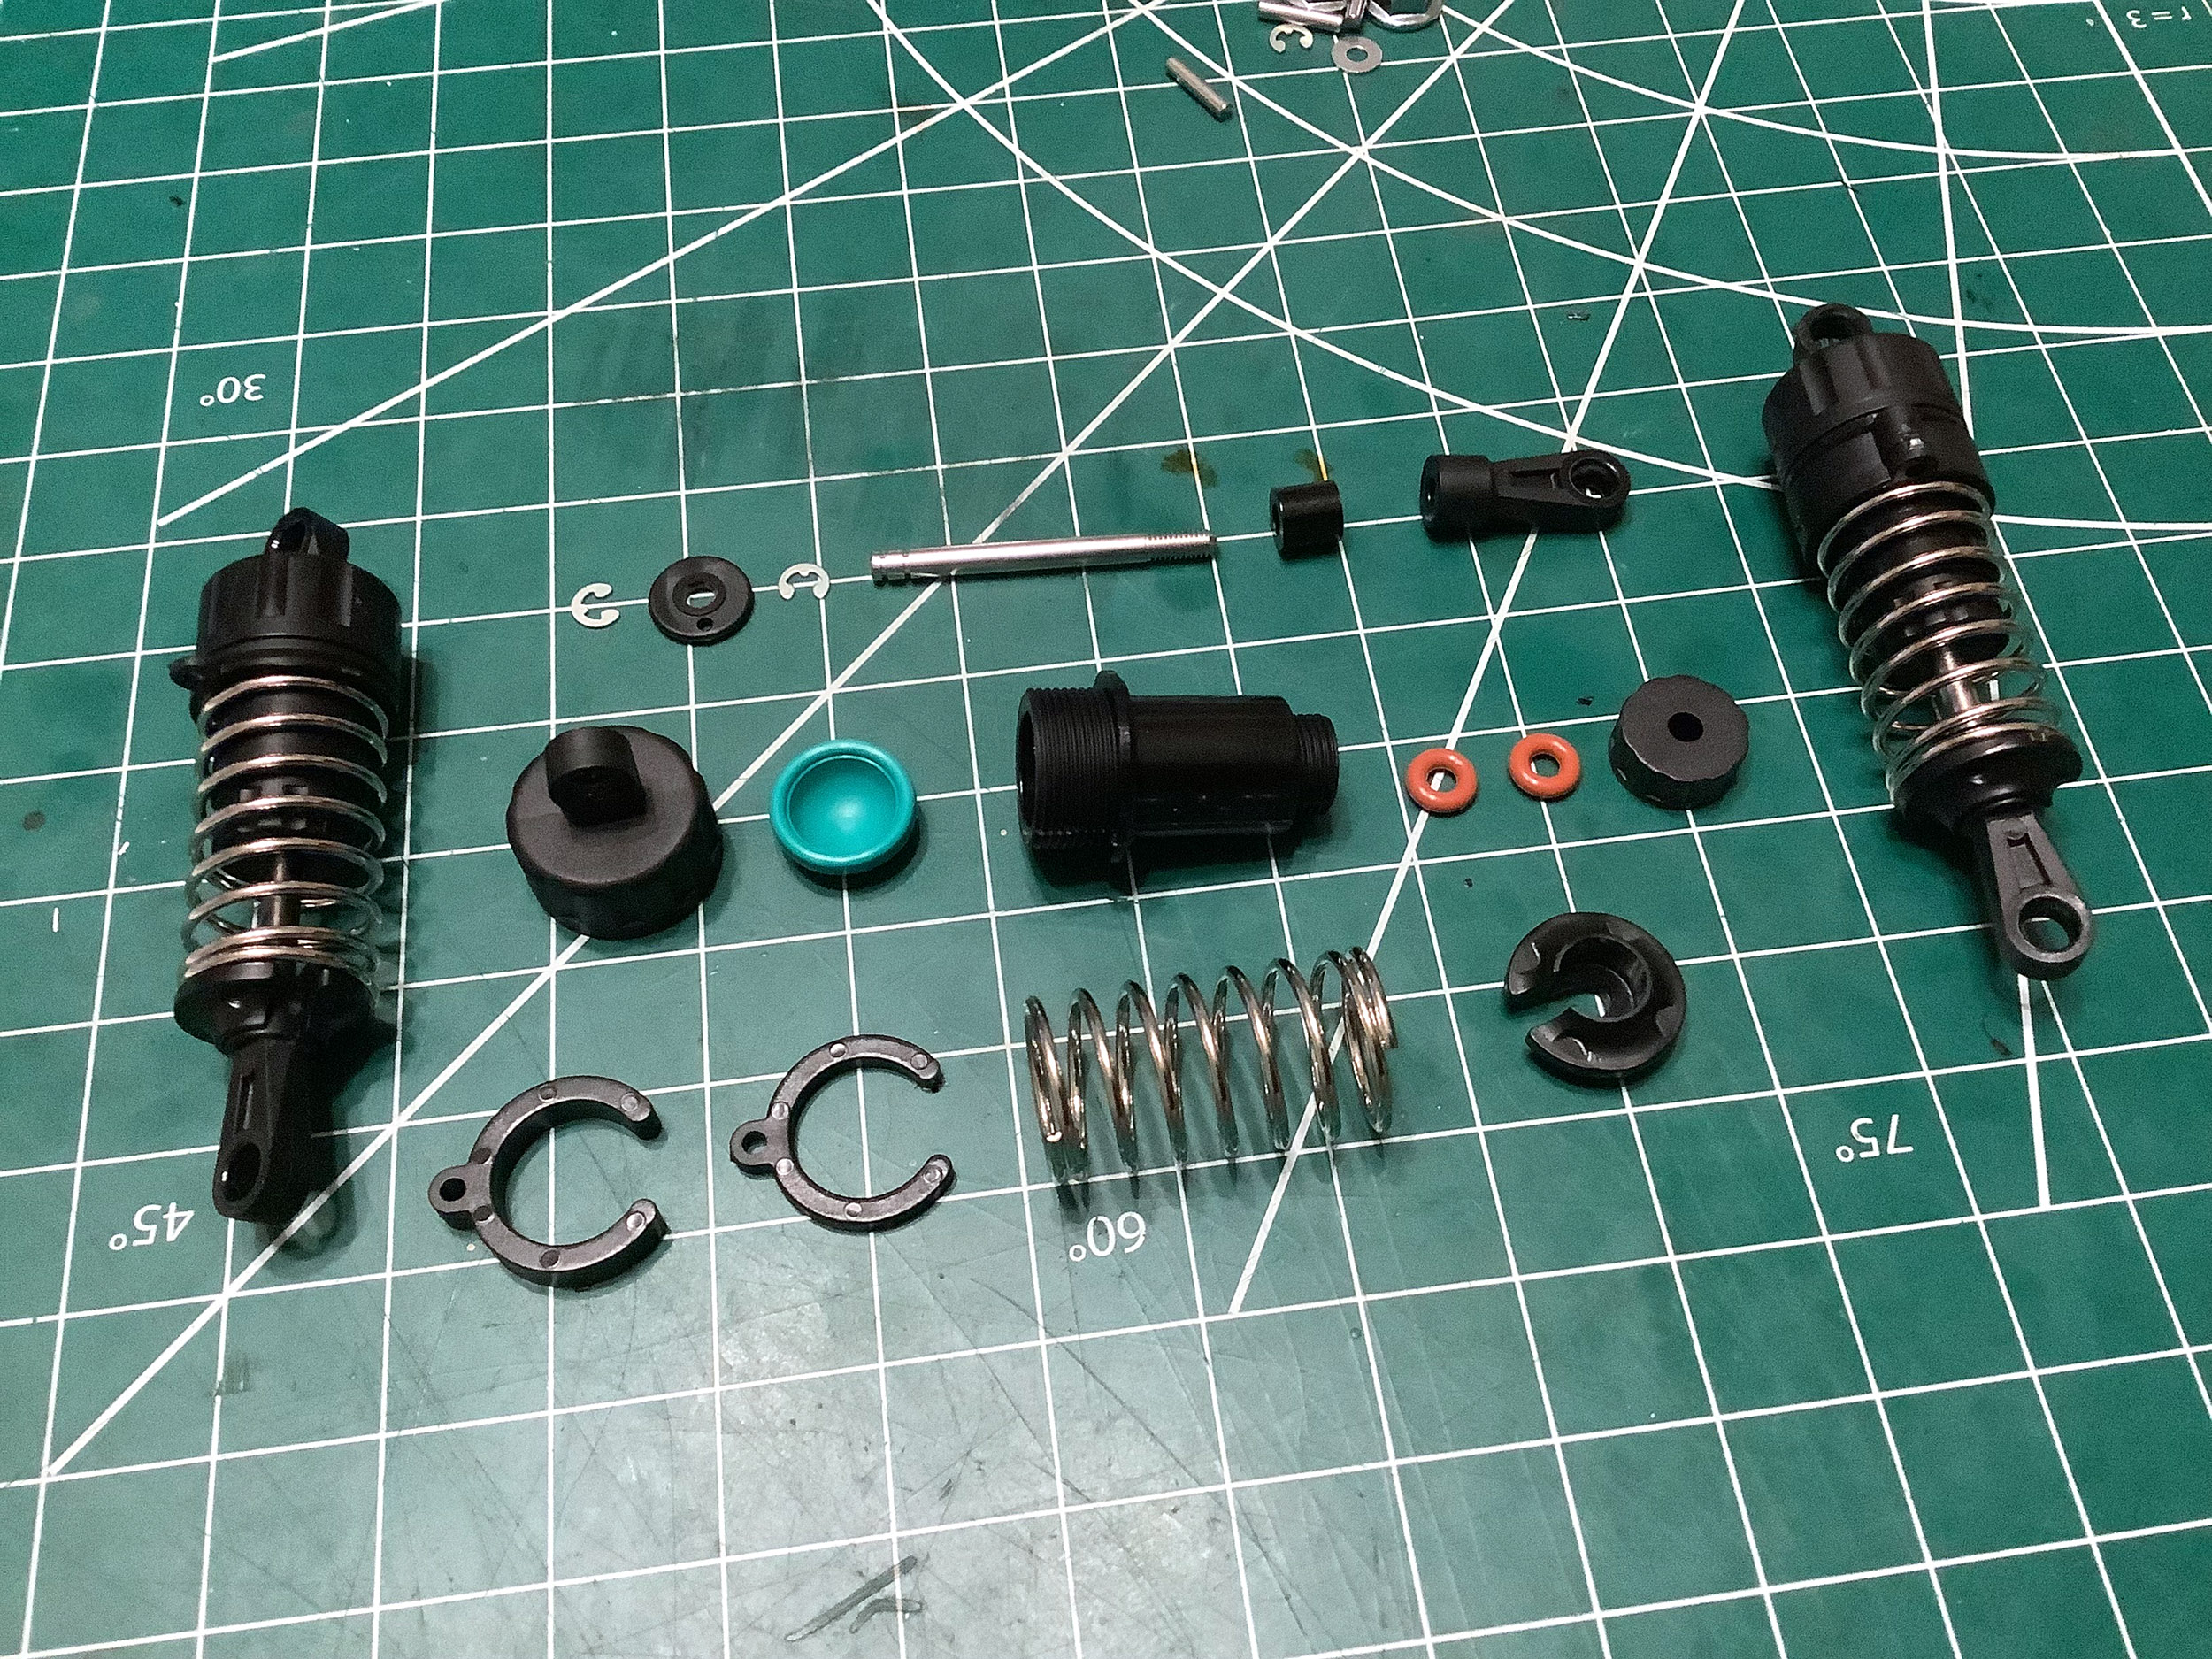
While the standard model did come with decent oil filled plastic CVA
shocks, the TRF model kicked it up several notches with these aluminum
shocks. Tamiya hadn't settled on their TRF shock design yet so
these represent an early attempt, but you can see the aluminum cylinder
with threaded caps, double o-ring seals with Delrin rod guide, Delrin
piston, and volume compensation bladder. The outside of the
cylinder is not threaded for a preload adjustment ring so spacers must
be used instead. The front and rear are built differently with
more internal o-ring spacers on the front (resulting in a shorter
extended length) and different spring rates. The pink and blue
colored caps and springs help differentiate them and are unique to this
model. Even the very closely related TA-03 R TRF uses gold, red,
and yellow instead. This damper style originated in the David Jun
Special Edition of the TA-03 F (silver and blue). All 3 models
share the same cylinder and spring part numbers despite being different
colors. Good luck getting the right parts if you ever need to
replace them.
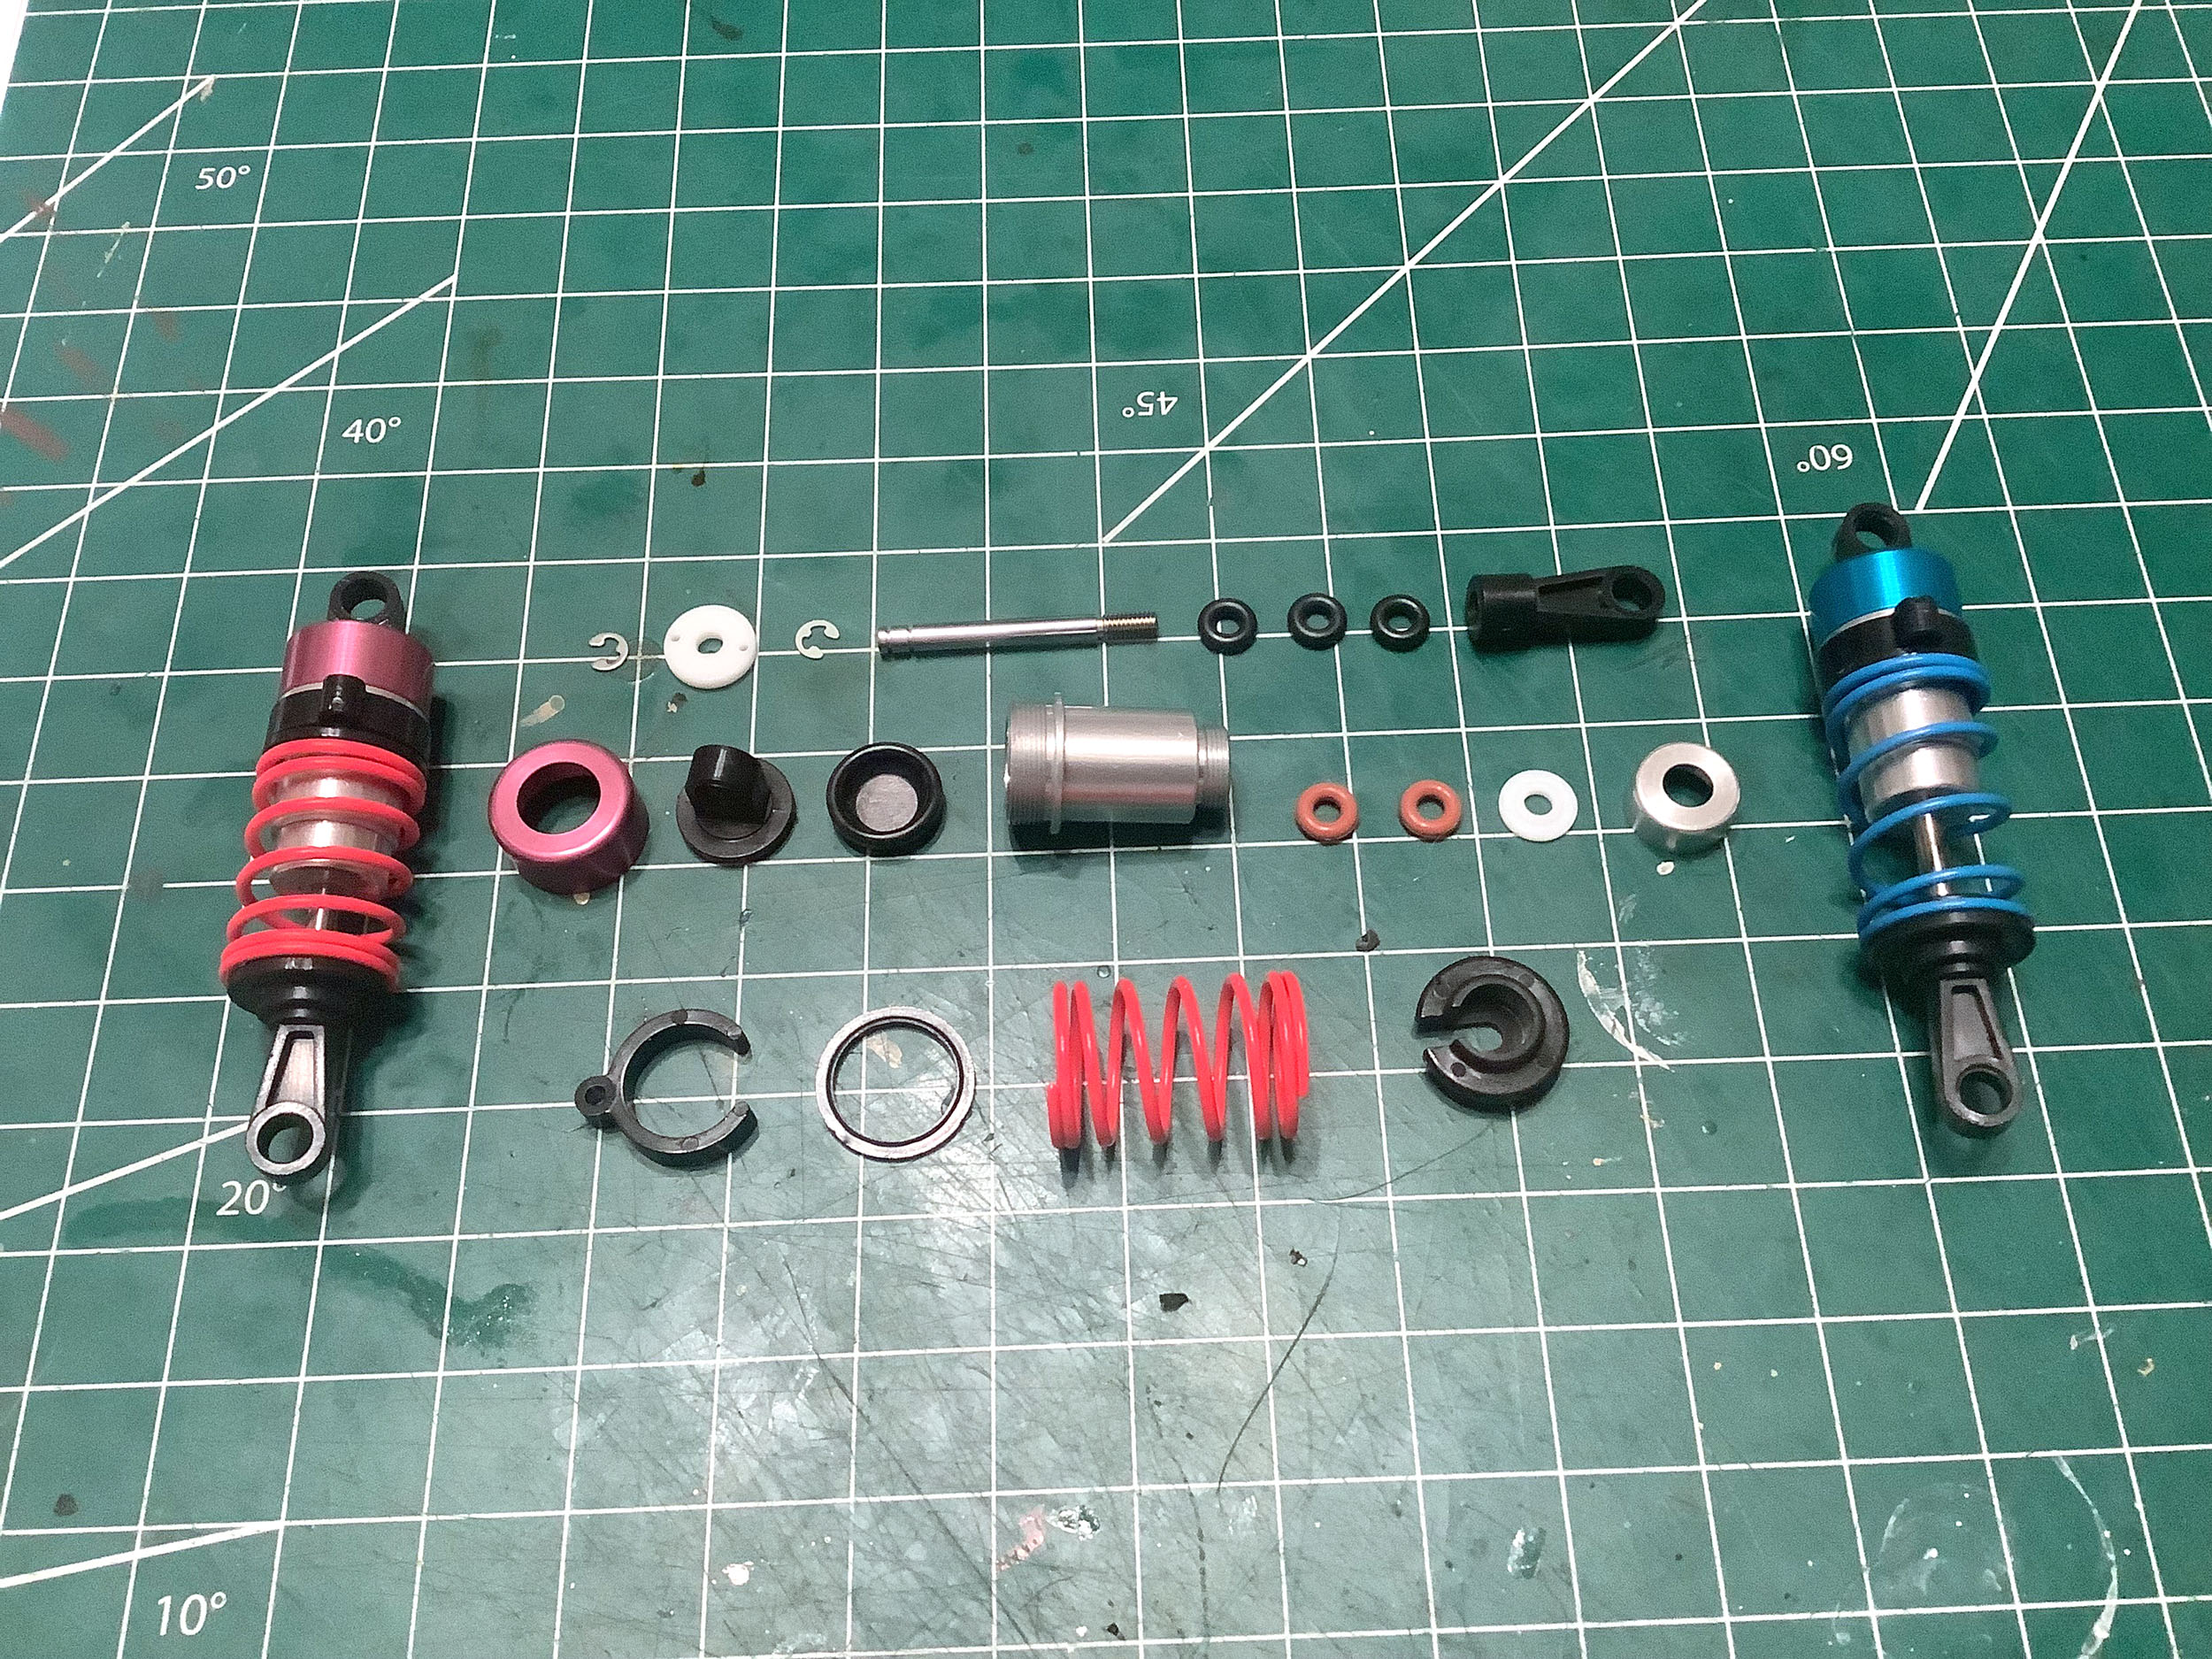
Here are completed front and rear suspension modules (with shocks) for
both the standard and the TRF chassis. Many external differences
are pretty easy to spot with the TRF version being much more colorful.
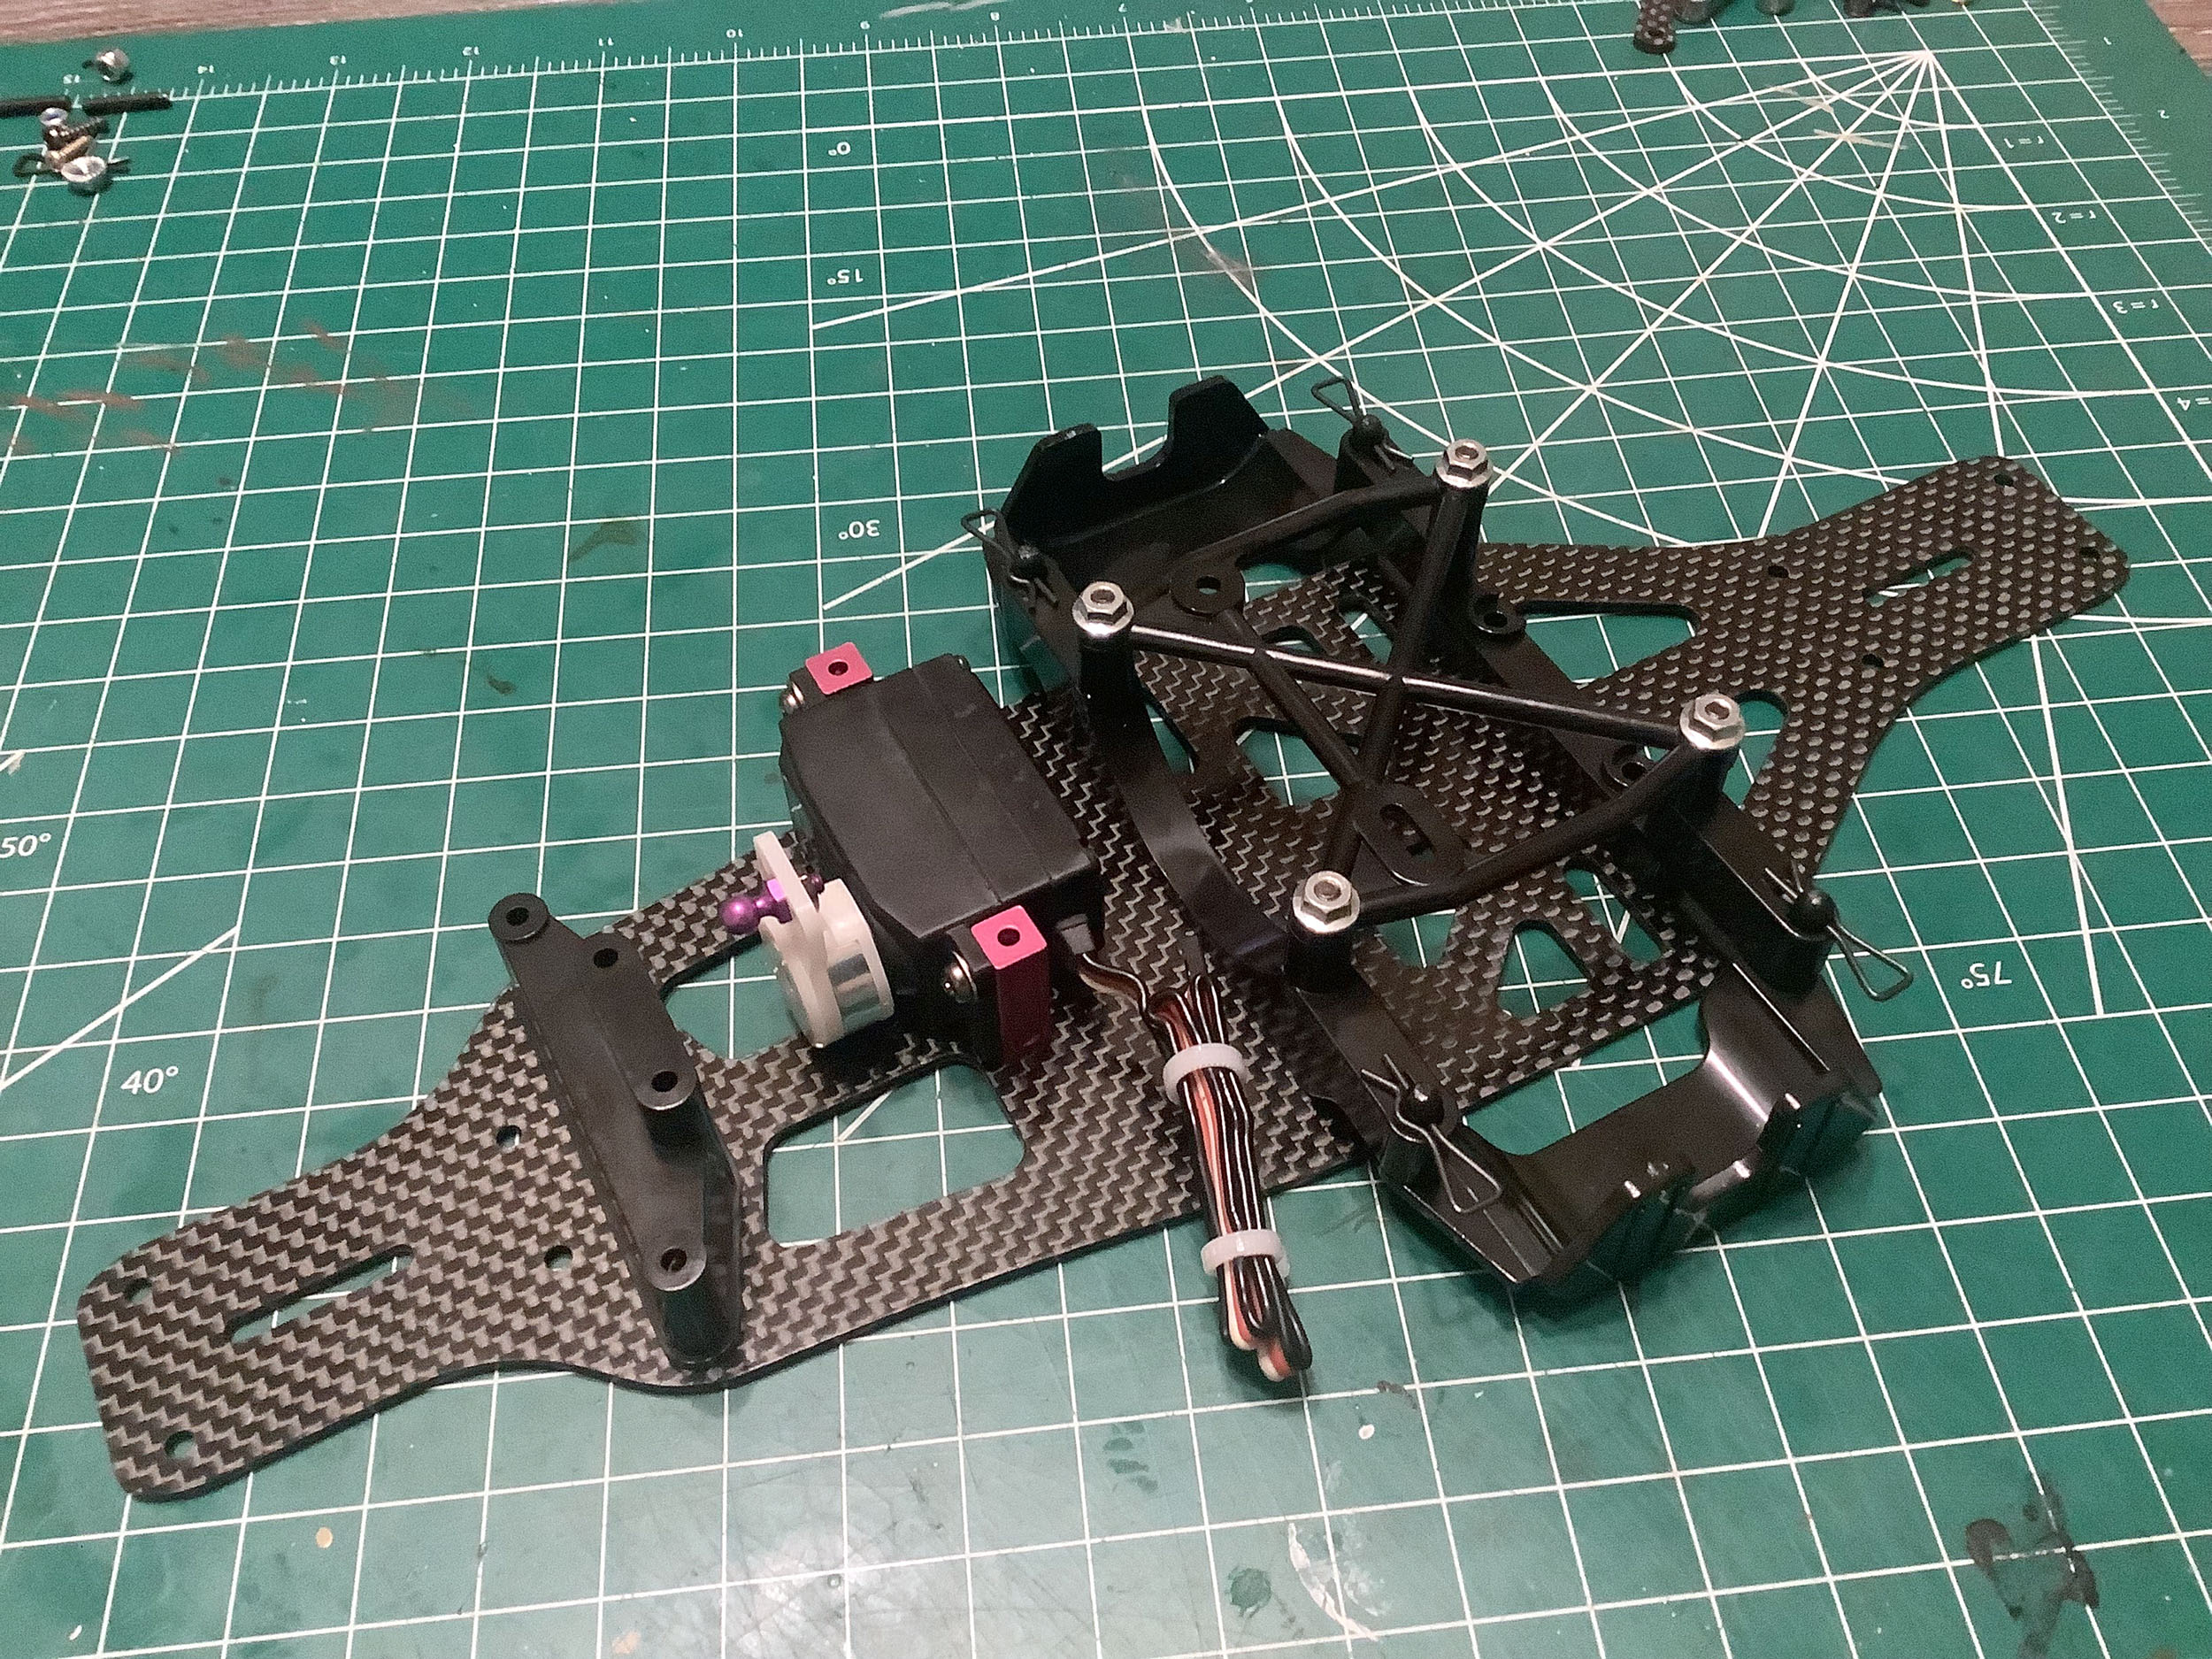
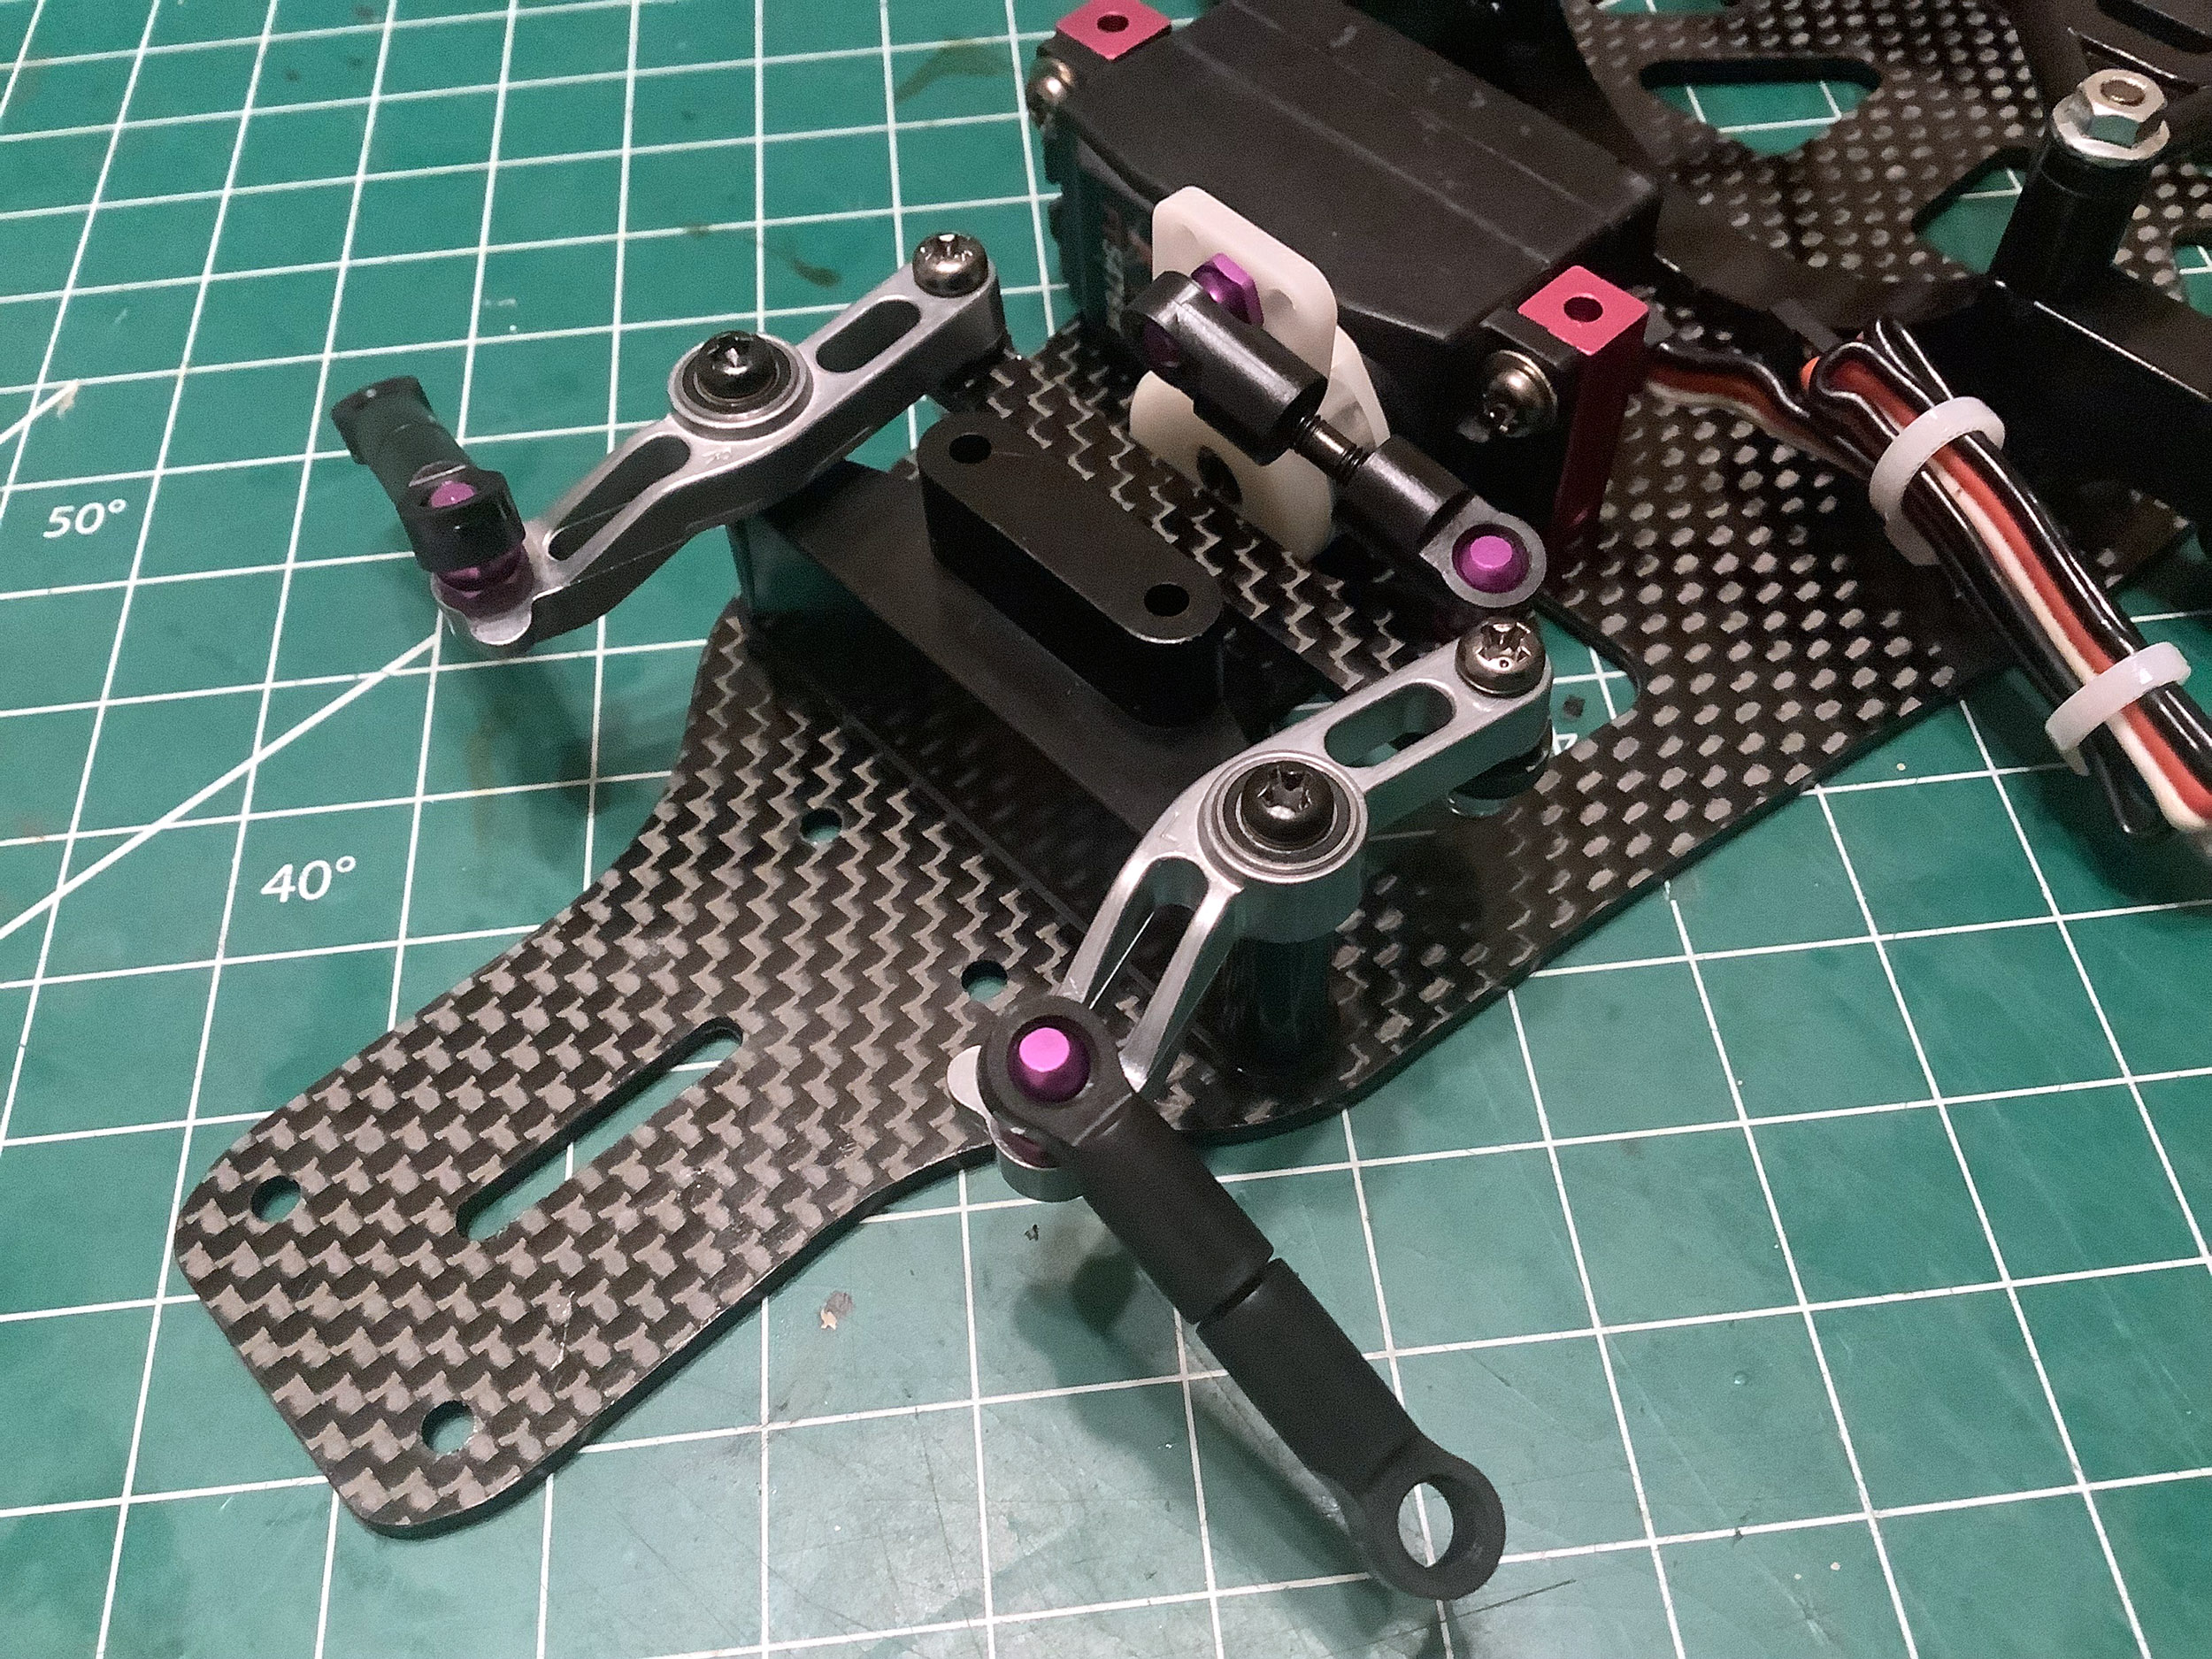
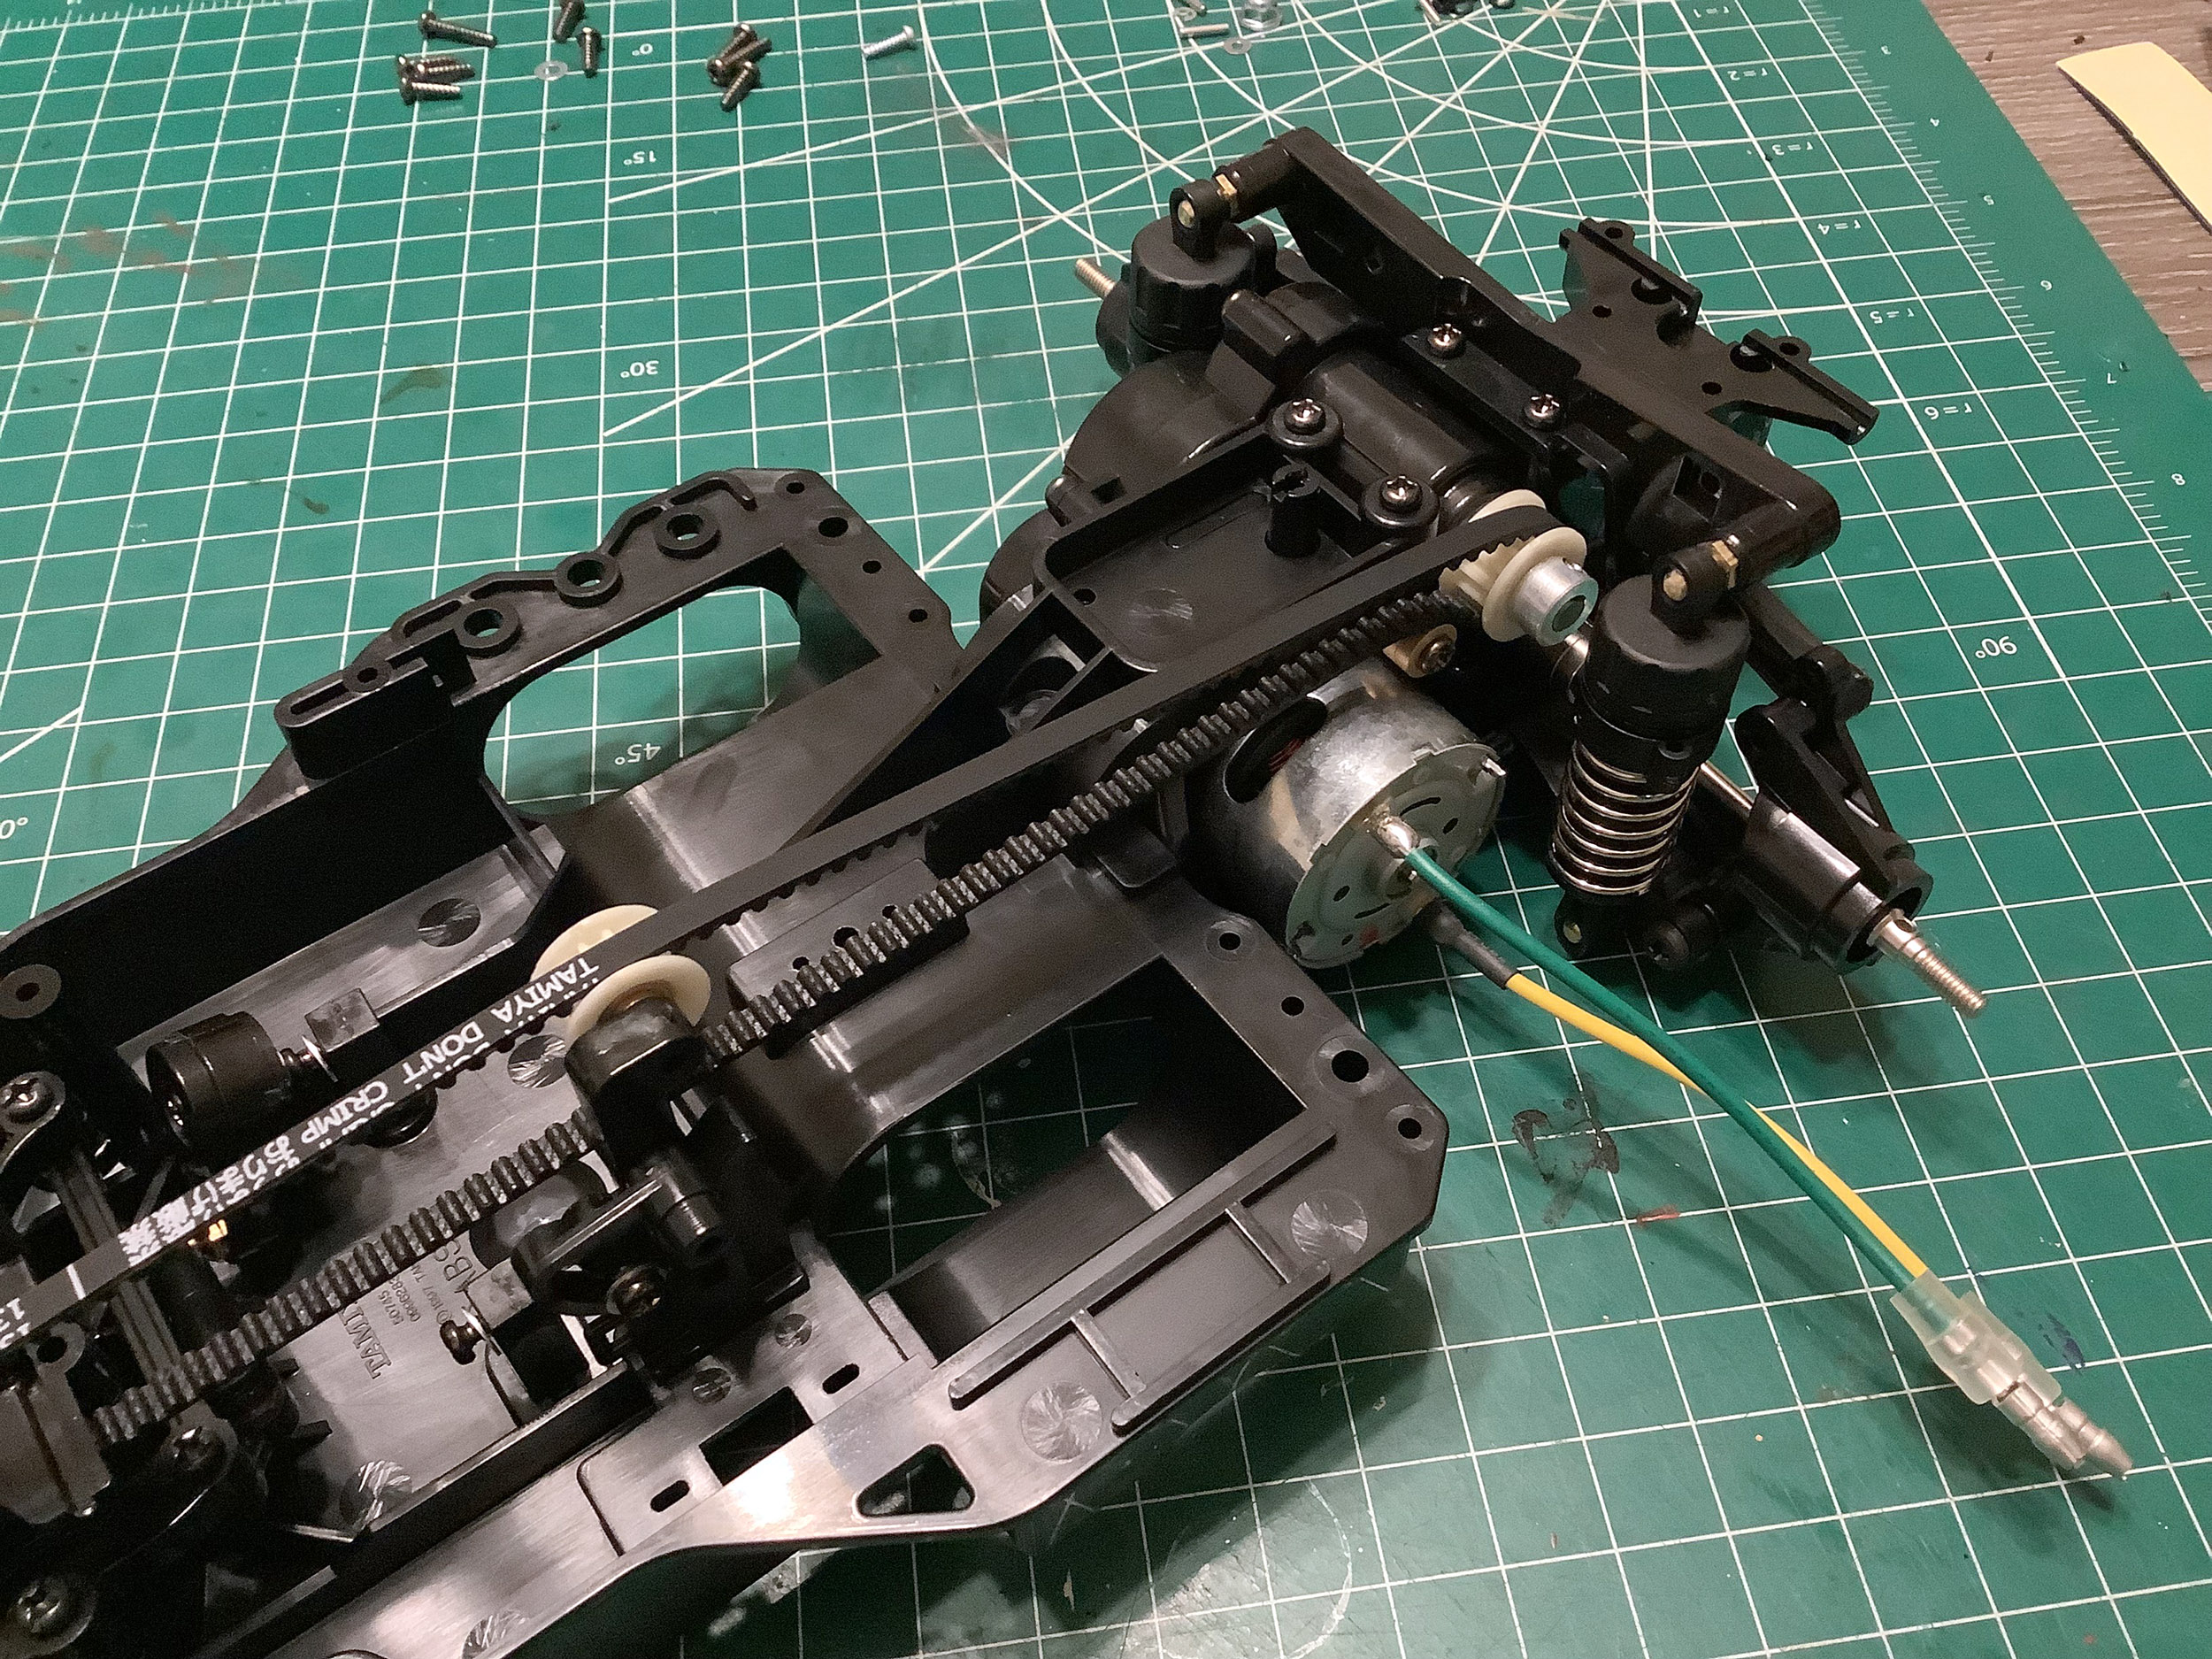
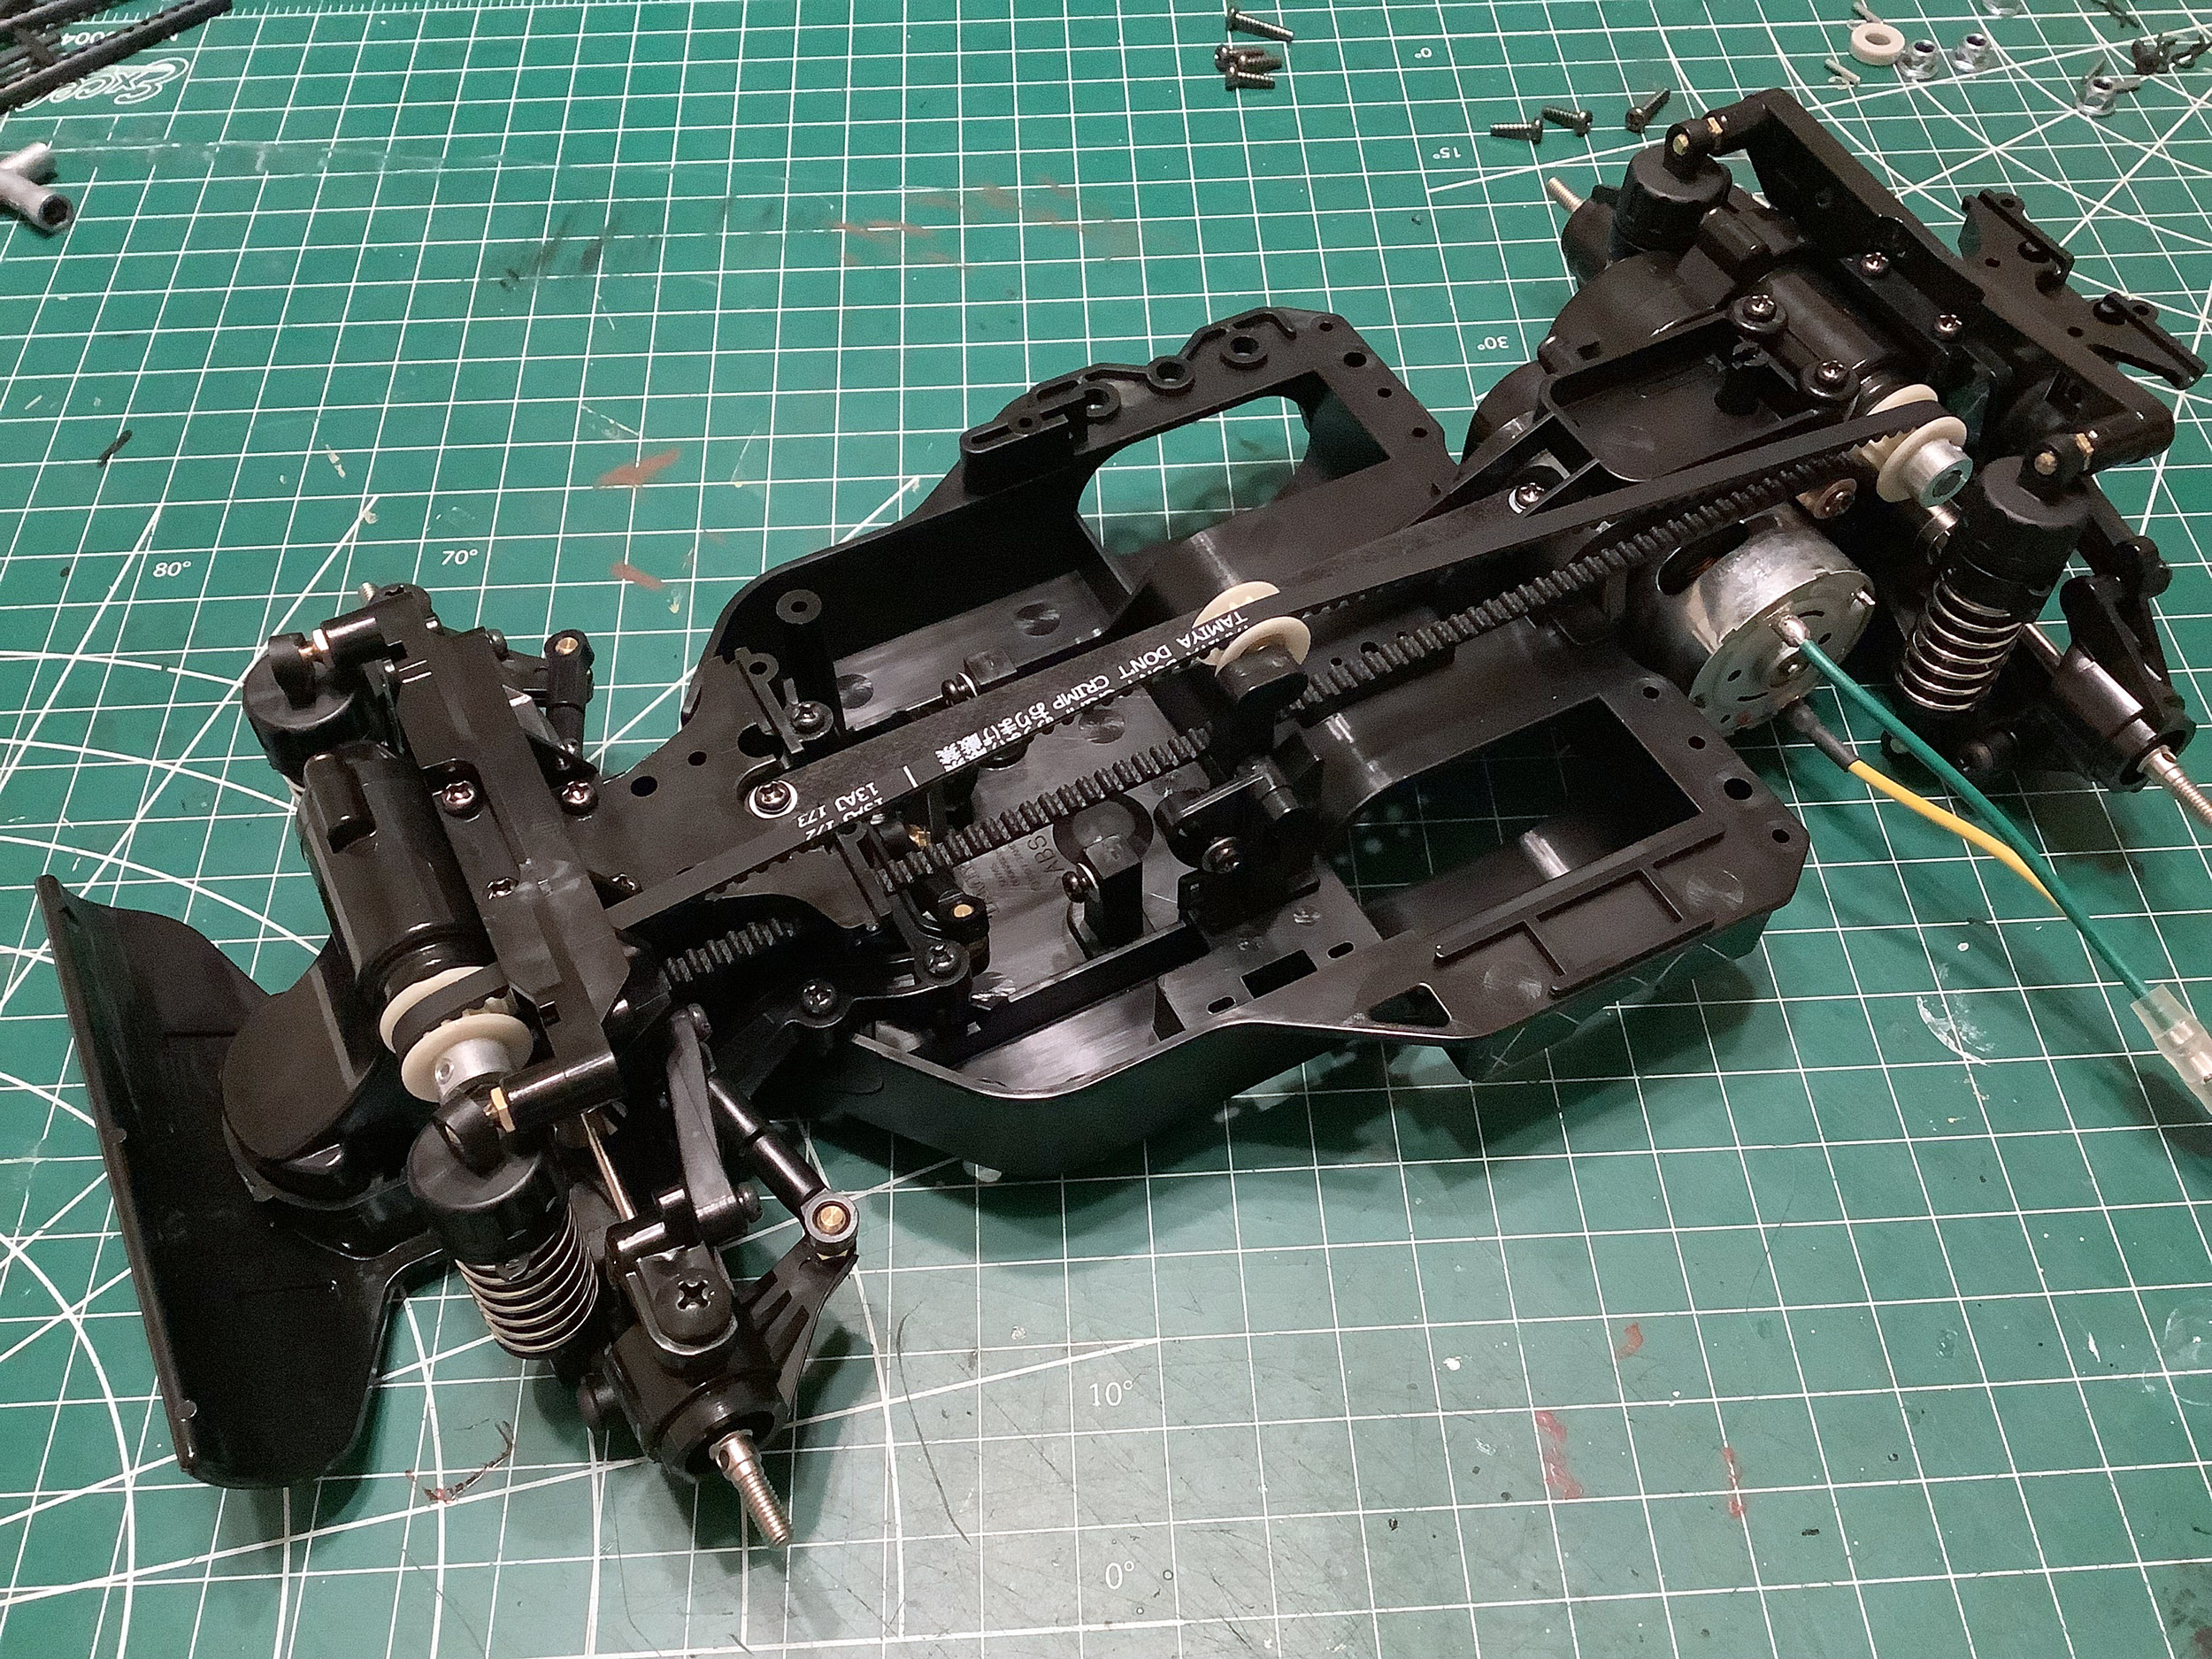
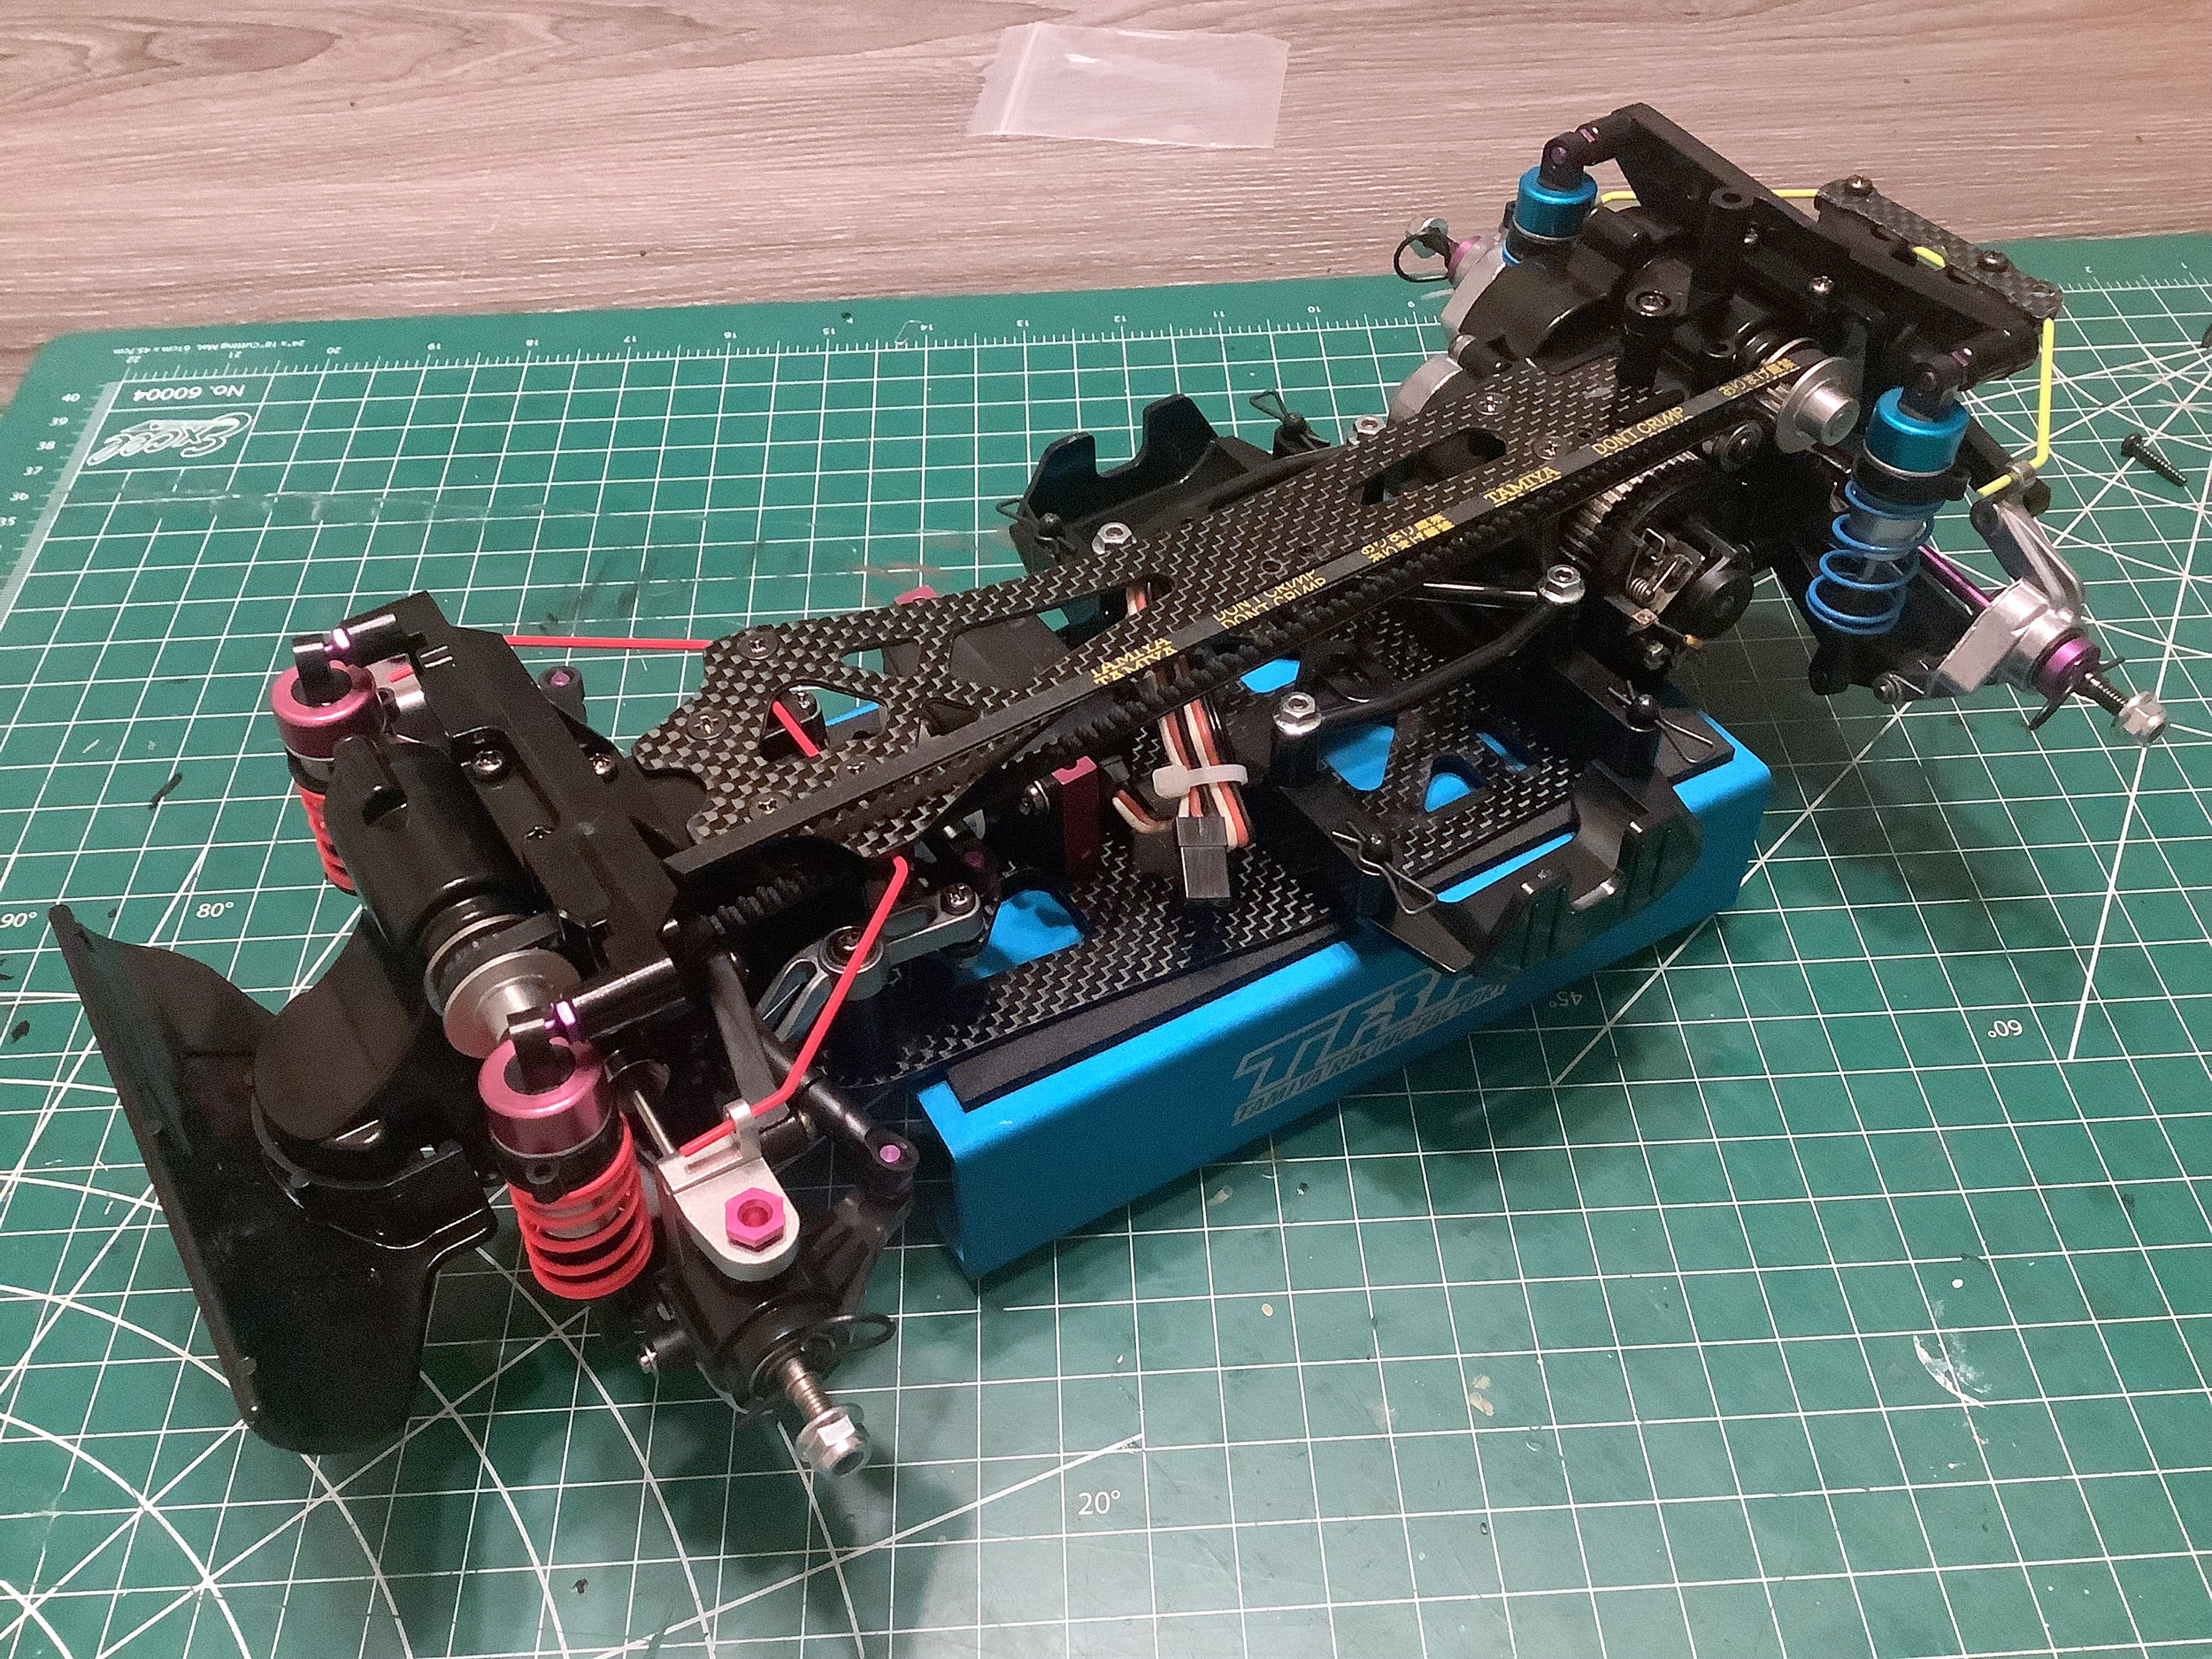
Now we'll get to work on the chassis. While the standard model
uses a plastic bathtub chassis that is all one piece, the TRF version of
the chassis needs to be built up from multiple parts. We start
with the carbon fiber base plate and work up from there. The large
plastic bits you see are for the battery holder and retainer.
I've used a low profile steering servo as a placeholder here, but a
standard size fits fine and I'll be retrofitting one later.
Finally, the plastic spacer up front is just to adapt the forward
bulkhead to the carbon chassis.
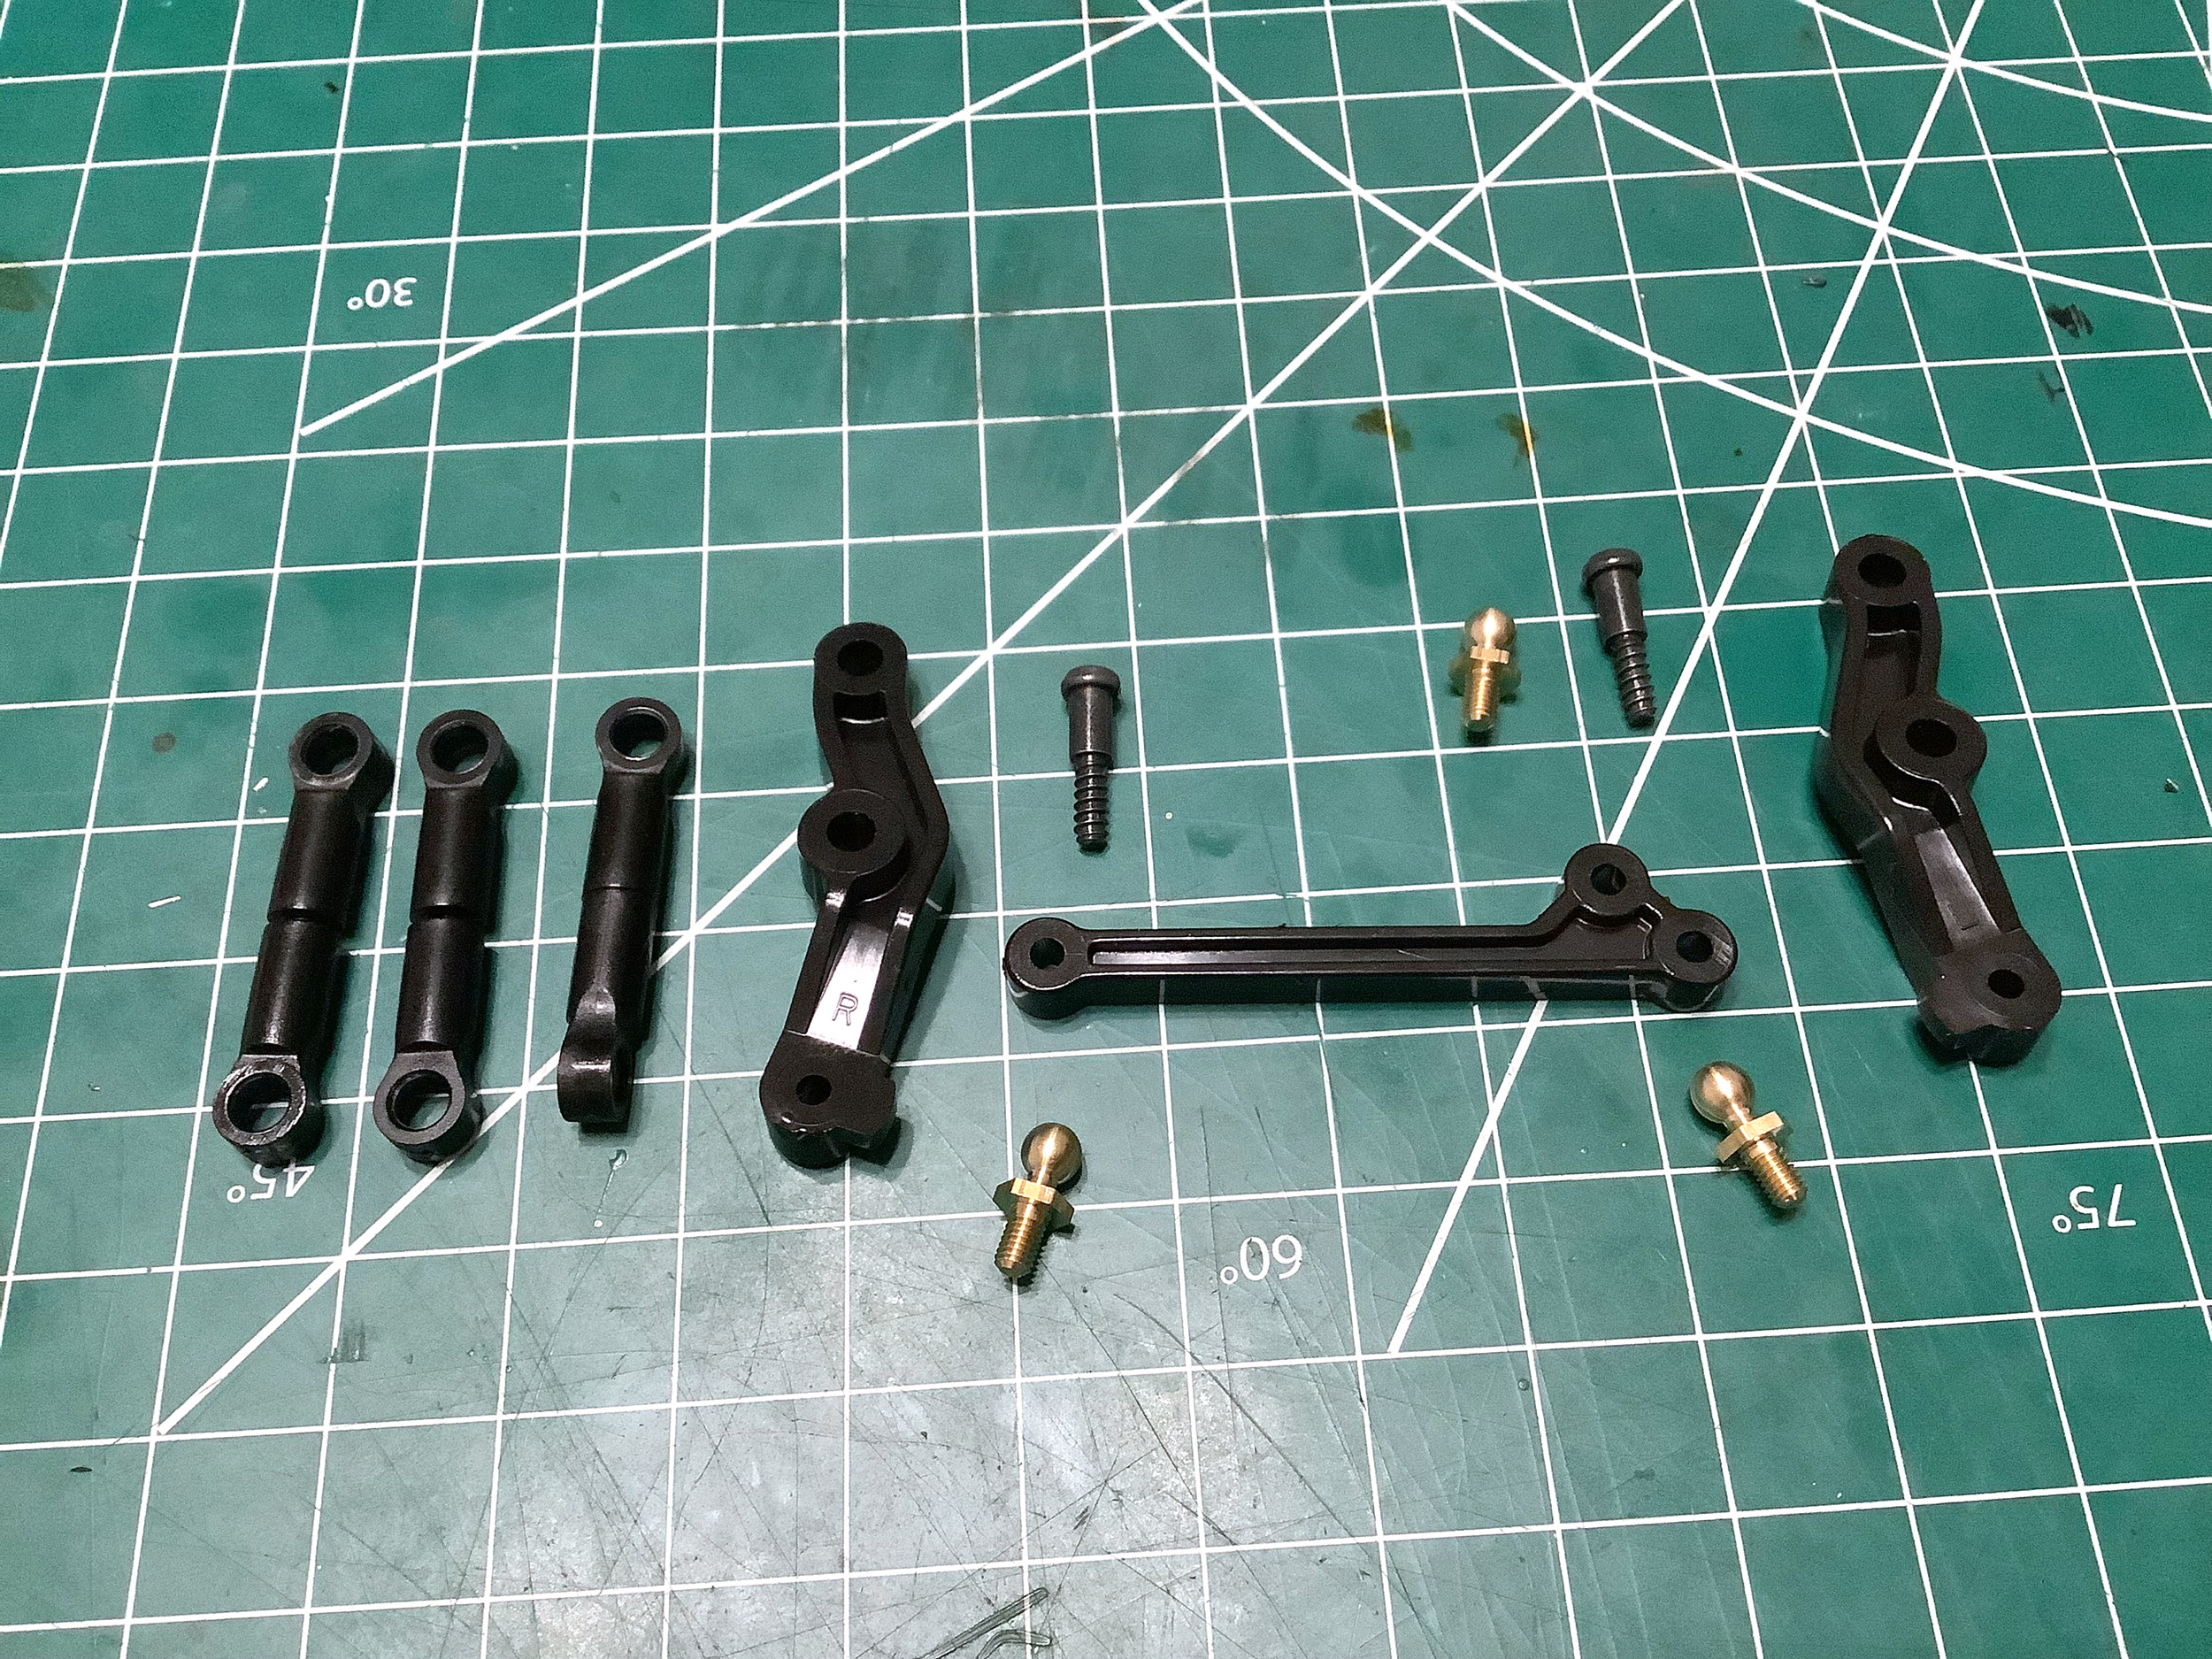
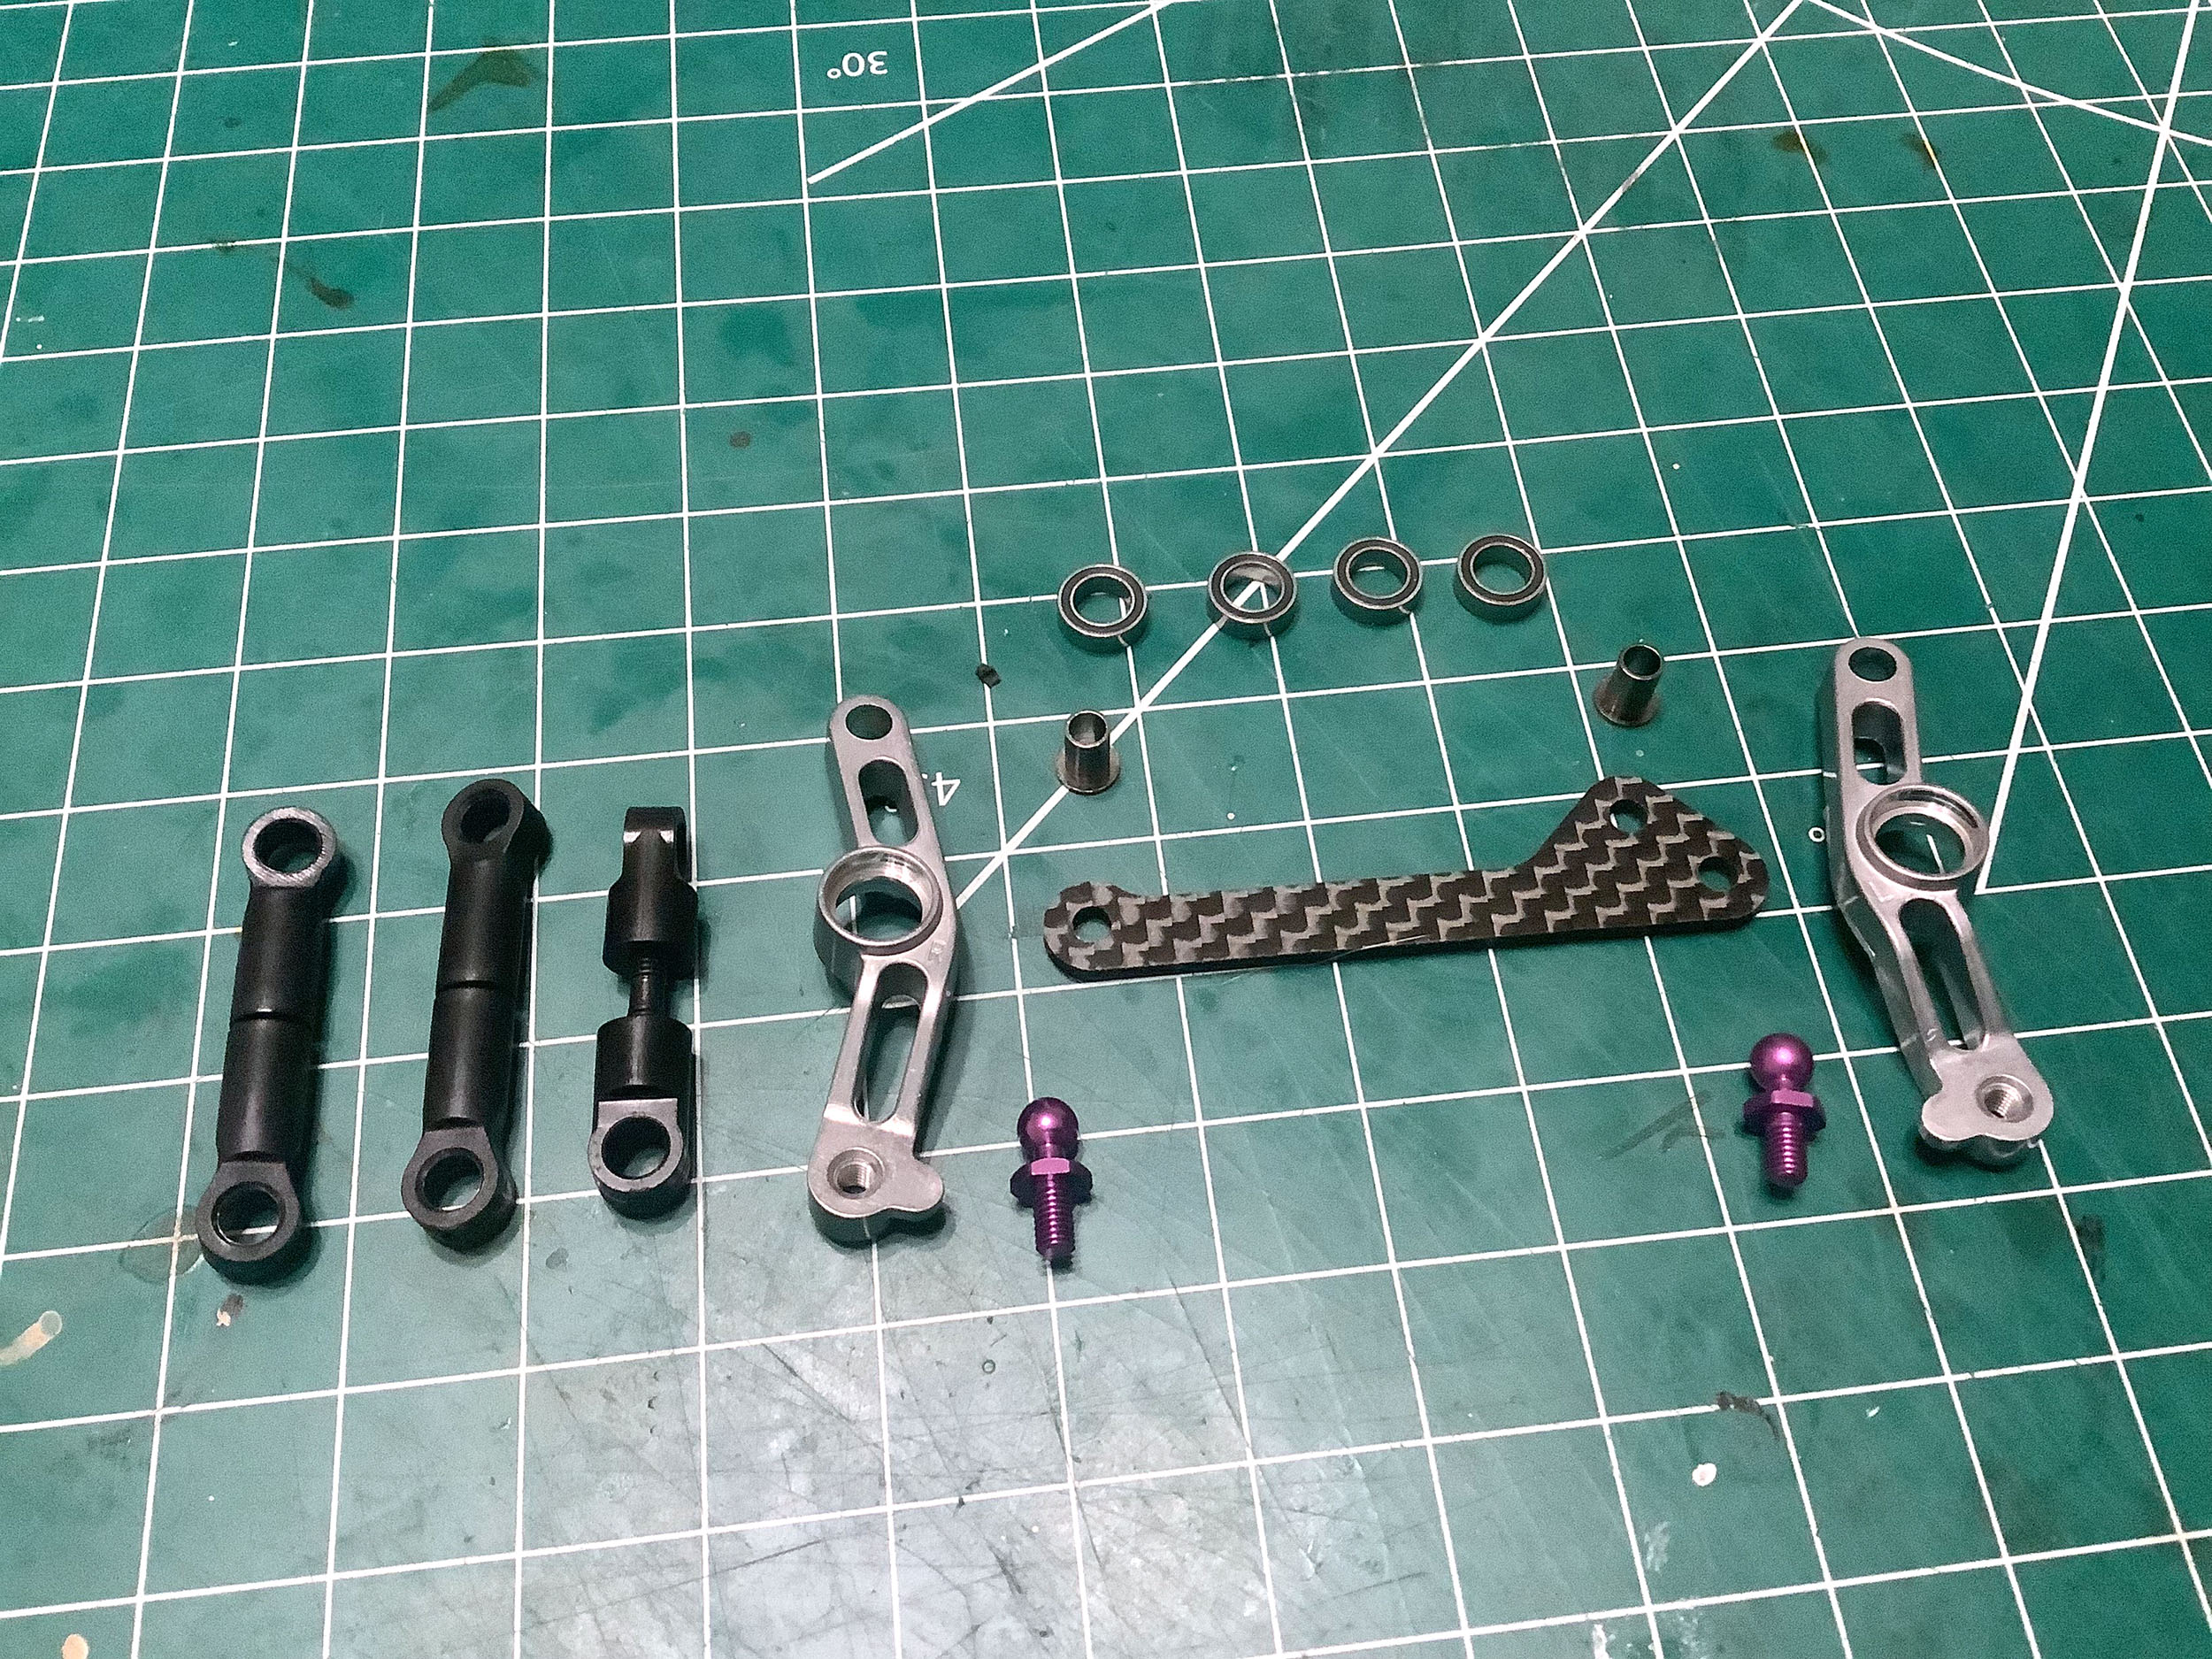
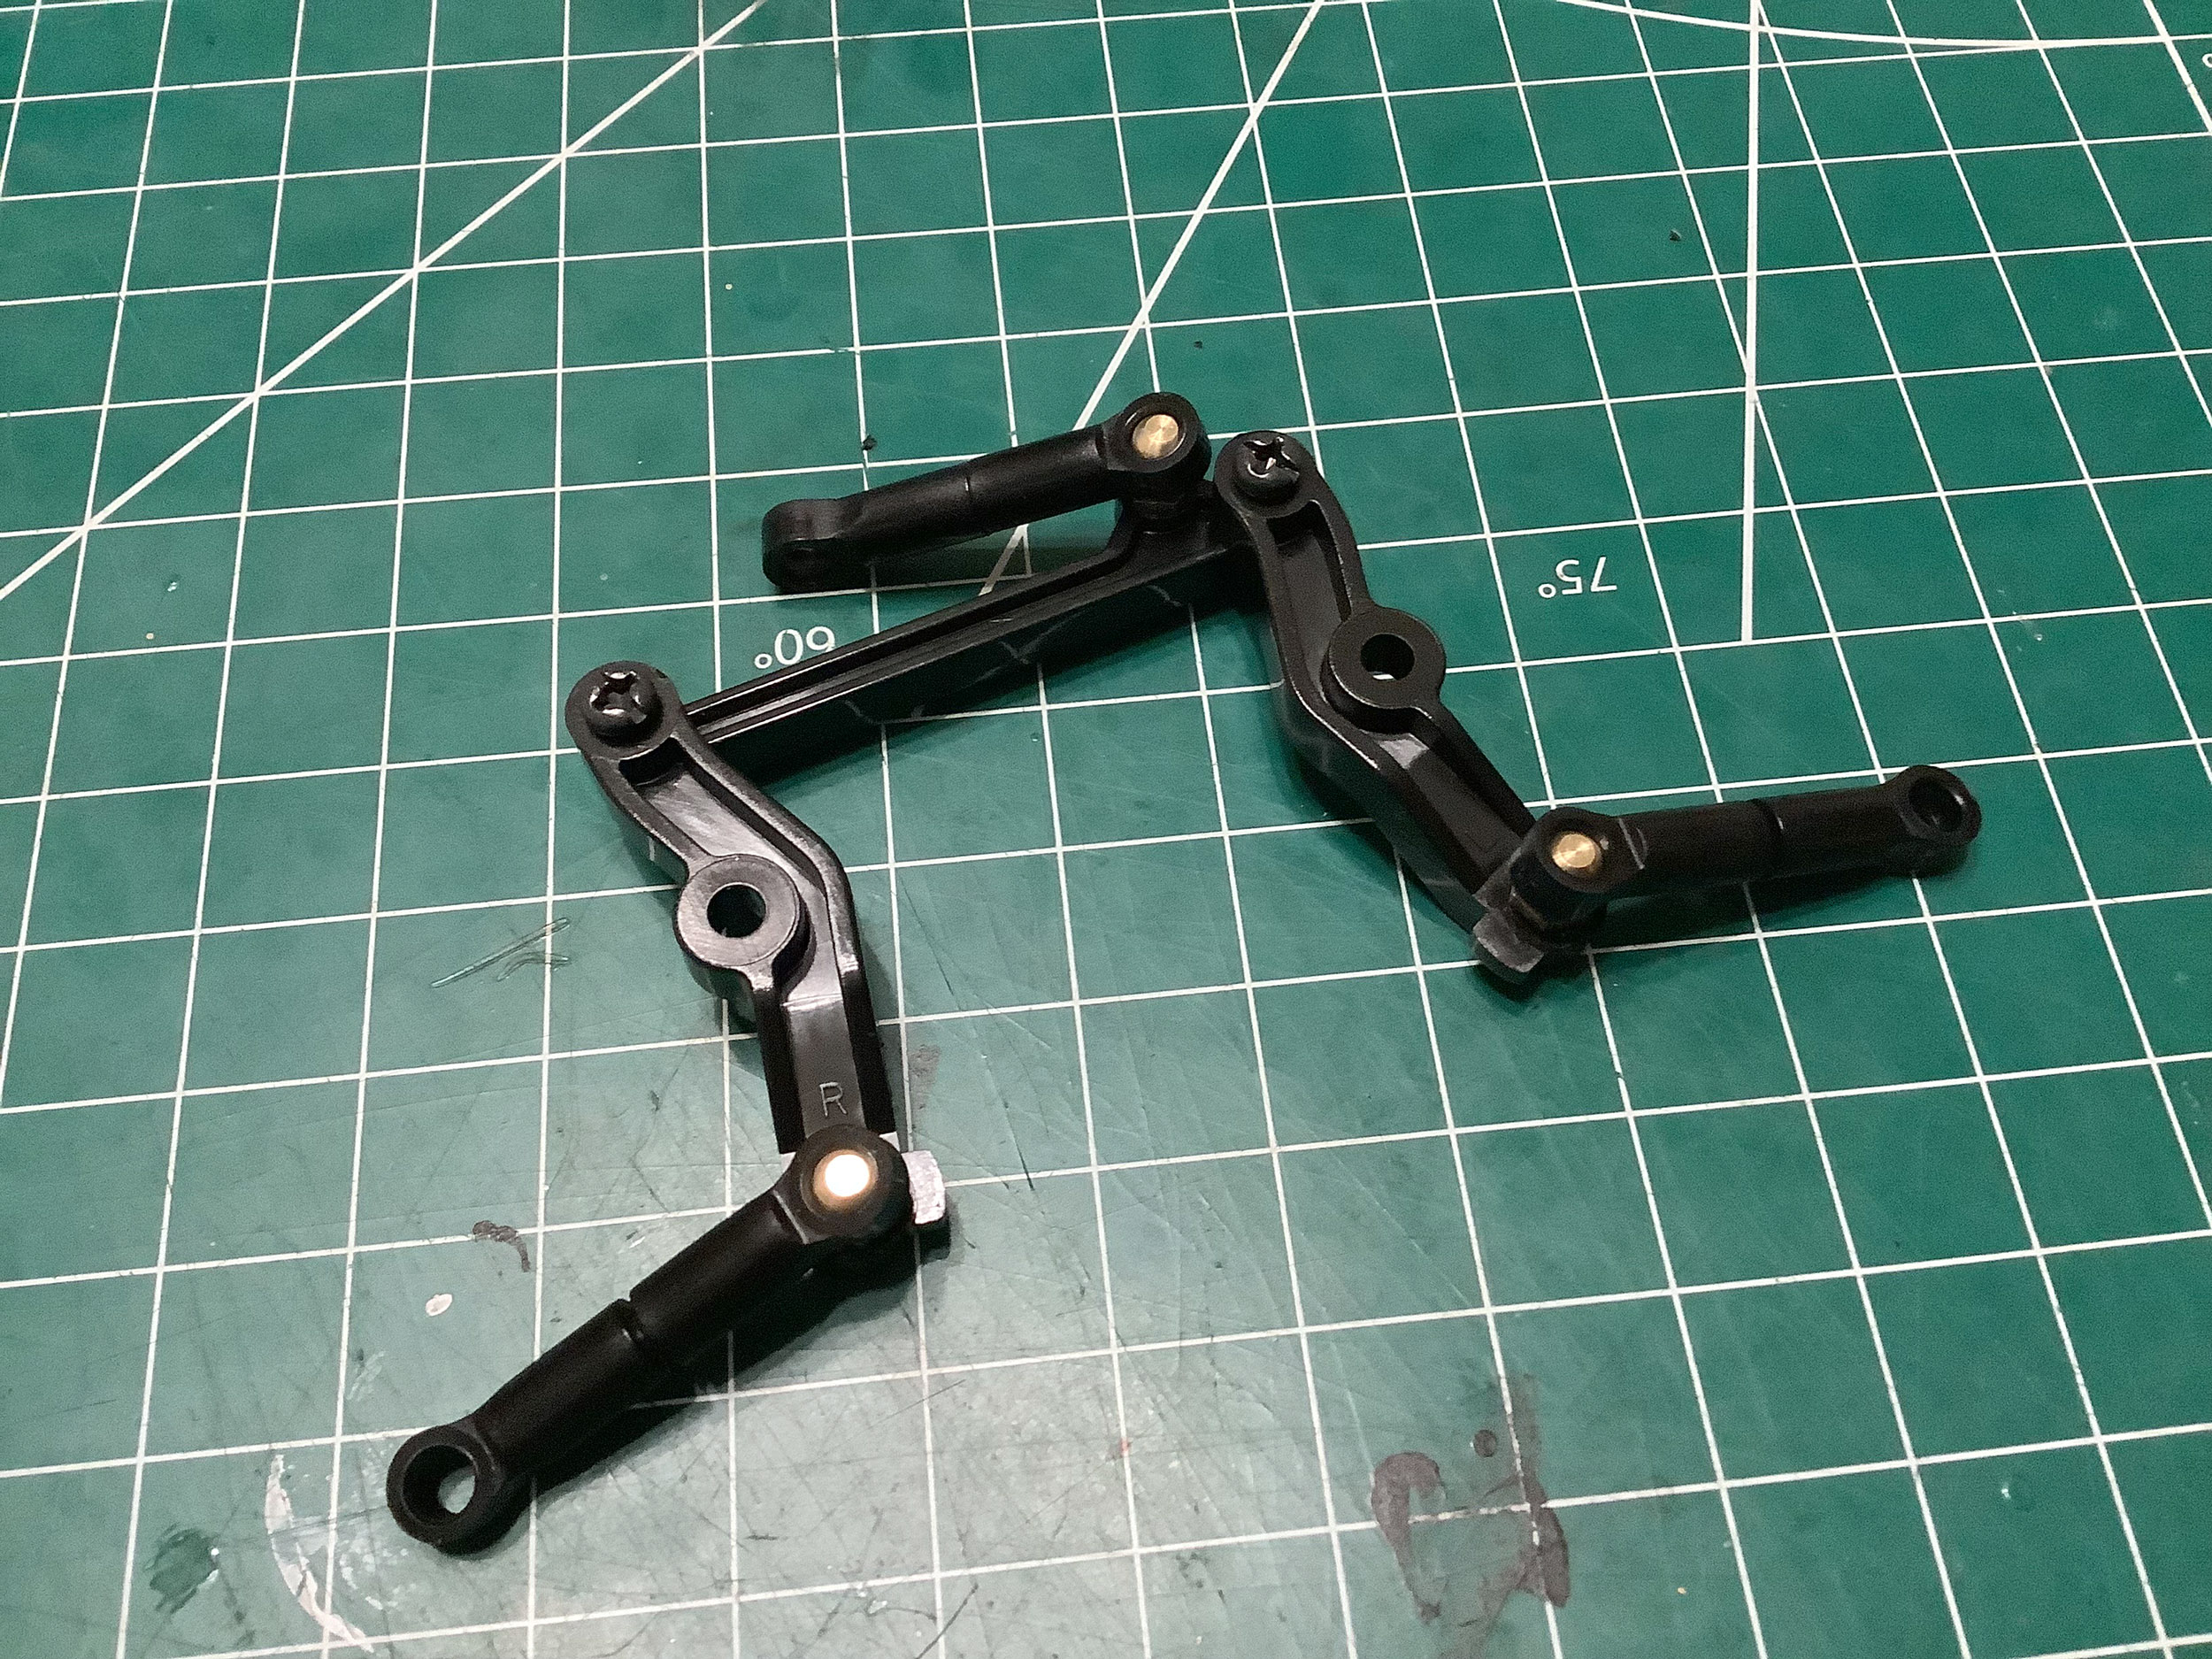
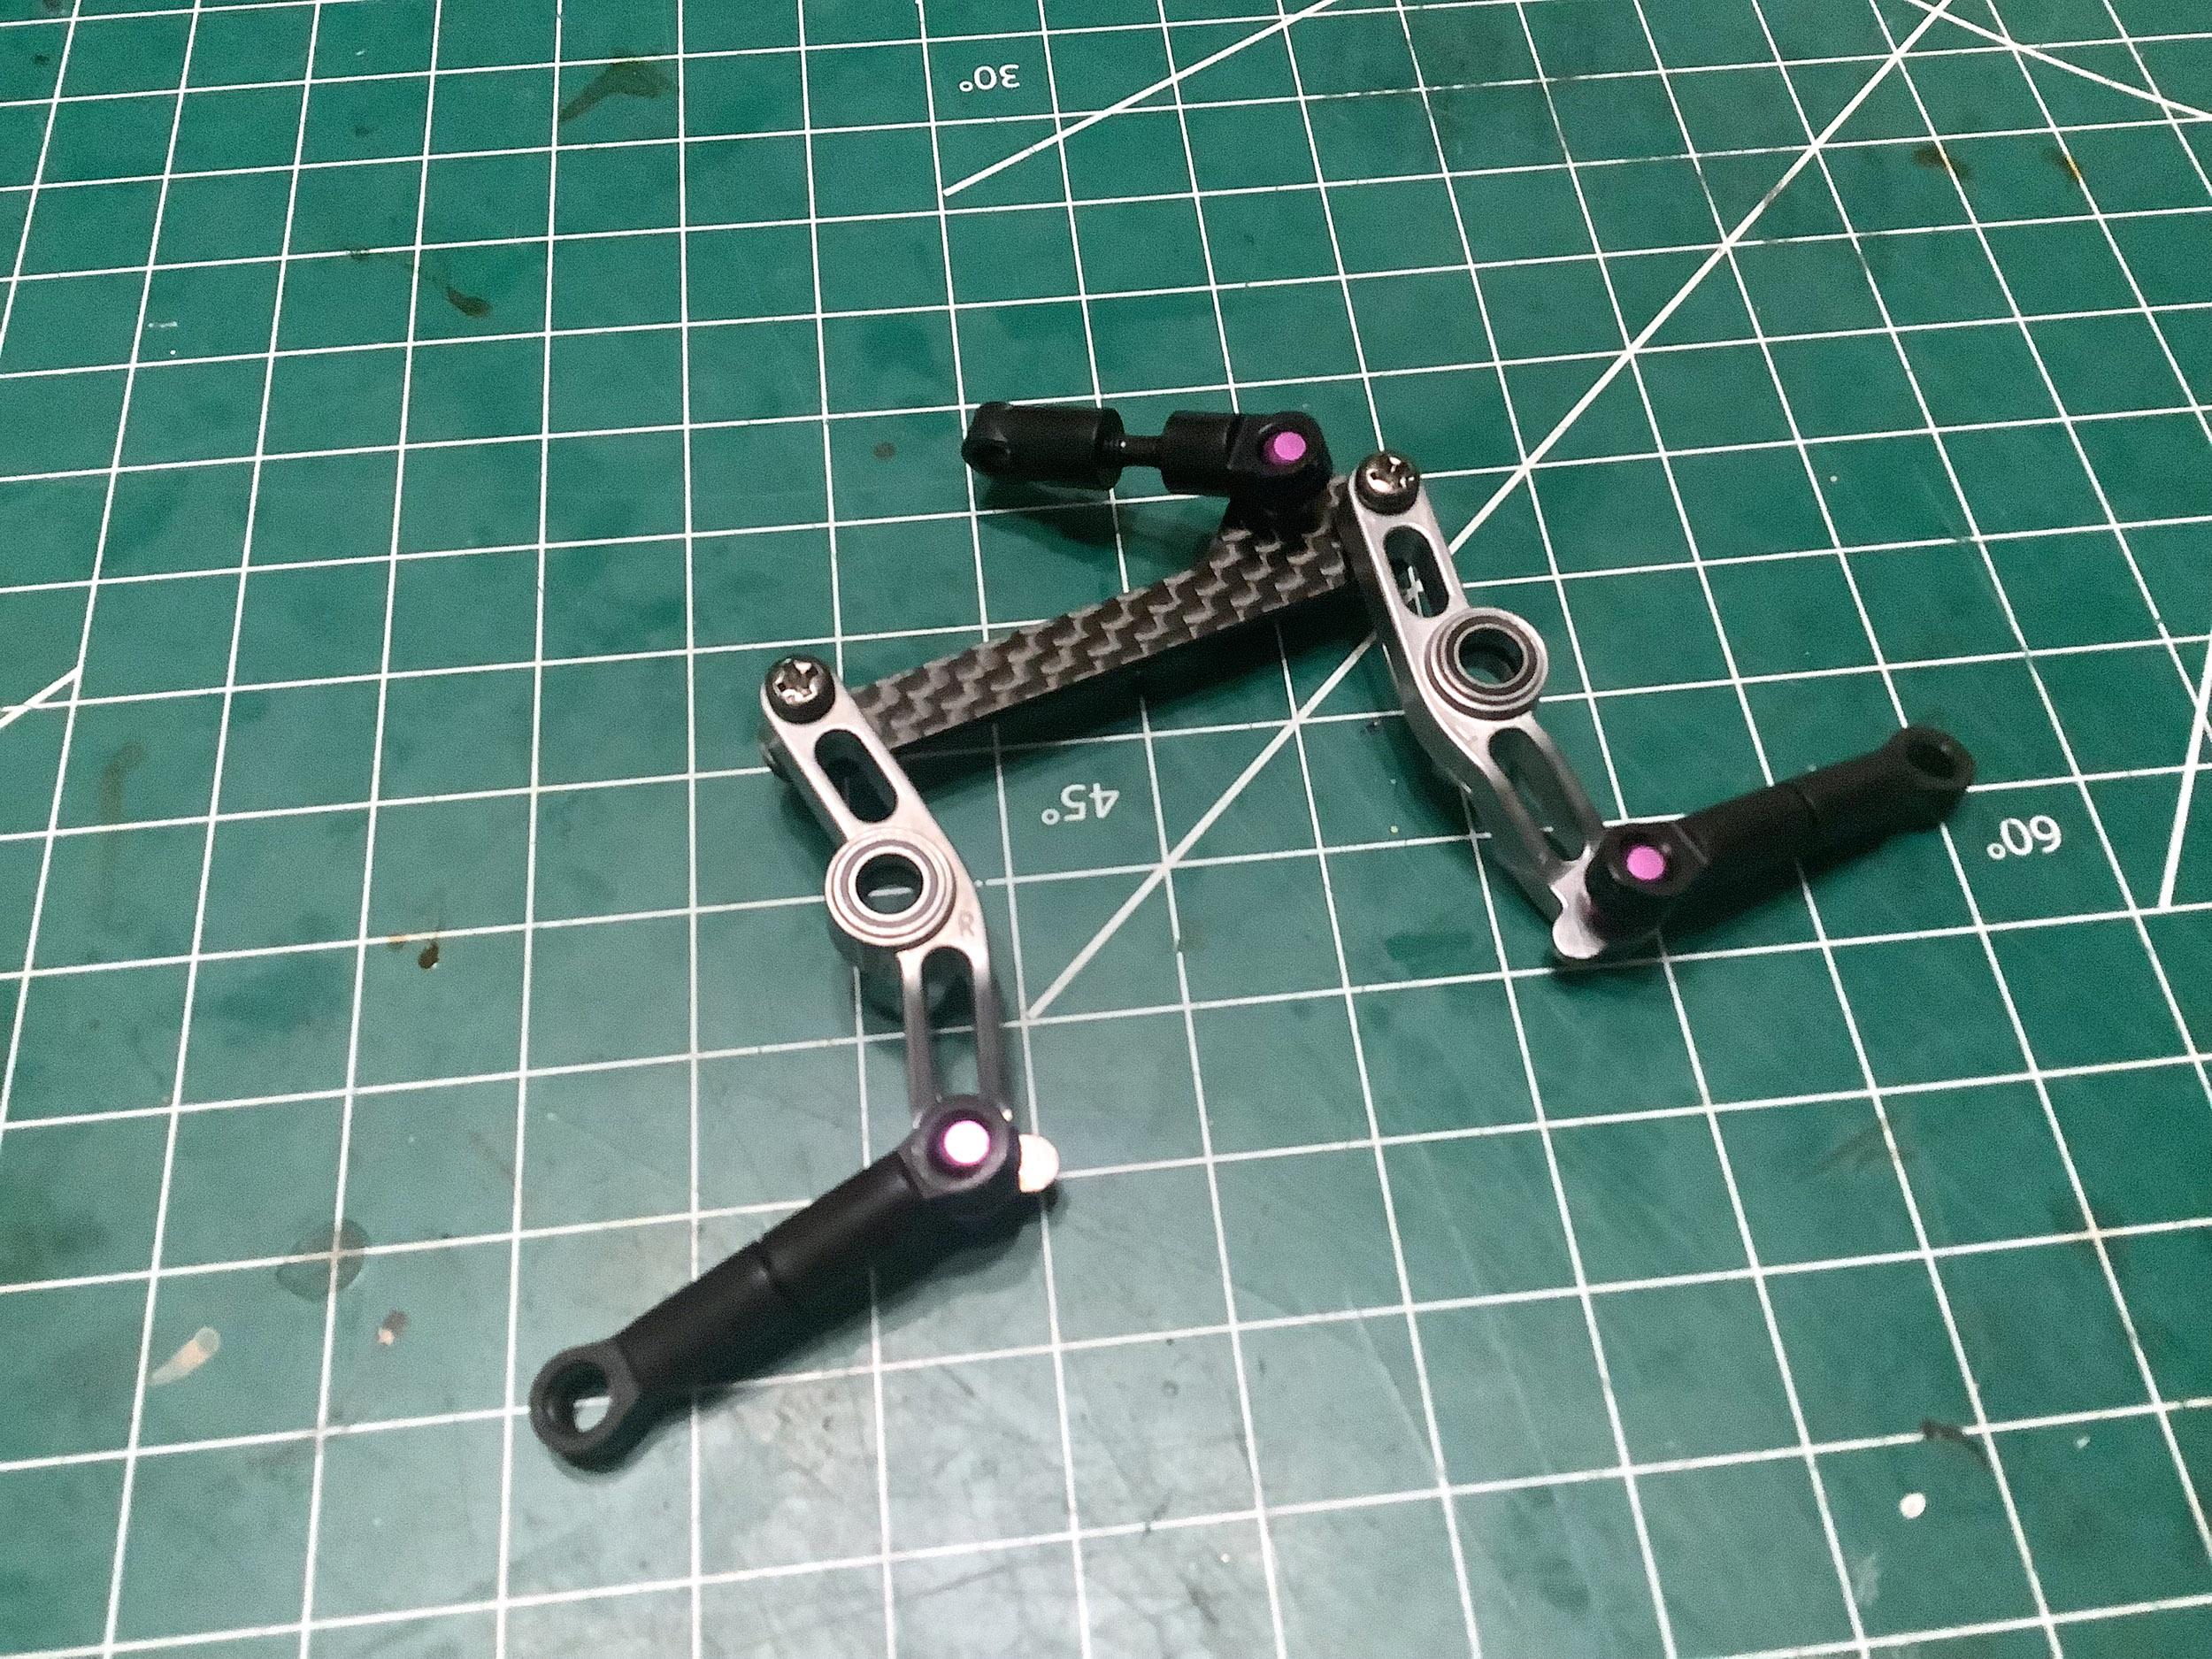
Both versions of the chassis use dual bellcrank steering, but while the
standard version is all plastic, the TRF version uses aluminum cranks
and a carbon bridge with ball bearings.
Here is a comparison of the completed steering linkage assemblies.
The overall geometry is the same, but the materials are quite
different.
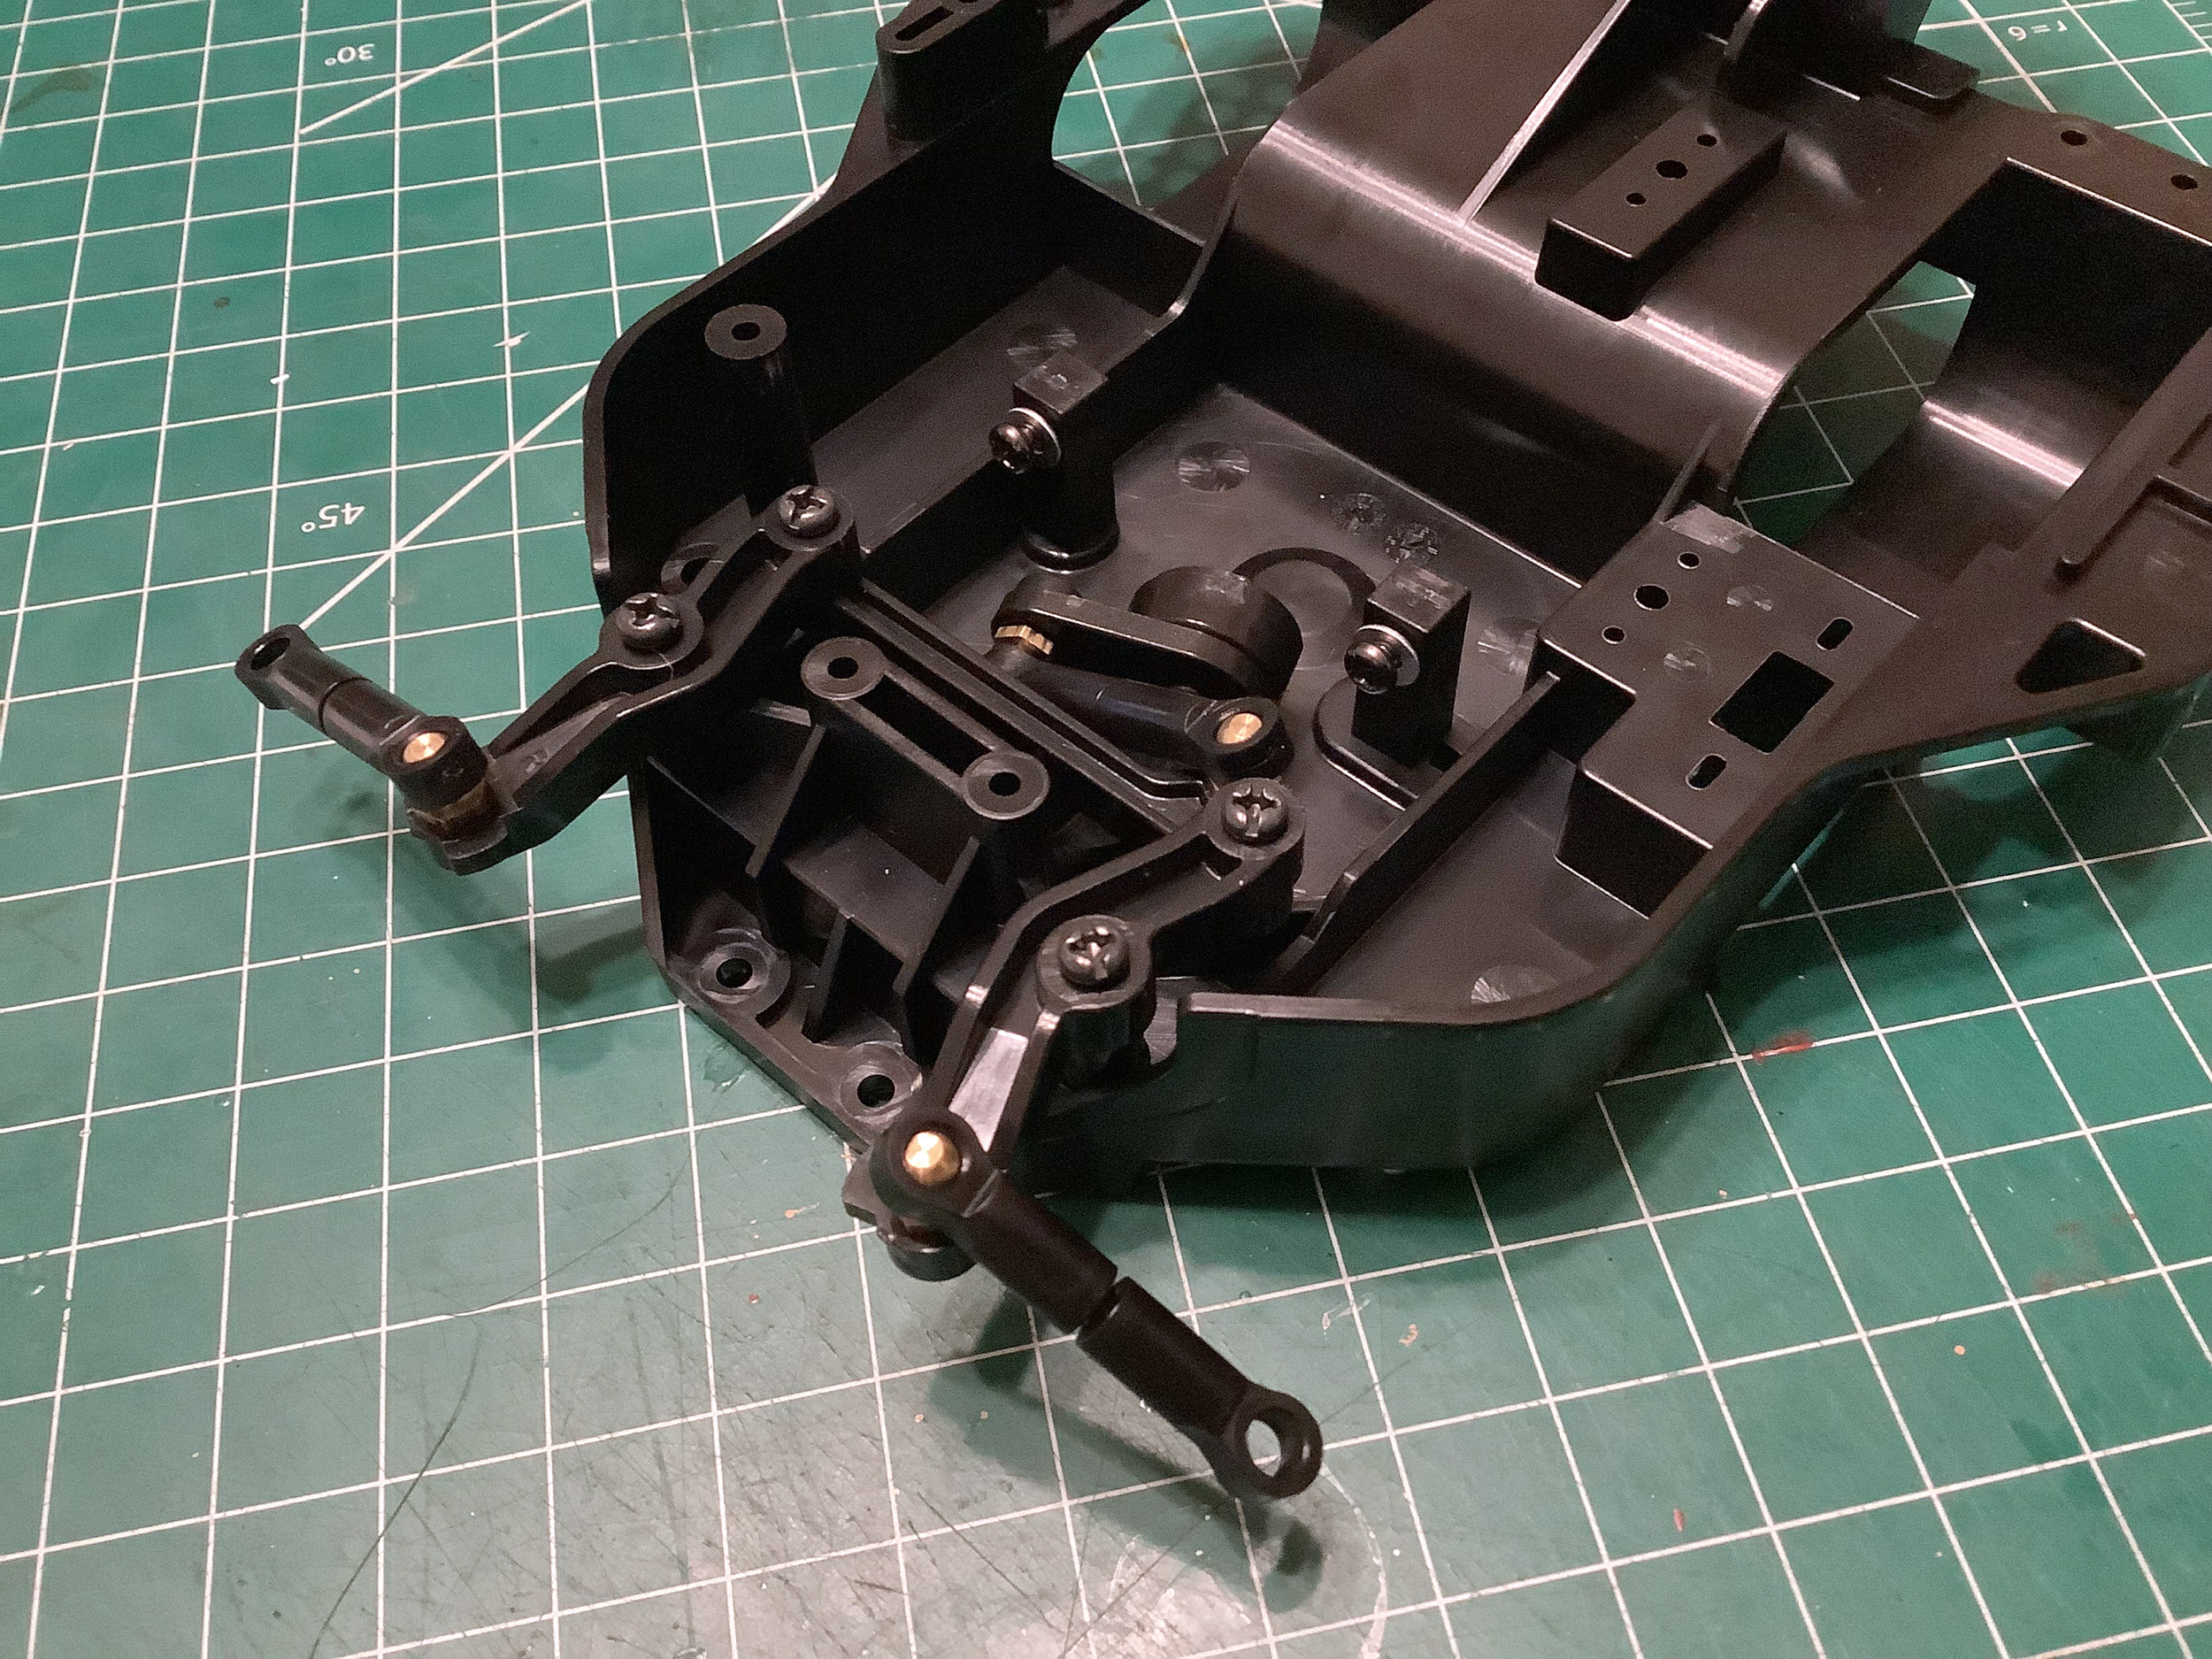
These photos compare the front end of the chassis with the steering
linkages installed. Note how much further the TRF carbon chassis
extends forward to cover the bottom of the front bulkhead.
Now the front suspension and gearbox assembly can be installed onto the
chassis. The standard model also installs the front bumper at this
point, while on the TRF model it was already part of the bulkhead
assembly. A close look at the picture on the left will also reveal
an idler pulley which can be used for belt tensioning. The TRF
version doesn't have one.
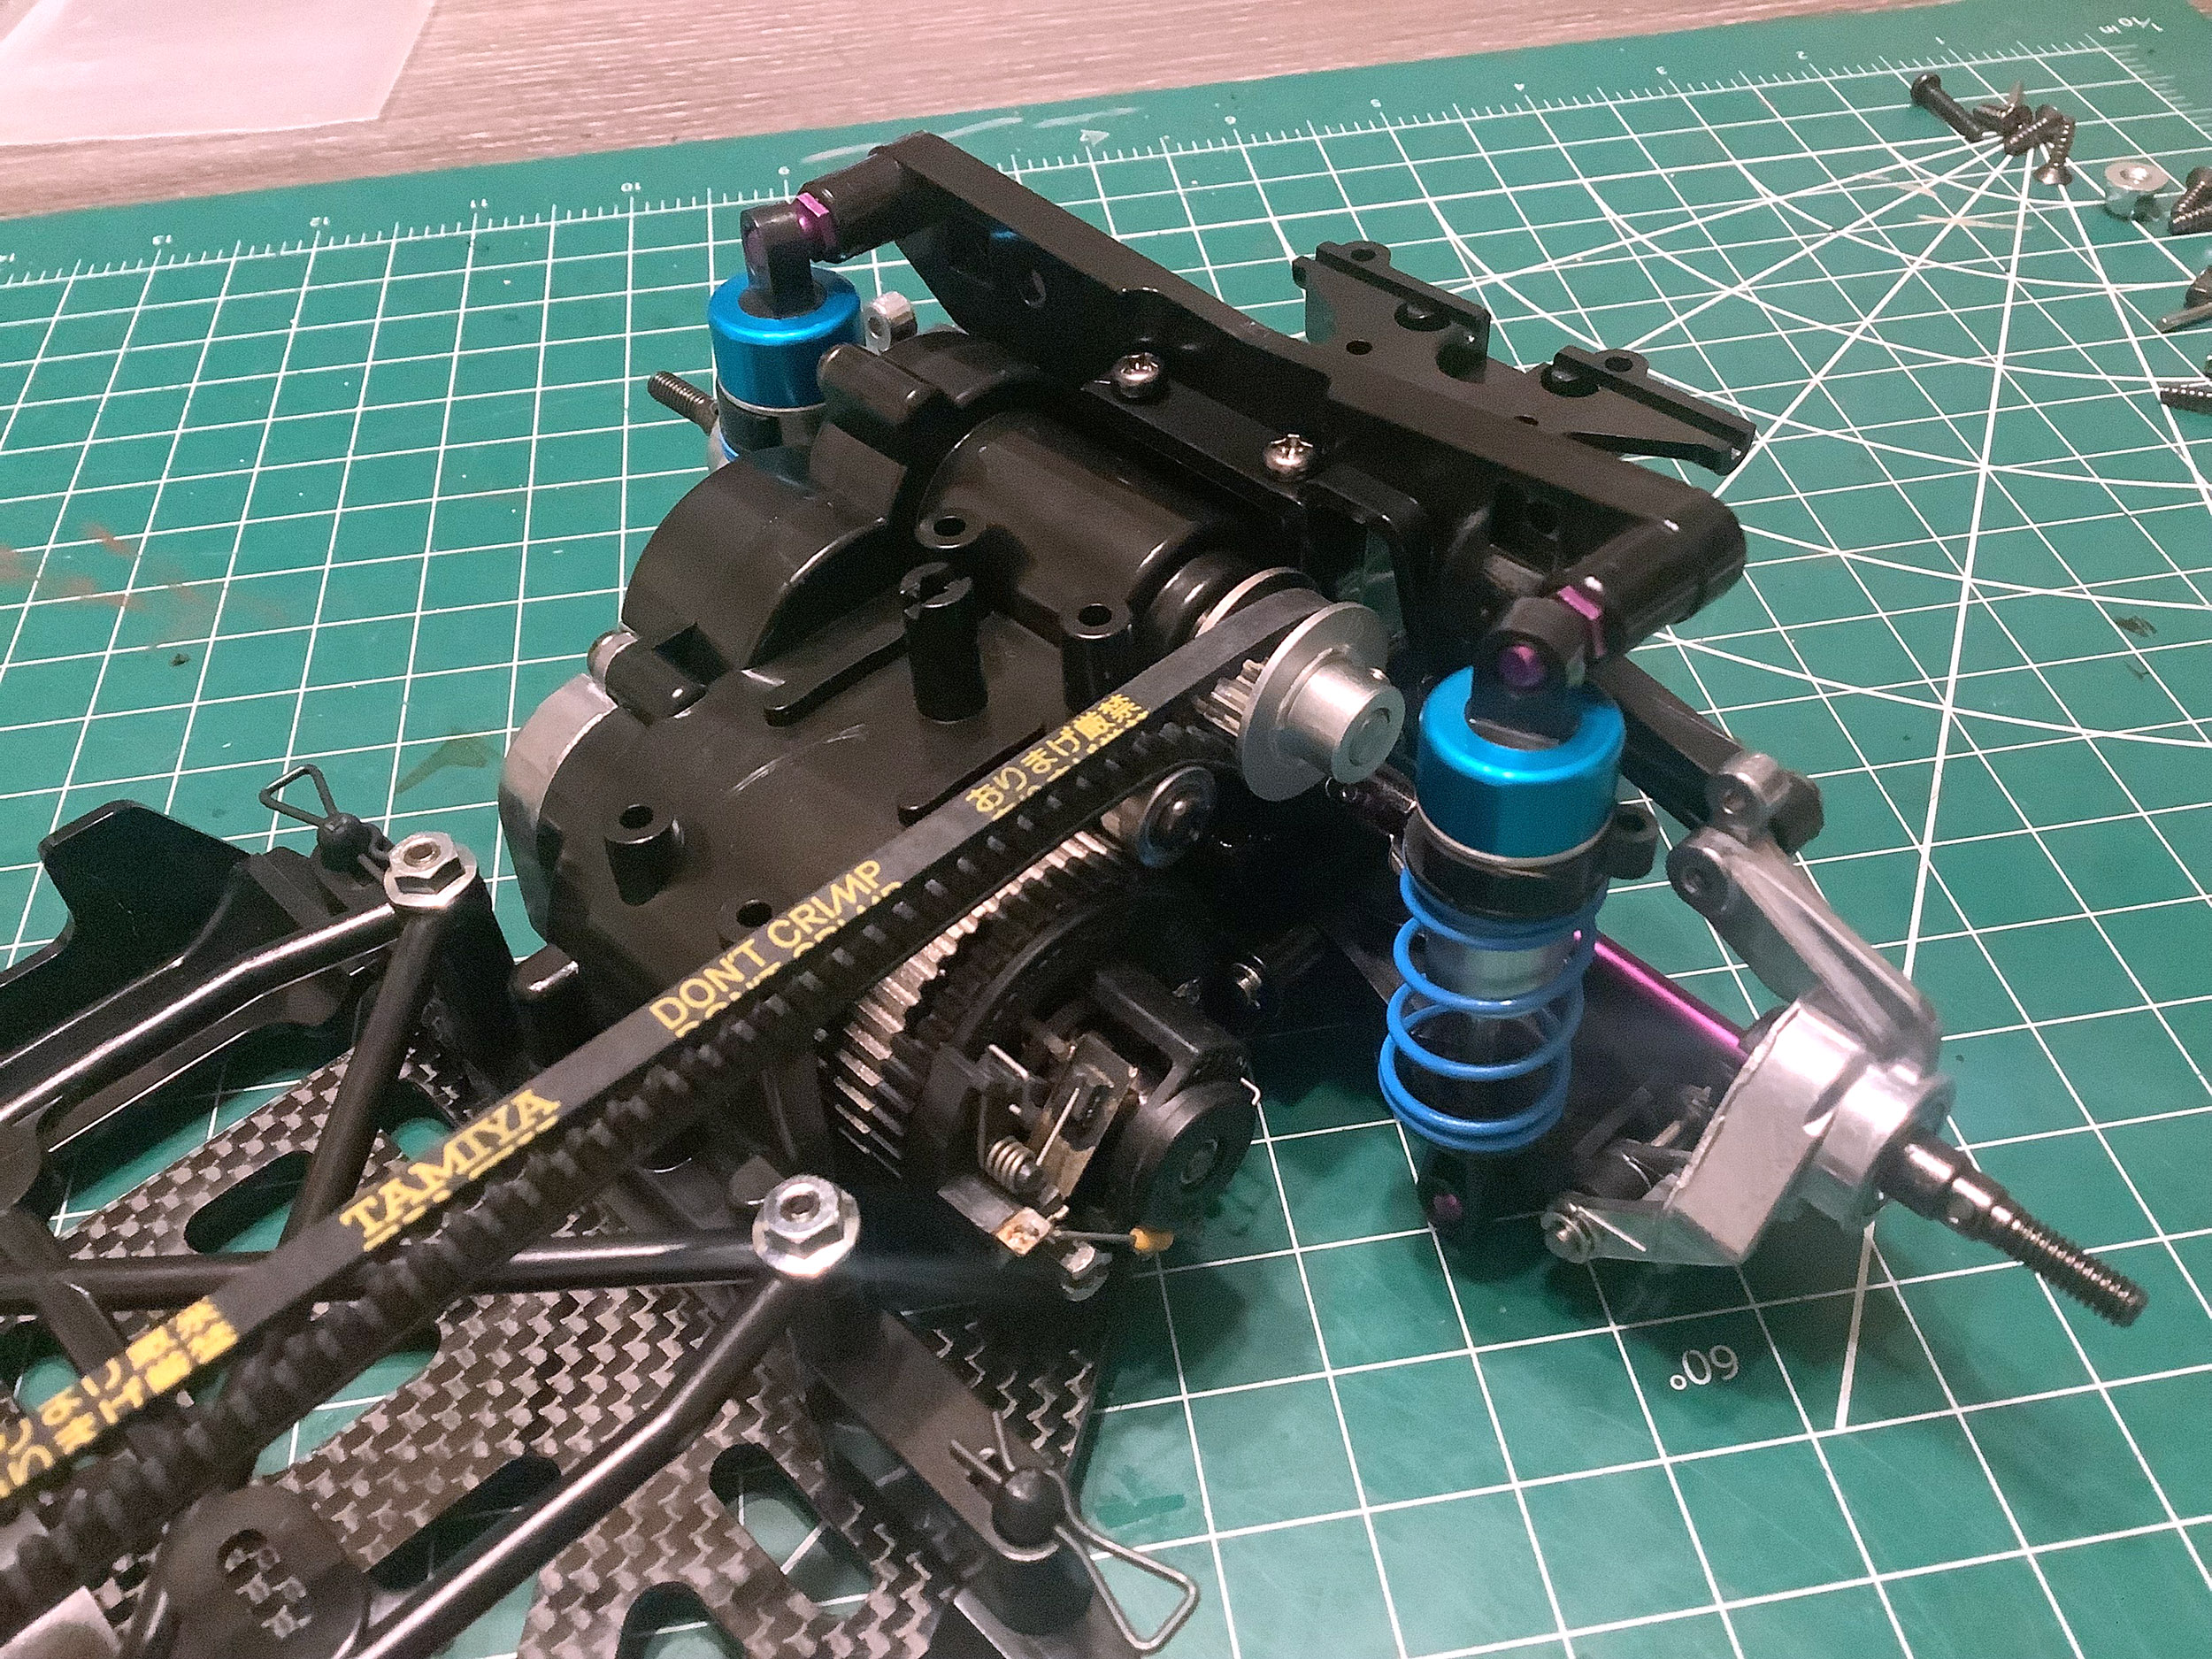
The rear suspension and gearbox assembly now gets the same
treatment. This is also the time to install the drive belt which
is NOT the same between the models. Apparently the TRF belt uses
aramid fibers which prevents it from stretching under prolonged
tension. This is why it doesn't need a tensioner.
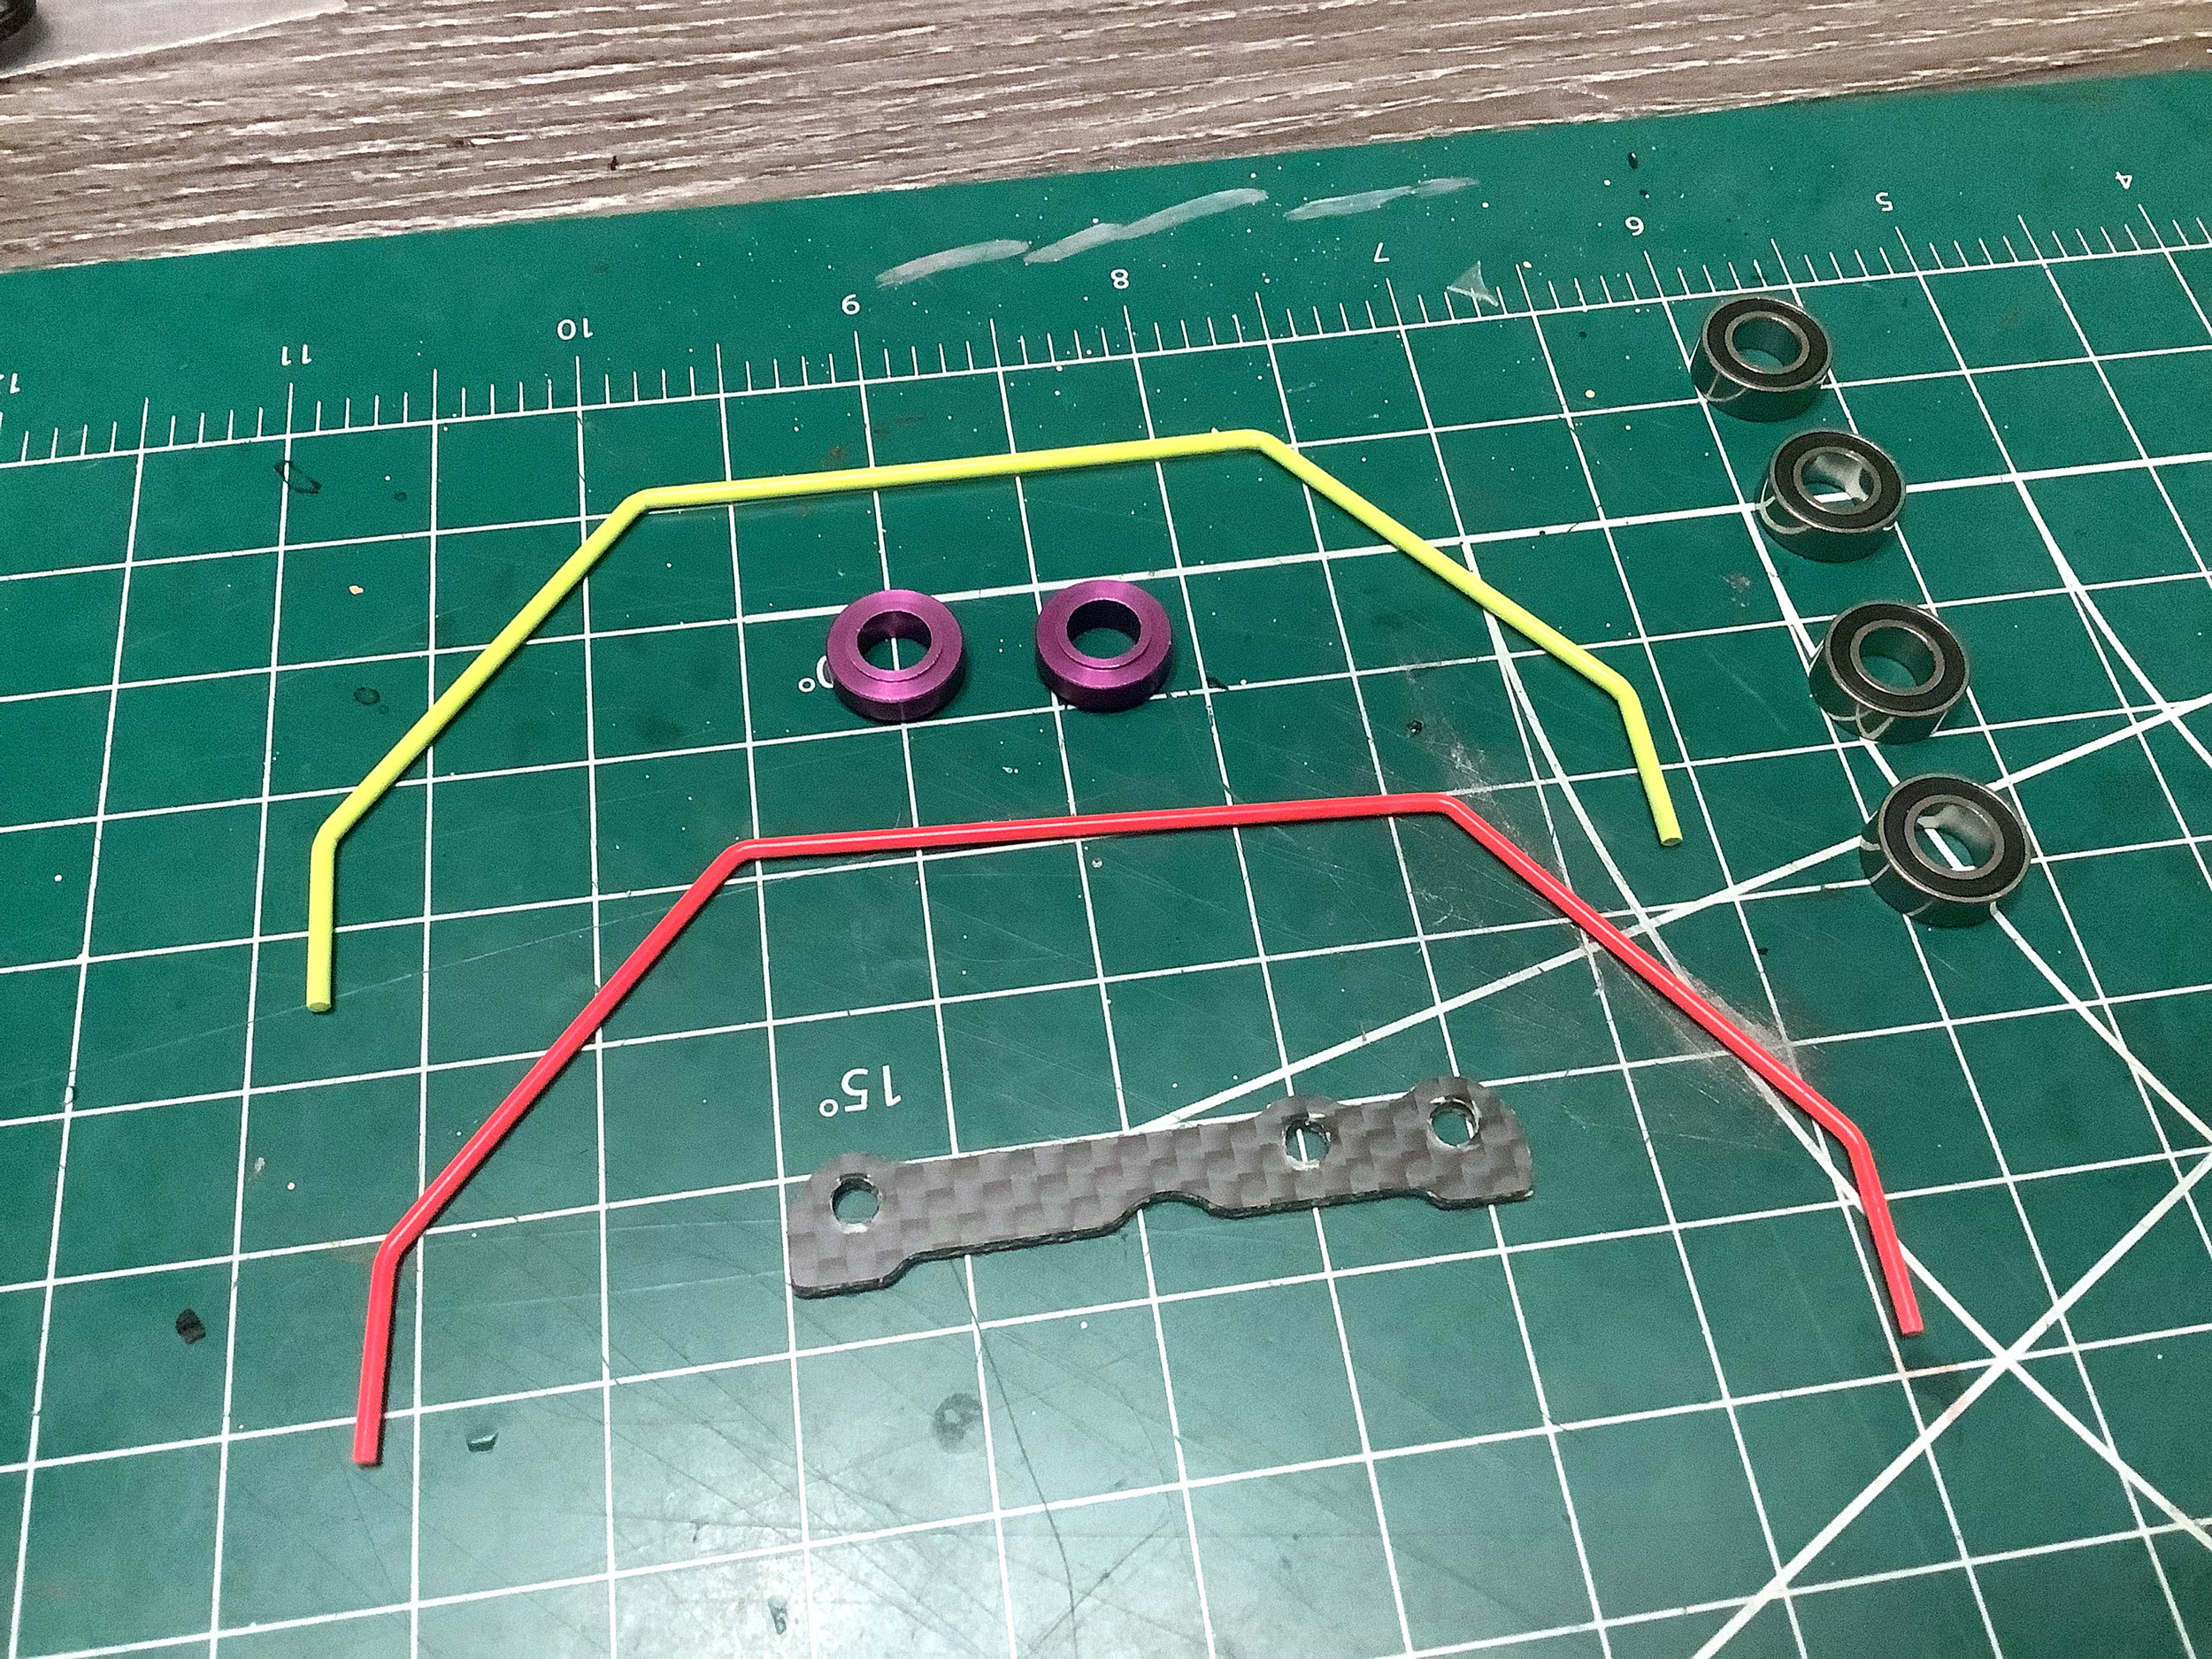
The TRF version comes with front and rear stabilizer bars out of the
box. In keeping with the rest of the model, they are coated in
bright colors. The standard model has provisions for sway bars,
but they are optional aftermarket parts.
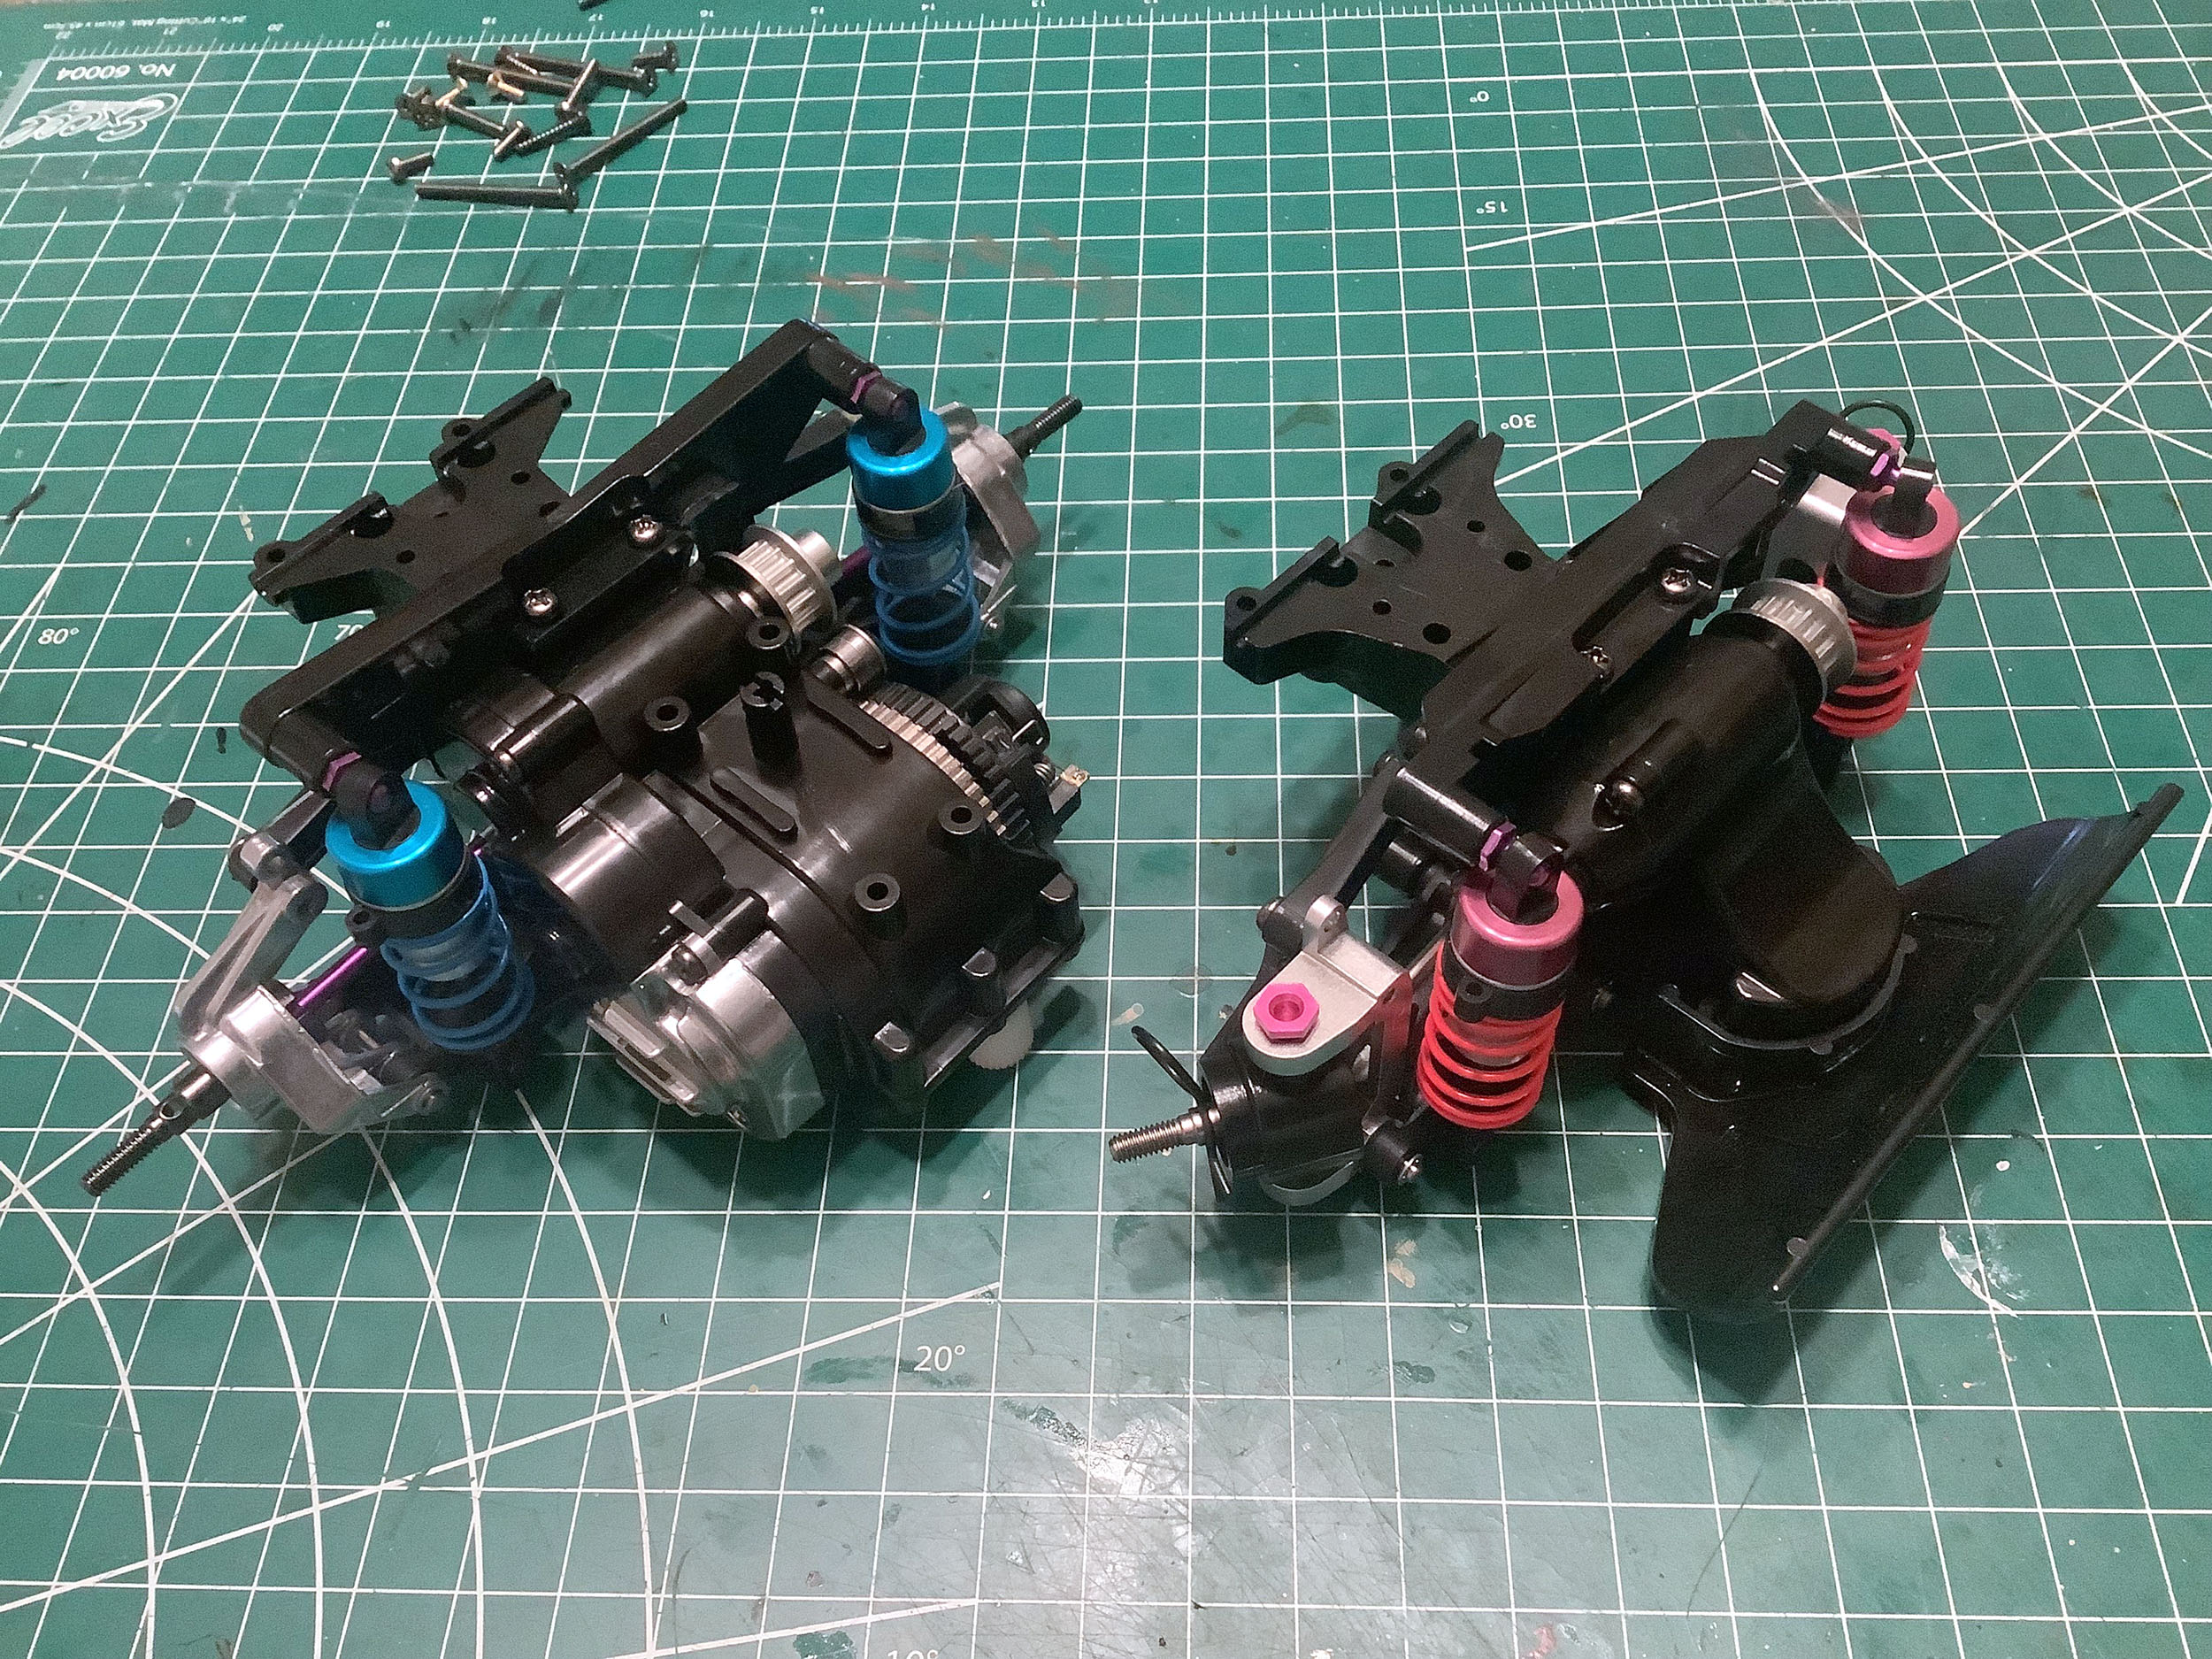
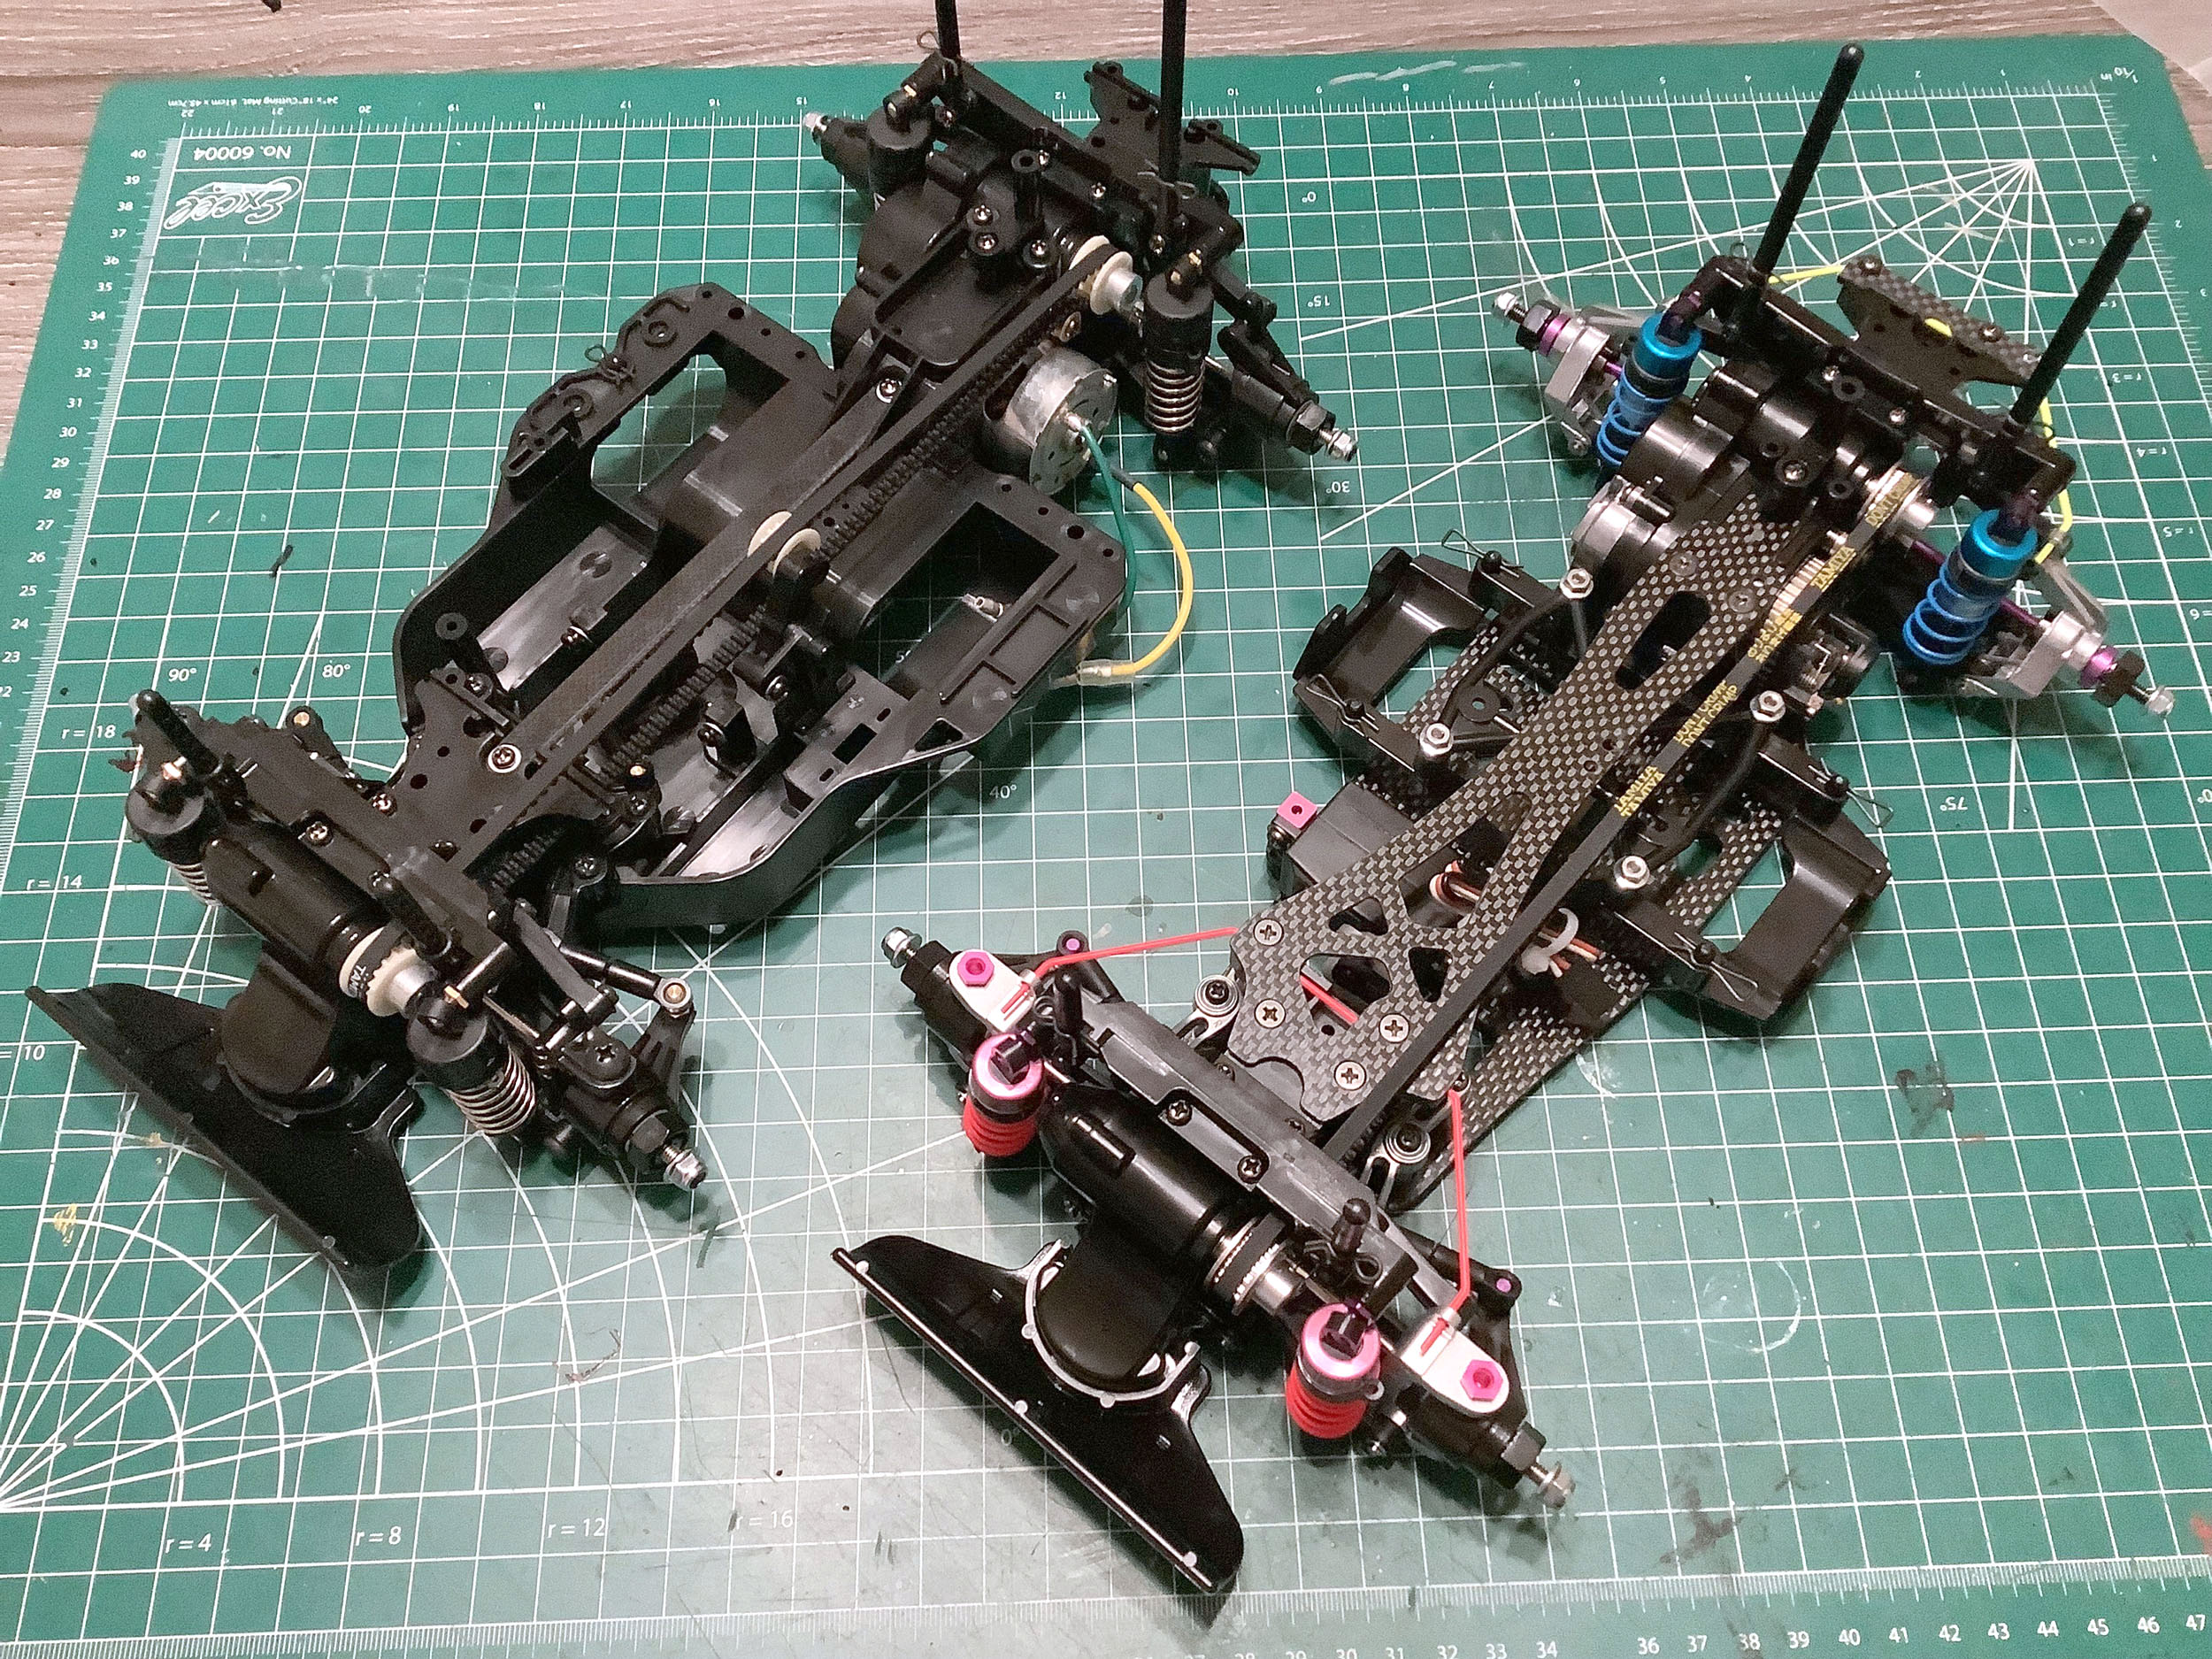
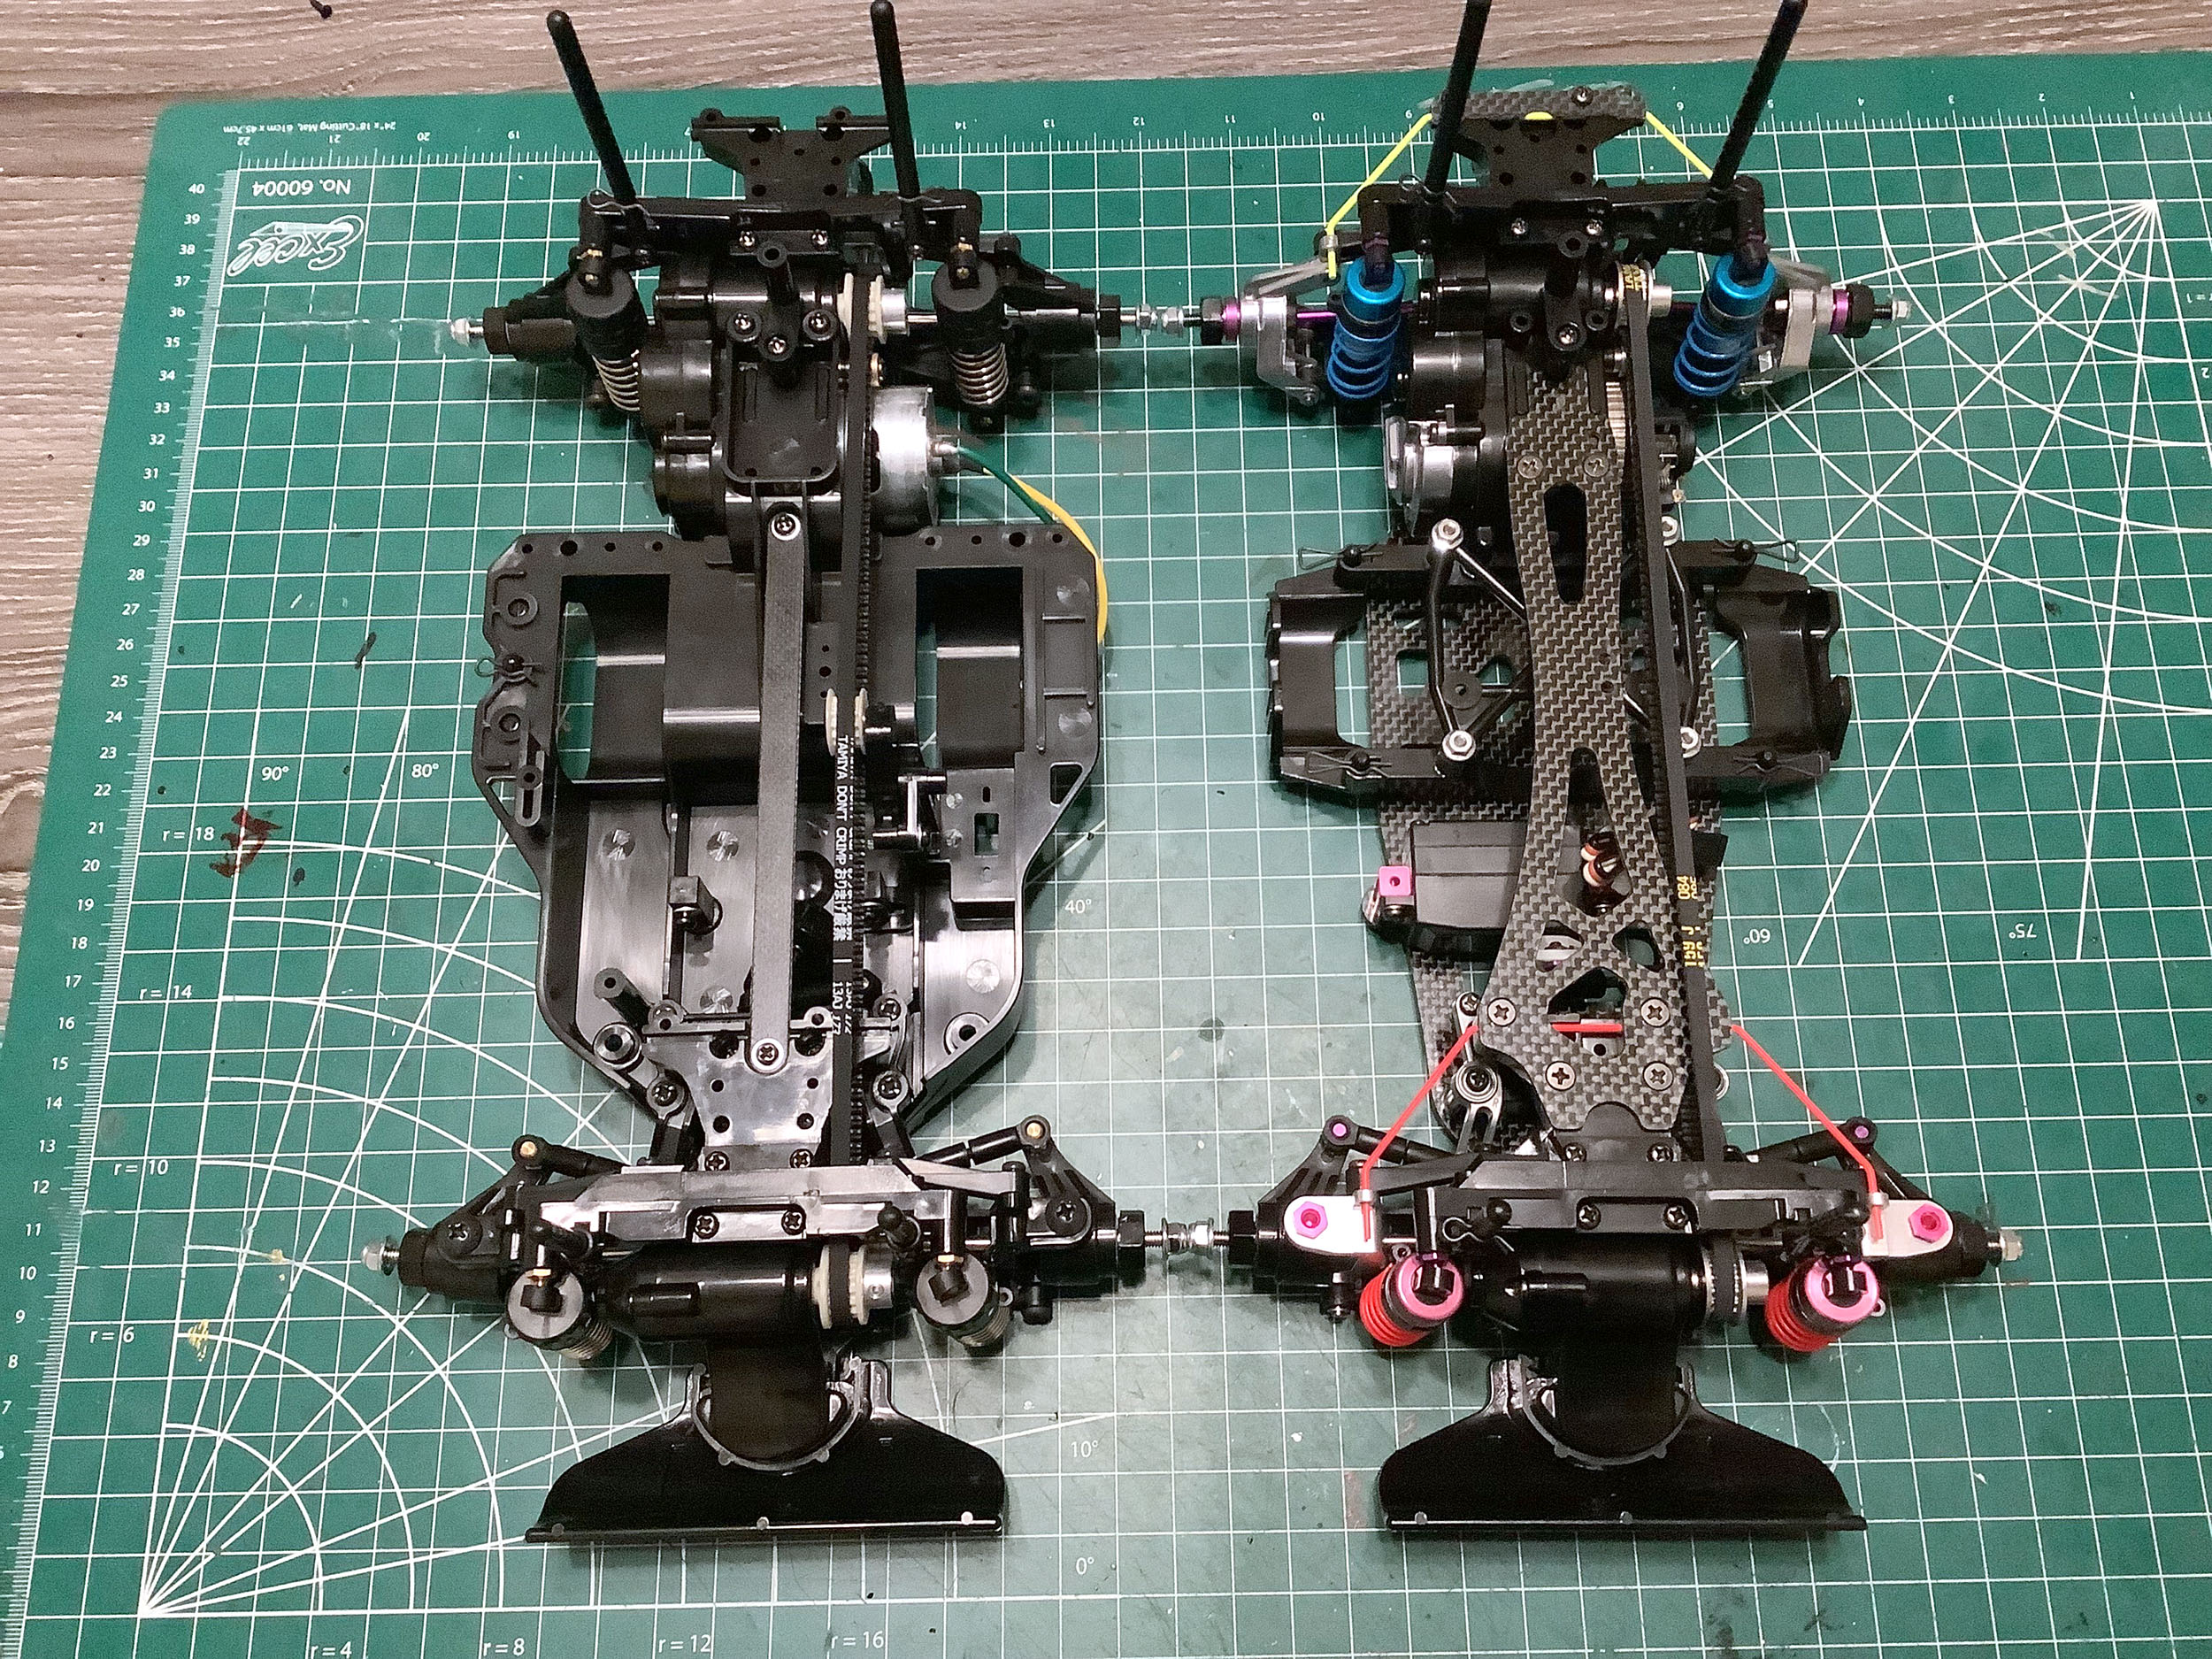
These pictures compare the completed standard and TRF chassis.
External dimensions are the same, but there are a lot of external and
internal parts which differ considerably. You may notice that an
upper carbon chassis brace has been installed on the TRF chassis while
the standard chassis just uses an FRP bar. The standard chassis
doesn't need as much help with torsional rigidity since the bathtub is
so much deeper than the flat plate used by the TRF chassis. Also
note the purple spacers on the rear axles. Those will be important
shortly. I found it interesting how the sway bars just slip into
holes on the uprights. No connecting rods or ball studs are
needed.
A couple of more pictures comparing the chassis varieties. You can
clearly see how the wheelbases line up exactly and how the batteries
are positioned in the same place. I've also installed the final items: the body posts.
Remember earlier when I mentioned that the TRF chassis uses longer rear
drive cups (compared above)? The Porsche 911 GT1 has a wider rear
track than the front and also uses much wider tires in the rear.
The TA-03 R-S chassis does not have any additional track width in the
rear, but the original 58193 model from 1997 used rear wheels with a
different offset to obtain the wider track. All four tires were
the same size. I figured I could do even better than that by using
Tamiya's really nice chrome and gold two piece wheels which are wider
in the rear. This would achieve the tire and track width all in
one step and be the ultimate in realism. What I did not realize is
that the TRF version of the chassis has the additional rear width built
in. That purple spacer we saw earlier along with the longer drive
cups push the rear wheel outward. That meant that I couldn't use
the wider two piece wheels and I couldn't use the original wheels with
extra offset either. I couldn't even steal the drive cups from the
standard model because the bearing seat is too short for the wider
uprights from the TRF chassis. I needed four front wheels to make
it work. The TRF chassis actually did come with wheels and tires,
but they are a different style that didn't look right with the GT1 body.
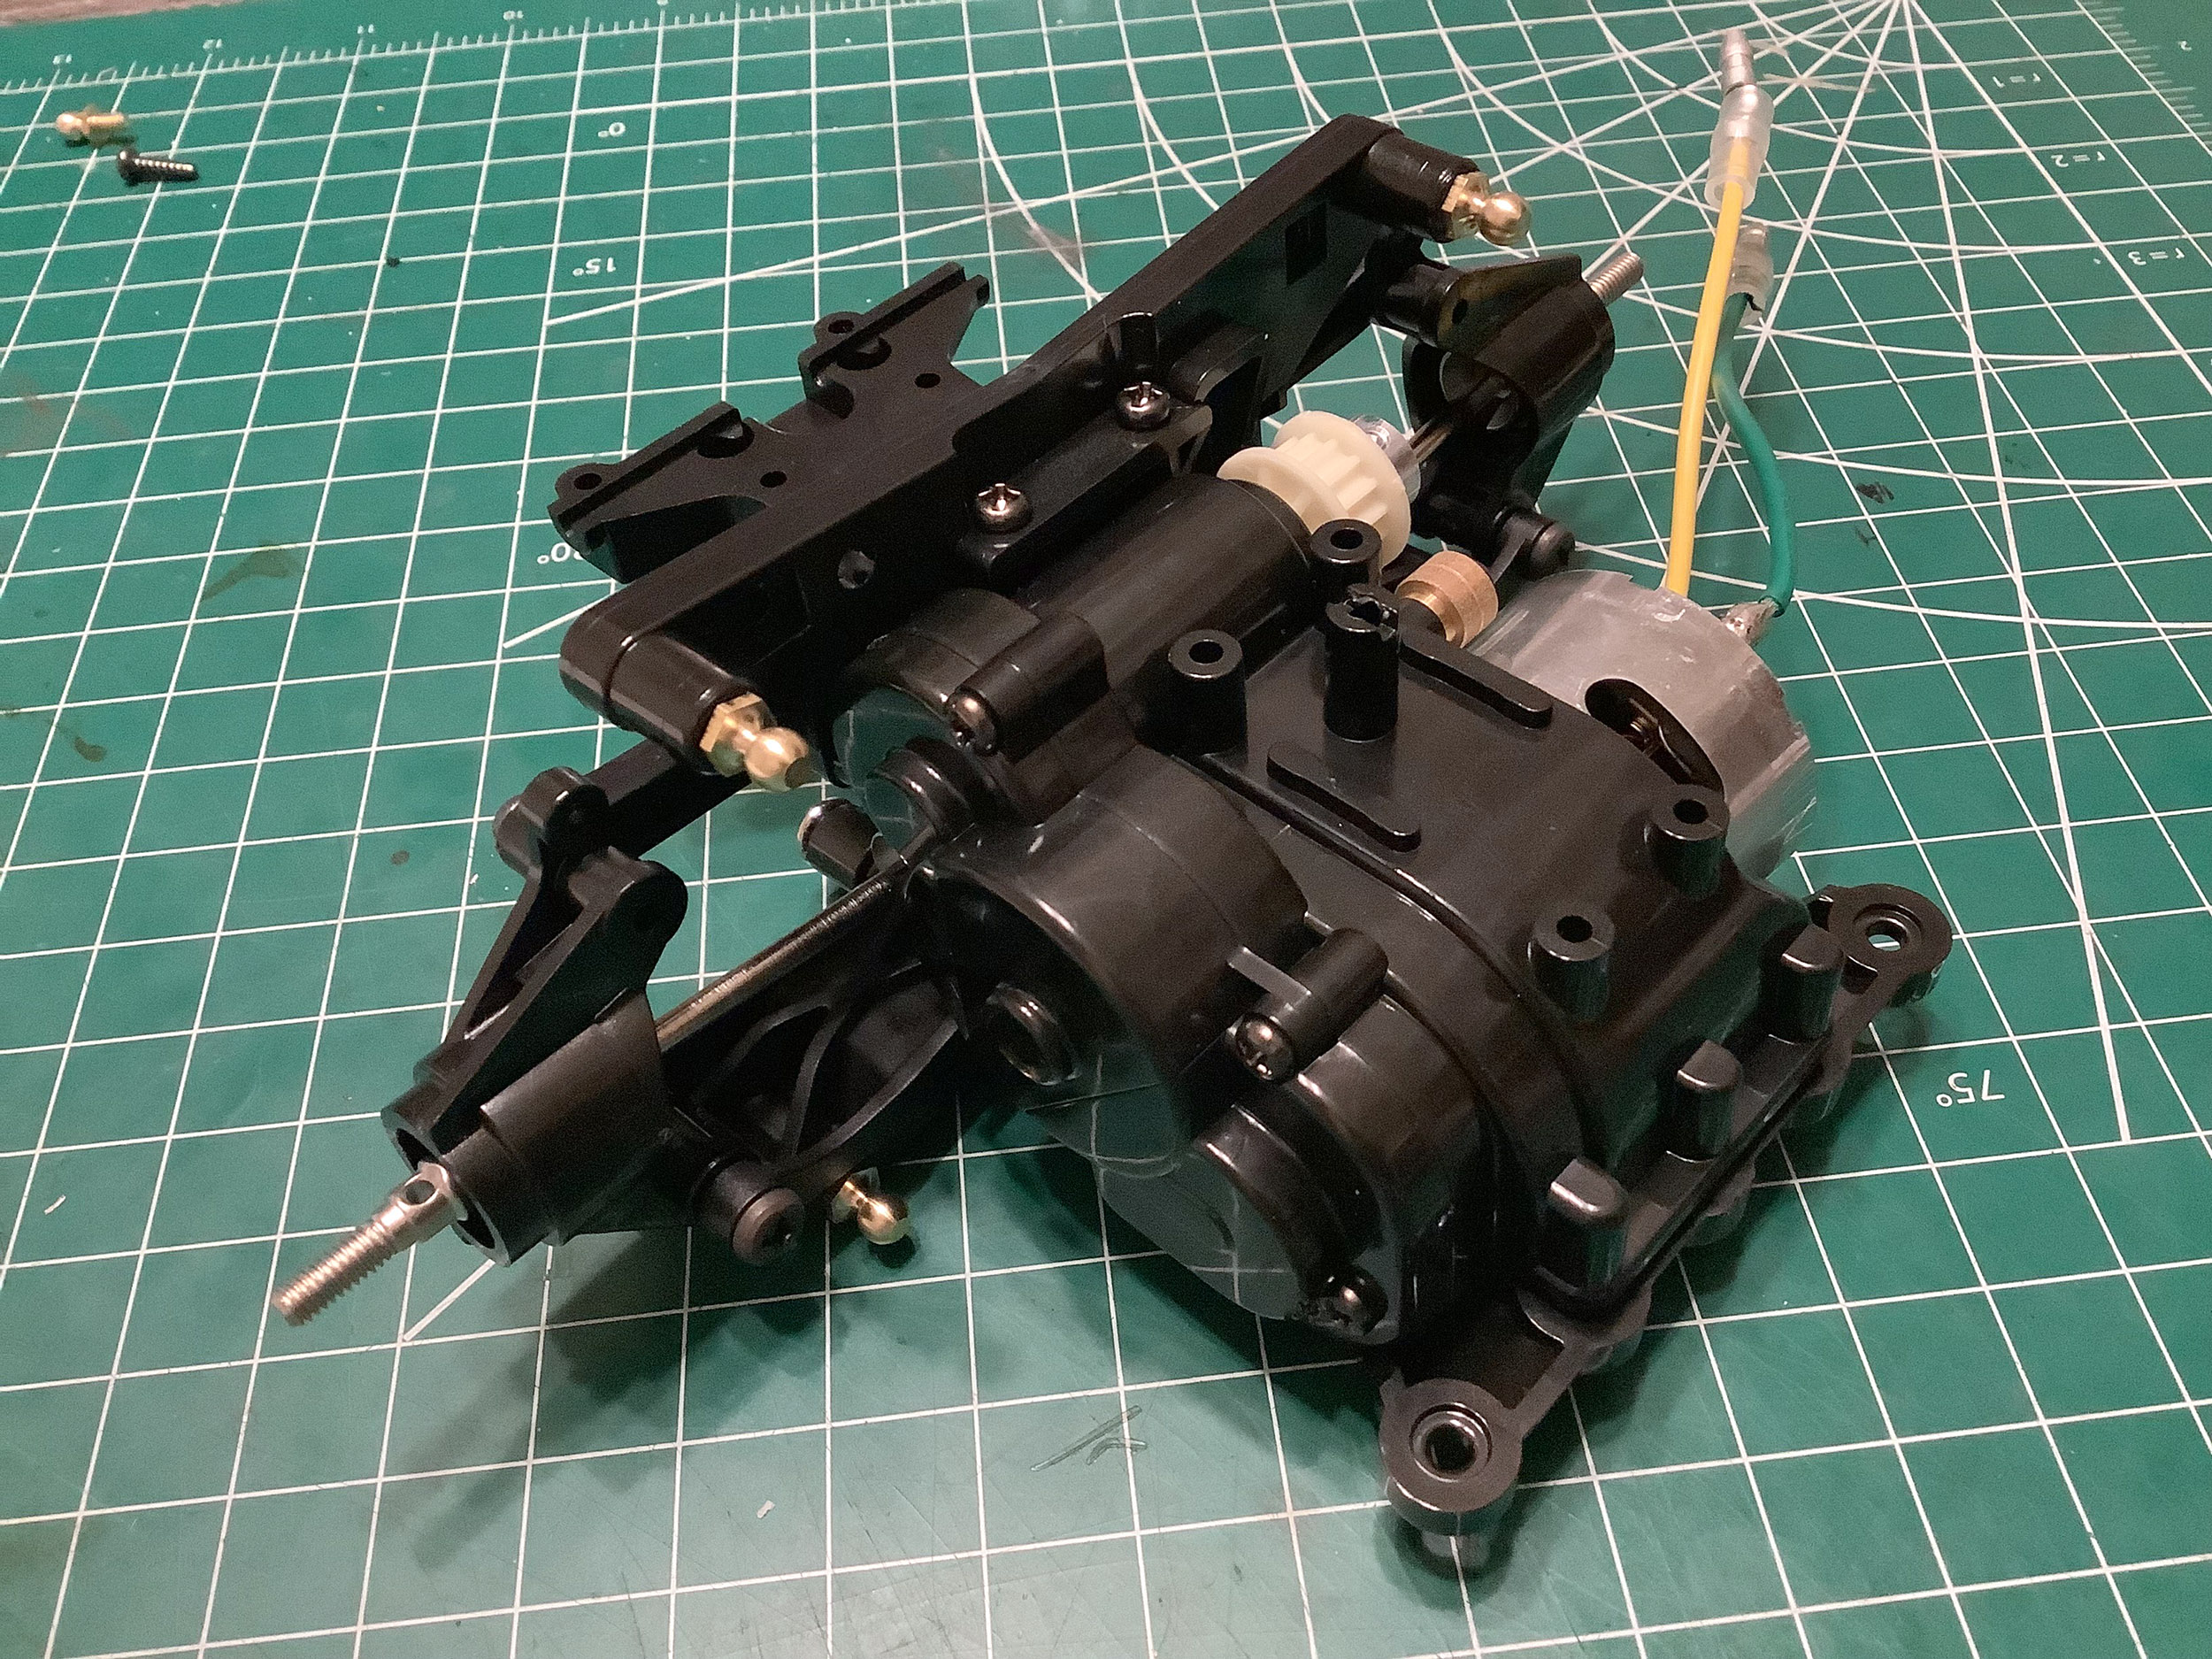
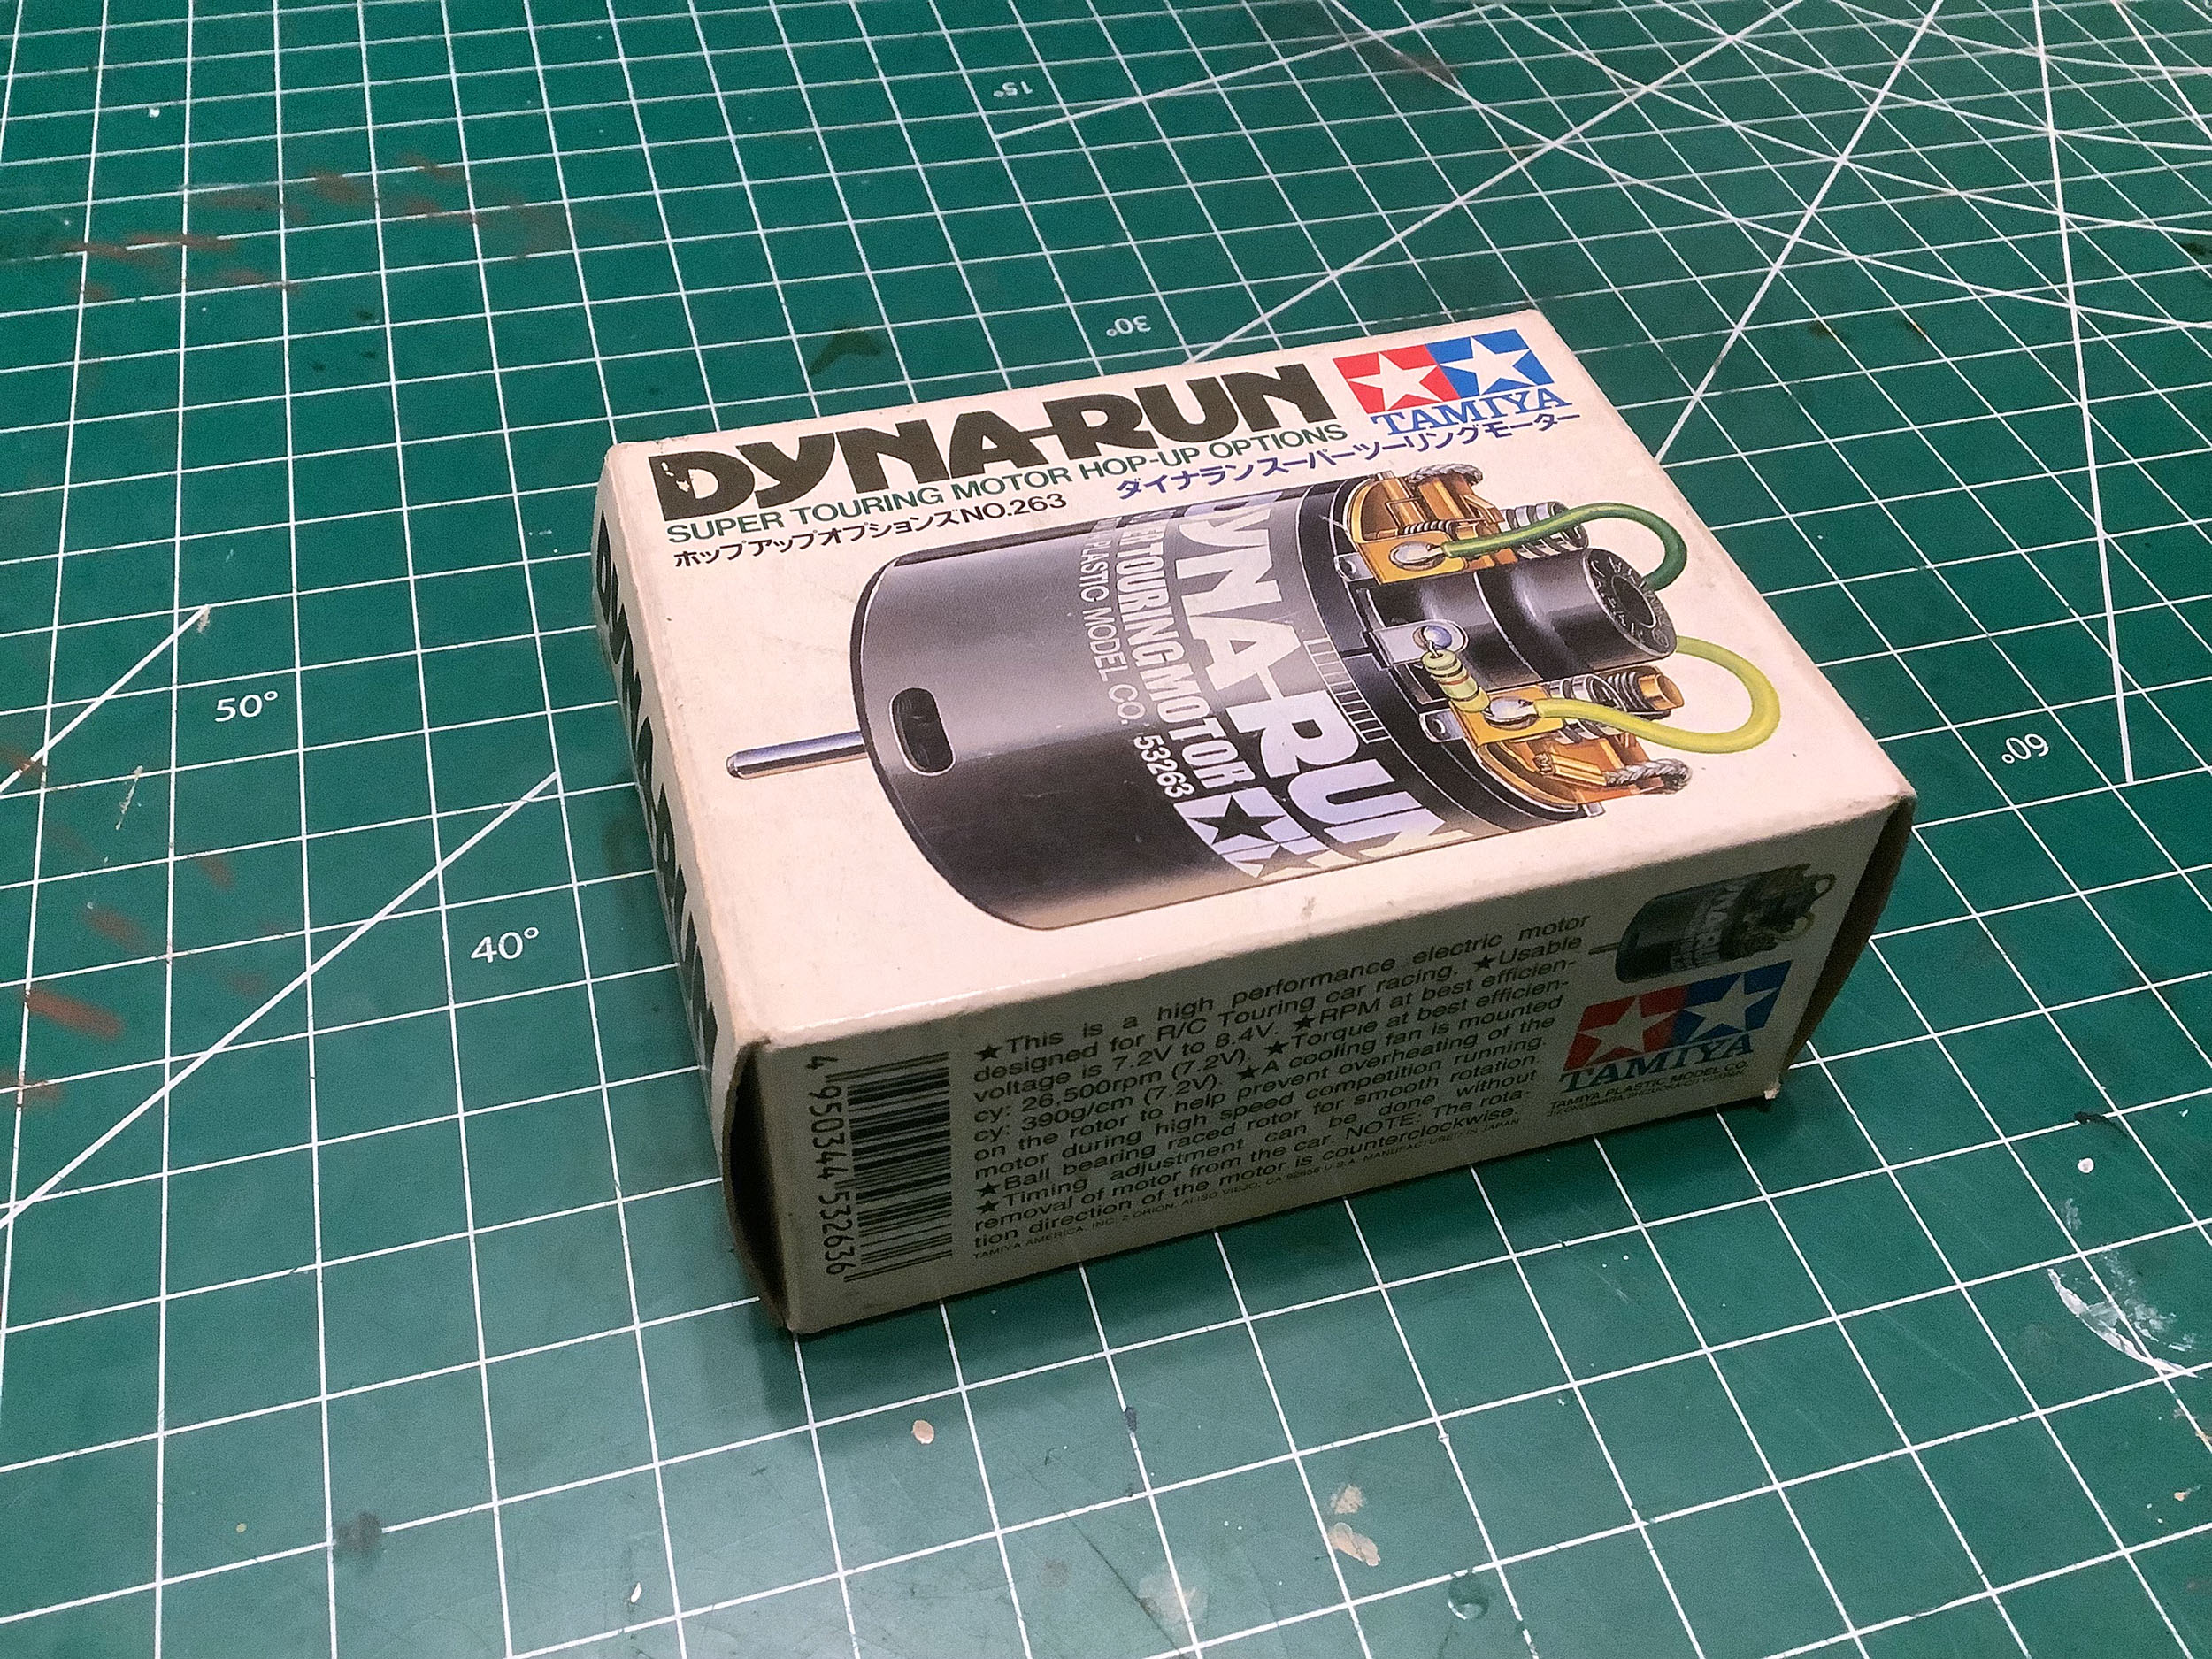
The second photo shows the original Dyna-Run motor I managed to
find. I love the sound of an old school low turn brushed motor.
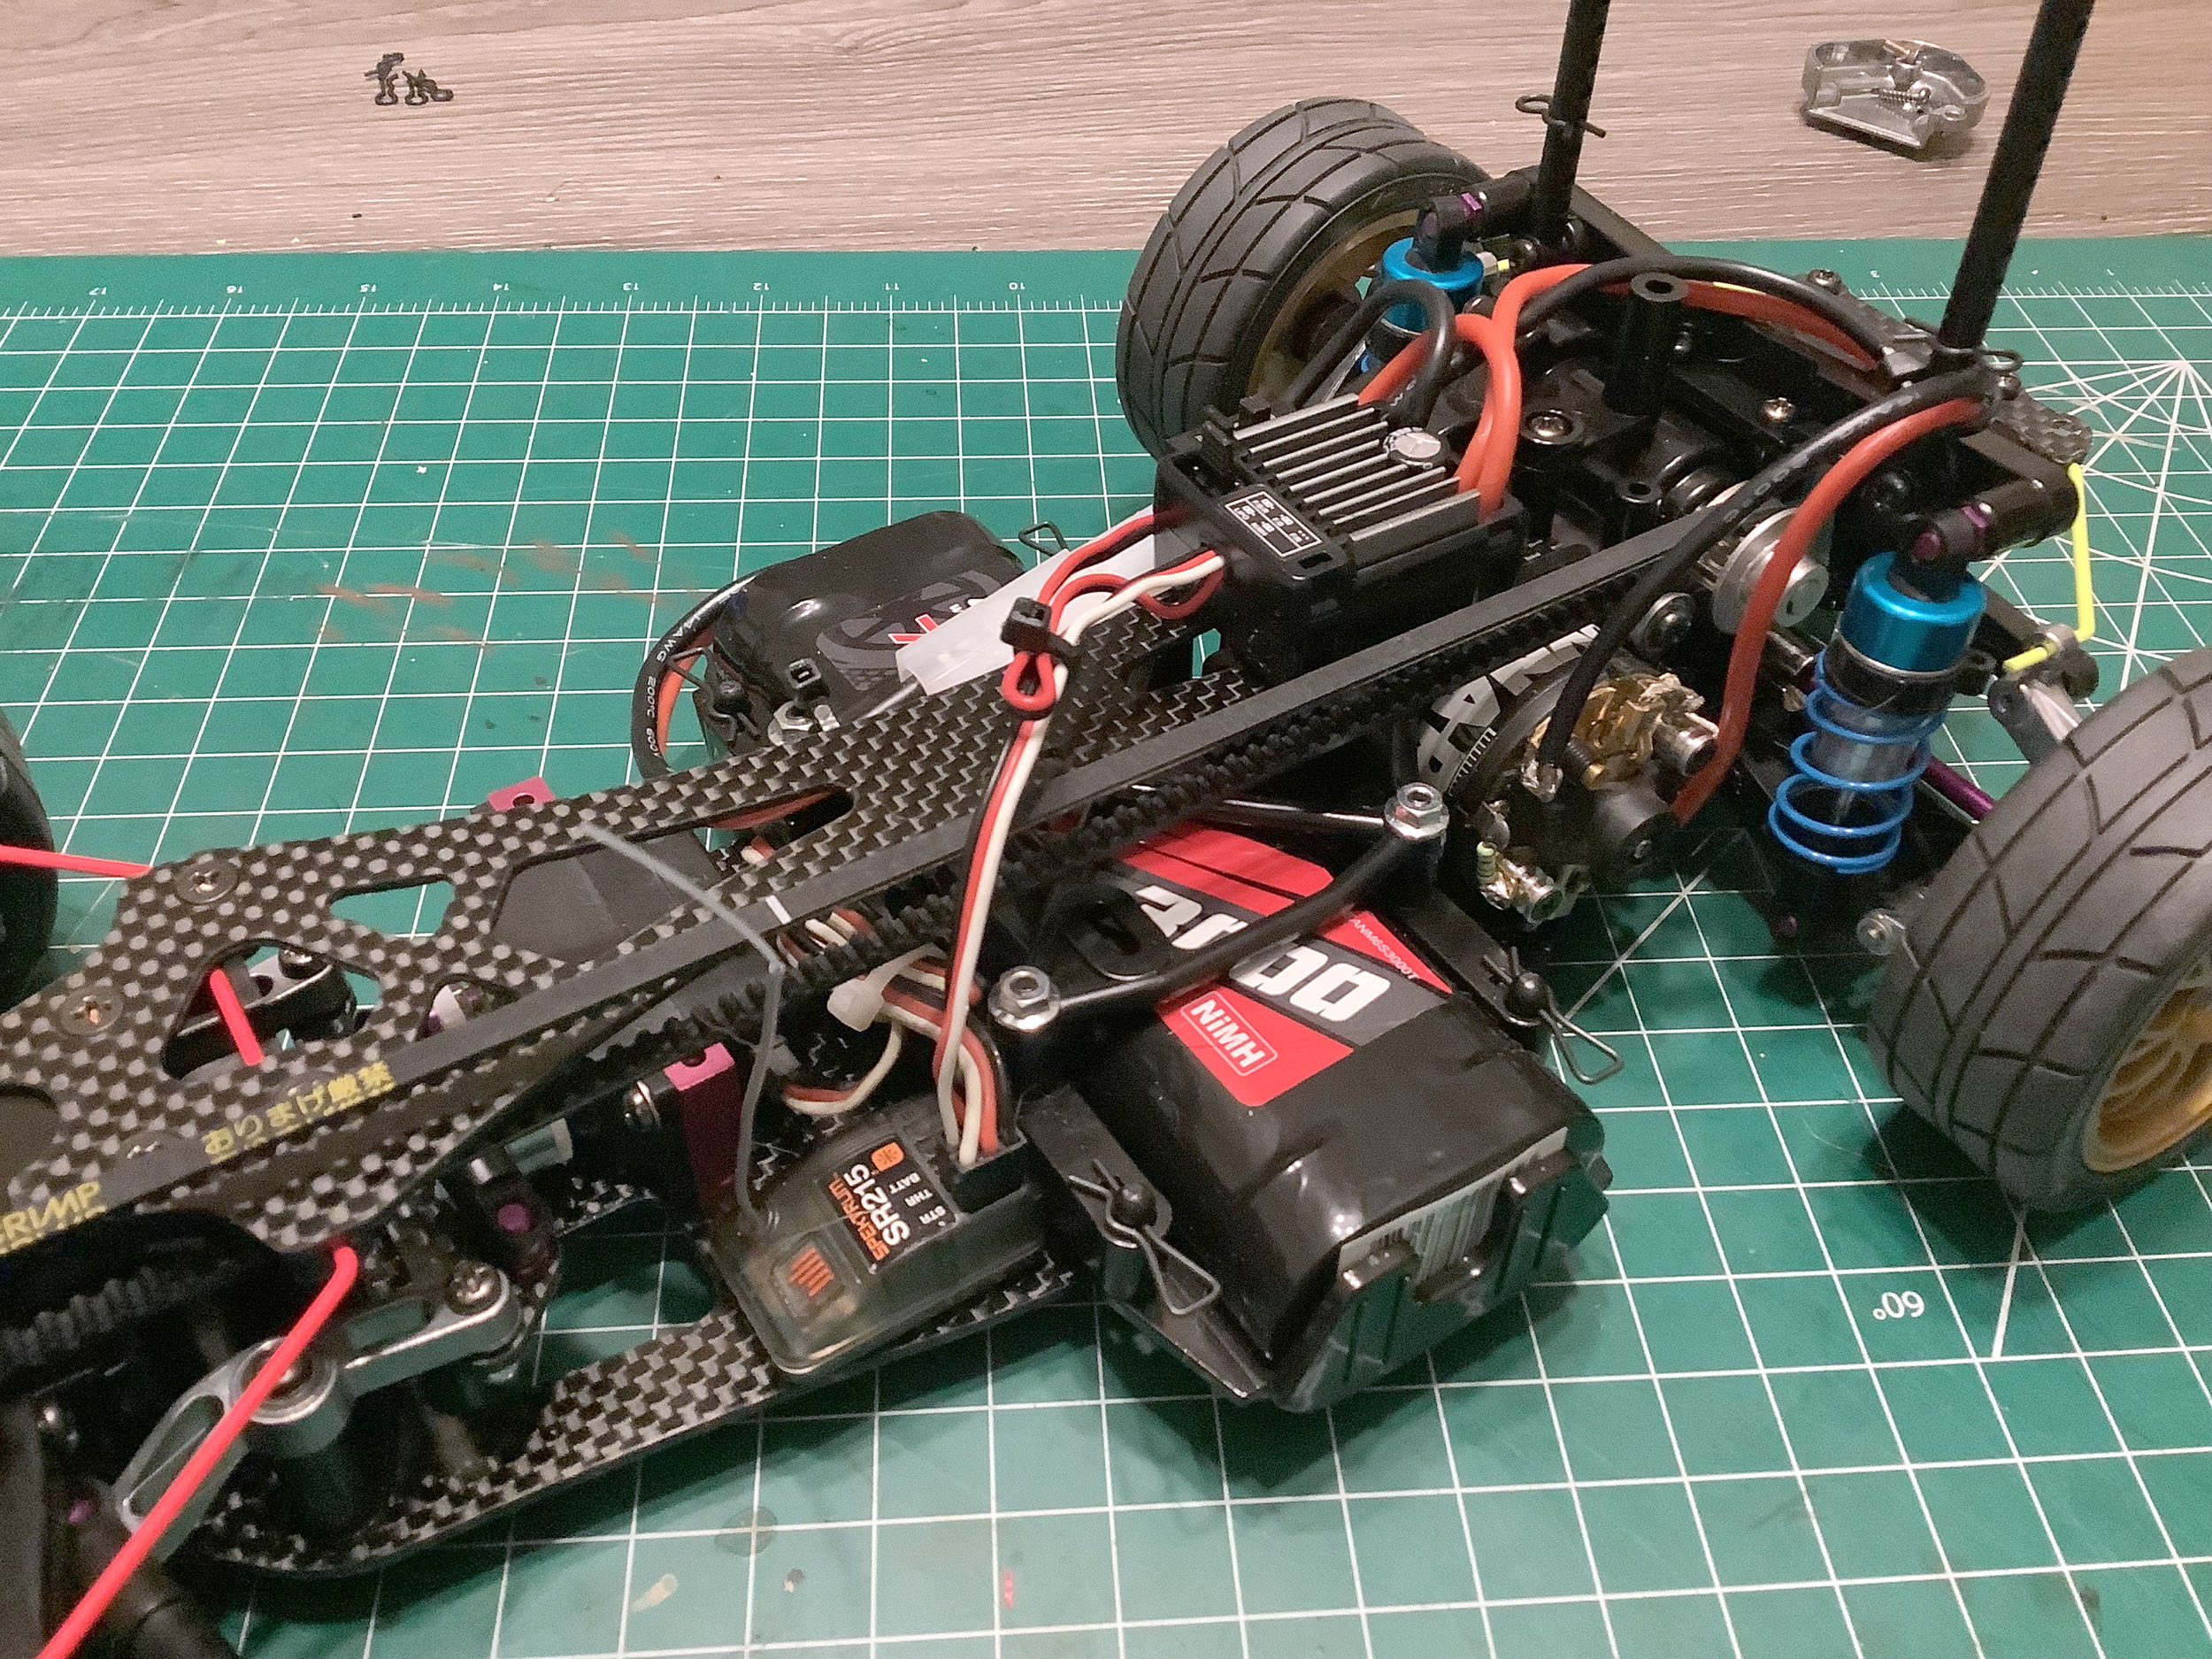
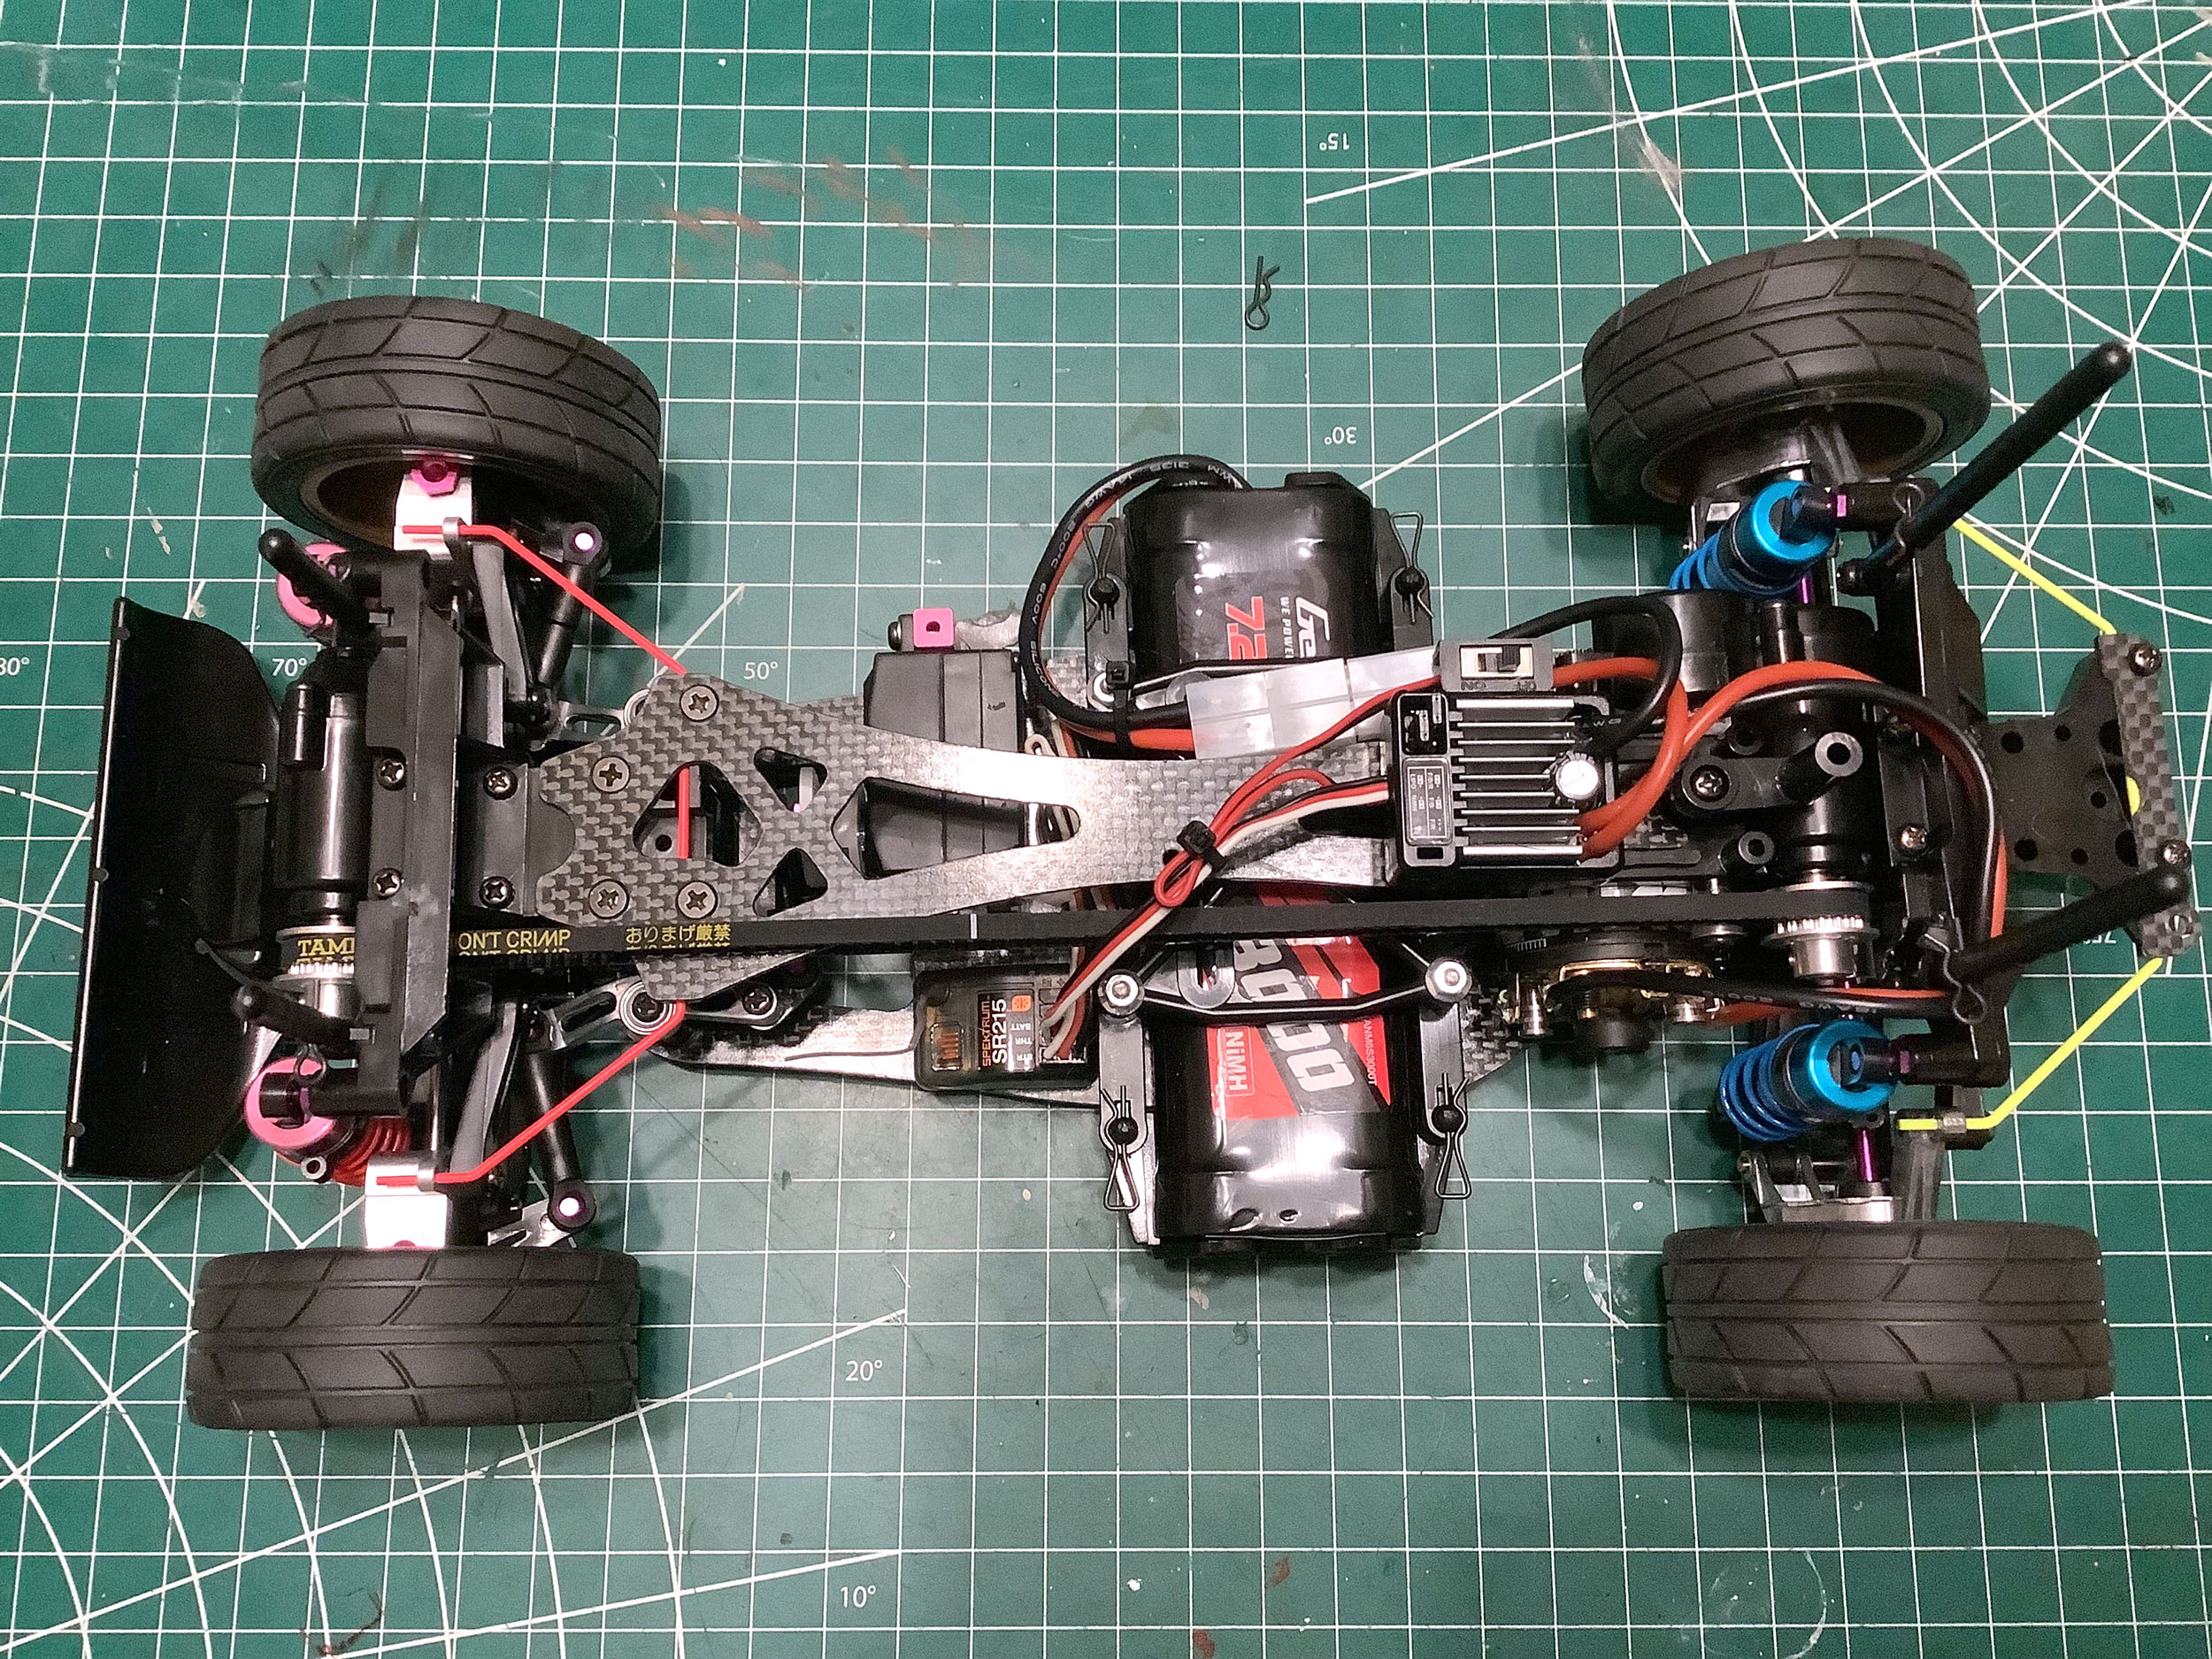
The final step was to install the electronics. I'm using a regular
NiMH battery because it fits perfectly and the car doesn't need to be
any faster. I was worried that my usual 60A ESC wouldn't be able
to handle to 13T motor, but so far it is OK. This model was never
intended to use a mechanical speed controller.
©2023 Eric Albrecht