Tamiya Porsche 911 GT1 Project
Page 2: Paint
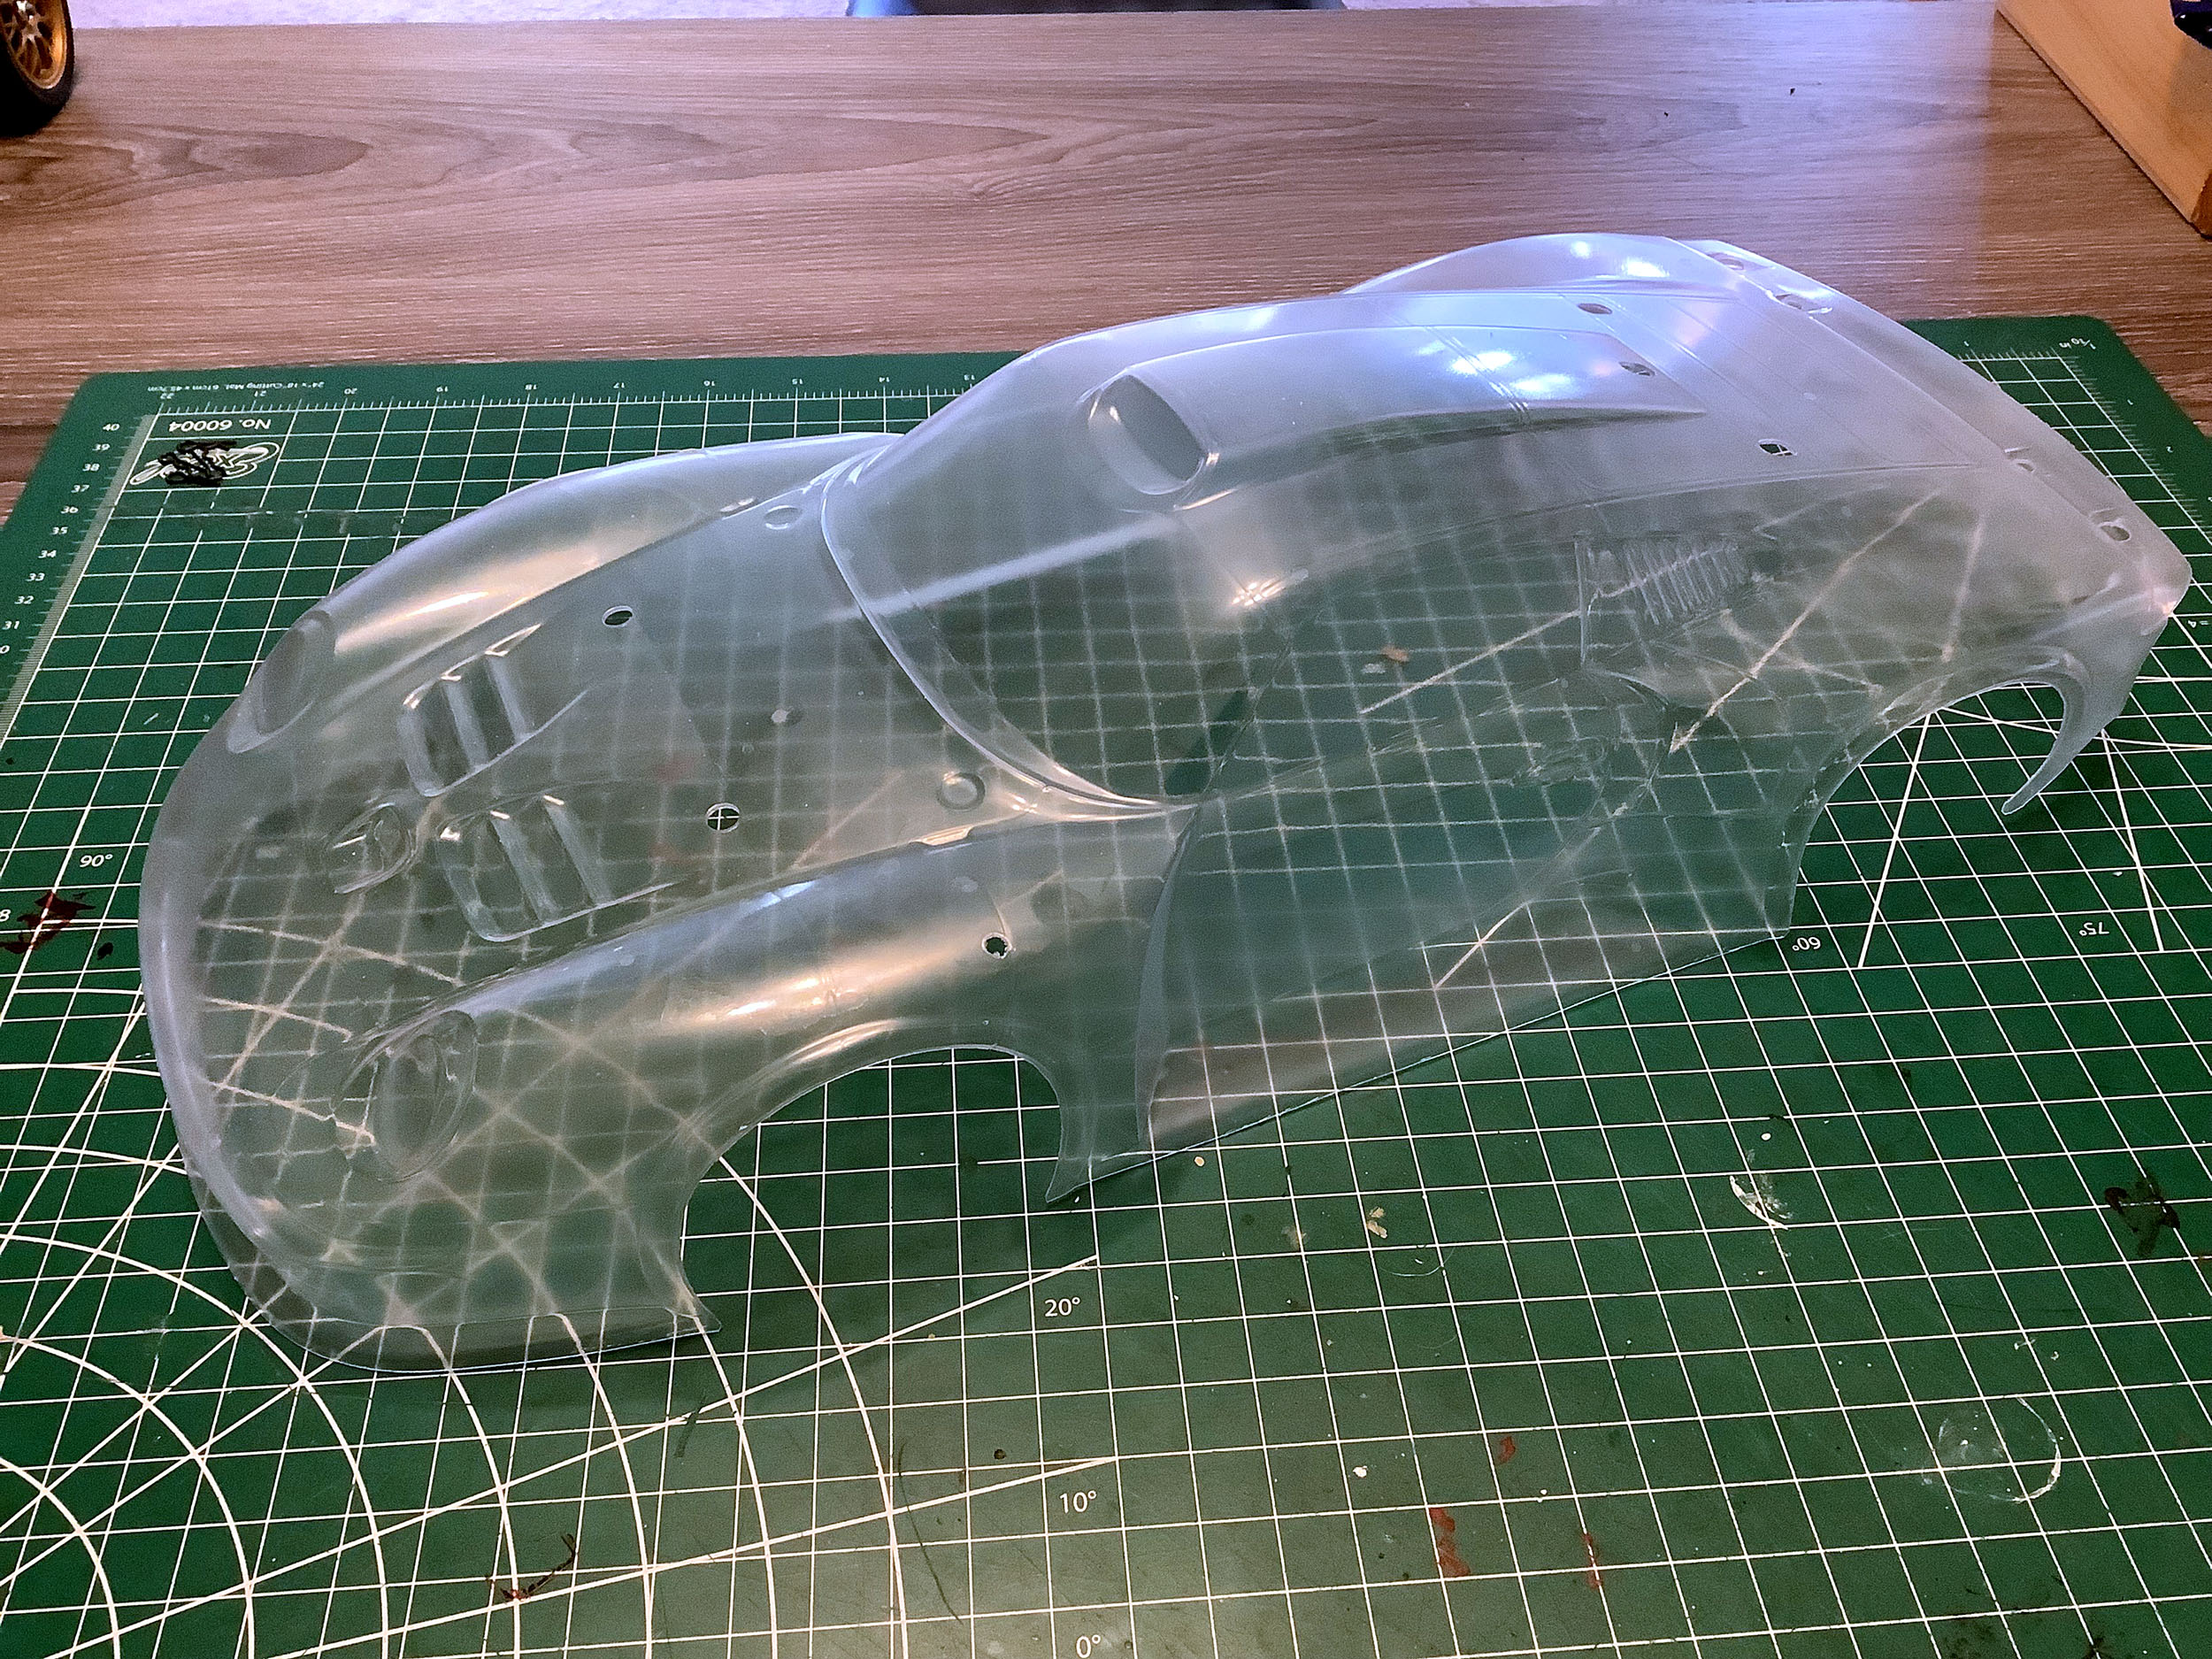
The first step is always to cut out the body and drill the holes which
has been completed in the picture on the left. The body is
intended to make the front splitter black using stickers, but I have
always found that these are the first to start peeling so I decided to
mask that area and paint it black instead. The windows have also been
masked.
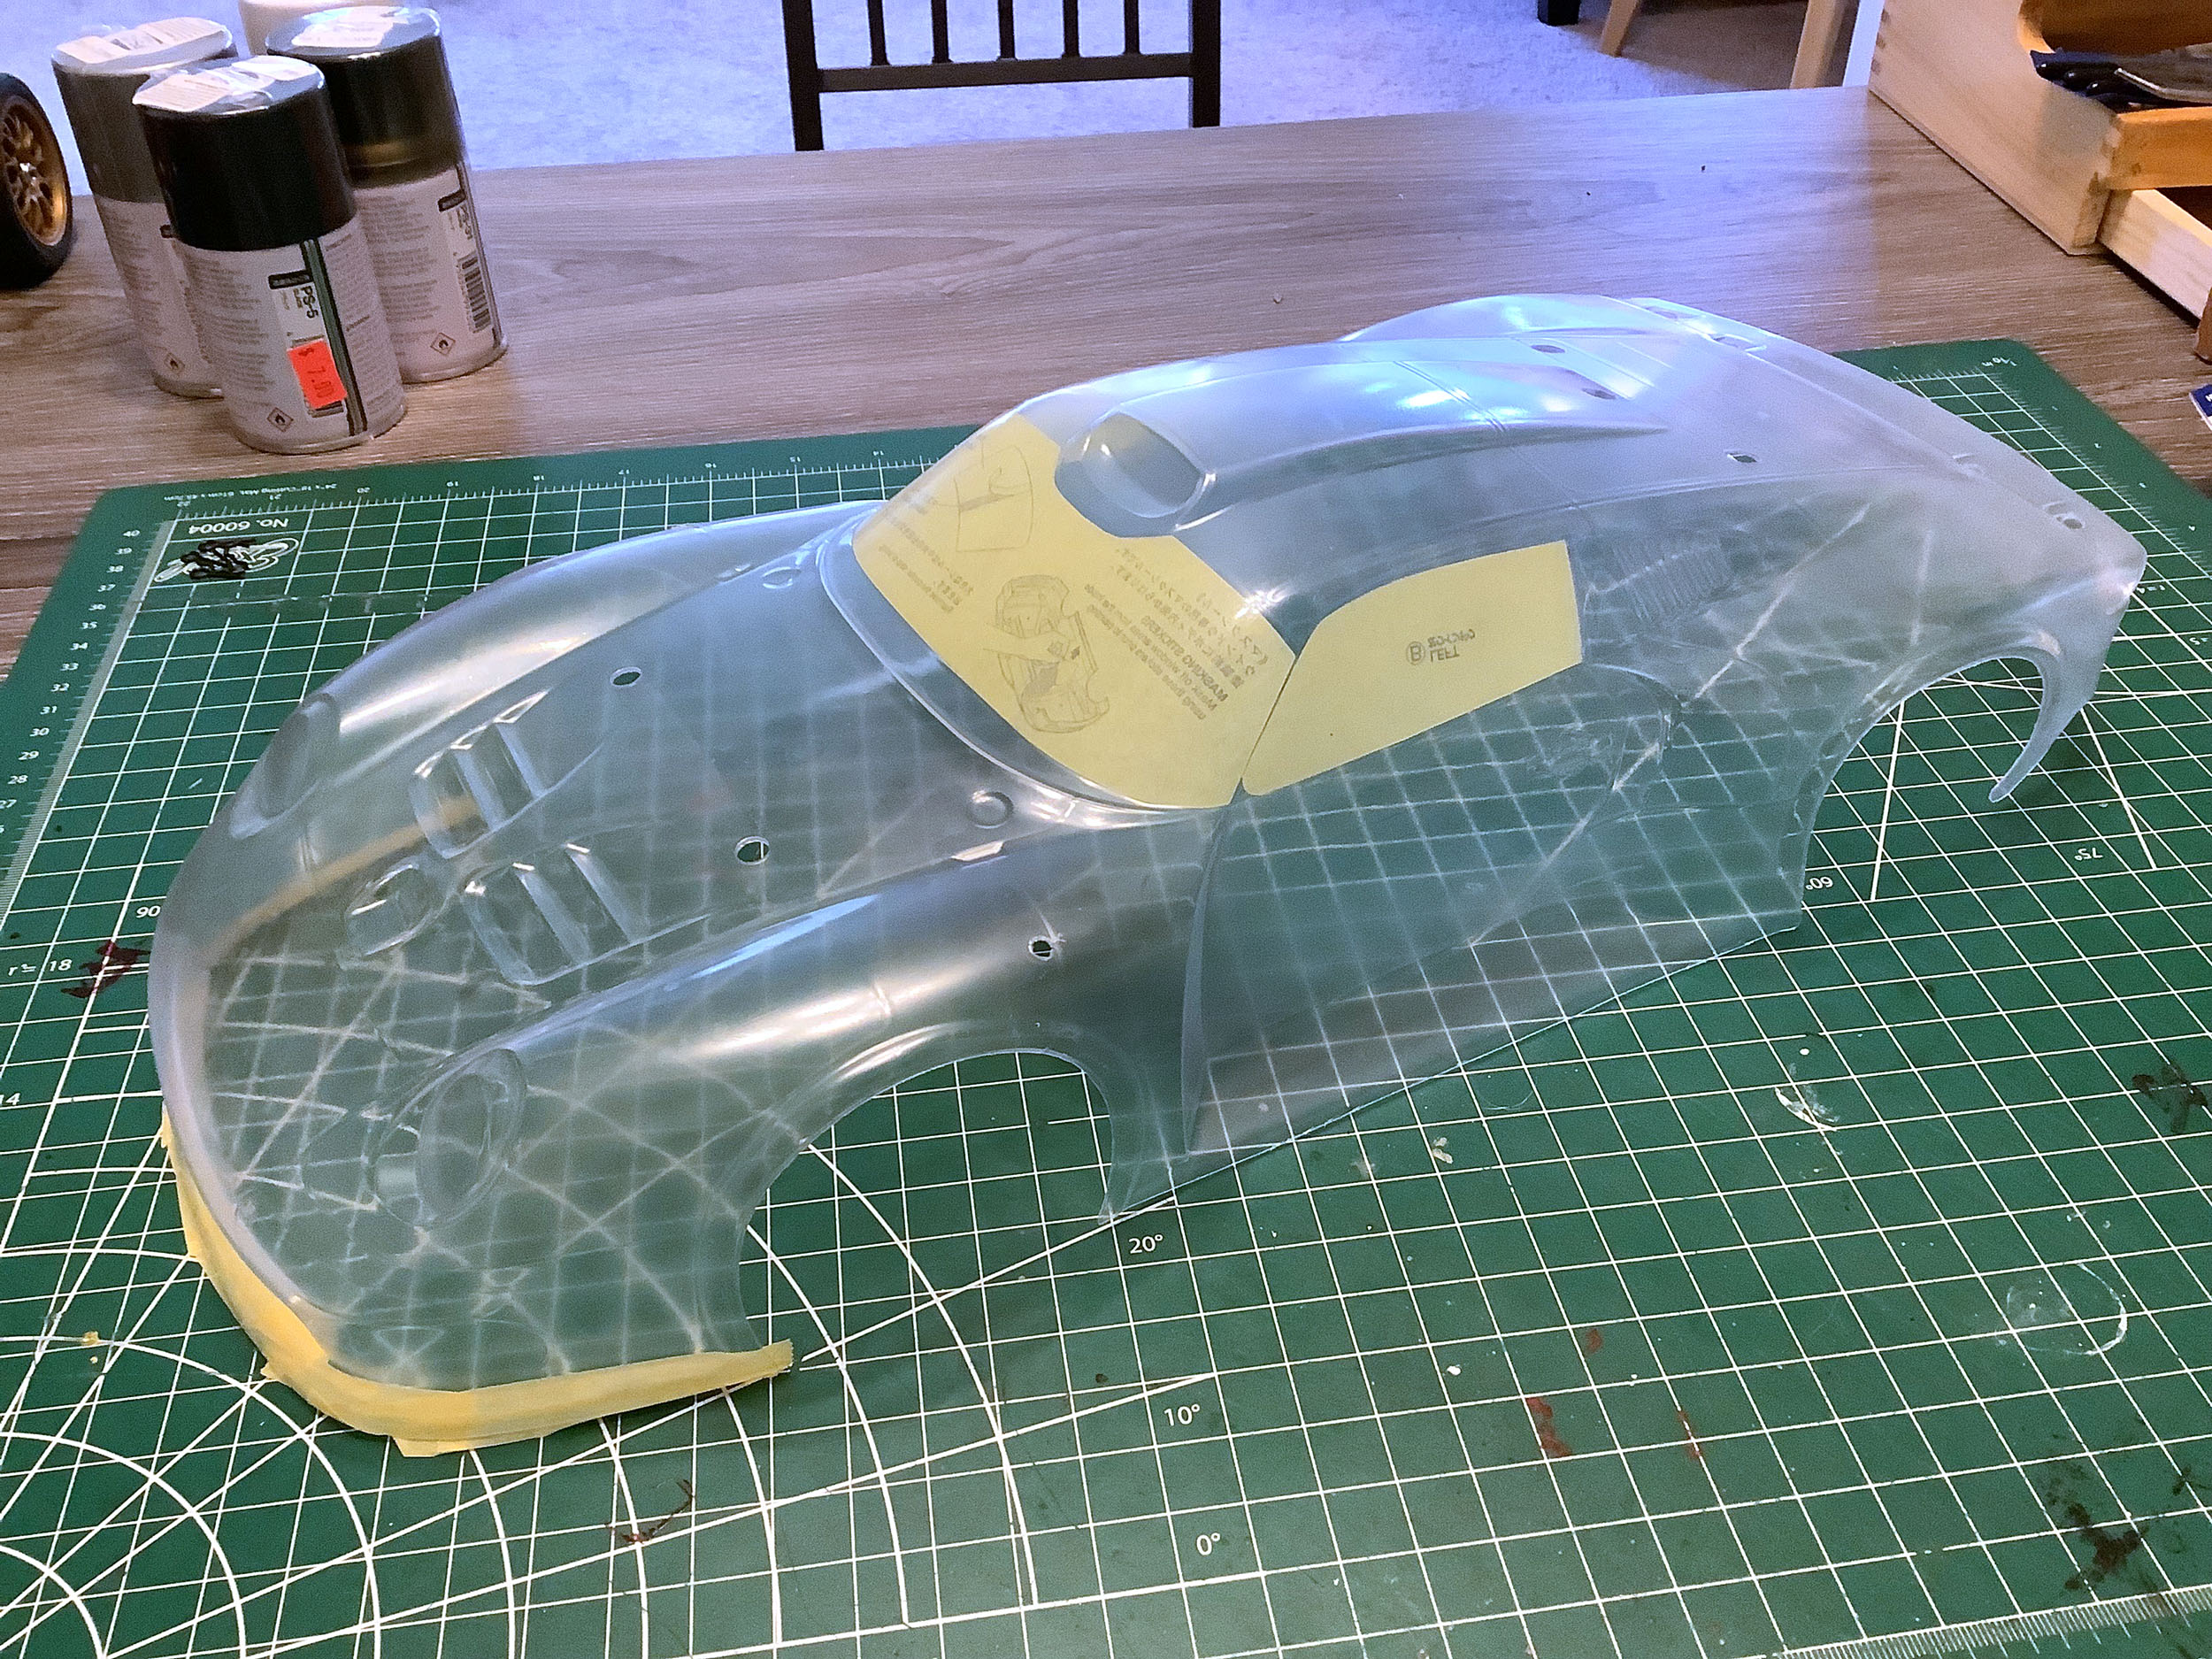
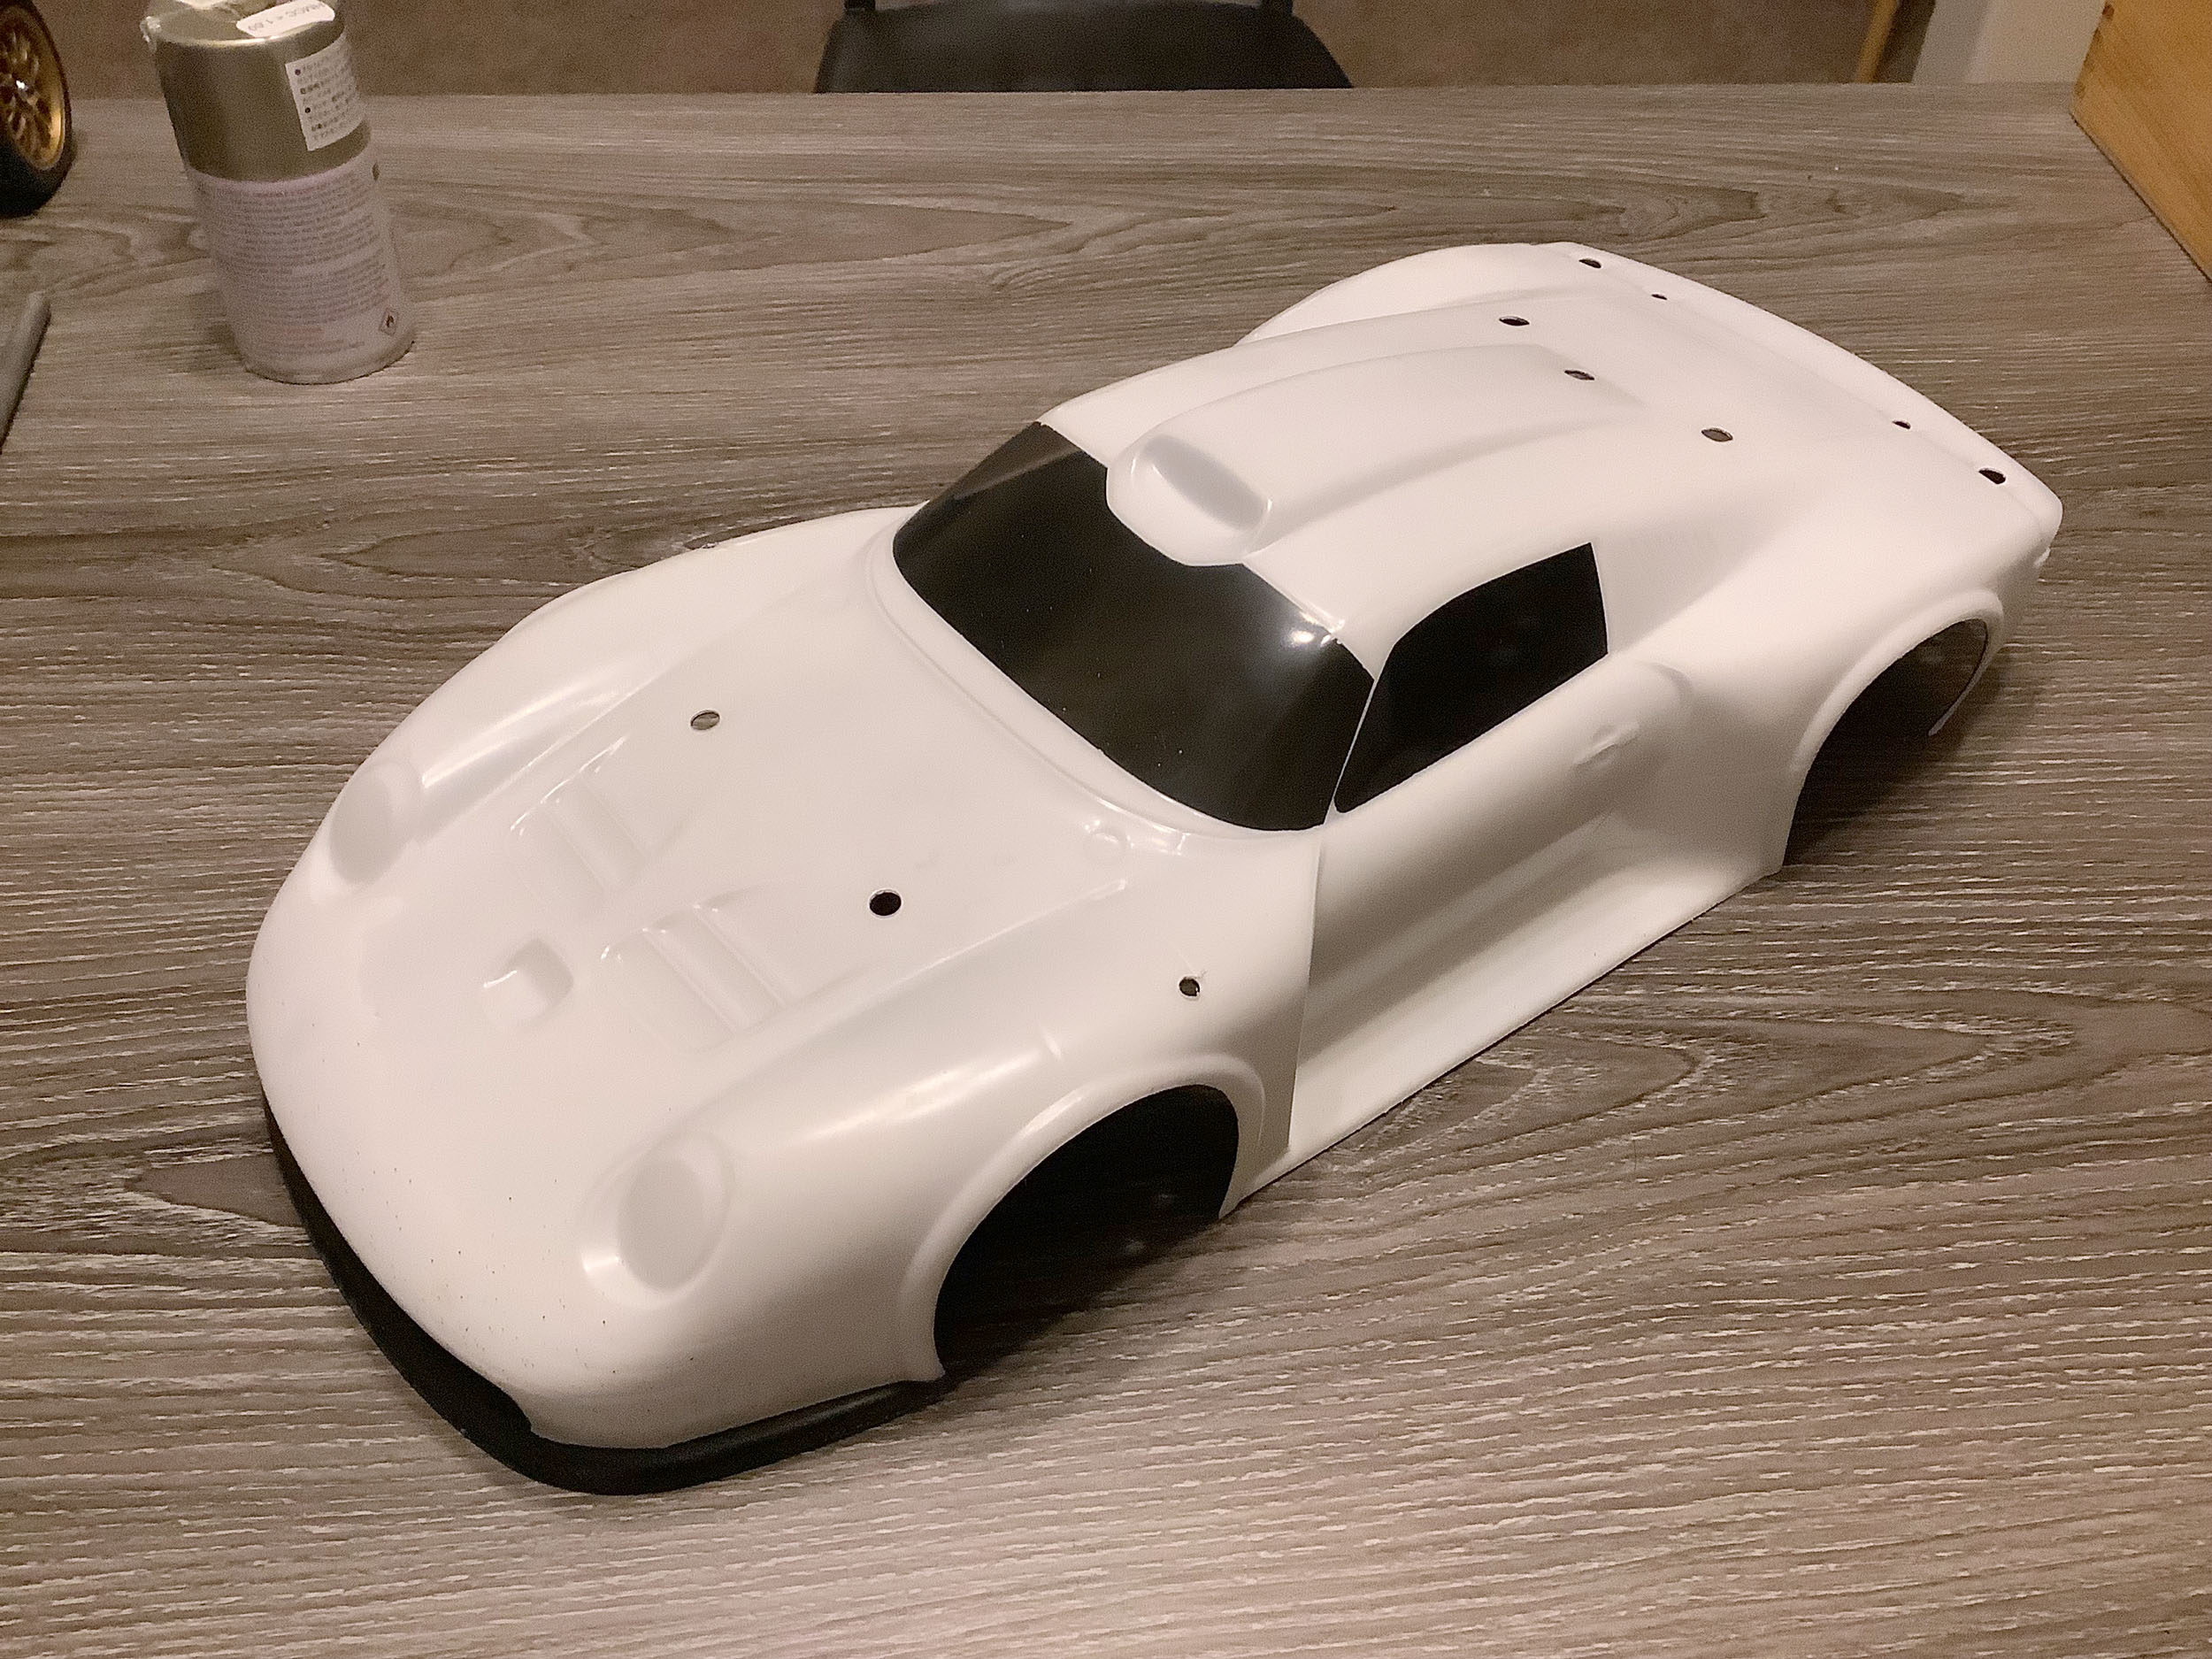
The paint job is pretty easy to start since it is nearly all
white. I backed the whole thing in silver and then black.
The black is to make the inside dark, and the silver is to keep the
black from tinting the white toward gray since the white tends to be
thin. It appears to have worked well. Finally, I smoked the
windows.
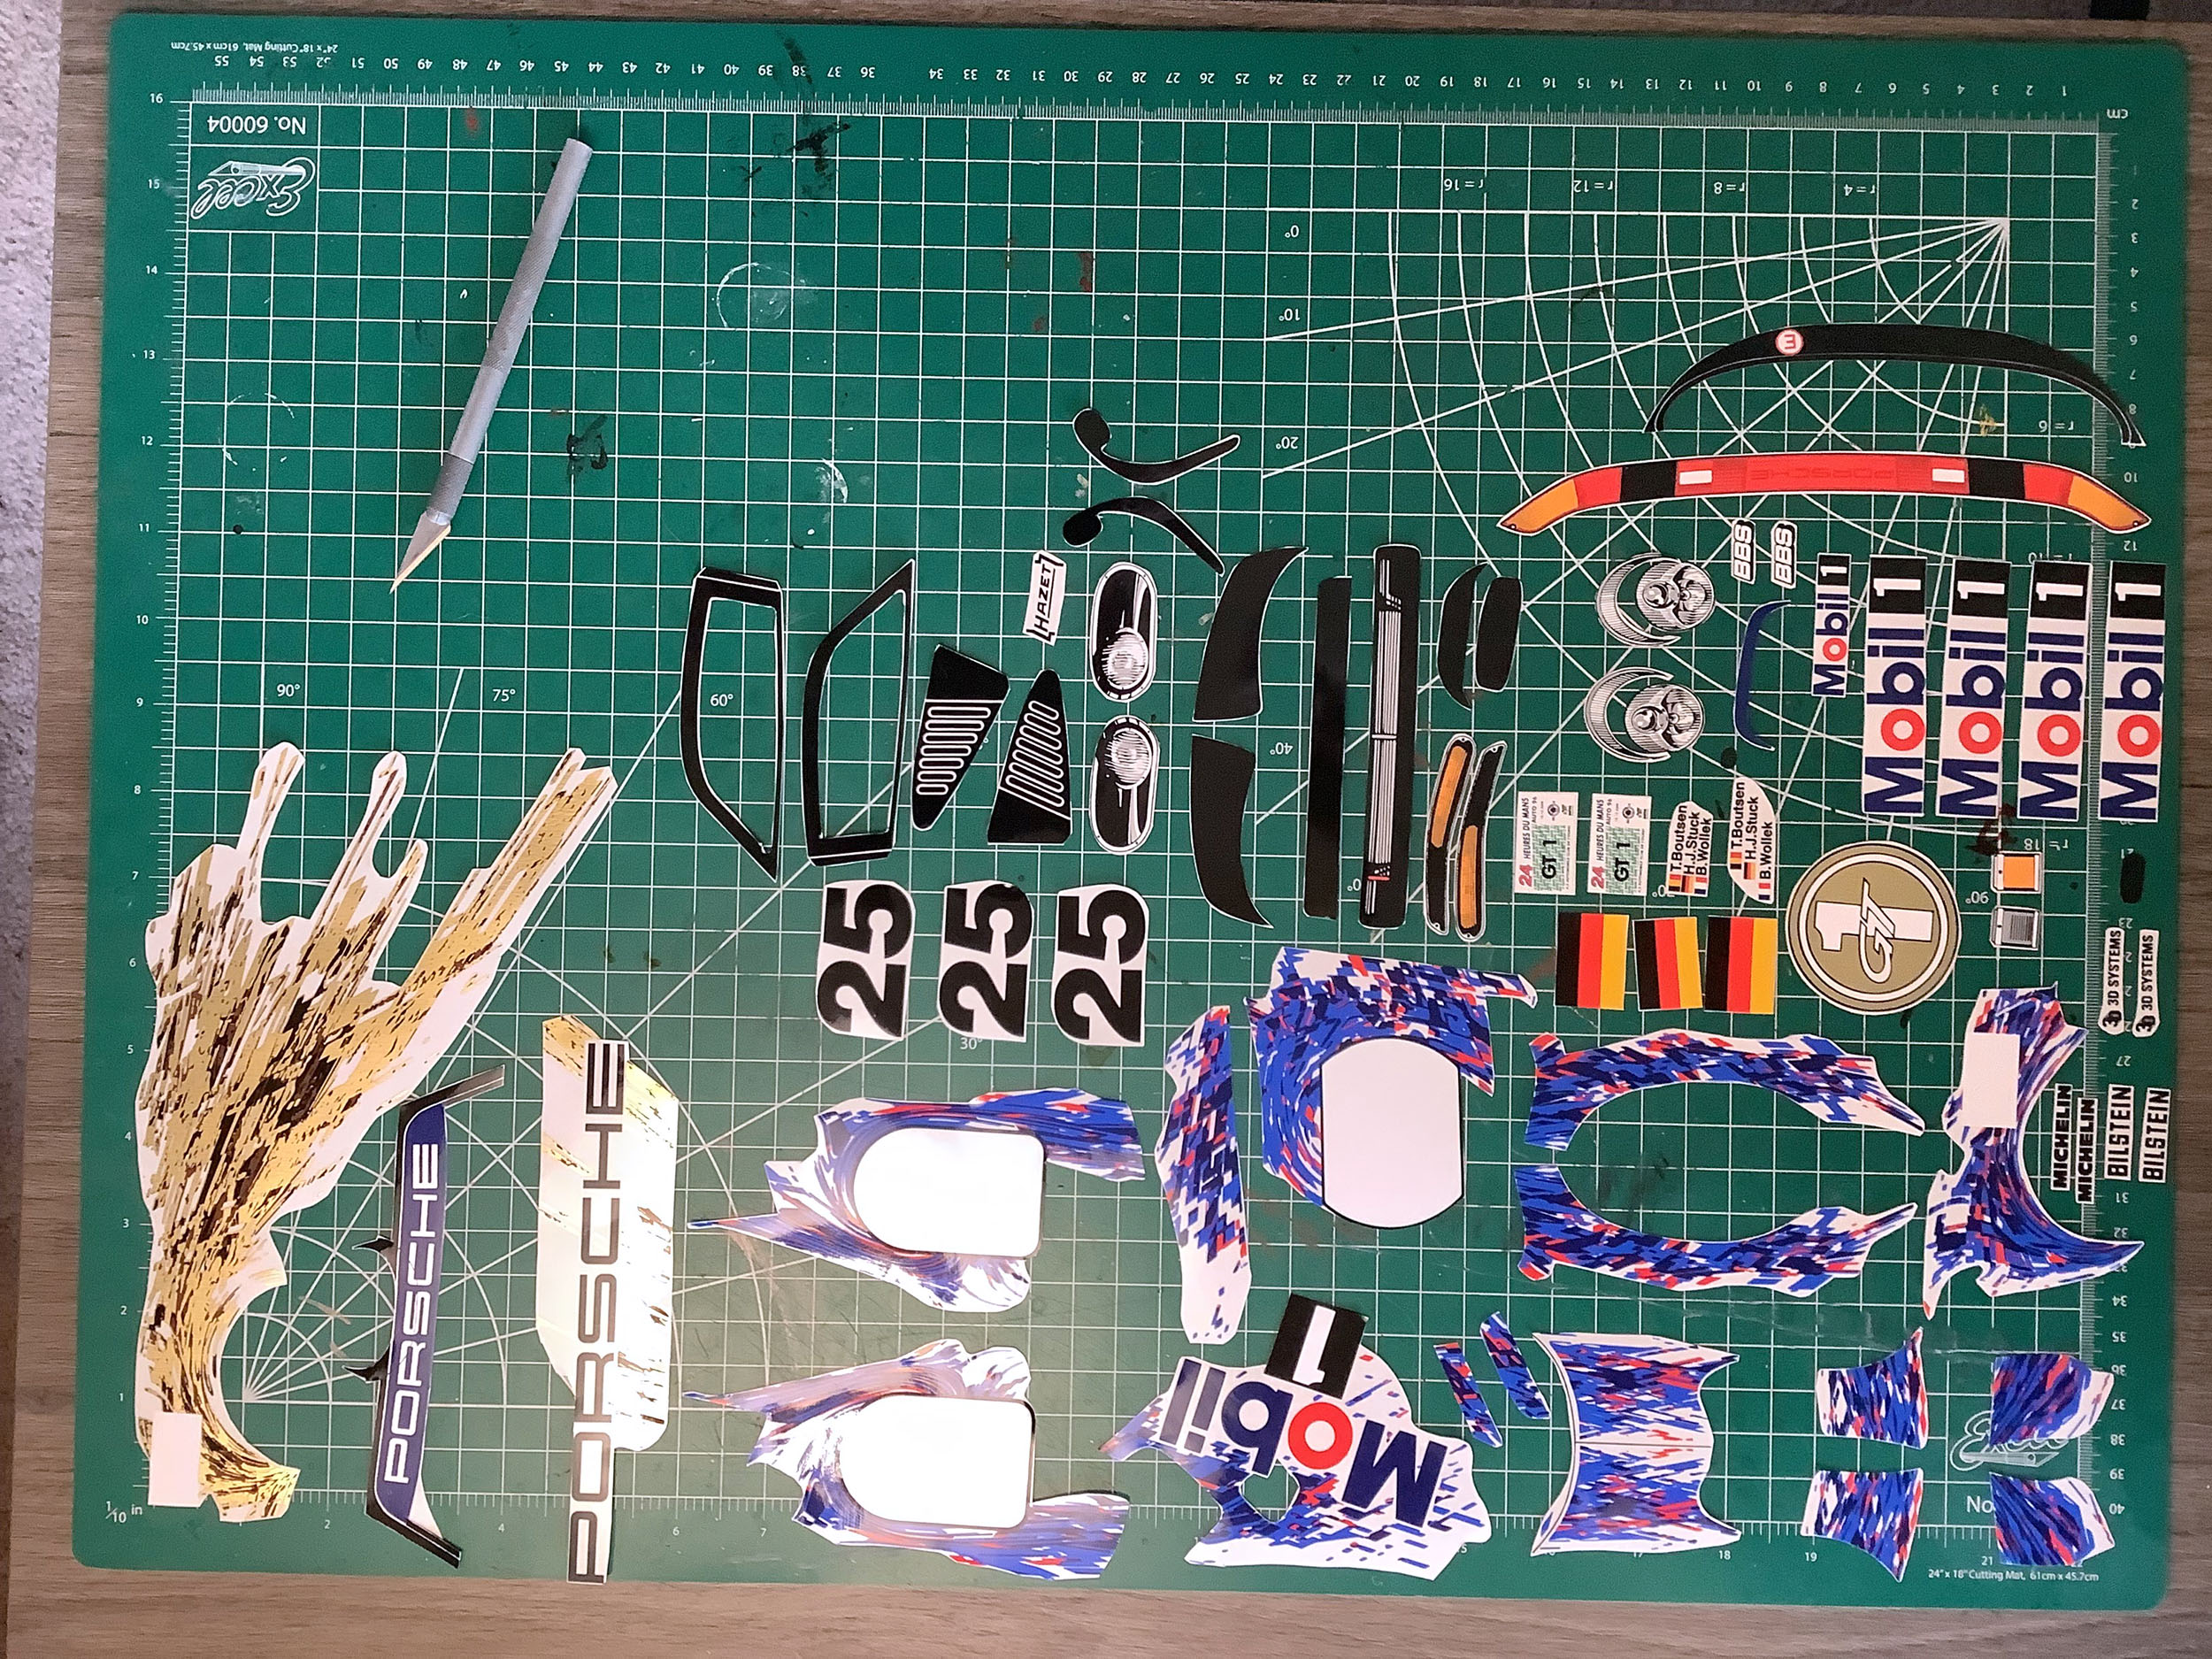
While I was waiting for the paint to dry, I cut out the vast quantity of
stickers. These are not original stickers; they are from MCI
Racing. I also used a couple of the Tamiya stickers from the
Street version of the sticker sheet to fill in black areas that were not
quite covered or to improve the gradient in areas like the hood
louvers.
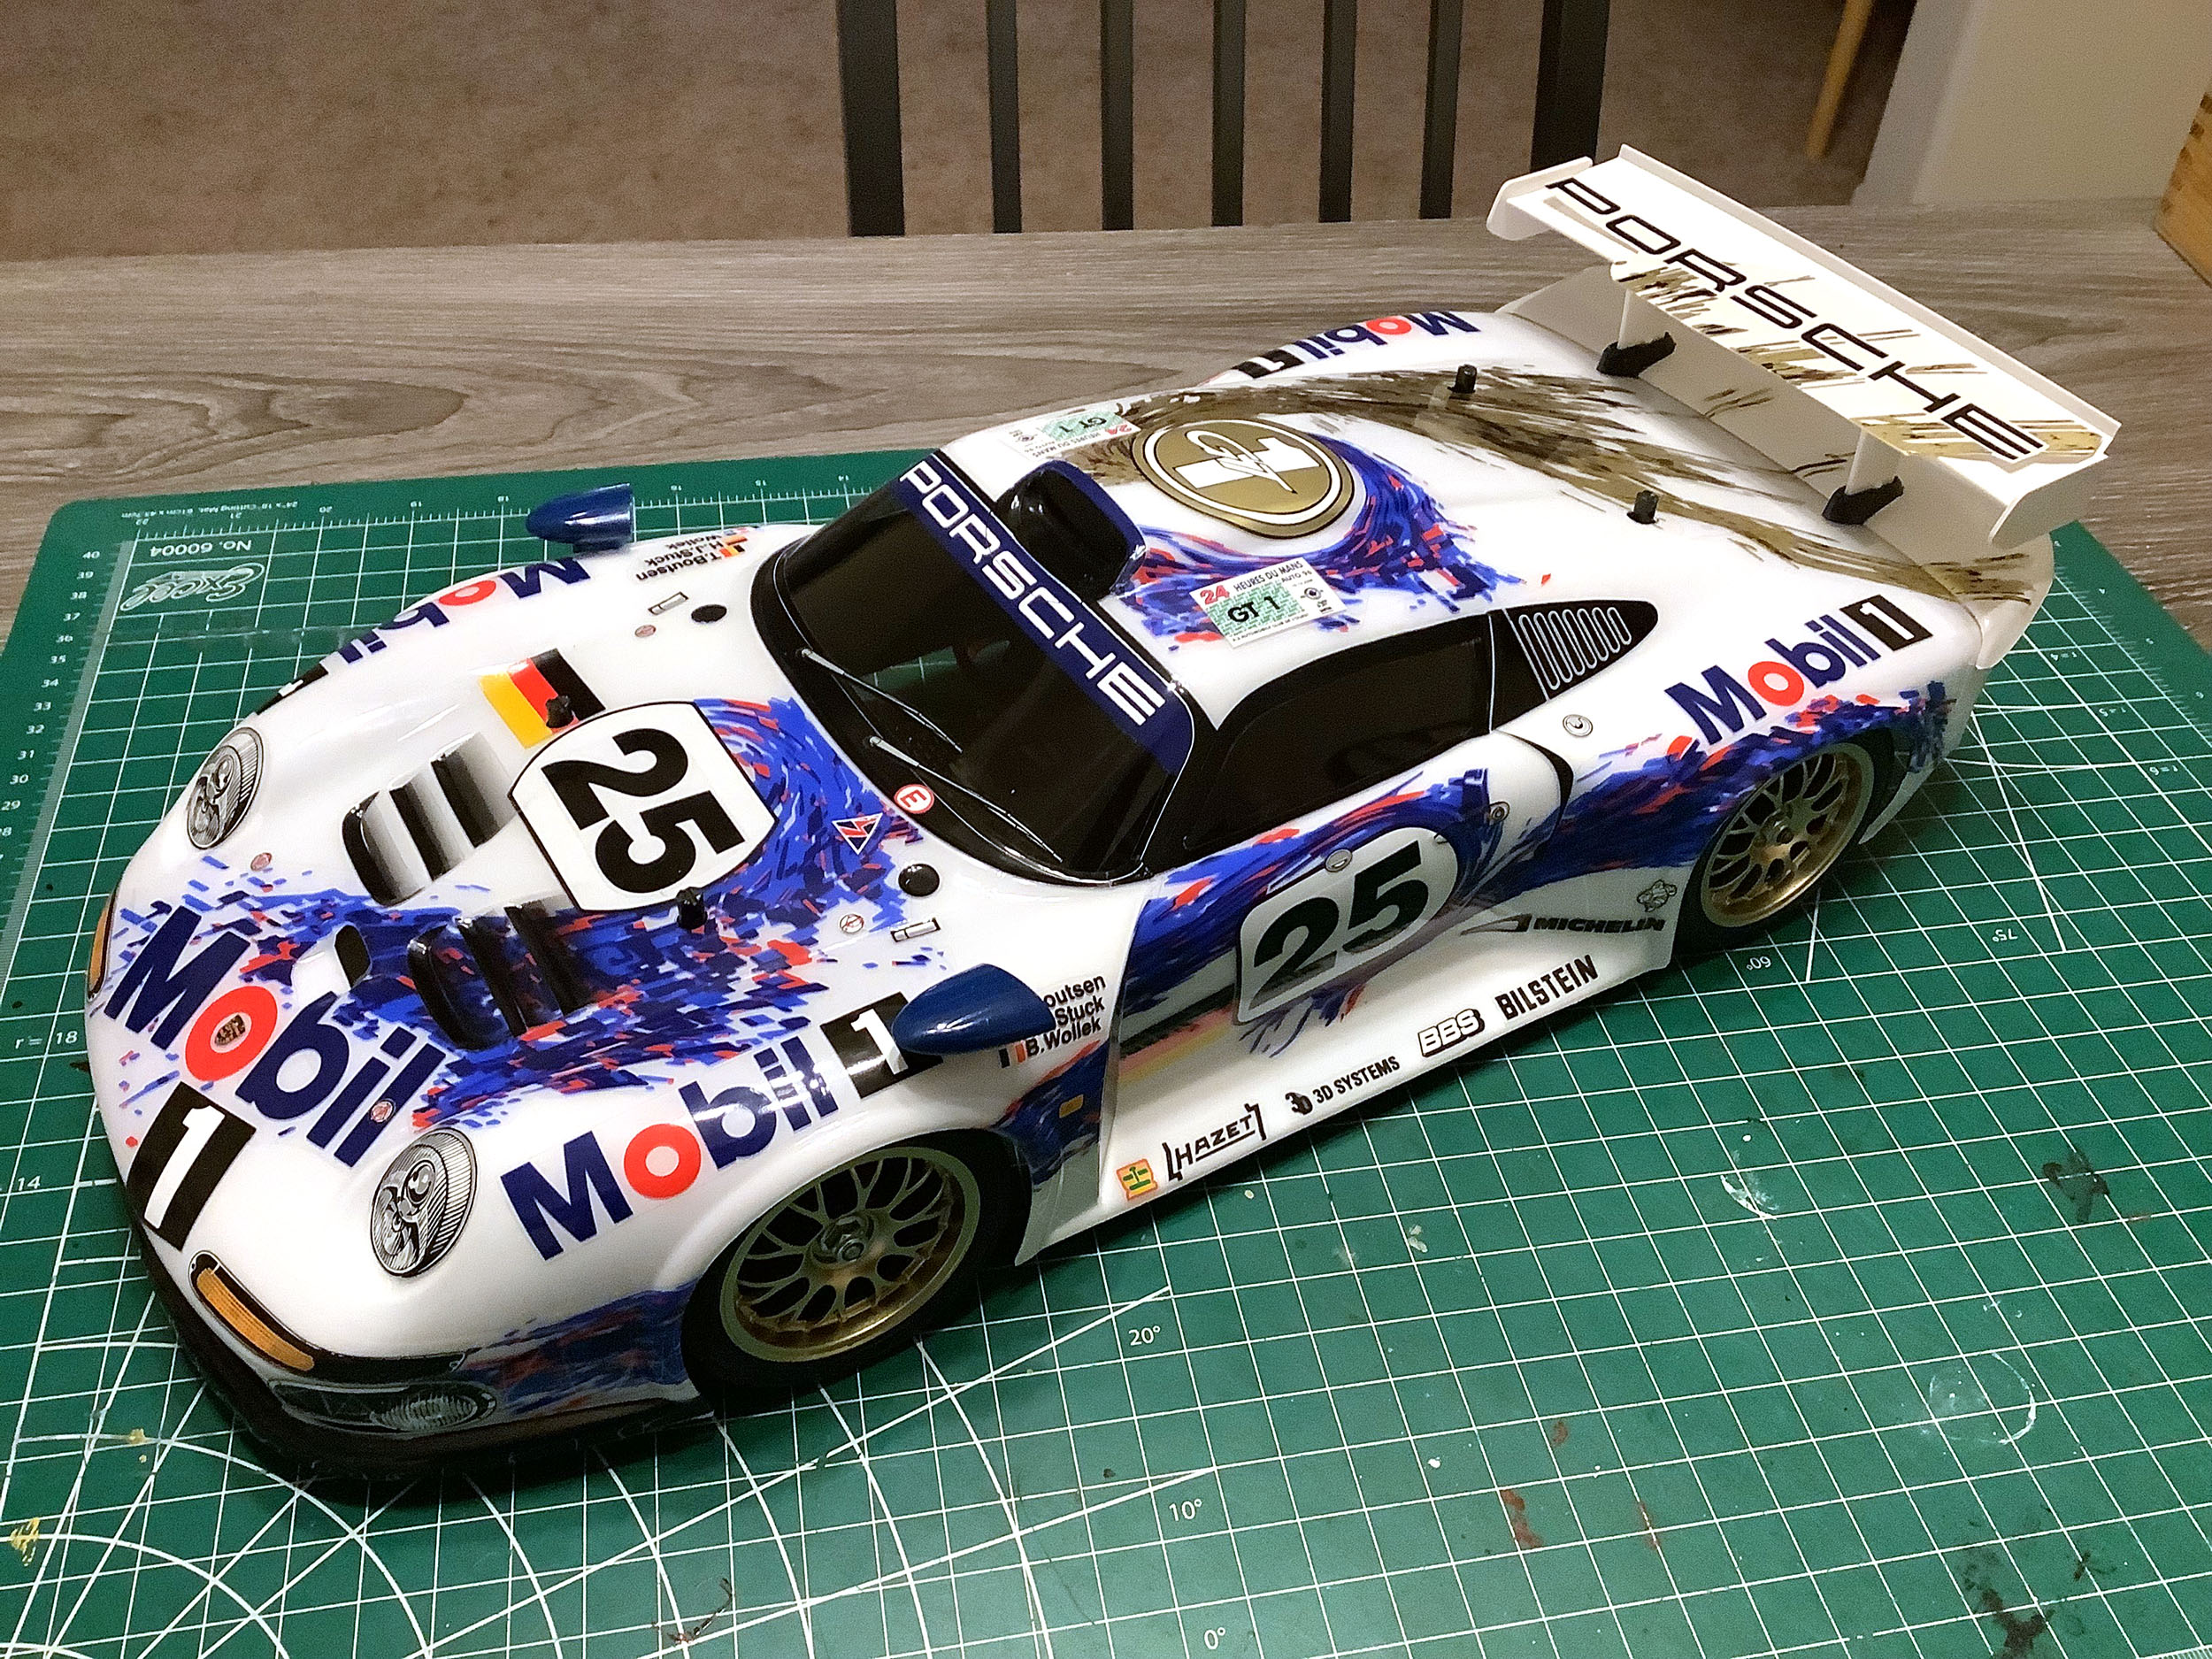
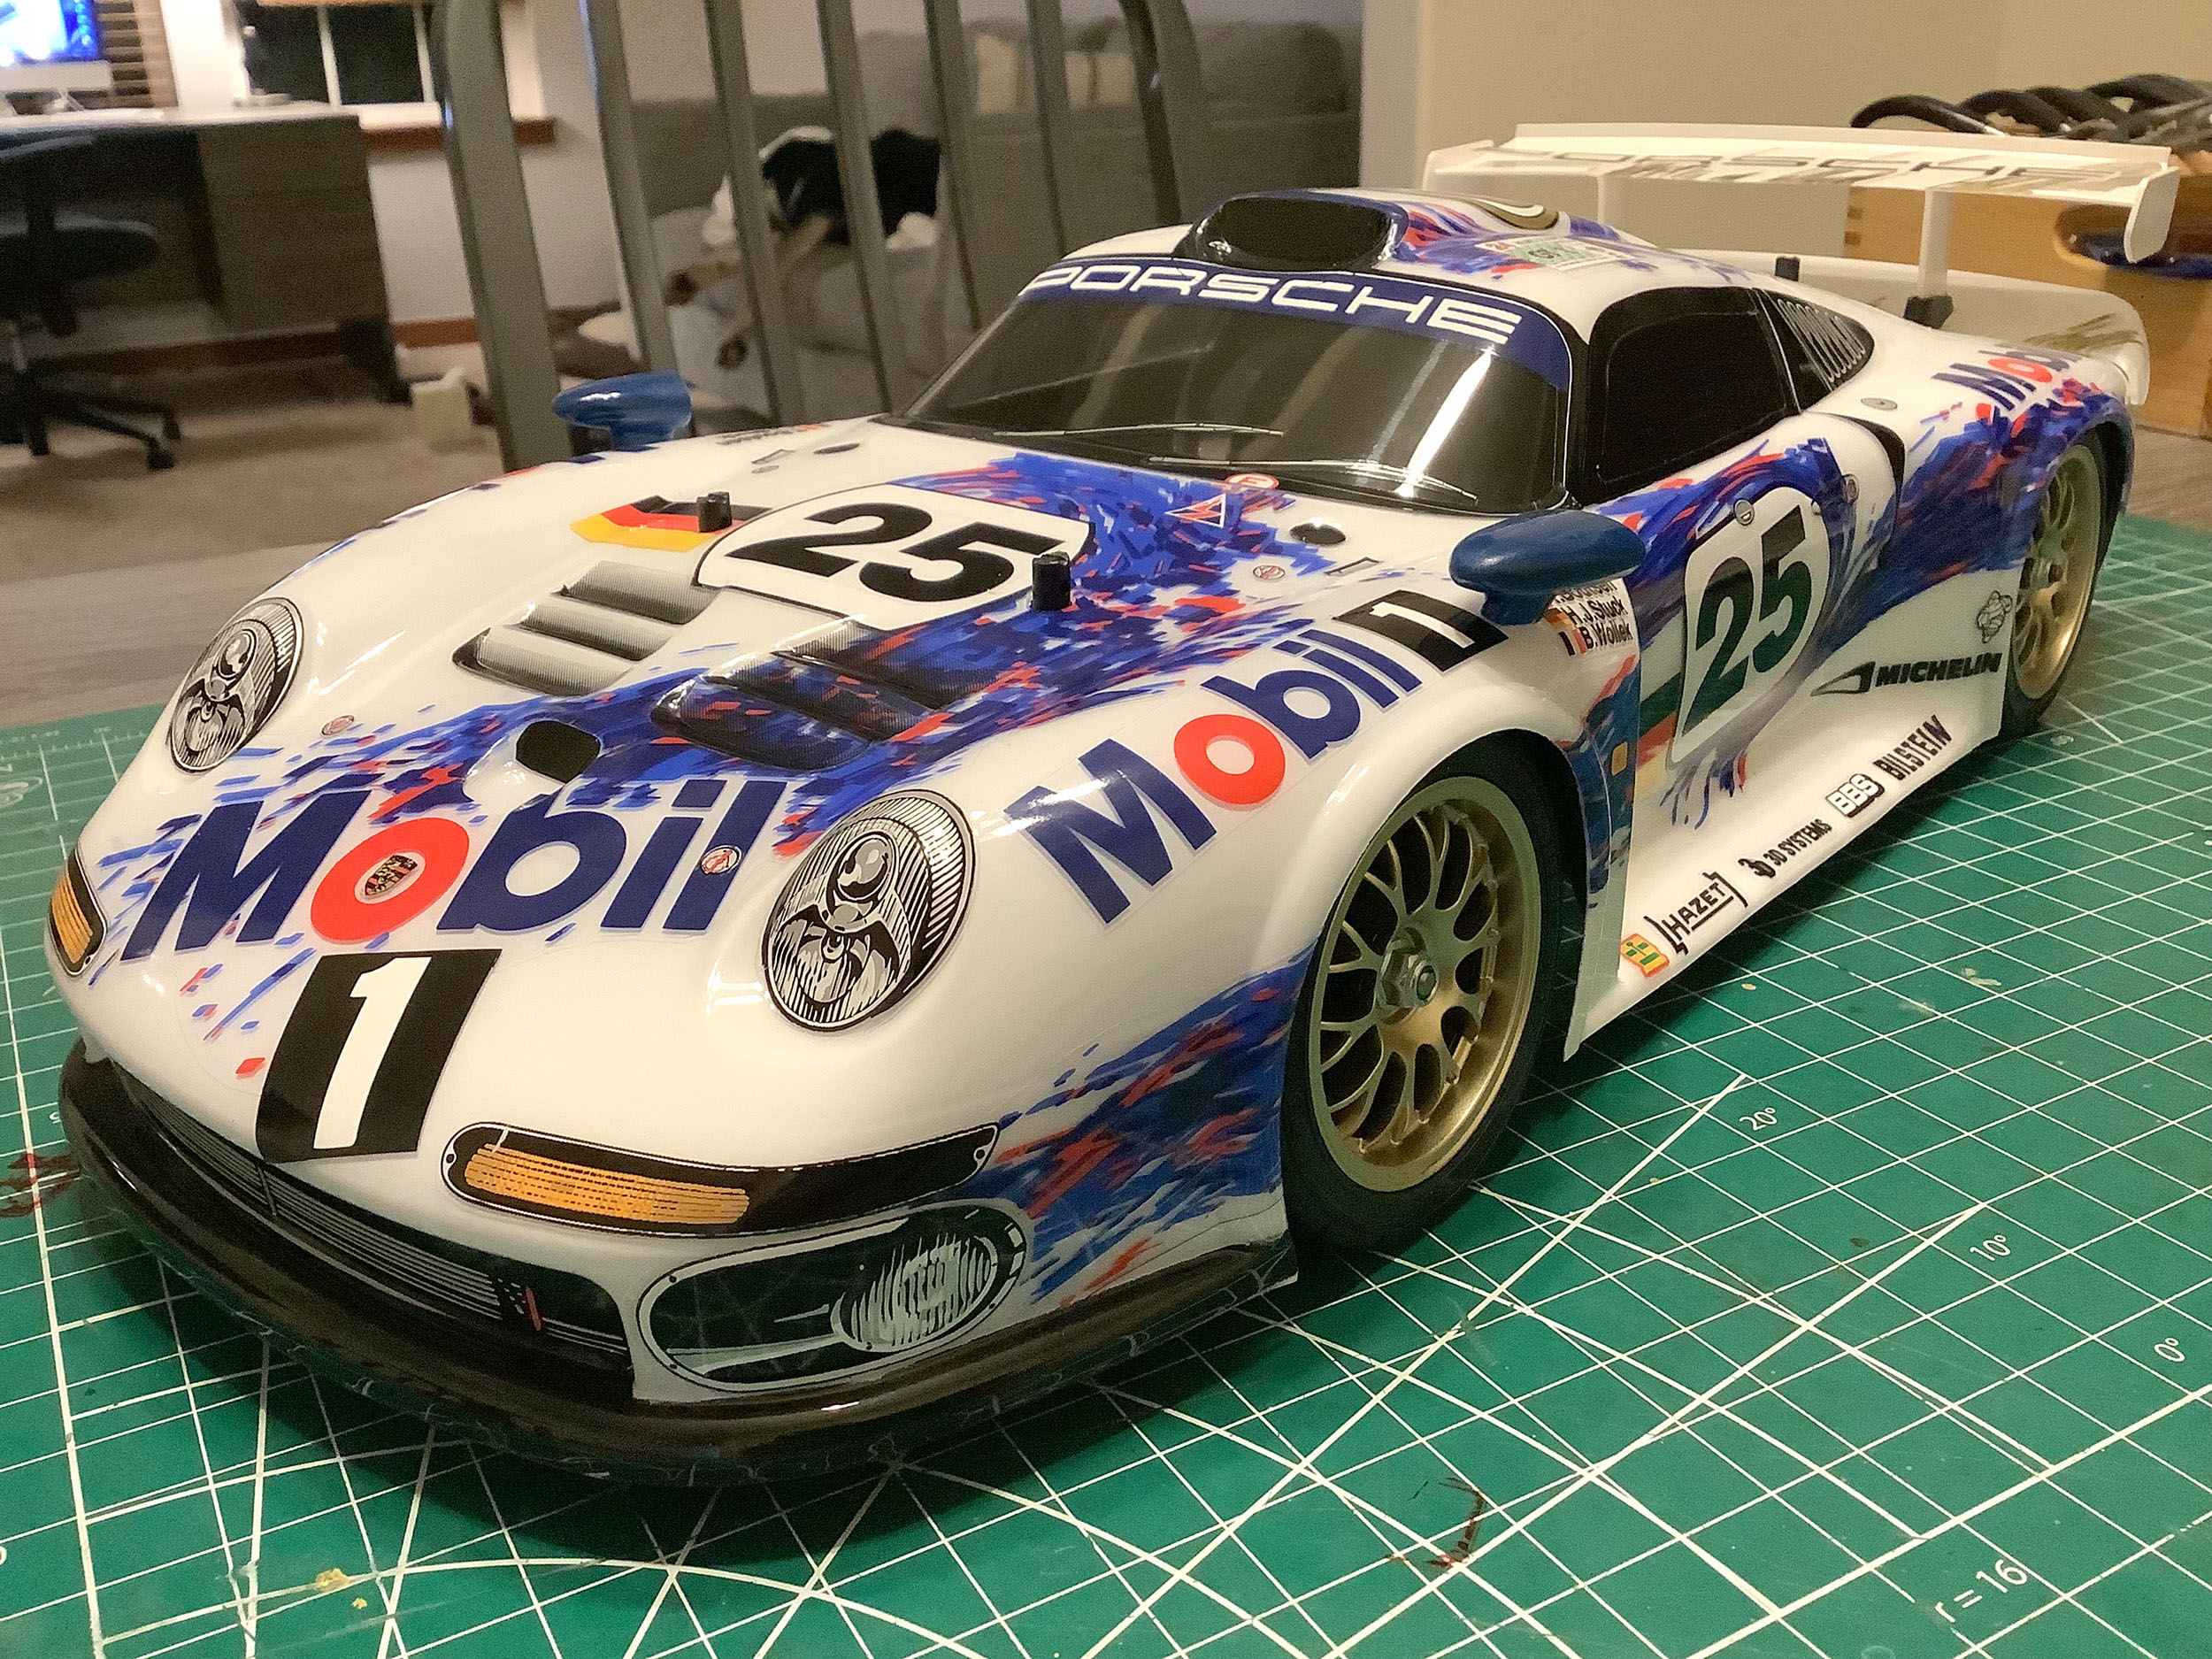
The sticker application took a very long time, but I knew that was going
to be the case when I chose this complex livery over the much simpler
Street version. The black areas around the edges of the tail
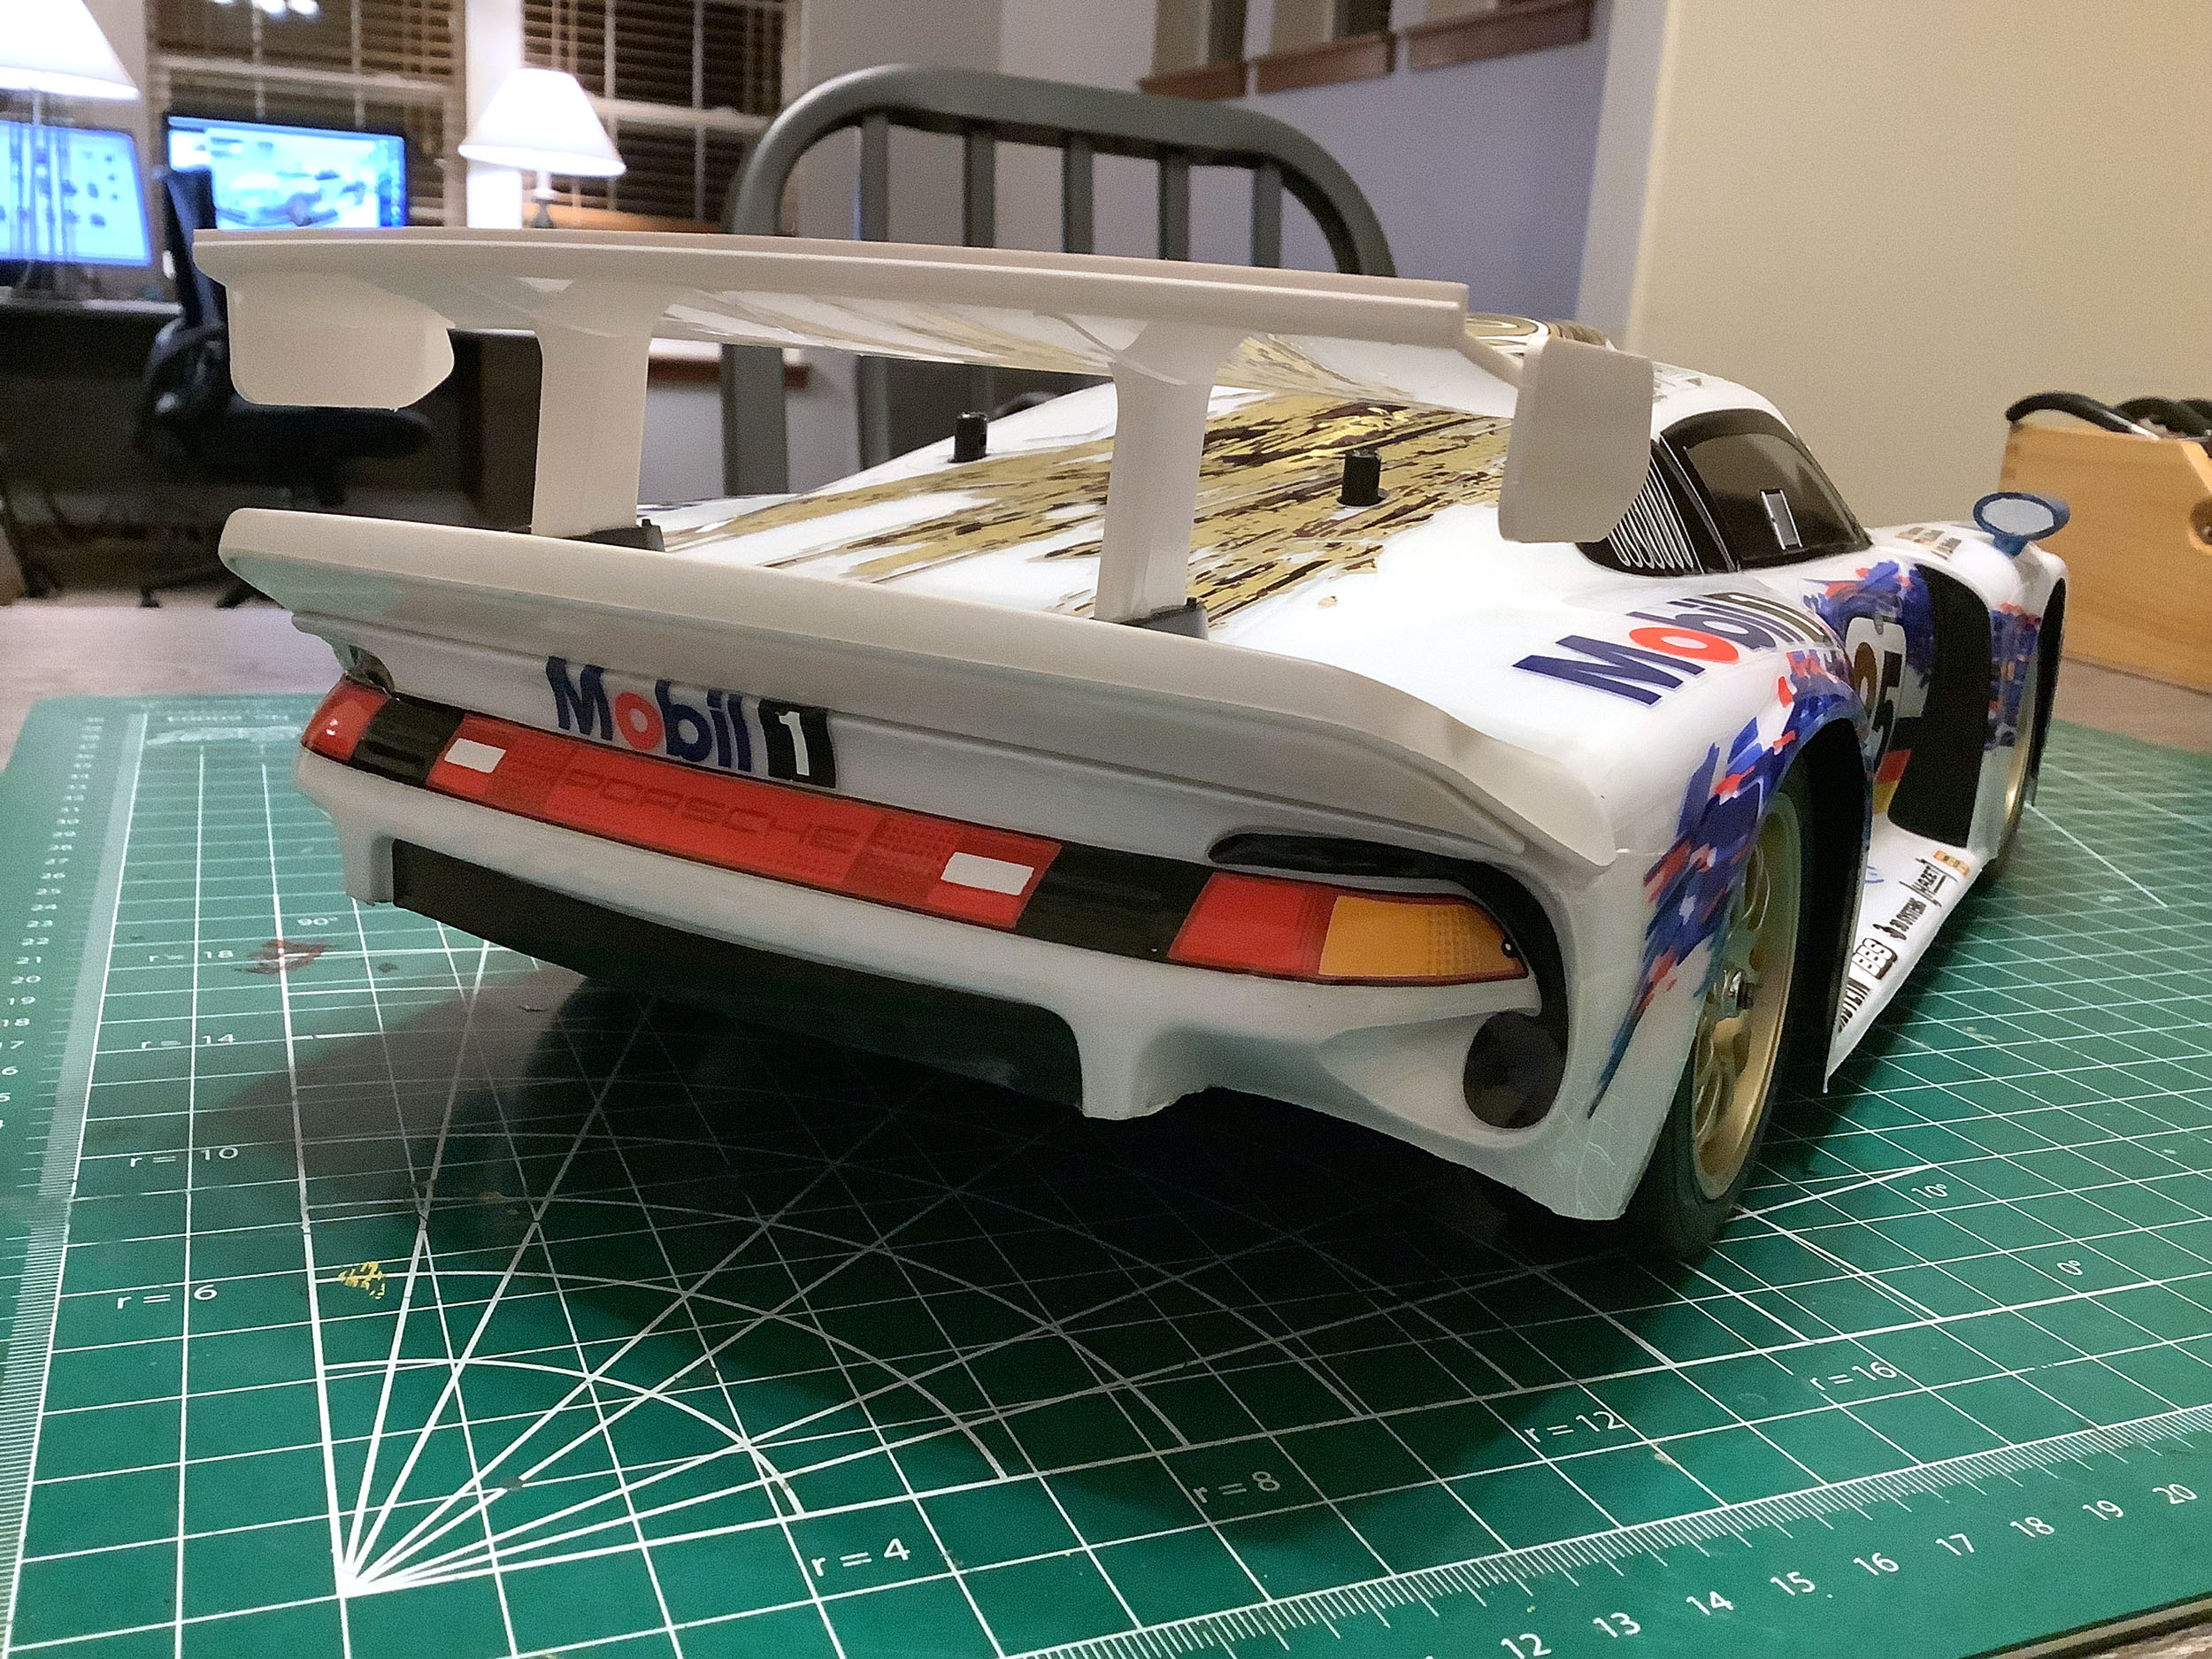
lights were particularly difficult. The wing in the photo on the
right is not quite complete. I was waiting for semi-gloss black
paint to do the vertical supports. There are also stickers on the
tires which are always a challenge to adhere properly. The wheels
were molded in gold, but I painted them gold anyway and then used a
chrome pen to do the outer rim like the real car.
©2023 Eric Albrecht