Cross RC UC6 Project
Page 3: Building the Body
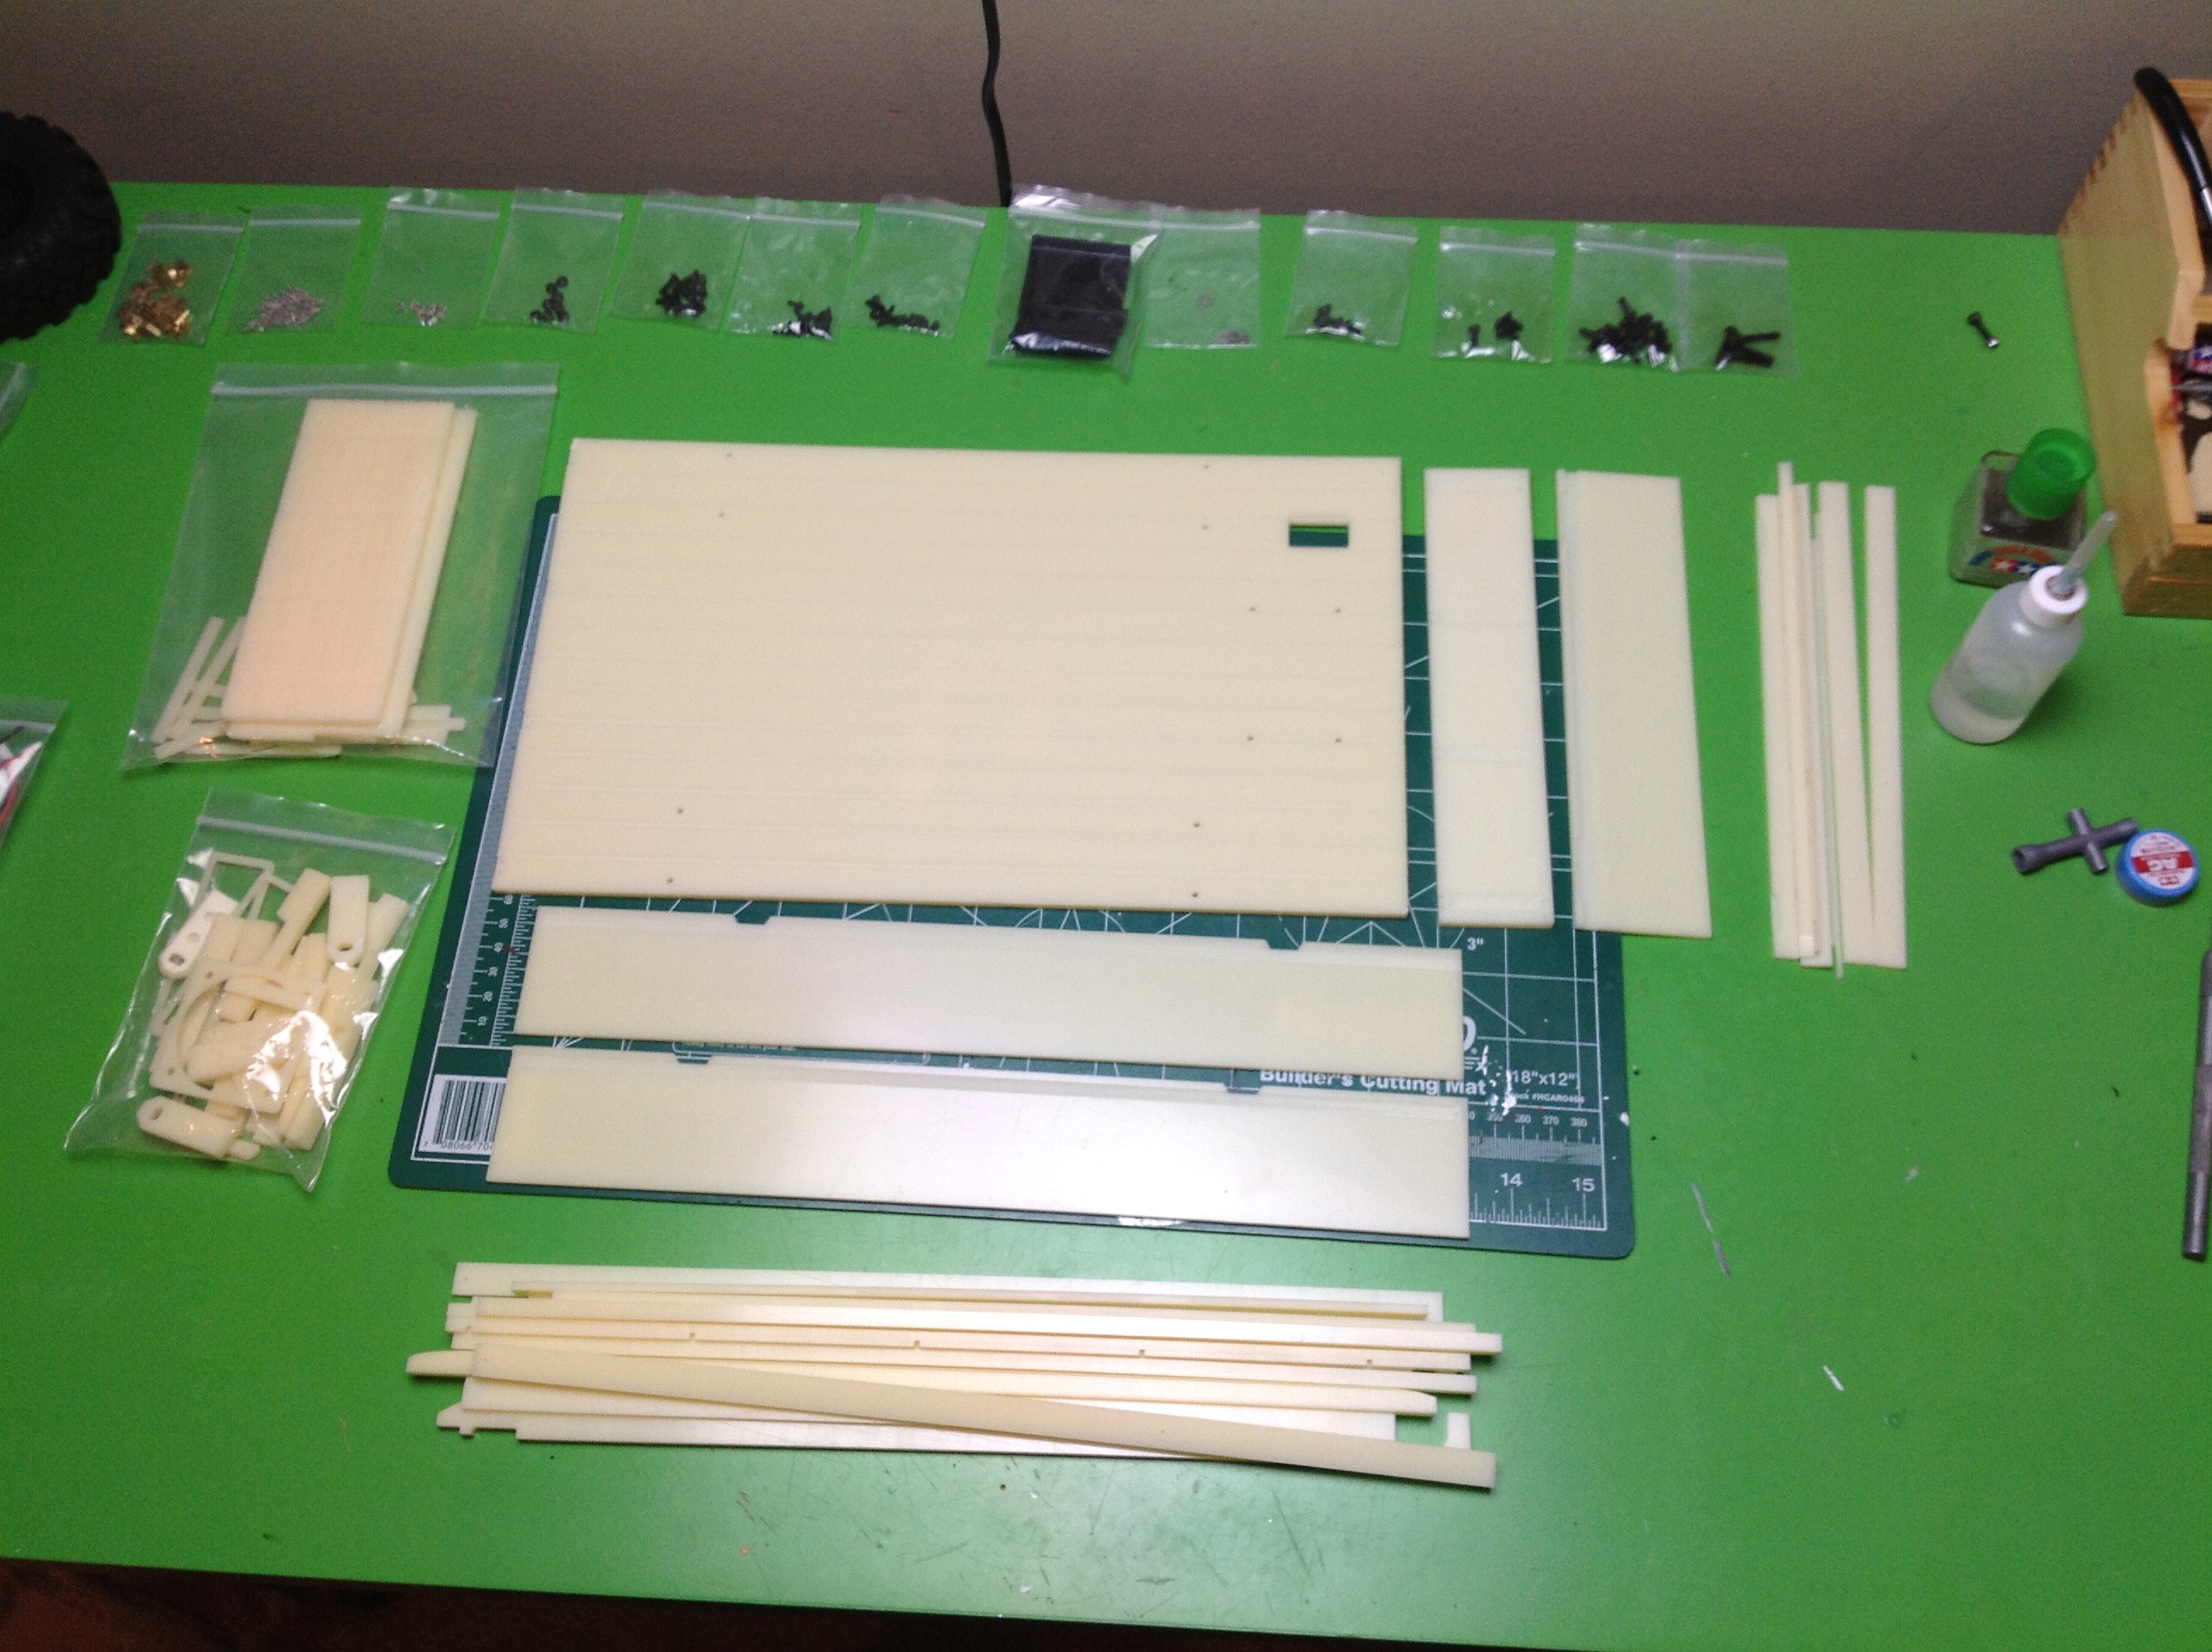
Although the cab on this truck is molded plastic, the whole rear section
is made from flat sheets which makes this a very unusual build.
You don't want to use glue here, you want to use a cement or
solvent. Apart from my thin and thick Tamiya cement, I also
happened to have some watery acrylic cement I use for making clear
display cases. This is just perfect for running a bead along the
seams of flat plates.
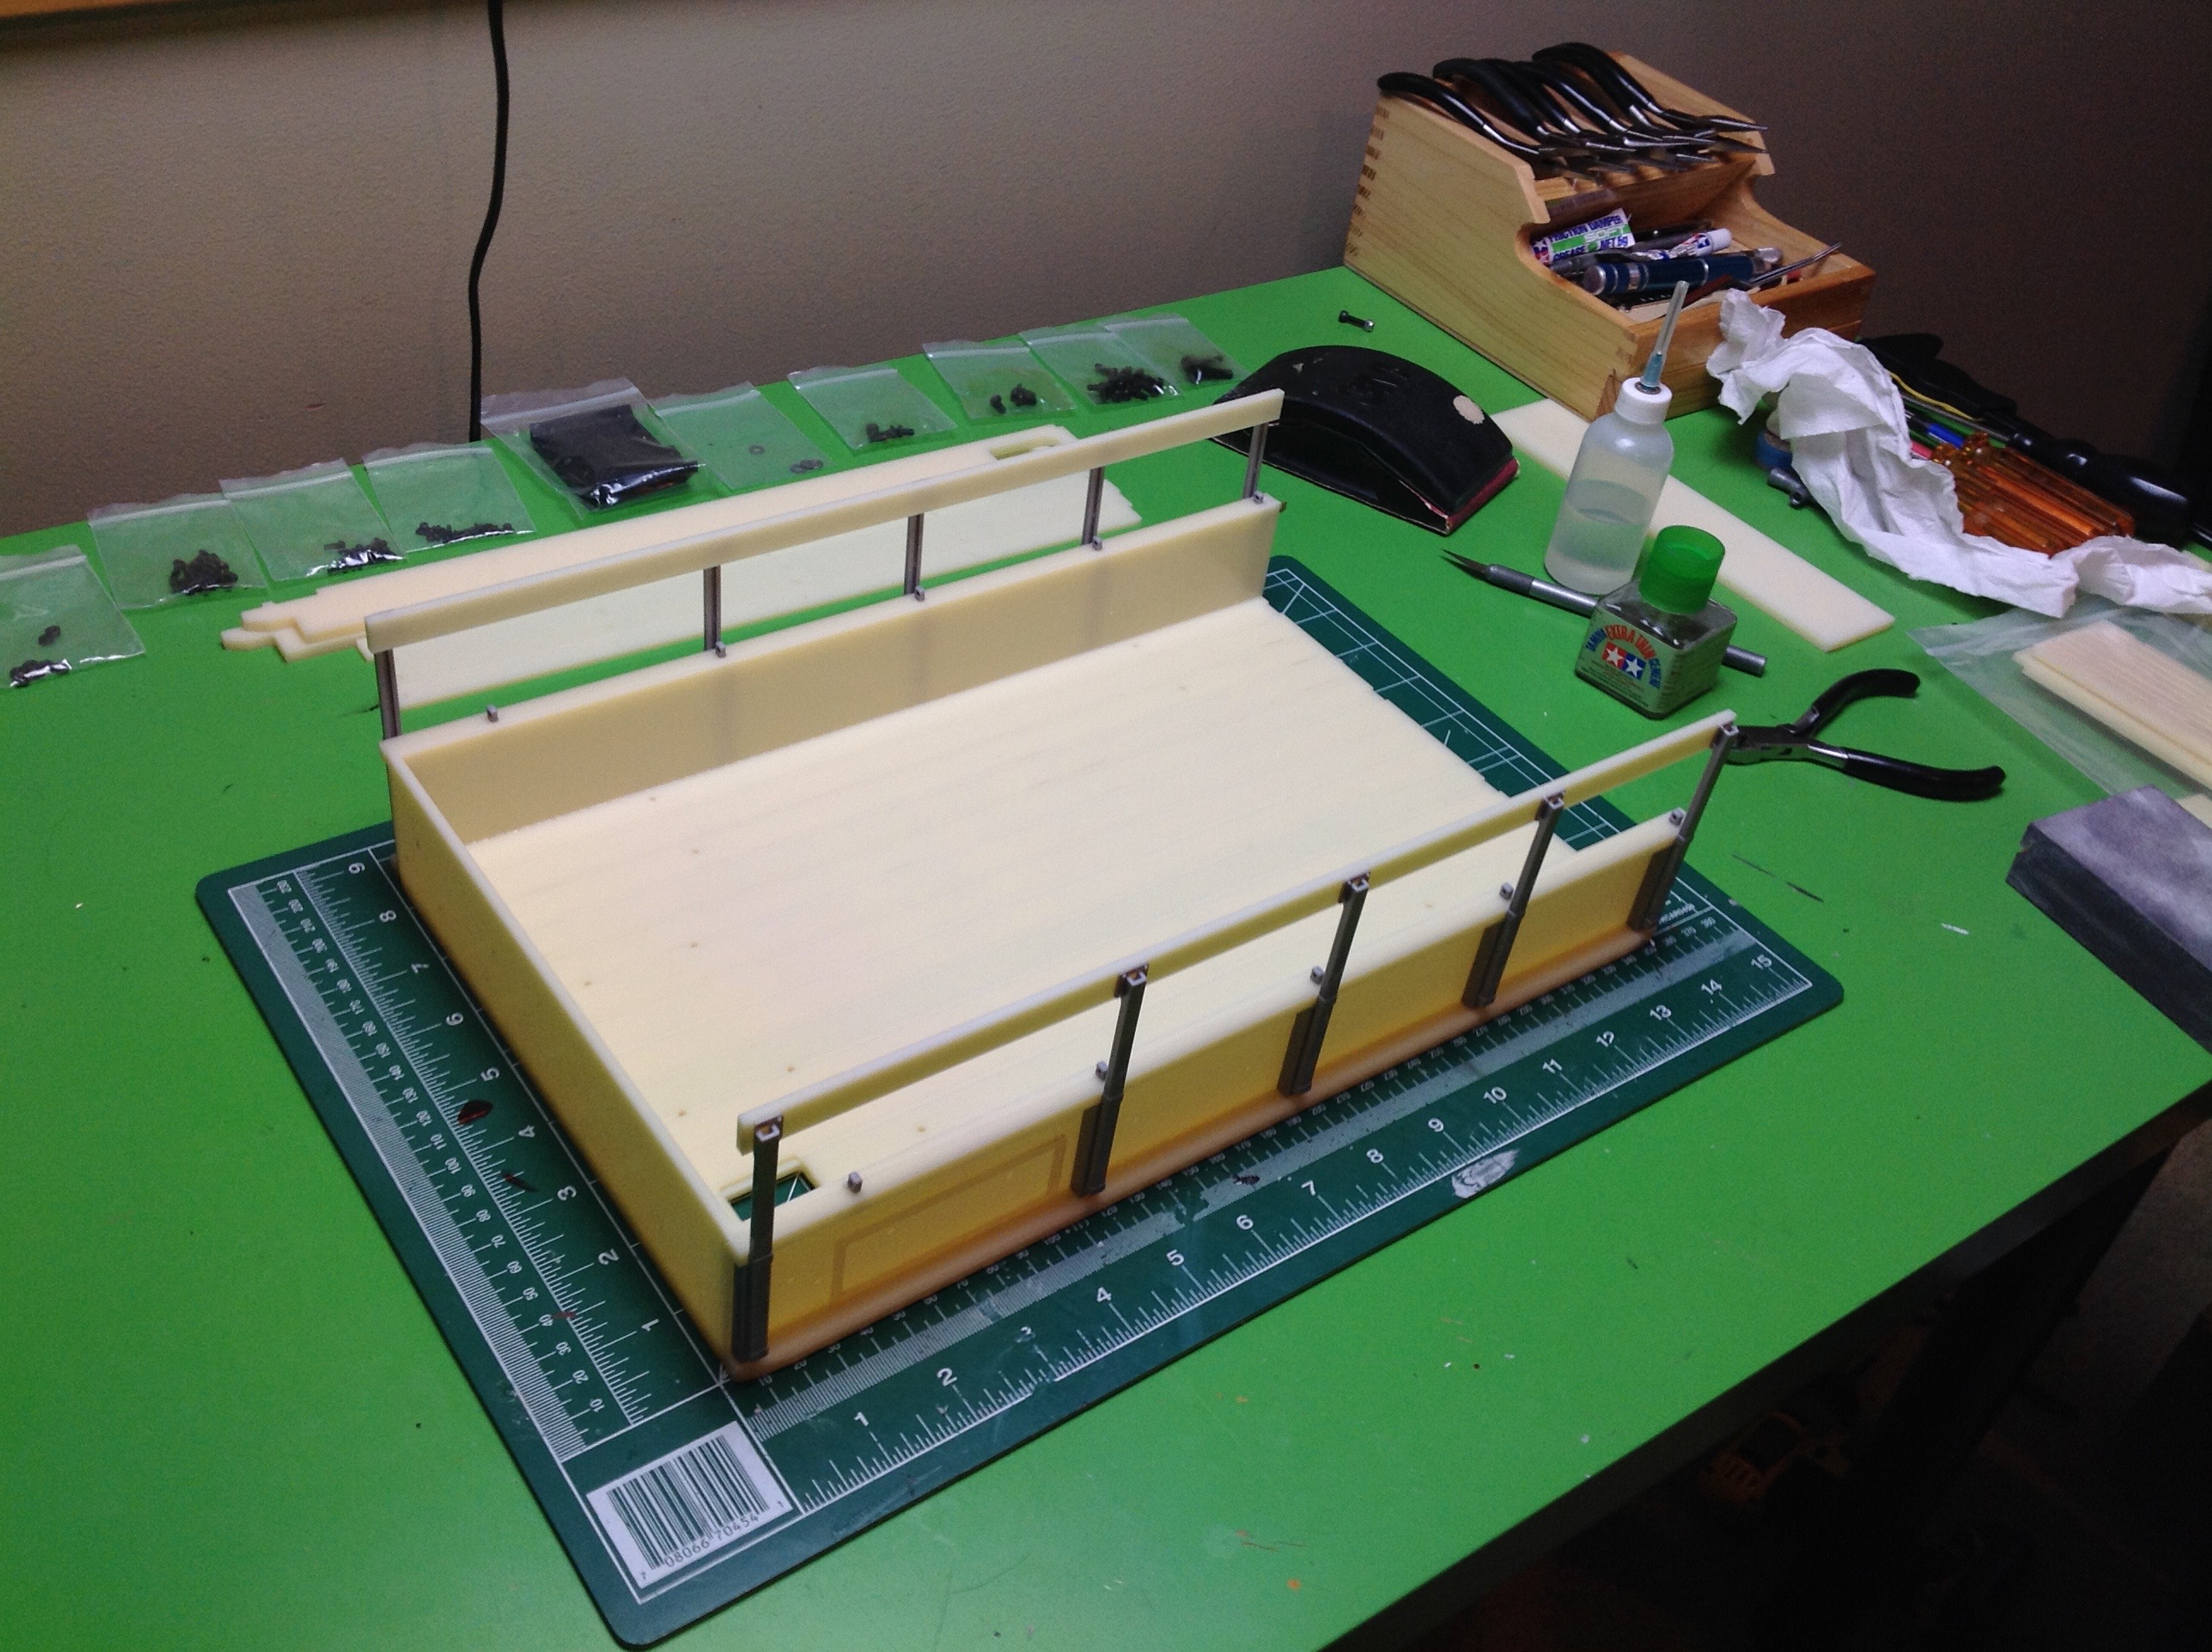
We start by just making a box using a floor, two sides, and a
front. After that we add some molded vertical columns which
support horizontal rails. The small rectangular hole you see at
the front is for the battery wires. In the right hand image, I've
added the rails in the front as well as a large number of side
details. Most obvious are all the little hooks for tying down the
canvas, but there are also brackets to support the hoops both when in
use and when stowed.
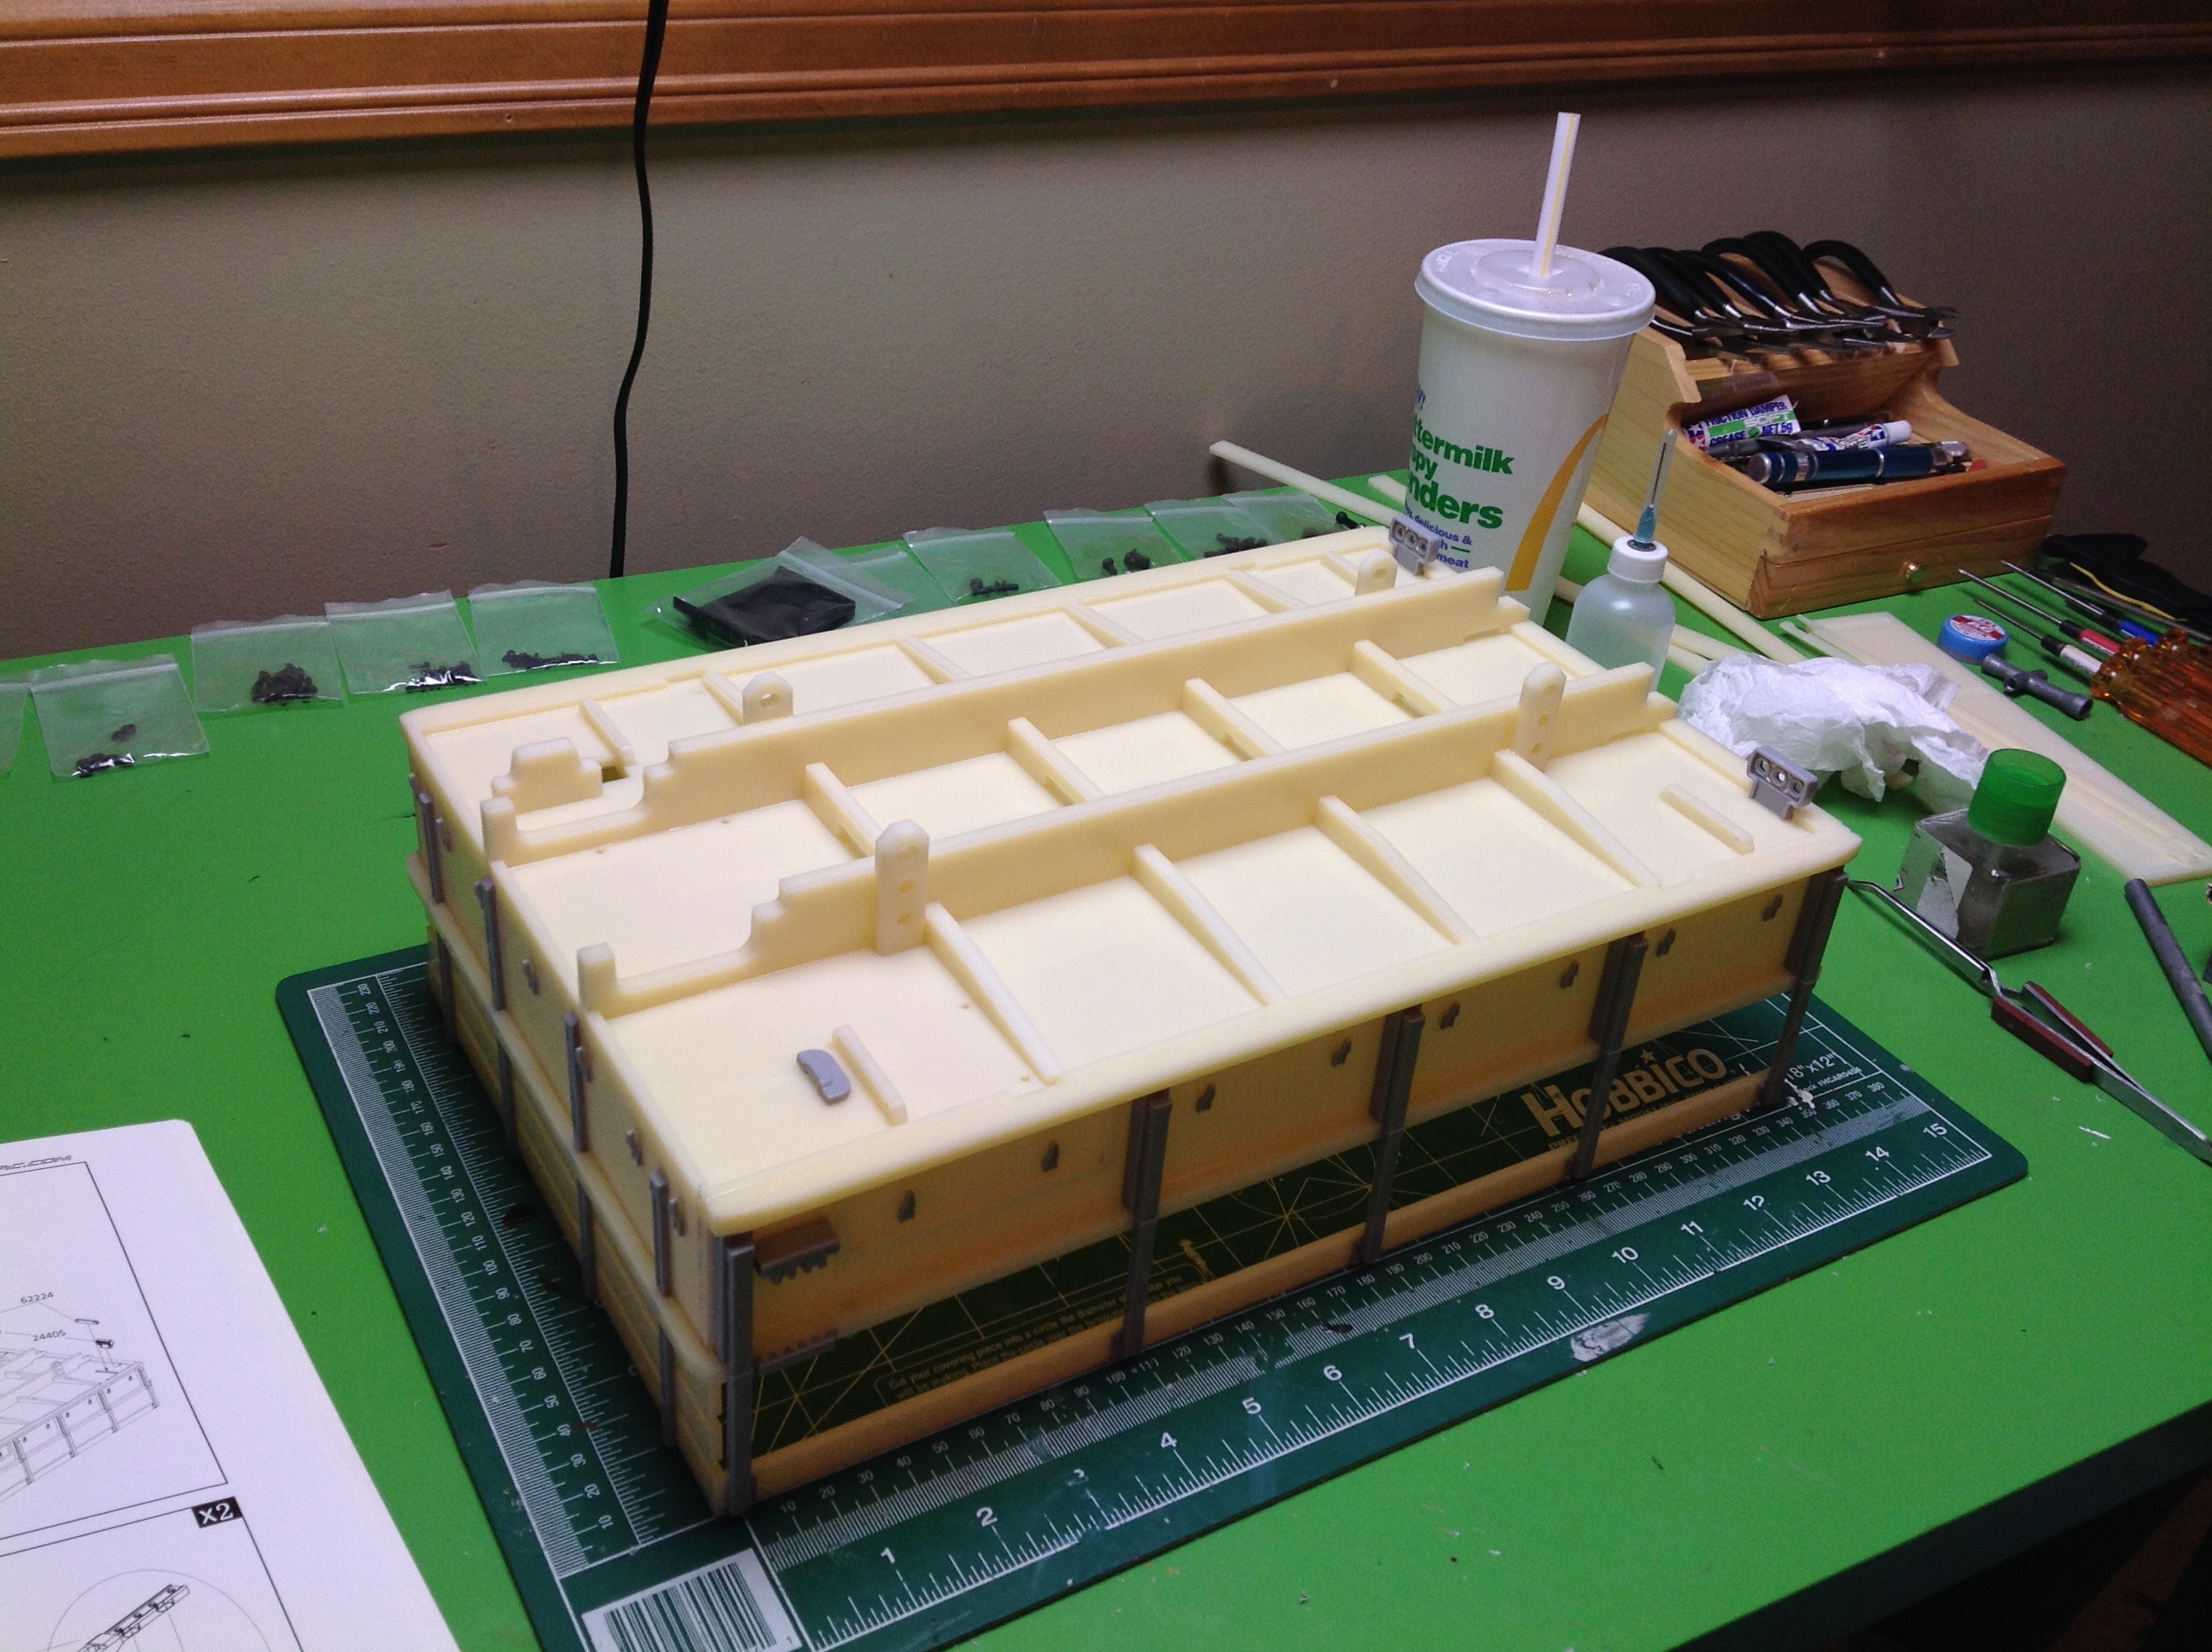
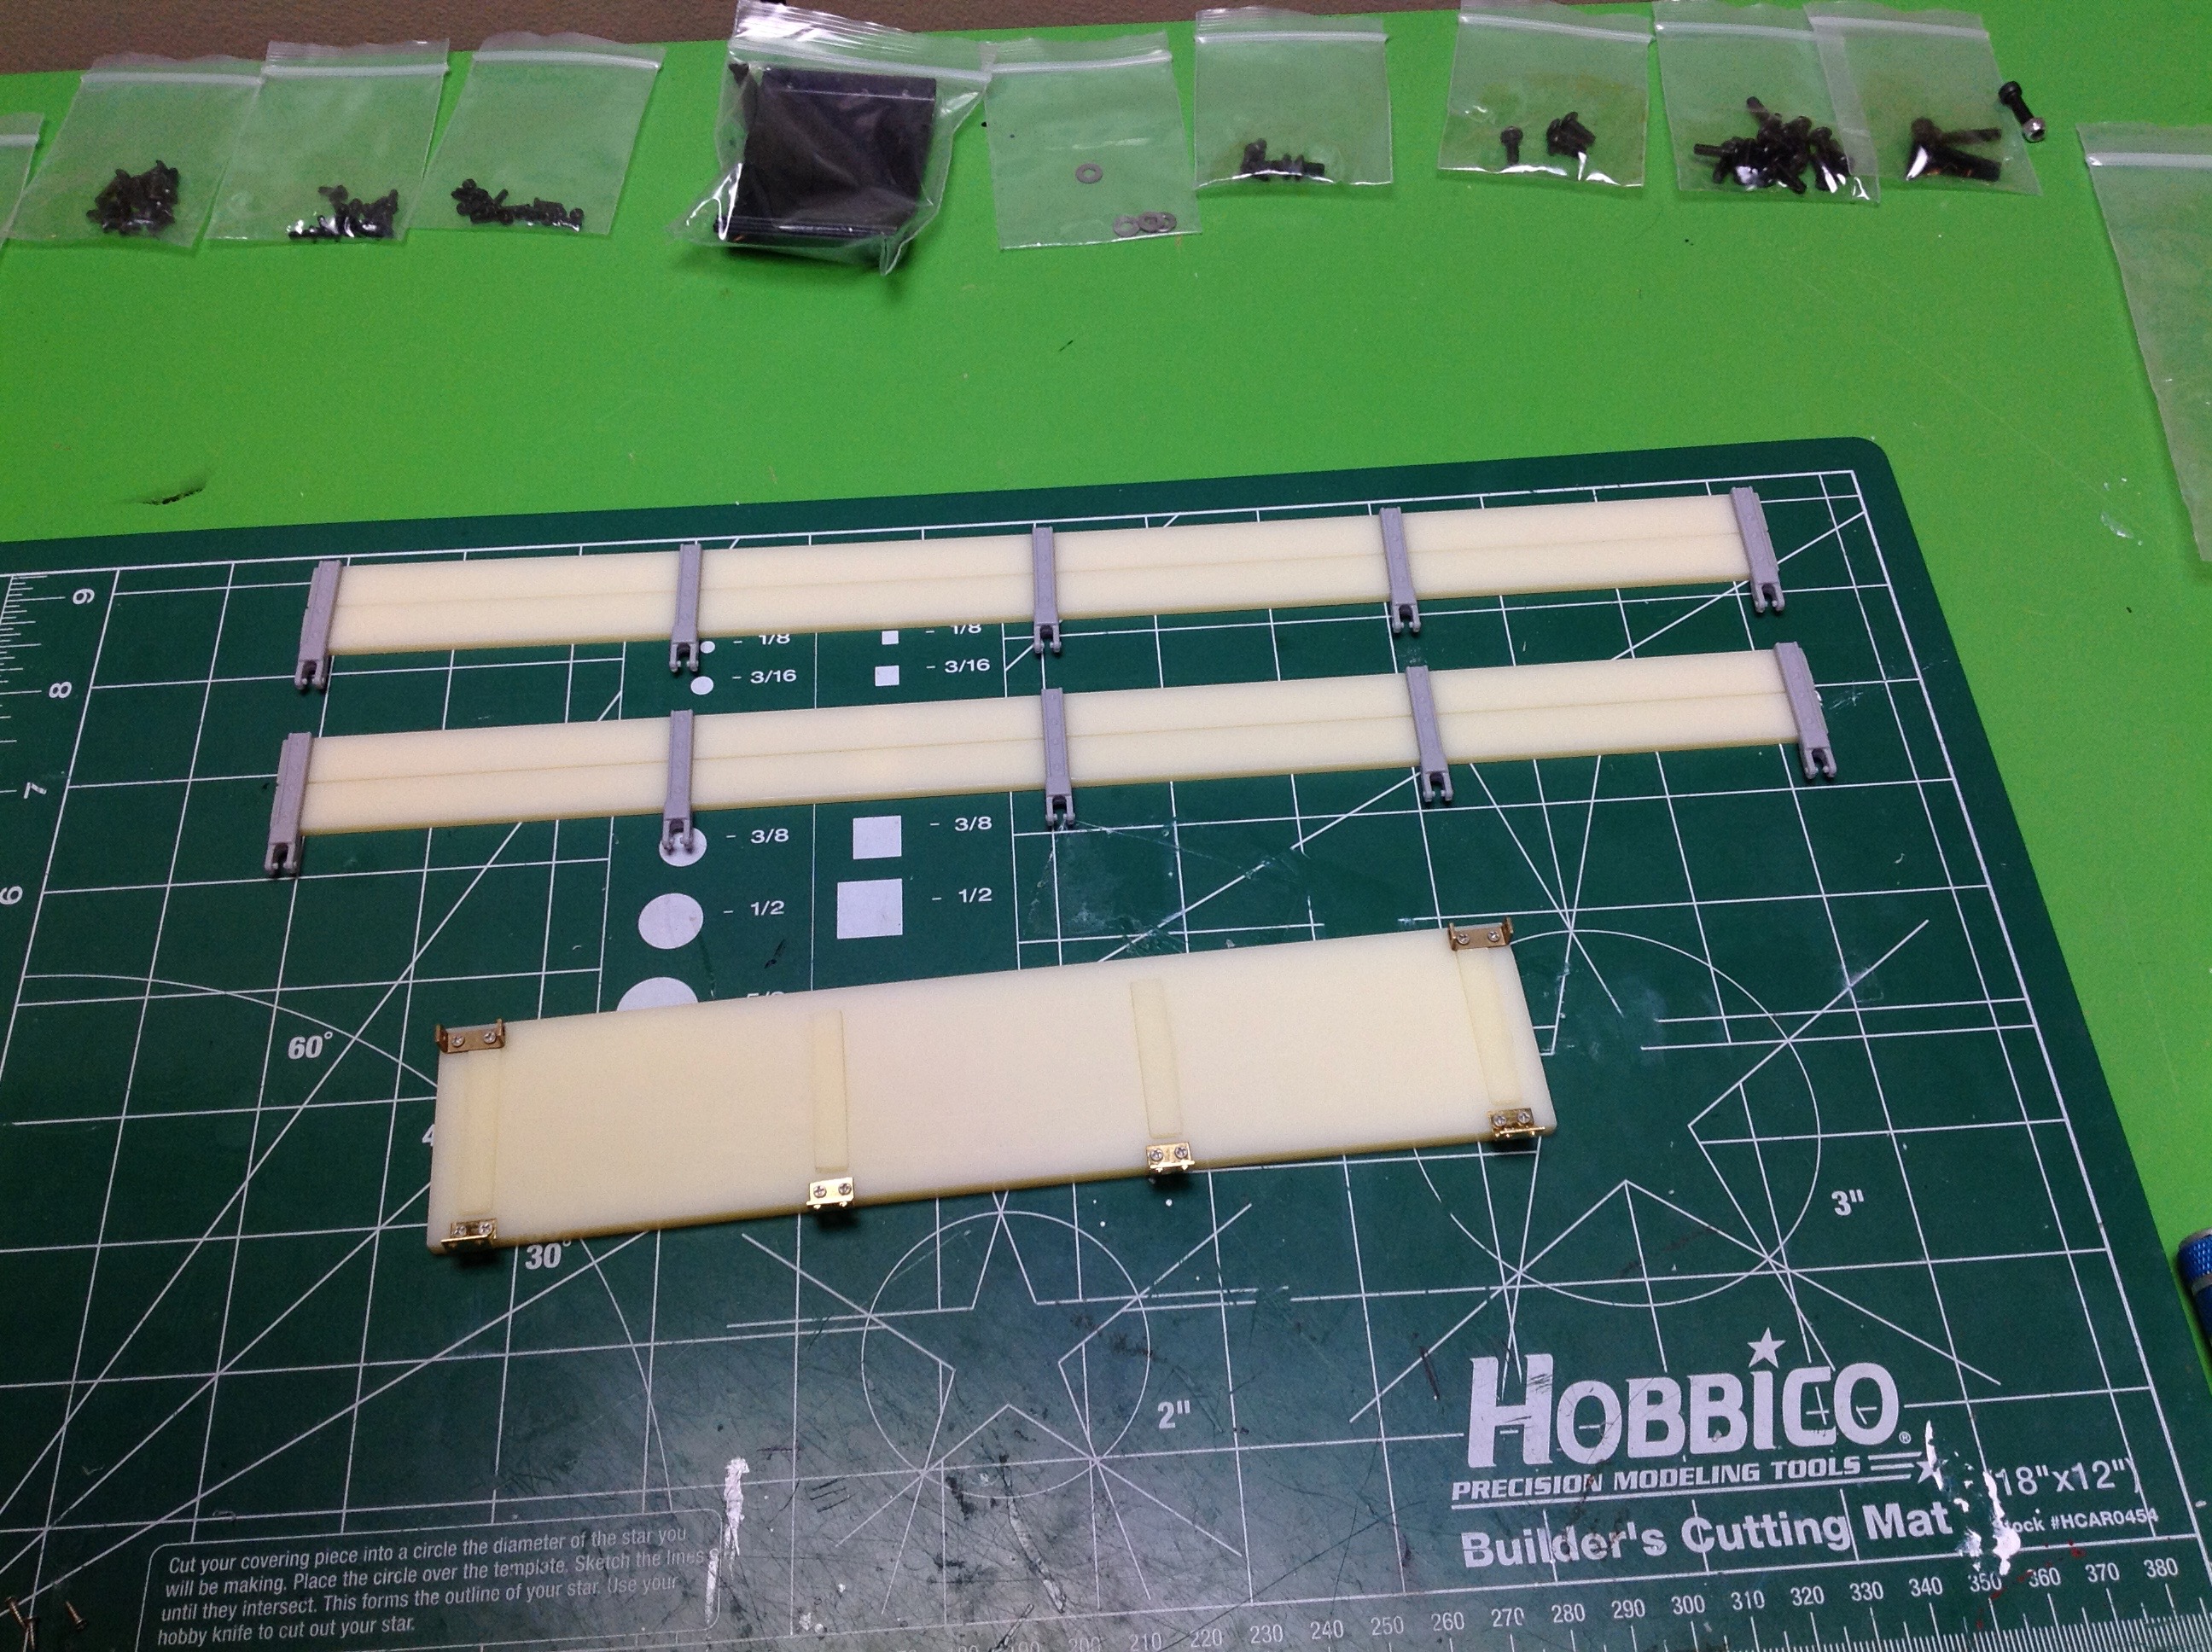
A flat floor by itself wouldn't be strong enough, so it is time to add a
latticework of stiffeners. Luckily, slots for the beams have been
milled into the floor so all you do is drop them into place to get them
straight. In the right hand image you can see the rails for the
sides which fold down to become bench seats. The panel below them
is the tail gate.
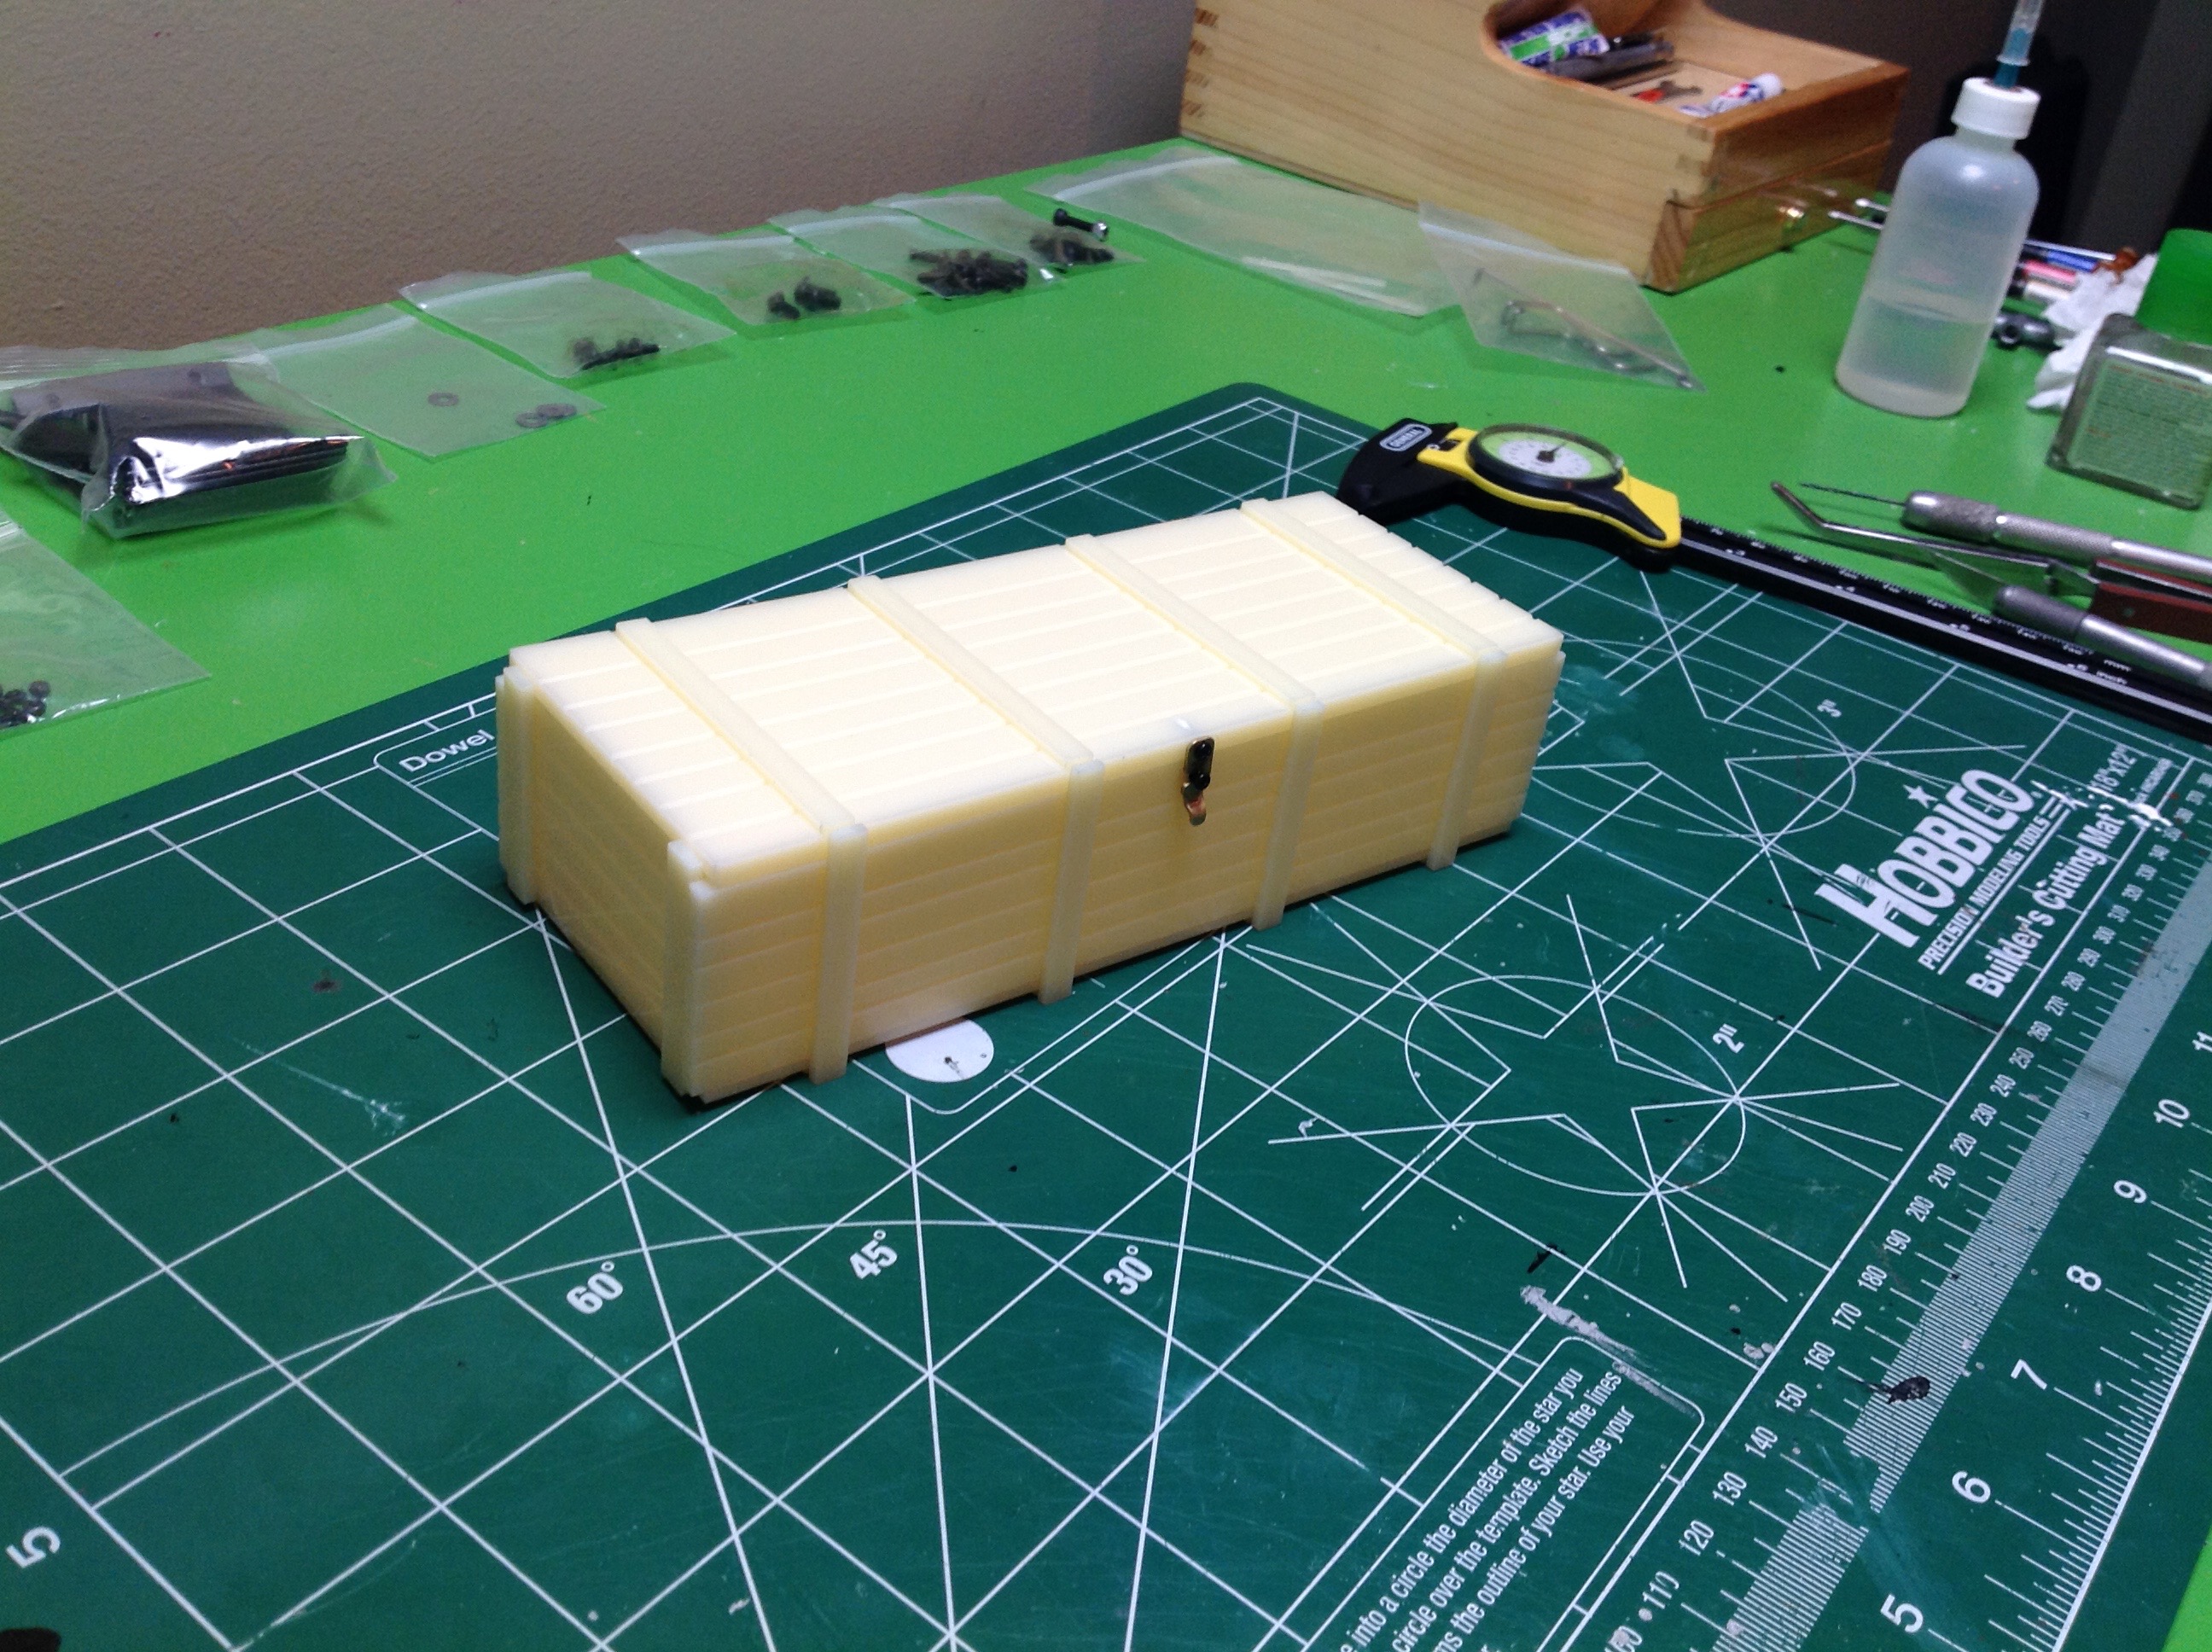
This lovely box will be used to hide the battery. It has become a
bit of a trademark of Cross kits since it is included in several.
Make sure to zoom in and look closely at all the texture. It
certainly will appear to be made from wooden slats once painted.
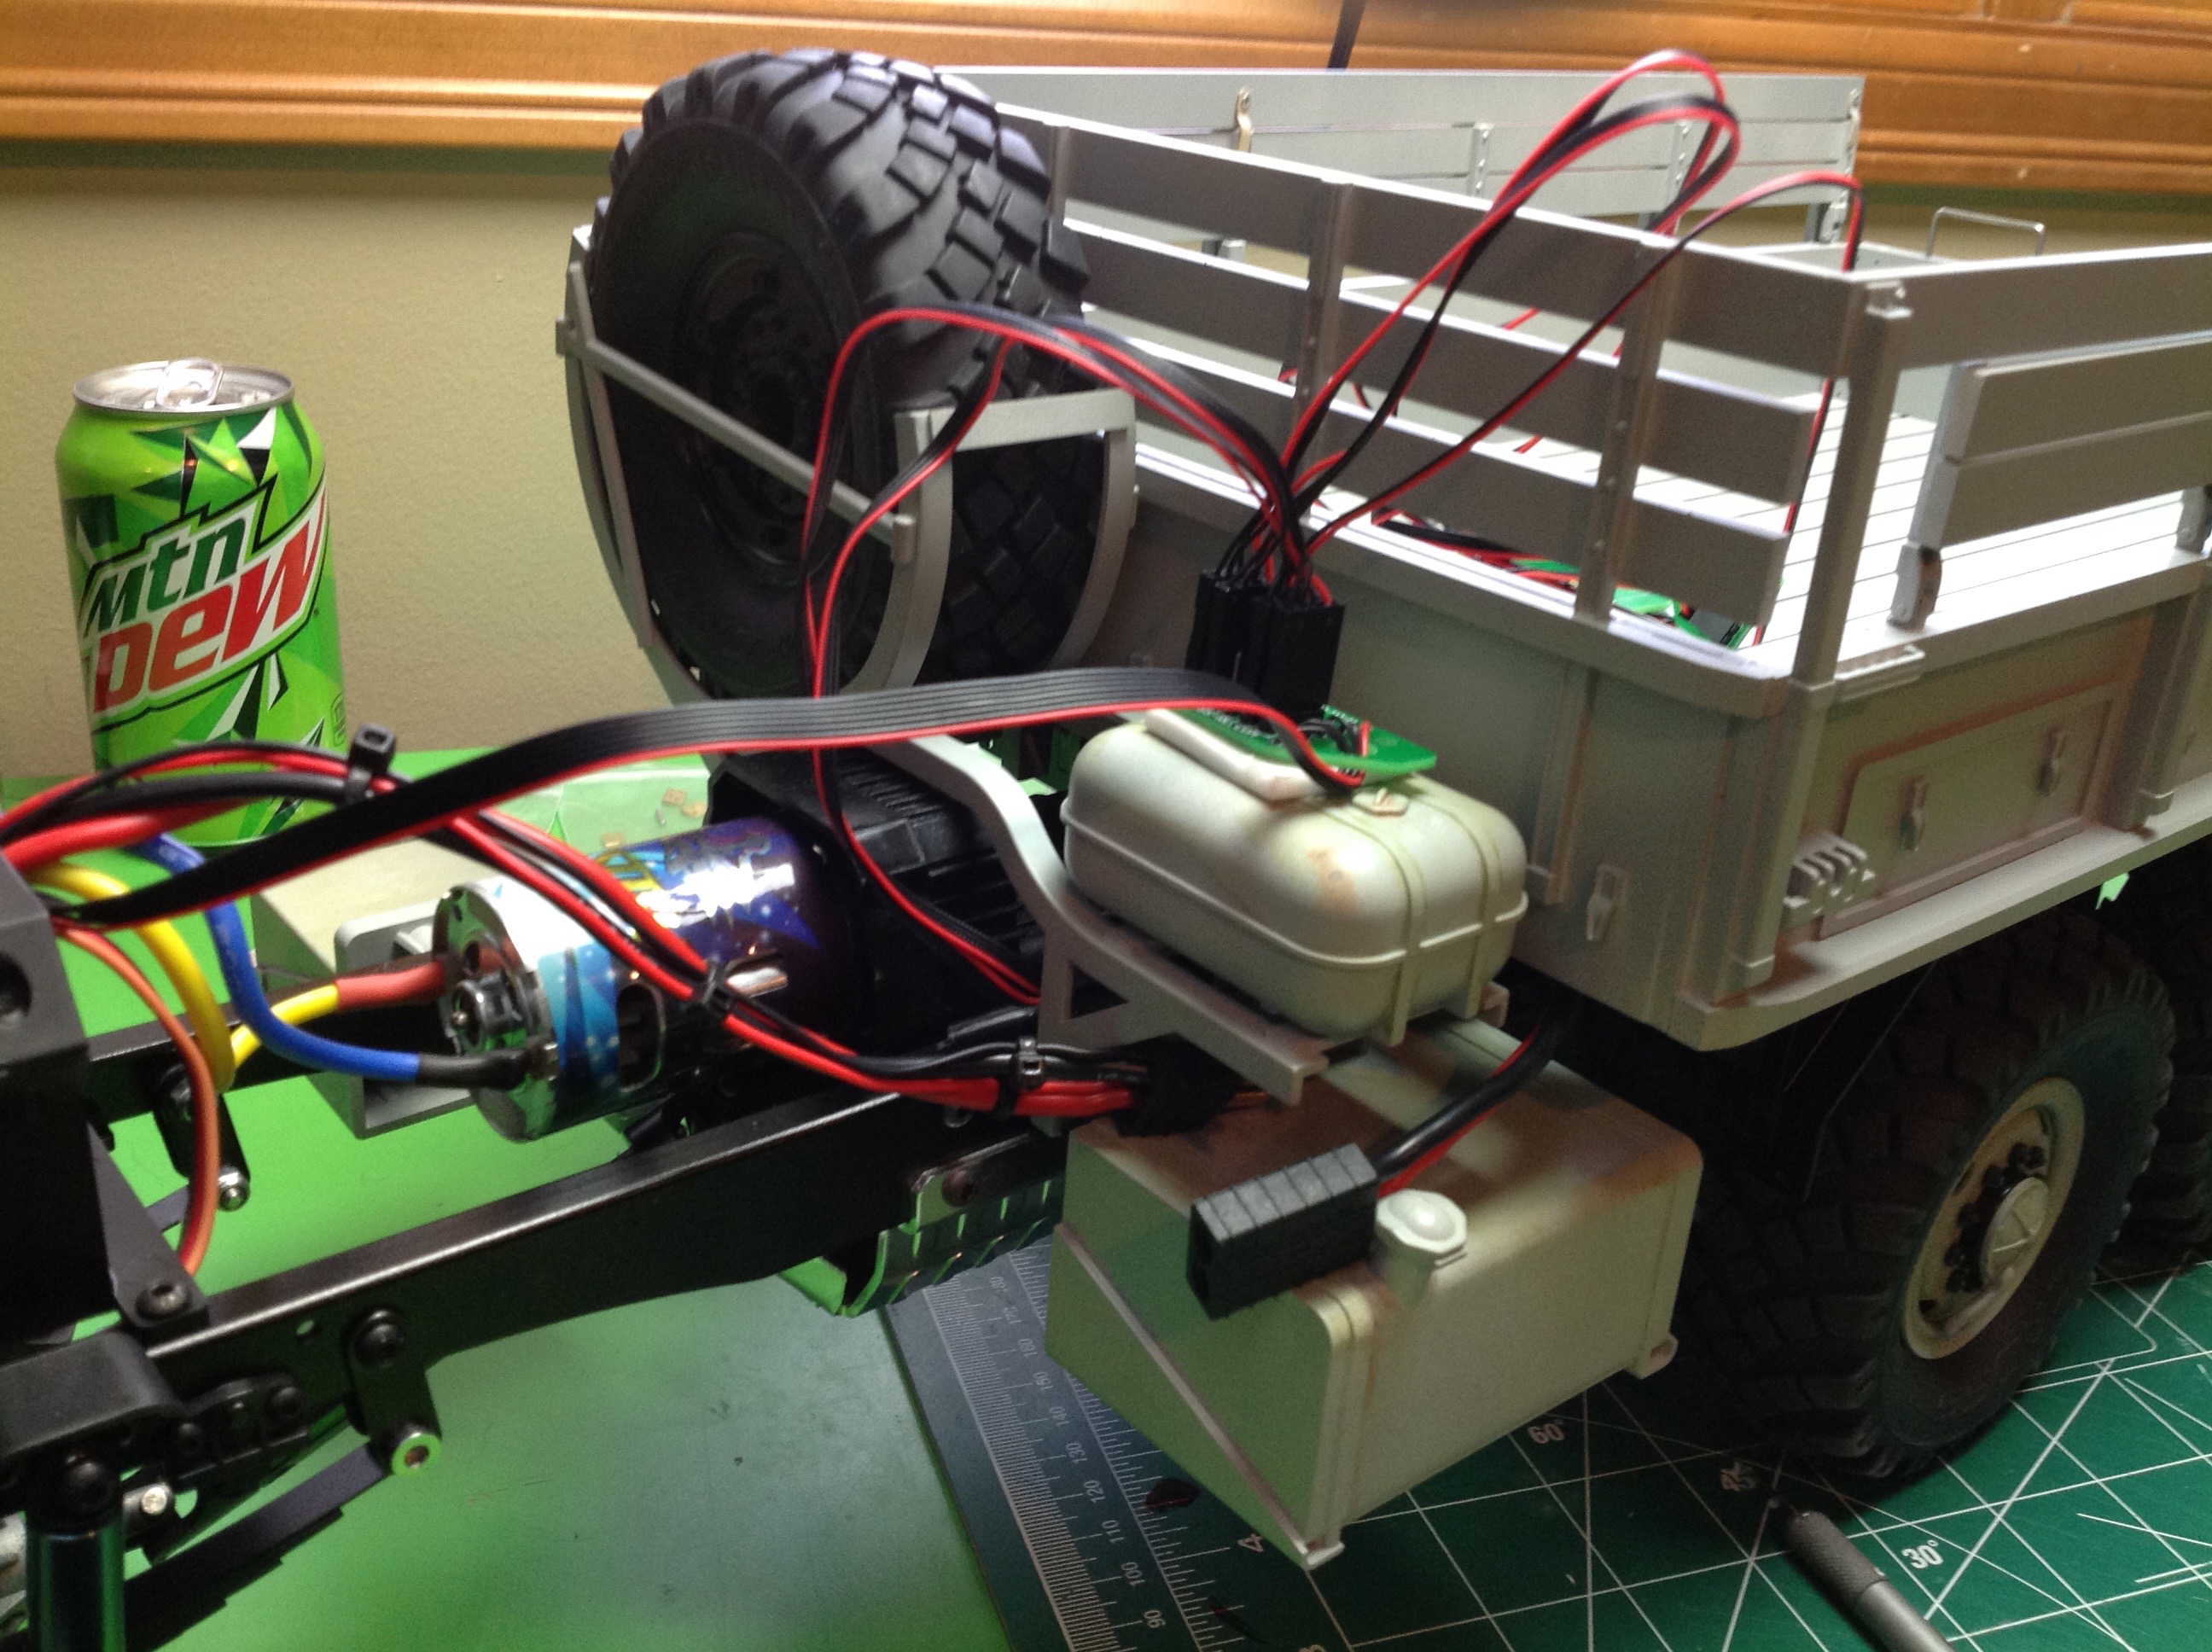
Now the box can be installed onto the chassis. From the previous
underside view you can imagine how it sits over the rails and then
simply screws on. The right hand image shows some more details
which have been added including a fuel tank, a spare tire holder, and
what I assume is an oil tank. The spare tire rack was fiddly to
make since it uses small, thin straps, but it becomes reasonably sturdy
once complete and will be protected by larger structure once everything
is done. At this point I've also added paint since it really needs
to be painted before assembly. I had thought about using
traditional army green but thought it was too cliche so I went with this
light gray instead which might be more fitting for a snowy environment.
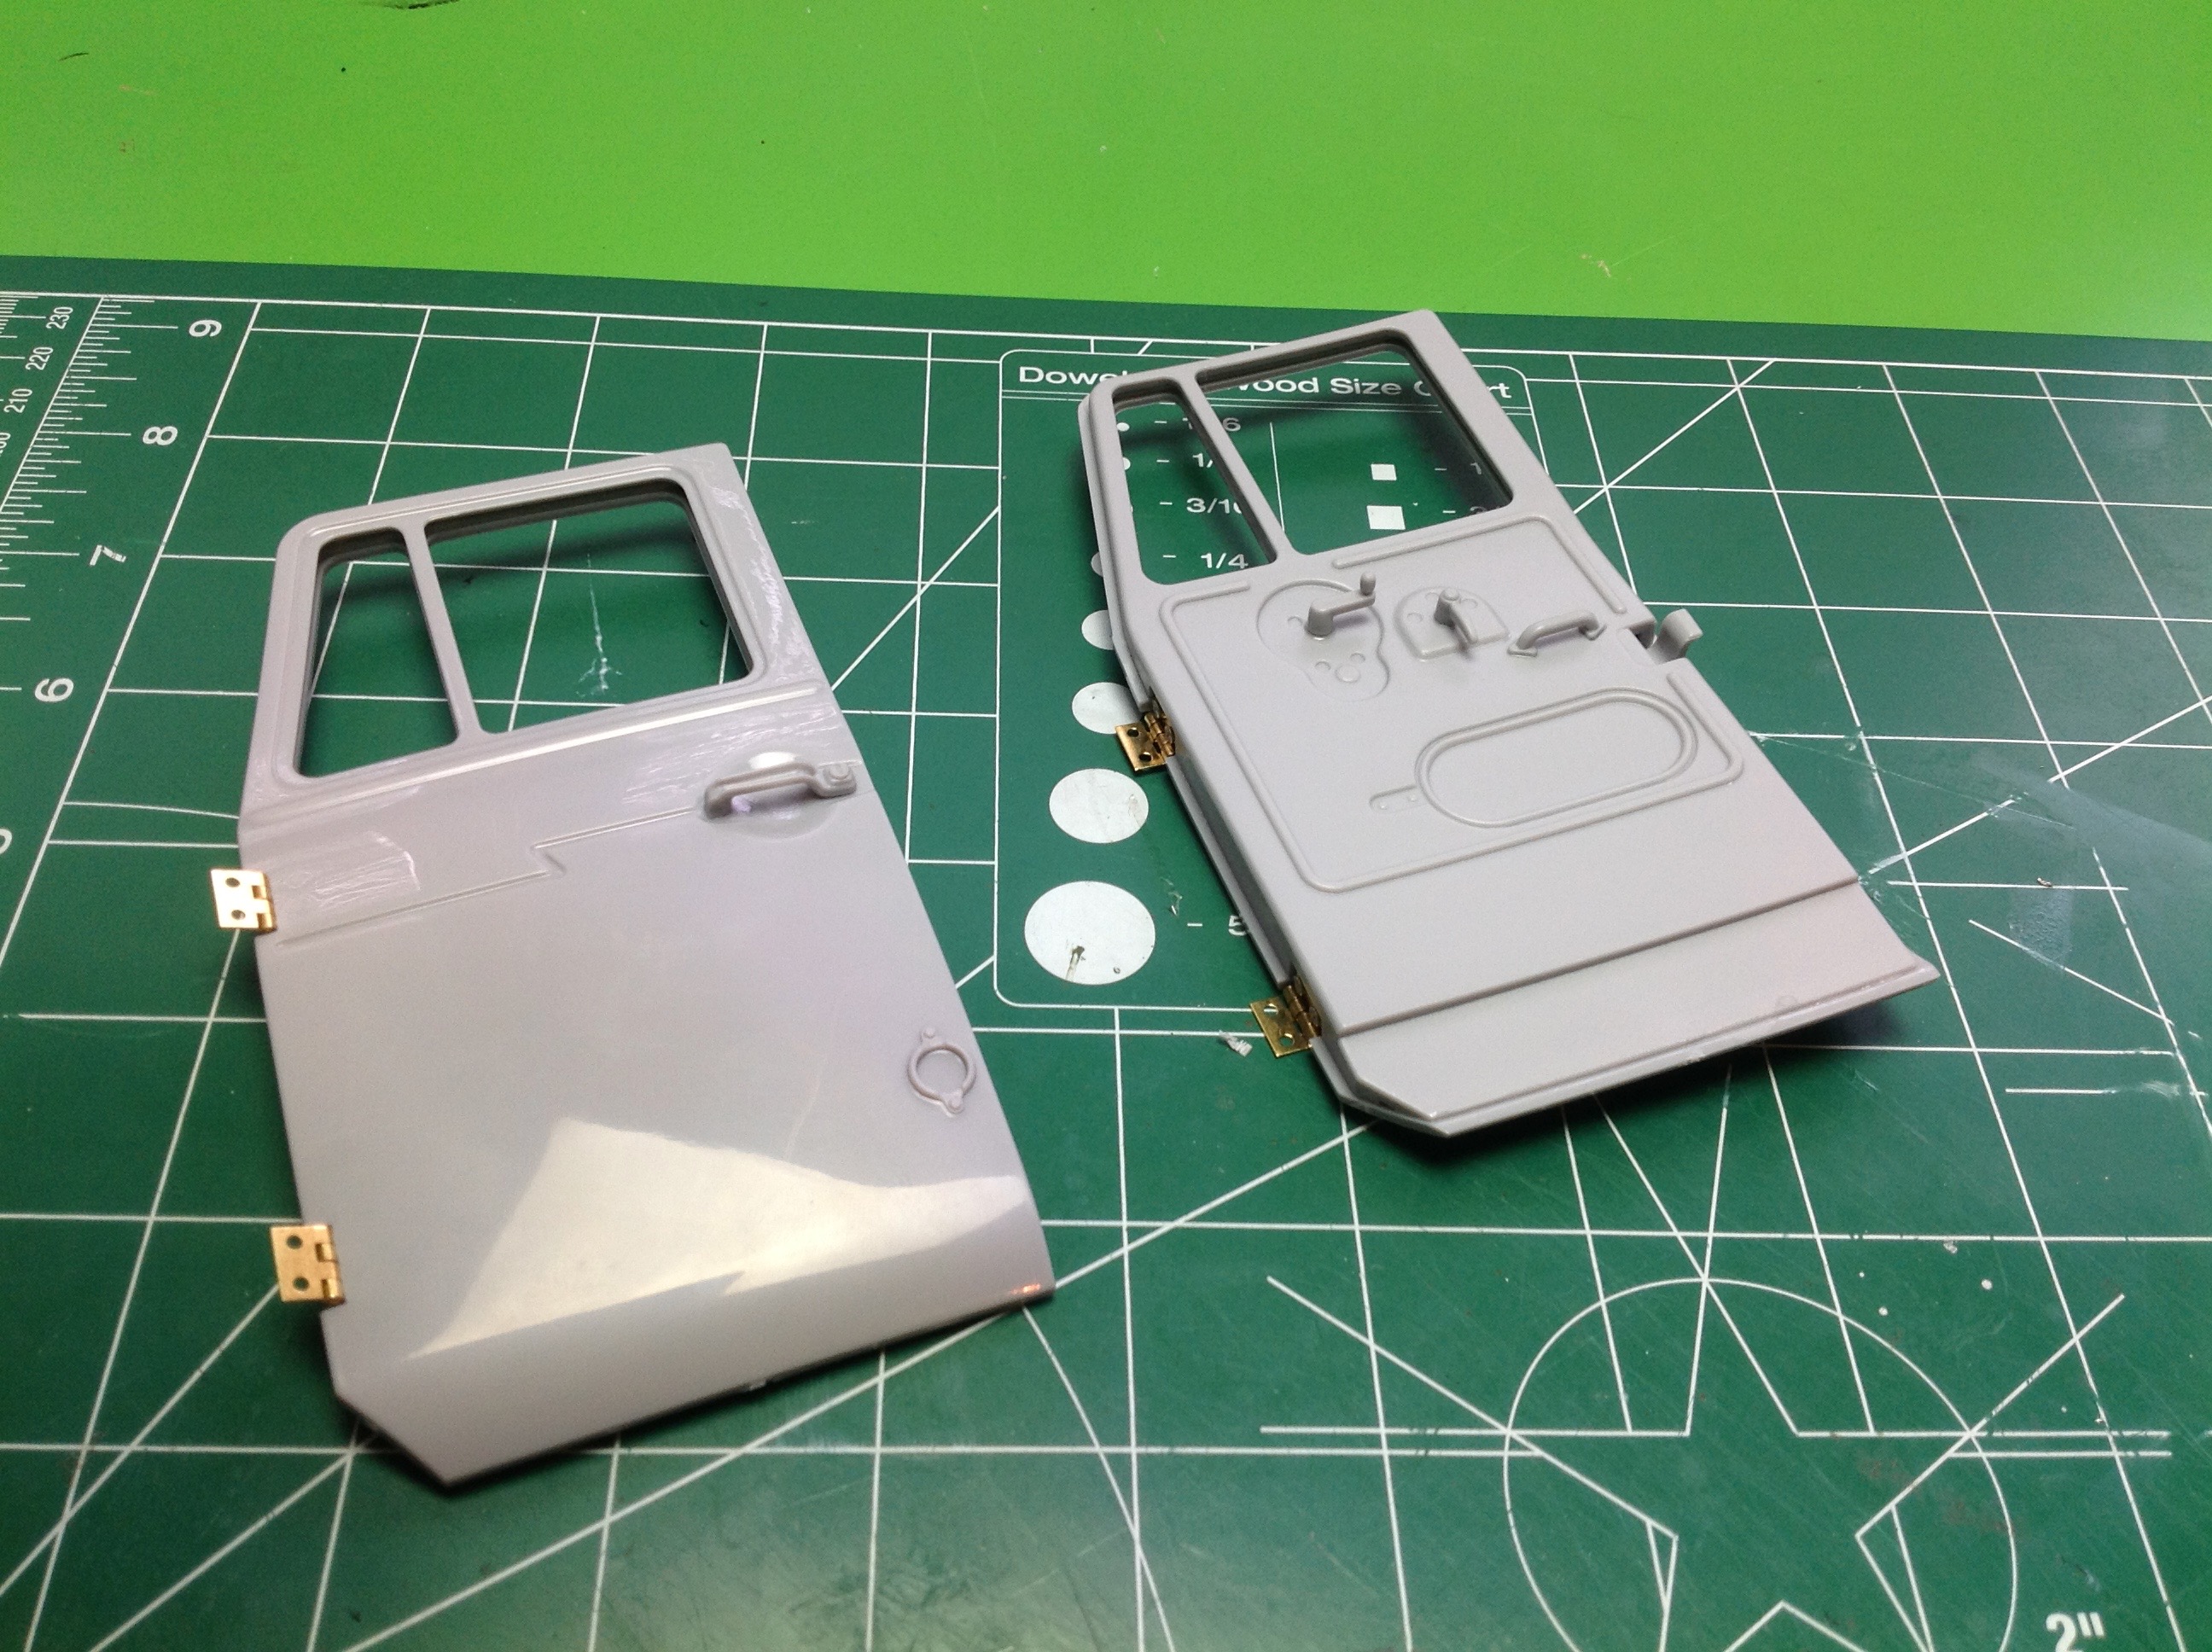
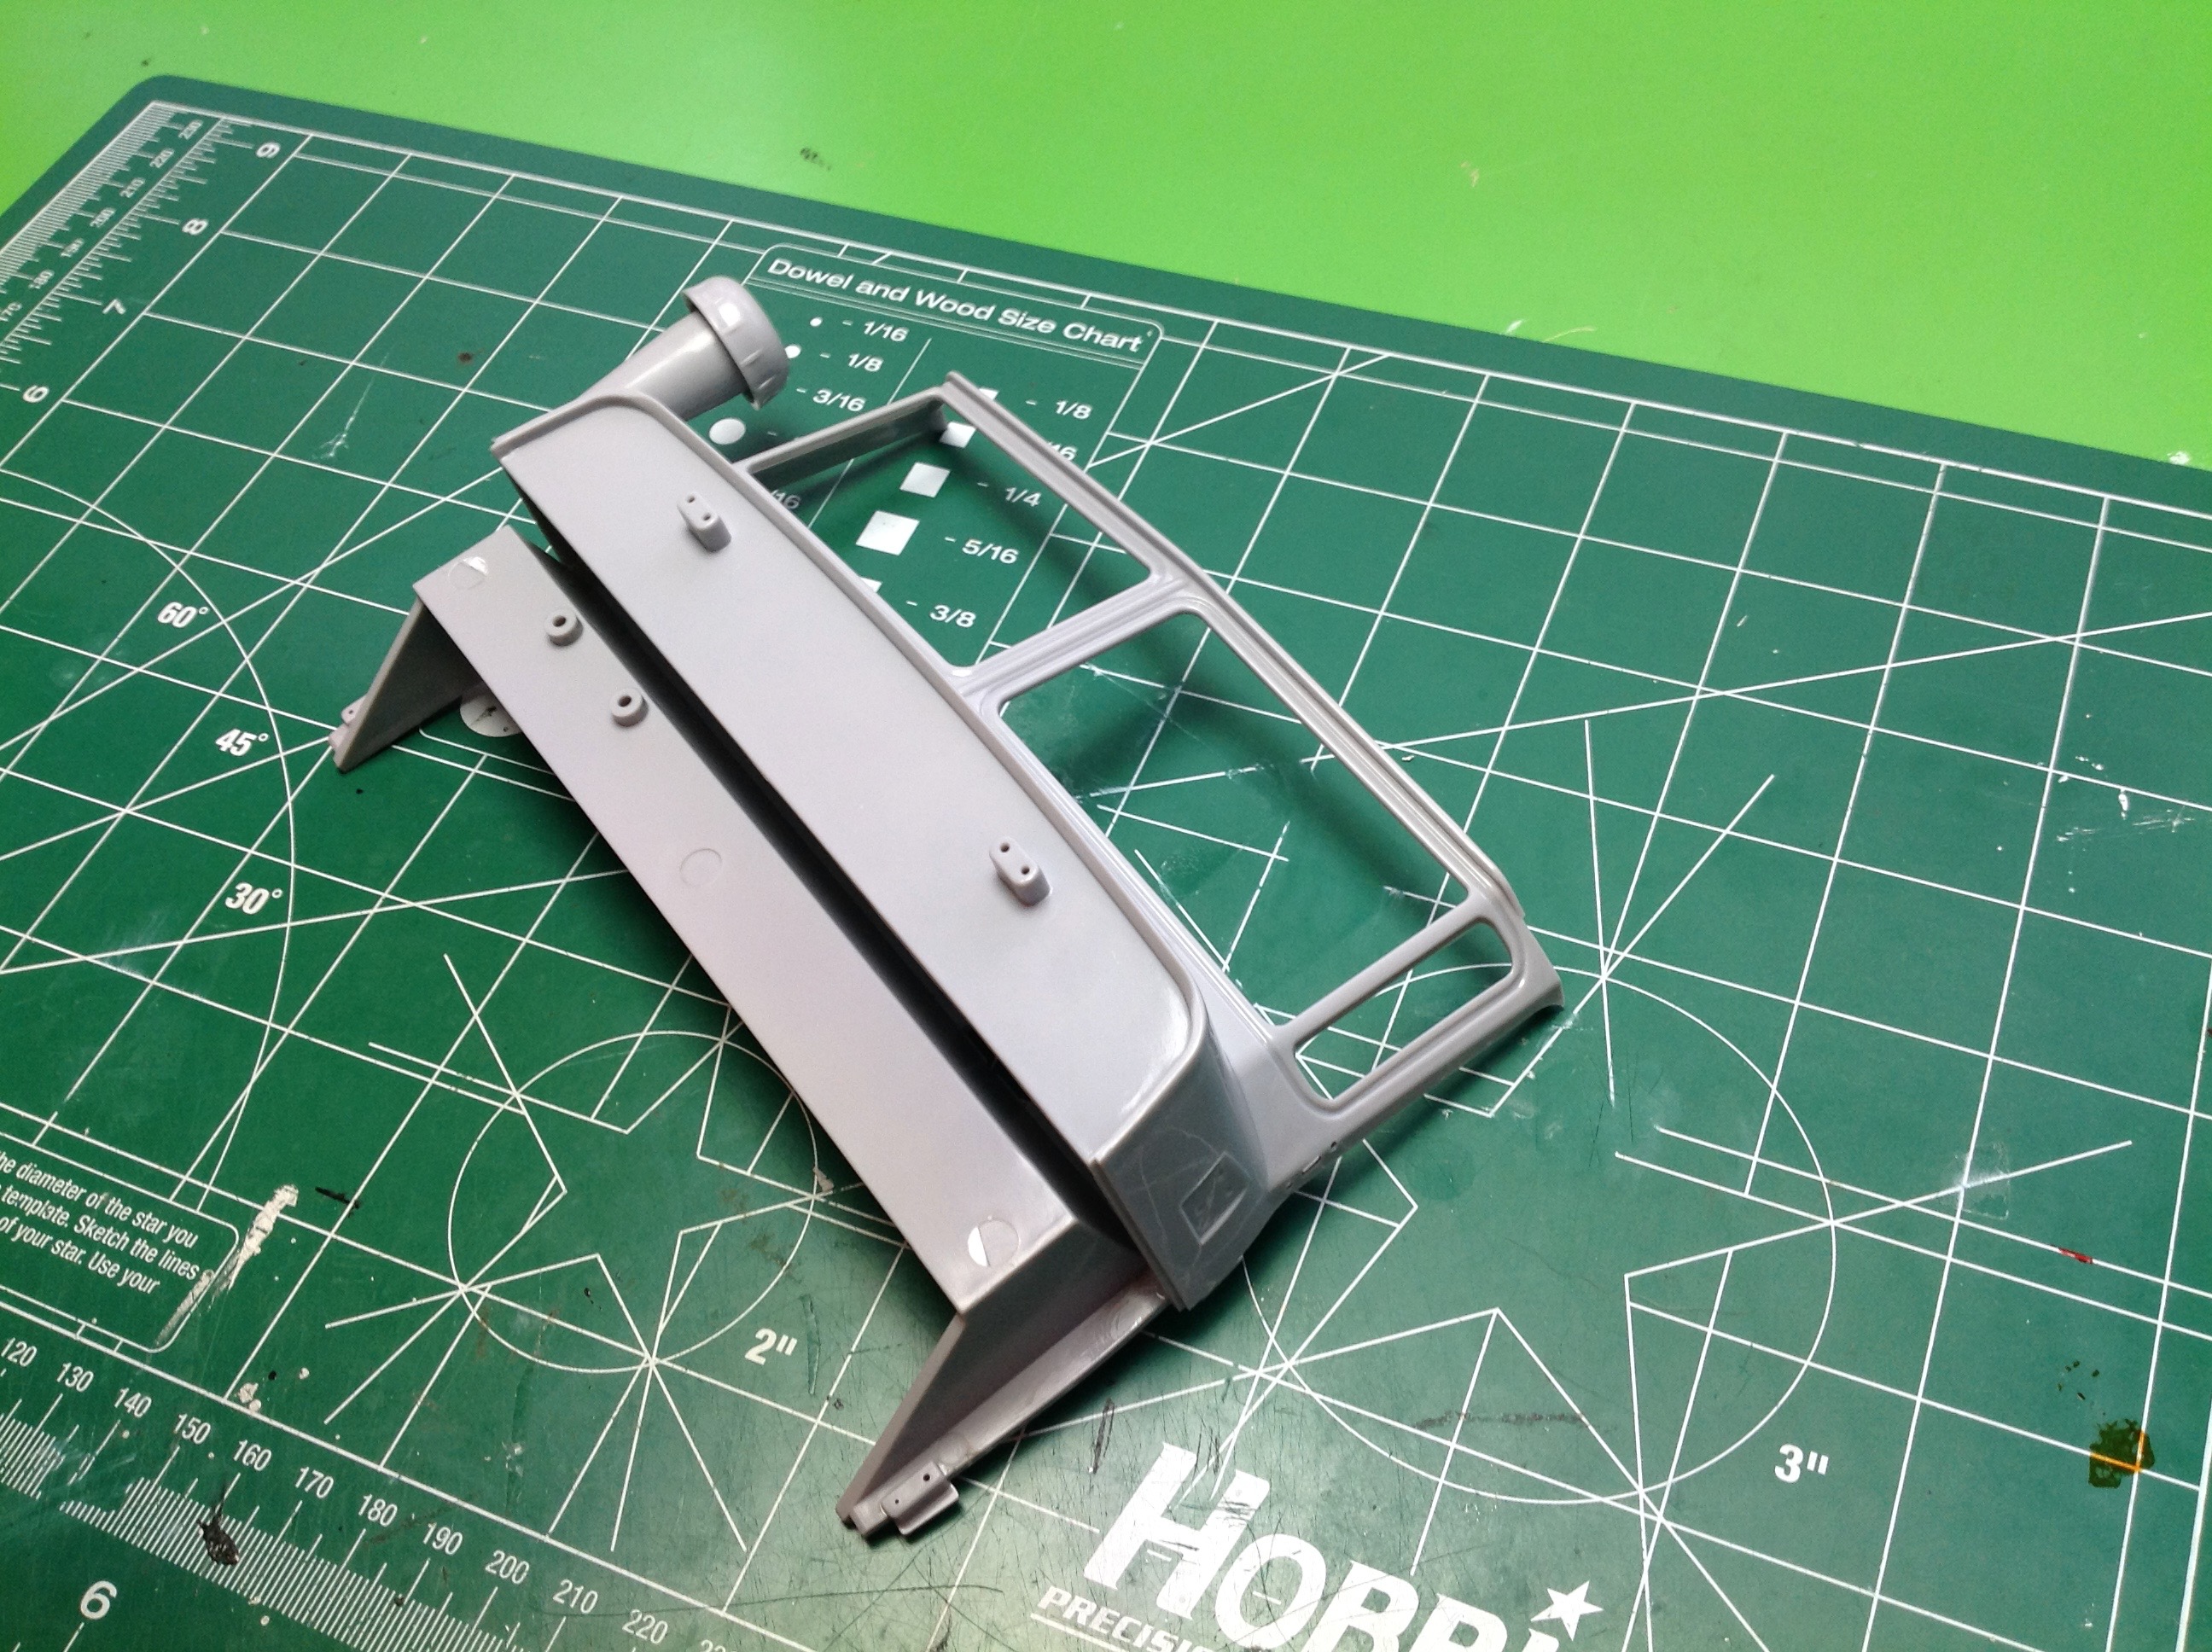
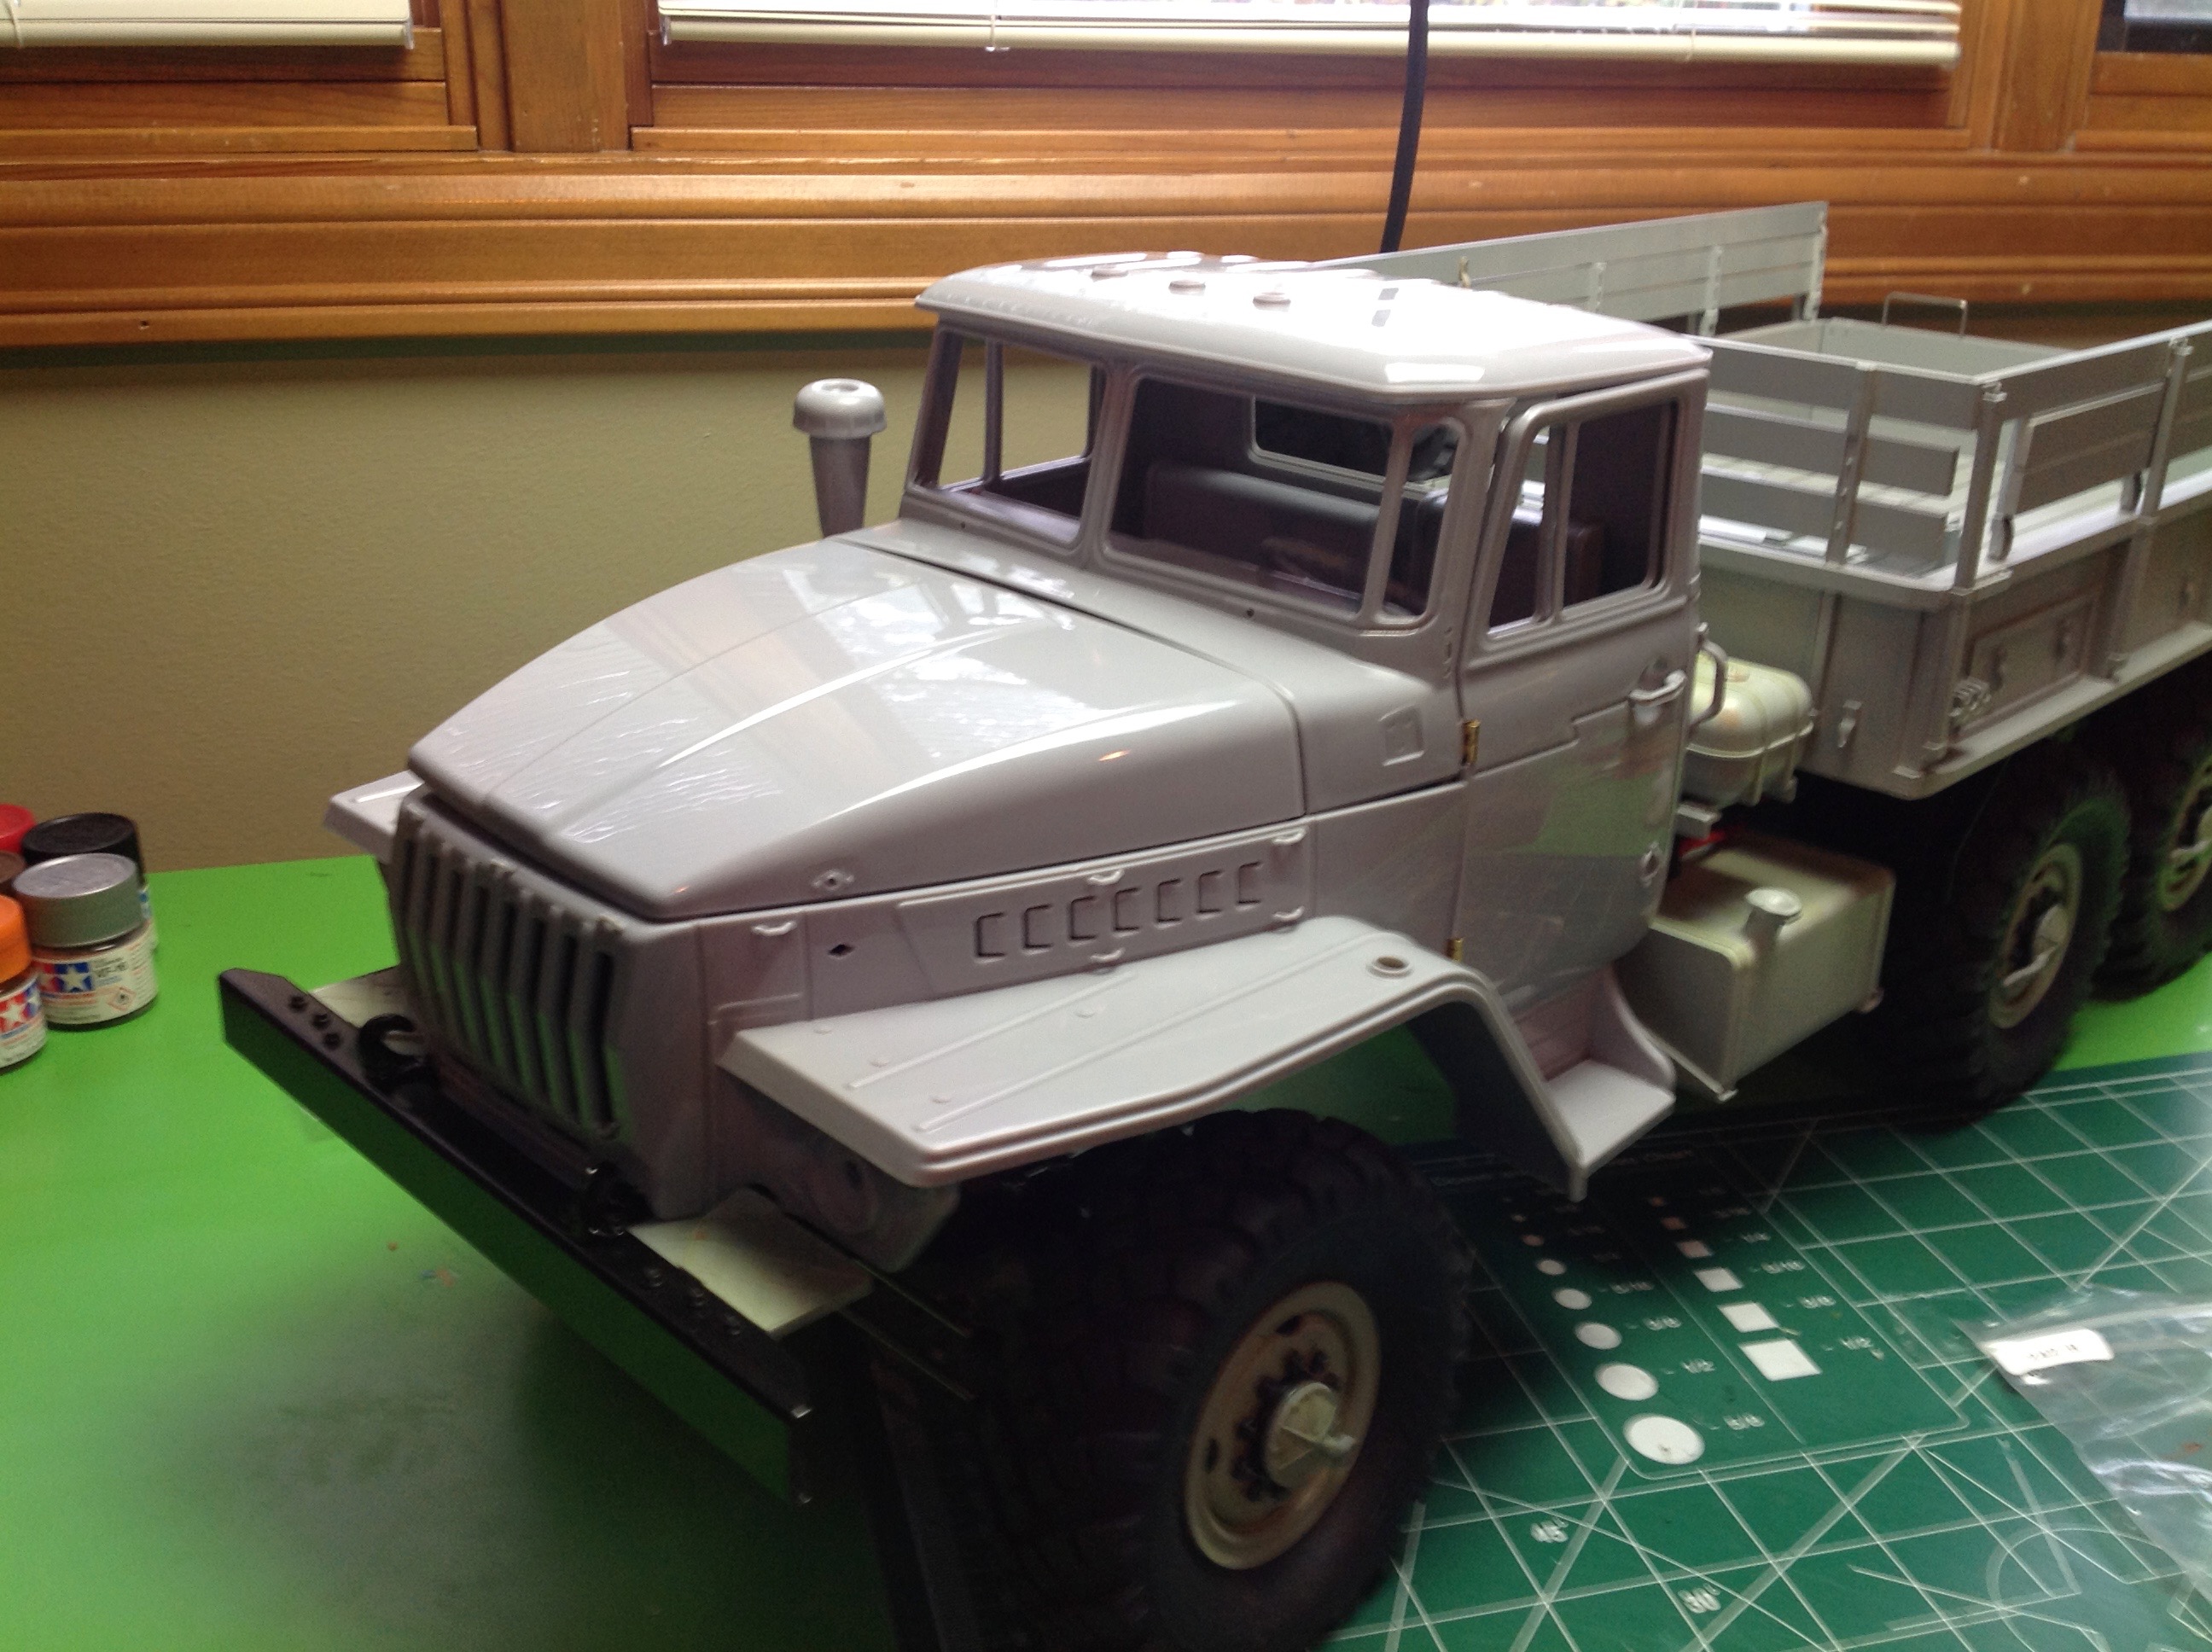
With the flat parts done it is time to start on the cabin.
Everything on this truck works which means the doors and hood open and
the interior is fully detailed. I start by putting the inner
panels on the doors and installing the hinges. Next up comes
gluing the front window supports and firewall.
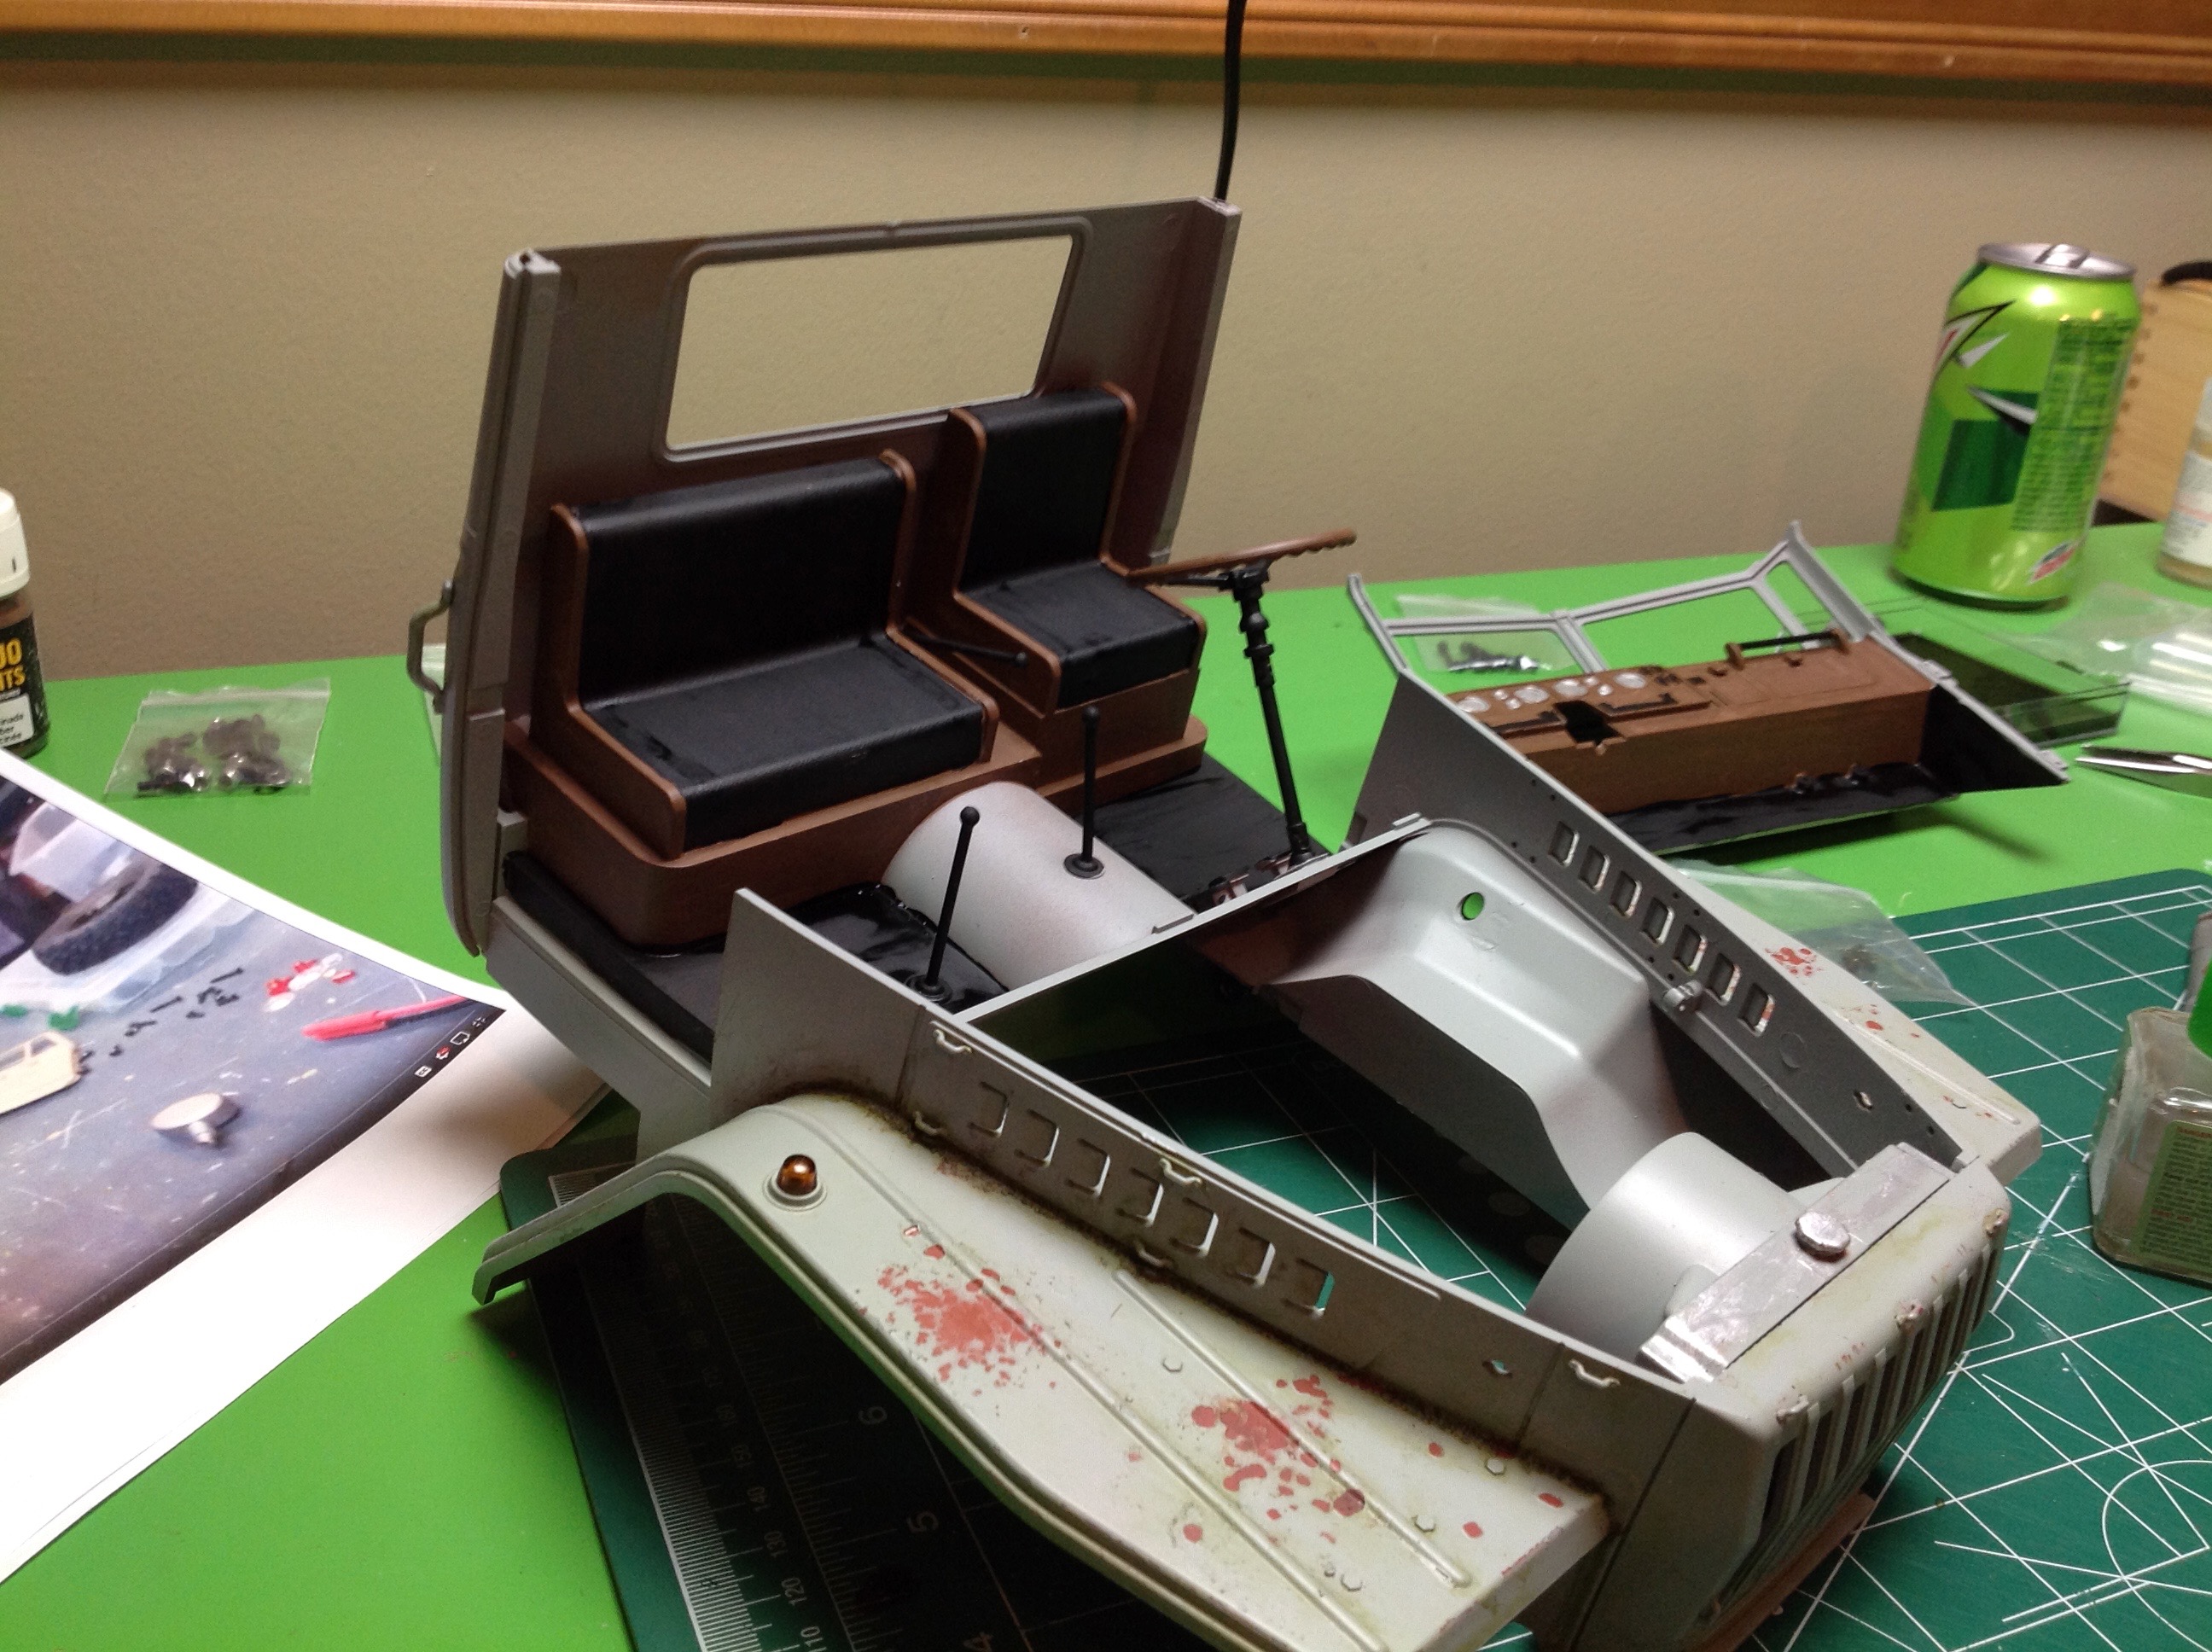
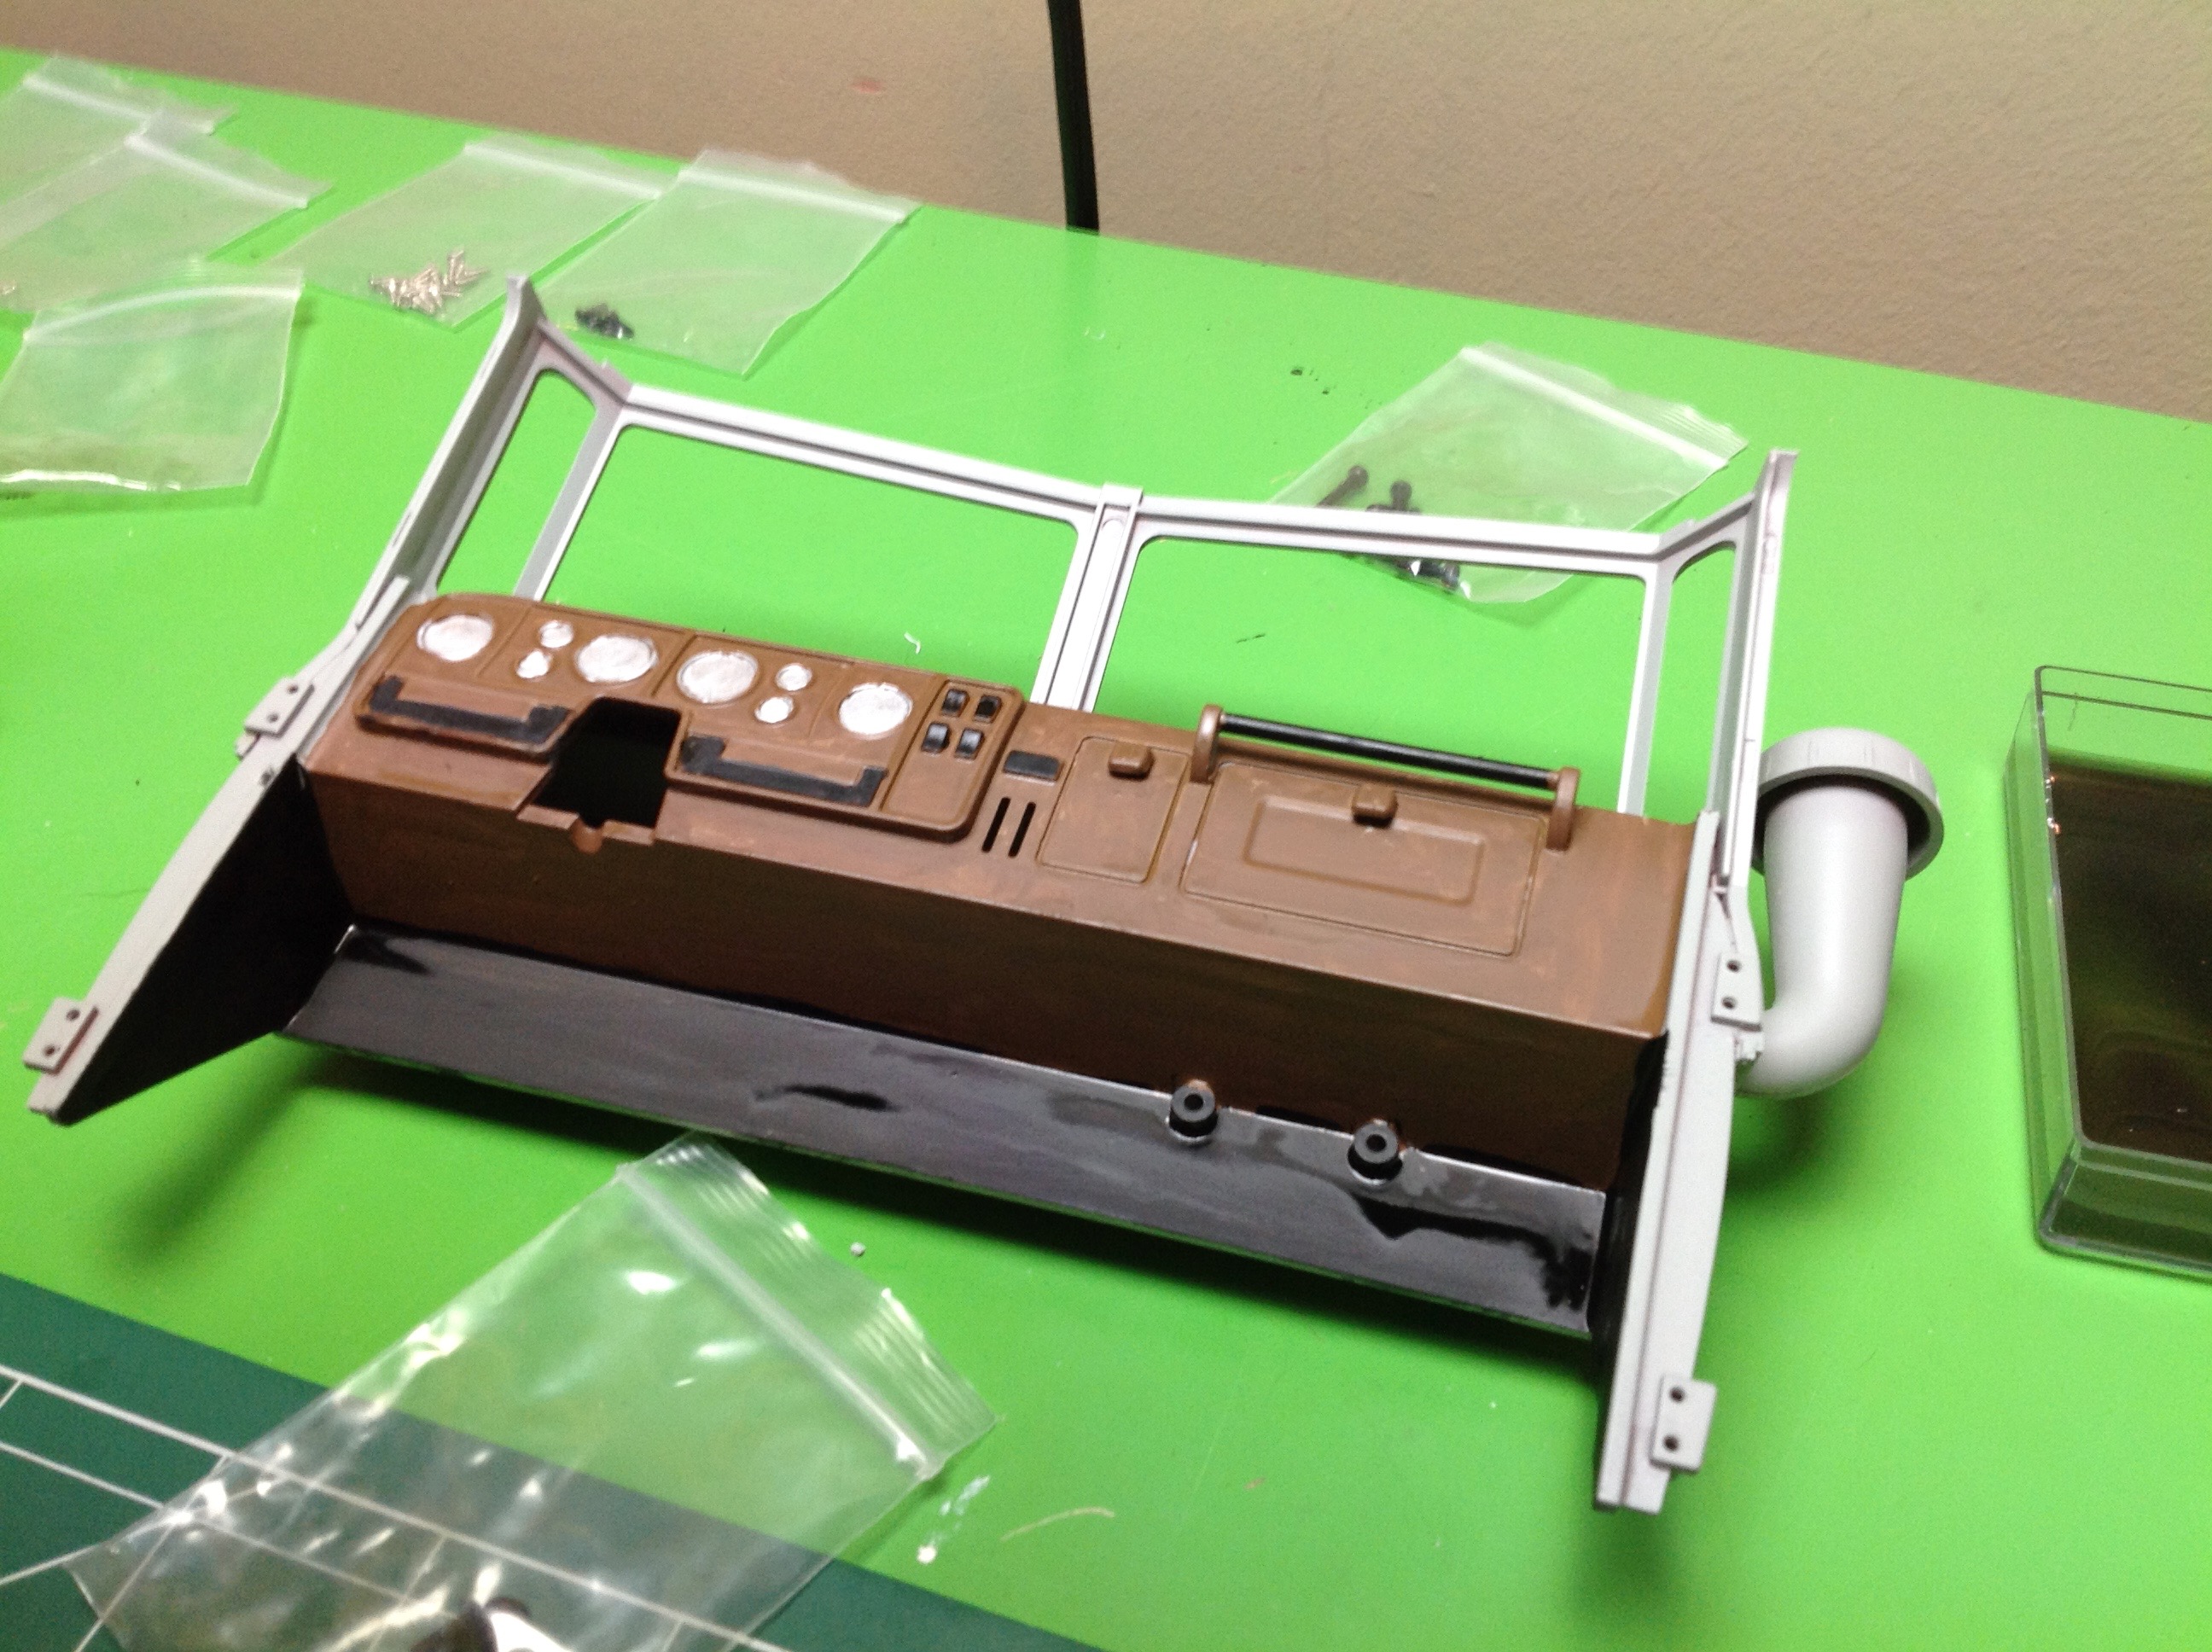
The interior includes unequal sized bench seats, shift levers, a
steering wheel, and pedals. The right hand image shows everything
test fit onto the chassis, but I cannot actually install them until
after everything has been painted and weathered.
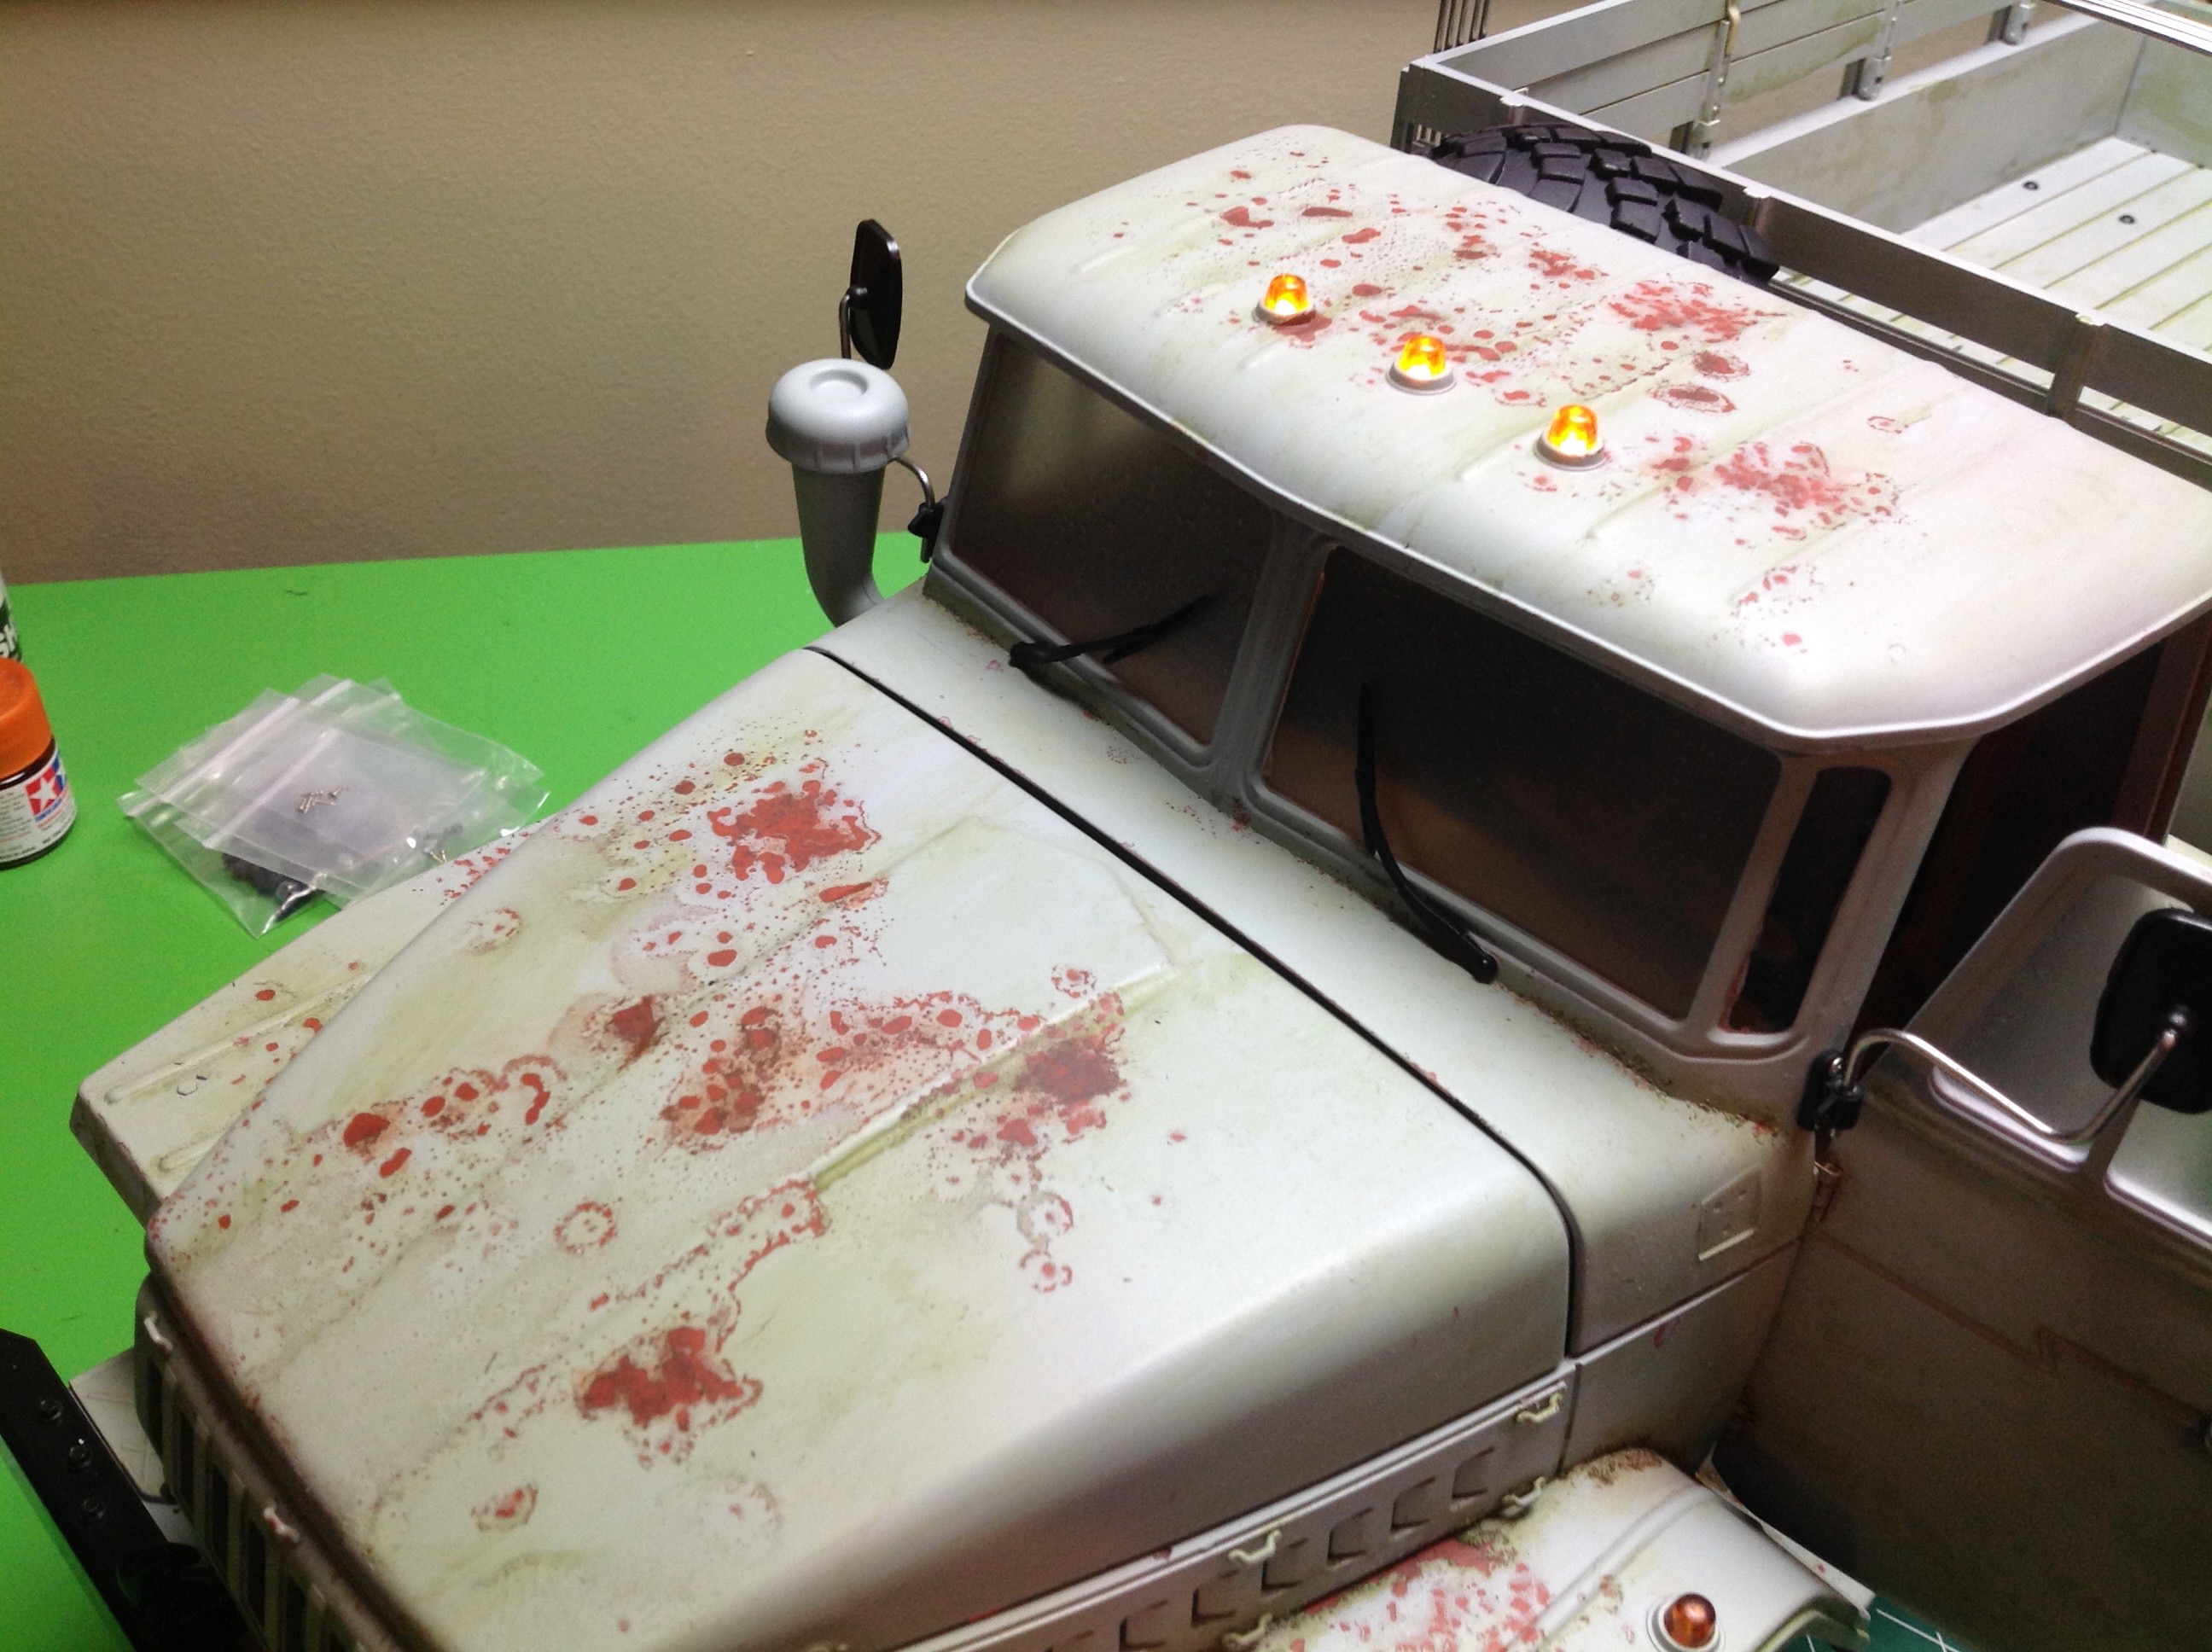
Voila! I've brush painted the interior including the seats and
dash, but most of the work went into the exterior. I started by
spraying the whole thing with a rust colored primer. Then I put
some coarse wet salt randomly over the surface and sprayed the final
color. After it was dry, I flaked off the salt which left behind
the rust patches. Following that, I went over the whole thing with
a dark green wash. What I was going for here is a truck that sat
in a field for decades with pools of water sitting on it resulting in
rust and mold on the flat surfaces. This was first try at large
scale weathering but I am reasonably happy with it. When all was
good I put flat clear over the whole thing to lock it all in.
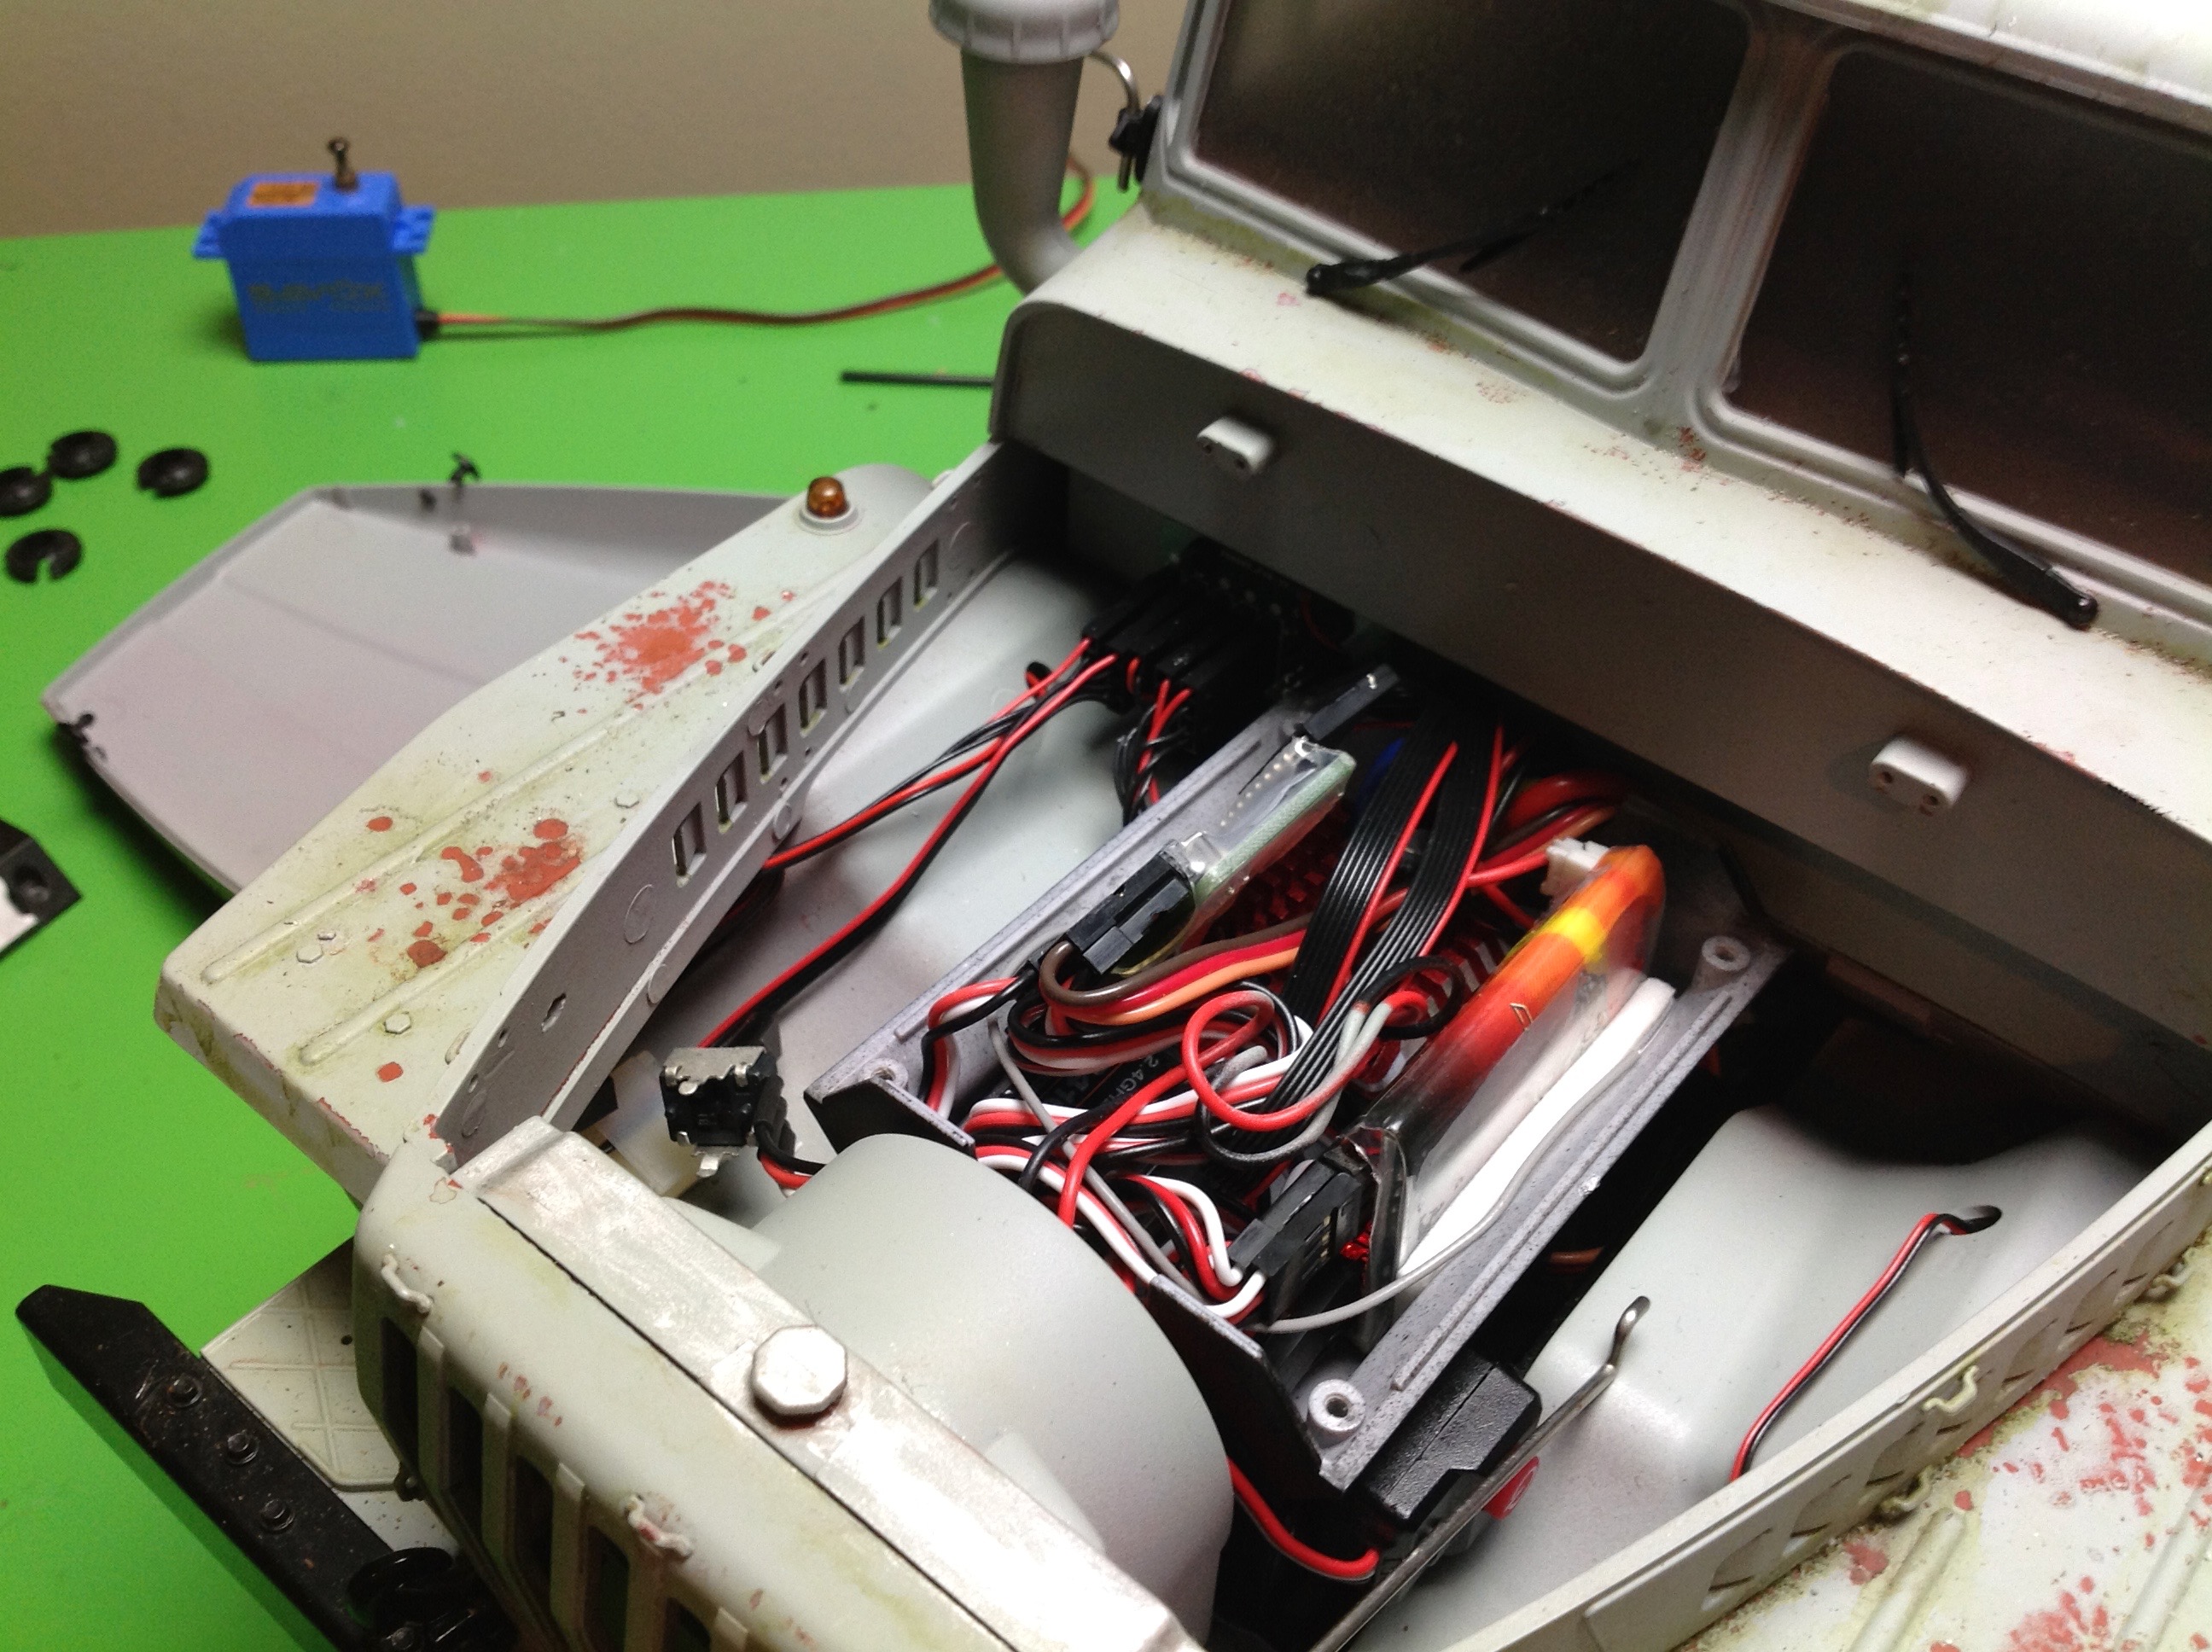
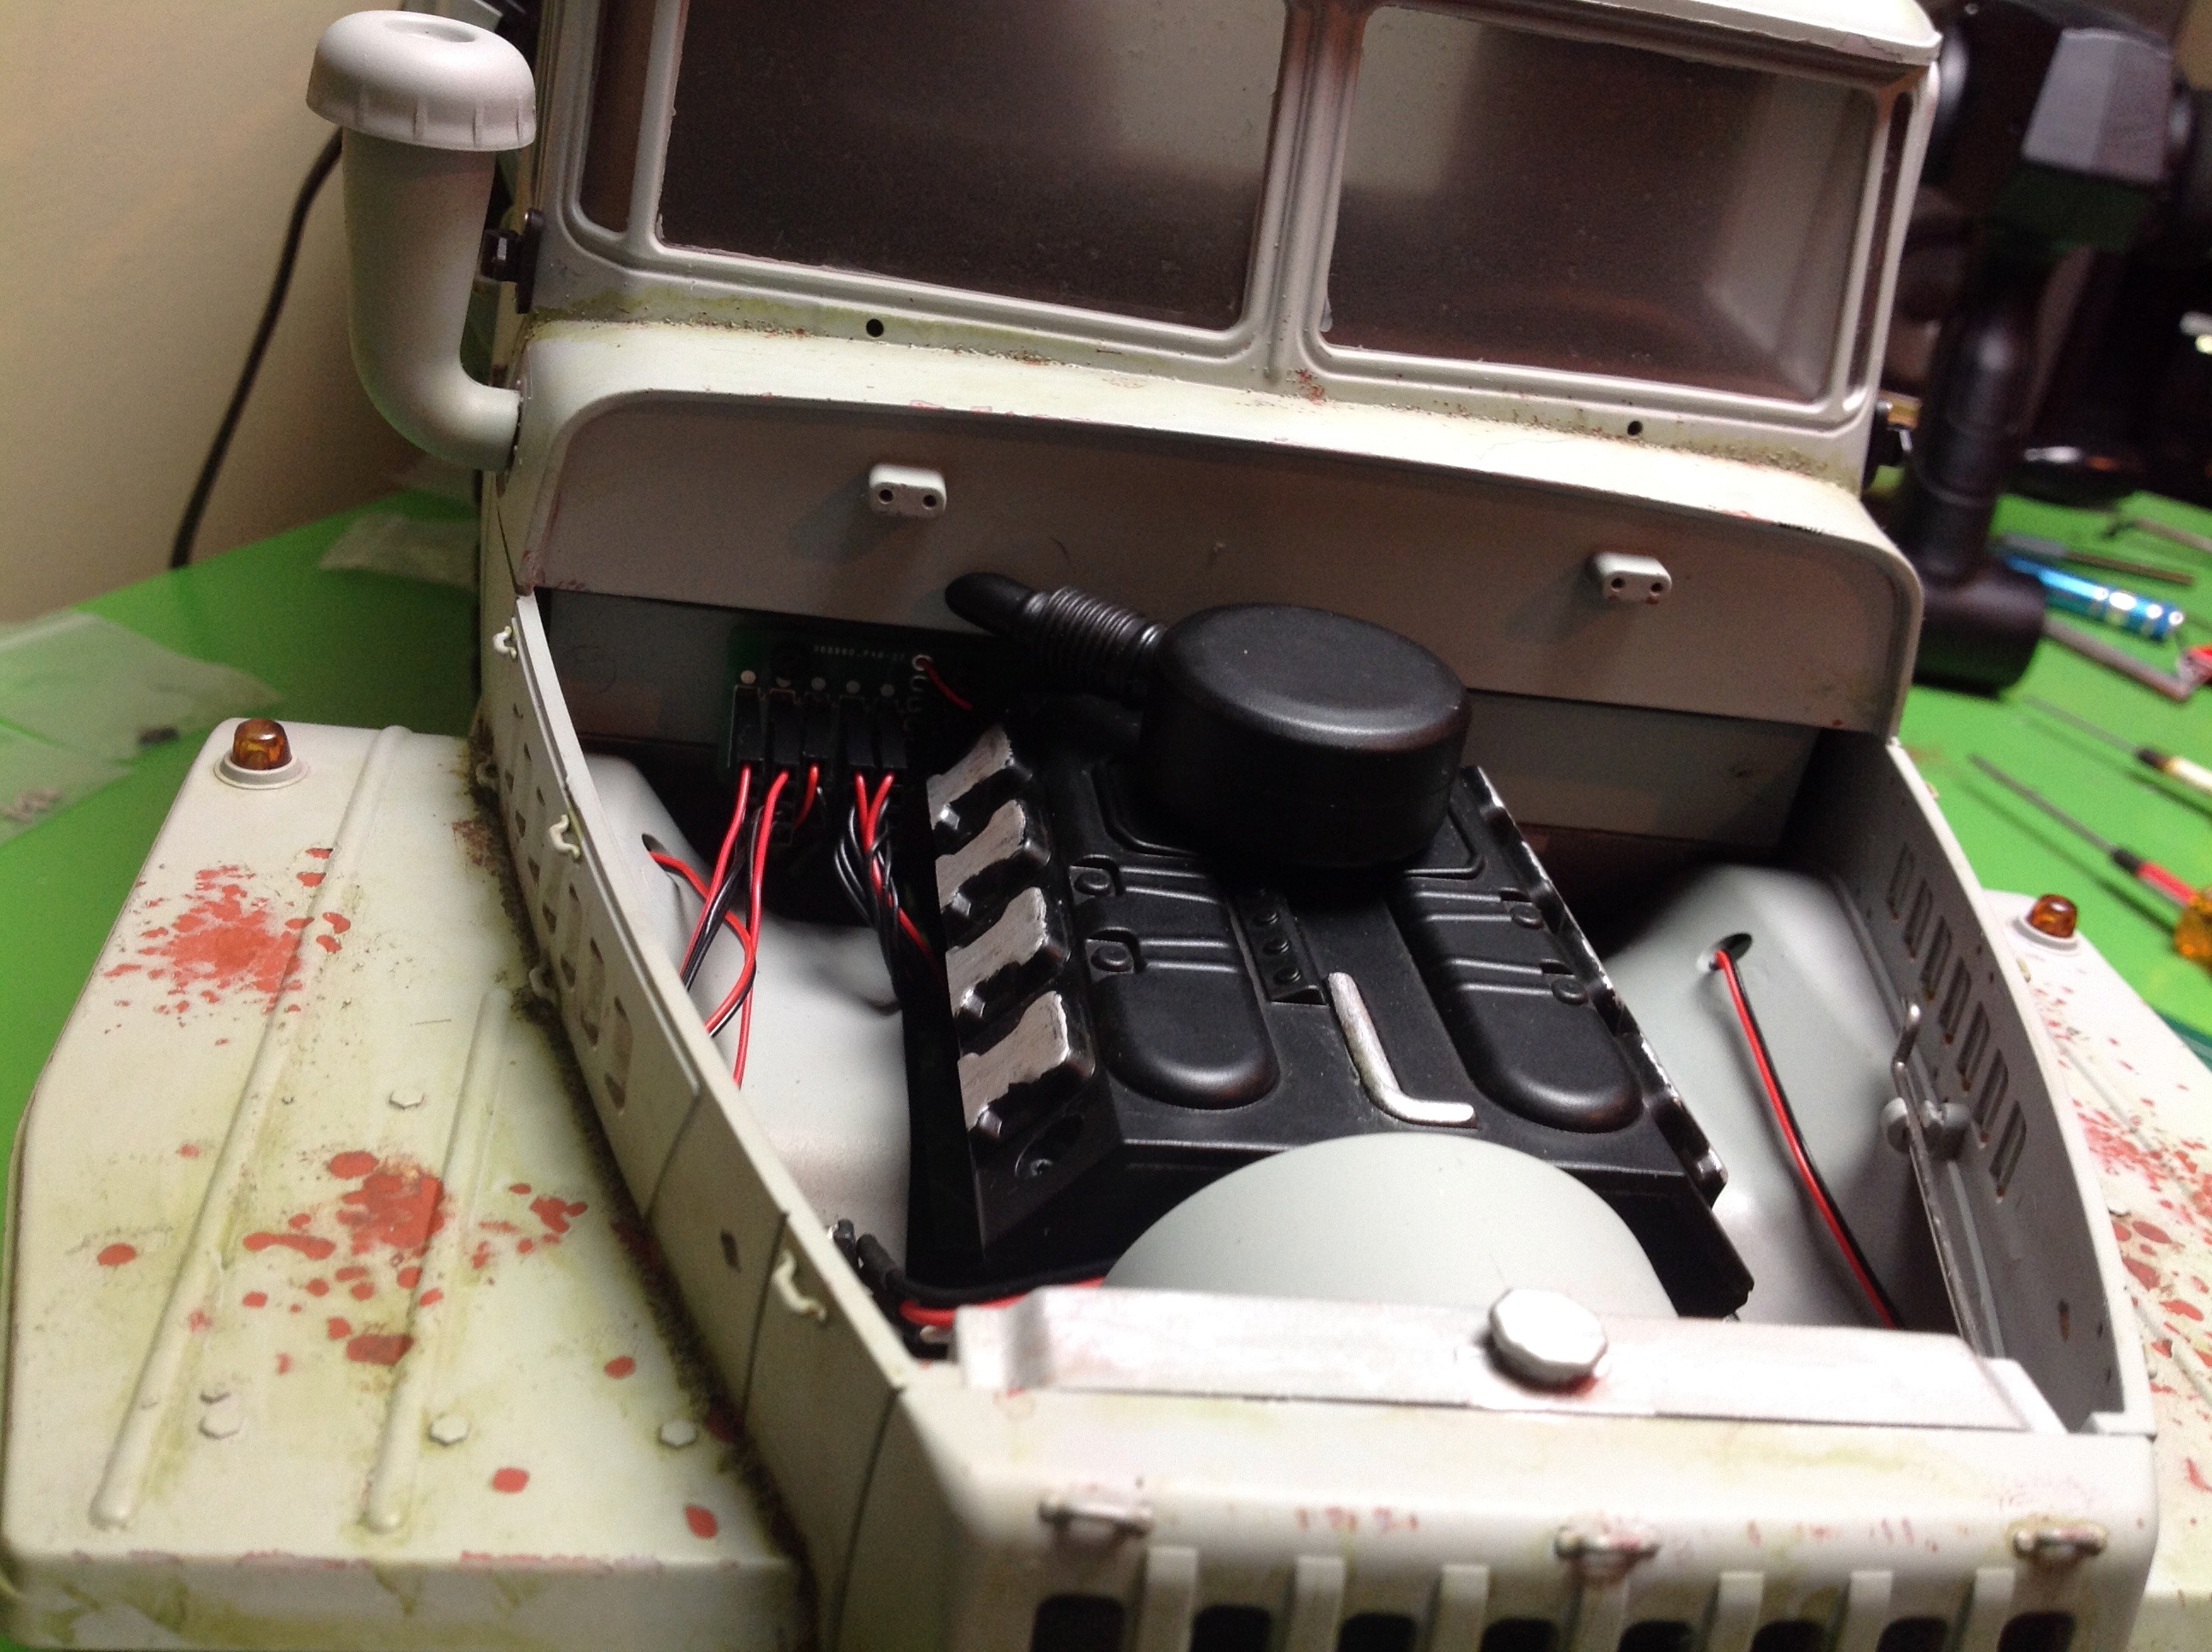
Now I have the daunting task of cramming everything into that engine bay
without damaging anything. I think I managed to make it look
reasonably neat. Once the cover is on, you wouldn't know what
lurks beneath. The wires against the firewall comprise a junction
box for the lighting system, but looks reasonably like a scale fuse
box. Notice all the little details in the form of handles and
brackets everywhere.
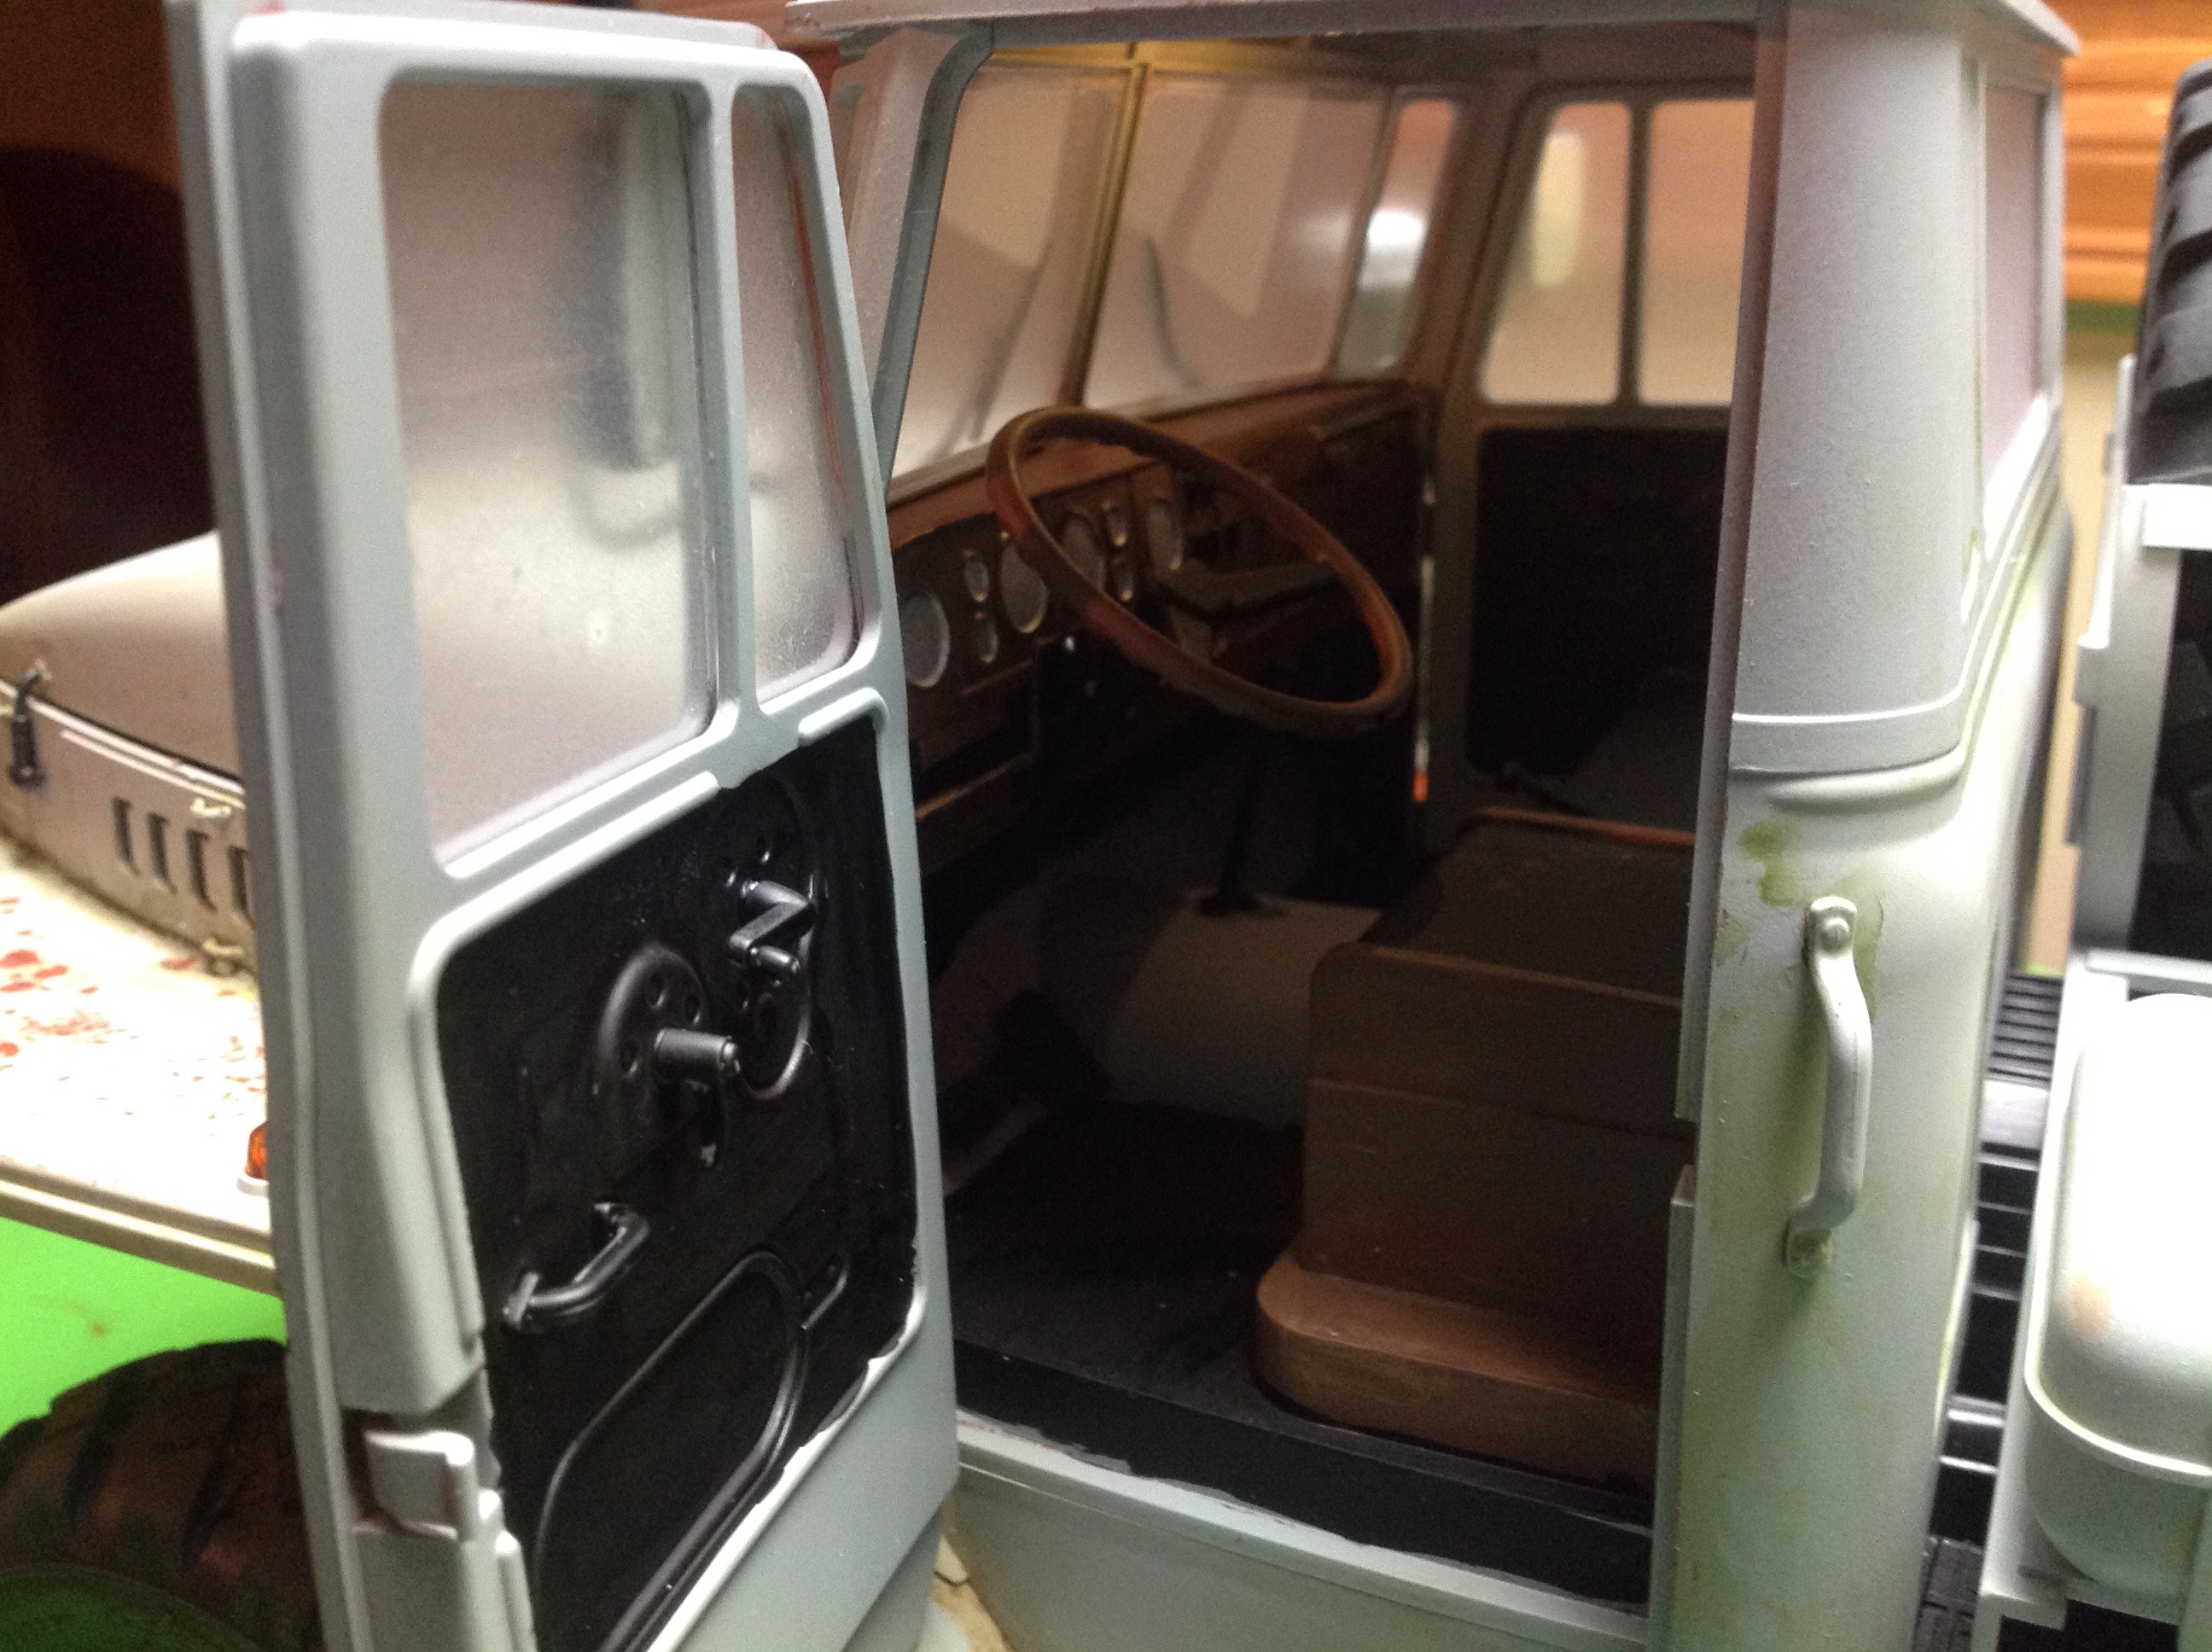
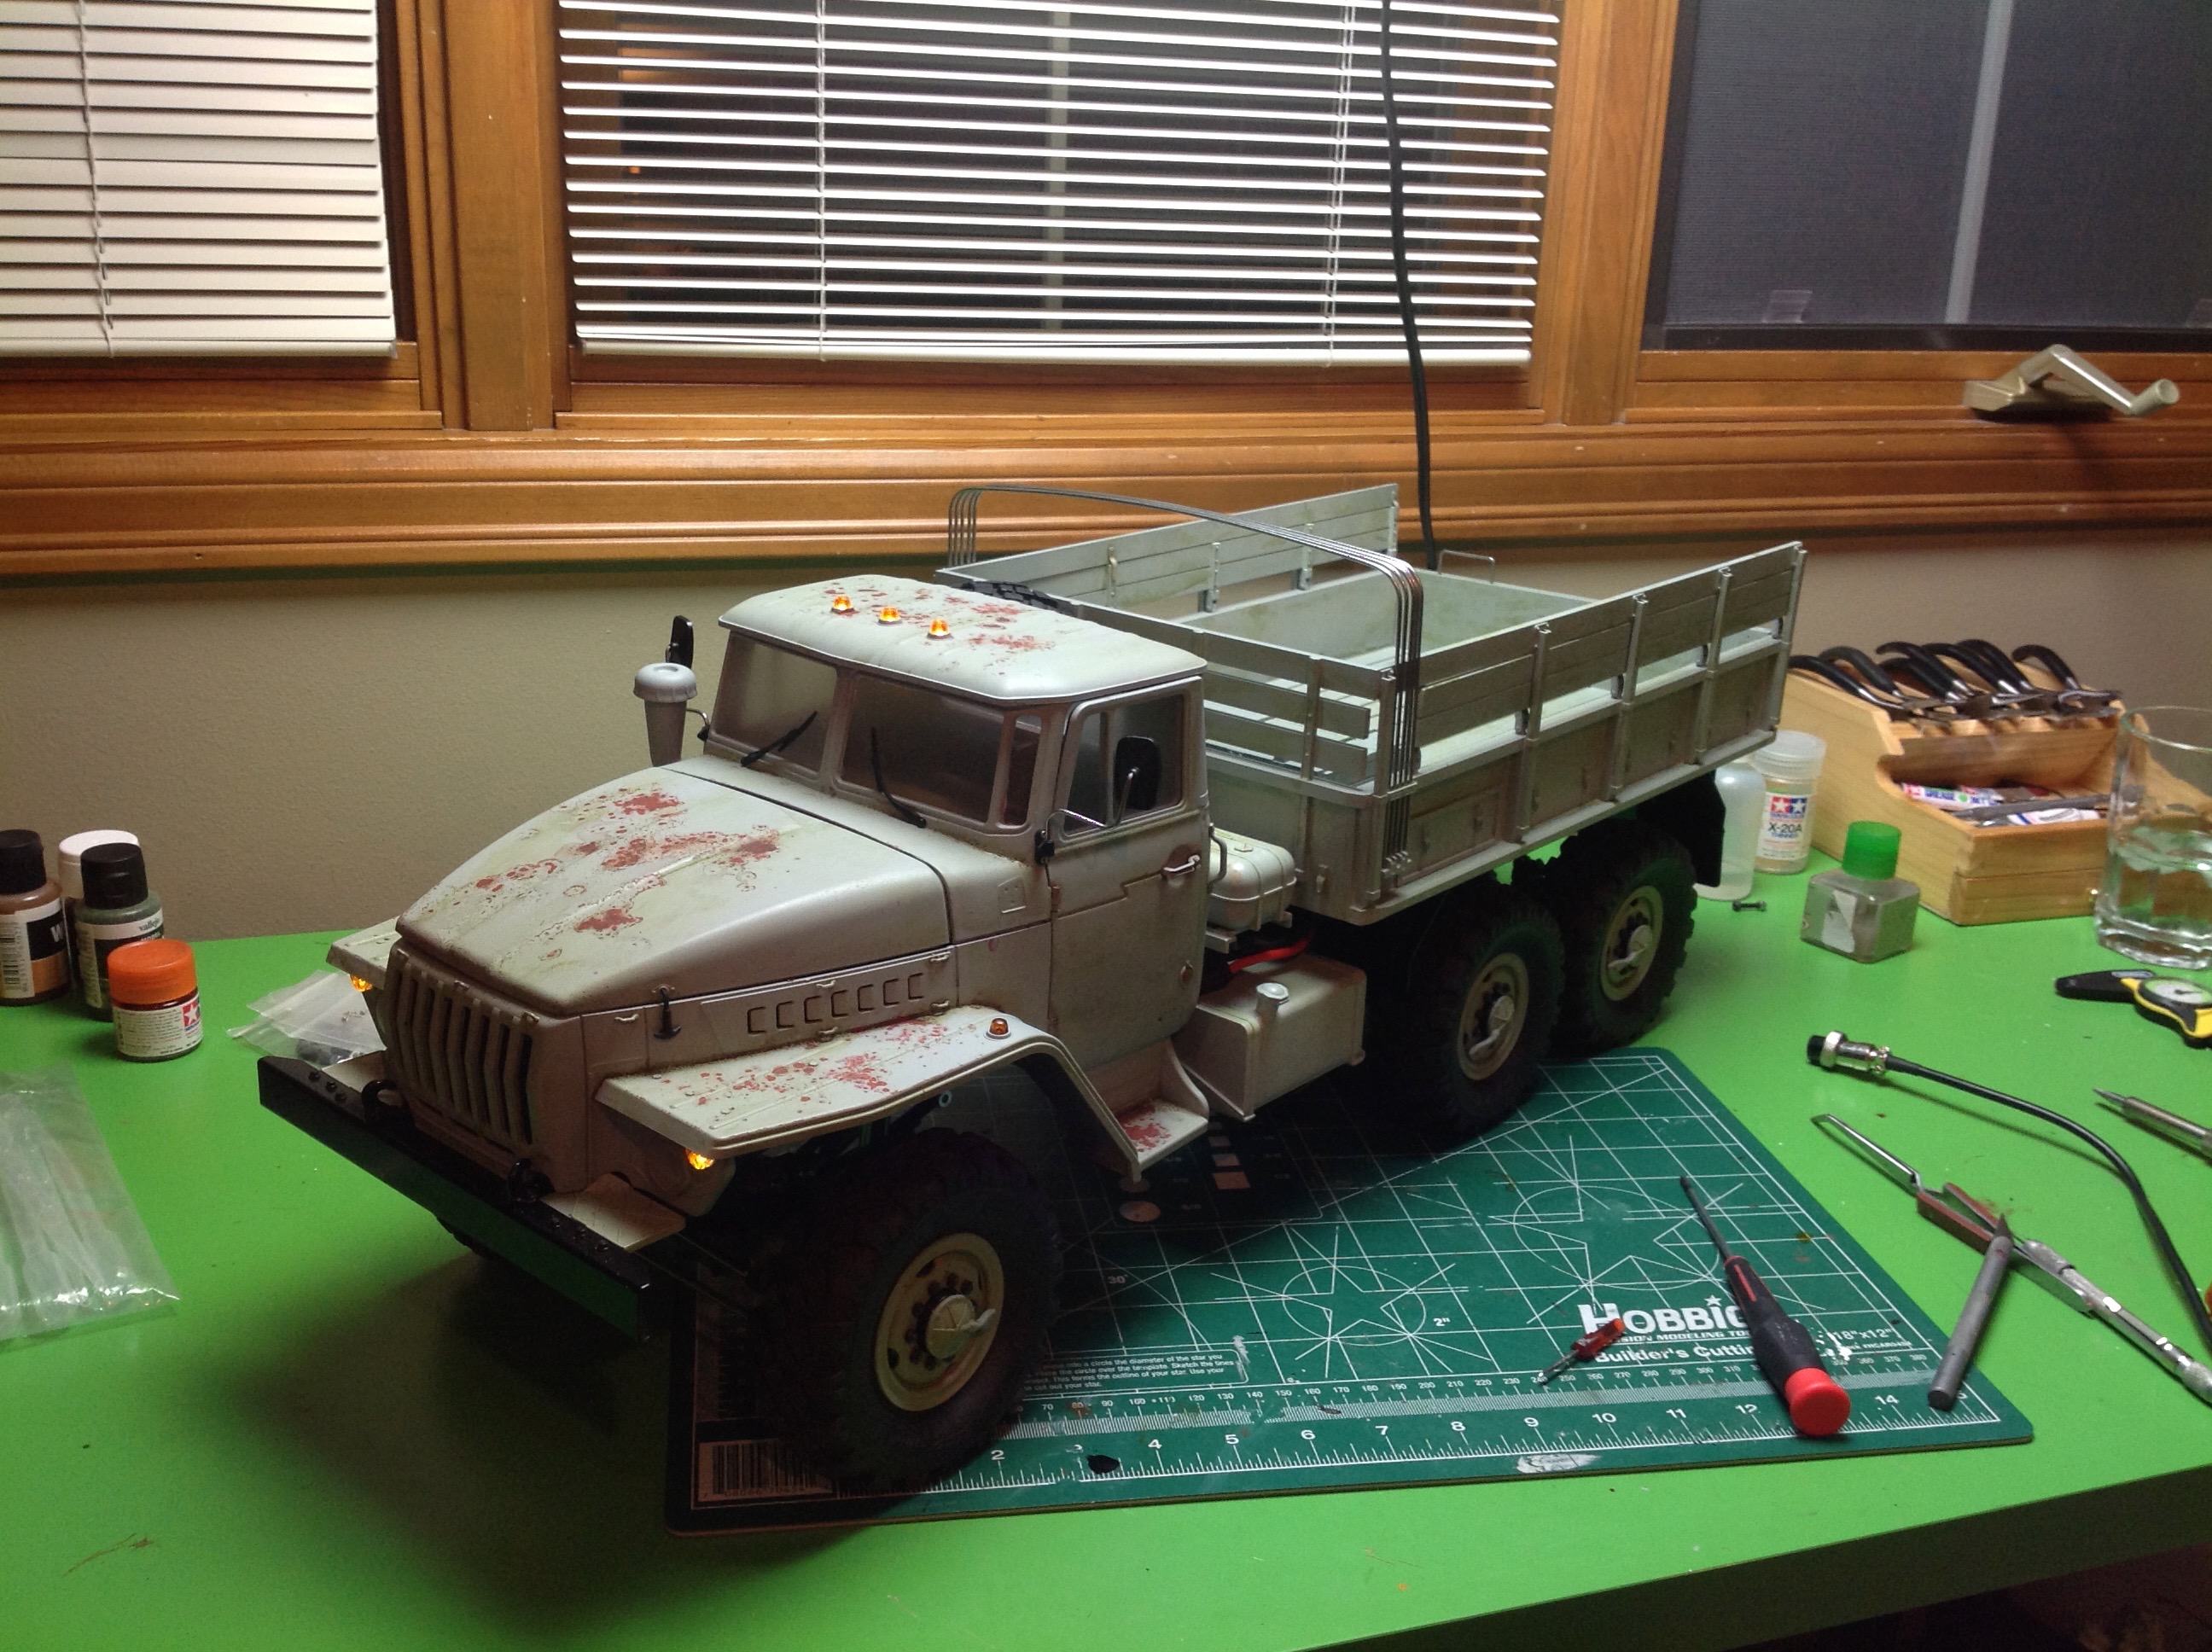
Now the hood, doors, roof, and other finishing touches can be
installed. The open door shows the marvelously detailed
interior. Notice the lights along the roof which work. There
is even an interior light. These photos also show my biggest
regret though. I sprayed the flat clear after everything was
assembled which means the windows ended up frosted instead of clear,
making it difficult to see the interior without the doors open. I
really need to try to fix this somehow and also to add a driver figure.
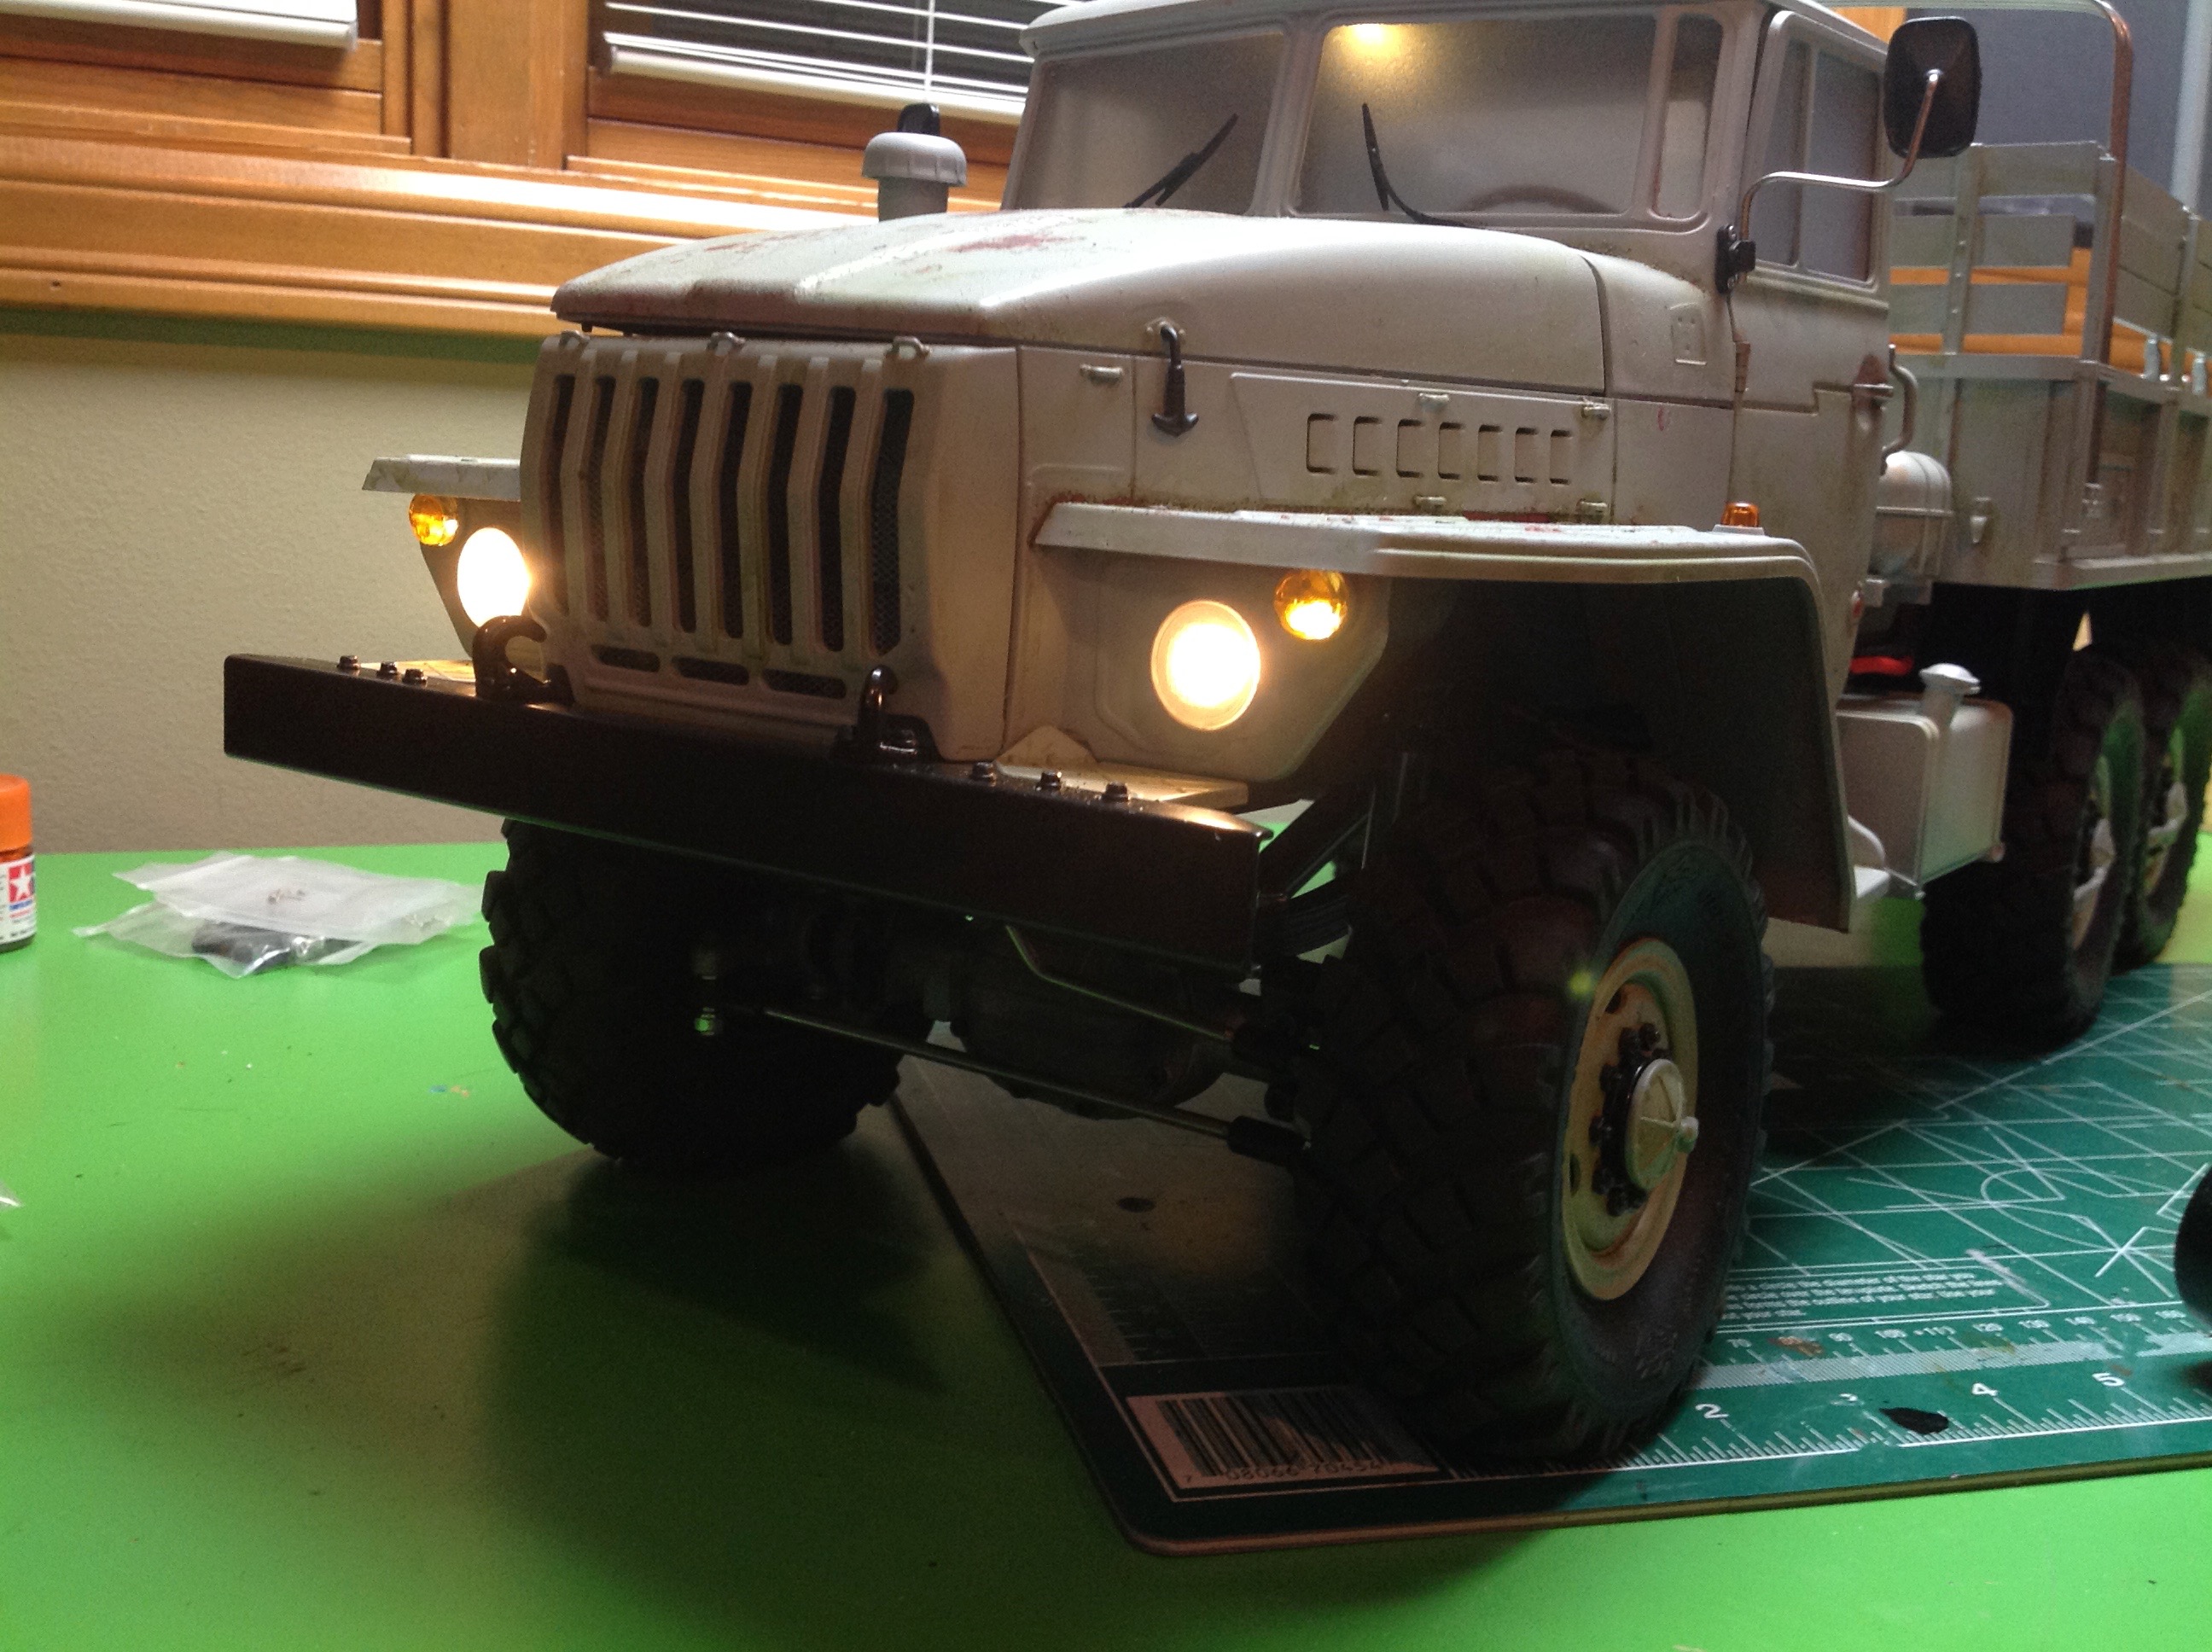
And here she is! The lights are incredibly realistic in their tone
and intensity. In the second image you can see the hoops in their
storage location.
©2018 Eric Albrecht