Tamiya XR311 Project
Page 2: Building the Body
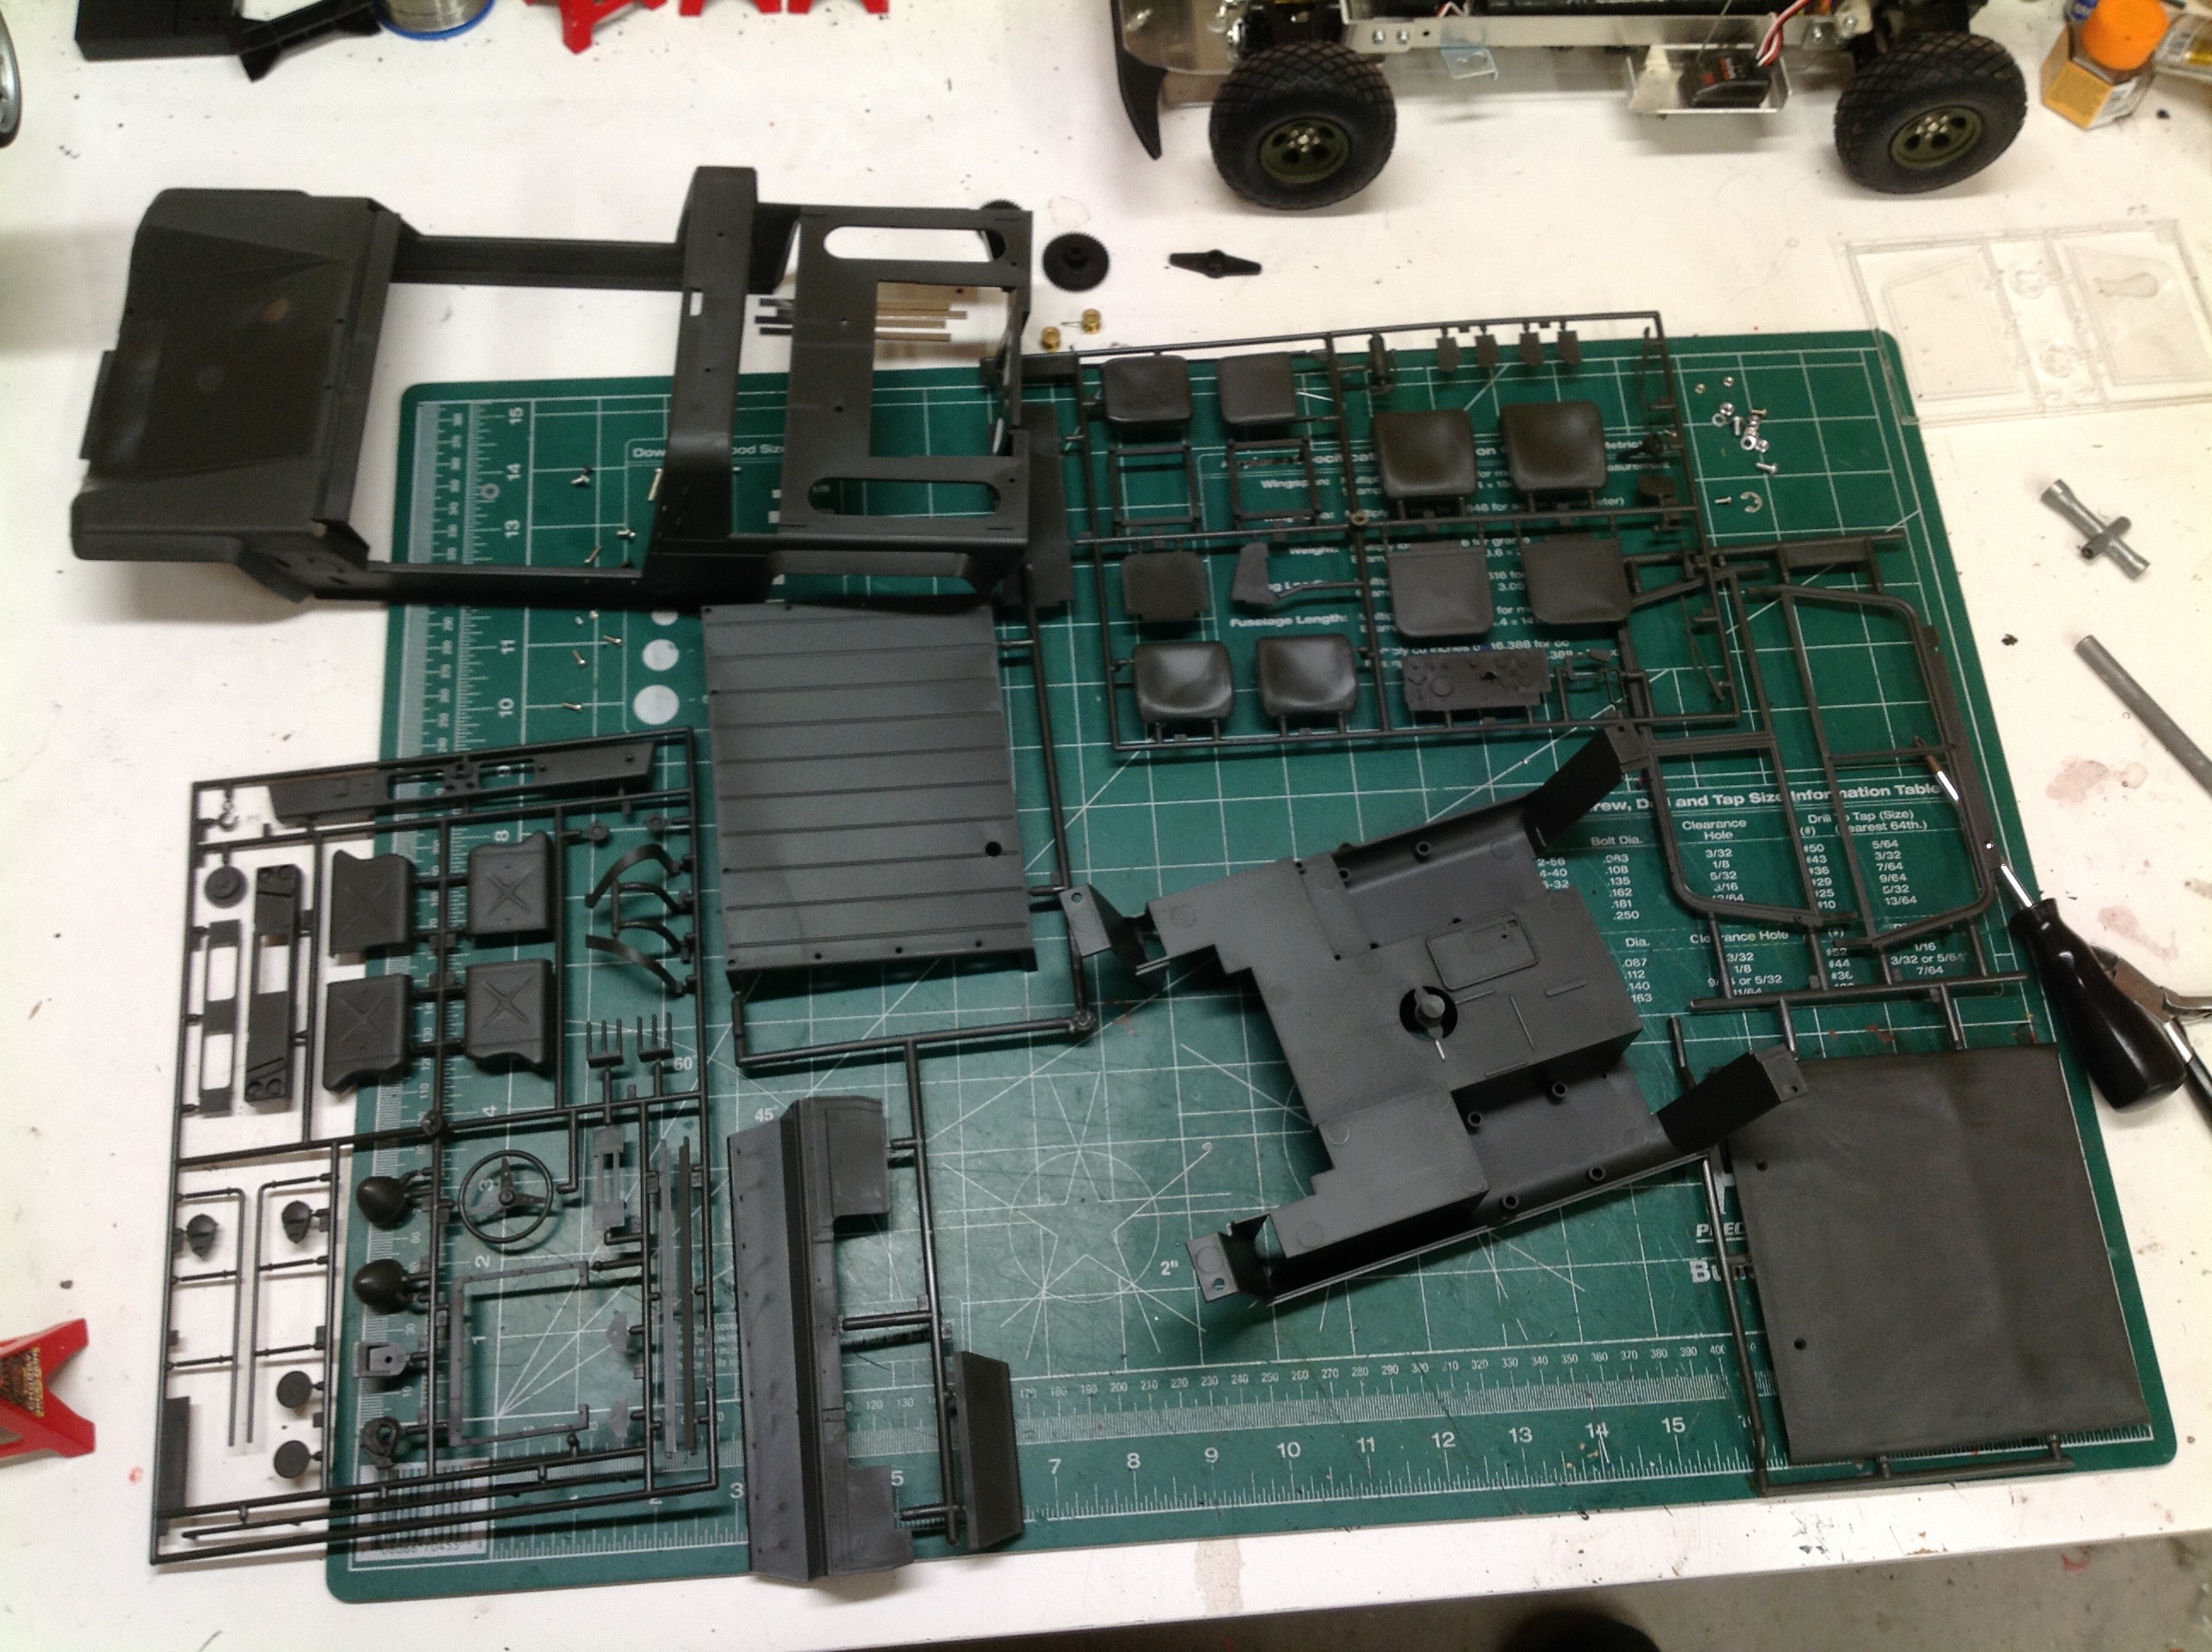
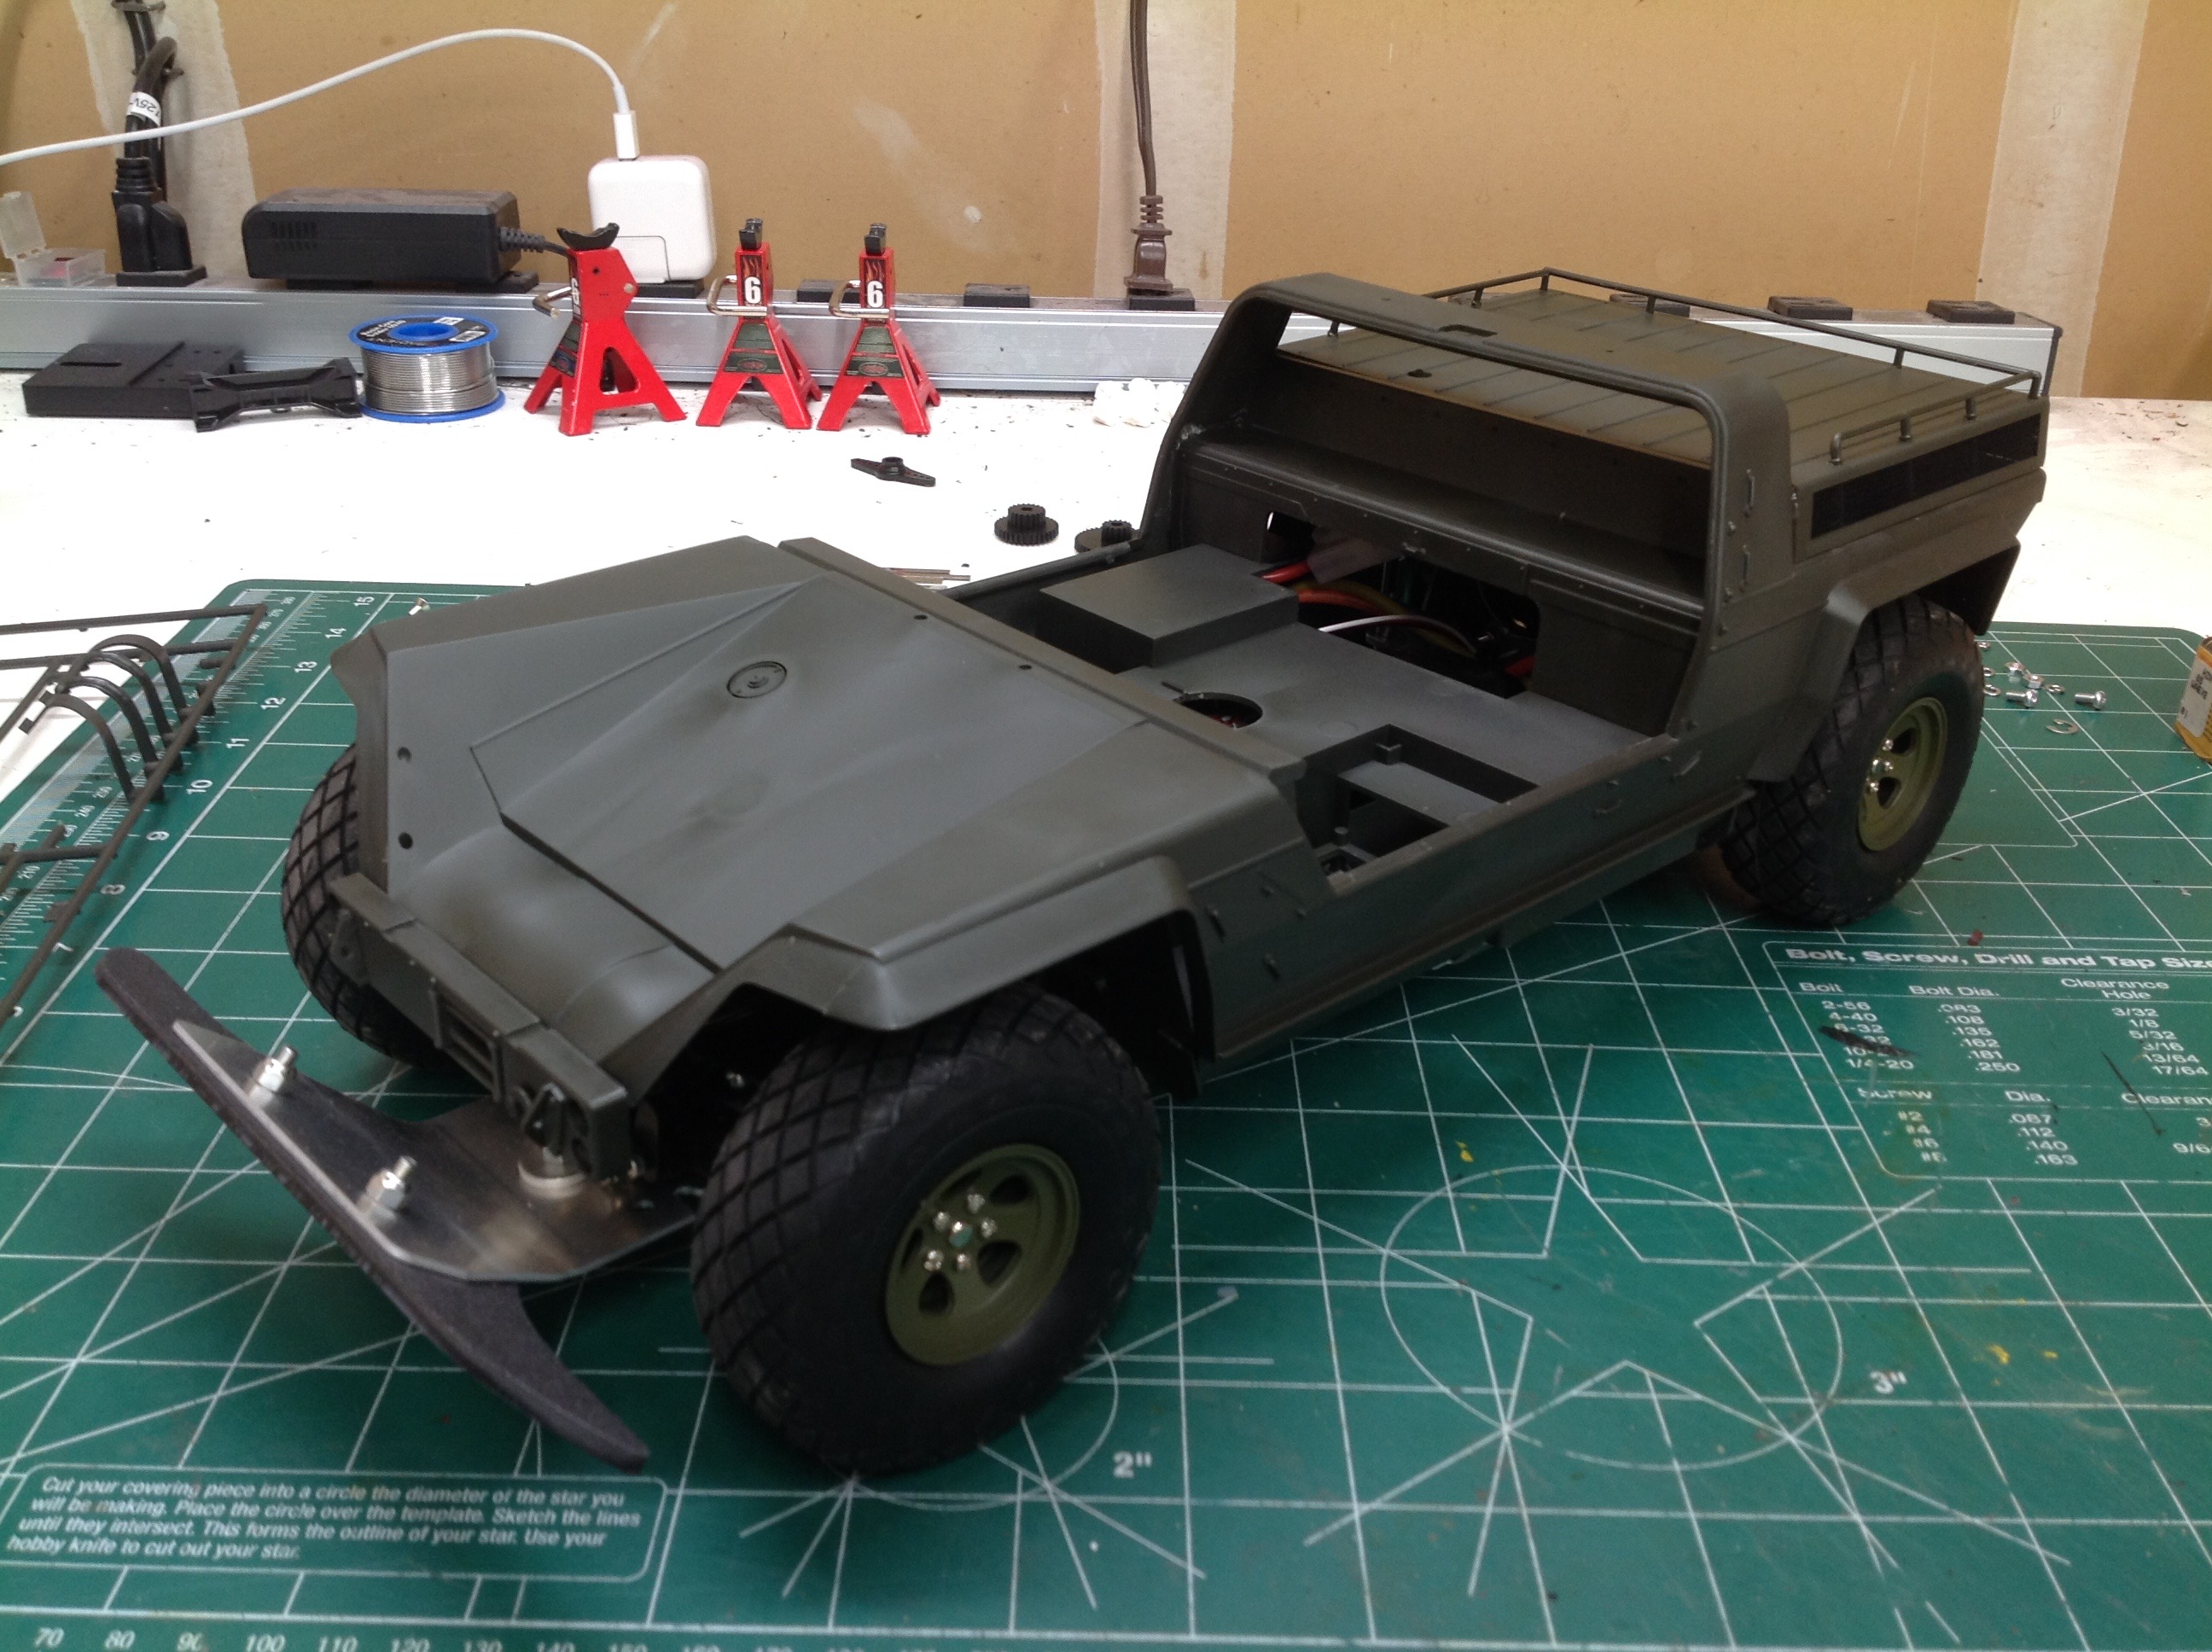
Building the body is a whole project in itself, and based on the photo
at left I'd say it probably has just as many parts as the chassis.
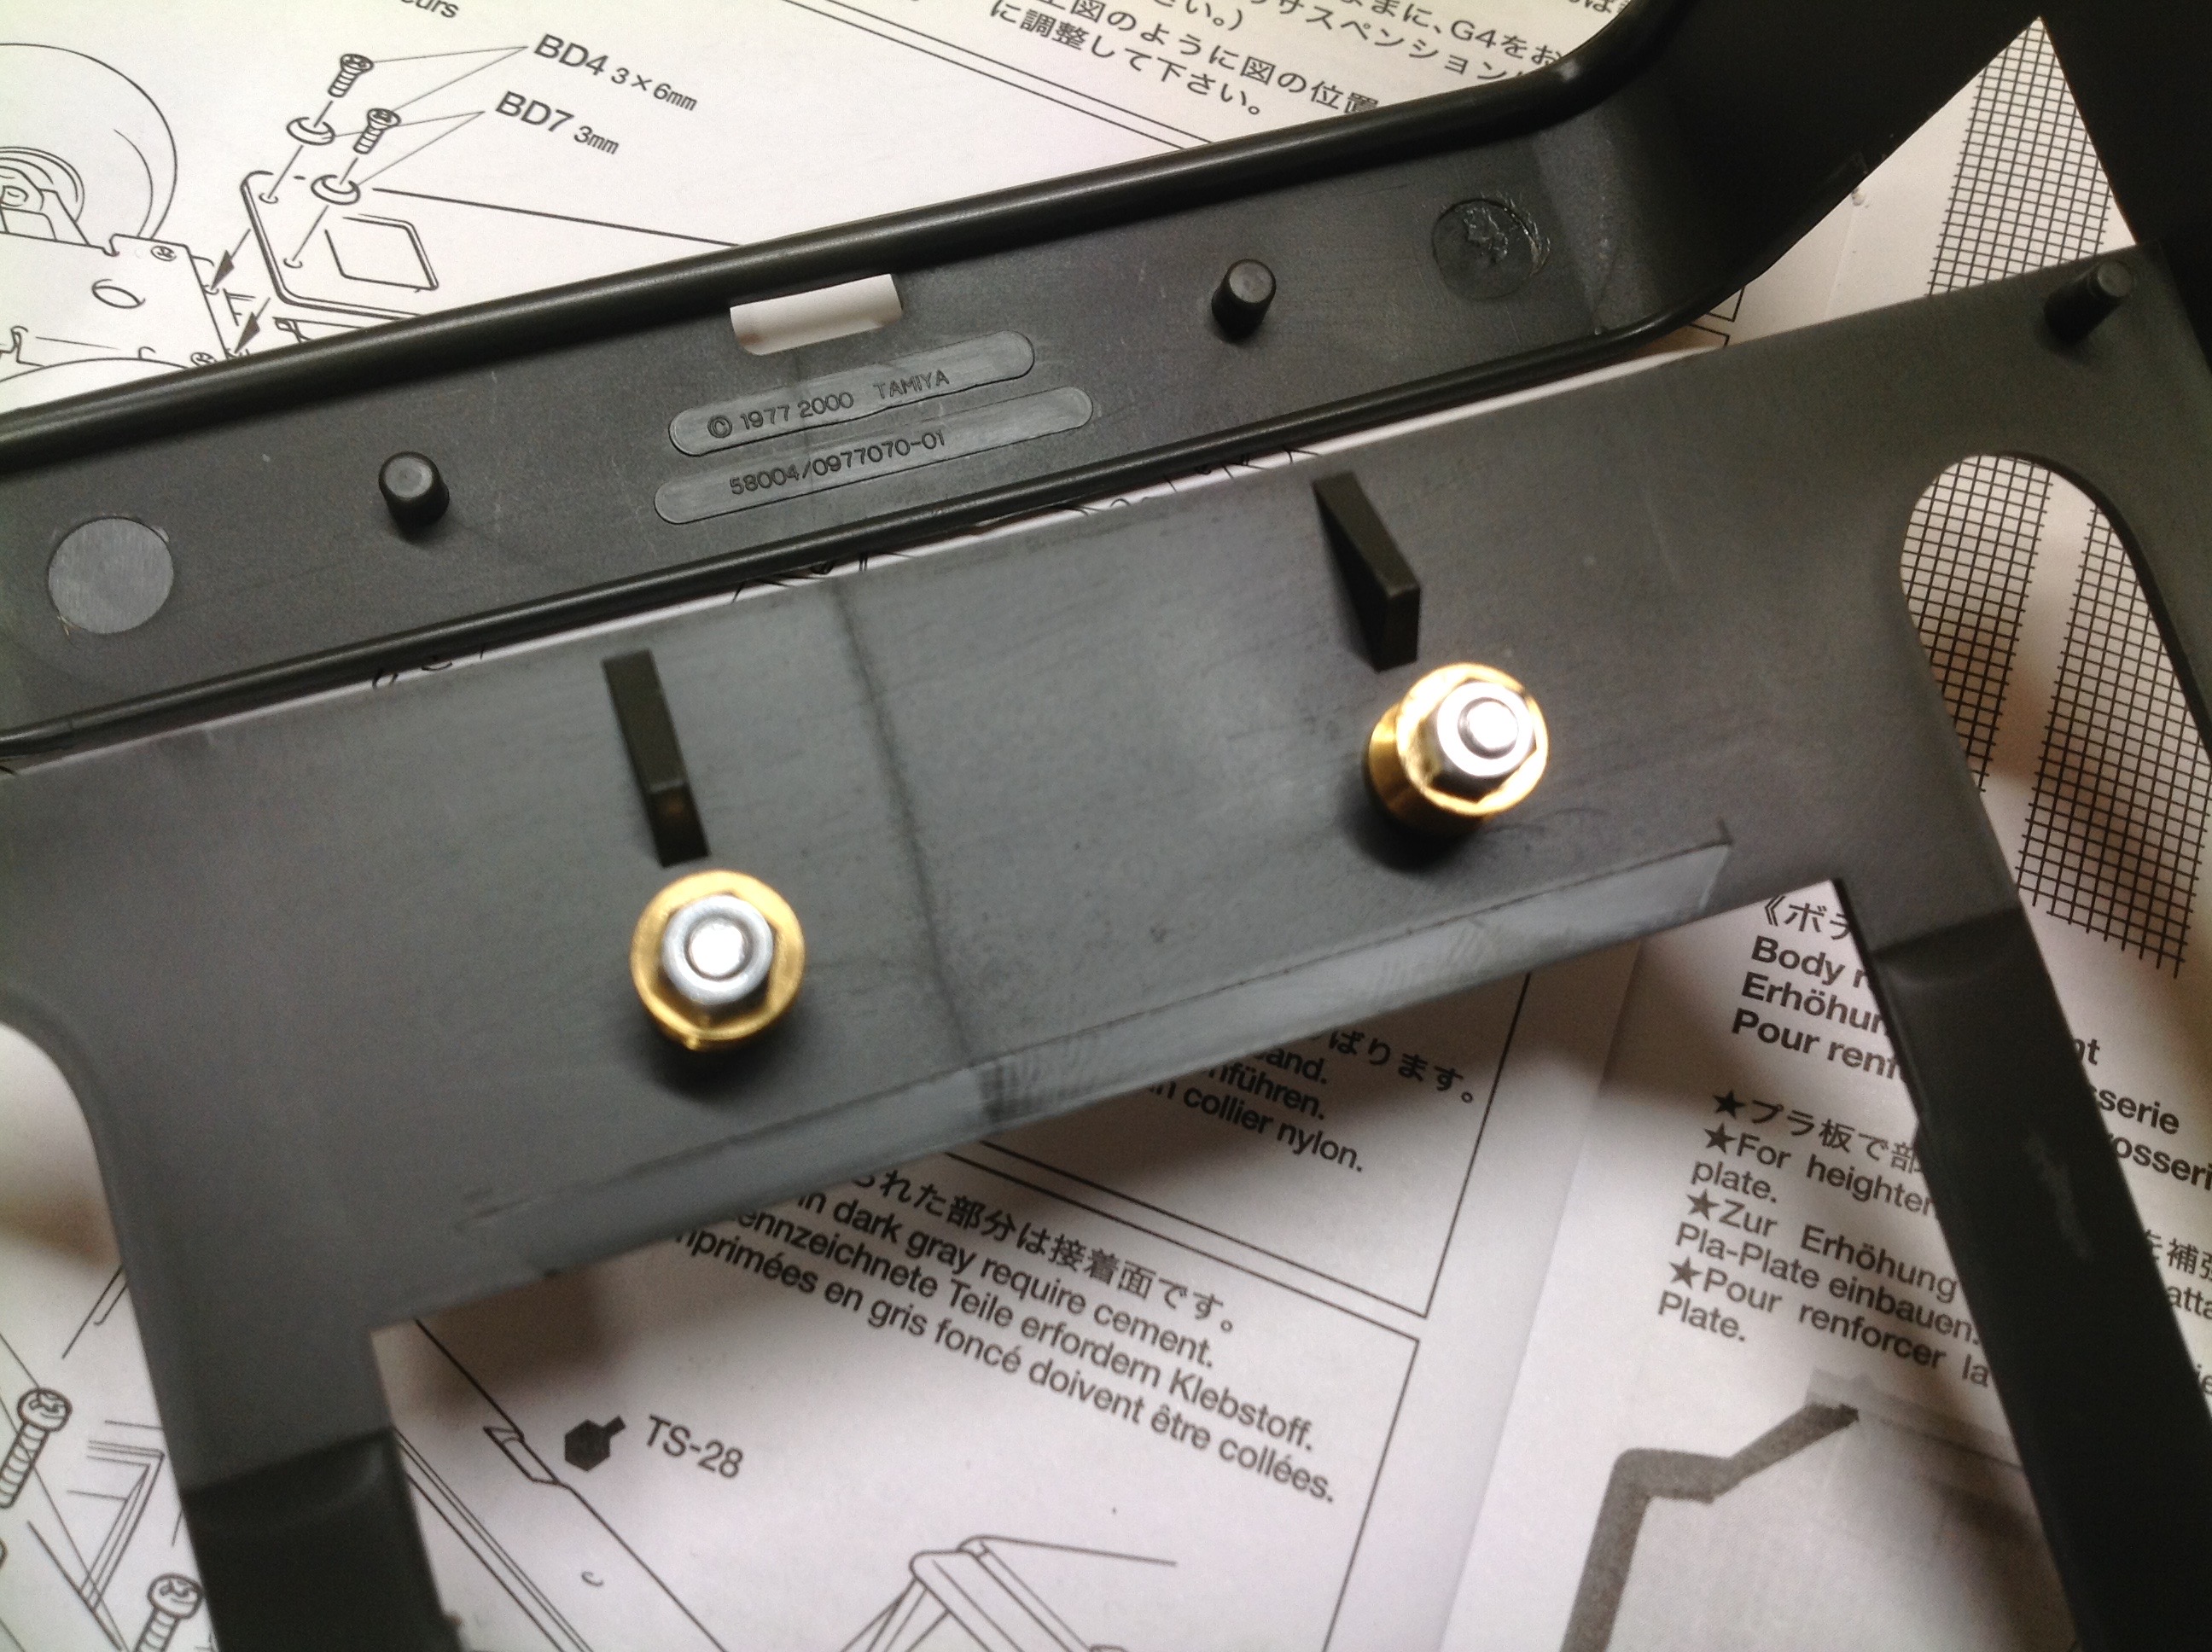
The photo at right shows a couple of brass hourglass buttons which slip
into slots on the chassis above the motor to lock the rear of the
body. The front uses similar buttons which lock to the cam system
described earlier. Note the copyright date on the body showing both 1977 and 2000.
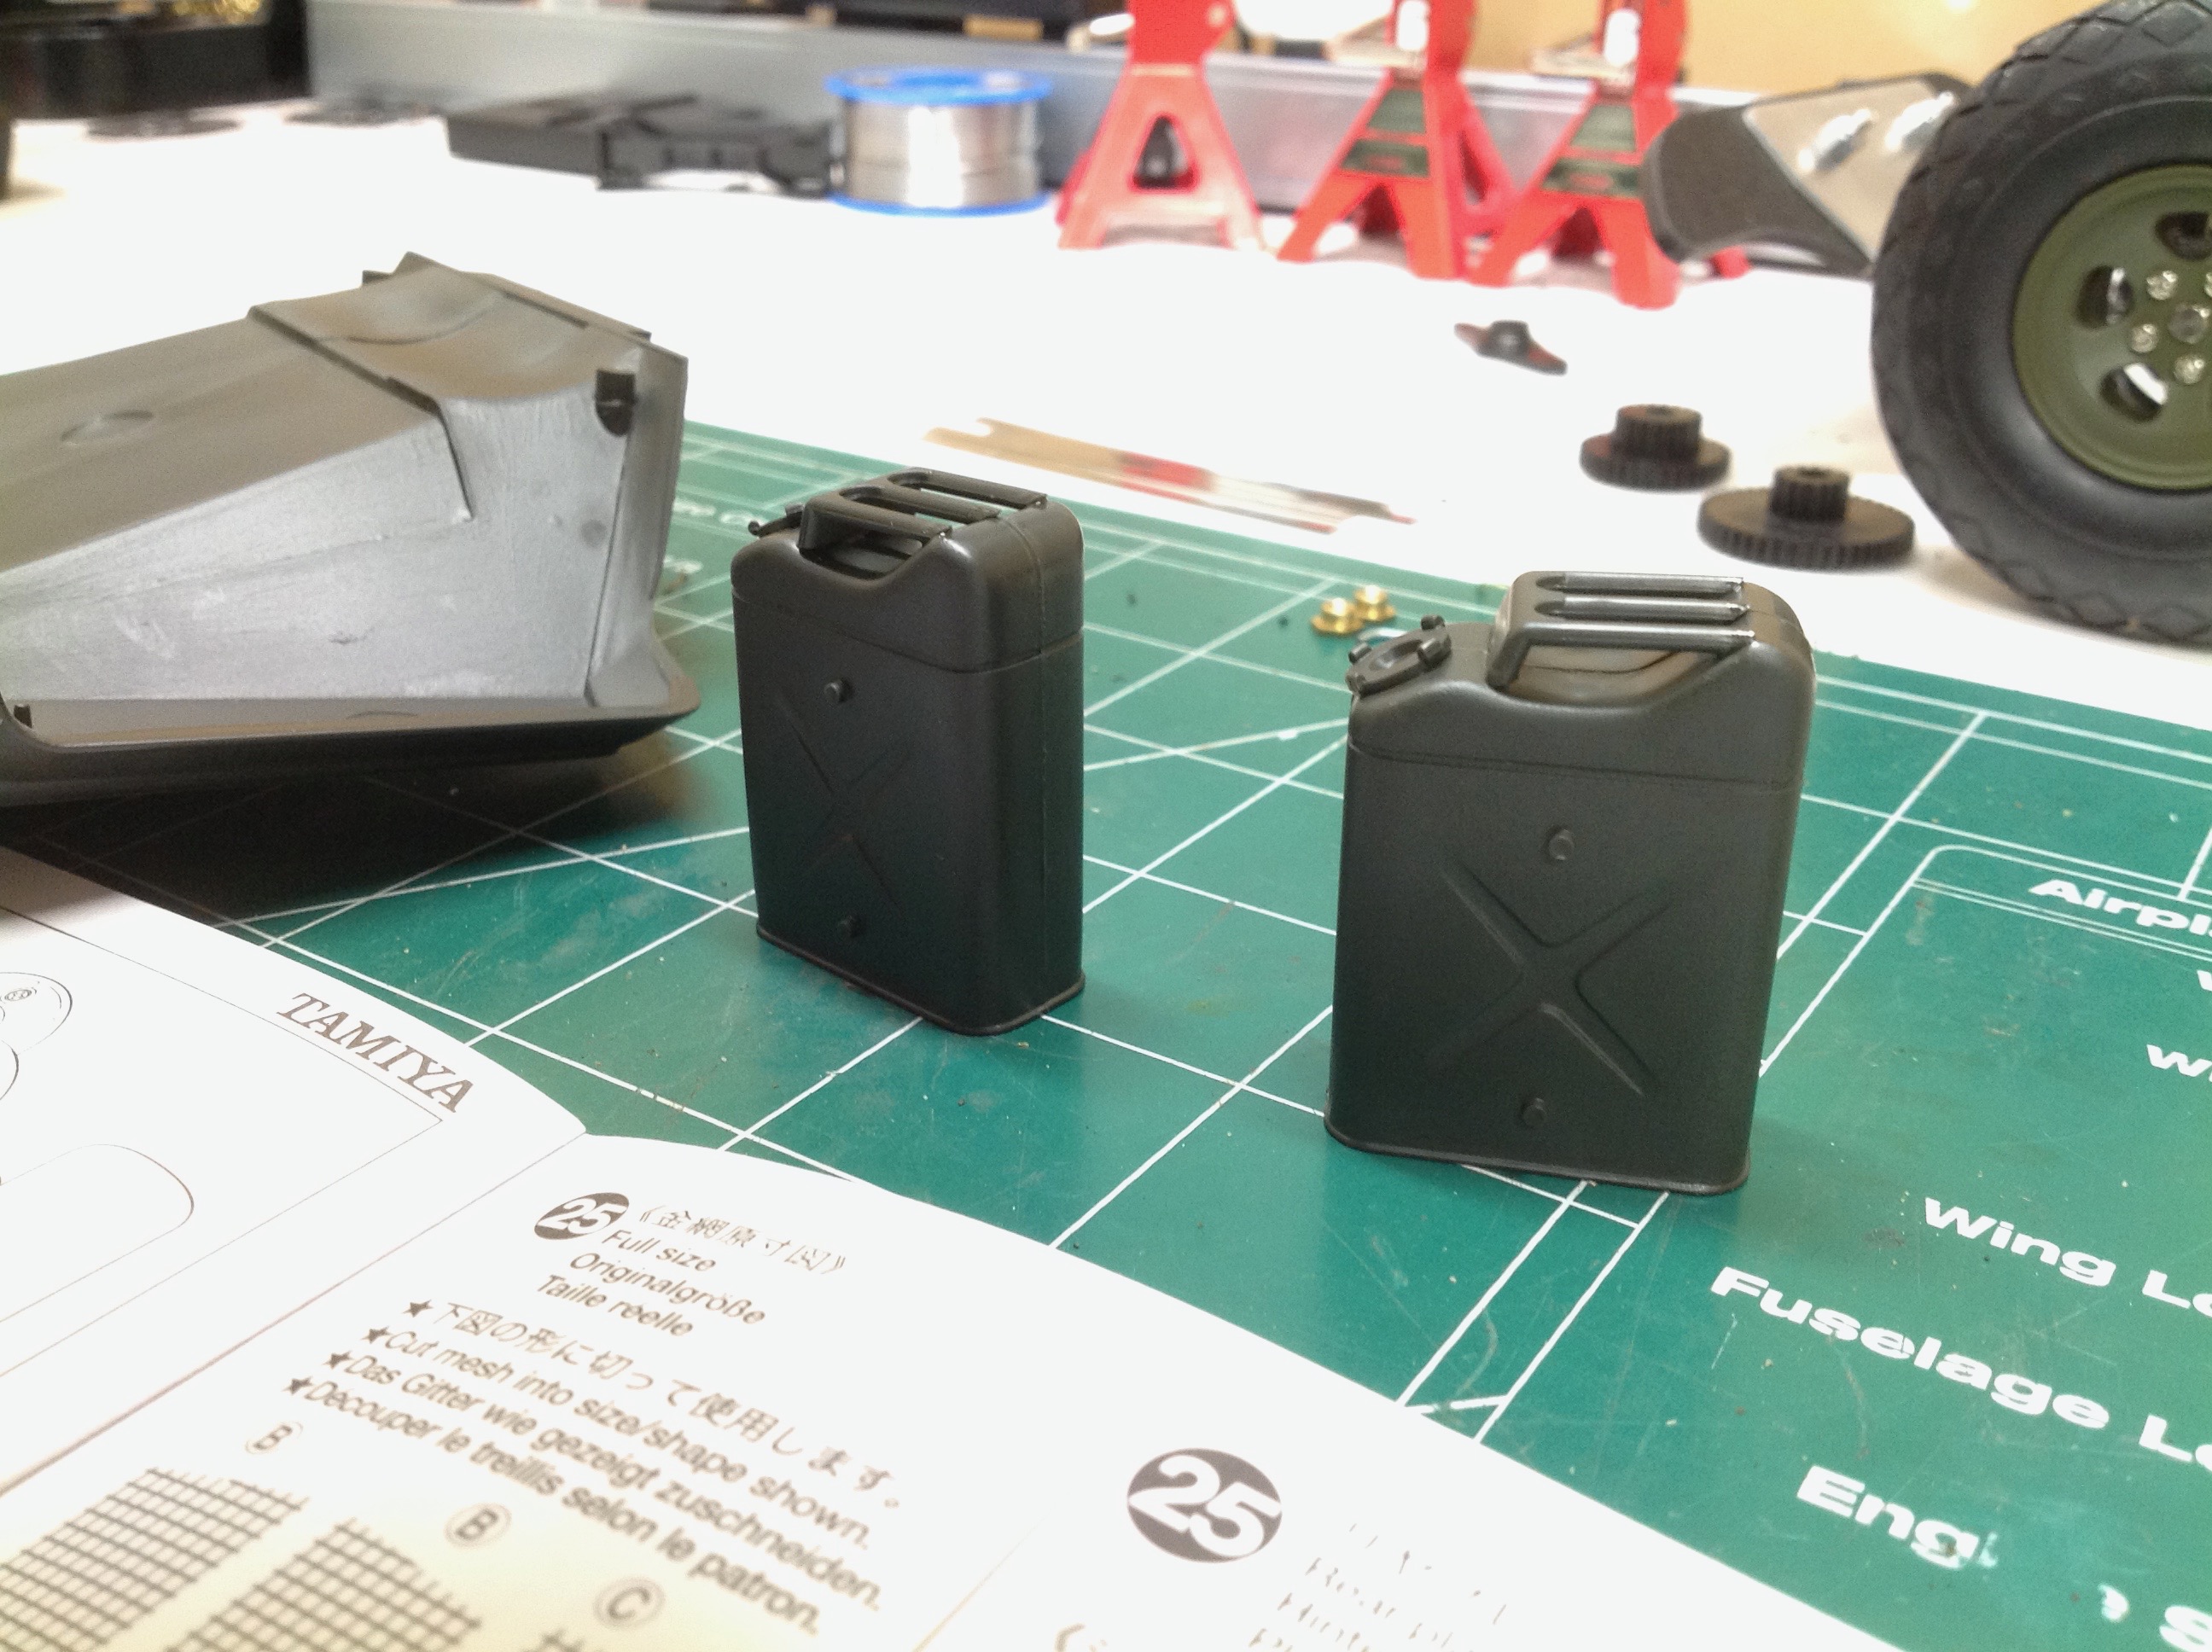
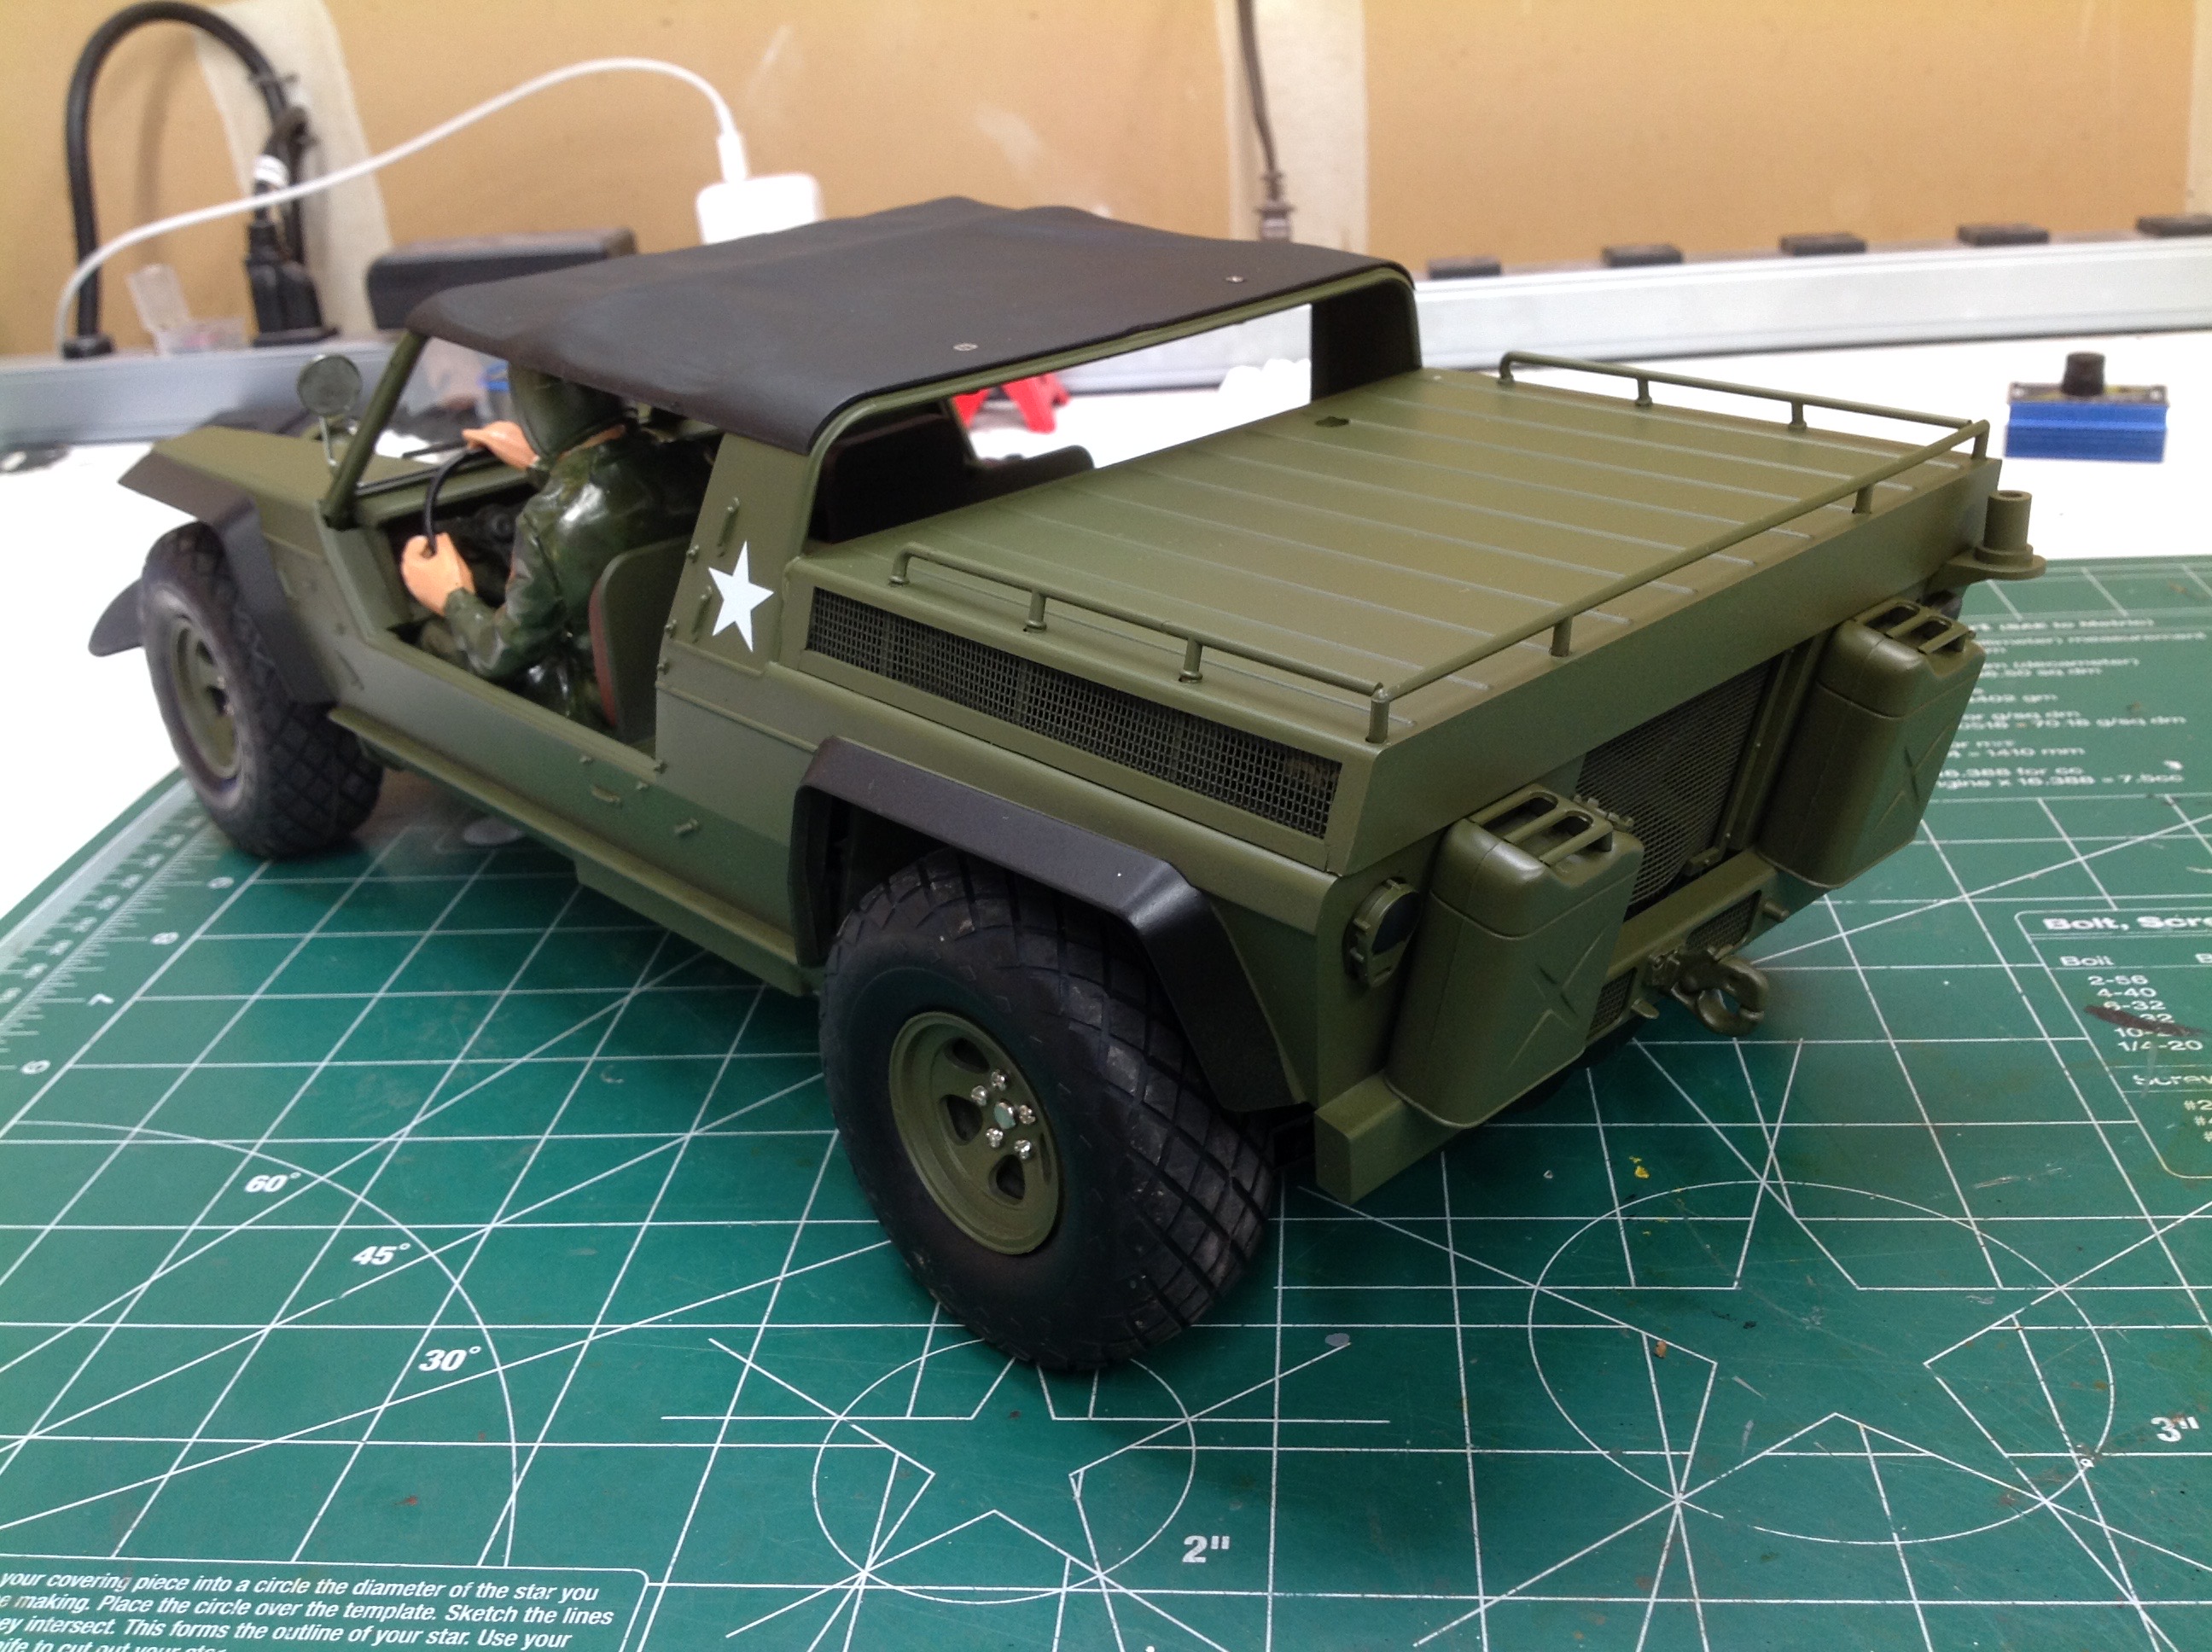
Here are some of the details of the body. The jerry cans are mode
of four individual parts cemented together: two sides, a handle, and a
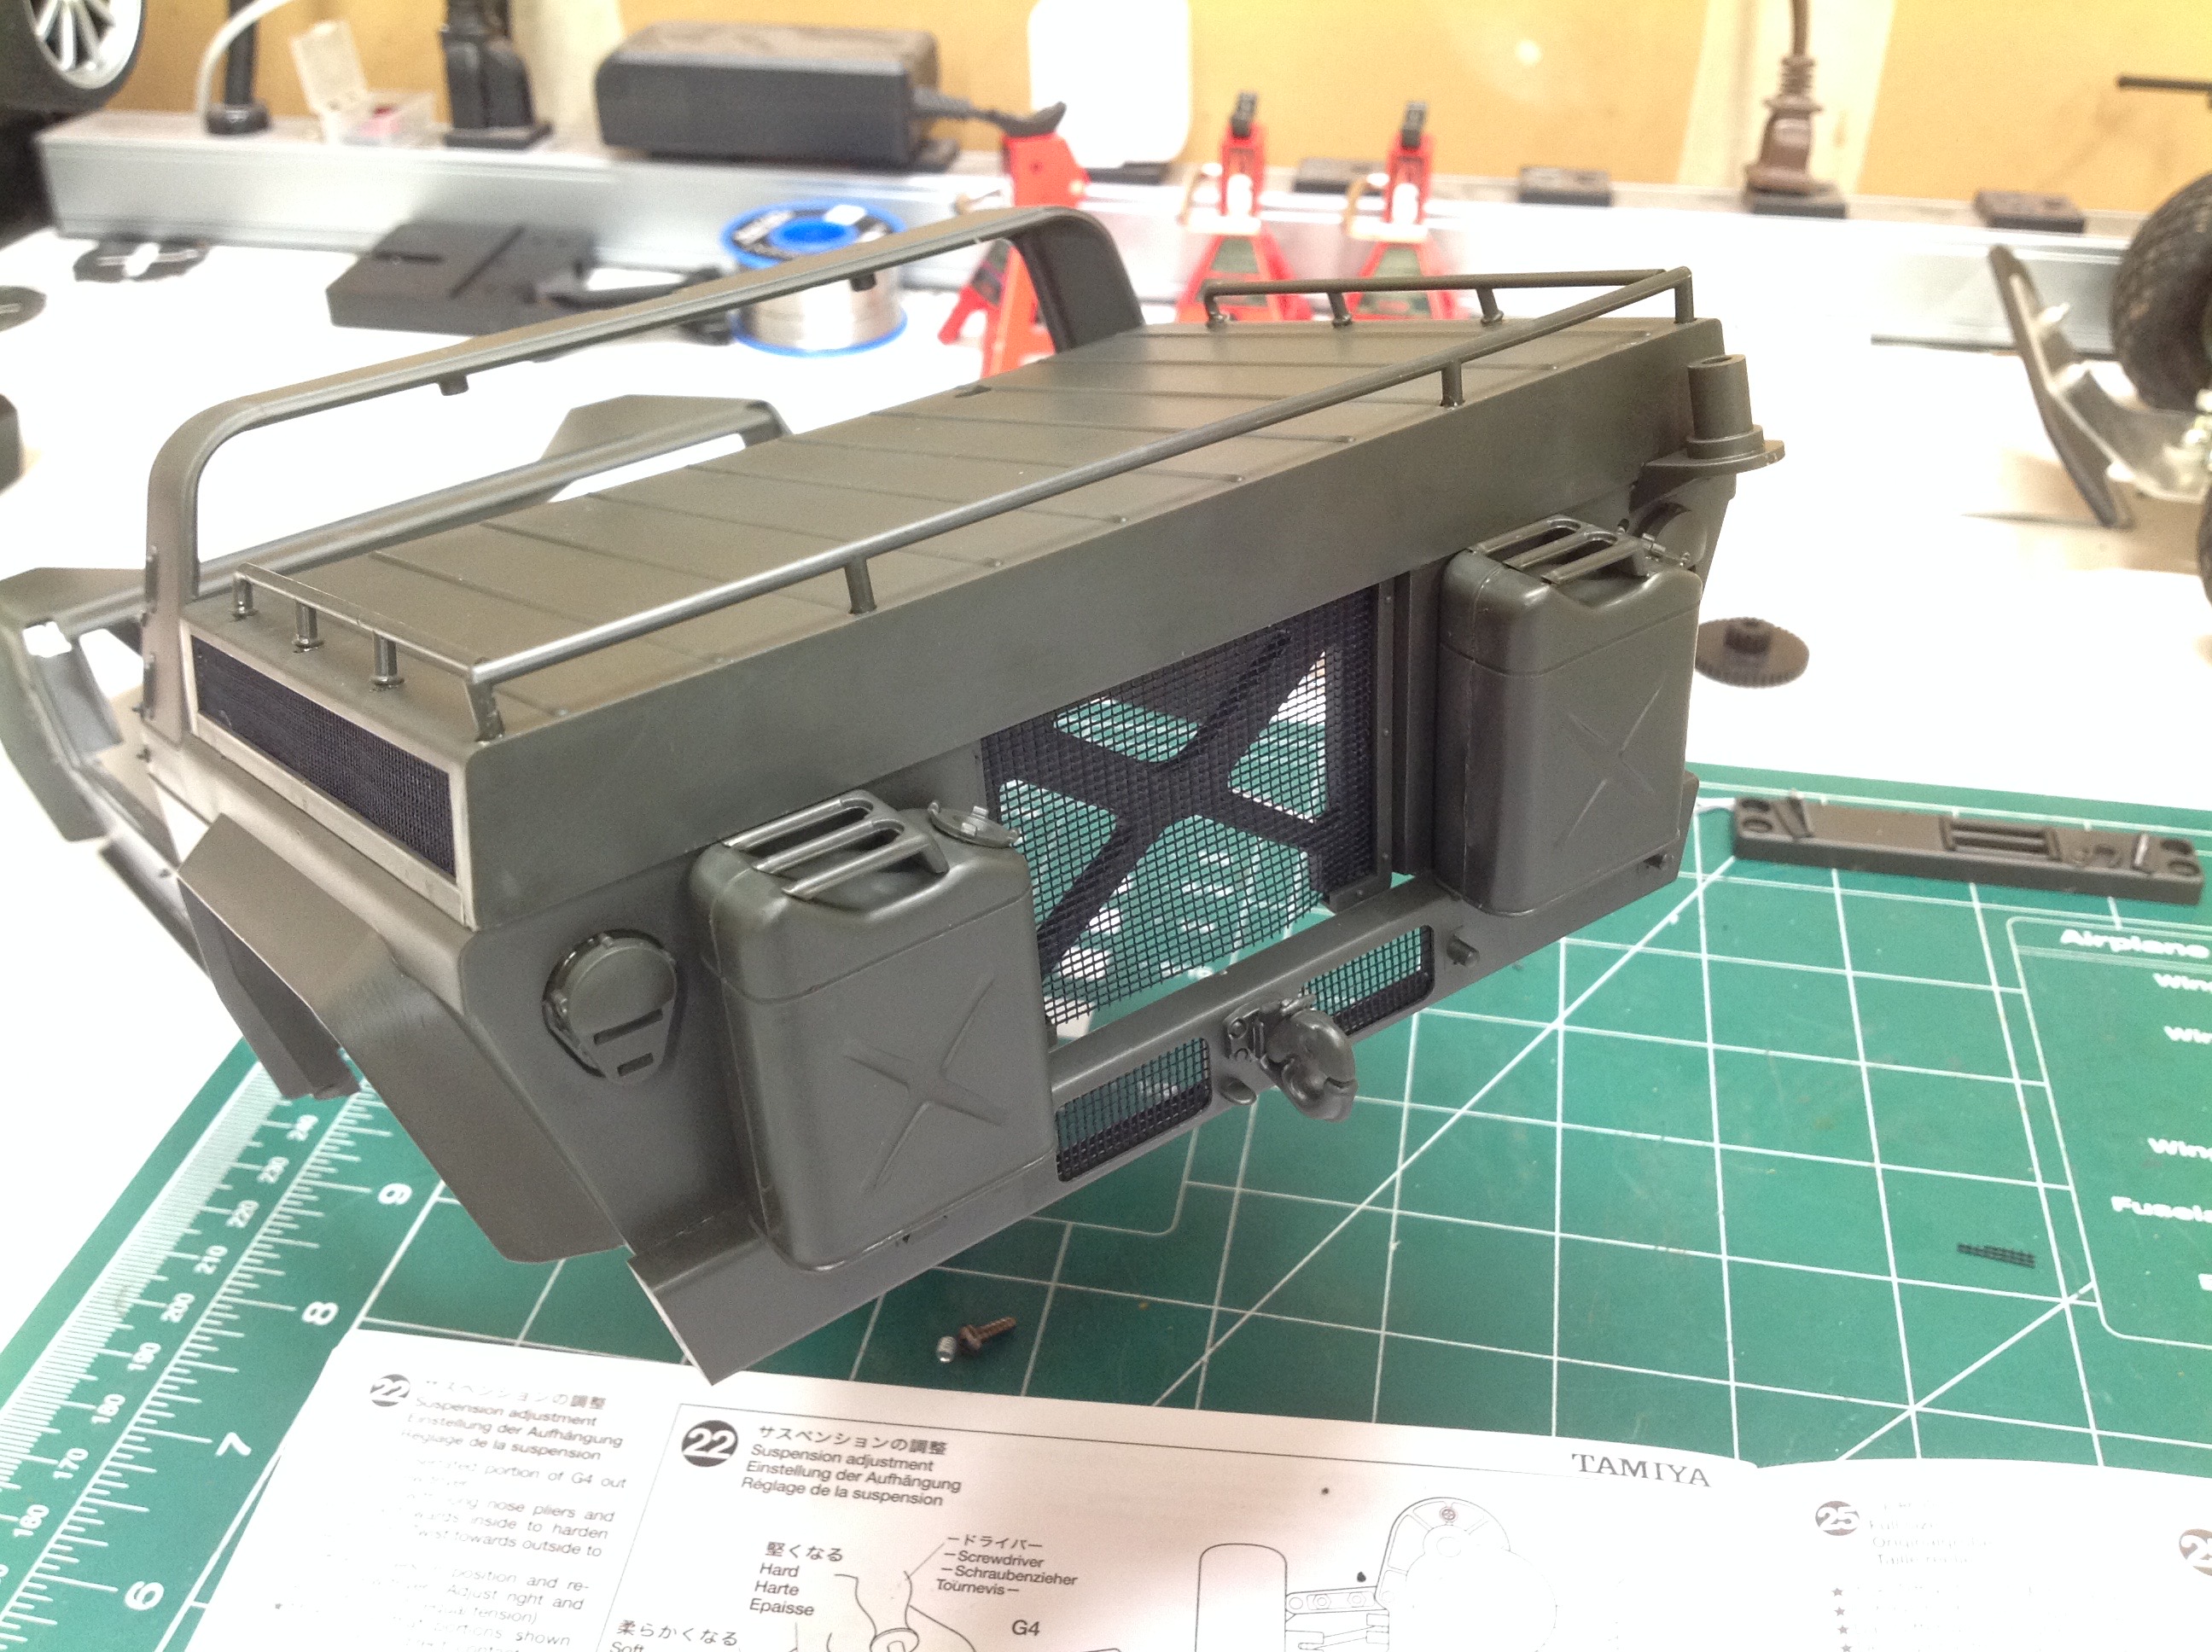
cap. These are attached to the rear of the body. In the
right hand image you can also see the mesh which is used for the
grille. Remember that the XR311 has a rear engine so this would be
the radiator. You can also see the pintle hitch. Don't tow
anything with it though; it is just glued on. The rails around the
engine cover are another detail made of tiny parts.
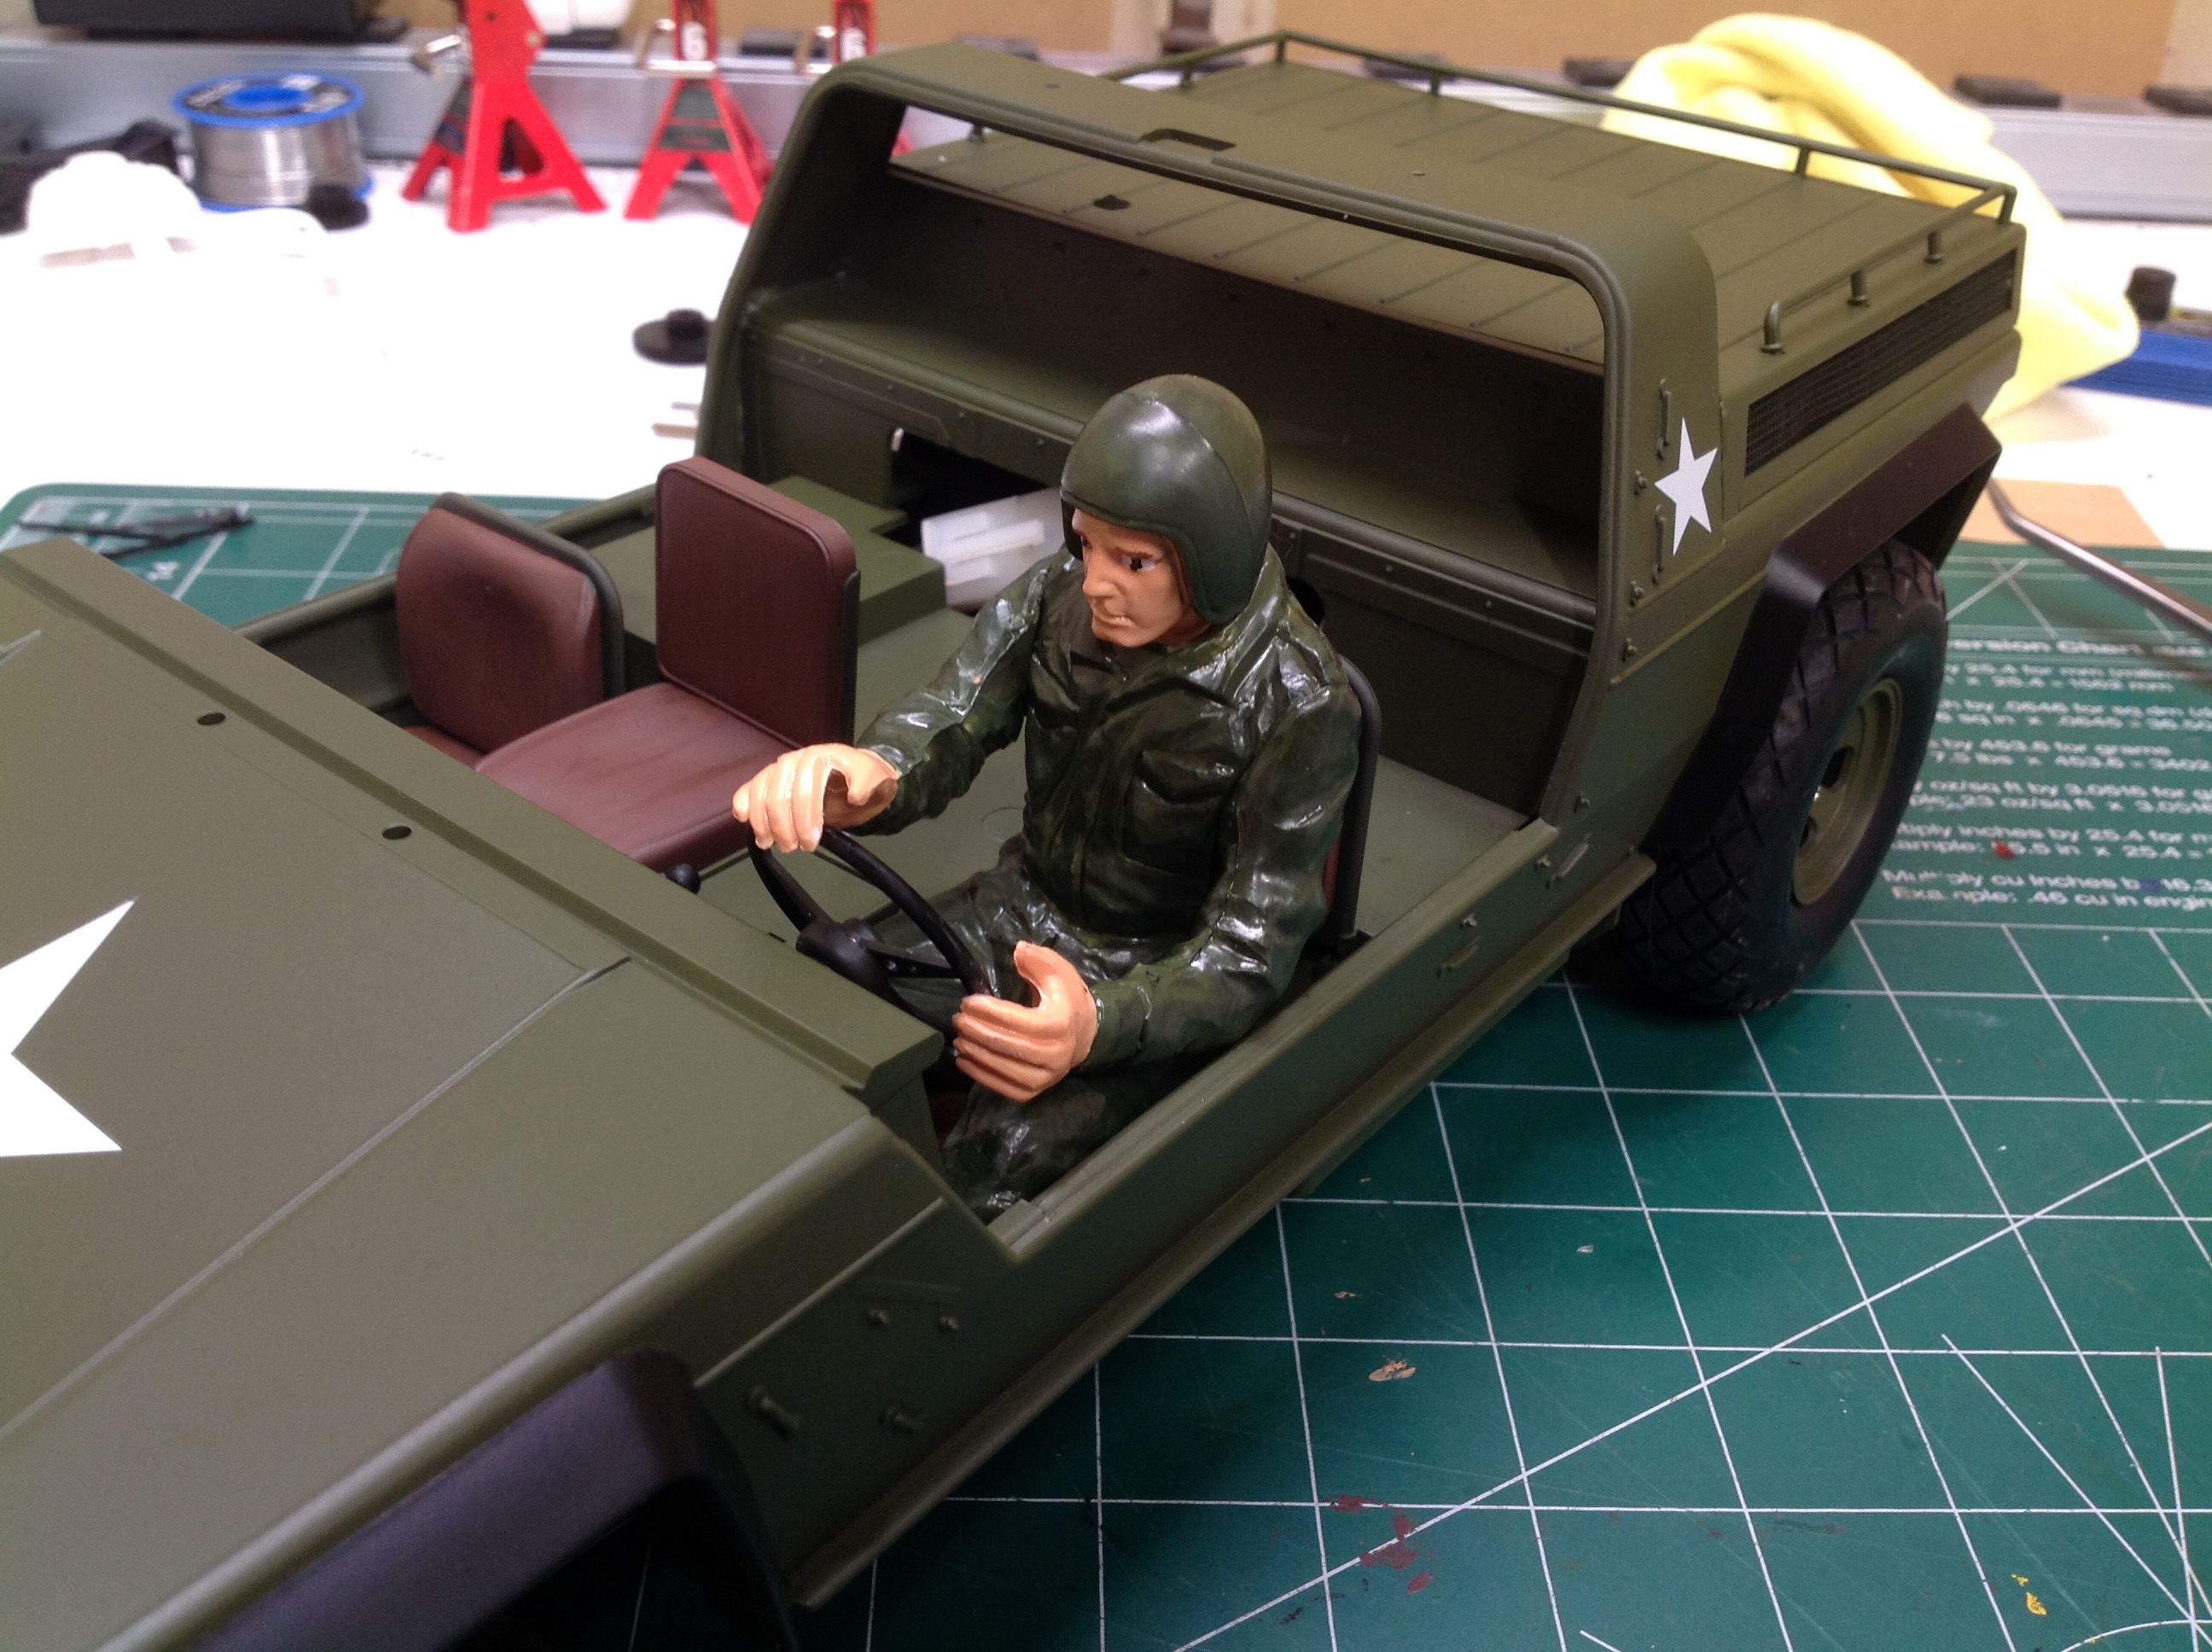
I started by painting the whole thing in olive green, but there is still
quite a bit of detailing to do. The fenders, for example, need to
be flat black. So does the area just behind the front
bumper. I did all of that with masking and black spray.
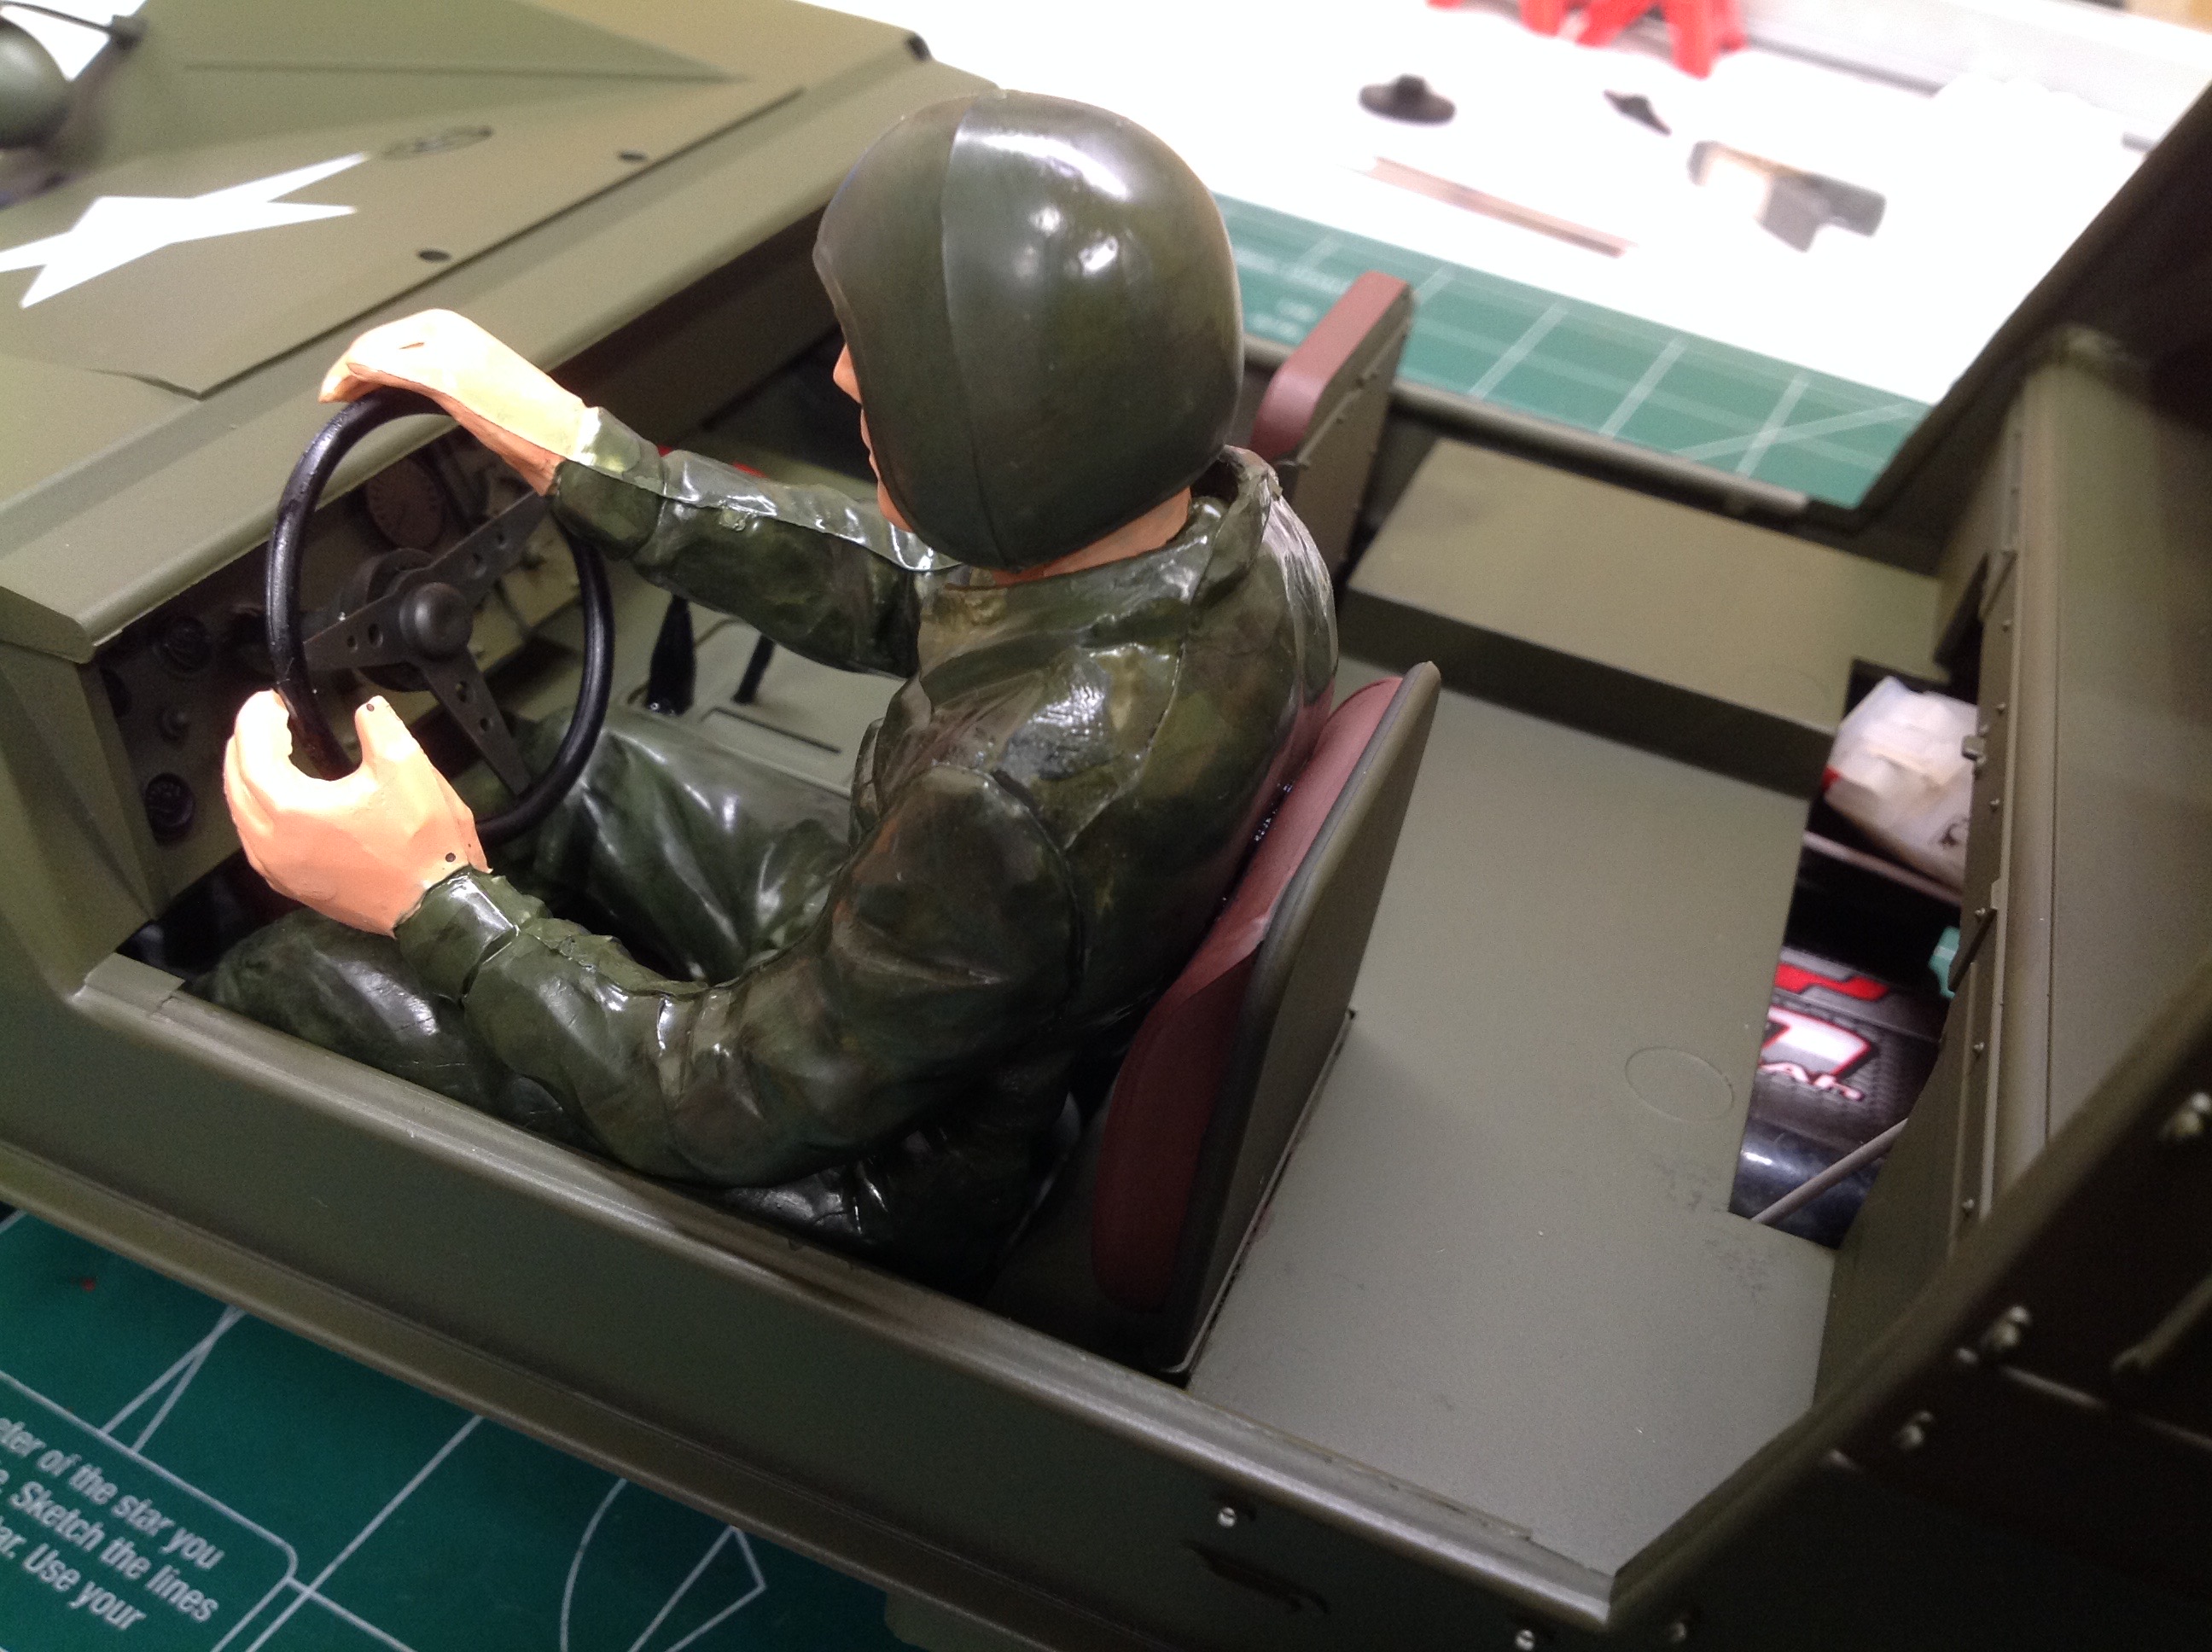
The realistic driver has to be painted as do the dash board and the
seats. Note that this vehicle seats 3 across. I didn't have
any flat green paint so the driver's clothes ended up shinier than I
would like. I solved this by going over everything with flat clear
at the end.
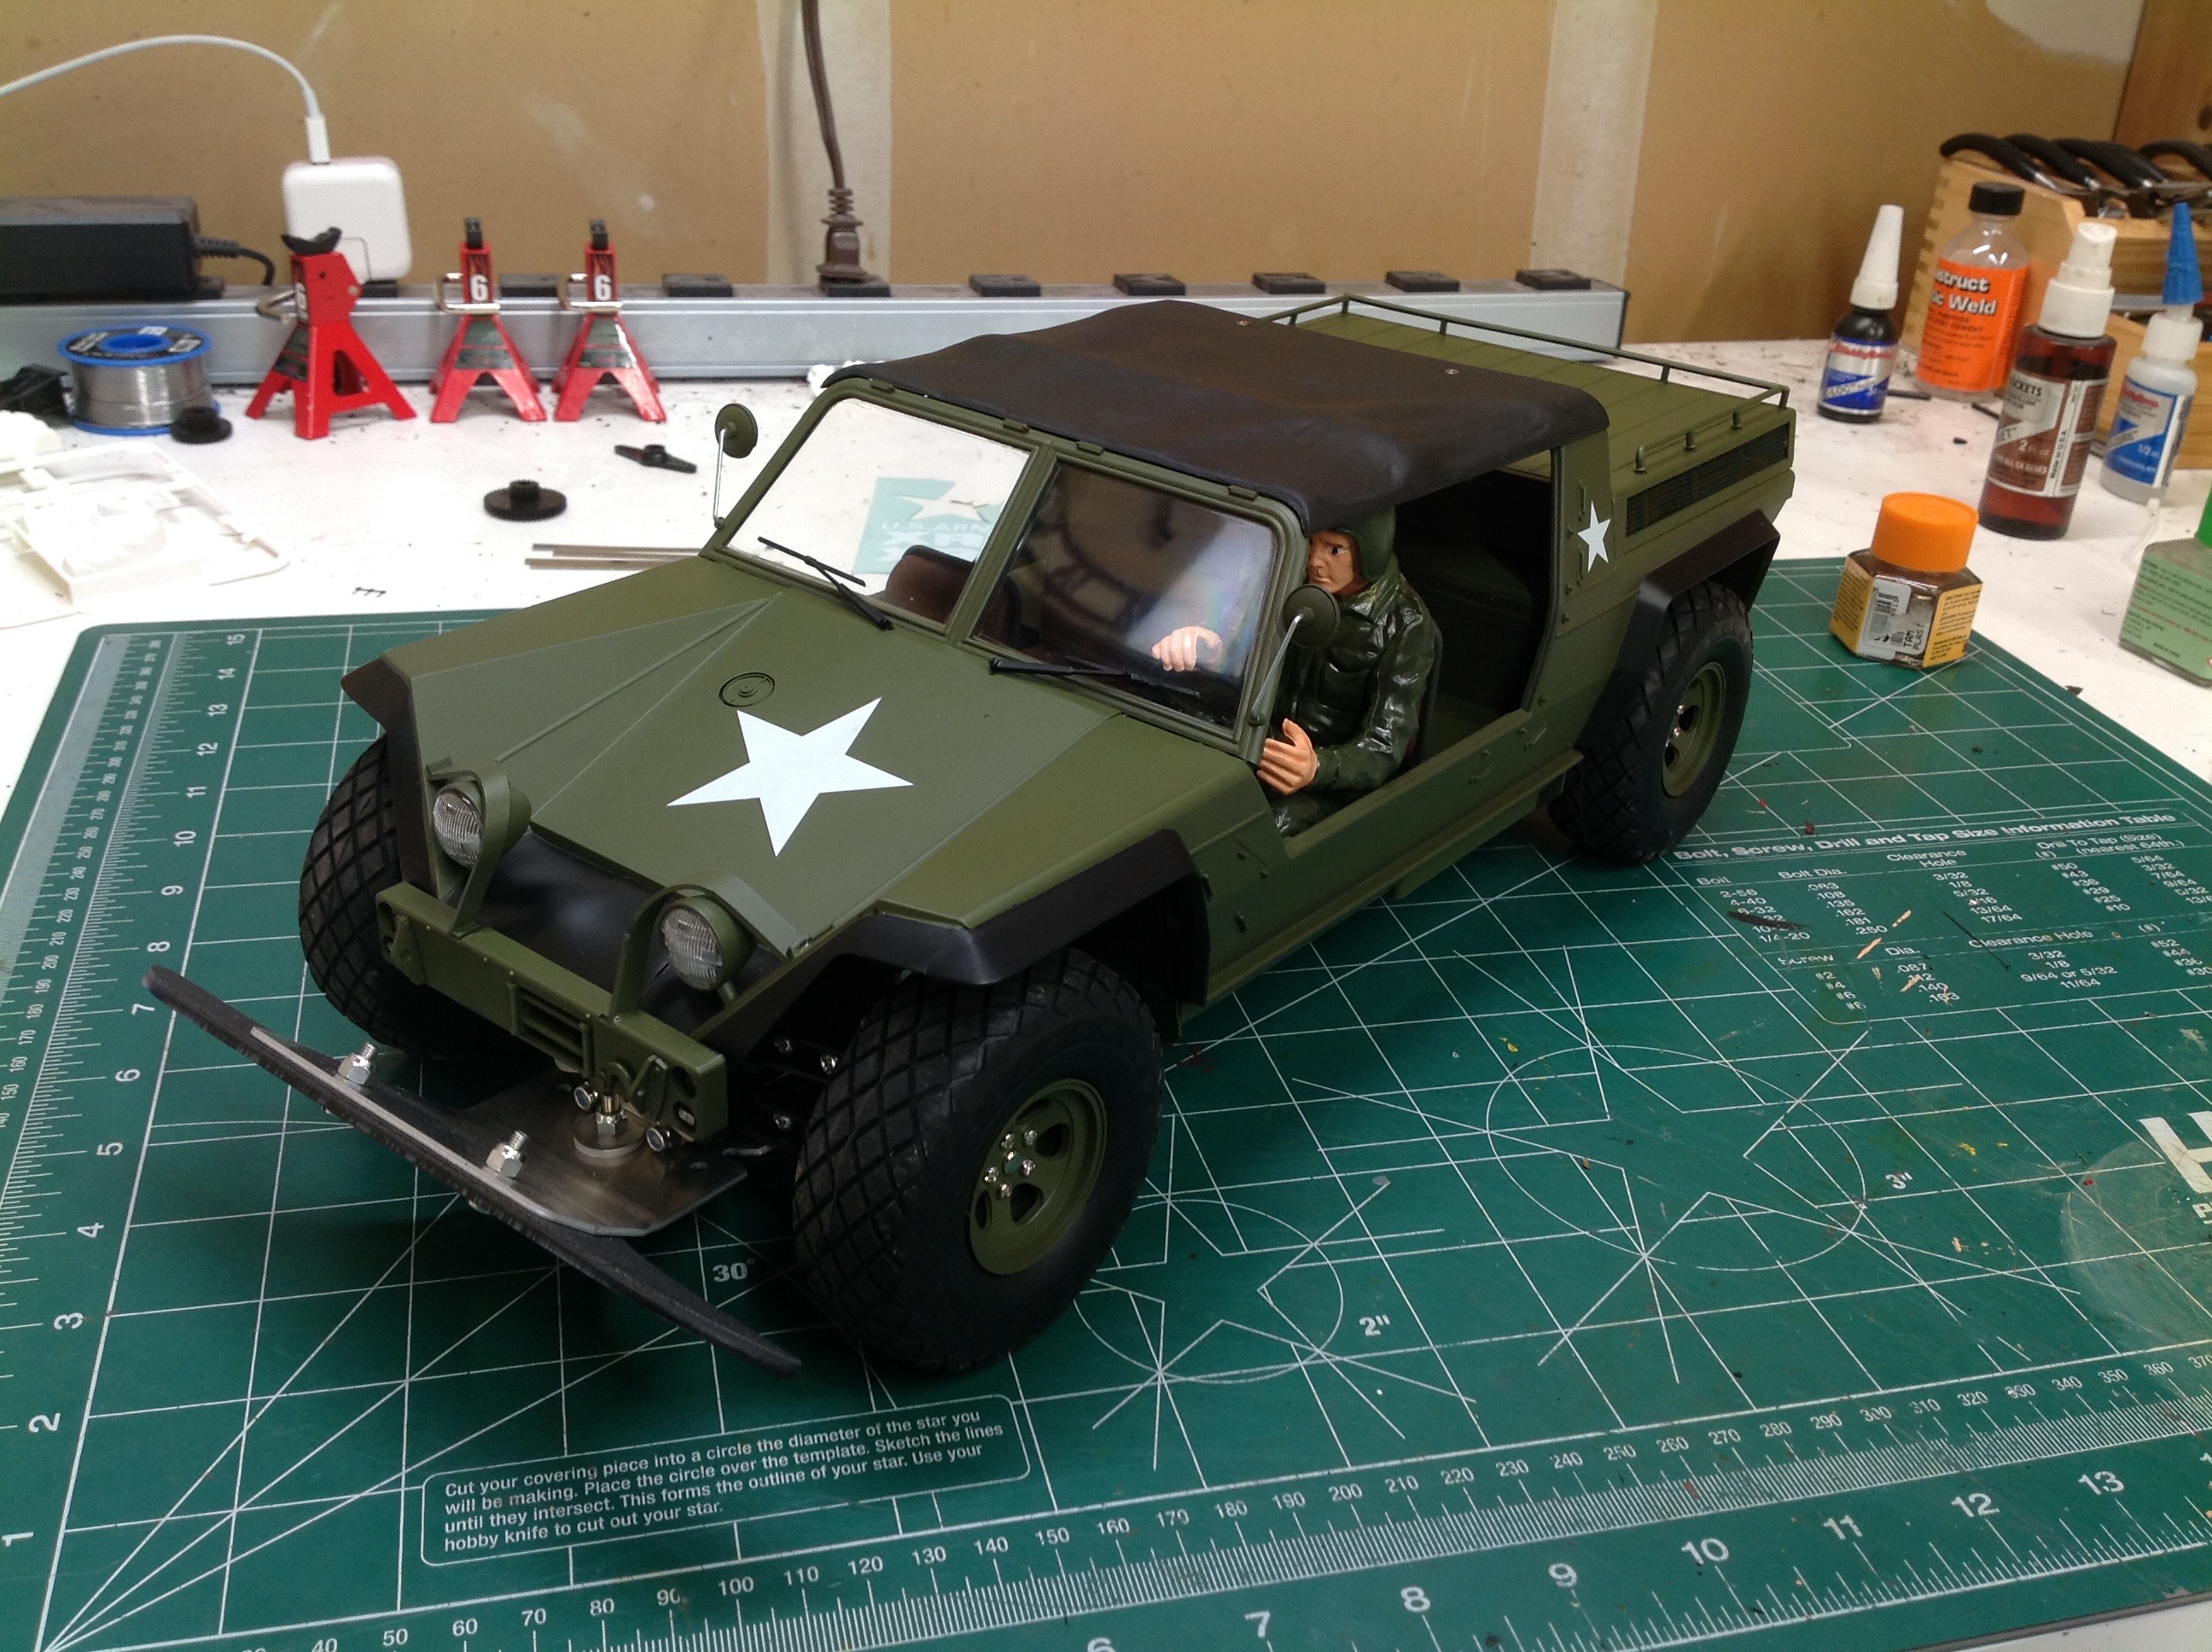
The final steps are to install the handful of stickers (I only used the
stars) and the soft top roof. It only looks like canvas; it is
actually hard plastic. It screws in to the back and is attached to
the windshield frame with double sided tape. Note that the front
window is not just open, there is a windshield in there. There are
wipers and mirrors as well. The mirrors are probably the most
fragile part of the installation because it is hard to glue metal to
plastic securely. The guards around the headlights are also very
difficult to install because there are no tabs for them to slot into so
they just mount to the surface.
©2019 Eric Albrecht