TW-715 Project
Page 6: Building the Body
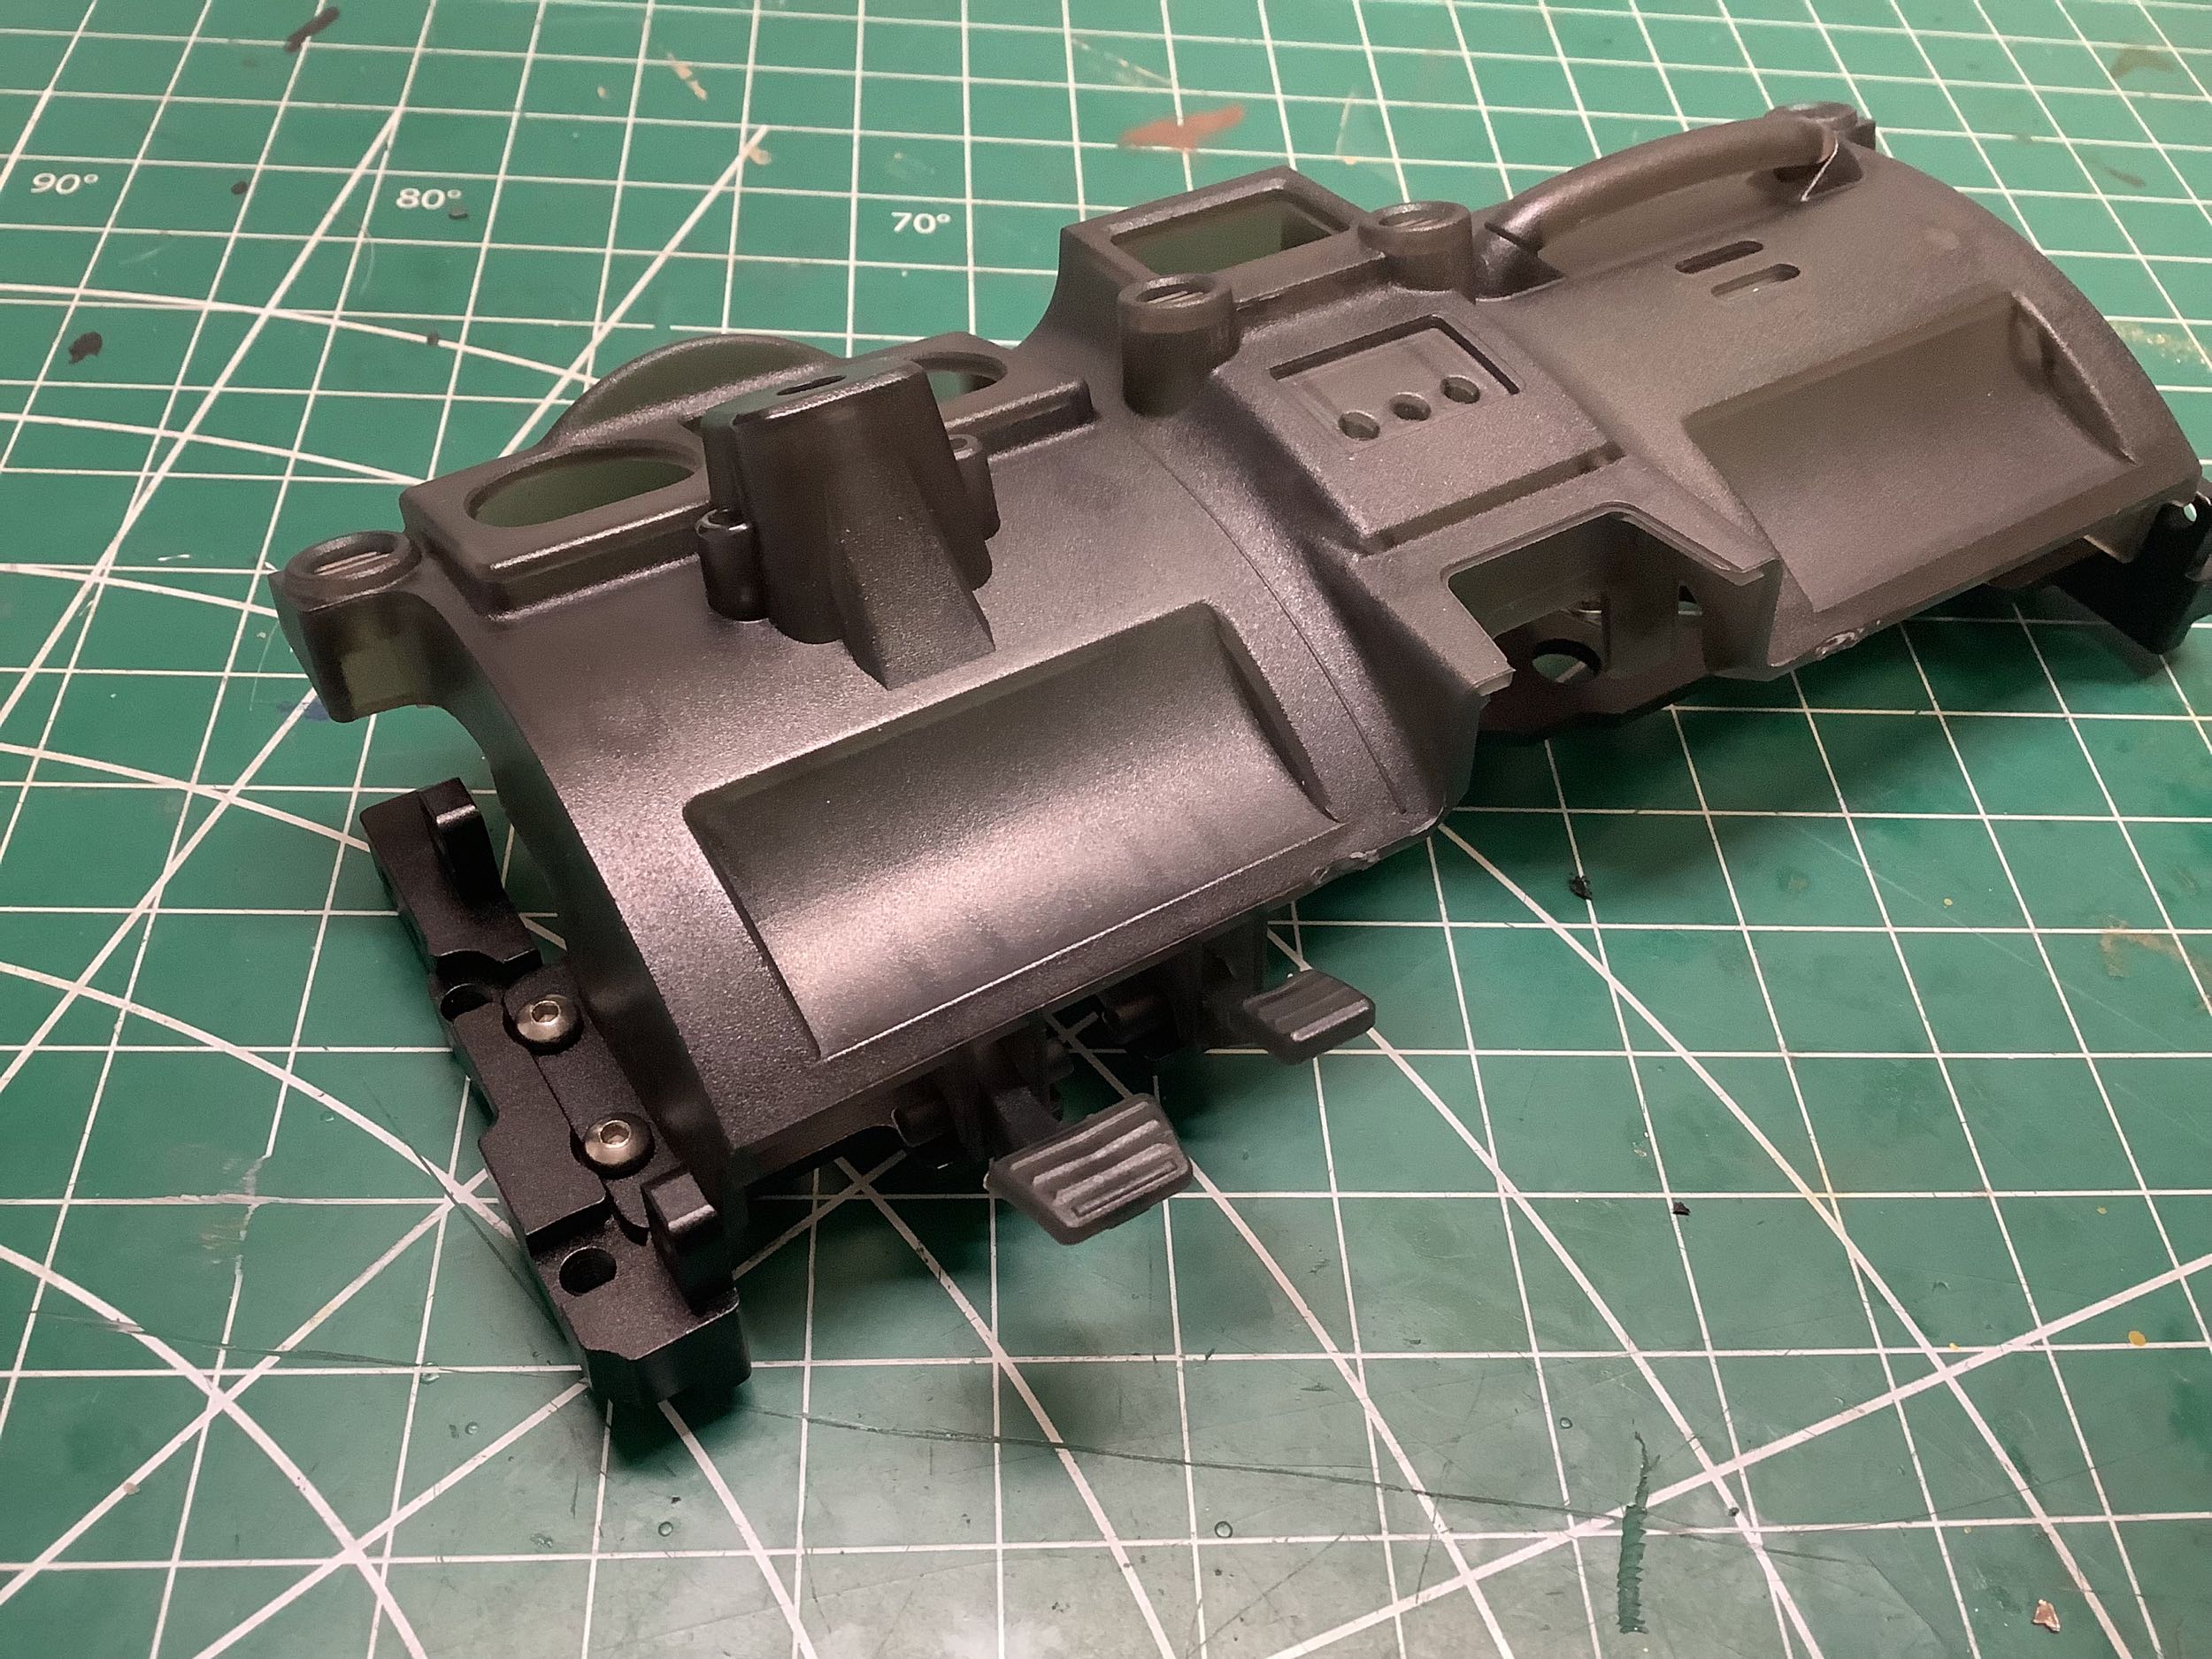
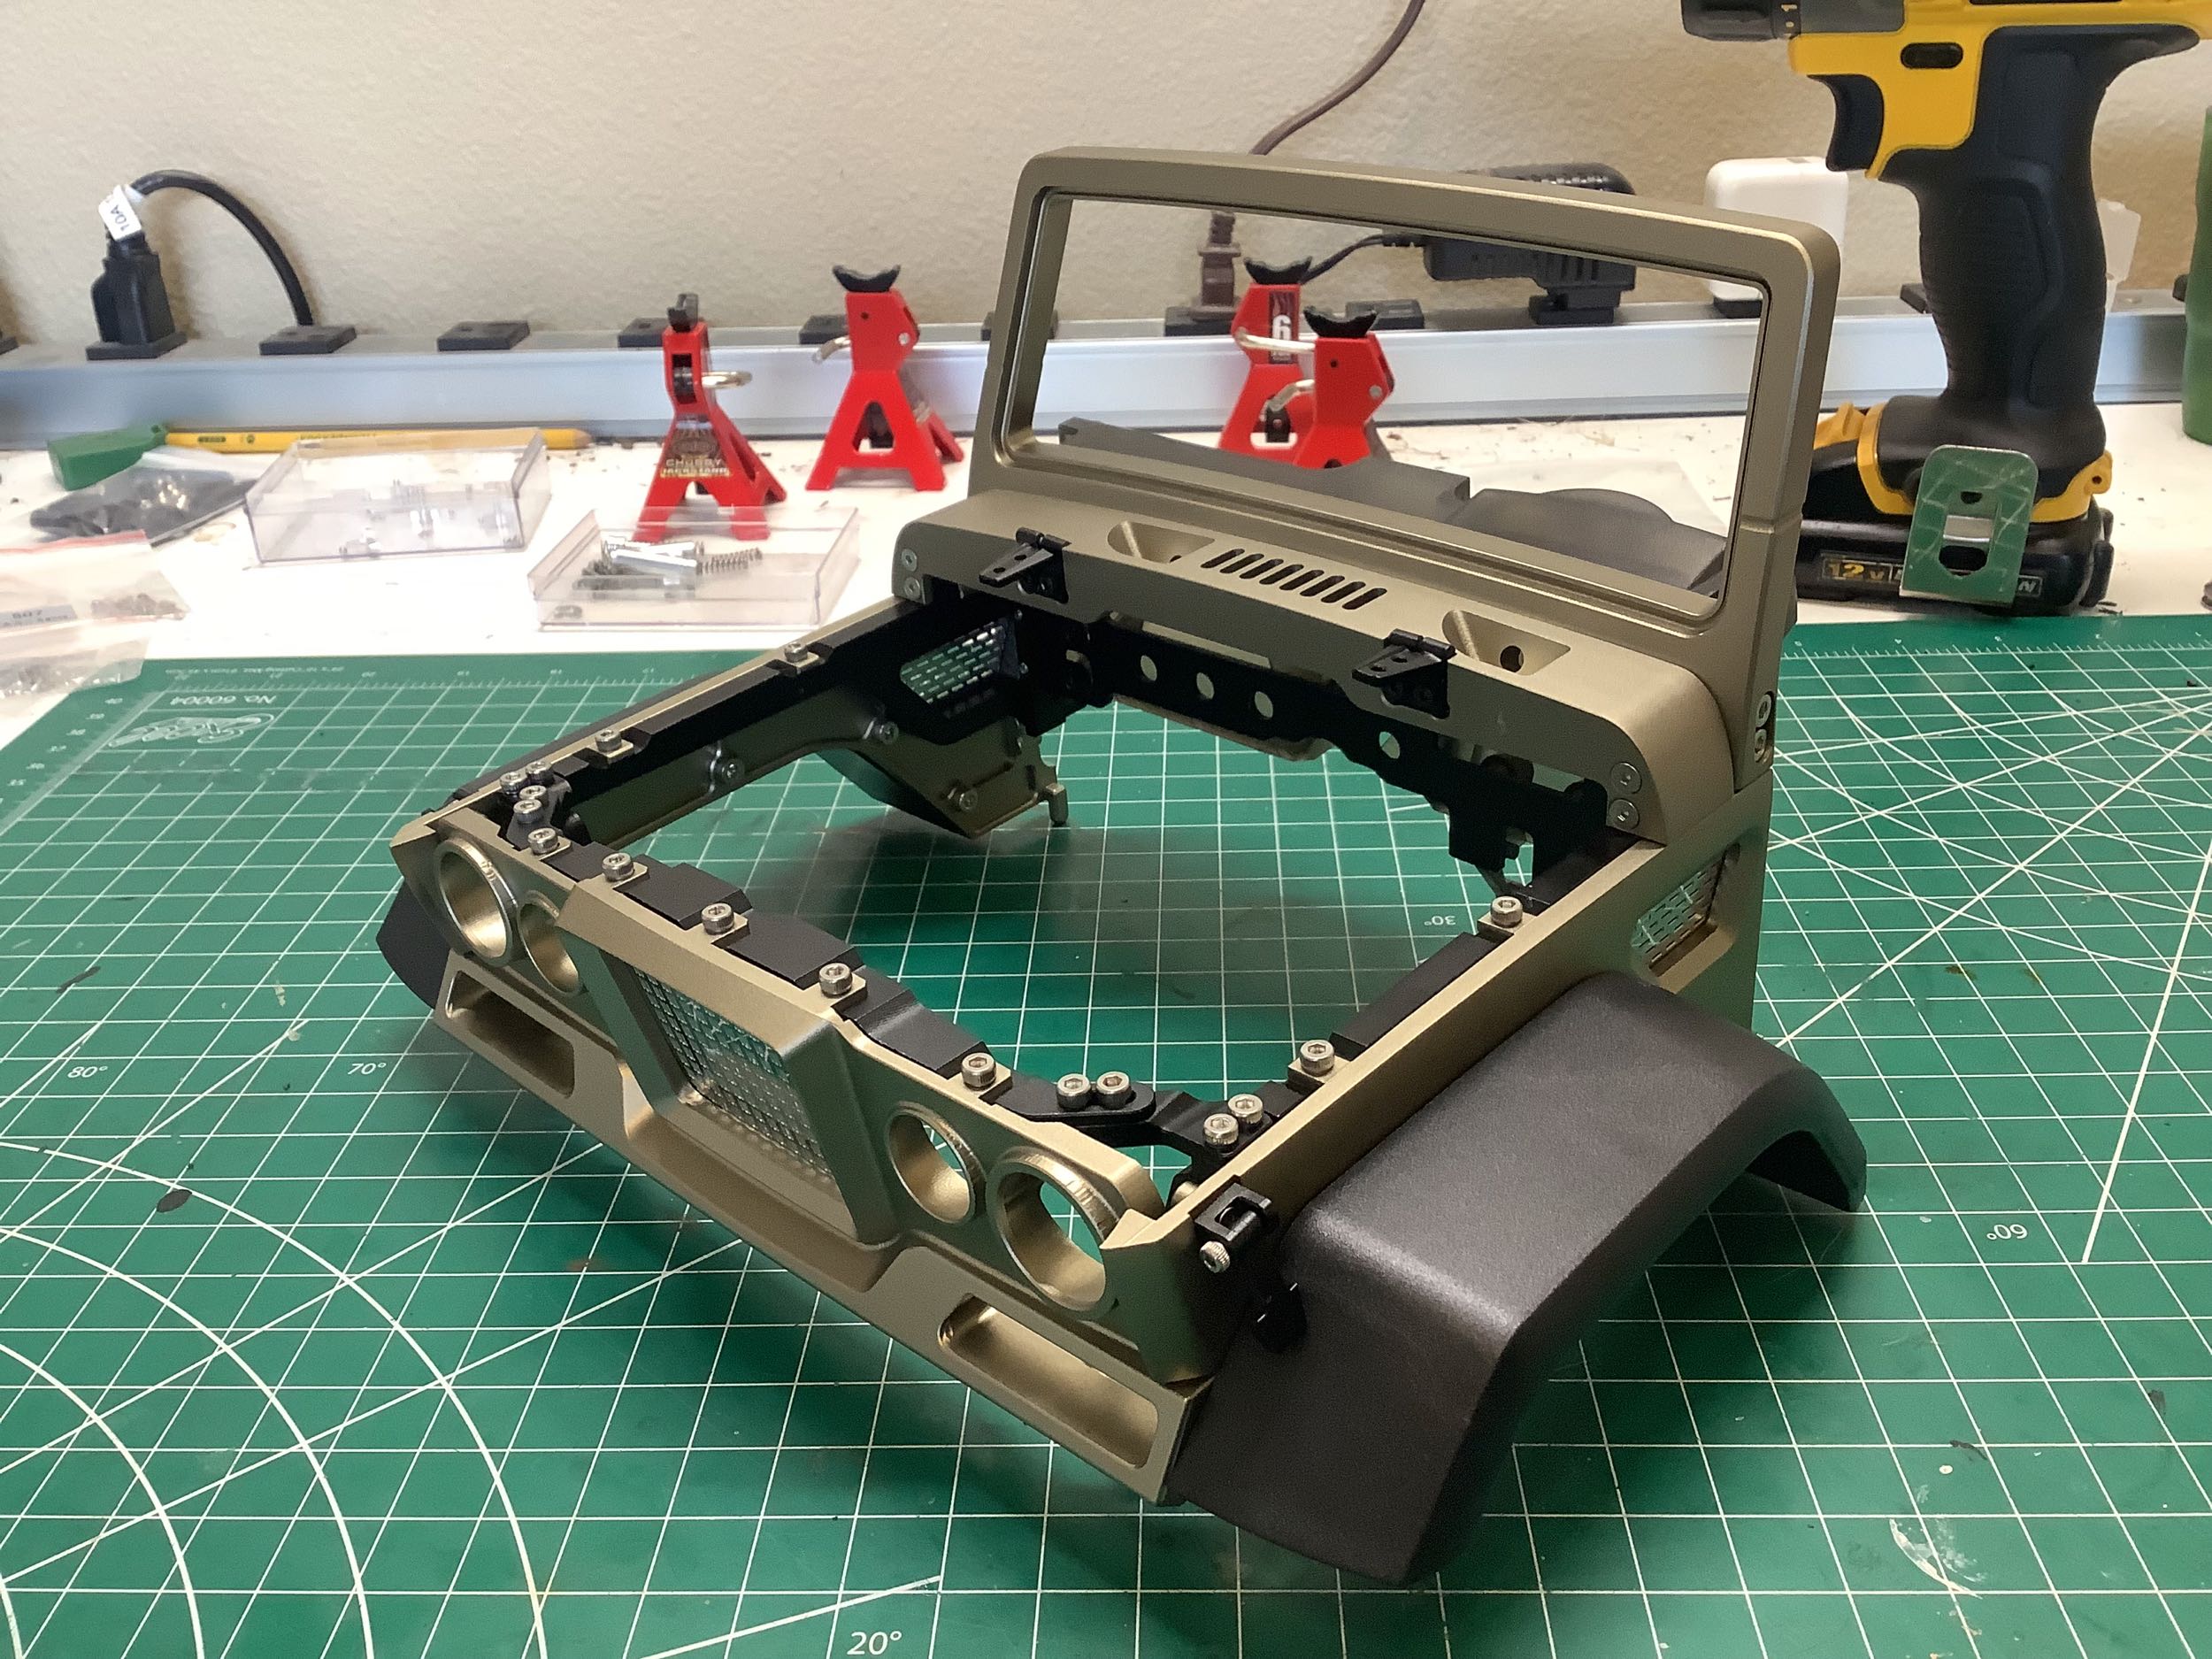
The dashboard actually forms an integral part of the front of the body,
so assembly starts with that. The dashboard is backed by an
aluminum support bracket which is then fastened to a pair of supports
forming the top of the front wheel arches as shown on the right.
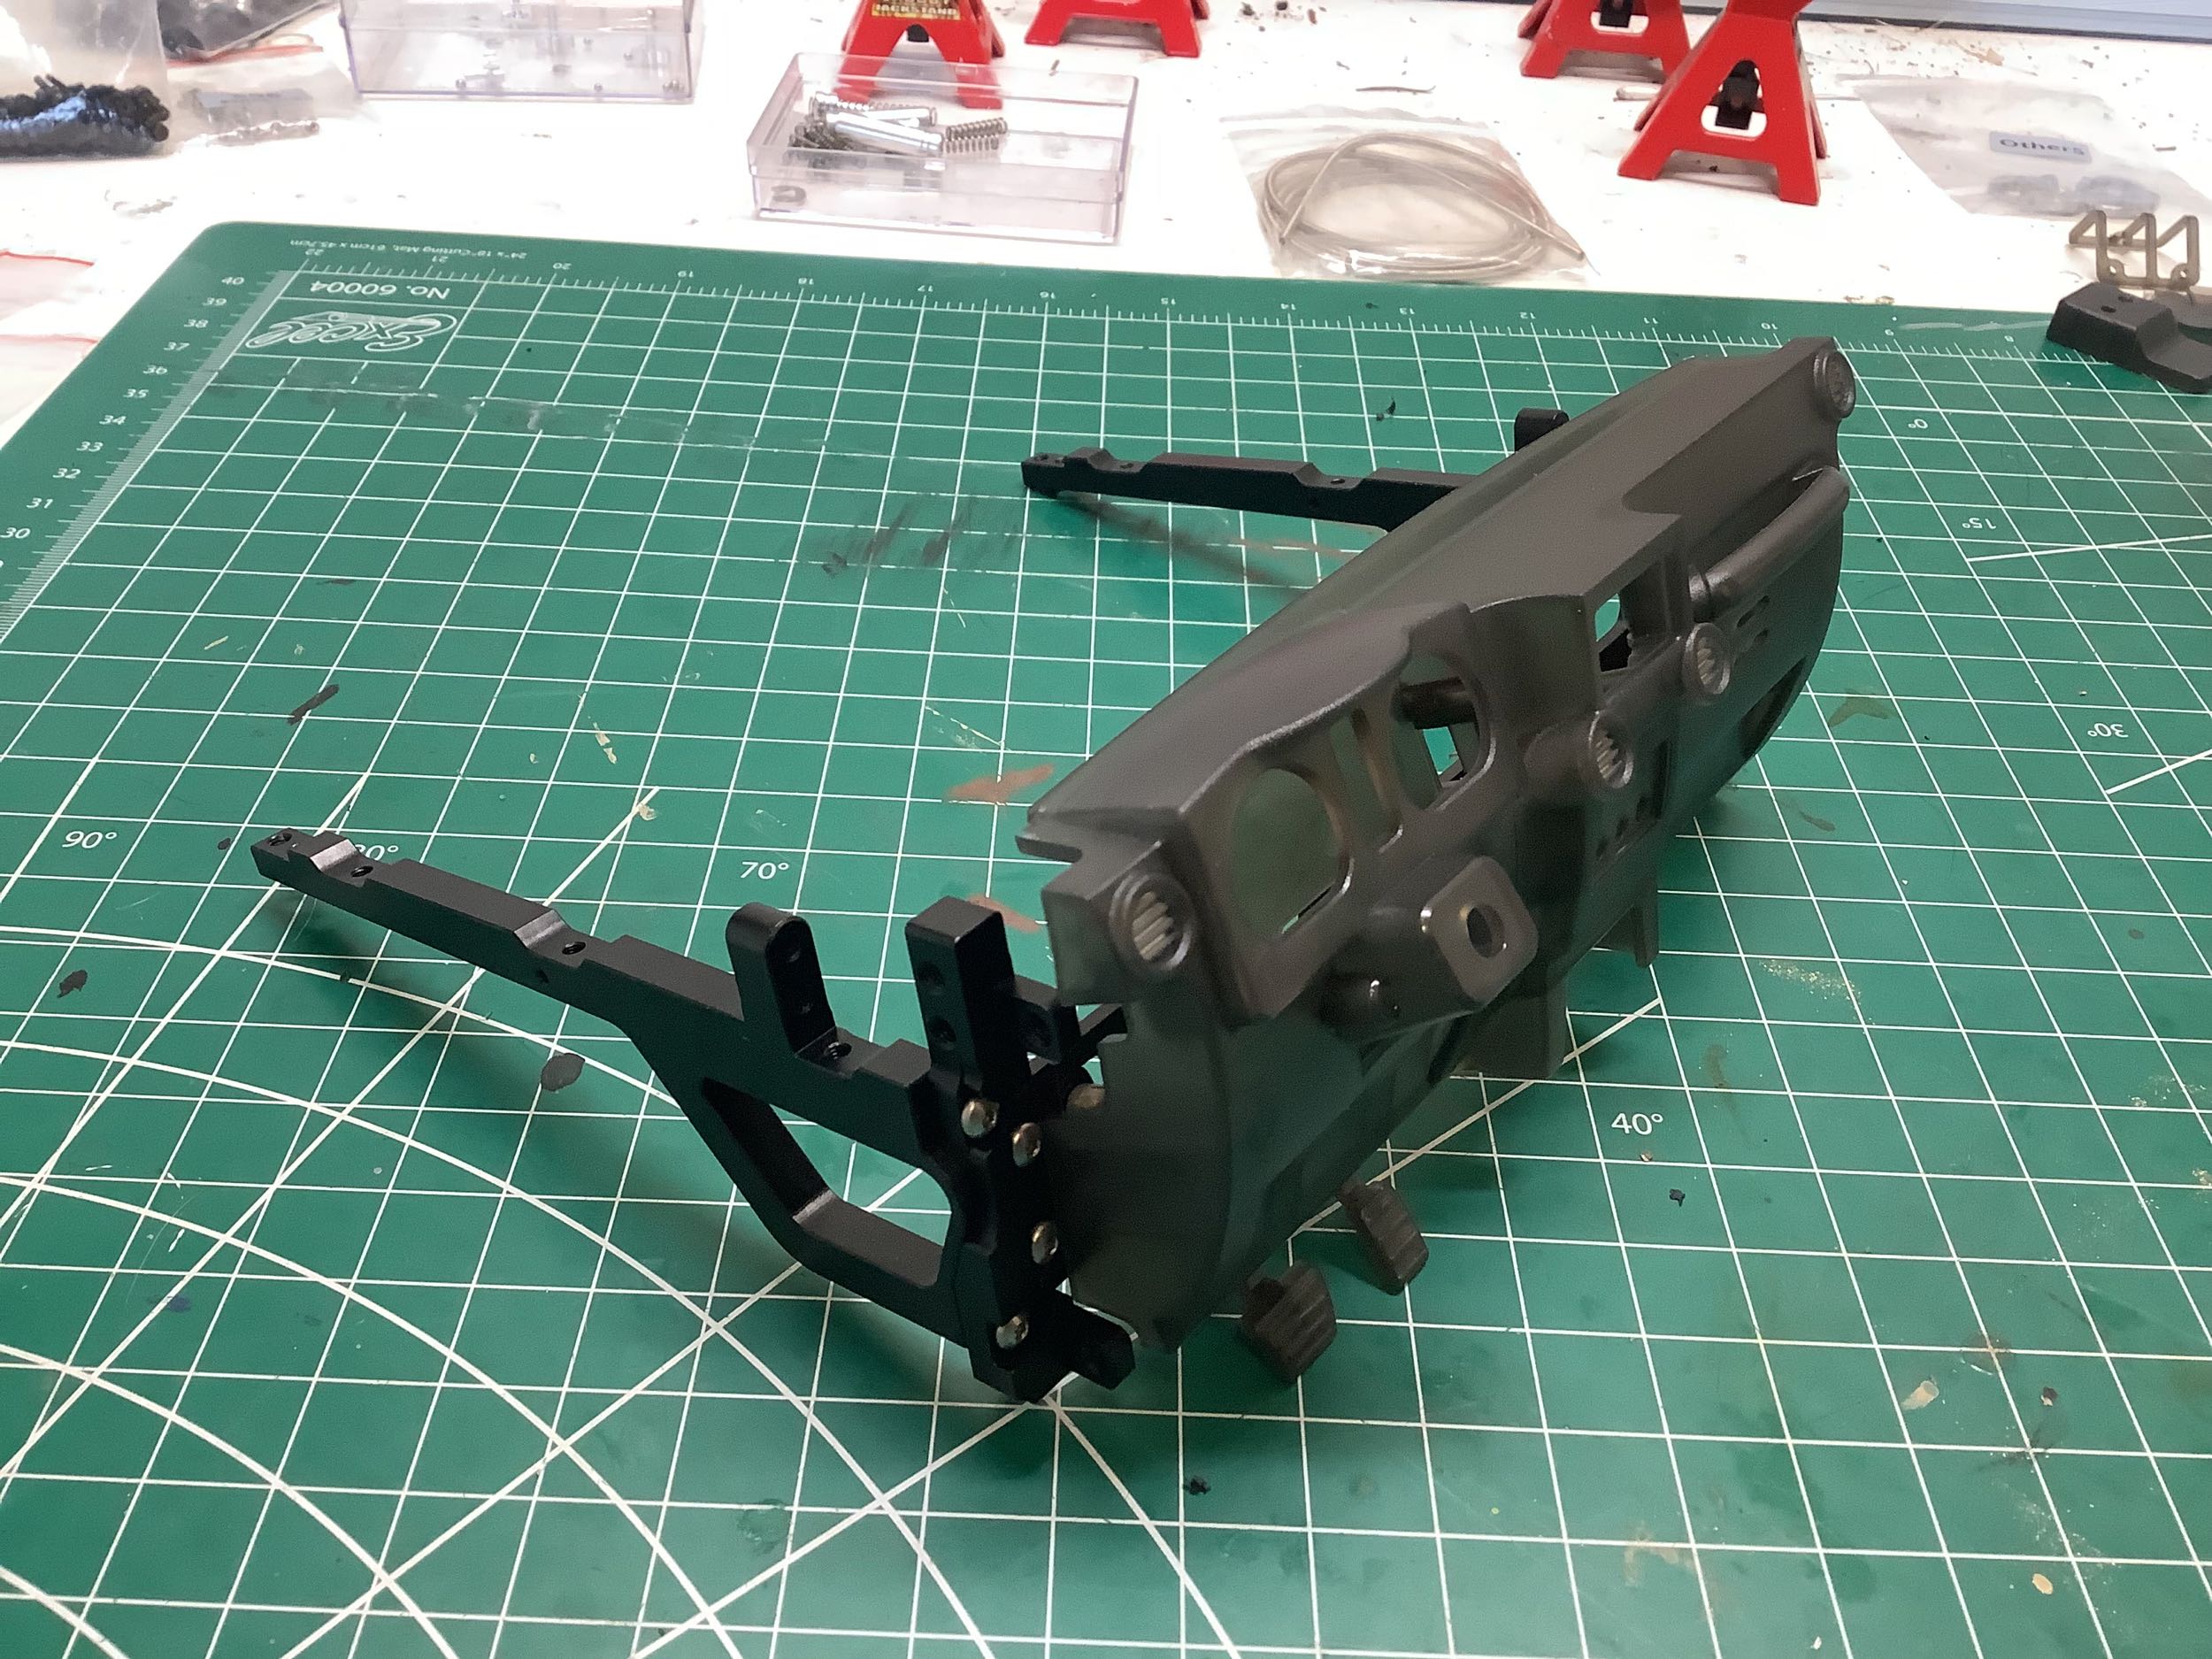
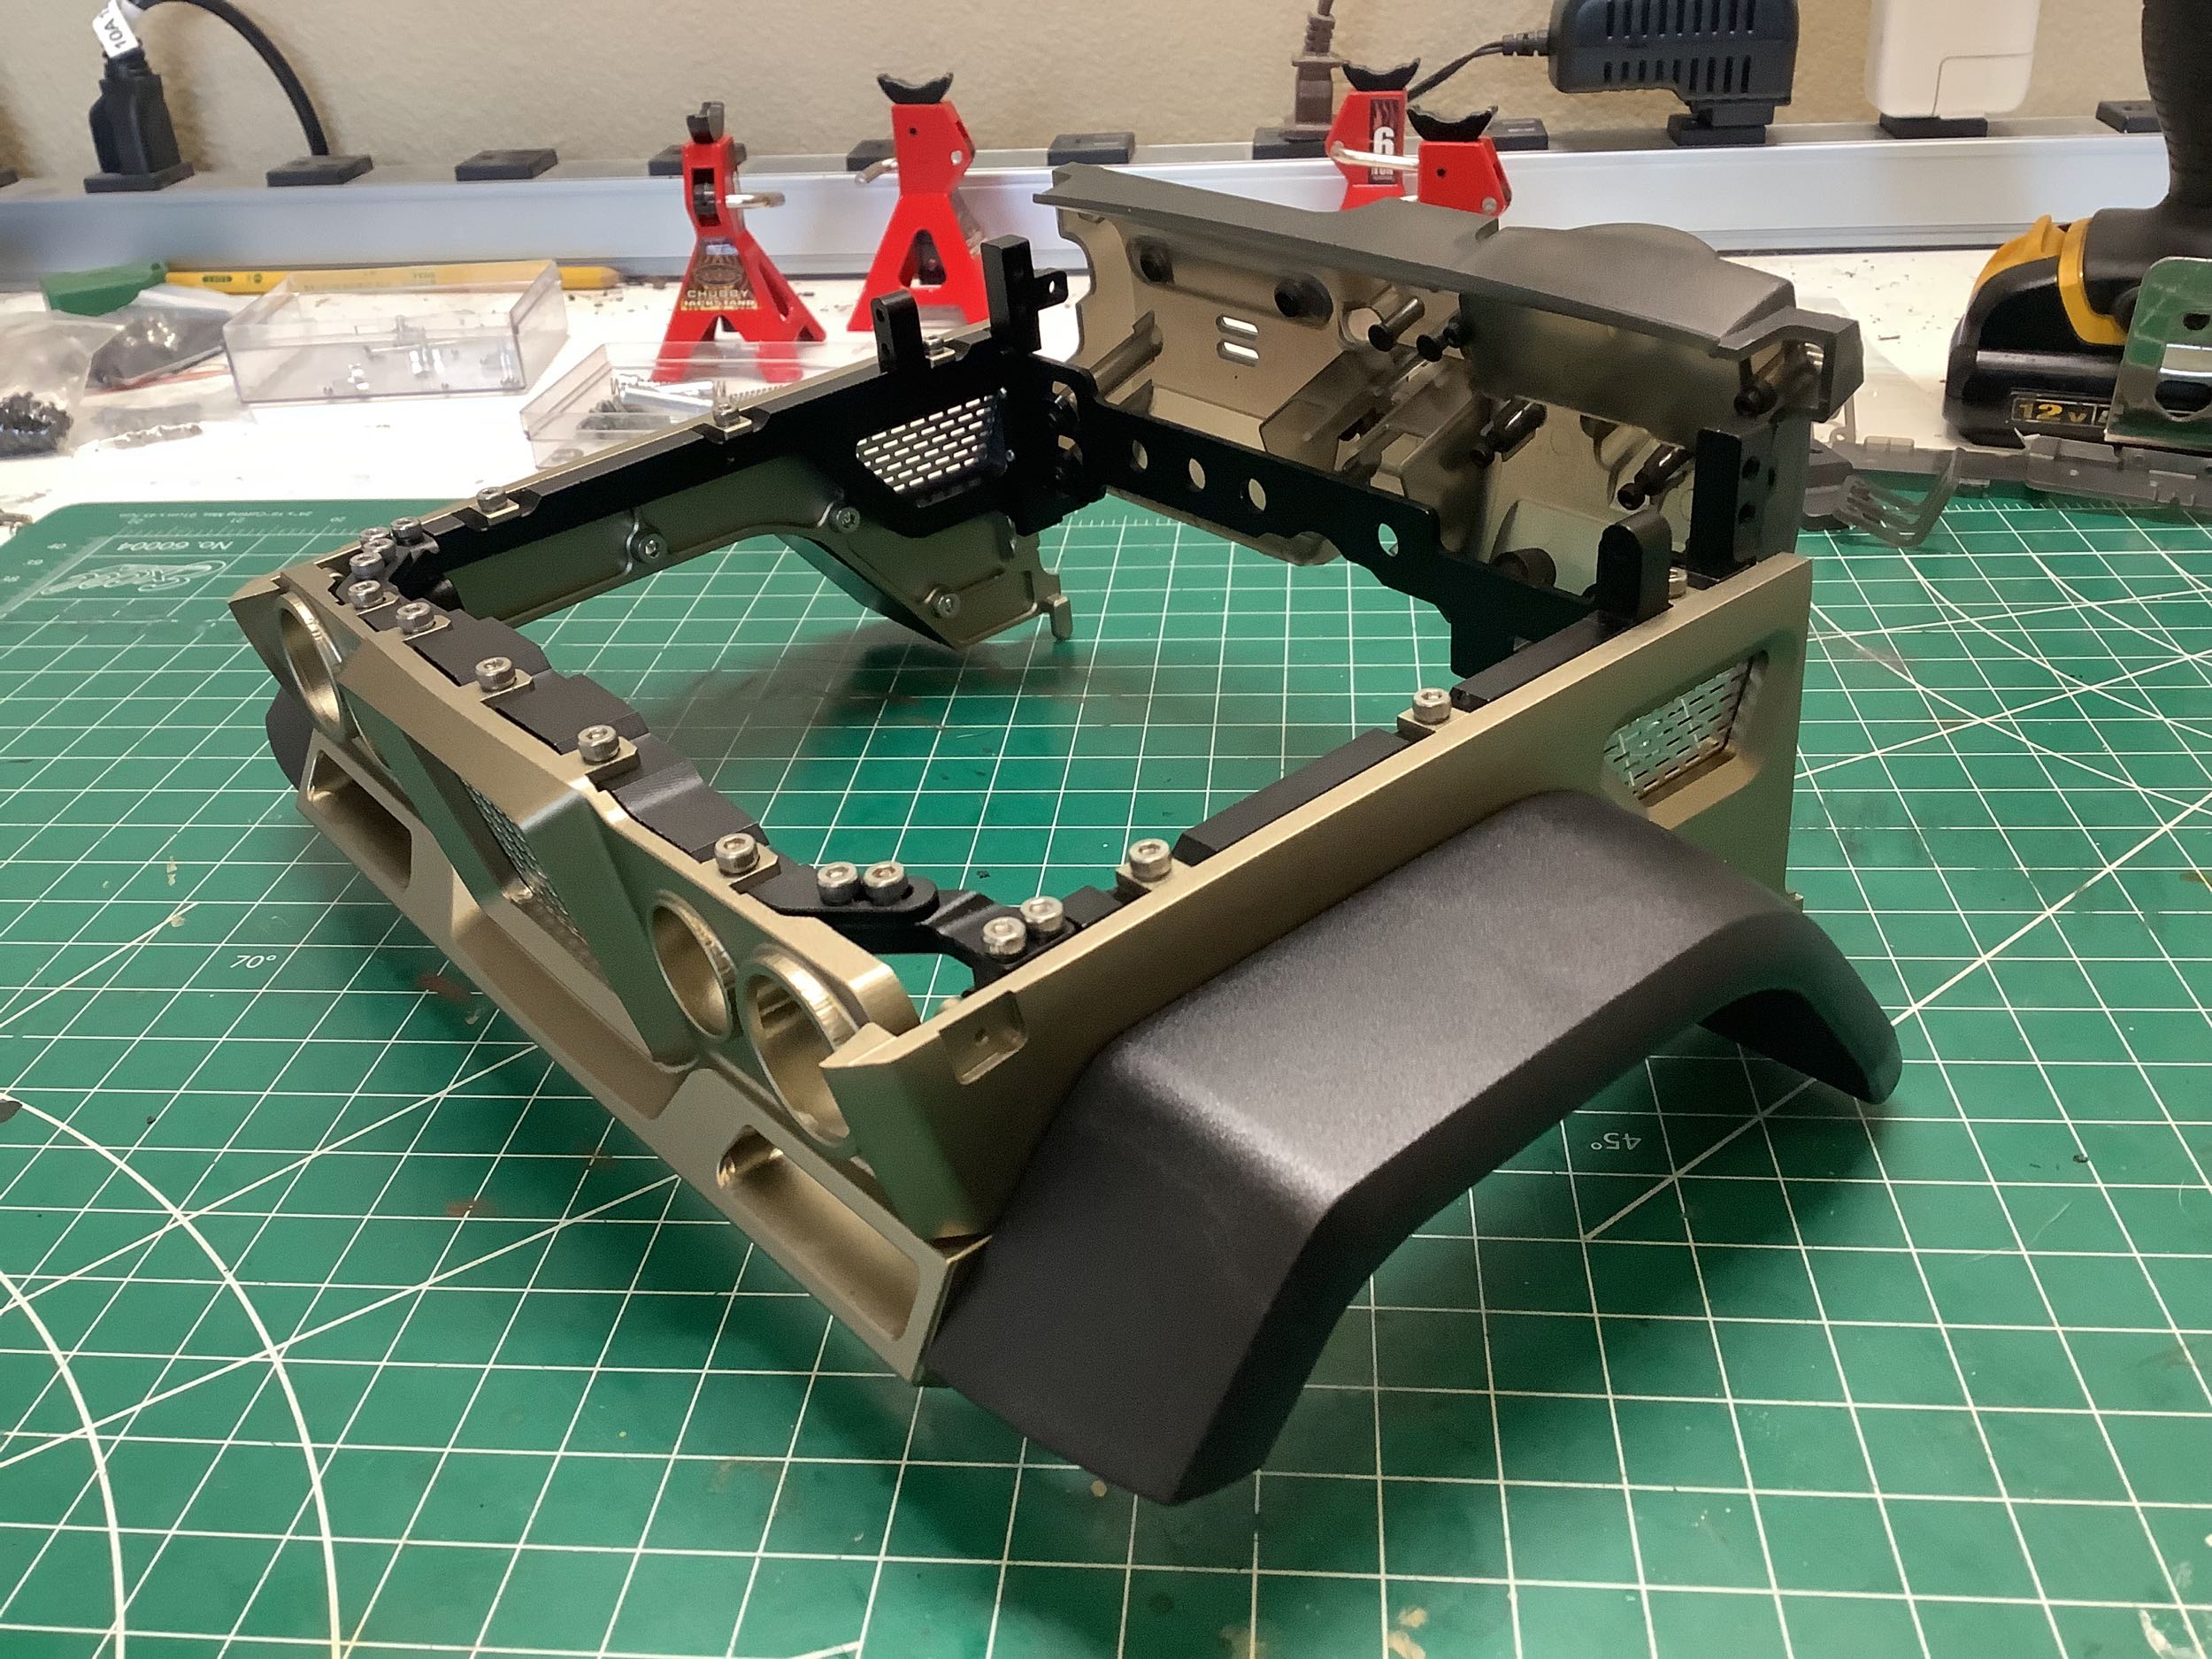
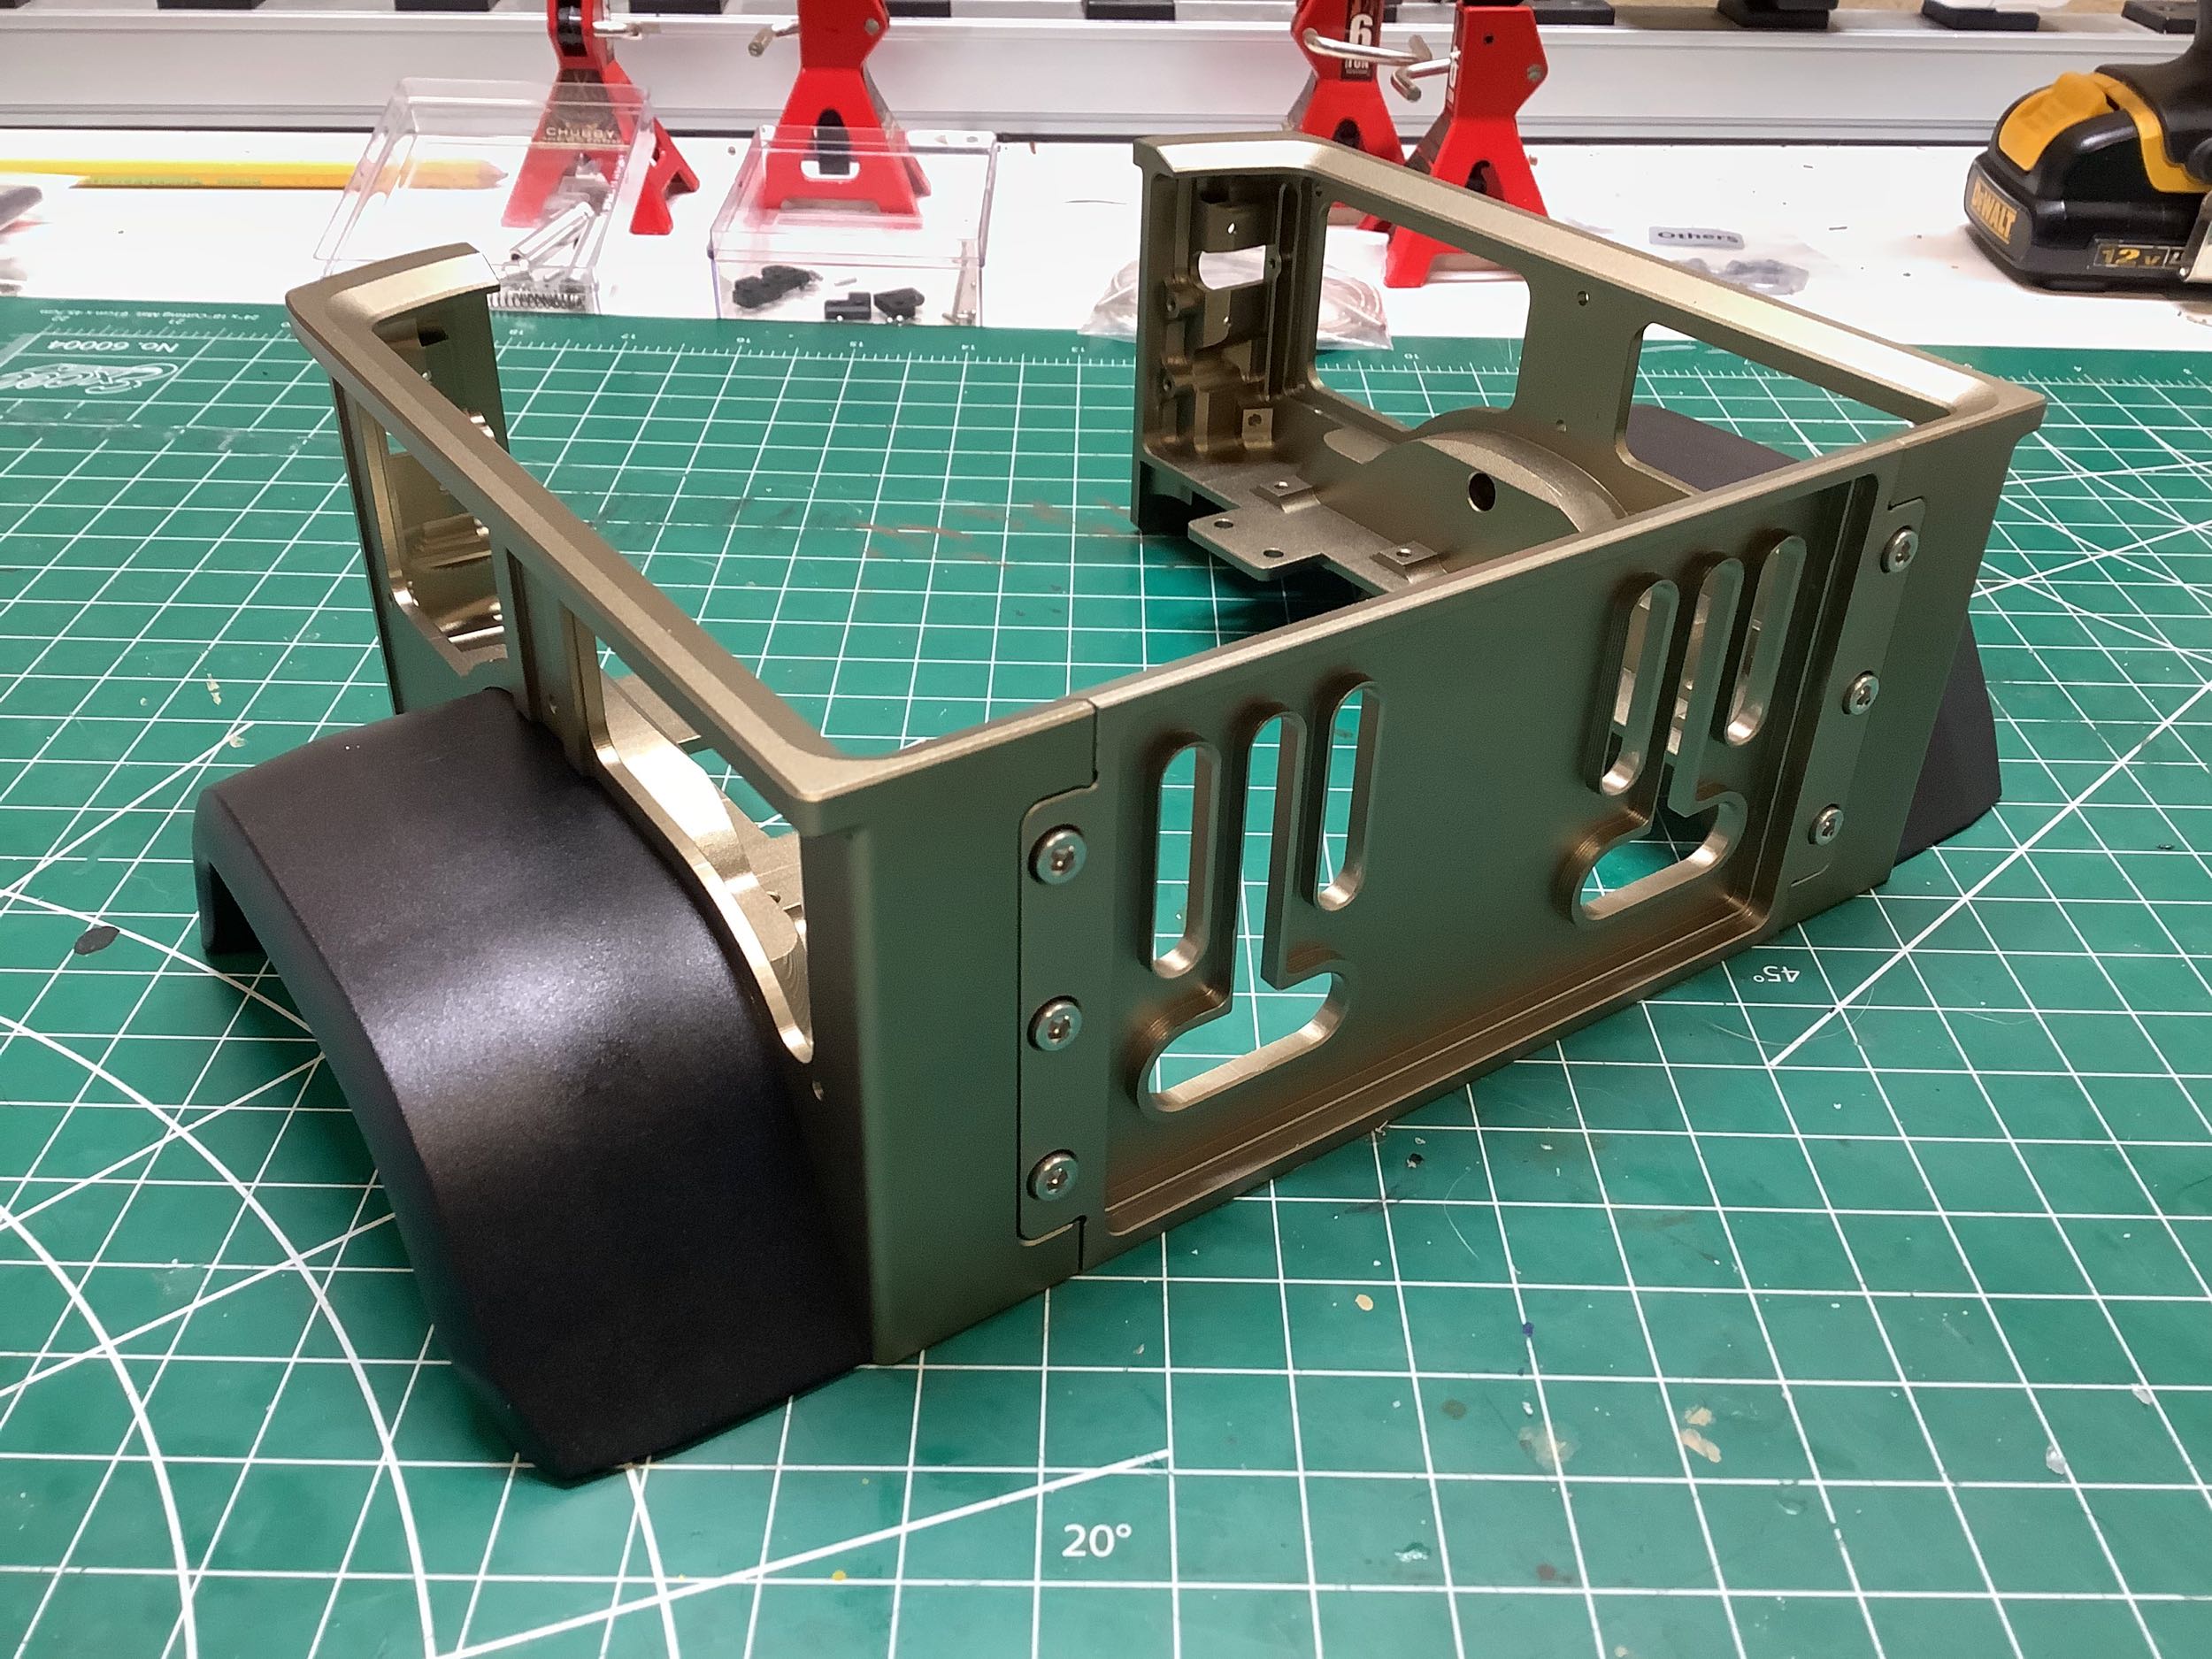
The geometry of these front brackets is quite complex. The angled
supports and cross braces shown form the structural backbone of the
front of the truck. However, since all the body panels are also
metal, they significantly stiffen the entire assembly once installed.
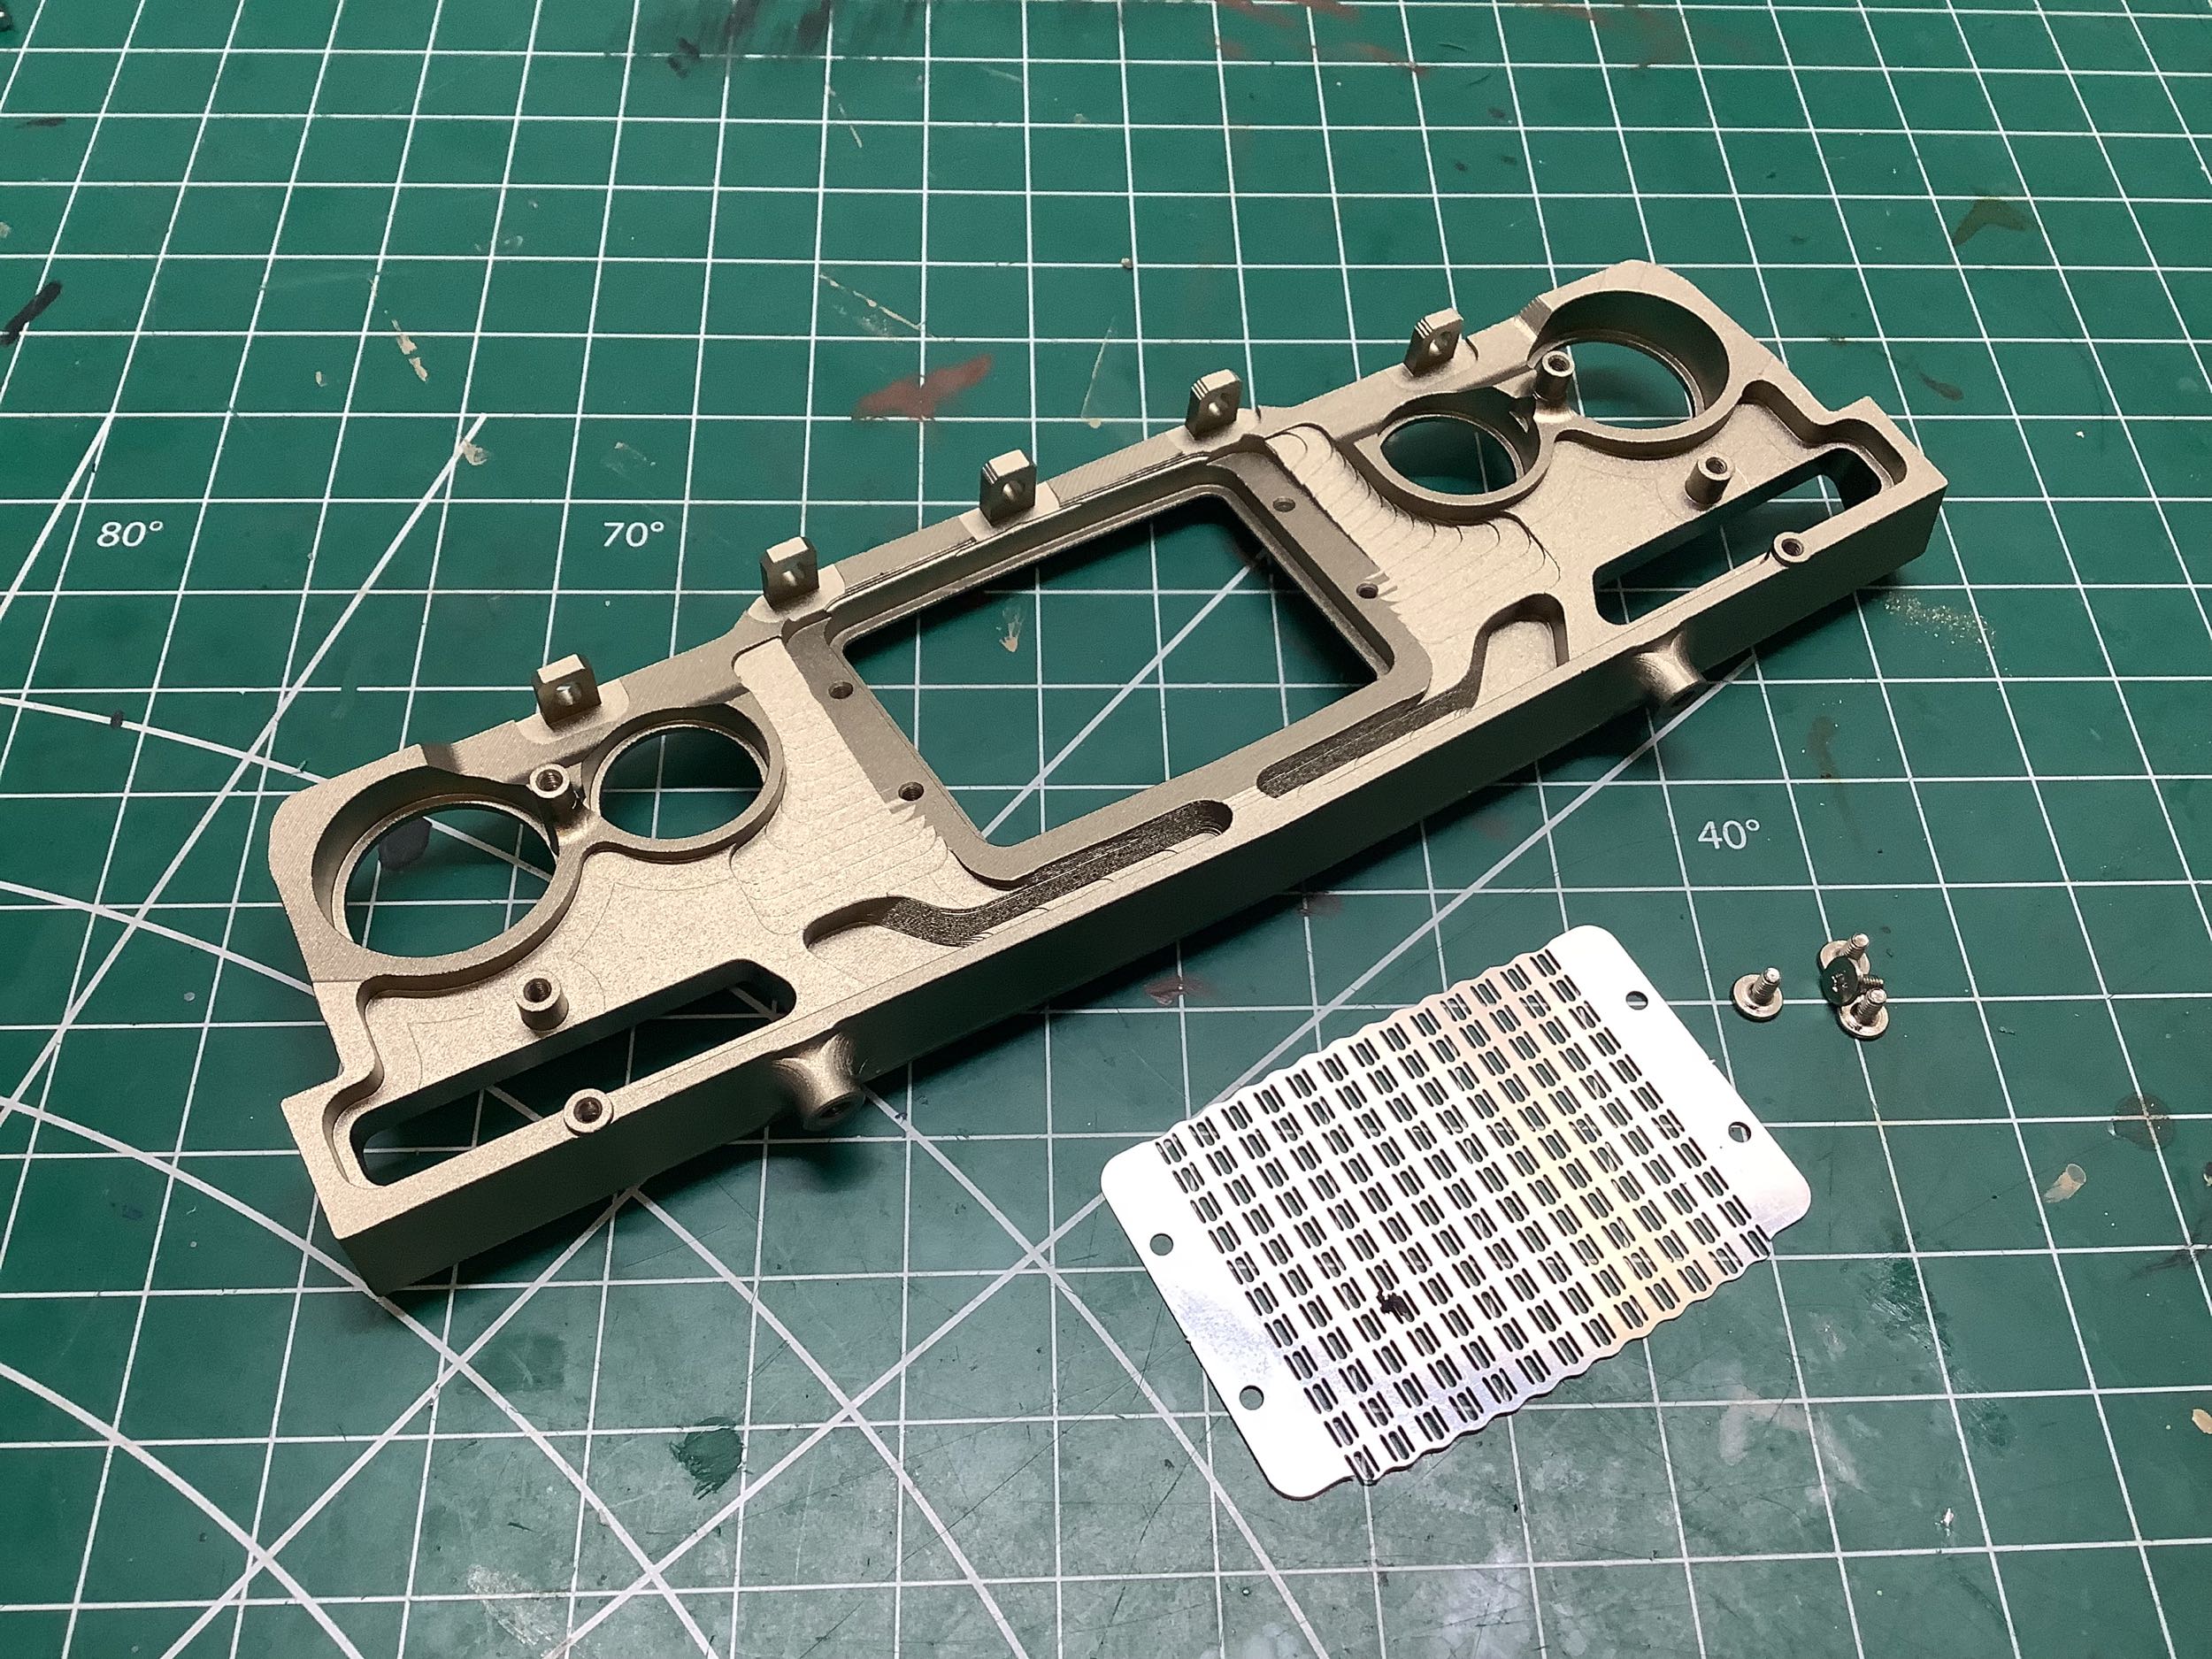
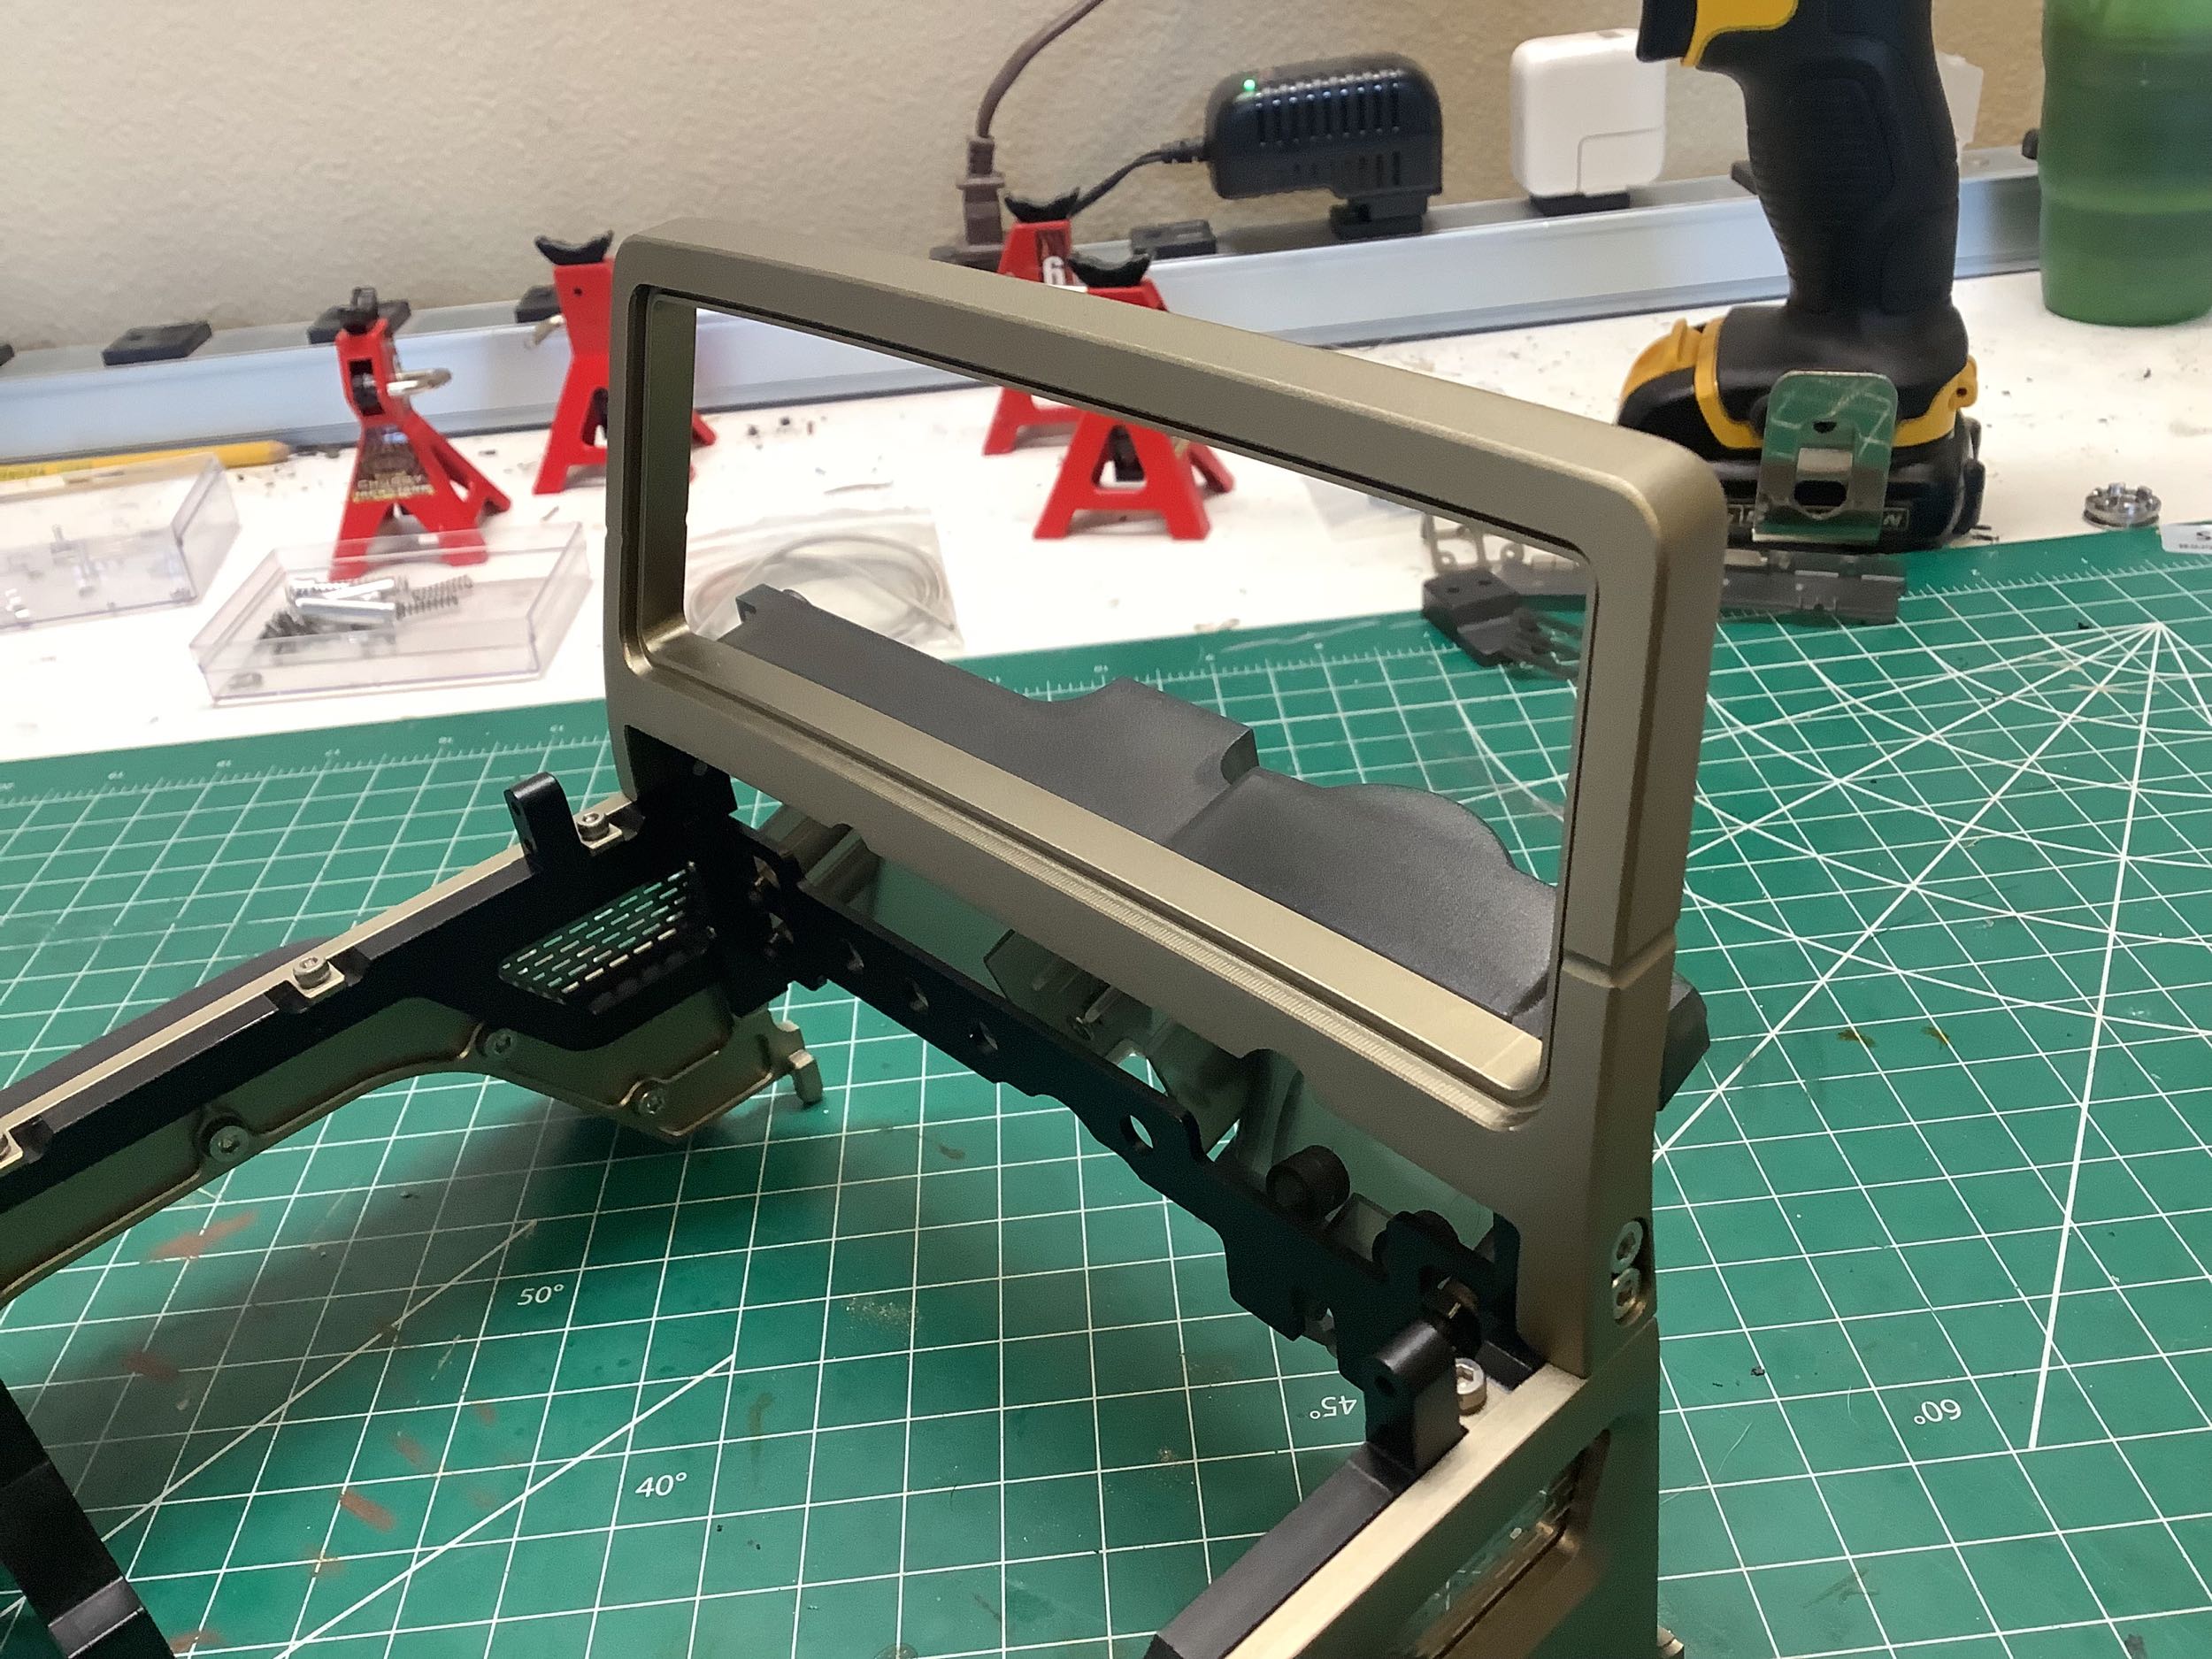
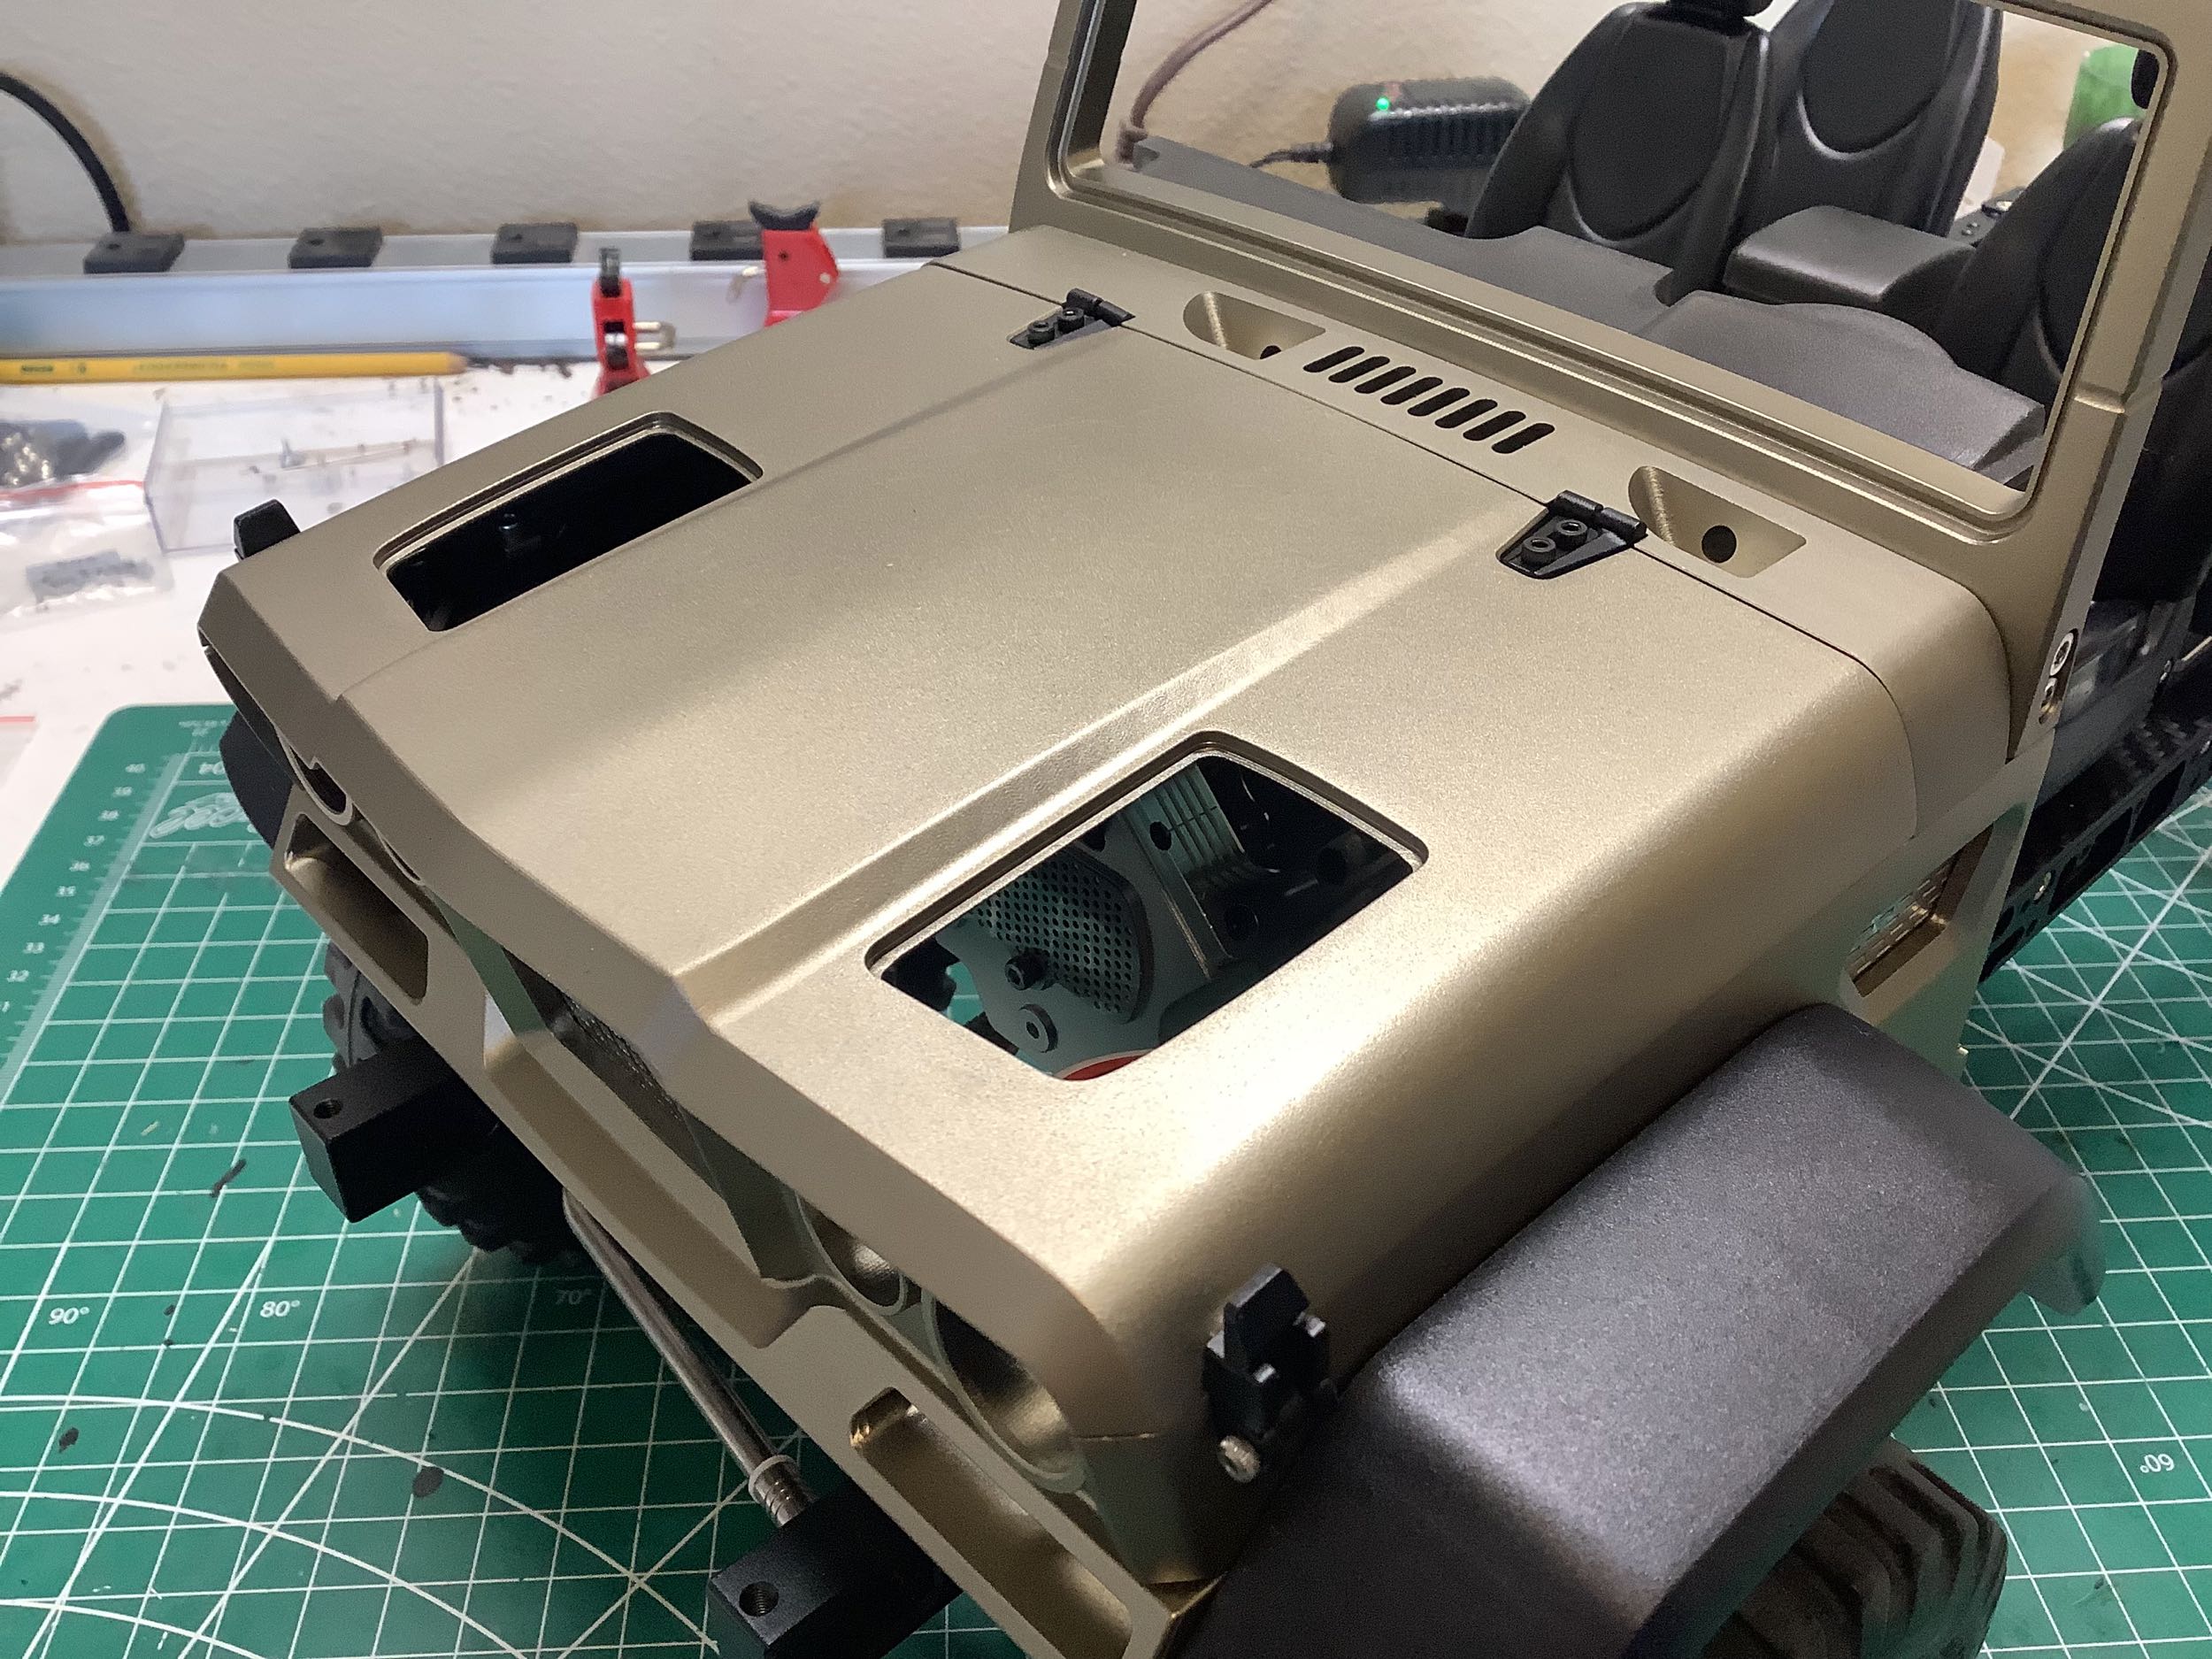
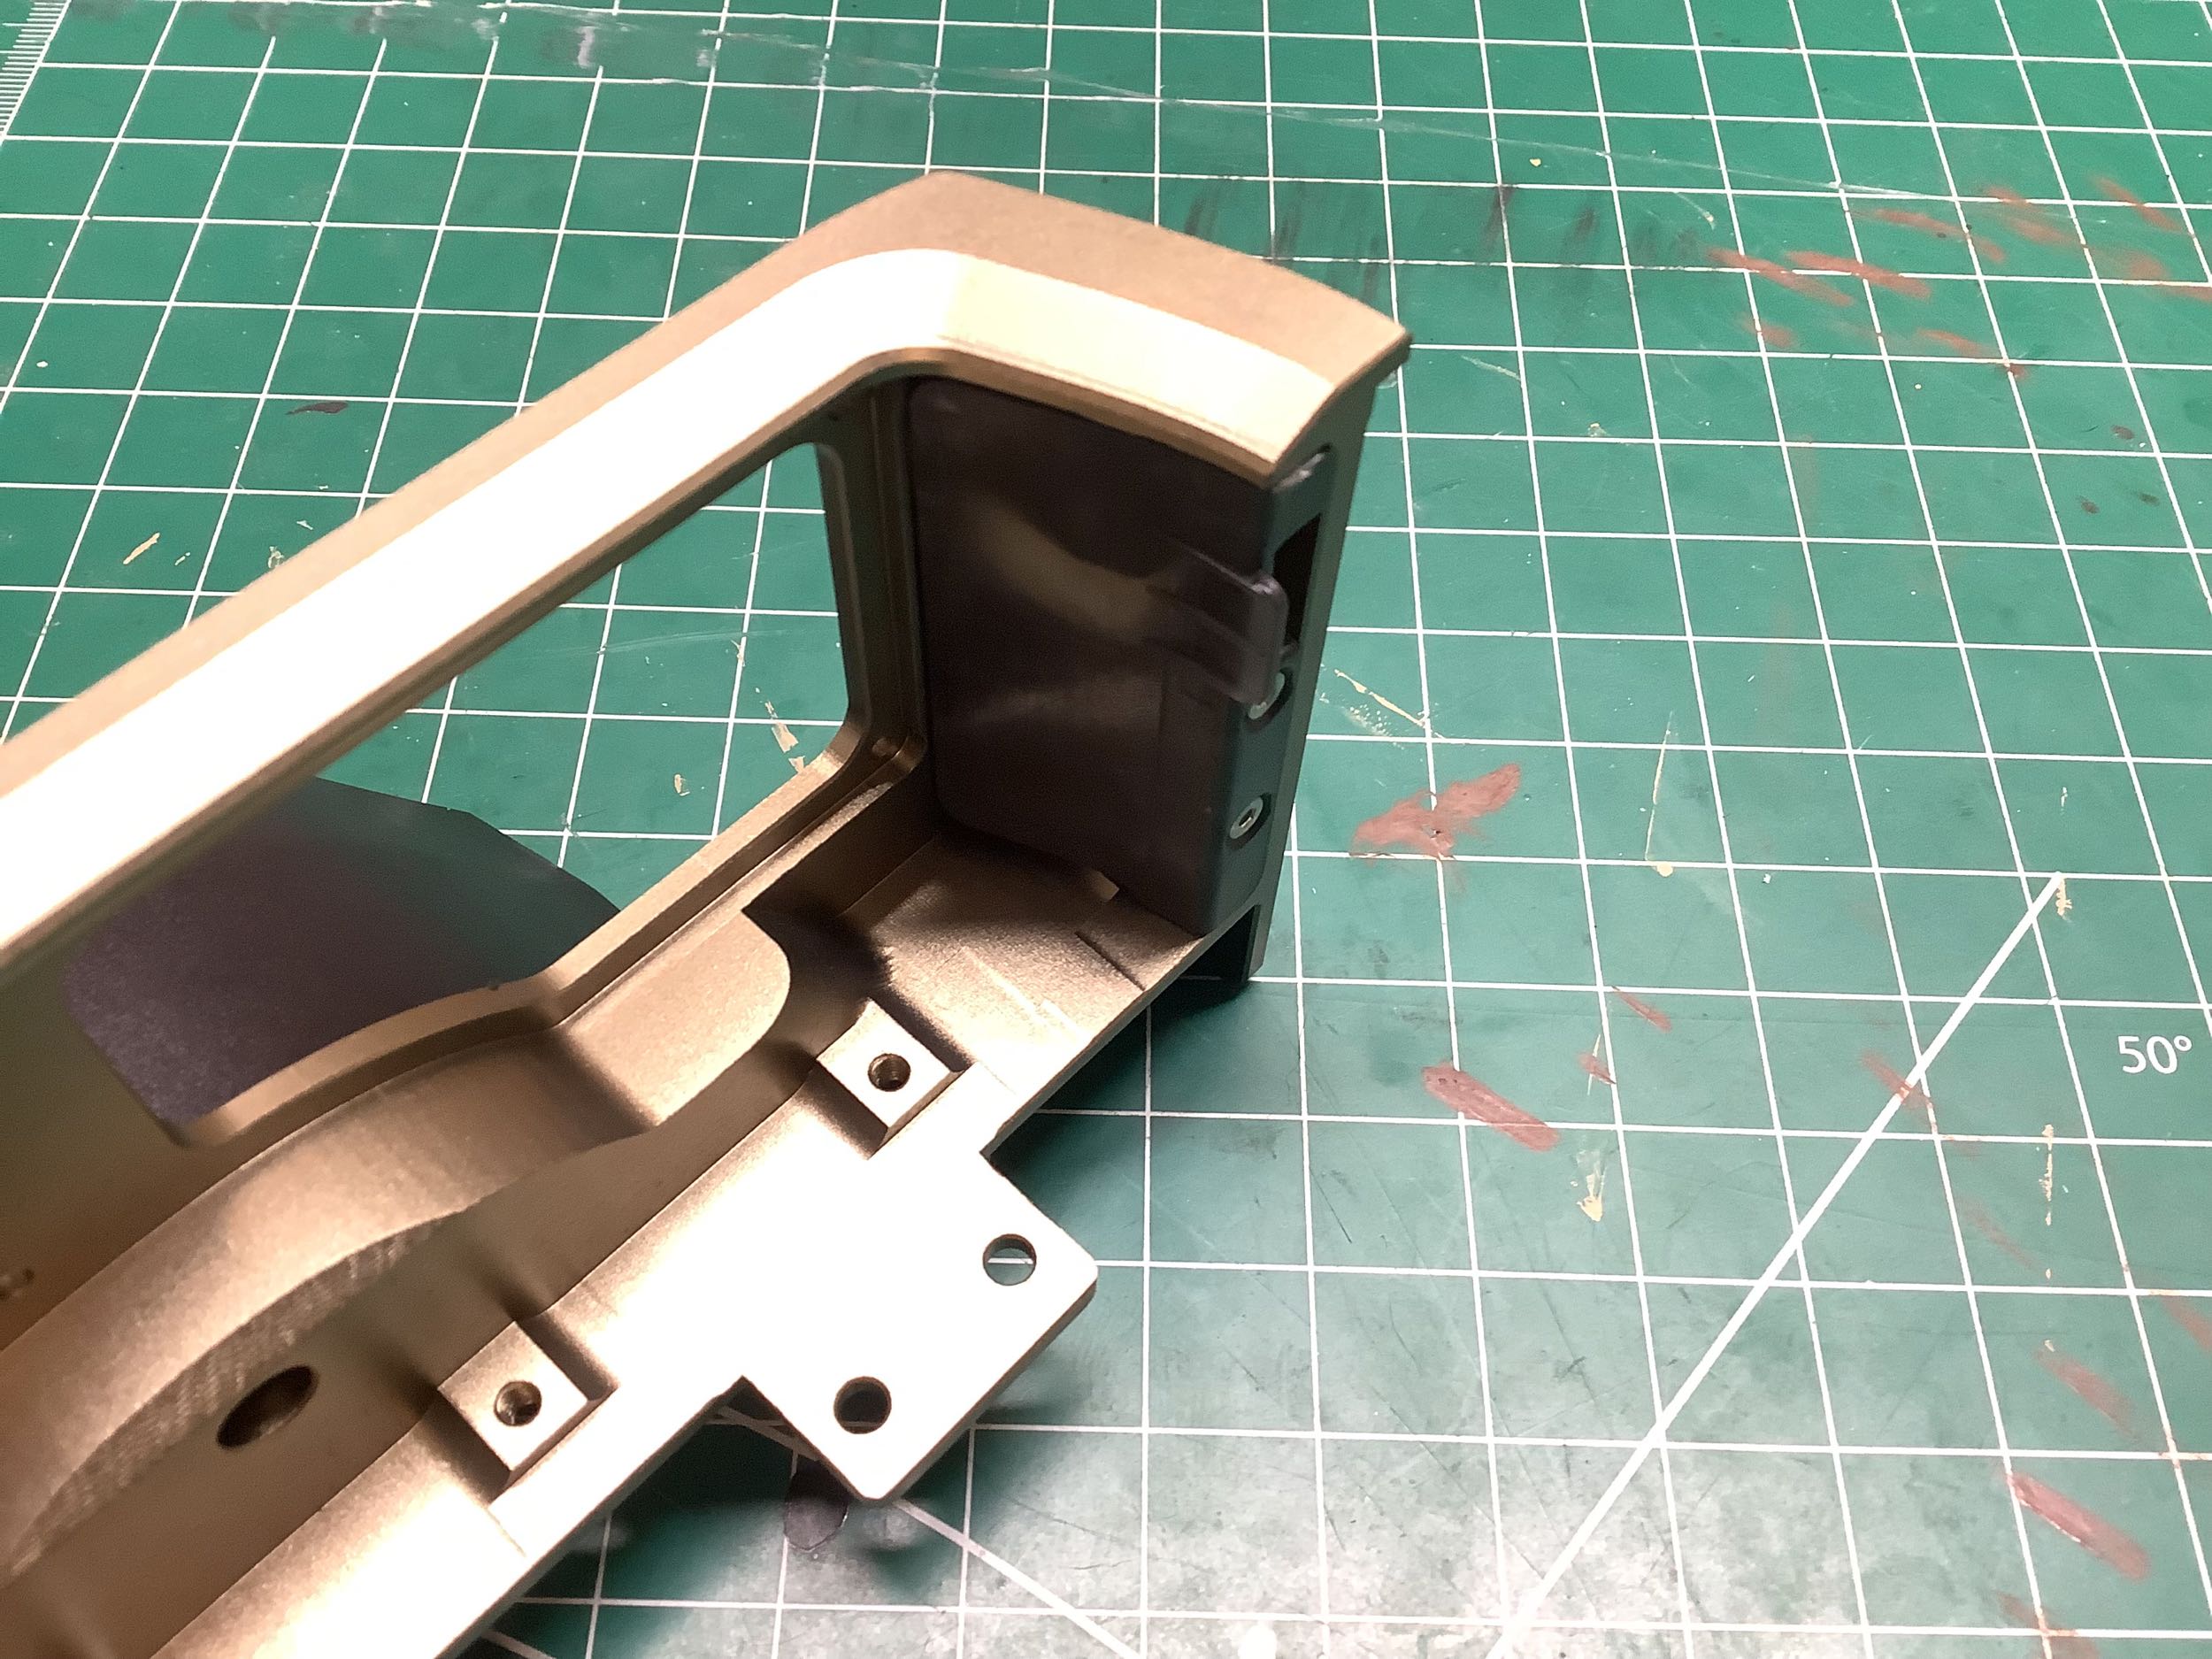
The machined front of the truck is shown from the back side along with
the photo etched grille. The light lenses would normally be
installed now, but I am coming back to do the painting and electronics
later so I only installed the mounting screws.
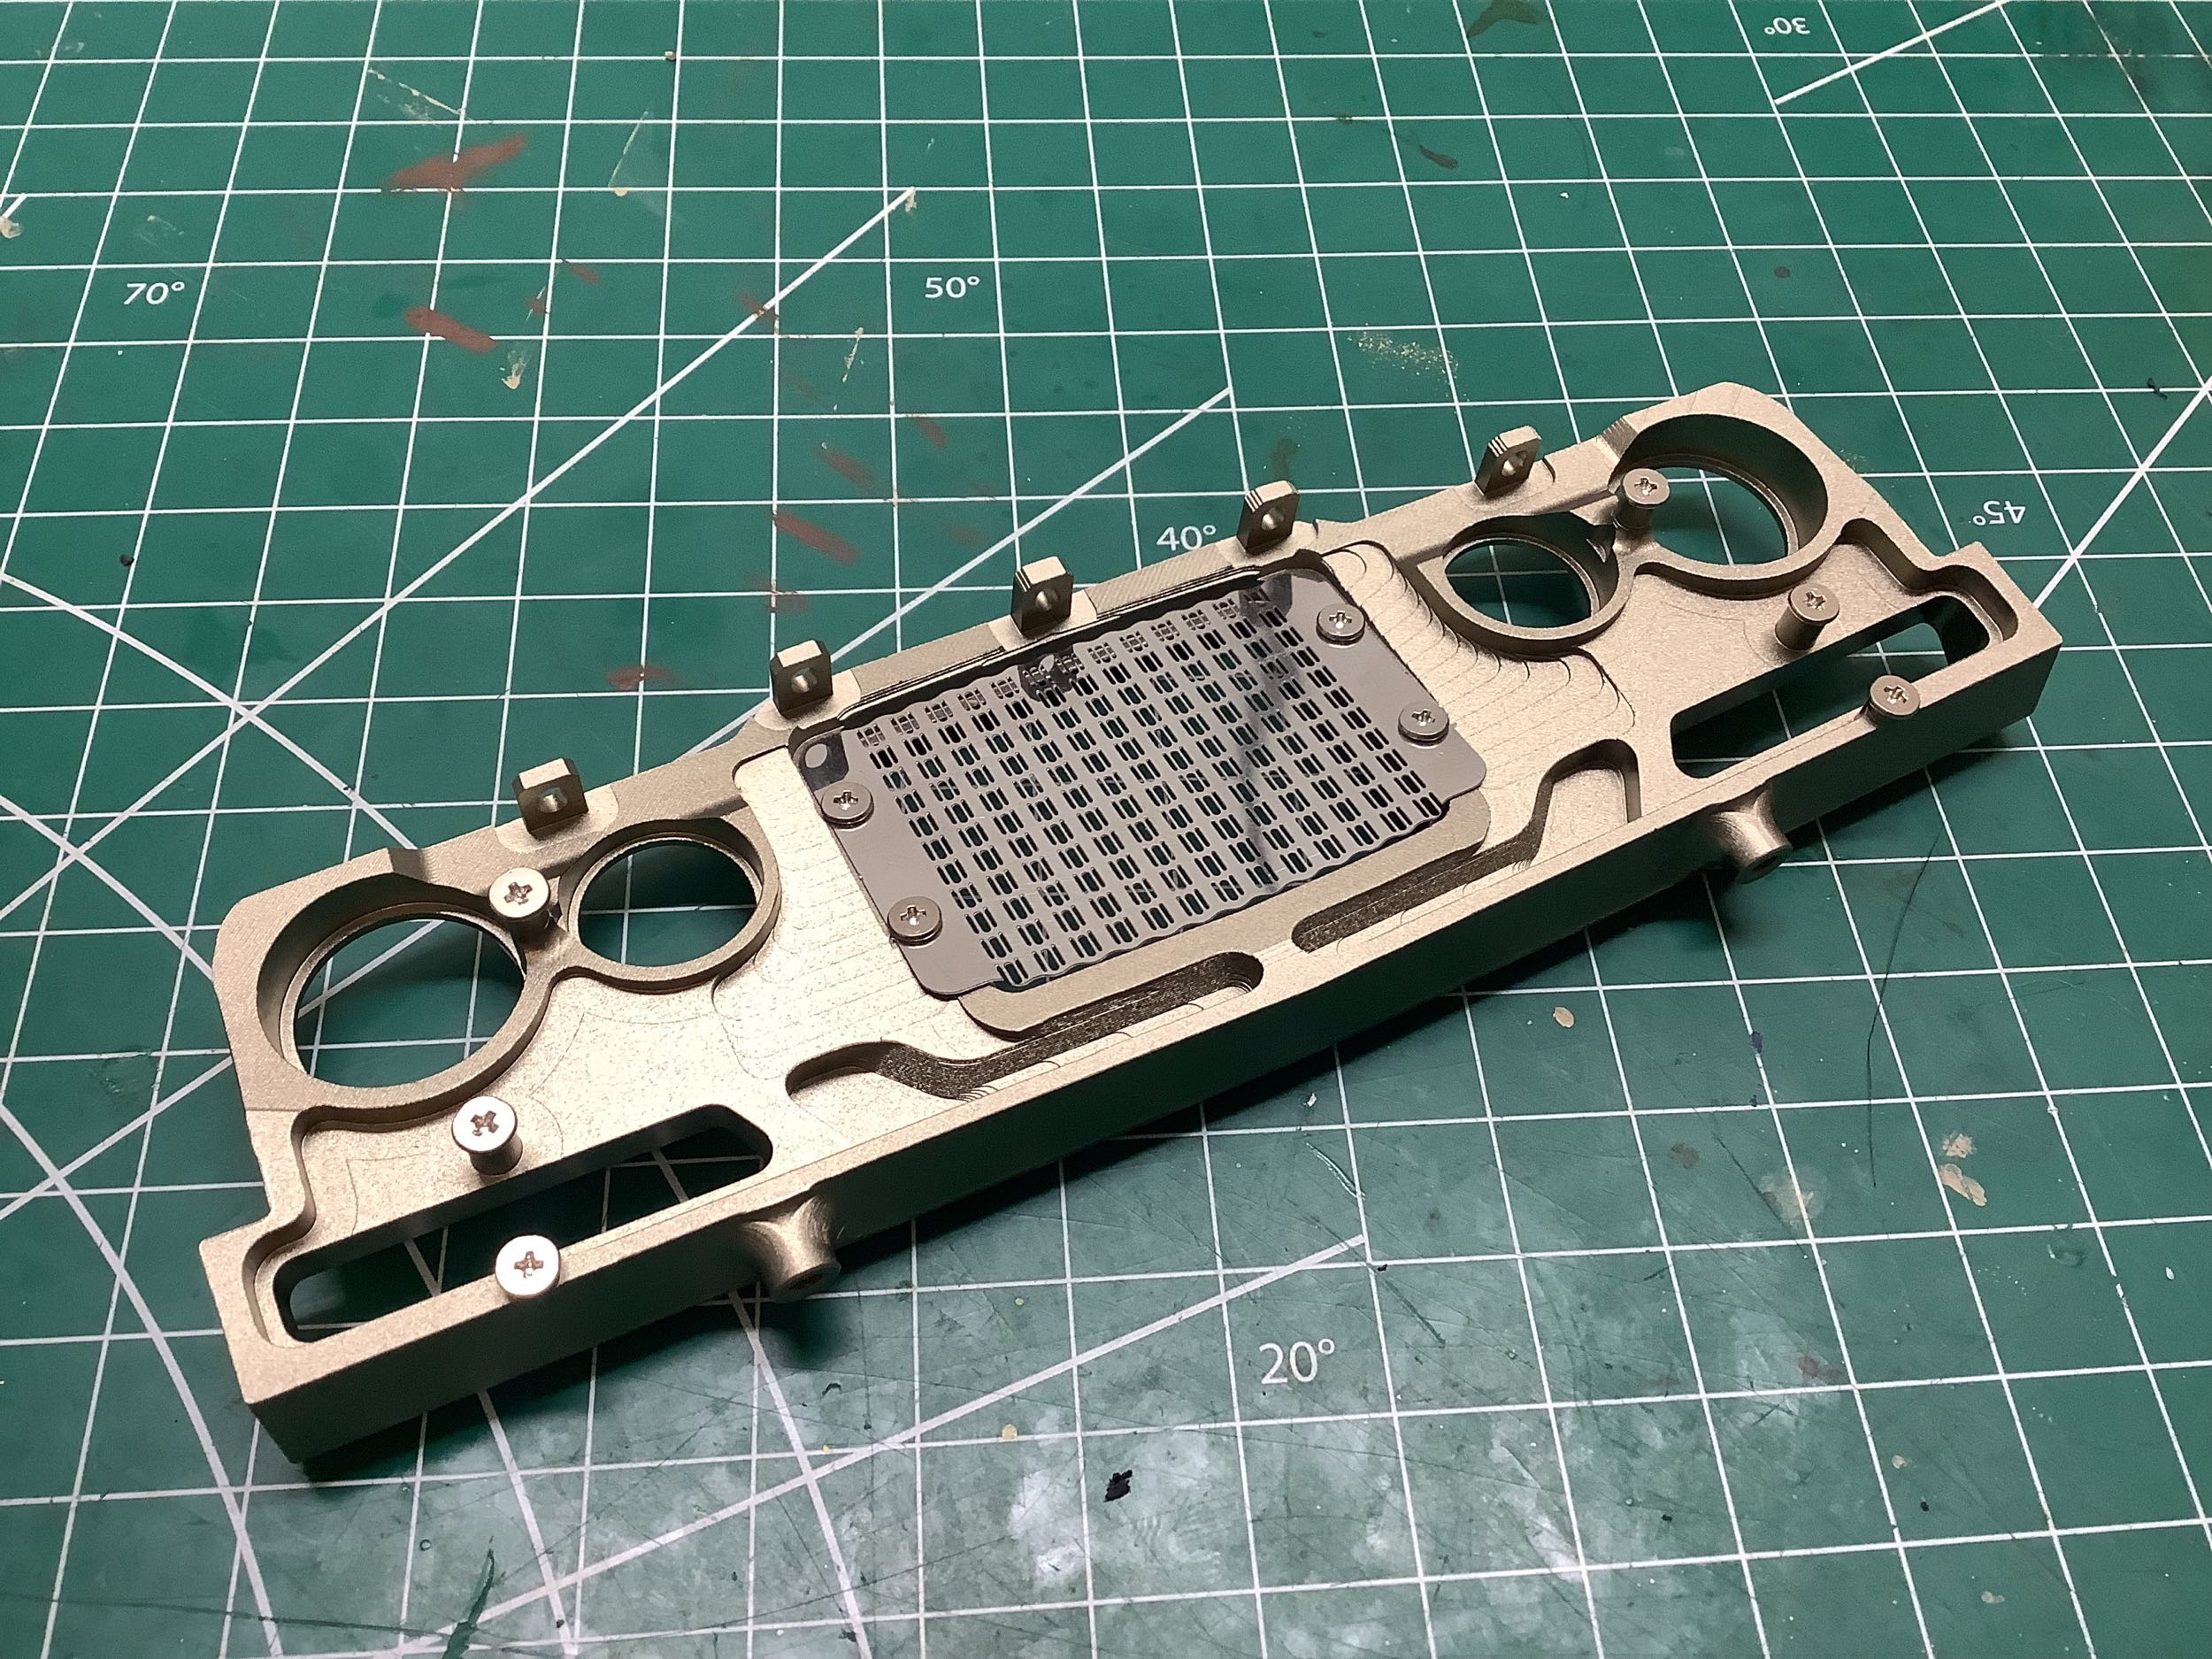
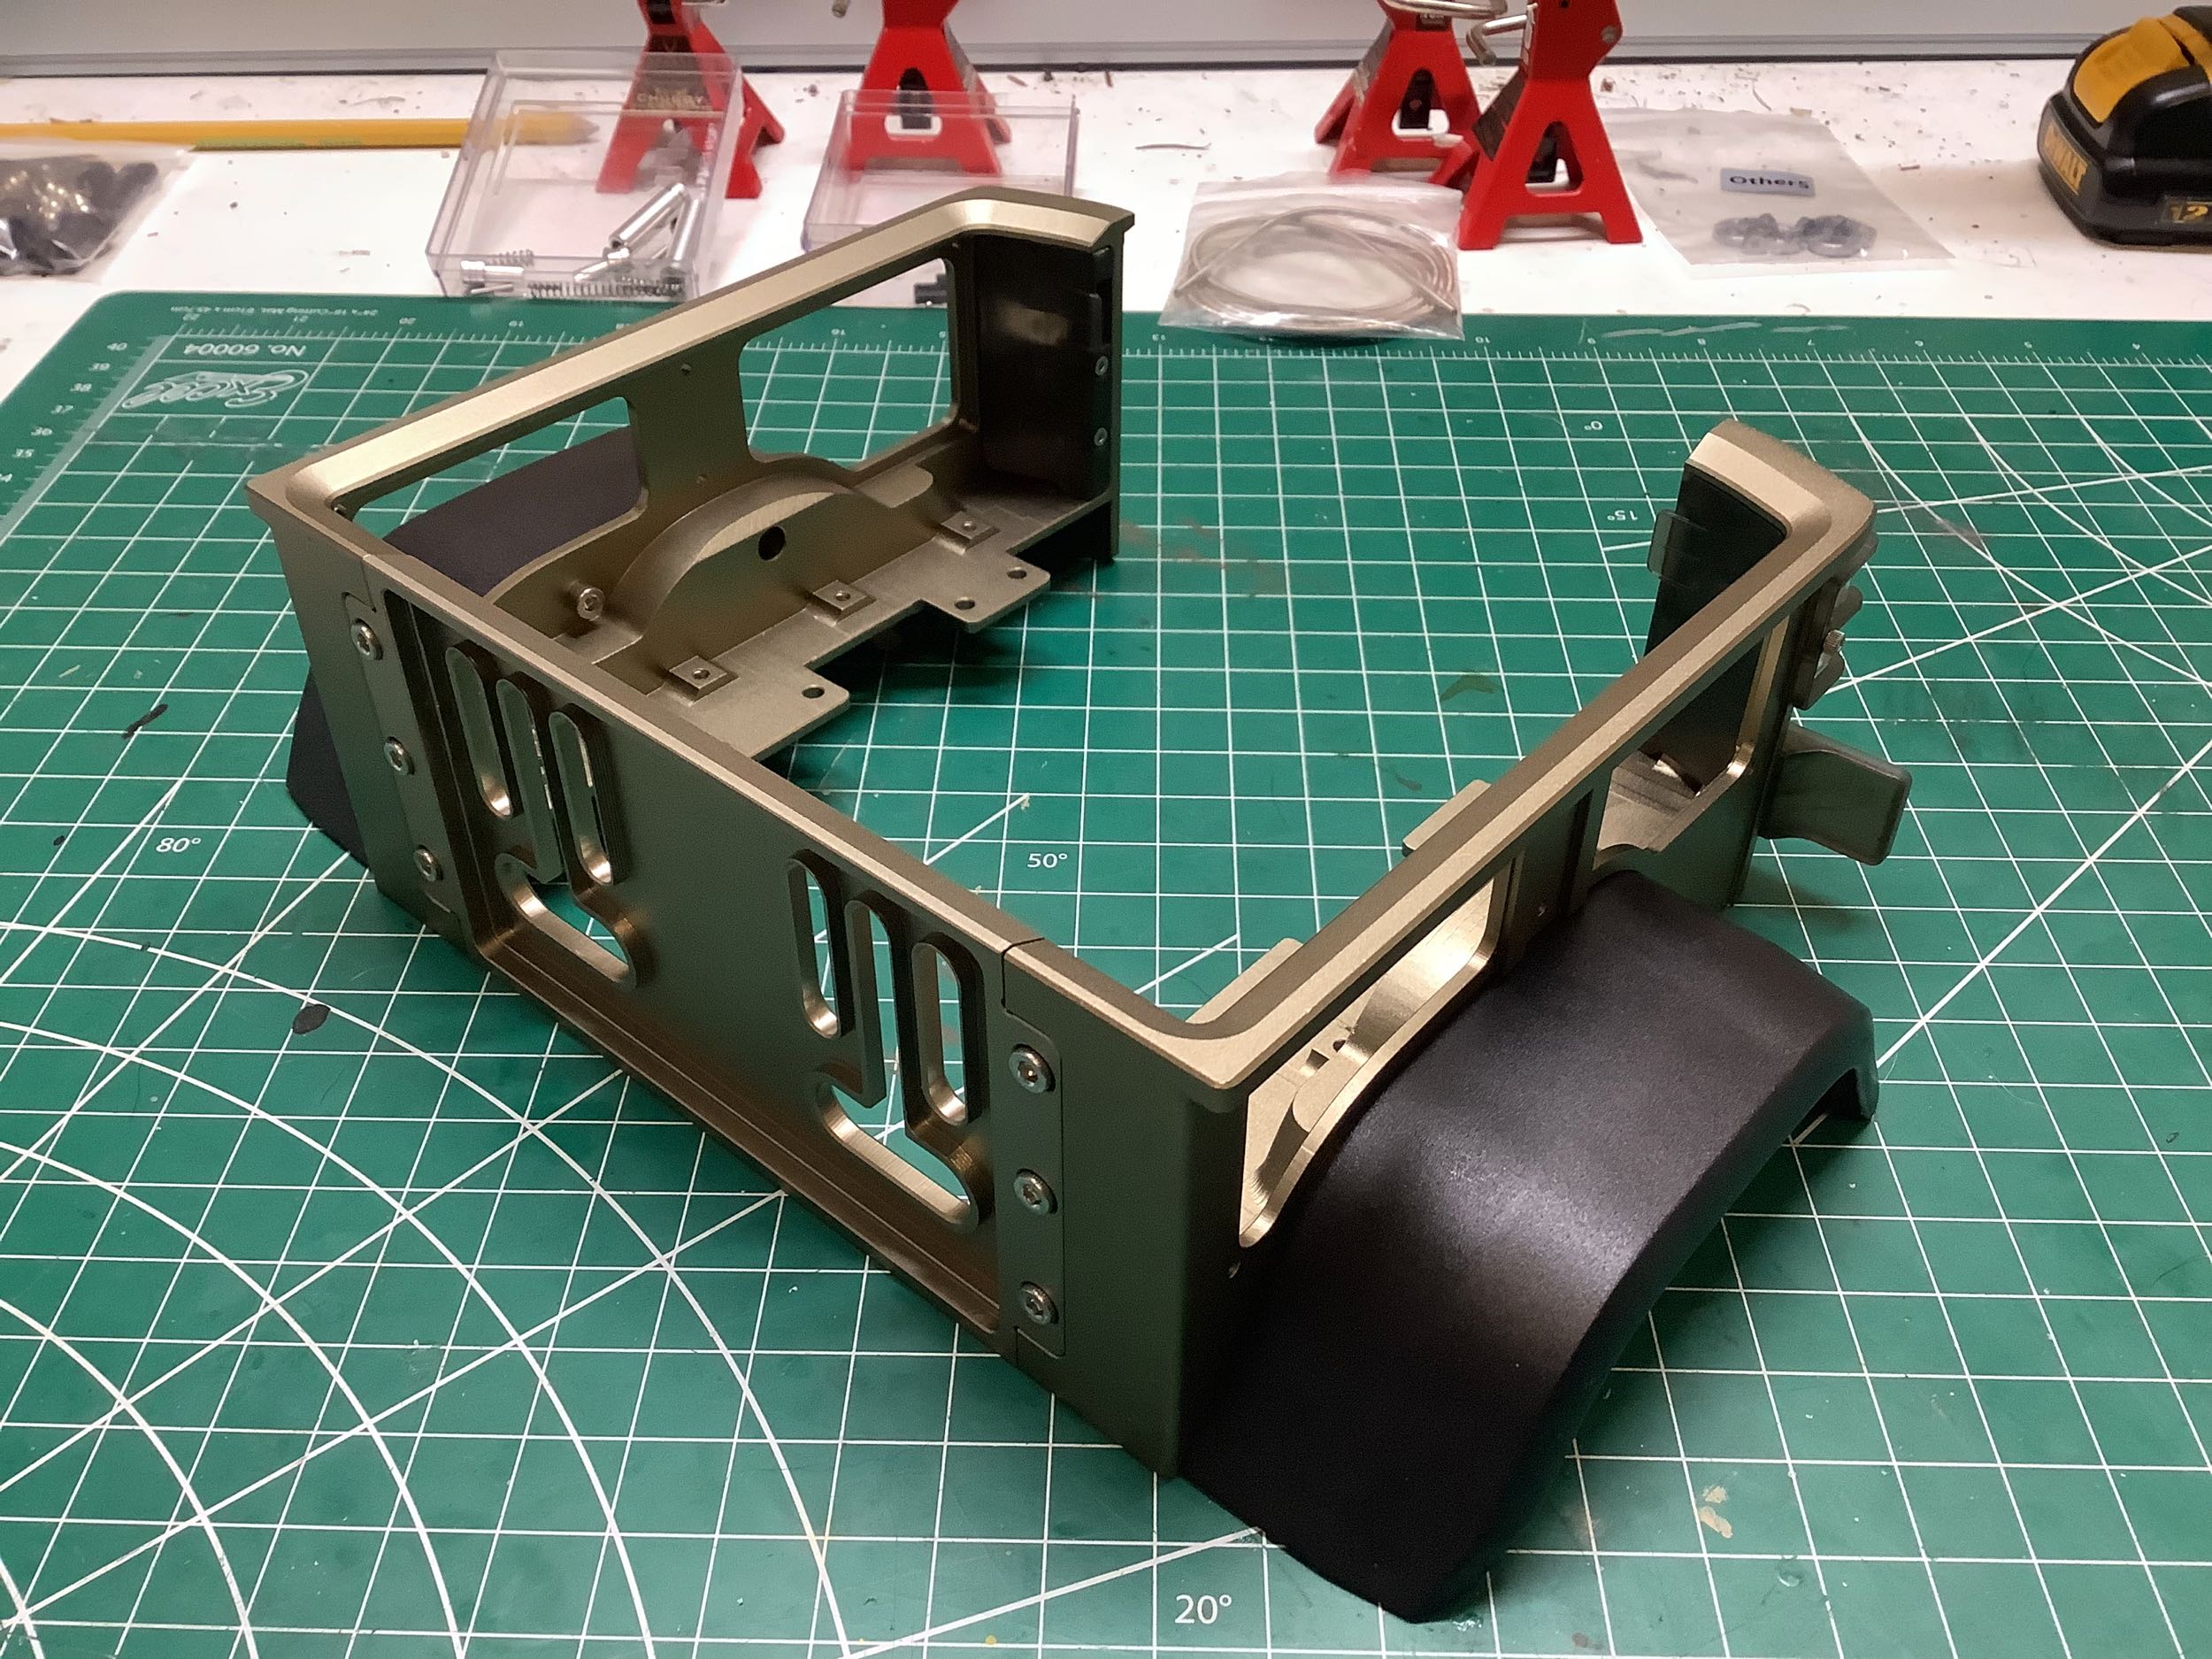
This picture shows the machined front face attached to the backing structure. It is starting to look like a truck!
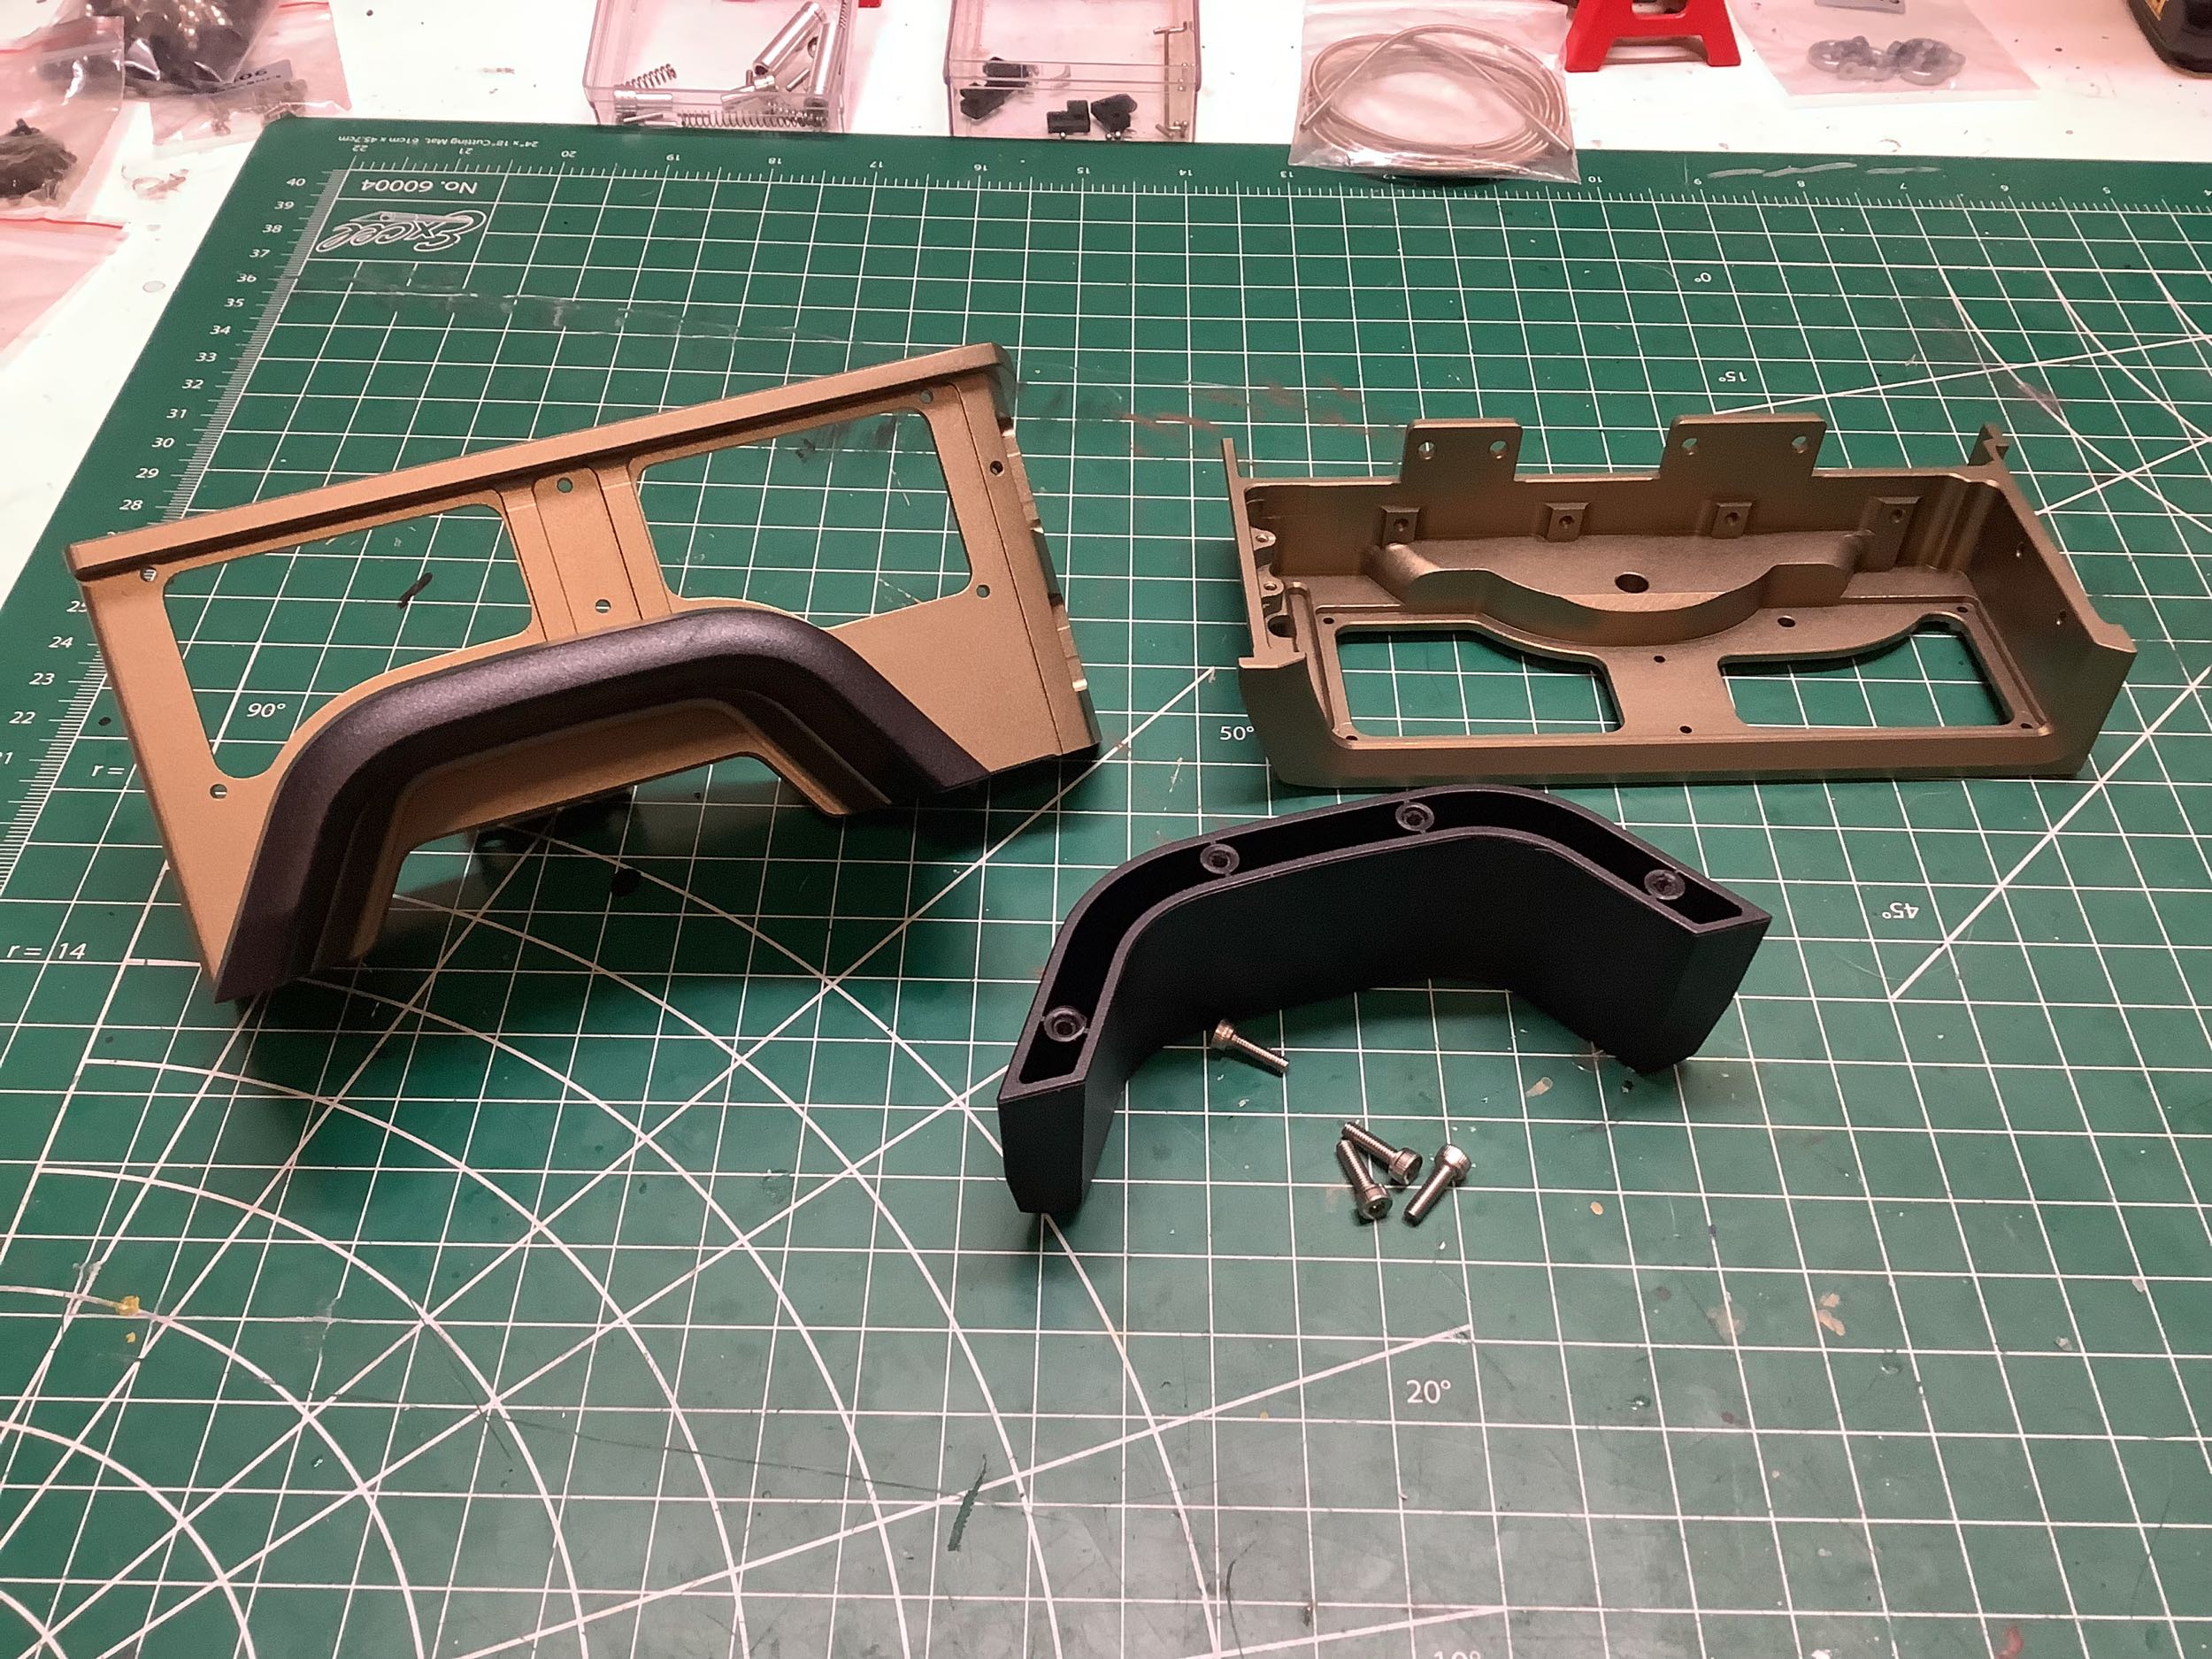
The fender flares on this truck are massive and required me to make a
difficult decision. According to the pictures of the real truck,
the fender flares are painted the same color as the rest of the
vehicle. I knew there was no way I was going to be able to paint
the molded flares and get them to actually match. My next option
was just to paint them black. I finally decided that since many
Jeep's actually have plastic fender flares and the texture of those used
on the model was a very good match, I'd just leave them alone in their
unpainted condition. I don't feel like they look unfinished at all
compared to the rest of the model. I did decide to tap all the
holes into the plastic to prevent and chance of splitting. I also
used double sided tape
to attach the photo etched side vents as shown.
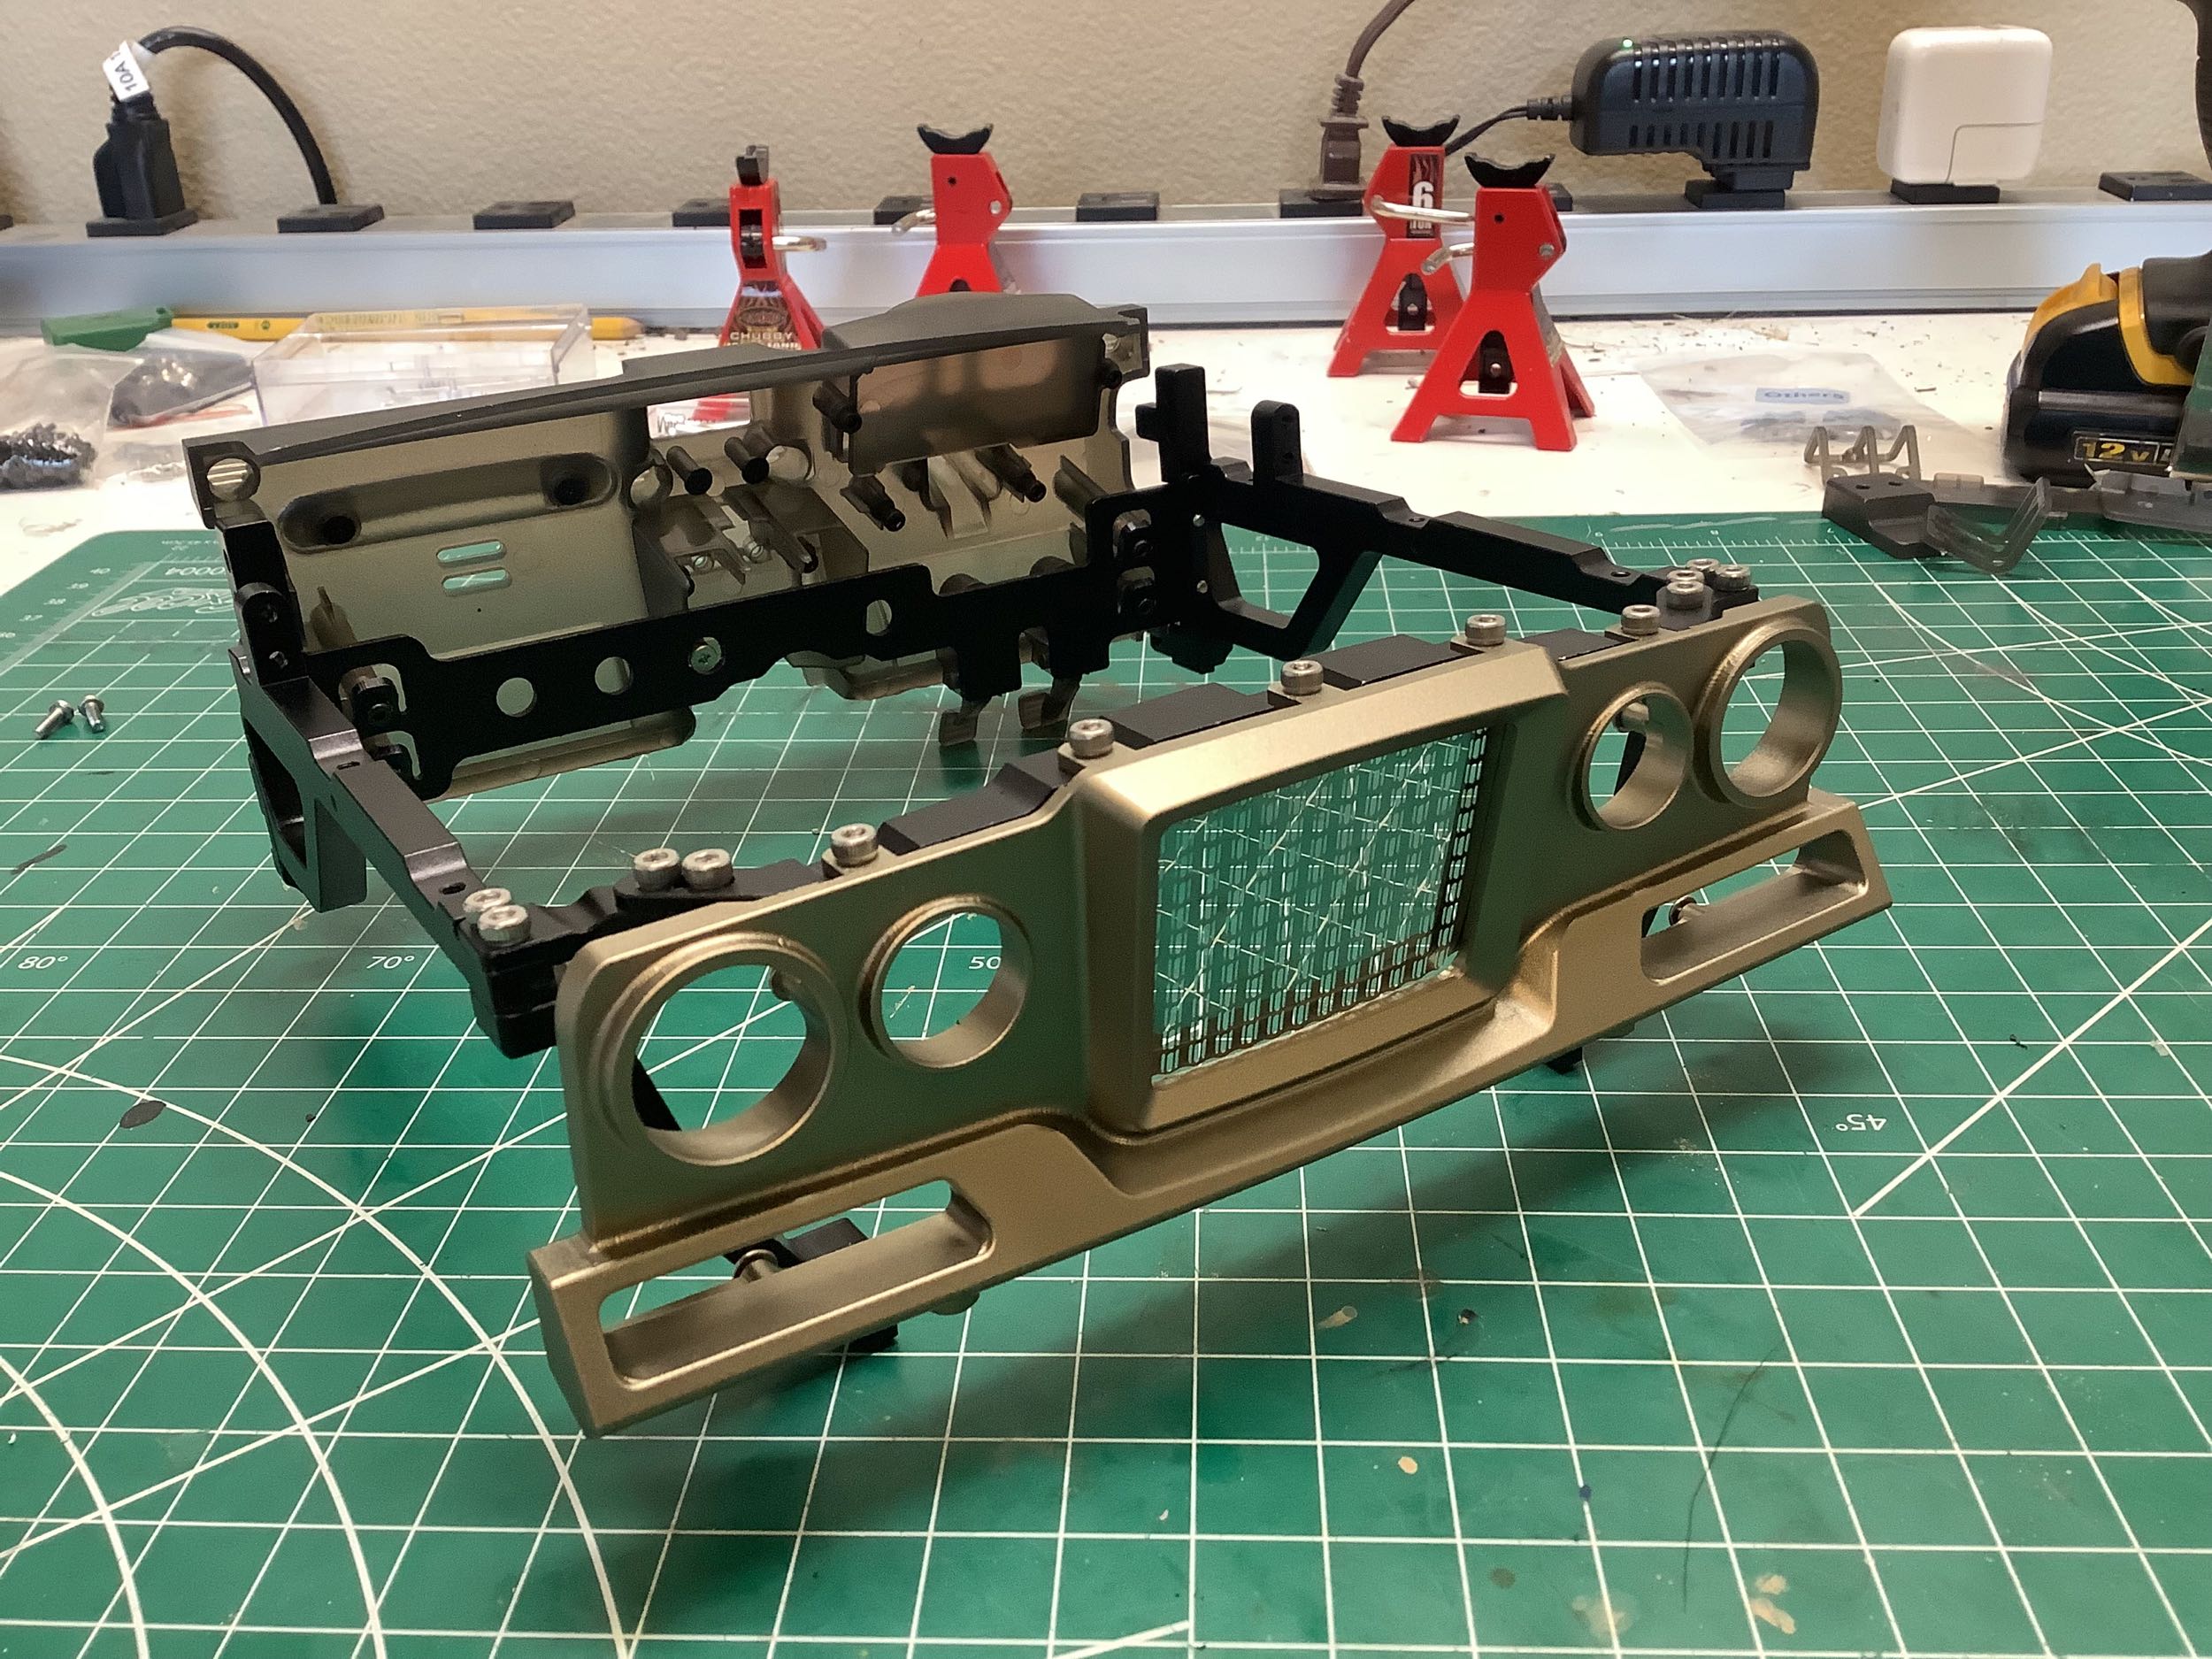
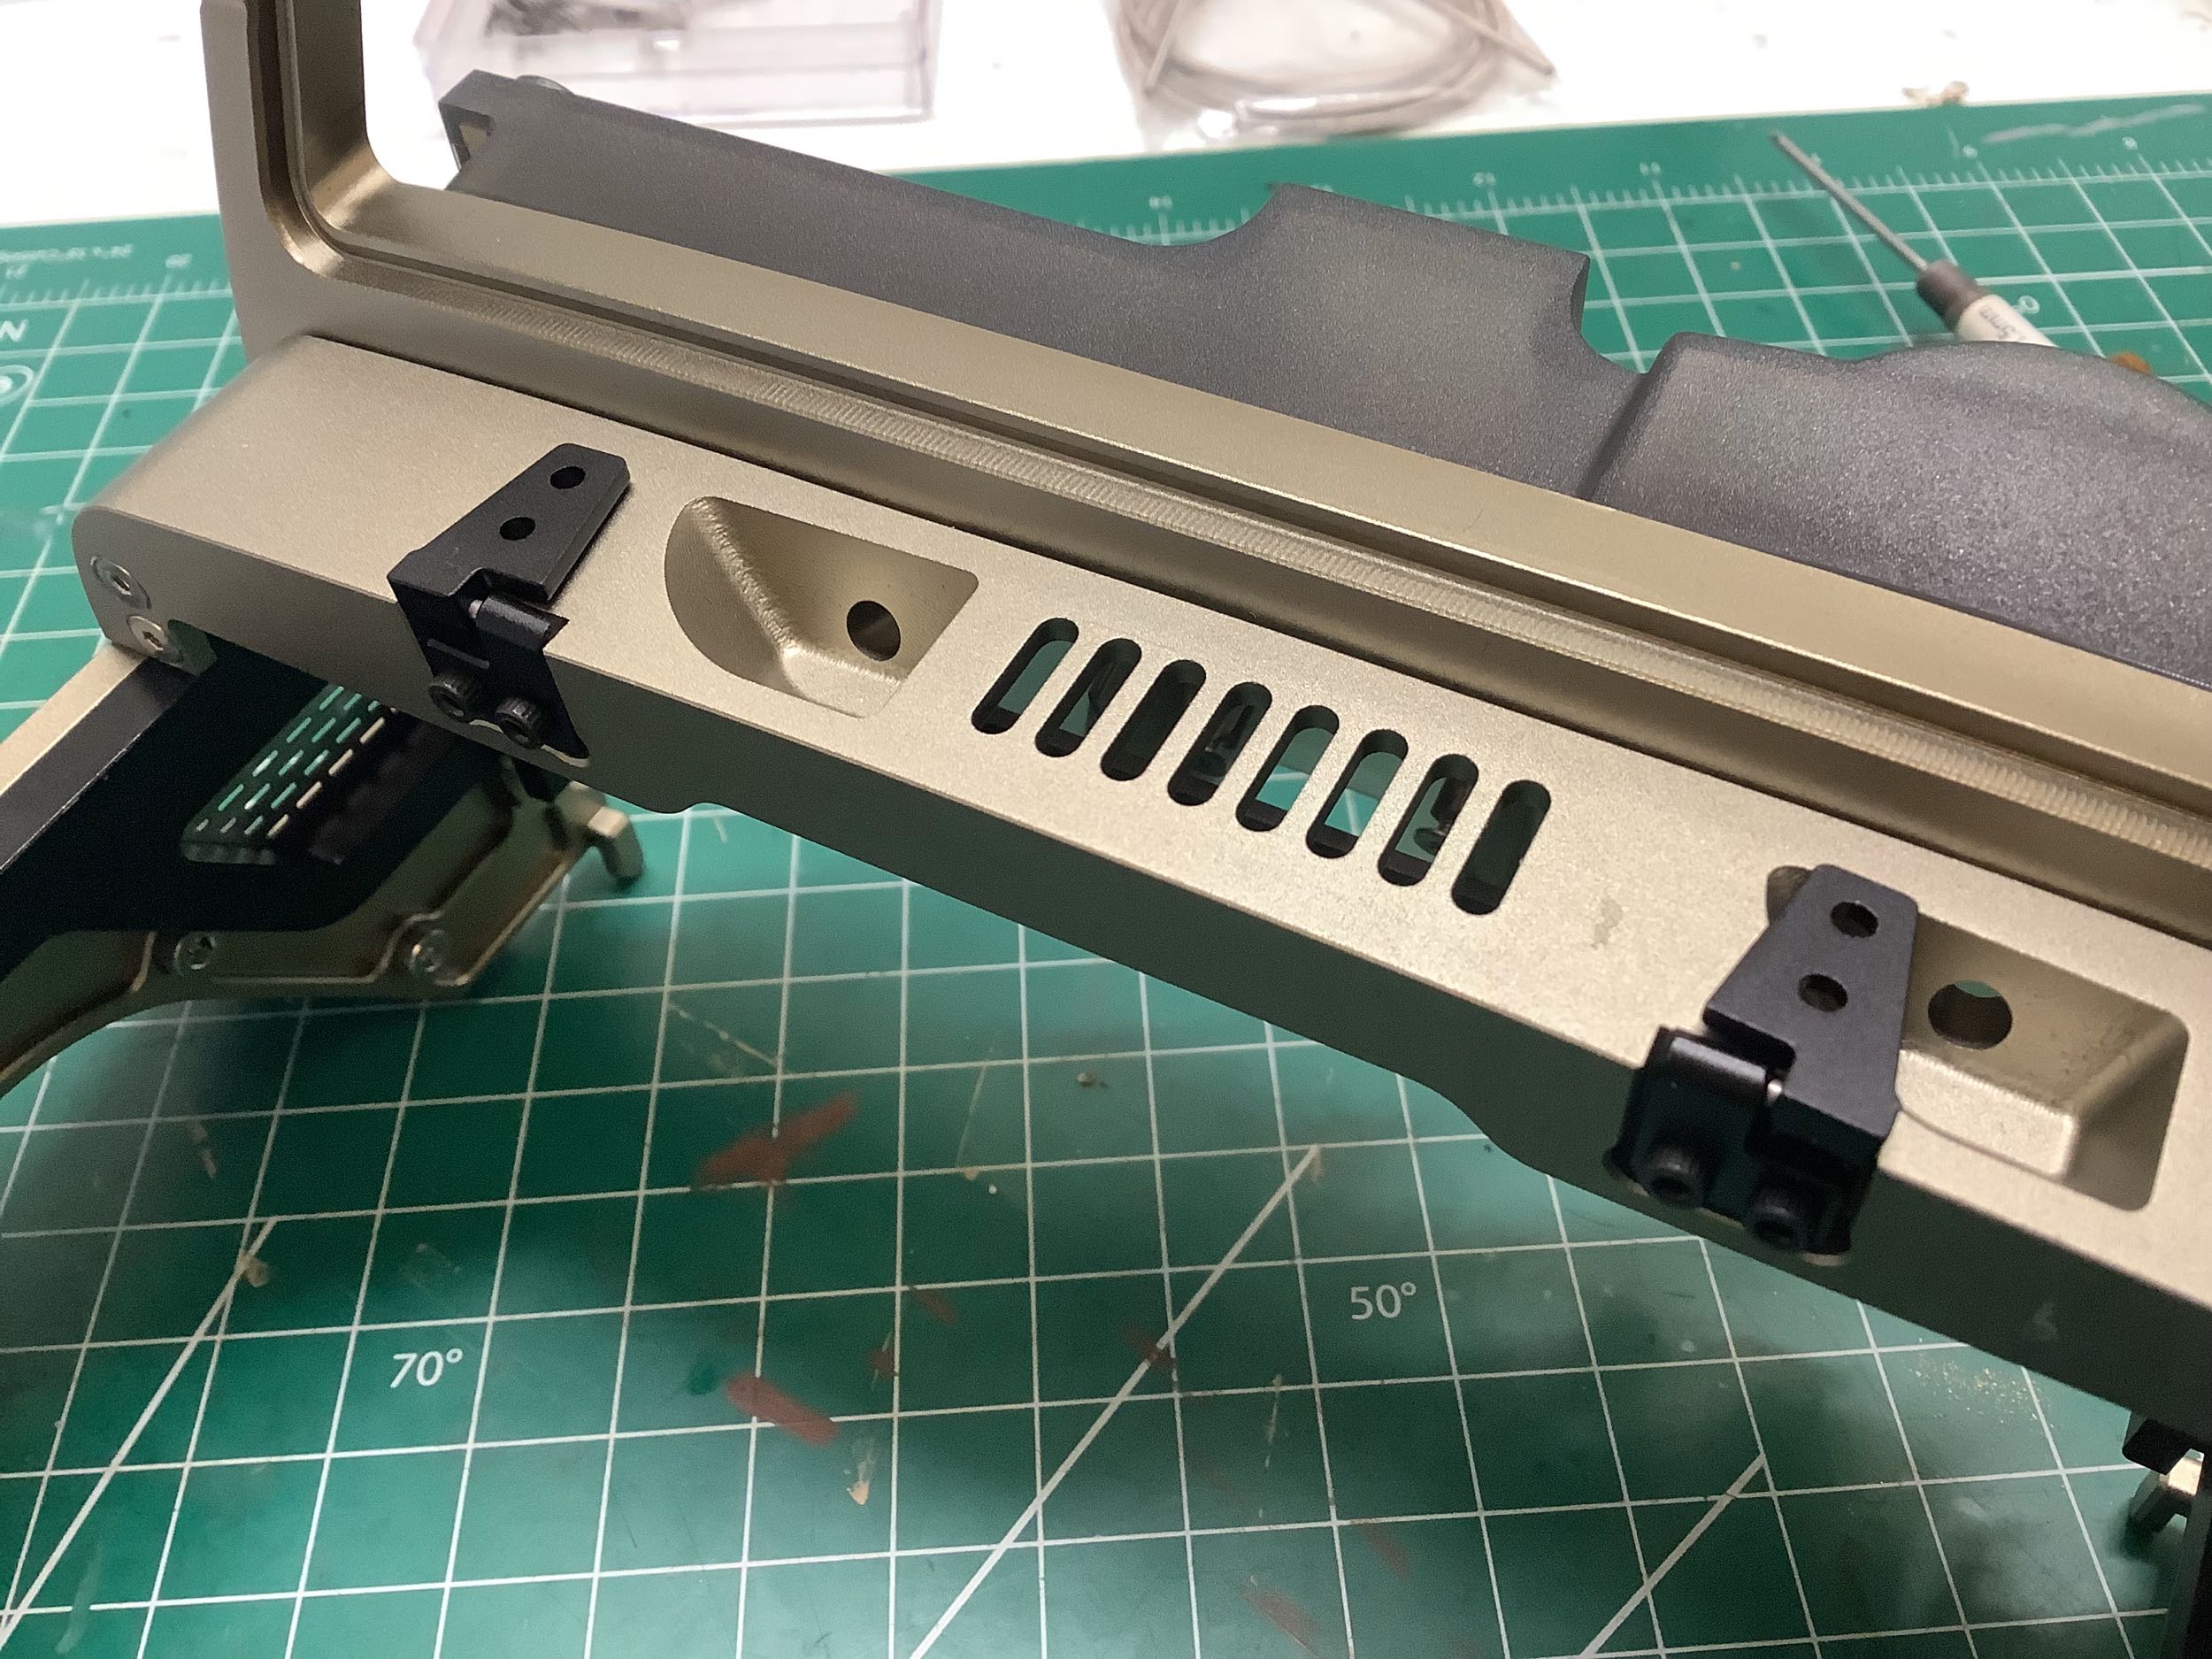
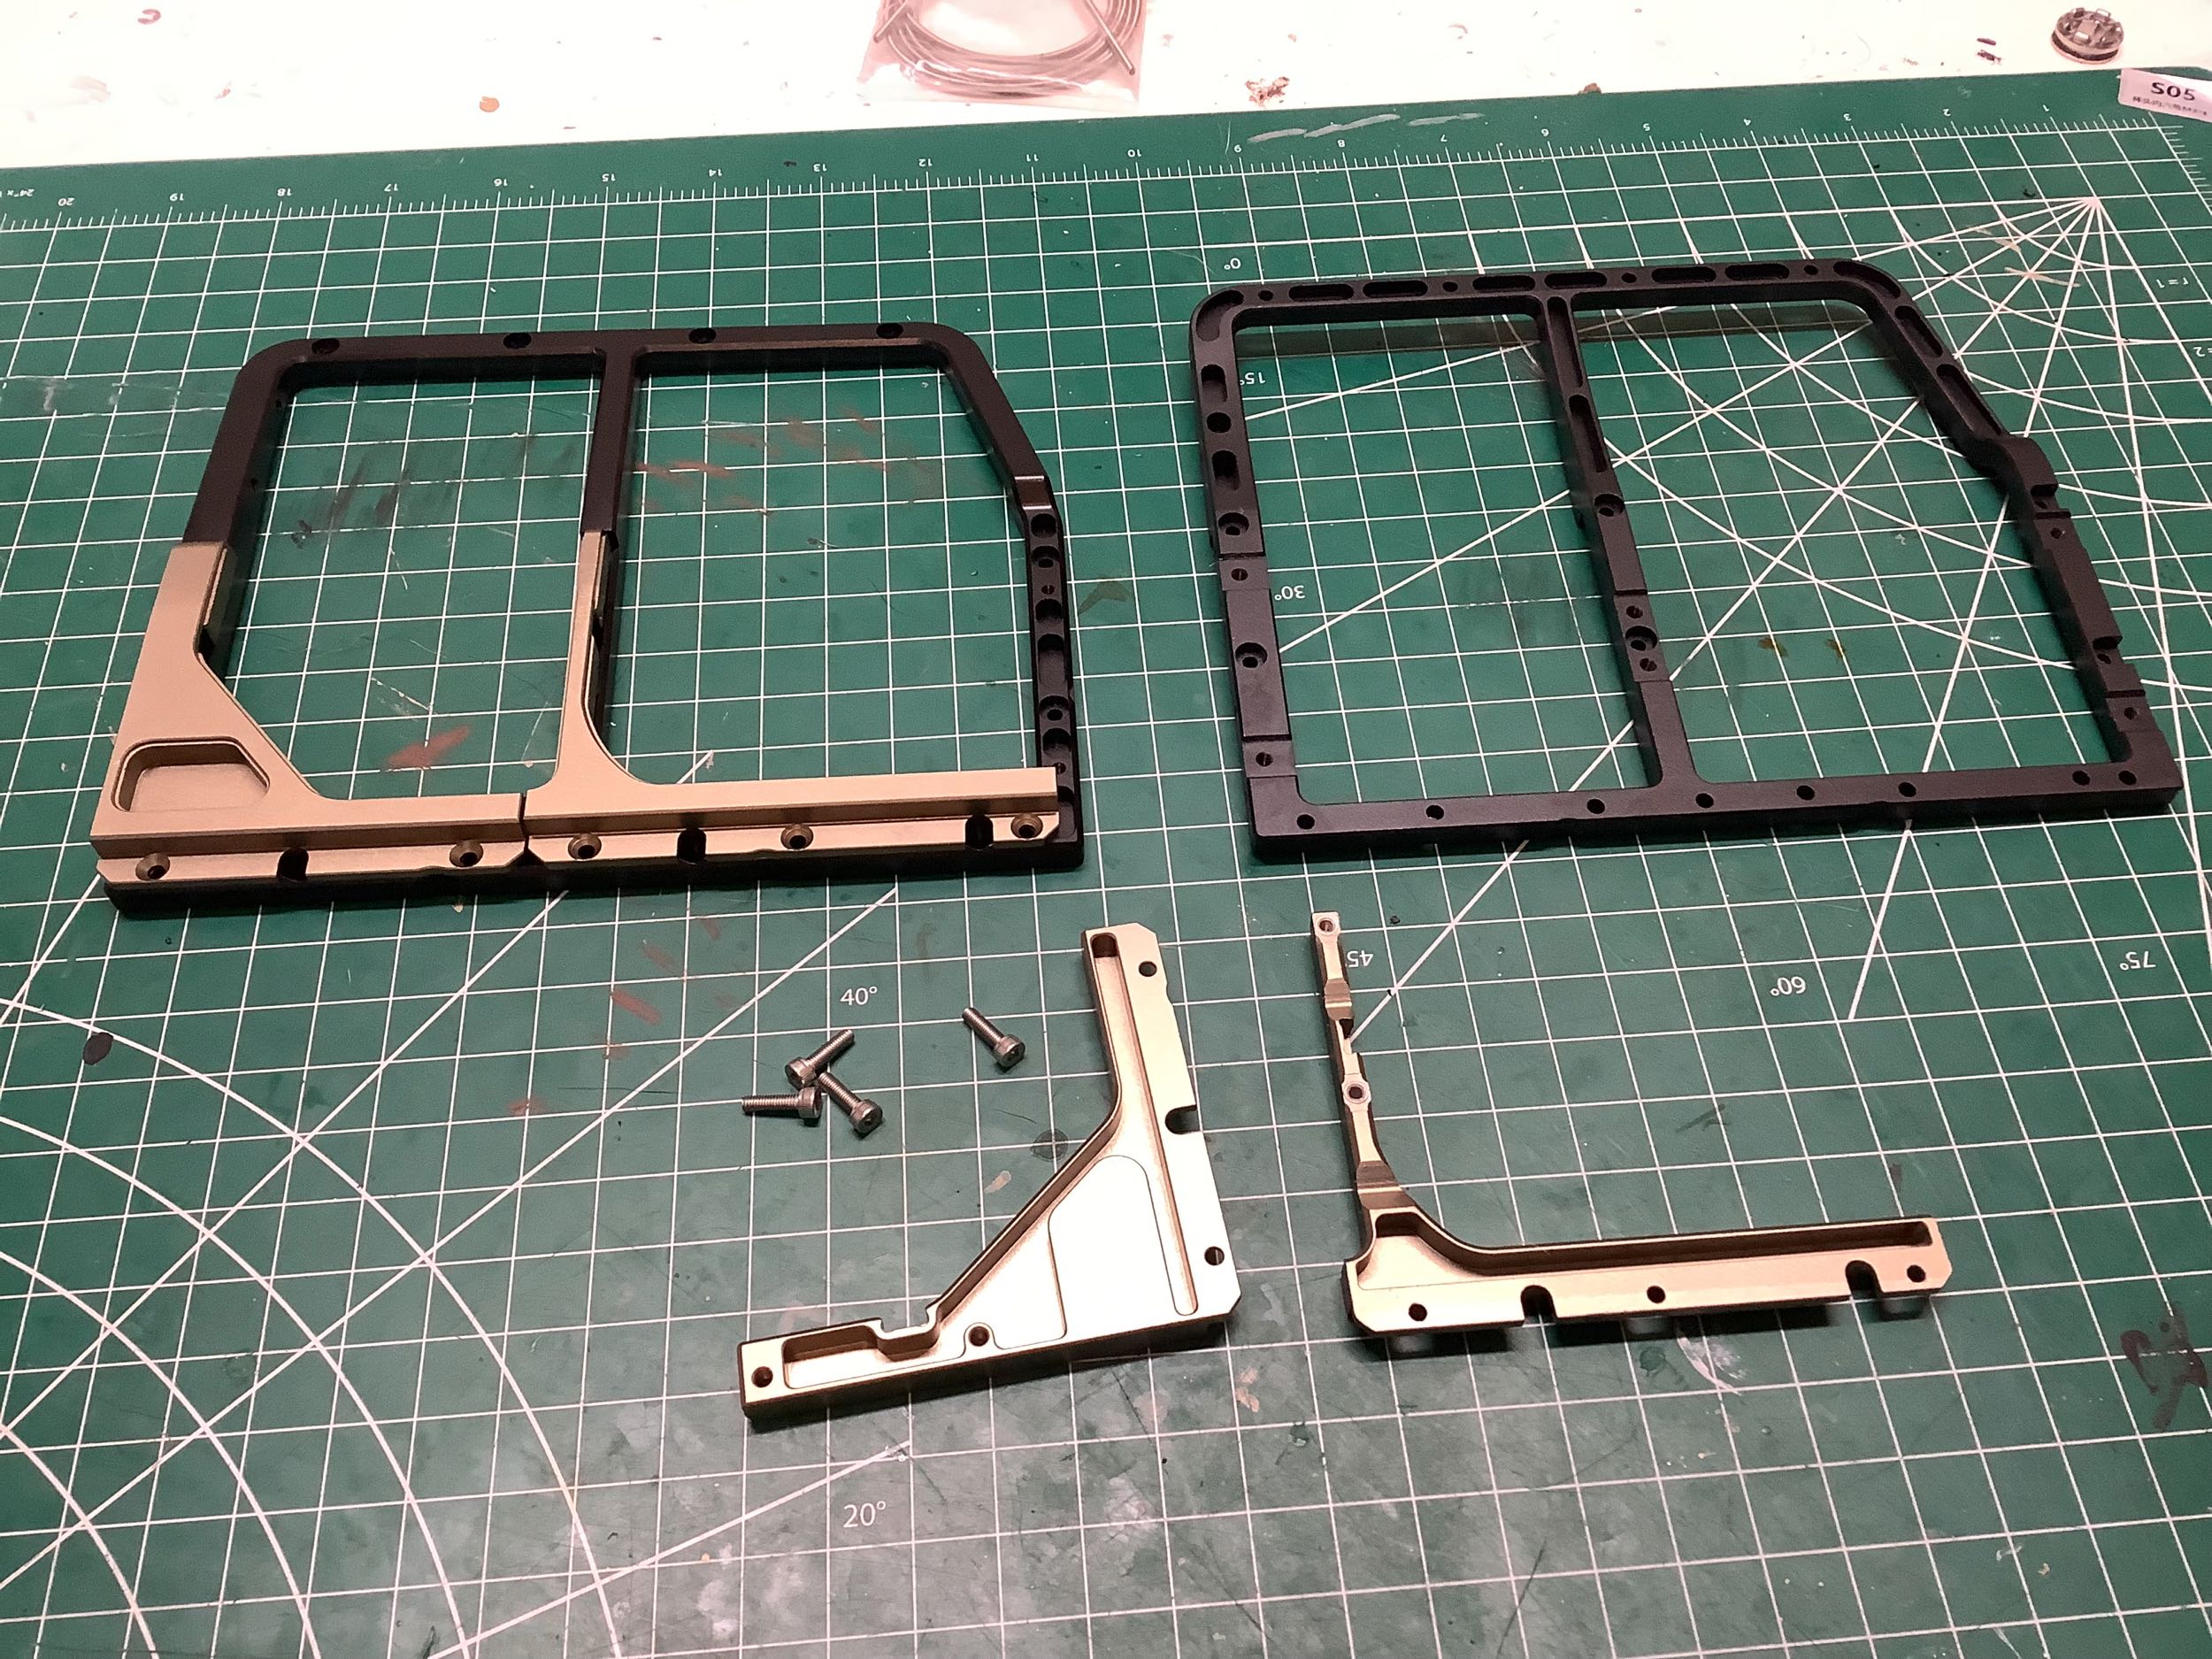
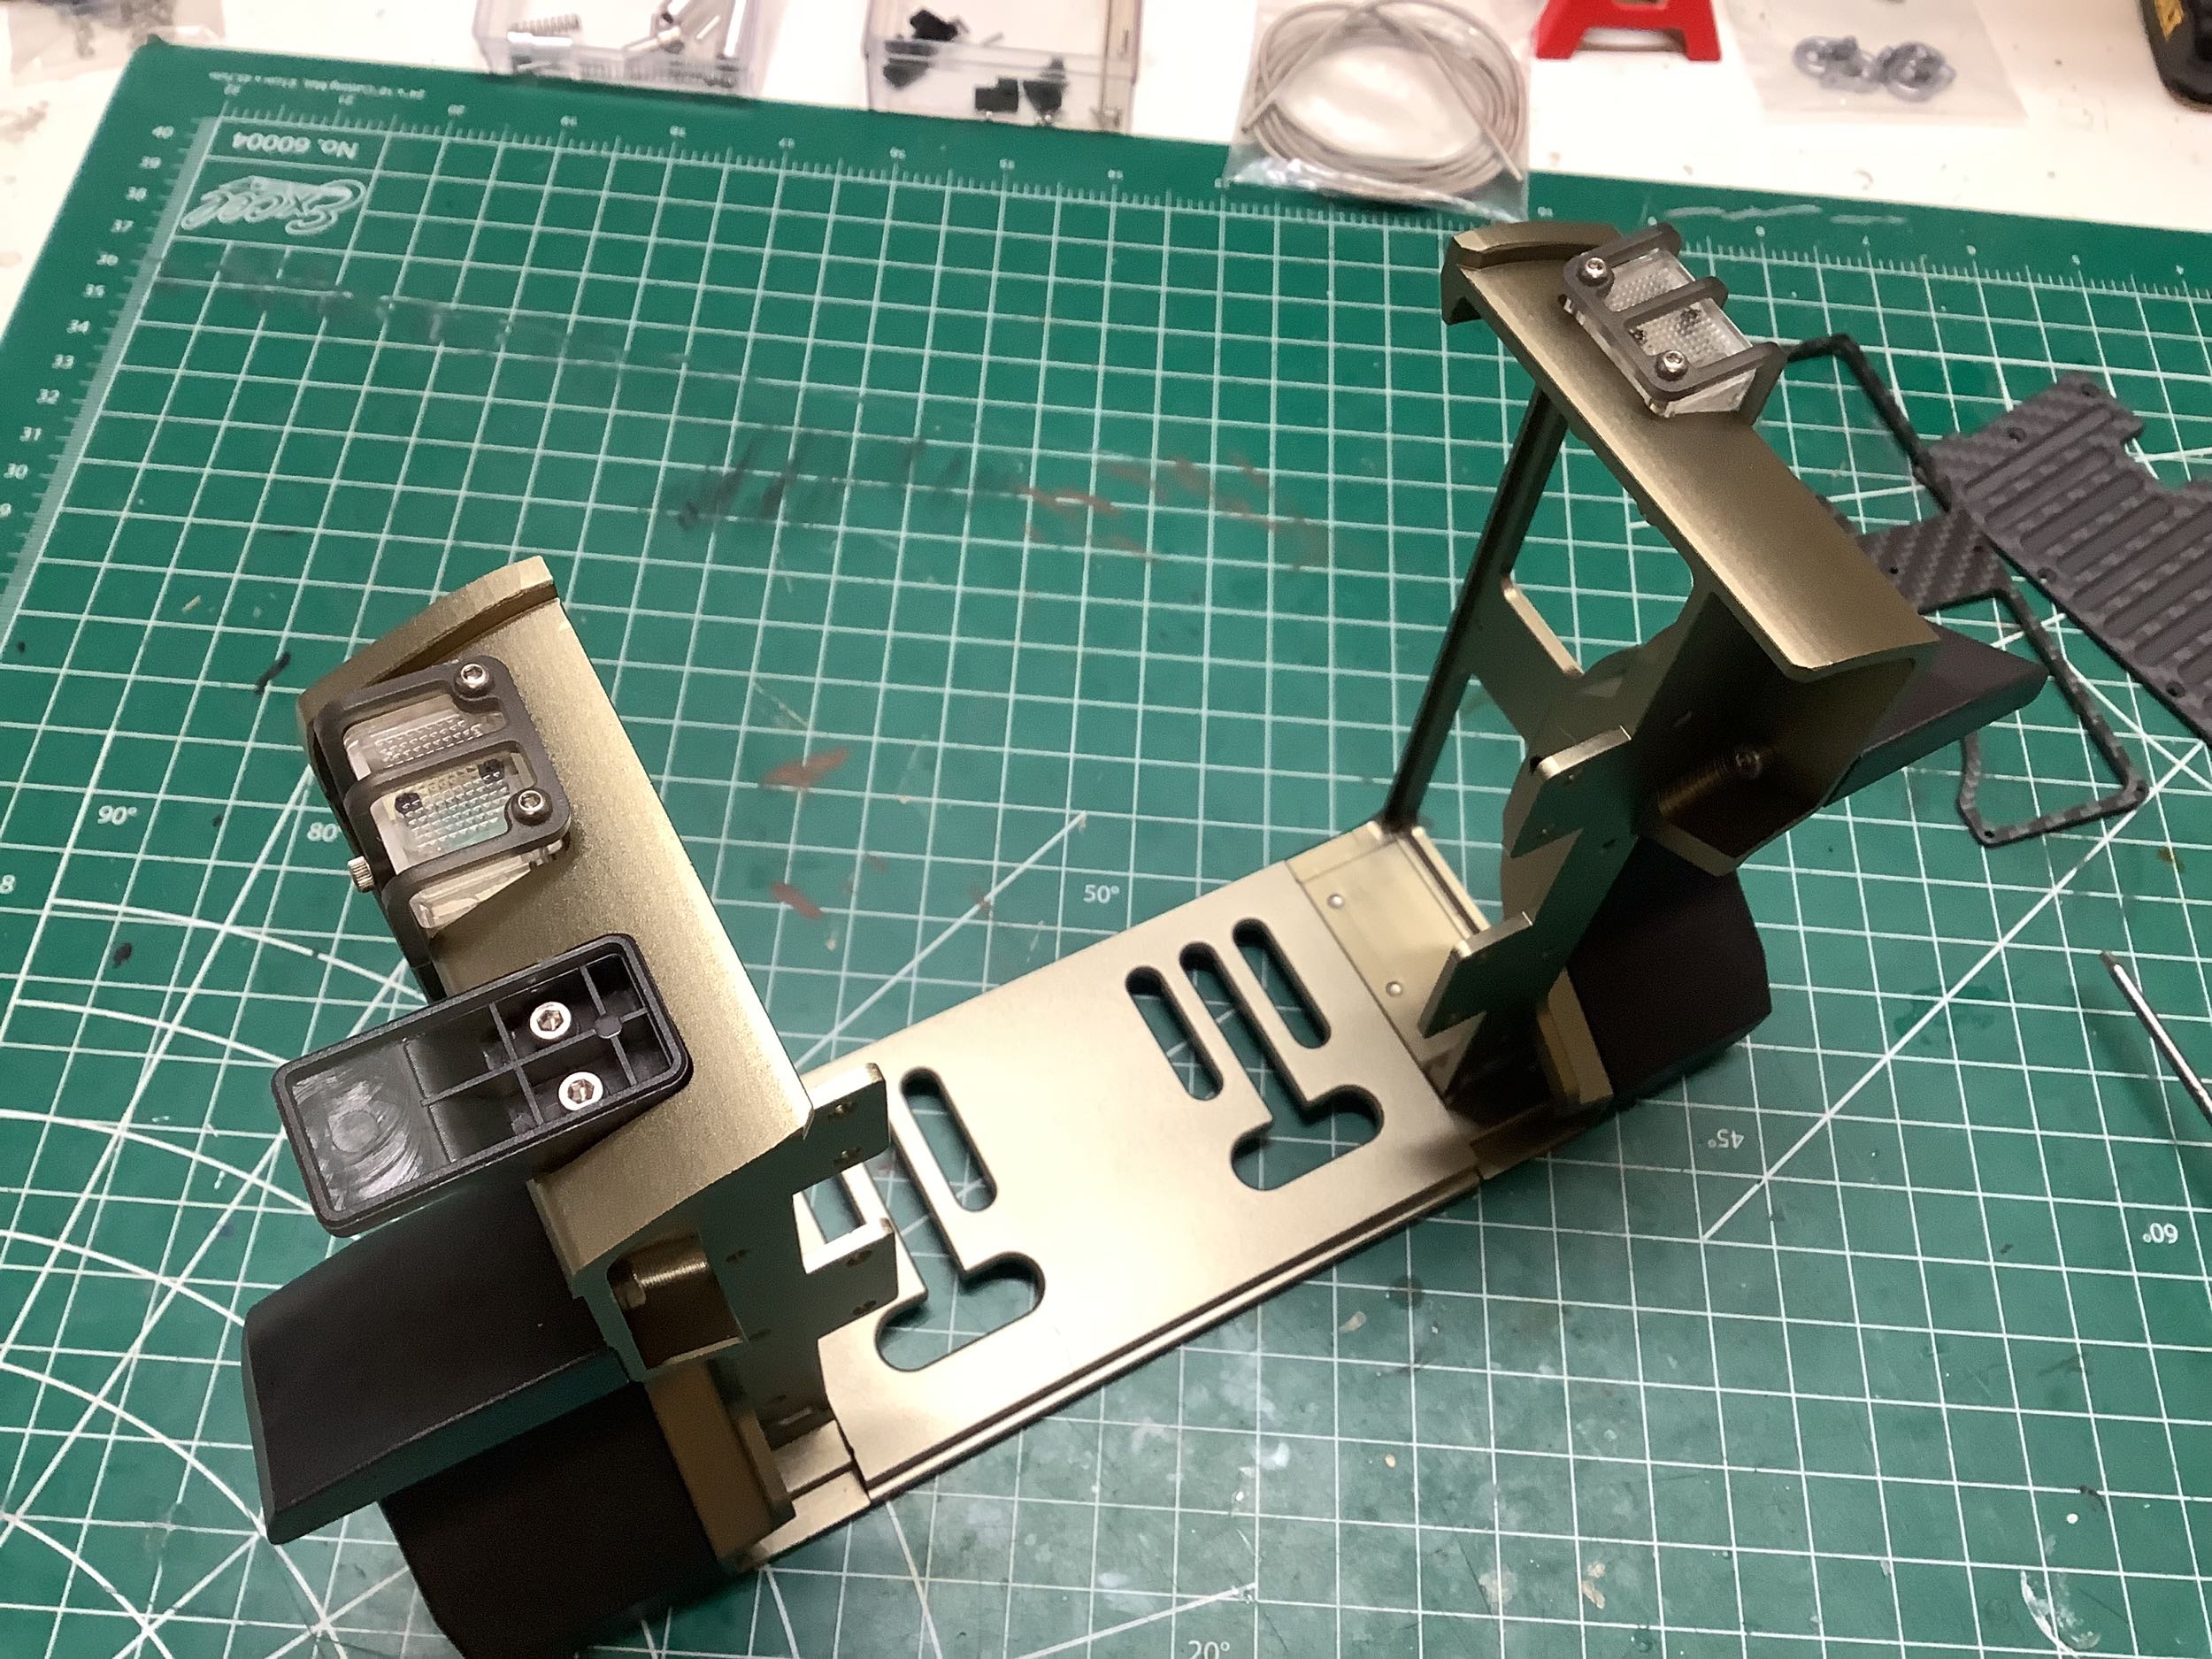
The next step is to install the A-pillars and windshield support.
This is a heavy machined component that is actually suitable as a roll
bar. Next is the air intake area behind the hood. Oddly,
even though the model is clearly provisioned for wipers (probably
motorized wipers), they do not come with the kit and are not available
as options either.
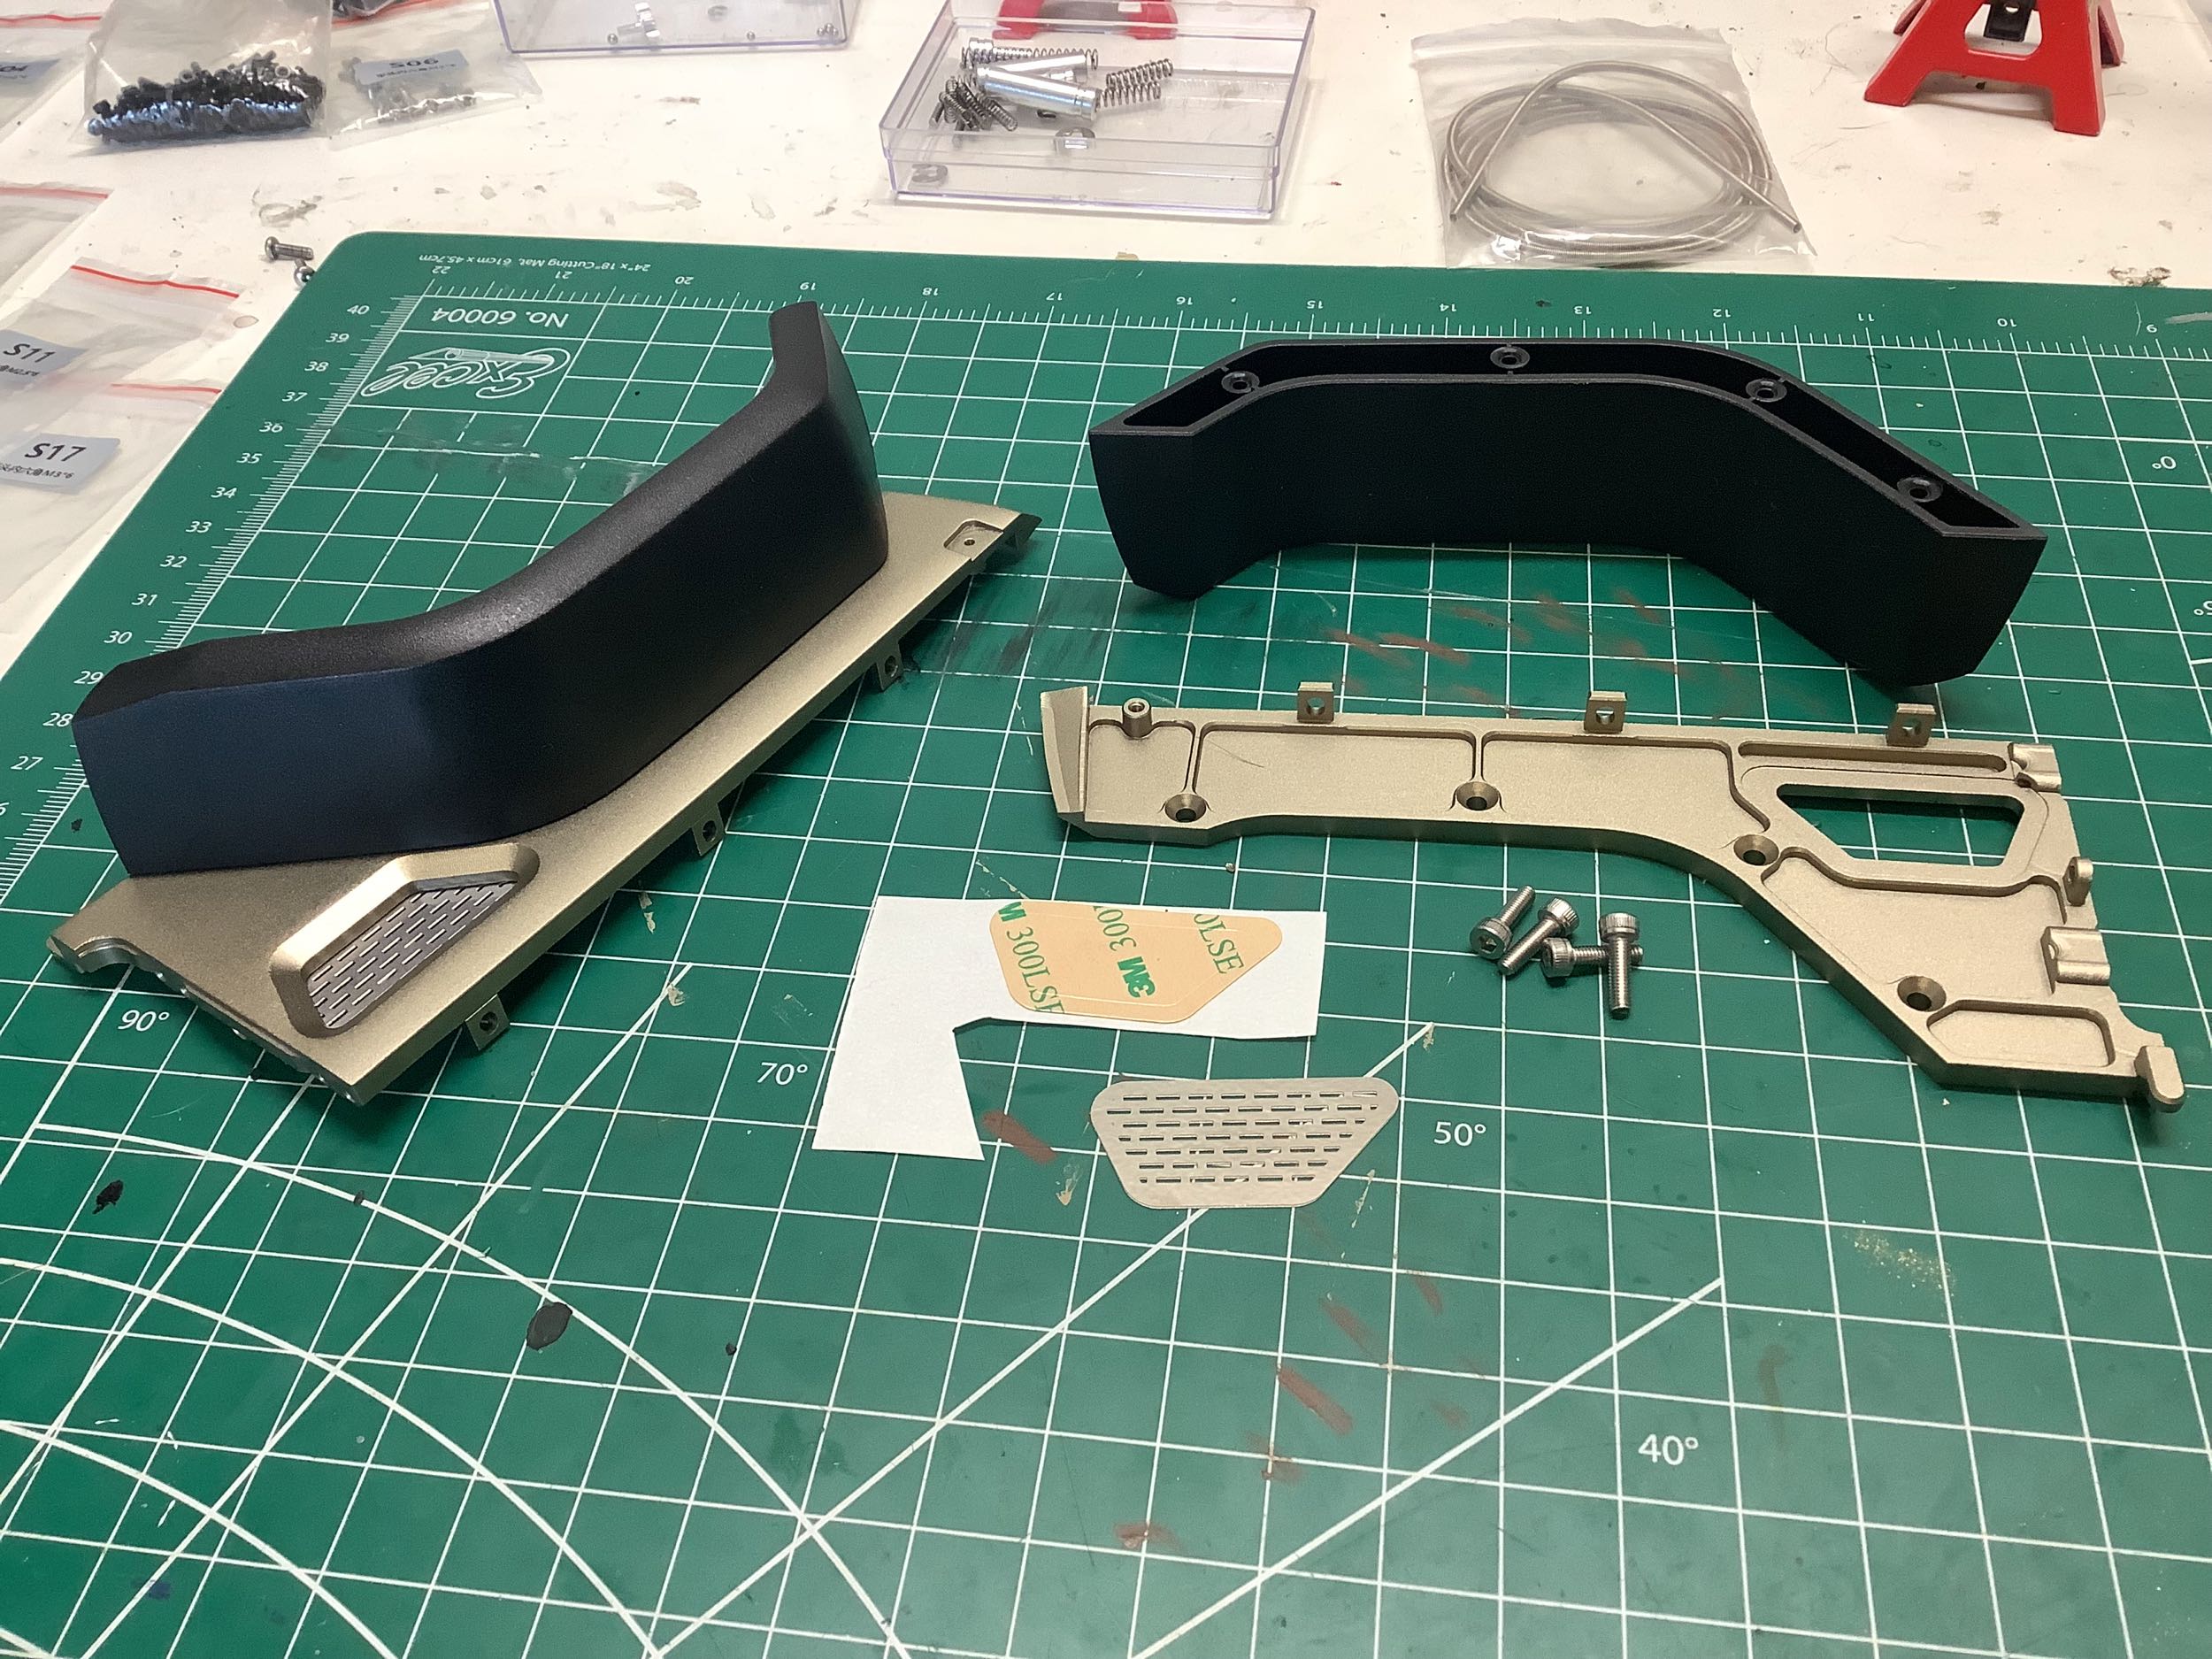
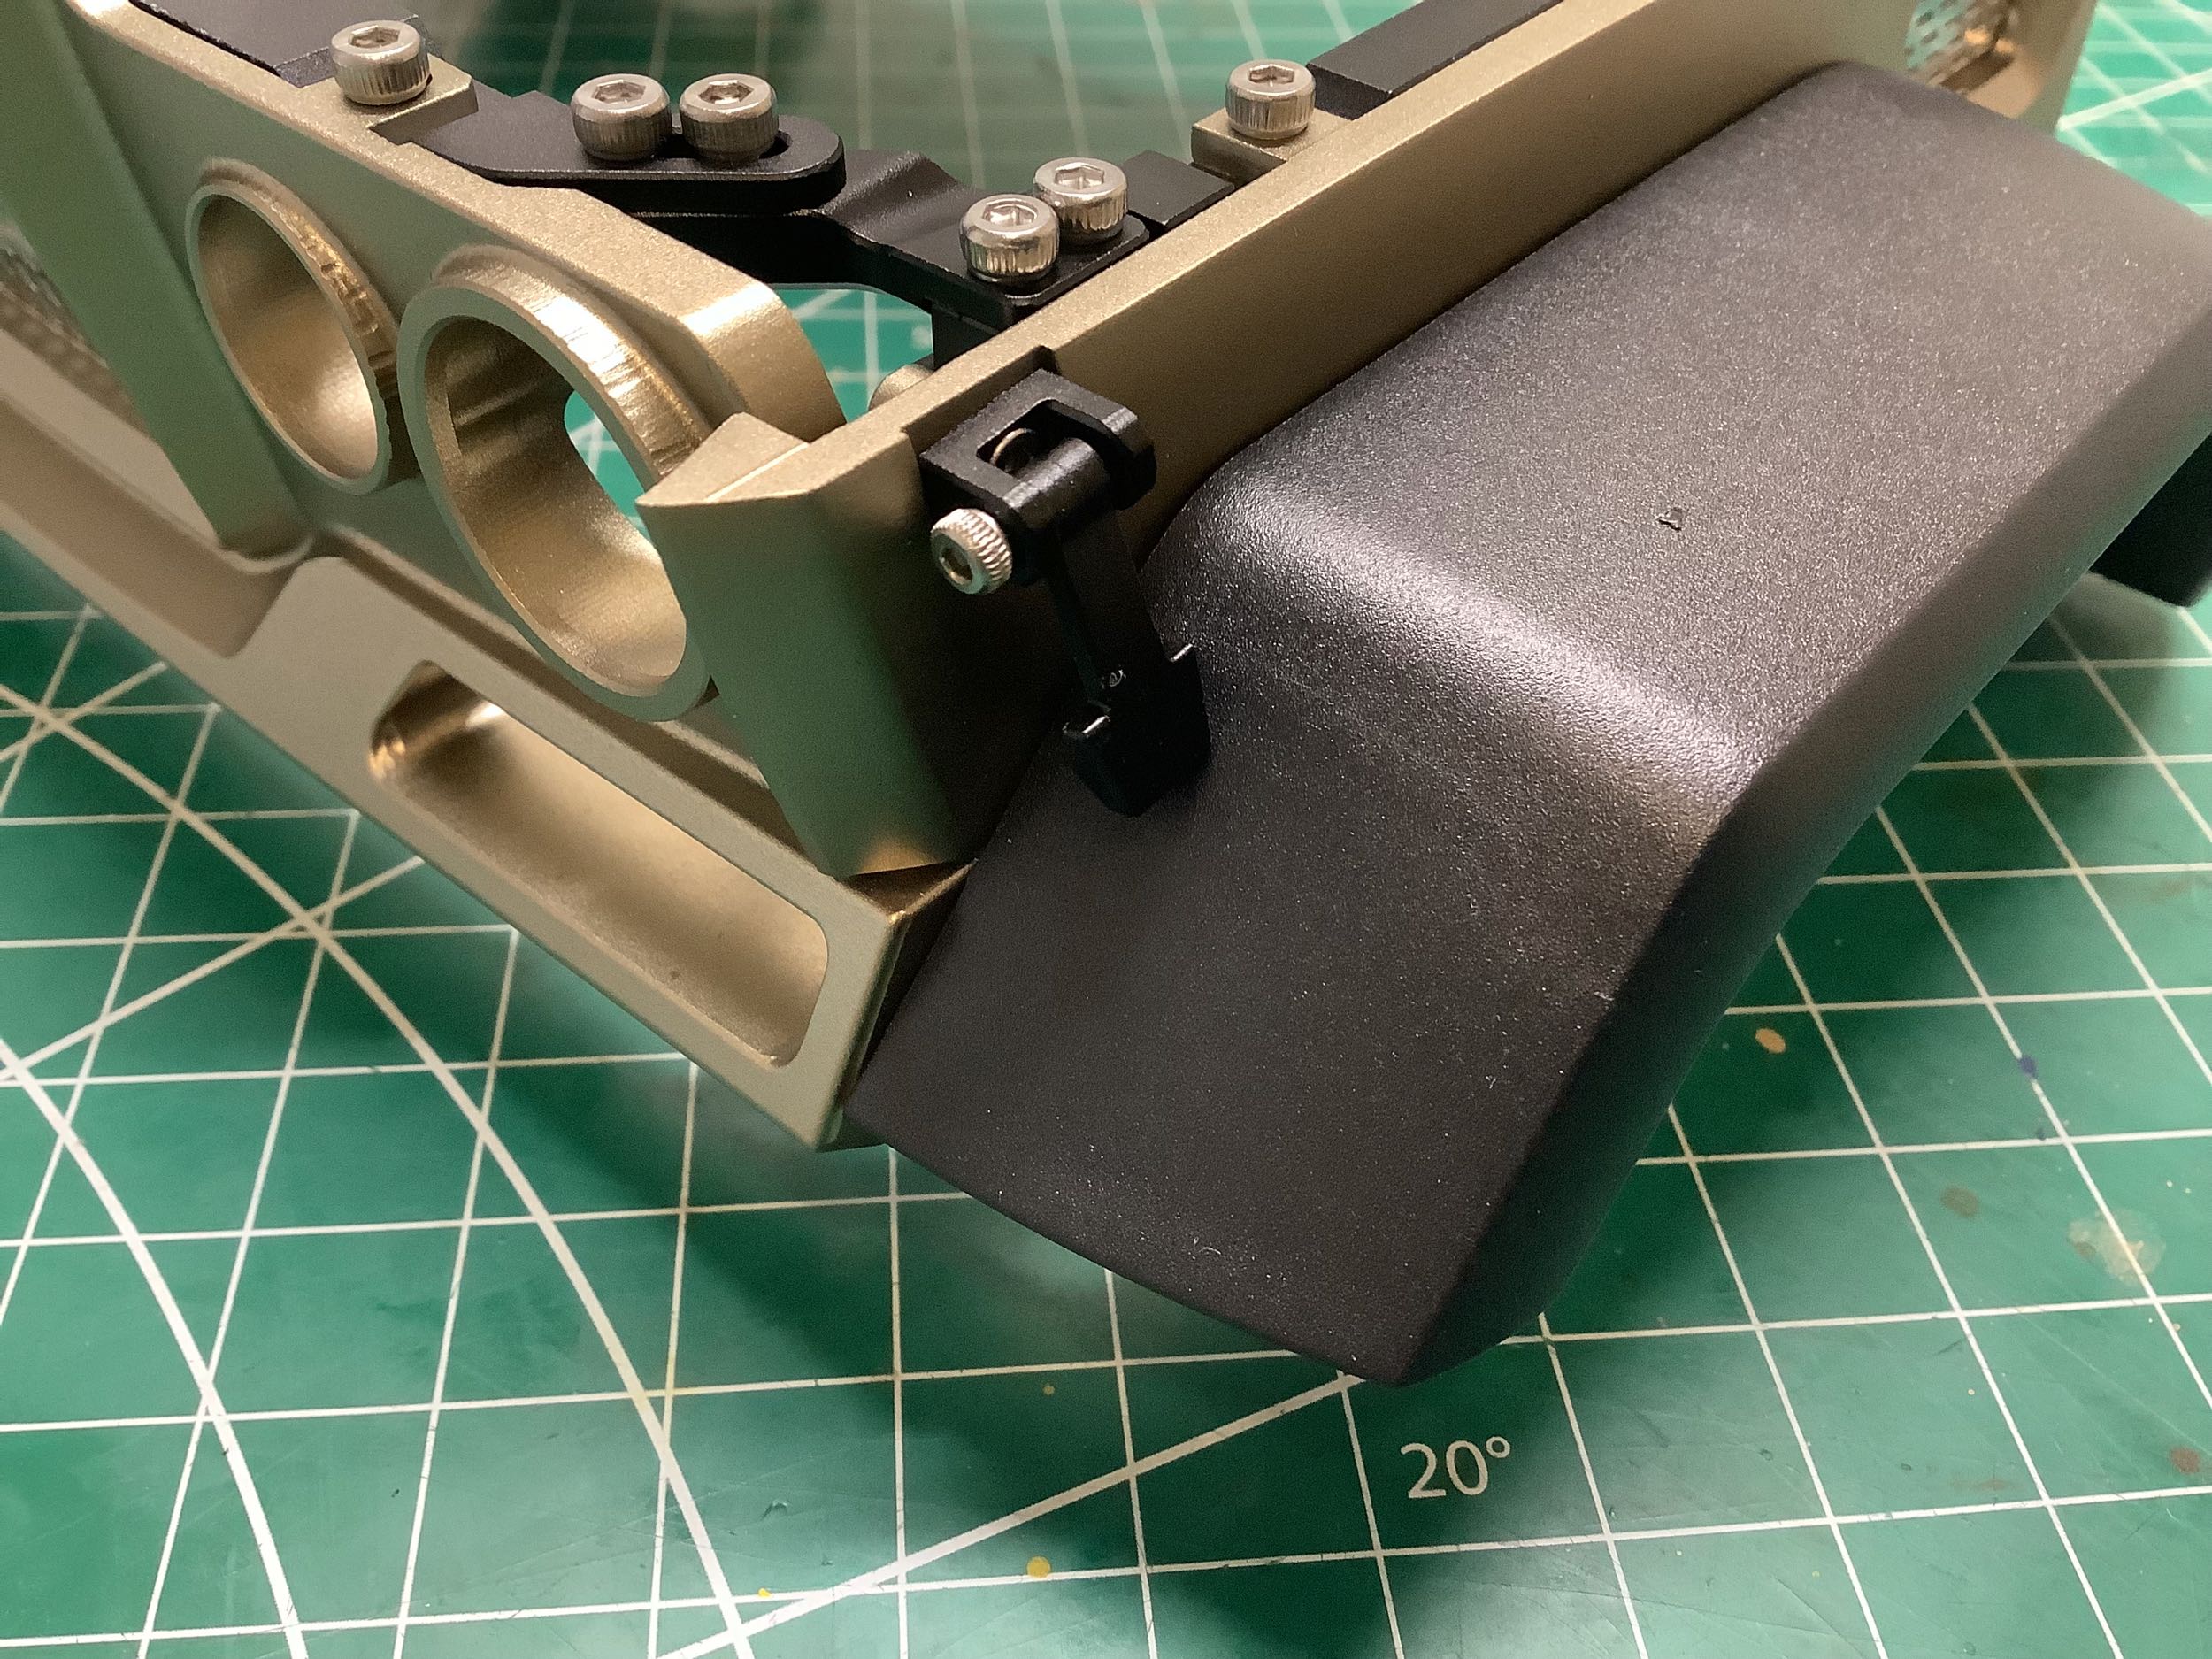
Now I can install the hardware which will attach the hood. These
trapezoidal hinges (left) look just like those on the real truck.
On the right you can see the front corner hood latches.
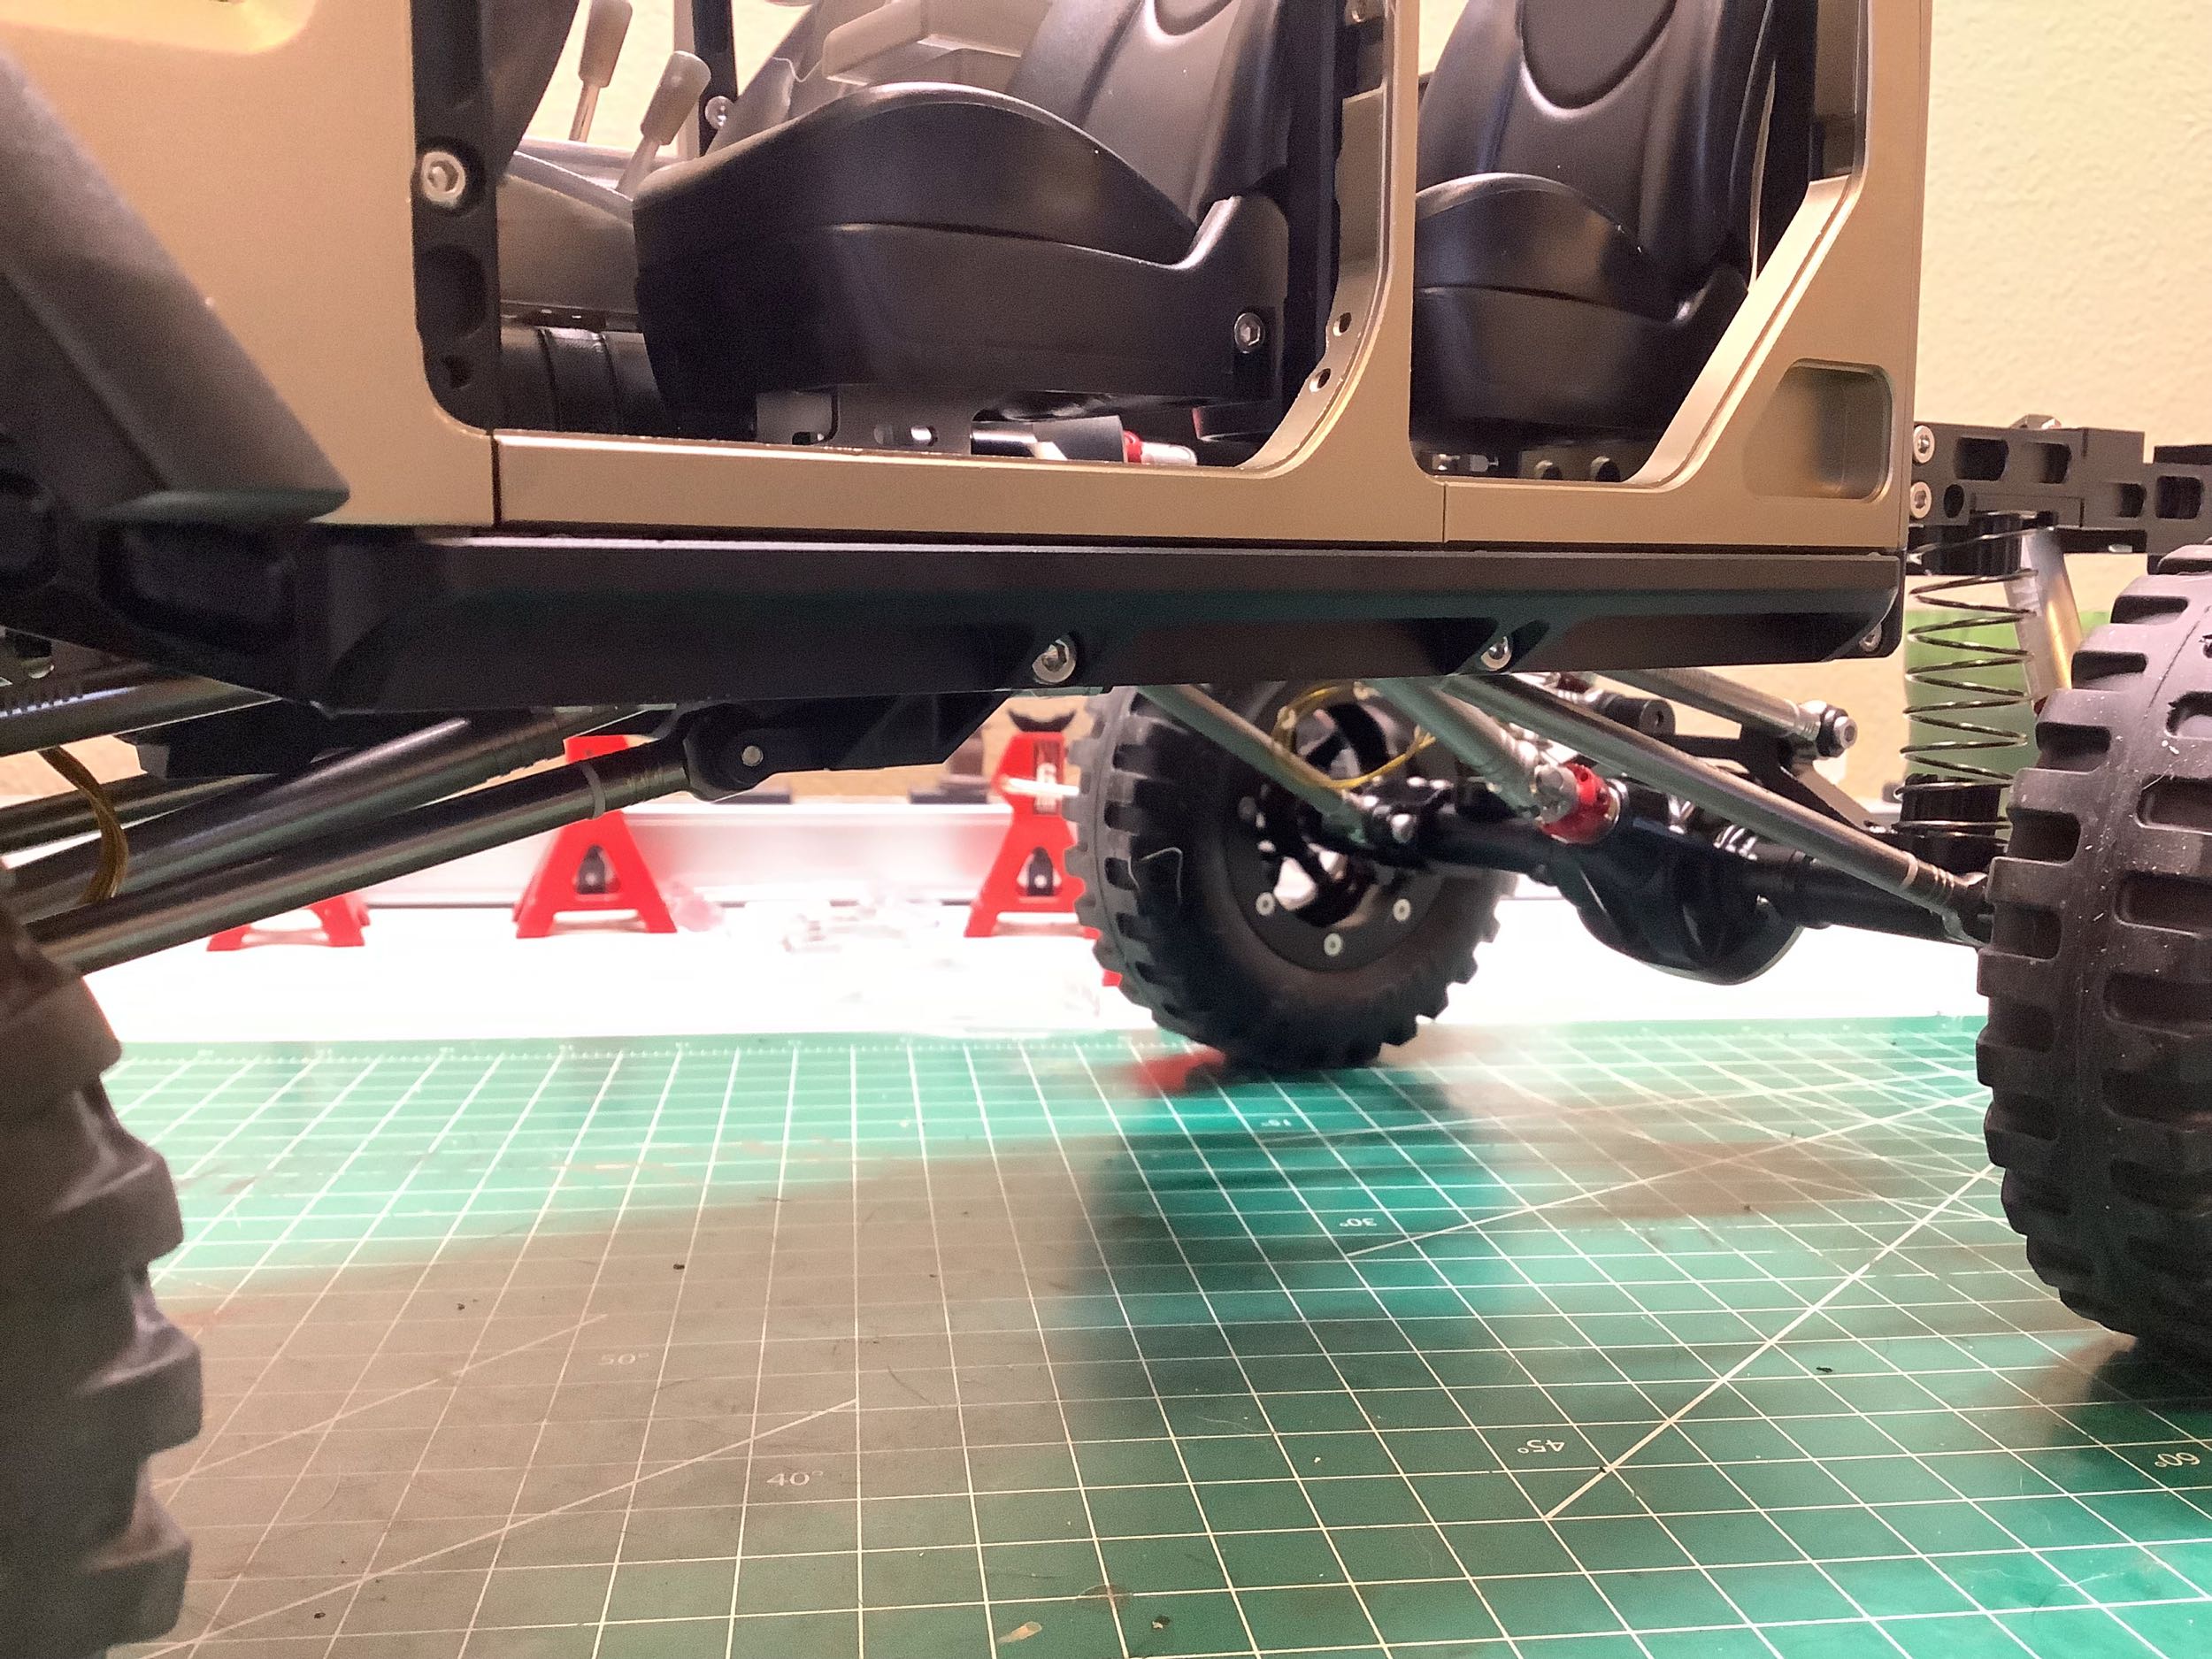
That completes the front end assembly (left). This assembly is
amazingly heavy even without the hood installed. When it was
placed on the truck (right), I was able to see the compression in the
front springs. You can again note how far back the engine
is. There is a lot of space up front, and the rear two cylinders
are actually tucked under the body. I don't know how accurate this
placement is compared to the real vehicle, but it doesn't even have a
V-8 so none of the engine bay is particularly representative. It
looks good though.
The instructions do not call for installation of the hood until the end,
but I went ahead and installed it anyway just to see how it
looked. It only takes four cap screws.
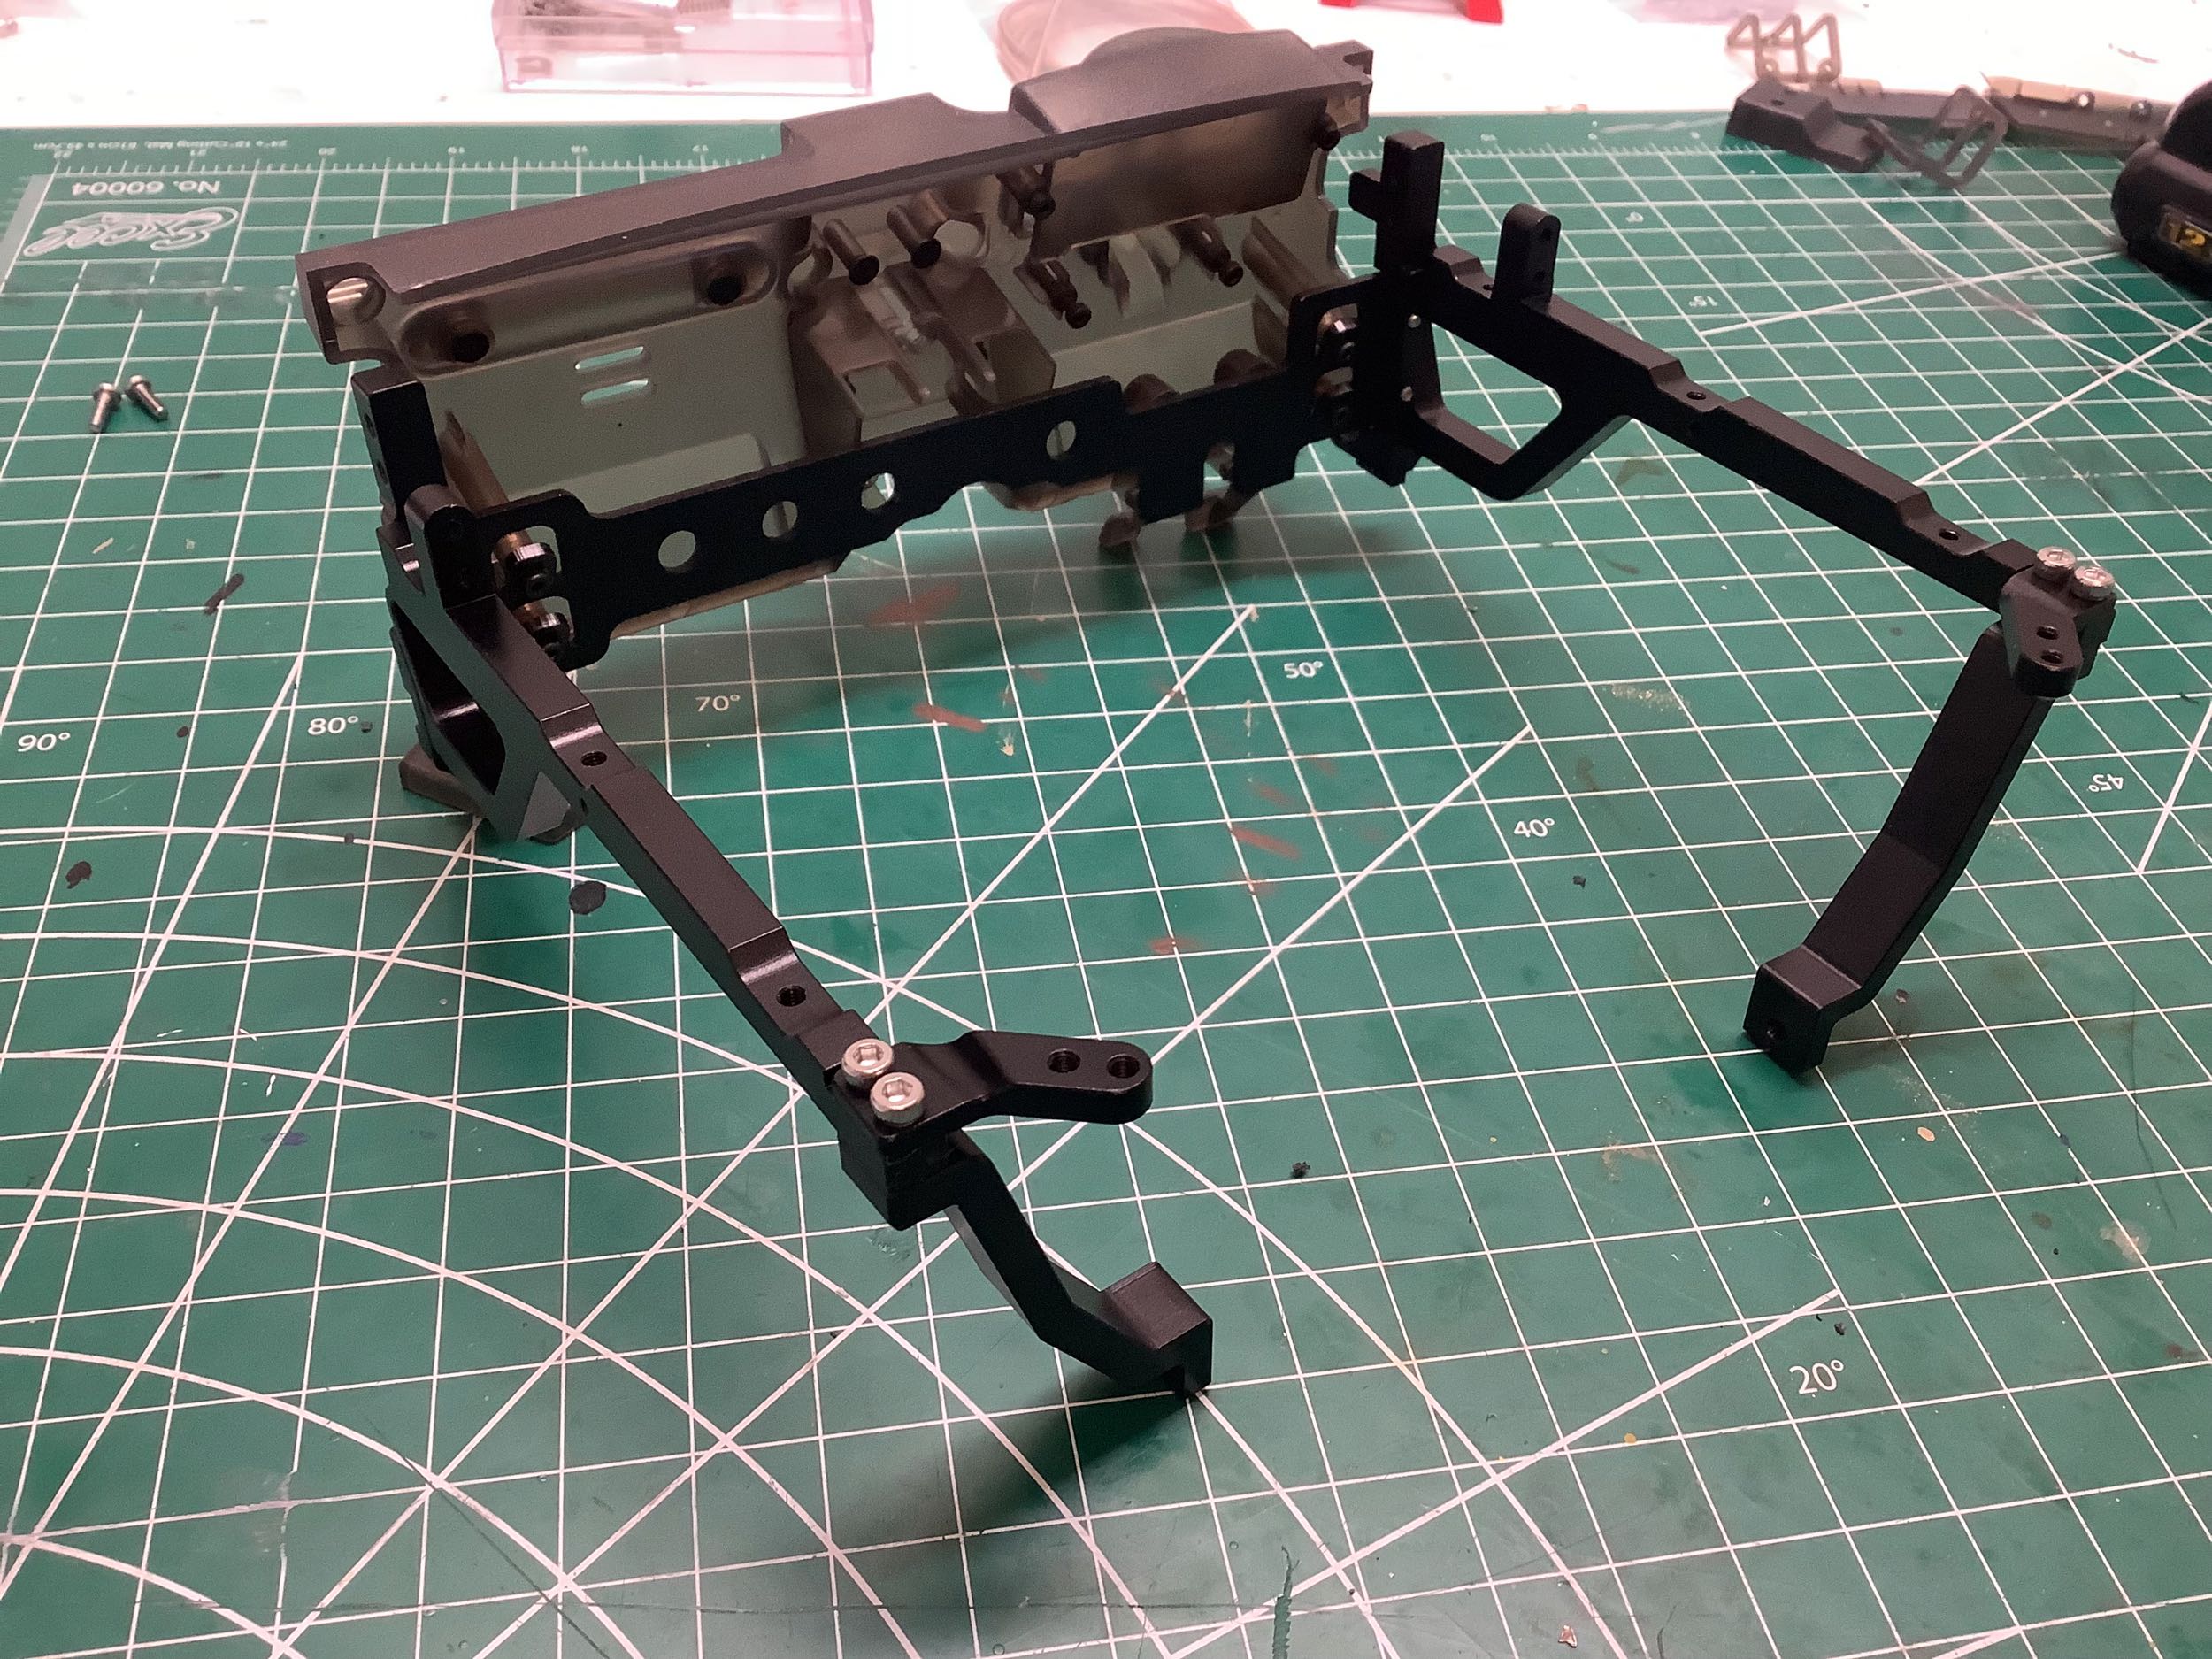
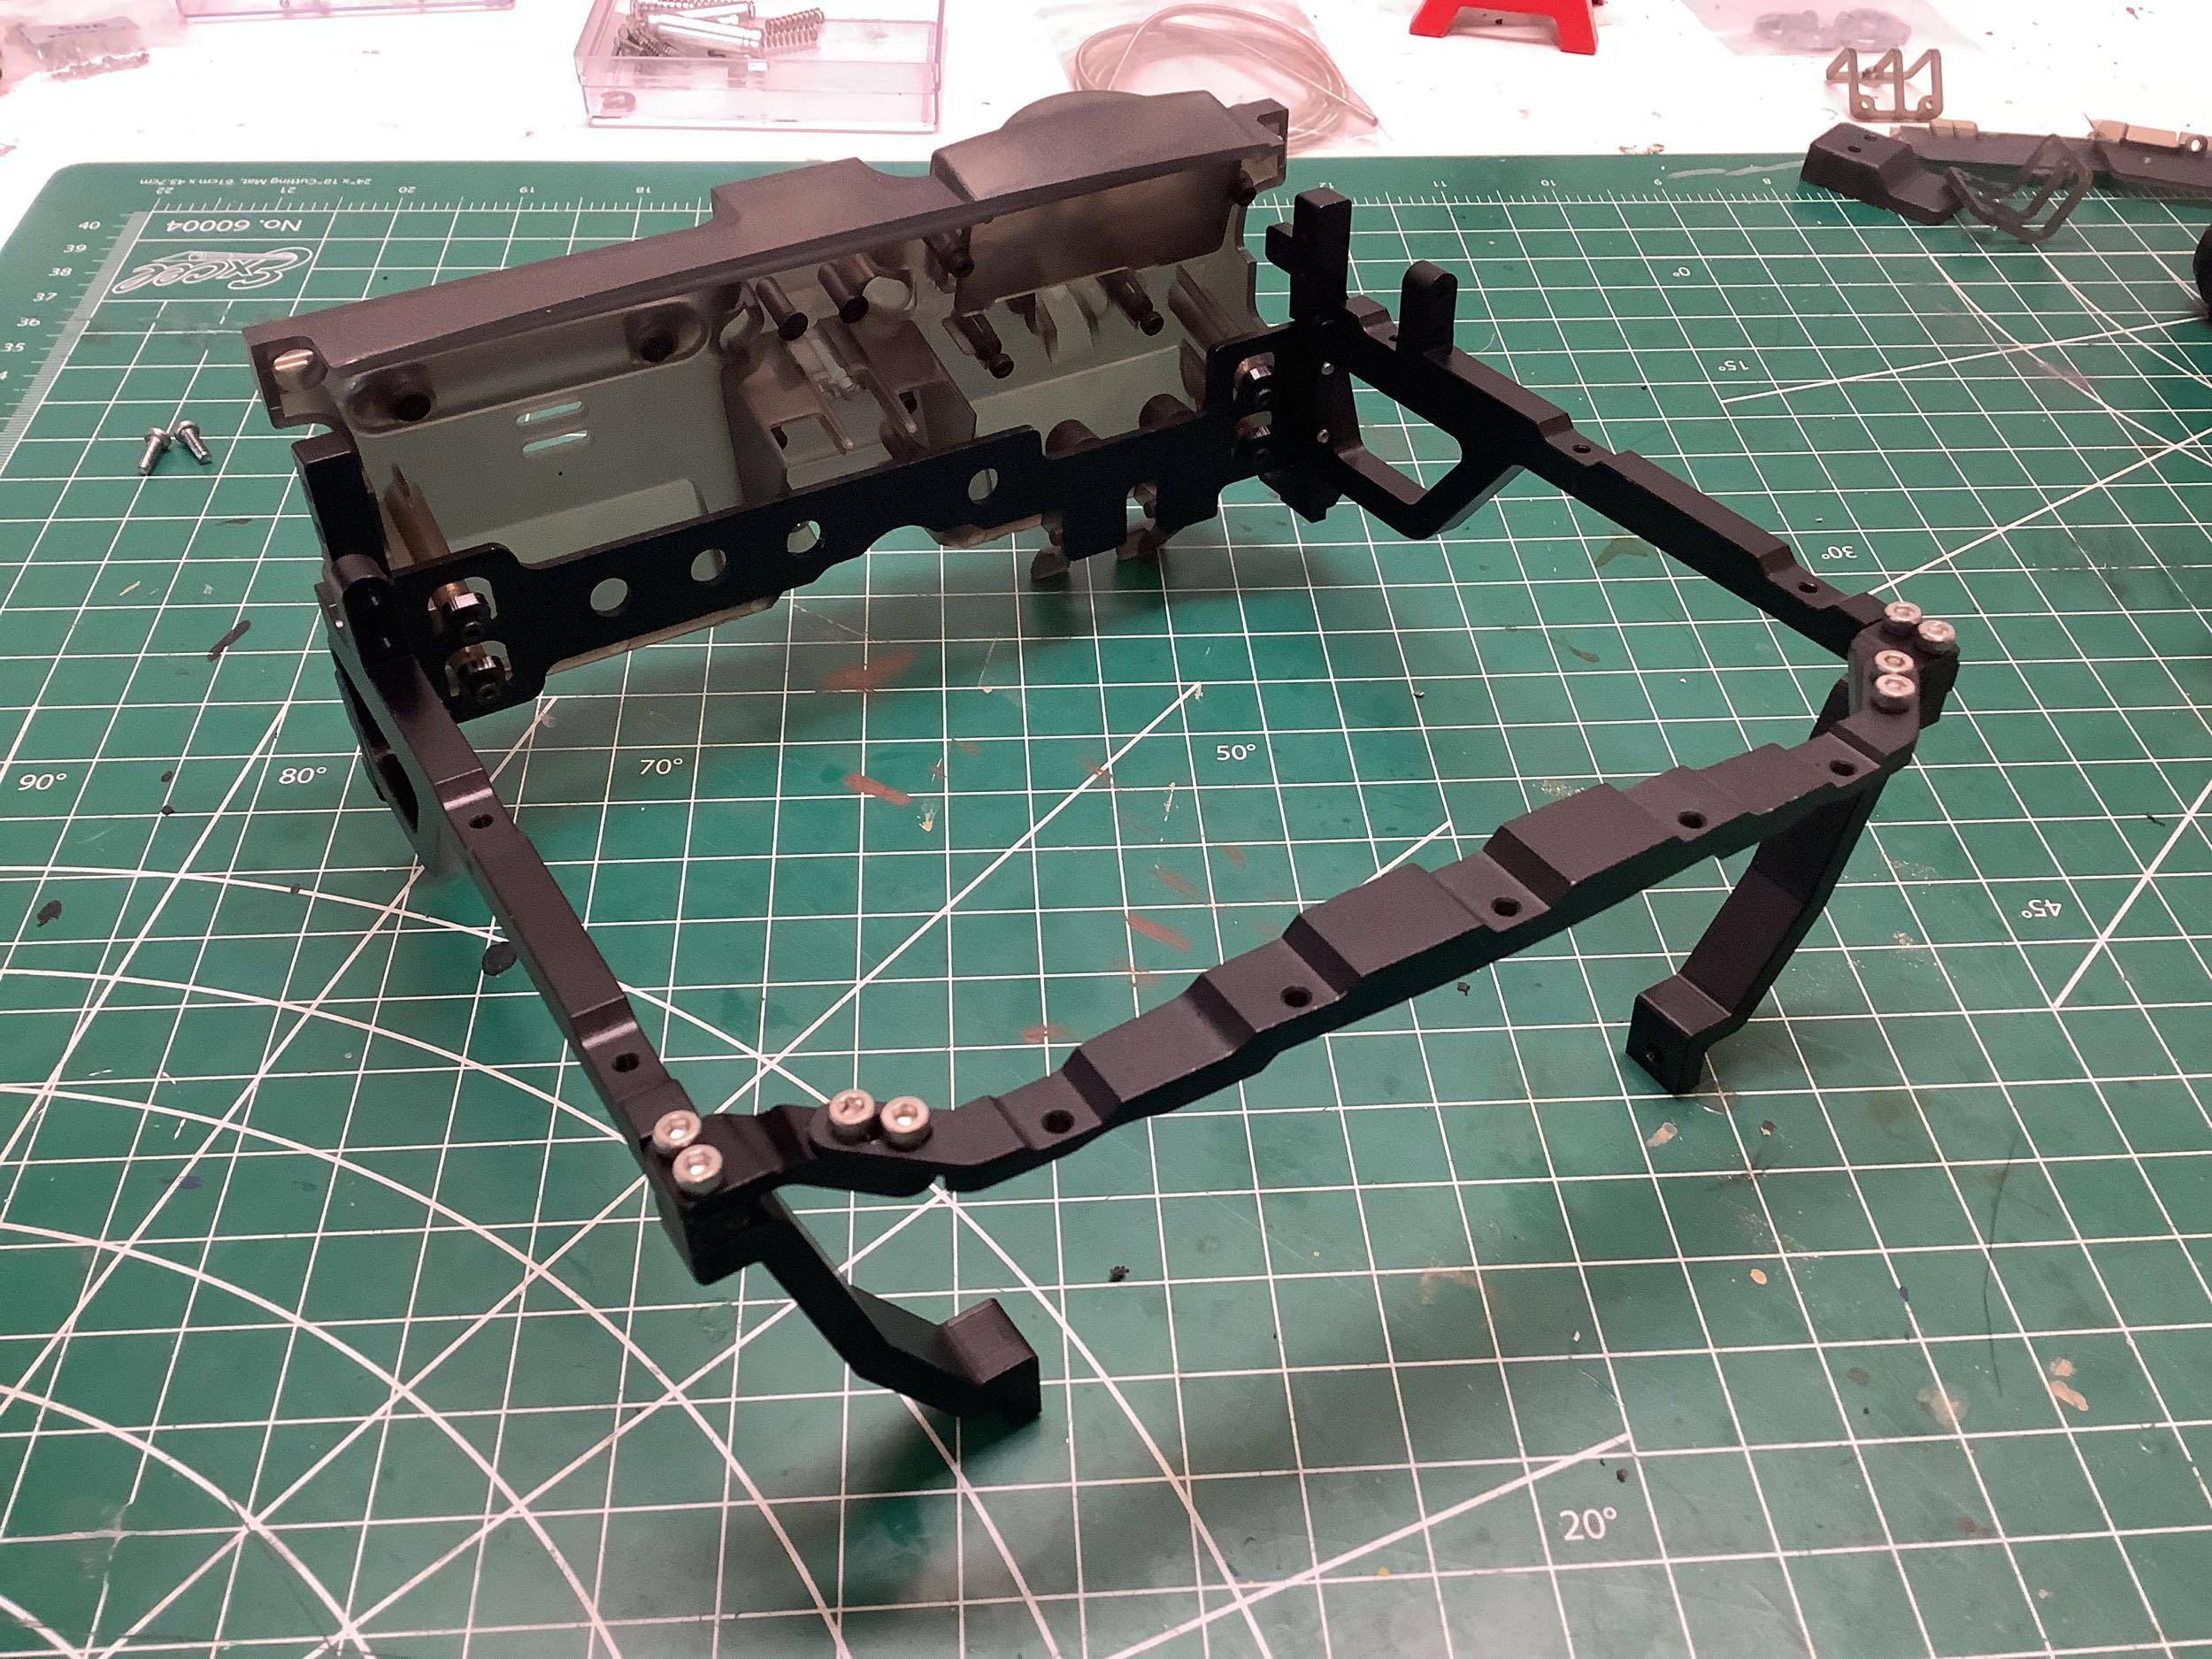
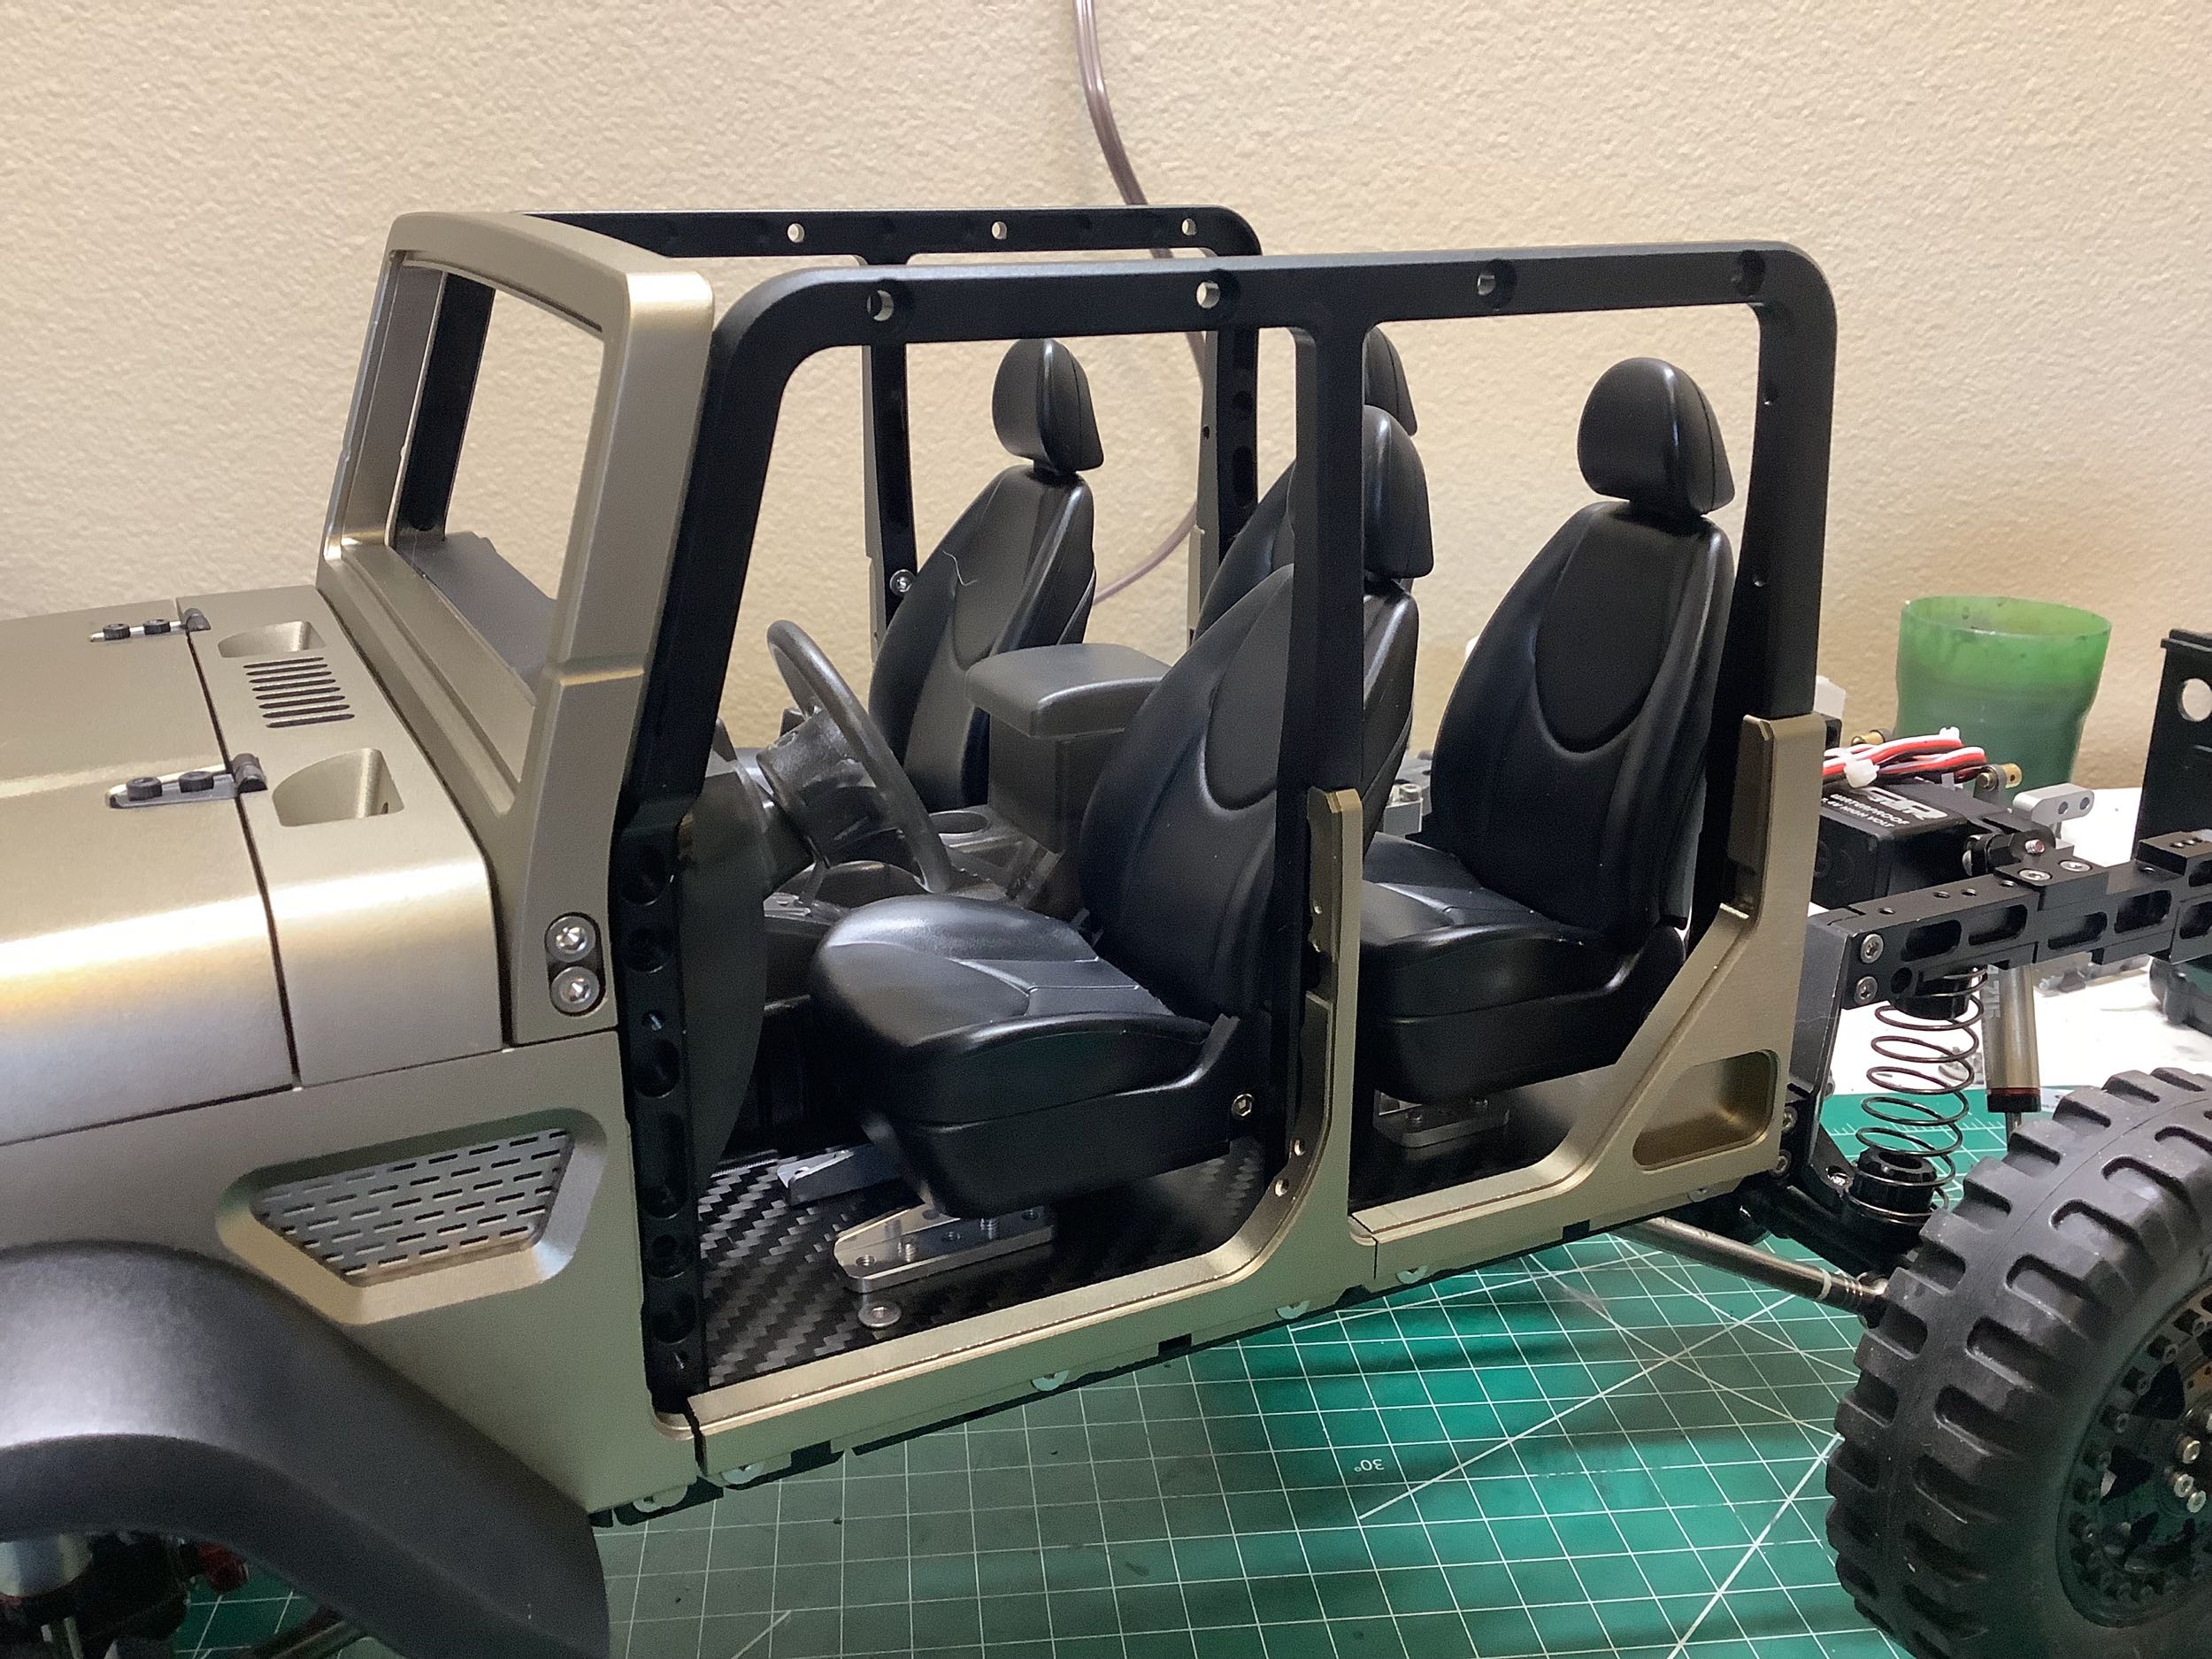
When it comes to making strong parts, the designers of this model were
not messing around. Take a look at that frame consisting A, B, and
C pillars made of machined aluminum. Those green panels fastened
over the top are aluminum as well. Considering the fact that both
the real truck and the model have removable doors, this structure needs
to be solid to protect the occupants.
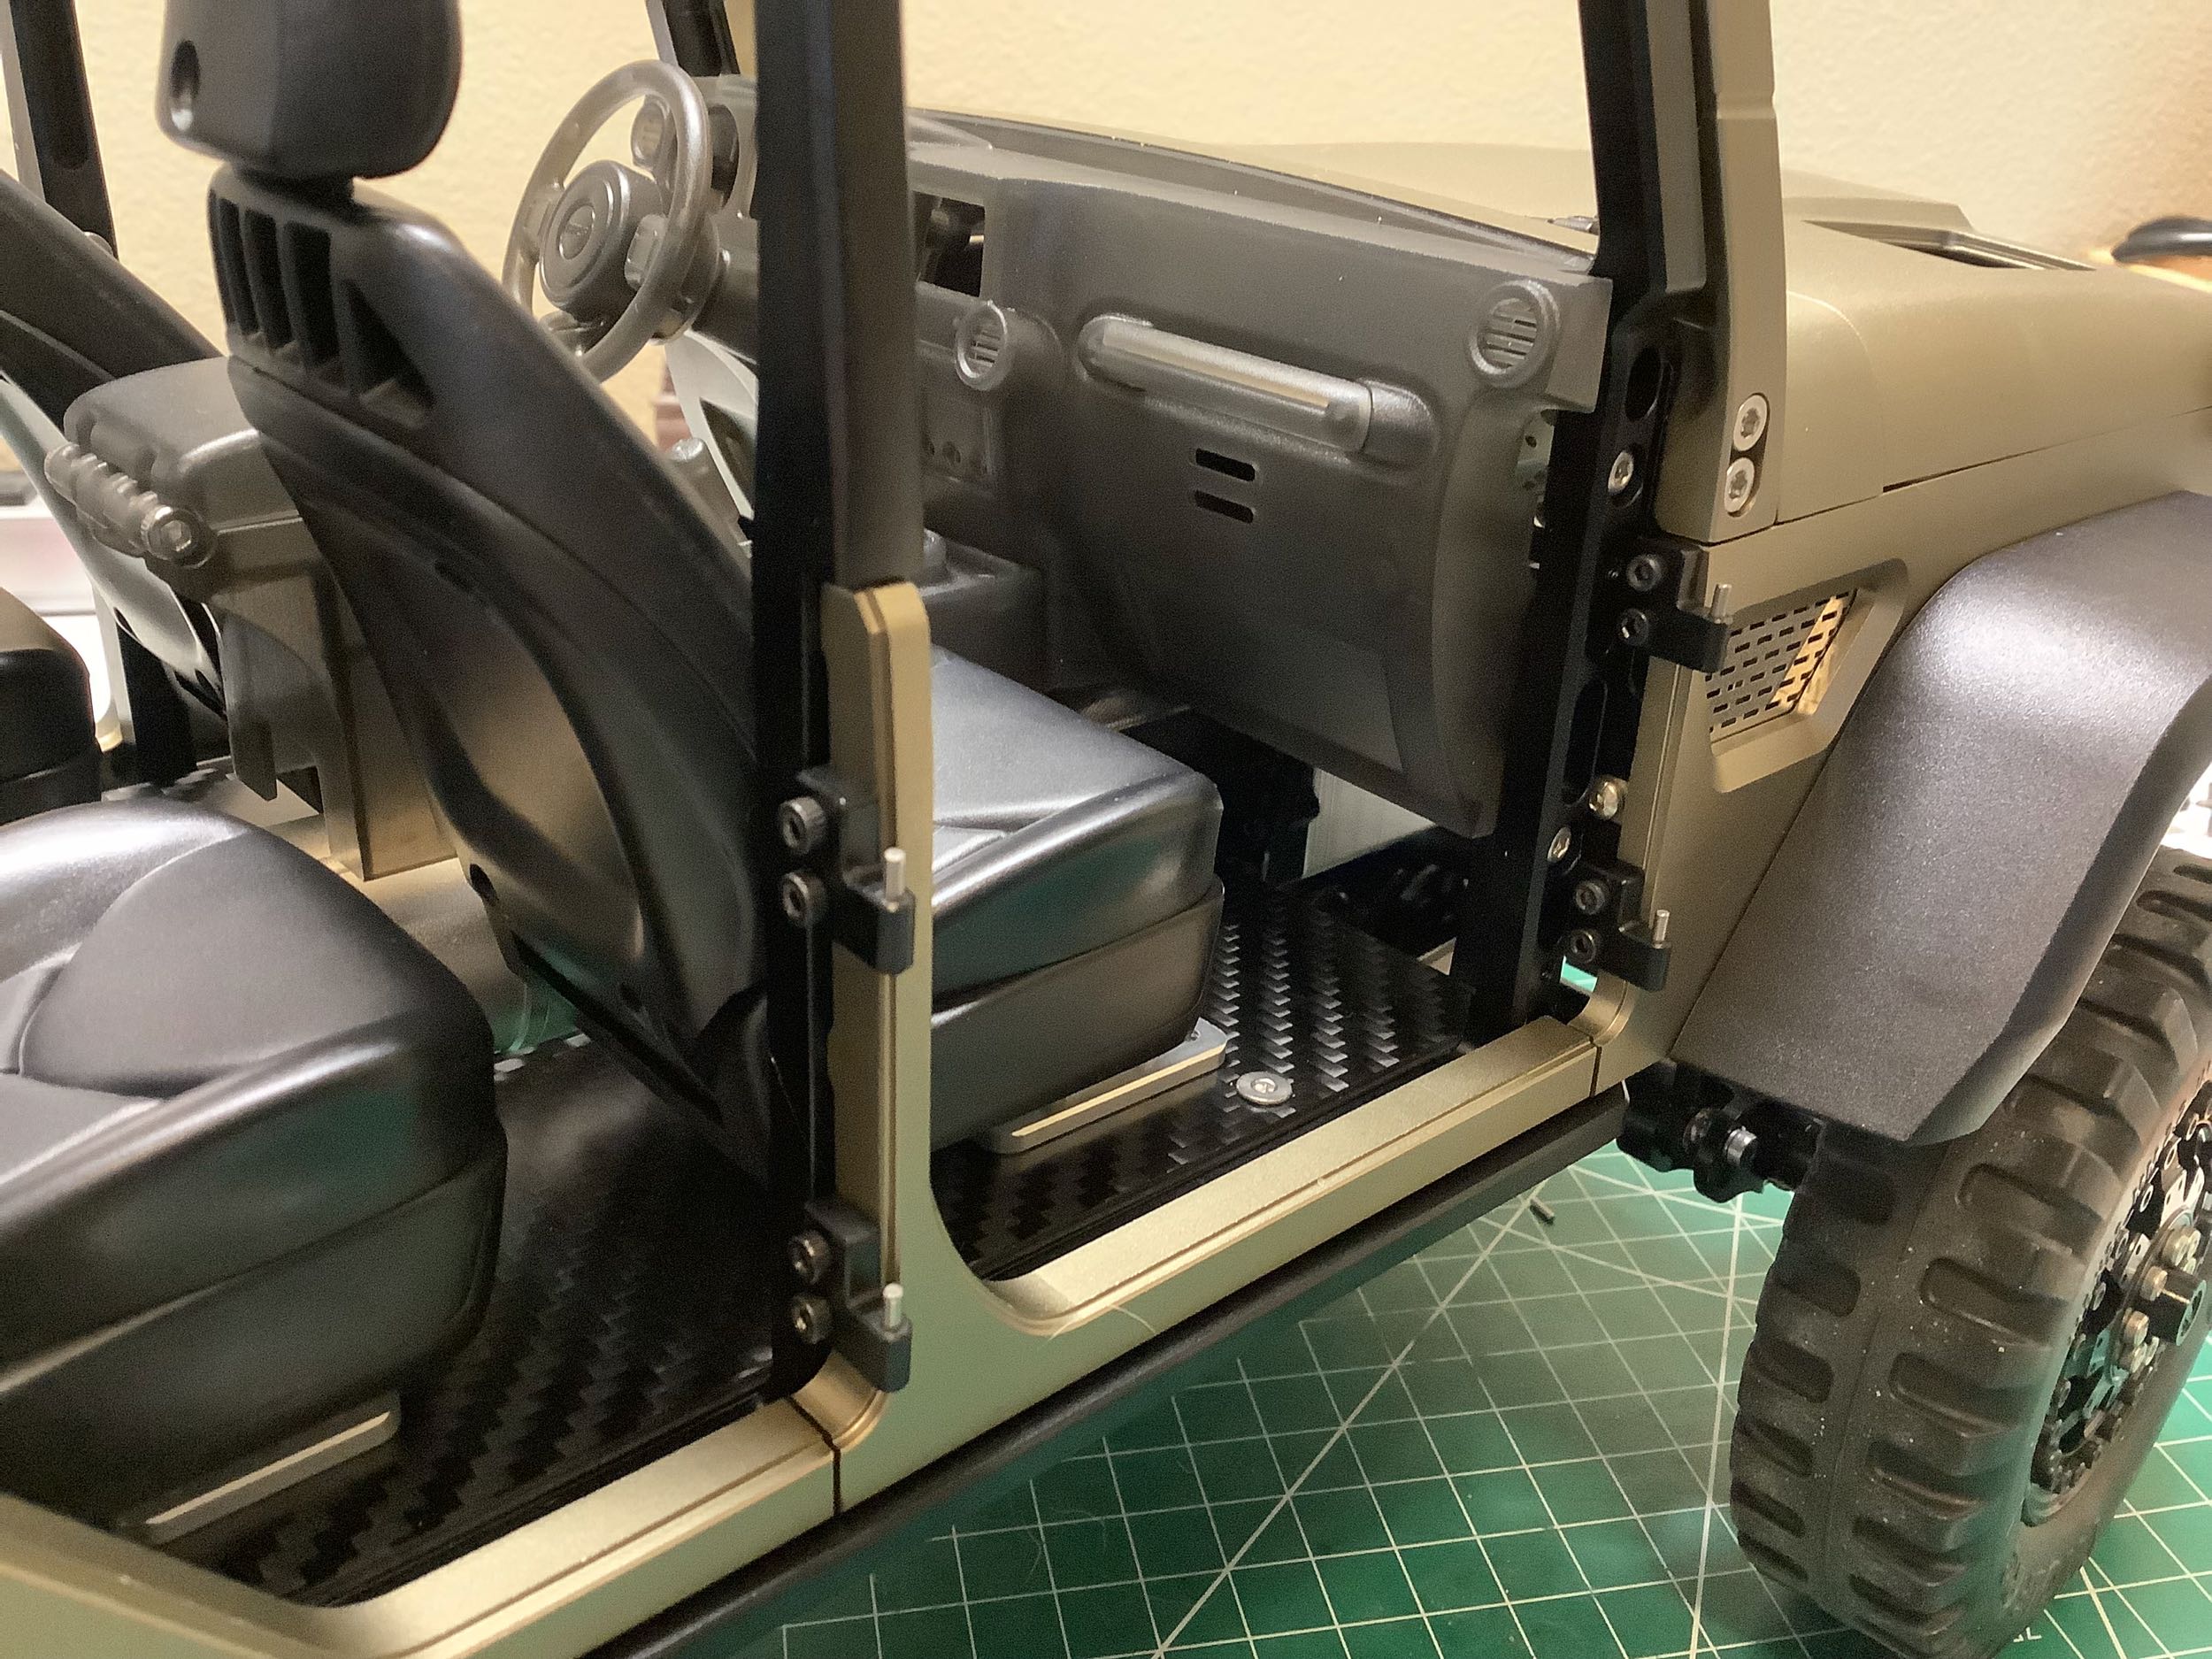
The picture on the left shows the installation of the sliders which
sit just underneath the rocker panel. On the right I've installed
the door hinges which is where I ran into one of my only quality
problems with the body. One of the 8 hinges was not drilled for a
hinge pin. Drilling a 1.5mm hole in a tiny hinge with normal sized
tools is very difficult, to say the least. I did manage it
though.
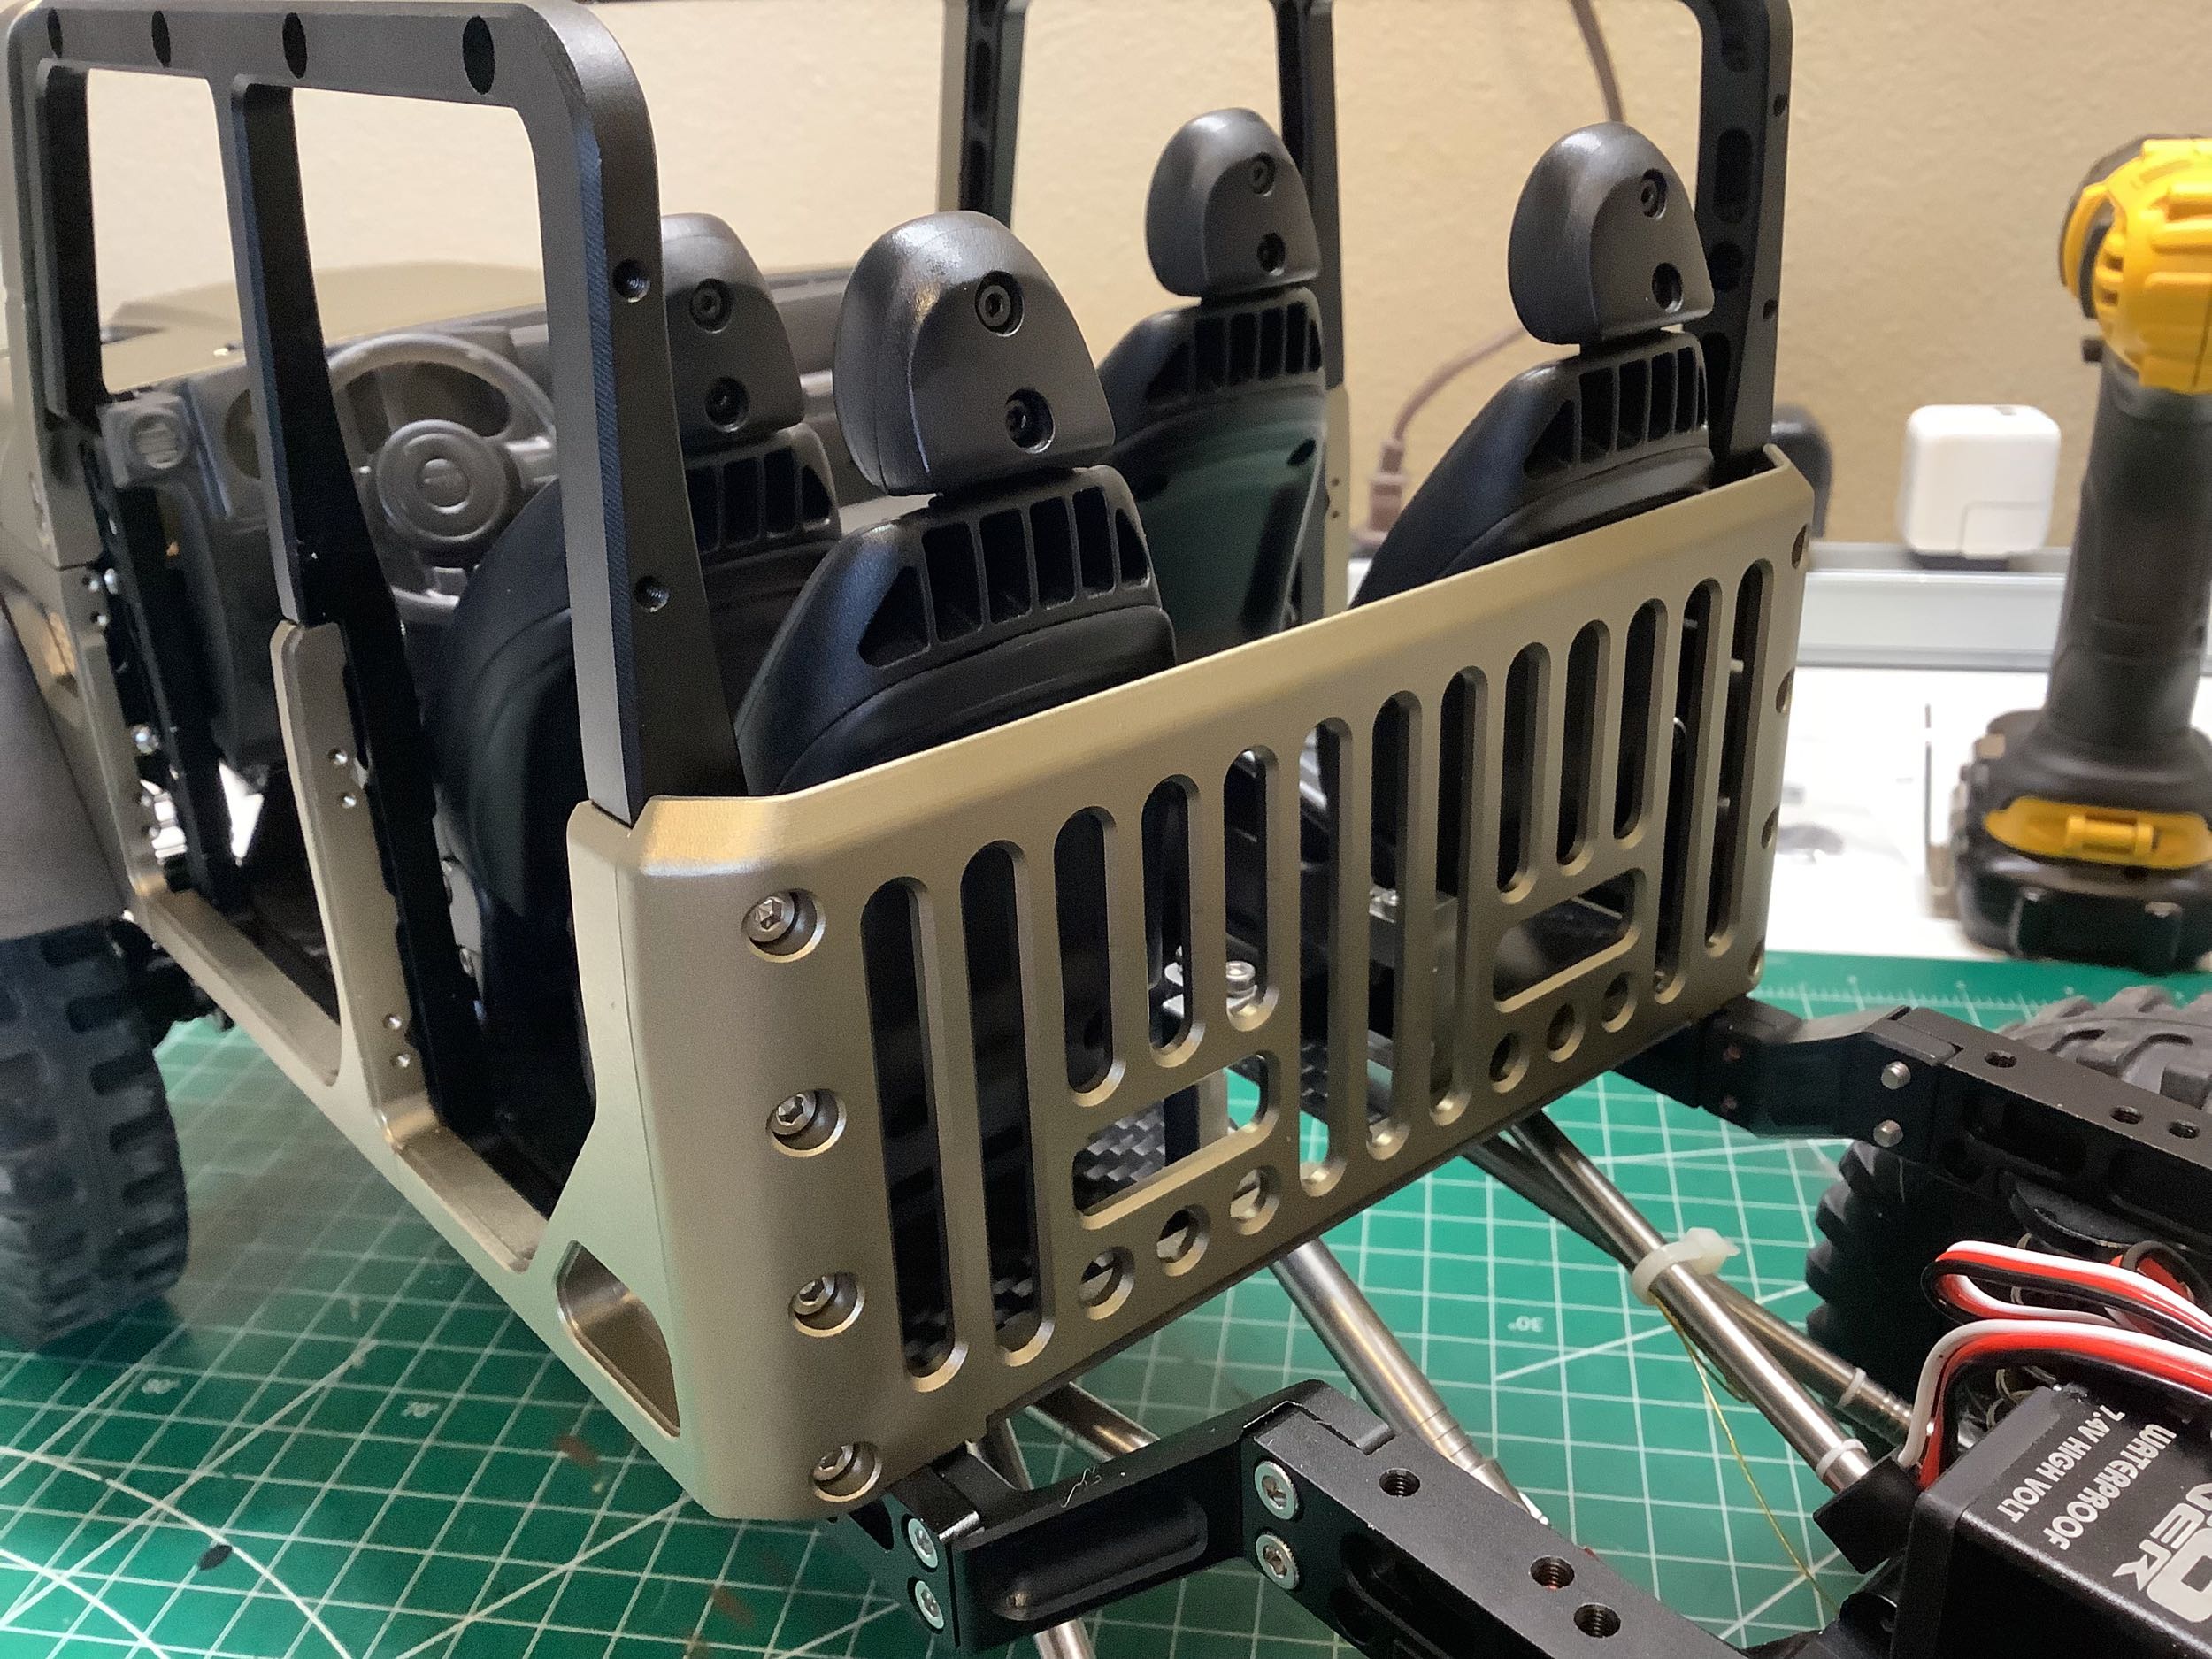
I'm quite confident that the rear panel on the real truck interior is not
covered with slots like this one is. Those slots were useful
though. I was able to run a lot of the rear electrical wires under
the bed, through those slots, under the seats, and into the radio
equipment in the front.
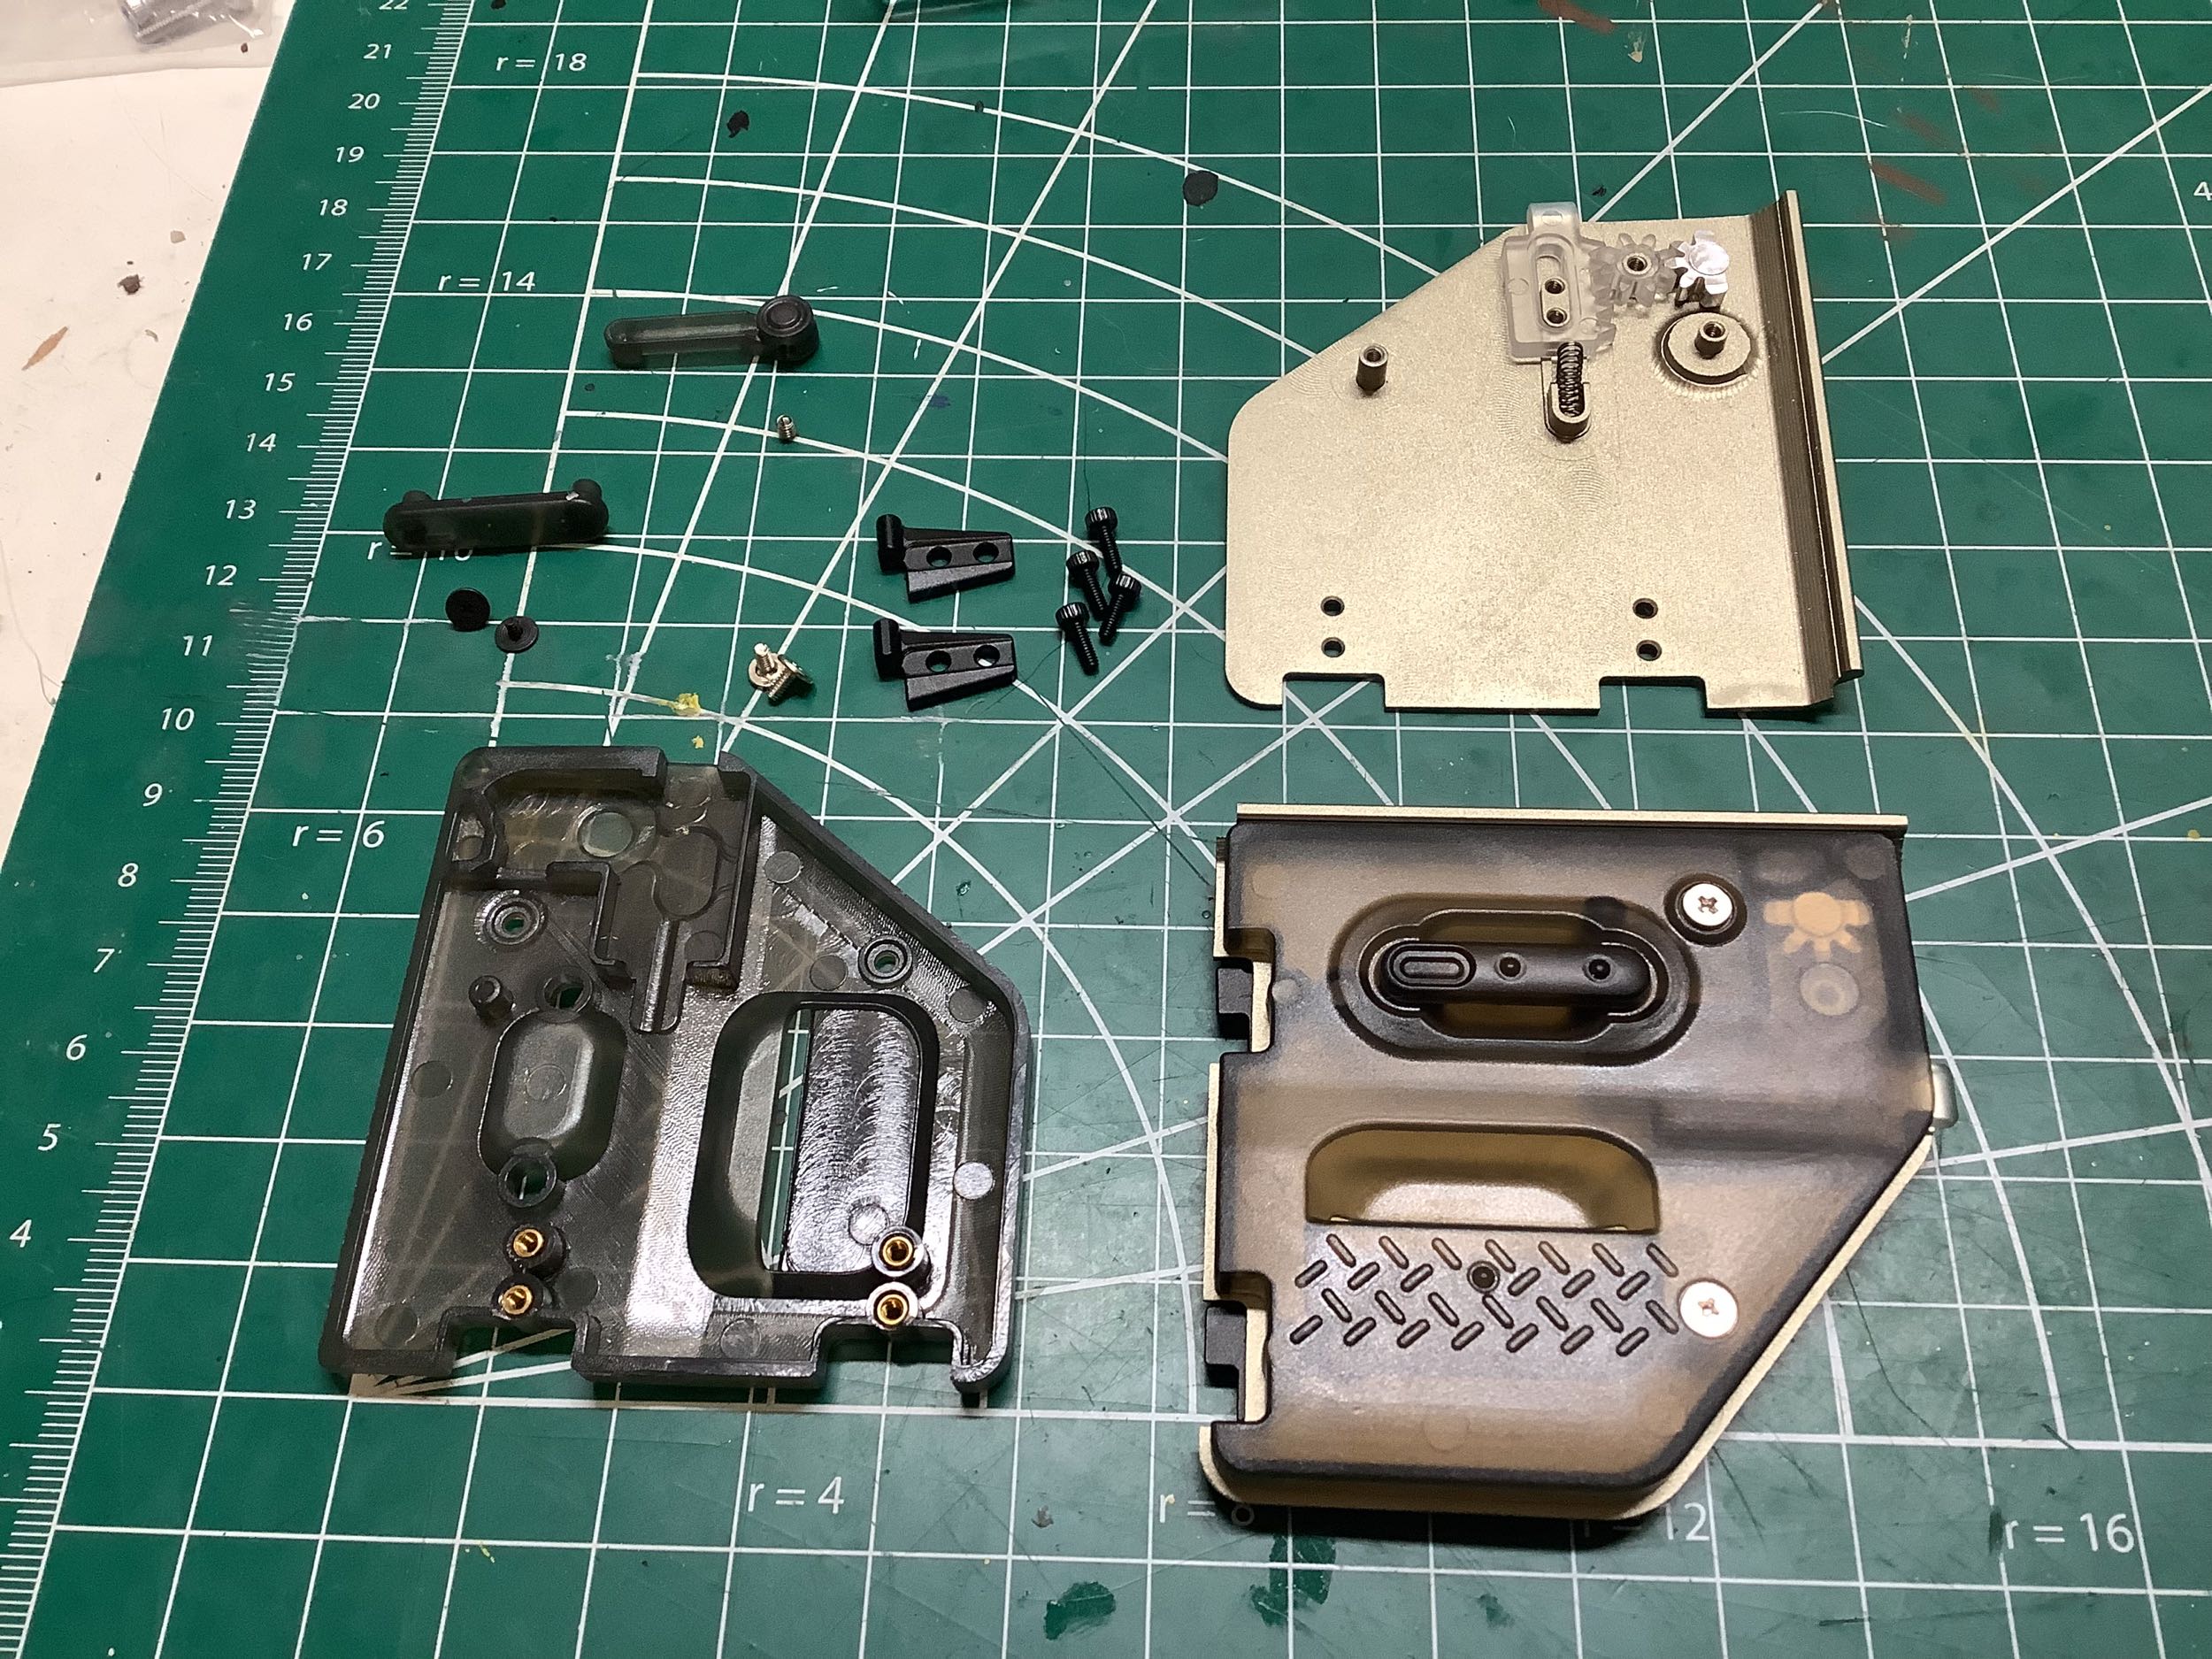
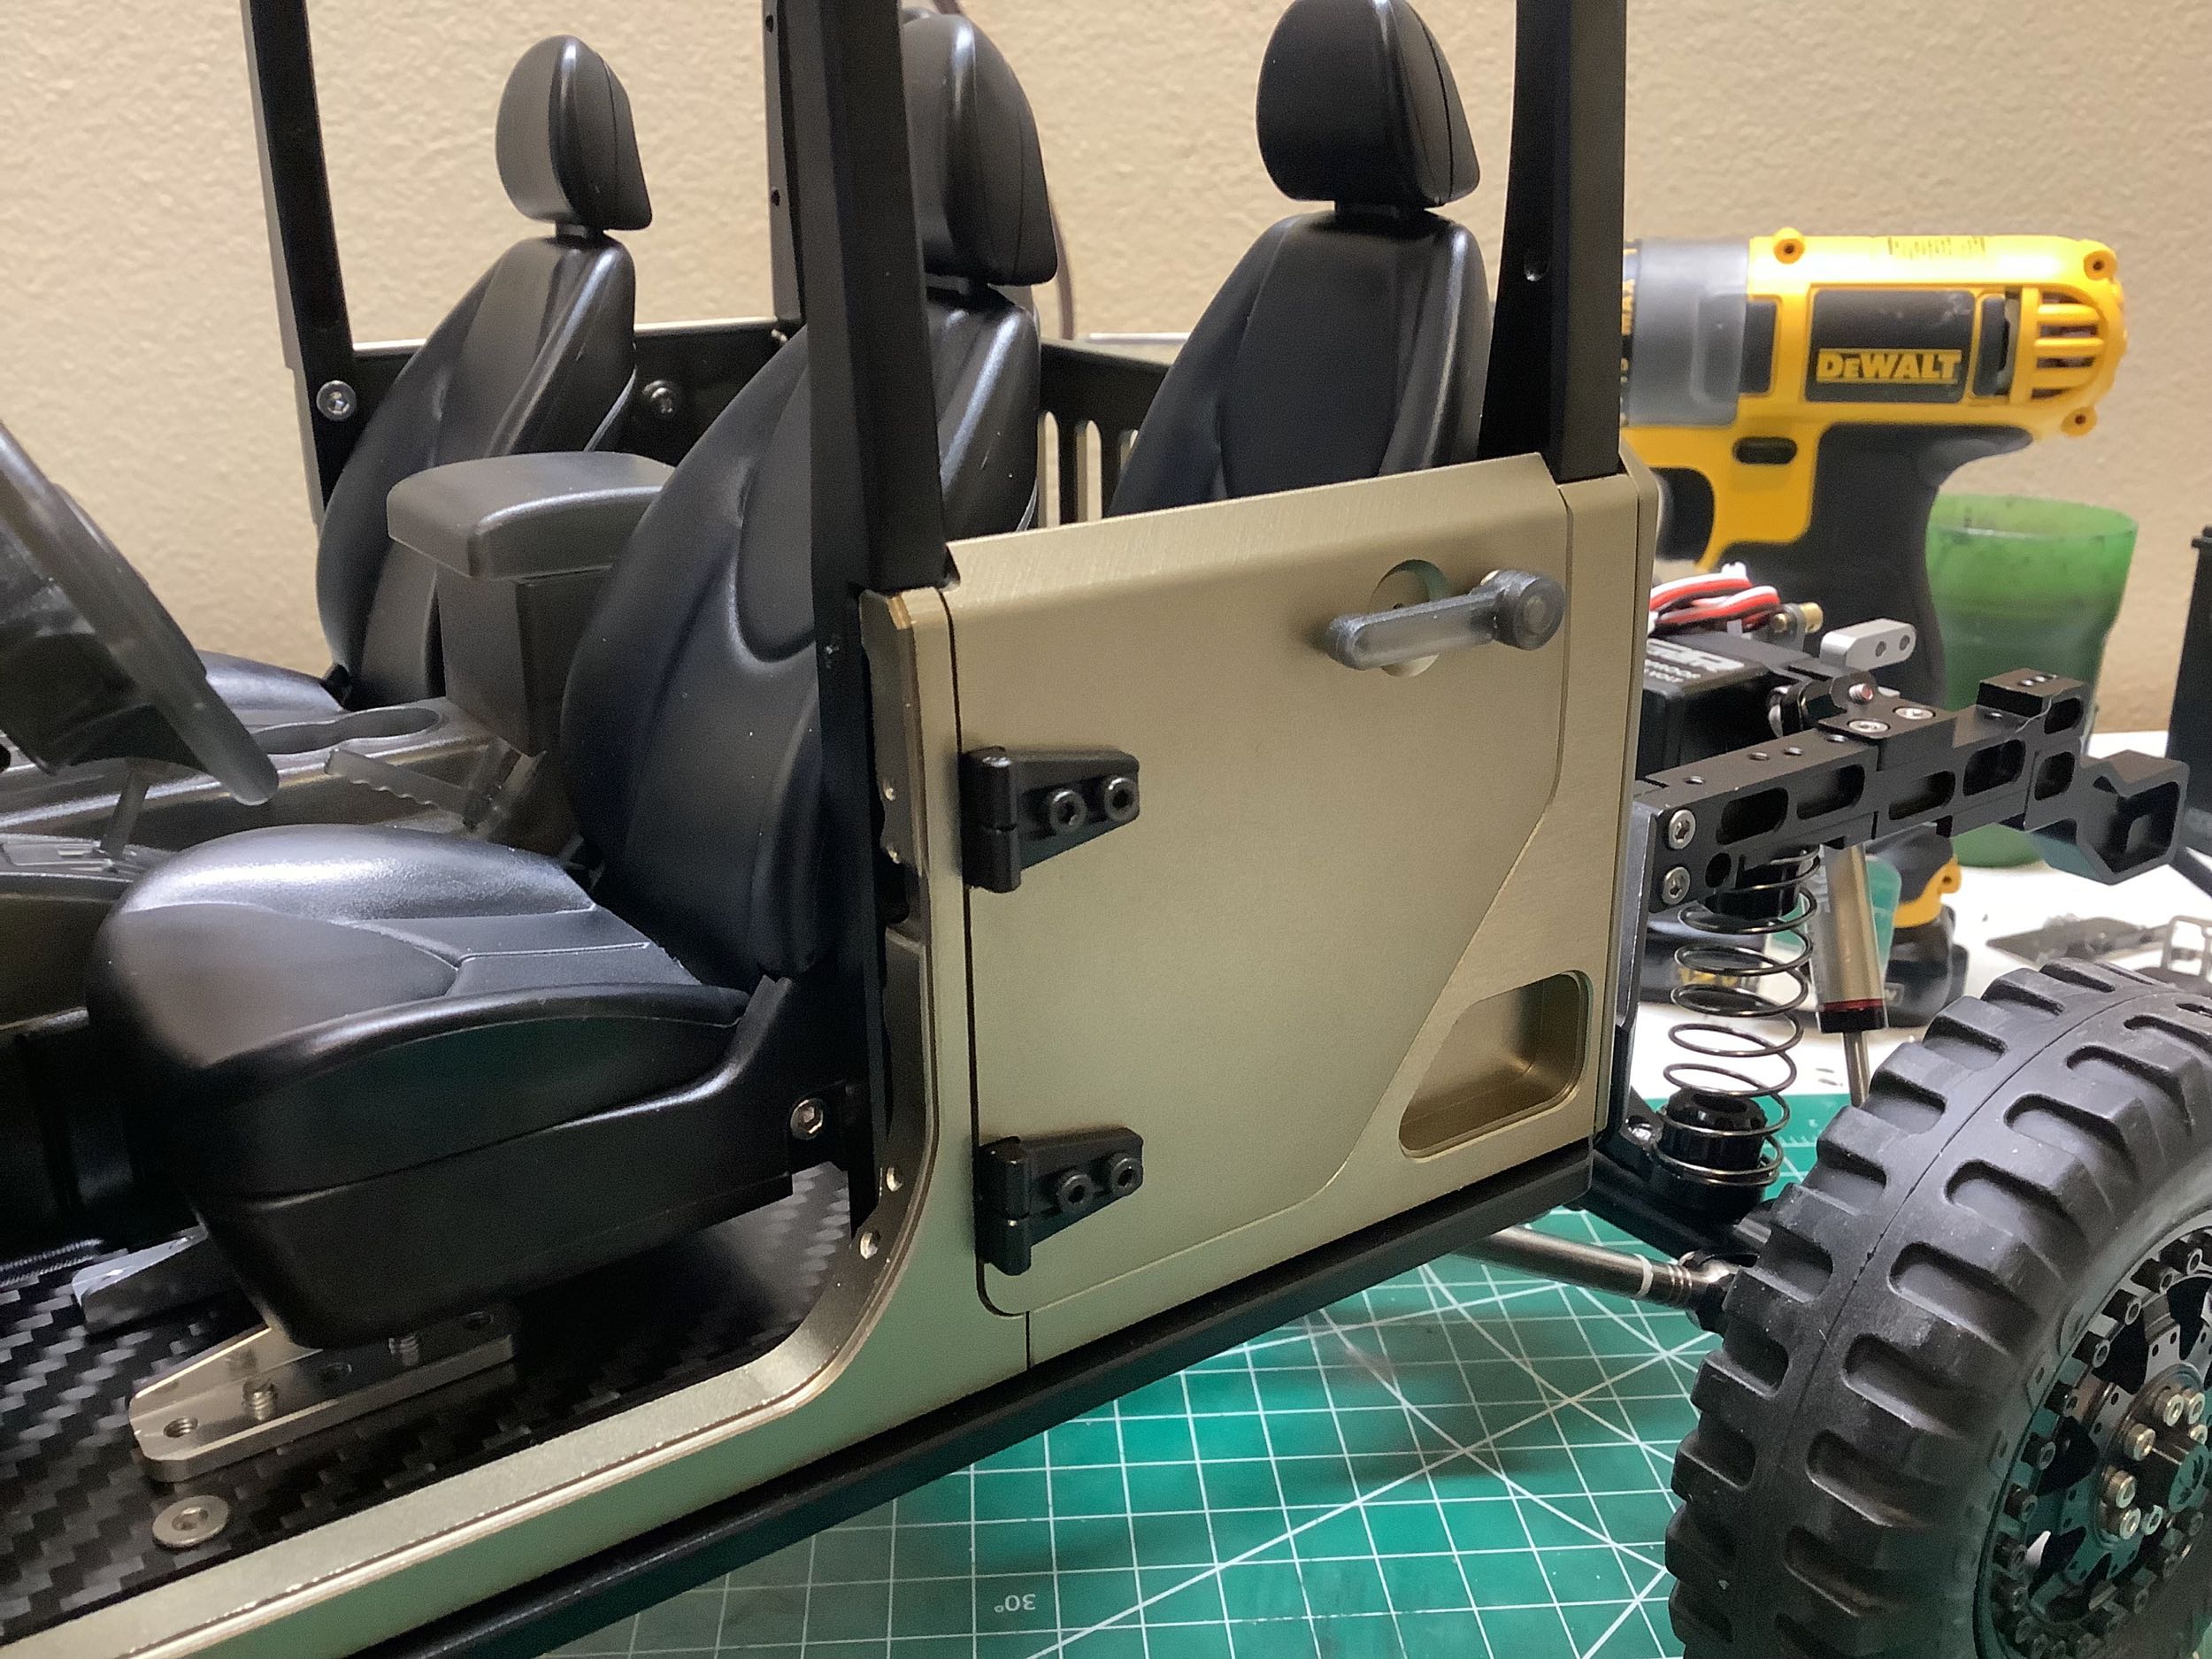
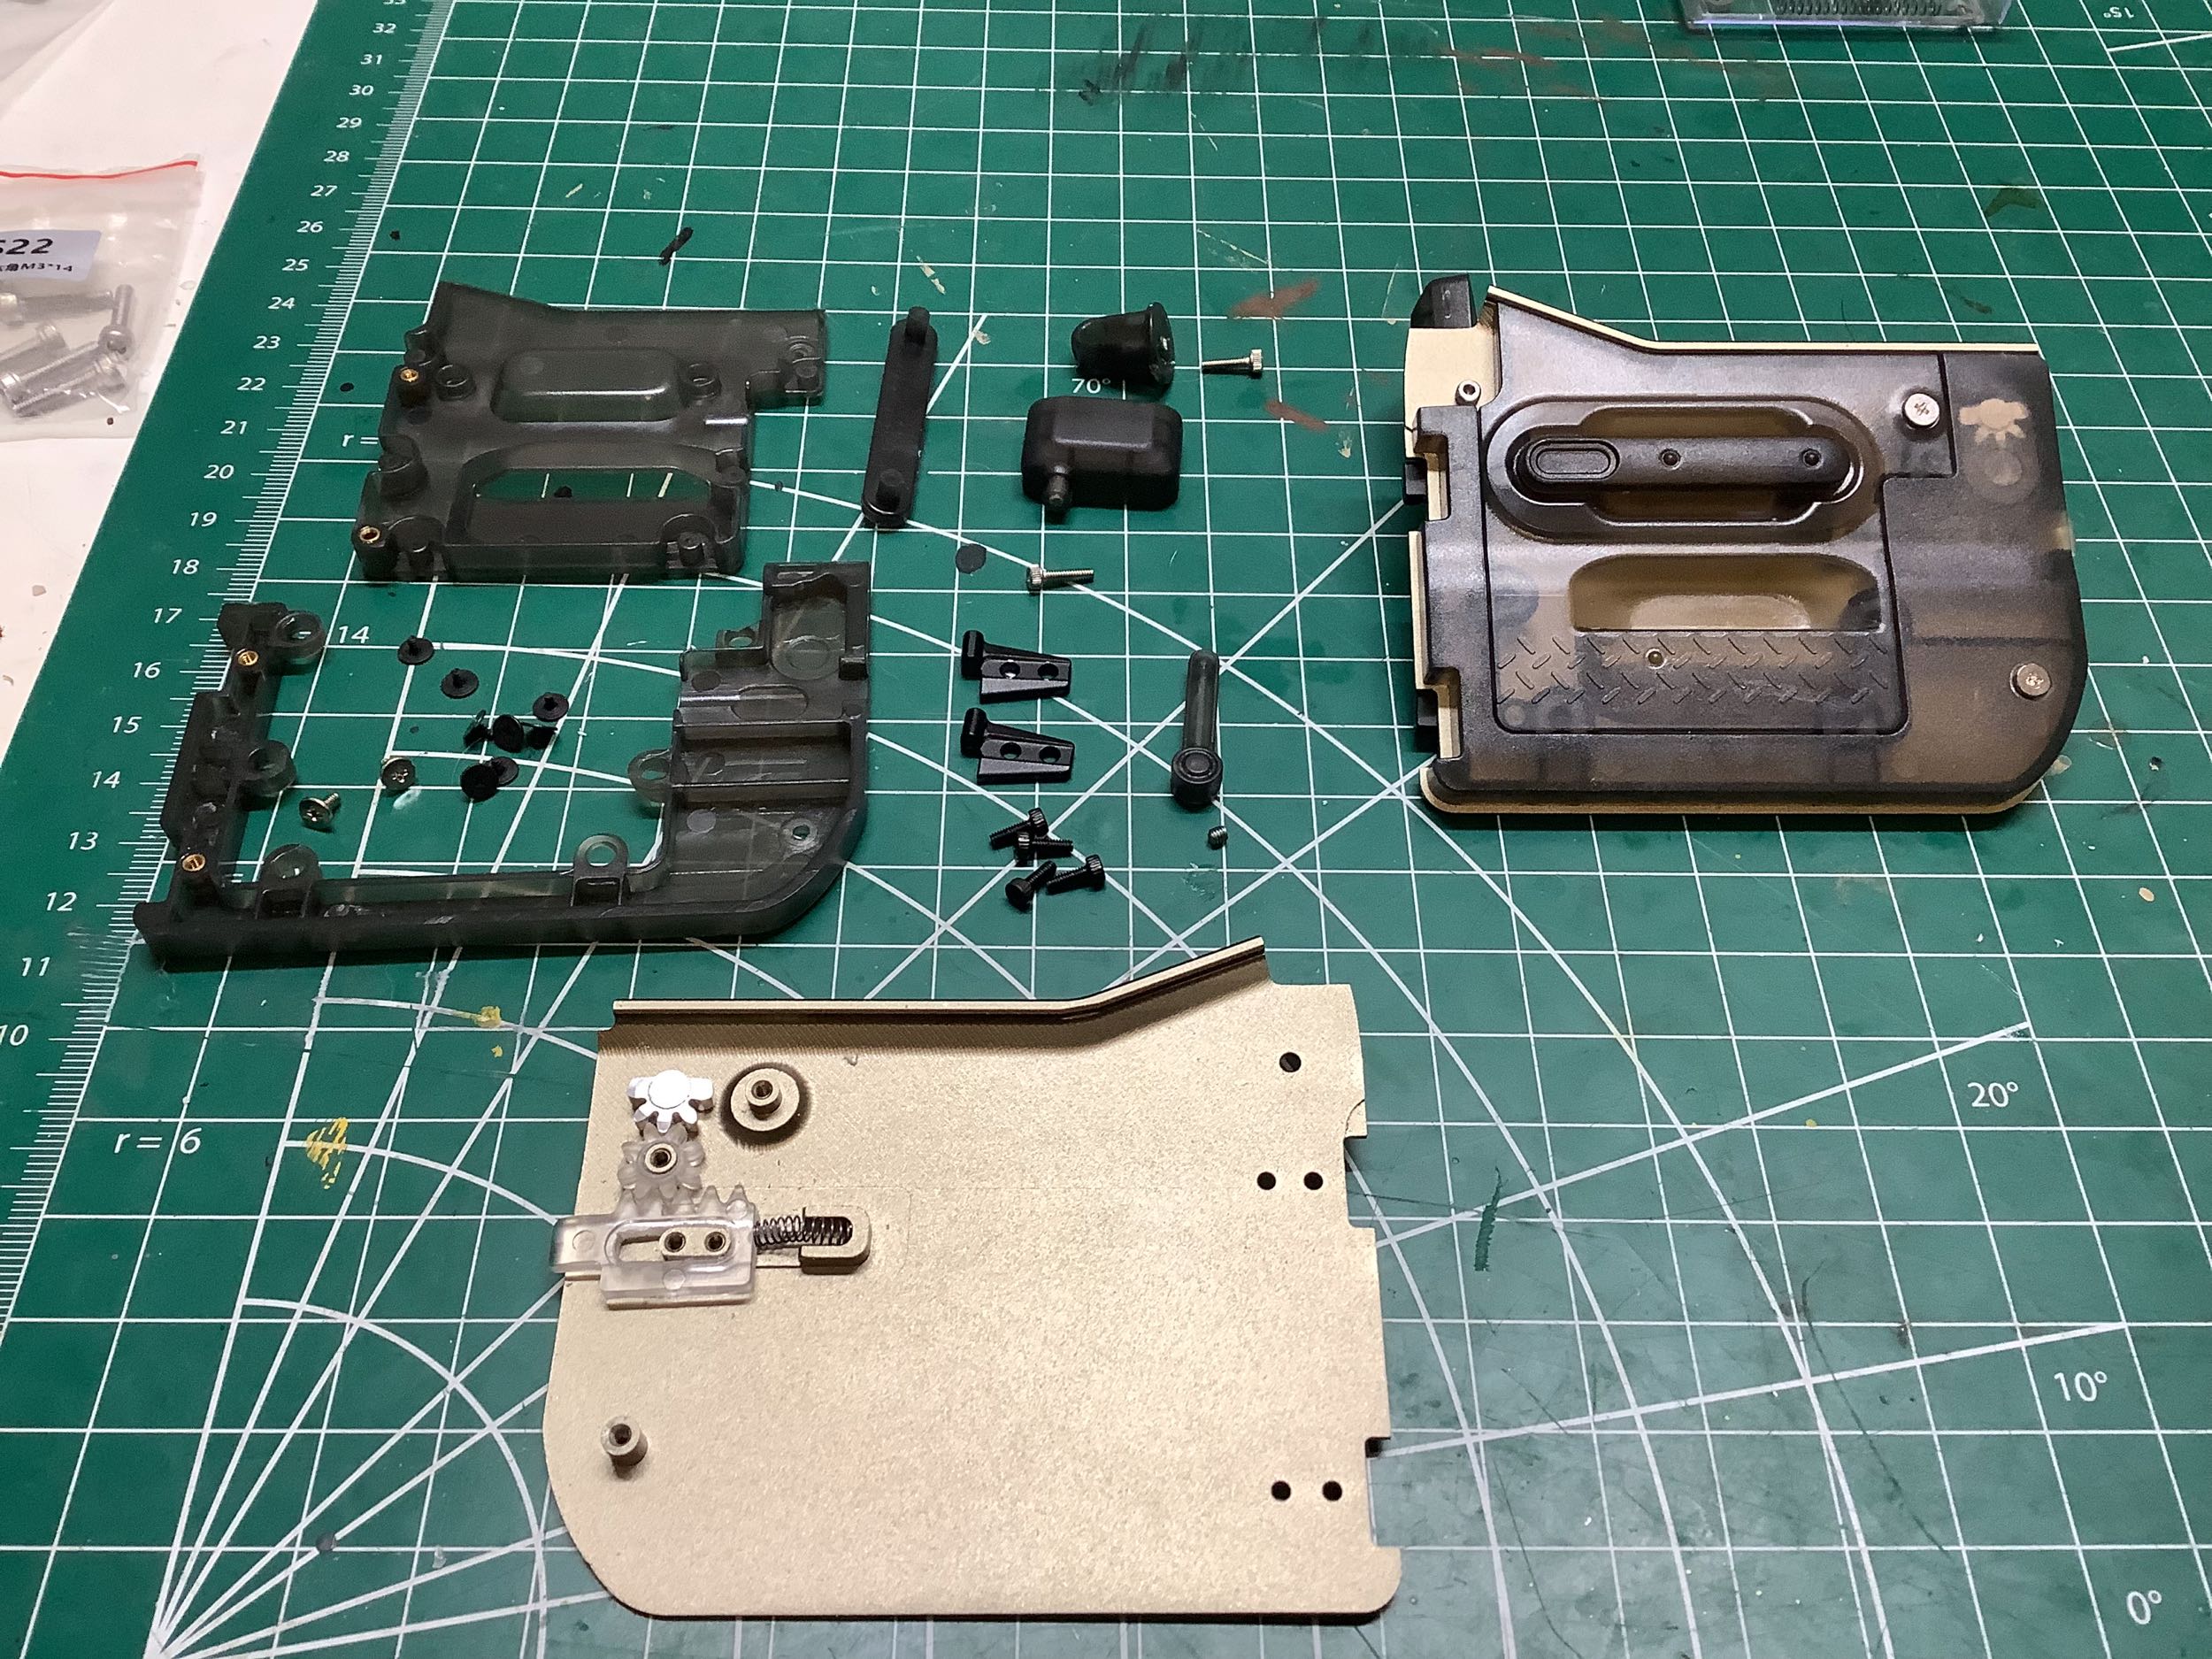
Did I mention everything on this truck is complicated? Here you
can see the parts for a door on the left next to a completed door.
That mechanism inside is for the spring loaded latch. You
actually rotate the external door handle to turn the aluminum gear which
slide the acrylic rack gear connected to the latch. The internal
door card has a separate handle and a pocket. These photos show
the rear doors.
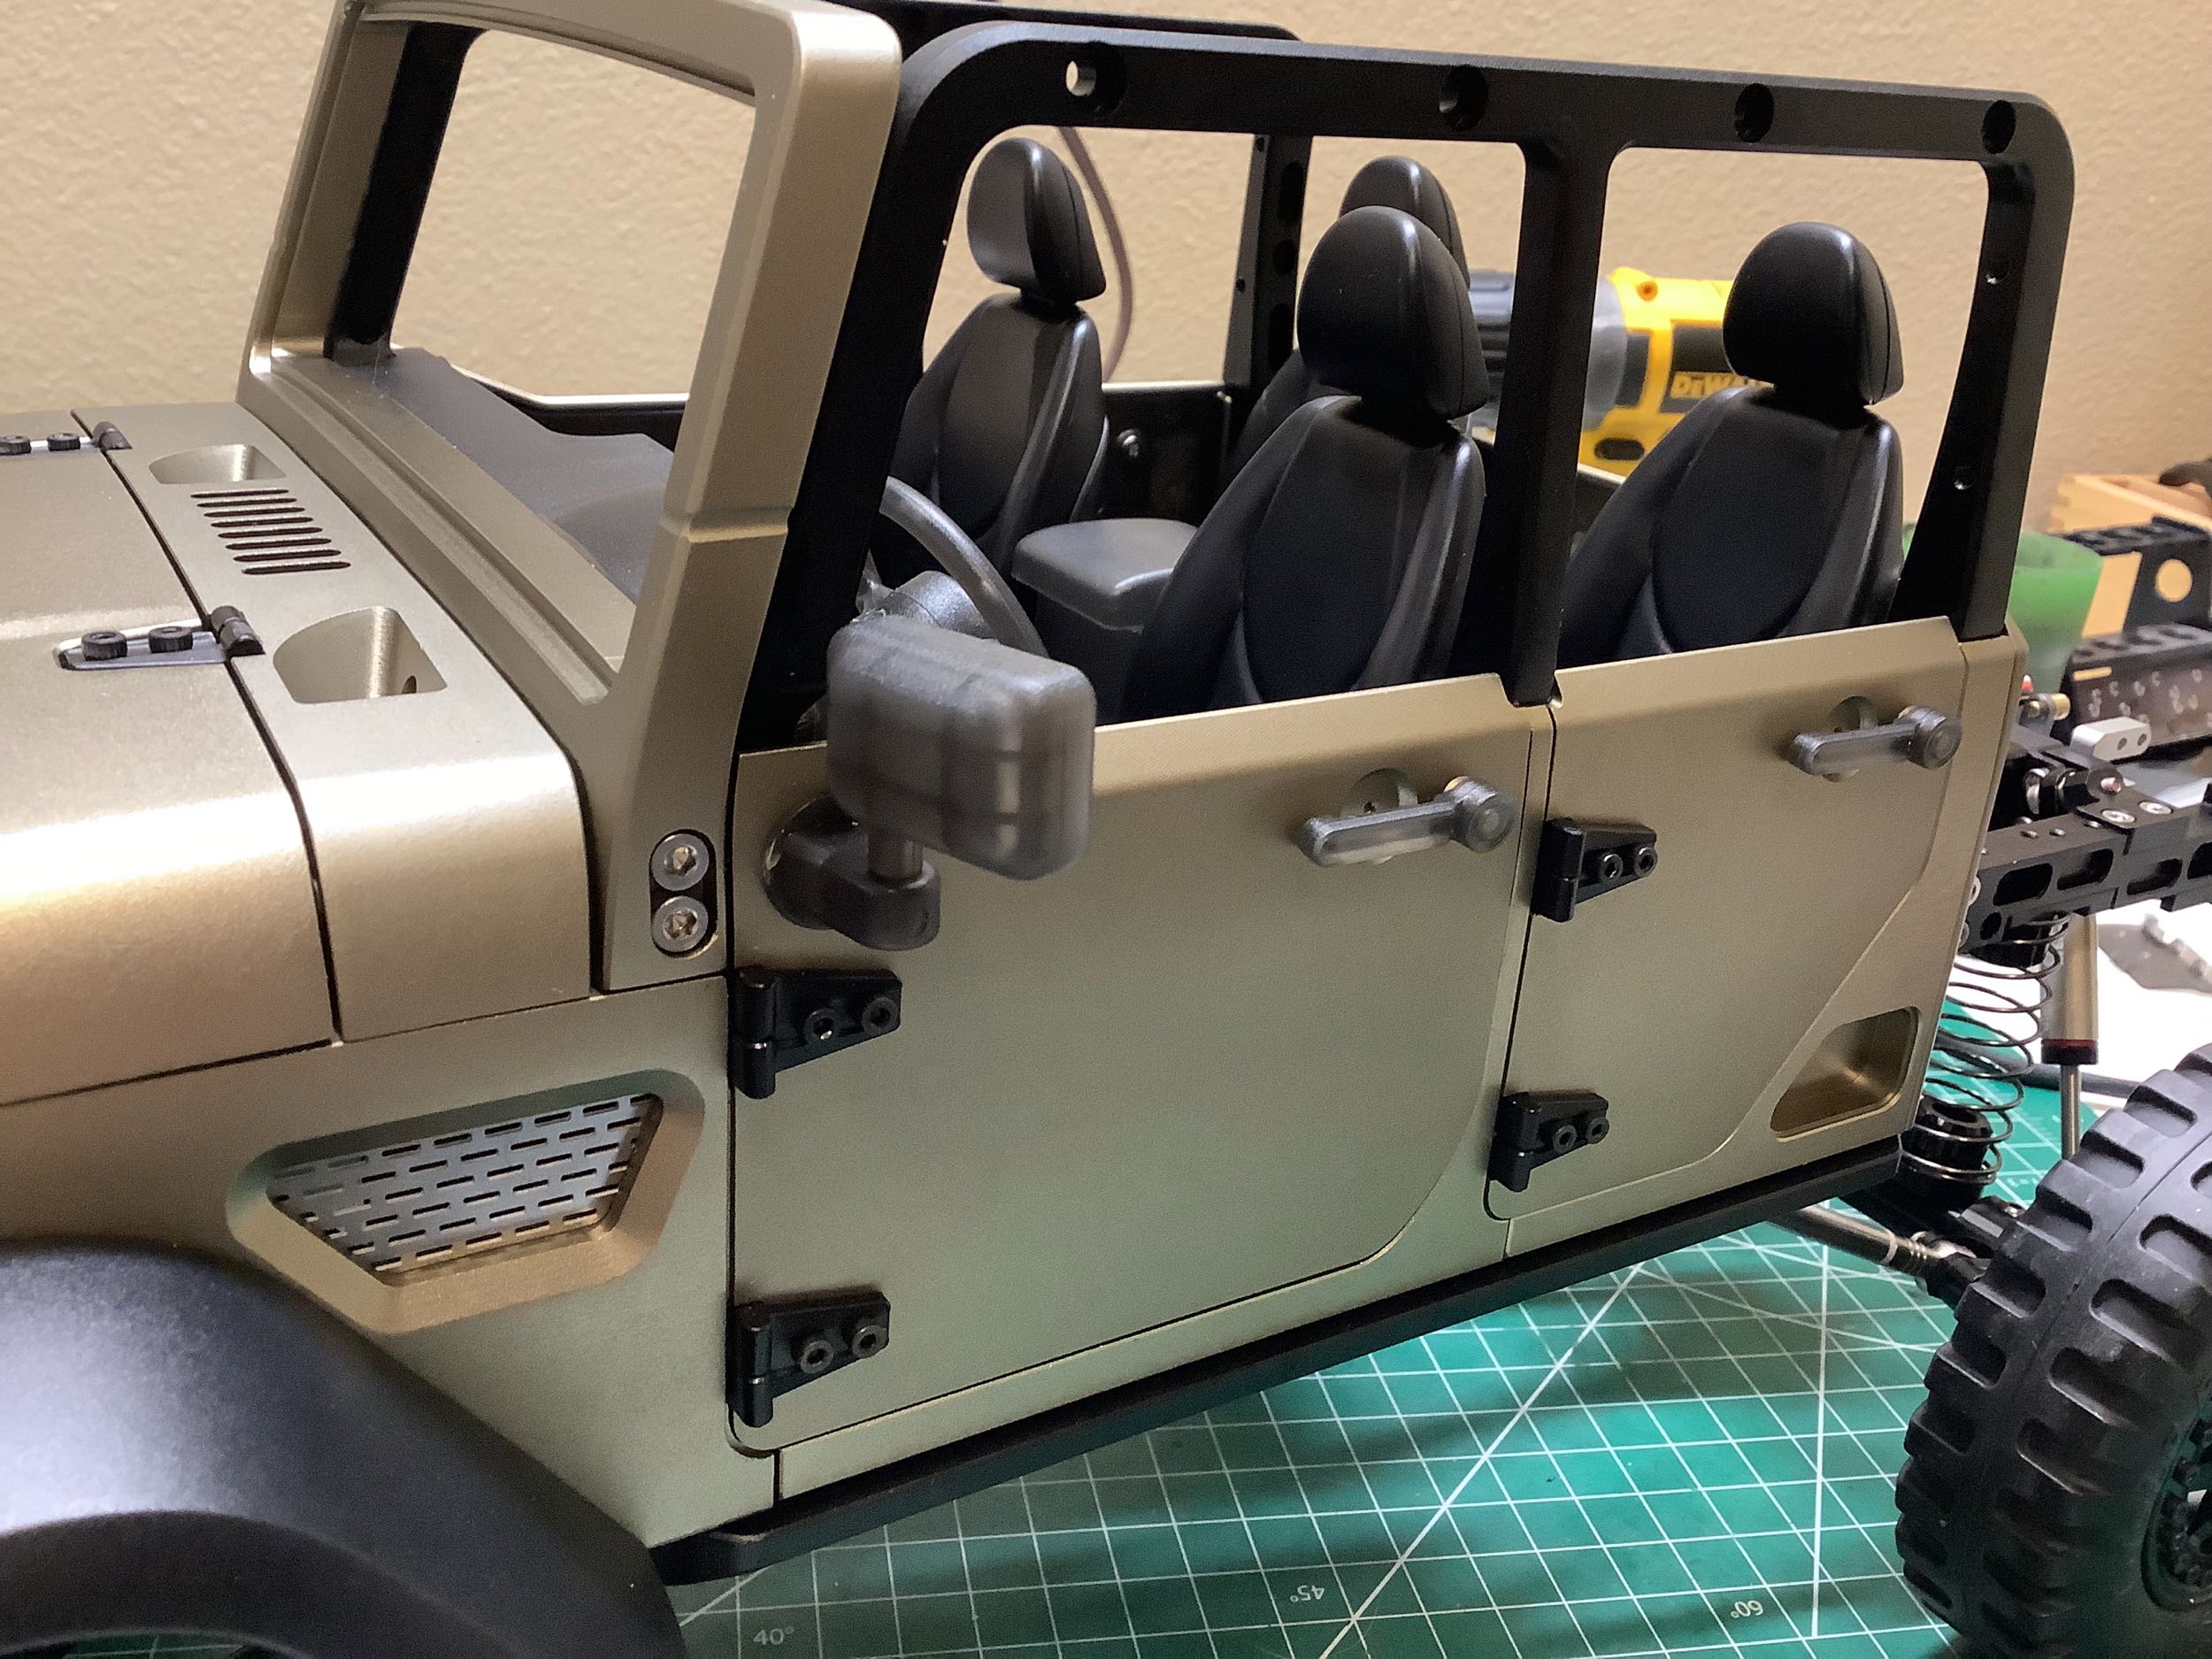
The front doors are mechanically identical to the rear but they are a
bit larger and are more rectangular. Just like the real vehicle,
you can lift the doors off the hinges any time they are open. The
front doors also have the large rectangular Jeep side mirrors.
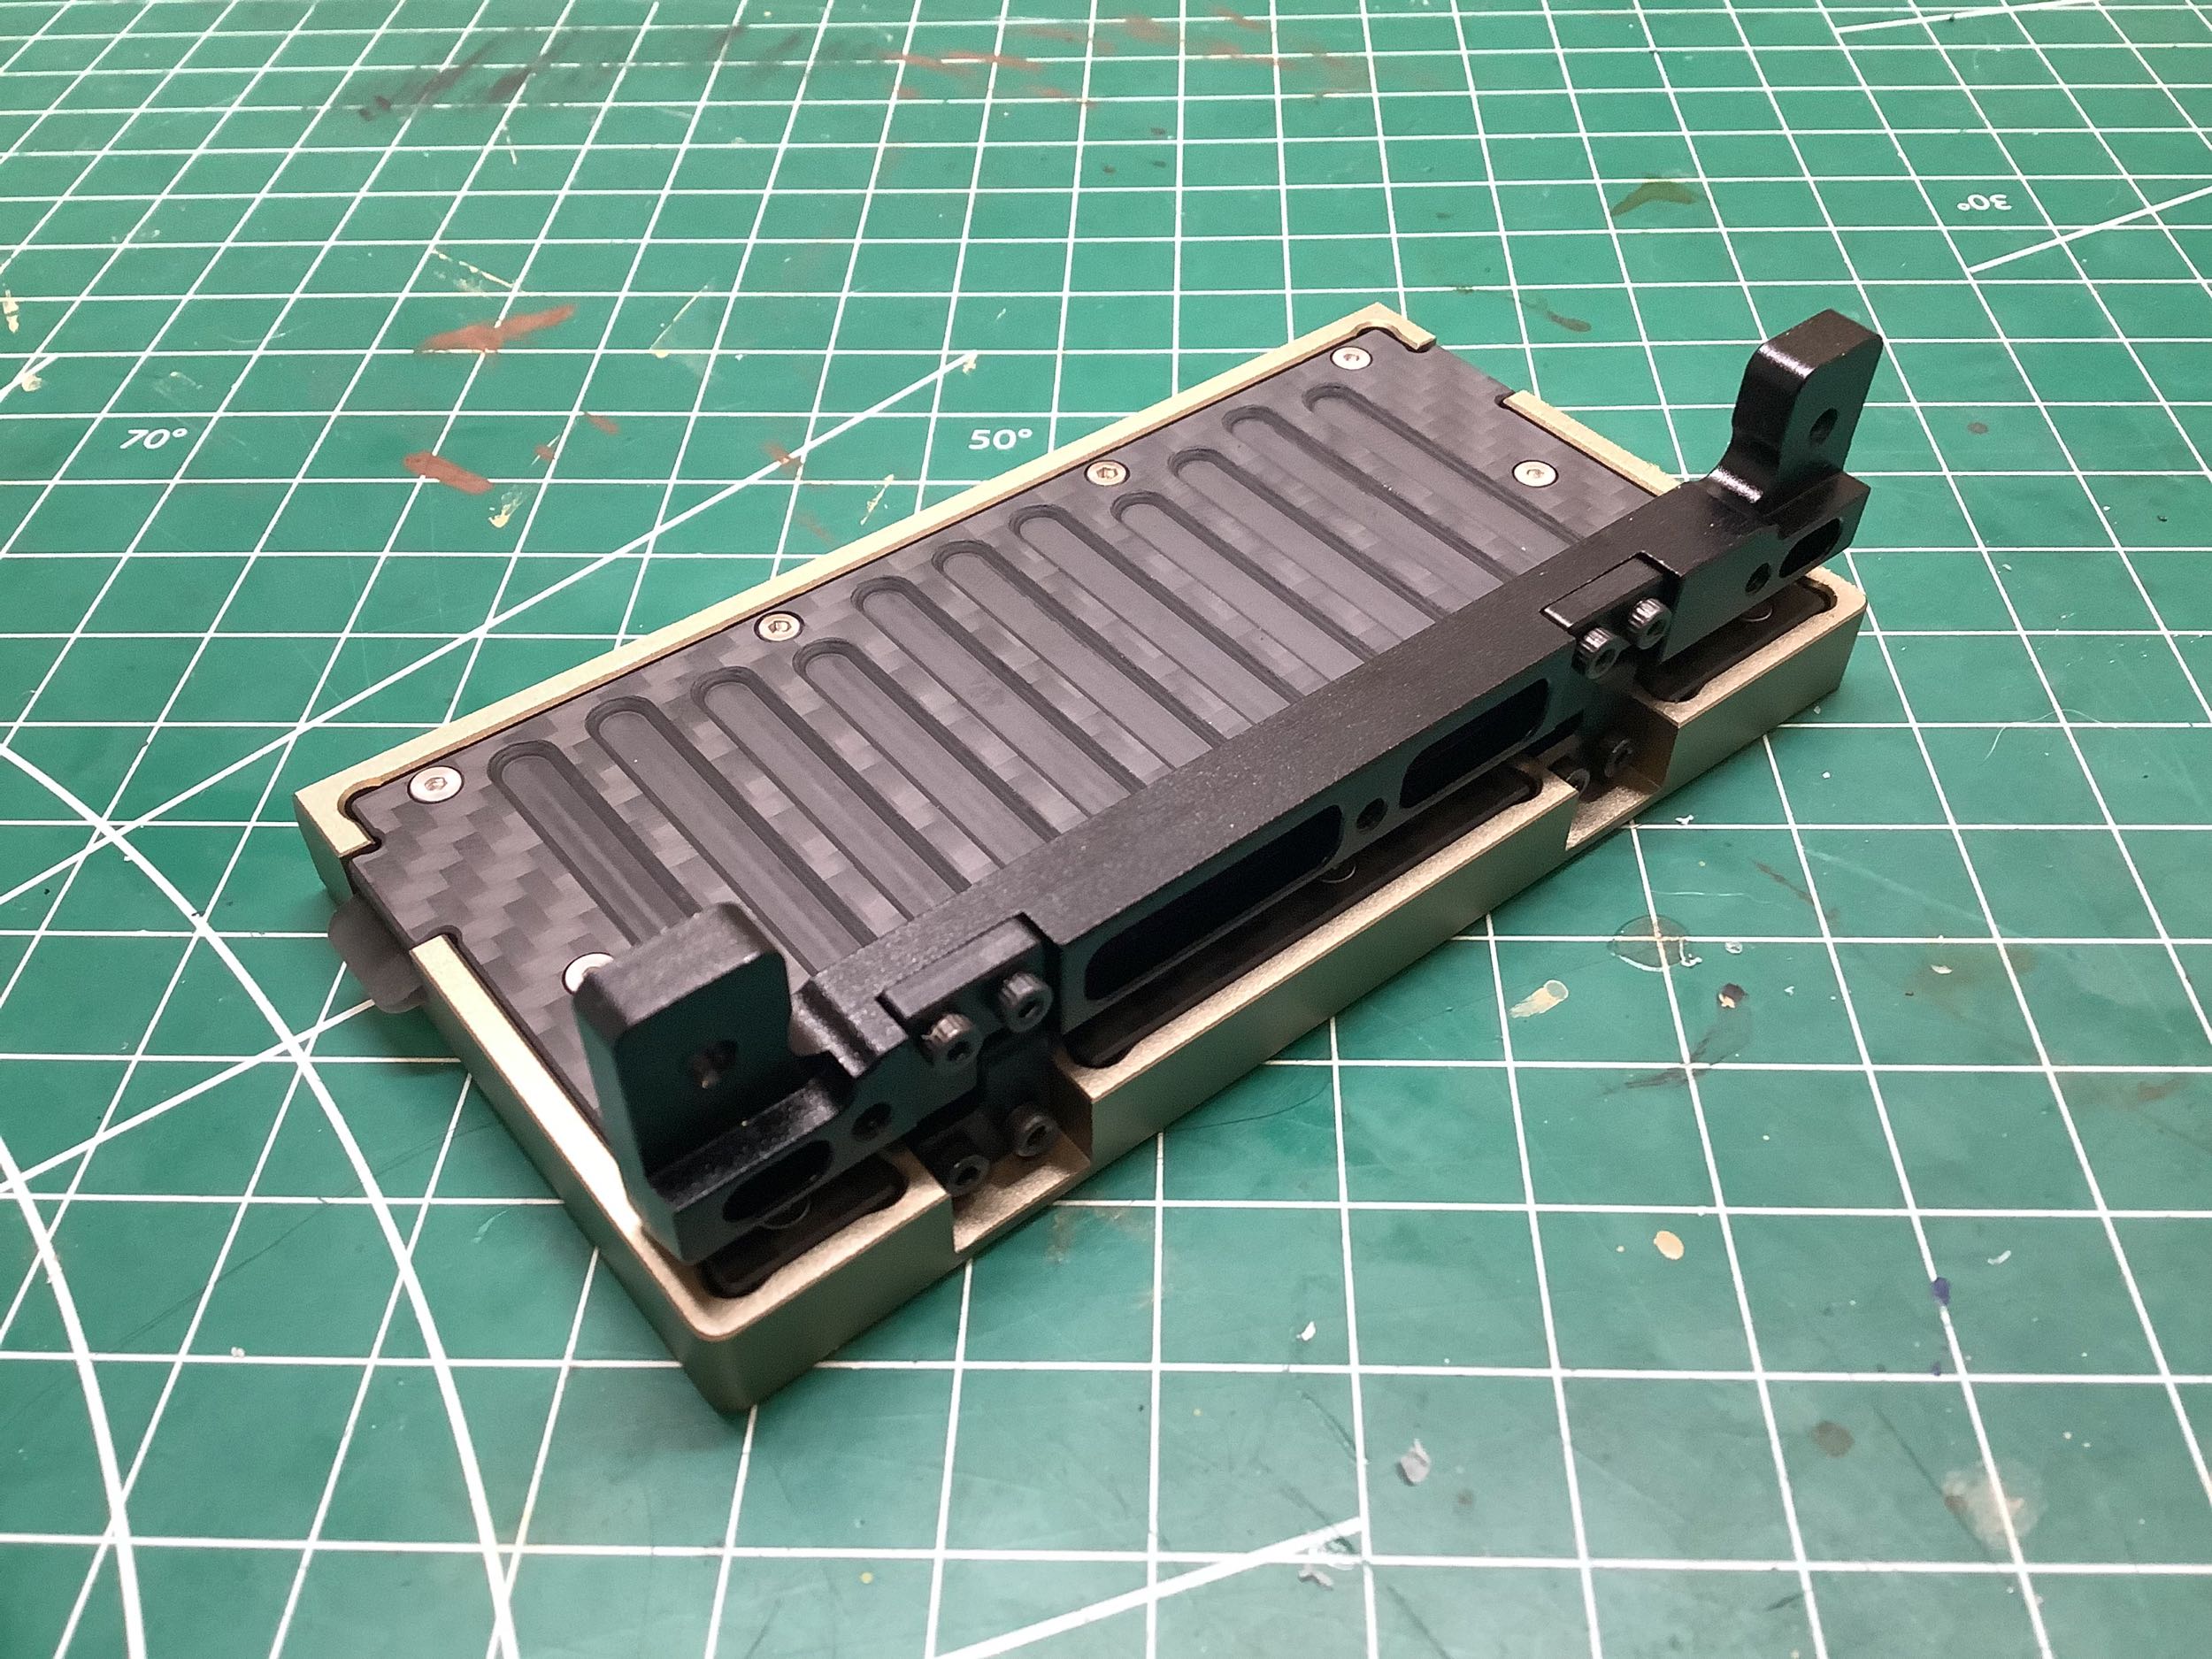
Let's get started on the bed. Like the front arches,
these were left unpainted. The side panels and front wall are all
machined aluminum like almost everything else on the body. Those
slots of the front line up with slots on the back of the cabin.
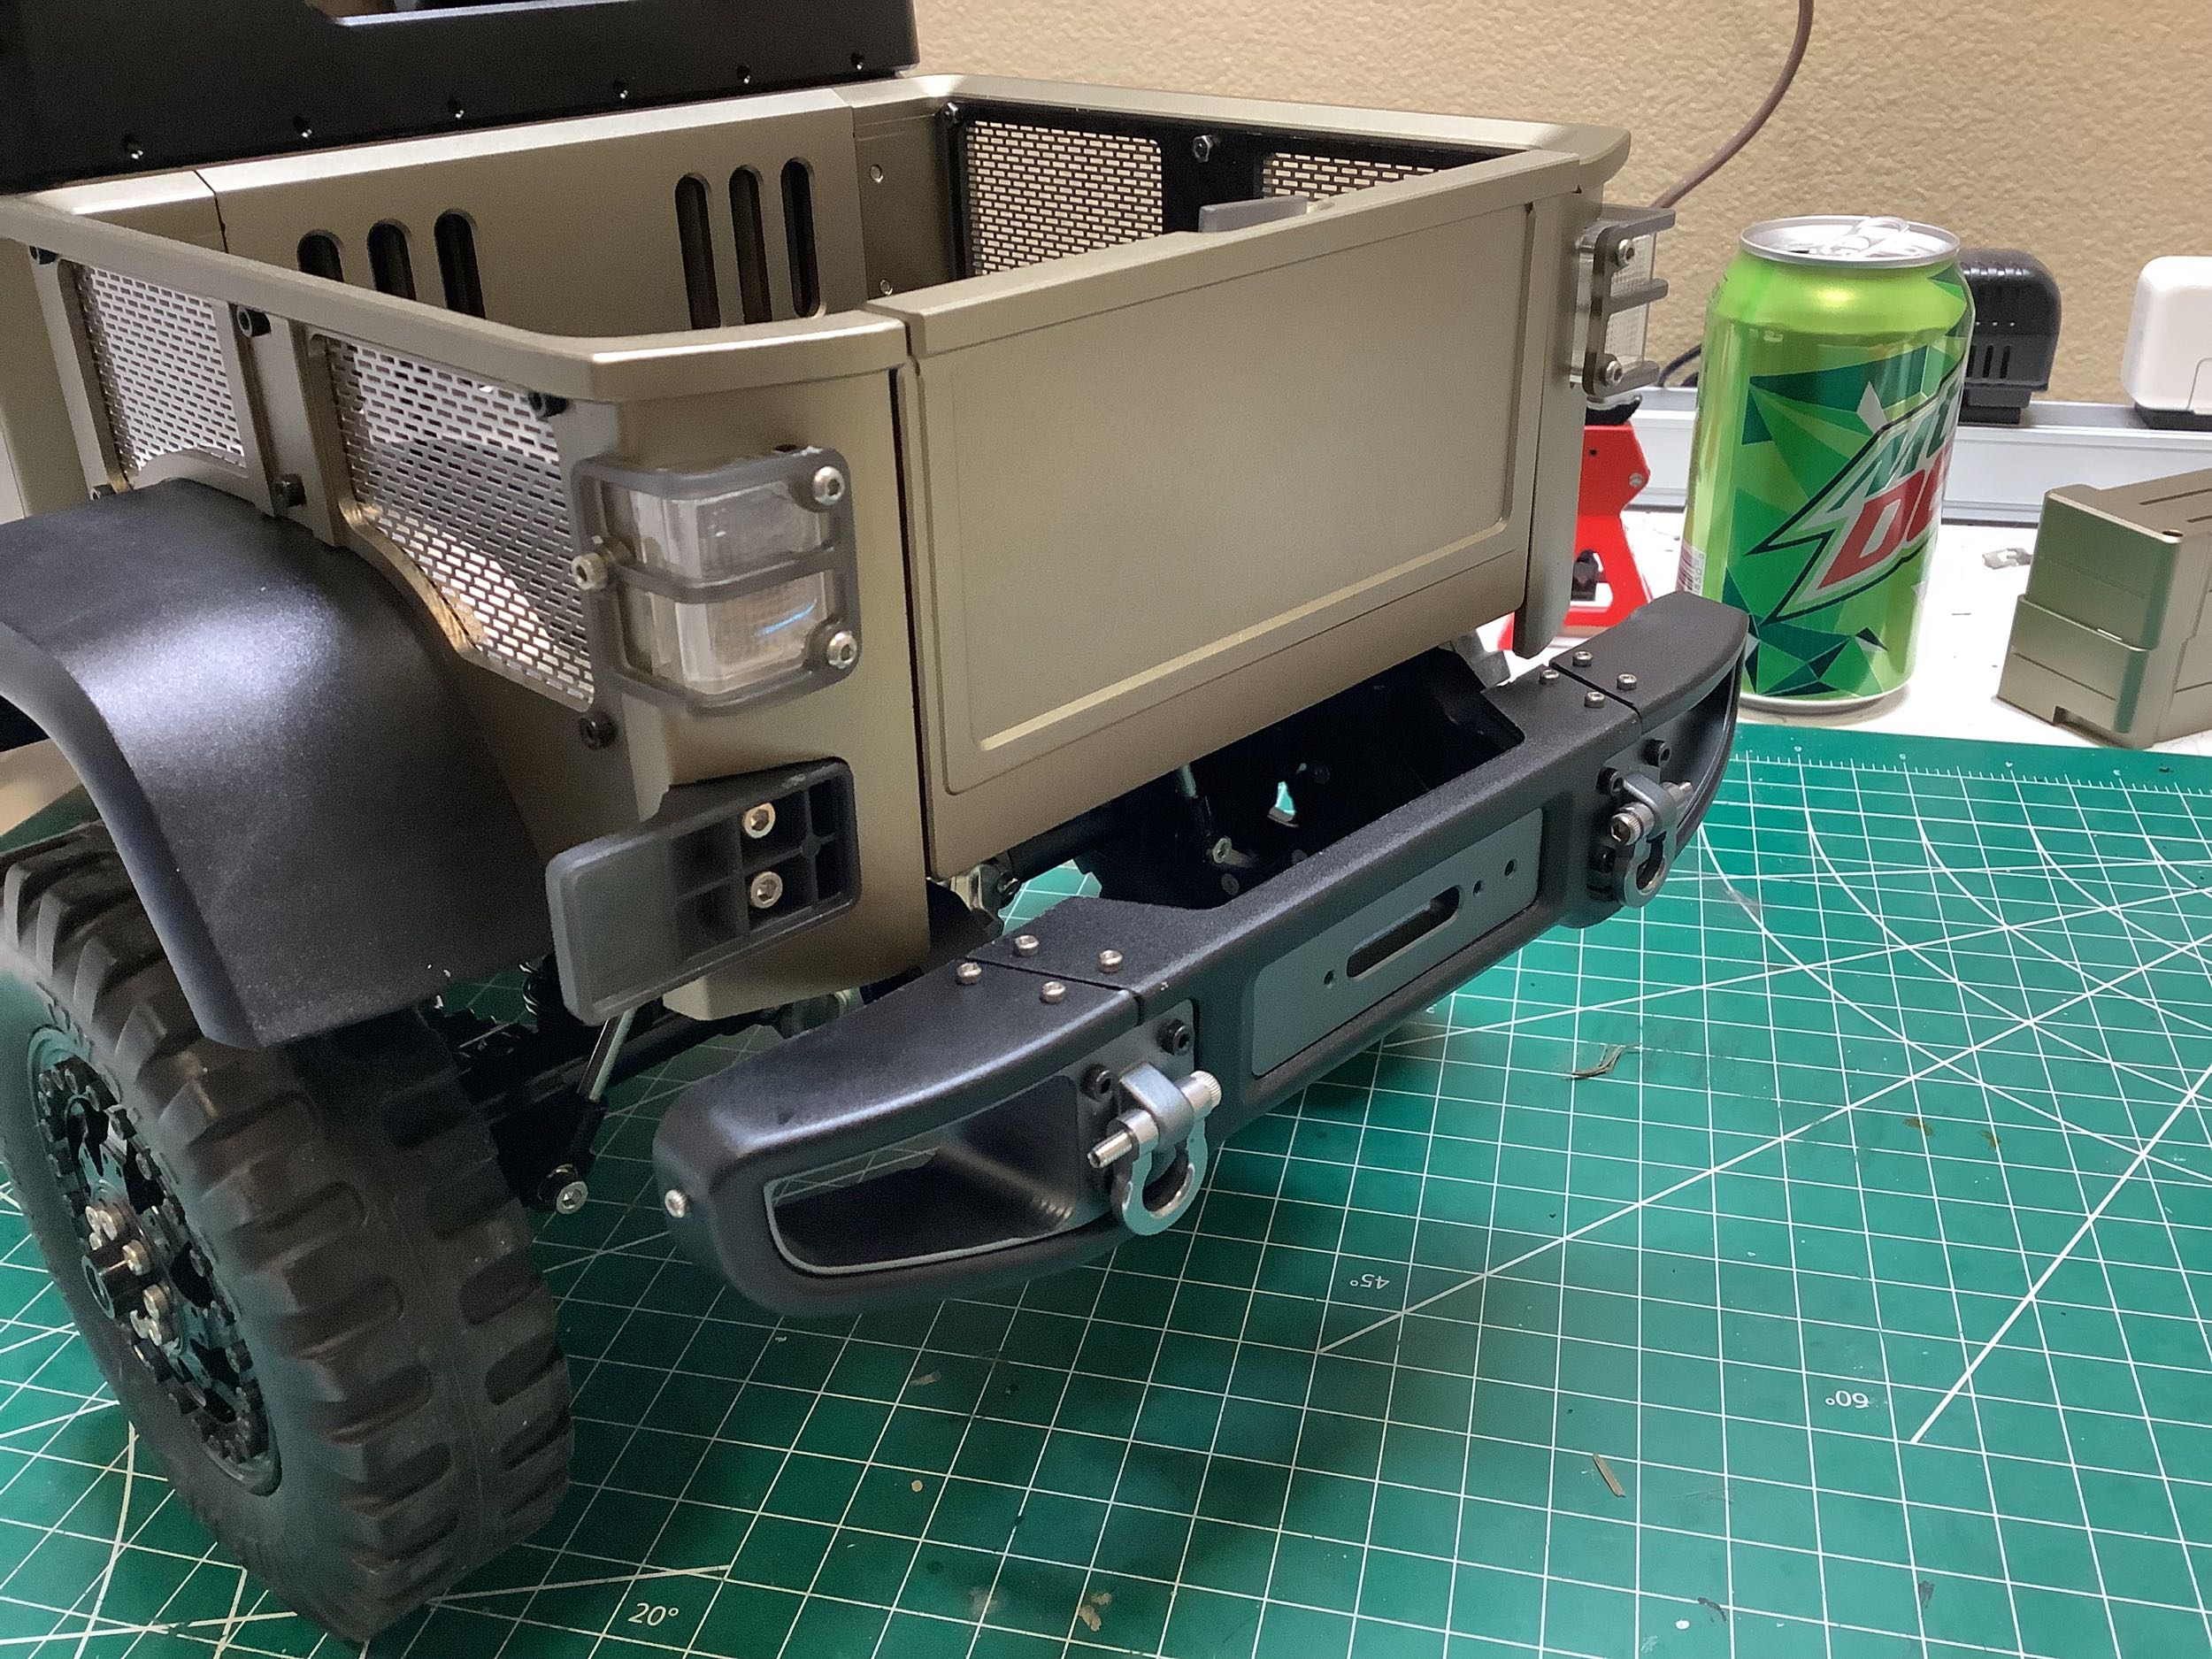
Now I've attached the tail lights, the protective brackets, and the
license plate holder. It is hard to see what I've added on the
right, but is a small plastic cover to conceal the back side of the tail
lights where the wires will be.
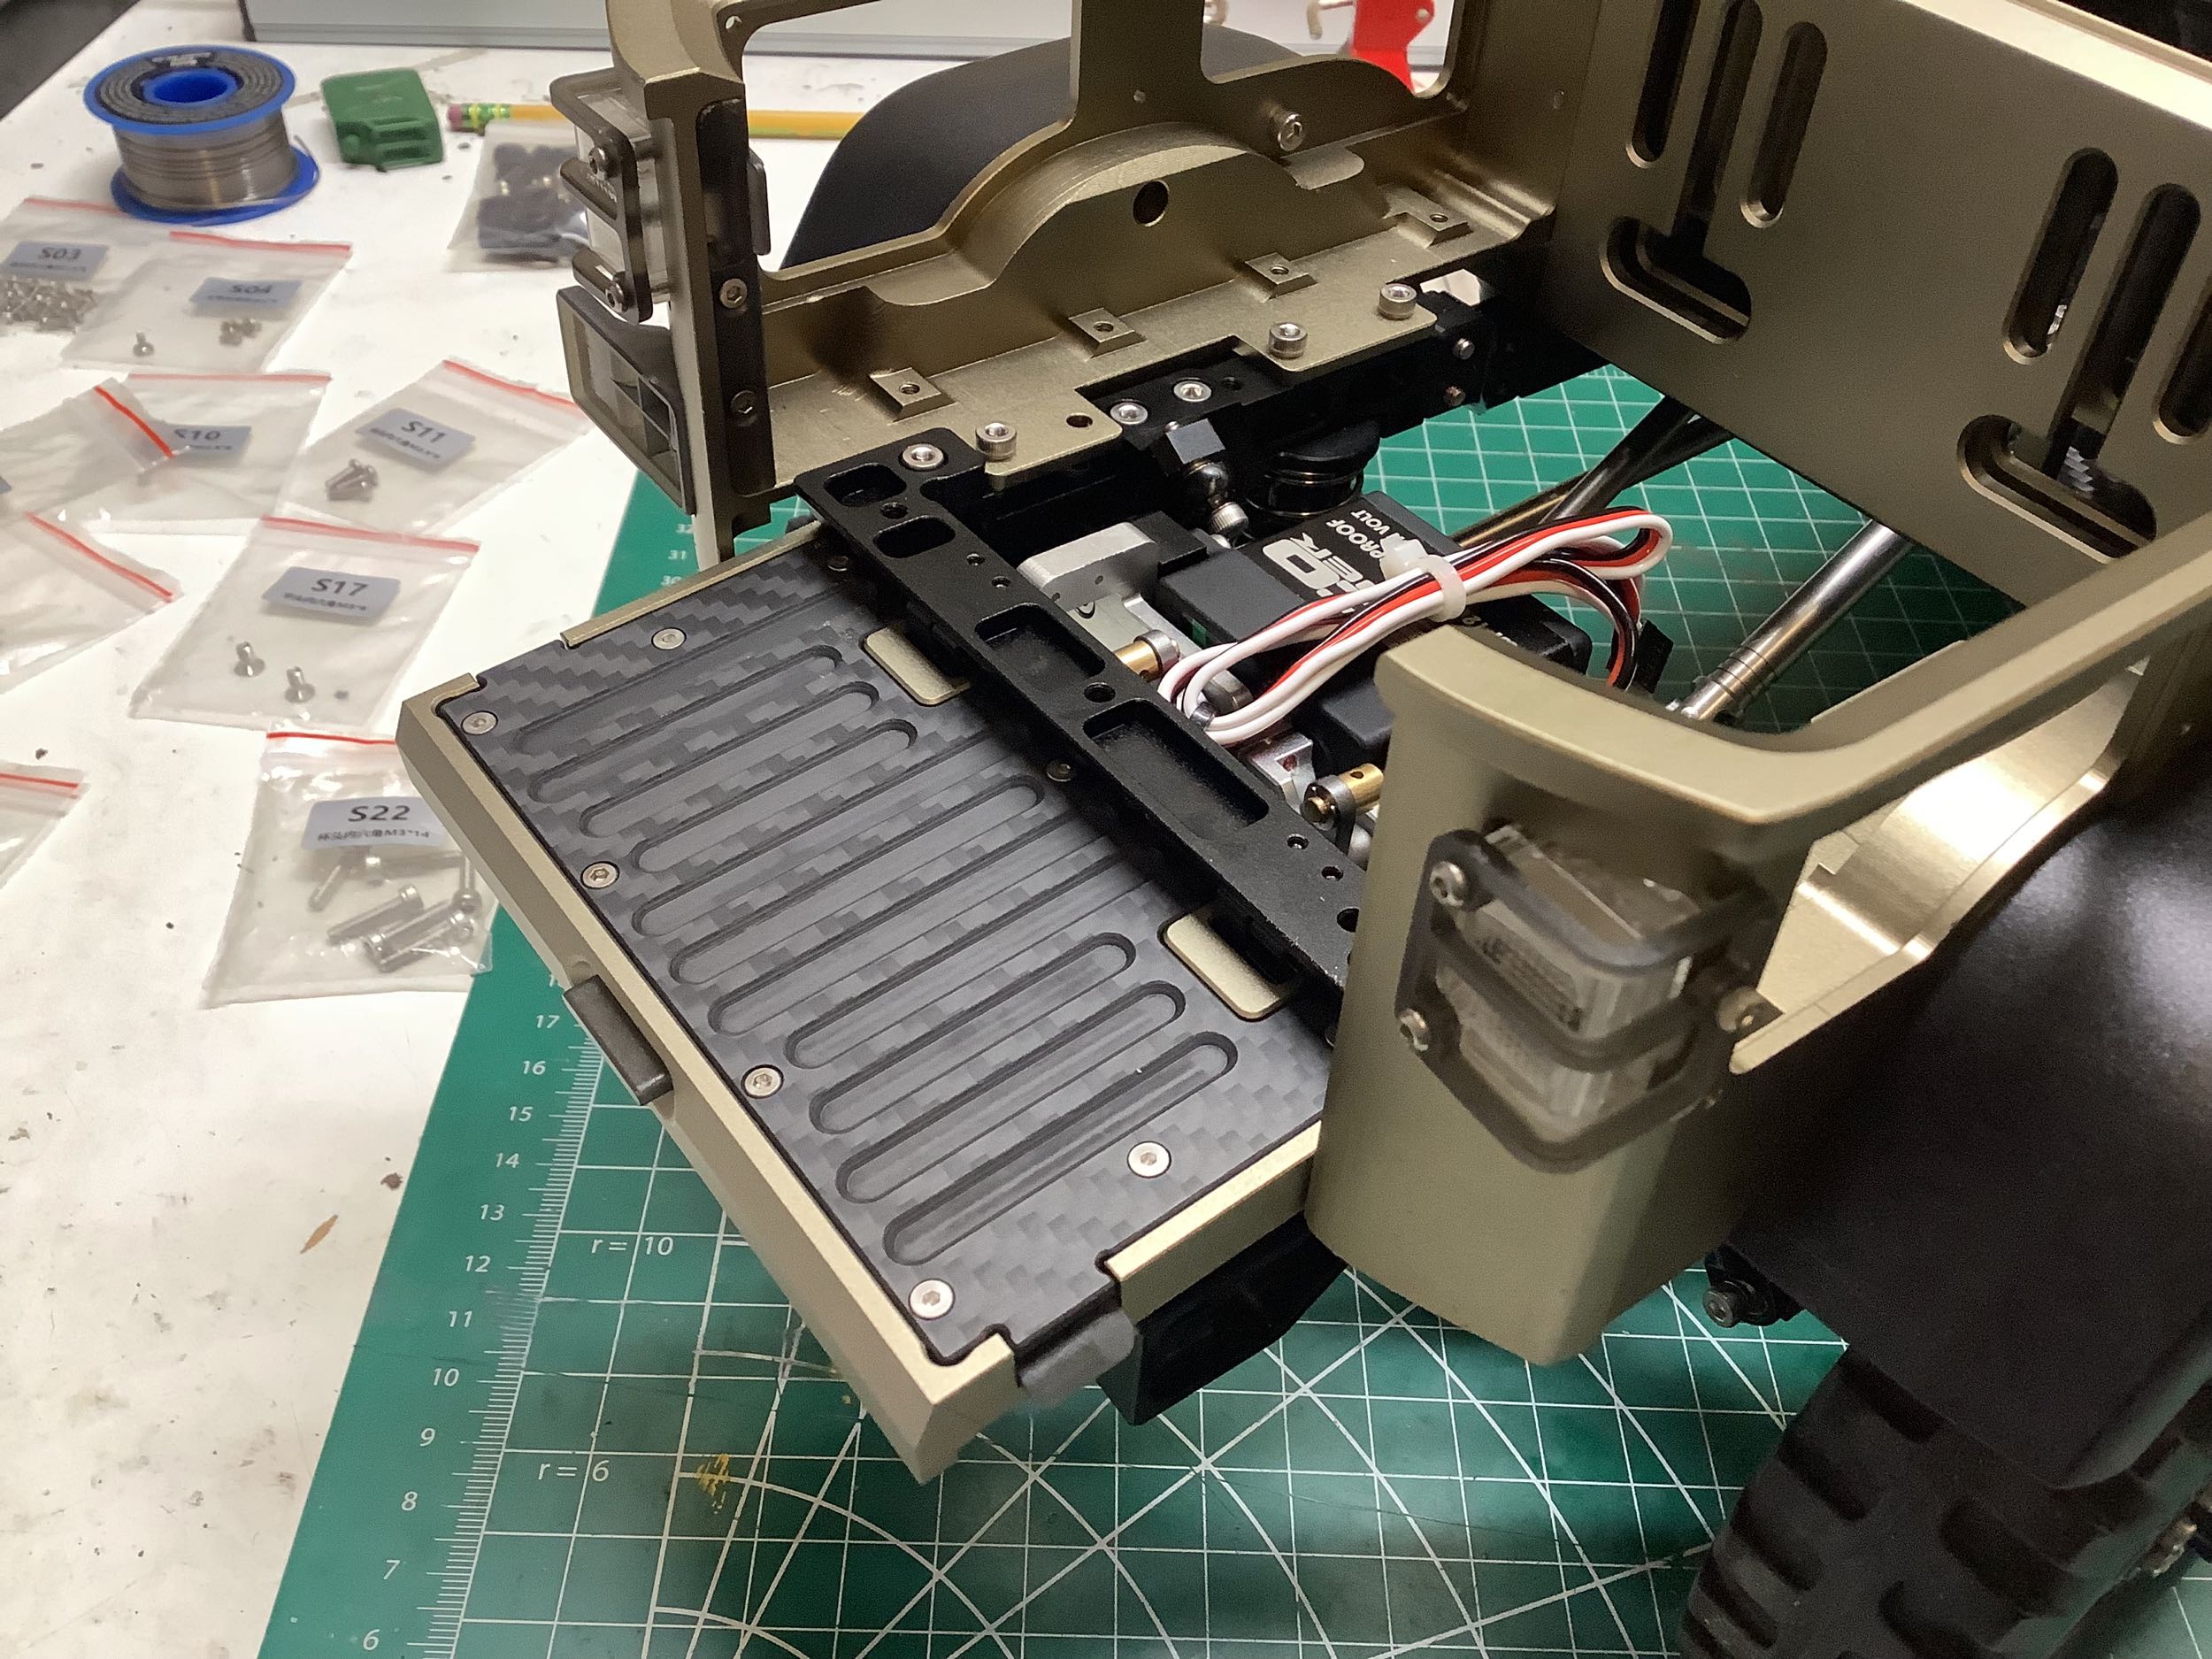
The three sided bed can now be attached to the chassis. This is
effectively a step side bed with the wheel arches on the outside
and therefore has a flat bottom. Unlike most step sides though,
it is
still full width. The bed is the width of the cabin and the wheel
arches stick out even farther.
The tailgate latching mechanism is pretty complicated. The release
button sits on top of the gate and pushes down vertically. This
button compresses the spring shown on the left and also moves those two
large inner bearings down. As they move down, the angled slot
forces the side latches inward. Those side latches slide on two
more bearings each to stay level. This whole mechanism then gets
hidden by a machined carbon plate and hinged off an aluminum bracket as
shown on the right.
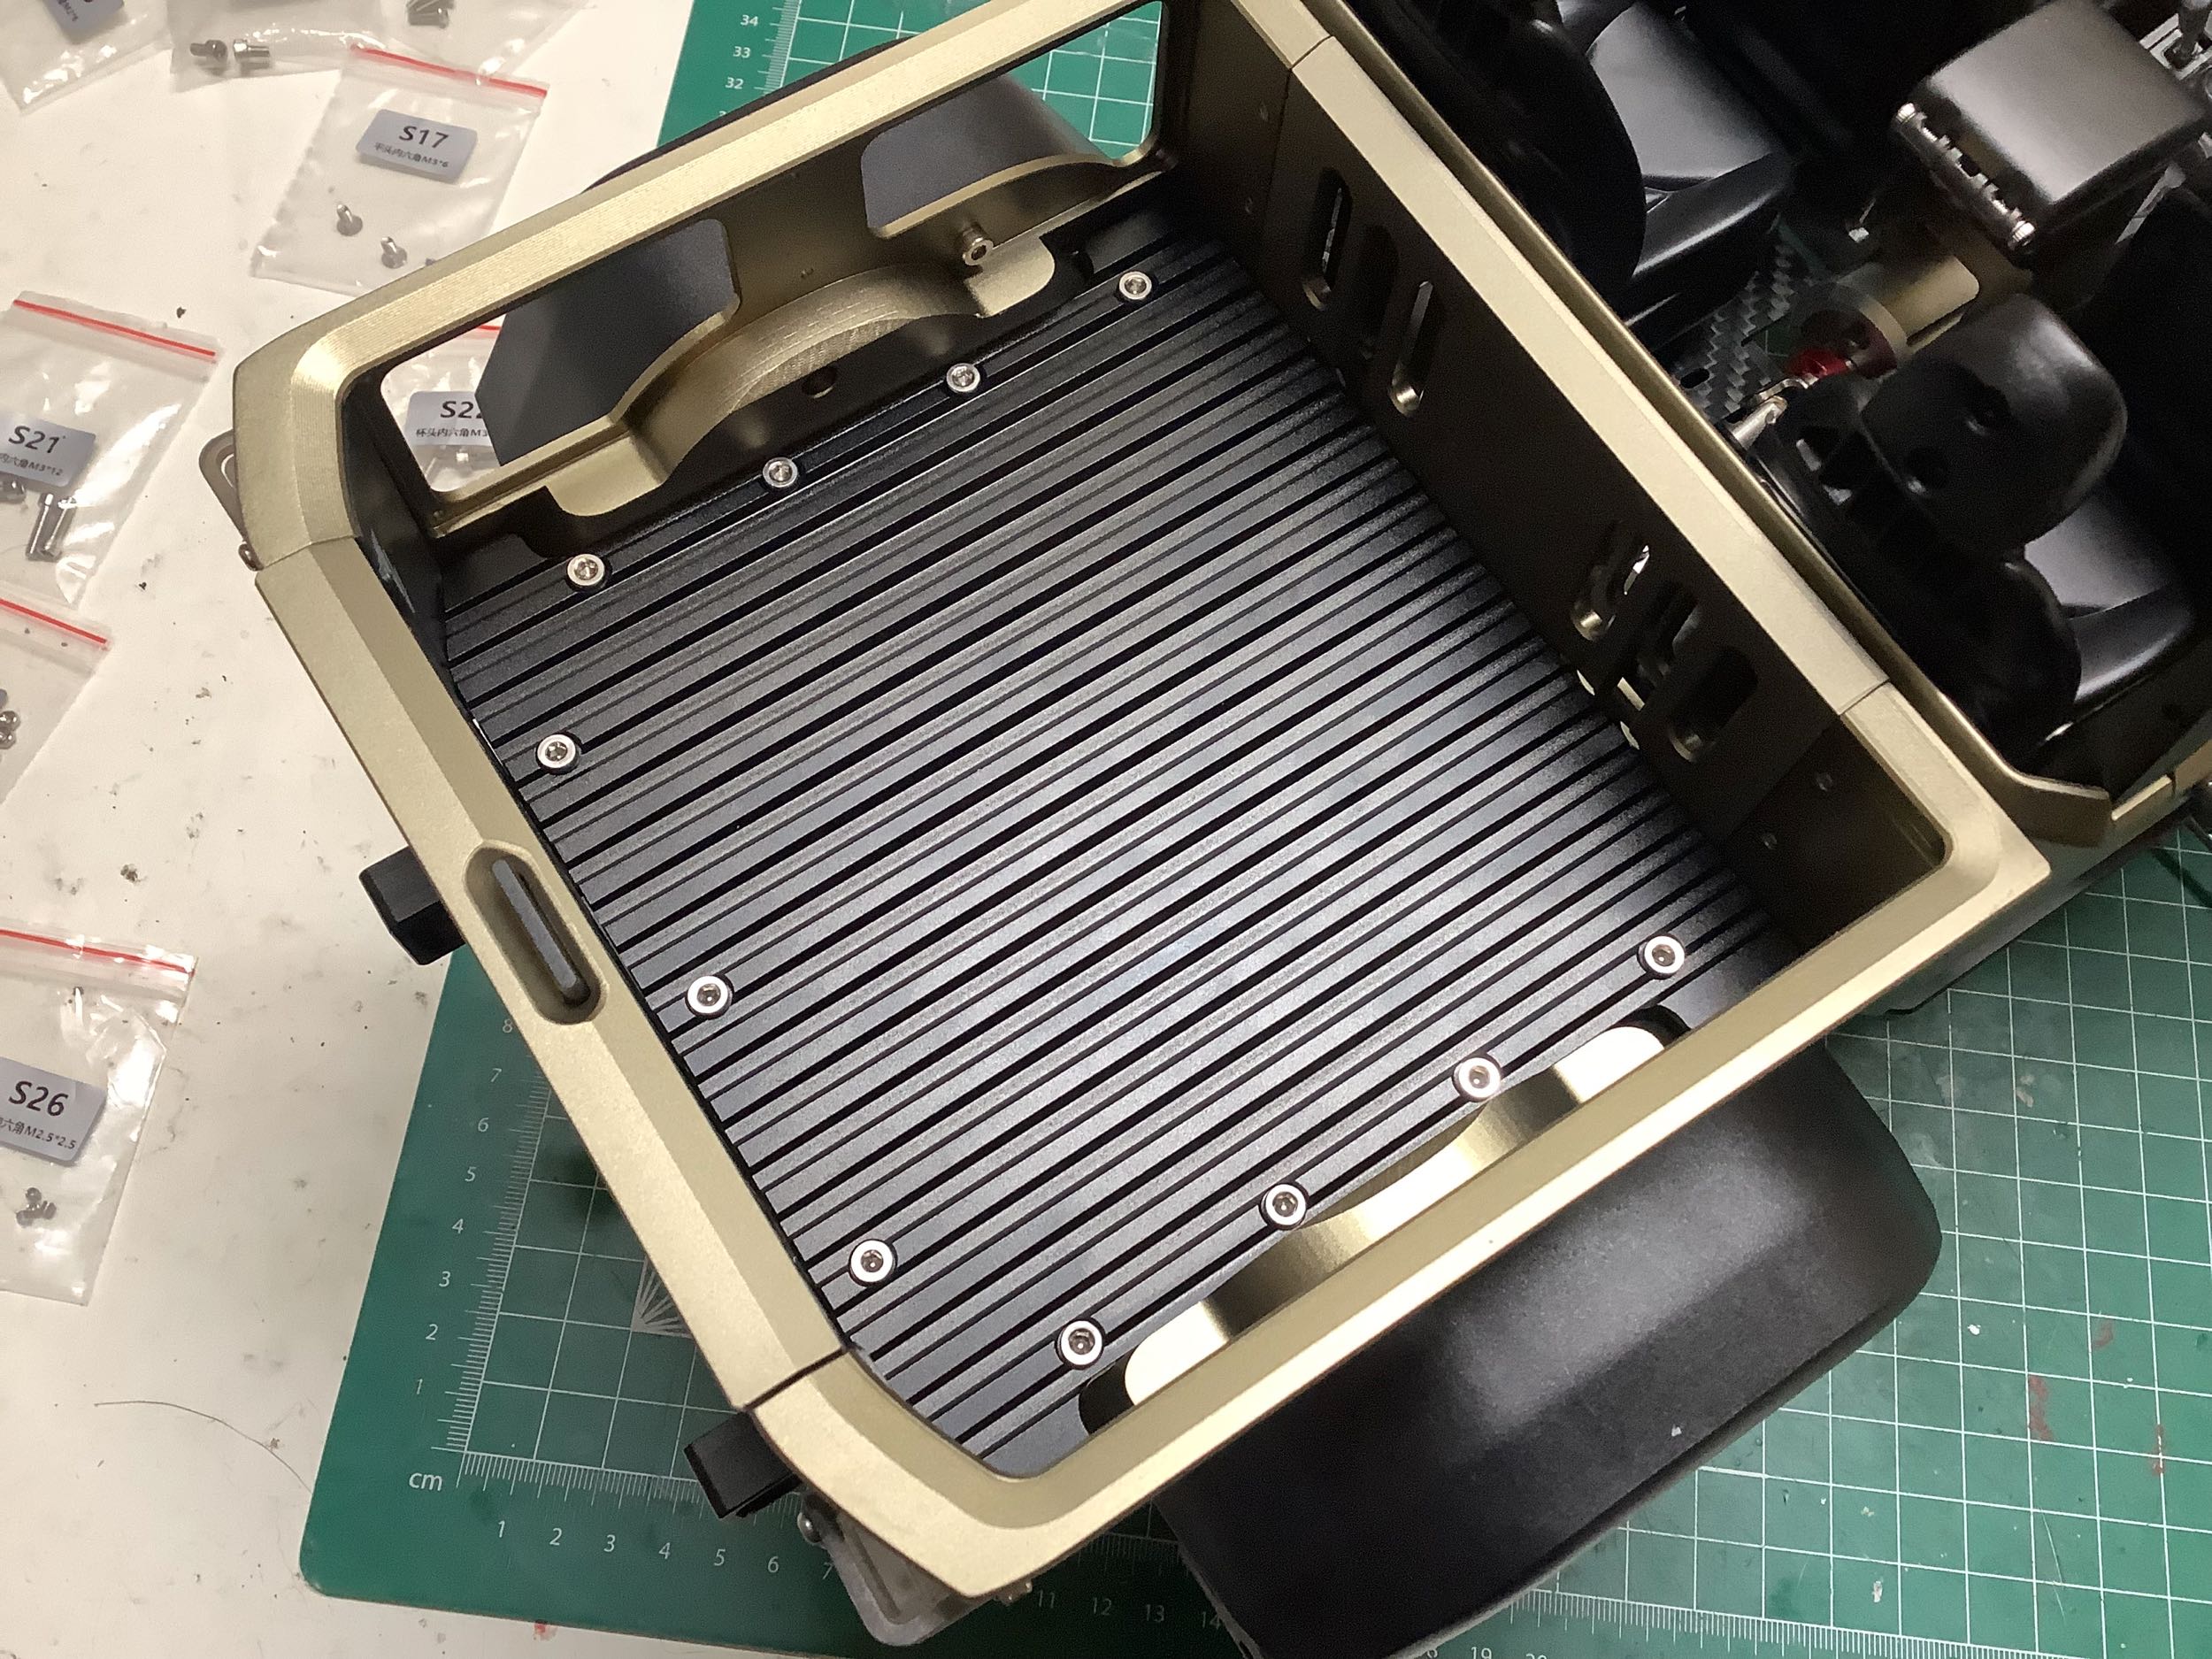
Now I've installed the tail gate onto the chassis. At this point I
can install the bed deck which is an aluminum plate. The real
truck has a wooden bed deck.
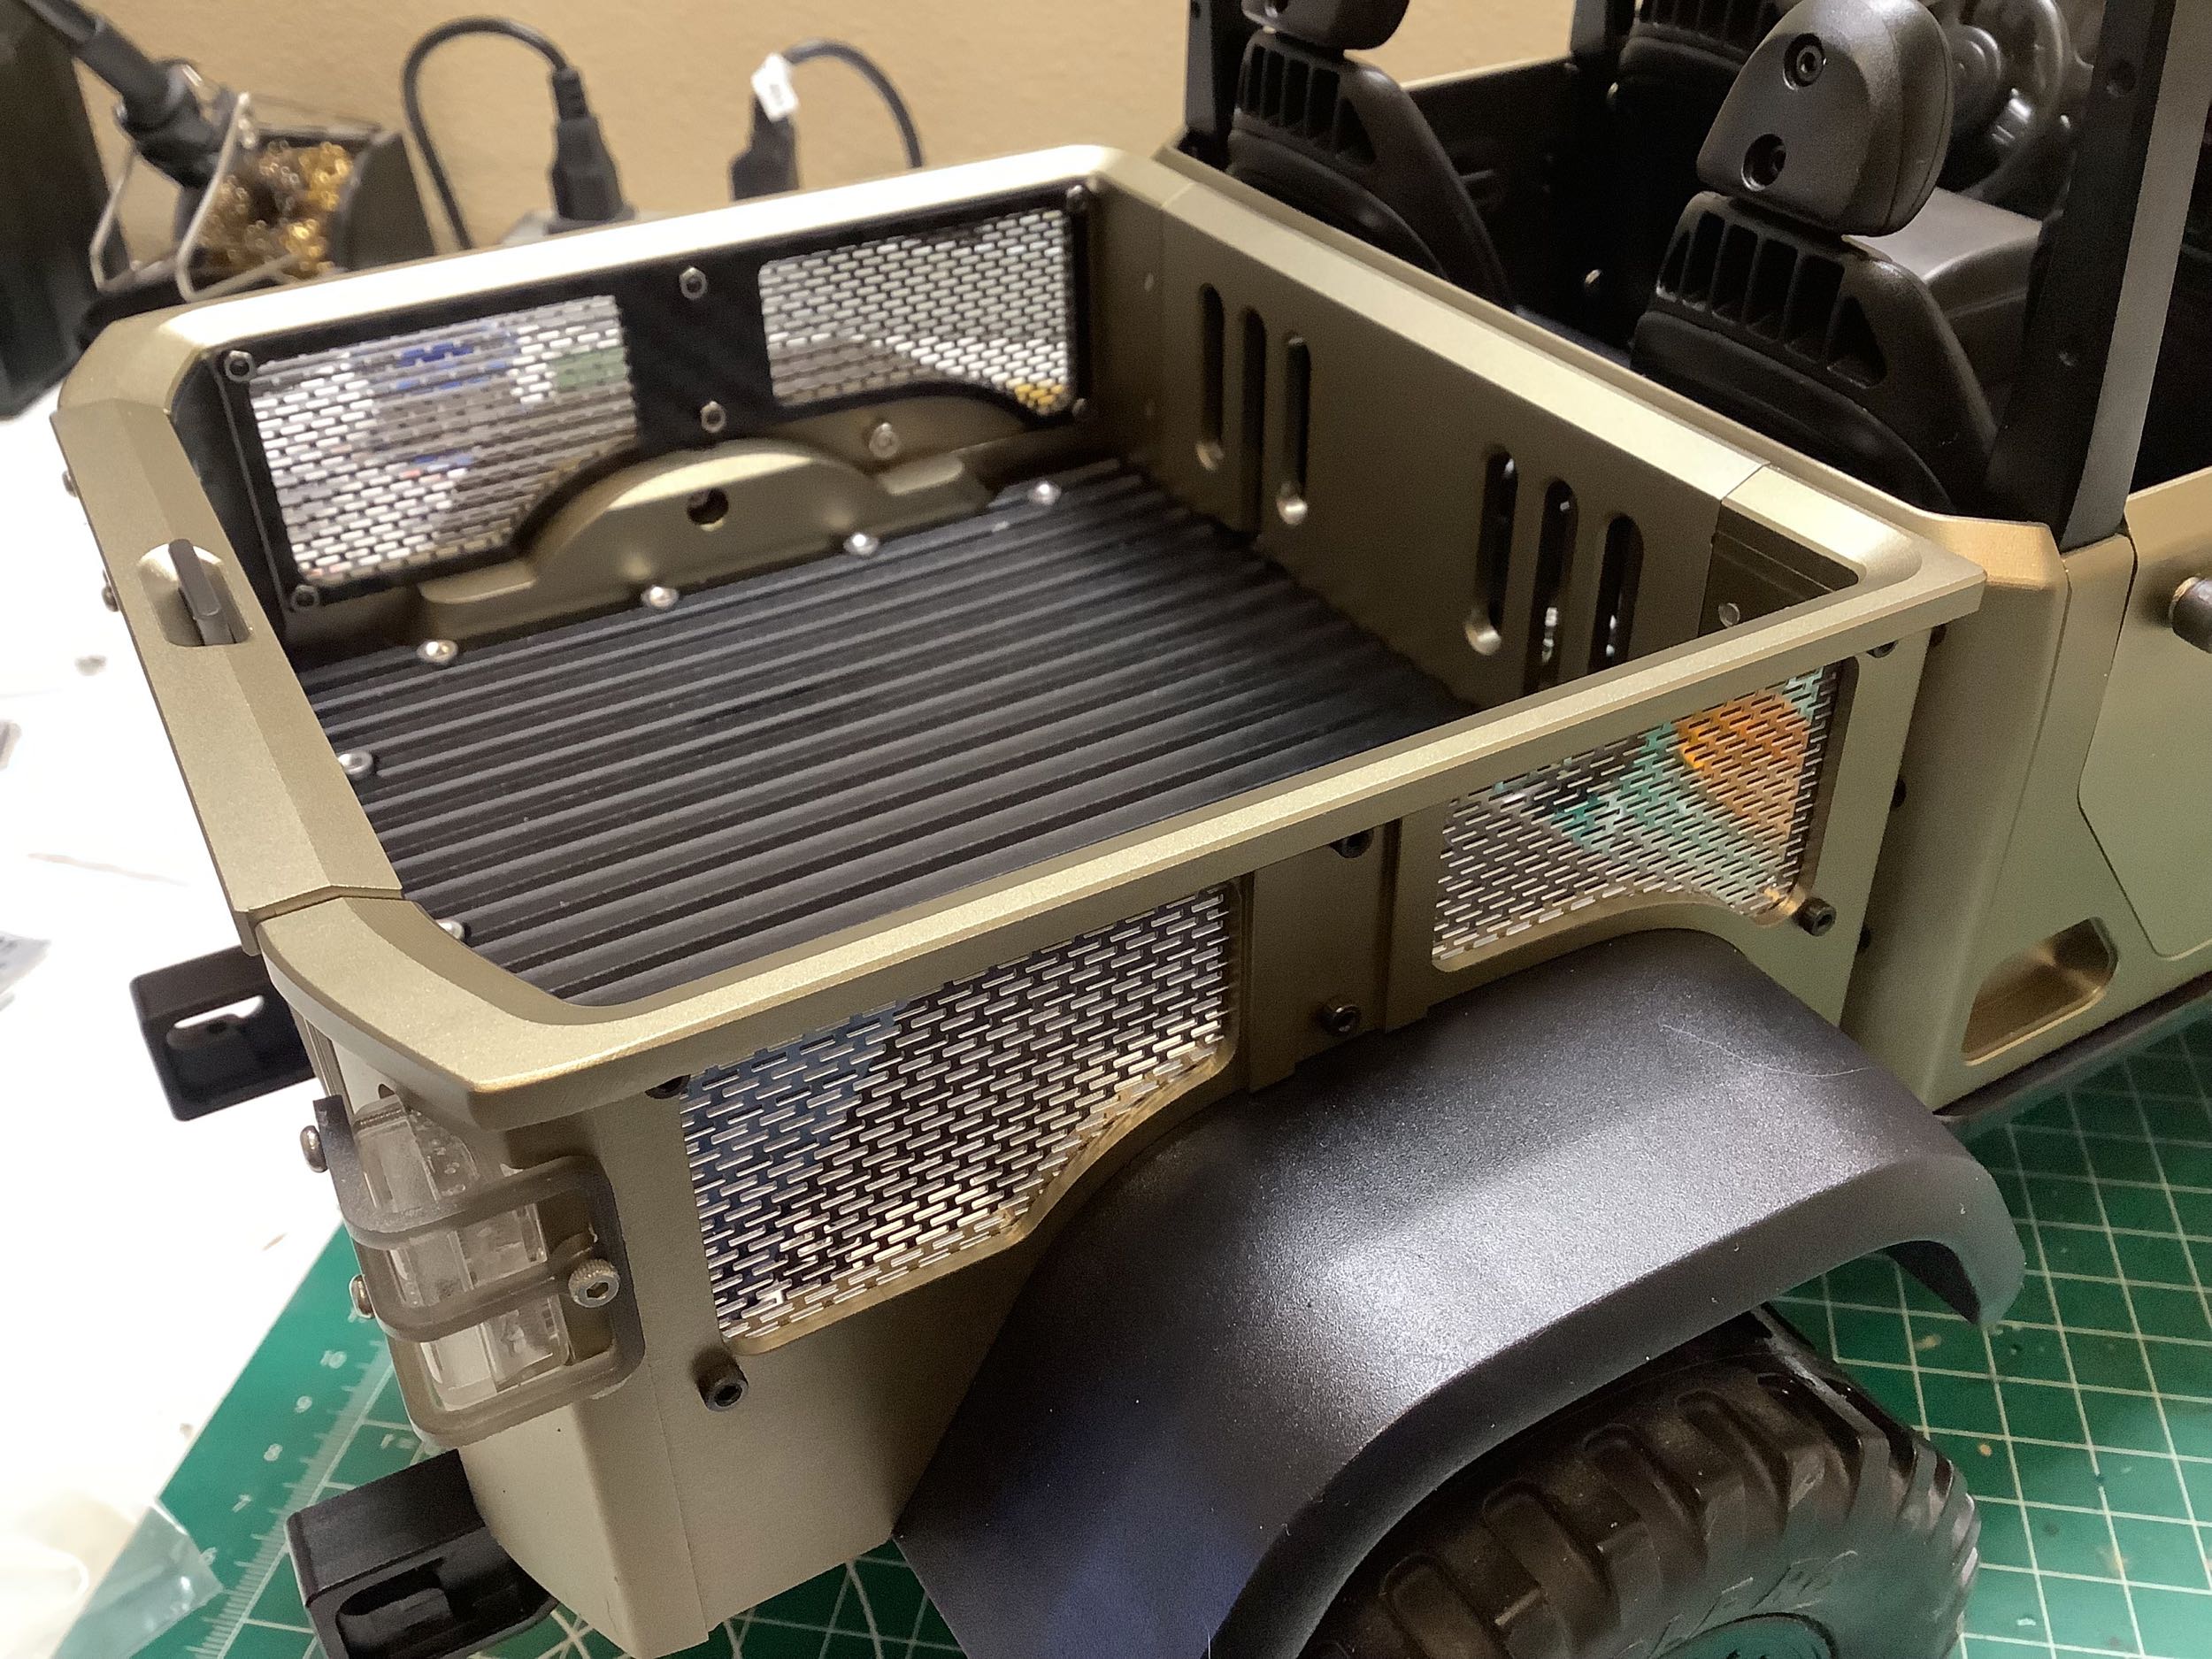
There are big cutouts on the sides of the bed, so to close those off
we'll use some photo etched screens. More carbon plates are used
to support and attach the screens. This is one of the few places
on the model in which we don't have tapped holes so we need to use tiny
nuts instead.
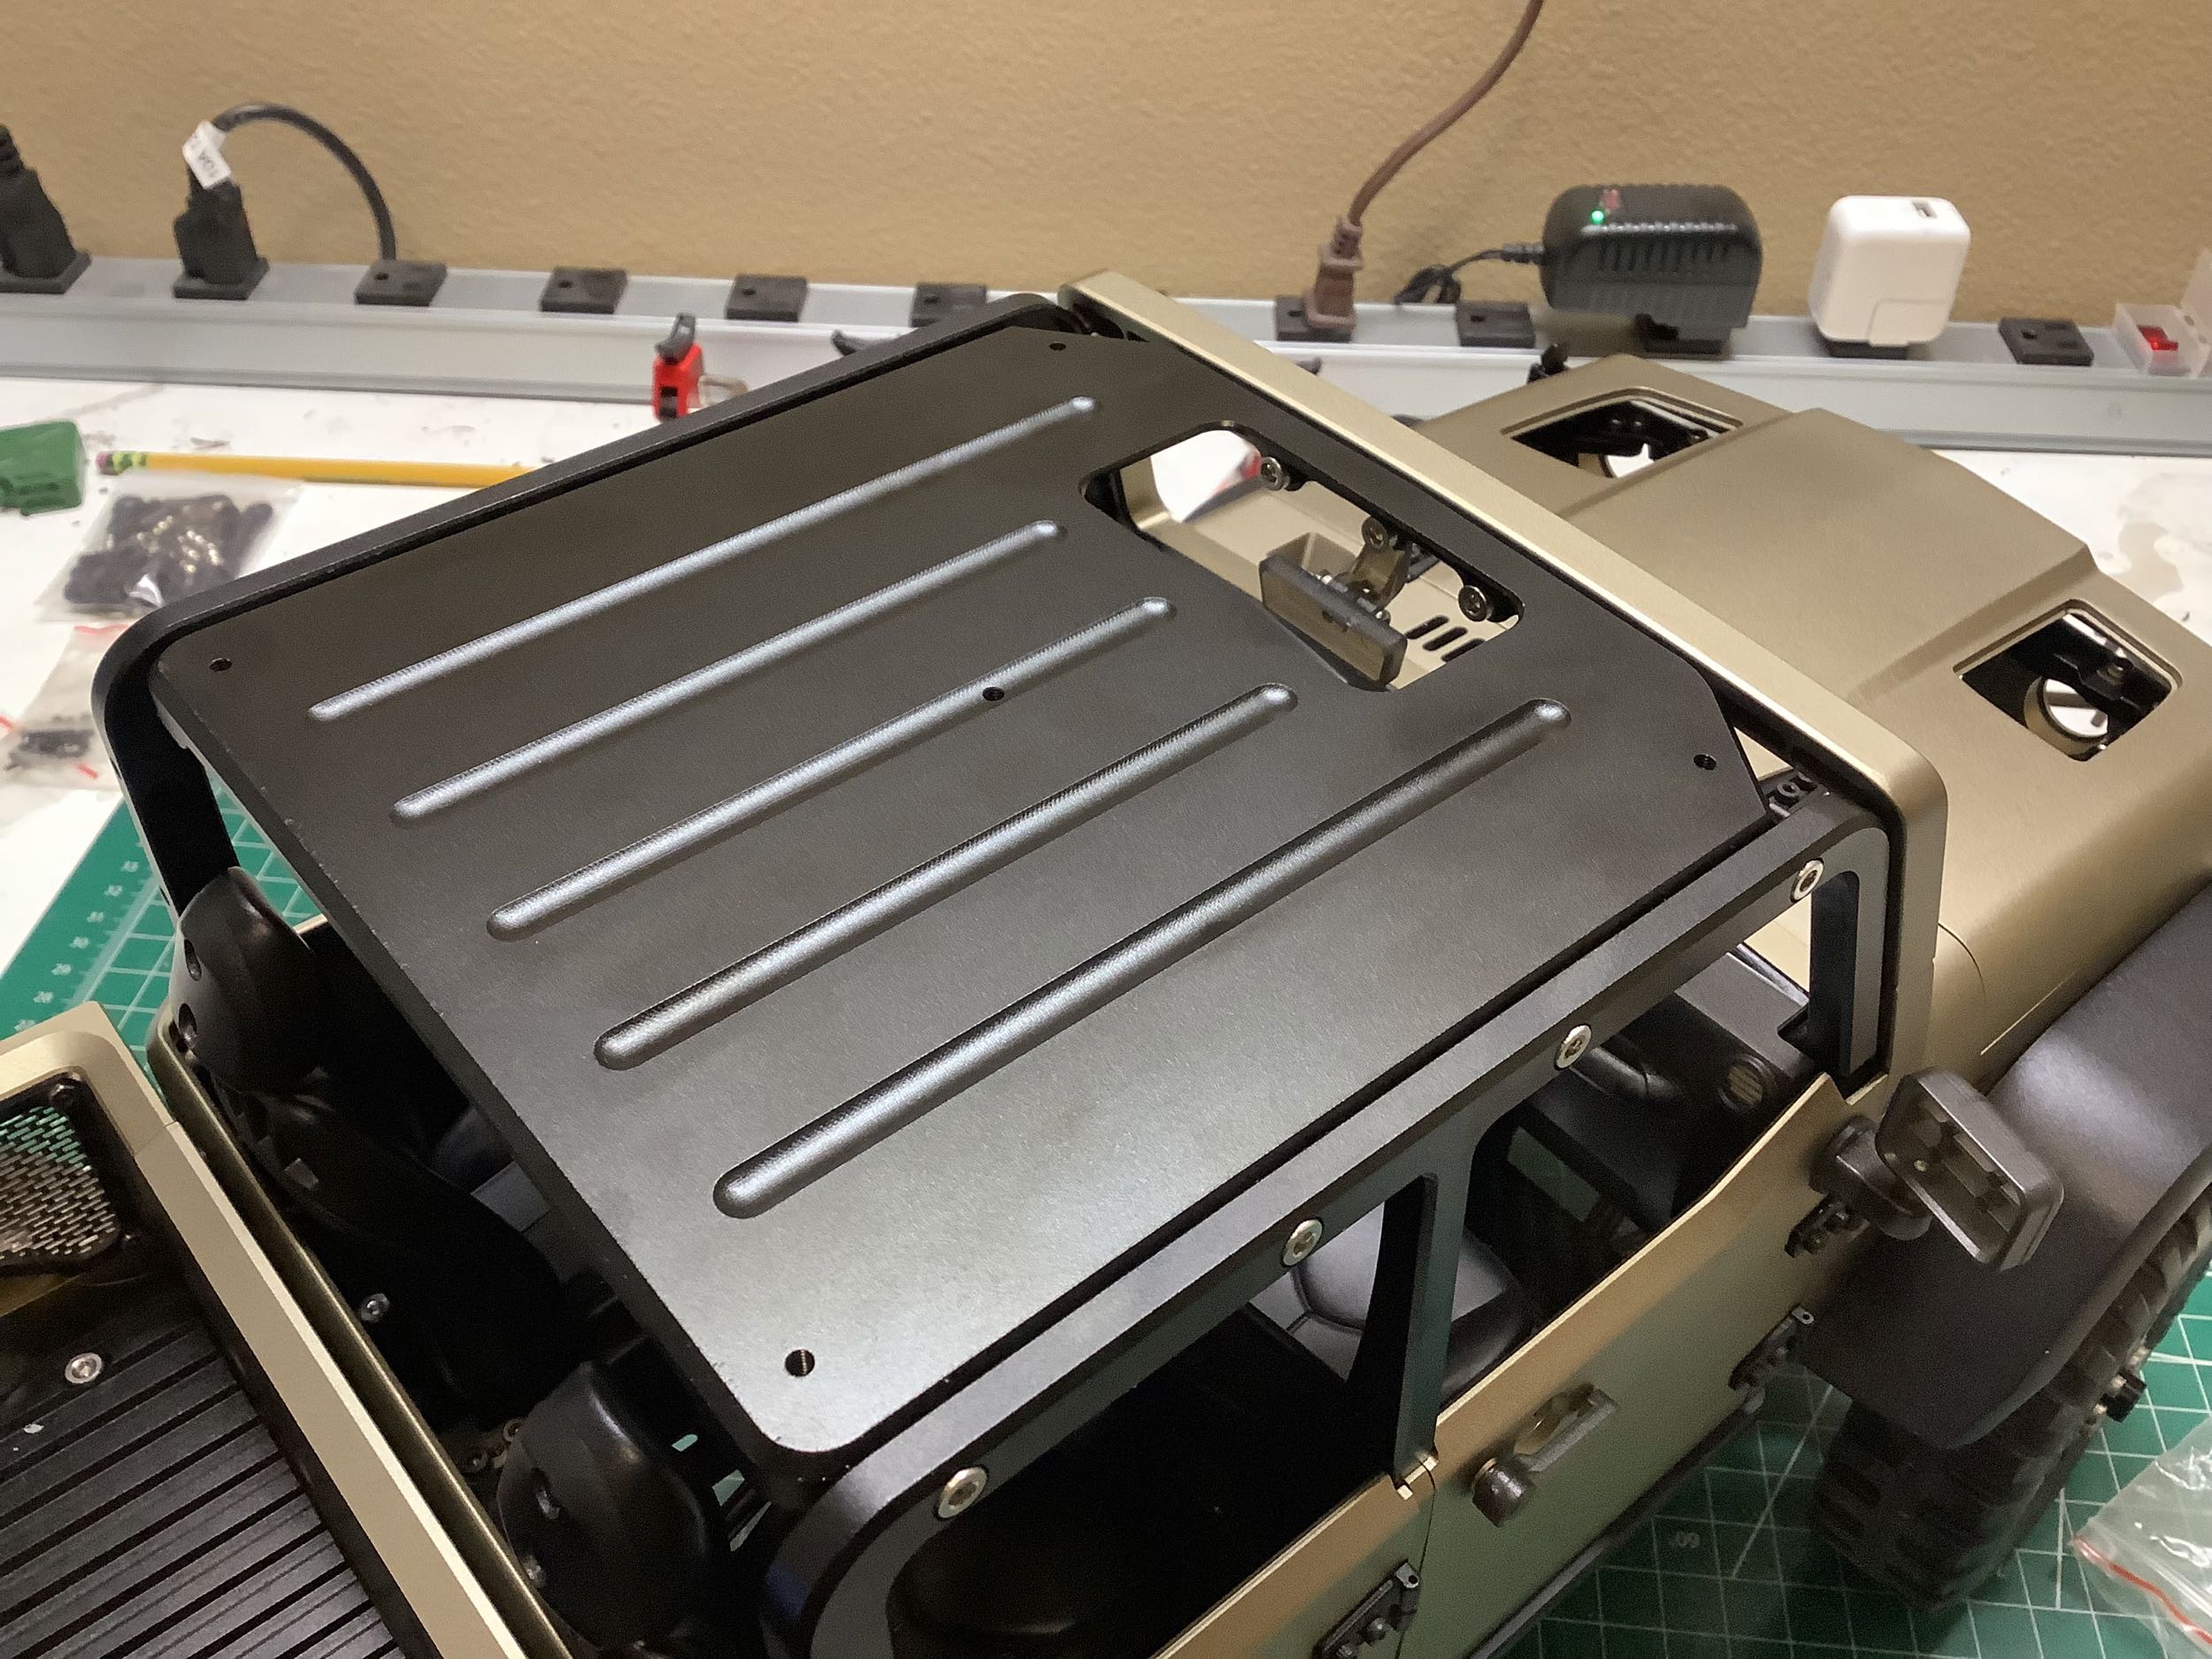
The real truck has a soft top, but the model uses a thick aluminum plate
with an open sun roof. This makes a convenient hand hold for
lifting the model. Even the rear window frame is a massive chunk
of aluminum. Note that there are no windows in the doors, rear, or
roof. Only the windshield will have a transparency, but I'll
install that last to keep it pristine.
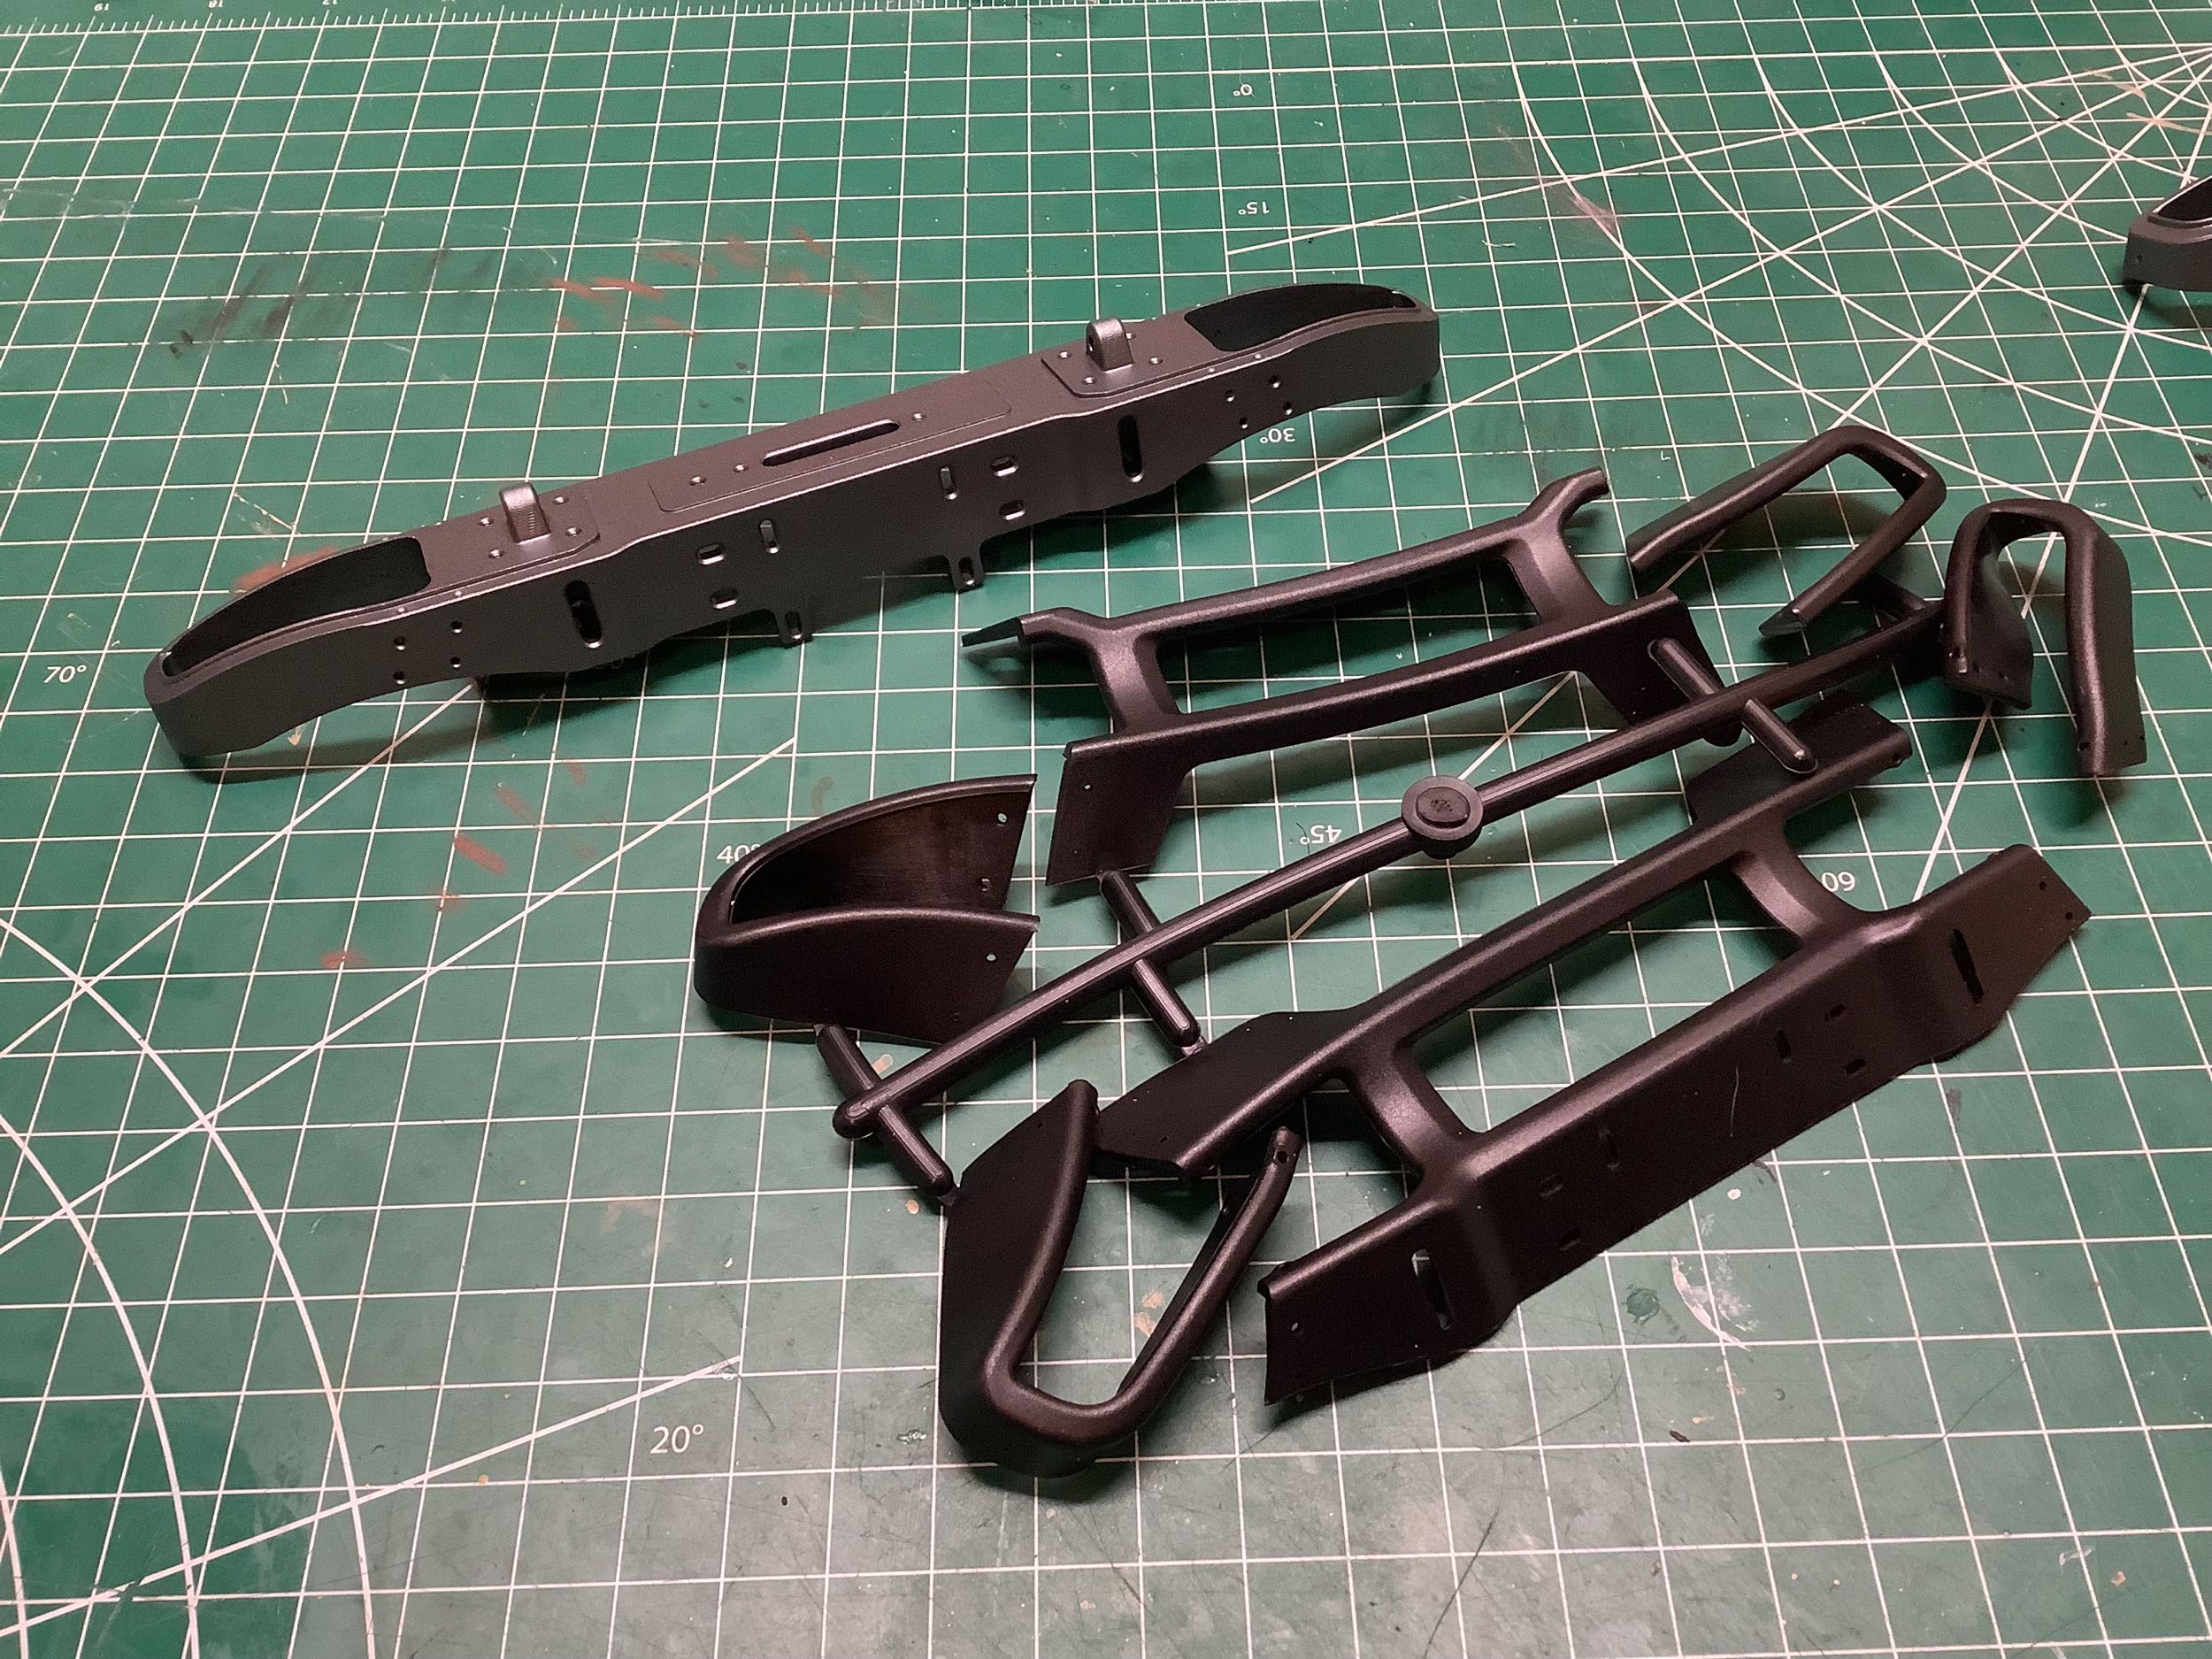
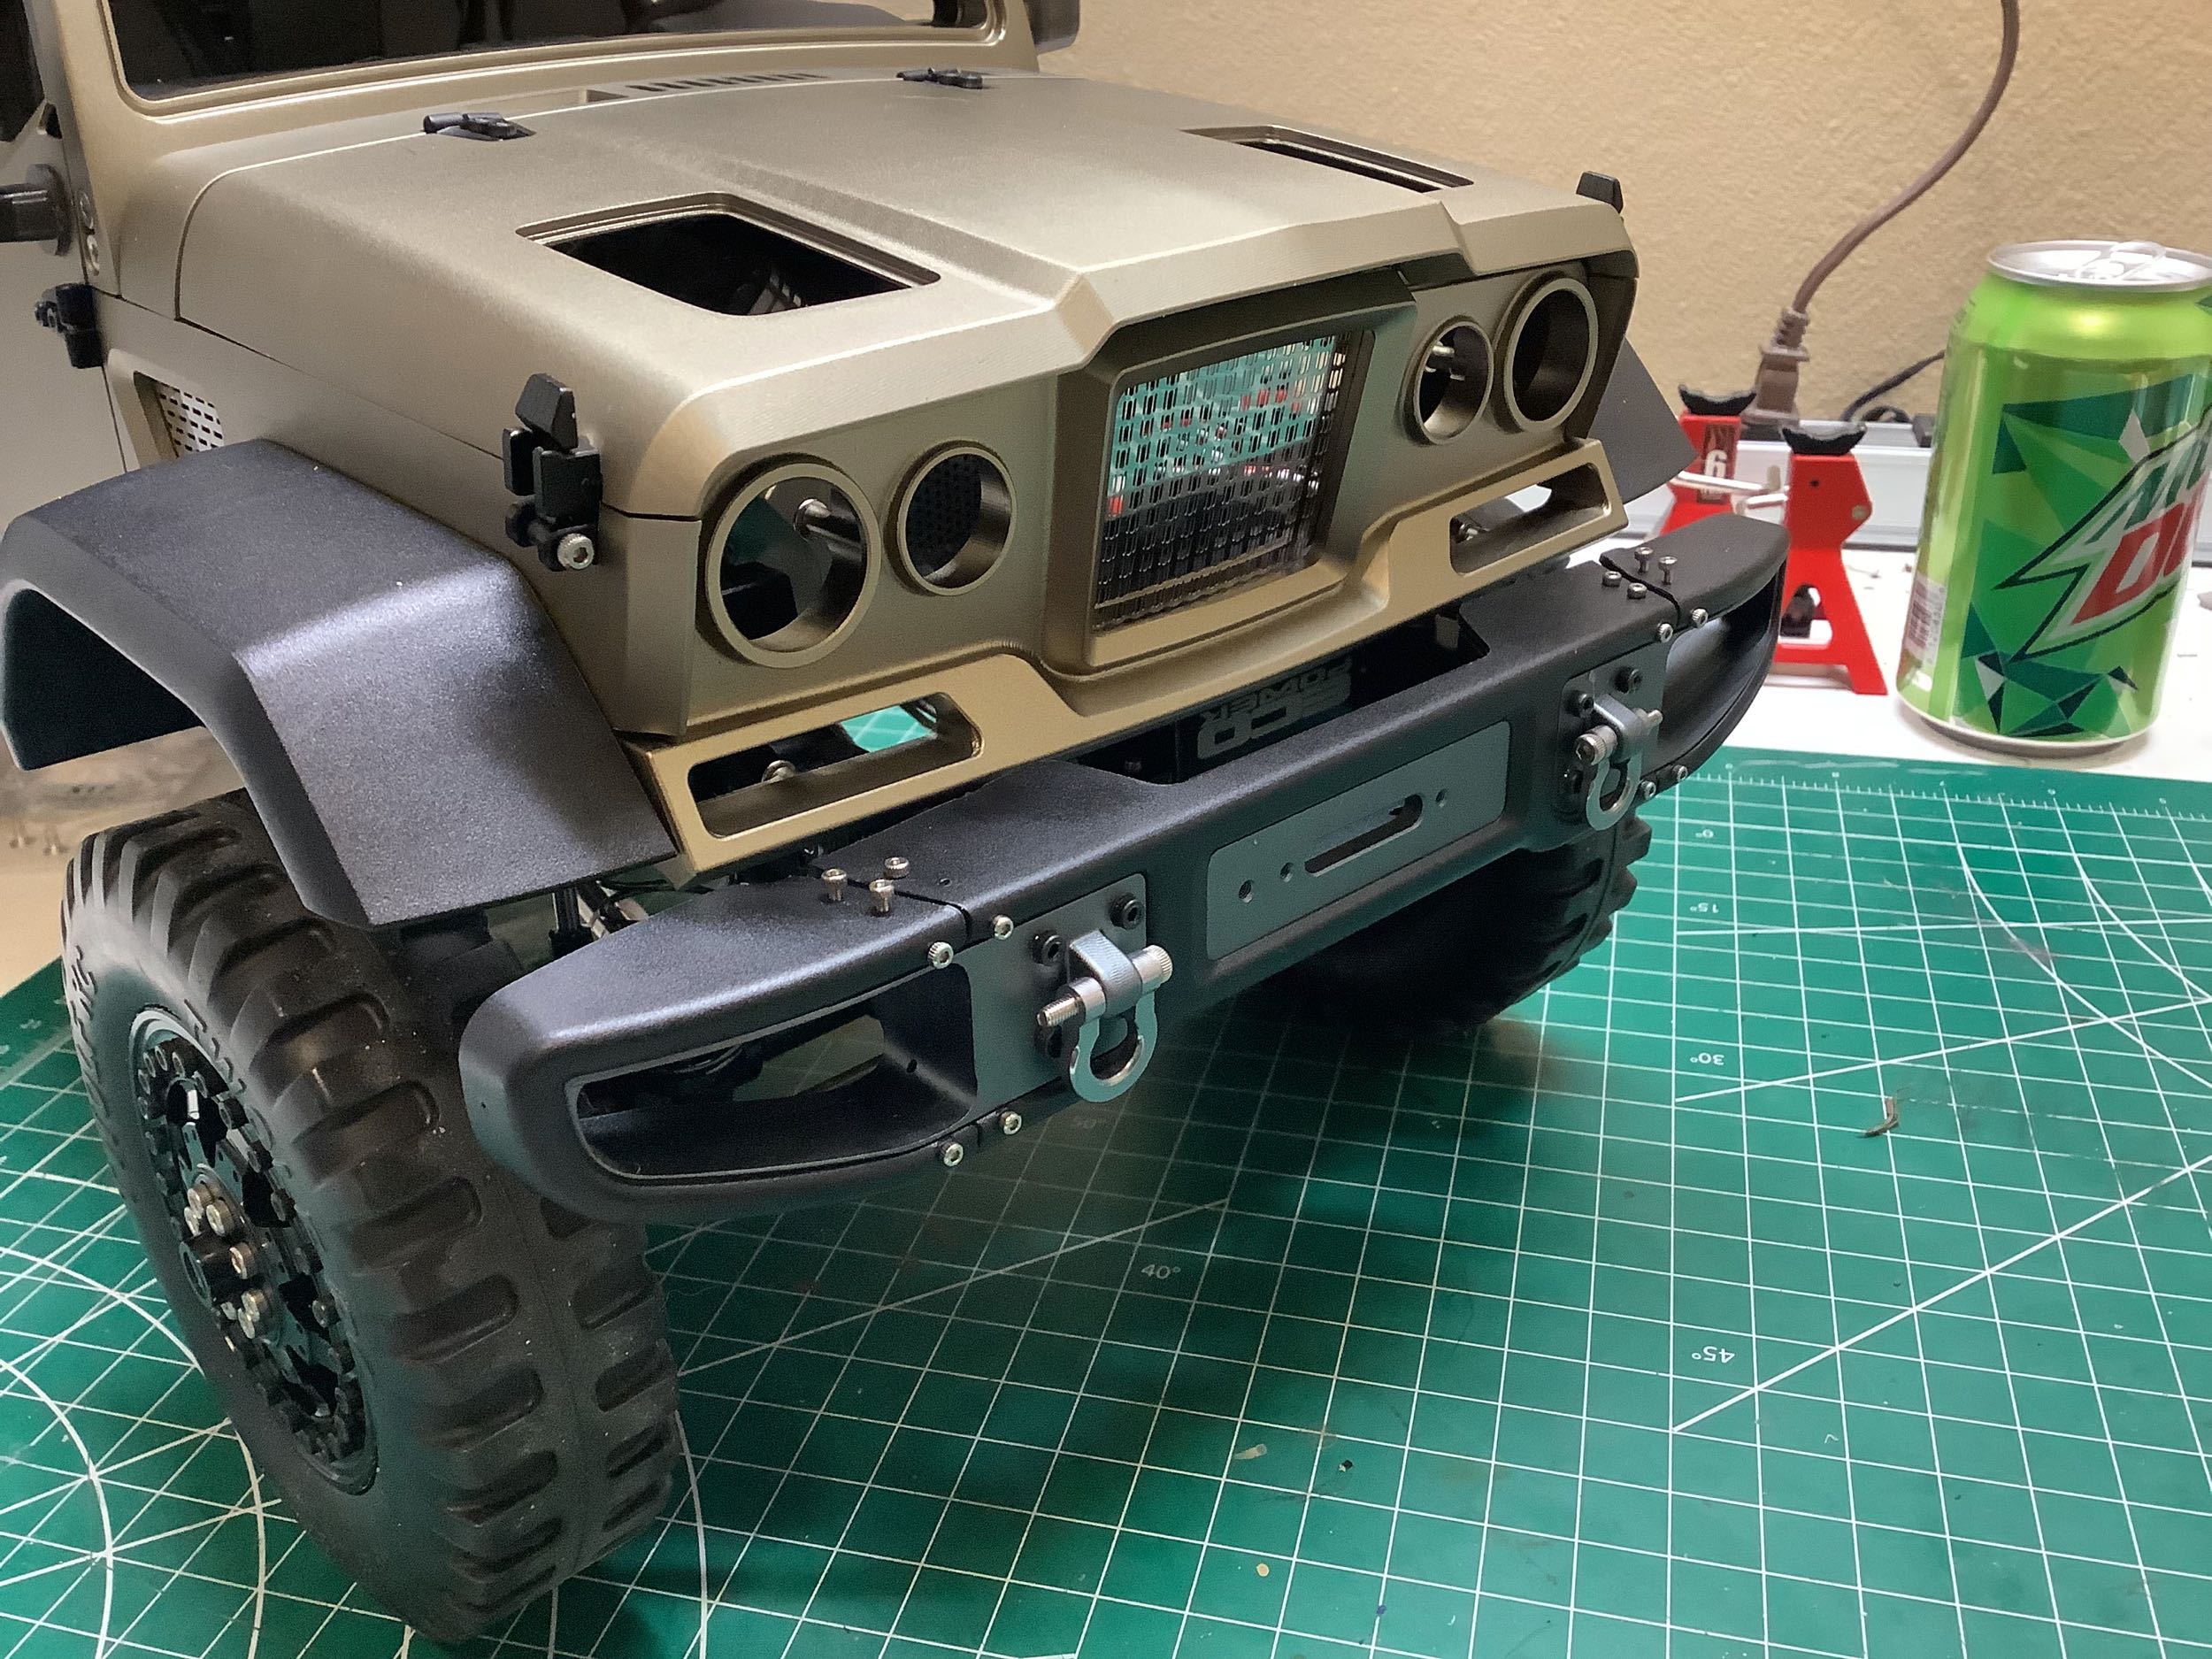
The chassis and body are done, so now we add the final structural
detail, the bumpers. Like everything else on this truck, these
have to be assembled from many pieces. The bumper itself is a
monolithic machined aluminum part that bolts directly to the frame, but
it is covered in the rubber like plastic covers shown on the left.
These are black and quite flexible. They attach to the bumper
with tiny M1.4 cap screws. I ran into another major problem
here. Many of the holes in the bumper were either not tapped to
full depth or tapped poorly so that the screws fit very tight. I
didn't have an M1.4 tap so I foolishly just applied extra torque trying
to get them in and sheared off one of the heads as you can see on the
right. Many of the others could not be fully tightened leaving
waviness in the flexible parts. This was a problem on both the
front and rear bumpers.
I ordered an M1.4 tap and waited a few days for it to arrive.
After re-tapping all the holes with a pin vise, everything went together
perfectly. The broken screw could not be removed though.
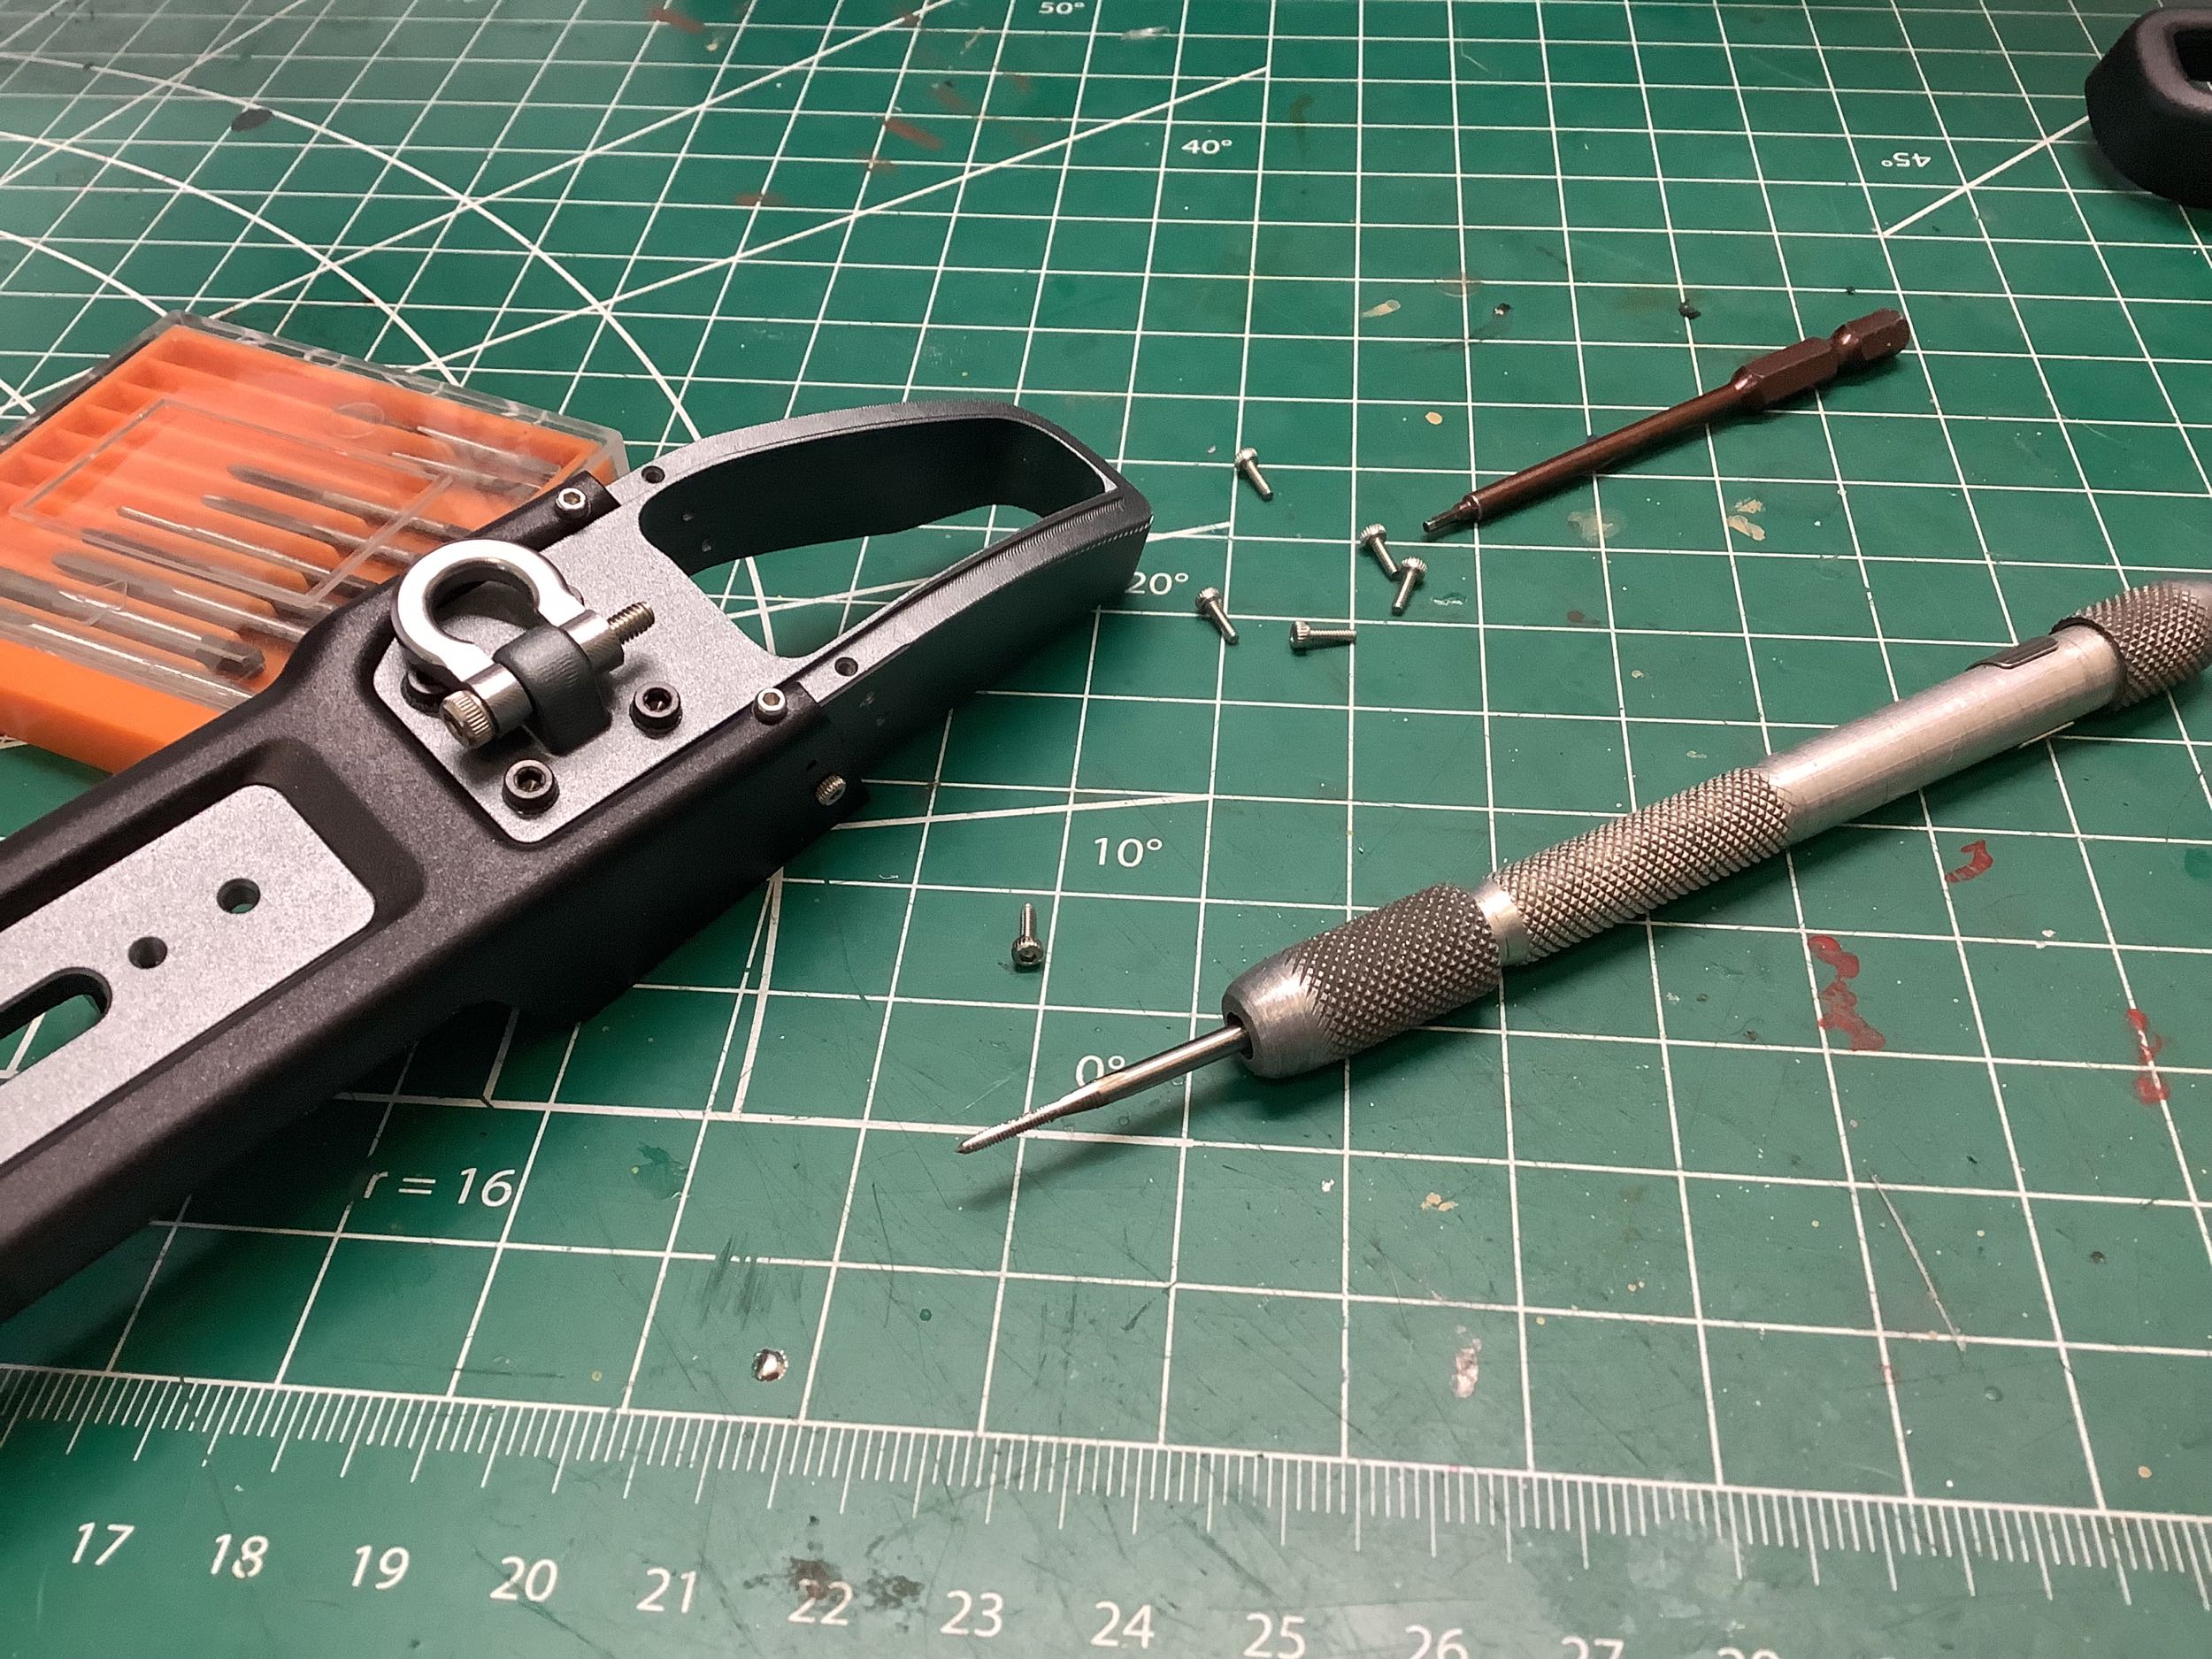
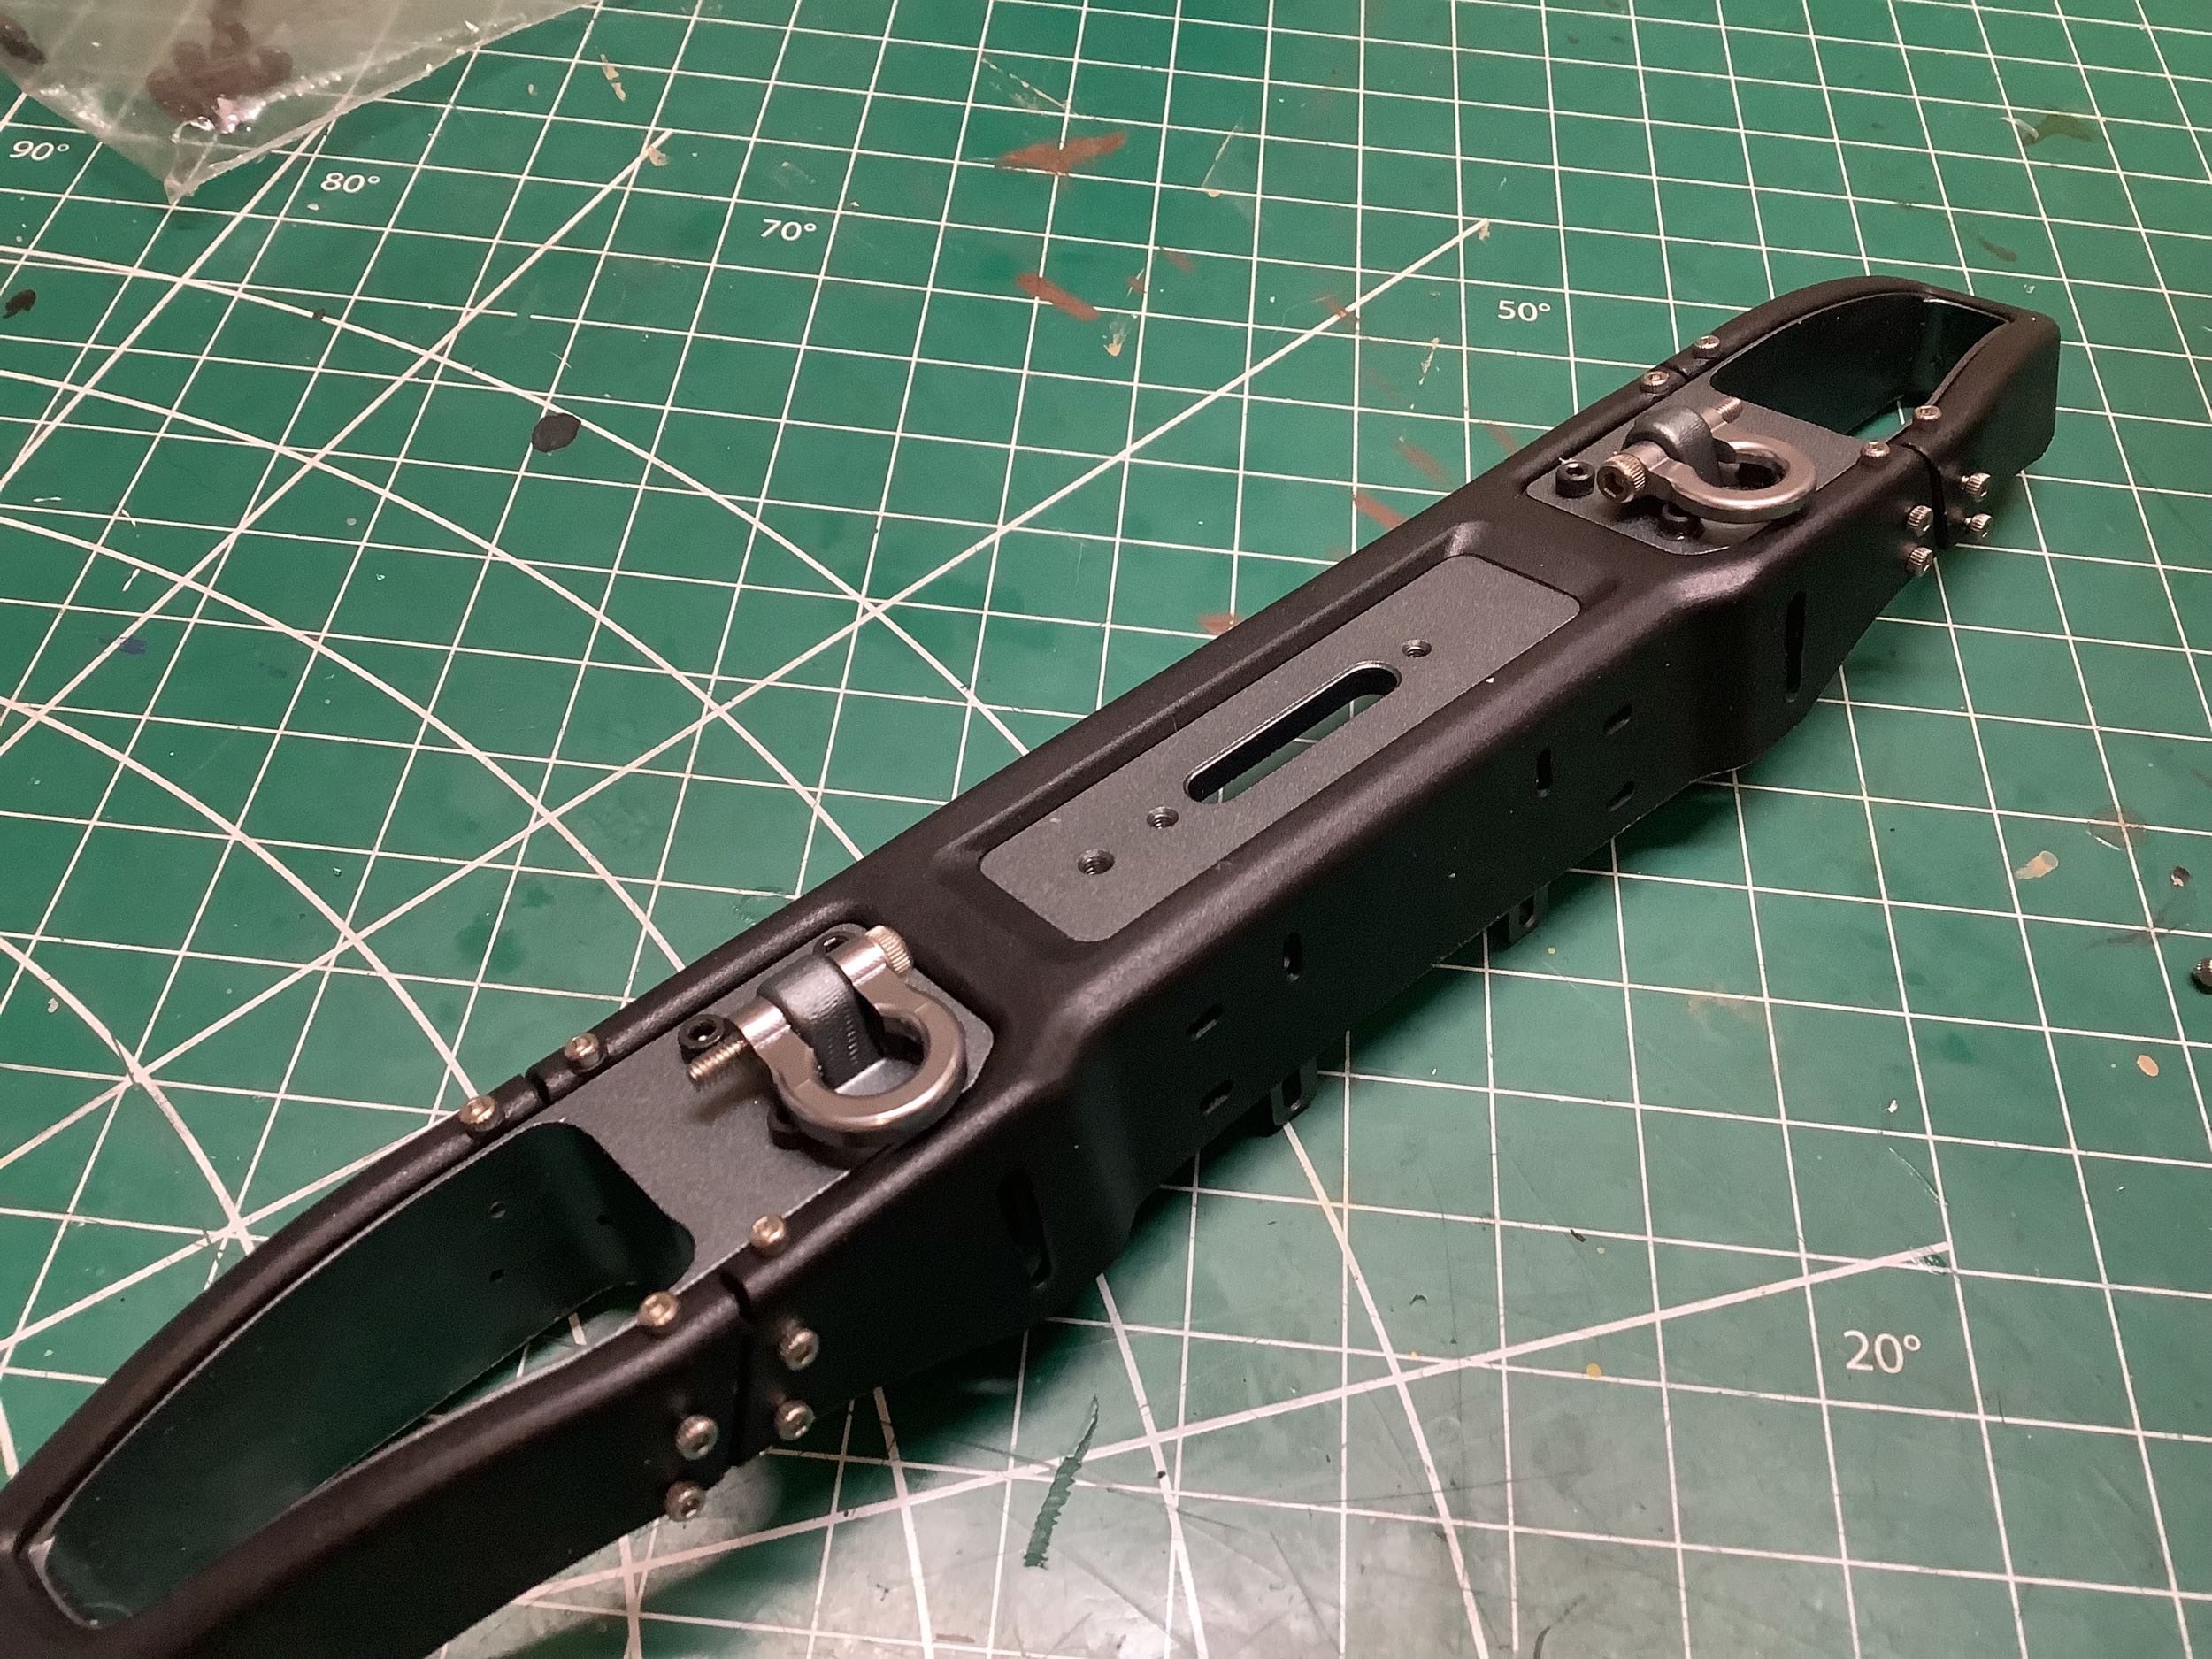
The next issue was with the D-ring shackles. The shackle itself
was drilled and tapped for M2.5, but the screw and hole in the bumper
were 3mm. I had to oversize the bores in the shackles and re-tap
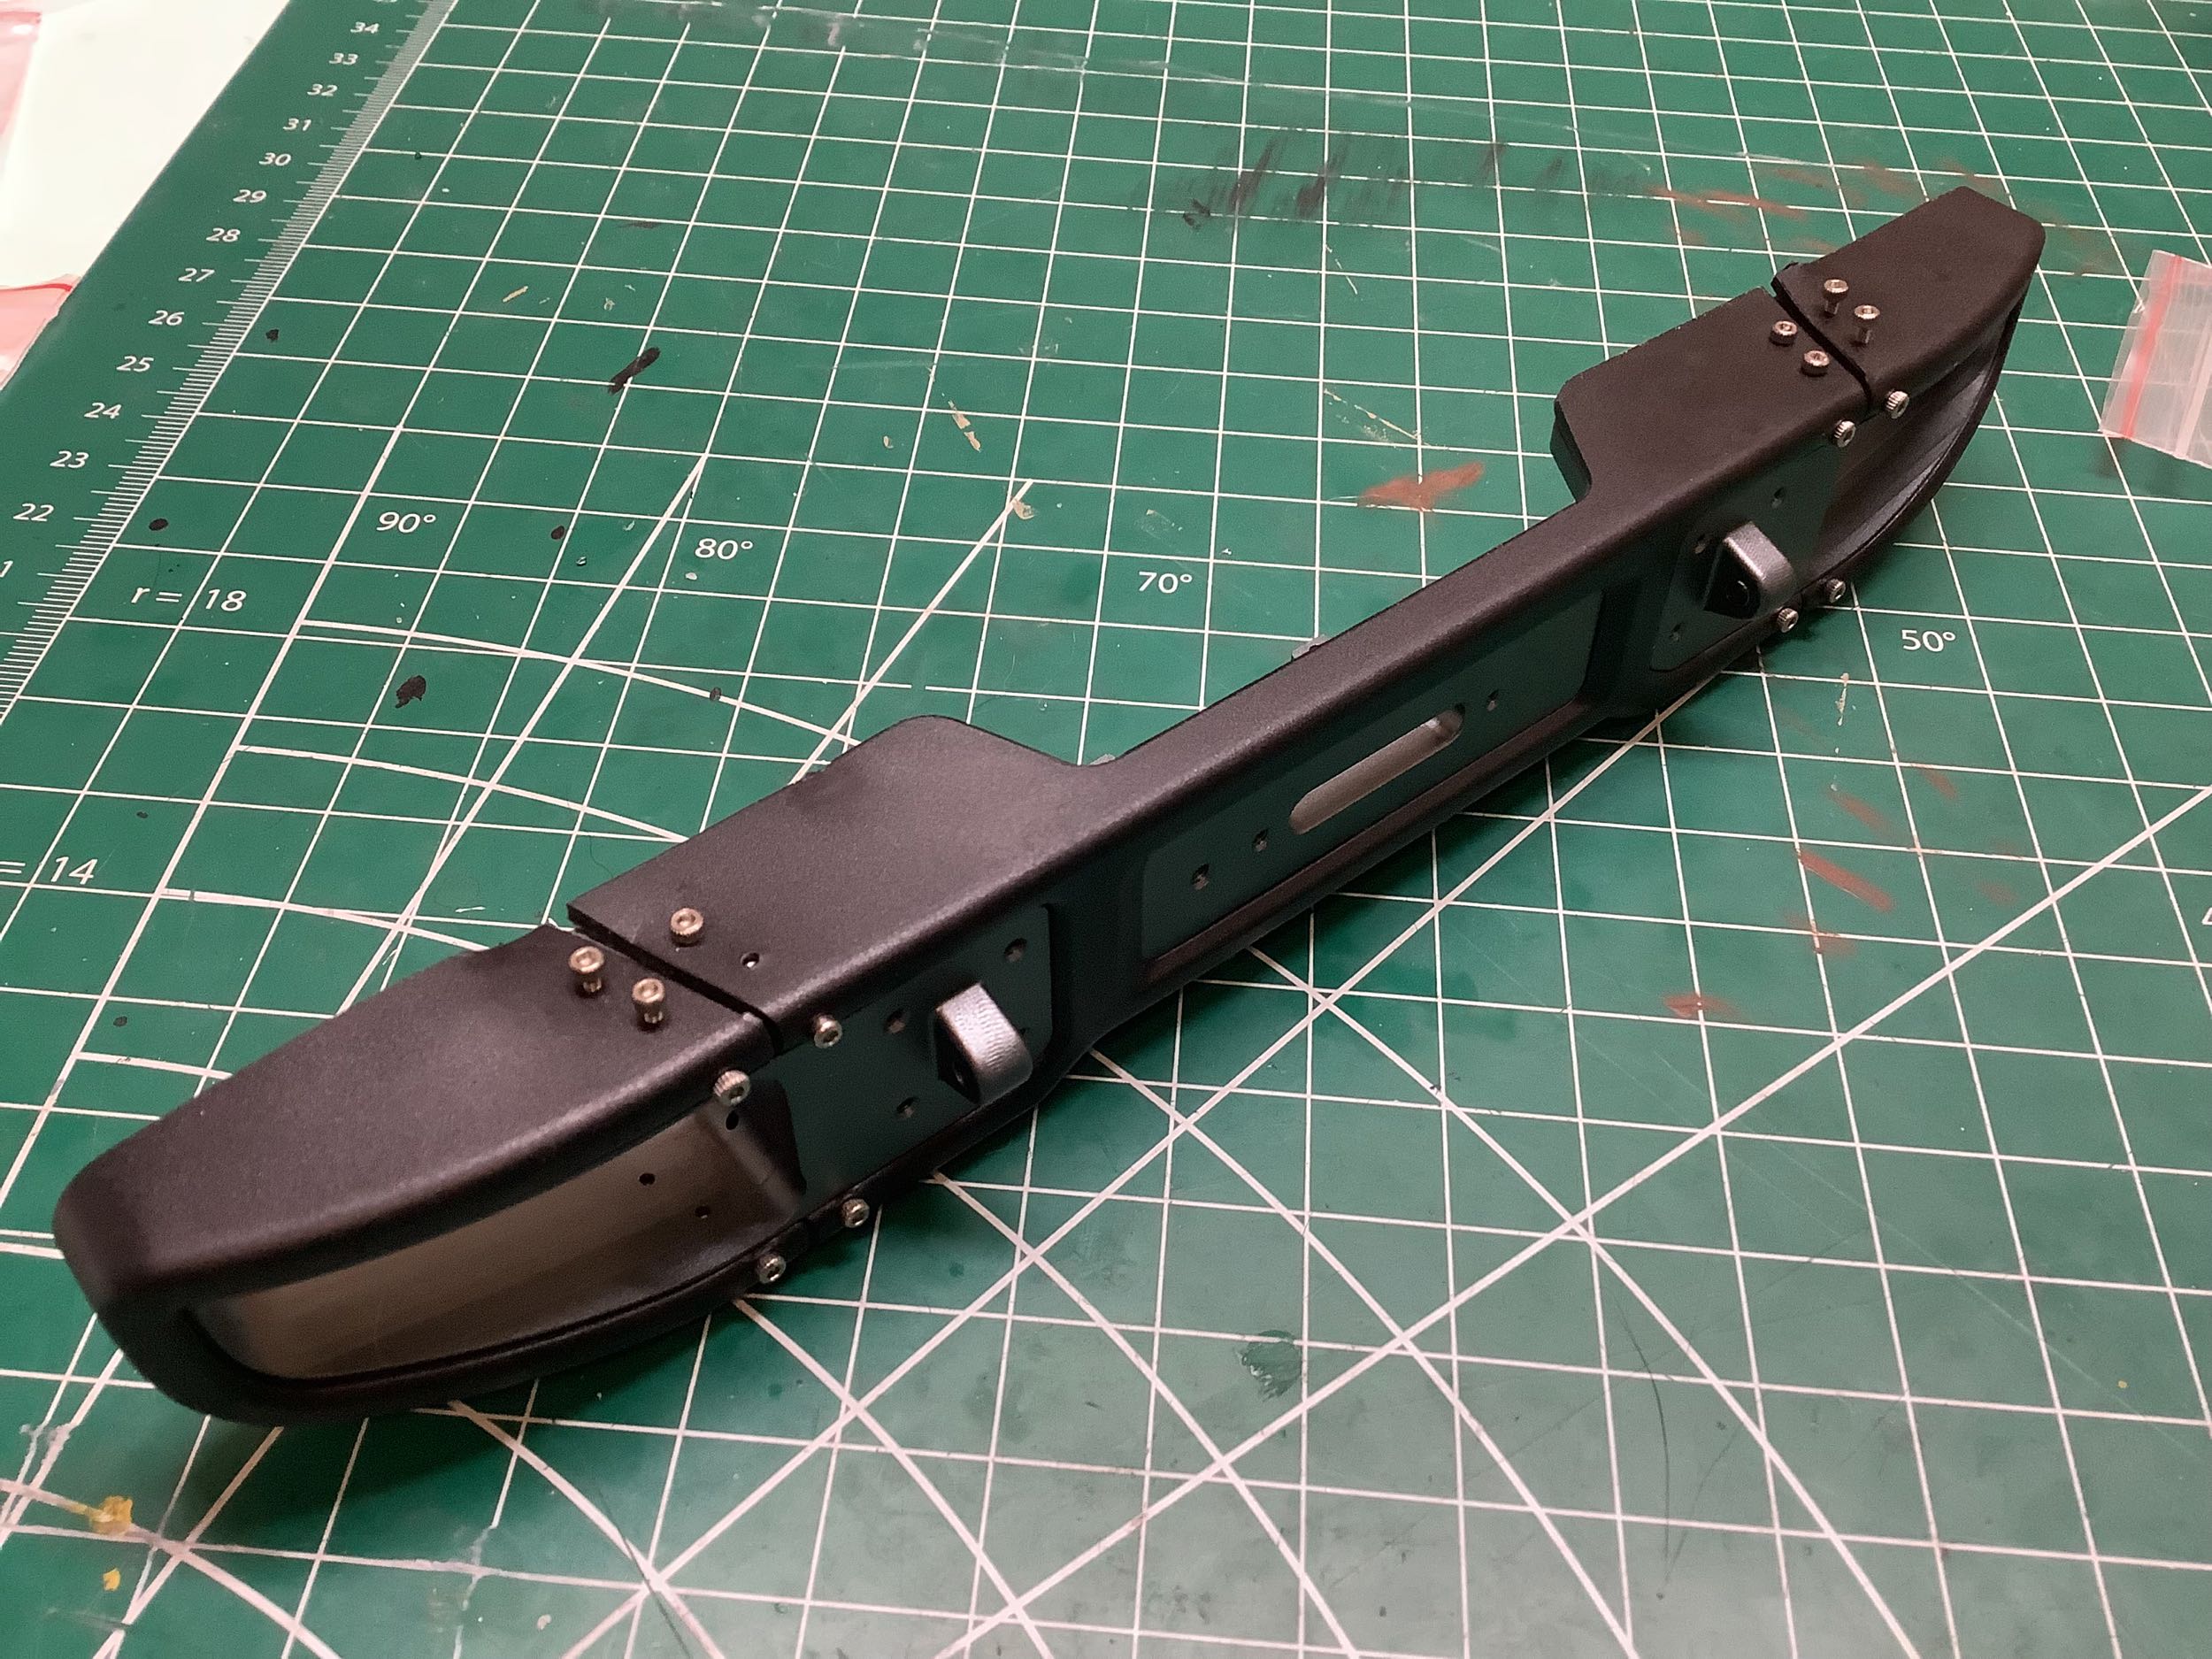
to M3 resulting in the installation shown. Then I could finally
install the bumper onto the chassis. This is a seriously solid
bumper.
The rear bumper assembled in exactly the same way as the front, and it
had all the same problems. After correcting all the holes and
threads using what I'd learned on the front, it went together fine.
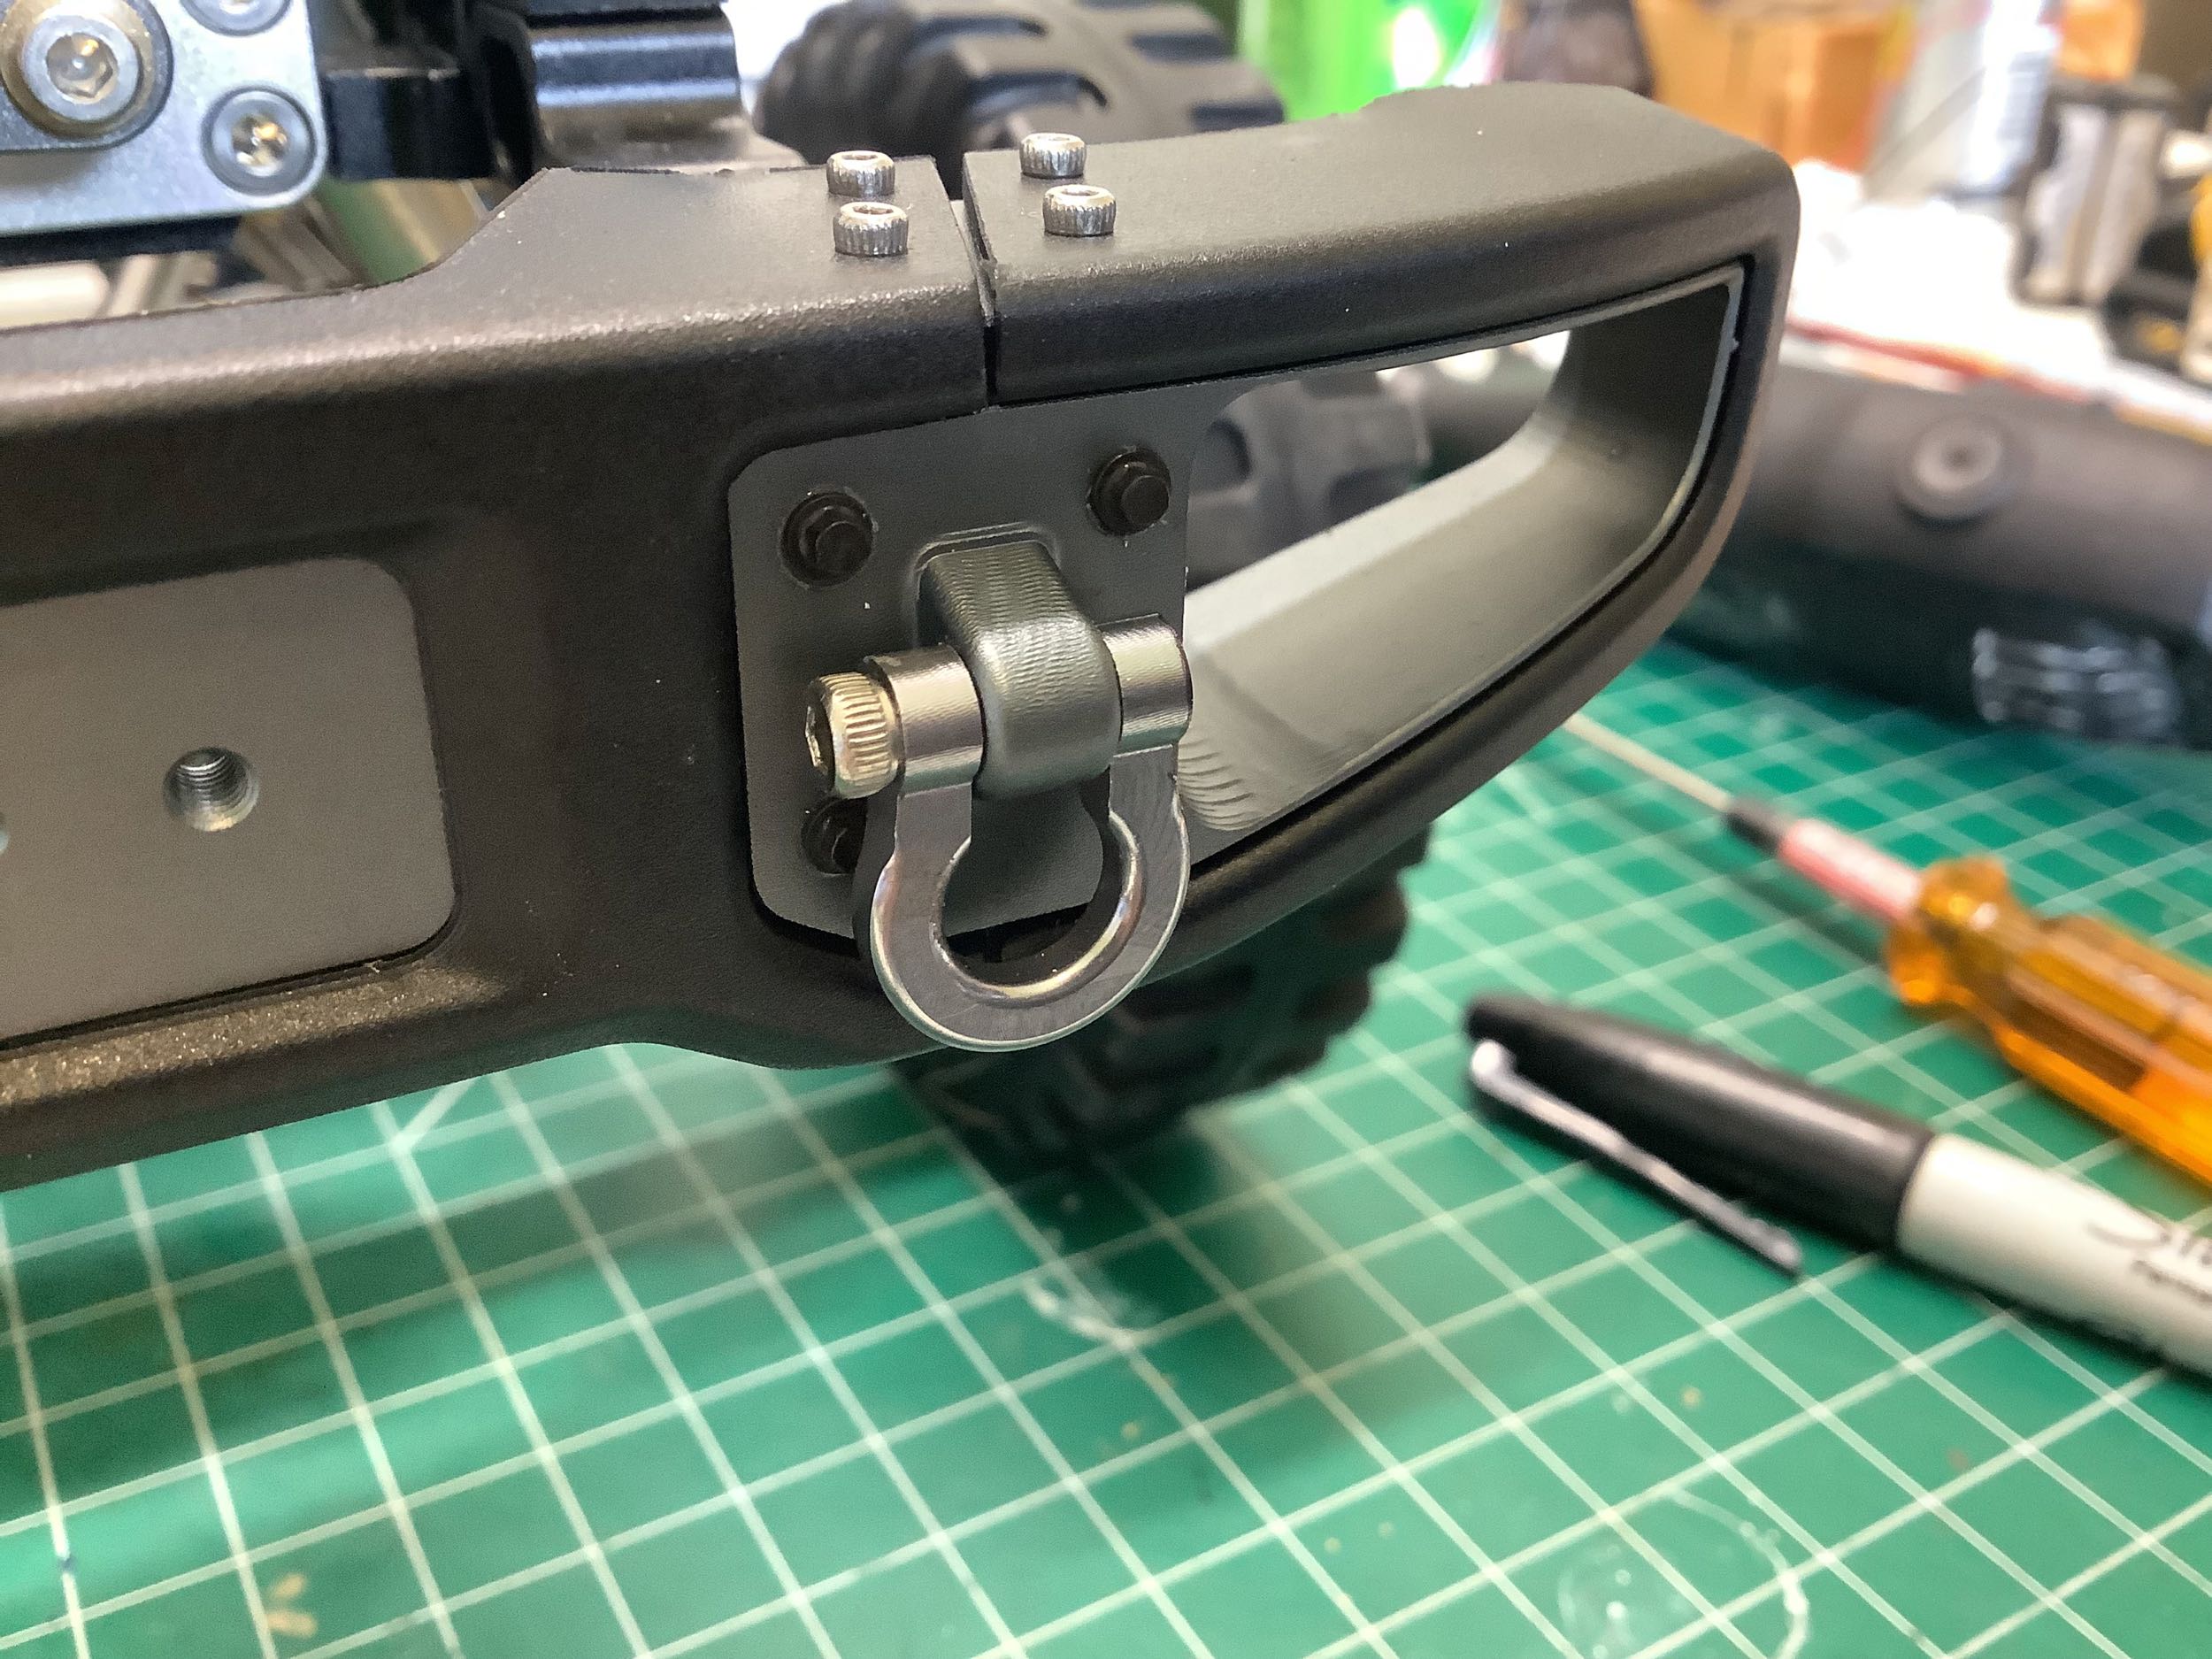
There were a couple of things I didn't like about the shackle
details. The first was that the shackle hinge bolt was way too
long (see photo from previous step) and looked terrible. I cut off
several mm with my Dremel and now they look much better. The four
bolts surrounding the shackle would be part of a plate bolted to the
bumper on the real truck, but on the model they are just for show.
I did not like that they were cap screws so I replaced them with tiny
hex bolts which I think look much better. Zoom in and you'll see
that I am (predictably) right.
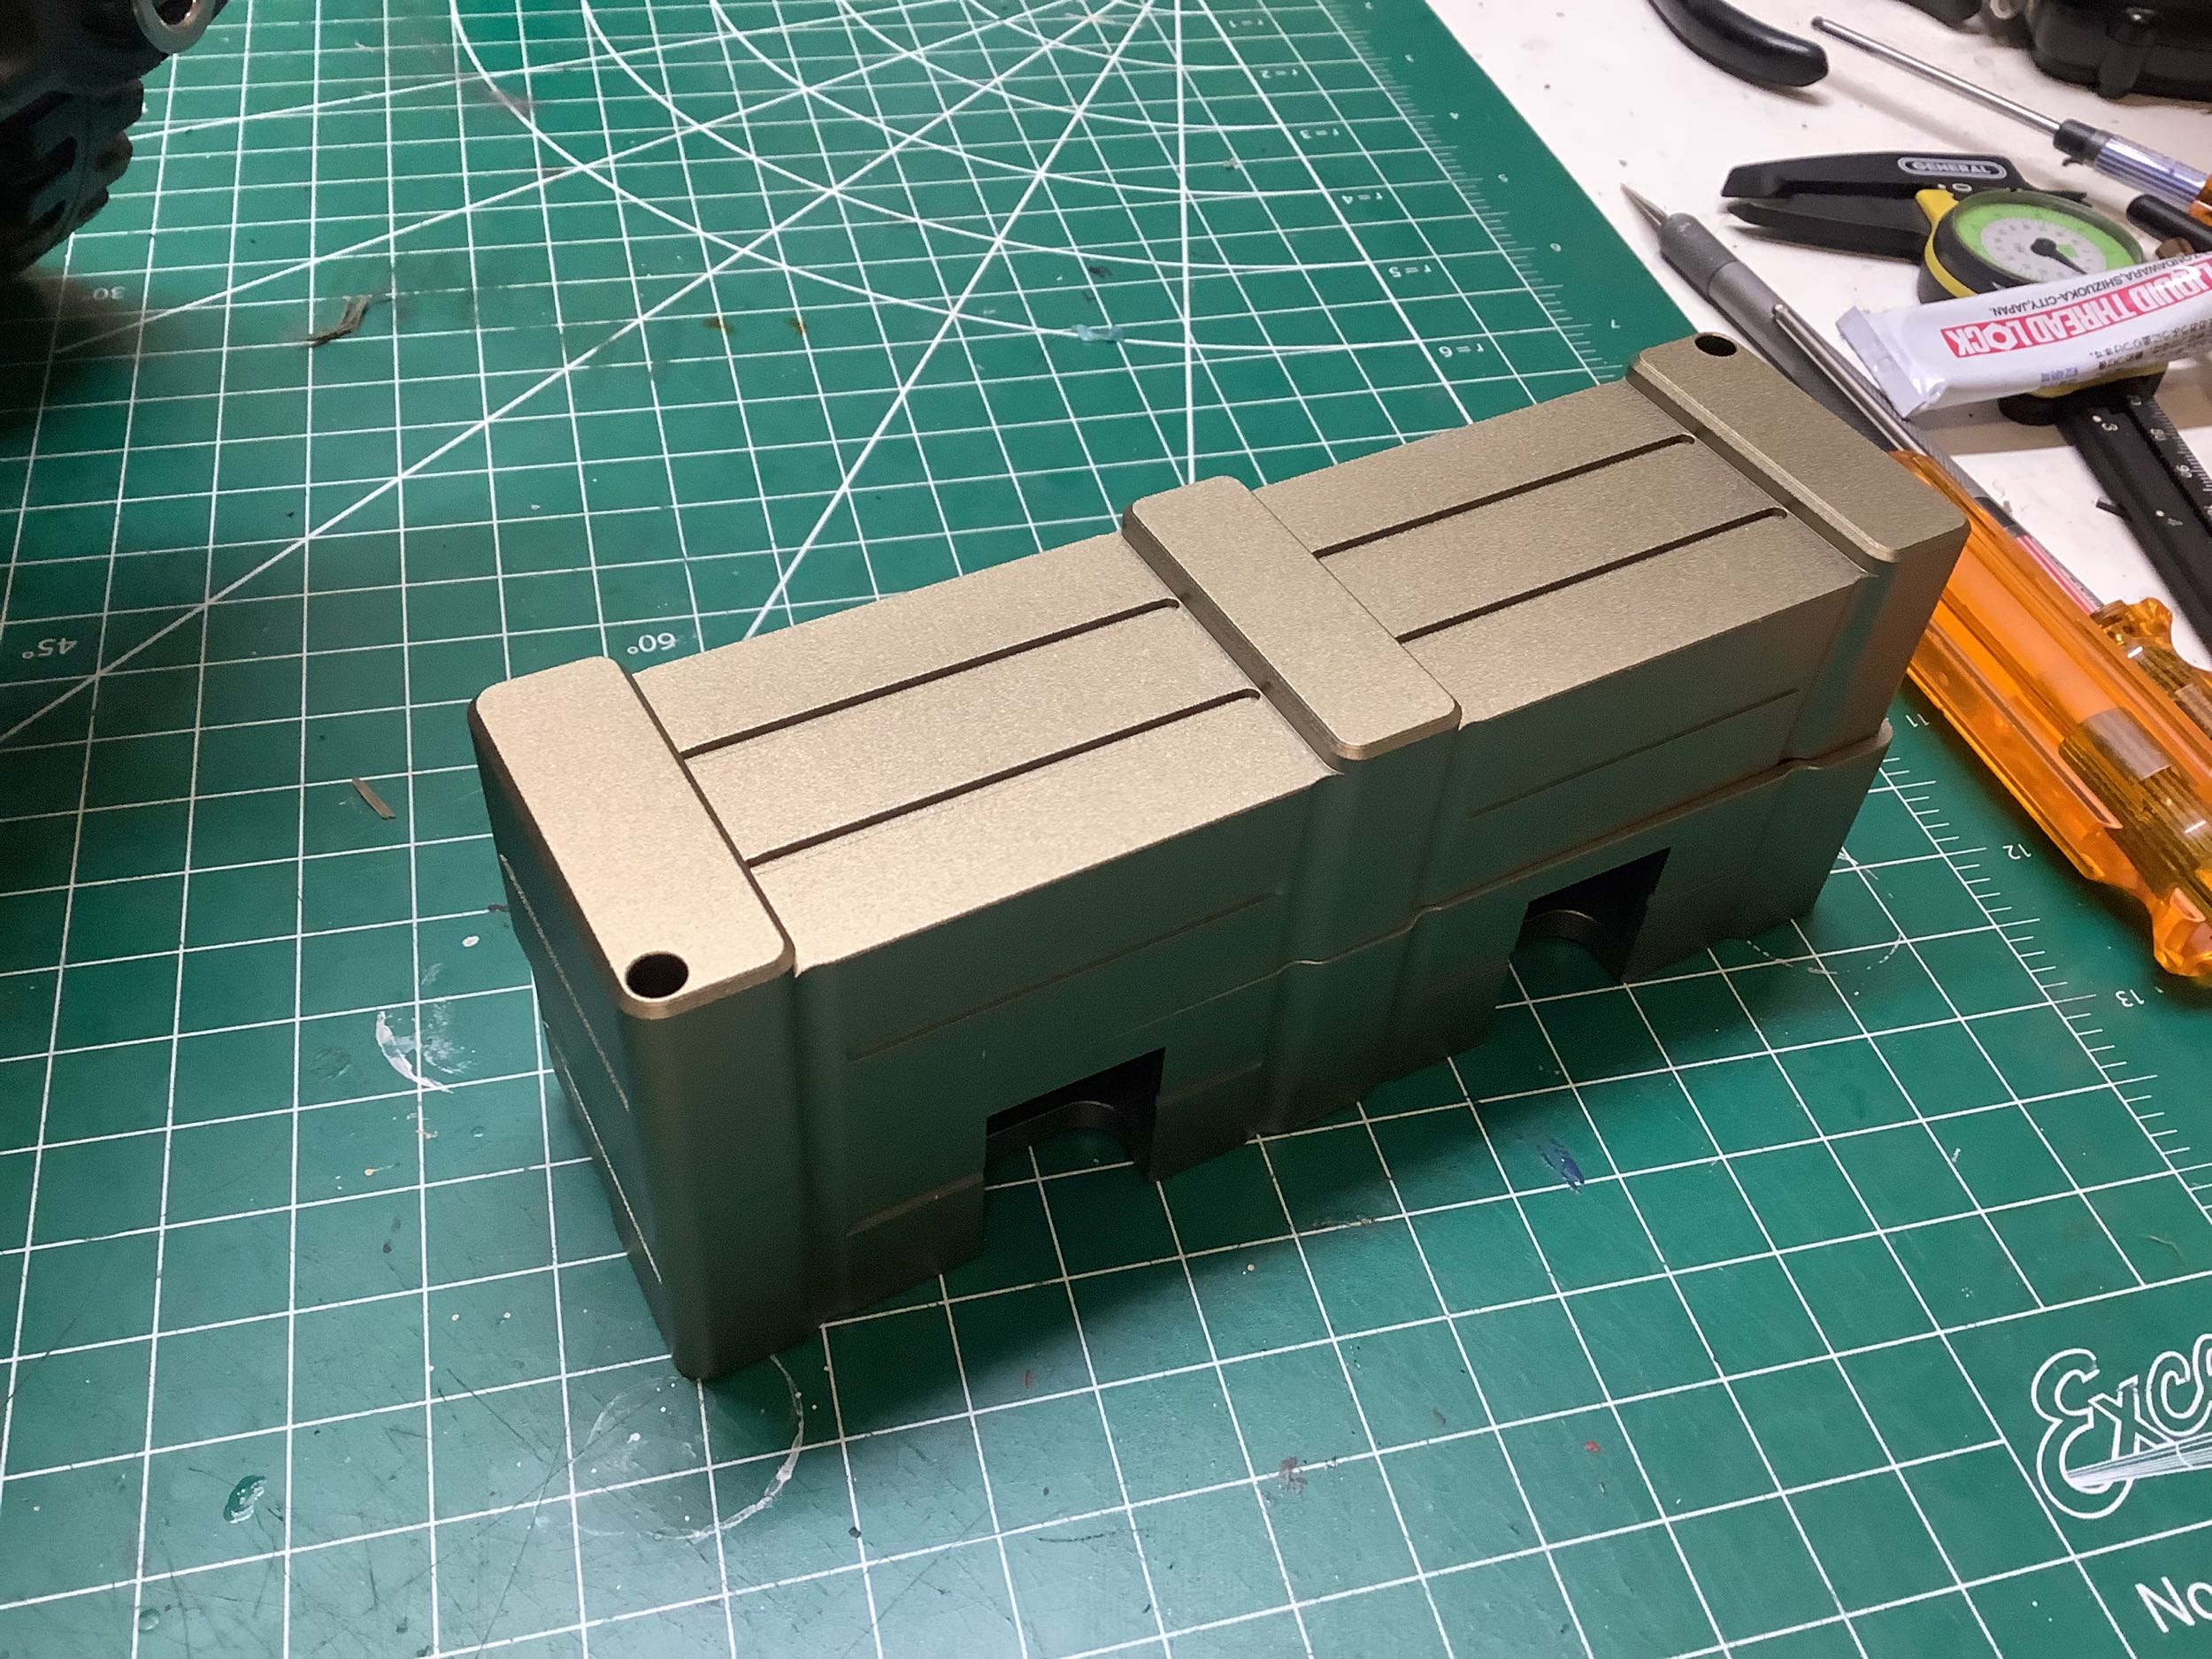
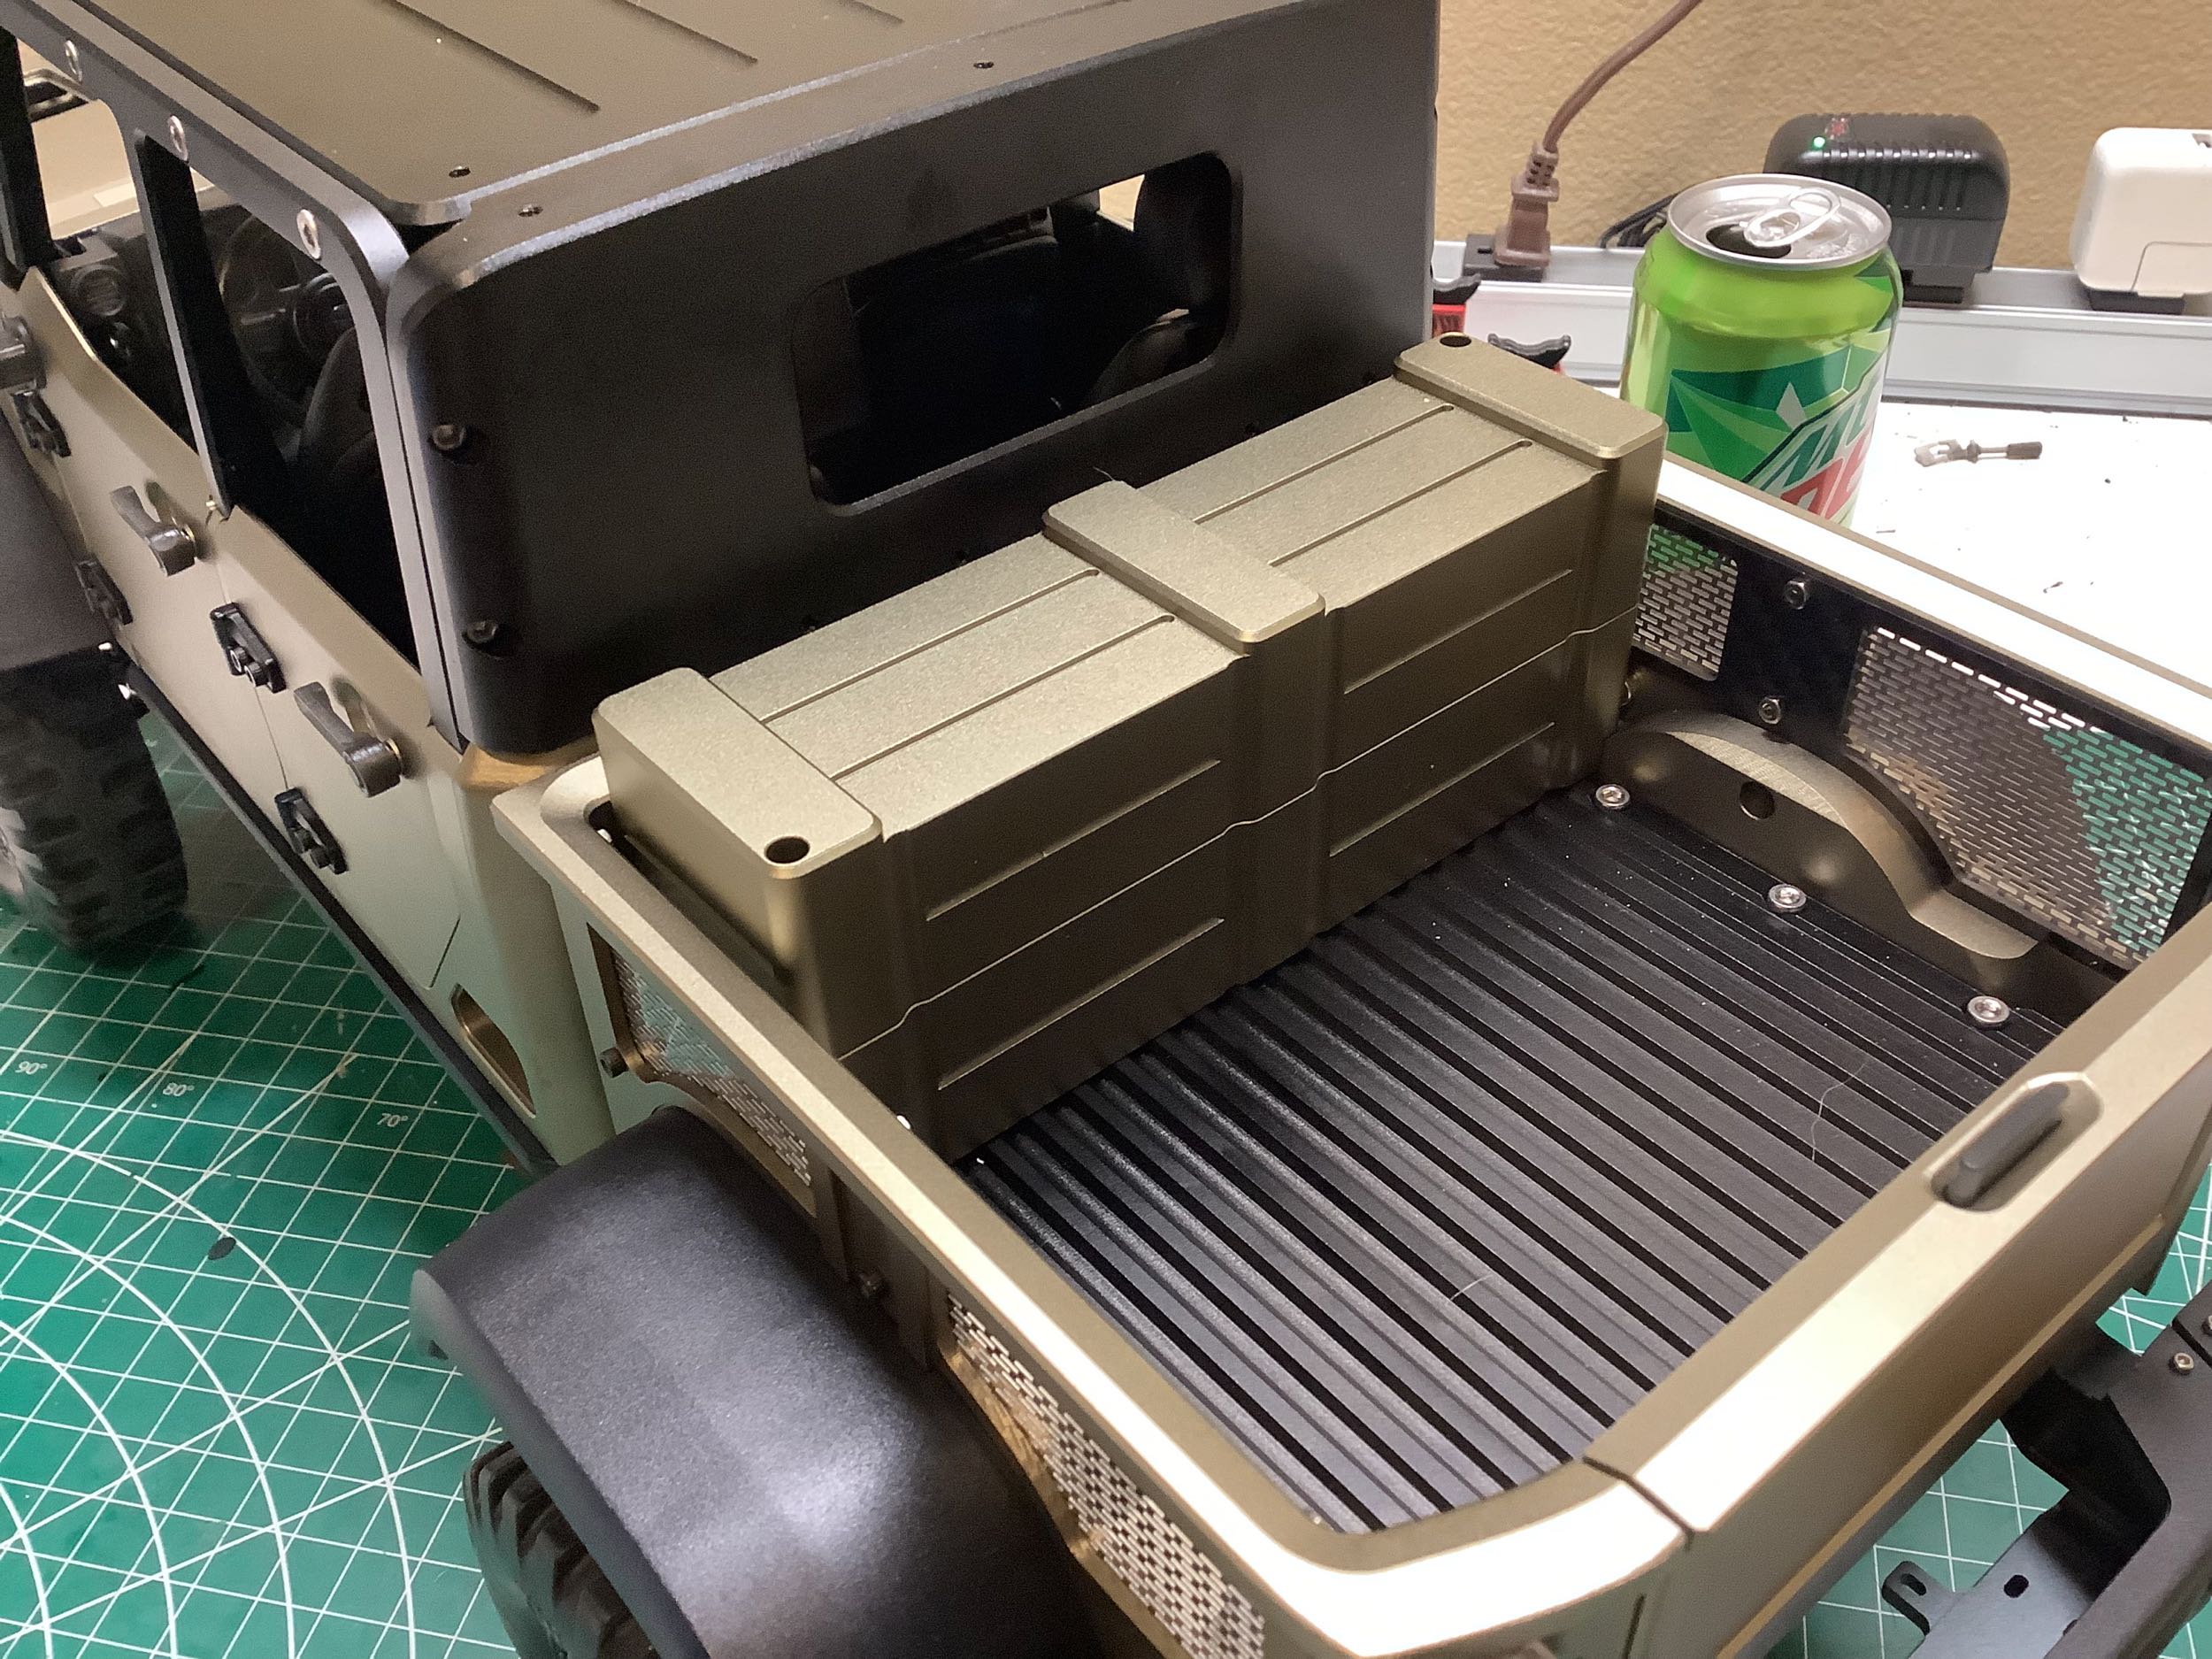
The instruction videos make no mention of a battery box, and this two
piece machined box was actually in a separate container inside the kit
packaging. I wonder if it was added as a last minute
addition? It wasn't hard to figure out how to bolt it into the bed
right behind the cabin. It does a nice job of hiding the battery,
but it is kind of annoying that you need a hex driver to access the
battery. I've more than once taken this truck out to a trail only
to realize I didn't have a tool to install the battery and therefore
couldn't use it.
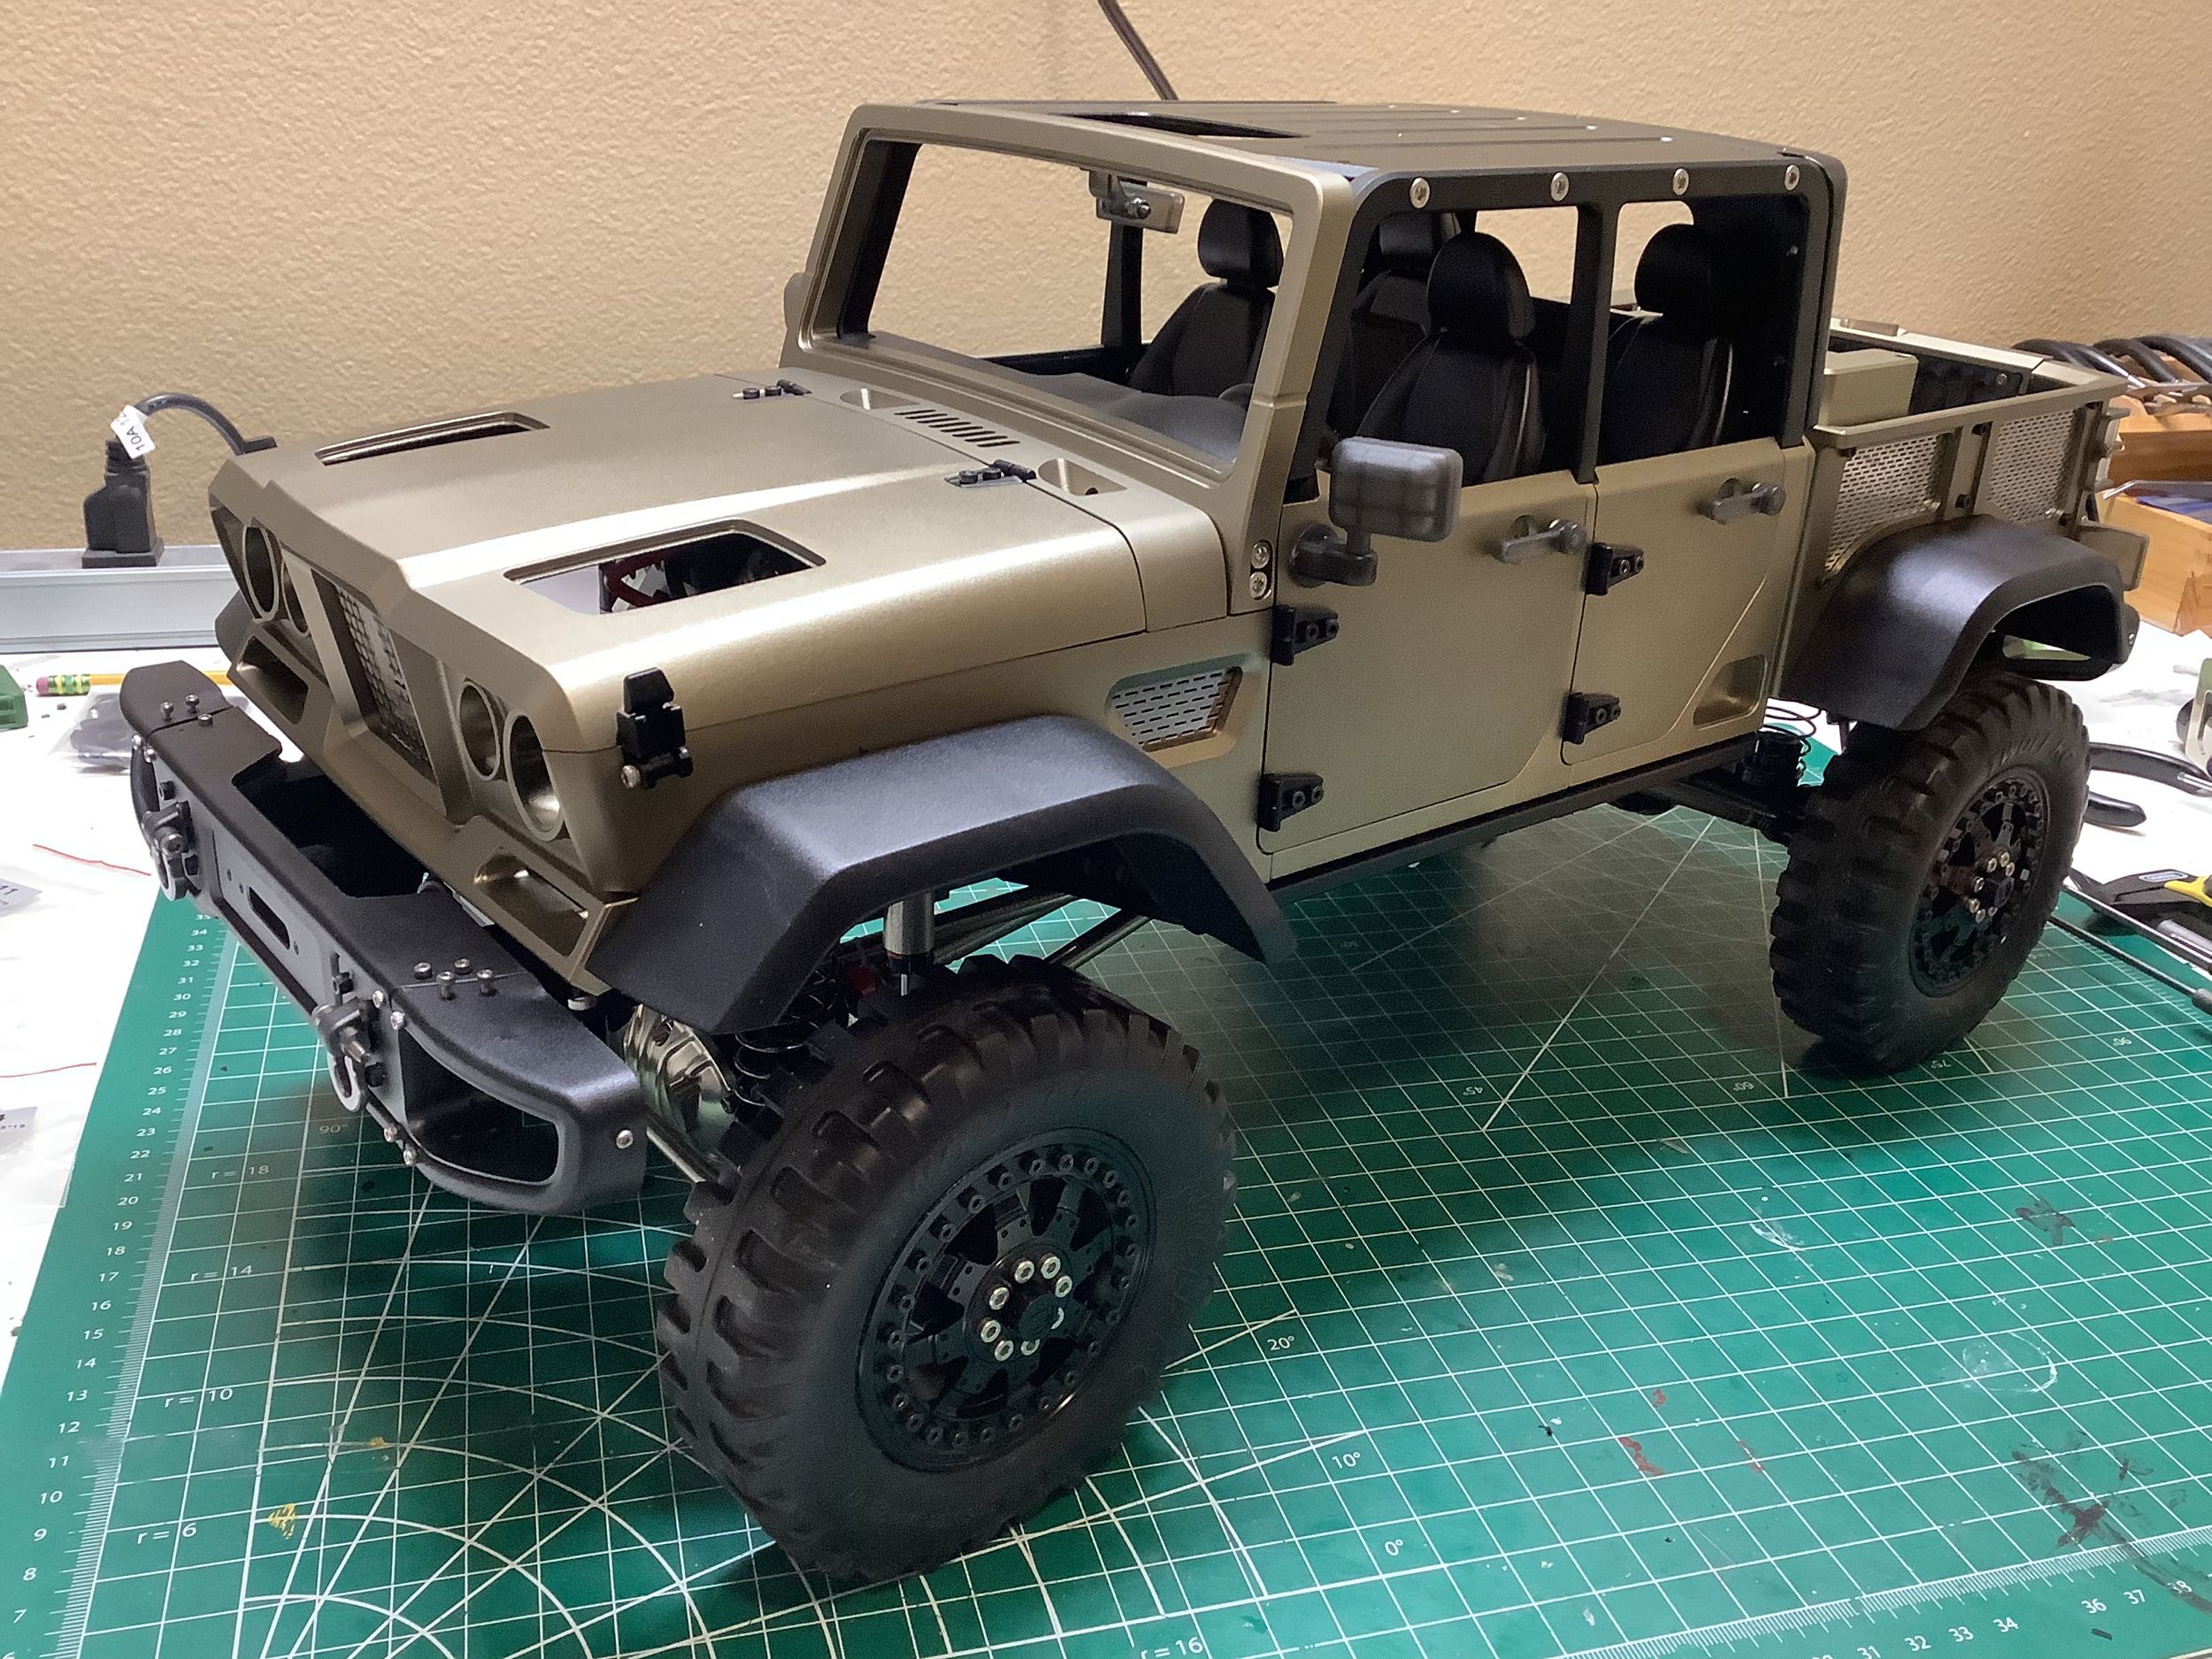
That's it! The initial assembly is completed. At this point
I've done only assembly; there are no electronics hooked up and nothing
has been painted. Now it is time to go back and do some detail
work.
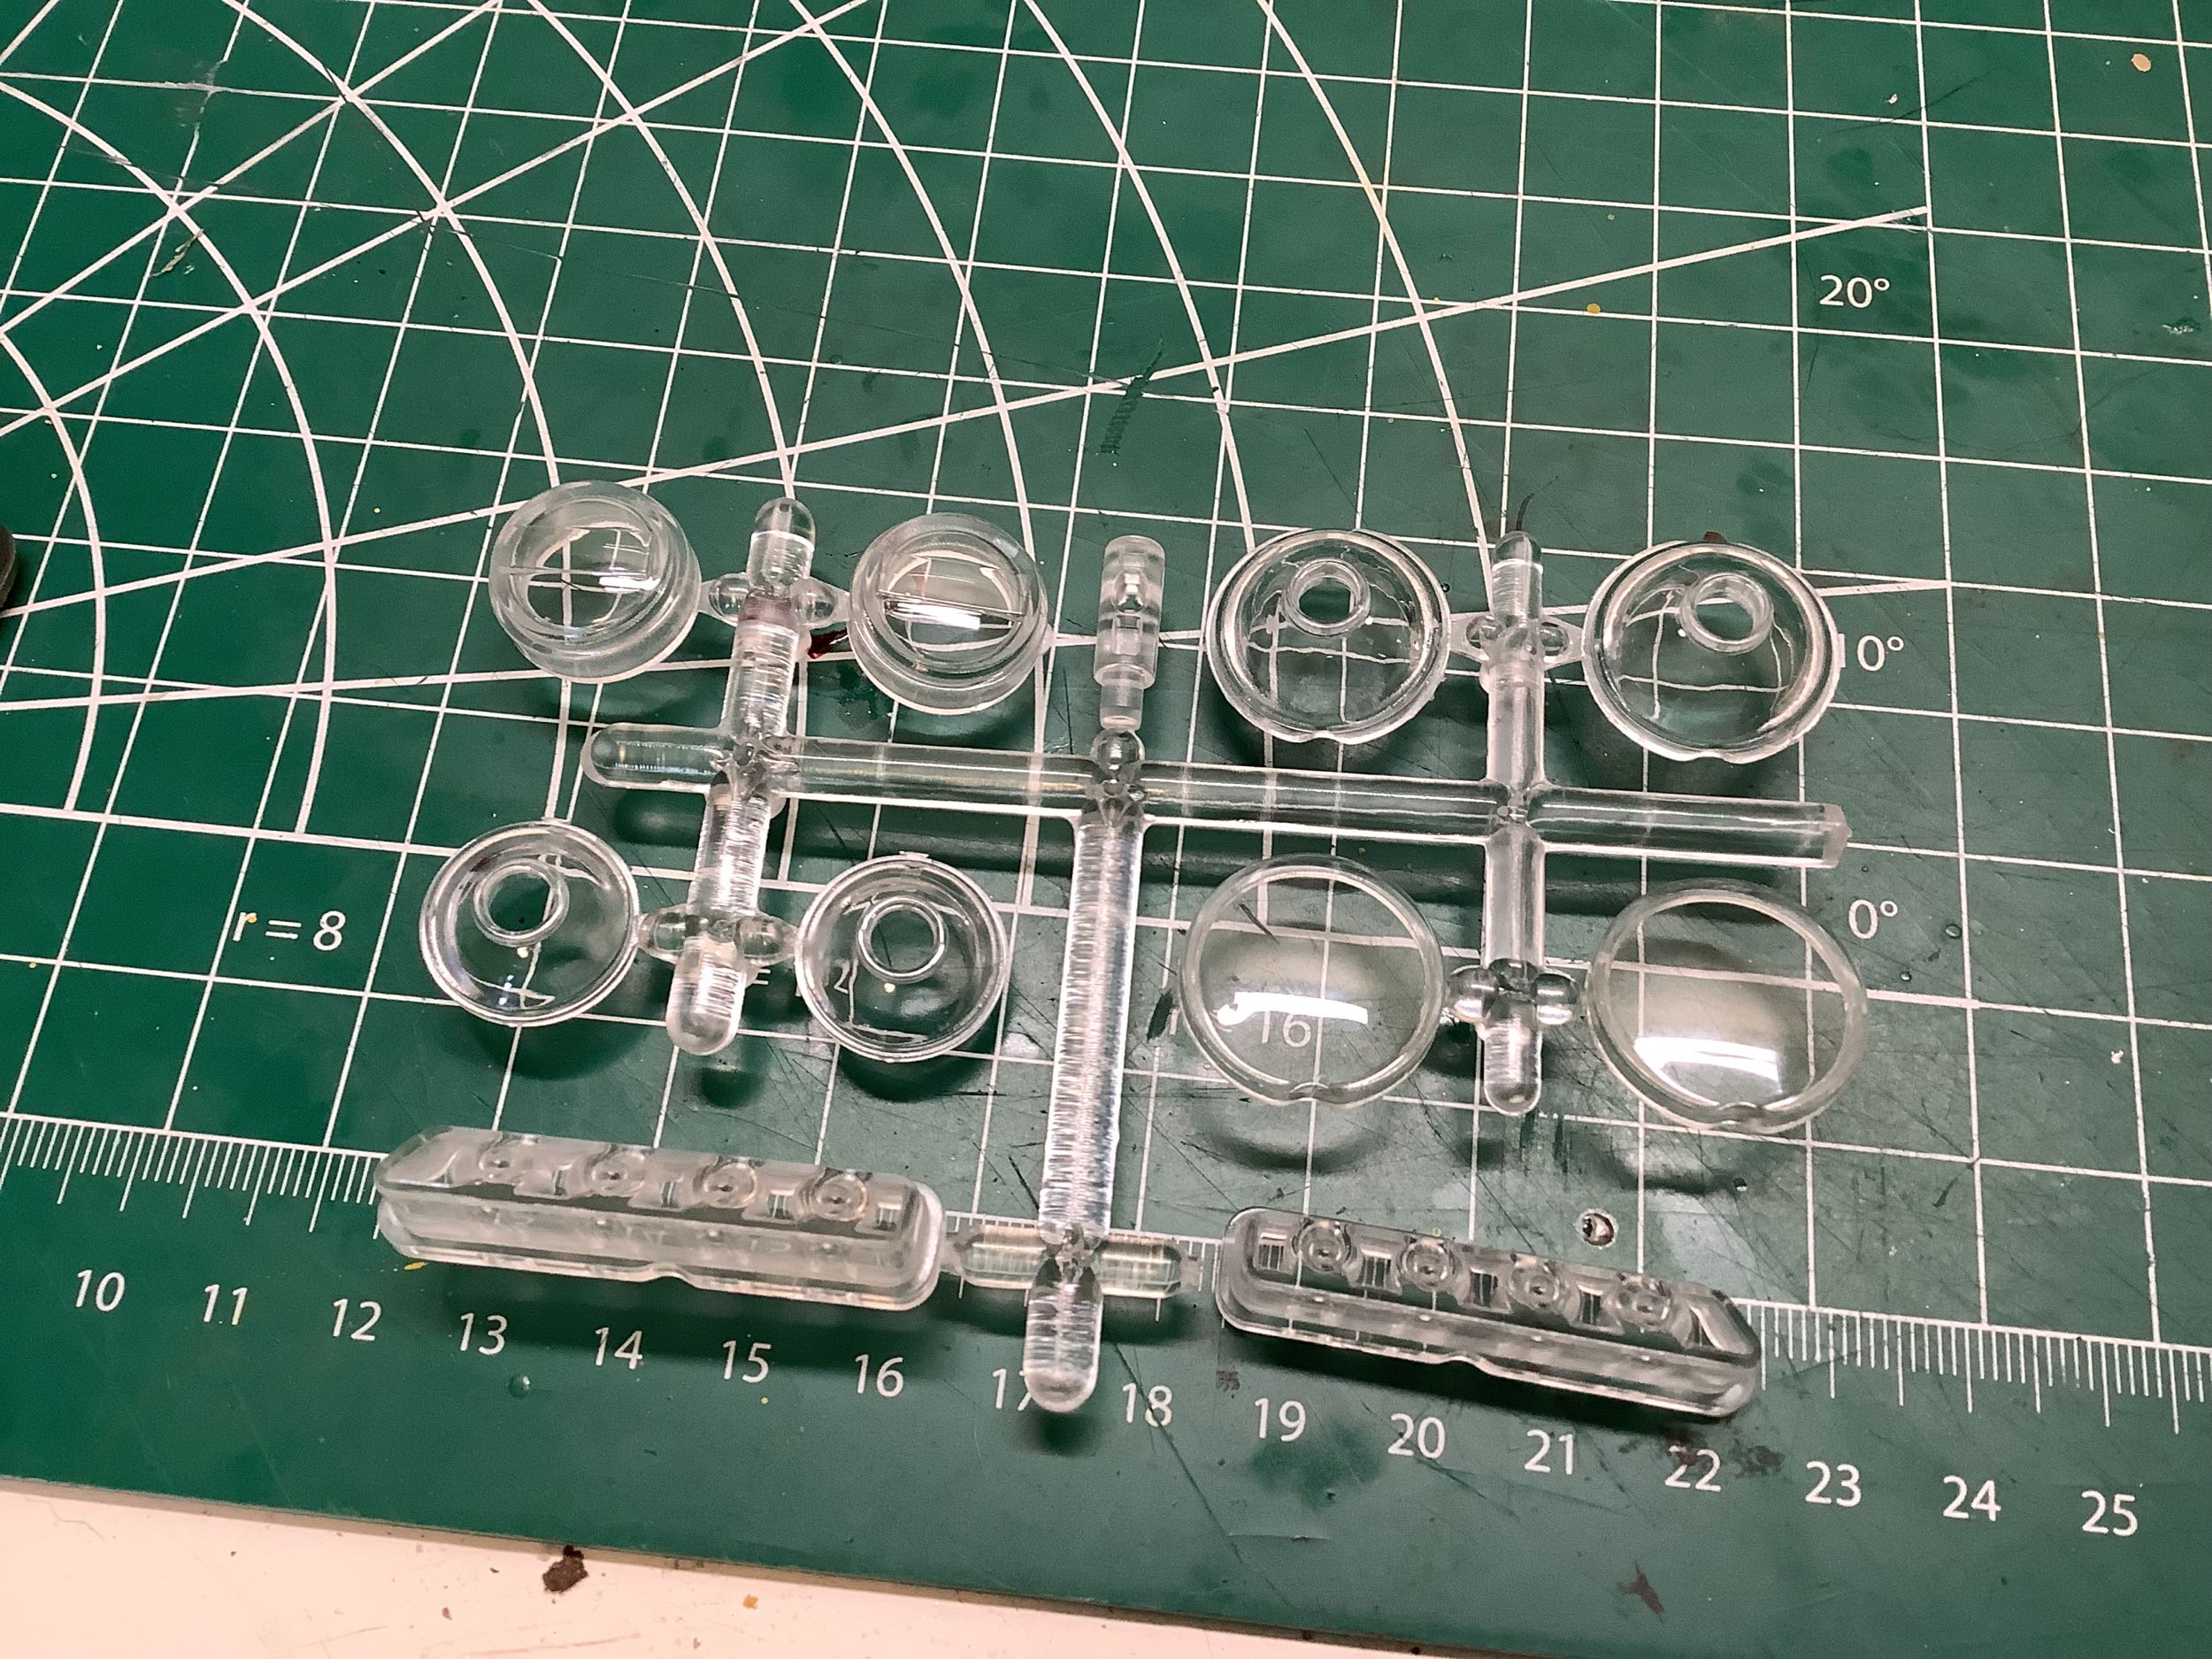
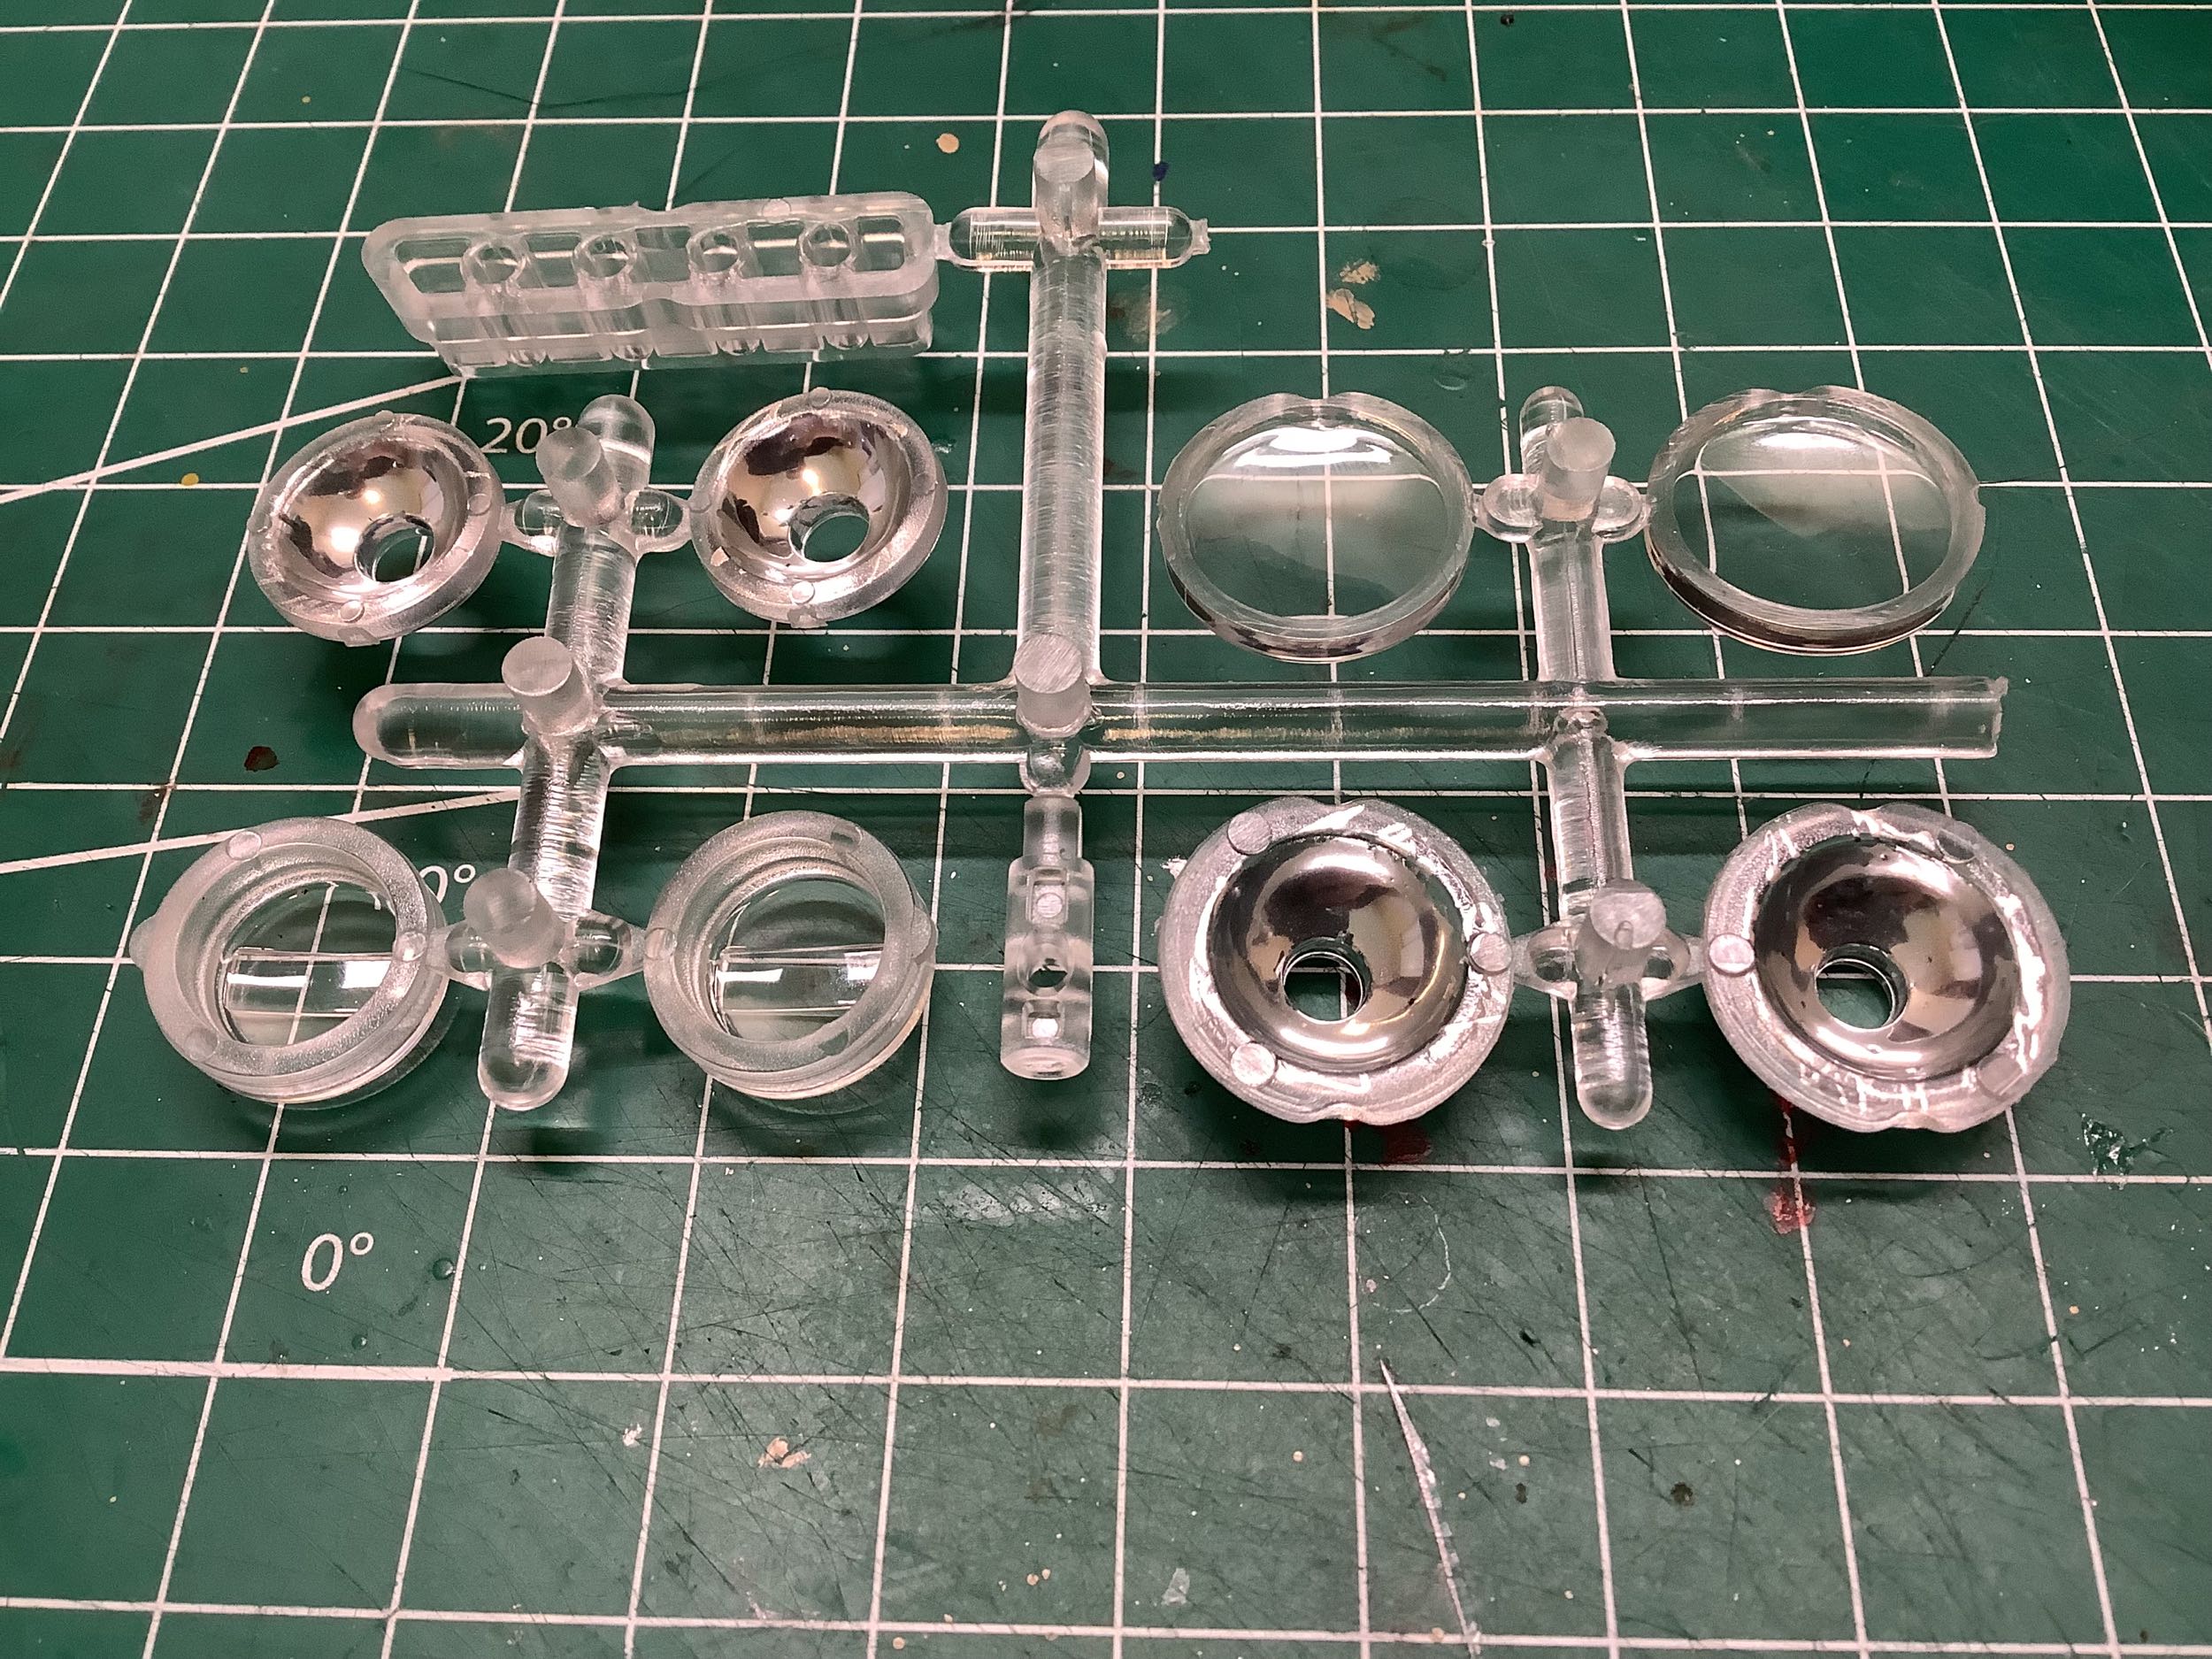
The transparent parts come on an acrylic tree. It makes sense for
the lenses to be transparent, but the light buckets should be reflective
so I painted them with my liquid chrome paint pen as shown on the
right.
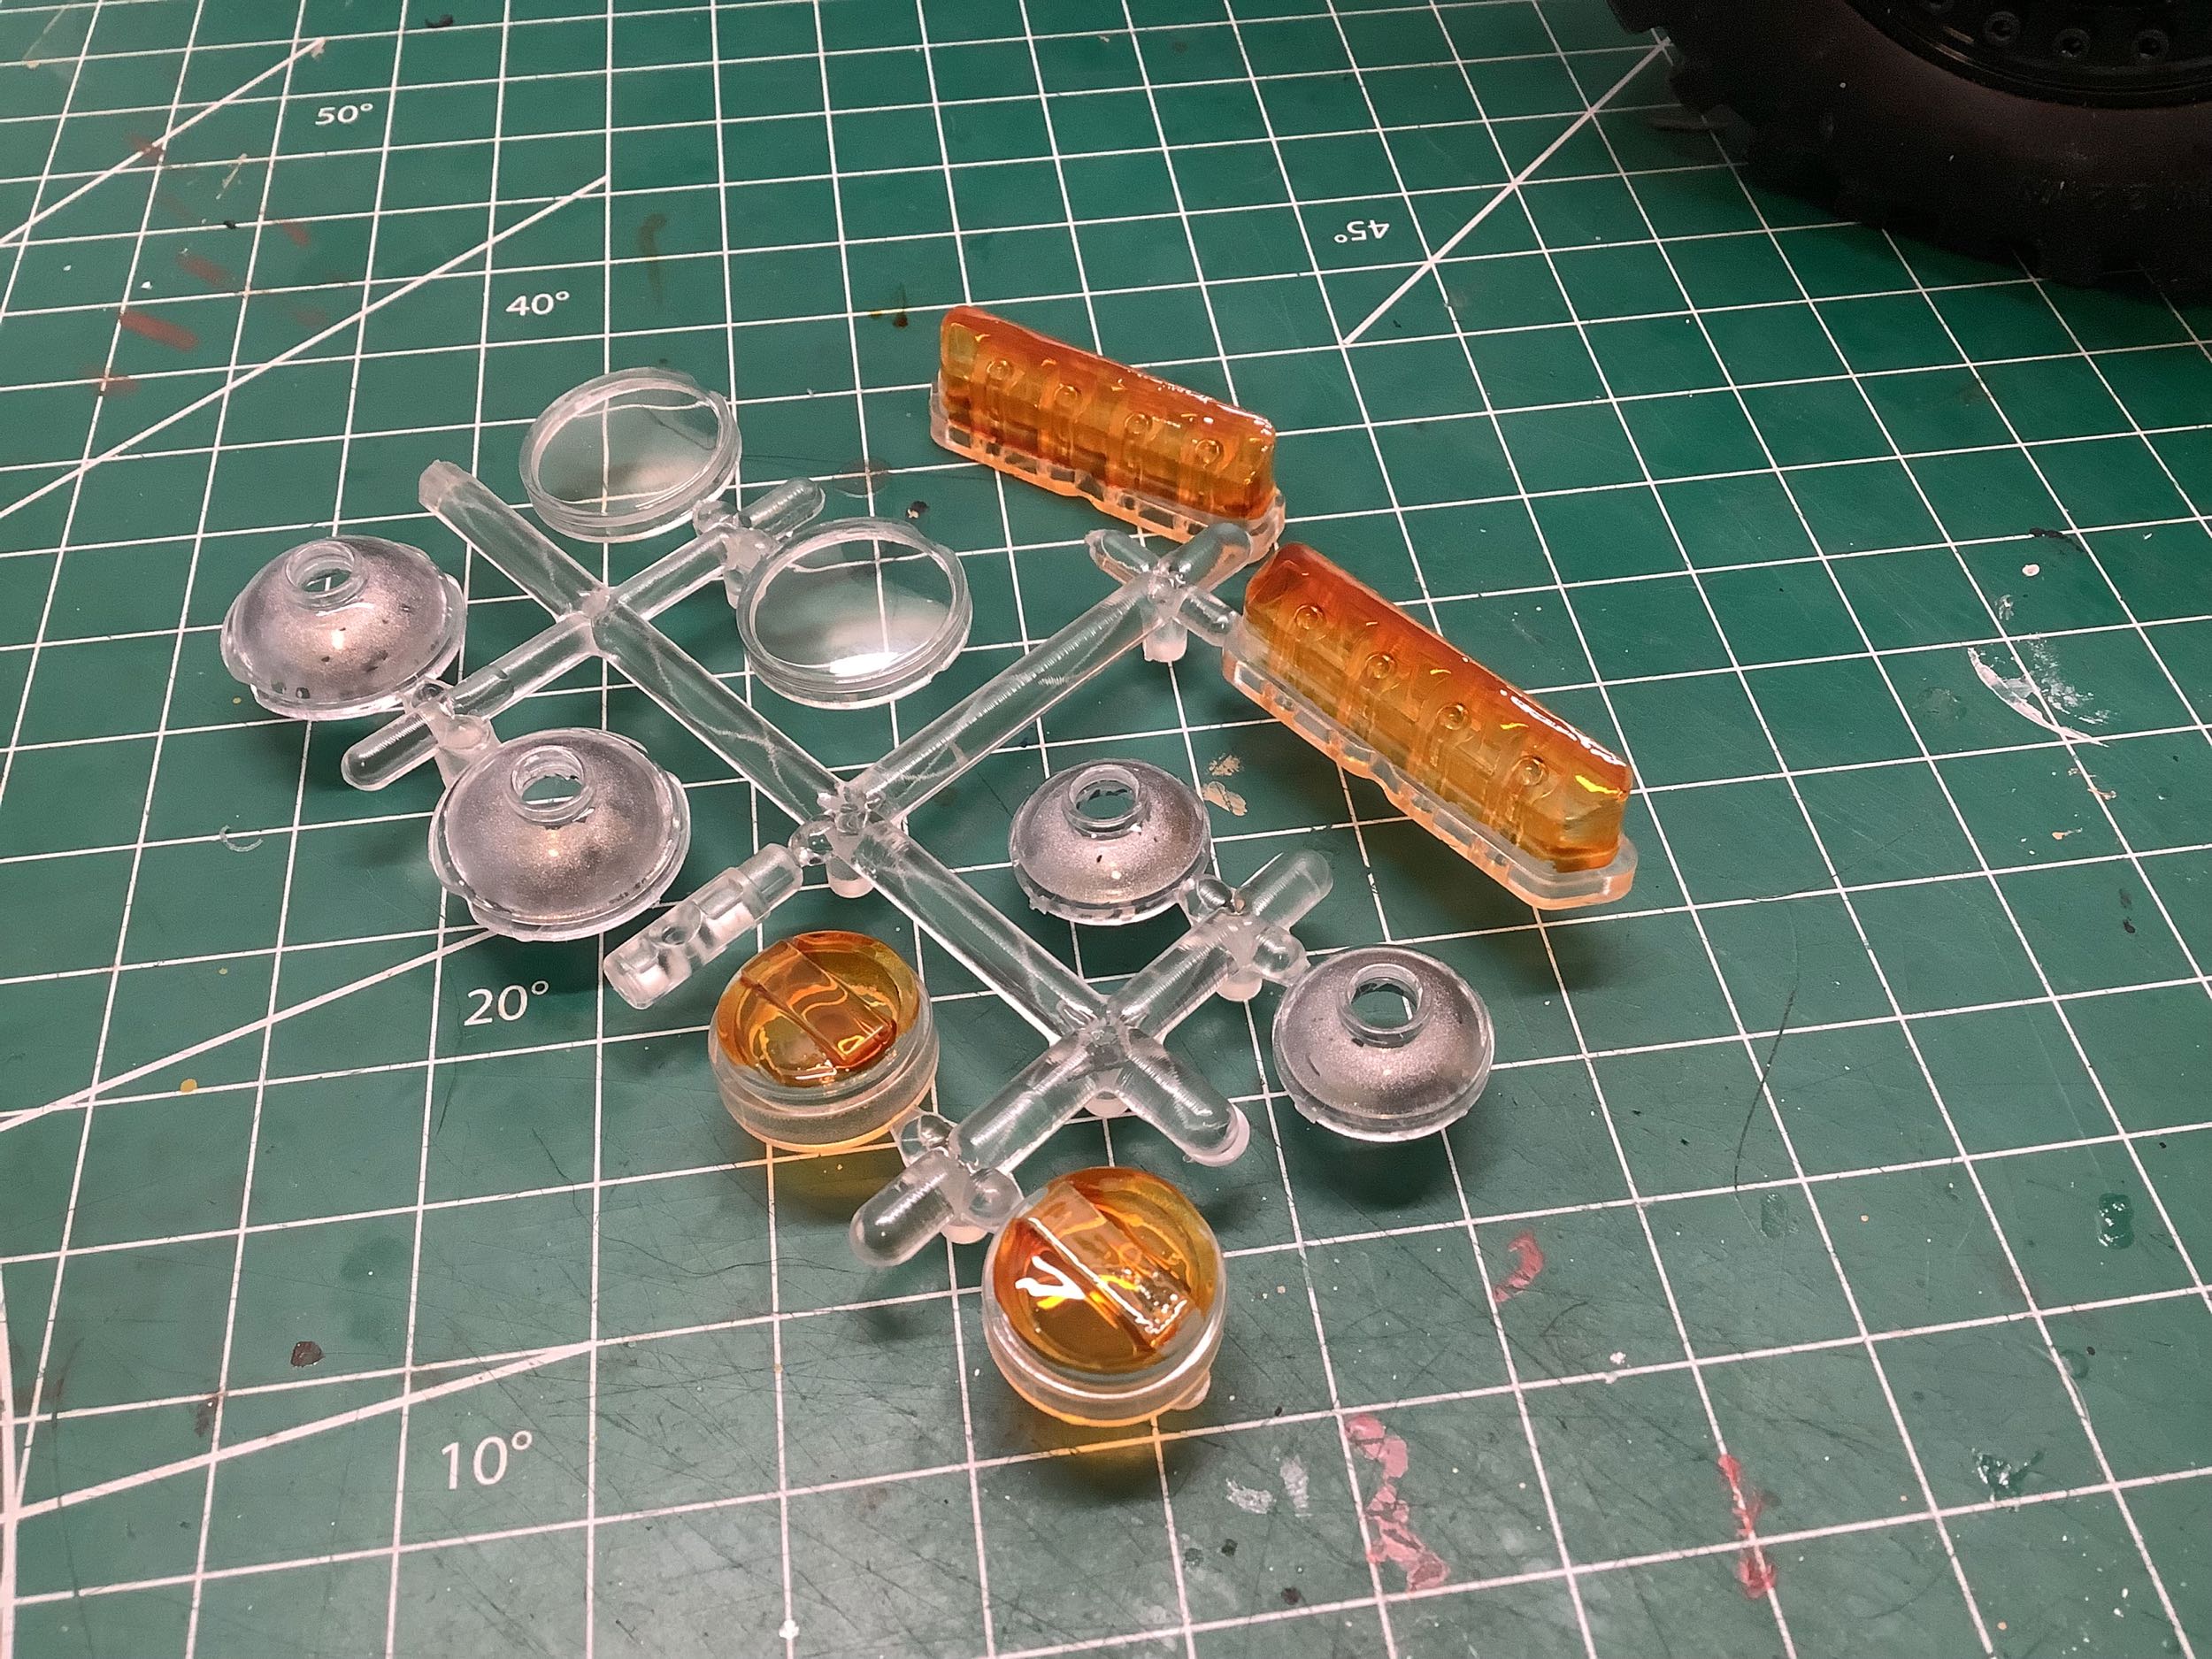
My next step was to paint the turn signal lenses in transparent
orange. I'm not entirely sure what those lights inboard of the
headlights are supposed to be, but on the real truck they are blacked
out with only the rectangular center illuminated in amber so I tried to
paint them the same way.
Let's paint some tail lights next. I painted the transparent
housings black and the lenses transparent red. Ideally the lower
portion of the lens would have a clear rectangular inset for the reverse
lights, but this model doesn't have reverse lights so I left them all
red. There should also be a rectangular inset on the outer side of
the housing for the turn signals but that level of fine detail is too
much for me. I think they look pretty good. The other parts
in the image were painted in black.
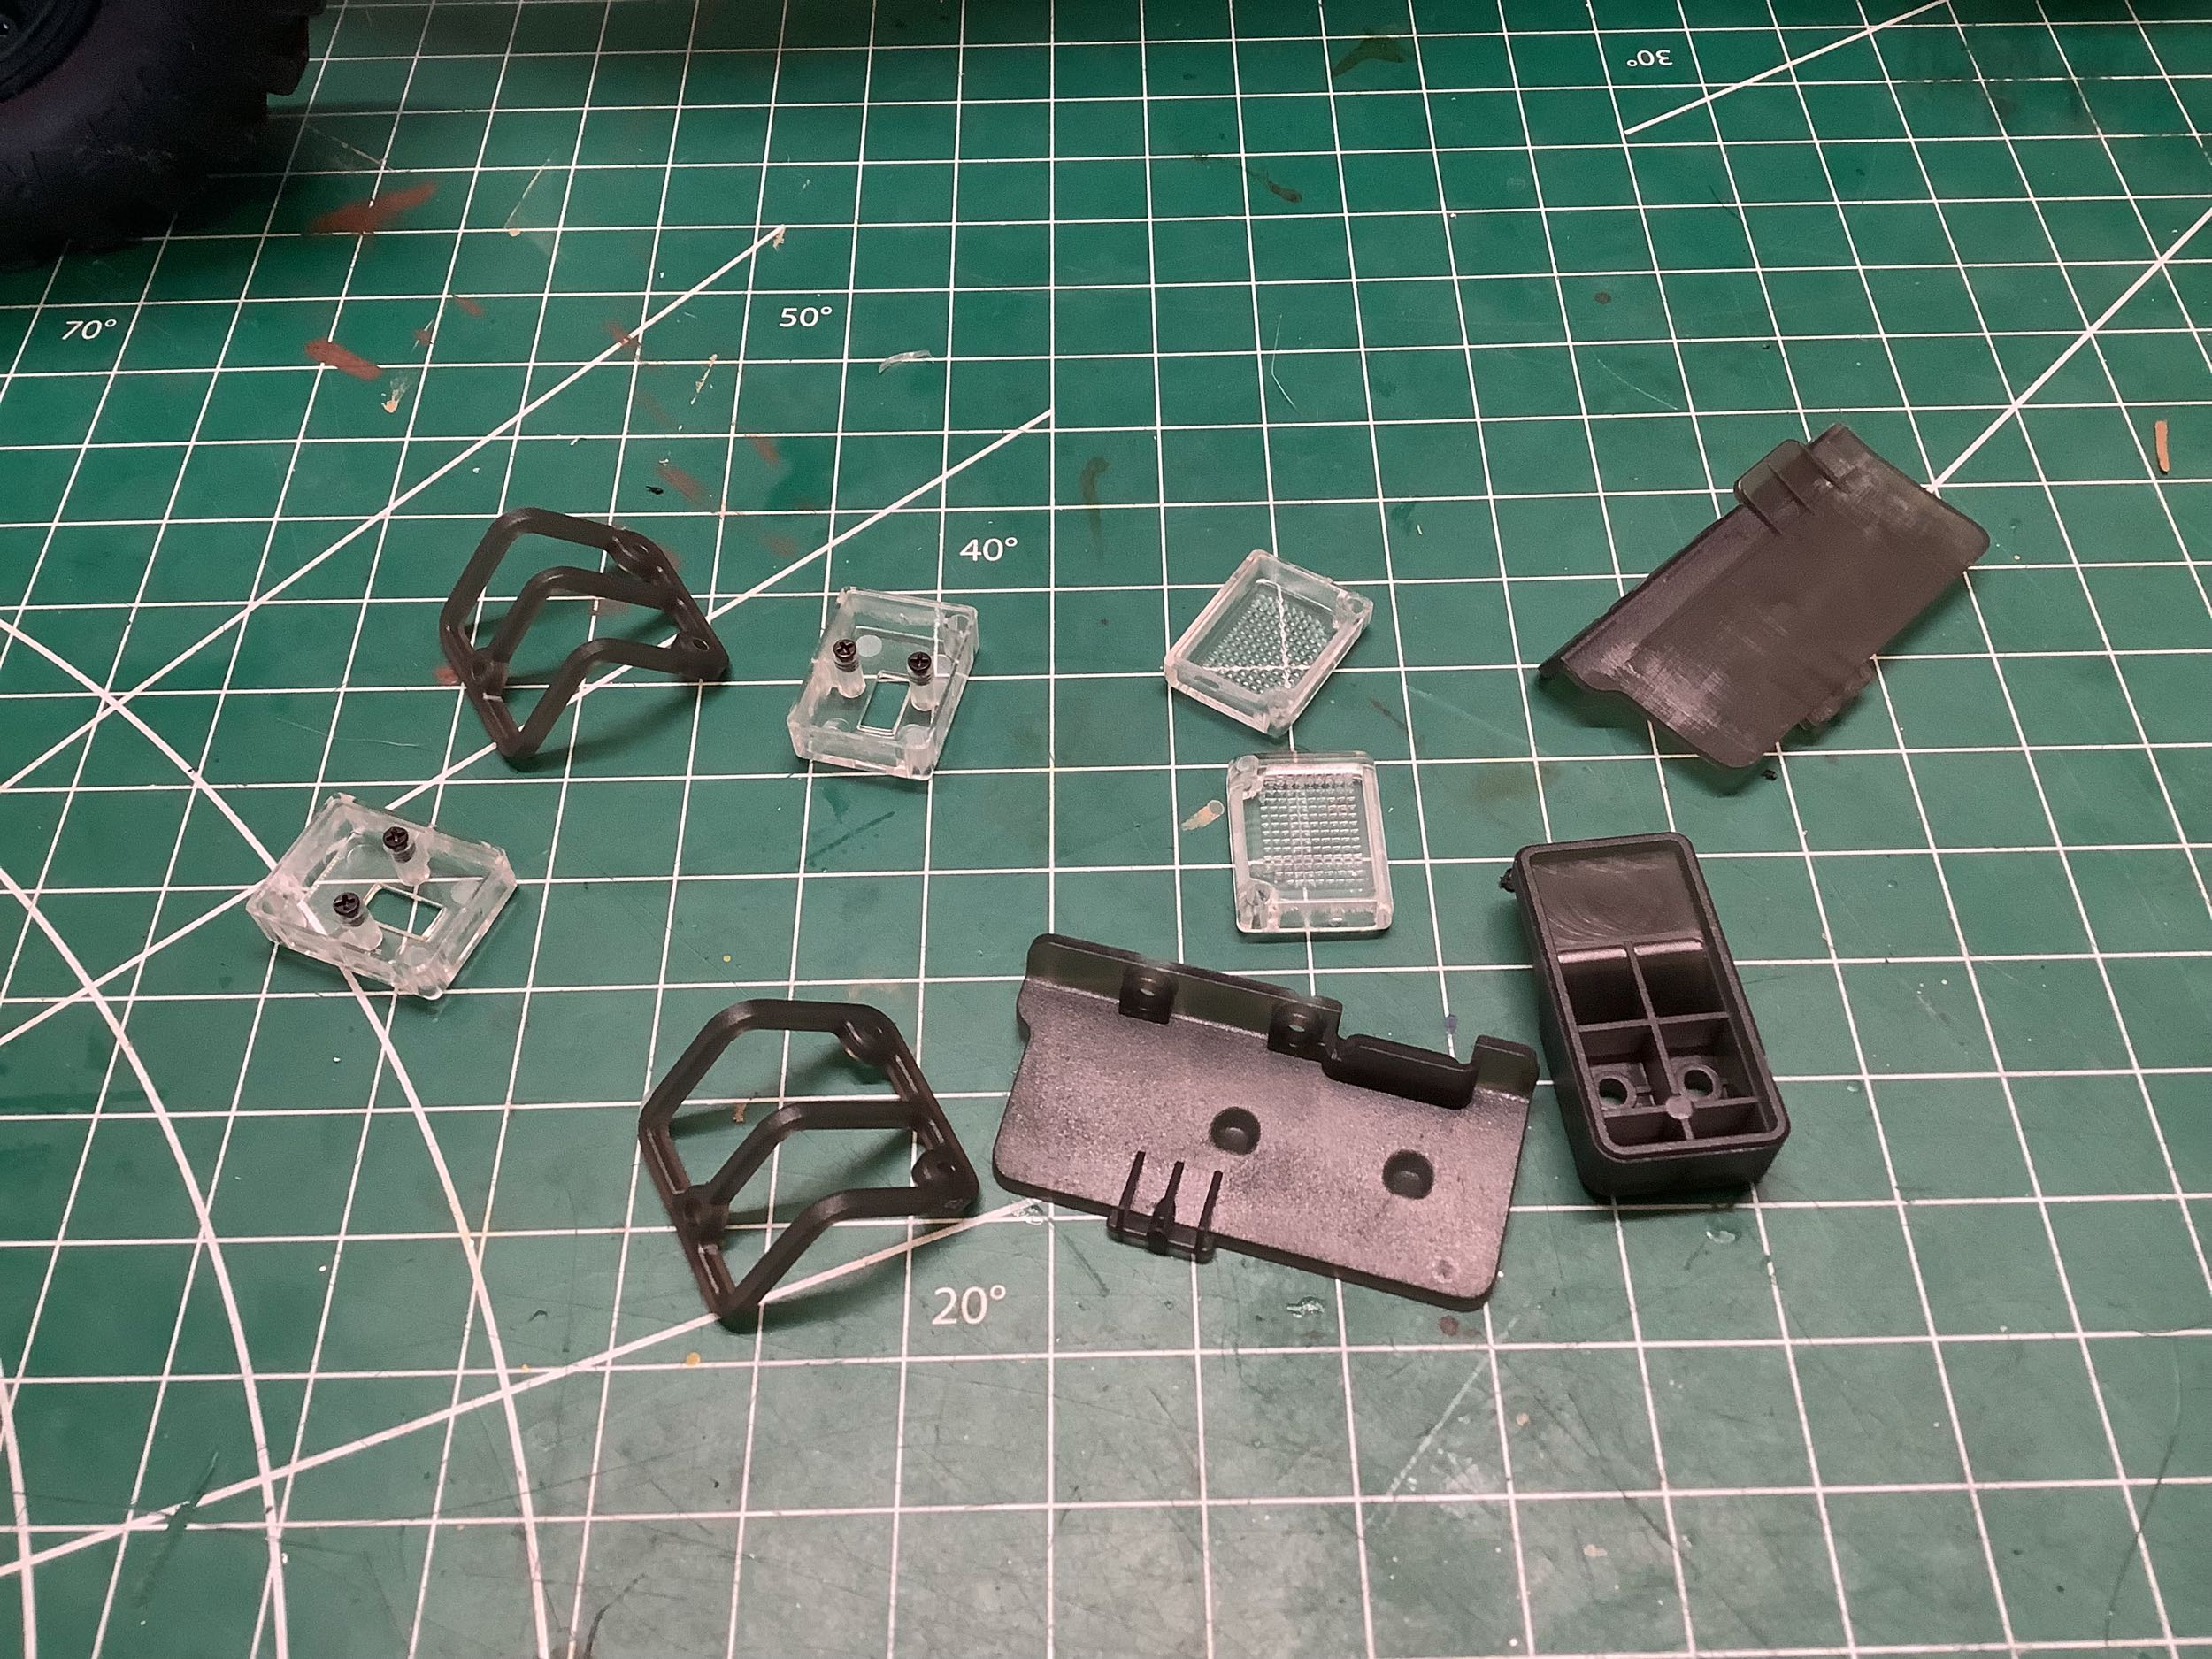
I'm pretty sure these insets behind the rear doors are supposed to be
steps. They look dark gray on the real truck so I painted them the
same way. It is the only place on the vehicle I used that
color. I wish they had been molded with a textured step instead of
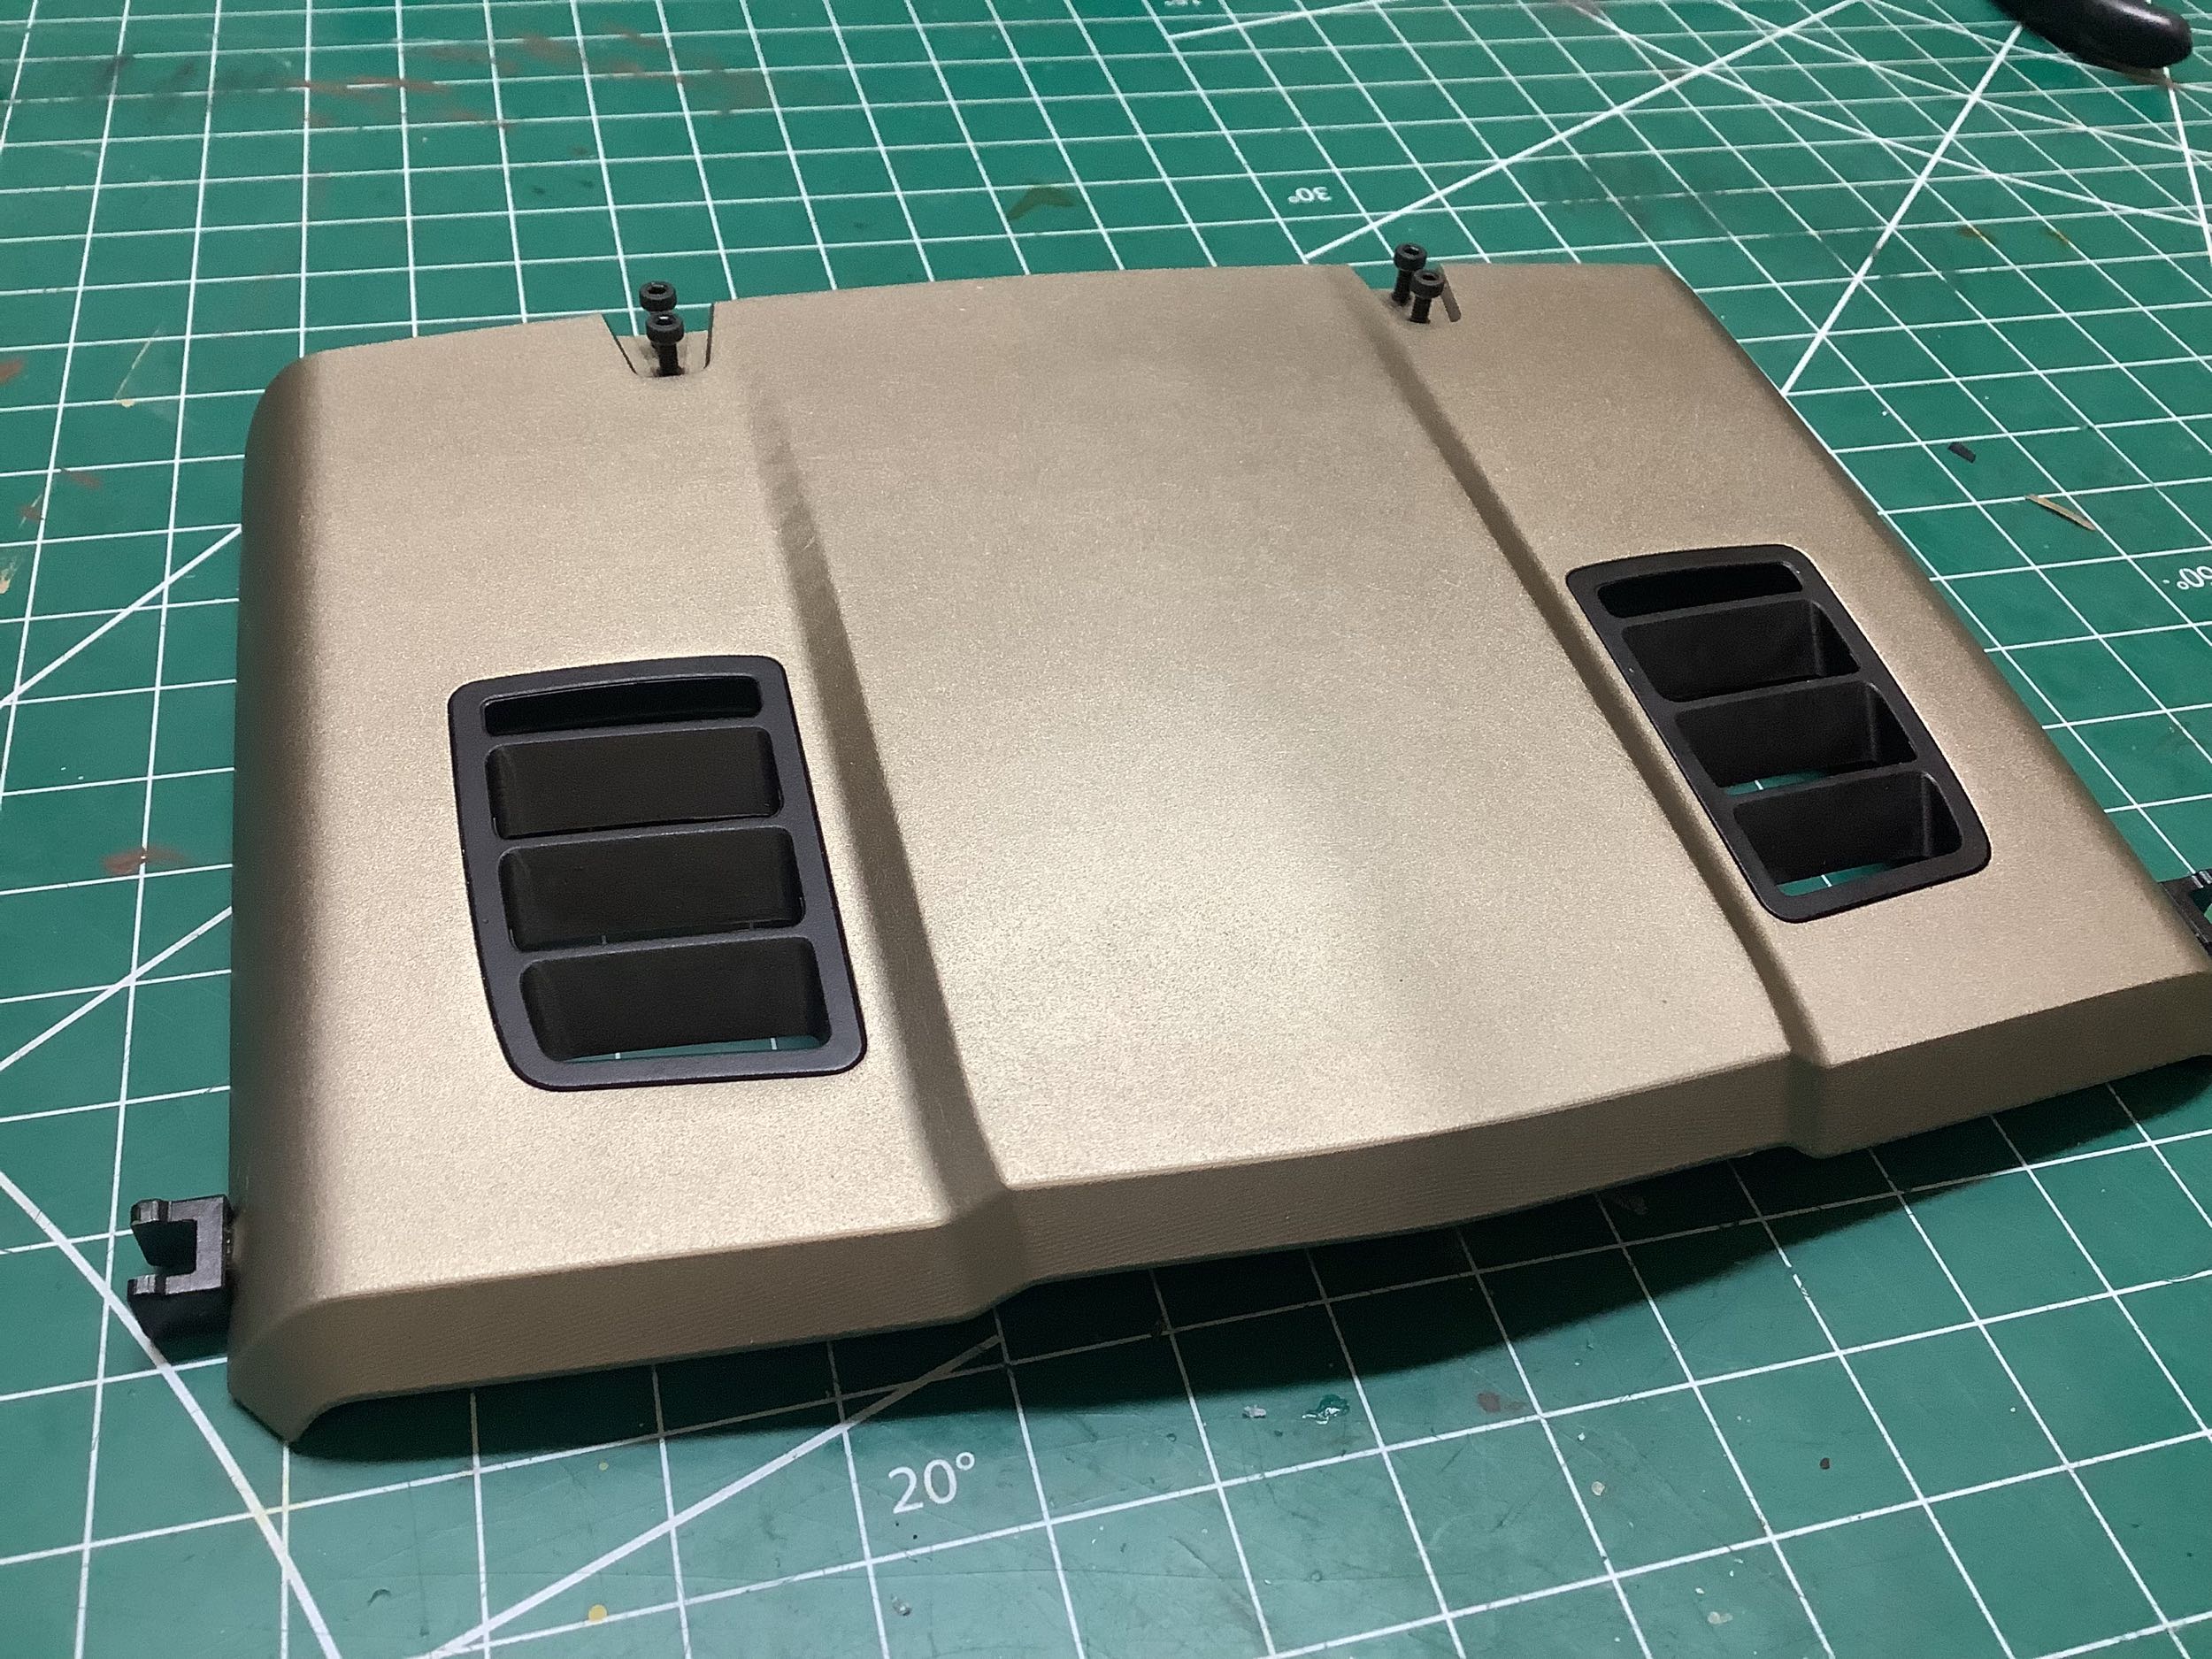
just a smooth bottom. Finally, I painted the hood grilles in
black and glued them in place. This was the only place on the
model I used glue.
©2022 Eric Albrecht